Mapping Environments Project 4 Modern Maps
|
|
|
- Arthur Copeland
- 5 years ago
- Views:
Transcription
1 Mapping Environments Project 4 Modern Maps Week 08-09: When Engineering Design Labs & University Campus: Where Group of 4: Who 15%: Worth 1


2 Aim: The overarching aim of this project is to introduce you to the process of measuring, mapping and visualizing in 3D.Staffs The project will introduce you to a number of surveying, imaging and modeling tools including: - Disto - Digital Compasses - Digital Cameras - GIMP - Site Plans - Floor Plans - Section - Google Sketchup Finally, the project aims to get you thinking critically and spatially about 3D computer based models and their application in managing real-world environments. Discussion 1: The University of Melbourne has a large number of culturally significant places. The Old Law Quadrant, the boom-time facade of the Old Commerce Building and the aluminum-framed Wilson Hall are just a few of the edifices that help to tell the story of Melbourne and it s people. 2


3 The University would like to preserve these places, both in their real-world form and in a virtual sense. You have been asked to help out with the project. Specifically, you are required to measure, map and visualize (in 3D) the University s only octagonal structure: the observatory in the System Garden. The model needs to be developed in an easy to use format so that it can be combined with other models later. So, how might you go about doing this? 1. Positioning the structure 2. Measuring it. 3. Mapping it 4. Visualizing it in 3D 3
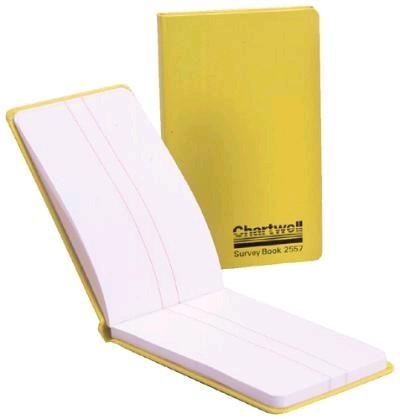

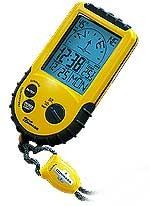


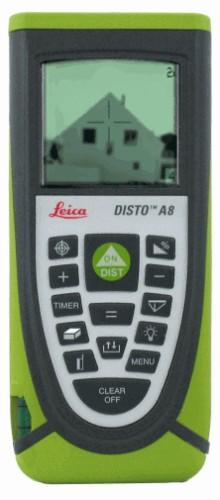
4 Equipment: Disto Tape Digital Compass Field Book Digital Camera (on PDA) Google Sketchup GIMP Image Editing Software Google Earth 4


5 Procedure: Step 1 - Drawing s Site Plan Locate the Observatory using Google Earth or a Map of the University then head into the field. This forms part of the reconnaissance, the first stage of many fieldwork projects. Once in the System Garden draw a sketch map of the surrounding features. A sketch map offers a bird s eye view of an area with the significant features highlighted. Include trees, buildings, paths and the observatory itself. This plan does not need to be to scale, it simply needs to tell us where things are relative to one another. System garden's site plan: 5


6 Step 2 - Positioning the Structure We now need to get some accurate measurements so we can position the structure on Google Earth later. To position the structure we are going to work in 2D: we will ignore height for the moment. We will use a process called Distance-Distance Intersection. Visit the Virtual Campus Lecture Theatre to learn more about simple plane positioning techniques. First, select two prominent points from your Site Plan (e.g. trees or corners or buildings). Make sure you can see the observatory from these points. 6
7 Second, use the Disto to measure the distance from each point to the two edges of one face of the observatory. Note these measurements down on your Site Plan. By intersecting these measurements later we will be able to position and orient the structure. As a check and to provide some redundancy you might like to repeat these measurements from a number of different points. 7

8 Step 3 - Measuring and Mapping the Structure Floor Plans Now we will draw a Floor Plan. This depicts a close-up birds eye view of the structure, inside and out. Ignore the roof for now. Building floor plan: Use the Disto or Tape to measure the wall widths and lengths. Also use the Tape to record total floor coverage. Record the measurements on your plan. 8

9 Use the compass to measure the internal angle between adjacent walls. Each angle should be roughly 135o. Record the measurements on your plan. Finally, you might also like to use the tape to record the dimensions of the internal benches, surrounding brickwork and flora. Step 4 - Measuring and Mapping the Structure Sections Plan Once you are happy with your floor plan, start work on your Section plans. These are side-on views and cut through the building at selected points. All these measurements can be acquired using the Tape and Disto. The very handy. button will come in 9


10 It s up to you how many Section views you wish to capture, however, at a minimum you will need to record: the height of the walls the width and height of the doors the height and width of the windows Building sections plan: Step 5 - Measuring and Mapping the Roof Structure Now that the Floor Plan and Section Plans of the base are complete you need to consider the roof. There are a number of ways you could go about measuring and modeling the roof. Here is a simple method: Sketch a Floor Plan of the Roof. It should look like an octagonal pie cut into 8 wedges. Roof floor plan: 10


11 You have already measured the outer sides of the wedges. They are the same length as each of the outer walls. Record these. Find the side lengths of the wedges by measuring along the ground from the centre point of the structure to one of the edges (To find the centre point stand inside the observatory and intersect two tapes running from adjacent sides). Record the length. Now, Sketch a Section Plan of one of the roof wedges. It should look like a squashed isosceles triangle. Again you already have the width of lower edge. Record this. Roof section plan: 11

 Step 6 - Capturing the façade imagery At this stage you should have all the measurements and accompanying plans required to build the observatory in a 3D modeling environment.")
12 You can find the vertical height of the triangle from the ground using the Disto. Subtract the height of the walls from the height just measured to get the vertical height of the roof. Now you can use the Pythagoras theorem to find the length of the roof between the centre-point and the walls. (Note: This simple method assumes the roof wedges are straight, not curved. You might like to devise a way of measuring and modeling the roof wedges as a curve. ) Step 6 - Capturing the façade imagery At this stage you should have all the measurements and accompanying plans required to build the observatory in a 3D modeling environment. Now you need to capture some imagery. This will be used to render your model. Using the PDA or your own Digital Camera take pictures of the all the building facades you have measured. You might also like to capture images of internal and surrounding features. Be sure to note down where you store the images. 12

13 Discussion 2: In the first week ok the project what issues did you group experience with the following: Drawing the site plan Positioning the structure on the site plan Measuring the structure Mapping the structure as floor plans and sections Capturing the facade imagery Results: Step 1 - Converting your floor and section plans into a 3D model First, load up Google Sketchup in the Engineering Design Labs Second, setup your workspace by going to: Window > Model Info > Unit Change the units to those shown below: Now you are ready to being modeling If you ve never used Google Sketchup before, take some time to learn the simple tools. Help > Quick Reference is a good place to start. 13
 2. Offset (width of bricks) 3. Push/Pull (height of walls) 4. Draw Rectangle (in dimensions of door) 5.")
14 Each tool provides hints. Some may ask for inputs (e.g. lengths, angles) There are many ways to model the structure. How your group builds the model is up to you. Here is a simple way to get started: 1. Draw > Polygon (8 sides) 2. Offset (width of bricks) 3. Push/Pull (height of walls) 4. Draw Rectangle (in dimensions of door) 5. Push/Pull (to create door opening) 6. Draw Circle (in dimensions of window) 7. Push/Pull (to create window opening) Step 2 - Rendering the model You will need images for each wall and the roof wedges. You might also have images for the internal benches and surrounding brickwork. Manipulate these images in a picture processing package to erase the background. Once you re happy with your images, save them and exit GIMP. 14

15 Back in Google SketchUp, Goto: File > Import Select the filename of one of your wall images. Select Use as Texture from the drop down menu Click Import The image should appear, but, it needs to be attached to the appropriate wall. Do this by clicking on the bottom corner of the wall, then the top. The image will attach itself to the wall. You might need to tinker with the positioning and size of your of your images. Ask your demonstrator or use the following; Help > SketchUp User s Guide > Entities > Images. Repeat this process for the rest of your surfaces. Step 3 - Placing your model onto Google Earth At this stage you should have a rendered model of the System Garden observatory. It now needs to be placed and oriented in Google Earth. Open Google Earth and navigate to the location of observatory. Make sure the observatory s location is visible on the screen. Return to Google Sketchup and click Get Current Screen. Google Sketchup will grab the current view from Google Earth and place it under your model. Use the Move and Rotate buttons to place and orient your model in the right position. 15


16 Use the measurements from your Site Plan to help place the model. You can also use the Site Plan measurements as a check to ensure you have your model in the right position. Once you re happy with the location of your model click Place Model. It will appear in Google Earth in the exact position you placed it. Save both your SketchUp and Google Earth files. You are now finished. 16
17 Discussion 3: What issues did you experience whilst using SketchUp. Did you find the interface intuitive? Did you experience any issues using GIMP. What image editing program do you usually used? Did you experience any issues with Google Earth when trying to place your model? Submission Details: Good work. You have successfully measured and modelled an important part of the University's history. You can now submit you work. What do we need to submit? A soft copy of your field notes including your site plan, floor plan and section plans. You may need to scan these or take a picture of them using your digital camera. The Google Sketchup file of the observatory. A.JPG image and the Google Earth file of the positioned observatory. A mini-report of no more than five pages. This should consider each of the discussion questions from the project. The report must identify each of the members in your group. Who needs to submit? Only one member of your group needs submit the project files. Remember: the mini-report must identify each member of your group so they can also be allocated marks. Where do we submit? Submit your project files on LMS. Goto Mapping Environments LMS page > 5. Modern Maps > Project 4. Up load your files and click 'Submit' NOT "Save'. How will we be marked? View the marking rubric on the LMS for more details on how this project will be marked. When is it due? This project needs to be submitted by 1800 on the first Friday after the semester break. See LMS for this date. 17
18 Summary Discussion: What we have learnt today in terms of: Thinking Critically Thinking Spatially To further explore the concepts and tools covered today, visit the... Lecture Theatre Library Instrument Room IT Department 18
SketchUp Quick Start For Surveyors
 SketchUp Quick Start For Surveyors Reason why we are doing this SketchUp allows surveyors to draw buildings very quickly. It allows you to locate them in a plan of the area. It allows you to show the relationship
SketchUp. SketchUp. Google SketchUp. Using SketchUp. The Tool Set
 Google Google is a 3D Modelling program which specialises in making computer generated representations of real-world objects, especially architectural, mechanical and building components, such as windows,
Designing Simple Buildings
 Designing Simple Buildings Contents Introduction 2 1. Pitched-roof Buildings 5 2. Flat-roof Buildings 25 3. Adding Doors and Windows 27 9. Windmill Sequence 45 10. Drawing Round Towers 49 11. Drawing Polygonal
Google SketchUp. and SketchUp Pro 7. The book you need to succeed! CD-ROM Included! Kelly L. Murdock. Master SketchUp Pro 7 s tools and features
 CD-ROM Included! Free version of Google SketchUp 7 Trial version of Google SketchUp Pro 7 Chapter example files from the book Kelly L. Murdock Google SketchUp and SketchUp Pro 7 Master SketchUp Pro 7 s
Introduction to Google SketchUp
 Introduction to Google SketchUp When initially opening SketchUp, it will be useful to select the Google Earth Modelling Meters option from the initial menu. If this menu doesn t appear, the same option
The Villa Savoye ( ), Poisy, Paris.
, Poisy, Paris.") Learning SketchUp Villa Savoye This tutorial will involve modeling the Villa Savoye by Le Corbusier Files needed to complete this tutorial are available in Mr. Cochran s Web Site The Villa Savoye (1929-1931),
Learning SketchUp Villa Savoye This tutorial will involve modeling the Villa Savoye by Le Corbusier Files needed to complete this tutorial are available in Mr. Cochran s Web Site The Villa Savoye (1929-1931),
SketchUp + Google Earth LEARNING GUIDE by Jordan Martin. Source (images): Architecture
: Architecture") SketchUp + Google Earth LEARNING GUIDE by Jordan Martin Source (images): www.sketchup.com Part 1: Getting Started with SketchUp GETTING STARTED: Throughout this manual users will learn different tools
SketchUp + Google Earth LEARNING GUIDE by Jordan Martin Source (images): www.sketchup.com Part 1: Getting Started with SketchUp GETTING STARTED: Throughout this manual users will learn different tools
SWITCHING FROM SKETCHUP TO VECTORWORKS
 SWITCHING FROM SKETCHUP TO VECTORWORKS INTRODUCTION There are a lot of 3D modeling software programs to choose from and each has its own strengths and weaknesses. For architects, flexibility and ease of
The Menger Sponge in Google SketchUp
 The Sierpinsky Carpet (shown below on the left) is a 2D fractal made from squares repeatedly divided into nine smaller squares. The Menger Sponge (shown below on the right) is the 3D version of this fractal.
CCM Unit 10 Angle Relationships
 CCM6+7+ Unit 10 Angle Relationships ~ Page 1 CCM6+7+ 2015-16 Unit 10 Angle Relationships Name Teacher Projected Test Date Main Concepts Page(s) Unit 10 Vocabulary 2-6 Measuring Angles with Protractors
SketchUp Starting Up The first thing you must do is select a template.
 SketchUp Starting Up The first thing you must do is select a template. While there are many different ones to choose from the only real difference in them is that some have a coloured floor and a horizon
Course Information Package
 Course Information Package PLANNING FORM FOR AN EDUCATIONAL MODULE (to be completed by the teacher) Programme of Studies: Name of the module: Target group: Level of the unit: Entrance requirements: Number
Creating a Poster in Google SketchUp
 If you have digital image, or can find one online, you can easily make that image into a room poster. For this project, it helps to have some basic knowledge of Google SketchUp (though detailed instructions
Lesson 1: Creating T- Spline Forms. In Samples section of your Data Panel, browse to: Fusion 101 Training > 03 Sculpt > 03_Sculpting_Introduction.
 3.1: Sculpting Sculpting in Fusion 360 allows for the intuitive freeform creation of organic solid bodies and surfaces by leveraging the T- Splines technology. In the Sculpt Workspace, you can rapidly
Using Google SketchUp
 Using Google SketchUp Mike Bailey mjb@cs.oregonstate.edu http://cs.oregonstate.edu/~mjb/sketchup What is Google SketchUp? Google SketchUp is a program which lets you sketch in 3D. It is excellent for creating
Describe Plane Shapes
 Lesson 12.1 Describe Plane Shapes You can use math words to describe plane shapes. point an exact position or location line endpoints line segment ray a straight path that goes in two directions without
SketchUp Fundamentals 2
 KU Design Group llc SketchUp Fundamentals 2 Led by: Mark-o Kennelly Ullman May 3, 2012 A download of today s handout is available at: kudesigngroup.com/niketraining 2012 KU Design Group llc T (503) 583-2194
CAD Tutorial 23: Exploded View
 CAD TUTORIAL 23: Exploded View CAD Tutorial 23: Exploded View Level of Difficulty Time Approximately 30 35 minutes Starter Activity It s a Race!!! Who can build a Cube the quickest: - Pupils out of Card?
Steven Holzner. Sams Teach Yourself. Google. SketchUp 8
 Steven Holzner Sams Teach Yourself Google SketchUp 8 Table of Contents Introduction 1 1 Welcome to SketchUp 5 Getting Started with SketchUp 5 Drawing Lines 7 Drawing Simpie Figures 7 Pushing (or Pulling)
Using Google SketchUp
 Using Google SketchUp Mike Bailey mjb@cs.oregonstate.edu http://cs.oregonstate.edu/~mjb/sketchup What is Google SketchUp? Google SketchUp is a program which lets you sketch in 3D. It is excellent for creating
COMPUTER AIDED ARCHITECTURAL GRAPHICS FFD 201/Fall 2013 HAND OUT 1 : INTRODUCTION TO 3D
 COMPUTER AIDED ARCHITECTURAL GRAPHICS FFD 201/Fall 2013 INSTRUCTORS E-MAIL ADDRESS OFFICE HOURS Özgür Genca ozgurgenca@gmail.com part time Tuba Doğu tubadogu@gmail.com part time Şebnem Yanç Demirkan sebnem.demirkan@gmail.com
IESVE Plug-in for Trimble SketchUp Version 3 User Guide
 IES Virtual Environment Copyright 2015 Integrated Environmental Solutions Limited. All rights reserved. No part of the manual is to be copied or reproduced in any form without the express agreement of
Version 14 COURSE UNIT 6. Visualisation
 Version 14 COURSE UNIT 6 Visualisation Table of Contents Introduction... 2 Preparation... 3 Materialization... 4 View position... 9 Camera... 10 Create design model view.... 12 Move background image...
Fireplace Mantel in Google SketchUp
 Creating the fireplace itself is quite easy: it s just a box with a hole. But creating the mantel around the top requires the fun-to-use Follow Me tool. This project was created in SketchUp 8, but will
M8WSB-C07.qxd 4/4/08 7:00 PM Page NEL
 8 NEL GOAL Chapter 7 Tessellations You will be able to use angle measurements to identify regular and irregular polygons that might tessellate identify and describe translations, reflections, or rotations
ME 111: Engineering Drawing. Geometric Constructions
 ME 111: Engineering Drawing Lecture 2 01-08-2011 Geometric Constructions Indian Institute of Technology Guwahati Guwahati 781039 Geometric Construction Construction of primitive geometric forms (points,
Geometry End of Course Review
 1 Area of a rectangle is equal to base x height. For a triangle Area = ½ (bh) or one half base x height. The height must be the perpendicular distance from the base to the tallest part. The area of a circle
TUTORIAL No 1: Page Setup
 TUTORIAL No 1: Page Setup Skill Level: Foundation This tutorial shows you how to set up a workspace to draw in. The workspace is the area you are working in on the screen. 1. Open 2D Design. A screen with
Introduction Make a plan with tool Rectangle Measurements Toolbar Enter Return Measurements Toolbar Measure Protractor
 Introduction Open SketchUp, and an empty file appears. You are looking at the red-green plane, and the blue axis (vertical) is pointing toward you. By default, you are in the Line tool, as indicated by
Mathematics. Geometry. Stage 6. S J Cooper
 Mathematics Geometry Stage 6 S J Cooper Geometry (1) Pythagoras Theorem nswer all the following questions, showing your working. 1. Find x 2. Find the length of PR P 6cm x 5cm 8cm R 12cm Q 3. Find EF correct
Dice in Google SketchUp
 A die (the singular of dice) looks so simple. But if you want the holes placed exactly and consistently, you need to create some extra geometry to use as guides. Plus, using components for the holes is
,
 Weekdays:- 1½ hrs / 3 days Fastrack:- 1½hrs / Day [Class Room and Online] ISO 9001:2015 CERTIFIED ADMEC Multimedia Institute www.admecindia.co.in 9911782350, 9811818122 Want to learn multi-purpose, easy
Creating T-Spline Forms
 1 / 28 Goals 1. Create a T-Spline Primitive Form 2. Create a T-Spline Revolve Form 3. Create a T-Spline Sweep Form 4. Create a T-Spline Loft Form 2 / 28 Instructions Step 1: Go to the Sculpt workspace
1 In the Mini Window Editor, double-click phase 1 (GF-Wall-External) to make it current:
 to make it current:") 1 This Quick Start tutorial introduces you to the basics of creating an intelligent drawing using the BIM components supplied with MicroGDS 2010. Here we demonstrate how to construct the external walls
1 This Quick Start tutorial introduces you to the basics of creating an intelligent drawing using the BIM components supplied with MicroGDS 2010. Here we demonstrate how to construct the external walls
Closed shapes with straight sides
 41 Unit 6 and 7 Properties of 2D shapes Activity 1 Closed shapes with straight sides (polygons). Let s revise the 2D shapes you learnt about in Grade 5 Closed shapes with straight sides triangle quadrilateral
Scene Modeling for a Single View
 Scene Modeling for a Single View René MAGRITTE Portrait d'edward James with a lot of slides stolen from Steve Seitz and David Brogan, Breaking out of 2D now we are ready to break out of 2D And enter the
EXERCISE 6: AEC OBJECTS
 EXERCISE 6: AEC OBJECTS ASSIGNMENT: In this exercise you will create a small pavilion using AEC extended objects, Doors, Windows and Stairs LEARNING OBJECTIVES: Modeling with AEC Objects Using Door, Windows,
Beaumont Middle School Design Project April May 2014 Carl Lee and Craig Schroeder
 Beaumont Middle School Design Project April May 2014 Carl Lee and Craig Schroeder 1 2 SketchUp 1. SketchUp is free, and you can download it from the website www.sketchup.com. For some K12 use, see www.sketchup.com/3dfor/k12-education.
Identify the following 3-D Geometric Shapes
 5.1 Intro January 3, 2011 4:55 PM Identify the following 3-D Geometric Shapes Important Terms Chapter 5 Page 1 - - - - - Face: Any flat area on a prism Curved Area: The curved part of a cylinder or cone
Quick Start Guide to using Light Converse along with Pangolin LD2000 and BEYOND
 Quick Start Guide to using Light Converse along with Pangolin LD2000 and BEYOND First Steps Regardless of when or from whom you purchased Light Converse, we recommend you do the following steps before
Around The House. Calculate the area of each room on the floor-plan below. Lounge: Bed 1:
 Around The House Calculate the area of each room on the floor-plan below. Lounge: Bed 1: 1 Bed 2: Bed 3: Bathroom: Spa: WC: Kitchen/dining: Area of house: 2 Classroom Plan 1. Use paper to draw then measure
Manual for SunHours Sketchup plugin
 Manual for SunHours Sketchup plugin (Version 2.0.8) By Alex Hall This is a list of features of the SunHours Sketchup plugin, a guide on how to use them, and some notes on the details in case you are having
GEOMETRY. TI-Nspire Help and Hints. 1 Open a Graphs and Geometry page. (Press c 2 ).
.") GEOMETRY TI-Nspire Help and Hints 1 Open a Graphs and Geometry page. (Press c 2 ). 2 You may need to save a current document you have been working on. Save or press e to move the cursor to No and press.
GEOMETRY TI-Nspire Help and Hints 1 Open a Graphs and Geometry page. (Press c 2 ). 2 You may need to save a current document you have been working on. Save or press e to move the cursor to No and press.
LESSON 2 MODELING BASICS
 LESSON 2 MODELING BASICS In this lesson we ll start to model a multi-story office building from scratch. We ll construct the base grid, create the two towers and place slabs between the stories. Also we
How to create shapes. Drawing basic shapes. Adobe Photoshop Elements 8 guide
 How to create shapes With the shape tools in Adobe Photoshop Elements, you can draw perfect geometric shapes, regardless of your artistic ability or illustration experience. The first step to drawing shapes
Terrestrial Laser Scanning assignment
 Terrestrial Laser Scanning assignment Objective: Underground 3D survey using terrestrial laser scanning Location: Otaniemi campus, Innopoli 3 Business Area Equipment: Faro Focus 3D Methodology: Multiple
Year 9: Long term plan
 Year 9: Long term plan Year 9: Long term plan Unit Hours Powerful procedures 7 Round and round 4 How to become an expert equation solver 6 Why scatter? 6 The construction site 7 Thinking proportionally
3D Digital Design. SketchUp
 3D Digital Design SketchUp 1 Overview of 3D Digital Design Skills A few basic skills in a design program will go a long way: 1. Orien
Inventor 201. Work Planes, Features & Constraints: Advanced part features and constraints
 Work Planes, Features & Constraints: 1. Select the Work Plane feature tool, move the cursor to the rim of the base so that inside and outside edges are highlighted and click once on the bottom rim of the
Students construct nets of three dimensional objects using the measurements of a solid s edges.
 Student Outcomes Students construct nets of three dimensional objects using the measurements of a solid s edges. Lesson Notes In the previous lesson, a cereal box was cut down to one of its nets. On the
Distance in Coordinate Geometry
 Page 1 of 6 L E S S O N 9.5 We talk too much; we should talk less and draw more. Distance in Coordinate Geometry Viki is standing on the corner of Seventh Street and 8th Avenue, and her brother Scott is
CIRCLES ON TAKS NAME CLASS PD DUE
 CIRCLES ON TAKS NAME CLASS PD DUE 1. On the calculator: Let s say the radius is 2. Find the area. Now let s double the radius to 4 and find the area. How do these two numbers relate? 2. The formula for
COURSE UNIT 1. Beginners MESSERLI ELITECAD VERSION
 MESSERLI ELITECAD VERSION 13 27.09.2013 COURSE UNIT 1 Switzerland: Austria: Germany: Messerli Informatik AG Messerli Informatik GmbH Messerli Informatik GmbH Pfadackerstrasse 6 Hamoderstraße 4 Konrad-Adenauer-Straße
7 th Grade CCGPS Math LFS Unit 5: Geometry
 7 th Grade CCGPS Math LFS Unit 5: Geometry Standards: Cluster: Draw, construct, and describe geometrical figures and describe the relationships between them. MCC7.G.2 (DOK2) Draw (freehand, with ruler
Math 6, Unit 8 Notes: Geometric Relationships
 Math 6, Unit 8 Notes: Geometric Relationships Points, Lines and Planes; Line Segments and Rays As we begin any new topic, we have to familiarize ourselves with the language and notation to be successful.
Grade 7/8 Math Circles Fall Nov.4/5 The Pythagorean Theorem
 1 Faculty of Mathematics Waterloo, Ontario Centre for Education in Mathematics and Computing Grade 7/8 Math Circles Fall 2014 - Nov.4/5 The Pythagorean Theorem Introduction A right triangle is any triangle
Modeling a Fluted Column in Google SketchUp
 Architectural columns in ancient Greece, Rome, and even China used flutes - vertical grooves cut along the outside of the cylinder. If you want to create a model of an ancient temple, or perhaps one of
Advanced point cloud processing
 Advanced point cloud processing George Vosselman ITC Enschede, the Netherlands INTERNATIONAL INSTITUTE FOR GEO-INFORMATION SCIENCE AND EARTH OBSERVATION Laser scanning platforms Airborne systems mounted
TOPOSCOPY, A CLOSE RANGE PHOTOGRAMMETRIC SYSTEM FOR ARCHITECTS AND LANDSCAPE DESIGNERS
 TOPOSCOPY, A CLOSE RANGE PHOTOGRAMMETRIC SYSTEM FOR ARCHITECTS AND LANDSCAPE DESIGNERS A. C. Groneman-van der Hoeven Bureau Toposcopie, Bachlaan 78, 6865 ES Doorwerth, The Netherlands. info@toposcopie.nl
GETTING STARTED TABLE OF CONTENTS
 Sketchup Tutorial GETTING STARTED Sketchup is a 3D modeling program that can be used to create 3D objects in a 2D environment. Whether you plan to model for 3D printing or for other purposes, Sketchup
round decimals to the nearest decimal place and order negative numbers in context
 6 Numbers and the number system understand and use proportionality use the equivalence of fractions, decimals and percentages to compare proportions use understanding of place value to multiply and divide
Esrefoglu Pattern, in Google SketchUp
 One of my favorite geometry books is Islamic Geometry Patterns by Eric Broug. The book contains instructions on 19 beautiful patterns found throughout the Middle East and Asia, and Eric s main tools are
3ds Max Cottage Step 1. Always start out by setting up units: We re going with this setup as we will round everything off to one inch.
 3ds Max Cottage Step 1 Always start out by setting up units: We re going with this setup as we will round everything off to one inch. File/Import the CAD drawing Be sure Files of Type is set to all formats
Shape, space and measures
 Shape, space and measures Non-Calculator Exam Questions 1. Here is the plan and side elevation of a prism. The side elevation shows the cross section of the prism. On the grid below, draw the front elevation
3D Design with 123D Design
 3D Design with 123D Design Introduction: 3D Design involves thinking and creating in 3 dimensions. x, y and z axis Working with 123D Design 123D Design is a 3D design software package from Autodesk. A
Calypso Construction Features. Construction Features 1
 Calypso 1 The Construction dropdown menu contains several useful construction features that can be used to compare two other features or perform special calculations. Construction features will show up
ACT Math and Science - Problem Drill 11: Plane Geometry
 ACT Math and Science - Problem Drill 11: Plane Geometry No. 1 of 10 1. Which geometric object has no dimensions, no length, width or thickness? (A) Angle (B) Line (C) Plane (D) Point (E) Polygon An angle
ARCHITECTURE & GAMES. A is for Architect Simple Mass Modeling FORM & SPACE. Industry Careers Framework. Applied. Getting Started.
 A is for Architect Simple Mass Modeling One of the first introductions to form and space usually comes at a very early age. As an infant, you might have played with building blocks to help hone your motor
Constructing a Dodecagon from a Circle, in Google SketchUp
 Constructing a Dodecagon from a Circle, in Google SketchUp I am a big fan of Wooden Books, and recently I was browsing through Sacred Geometry by Miranda Lundy. I ve had this wonderful little book for
Properties of polygons Year level: 6 7
 Properties of polygons Year level: 6 7 Unit of work contributed by Anne Pillman, Marryatville Primary School, SA L6558 Exploring s. Copyright Alberta Education About the unit Unit description This unit
Getting Started Follow the sequence below to get a twin track station up and running.
 Getting Started Follow the sequence below to get a twin track station up and running. Place a Station Template component (red arrow denotes Platform 1) and two Ramp Templates (rotate so that the red arrows
Edexcel Linear GCSE Higher Checklist
 Number Add, subtract, multiply and divide whole numbers integers and decimals Multiply and divide fractions Order integers and decimals Order rational numbers Use the concepts and vocabulary of factor
Geometry Workbook WALCH PUBLISHING
 Geometry Workbook WALCH PUBLISHING Table of Contents To the Student..............................vii Unit 1: Lines and Triangles Activity 1 Dimensions............................. 1 Activity 2 Parallel
2012 by Xactware. All rights reserved.
 Version 27.5 2012 by Xactware. All rights reserved. Xactware, Xactimate, XactScope, and/or other Xactware products referenced herein are either trademarks or registered trademarks of Xactware Solutions,
COS 116 The Computational Universe Laboratory 10: Computer Graphics
 COS 116 The Computational Universe Laboratory 10: Computer Graphics As mentioned in lecture, computer graphics has four major parts: imaging, rendering, modeling, and animation. In this lab you will learn
2. Draw a non-isosceles triangle. Now make a template of this triangle out of cardstock or cardboard.
 Tessellations The figure at the left shows a tiled floor. Because the floor is entirely covered by the tiles we call this arrangement a tessellation of the plane. A regular tessellation occurs when: The
Suggested Foundation Topics for Paper 2
 Suggested Foundation Topics for Paper 2 Number N a N b N b N c N d Add, subtract, multiply and divide any positive and negative integers Order decimals and integers Order rational numbers Use the concepts
Guided Problem Solving
 -1 Guided Problem Solving GPS Student Page 57, Exercises 1 1: Match each rule with the correct translation. A. (x, y) (x, y 1 ) I. P(, 1) P (3, ) B. (x, y) (x 1 3, y) II. Q(3, 0) Q (3, ) C. (x, y) (x 1,
Leica DISTO X3 Designed for tough, rugged conditions
 Leica DISTO X3 Designed for tough, rugged conditions The rugged Leica DISTO X-series combines innovative measuring technologies with a site-proof design and simple user interface. Together with the Leica
3D Modeler Creating Custom myhouse Symbols
 3D Modeler Creating Custom myhouse Symbols myhouse includes a large number of predrawn symbols. For most designs and floorplans, these should be sufficient. For plans that require that special table, bed,
Board Tiling, Chocolate Breaking with a Hint of Fibonacci. Part I By Harry Main-Luu
 Board Tiling, Chocolate Breaking with a Hint of Fibonacci Part I By Harry Main-Luu General Overview Part 1: Tiling a Plane Part 2: Tiling a Board Part 3: Breaking and Sharing Chocolate Some overarching
lundi 7 janvier 2002 Blender: tutorial: Building a Castle Page: 1
 lundi 7 janvier 2002 Blender: tutorial: Building a Castle Page: 1 www.blender.nl this document is online at http://www.blender.nl/showitem.php?id=4 Building a Castle 2000 07 19 Bart Veldhuizen id4 Introduction
**These steps start after you have a complete model and decide to start rendering views.
 Abstract: This step by step guide will help you understand how to render camera views as well as set up your own screen views straight from the render dialog box. **These steps start after you have a complete
Number of sides Name of polygon Least number of Interior angle sum 3 Triangle
 Name: Period: 6.1 Polygon Sum Polygon: a closed plane figure formed by three or more segments that intersect only at their endpoints. Are these polygons? If so, classify it by the number of sides. 1) 2)
Pick up some wrapping paper.
 Pick up some wrapping paper. What is the area of the following Christmas Tree? There is a nice theorem that allows one to compute the area of any simply-connected (i.e. no holes) grid polygon quickly.
Lab Assignment #1: Introduction to Creo ME 170
 Lab Assignment #1: Introduction to Creo ME 170 Instructor: Mike Philpott (email: mphilpot@illinois.edu) Date Due: One week from Start Day of Lab (turn in deadline 11pm night before next lab) Make sure
"Unpacking the Standards" 4th Grade Student Friendly "I Can" Statements I Can Statements I can explain why, when and how I got my answer.
 0406.1.1 4th Grade I can explain why, when and how I got my answer. 0406.1.2 I can identify the range of an appropriate estimate. I can identify the range of over-estimates. I can identify the range of
2D rendering takes a photo of the 2D scene with a virtual camera that selects an axis aligned rectangle from the scene. The photograph is placed into
 2D rendering takes a photo of the 2D scene with a virtual camera that selects an axis aligned rectangle from the scene. The photograph is placed into the viewport of the current application window. A pixel
number Understand the equivalence between recurring decimals and fractions
 number Understand the equivalence between recurring decimals and fractions Using and Applying Algebra Calculating Shape, Space and Measure Handling Data Use fractions or percentages to solve problems involving
Chapter 23- UV Texture Mapping
 Chapter 23- UV Texture Mapping Since games need to be able to process operations as fast as possible, traditional rendering techniques (specular, ray tracing reflections and refractions) cannot typically
Algebra Area of Parallelograms
 Lesson 10.1 Reteach Algebra Area of Parallelograms The formula for the area of a parallelogram is the product of the base and height. The formula for the area of a square is the square of one of its sides.
Build a flying buttress of Chartres Cathedral
 Build a flying buttress of Chartres Cathedral Overview: Step 1. Create a new Design Layer Step 2. Measure reference image Step 3. Build the buttress Step 4. Build the arches Dimensions for the buttress
SMMG October 14 th, 2006 featuring Dr. Michael Starbird Circles, Rings, and Tractors: Clever Cleaving for Finding Formulas
 SMMG October 14 th, 2006 featuring Dr. Michael Starbird Circles, Rings, and Tractors: Clever Cleaving for Finding Formulas 1. The Polygon Sweep a) On one of the colored pieces of construction paper you
Google SketchUp INTRODUCTION WORKSHOPS
 INTRODUCTION WORKSHOPS Outcomes: -A basic understanding of SketchUp uses and outcomes -Why you would use it for project development -A basic understanding of workspace -Basic ability to use/ get satrted
Tutorial for Lane County Mapping Applications
 Tutorial for Lane County Mapping Applications Contents Overview... 2 Tools... 2 Navigation Tools... 3 Display Tools... 5 Information Tools... 6 Sharing Tools... 7 Common Tasks... 9 Identify or Show Data
Standard 2.0 Knowledge of Geometry: Students will apply the properties of one-,
 VSC - Mathematics Print pages on legal paper, landscape mode. Grade PK Grade K Grade 1 Grade 2 Grade 3 Grade 4 Grade 5 Grade 6 Grade 7 Grade 8 Geometry: Students will apply the properties of one-, two-,
Boardworks Ltd KS3 Mathematics. S1 Lines and Angles
 1 KS3 Mathematics S1 Lines and Angles 2 Contents S1 Lines and angles S1.1 Labelling lines and angles S1.2 Parallel and perpendicular lines S1.3 Calculating angles S1.4 Angles in polygons 3 Lines In Mathematics,
L2 Translations, Reflections, and Rotations Pre-Assessment Per Date
 L Translations, Reflections, and Rotations.1 - Pre-Assessment Per Date Have you ever wanted to rearrange the furniture in your room? First you might want to make sure that the furniture would fit in the
The National Strategies Secondary Mathematics exemplification: Y8, 9
 Mathematics exemplification: Y8, 9 183 As outcomes, Year 8 pupils should, for example: Understand a proof that the sum of the angles of a triangle is 180 and of a quadrilateral is 360, and that the exterior
CH. 1 How To Use This Book 12
 CH. 1 How To Use This Book 12 Play Video Content With BookText 12 Navigate Within The Book 14 Searching Within The Book 15 VIDEO: Make the Most of This Book 14 CH. 2 Setting Up SketchUp 18 Setting Preferences