CGS 3220 Lecture 13 Polygonal Character Modeling
|
|
|
- Kristin Pierce
- 6 years ago
- Views:
Transcription

1 CGS 3220 Lecture 13 Polygonal Character Modeling Introduction to Computer Aided Modeling Instructor: Brent Rossen
2 Overview Box modeling Polygon proxy Mirroring Polygonal components Topology editing Procedural modeling attributes Changing edge normals Using the lattice deformer
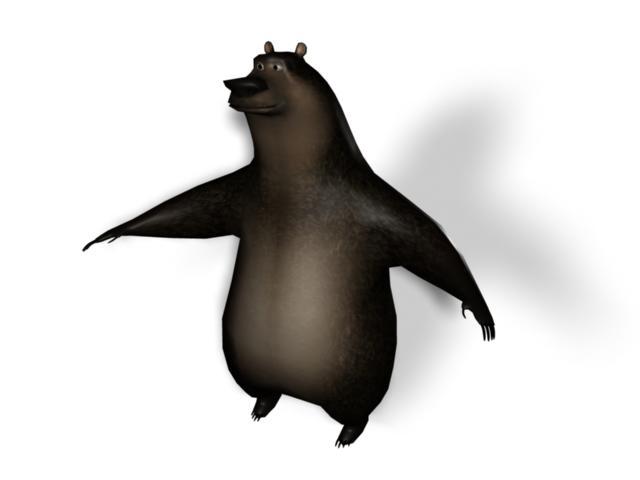
3 A New Project We will build Boog the bear from polygonal primitives and a few tools Set up a new project File > Project > New Name: Boog Click Use Defaults Accept Create a new Scene, File > New, save it as BoogModeling
4 Our Plan Torso Cube primitive will be the pelvis, then extrude faces to create the torso, neck, and head Legs Extrude polygons out of the torso to create the legs Arms Extrude arms from torso Cut and mirror geometry for symmetry
5 Primitive Cube Create > Polygon Primitives > Cube Rename to body From Inputs in the Channel Box, set the Subdivisions Width to 2 As a convention, you should model your characters facing the Z axis
6 Outline front and side
7 Image Plane Reference From the front view View > Camera Attribute Editor Environment > Image Plane > Create Image Name > Folder Icon, select your front view Do the same for your side view drawing Change the Placement attributes till your images line up

8 Image Planes and Start Cube
9 Extrude Faces Place the first cube where the pelvis will be Make sure Edit Mesh > Keep Faces together is checked F11 will go into component mode Select the top two faces Edit Mesh > Extrude Move the faces up in the Y Axis, scale them in a little Repeat to get the images in the next slide

10 Front and Side

11 Head, Neck, and Nose Extrude 3 more times to get the head, neck, and nose Rotate to make the faces flow according to the reference images, like in the image to the right

12 Subdiv Proxy Subdiv proxy allows you to see the smoothed model while working with the cube version Go back to object mode and select Proxy > Subdiv Proxy Never tweak the smoothed version directly using this tool

13 Extrude the Legs F11 to display faces Select the two faces from below the pelvis Turn off Keep faces together Edit Mesh > Extrude Move and scale approx to his knees Extrude again to ankles and put at about 45 degrees Extrude again to his toes

14 Extruding the Arms Select the face on one side of the torso, closest to where the arms will be We ll duplicate it later Extrude it three times to roughly match the reference images
15 Mirror the bear Delete Half Now we ll refine the bear s geometry to look a little more realistic The first thing we ll do is mirror the geometry so we only have to model one side of the bear From the front view, select all the geometry on the bear s left side use the Paint Selection tool and make sure you get it all
16 Mirror the Bear - Duplicate Delete it Select remaining geometry and Edit > Duplicate Special > Options Geometry type: Instance Scale X: -1 Hit Duplicate Special Now, whatever we do to one side, will be mirrored on the other
17 Lock the Mirror Select the group that was created by mirroring the geometry Create a Layer on the Channel Box / Layer Editor Rename it DuplicateLayer Change that layer to reference (R) Now we can t edit that layer, except by changing the original geometry
18 Shaping the bear Now let s move some polygons around to refine the bear s silhouette Select the proxy geometry Go into component mode with vertices displayed F9 Tweak the shape of the character using the proxy geometry Use the compass in the upper right of the perspective view to see your character from all different angles To toggle it: View > Camera Settings > View Compass

19 Four Views
20 Refining the bear Shading > Wireframe On Shaded to see more of the underlying geometry Try not to move the x translation value of the central line, otherwise it will mess with the line of the mirrored geometry and make holes Now we ll need more geometry to make the details of the bear First we ll define the tail, then the feet and hands

21 The Tail Select the vertex closest to the tail area, where the lower back splits into the legs Edit Mesh > Chamfer Vertex Change it so it makes a hexagon around the tail

22 Extrude the Tail Go to face mode F11 Extrude the tail twice along the side outline Be sure to delete the faces that are made between the original and the duplicate

23 Flatten the Feet The bear does not currently have flat feet, but he should Select the faces under the original foot Edit Mesh > Extrude Scale the faces a bit smaller in X and Z

24 Thumbs The hands will end up being simple, but he still needs thumbs In Object Mode, Zoom in on the hand Edit Mesh > Insert Edge Loop Tool Then extrude the face to make a thumb
25 Refine the Head The most important part of the character is the face Unfortunately, this is a very artistic task, so I can really only demonstrate so much You will need to try it at home and practice with each tool The final character will be on the website for you to examine if you need it

26 Offset Edge Loop Tool This tool adds two edge loops along side an existing edge loop Edit Mesh > Offset Edge Loop Tool Click drag a horizontal edge at the top of the neck Release the mouse
27 Deleting Edges As you work, you may need to delete edges If you simply select and delete the edges, it will leave floating vertices Use the Select > Select Edge Loop Tool Then the Edit Mesh > Delete Edge/Vertex That will properly delete a whole edge loop
28 Marking Menus Using the regular menus is fine, but to speed up the task, you can use the Marking Menu Go to Edge Mode, Select an edge CTRL + RMB, this will bring up the polygonal marking menu There we have Edge Loop Utilities This will bring up a second marking menu related to edge loops

29 Edge Ring Select an edge on the neck Ctrl + RMB, Select Edge Ring Utilities Select To Edge Ring and Split This automatically selects the related edge ring and then splits those edges We split our character in half

30 Nose Loops Edit Mesh > Insert Edge Loop Tool Insert Two more vertical edge loops on the nose of the character

31 Tweak the Head Vertices There is now much more geometry, so let s refine the head some more
32 Delete History Remove Proxy At this point, if you re working on a slow machine, Maya is going to start to slow down So let s delete the history This also makes adding additional geometry less complicated Edit > Delete All By Type > History Select the proxy and delete it Your now left with the underlying geometry
33 Refining Refinement We ve covered a lot about polygonal modeling, now we ll refine the bear some more We ll have to move much of it vertex by vertex, you should expect to do that on your model as well Split edges to define and refine different parts of the face, then extrude as needed Extrude out the ears, move many vertices around to form the shape of the eyes and nose Normals > Soften Edges

34 Tweak the Head Vertices
35 Merging the Model At this point, we could continue defining the bear, but we re going to call it final and move on, just so we don t take forever Delete the instanced geometry Select the body Mesh > Mirror Geometry > Options Mirror direction: +X The Geometry is mirrored and merged, we have one big mesh Edit > Delete all by type > History
36 Proportions An easy way to change the proportions of a model is using a lattice deformer Select the geometry Deform > Create Lattice In the Channel Box, with the lattice selected, change these: S Divisions: 5, T Divisions: 5, U Divisions: 3 Change the Box to make changes to the model

37 More Gut RMB > Lattice Point
38 Final Touches - Eyeball Find the right proportions and delete all the history again The body looks pretty decent now, but he needs eyes Create > NURBS Primitives > Sphere Rename the sphere to eyeball Rotate 90 on x, translate and scale to the right place
39 Eye Lid With the eyeball selected, Edit > Duplicate Special > Options Reset Settings Duplicate input: on, Duplicate Special Rename it to eyelid Rotate -90 on Y Scale so that it s slightly larger than the eyeball In the Channel box, highlight the input node, Change Start Sweep to 20, End Sweep to 340 We ll use this to make eye blinks Duplicate Special, Duplicate Input Graphs

40 Claws Create a NURBS cone primitive Radius:.2 Sections: 4 Spans: 2 Height Ratio: 10 Rename to claw1 Adjust the CVs to make the image to the right Duplicate to make all the other claws Group all of the claws you made for the left side Duplicate, Scale X: -1 to mirror
41 Conclusion We went over how to model a complete character Obviously it takes more time than we have in class to really get good details, just keep refining For your project, be sure to have some reference material, such as a real image or take photos The lattice deformer can help you in many instances, remember that one
42 Next Time
CGS 3220 Lecture 17 Subdivision Surfaces
 CGS 3220 Lecture 17 Subdivision Surfaces Introduction to Computer Aided Modeling Instructor: Brent Rossen Overview Converting from polygons to subdivision surfaces (sub-d) Modeling with sub-d using polygon
Character Modeling IAT 343 Lab 6. Lanz Singbeil
 Character Modeling IAT 343 Lab 6 Modeling Using Reference Sketches Start by creating a character sketch in a T-Pose (arms outstretched) Separate the sketch into 2 images with the same pixel height. Make
Box Modeling a Character Model Maya 2013
 2007-2013 Michael O'Rourke Box Modeling a Character Model Maya 2013 Concept When modeling a polygon character model, it can be faster to create a symmetrical model at first by working on only one half
5 Subdivision Surfaces
 5 Subdivision Surfaces In Maya, subdivision surfaces possess characteristics of both polygon and NURBS surface types. This hybrid surface type offers some features not offered by the other surface types.
Character Modeling COPYRIGHTED MATERIAL
 38 Character Modeling p a r t _ 1 COPYRIGHTED MATERIAL 39 Character Modeling Character Modeling 40 1Subdivision & Polygon Modeling Many of Maya's features have seen great improvements in recent updates
ARCHITECTURE & GAMES. A is for Architect Simple Mass Modeling FORM & SPACE. Industry Careers Framework. Applied. Getting Started.
 A is for Architect Simple Mass Modeling One of the first introductions to form and space usually comes at a very early age. As an infant, you might have played with building blocks to help hone your motor
Maya Lesson 3 Temple Base & Columns
 Maya Lesson 3 Temple Base & Columns Make a new Folder inside your Computer Animation Folder and name it: Temple Save using Save As, and select Incremental Save, with 5 Saves. Name: Lesson3Temple YourName.ma
Transforming Objects and Components
 4 Transforming Objects and Components Arrow selection Lasso selection Paint selection Move Rotate Scale Universal Manipulator Soft Modification Show Manipulator Last tool used Figure 4.1 Maya s manipulation
Editing Polygons. Adding material/volume: Extrude. Learning objectives
 Learning objectives Be able to: use the Extrude tool to add volume to a polygon know what edge loops are and how to insert edge loops in a polygon cut edges in a polygon know multiple methods of sewing
Tutorial Model the perfect 3D face
 Model the perfect D face Want to get your head around D modelling? We use Maya to show you how to build an animatable face feature by feature T here are many ways in which to model a head in D. In this
3 Polygonal Modeling. Getting Started with Maya 103
 3 Polygonal Modeling In Maya, modeling refers to the process of creating virtual 3D surfaces for the characters and objects in the Maya scene. Surfaces play an important role in the overall Maya workflow
3D Modeling Course Outline
 3D Modeling Course Outline Points Possible Course Hours Course Overview 4 Lab 1: Start the Course Identify computer requirements. Learn how to move through the course. Switch between windows. Lab 2: Set
Beginners Guide Maya. To be used next to Learning Maya 5 Foundation. 15 juni 2005 Clara Coepijn Raoul Franker
 Beginners Guide Maya To be used next to Learning Maya 5 Foundation 15 juni 2005 Clara Coepijn 0928283 Raoul Franker 1202596 Index Index 1 Introduction 2 The Interface 3 Main Shortcuts 4 Building a Character
Shade tutorial: Shoes for Poser.
 Shade tutorial: Shoes for Poser www.oscillator.se/3d Notes Welcome to the Shade tutorial: Shoes for Poser. This is my first tutorial for Shade. I was inspired by the friendly and generous people at Shader
3D Design with 123D Design
 3D Design with 123D Design Introduction: 3D Design involves thinking and creating in 3 dimensions. x, y and z axis Working with 123D Design 123D Design is a 3D design software package from Autodesk. A
Create a Rubber Duck. This tutorial shows you how to. Create simple surfaces. Rebuild a surface. Edit surface control points. Draw and project curves
 Page 1 of 24 Create a Rubber Duck This exercise focuses on the free form, squishy aspect. Unlike the flashlight model, the exact size and placement of the objects is not critical. The overall form is the
Modeling a Low-Poly Character
 NOTE Once you make a manual change to the original orientation of the normal, the normal changes to a green color, signifying that it's now an Explicit normal. 6 Experiment by selecting some of the other
Brief 3ds max Shaping Tutorial
 Brief 3ds max Shaping Tutorial Part1: Power Key Axe Shaft Written by Maestro 1. Creation: Go to top view, create a 6 sided cylinder, 0.1 radius this is the perfect shaft thickness to fit in the hand, so
BlockMan Directions V2 Computer Graphics and Animation. Description:
 BlockMan Directions V2 Computer Graphics and Animation Description: These directions work through modeling, creating a skeleton, skinning, UV map, and animation of a block figure with Maya 2015. This process
Images from 3D Creative Magazine. 3D Modelling Systems
 Images from 3D Creative Magazine 3D Modelling Systems Contents Reference & Accuracy 3D Primitives Transforms Move (Translate) Rotate Scale Mirror Align 3D Booleans Deforms Bend Taper Skew Twist Squash
Actions and Graphs in Blender - Week 8
 Actions and Graphs in Blender - Week 8 Sculpt Tool Sculpting tools in Blender are very easy to use and they will help you create interesting effects and model characters when working with animation and
Chapter 3- Creating & Editing Objects
 Working with Basic Meshes Chapter 3- Creating & Editing Objects Now that we know how to move around in Blender, let s start doing some basic building and shaping. In this chapter we will talk about creating
Learning Autodesk Maya The Modeling & Animation Handbook. Free Models From Turbo Squid Value US $ Official Autodesk Training Guide
 Free Models From Turbo Squid Value US $239.00 Official Autodesk Training Guide Learning Autodesk Maya 2008 The Modeling & Animation Handbook A hands-on introduction to key tools and techniques in Autodesk
Modeling Technology Group
 Modeling Technology Group Hiroshi Hayashi David Ogirala Matt Nedrich Jeff Ridenbaugh Spencer Smith Saba Bokhari John Gray Charles Hellstrom Bryan Linthicum Polygon Models (part-1) What are polygons? -
Key 3D Modeling Terms Beginners Need To Master
 Key 3D Modeling Terms Beginners Need To Master Starting your 3D modeling journey is an exciting and rewarding experience. As you begin to learn and practice, there are essential terms you need to know
XSI TO SINS: COMMANDS & SHORTCUTS
 XSI TO SINS: COMMANDS & SHORTCUTS I. Commonly Used Basic Modeling Commands and Shortcuts in XSI: Section A: The Main Control Panel Select Menu Group/Cluster Selection (See Fig. 1.1 for a quick visual overview)
Polygon & Subdivision Surface Modeling in Maya: The Mouse Embryo
 Polygon & Subdivision Surface Modeling in Maya: The Mouse Embryo Maya s polygon toolset has evolved over the past several versions to include numerous approaches for the creation of organic and hard surface
Basic Blender Commands This is just a partial list of Blender commands. Please visit the Blender.org website for more details.
 Basic Key Commands Basic Blender Commands This is just a partial list of Blender commands. Please visit the Blender.org website for more details. TAB key- Toggles between edit mode (vertex editing) and
The Pilot Bust: Low-Poly Head CHAPTER Modeling 7
 Li kewhatyou see? Buyt hebookat t hefocalbookst or e Mayaf orgames Ingr assi a ISBN 9780240810645 The Pilot Bust: Low-Poly Head CHAPTER Modeling 7 The Pilot Bust: Low-Poly Head Modeling This lesson will
Animator Friendly Rigging Part 2b
 Animator Friendly Rigging Part 2b Creating animation rigs which solve problems, are fun to use, and don t cause nervous breakdowns. - 1- CONTENTS Review The Requirements... 5 Torso Animation Rig Requirements...
Lesson 11. Polygonal Spaceship
 11 Polygonal Spaceship In this lesson, you will build and texture map a polygonal spaceship. Starting with a polygonal cube, you will extrude facets until you have a completed ship. You will then be able
Facial Animation. Chapter 7
 Chapter 7 Facial Animation Although you can go a long way toward completing a scene simply by animating the character s body, animating the character s face adds greatly to the expressiveness of a sequence.
CS 465 Program 4: Modeller
 CS 465 Program 4: Modeller out: 30 October 2004 due: 16 November 2004 1 Introduction In this assignment you will work on a simple 3D modelling system that uses simple primitives and curved surfaces organized
Lecture 4, 5/27/2017, Rhino Interface an overview
 數字建築與城市设计 Spring 2017 Lecture 4, 5/27/2017, Rhino Interface an overview Copyright 2017, Chiu-Shui Chan. All Rights Reserved. This lecture concentrates on the use of tools, 3D solid modeling and editing
Evil Blink 1 EVIL BLINK
 1 EVIL BLINK Houdini Training V4.0 Side Effects Software 1999 1 1.1 CREATING THE EYE SOCKET 1. Launch Houdini 2. From the desktop selector button located at the top of the interface, select the Training
Chapter 3- Creating & Editing Objects
 ` Chapter 3- Creating & Editing Objects Edit Mode- Mesh Editing Object Mode After you have created a mesh, you can go into Edit mode (Tab key or Mode option in window) and change its shape. In edit mode,
Scale Rate by Object Size: Only available when the current Emitter Type is Surface, Curve, or Volume. If you turn on this attribute, the
 Basic Emitter Attributes Emitter Name: The name helps you identify the emitter object in the Outliner. If you don t enter a name, the emitter object receives a default name such as emitter1. Solver: (For
A Guide to Autodesk Maya 2015
 A Guide to Autodesk Maya 2015 Written by Mitchell Youngerman Table of Contents Layout of Toolbars...pg 1 Creating Objects...pg 2 Selecting & Deselecting Objects...pg 3 Changing Perspective... pg 4 Transforming
Bonus Ch. 1. Subdivisional Modeling. Understanding Sub-Ds
 Bonus Ch. 1 Subdivisional Modeling Throughout this book, you ve used the modo toolset to create various objects. Some objects included the use of subdivisional surfaces, and some did not. But I ve yet
1st Point. 2nd Point. hold shift & drag along Y. Splines
 Splines STEP 1: open 3DS Max _ from the Command Panel under the Create tab click on Shapes (note: shapes are really Splines) _ under Object Type click on Ellipse STEP 2: Expand the Keyboard Entry tab type
Introduction to Maya
 1 M CO PY RI GH TE D MA TE RI AL Introduction to Maya aya is a powerful 3D modeling, animation, effects, and rendering solution that has been used in everything from product design to feature films. In
CGS 3220 Lecture 4 Shaders, Textures, and Light
 CGS 3220 Lecture 4 Shaders, Textures, and Light Introduction to Computer Aided Modeling Instructor: Brent Rossen Overview Working with the menu-less UI Working with the Hypershade Creating shading groups
Dave s Phenomenal Maya Cheat Sheet The 7 Default Menus By Dave
 Dave s Phenomenal Maya Cheat Sheet The 7 Default Menus By Dave Menu Set Hot Keys F2 F3 F4 F5 Animation Modeling Dynamics Rendering Transformation / Manipulator Hot Keys Q W E R T Y Select Tool Move Tool
How to Create a Simple Animation Using MAYA
 How to Create a Simple Animation Using MAYA Jennifer Soltz July 29, 2011 0 Table of Contents Introduction Safety Information. 2. 3 What you need Materials Overview Diagram. 4. 4 Instructions Setup Modeling
Maya Lesson 6 Screwdriver Notes & Assessment
 Maya Lesson 6 Screwdriver Notes & Assessment Save a new file as: Lesson 6 Screwdriver YourNameInitial Save in your Computer Animation folder. Screwdriver Handle Base Using CVs Create a polygon cylinder
Lesson 01 Polygon Basics 17. Lesson 02 Modeling a Body 27. Lesson 03 Modeling a Head 63. Lesson 04 Polygon Texturing 87. Lesson 05 NURBS Basics 117
 Table of Contents Project 01 Lesson 01 Polygon Basics 17 Lesson 02 Modeling a Body 27 Lesson 03 Modeling a Head 63 Lesson 04 Polygon Texturing 87 Project 02 Lesson 05 NURBS Basics 117 Lesson 06 Modeling
An Approach to Content Creation for Trainz
 An Approach to Content Creation for Trainz Paul Hobbs Part 6 GMax Basics (Updates and sample files available from http://www.44090digitalmodels.de) Page 1 of 18 Version 3 Index Foreward... 3 The Interface...
Course: 3D Design Title: Mesh Modeling Shark Dropbox File: Shark.zip Blender: Version 2.45 Level: Beginning Author: Neal Hirsig
 Course: 3D Design Title: Mesh Modeling Shark Dropbox File: Shark.zip Blender: Version 2.45 Level: Beginning Author: Neal Hirsig (nhirsig@tufts.edu) Mesh Modeling Shark In this tutorial, we ll model a Shark.
Extrude & Revolve Maya 2013
 2000-2013 Michael O'Rourke Extrude & Revolve Maya 2013 Concept There are several basic modeling techniques shared by all 3D programs These can be used either to create your final model For example, a vase
Chapter 15: Penguin - Point Editing and Blending
 This tutorial demonstrates point-editing techniques including moving and scaling control points and adding knots to surfaces to increase control. In addition, you will use blends to create smooth transitions
MAYA; AN INTRODUCTION TO MAYA; EndOfLine.info;
 MAYA; AN INTRODUCTION TO MAYA; EndOfLine.info; Maya is an intuitive modelling and animation software that relies on a different set of techniques and strategies than Rhinoceros. It is important to note
COS 116 The Computational Universe Laboratory 10: Computer Graphics
 COS 116 The Computational Universe Laboratory 10: Computer Graphics As mentioned in lecture, computer graphics has four major parts: imaging, rendering, modeling, and animation. In this lab you will learn
CGS 3034 Lecture 2 Ball Bounce
 CGS 3034 Lecture 2 Ball Bounce Introduction to Computer Aided Animation Instructor: Brent Rossen Ball Bounce Example 1 Setup a new project: BallBounce Use Default placement settings Exports to Image folder
Course: 3D Design Title: Mesh Modeling Hand Dropbox File: Hand.zip Blender: Version 2.41 Level: Beginning Author; Neal Hirsig
 Course: 3D Design Title: Mesh Modeling Hand Dropbox File: Hand.zip Blender: Version 2.41 Level: Beginning Author; Neal Hirsig (nhirsig@tufts.edu) Mesh Modeling Hand Open a new Blender file. We will be
How to model a car body in T-Splines
 How to model a car body in T-Splines My name is and I ll show you how to model complex cars like the Alfa Romeo 147 gta using the T-Splines Maya plugin and various techniques. This will be useful if you
Maya 2014 NURBS Modeling Tutorial Airship
 Maya 2014 NURBS Modeling Tutorial Airship Airships have captured human imagination for centuries and are featured prominently in books, film and video games. As an introduction to modeling with NURBS (non
ArtCAM Pro 5.5. Combining Reliefs Reliefs can also be generated from bitmaps as well as vectors and a combination of the two.
 ArtCAM Pro 5.5 Combining Reliefs Reliefs can also be generated from bitmaps as well as vectors and a combination of the two. Teddy Bear Example The vector artwork has already been created and saved, so
Google SketchUp. and SketchUp Pro 7. The book you need to succeed! CD-ROM Included! Kelly L. Murdock. Master SketchUp Pro 7 s tools and features
 CD-ROM Included! Free version of Google SketchUp 7 Trial version of Google SketchUp Pro 7 Chapter example files from the book Kelly L. Murdock Google SketchUp and SketchUp Pro 7 Master SketchUp Pro 7 s
Autodesk Inventor Design Exercise 2: F1 Team Challenge Car Developed by Tim Varner Synergis Technologies
 Autodesk Inventor Design Exercise 2: F1 Team Challenge Car Developed by Tim Varner Synergis Technologies Tim Varner - 2004 The Inventor User Interface Command Panel Lists the commands that are currently
Blender Notes. Introduction to Digital Modelling and Animation in Design Blender Tutorial - week 1 The Blender Interface and Basic Shapes
 Blender Notes Introduction to Digital Modelling and Animation in Design Blender Tutorial - week 1 The Blender Interface and Basic Shapes Introduction Blender is a powerful modeling, animation and rendering
4) Finish the spline here. To complete the spline, double click the last point or select the spline tool again.
 Finish the spline here. To complete the spline, double click the last point or select the spline tool again.") 1) Select the line tool 3) Move the cursor along the X direction (be careful to stay on the X axis alignment so that the line is perpendicular) and click for the second point of the line. Type 0.5 for
1) Select the line tool 3) Move the cursor along the X direction (be careful to stay on the X axis alignment so that the line is perpendicular) and click for the second point of the line. Type 0.5 for
FormZ Tips created by Phil Jones, edited by Nancy Cheng, University of Oregon 11/16/05
 FormZ Tips created by Phil Jones, edited by Nancy Cheng, University of Oregon 11/16/05 window tools: 1 2 3 4 5 6 7 8 9 1 set reference plane use this to choose between standard reference planes. 2 perpendicular
Lesson 1: Creating T- Spline Forms. In Samples section of your Data Panel, browse to: Fusion 101 Training > 03 Sculpt > 03_Sculpting_Introduction.
 3.1: Sculpting Sculpting in Fusion 360 allows for the intuitive freeform creation of organic solid bodies and surfaces by leveraging the T- Splines technology. In the Sculpt Workspace, you can rapidly
Importing and Applying Motion. Ingredients. Pre-production Issues. SIGGRAPH-02 Course 28: Motion Capture: Pipeline, Applications, and Use
 Importing and Applying Motion SIGGRAPH-02 Course 28: Motion Capture: Pipeline, Applications, and Use Importing Acclaim Skeleton Creating a Simple Model Importing Acclaim Motion SIGGRAPH-02 Course 28: Motion
Freeform / Freeform PLUS
 Freeform / Freeform PLUS WORKING WITH FREEFORM Work from Coarse Clay to Fine When creating new models from scratch, it is best to first create a rough shape using a coarse clay setting such as Rough Shape
How to draw and create shapes
 Adobe Flash Professional Guide How to draw and create shapes You can add artwork to your Adobe Flash Professional documents in two ways: You can import images or draw original artwork in Flash by using
Blender Character Modeling A companion book to the Blender Character Creation Series on Youtube
 Blender Character Modeling A companion book to the Blender Character Creation Series on Youtube https://www.youtube.com/user/darrinlile Darrin Lile Blender Foundation Certified Trainer 2017, Darrin Lile.
Trimmed Surfaces Maya 2013
 2000-2013 Michael O'Rourke Trimmed Surfaces Maya 2013 Concepts Trimming works only on patches (in Maya, this means NURBS patches) Does not work with polygonal models A trim can look similar to a Boolean
Mia Round Corners Node
 Mia Round Corners Node NAKHLE Georges - july 2007 This tutorial describes how to use the mental ray MIA Round Corners node. 1) Create a polygonal cube, and make sure that mental ray plug-in is loaded.
Basics of Design p. 2 Approaching Design as an Artist p. 4 Knowing Your Character p. 4 Making Decisions p. 4 Categories of Design p.
 Basics of Design p. 2 Approaching Design as an Artist p. 4 Knowing Your Character p. 4 Making Decisions p. 4 Categories of Design p. 6 Realistic Designs p. 6 Stylized Designs p. 7 Designing a Character
Full Screen Layout. Main Menu Property-specific Options. Object Tools ( t ) Outliner. Object Properties ( n ) Properties Buttons
 Outliner. Object Properties ( n ) Properties Buttons") Object Tools ( t ) Full Screen Layout Main Menu Property-specific Options Object Properties ( n ) Properties Buttons Outliner 1 Animation Controls The Create and Add Menus 2 The Coordinate and Viewing
Object Tools ( t ) Full Screen Layout Main Menu Property-specific Options Object Properties ( n ) Properties Buttons Outliner 1 Animation Controls The Create and Add Menus 2 The Coordinate and Viewing
3D Modeling and Design Glossary - Beginner
 3D Modeling and Design Glossary - Beginner Align: to place or arrange (things) in a straight line. To use the Align tool, select at least two objects by Shift left-clicking on them or by dragging a box
Create a Cool Vector Robot Character in Illustrator
 Create a Cool Vector Robot Character in Illustrator In this tutorial, we will use various tools and techniques to create a simple vector robot character and learn the basic of Adobe Illustrated. With this
Chapter 3- Creating & Editing Objects
 ` Chapter 3- Creating & Editing Objects Working with Basic Meshes Now that you can move around in Blender, let s start doing some basic building and shaping. In this chapter we will talk about creating
Basic Blender Commands This is just a partial list of Blender commands. Please visit the Blender.org website for more details.
 Basic Key Commands Basic Blender Commands This is just a partial list of Blender commands. Please visit the Blender.org website for more details. TAB key- Toggles between edit mode (vertex editing) and
Taking the Best Reference Photos
 Sides Three and Four To fill in the other two sides select the top vertice and the corners on a side where there is no face yet. Again, use FKEY to fill in a face. Repeat this for the last side to have
doi: / The Application of Polygon Modeling Method in the Maya Persona Model Shaping
 doi:10.21311/001.39.12.37 The Application of Polygon Modeling Method in the Maya Persona Model Shaping Qinggang Sun Harbin University of Science and Technology RongCheng Campus, RongCheng Shandong, 264300
In Wings 3D: Basic Pants
 Modeling for Poser In Wings 3D: Basic Pants Cyberwoman 2010; illustrations by Cyberwoman with the cooperation of Sydney G2. Do not reproduce or redistribute without permission. This tutorial will show
Creating a T-Spline using a Reference Image
 1 / 17 Goals Learn how to create a T-Spline using a Reference Image. 1. Insert an image into the workspace using Attach Canvas. 2. Use Calibrate to set the proper scale for the reference image. 3. Invoke
Spring 2011 Workshop ESSENTIALS OF 3D MODELING IN RHINOCEROS February 10 th 2011 S.R. Crown Hall Lower Core Computer Lab
 [1] Open Rhinoceros. PART 1 INTRODUCTION [4] Click and hold on the Boundary Lines in where they form a crossing and Drag from TOP RIGHT to BOTTOM LEFT to enable only the PERSPECTIVE VIEW. [2] When the
solidthinking User Interface
 Lesson 1 solidthinking User Interface This lesson introduces you to the solidthinking interface. The functions described represent the tools necessary for effectively managing the modeling of a project.
Project 9. Render a Kitchen
 Project 9 Render a Kitchen Creating a kitchen in 3D is one of those projects that help a lot in improving our skills. Since a kitchen can be created without having to resort to complex modeling skills,
First Animated Model Yellow Submarine
 Course: 3D Design Title: First Animated Model Yellow Submarine Blender: Version 2.6X Level: Beginning Author; Neal Hirsig (May 2012) First Animated Model Yellow Submarine Most of you are perhaps too young
Platformer Tutorial 8 - Adding Mr.Green and Character Animation. Last month. Character FX
 Last month Things became a lot more dangerous as traps and deadly particles were added. It just wouldn t be the same without Mr.Green so he s making his debut this month. As this has always been the plan,
This is the opening view of blender.
 This is the opening view of blender. Note that interacting with Blender is a little different from other programs that you may be used to. For example, left clicking won t select objects on the scene,
NURBS Sailboat on Ocean (Modeling/Animation)
") Course: 3D Design Title: NURBS Sailboat Blender: Version 2.6X Level: Beginning Author; Neal Hirsig (nhirsig@tufts.edu) (April 2013) NURBS Sailboat on Ocean (Modeling/Animation) The objective of this PDF
Course: 3D Design Title: NURBS Sailboat Blender: Version 2.6X Level: Beginning Author; Neal Hirsig (nhirsig@tufts.edu) (April 2013) NURBS Sailboat on Ocean (Modeling/Animation) The objective of this PDF
ppmodeler Real Time Character Modelling Tutorial
 This tutorial is based on the "Real Time Character Modelling Tutorial" by Antony Ward that can be found at : http://www.ant online.co.uk/downloads/modtutorial.htm. Please, read it before this one. We will
Creative Sewing Machines Workbook based on BERNINA Embroidery Software V8.1
 : Photosnap Edited for 8.1 This lesson has been rewritten to reflect V8.1 changes from the original 8.0 version. Another auto digitizing feature of BERNINA Embroidery Software V8 is PhotoSnap. PhotoSnap
lundi 7 janvier 2002 Blender: tutorial: Building a Castle Page: 1
 lundi 7 janvier 2002 Blender: tutorial: Building a Castle Page: 1 www.blender.nl this document is online at http://www.blender.nl/showitem.php?id=4 Building a Castle 2000 07 19 Bart Veldhuizen id4 Introduction
Mesh Modeling Dice Boolean
 Course: 3D Design Title: Mesh Modeling Dice - Boolean Dropbox File: Dice.zip Blender: Version 2.41 Level: Beginning Author: Neal Hirsig (nhirsig@tufts.edu) Mesh Modeling Dice Boolean In this tutorial,
By Roland Hess -- Based on the Blender Summer of Code tutorial by Michael Worcester
 Mesh Modeling Tutorial By Roland Hess -- Based on the Blender Summer of Code tutorial by Michael Worcester In the previous chapter, you learned how to manipulate objects in Blender. You've seen how to
Kobold. Shoe Modeling Tutorial 01: Model and animate a red high heel shoe. Software: CINEMA 4D R14
 Kobold Chara teranimation Shoe Modeling Tutorial 01: Model and animate a red high heel shoe Software: CINEMA 4D R14 www.koboldcharakteranimation.com Shoe Modeling Tutorial 01: Model and animate a red high
COS 116 The Computational Universe Laboratory 10: Computer Graphics
 COS 116 The Computational Universe Laboratory 10: Computer Graphics As mentioned in lecture, computer graphics has four major parts: imaging, rendering, modeling, and animation. In this lab you will learn
3ds Max Cottage Step 1. Always start out by setting up units: We re going with this setup as we will round everything off to one inch.
 3ds Max Cottage Step 1 Always start out by setting up units: We re going with this setup as we will round everything off to one inch. File/Import the CAD drawing Be sure Files of Type is set to all formats
Dremel Digilab 3D Slicer Software
 Dremel Digilab 3D Slicer Software Dremel Digilab 3D Slicer prepares your model for 3D printing. For novices, it makes it easy to get great results. For experts, there are over 200 settings to adjust to
Revit Architecture 2015 Basics
 Revit Architecture 2015 Basics From the Ground Up Elise Moss Authorized Author SDC P U B L I C AT I O N S Better Textbooks. Lower Prices. www.sdcpublications.com Powered by TCPDF (www.tcpdf.org) Visit
To build shapes from scratch, use the tools are the far right of the top tool bar. These
 3D GAME STUDIO TUTORIAL EXERCISE #5 USE MED TO SKIN AND ANIMATE A CUBE REVISED 11/21/06 This tutorial covers basic model skinning and animation in MED the 3DGS model editor. This exercise was prepared
Solid surface modeling in AutoCAD
 Solid surface modeling in AutoCAD Introduction into 3D modeling Managing views of 3D model Coordinate Systems 1 3D model advantages ability to view the whole model looking inside the model collision checking
3D Animation. Modelling Organic Objects 40374E
 3D Animation Modelling Organic Objects 3D Animation About the author Catherine Grundy is a Senior Lecturer at the University of Brighton for the Computing, Mathematics and Information Sciences department,
MODELING EYES ESTIMATED TIME REQUIRED
 MODELING EYES This tutorial will teach you how to model a pair of realistic-looking eyes and insert them into the head of a character. ESTIMATED TIME REQUIRED 30 Minutes LEARNING GOALS In this tutorial,