User s Manual Copyright SofTec Microsystems. Freescale and the Freescale logo are trademarks of Freescale Semiconductor, Inc.
|
|
|
- Augustus Smith
- 6 years ago
- Views:
Transcription


1 User s Manual
2

3 indart-one In-Circuit Programmer and Debugger for Freescale 8- and 16-bit Microcontrollers User s Manual Revision 2.0 Copyright 2006 SofTec Microsystems DC01076
4 We want your feedback! SofTec Microsystems is always on the look-out for new ways to improve its Products and Services. For this reason feedback, comments, suggestions or criticisms, however small, are always welcome. Our policy at SofTec Microsystems is to comply with all applicable worldwide safety and EMC/EMI regulations. Our products are certified to comply to the European New Approach Directives and the CE mark is applied on all our products. This product as shipped from the factory has been verified to meet with requirements FCC as a CLASS A product. This product is designed and intended for use as a development platform for hardware or software in an educational or professional laboratory. In a domestic environment, this product may cause radio interference in which case the user may be required to take adequate prevention measures. Attaching additional wiring to this product or modifying the product operation from the factory default as shipped may effect its performance and cause interference with other apparatus in the immediate vicinity. If such interference is detected, suitable mitigating measures should be taken. SofTec Microsystems (general information): info@softecmicro.com (marketing department): marketing@softecmicro.com (technical support): support@softecmicro.com Web: Important SofTec Microsystems reserves the right to make improvements to the indart-one In-Circuit Programmer/Debugger, its documentation and software routines, without notice. Information in this manual is intended to be accurate and reliable. However, SofTec Microsystems assumes no responsibility for its use; nor for any infringements of rights of third parties which may result from its use. SOFTEC MICROSYSTEMS WILL NOT BE LIABLE FOR DAMAGES RESULTING FROM LOSS OF DATA, PROFITS, USE OF PRODUCTS, OR IIDENTAL OR CONSEQUENTIAL DAMAGES, EVEN IF ADVISED OF THE POSSIBILITY THEREOF. Trademarks SofTec Microsystems is a registered trademark of SofTec Microsystems, Spa. Freescale and the Freescale logo are trademarks of Freescale Semiconductor, Inc. Microsoft and Windows are trademarks or registered trademarks of Microsoft Corporation. PC is a registered trademark of International Business Machines Corporation. Other products and company names listed are trademarks or trade names of their respective companies. Written by Paolo Xausa
5 indart-one User's Manual Contents 0 Before Starting Important Notice to Users Required Skills 13 1 Overview What is indart-one? In-Circuit Debugger Single Programmer Multiple Programmer indart Programming Library Package Contents Optional HC08 Fast Programming Algorithms Hardware Overview USB Connector MON08 Connector BDM Connector Target Power Connectors Status LEDs START Push-Button Software Overview CodeWarrior Development Studio Special Edition DataBlaze Programming Utility MultiBlaze Programming Utility indart-one Control Panel Software Upgrades Recommended Reading Getting Technical Support 26 2 Setup Software Setup Host System Requirements CodeWarrior Setup 27
6 Contents indart-one Utilities Setup Hardware Setup PC Connection Target Connection Communication Settings Unlocking Fast Programming Algorithms 32 3 Debugging indart-one Working Principles Working with CodeWarrior Using the Project Wizard to Create Your Application Skeleton Starting your First Debugging Session Using Existing Projects with indart-one Breakpoints and Trace HC08 Notes and Tips Stop Command Handling Breakpoints and Swi Instruction Reading Peripheral Status Interrupt Execution during Steps Peripheral Status during Steps HCS08, RS08 and S12(X) Notes and Tips Entering Debug Session with CodeWarrior Reading Peripheral Status Breakpoints and BGND Instruction Real-Time Memory Update 40 4 Programming DataBlaze Programming Utility Overview Using DataBlaze Using HC08 Fast Algorithms MultiBlaze Gang Programming Utility Overview Starting MultiBlaze Creating a Project Programming Using HC08 Fast Algorithms 53
7 indart-one User's Manual 4.3 BDM Programming Notes 54 5 Working with HC08 Devices Debugging Limitations Communication Settings MON08 Configuration Power Settings Programming Trimming MON08 Target Connections Standard MON08 Connections Enhanced MON08 Connections MC68HC908AB Family Connections MC68HC908AP Family Connections MC68HC908AS Family Connections MC68HC908AZ Family Connections MC68HC908BD Family Connections MC68HC908EY Family Connections MC68HC908GP Family Connections MC68HC908GR4/4A/8/8A Connections MC68HC908GR16 Connections MC68HC908GR16A/32A/48A/60A Connections MC68HC908GT Family Connections MC68HC908GZ Family Connections MC68HC908JB8 Connections MC68HC908JB12/16 Connections MC68HC908JG Connections MC68H(L)C908JK Family Connections MC68H(L)C908JL Family Connections MC68HC908JW Family Connections MC68HC908KX Family Connections MC68HC908LB Family Connections MC68HC908LD Family Connections MC68HC908LJ Family Connections MC68HC908LK Family Connections MC68HC908LT Family Connections MC68HC908LV Family Connections MC68HC908MR Family Connections 79
8 Contents MC68HC908QB Family Connections MC68HC908QC Family Connections MC68HC908QF Family Connections MC68HC908QL Family Connections MC68H(L)C908QT Family Connections MC68H(L)C908QY Family Connections MC68HC908RF Family Connections MC68HC908RK Family Connections MC68HC908SR Family Connections 84 6 Working with HCS08 Devices Communication Settings BDM Clock Fast Programming Trimming Other Settings 86 7 Working with RS08 Devices Communication Settings Target Communication Trimming Other Settings 88 8 Working with S12(X) Devices Communication Settings 89 9 indart Programming Library Introduction The indart Programming Library (IPL) Installation Programming Library Reference Using the Interface Library Functions Return Values of the Programming Library Functions Programming Buffer Function Reference Typedefs and Structures IPL_EndSession() 102
9 indart-one User's Manual IPL_GetBufferChecksum() IPL_GetButtonStatus() IPL_GetDefaultProgrammingSteps() IPL_GetDeviceList() IPL_GetError() IPL_GetInstrumentsConnected() IPL_GetInstrumentStatus() IPL_GetVersion() IPL_LoadFileIntoBuffer() IPL_ReadDataFromBuffer() IPL_ReadDeviceMemory() IPL_SetCallback() IPL_SetCommunicationSettings() IPL_SetDevice() IPL_SetInstrumentConfiguration() IPL_SetProgrammingSteps() IPL_StartProgramming() IPL_StartSession() IPL_WriteDataToBuffer() Troubleshooting Common Problems and Solutions USB Driver Problems Communication Can t Be Established with indart-one CodeWarrior-Specific: Stepping Execution is Slow HC08-Specific: Peripheral Speed is Low HCS08-Specific: Communication Lost During Debugging HCS08-Specific: STOP Assembly Instruction Causes a Microcontroller Reset Diagnostic Test Getting Technical Support Technical Specifications 133
10
11 indart-one User's Manual Index of Figures Figure 1.1: indart-one Connectors 18 Figure 1.2: MON08 Connector Signals (Standard Mode) 19 Figure 1.3: MON08 Connector Signals (Enhanced Mode) 20 Figure 1.4: BDM Connector Signals 22 Figure 1.5: Status LEDs 23 Figure 2.1: New Hardware Wizard, Step 1 29 Figure 2.2: New Hardware Wizard, Step 2 30 Figure 2.3: New Hardware Wizard, Step 3 30 Figure 2.4: New Hardware Wizard, Step 4 31 Figure 2.5: indart-one Control Panel 33 Figure 3.1: The MCU Configuration Dialog Box 36 Figure 3.2: The Set Connection Dialog Box 37 Figure 3.3: The MCU Configuration Dialog Box 37 Figure 4.1: The DataBlaze User Interface 44 Figure 4.2: Device Selection 45 Figure 4.3: MultiBlaze Login 46 Figure 4.4: MultiBlaze Main Window 47 Figure 4.5: MultiBlaze Project Wizard, Step 1 48 Figure 4.6: MultiBlaze Project Wizard, Step 2 49 Figure 4.7: MultiBlaze Project Wizard, Step 3 50 Figure 4.8: MultiBlaze Project Wizard, Step 4 51 Figure 4.9: MultiBlaze Programming Window 52 Figure 5.1: MON08 Communication Settings: MON08 Configuration 56 Figure 5.2: MON08 Communication Settings: Power Settings 58 Figure 5.3: MON08 Communication Settings: Target Power Connectors Modes 59 Figure 5.4: MON08 Communication Settings: Programming 60 Figure 5.5: MON08 Communication Settings: Baud Rate Calculator 61 Figure 5.6: MON08 Communication Settings: Trimming 62 Figure 5.7: Typical MON08 Target Connections (Standard Mode) 64 Figure 5.8: Typical MON08 Target Connections (Enhanced Mode) 65 Figure 5.9: Jumpered Enhanced MON08 Connector 66 Figure 5.10: Standard MON08 Connections for the MC68HC908AB Family 67 Figure 5.11: Standard MON08 Connections for the MC68HC908AP Family 67 Figure 5.12: Standard MON08 Connections for the MC68HC908AS Family 68
12 Contents Figure 5.13: Standard MON08 Connections for the MC68HC908AZ Family 68 Figure 5.14: Standard MON08 Connections for the MC68HC908BD Family 69 Figure 5.15: Standard MON08 Connections for the MC68HC908EY Family 69 Figure 5.16: Standard MON08 Connections for the MC68HC908GP Family 70 Figure 5.17: Standard MON08 Connections for MC68HC908GR4/4A/8/8A Devices 70 Figure 5.18: Standard MON08 Connections for the MC68HC908GR16 Device 71 Figure 5.19: Standard MON08 Connections for MC68HC908GR16A/32A/48A/60A Devices 71 Figure 5.20: Standard MON08 Connections for the MC68HC908GT Family 72 Figure 5.21: Standard MON08 Connections for the MC68HC908GZ Family 72 Figure 5.22: Standard MON08 Connections for the MC68HC908JB8 Device 73 Figure 5.23: Standard MON08 Connections for MC68HC908JB12/16 Devices 73 Figure 5.24: Standard MON08 Connections for the MC68HC908JG Family 74 Figure 5.25: Standard MON08 Connections for the MC68H(L)C908JK Family 74 Figure 5.26: Standard MON08 Connections for the MC68H(L)C908JL Family 75 Figure 5.27: Standard MON08 Connections for the MC68HC908JW Family 75 Figure 5.28: Standard MON08 Connections for the MC68HC908KX Family 76 Figure 5.29: Standard MON08 Connections for the MC68HC908LB Family 76 Figure 5.30: Standard MON08 Connections for the MC68HC908LD Family 77 Figure 5.31: Standard MON08 Connections for the MC68HC908LJ Family 77 Figure 5.32: Standard MON08 Connections for the MC68HC908LK Family 78 Figure 5.33: Standard MON08 Connections for the MC68HC908LT Family 78 Figure 5.34: Standard MON08 Connections for the MC68HC908LV Family 79 Figure 5.35: Standard MON08 Connections for the MC68HC908MR Family 79 Figure 5.36: Standard MON08 Connections for the MC68HC908QB Family 80 Figure 5.37: Standard MON08 Connections for the MC68HC908QC Family 80 Figure 5.38: Standard MON08 Connections for the MC68HC908QF Family 81 Figure 5.39: Standard MON08 Connections for the MC68HC908QL Family 81 Figure 5.40: Standard MON08 Connections for the MC68HC908QT Family 82 Figure 5.41: Standard MON08 Connections for the MC68HC908QY Family 82 Figure 5.42: Standard MON08 Connections for the MC68HC908RF Family 83 Figure 5.43: Standard MON08 Connections for the MC68HC908RK Family 83 Figure 5.44: Standard MON08 Connections for the MC68HC908SR Family 84 Figure 6.1: The BDM Communication Settings Dialog Box for HCS08 Devices 85 Figure 7.1: The BDM Communication Settings Dialog Box for RS08 Devices 87 Figure 8.1: The BDM Communication Settings Dialog Box for S12(X) Devices 89 Figure 9.1: Typical IPL Workflow 96 Figure 9.2: Programming Buffer 98 Figure 10.1: indart-one Control Panel 132
13 indart-one User's Manual Index of Tables Table 1.1: Fast Programming Times for Some HC08 Devices 17 Table 1.2: MON08 Connector Signals (Standard Mode) 20 Table 1.3: MON08 Connector Signals (Enhanced Mode) 21 Table 1.4: BDM Connector Signals 22 Table 1.5: Status LEDs 23 Table 4.1: MultiBlaze Programming States 53 Table 9.1: IPL Callback Events 120 Table 11.1: Electrical Specifications 133 Table 11.2: Physical and Environmental Specifications 134
14
15 0 Before Starting indart-one User's Manual Important Notice to Users While every effort has been made to ensure the accuracy of all information in this document, SofTec Microsystems assumes no liability to any party for any loss or damage caused by errors or omissions or by statements of any kind in this document, its updates, supplements, or special editions, whether such errors are omissions or statements resulting from negligence, accidents, or any other cause. 0.2 Required Skills In order to beneficially use the indart-one In-Circuit Programmer/Debugger, you should be acquainted with certain skills, ranging from hardware design to software design. In particular, you should possess knowledge of the following: Microcontroller systems; HC08, HCS08, RS08, S12 or S12X architecture knowledge; Programming knowledge (Assembly and C). 13
16
17 indart-one User's Manual 1 Overview 1.1 What is indart-one? 1 The indart-one In-Circuit Programmer/Debugger is a powerful programming and debugging tool for Freescale HC08-, HCS08-, RS08-, S12- and S12X-based systems In-Circuit Debugger indart-one takes advantage of the CodeWarrior Development Studio Special Edition (which groups an Editor, Assembler, C Compiler and Debugger) and the Freescale MON08 and BDM interfaces, which allow the download and debug of the user application into the target microcontroller s FLASH memory. Together with CodeWarrior, indart-one provides you with everything you need to write, compile, download, in-circuit emulate and debug user code. Full-speed program execution allows you to perform hardware and software testing in real time. indart-one is connected to the host PC through a USB port. indart-one offers you the following debugging features: Real-time code execution and in-circuit debugging without probes works with all packages (MON08- and BDM-compatible connectors); 1.8 V to 5.5 V devices supported; Standard chip used no bondouts, 100% electrical characteristics guaranteed; Working frequency up to the target microcontroller s maximum; Jumperless hardware mode setting; MON08 automatic target frequency detection; MON08 automatic V DD and V TST voltage generation; Target power in and power out connectors for manual or automatic MON08 target power switching; 15
18 Overview 1 Hardware self diagnostic test; USB connection to the PC; CodeWarrior IDE (the same user interface of all Freescale tools), with editor, assembler, C compiler and debugger Single Programmer Additionally, indart-one is a full-featured programmer, thanks to the provided DataBlaze programming utility Multiple Programmer Up to 32 indart-one instruments can be connected (using USB hubs) to the same PC, allowing for multiple (gang) programming sessions. A specific multiple programming utility, MultiBlaze, is provided indart Programming Library The indart Programming Library (IPL-One) is a DLL which includes all of the low-level functions that allow you to set up the instrument and perform all of the programming commands and functions of the DataBlaze and MultiBlaze programming utilities from within your own Windows application. The IPL-One Programming Library contains C written routines, and can be used to interface the instrument from within, for example, a Microsoft Visual C or Visual Basic application, as well as any other programming language that supports the DLL mechanism. 1.2 Package Contents The indart-one package includes the following items: indart-one in-circuit programming/debugging unit; A USB cable; A 16-conductor MON08 cable; A 6-conductor BDM cable; 16
19 indart-one User's Manual Two 2-conductor target power cables; SofTec Microsystems indart-one System Software CD-ROM; CodeWarrior Development Studio Special Edition CD-ROMs; A QuickStart Tutorial poster; This user s manual; A registration card Optional HC08 Fast Programming Algorithms Fast programming algorithms reduce significantly the amount of time needed to program HC08 devices. Fast programming algorithms can be used both in single and multiple programming. Device Memory Size Programming Times MC68HC908GP32 32KB, fcpu = 4 MHz Program = 1.5 s Program + Verify = 2.9 s MC68HC908QB8 8KB, fcpu = 4 MHz Program = 1.1 s Program + Trimming + Verify = 1.5 s MC68HC908AZ60A 60KB, fcpu = 4 MHz Program = 2.7 s Program + Verify = 5.4 s Table 1.1: Fast Programming Times for Some HC08 Devices See Unlocking Fast Programming Algorithms on page 32 for information on how to purchase and setup these features. 1.4 Hardware Overview The following figure shows the various indart-one connectors. 17

20 Overview 1 Figure 1.1: indart-one Connectors USB Connector The USB connector is used to connect indart-one to the host PC. When connecting more then one indart-one to a host PC, USB hubs can be used. indart-one is USB 2.0 compliant and uses a high speed connection, but can be connected to USB 1.1 systems as well. indart-one is powered by the USB bus voltage MON08 Connector indart-one uses a 16-pin MON08 connector to program and debug HC08 devices. This connector can be configured to work as a standard (Multilink compatible) MON08 connector or as an enhanced (SofTec Microsystems compatible) MON08 connector. The enhanced MON08 connector allows the 18
21 indart-one User's Manual target microcontroller to free some lines after entering the monitor mode at reset. For more information about how to provide the appropriate MON08 connector on your target board, see MON08 Target Connections on page OSC VDD GND RST IRQ MON4 MON5 MON6 MON7 MON MON08 Connector (Standard Mode) Figure 1.2: MON08 Connector Signals (Standard Mode) 19
22 Overview Pin Signal Name Description 1 2 GND System ground. 4 RST# MCU reset; held at V TST (or V DD, depending on the target microcontroller) out of reset. No other target-system logic should be tied to this signal. 6 IRQ# MCU interrupt; held at V TST. 8, 10, 12, 14, 16 MON4... MON8 I/O pins connected to target microcontroller. 13 OSC This signal can be used as an auxiliary clock source, and is particularly useful when the target microcontroller requires an external clock which is not available on the target board. 15 VDD The target V DD line needs to be driven correctly at reset. When using the MON08 connector in standard mode, indart-one can automatically generate this signal. 1, 3, 5, 7, 9, 11 Not connected. Table 1.2: MON08 Connector Signals (Standard Mode) \ 1 2 RST_OUT RST_IN TGT_IRQ TGT_MON4 TGT_MON5 TGT_MON6 TGT_MON7 TGT_MON8 GND RST IRQ MON4 MON5 MON6 MON7 MON MON08 Connector (Enhanced Mode) Figure 1.3: MON08 Connector Signals (Enhanced Mode) 20
23 indart-one User's Manual Pin Signal Name Description 1 RST_OUT# Reset signal to target system: GND or open drain output reflecting the state of the MCU RST# and RST_IN# signals. 2 GND System ground. 3 RST_IN# Reset signal from target system: GND to V DD input to control the state of the MCU RST# and RST_OUT# signals. 4 RST# MCU reset; held at V TST (or V DD, depending on the target microcontroller) out of reset. No other target-system logic should be tied to this signal. 5 TGT_IRQ# Interrupt signal from target system: GND to V DD input to control the state of the MCU IRQ# signal. 6 IRQ# MCU interrupt; held at V TST when the TGT_IRQ# signal is not asserted. 7, 9, 11, 13, 15 8, 10, 12, 14, 16 TGT_MON4... TGT_MON8 MON4... MON8 I/O pins connected to target application. I/O pins connected to target microcontroller. 1 Table 1.3: MON08 Connector Signals (Enhanced Mode) Each of the MON08 connector lines must be connected to the appropriate pins of the specific target microcontroller used. Once a target microcontroller has been selected, the Communication Settings dialog box (available in CodeWarrior, DataBlaze and MultiBlaze) automatically shows you how to connect that specific device to the MON08 connector BDM Connector indart-one uses the standard, 6-pin BDM connector defined by Freescale to program and debug HCS08, RS08, S12 and S12X devices. You must therefore provide such connector (see the diagram below) on your target board. 21
24 Overview BKGD GND RST/VPP VDD 5 6 BDM Connector Figure 1.4: BDM Connector Signals Pin Signal Name Description 1 BKGD Single-wire background interface pin. 2 GND System ground. 3 Not connected. 4 RST#/VPP Reset signal to target system, or V PP. 5 Not connected. 6 VDD Power supply voltage from target. This pin is used by indart-one for signal conditioning. Table 1.4: BDM Connector Signals Target Power Connectors These two connectors allow you control how to power the target board, depending on the target device selected and on the target communication settings. For more information, see the chapter relative to the target family you are working with, later in this manual Status LEDs The status LEDs on the instrument turn on/off during the various stages of debugging and programming. 22

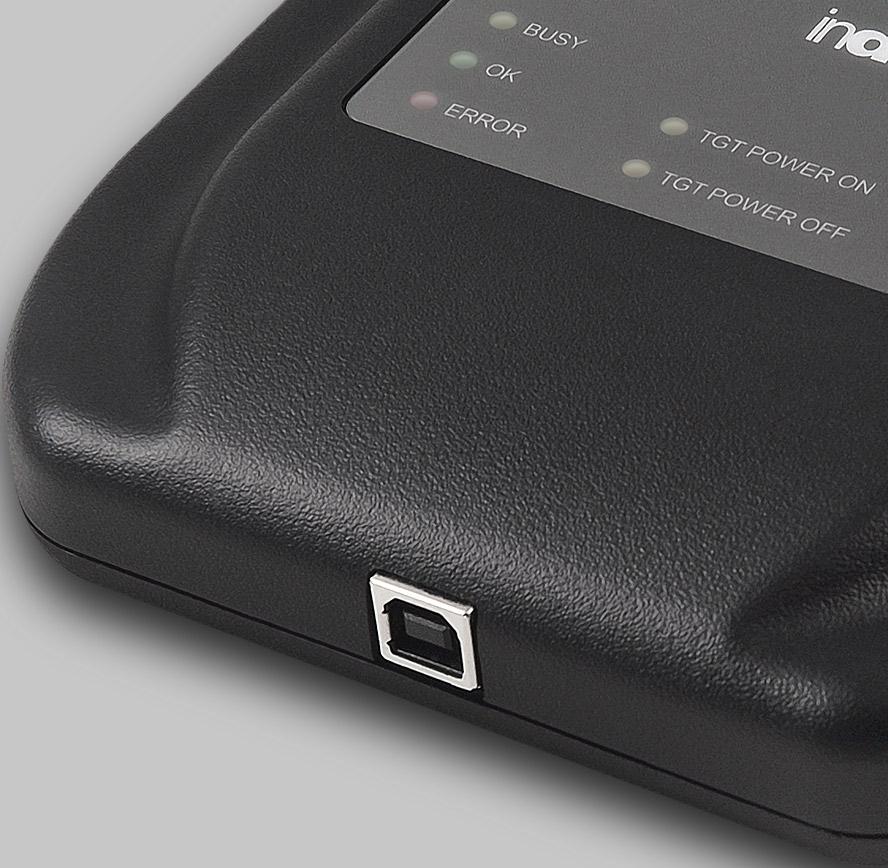
25 indart-one User's Manual 1 Figure 1.5: Status LEDs The following table explains the meaning of each LED. LED Name POWER BUSY OK ERROR TGT POWER ON TGT POWER OFF Description Indicates that the instrument is powered on. Turns on when connecting the instrument to the USB bus. Indicates that the instrument is busy, either during programming or debugging. Turns on at the end of the programming if no errors occurred. Turns on at the end of the programming if it could not be performed successfully. Indicates that you must power on the target board. Only for MON08 devices, when manual target powering is selected. Indicates that you must power off the target board. Only for MON08 devices, when manual target powering is selected. Table 1.5: Status LEDs START Push-Button The START push-button can be used to start programming the target device, when using the DataBlaze or MultiBlaze programming utilities. Additionally, when using MON08 devices with manual target powering, the START button can be used to confirm the target board s powering on/off, (see Power Settings on page 57). 23
26 Overview 1.5 Software Overview CodeWarrior Development Studio Special Edition The indart-one In-Circuit Programmer/Debugger comes with CodeWarrior Development Studio Special Editions for the various Freescale HC08, HCS08, RS08, S12 and S12X families. CodeWarrior Development Studio is a powerful and easy-to-use tool suite designed to increase your software development productivity. Its Integrated Development Environment (IDE) provides unrivaled features such as Processor Expert application design tool, full chip simulation, Data Visualization and project manager with templates to help you concentrate on the added value of your application. The comprehensive, highly visual CodeWarrior Development Studio for Freescale Microcontrollers enables you to build and deploy Freescale systems quickly and easily. This tool suite provides the capabilities required by every engineer in the development cycle, from board bring-up to firmware development to final application development. Without a license key, the product will run in a 1 KB code-size limited demonstration mode. To break the 1 KB limit, you have two options: 1. Contact Metrowerks to request an unlimited period, free license key to increase the code size limit to 16 KB (HC08, HCS08, RS08) or 32 KB (S12, S12X); 2. Contact Metrowerks to request a 30-day limited, free license key to run the compiler without limitations. This documentation covers the basic setup and operation of CodeWarrior Development Studio, but does not cover all of its functions. For further information, please refer to the CodeWarrior on-line help and on-line documentation provided DataBlaze Programming Utility DataBlaze is a full-featured programming utility. DataBlaze offers the following advanced features: 24
27 indart-one User's Manual Memory editing; Blank check/erase/program/verify/read operations; Project handling; One-button, multiple-operations programming ( Auto feature); Serial numbering MultiBlaze Programming Utility MultiBlaze is an easy-to-use multiple programming utility suitable for production environments. MultiBlaze offers the following features: Easy-to-use programming interface; Blank check/erase/program/verify/read operations; One-button, multiple-operations programming ( Auto feature); Statistics and logging indart-one Control Panel The indart-one Control Panel utility allows you to: Perform an instrument self-diagnostic hardware test; Install/enable purchased HC08 fast algorithms Software Upgrades The latest version of the indart-one system software is always available free of charge from our website: When installing the indart-one system software you have the option to electronically register the product. If you register the product, you will be automatically notified by every time a new version of the indart-one system software is available. 25
28 Overview 1.6 Recommended Reading 1 This documentation describes how to use the indart-one In-Circuit Programmer/Debugger, how to set up basic debugging sessions with CodeWarrior, how to use the DataBlaze and MultiBlaze programming utilities, and how to use the IPL-One Programming Library. Additional information can be found in the following documents: CodeWarrior additional documentation available from the CodeWarrior IDE. Freescale datasheets. Freescale application notes. 1.7 Getting Technical Support For technical assistance, documentation and information about products and services, please refer to your local SofTec Microsystems partner. SofTec Microsystems offers its customers a technical support service at support@softecmicro.com. Before getting in contact with us, we advise you to check that you are working with the latest version of the indart-one system software (upgrades are available free of charge at and to run the diagnostic test (see Diagnostic Test on page 131). 26
29 indart-one User's Manual 2 Setup 2.1 Software Setup i Note: before connecting the indart-one board to the PC, it is recommended that you install all of the required software first (see below), so that the indart-one USB driver will be automatically found by Windows when you connect the board Host System Requirements The following hardware and software are required to run the CodeWarrior user interface and the DataBlaze and MultiBlaze programming utilities together with indart-one: 1. A 500-MHz (or higher) PC compatible system running Windows 98, Windows 2000 or Windows XP; MB of available system RAM plus 1 GB of available hard disk space; 3. A USB port; 4. CD-ROM drive for installation CodeWarrior Setup To install the CodeWarrior Development Studio Special Edition, insert the correct CodeWarrior CD-ROM (the one supporting the device family you will work with) into your computer s CD-ROM drive. A startup window will automatically appear. Follow the on-screen instructions. 27
30 Setup indart-one Utilities Setup The indart-one utilities setup install all of the other required components to your hard drive. These components include: 2 The indart-one USB driver and DLLs; DataBlaze programming utility; MultiBlaze multiple programming utility; indart-one control panel; CodeWarrior examples; indart Programming Library examples; Documentation in PDF format. To install the indart-one utilities, insert the SofTec Microsystems System Software CD-ROM into your computer s CD-ROM drive. A startup window will automatically appear. Choose Install Instrument Software from the main menu. A list of available software will appear. Click on the indart- One Utilities option. Follow the on-screen instructions. i Note: to install the indart-one utilities on Windows 2000 or Windows XP, you must log in as Administrator. 2.2 Hardware Setup PC Connection indart-one connects to the host PC through a USB port. When connecting more than one indart-one to a host PC, USB hubs can be used. indart-one is USB 2.0 compliant and uses a high speed connection, but can be connected to USB 1.1 systems as well. indart-one is powered by the USB bus voltage, and requires a USB port capable of supplying 350 ma. 28
31 indart-one User's Manual The first time indart-one is connected to the PC, Windows recognizes the instrument and starts the Found New Hardware Wizard procedure, asking you to specify the driver to use for the instrument. 1. On Windows XP (SP2) the following dialog box will appear, asking you to search for a suitable driver on the web. 2 Figure 2.1: New Hardware Wizard, Step 1 Select the No, not this time option and click the Next > button. 2. The following dialog box will appear. 29


32 Setup 2 Figure 2.2: New Hardware Wizard, Step 2 Click the Next > button. 3. Depending on your Windows settings, the following warning may appear. Figure 2.3: New Hardware Wizard, Step 3 30
33 indart-one User's Manual i Note: this warning is related to the fact that the USB driver used by indart-one is not digitally signed by Microsoft, and Windows considers it to be potentially malfunctioning or dangerous for the system. However, you can safely ignore the warning, since every kind of compatibility/security test has been carried out by SofTec Microsystems. Click the Continue Anyway button. 4. Windows will install the driver files to your system. At the end of the installation, the following dialog box will appear. 2 Figure 2.4: New Hardware Wizard, Step 4 Click the Finish button to exit from the Found New Hardware Wizard procedure. 5. The Starter Kit s USB driver is now installed on your system Target Connection indart-one connects to your target board either via the MON08 connector or the BDM connector, depending on your hardware s target device. Additionally, you can take advantage of the Target Power connectors to supply your target board. For detailed information about these two 31
34 Setup connectors and how to use them in conjunction with your target board, please refer to the following chapters: 2 Working with HC08 Devices, on page 55 Working with HCS08 Devices, on page 85 Working with RS08 Devices, on page 87 Working with S12(X) Devices, on page 89 depending on the hardware you are working with Communication Settings After physically connecting indart-one to your target hardware, indart- One must be configured properly so that communication with the target device can be established correctly. Communication settings are defined through the Communication Settings dialog box, available both in CodeWarrior and in the DataBlaze and MultiBlaze programming utilities. Each target device/hardware configuration requires specific settings, detailed later in this manual in the chapter relative to the target family you are working with. 2.3 Unlocking Fast Programming Algorithms Fast HC08 programming algorithms can be purchased and enabled (in one or more instruments) in order to reduce significantly the amount of time needed to program HC08 devices. To purchase fast HC08 programming algorithms, please contact SofTec Microsystems (info@softemicro.com). 32
35 indart-one User's Manual i Note: once an instrument is unlocked for a particular fast algorithm, all of the other instruments connected to the same PC are automatically considered unlocked for the same fast algorithm, as long as the unlocked instrument is also connected. The unlocked instrument works as a master, temporarily unlocking all of the other instruments connected to the same PC at the same time. Once you have the unlocking code(s), do the following: 2 1. Open the indart-one Control Panel. Select Start > Programs > SofTec Microsystems > indart-one > Control Panel. The following dialog box will appear. Figure 2.5: indart-one Control Panel 2. Click the License Upgrade button and follow the on-screen instructions. 33
36
37 indart-one User's Manual 3 Debugging 3.1 indart-one Working Principles indart-one is an in-circuit debugger as well as a programming tool. It programs files into the target microcontroller and offers debugging features like real-time code execution, stepping, and breakpoint. Its debugging features are achieved thanks to the microcontroller s integrated debug module. The integrated debug module communicates with the host PC through a bidirectional, command-based protocol via some dedicated lines of the microcontroller (which are therefore reserved during debugging sessions). The same lines are also used during device programming. Contrariwise to traditional in-circuit emulation (where the target application is executed and emulated inside the emulator), indart-one uses the very same target microcontroller to carry on in-circuit execution. This means that all microcontroller s peripherals (timers, A/D converters, I/O pins, etc.) are not reconstructed or simulated by an external device, but are the very same target microcontroller s peripherals. Moreover, the indart-one debugging approach ensures that the target microcontroller s electrical characteristics (pull-ups, low-voltage operations, I/O thresholds, etc.) are 100% guaranteed. The trade-off, however, is that the target microcontroller must be properly configured and ready to execute target applications Working with CodeWarrior Using the Project Wizard to Create Your Application Skeleton CodeWarrior helps you get started with your own application by including a project wizard specific for indart-one. To create a new project with CodeWarrior for HC08/HCS08/RS08: 35
38 Debugging 1. From the main menu, select File > New Project. 2. A Project Wizard dialog box will appear. Follow the Project Wizard steps, making sure you select the correct microcontroller derivative you are working with and that the SofTec target connection is used. To create a new project with CodeWarrior for S12(X): 3 1. From the main menu, select File > New. 2. A dialog box will appear. Select HC(S)12 New Project Wizard. 3. Follow the Project Wizard steps, making sure you select the correct microcontroller derivative you are working with and that the SofTec target connection is used Starting your First Debugging Session The first time you enter a debugging session (by selecting Project > Debug from the CodeWarrior s main menu) the MCU Configuration dialog box will open, asking you to select the debugging hardware connected to the PC. Make sure that the hardware code is set to indart- One. Figure 3.1: The MCU Configuration Dialog Box 36

 as processor and SofTec as connection. Click the OK button. 3.")
39 indart-one User's Manual Using Existing Projects with indart-one If your project has been targeted to an emulator/simulator other than indart-one and you wish to use indart-one as the debugger for your project, please do the following: 1. From the CodeWarrior debugger interface, select Component > Set Connection. The Set Connection dialog box will appear. 3 Figure 3.2: The Set Connection Dialog Box 2. Choose HC08, HCS08, RS08 or HC12 (depending on your target device) as processor and SofTec as connection. Click the OK button. 3. The MCU Configuration dialog box will appear allowing you to select indart-one as the hardware debugger. Figure 3.3: The MCU Configuration Dialog Box 37
40 Debugging 4. On the CodeWarrior debugger interface a new menu ( indart-hc08, SofTec-HCS08, SofTec-RS08 or indart-hcs12 ) will be created. From this menu, select Load and locate the object file your project is based on Breakpoints and Trace CodeWarrior offers a variety of tools for analyzing the program flow: breakpoints (both simple and complex), watchpoints and a trace buffer. All these features are implemented by taking advantage of the target microcontroller s debug peripheral. i Note: when setting an instruction breakpoint on a RAM location, a software breakpoint is set (the opcode present at that location is automatically replaced by the BGND Assembly instruction). Therefore, no hardware breakpoints are wasted. i Note: the Single Step command (in a C source code) and the Step Over and Step Out commands (both in a C and Assembly source code) use one hardware breakpoint. 3.3 HC08 Notes and Tips Stop Command Handling The Halt debugging command will not work unless the IRQ interrupt is properly handled. In particular, the following precautions must be taken in the application s source code. 1. Global interrupts must be enabled (use the cli instruction); 2. The IRQ interrupt must be enabled; 38
41 indart-one User's Manual 3. The IRQ interrupt vector must be handled; 4. The IRQ handling routine must include the following code: irq_isr: bil irq_isr ; Waits for the IRQ signal to go high swi ; Jumps to monitor code rti 5. Under these conditions, the TGT_IRQ# line is reserved; when it is driven low, a Halt debugging command is automatically recognized Breakpoints and Swi Instruction The HC08 s on-chip debug module only handles one hardware breakpoint. However, you can force the program execution to stop at other specific locations by inserting the swi Assembly instruction on your source code Reading Peripheral Status Care must be taken when reading some peripheral s status/data registers, since a reading operation may cause the clearing of flags. This may happen when the Memory window or the Data window is open, since these windows read microcontroller s resources during refresh operations Interrupt Execution during Steps When issuing stepping instructions (Single Step, Step Over, etc.) and there are pending interrupts, indart-one will not step inside the interrupt handling routine, but the whole interrupt handling routine is executed. An exception is when you single step on an Assembly instruction which branches to itself: in this case, interrupts which may occur are not handled Peripheral Status during Steps When single stepping on an Assembly instruction which branches to itself, peripheral status is frozen. 39
42 Debugging 3.4 HCS08, RS08 and S12(X) Notes and Tips Entering Debug Session with CodeWarrior When entering a debug session, the target microcontroller s FLASH memory is automatically erased, unsecured, programmed with the user application, and the trimming value (if trimming is available for the selected microcontroller) is automatically calculated and programmed (in the location suggested by Freescale). i Note: When programming the microcontroller with the user application (after having unsecured the device), CodeWarrior ignores (doesn t program) the security bits. As a result, when entering a debug session, the device is always unsecured, regardless of other user settings Reading Peripheral Status Care must be taken when reading some peripheral s status/data registers, since a reading operation may cause the clearing of flags. This may happen when the Memory window or the Data window is open, since these windows read microcontroller s resources during refresh operations Breakpoints and BGND Instruction The BGND Assembly instruction forces the target microcontroller to enter the Active Background Debug mode, stopping program execution. CodeWarrior recognizes this event as a breakpoint and updates the contents of registers, memory, etc. Successive commands (Start/Continue, Single Step, etc.) will continue the execution of the program from the next instruction Real-Time Memory Update During program execution, it is possible to view/edit the contents of the Memory window and Data window in real time (edit operations are only 40
43 indart-one User's Manual available for RAM locations). For example, it is possible to set the periodical refresh of the Memory window contents by choosing Mode > Periodical from the pop-up menu which appears by right-clicking on the Memory window. 3 41
44
45 indart-one User's Manual 4 Programming 4.1 DataBlaze Programming Utility Overview DataBlaze is a full-featured programming utility. DataBlaze offers the following advanced features: Memory editing; Blank check/erase/program/verify/read operations; Project handling; One-button, multiple-operations programming ( Auto feature); Serial numbering Using DataBlaze To start the DataBlaze utility select Start > Programs > SofTec Microsystems > indart-one > DataBlaze Programmer. 43

46 Programming 4 Figure 4.1: The DataBlaze User Interface First, select the target device you are working with. To do so, select Operations > Select Device from the DataBlaze main menu. The following dialog box will appear. 44

47 indart-one User's Manual 4 Figure 4.2: Device Selection If you have more than one indart-one instrument connected to the USB hub, you can specify which one to use with DataBlaze. Select the device you are working with in the Device Code device list and click the OK button. Next, open the Communication Settings dialog box ( Operations > Communication Settings ), and specify target device-specific settings. For more information, please refer to the Communication Settings section in the chapter relative to the target family you are working with, later in this manual. The Communication Settings dialog box can be recalled at any time by selecting Operations > Communication Settings from the DataBlaze main menu. For more information about the DataBlaze user interface, please refer to the DataBlaze online help ( Help > Contents ) Using HC08 Fast Algorithms Fast programming algorithms (available as option) reduce significantly the amount of time needed to program HC08 devices. 45

48 Programming To unlock fast programming algorithms, you must purchase the appropriate license. See Unlocking Fast Programming Algorithms on page 32 for more information. Once fast programming algorithms are unlocked, they are immediately available to be selected in the Communication Settings dialog box. 4.2 MultiBlaze Gang Programming Utility Overview MultiBlaze is an easy-to-use multiple programming utility suitable for production environments. MultiBlaze offers the following features: Easy-to-use programming interface; Blank check/erase/program/verify/read operations; One-button, multiple-operations programming ( Auto feature); Statistics and logging Starting MultiBlaze To start the MultiBlaze gang programming utility select Start > Programs > SofTec Microsystems > indart-one > MultiBlaze Programmer. The following dialog box will appear. Figure 4.3: MultiBlaze Login MultiBlaze requires you to log in, either as supervisor or operator, with your username and password. Logging in as supervisor allows you to set up a 46

49 indart-one User's Manual project and perform program sessions, while logging in as operator only allows you to perform programming sessions based on an existing project. i Note: logging in as supervisor requires a password. The default password is admin. You can enter a different password after you have logged in. The default password, admin, can still be used to login, should you forget your own password. After you log in, the MultiBlaze main window will appear. 4 Figure 4.4: MultiBlaze Main Window Creating a Project Before to start a programming session, you must first create a project. To create a project, click the New Project button. You will be guided through a wizard that will help you select your target device, the file to be programmed, and the indart-one instruments to be used. i Note: creating or editing a project is only possible if you have logged in as supervisor. 47
50 Programming On the first wizard step, you must specify a name for the project and the path where the project file will be saved. You must also specify the target device you are going to program, and you must specify the communication settings with your target board by clicking the Communication Settings button, which will open the Communication Settings dialog box. The Communication Settings dialog box is specific for the target device you selected. For more information, please refer to the Communication Settings section in the chapter relative to the target family you are working with, later in this manual. 4 Figure 4.5: MultiBlaze Project Wizard, Step 1 On the second wizard step, you must specify the filename to be programmed into the target device, its format, and the file and buffer offsets, if different than zero. 48
51 indart-one User's Manual Figure 4.6: MultiBlaze Project Wizard, Step 2 4 On the third wizard step, you can specify which programming steps will be performed, in sequence, during device programming. Additionally, you can specify how to start programming. Programming can be started by either clicking the Start button on the Program dialog box (see below) or by pressing the Start button on each indart-one instrument. i Note: clicking the Start button in the Program dialog box causes all instruments to start programming simultaneously. Pressing the Start button on any indart-one instrument causes only that instrument to start programming. 49

52 Programming 4 Figure 4.7: MultiBlaze Project Wizard, Step 3 Finally, on the fourth wizard step, you can assign each indart-one instrument to a programming node. Different indart-one instruments are identified by their serial numbers: you can manually associate their serial numbers to the programming node of choice. The Autofill button can be used to automatically detect each indart-one instrument connected to the USB bus and assign it to a programming node. Only indart-one instruments specified in this wizard step will be used during programming sessions. 50
53 indart-one User's Manual Figure 4.8: MultiBlaze Project Wizard, Step 4 4 At the end of the wizard, a project file is automatically created with the name and in the location you specified Programming Once a project is loaded (via the Open Project button) or after a project has been created (via the New Project button) programming sessions can be performed. To start a programming session, click the Program button. The following dialog box will appear. 51

54 Programming 4 Figure 4.9: MultiBlaze Programming Window For each of the indart-one instruments specified in your project, an icon is present which indicates the status of that instrument. Possible states are listed in the table below. 52
55 indart-one User's Manual Icon State Description Connected Not Connected The instrument is connected and waiting for a start programming command. No link could be established with the instrument. Busy The instrument is programming the target device. OK Error Disabled The instrument has successfully performed all of the programming steps and is waiting for a new start programming command. The instrument could not complete all of the programming steps successfully and is waiting for a new start programming command. The instrument will not take part in the programming (as defined in the current project). 4 Table 4.1: MultiBlaze Programming States Depending on the project settings, you can start programming by either clicking the Start button in the Program dialog box (all instruments start programming simultaneously) or press the Start button on any indart- One instrument (only that instrument will perform programming). A log file with the details of the programming session is automatically saved in the project directory Using HC08 Fast Algorithms Fast programming algorithms (available as option) reduce significantly the amount of time needed to program HC08 devices. To unlock fast programming algorithms, you must purchase the appropriate license. See Unlocking Fast Programming Algorithms on page 32 for more information. Once fast programming algorithms are unlocked, they are immediately available to be selected in the Communication Settings dialog box. 53
56 Programming 4.3 BDM Programming Notes 4 The Mass Erase operation always blanks the device (even if the device is protected or secured) and unsecures the device (the FLASH Options/Security Byte location is programmed with 0xFE). The Blank Check operation doesn t blank check the FLASH Options/Security Byte location. The Program operation automatically verifies the programmed data, by reading back the programmed data and checking it against the buffer sent to the target device. The Verify operation is much more secure (but slower), since it reads back the programmed data and checks it against the data buffer present in the host PC. In case of verifying error, please verify the value programmed to the FLASH Options/Security Byte location. The bit 0 of this byte is always programmed to 0, so any attempt to program it to 1 will cause a verifying error. The Read, Program and Verify operations are performed (when possible) by setting the target microcontroller s PLL peripheral so that the maximum BDM communication speed is achieved. In the Auto operation, a Run option is available which, if enabled, resets the microcontroller and runs the user application at the end of programming. 54
57 indart-one User's Manual 5 Working with HC08 Devices 5.1 Debugging Limitations Since indart-one is based on the in-chip debugging features of the HC08 family of microcontrollers, some hardware and software limitations apply. The main ones are listed below; for the complete list of limitations please refer to the microcontroller s data sheet. The pin dedicated to the host communication is reserved in particular, the corresponding bit in the Data Direction Register must not be changed (must be left to input); The Break Module peripheral is reserved, and only one hardware breakpoint is available however, you can insert a swi instruction into your code to generate a software breakpoint; The swi instruction is reserved and can be only used to generate a software breakpoint; Step commands which involve the execution of two or more Assembly instructions waste one hardware breakpoint therefore, if one breakpoint was already set by the user, the step command cannot be executed; The Halt debugging command (in the CodeWarrior HC08 user interface) will not work unless the IRQ interrupt is properly handled; 13 bytes of stack are wasted by the on-chip monitor therefore the addresses from SP-13 to SP are reserved; Registers which affect the target microcontroller s clock speed must not be changed during debugging sessions Communication Settings indart-one must be configured properly so that MON08 communication with the target device can be established correctly. 55

58 Working with HC08 Devices Communication settings are defined through the Communication Settings dialog box, available both in CodeWarrior and in the DataBlaze and MultiBlaze programming utilities. The dialog box is divided into four sections: MON08 Configuration, Power Settings, Programming and Trimming. All of the parameters must be carefully set, otherwise unsuccessful operations will result MON08 Configuration This section shows you what lines of the target microcontroller must be tied to the MON4-MON8 lines of the MON08 connector. Depending on the microcontroller, either the MON4 or MON5 line is dedicated to the singlewire communication (which is reserved during debugging). The other MON lines must be driven at specific values at reset. indart-one automatically drives all of the required lines upon reset, and releases them soon afterwards (except for the single-wire communication line which is always reserved). Please note that each microcontroller implements the MON08 interface on different ports and pins. Figure 5.1: MON08 Communication Settings: MON08 Configuration 56
59 indart-one User's Manual indart-one s MON08 connector can behave as a standard (Multilink compatible) MON08 connector or as an enhanced MON08 connector. The former is suggested for most target boards, while the latter is compatible with SofTec Microsystems indart-hc08 and can be specifically used in conjunction with Freescale ICS boards or with SofTec Microsystems demo boards. In this case less target I/O lines will be wasted. For device-specific information, see MON08 Target Connections later in this chapter. The MON08 OSC Signal parameter (available in the standard MON08 mode) allows you to select whether indart-one generates a clock signal at the pin 13 of the MON08 connector. This signal can be used as an auxiliary clock source, and is particularly useful when the target microcontroller requires an external clock which is not otherwise available on the target board. The External Clock Divider parameter should always be set to DIV 4 in order to guarantee that, in monitor mode, all of the target microcontroller s peripherals run at the same speed they do in user mode. If, however, you need to speed up program execution, you can set this parameter to DIV 2, therefore doubling the microcontroller s speed in monitor mode. Note, however, that not all peripherals will work at this doubled speed Power Settings The parameters in this group are used by indart-one to determine how to force the target microcontroller to enter the monitor mode. 57
 the signal conditioning of MON08 lines.")
60 Working with HC08 Devices 5 Figure 5.2: MON08 Communication Settings: Power Settings The Target Voltage Selection parameter must be set to the actual operating voltage of the target microcontroller. This parameter is fundamental for proper operations, since it affects (among other things) the signal conditioning of MON08 lines. The Power Control parameter specifies how the target board is powered off/on. MON08 debugging and programming requires that the target microcontroller is powered off and on in order to enter the monitor mode. Depending on your target hardware, two possibilities are available: Automatic. Select this option if you want indart-one to automatically turn off and on the target system in order to enter the monitor mode. In order for this option to work, the target system must be powered through the TARGET POWER connectors (see below). Manual. Select this option if your target system cannot be powered by the TARGET POWER connectors. You will be asked, when necessary, to power off and on the target board manually. When Automatic is selected, you must additionally set two parameters: 58

61 indart-one User's Manual Power down time. The time it takes for the power voltage to drop below 100 mv. Power up time. The time it takes for target microcontroller to get ready to communicate after the V DD voltage becomes high. The TARGET POWER Connectors parameter specifies how the two TARGET POWER connectors work. When the first option ( Mode A ) is selected, the user-supplied voltage at the TARGET POWER IN connector is routed to the target board via the TARGET POWER OUT connector, through an internal relay driven by indart-one. When the second option ( Mode B ) is selected, the voltage at the TARGET POWER OUT connector is internally generated by indart-one, and the TARGET POWER IN connector is not used. The generated voltage is as specified by the Target Voltage Selection parameter. i Note: when Mode B is selected, only the central pin of the TARGET POWER OUT connector is used, while the outer sleeve is not connected. The GND reference is taken from the MON08 cable. 5 Figure 5.3: MON08 Communication Settings: Target Power Connectors Modes 59

62 Working with HC08 Devices i Note: when the MON08 connector is configured as Standard (Multilink Compatible) connector, the target voltage is also generated by indart-one at the pin 15 of the MON08 connector Programming Programming parameters mainly determine the speed at which programming operations are performed. 5 Figure 5.4: MON08 Communication Settings: Programming The Programming Speed parameter allows you to select among four programming speeds. i Note: the High Speed option is only available after purchasing the appropriate license. See Unlocking Fast Programming Algorithms on page 32 for more information. 60

63 indart-one User's Manual The Target Baud Rate parameter specifies the MON08 serial line s baud rate used to enter the monitor mode. indart-one can automatically determine the correct target baud rate in the most common situations; the Automatic Detection is the default option. However, if for some reasons the automatic detection doesn t work, you still have the possibility to select the baud rate manually. i Note: when using the manual baud rate selection, keep in mind that the correct target baud rate value to use critically depends on the target hardware; different target configurations require different baud rate values. It is highly recommended that you consult the data sheet of the target microcontroller (the section about entering the monitor mode) in order to calculate the correct baud rate to set. An improper target baud rate value may result in programming errors. As an aid, a baud rate calculator is provided. Just click on the Baud Rate Calc. button and enter the microcontroller external clock frequency and the appropriate baud rate will be calculated for you. Please note, however, that this method only works if the IRQ line of the microcontroller is tied to the IRQ line of the MON08 connector. In all other cases, again, you must consult the data sheet of the target microcontroller. 5 Figure 5.5: MON08 Communication Settings: Baud Rate Calculator 61

64 Working with HC08 Devices The Verify Mode parameter specifies how the verifying of the programmed data will be performed. The standard verify mode reads back all of the programmed data and verifies it with the data in the PC buffer, while the checksum mode is based on a checksum of the programmed data. The standard verify mode is the safest mode, while the checksum verify mode is the fastest. i Note: the Verify Mode parameter is only available when using the DataBlaze or MultiBlaze user interface Trimming indart-one allows you to enable the target microcontroller s internal oscillator calibration (trimming). Figure 5.6: MON08 Communication Settings: Trimming 62
65 indart-one User's Manual The trimming parameters are specific for the selected device. If the selected device incorporates the OSC module, then you are allowed to select the OSC frequency to be calibrated, through the Internal Bus Frequency parameter (if more than one internal bus clock frequency is available on that device). If, instead, the selected device incorporates the ICG module, then you are allowed to select the ICG frequency to be calibrated ( ICG Frequency parameter), with the corresponding multiplier. In both cases, it is possible to specify whether to save the calculated trimmed value in the default location (the location suggested either by Freescale or SofTec Microsystems, restorable at any moment via the Restore button) or into a different location ( Flash Trimming Location parameter). 5.3 MON08 Target Connections Standard MON08 Connections The following diagram illustrates a typical connection between your target microcontroller and the MON08 connector, when indart-one is configured to use the standard (Multilink compatible) MON08 connector. 5 63
66 Working with HC08 Devices 1 2 VDD RST IRQ MON4 MON5 OSC VDD MON6 MON7 MON8 Target Microcontroller Standard MON08 Connector 4K7 Typical OSC1 OSC2 VSS 5 User Application Figure 5.7: Typical MON08 Target Connections (Standard Mode) i i Note: the target V DD line needs to be driven correctly at reset. When using the MON08 connector in standard mode, indart-one can automatically supply the connector s pin 15 with the appropriate voltage. Note: the MON08 OSC signal (pin 13 of the MON08 connector) can be used instead as an auxiliary clock source, and is particularly useful when the target microcontroller requires an external clock which is not available on the target board. 64
67 indart-one User's Manual i Note: each microcontroller implements the MON08 interface on different ports and pins. MON4-MON8 lines must be therefore tied to the appropriate pins of the specific target microcontroller Enhanced MON08 Connections The following diagram illustrates a typical connection between your target microcontroller and the MON08 connector, when indart-one is configured to use the enhanced (SofTec Microsystems) MON08 connector. RST_OUT 1 2 VDD RST_IN TGT_IRQ TGT_MON4 RST IRQ MON4 5 TGT_MON5 MON5 User Application TGT_MON6 TGT_MON7 MON6 MON7 Target Microcontroller TGT_MON8 MON Enhanced MON08 Connector OSC1 OSC2 VSS Figure 5.8: Typical MON08 Target Connections (Enhanced Mode) i Note: the target V DD line needs to be driven correctly at reset. When using the MON08 connector in enhanced mode, the correct voltage can be taken from indart-one s TARGET POWER connectors. 65
68 Working with HC08 Devices i Note: each microcontroller implements the MON08 interface on different ports and pins. MON4-MON8 lines must be therefore tied to the appropriate pins of the specific target microcontroller. If your target board implements the enhanced MON08 connector, to work without indart-one connected then the MON08 connector must be jumpered as shown below on the left Enhanced MON08 connector jumpered to allow the target board to work when indart-one is not used Enhanced MON08 connector with PCB tracks to be cut for debugging Figure 5.9: Jumpered Enhanced MON08 Connector Alternatively, PCB tracks can be routed as shown on the right. In the target board you use for debugging, cut the tracks as indicated. 66
69 indart-one User's Manual MC68HC908AB Family Connections Standard MON08 connections for MC68HC908AB family devices are shown in the figure below. 1 2 OSC VDD GND RST IRQ MON4 = MON5 = PTA0 (COM) MON6 = PTC0 (1) MON7 = PTC1 (0) MON8 = PTC3 (DIV) Standard MON08 Connector Figure 5.10: Standard MON08 Connections for the MC68HC908AB Family MC68HC908AP Family Connections Standard MON08 connections for MC68HC908AP family devices are shown in the figure below. 1 2 OSC VDD GND RST IRQ MON4 = MON5 = PTA0 (COM) MON6 = PTA2 (0) MON7 = PTA1 (1) MON8 = PTB0 (DIV) Standard MON08 Connector Figure 5.11: Standard MON08 Connections for the MC68HC908AP Family 67
70 Working with HC08 Devices MC68HC908AS Family Connections Standard MON08 connections for MC68HC908AS family devices are shown in the figure below. 1 2 OSC VDD GND RST IRQ MON4 = MON5 = PTA0 (COM) MON6 = PTC0 (1) MON7 = PTC1 (0) MON8 = PTC3 (DIV) Standard MON08 Connector Figure 5.12: Standard MON08 Connections for the MC68HC908AS Family MC68HC908AZ Family Connections Standard MON08 connections for MC68HC908AZ family devices are shown in the figure below. 1 2 OSC VDD GND RST IRQ MON4 = MON5 = PTA0 (COM) MON6 = PTC0 (1) MON7 = PTC1 (0) MON8 = PTC3 (DIV) Standard MON08 Connector Figure 5.13: Standard MON08 Connections for the MC68HC908AZ Family 68
71 indart-one User's Manual MC68HC908BD Family Connections Standard MON08 connections for MC68HC908BD family devices are shown in the figure below. 1 2 OSC VDD GND RST IRQ MON4 = PTA0 (COM) MON5 = PTA7 (0) MON6 = PTC0 (1) MON7 = PTC1 (0) MON8 = PTC3 (DIV) Standard MON08 Connector Figure 5.14: Standard MON08 Connections for the MC68HC908BD Family MC68HC908EY Family Connections Standard MON08 connections for MC68HC908EY family devices are shown in the figure below. 1 2 OSC VDD GND RST IRQ MON4 = PTA0 (COM) MON5 = PTA1 (0) MON6 = PTB3 (0) MON7 = PTB4 (1) MON8 = PTB5 (DIV) Standard MON08 Connector Figure 5.15: Standard MON08 Connections for the MC68HC908EY Family 69
72 Working with HC08 Devices MC68HC908GP Family Connections Standard MON08 connections for MC68HC908GP family devices are shown in the figure below. 1 2 OSC VDD GND RST IRQ MON4 = PTA0 (COM) MON5 = PTA7 (0) MON6 = PTC0 (1) MON7 = PTC1 (0) MON8 = PTC3 (DIV) Standard MON08 Connector Figure 5.16: Standard MON08 Connections for the MC68HC908GP Family MC68HC908GR4/4A/8/8A Connections Standard MON08 connections for MC68HC908GR4/4A/8/8A devices are shown in the figure below. 1 2 OSC VDD GND RST IRQ MON4 = PTA0 (COM) MON5 = PTA1 (0) MON6 = PTB0 (1) MON7 = PTB1 (0) MON8 = Standard MON08 Connector Figure 5.17: Standard MON08 Connections for MC68HC908GR4/4A/8/8A Devices 70
73 indart-one User's Manual MC68HC908GR16 Connections Standard MON08 connections for the MC68HC908GR16 device are shown in the figure below. 1 2 OSC VDD GND RST IRQ MON4 = PTA0 (COM) MON5 = PTA1 (0) MON6 = PTB0 (1) MON7 = PTB1 (0) MON8 = PTB4 (DIV) Standard MON08 Connector Figure 5.18: Standard MON08 Connections for the MC68HC908GR16 Device MC68HC908GR16A/32A/48A/60A Connections Standard MON08 connections for MC68HC908GR16A/32A/48A/60A devices are shown in the figure below. 1 2 OSC VDD GND RST IRQ MON4 = PTA0 (COM) MON5 = PTA1 (0) MON6 = PTB0 (1) MON7 = PTB1 (0) MON8 = PTB4 (DIV) Standard MON08 Connector Figure 5.19: Standard MON08 Connections for MC68HC908GR16A/32A/48A/60A Devices 71
74 Working with HC08 Devices MC68HC908GT Family Connections Standard MON08 connections for MC68HC908GT family devices are shown in the figure below. 1 2 OSC VDD GND RST IRQ MON4 = PTA0 (COM) MON5 = MON6 = PTC0 (1) MON7 = PTC1 (0) MON8 = PTC3 (DIV) Standard MON08 Connector Figure 5.20: Standard MON08 Connections for the MC68HC908GT Family MC68HC908GZ Family Connections Standard MON08 connections for MC68HC908GZ family devices are shown in the figure below. 1 2 OSC VDD GND RST IRQ MON4 = PTA0 (COM) MON5 = PTA1 (0) MON6 = PTB0 (1) MON7 = PTB1 (0) MON8 = PTB4 (DIV) Standard MON08 Connector Figure 5.21: Standard MON08 Connections for the MC68HC908GZ Family 72
75 indart-one User's Manual MC68HC908JB8 Connections Standard MON08 connections for the MC68HC908JB8 device are shown in the figure below. 1 2 OSC VDD GND RST IRQ MON4 = MON5 = PTA0 (COM) MON6 = PTA1 (1) MON7 = PTA2 (0) MON8 = PTA3 (DIV) Standard MON08 Connector Figure 5.22: Standard MON08 Connections for the MC68HC908JB8 Device MC68HC908JB12/16 Connections Standard MON08 connections for MC68HC908JB12/16 devices are shown in the figure below. 1 2 OSC VDD GND RST IRQ MON4 = PTE3 (1) MON5 = PTA0 (COM) MON6 = PTA1 (1) MON7 = PTA2 (0) MON8 = PTA3 (DIV) Standard MON08 Connector Figure 5.23: Standard MON08 Connections for MC68HC908JB12/16 Devices 73
76 Working with HC08 Devices MC68HC908JG Connections Standard MON08 connections for MC68HC908JG family devices are shown in the figure below. 1 2 OSC VDD GND RST IRQ MON4 = PTE3 (1) MON5 = PTA0 (COM) MON6 = PTA1 (1) MON7 = PTA2 (0) MON8 = PTA3 (DIV) Standard MON08 Connector Figure 5.24: Standard MON08 Connections for the MC68HC908JG Family MC68H(L)C908JK Family Connections Standard MON08 connections for MC68H(L)C908JK family devices are shown in the figure below. 1 2 OSC VDD GND RST IRQ MON4 = MON5 = PTB0 (COM) MON6 = PTB1 (1) MON7 = PTB2 (0) MON8 = PTB3 (DIV) Standard MON08 Connector Figure 5.25: Standard MON08 Connections for the MC68H(L)C908JK Family 74
77 indart-one User's Manual MC68H(L)C908JL Family Connections Standard MON08 connections for MC68H(L)C908JL family devices are shown in the figure below. 1 2 OSC VDD GND RST IRQ MON4 = MON5 = PTB0 (COM) MON6 = PTB1 (1) MON7 = PTB2 (0) MON8 = PTB3 (DIV) Standard MON08 Connector Figure 5.26: Standard MON08 Connections for the MC68H(L)C908JL Family MC68HC908JW Family Connections Standard MON08 connections for MC68HC908JW family devices are shown in the figure below. 1 2 OSC VDD GND RST IRQ MON4 = MON5 = PTA0 (COM) MON6 = PTA1 (1) MON7 = PTA2 (0) MON8 = PTC1 (DIV) Standard MON08 Connector Figure 5.27: Standard MON08 Connections for the MC68HC908JW Family 75
78 Working with HC08 Devices MC68HC908KX Family Connections Standard MON08 connections for MC68HC908KX family devices are shown in the figure below. 1 2 OSC VDD GND RST IRQ MON4 = PTA0 (COM) MON5 = PTA1 (0) MON6 = PTB0 (1) MON7 = PTB1 (0) MON8 = Standard MON08 Connector Figure 5.28: Standard MON08 Connections for the MC68HC908KX Family MC68HC908LB Family Connections Standard MON08 connections for MC68HC908LB family devices are shown in the figure below. 1 2 OSC VDD GND RST IRQ MON4 = PTA0 (COM) MON5 = PTA4 (0) MON6 = PTA1 (1) MON7 = MON8 = Standard MON08 Connector Figure 5.29: Standard MON08 Connections for the MC68HC908LB Family 76
79 indart-one User's Manual MC68HC908LD Family Connections Standard MON08 connections for MC68HC908LD family devices are shown in the figure below. 1 2 OSC VDD GND RST IRQ MON4 = PTA0 (COM) MON5 = PTA7 (0) MON6 = PTC0 (1) MON7 = PTC1 (0) MON8 = PTC3 (DIV) Standard MON08 Connector Figure 5.30: Standard MON08 Connections for the MC68HC908LD Family MC68HC908LJ Family Connections Standard MON08 connections for MC68HC908LJ family devices are shown in the figure below. 1 2 OSC VDD GND RST IRQ MON4 = MON5 = PTA0 (COM) MON6 = PTA1 (1) MON7 = PTA2 (0) MON8 = PTC1 (DIV) Standard MON08 Connector Figure 5.31: Standard MON08 Connections for the MC68HC908LJ Family 77
80 Working with HC08 Devices MC68HC908LK Family Connections Standard MON08 connections for MC68HC908LK family devices are shown in the figure below. 1 2 OSC VDD GND RST IRQ MON4 = MON5 = PTA0 (COM) MON6 = PTA1 (1) MON7 = PTA2 (0) MON8 = PTC1 (DIV) Standard MON08 Connector Figure 5.32: Standard MON08 Connections for the MC68HC908LK Family MC68HC908LT Family Connections Standard MON08 connections for MC68HC908LT family devices are shown in the figure below. 1 2 OSC VDD GND RST IRQ MON4 = PTA0 (COM) MON5 = MON6 = PTA1 (1) MON7 = PTA2 (0) MON8 = PTC3 (1) Standard MON08 Connector Figure 5.33: Standard MON08 Connections for the MC68HC908LT Family 78
81 indart-one User's Manual MC68HC908LV Family Connections Standard MON08 connections for MC68HC908LV family devices are shown in the figure below. 1 2 OSC VDD GND RST IRQ MON4 = PTA0 (COM) MON5 = MON6 = PTA1 (1) MON7 = PTA2 (0) MON8 = PTC3 (1) Standard MON08 Connector Figure 5.34: Standard MON08 Connections for the MC68HC908LV Family MC68HC908MR Family Connections Standard MON08 connections for MC68HC908MR family devices are shown in the figure below. 1 2 OSC VDD GND RST IRQ MON4 = PTA0 (COM) MON5 = PTC2 (DIV) MON6 = PTC3 (1) MON7 = PTC4 (0) MON8 = PTA7 (0) Standard MON08 Connector Figure 5.35: Standard MON08 Connections for the MC68HC908MR Family 79
82 Working with HC08 Devices MC68HC908QB Family Connections Standard MON08 connections for MC68HC908QB family devices are shown in the figure below. 1 2 OSC VDD GND RST IRQ MON4 = PTA0 (COM) MON5 = PTA4 (0) MON6 = PTA1 (1) MON7 = MON8 = Standard MON08 Connector Figure 5.36: Standard MON08 Connections for the MC68HC908QB Family MC68HC908QC Family Connections Standard MON08 connections for MC68HC908QC family devices are shown in the figure below. 1 2 OSC VDD GND RST IRQ MON4 = PTA0 (COM) MON5 = PTA4 (0) MON6 = PTA1 (1) MON7 = MON8 = Standard MON08 Connector Figure 5.37: Standard MON08 Connections for the MC68HC908QC Family 80
83 indart-one User's Manual MC68HC908QF Family Connections Standard MON08 connections for MC68HC908QF family devices are shown in the figure below. 1 2 OSC VDD GND RST IRQ MON4 = PTA0 (COM) MON5 = PTA4 (0) MON6 = PTA1 (1) MON7 = MON8 = Standard MON08 Connector Figure 5.38: Standard MON08 Connections for the MC68HC908QF Family MC68HC908QL Family Connections Standard MON08 connections for MC68HC908QL family devices are shown in the figure below. 1 2 OSC VDD GND RST IRQ MON4 = PTA0 (COM) MON5 = PTA4 (0) MON6 = PTA1 (1) MON7 = MON8 = Standard MON08 Connector Figure 5.39: Standard MON08 Connections for the MC68HC908QL Family 81
84 Working with HC08 Devices MC68H(L)C908QT Family Connections Standard MON08 connections for MC68H(L)C908QT family devices are shown in the figure below. 1 2 OSC VDD GND RST IRQ MON4 = PTA0 (COM) MON5 = PTA4 (0) MON6 = PTA1 (1) MON7 = MON8 = Standard MON08 Connector Figure 5.40: Standard MON08 Connections for the MC68HC908QT Family MC68H(L)C908QY Family Connections Standard MON08 connections for MC68H(L)C908QY family devices are shown in the figure below. 1 2 OSC VDD GND RST IRQ MON4 = PTA0 (COM) MON5 = PTA4 (0) MON6 = PTA1 (1) MON7 = MON8 = Standard MON08 Connector Figure 5.41: Standard MON08 Connections for the MC68HC908QY Family 82
85 indart-one User's Manual MC68HC908RF Family Connections Standard MON08 connections for MC68HC908RF family devices are shown in the figure below. 1 2 OSC VDD GND RST IRQ MON4 = PTA0 (COM) MON5 = PTB0 (1) MON6 = PTB2 (0) MON7 = PTB3 (DIV) MON8 = Standard MON08 Connector Figure 5.42: Standard MON08 Connections for the MC68HC908RF Family MC68HC908RK Family Connections Standard MON08 connections for MC68HC908RK family devices are shown in the figure below. 1 2 OSC VDD GND RST IRQ MON4 = PTA0 (COM) MON5 = PTB0 (1) MON6 = PTB2 (0) MON7 = PTB3 (DIV) MON8 = Standard MON08 Connector Figure 5.43: Standard MON08 Connections for the MC68HC908RK Family 83
86 Working with HC08 Devices MC68HC908SR Family Connections Standard MON08 connections for MC68HC908SR family devices are shown in the figure below. 1 2 OSC VDD GND RST IRQ MON4 = MON5 = PTA0 (COM) MON6 = PTA2 (0) MON7 = PTA1 (1) MON8 = PTC1 (DIV) Standard MON08 Connector Figure 5.44: Standard MON08 Connections for the MC68HC908SR Family 84

87 indart-one User's Manual 6 Working with HCS08 Devices 6.1 Communication Settings indart-one must be configured properly so that BDM communication with the target device can be established correctly. Communication settings are defined through the Communication Settings dialog box, available both in CodeWarrior and in the DataBlaze and MultiBlaze programming utilities. 6 Figure 6.1: The BDM Communication Settings Dialog Box for HCS08 Devices BDM Clock The BDM communication speed depends on a clock source which, in turn, is selected by the CLKSW bit in the Status register. If the CLKSW bit is set to 1, the BDM communication clock source is the microcontroller s bus frequency; if the CLKSW bit is set to 0, the BDM communication clock source is a constant clock source, which can vary depending on the specific HCS08 derivative. In the case of the MC9S08GB60, for example, this constant clock source is a 8 MHz internal clock. Other derivatives may use the external crystal frequency. Which CLKSW setting to use depends on the target system and on the user application. The idea is to set the CLKSW bit so that the highest (and less subject to changes) clock frequency is used for the BDM communication. A 85
88 Working with HCS08 Devices low clock frequency will result in slow BDM communication (and therefore slow debugging and slow programming), while a clock frequency which changes frequently (as in the case of the user application modifying the FLL peripheral) may result in loss of BDM communication Fast Programming The Enable Fast Programming parameter (available on some devices), if selected, speeds up programming by driving the microcontroller s internal PLL circuitry to the maximum settings Trimming Some devices can have their internal oscillator calibrated (trimmed) through the VCO Bus Frequency parameter (please note that other devices may present different calibration parameters) Other Settings The TARGET POWER OUT Voltage parameter specifies the voltage provided by indart-one on the TARGET POWER OUT connector, which can be used to power up the target board. i Note: only the central pin of the TARGET POWER OUT connector is used, while the outer sleeve is not connected. The GND reference is taken from the BDM cable. The RESET Rise Time parameter specifies the time, in milliseconds, needed for the target RESET signal to go high. This value depends on the target system, and is used by indart-one to generate the appropriate delay before to drive the BKGD line correctly in order to enter the special single chip mode. The default value of 20 ms is appropriate for most systems. 86

89 indart-one User's Manual 7 Working with RS08 Devices 7.1 Communication Settings indart-one must be configured properly so that BDM communication with the target device can be established correctly. Communication settings are defined through the Communication Settings dialog box, available both in CodeWarrior and in the DataBlaze and MultiBlaze programming utilities. i Figure 7.1: The BDM Communication Settings Dialog Box for RS08 Devices Note: this chapter describes communication settings with the only RS08 device so far released by Freescale (MC9RS08KA2). Other devices may present different configuration parameters Target Communication The Target Communication parameter specifies how to enter the target device s Active Background Mode. Communication with the target device can be established via either a hardware or software Reset, depending on whether the Reset pin is used as Reset function or not. 87
90 Working with RS08 Devices Trimming The target device s internal oscillator can be calibrated (trimmed) through the DCO Output Frequency parameter (please note that other devices may present different calibration parameters) Other Settings The TARGET POWER OUT Voltage parameter specifies the voltage provided by indart-one on the TARGET POWER OUT connector, which can be used to power up the target board. i Note: only the central pin of the TARGET POWER OUT connector is used, while the outer sleeve is not connected. The GND reference is taken from the BDM cable. 7 88

91 indart-one User's Manual 8 Working with S12(X) Devices 8.1 Communication Settings indart-one must be configured properly so that BDM communication with the target device can be established correctly. Communication settings are defined through the Communication Settings dialog box, available both in CodeWarrior and in the DataBlaze and MultiBlaze programming utilities. Figure 8.1: The BDM Communication Settings Dialog Box for S12(X) Devices 8 The first parameter, BDM Clock Frequency Detection, specifies how to detect the target microcontroller s BDM clock frequency. There are two options: Automatic Detection : indart-one automatically detects the target microcontroller s BDM frequency. This setting is highly recommended for devices which support the SY BDM command, since in such 89
92 Working with S12(X) Devices devices the frequency detection is totally accurate. For devices which do not support the SY command, the automatic frequency detection may not be accurate. Manual : alternatively, you can manually specify the microcontroller s BDM frequency. Usually, this value is half that of the external oscillator frequency. Since this frequency is also used by the programming algorithms, it is important to carefully specify this parameter. Programming the device with an incorrect BDM frequency may result in stress to the FLASH/EEPROM memory cells, thus reducing the lifetime of the memory. Another parameter, BDM Clock Source, specifies the link between the microcontroller s bus frequency and the BDM clock frequency during debugging. The BDM clock source can be selected by the CLKSW bit in the BDM Status register. If the CLKSW bit is set to 1, the BDM communication clock source is the microcontroller s bus frequency. If the CLKSW bit is set to 0, the BDM communication clock source is a constant clock source (not dependent on the bus frequency), which can vary depending on the specific S12 derivative. In the case of the MC9S12DP256, for example, this constant clock source is half the frequency of the external oscillator. 8 Which CLKSW setting to use depends on the target system and on the user application. The idea is to set the CLKSW bit so that the highest (and less subject to changes) clock frequency is used for the BDM communication. A low clock frequency will result in slow BDM communication (and therefore slow debugging), while a clock frequency which changes frequently (as in the case of the user application modifying the PLL peripheral) may result in loss of BDM communication. The Enable Fast Programming parameter, if selected, speeds up programming by driving the microcontroller s internal PLL circuitry to the maximum settings. In order for this feature to work, an appropriate loop filter circuitry must be provided to the device s XFC pin. The TARGET POWER OUT Voltage parameter specifies the voltage provided by indart-one on the TARGET POWER OUT connector, which can be used to power up your target board. 90
93 indart-one User's Manual i Note: only the central pin of the TARGET POWER OUT connector is used, while the outer sleeve is not connected. The GND reference is taken from the BDM cable. The RESET Rise Time parameter specifies the time, in milliseconds, needed for the target RESET signal to go high. This value depends on the target system, and is used by indart-one to generate the appropriate delay before to drive the BKGD line correctly in order to enter the special single chip mode. The default value of 20 ms is appropriate for most systems. 8 91
94
95 indart-one User's Manual 9 indart Programming Library 9.1 Introduction This documentation deals with low-level interfacing between user written PC applications and the indart-one In-Circuit Programmer/Debugger. This section assumes you have already read the previous sections of this user s manual and got acquainted with the instrument. All of the examples provided in this documentation are written in C, unless otherwise reported. 9.2 The indart Programming Library (IPL) The IPL-One Programming Library is a DLL which includes all of the lowlevel functions that allow you to set up the instrument and perform most of the programming commands and functions of the DataBlaze and MultiBlaze user interfaces from within your own application. Dynamic-link libraries (DLL) are modules that contain functions and data. A DLL is loaded at run time by its calling modules (.exe or.dll). When a DLL is loaded, it is mapped into the address space of the calling process. The indart Programming Library contains C written routines, and can be used to interface the instrument from within, for example, a Microsoft Visual C or Visual Basic application, as well as any other programming language that supports the DLL mechanism. For details on how to call DLL functions from within your application, please refer to the your programming language s documentation. 9.3 Installation Before to start working with the indart Programming Library, you must set up your system with all the required files and drivers. The files to be installed are: 9 The sftdrv01.sys file in Windows\System32\Drivers ; 93
96 indart Programming Library The udart01.inf file in Windows\Inf ; The IPL-One.dll, BL-One.dll, PI-One.dll and all of the Drv*.dll files into your application s directory. These files are automatically installed by the indart-one Utilities setup, as described in indart-one Utilities Setup on page Programming Library Reference Using the Interface Library Functions When you control one or more indart-one within your own application, you will typically follow the steps indicated below: 1. Initialize the programming session. The IPL_StartSession() function must be called prior to any other IPL function. This function detects all indart-one instruments connected to the USB bus and determines whether fast programming algorithms are unlocked. 2. Initialize the instrument(s). To communicate with the target device you need to initialize the instrument(s) with target device information. Initialization functions include: 9 IPL_GetDeviceList() IPL_SetDevice() IPL_SetCommunicationSettings() IPL_LoadFileIntoBuffer() 3. Program. Once the instrument(s) has/have been set up, you can begin programming, with the IPL_StartProgramming() function. 4. Close the communication with the instrument(s). This is done by the IPL_EndSession() function. Closing the 94
97 indart-one User's Manual communication with the instrument(s) frees resources used during communication. The figure below illustrates a typical working flow. 9 95
98 indart Programming Library Optional IPL_StartSession() Instrument Network Configuration IPL_GetInstrumentsConnected() IPL_SetInstrumentsConfiguration() IPL_SetCallBack() Target Device Selection and Configuration IPL_GetDeviceList() IPL_SetDevice() IPL_SetCommunicationSettings() Programming Steps Definition IPL_GetDefaultProgrammingSteps() IPL_SetProgrammingSteps() Programming Buffer Definition IPL_WriteDataToBuffer() IPL_LoadFileIntoBuffer() 9 Programming IPL_StartProgramming() IPL_GetInstrumentStatus() IPL_EndSession() Figure 9.1: Typical IPL Workflow 96
99 indart-one User's Manual Return Values of the Programming Library Functions Most of the indart Programming Library functions return a BOOL value which indicates whether the function was successfully executed (return value = TRUE) or not (return value = FALSE). In the latter case it is possible to get extended error information by calling the function IPL_GetError: void IPL_GetError(char *error_string); The error_string parameter will be filled with a text message explaining the cause of the problem Programming Buffer A local (PC) programming buffer is automatically handled by the Programming Library. Between an IPL_StartSession() and IPL_EndSession() block, the Programming Library maintains a buffer which can be used to write data to/read data from the target device. This buffer is filled via the IPL_LoadFileIntoBuffer(), IPL_ReadDeviceMemoryIntoBuffer() and IPL_WriteDataToBuffer() functions and is read via the IPL_ReadDataFromBuffer() function. The IPL_StartProgramming() function uses the programming buffer contents to program the target device. The programming buffer can be thought of as a one-to-one mapping of the target device memory into a PC memory area. The figure below illustrates how the programming buffer is used. 9 97
100 indart Programming Library User Application Programming Buffer Target Device IPL_ReadDeviceMemoryIntoBuffer() IPL_StartProgramming() IPL_ReadDeviceMemoryIntoBuffer() IPL_ReadDeviceMemoryIntoBuffer() IPL_StartProgramming() Figure 9.2: Programming Buffer i Note: the programming buffer size is automatically set to the target device s memory size, after the IPL_SetDevice() function is called. 9.5 Function Reference Each Programming Library function is listed alphabetically and explained in the following pages Typedefs and Structures Listed below are the various typedefs and structures used by the IPL-One functions. 9 typedef enum { IPL_FORMAT_BINARY = 0, IPL_FORMAT_IHEX = 1, IPL_FORMAT_S19 = 2, } IPL_FILE_FORMAT; 98
101 indart-one User's Manual typedef enum { IPL_STEP_CODE_BLANK = 0, IPL_STEP_CODE_ERASE = 1, IPL_STEP_CODE_PROGRAM = 2, IPL_STEP_CODE_VERIFY = 3, IPL_STEP_DATA_BLANK = 4, IPL_STEP_DATA_ERASE = 5, IPL_STEP_DATA_PROGRAM = 6, IPL_STEP_DATA_VERIFY = 7, IPL_STEP_TRIM_PROG = 8, IPL_STEP_RUN = 9, IPL_STEP_CODE_READ = 10, IPL_STEP_DATA_READ = 11, IPL_STEP_NOT_SUPPORTED = 12, IPL_STEP_TARGET_OFF = 13, } IPL_PROG_STEP; typedef enum { IPL_STATUS_IDLE = 0, IPL_STATUS_WORKING = 1, IPL_STATUS_ERR_COMMUNICATION = 2, IPL_STATUS_ERR_INTERNAL = 3, IPL_STATUS_ERR_BLANKCHECK_DEVICE = 4, IPL_STATUS_ERR_READ_DEVICE = 5, IPL_STATUS_ERR_ERASE_DEVICE = 6, IPL_STATUS_ERR_PROGRAM_DEVICE = 7, IPL_STATUS_ERR_VERIFY_DEVICE = 8, IPL_STATUS_ERR_PROTECTION_DEVICE = 9, IPL_STATUS_ERR_INVALID_DEVICE = 10 } IPL_INST_STATUS_MODE; 9 99
102 indart Programming Library typedef enum { IPL_EVENT_PROG_START = 0, IPL_EVENT_PROG_END = 1, IPL_EVENT_PROG_STEP = 2, IPL_EVENT_ERROR = 3, } IPL_EVENT_TYPE; typedef struct _IPL_DEVICE_LIST { char device_code[50]; char family_code[20]; } IPL_DEVICE_LIST; typedef struct _IPL_INST_INFO { unsigned int SN; BOOL driver_busy; } IPL_INST_INFO; typedef struct _IPL_INST_CONFIG { unsigned int SN; int ID; } IPL_INST_CONFIG; 9 typedef struct _IPL_INST_STATUS { IPL_INST_STATUS_MODE mode; char message[maxlen_error_msg]; } IPL_INST_STATUS; typedef struct _IPL_EVENT_PROG_STEP_DATA { IPL_PROG_STEP cmd; unsigned long perc; } IPL_EVENT_PROG_STEP_DATA; 100
103 indart-one User's Manual void (*IPL_CALLBACK)( int inst_id, IPL_EVENT_TYPE event_type, void *event_data); 9 101
104 indart Programming Library IPL_EndSession() Include file: #include IPL-One.h Function prototype: BOOL IPL_EndSession(void); Parameters: None. Return value: TRUE: FALSE: the function was successful. an error occurred. Call the IPL_GetError() function to get extended error information. Description: Ends a programming session. All of the Programming Library functions (exception made for the IPL_GetVersion() function) must be called within a IPL_StartSession() and IPL_EndSession() function
105 indart-one User's Manual IPL_GetBufferChecksum() Include file: #include IPL-One.h Function prototype: BOOL IPL_GetBufferChecksum(unsigned long *chk); Parameters: chk: pointer to an unsigned integer that will receive the checksum of the programming buffer. Return value: TRUE: FALSE: the function was successful. an error occurred. Call the IPL_GetError() function to get extended error information. Description: Calculates and returns the checksum of the programming buffer
106 indart Programming Library IPL_GetButtonStatus() Include file: #include IPL-One.h Function prototype: BOOL IPL_GetButtonStatus( int inst_id, BOOL *pressed, IPL_INST_STATUS *status); Parameters: inst_id: pressed: status: ID of the indart-one instrument (previously set via the IPL_SetInstrumentConfiguration() function). TRUE if the START button is pressed, FALSE otherwise. pointer to an IPL_INST_STATUS structure that will receive instrument status information (see the IPL_GetInstrumentStatus() function). Return value: TRUE: FALSE: the function was successful. an error occurred. Call the IPL_GetError() function to get extended error information. 9 Description: This function reads the status of the START button of the specified indart-one instruments. If the START button is pressed, the pressed parameter will be TRUE. 104
107 indart-one User's Manual i Note: calling this function when the specified indart- One instrument is busy programming will always result in the pressed parameter to be FALSE
108 indart Programming Library IPL_GetDefaultProgrammingSteps() Include file: #include IPL-One.h Function prototype: BOOL IPL_GetDefaultProgrammingSteps( IPL_PROG_STEP *prog_steps, int n_items, int *items_found); Parameters: prog_steps: n_items: items_found: pointer to the array that will be filled with the default programming steps for the currently selected target device. number of programming steps to retrieve. the actual number of default programming steps available for the currently selected target device. Return value: TRUE: FALSE: the function was successful. an error occurred. Call the IPL_GetError() function to get extended error information. 9 Description: Fills an array (prog_steps) with the default programming steps for the currently selected target device. The function returns n_items. The items_found variable will contain the actual number of programming steps. 106
109 indart-one User's Manual Tip: you can first call: IPL_GetDefaultProgrammingSteps(NULL, 0, *no_of_prog_steps); to get the number of programming steps, and then call: IPL_GetDefaultProgrammingSteps(*tot_steps, no_of_prog_steps, NULL); to retrieve them all
110 indart Programming Library IPL_GetDeviceList() Include file: #include IPL-One.h Function prototype: BOOL IPL_GetDeviceList( IPL_DEVICE_LIST *device_list, int n_items, int *items_found); Parameters: device_list: n_items: items_found: pointer to the array that will be filled with the device list. number of devices to retrieve. the actual number of devices present in the Programming Library s device list. Return value: TRUE: FALSE: the function was successful. an error occurred. Call the IPL_GetError() function to get extended error information. 9 Description: Fills an array (device_list) with devices supported by the IPL-One Programming Library. The function extracts n_items from the Programming Library device list. The items_found variable will contain the actual number of devices present in the Programming Library s device list. 108
111 indart-one User's Manual Tip: you can first call: IPL_GetDeviceList(NULL, 0, *no_of_devices); to get the number of devices, and then call: IPL_GetDeviceList(*tot_list, no_of_devices, NULL); to retrieve them all
112 indart Programming Library IPL_GetError() Include file: #include IPL-One.h Function prototype: void IPL_GetError(char *error_string); Parameters: error_string: this parameter will be filled with a text message explaining the cause of the problem. Return value: None. Description: Most of the Programming Library functions return a BOOL value which indicates whether the function was successfully executed (return value = TRUE) or not (return value = FALSE). In the latter case it is possible to get extended error information by calling the IPL_GetError() function. i Note: this function must be called within an IPL_StartSession()/ IPL_EndSession() block
113 indart-one User's Manual IPL_GetInstrumentsConnected() Include file: #include IPL-One.h Function prototype: BOOL IPL_GetInstrumentsConnected( IPL_INST_INFO *inst_info, int n_items, int *items_found); Parameters: inst_info: n_items: items_found: pointer to the array that will be filled with information about indart-one instruments connected to the USB bus. number of instruments to retrieve. the actual number of instruments found. Return value: TRUE: FALSE: the function was successful. an error occurred. Call the IPL_GetError() function to get extended error information. Description: Fills an array (inst_info) with information about indart-one instruments connected to the USB bus. The function returns n_items. The items_found variable will contain the actual number of indart-one instruments found. Tip: you can first call: 9 IPL_GetInstrumentsConnected(NULL, 0, *no_of_inst); 111
114 indart Programming Library to get the number of all of the indart-one instruments connected to the USB bus, and then call: IPL_GetInstrumentsConnected(*tot_inst, no_of_inst, NULL); to retrieve information about all of them
115 indart-one User's Manual IPL_GetInstrumentStatus() Include file: #include IPL-One.h Function prototype: BOOL IPL_GetInstrumentStatus( int inst_id, IPL_INST_STATUS *status); Parameters: inst_id: status: ID of the indart-one instrument (previously set via the IPL_SetInstrumentConfiguration() function). pointer to an IPL_INST_STATUS structure that will receive status information. Return value: TRUE: FALSE: the function was successful. an error occurred. Call the IPL_GetError() function to get extended error information. Description: Returns status information for the specified instrument. This function is useful to retrieve the result of reading (IPL_ReadDeviceMemory() function) or programming (IPL_StartProgramming() function) operations
116 indart Programming Library IPL_GetVersion() Include file: #include IPL-One.h Function prototype: void IPL_GetVersion(char *ver); Parameters: ver: this parameter will be filled with a string containing the version of the IPL-One DLL and related DLLs. Return value: None. Description: Call this function to get version information about the IPL-One Programming Library and related DLLs
117 indart-one User's Manual IPL_LoadFileIntoBuffer() Include file: #include IPL-One.h Function prototype: BOOL IPL_LoadFileIntoBuffer( const char *filename, IPL_FILE_FORMAT file_format, unsigned long file_offset, unsigned long buffer_offset); Parameters: filename: file_format: file to load into the programming buffer. file format. Can be one of the following constants: IPL_FORMAT_BINARY (for binary files); IPL_FORMAT_IHEX (for Intel-Hex files); IPL_FORMAT_S19 (for Motorola S-Record files). file_offset: offset (in bytes) from the beginning of the file. That is, the first file_offset bytes read from the file are discarded. Valid only when file_format is IPL_FORMAT_BINARY. buffer_offset: offset (in bytes) from the beginning of the programming buffer. That is, the programming buffer is filled starting from the buffer_offset address. Valid only when file_format is IPL_FORMAT_BINARY. 9 Return value: TRUE: the function was successful. 115
118 indart Programming Library FALSE: an error occurred. Call the IPL_GetError() function to get extended error information. Description: Loads the contents of an external file into the programming buffer
119 indart-one User's Manual IPL_ReadDataFromBuffer() Include file: #include IPL-One.h Function prototype: BOOL IPL_ReadDataFromBuffer( unsigned long addr, unsigned char *dest_data, int len); Parameters: addr: dest_data: len: programming buffer start address. pointer to a destination buffer which will contain the data copied from the programming buffer. number of bytes to copy. Return value: TRUE: FALSE: the function was successful. an error occurred. Call the IPL_GetError() function to get extended error information. Description: Reads data from the programming buffer. Since the programming buffer is a one-to-one mapping of the target device memory, the addr parameter corresponds to a target device memory address
120 indart Programming Library IPL_ReadDeviceMemory() Include file: #include IPL-One.h Function prototype: BOOL IPL_ReadDeviceMemory(int inst_id); Parameters: inst_id: ID of the indart-one instrument (previously set via the IPL_SetInstrumentConfiguration() function) to read from. Return value: TRUE: FALSE: the function was successful. an error occurred. Call the IPL_GetError() function to get extended error information. Description: Reads the memory of target device connected to the inst_id instrument and copies it into the PC programming buffer. The programming buffer can then be read with the IPL_ReadDataFromBuffer() function. To check the status of the reading operation, call the IPL_GetInstrumentStatus() function
121 indart-one User's Manual IPL_SetCallback() Include file: #include IPL-One.h Function prototype: BOOL IPL_SetCallback(IPL_CALLBACK callback); Parameters: callback: callback function. Return value: TRUE: FALSE: the function was successful. an error occurred. Call the IPL_GetError() function to get extended error information. Description: Sets the callback function that will be called by the Programming Library each time a meaningful event occurs. The callback function prototype is: void (*IPL_CALLBACK)( int inst_id, IPL_EVENT_TYPE event_type, void *event_data); where inst_id is the instrument that generated the event, event_type is the type of event and event_data is additional information regarding the event (if available). Possible events are summarized in the table below
122 indart Programming Library Event (event_type) IPL_EVENT_PROG_START IPL_EVENT_PROG_END IPL_EVENT_PROG_STEP IPL_EVENT_ERROR Description Occurs after the IPL_StartProgramming() function is called. No event information is passed to the callback function (event_data is NULL). Occurs at the end of programming, i.e. after all of the programming steps are performed. No event information is passed to the callback function (event_data is NULL). Repeatedly occurs when a programming step is being performed. Programming step s information (programming step type and completion percentage) is passed to the callback function (event_data is a pointer to a IPL_EVENT_PROG_STEP_DATA structure). Occurs when there is a programming error. Call the IPL_GetInstrumentStatus() function to get error information. No event information is passed to the callback function (event_data is NULL). Table 9.1: IPL Callback Events i Note: in order to avoid recursion when handling events, do not call IPL functions that can cause other events to happen
123 indart-one User's Manual IPL_SetCommunicationSettings() Include file: #include IPL-One.h Function prototype: BOOL IPL_SetCommunicationSettings( char *settings, BOOL show_window); Parameters: settings: show_window: pointer to a buffer containing the initialization string. if set to TRUE, opens the Communication Settings dialog box, where you can specify all of the target s communication settings. Upon exiting the Communication Settings dialog box, the settings parameter is filled with the information coming from the dialog box. If set to FALSE, the settings parameter must be manually specified. Return value: TRUE: FALSE: the function was successful. an error occurred. Call the IPL_GetError() function to get extended error information. Description: Initializes indart-one with target device information. This initialization procedure must be done before calling any other function that reads from/writes to the target device
124 indart Programming Library IPL_SetDevice() Include file: #include IPL-One.h Function prototype: BOOL IPL_SetDevice(const char *device_code); Parameters: device_code: the string containing the complete device code. Return value: TRUE: FALSE: the function was successful. an error occurred. Call the IPL_GetError() function to get extended error information. Description: Sets the target device to be programmed. To retrieve a list of supported devices, call the IPL_GetDeviceList() function
125 indart-one User's Manual IPL_SetInstrumentConfiguration() Include file: #include IPL-One.h Function prototype: BOOL IPL_SetInstrumentsConfiguration( IPL_INST_CONFIG *config, int n_items); Parameters: config: n_items: pointer to the array that specifies instrument configuration. number of instruments to configure. Return value: TRUE: FALSE: the function was successful. an error occurred. Call the IPL_GetError() function to get extended error information. Description: Configures one or more indart-one instruments. The config parameter is a pointer to an array of IPL_INST_CONFIG structures which associate each instrument s serial number to a logical ID. i Note: this function can be called only once between an IPL_StartSession() and IPL_EndSession() block
126 indart Programming Library IPL_SetProgrammingSteps() Include file: #include IPL-One.h Function prototype: BOOL IPL_SetProgrammingSteps( IPL_PROG_STEP *prog_steps, int n_items); Parameters: prog_steps: n_items: pointer to the array that specifies the programming steps. number of programming steps in the array. Return value: TRUE: FALSE: the function was successful. an error occurred. Call the IPL_GetError() function to get extended error information. Description: Sets the programming steps to be performed when calling the IPL_StartProgramming() function. To retrieve the default programming steps available for the currently selected target device, call the IPL_GetDefaultProgrammingSteps() function. 9 i Note: programming steps will be performed in a fixed, pre-defined order, regardless of their order in the prog_steps array. E.g., a blank check operation will be always performed before an erase operation, a verify operation will be always performed after a program operation, etc. 124
127 indart-one User's Manual IPL_StartProgramming() Include file: #include IPL-One.h Function prototype: BOOL IPL_StartProgramming(int inst_id); Parameters: inst_id: ID of the indart-one instrument (previously set via the IPL_SetInstrumentConfiguration() function). Return value: TRUE: FALSE: the function was successful. an error occurred. Call the IPL_GetError() function to get extended error information. Description: Starts the programming in the specified instrument. The instrument will perform the programming steps specified with the IPL_SetProgrammingSteps() function. To check the status of the programming, call the IPL_GetInstrumentStatus() function
128 indart Programming Library IPL_StartSession() Include file: #include IPL-One.h Function prototype: BOOL IPL_StartSession(void); Parameters: None. Return value: TRUE: FALSE: the function was successful. an error occurred. Call the IPL_GetError() function to get extended error information. Description: Starts a programming session. All of the Programming Library functions (exception made for the IPL_GetVersion() function) must be called within an IPL_StartSession() and IPL_EndSession() function. The IPL_StartSession() function detects all indart-one instruments connected to the USB bus and determines whether fast programming algorithms are unlocked
129 indart-one User's Manual IPL_WriteDataToBuffer() Include file: #include IPL-One.h Function prototype: BOOL IPL_WriteDataToBuffer( unsigned long addr, unsigned char *src_data, int len); Parameters: addr: src_data: len: programming buffer start address. pointer to a source buffer containing the data to be copied to the programming buffer. length (in bytes) of the source buffer. Return value: TRUE: FALSE: the function was successful. an error occurred. Call the IPL_GetError() function to get extended error information. Description: Writes data to the programming buffer. The contents of the programming buffer will be programmed into the target device with the IPL_StartProgramming() function. Since the programming buffer is a one-to-one mapping of the target device memory, the addr parameter corresponds to a target device memory address
130
131 indart-one User's Manual 10 Troubleshooting 10.1 Common Problems and Solutions This section reports some common problems that may arise during general use. Please be aware, however, that working with a specific target device may cause device-specific issues USB Driver Problems If you connected indart-one to the PC before installing the indart-one utilities, the instrument s USB driver may not have been correctly installed on your system. Unplugging and replugging the USB cable is of no use, since Windows has marked the device as disabled. As a consequence, the PC cannot communicate with indart-one. To restore the USB driver (provided the indart-one utilities have been installed), perform the following steps under Windows XP: 1. Connect indart-one to the PC. 2. Open the Control Panel ( Start > Settings > Control Panel ). 3. Open the System options. 4. Select the Hardware tab. 5. Click the Device Manager button. 6. The indart-one device will be shown with an exclamation mark next to it. Double click on this device. 7. In the General tab, click the Reinstall Driver button. Follow the onscreen instructions Communication Can t Be Established with indart-one 1. Make sure that indart-one is connected to the PC and powered on. indart-one is powered by the USB connection
132 indart-one User's Manual 2. Make sure that the target board is powered on and the target microcontroller is working. Programming and debugging rely on a MON08/BDM communication between indart-one and the target board. This means that, in order to work correctly, the target microcontroller must be running. In particular, make sure that: The MON08/BDM cable is connected to the target board. All of the required MON08/BDM connector signals are correctly tied to the target microcontroller. 3. Make sure you are working with the correct indart hardware model. a) To view/change the indart hardware model in use in CodeWarrior, choose Connect (or Communication ) from the indart-hc08, SofTec-HCS08, SofTec-RS08 or indart- HCS12 menu (depending on the target device currently selected) in the CodeWarrior debugger window. b) To view/change the indart hardware model in the DataBlaze programming utility, select the Operations > Select Device menu item. c) To view/change indart-one instruments in the MultiBlaze gang programming utility, choose the New Project or Modify Project options CodeWarrior-Specific: Stepping Execution is Slow When the Memory window is open, step commands may execute slower, since the Memory window contents need to be refreshed after every step HC08-Specific: Peripheral Speed is Low The Frequency divider parameter (in the Communication Settings dialog box) should always be set to 4 in order to guarantee that, in monitor mode, all of the target microcontroller s peripherals run at the same speed they do in user mode. If, however, you set this parameter to 2 not all peripherals will work at this doubled speed. 130
133 indart-one User's Manual HCS08-Specific: Communication Lost During Debugging This problem may have several causes: 1. The microcontroller s bus frequency has been changed by the user application and the CLKSW bit is set to 1. In this case, set the CLKSW bit to 0 (in the Communication Settings dialog box). 2. The BKGDPE bit in the SOPT (System Option Register) register has been set to 0, configuring the BKGD pin as a generic I/O pin. The BKGD pin must be reserved for the BDC communication (BKGDPE = 1). 3. A microcontroller reset has occurred. Among other things, this may be caused by the COP peripheral. After reset, the COP is enabled, so your program must either disable it or reset its timer HCS08-Specific: STOP Assembly Instruction Causes a Microcontroller Reset If the STOPE bit in the SOPT register is not set, the STOP instruction is recognized as an illegal opcode, causing the microcontroller to reset. The SOPT register can be written only once after reset Diagnostic Test indart-one has built-in self-test capabilities. This means that you can verify by yourself, at any time, the correct operation of the instrument s hardware. To perform the diagnostic test: 1. Open the indart-one Control Panel. Select Start > Programs > SofTec Microsystems > indart-one > Control Panel. The following dialog box will appear

134 indart-one User's Manual Figure 10.1: indart-one Control Panel 2. Click the Diagnostic Test button and follow the on-screen instructions. i Note: before to start the diagnostic test, make sure that only one instrument is connected to the PC and that no target system is connected to the instrument Getting Technical Support For technical assistance, documentation and information about products and services, please refer to your local SofTec Microsystems partner. SofTec Microsystems offers its customers a free technical support service at support@softecmicro.com. Before getting in contact with us, we advise you to check that you are working with the latest version of the indart-one system software (upgrades are available free of charge at Additional resources can be found on our online discussion forums (
indart -HCS08 In-Circuit Debugger/Programmer for Freescale HCS08 Family FLASH Devices User s Manual Rev. 2.0
 indart -HCS08 In-Circuit Debugger/Programmer for Freescale HCS08 Family FLASH Devices User s Manual Rev. 2.0 Copyright 2006 SofTec Microsystems DC01028 We want your feedback! SofTec Microsystems is always
indart -HC08 In-Circuit Debugger/Programmer for Freescale HC08 Family FLASH Devices User s Manual Rev. 2.0 Copyright 2006 SofTec Microsystems DC01027
 indart -HC08 In-Circuit Debugger/Programmer for Freescale HC08 Family FLASH Devices User s Manual Rev. 2.0 Copyright 2006 SofTec Microsystems DC01027 SofTec Microsystems E-mail (general information): info@softecmicro.com
PK-HCS12C32 Starter Kit for Motorola MC9S12C32 User s Manual
 PK-HCS12C32 Starter Kit for Motorola MC9S12C32 User s Manual Copyright 2003 SofTec Microsystems DC00685 We want your feedback! SofTec Microsystems is always on the look-out for new ways to improve its
EVB9S08DZ60. Demonstration Board for Freescale MC9S08DZ60. User s Manual
 EVB9S08DZ60 Demonstration Board for Freescale MC9S08DZ60 User s Manual EVB9S08DZ60 Evaluation Board for Freescale MC9S08DZ60 (64-Pin LQFP) User s Manual Revision 1.0 Copyright 2006 SofTec Microsystems
EVBQE128. Evaluation Board for Freescale Flexis QE128. User s Manual
 EVBQE128 Evaluation Board for Freescale Flexis QE128 User s Manual EVBQE128 Evaluation Board for Freescale Flexis QE128 Microcontrollers (80-Pin LQFP) User s Manual Revision 1.1 Copyright 2007 SofTec
IDB-HC08GZ Evaluation Board For Motorola MC68HC908GZ/GR
 IDB-HC08GZ Evaluation Board For Motorola MC68HC908GZ/GR User s Manual. Introduction Overview The IDB-HC08GZ Evaluation Board demonstrates the capabilities of the -pin MC68HC908GZ/GR devices. The IDB-HC08GZ
Controller Continuum. for Microcontrollers V6.3. Quick Start
 Controller Continuum for Microcontrollers V6.3 Quick Start CodeWarrior Development Studio for Microcontrollers V6.x Quick Start SYSTEM REQUIREMENTS Hardware Operating System Disk Space PC with 1 GHz Intel
indart -ST7C In-Circuit Debugger for STMicroelectronics ST72CXXX FLASH Devices User s Manual Copyright 2001 SofTec Microsystems DC00326
 indart -ST7C In-Circuit Debugger for STMicroelectronics ST72CXXX FLASH Devices User s Manual Copyright 2001 SofTec Microsystems DC00326 SofTec Microsystems E-mail (general information): info@softecmicro.com
SK-S12XDP512-A. (Freescale Code EVB9S12XDP512) Starter Kit for Freescale MC9S12XDP512. User s Manual. Revision 1.0
 Starter Kit for Freescale MC9S12XDP512. User s Manual. Revision 1.0") SK-S12XDP512-A (Freescale Code EVB9S12XDP512) Starter Kit for Freescale MC9S12XDP512 User s Manual Revision 1.0 Copyright 2005 SofTec Microsystems DC00854 We want your feedback! SofTec Microsystems is
SK-S12XDP512-A (Freescale Code EVB9S12XDP512) Starter Kit for Freescale MC9S12XDP512 User s Manual Revision 1.0 Copyright 2005 SofTec Microsystems DC00854 We want your feedback! SofTec Microsystems is
MP8011A. Gang Programming System
 MP8011A Gang Programming System User s Manual Copyright 2000 SofTec Microsystems DC00242 SofTec Microsystems via Roma, 1 33082 Azzano Decimo (PN) ITALY Tel: (+39) 0434 640 729 Fax: (+39) 0434 632 695 E-mail
The Newest S08/RS08 Tool New breed of SPYDER discovered
 Inga Harris The Newest S0/RS0 Tool New breed of SPYDER discovered Figre : Core Roadmap Performance/ Integration HC OTP MHz HC0 OTP MHz Past HC MHz HC0 MHz Freescale Semiconductor is a global leader in
CodeWarrior Development Studio for Freescale 68HC12/HCS12/HCS12X/XGATE Microcontrollers Quick Start SYSTEM REQUIREMENTS Hardware Operating System 200
 CodeWarrior Development Studio for Freescale 68HC12/HCS12/HCS12X/XGATE Microcontrollers Quick Start SYSTEM REQUIREMENTS Hardware Operating System 200 MHz Pentium II processor or AMD-K6 class processor,
FlashRunner 2.0 Series
 FlashRunner 2.0 Series HighPerformance, Standalone InSystem Programmers User s Manual Revision 1.0 July 2016 Copyright 2016 SMH Technologies DC10743 We want your feedback! SMH Technologies is always on
USB Debug Adapter. Power USB DEBUG ADAPTER. Silicon Laboratories. Stop. Run. Figure 1. Hardware Setup using a USB Debug Adapter
 C8051F38X DEVELOPMENT KIT USER S GUIDE 1. Kit Contents The C8051F38x Development Kit contains the following items: C8051F380 Target Board C8051Fxxx Development Kit Quick-start Guide Silicon Laboratories
EMULATOR SETUP MB BIT COMPACT-ICE
 Fujitsu Microelectronics Europe Application Note MCU-AN-390077-E-V11 F²MC-16L/LX FAMILY 16-BIT MICROCONTROLLER MB903XX/4XX/5XX/6XX EMULATOR SETUP MB2147-05 16BIT COMPACT-ICE APPLICATION NOTE Revision History
P&E Microcomputer Systems, Inc. P.O. Box 2044, Woburn, MA 01888, USA
 P&E Microcomputer Systems, Inc. P.O. Box 2044, Woburn, MA 01888, USA TEL: (617) 353-9206 FAX: (617) 353-9205 http://www.pemicro.com USB-ML-MON08 Rev D Technical Summary Document # PE3357, Version 1.01
Getting Started with the Microcontroller Student Learning Kit (MCUSLK) Using the MC9S12C32 MCU Application Module (CSM-12C32)
 Using the MC9S12C32 MCU Application Module (CSM-12C32)") Freescale Semiconductor User Guide MCUSLK_CSM12C32 Rev. 0, 6/2005 Getting Started with the Microcontroller Student Learning Kit (MCUSLK) Using the MC9S12C32 MCU Application Module (CSM-12C32) By Eduardo
Freescale Semiconductor User Guide MCUSLK_CSM12C32 Rev. 0, 6/2005 Getting Started with the Microcontroller Student Learning Kit (MCUSLK) Using the MC9S12C32 MCU Application Module (CSM-12C32) By Eduardo
HCS12 BDM Getting Started V4.3
 HCS12 BDM Getting Started V4.3 Background The term BDM stands for Background Debug Mode. It is used for the system development and FLASH programming. A BDM firmware is implemented on the CPU silicon providing
CMS-8GP32. A Motorola MC68HC908GP32 Microcontroller Board. xiom anufacturing
 CMS-8GP32 A Motorola MC68HC908GP32 Microcontroller Board xiom anufacturing 2000 717 Lingco Dr., Suite 209 Richardson, TX 75081 (972) 994-9676 FAX (972) 994-9170 email: Gary@axman.com web: http://www.axman.com
for ColdFire Architectures V7.2 Quick Start
 for ColdFire Architectures V7.2 Quick Start CodeWarrior Development Studio for ColdFire Architectures V7.2 Quick Start SYSTEM REQUIREMENTS Hardware Operating System Disk Space 1 GHz Pentium compatible
Purchase Agreement. P&E Microcomputer Systems, Inc. 98 Galen St. Watertown, MA
 Purchase Agreement P&E Microcomputer Systems, Inc. reserves the right to make changes without further notice to any products herein to improve reliability, function, or design. P&E Microcomputer Systems,
NEC 78K0- Family On-Chip Emulation
 _ Technical Notes V9.9.86 NEC 78K0- Family On-Chip Emulation Contents Contents... 1 1 Introduction... 2 2 Emulation options... 3 2.1 Hardware Options... 3 3 CPU Setup... 6 3.1 General Options... 6 3.2
Old Company Name in Catalogs and Other Documents
 To our customers, Old Company Name in Catalogs and Other Documents On April 1 st, 2010, NEC Electronics Corporation merged with Renesas Technology Corporation, and Renesas Electronics Corporation took
DEMO9S08SH8/SG8 Demonstration Board for Freescale MC9S08SH8/SG8
 DOC-0398-010, REV A DEMO9S08SH8/SG8 Demonstration Board for Freescale MC9S08SH8/SG8 Axiom Manufacturing 2813 Industrial Lane Garland, TX 75041 Email: Sales@axman.com Web: http://www.axman.com CONTENTS
Freescale and the Freescale logo are trademarks of Freescale Semiconductor, Inc. All other product or service names are the property of their
 S08 Highlighted Features Why Do I Need a Slave LIN Interface Controller (SLIC)? Design Challenges Slave synchronization Slave synchronizing to LIN messaging requires a cost versus resource trade-off. Your
ADSP-218x Family EZ-ICE Hardware Installation Guide
 ADSP-218x Family EZ-ICE Hardware Installation Guide 2000 Analog Devices, Inc. ADSP-218x Family EZ-ICE Hardware Installation Guide a Notice Analog Devices, Inc. reserves the right to make changes to or
Figure 1. Proper Method of Holding the ToolStick. Figure 2. Improper Method of Holding the ToolStick
 TOOLSTICK C8051F330 DAUGHTER CARD USER S GUIDE 1. Handling Recommendations To enable development, the ToolStick Base Adapter and daughter cards are distributed without any protective plastics. To prevent
Z8 Encore! XP/Z8 Encore! Development Kits
 Z8 Encore! XP/Z8 Encore! Development Kits QS004311-0111 Introduction This describes how to set up Zilog s Z8 Encore! XP/Z8 Encore! Development Kits and start using them to build designs and applications
Quick-Start Guide. BNS Solutions. QSK62P Plus
 BNS Solutions Quick-Start Guide QSK62P Plus RS-232 Port Link LED 8-character x 2-line LCD Expansion Port (2) Reset Switch Power LED Thermistor I/O Ring (4) M16C MCU Analog Adjust Pot MCU Crystal Expansion
Figure 1. Proper Method of Holding the ToolStick. Figure 2. Improper Method of Holding the ToolStick
 TOOLSTICK LIN DAUGHTER CARD USER S GUIDE 1. Handling Recommendations To enable development, the ToolStick Base Adapter and daughter cards are distributed without any protective plastics. To prevent damage
EB-51 Low-Cost Emulator
 EB-51 Low-Cost Emulator Development Tool for 80C51 Microcontrollers FEATURES Emulates 80C51 Microcontrollers and Derivatives Real-Time Operation up to 40 MHz 3.3V or 5V Voltage Operation Source-Level Debugger
IAR EWARM Quick Start for. Holtek s HT32 Series Microcontrollers
 IAR EWARM Quick Start for Holtek s Microcontrollers Revision: V1.10 Date: August 25, 2011 Table of Contents 1 Introduction... 5 About the Quick Start Guide... 5 About the IAR EWARM... 6 2 System Requirements...
Old Company Name in Catalogs and Other Documents
 To our customers, Old Company Name in Catalogs and Other Documents On April 1 st, 2010, NEC Electronics Corporation merged with Renesas Technology Corporation, and Renesas Electronics Corporation took
USB Debug Adapter. Power USB DEBUG ADAPTER. Silicon Laboratories. Stop. Run. Figure 1. Hardware Setup using a USB Debug Adapter
 C8051F2XX DEVELOPMENT KIT USER S GUIDE 1. Kit Contents The C8051F2xx Development Kits contain the following items: C8051F206 or C8051F226 Target Board C8051Fxxx Development Kit Quick-Start Guide Silicon
Old Company Name in Catalogs and Other Documents
 To our customers, Old Company Name in Catalogs and Other Documents On April 1 st, 2010, NEC Electronics Corporation merged with Renesas Technology Corporation, and Renesas Electronics Corporation took
EMUL-PPC-PC. Getting Started Guide. Version 1.0
 EMUL-PPC-PC Getting Started Guide Version 1.0 EMUL PowerPC Getting Started Guide Edition1 ICE Technology. All rights reserved worldwide. Contents Warranty Information European CE Requirements User Responsibility
LAB #1: The CSM12C32 Module and PBMCUSLK Project Board
 CS/EE 5780/6780 Handout #1 Spring 2007 Myers LAB #1: The CSM12C32 Module and PBMCUSLK Project Board Lab writeup is due to your TA at the beginning of your next scheduled lab. Don t put this off to the
S3 Flash In-System Programmer
 S3 Family of Microcontrollers S3 Flash In-System Programmer UM026604-0816 PRELIMINARY Copyright 2016 Zilog, Inc. All rights reserved. www.zilog.com ii Warning: DO NOT USE THIS PRODUCT IN LIFE SUPPORT SYSTEMS.
M68EM05X4 EMULATOR MODULE USER'S MANUAL
 M68EM05X4/D Rev. 2 January 1996 M68EM05X4 EMULATOR MODULE USER'S MANUAL Third Edition MOTOROLA Ltd., 1993, 1995, 1996; All Rights Reserved Motorola reserves the right to make changes without further notice
SEMICONDUCTOR PRODUCT INFORMATION
 CMB2114RG/D REV 1 Semiconductor Products Sector Product Release Guide Motorola CMB2114 1 Overview 2 System Requirements This guide explains installation and other information for the CMB2114 controller
DEMO9S08SH32/SG32 Demonstration Board for Freescale MC9S08SH32/SG32
 DOC-0421-010, REV A DEMO9S08SH32/SG32 Demonstration Board for Freescale MC9S08SH32/SG32 Axiom Manufacturing 2813 Industrial Lane Garland, TX 75041 Email: Sales@axman.com Web: http://www.axman.com CONTENTS
Keil TM MDK-ARM Quick Start for. Holtek s HT32 Series Microcontrollers
 Keil TM MDK-ARM Quick Start for Holtek s Microcontrollers Revision: V1.10 Date: August 25, 2011 Table of Contents 1 Introduction... 5 About the Quick Start Guide... 5 About the Keil MDK-ARM... 6 2 System
USB-to-I2C. Professional Hardware User s Manual.
 USB-to-I2C Professional Hardware User s Manual https://www.i2ctools.com/ Information provided in this document is solely for use with the USB-to-I2C Professional product from SB Solutions, Inc. SB Solutions,
Note that FLIP is an Atmel program supplied by Crossware with Atmel s permission.
 INTRODUCTION This manual will guide you through the first steps of getting the SE-8051ICD running with the Crossware 8051 Development Suite and the Atmel Flexible In-System Programming system (FLIP). The
for StarCore DSP Architectures Quick Start for the Windows Edition
 for StarCore DSP Architectures Quick Start for the Windows Edition CodeWarrior Development Studio for StarCore DSP Architectures Quick Start for the Windows Edition SYSTEM REQUIREMENTS Hardware Operating
Programming in the MAXQ environment
 AVAILABLE The in-circuit debugging and program-loading features of the MAXQ2000 microcontroller combine with IAR s Embedded Workbench development environment to provide C or assembly-level application
HandsOn Technology -- HT-MC-02 MODEL: HT-MC-02
 HandsOn Technology 8051 μcontroller Starter Kits FLASH μcontroller PROGRAMMER/DEVELOPMENT SYSTEM MODEL: HT-MC-02 8051 is one of the most popular 8-bit µcontroller architectures in use today, learn it the
Figure 1. Proper Method of Holding the ToolStick. Figure 2. Improper Method of Holding the ToolStick
 TOOLSTICK UNIVERSITY DAUGHTER CARD USER S GUIDE 1. Handling Recommendations To enable development, the ToolStick Base Adapter and daughter cards are distributed without any protective plastics. To prevent
FlashRunner High-Performance, Standalone In-System Programmer User s Manual
 FlashRunner High-Performance, Standalone In-System Programmer User s Manual Revision 1.3 May 2007 Copyright 2007 SofTec Microsystems DC01276 We want your feedback! SofTec Microsystems is always on the
CodeWarrior Development Studio for Freescale HCS12(X) Microcontrollers
 Microcontrollers") 8-/16-bit Microcontrollers CodeWarrior Development Studio for Freescale HCS12(X) Microcontrollers Overview The comprehensive, highly visual CodeWarrior Development Studio for Freescale HCS12(X) Microcontrollers
8-/16-bit Microcontrollers CodeWarrior Development Studio for Freescale HCS12(X) Microcontrollers Overview The comprehensive, highly visual CodeWarrior Development Studio for Freescale HCS12(X) Microcontrollers
Contents. Cortex M On-Chip Emulation. Technical Notes V
 _ Technical Notes V9.12.225 Cortex M On-Chip Emulation Contents Contents 1 1 Introduction 2 2 Access Breakpoints 3 3 Trace 5 4 NXP LPC 5 4.1 Boot and Memory Remapping 5 4.2 LPC17xx Startup 5 4.1 LPC11A02/04
Quick Start Guide TWR-S08PT60. 5-Volt S08P Family of 8-bit MCUs for Industrial and Appliance Applications TOWER SYSTEM
 TWR-S08PT60 5-Volt S08P Family of 8-bit MCUs for Industrial and Appliance Applications TOWER SYSTEM Get to Know the TWR-S08PT60 Primary Connector Force BDM Infrared Port Reset Switch Motor Control Daughter
for Freescale MPC55xx/MPC56xx Microcontrollers V2.10 Quick Start
 for Freescale MPC55xx/MPC56xx Microcontrollers V2.10 Quick Start CodeWarrior Development Studio for MPC55xx/MPC56xx Microcontrollers, version 2.xx Quick Start SYSTEM REQUIREMENTS Hardware Operating System
CodeWarrior Development Studio for etpu v10.x Quick Start SYSTEM REQUIREMENTS
 CodeWarrior Development Studio for etpu v10.x Quick Start SYSTEM REQUIREMENTS Hardware Operating System Software Disk Space Intel Pentium 4 processor, 2 GHz or faster, Intel Xeon, Intel Core, AMD Athlon
Quick Start Guide for TWR-S08MM128-KIT TOWER SYSTEM MC9S08MM128. The industry s most complete solution for portable medical applications
 Quick Start Guide for TWR-S08MM128-KIT TOWER SYSTEM MC9S08MM128 The industry s most complete solution for portable medical applications TOWER SYSTEM Get to Know the TWR-S08MM128-KIT BDM Interface for MC9S08MM128
AN1369 APPLICATION NOTE
 AN1369 APPLICATION NOTE GETTING STARTED WITH RAISONANCE IDE FOR THE ST6 MICROCONTROLLER by Microcontroller Division Applications INTRODUCTION Ride is the development toolchain for ST62 developed by Raisonance.
EMUL IP2K PC. User Guide. Edition 1, July 13, Nohau Corporation. All rights reserved worldwide.
 EMUL IP2K PC User Guide Edition 1, July 13, 2001 2001 Nohau Corporation. All rights reserved worldwide. EMUL IP2K PC User Guide Contents About This Guide vi Overview of the EMUL IP2K PC Emulator System
Figure 1. Proper Method of Holding the ToolStick. Figure 2. Improper Method of Holding the ToolStick
 TOOLSTICK C8051F560 DAUGHTER CARD USER S GUIDE 1. Handling Recommendations To enable development, the ToolStick Base Adapter and daughter cards are distributed without any protective plastics. To prevent
R8C/Tiny. StarterKit Plus SKP8CMINI-15, SKP8CMINI-17. Clock Stop Detect
 QuickStart Guide R8C/Tiny StarterKit Plus SKP8CMINI-15, SKP8CMINI-17 Target/Bus Power Mode Selector Clock Stop Detect R8C/Tiny CdS Cell Thermistor Slide Switch S1 Pushbutton Switch S2 RTA-FoUSB-MON In-Circuit
E8a Emulator Additional Document for User's Manual R0E00008AKCE00EP9
 REJ10J1646-0100 E8a Emulator Additional Document for User's Manual R0E00008AKCE00EP9 Renesas Microcomputer Development Environment System M16C Family / R8C/Tiny Series Notes on Connecting the R8C/18, R8C/19,
Win-I2CUSB Hardware User s Manual
 Win-I2CUSB Hardware User s Manual http://www.demoboard.com Information provided in this document is solely for use with the Win-I2CUSB product from The Boardshop. The Boardshop and SB Solutions, Inc. reserve
High-Performance Gang In-System Programmer PXI Module
 FlashRunner FRPXIA3 HighPerformance Gang InSystem Programmer PXI Module User s Manual Revision 1.0 June 2014 Copyright 2014 SMH Technologies DC10665 We want your feedback! SMH Technologies is always on
USER GUIDE. Atmel OLED1 Xplained Pro. Preface
 USER GUIDE Atmel OLED1 Xplained Pro Preface Atmel OLED1 Xplained Pro is an extension board to the Atmel Xplained Pro evaluation platform. The board enables the user to experiment with user interface applications
USB-to-I2C Basic. Hardware User s Manual.
 USB-to-I2C Basic Hardware User s Manual http://www.i2ctools.com/ Information provided in this document is solely for use with the USB-to-I2C product from SB Solutions, Inc. SB Solutions, Inc. reserves
AC/DC. Adapter. Ribbon. Cable Serial. Serial. Adapter. Figure 1. Hardware Setup using an EC2 Serial Adapter
 C8051F32X DEVELOPMENT KIT USER S GUIDE 1. Kit Contents The C8051F32x Development Kit contains the following items: C8051F320 Target Board C8051Fxxx Development Kit Quick-Start Guide C8051F32x Development
P&E Microcomputer Systems, Inc. P.O. Box 2044, Woburn, MA 01888, USA
 nc. P&E Microcomputer Systems, Inc. P.O. Box 2044, Woburn, MA 01888, USA TEL: (617) 353-9206 FAX: (617) 353-9205 http://www.pemicro.com USB HCS08/HCS12 Multilink Rev A Technical Summary 1. Introduction
F²MC-8FX FAMILY MB95100 SERIES EMULATOR HW SETUP 8-BIT MICROCONTROLLER APPLICATION NOTE. Fujitsu Microelectronics Europe Application Note
 Fujitsu Microelectronics Europe Application Note MCU-AN-395002-E-V10 F²MC-8FX FAMILY 8-BIT MICROCONTROLLER MB95100 SERIES EMULATOR HW SETUP APPLICATION NOTE Revision History Revision History Date 2004-10-12
F²MC-8L FAMILY MB89201 SERIES FLASH PROGRAMMING 8-BIT MICROCONTROLLER APPLICATION NOTE. Fujitsu Microelectronics Europe Application Note
 Fujitsu Microelectronics Europe Application Note MCU-AN-300001-E-V10 F²MC-8L FAMILY 8-BIT MICROCONTROLLER MB89201 SERIES FLASH PROGRAMMING APPLICATION NOTE Revision History Revision History Date 2005-02-09
Network USB over IP Server With 1-USB2.0 Port. User Manual V1.0
 Network USB over IP Server With 1-USB2.0 Port User Manual V1.0 1 2 TABLE OF CONTENTS COPYRIGHT...4 1. INTRODUCTION...5 PRODUCT OVERVIEW...5 COMPONENTS AND FEATURES...5 HARDWARE INSTALLATION...5 2. THE
Ethernet1 Xplained Pro
 Ethernet1 Xplained Pro Part Number: ATETHERNET1-XPRO The Atmel Ethernet1 Xplained Pro is an extension board to the Atmel Xplained Pro evaluation platform. The board enables the user to experiment with
AN ELNEC EN ISP-HC08. Application note for In-System Programming of Motorola/Freescale HC08 microcontrollers
 www.elnec.com AN ELNEC EN ISP-HC08 Application note for In-System Programming of Motorola/Freescale HC08 microcontrollers Version 05/2006 1 Introduction In system programming (ISP) of HC08 microcontrollers
Product Update. Errata to Z8 Encore! 8K Series Silicon. Z8 Encore! 8K Series Silicon with Date Codes 0402 and Later
 Product Update Errata to Z8 Encore! 8K Series Silicon Z8 Encore! 8K Series Silicon with Date Codes 0402 and Later The errata listed in Table 1 are found in the Z8 Encore! 8K Series devices with date codes
Application Note. Startup DevKit16. History 19 th June 00 TKa V1.0 started 20 th June 00 TKa V1.1 Some minor text corrections
 Application Note Startup DevKit16 Fujitsu Mikroelektronik GmbH, Microcontroller Application Group History 19 th June 00 TKa V1.0 started 20 th June 00 TKa V1.1 Some minor text corrections 1 Warranty and
FlashRunner FR01AT0. High-Performance, Standalone In-System Programmer. User s Manual. Revision 1.0 September 2008
 FlashRunner FR01AT0 High-Performance, Standalone In-System Programmer User s Manual Revision 1.0 September 2008 Copyright 2008 SMH Technologies DC10064 We want your feedback! SMH Technologies is always
Getting Started Guide: TMS-FET470A256 IAR Kickstart Development Kit
 Getting Started Guide: TMS-FET470A256 IAR Kickstart Development Kit Skrtic/Mangino Page 1 of 11 SPNU250 IMPORTANT NOTICE Texas Instruments and its subsidiaries (TI) reserve the right to make changes to
M16C R8C FoUSB/UART Debugger. User s Manual REJ10J
 REJ10J1217-0100 M16C R8C FoUSB/UART Debugger User s Manual RENESAS MICROCOMPUTER Development Environment System M16C Family R8C/Tiny Series Precautions on Connecting R8C/20, R8C/21, R8C/22, R8C/23 Rev.1.00
Figure 1. Power Barrel Connector Requirements
 Freescale Semiconductor Quick Start Guide Rev. 0.1, 06/29/2004 DEMO9S12NE64 Demo Quick Start Guide Introduction This kit and guide contains everything you need to get started. You will connect the board
Evaluation & Development Kit for Freescale PowerPC MPC5517 Microcontroller
 _ V1.0 User s Manual Evaluation & Development Kit for Freescale PowerPC MPC5517 Microcontroller Ordering code ITMPC5517 Copyright 2007 isystem AG. All rights reserved. winidea is a trademark of isystem
Figure 1. Proper Method of Holding the ToolStick. Figure 2. Improper Method of Holding the ToolStick
 TOOLSTICK C8051F931 DAUGHTER CARD USER S GUIDE 1. Handling Recommendations To enable development, the ToolStick Base Adapter and daughter cards are distributed without any protective plastics. To prevent
E8a Emulator Additional Document for User's Manual R0E00008AKCE00EP2
 REJ10J1644-0100 E8a Emulator Additional Document for User's Manual R0E00008AKCE00EP2 Renesas Microcomputer Development Environment System M16C Family / R8C/Tiny Series Notes on Connecting the R8C/10, R8C/11,
Figure 1-1 ISPAVRU1 application
 ISP AVR Programmer through USB Main Features AVR Studio Interface (AVR Studio 4.12 or later) Supports all AVR Device with ISP interface, refer to AVR Studio Programs both Flash and EEPROM Supports Fuse
Z8ICE001ZEM Z8PLUS EMULATOR PRODUCT SPECIFICATION KIT CONTENTS OPTIONAL ITEMS NOT SUPPLIED
 PRODUCT SPECIFICATION Z8PLUS EMULATOR KIT CONTENTS Circuit Board Z8M001 Emulation Board (99C0603-001) Cables 18-Pin Emulation Pod Cable 9-Pin M F Serial Cable (6 ft.) Host Software Developer Studio (ZDS)
USER GUIDE. Atmel QT6 Xplained Pro. Preface
 USER GUIDE Atmel QT6 Xplained Pro Preface Atmel QT6 Xplained Pro kit is a Xplained Pro extension board that enables the evaluation of a mutual capacitance touch suface using the Peripheral Touch Controller
Apex-ICE Universal Emulator Hardware and Software Installation Guide
 Apex-ICE Universal Emulator Hardware and Software Installation Guide a Notice Analog Devices, Inc. reserves the right to make changes to or to discontinue any product or service identified in this publication
Purchase Agreement. P&E Microcomputer Systems, Inc. 98 Galen St. Watertown, MA
 Purchase Agreement P&E Microcomputer Systems, Inc. reserves the right to make changes without further notice to any products herein to improve reliability, function, or design. P&E Microcomputer Systems,
_ V ST STM8 Family On-Chip Emulation. Contents. Technical Notes
 _ V9.12. 225 Technical Notes ST STM8 Family On-Chip Emulation This document is intended to be used together with the CPU reference manual provided by the silicon vendor. This document assumes knowledge
Also available for purchase separately are socket daughter boards for the QFN-11 and QFN-10 packages.
 C8051T606 DEVELOPMENT KIT USER S GUIDE 1. Kit Contents The C8051T606 Development Kit contains the following items: C8051T606 Main Board C8051T606 MSOP Socket Daughter Board for programming MSOP devices
AC/DC. Adapter. Serial. Adapter. Figure 1. Hardware Setup
 C8051F35X DEVELOPMENT KIT USER S GUIDE 1. Kit Contents The C8051F35x Development Kit contains the following items: C8051F350 Target Board Serial Adapter (RS232 to Target Board Debug Interface Protocol
Apex-ICE Universal JTAG Emulator Hardware and Software Installation Guide
 Apex-ICE Universal JTAG Emulator Hardware and Software Installation Guide a Notice Analog Devices, Inc. reserves the right to make changes to or to discontinue any product or service identified in this
For an electronic copy of this book, visit Motorola s web site at Motorola, Inc., 2004; All Rights Reserved
 EML08AP64UM/D Version 1.1 June 25, 2004 M68EML08AP64 Emulation Module Motorola, Inc., 2003 Important Notice to Users While every effort has been made to ensure the accuracy of all information in this document,
USB-to-I2C. Ultra Hardware User s Manual.
 USB-to-I2C Ultra Hardware User s Manual https://www.i2ctools.com/ Information provided in this document is solely for use with the USB-to-I2C Ultra product from SB Solutions, Inc. SB Solutions, Inc. reserves
ZCRMZNICE01ZEMG Crimzon In-Circuit Emulator
 Quick Start Guide QS006602-0408 Introduction Zilog s ZCRMZNICE01ZEMG Crimzon (ICE), shown in Figure 1, provides Crimzon chip family emulation with a Trace and Event system for program debugging using Zilog
CodeWarrior Development Studio for StarCore DSP SC3900FP Architectures Quick Start for the Windows Edition
 CodeWarrior Development Studio for StarCore DSP SC3900FP Architectures Quick Start for the Windows Edition SYSTEM REQUIREMENTS Hardware Operating System Disk Space Intel Pentium 4 processor, 2 GHz or faster,
ToolStick-EK TOOLSTICK USER S GUIDE. 1. Kit Contents. 2. ToolStick Overview. Green and Red LEDs. C8051F321 provides USB debug interface.
 TOOLSTICK USER S GUIDE 1. Kit Contents The ToolStick kit contains the following items: ToolStick Silicon Laboratories Evaluation Kit IDE and Product Information CD-ROM. CD content includes: Silicon Laboratories
Chapter 7 Central Processor Unit (S08CPUV2)
") Chapter 7 Central Processor Unit (S08CPUV2) 7.1 Introduction This section provides summary information about the registers, addressing modes, and instruction set of the CPU of the HCS08 Family. For a more
Chapter 7 Central Processor Unit (S08CPUV2) 7.1 Introduction This section provides summary information about the registers, addressing modes, and instruction set of the CPU of the HCS08 Family. For a more
MCUez MMDS or MMEVS for HC05/08 ezstart GUIDE
 MCUEZQSG0508/D FEBRUARY 1998 MCUez MMDS or MMEVS for HC05/08 ezstart GUIDE Copyright 1998 MOTOROLA; All Rights Reserved Important Notice to Users While every effort has been made to ensure the accuracy
Magnetek Material Handling IMPULSE LINK 4.1 Basic Instruction Manual
 Magnetek Material Handling IMPULSE LINK 4.1 Basic Instruction Manual March 2013 Part Number: 140-10350 R6 Copyright 2013 Magnetek Material Handling 2013 MAGNETEK MATERIAL HANDLING All rights reserved.
AN10955 Full-duplex software UART for LPC111x and LPC13xx
 Rev. 1 13 July 2010 Application note Document information Info Content Keywords LPC111X, LPC13XX, UART, software Abstract This application note illustrates how software running on an LPC111X or LPC13XX
ICE-100B Emulator User Guide
 ICE-100B Emulator User Guide Revision 1.0, September 2009 Part Number 82-000225-01 Analog Devices, Inc. One Technology Way Norwood, Mass. 02062-9106 a Copyright Information 2009 Analog Devices, Inc., ALL
EMULATOR SYSTEM MB
 Fujitsu Microelectronics Europe Application Note MCU-AN-391026-E-V12 FR FAMILY SUPPORT TOOL EMULATOR SYSTEM MB2198-01 INSTALLATION GUIDE MB2198-01 APPLICATION NOTE Revision History Revision History Date