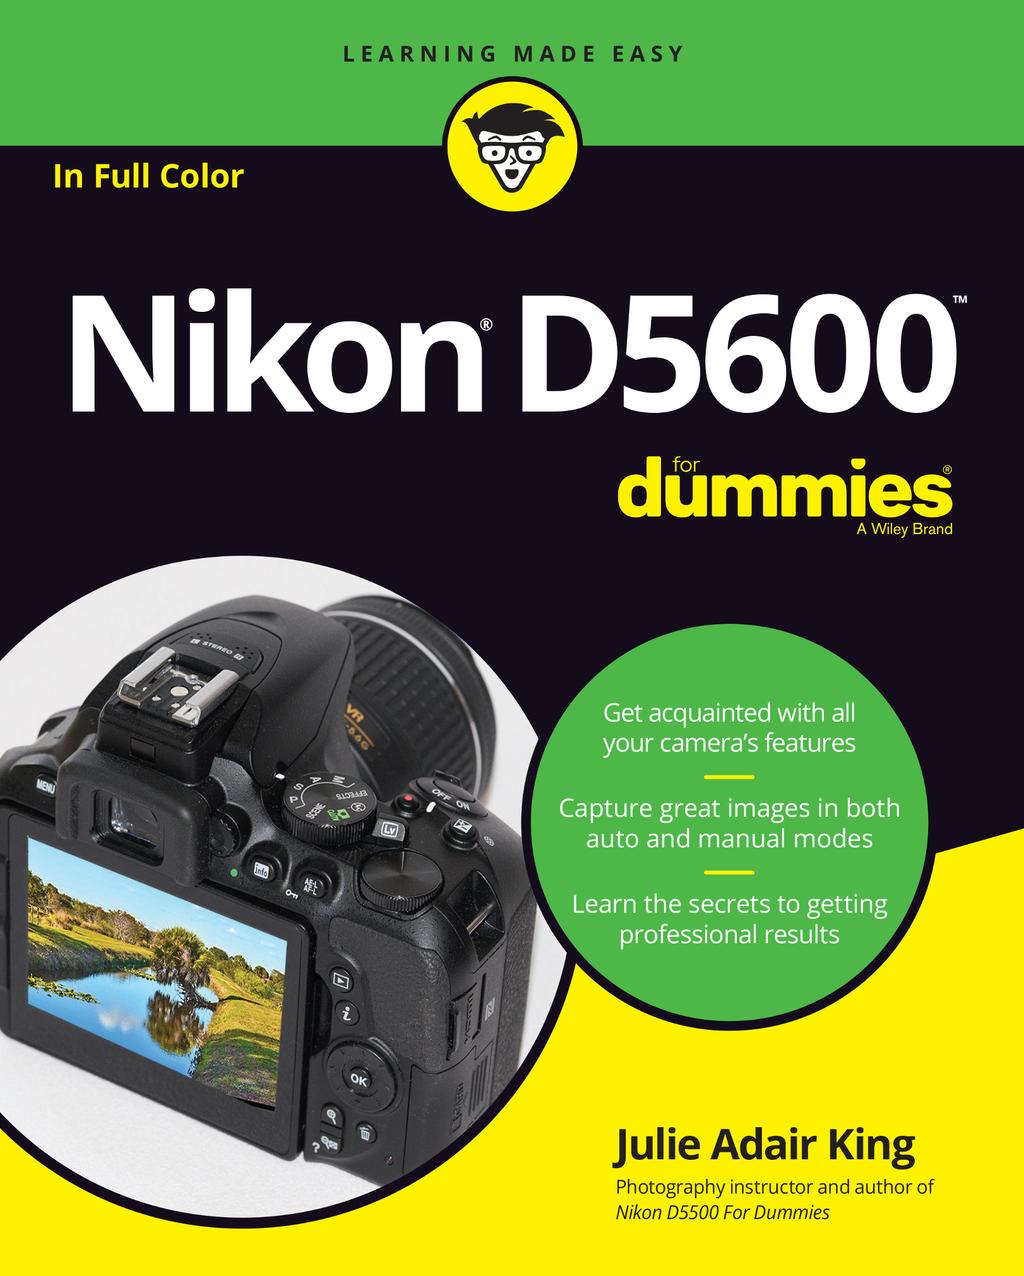
Nikon D5600. by Julie Adair King
|
|
|
- Melissa Jennings
- 5 years ago
- Views:
Transcription
1
2
3 Nikon D5600
4
5 Nikon D5600 by Julie Adair King
6 Nikon D5600 For Dummies Published by: John Wiley & Sons, Inc., 111 River Street, Hoboken, NJ , Copyright 2017 by John Wiley & Sons, Inc., Hoboken, New Jersey Published simultaneously in Canada No part of this publication may be reproduced, stored in a retrieval system or transmitted in any form or by any means, electronic, mechanical, photocopying, recording, scanning or otherwise, except as permitted under Sections 107 or 108 of the 1976 United States Copyright Act, without the prior written permission of the Publisher. Requests to the Publisher for permission should be addressed to the Permissions Department, John Wiley & Sons, Inc., 111 River Street, Hoboken, NJ 07030, (201) , fax (201) , or online at permissions. Trademarks: Wiley, For Dummies, the Dummies Man logo, Dummies.com, Making Everything Easier, and related trade dress are trademarks or registered trademarks of John Wiley & Sons, Inc. and may not be used without written permission. Nikon and D5600 are trademarks or registered trademarks of Nikon Corporation. All other trademarks are the property of their respective owners. John Wiley & Sons, Inc. is not associated with any product or vendor mentioned in this book. LIMIT OF LIABILITY/DISCLAIMER OF WARRANTY: THE PUBLISHER AND THE AUTHOR MAKE NO REPRESENTATIONS OR WARRANTIES WITH RESPECT TO THE ACCURACY OR COMPLETENESS OF THE CONTENTS OF THIS WORK AND SPECIFICALLY DISCLAIM ALL WARRANTIES, INCLUDING WITHOUT LIMITATION WARRANTIES OF FITNESS FOR A PARTICULAR PURPOSE. NO WARRANTY MAY BE CREATED OR EXTENDED BY SALES OR PROMOTIONAL MATERIALS. THE ADVICE AND STRATEGIES CONTAINED HEREIN MAY NOT BE SUITABLE FOR EVERY SITUATION. THIS WORK IS SOLD WITH THE UNDERSTANDING THAT THE PUBLISHER IS NOT ENGAGED IN RENDERING LEGAL, ACCOUNTING, OR OTHER PROFESSIONAL SERVICES. IF PROFESSIONAL ASSISTANCE IS REQUIRED, THE SERVICES OF A COMPETENT PROFESSIONAL PERSON SHOULD BE SOUGHT. NEITHER THE PUBLISHER NOR THE AUTHOR SHALL BE LIABLE FOR DAMAGES ARISING HEREFROM. THE FACT THAT AN ORGANIZATION OR WEBSITE IS REFERRED TO IN THIS WORK AS A CITATION AND/OR A POTENTIAL SOURCE OF FURTHER INFORMATION DOES NOT MEAN THAT THE AUTHOR OR THE PUBLISHER ENDORSES THE INFORMATION THE ORGANIZATION OR WEBSITE MAY PROVIDE OR RECOMMENDATIONS IT MAY MAKE. FURTHER, READERS SHOULD BE AWARE THAT INTERNET WEBSITES LISTED IN THIS WORK MAY HAVE CHANGED OR DISAPPEARED BETWEEN WHEN THIS WORK WAS WRITTEN AND WHEN IT IS READ. For general information on our other products and services, please contact our Customer Care Department within the U.S. at , outside the U.S. at , or fax For technical support, please visit Wiley publishes in a variety of print and electronic formats and by print-on-demand. Some material included with standard print versions of this book may not be included in e-books or in print-on-demand. If this book refers to media such as a CD or DVD that is not included in the version you purchased, you may download this material at For more information about Wiley products, visit Library of Congress Control Number: ISBN (pbk); ISBN (ebk); ISBN Manufactured in the United States of America
7 Contents at a Glance Introduction...1 Part 1: Fast Track to Super Snaps...5 CHAPTER 1: First Steps, First Shots...7 CHAPTER 2: Reviewing Five Essential Picture-Taking Options Part 2: Taking Creative Control...85 CHAPTER 3: Taking Charge of Exposure...87 CHAPTER 4: Controlling Focus and Depth of Field CHAPTER 5: Mastering Color Controls CHAPTER 6: Putting It All Together CHAPTER 7: Shooting, Viewing, and Trimming Movies Part 3: After the Shot CHAPTER 8: Playback Mode: Viewing Your Photos CHAPTER 9: Working with Picture and Movie Files Part 4: The Part of Tens CHAPTER 10: Ten More Ways to Customize Your Camera CHAPTER 11: Ten Fun (And Practical) Features to Explore on a Rainy Day Appendix: Intro to Nikon SnapBridge Index
8
9 Table of Contents INTRODUCTION...1 About This Book How This Book Is Organized... 2 Icons and Other Stuff to Note Where to Go from Here PART 1: FAST TRACK TO SUPER SNAPS...5 CHAPTER 1: First Steps, First Shots...7 Preparing the Camera for Initial Use Checking Out External Controls Topside controls Back-of-the-body controls Front-left features Hidden connections Enabling and Using the Touchscreen Navigating Menus Viewing Critical Picture Settings Adjusting Settings via the Control Strip Familiarizing Yourself with the Lens Working with Memory Cards Taking a Few Final Setup Steps Cruising the Setup menu Custom Setting options Restoring default settings Shooting Pictures in Auto Mode Viewfinder photography in Auto mode Live View photography in Auto mode CHAPTER 2: Reviewing Five Essential Picture-Taking Options...45 Choosing an Exposure Mode Beginner exposure modes Advanced exposure modes: P, S, A, and M Setting the Release Mode Single Frame and Quiet Shutter modes Continuous (burst mode) shooting Self-timer shooting Investigating other shutter-release options Table of Contents vii
10 Checking Image Size and Image Quality Considering the Image Size setting (resolution) Understanding Image Quality options (JPEG or Raw) Setting Image Size and Image Quality Adding Flash Enabling and disabling flash Choosing a Flash mode Adjusting flash output Controlling flash output manually PART 2: TAKING CREATIVE CONTROL...85 CHAPTER 3: Taking Charge of Exposure...87 Introducing the Exposure Trio: Aperture, Shutter Speed, and ISO Aperture affects depth of field Shutter speed affects motion blur ISO affects image noise Doing the exposure balancing act Stepping Up to Advanced Exposure Modes (P, S, A, and M) Checking the Exposure Meter Choosing an Exposure Metering Mode Setting Aperture, Shutter Speed, and ISO Adjusting aperture and shutter speed Controlling ISO Solving Exposure Problems Applying Exposure Compensation Expanding tonal range Eliminating vignetting Using autoexposure lock Bracketing Exposures CHAPTER 4: Controlling Focus and Depth of Field Choosing Automatic or Manual Focusing Exploring Standard Focusing Options (Viewfinder Photography) Mastering the D5600 focus system Focusing manually Focusing in Live View Mode Using Live View autofocus Manual focusing in Live View mode Zooming in to check focus Manipulating Depth of Field viii Nikon D5600 For Dummies
11 CHAPTER 5: Mastering Color Controls Adjusting the White Balance Setting Changing the White Balance setting Fine-tuning White Balance settings Creating white balance presets Bracketing white balance Taking a Quick Look at Picture Controls CHAPTER 6: Putting It All Together Recapping Basic Picture Settings Shooting Still Portraits Capturing Action Capturing Scenic Vistas Capturing Dynamic Close-Ups Coping with Special Situations CHAPTER 7: Shooting, Viewing, and Trimming Movies Shooting Movies Using Default Settings Adjusting Video Settings Controlling Audio Setting microphone sensitivity Reducing wind noise Exploring Other Recording Options Manipulating Movie Exposure Screening Your Movies Trimming Movies Saving a Movie Frame As a Still Image PART 3: AFTER THE SHOT CHAPTER 8: Playback Mode: Viewing Your Photos Picture Playback Choosing Which Images to View Adjusting Playback Timing Enabling Automatic Picture Rotation Shifting to Thumbnails Display Displaying Photos in Calendar View Zooming in for a closer view Viewing Picture Data File Information mode Highlights (blinkies) mode RGB Histogram mode Shooting Data display mode Overview mode Viewing Your Photos on a Television Table of Contents ix
12 CHAPTER 9: Working with Picture and Movie Files Rating Photos and Movies Protecting Files Deleting Files Deleting files one at a time Deleting all files Deleting a batch of selected files Taking a Look at Nikon s Photo Software Downloading Pictures to the Computer Connecting via USB Starting the file-transfer process Downloading using Nikon ViewNX-i Processing Raw (NEF) Files Processing Raw images in the camera Processing Raw files in Capture NX-D Preparing Pictures for Online Sharing Prepping online photos using ViewNX-i Resizing pictures in the camera PART 4: THE PART OF TENS CHAPTER 10: Ten More Ways to Customize Your Camera Adding Comments and Copyright Notices Adding an image comment Adding a copyright notice Creating a Custom Storage Folder Customizing Filenames Changing the Information Display Style Keeping the Information Display Hidden Creating Your Own Menu Adjusting Automatic Shutdown Timing Customizing a Few Buttons Assigning a Touch Function Role Reversing the Command Dial Orientation CHAPTER 11: Ten Fun (And Practical) Features to Explore on a Rainy Day Applying the Retouch Menu Filters Removing Red-Eye Fixing Tilting and Distorted Images Manipulating Exposure and Color Cropping Your Photo Adding Special Effects to Existing Photos Shooting in Effects Mode x Nikon D5600 For Dummies
13 Creating a Dust Reference File Printing Directly from the Camera Presenting a Slide Show APPENDIX: INTRO TO NIKON SNAPBRIDGE What Can I Do with SnapBridge? Setting Up the Camera for SnapBridge Connecting to Your Smart Device Taking a Look at SnapBridge Functions Connect tab Gallery tab Camera tab Other tab INDEX Table of Contents xi
14
15 Introduction Nikon. The name has been associated with top-flight photography equipment for generations, and the D5600 only enriches that reputation, offering terrific features for capturing both still photos and high-definition digital movies. But the fun doesn t stop after the shoot: On top of everything else, the D5600 enables you to transfer photos wirelessly to certain smartphones and tablets so that you can instantly share images online. You can even use your smart device as a wireless remote control. In fact, the D5600 offers so many features that sorting them all out can be more than a little confusing. And therein lies the point of Nikon D5600 For Dummies: With the help of this book, you can take full advantage of everything the camera has to offer, even if you re brand new to photography. About This Book Unlike many photography books, this one doesn t require any previous knowledge of photography or digital imaging to make sense of things. In classic For Dummies style, everything is explained in easy-to-understand language, with lots of illustrations to help clear up any confusion. However, even if you have some photography experience or quite a bit of experience, for that matter this book has plenty to offer. I provide detailed information about all the camera s advanced exposure, focus, and color controls, explaining not just what each feature does but why and how to put it to best use. In short, what you have in your hands is the paperback version of an in-depth photography workshop tailored specifically to your Nikon picture-taking powerhouse. Introduction 1
16 How This Book Is Organized This book is organized into four parts, each devoted to a different aspect of using your camera. Although chapters flow in a sequence that s designed to take you from absolute beginner to experienced user, I ve also made each chapter as selfstanding as possible so that you can explore the topics that interest you in any order you please. Here s a brief preview of what you can find in each part of the book: Part 1: Fast Track to Super Snaps: Part 1 contains two chapters to help you get up and running. Chapter 1 guides you through initial camera setup, shows you how to view and adjust camera settings, and walks you through the steps of taking your first pictures using the Auto exposure mode. Chapter 2 introduces you to other exposure modes and explains basic picture options such as Release mode, Image Size (resolution), and Image Quality (JPEG or Raw). The end of Chapter 2 provides information on using flash. Part 2: Taking Creative Control: Chapters in this part help you unleash the full power of your camera by detailing the advanced shooting modes (P, S, A, and M). Chapter 3 covers the critical topic of exposure; Chapter 4 explains how to manipulate focus; and Chapter 5 discusses color controls. Chapter 6 summarizes techniques explained in earlier chapters, providing a quickreference guide to the camera settings and shooting strategies that produce the best results for portraits, action shots, landscape scenes, and close-ups. Chapter 7 shifts gears, moving from still photography to HD movie recording. Part 3: After the Shot: Chapter 8 explains picture playback features and how to connect your camera to a TV for large-screen playback. Chapter 9 topics include rating, deleting, and protecting photos, downloading images to your computer, processing Raw files, and resizing pictures for online sharing. Part 4: The Part of Tens: In famous For Dummies tradition, this book concludes with two top-ten lists containing additional bits of information and advice. Chapter 10 details options for customizing your camera. Chapter 11 covers the tools found on the camera s Retouch menu, shows you how to use the Effects exposure mode, and explains a few other features that may come in handy on occasion, such as creating a slide show featuring your best work. Appendix: Intro to Nikon SnapBridge: Nikon SnapBridge is an app you can install on certain Android and Apple ios smartphones and tablets. It s this app that enables you to use the camera s wireless functions to connect your D5600 to your smart device. After making the connection, you can transfer photos to the device for viewing or easy uploading to social media sites or online photo-storage sites. You also can use the smart device as a wireless remote control. Check out the appendix for an overview of these features. 2 Nikon D5600 For Dummies
17 Cheat sheet: When you have a minute or two, visit and enter the name of this book in the search box. You ll find a link to a cheat sheet, which provides a handy reference to your camera s buttons, controls, and exposure modes. Icons and Other Stuff to Note If this isn t your first For Dummies book, you may be familiar with the large, round icons that decorate its margins. If not, here s your very own icon-decoder ring: The Tip icon flags information that will save you time, effort, money, or some other valuable resource, including your sanity. Tips also point out techniques that help you get the best results from specific camera features. When you see this icon, look alive. It indicates a potential danger zone that can result in much wailing and teeth-gnashing if ignored. In other words, this is stuff that you really don t want to learn the hard way. Lots of information in this book is of a technical nature digital photography is a technical animal, after all. But when I present a detail that is useful mainly for impressing your tech-geek friends, I mark it with this icon. I apply this icon either to introduce information that is especially worth storing in your brain s long-term memory or to remind you of a fact that may have been displaced from that memory by another pressing fact. Additionally, replicas of some of your camera s buttons and onscreen graphics appear in the margins and in some tables. I include these images to provide quick reminders of the appearance of the button or option being discussed. Where to Go from Here To wrap up this preamble, I want to stress that if you initially think that digital photography is too confusing or too technical for you, you re in very good company. Everyone finds this stuff mind-boggling at first. So take it slowly, experimenting with just one or two new camera settings or techniques at first. Then every time you go on a photo outing, make it a point to add one or two more shooting skills to your repertoire. Introduction 3
18 I know it s hard to believe when you re just starting out, but it really won t be long before everything starts to come together. With some time, patience, and practice, you ll soon wield your camera like a pro, dialing in the necessary settings to capture your creative vision almost instinctively. So without further ado, I invite you to grab your camera, a cup of whatever it is you prefer to sip while you read, and start exploring the rest of this book. Your D5600 is the perfect partner for your photographic journey, and I m grateful for the opportunity to act as your tour guide. 4 Nikon D5600 For Dummies

19 1Fast Track to Super Snaps
20 IN THIS PART... Familiarize yourself with the basics of using your camera, from attaching lenses to navigating menus. Get step-by-step help with shooting your first pictures in Auto mode. Find out how to select the exposure mode, Release mode, Image Size (resolution), and Image Quality (JPEG or Raw file type). Discover options available for flash photography.

21 IN THIS CHAPTER Preparing the camera for its first outing Getting acquainted with the touchscreen and other camera features Viewing and adjusting camera settings Setting a few basic preferences Taking a picture in Auto mode Chapter 1 First Steps, First Shots Shooting for the first time with a camera as sophisticated as the Nikon D5600 can produce a blend of excitement and anxiety. On one hand, you can t wait to start using your new equipment, but on the other, you re a little intimidated by all its buttons, dials, and menu options. Well, fear not: This chapter provides the information you need to start getting comfortable with your D5600. The first section walks you through initial camera setup; following that, you can discover how to view and adjust picture settings and get my take on additional setup options. At the end of the chapter, I explain how to take pictures using Auto mode, which offers point-and-shoot simplicity until you re ready for more advanced options. Preparing the Camera for Initial Use After unpacking your camera, you have to assemble a few parts. In addition to the camera body and the supplied battery (be sure to charge it before the first use), you need a lens and a memory card. Later sections in this chapter provide details CHAPTER 1 First Steps, First Shots 7

22 about working with lenses and memory cards, but here s what you need to know up front: Lens: You can mount a wide range of lenses on your D5600, but some aren t compatible with all camera features. For example, to enjoy autofocusing, you need an AF-P or AF-S lens. (The 18 55mm lens featured in this book and sold in a kit with the D5600 body is an AF-P lens.) The camera s instruction manual offers details about lens compatibility. (The full manual is available online at the Nikon Download Center.) The AF in AF-S and AF-P stands for autofocus. The S in AF-S stands for a silent wave focusing motor; the P refers to an autofocusing technology known as a stepping motor. Both are designed to deliver faster and quieter autofocusing. How you implement autofocusing differs between the two types, however. Read more about this issue later in this chapter, in the section Familiarizing Yourself with the Lens. SD (Secure Digital) memory card: Your camera accepts only this type of card. Most SD cards carry the designation SDHC (for High Capacity) or SDXC (for extended Capacity), depending on how many gigabytes (GB) of data they hold. SDHC cards hold from 4GB to 32GB of data; the SDXC moniker is assigned to cards with capacities greater than 32GB. With camera, lens, battery, and card within reach, take these steps: 1. Turn the camera off. 2. Install the battery into the compartment on the bottom of the camera. 3. Attach a lens. First, remove the caps that cover the front of the camera and the back of the lens. Then align the mounting index (white dot) on the lens with the one on the camera body, as shown in Figure 1-1. After placing the lens on the camera mount, rotate the lens toward the shutter-button side of the camera. You should feel a solid click as the lens locks into place. FIGURE 1-1: Align the white dot on the lens with the one on the camera body. 8 PART 1 Fast Track to Super Snaps


23 4. Insert a memory card. Open the card-slot cover on the right side of the camera and orient the card as shown in Figure 1-2 (the label faces the back of the camera). Push the card gently into the slot and close the cover. The memorycard access light, labeled in the figure, illuminates briefly to let you know that the camera recognizes the card. 5. Rotate the monitor to the desired viewing position. When you first take the camera out of its box, the monitor is positioned with the screen facing inward, protecting it from scratches and smudges. Gently lift the right side of the monitor up and away from the camera back. You can then FIGURE 1-2: Insert the memory card with the label facing the back of the camera. rotate the monitor to move it into the traditional position on the camera back, as shown on the left in Figure 1-3, or swing the monitor out to get a different viewing angle, as shown on the right. FIGURE 1-3: Here are just two possible monitor positions. 6. Turn on the camera. 7. Set the language, time zone, and date. When you power up the camera for the first time, you can t do anything until you take this step. CHAPTER 1 First Steps, First Shots 9

24 The easiest way to adjust the settings is to use the touchscreen, which is enabled by default. To select an option or display a menu of settings, just tap it on the screen, just as you do with any touchscreen device. If you see an OK symbol in the lower-right corner of the screen, tap it to finalize your selection and return to the previous screen. To exit a screen without making changes, tap the exit arrow shown in the upper-right corner of the screen. If you prefer, you also can use the Multi Selector and OK button, labeled in Figure 1-3, to navigate menus. You can find more details about using the touchscreen and other ways to adjust settings later in this chapter. 8. Adjust the viewfinder to your eyesight. This step is critical; if you don t set the viewfinder to your eyesight, subjects that appear out of focus in the viewfinder might actually be in focus, and vice versa. If you wear glasses while shooting, adjust the viewfinder with your glasses on. You set viewfinder focus by rotating the adjustment dial labeled in Figure 1-4. After taking off the lens cap and making sure that the camera is turned on, look through the viewfinder and press the shutter button halfway. In dim lighting, the flash may pop up. Ignore it for now and concentrate on the row of data that appears at the bottom of the viewfinder screen. Rotate the dial until that data appears sharpest. The markings in the center of the viewfinder, which relate to autofocusing, also become more or less sharp. Ignore the scene you see through the lens; that won t change because you re not actually focusing the camera. When you finish, press down on the flash unit to close it if necessary. 9. If using a retractable lens, unlock and extend the lens. FIGURE 1-4: Rotate this dial to set the viewfinder focus for your eyesight. The lens barrels of AF-P kit lenses, as well as some AF-S lenses, extend and retract. When you re not shooting, you can retract the lens so that it takes up less space in your camera bag. But before you can take a picture or even access most camera menu items, you must unlock and extend the lens. A message appears on the monitor to remind you of this step. To extend the lens, press the lens lock button, highlighted in Figure 1-5, while rotating the lens barrel toward the shutter-button side of the camera. To retract the lens, press the button while rotating the lens in the other direction. 10 PART 1 Fast Track to Super Snaps


25 FIGURE 1-5: If using a retractable lens, press the lens lock button while rotating the lens barrel to extend and retract the lens. That s all there is to it your camera is now ready to go. From here, my recommendation is that you keep reading this chapter to familiarize yourself with the main camera features and basic operation. But if you re anxious to take a picture right away, skip to the last section of the chapter, which guides you through the basic process. Just promise that at some point, you ll read the pages in between, because they do contain important information. Checking Out External Controls Scattered across your camera s exterior are numerous features that you use to change picture-taking settings, review your photos, and perform various other operations. In later chapters, I discuss all your camera s functions in detail and provide the exact steps to follow to access them. This section provides just a basic what s this thing do? guide to each control. (Don t worry about memorizing the button names; throughout the book, I show pictures of buttons in the page margins to help you know exactly which one to press.) Keep in mind, too, that you can adjust many settings by simply tapping the touchscreen, which is sometimes faster than fiddling with the camera buttons. I explain how to use the touchscreen later in this chapter. Topside controls Your virtual tour begins with the bird s-eye view shown in Figure 1-6. There are a number of features of note here: Shutter button/power switch: Okay, I m pretty sure you already figured out this combo button. But you may not be aware that you need to press the CHAPTER 1 First Steps, First Shots 11

26 shutter button in two stages: Press and hold the button halfway and wait for the camera to initiate exposure metering and, if you re using autofocusing, to set the focusing distance. Then press the button the rest of the way to take the picture. FIGURE 1-6: Rotate the Live View switch to shift from viewfinder to Live View photography. Mode dial: With this dial, you choose the exposure mode, which determines which picture-taking settings you can control. You get a number of automatic, beginner modes as well as four advanced modes (P, S, A, and M). Effects mode enables you to apply special effects as an image or movie is captured; the Scene setting accesses automatic modes designed for specific types of shots (portraits, landscapes, and so on). Chapter 2 introduces you to each exposure mode. Command dial: After you activate certain camera features, you rotate this dial, labeled in the figure, to select a setting. For example, to choose a shutter speed when shooting in shutter-priority (S) mode, you rotate the Command dial. 12 PART 1 Fast Track to Super Snaps
27 Exposure Compensation button: The main use of this button is to apply Exposure Compensation, which enables you to tweak autoexposure results when using some exposure modes. Hold the button down while rotating the Command dial to adjust the setting. Chapter 3 explains Exposure Compensation. Live View switch: Rotate this switch to turn Live View on and off. In Live View mode, the scene in front of the lens appears on the monitor, and you can t see anything through the viewfinder. You then can compose a photo using the monitor. For movie recording, you must use Live View; you can t shoot a movie using the viewfinder. The last section of this chapter introduces you to Live View photography; see Chapter 7 for help with movie making. Record button: After shifting to Live View mode, press this button to start recording a movie. Press it again to stop recording. AF-assist light: In dim lighting, this light turns on briefly to help the camera locate your focusing target. The light also comes on when you use red-eye reduction flash and the Self-Timer shutter-release mode, both covered in Chapter 2. Flash hot shoe: Hot shoe is photography-speak for a terminal that enables you to connect an external flash. On the D5600, the hot shoe also serves as a mount for the optional Nikon ME-1 and ME-W1 stereo microphones. Microphone: If you don t attach an external microphone, movie audio is recorded using the camera s built-in microphone. Speaker: When you play a movie, sound comes out of these holes. Focal plane indicator: If you need to know the exact distance between your subject and the camera, as you might if you need to photograph objects for scientific or legal documentation, the focal plane indicator is key. The mark indicates the plane at which light coming through the lens is focused onto the camera s image sensor. Basing your measurement on this mark produces a more accurate camera-to-subject distance than using the end of the lens or another external point on the camera body as your reference point. Back-of-the-body controls On the back of the camera, shown in Figure 1-7, you find the following features: Menu button: Press this button to access menus of camera options. See Navigating Menus, later in this chapter, for details. Viewfinder adjustment dial: Rotate this dial to adjust the viewfinder focus to your eyesight; see the first section of this chapter for details. CHAPTER 1 First Steps, First Shots 13

28 FIGURE 1-7: For quick access to primary picture settings, press the i button. Eye sensor: This window senses when you put your eye to the viewfinder and, in response, turns off the monitor to save battery power. Not working? Open the Setup menu and check the status of the item named Info Display Auto Off. The option should be set to On, as it is by default. If that s not the issue, you may simply need to press your eye closer to the viewfinder. Also, when you wear glasses, sometimes the sensor can t detect your eye. You do have the option of pressing the Info button, labeled in the figure, to turn the monitor on and off. Info button: When using the viewfinder to compose photos, press this button to display the Information screen, which shows key camera settings and various bits of information, such as the battery status. To turn off the screen, press Info again. 14 PART 1 Fast Track to Super Snaps
29 You also can display the screen by pressing the shutter button halfway and releasing it. In Live View mode, pressing the Info button changes the type and amount of data that appears on the preview. AE-L/AF-L button: During shooting, pressing this button initiates autoexposure lock (AE-L) and autofocus lock (AF-L). Chapter 3 explains autoexposure lock; Chapter 4 talks about autofocus lock. In playback mode, pressing the button locks the picture file hence the little key symbol that appears near the button so that it isn t erased if you use the picture-delete functions. See Chapter 9 for details. (The picture is erased if you format the memory card, however.) Playback button: Press this button to switch the camera to picture-review mode. Chapter 8 details playback features. i button: During shooting, pressing this button activates a control strip that enables quick access to certain picture settings. I provide details in the later section Adjusting Settings via the Control Strip. Press i again to exit the control strip. In Playback mode, pressing the button brings up a small menu that enables you to rate photos, edit them using the Retouch menu features, and tag them for later wireless transmission to a smartphone or tablet. I refer to the Playback menu as the i-button menu. Multi Selector/OK button: This dual-natured control plays a role in many camera functions. You press the outer edges of the Multi Selector left, right, up, or down to navigate camera menus and access certain other options. At the center of the control is the OK button, which you press to finalize a menu selection or another camera adjustment. In this book, the instruction Press the Multi Selector left means to press the left edge of the control. Press the Multi Selector right means to press the right edge, and so on. Delete button: Sporting a trash can icon, the universal symbol for delete, this button enables you to erase pictures from your memory card. Chapter 9 explains the steps. Zoom In and Zoom Out buttons: These buttons have several purposes, depending on what camera function you re using: Picture playback: In still-photo playback mode, pressing the Zoom In button magnifies the image; pressing Zoom Out reduces the magnification. After you display a photo at its normal magnification, you can press Zoom Out repeatedly to shift to thumbnails view, which displays multiple image previews at a time, and then to Calendar view, which simplifies the job of tracking down all pictures taken on a certain date. Pressing Zoom In cycles the display in the other direction. CHAPTER 1 First Steps, First Shots 15

30 Movie playback: Press Zoom In to increase audio volume; press Zoom Out to lower it. Live View mode: Pressing the Zoom In button magnifies the live preview so you can check focus more closely. Pressing Zoom Out reduces the magnification amount. (Chapter 4 details this feature.) Additionally, if you see a question mark symbol on a menu screen or other display, pressing the Zoom Out button displays a Help screen that contains information about the feature you re using. (Note the question mark symbol beneath the button.) Both buttons also come into play when you use certain other camera features, such as applying changes from the Retouch menu. Front-left features The front-left side of the camera, shown in Figure 1-8, sports these features: Flash button: In some exposure modes, pressing this button raises the built-in flash. In other modes, the camera controls whether flash is enabled. By holding the Flash button down and rotating the Command dial, you can adjust the Flash mode (Fill Flash, Red-Eye Reduction, and so on). In some exposure modes, you also can adjust the flash power by pressing the button while simultaneously pressing the Exposure Compensation button and rotating the Command dial. The little +/ symbol that appears below the Flash button the same symbol that s on the Exposure Compensation button is a reminder of the button s role in flash-power adjustment. Check out Chapter 2 for details on flash options. FIGURE 1-8: Press the Flash button to use the built-in flash in P, S, A, or M mode. 16 PART 1 Fast Track to Super Snaps
Nikon D7500. by Julie Adair King
 Nikon D7500 by Julie Adair King Nikon D7500 For Dummies Published by: John Wiley & Sons, Inc., 111 River Street, Hoboken, NJ 07030-5774, www.wiley.com Copyright 2018 by John Wiley & Sons, Inc., Hoboken,
Introduction to Photography
 Topic 5 - Basic DSLR Settings Learning Outcomes In this topic, you will learn about the functions of the buttons on the top, the side and the back of your camera. This will give you the platform to begin
Canon. EOS Rebel T 7i/800D. by Julie Adair King
 Canon EOS Rebel T 7i/800D by Julie Adair King Canon EOS Rebel T7i/800D For Dummies Published by: John Wiley & Sons, Inc., 111 River Street, Hoboken, NJ 07030-5774, www.wiley.com Copyright 2017 by John
In Chapters 4 and 6 I discussed the many options
 Chapter 7: The Custom Menu and the Setup Menu Figure 7-1. Icon for Custom Menu Highlighted In Chapters 4 and 6 I discussed the many options available to you in the Recording and Playback menu systems.
two using your LensbAby
 two Using Your Lensbaby 28 Lensbaby Exposure and the Lensbaby When you attach your Lensbaby to your camera for the first time, there are a few settings to review so that you can start taking photos as
Cloud Phone Systems. Andrew Moore. Making Everything Easier! Nextiva Special Edition. Learn:
 Making Everything Easier! Nextiva Special Edition Cloud Phone Systems Learn: What cloud phone systems are and how they can benefit your company About the many advantages a cloud phone system offers Features
SD Cards = Your Film. Always turn off your camera before removing! First thing, format your card (erases card)
") Core Concepts SD Cards = Your Film Always turn off your camera before removing! First thing, format your card (erases card) Formatting your card Menu Button Top Wheel To Wrench 1 Back Wheel to Format Card
Core Concepts SD Cards = Your Film Always turn off your camera before removing! First thing, format your card (erases card) Formatting your card Menu Button Top Wheel To Wrench 1 Back Wheel to Format Card
We ll go over a few simple tips for digital photographers.
 Jim West We ll go over a few simple tips for digital photographers. We ll spend a fair amount of time learning the basics of photography and how to use your camera beyond the basic full automatic mode.
Section Ⅱ The X-Pro1 CONTENTS 24
 Section Ⅱ The X-Pro1 24 The Hybrid Multi Viewfinder The Optical Viewfinder (OVF) The attraction of optical viewfinders is that they provide a clear optical image with sharp bright brackets superimposed
Taking Photographs The Basics
 STEP 3 STEP 5 Taking Photographs The Basics This section details the basic steps involved in taking photographs in User Set A. In this automatic, point-and-shoot mode, the majority of settings are controlled
Office 2016 For Seniors. by Faithe Wempen
 Office 2016 For Seniors by Faithe Wempen Office 2016 For Seniors For Dummies Published by: John Wiley & Sons, Inc., 111 River Street, Hoboken, NJ 07030-5774, www.wiley.com Copyright 2016 by John Wiley
Quick Setup Guide for MEC-5-FSL-D3200-N85 Iris Camera
 Quick Setup Guide for MEC-5-FSL-D3200-N85 Iris Camera Contents of the Camera Carry Case MEC-5-FSL-D3200-N85 Contents 1. Camera with macro lens 2. Illuminator 3. Camera Battery Charger 4. Zoom Lens 5. Cord/Accessory
Professional. Technical Guide Useful Features
 Professional Technical Guide Useful Features En Table of Contents Custom Controls 5 Custom Control Assignments... 6 Quick Menu Access... 10 Custom Folders... 12 Taking Pictures 15 White Balance Tips and
DVR 710HDv2 Digital Video Recorder
 DVR 710HDv2 Digital Video Recorder User Manual 2009-2011 Sakar International, Inc. All rights reserved. Windows and the Windows logo are registered trademarks of Microsoft Corporation. All other trademarks
Minolta DiMAGE E203 Small, Simple, and Versatile 2.0 Million Pixel,* 3X Zoom Digital Camera
 NPI Minolta DiMAGE E203 Small, Simple, and Versatile 2.0 Million Pixel,* 3X Zoom Digital Camera Minolta is pleased to introduce the DiMAGE E203, a compact digital camera with high-quality images, automated
Auto Flash Off Portrait Landscape Action
 Exposure Modes Turn the exposure mode dial to P, S, A, M or one of the symbols representing the auto modes. Auto The Auto mode is the simplest exposure mode available. The camera controls most of the settings,
Chapter 3-Camera Work
 Chapter 3-Camera Work The perfect camera? Make sure the camera you purchase works for you Is it the right size? Does it have the type of lens you need? What are the features that I want? What type of storage
615HD Digital Video Camera
 615HD Digital Video Camera User Manual 2009-2011 Sakar International, Inc. All rights reserved. Windows and the Windows logo are registered trademarks of Microsoft Corporation. All other trademarks are
Quick Start Guide. Take the Camera out of the Box 3 First Steps 4 Shooting and Playback 9 Installing ViewNX 2 13 Using ViewNX 2 15
 Quick Start Guide Take the Camera out of the Box 3 First Steps 4 Shooting and Playback 9 Installing ViewNX 2 13 Using ViewNX 2 15 En Thank you for purchasing a Nikon COOLPIX S8100 digital camera. This
Personalizing the EOS 1D Mark II with Custom and Personal Functions Part 1 Custom Functions Text copyright E.J. Peiker, all rights reserved
 Personalizing the EOS 1D Mark II with Custom and Personal Functions Part 1 Custom Functions Text copyright E.J. Peiker, all rights reserved Modern digital SLR s offer many ways to customize the performance
SP mm F/4-5.6 Di VC USD for Canon and Nikon (Model A005) SP mm F/4-5.6 Di USD for Sony (Model A005)
 SP mm F/4-5.6 Di USD for Sony (Model A005)") R SP 70-300mm F/4-5.6 Di VC USD for Canon and Nikon (Model A005) SP 70-300mm F/4-5.6 Di USD for Sony (Model A005) Thank you for purchasing the Tamron lens as the latest addition to your photographic equipment.
R SP 70-300mm F/4-5.6 Di VC USD for Canon and Nikon (Model A005) SP 70-300mm F/4-5.6 Di USD for Sony (Model A005) Thank you for purchasing the Tamron lens as the latest addition to your photographic equipment.
SP 90mm F/2.8 Di VC USD 1:1 Macro (Model F004)
") SP 90mm F/2.8 Di VC USD 1:1 Macro (Model F004) Thank you for purchasing the Tamron lens as the latest addition to your photographic equipment. Before using your new lens, please read the contents of this
SP 90mm F/2.8 Di VC USD 1:1 Macro (Model F004) Thank you for purchasing the Tamron lens as the latest addition to your photographic equipment. Before using your new lens, please read the contents of this
DVR 514 Digital Video Recorder
 DVR 514 Digital Video Recorder User Manual 2010 Sakar International, Inc. All rights reserved. Windows and the Windows logo are registered trademarks of Microsoft Corporation. All other trademarks are
ACKNOWLEDGEMENTS... 3 ABOUT THIS EBOOK... 4 YOUR RIGHTS VERSUS MINE... 4 PRINTING THE EBOOK... 5
 Table of Contents ACKNOWLEDGEMENTS... 3 ABOUT THIS EBOOK... 4 YOUR RIGHTS VERSUS MINE... 4 PRINTING THE EBOOK... 5 NOTE ON THE FIRST EDITION... 8 TABLE OF CONTENTS... 10 CONVENTIONS USED IN THIS EBOOK...
PHOTOGRAPHER S GUIDE TO THE FUJIFILM X10
 Index A AC adapter 306 Adobe RGB color space 255 Advanced Anti Blur setting 89, 90, 121 Advanced mode 83 AE/AF-Lock Button menu option 160, 249 AE/AF-Lock Mode menu option 160, 248 AEL/AFL button controlling
VIV-CV-1225V v2 Digital Camera Binoculars. Instruction Manual
 VIV-CV-1225V v2 Digital Camera Binoculars Instruction Manual 2009-2019 Sakar International, Inc. All rights reserved Windows and the Windows logo are registered trademarks of Microsoft Corporation. All
FinePix S
 USA FinePix S4800 16301535 Specifications Number of effective pixels Image sensor Storage media Lens Digital zoom Aperture 16.0 million pixels 1/2.3 - inch CCD with primary color filter, Internal memory
SP mm F/2.8 Di VC USD (Model A009)
") SP 70-200mm F/2.8 Di VC USD (Model A009) Thank you for purchasing the Tamron lens as the latest addition to your photographic equipment. Before using your new lens, please read the contents of this Owner
SP 70-200mm F/2.8 Di VC USD (Model A009) Thank you for purchasing the Tamron lens as the latest addition to your photographic equipment. Before using your new lens, please read the contents of this Owner
Operating Manual. (Version 3.5)
") Operating Manual (Version 3.5) Thank you for purchasing this PENTAX Digital Camera. This is the manual for PENTAX REMOTE Assistant 3 software for your Windows PC or Macintosh for enabling you to set and
Operating Manual (Version 3.5) Thank you for purchasing this PENTAX Digital Camera. This is the manual for PENTAX REMOTE Assistant 3 software for your Windows PC or Macintosh for enabling you to set and
DVR 949HD Digital Video Camera
 DVR 949HD Digital Video Camera User Manual 2009-2012 Sakar International, Inc. All rights reserved. Windows and the Windows logo are registered trademarks of Microsoft Corporation. All other trademarks
HP Photosmart M417/M517 Digital Camera with HP Instant Share. User s Manual
 HP Photosmart M417/M517 Digital Camera with HP Instant Share User s Manual Legal and notice information Copyright 2005 Hewlett-Packard Development Company, L.P. The information contained herein is subject
FinePix JX
 USA FinePix JX660 16291015 Specifications Number of effective pixels Image sensor 16.0 million pixels 1/2.3-inch CCD with primary color filter Storage media Internal memory (none), SD / SDHC memory card
28-300mm F/ XR Di VC LD Aspherical [IF] Macro (Model A020)
![28-300mm F/ XR Di VC LD Aspherical [IF] Macro (Model A020)](/thumbs/82/86828397.jpg "28-300mm F/ XR Di VC LD Aspherical [IF] Macro (Model A020)") R 28-300mm F/3.5-6.3 XR Di VC LD Aspherical [IF] Macro (Model A020) Thank you for purchasing the Tamron lens as the latest addition to your photographic equipment. Before using your new lens, please read
R 28-300mm F/3.5-6.3 XR Di VC LD Aspherical [IF] Macro (Model A020) Thank you for purchasing the Tamron lens as the latest addition to your photographic equipment. Before using your new lens, please read
HP Photosmart M437/M537 Digital Camera. Quick Start Guide
 HP Photosmart M437/M537 Digital Camera Quick Start Guide www.hp.com/support Argentina (Buenos Aires) Argentina Brasil (São Paulo) Brasil Chile 54-11-4708-1600 0-800-555-5000 55-11-4004-7751 0-800-709-7751
388 Photographer s Guide to the Fujifilm X100S
 Index A AC adapter 371 Advanced Filter menu option 143 150 chart of comparison images 145 Dynamic Tone setting 149 High-key setting 148 incompatibility with other settings 143 list of available settings
TG 2 Black. Maximum toughness for extreme situations
 TG 2 Black Waterproof to 15m**, shockproof to 2.1m***, crushproof to 100kg**** and freezeproof to 10 C 4x wide optical zoom (25 100mm*) ihs Technology TruePic VI image processor 1:2.0 4.9 wide aperture
DVR 584HD Digital Camcorder
 DVR 584HD Digital Camcorder User Manual 2009-2012 Sakar International, Inc. All rights reserved. Windows and the Windows logo are registered trademarks of Microsoft Corporation. All other trademarks are
hp photosmart 730 series digital camera
 hp photosmart 730 series digital camera user's manual user's manual Trademark and copyright information Copyright 2003 Hewlett-Packard Company All rights are reserved. No part of this document may be
App for a Smartphone or Tablet Terminal EXILIM Connect 3.0
 App for a Smartphone or Tablet Terminal EXILIM Connect 3.0 User s Guide EN This manual uses a typical CASIO camera and smartphone for explanations. Certain details (display contents, etc.) may differ on
7 Windows Tweaks. A Comprehensive Guide to Customizing, Increasing Performance, and Securing Microsoft Windows 7. Steve Sinchak
 Take control of Windows 7 Unlock hidden settings Rev up your network Disable features you hate, for good Fine-tune User Account control Turbocharge online speed Master the taskbar and start button Customize
App for a Smartphone or Tablet Terminal EXILIM Remote 3.0
 App for a Smartphone or Tablet Terminal EXILIM Remote 3.0 User s Guide EN This manual uses a typical CASIO camera and smartphone for explanations. Certain details (display contents, etc.) may differ on
Table of contents Introduction Getting Started Taking still images or videos
 User Manual Table of contents Introduction Features............................................1 Package contents.....................................2 Camera overview.....................................2
Contents. Contents. Perfecting people shots Making your camera a friend.5. Beyond point and shoot Snapping to the next level...
 Contents 1 Making your camera a friend.5 What are the options?... 6 Ready for action: know your buttons.8 Something from the menu?... 10 Staying focused... 12 Look, no hands... 13 Size matters... 14 Setting
Specifications. Image Capture Device. Lens. Viewfinders
 Specifications Type Compact digital still camera with built-in flash, 20x Optical, 4x Digital and 80x Combined Zoom with Optical Image Stabilizer Image Capture Device Type 12.1 Megapixel, 1/2.3-inch CMOS
Specifications CAMEDIA C-8080 WIDE ZOOM
 Specifications CAMEDIA C-8080 WIDE ZOOM Model Type CAMEDIA C-8080 WIDE ZOOM Digital camera with 4.5 cm/1.8 inch sunshine colour TFT LCD monitor. Image sensor Image sensor 2/3 inch CCD solid-state image
DVR 505 Digital Camcorder
 DVR 505 Digital Camcorder User Manual 2016 Sakar International, Inc. All rights reserved. Windows and the Windows logo are registered trademarks of Microsoft Corporation. All other trademarks are the property
DVR 528 Digital Video Camera
 DVR 528 Digital Video Camera User Manual 2010 Sakar International, Inc. All rights reserved. Windows and the Windows logo are registered trademarks of Microsoft Corporation. All other trademarks are the
Guide to the SONY HXR-NX5U Videocamera Adapted from the SONY camera/hard disk manuals, and OHM Media Lab Guide January 6, 2011
 Guide to the SONY HXR-NX5U Videocamera Adapted from the SONY camera/hard disk manuals, and OHM Media Lab Guide January 6, 2011 This camera can record on SDHC memory cards. This guide is for HD shooting;
Using DSLR for Video
 Using DSLR for Video Is your DSLR the right tool? Shooting objects moving towards or away from the camera is not well suited for DSLR use, and would be best shot with video camera. This is because Auto
Best Canon Lens For Hd Video 7d General Purpose
 Best Canon Lens For Hd Video 7d General Purpose It is good for video AF in later Canon Rebel models and is considerably wider than the 50mm lens above, which makes it a great little all purpose lens to
E-510. Built-in image stabiliser Excellent dust reduction system 6.4cm / 2.5'' HyperCrystal LCD New image processing engine
 E-510 Built-in image stabiliser Excellent dust reduction system 6.4cm / 2.5'' HyperCrystal LCD New image processing engine Live View 10 Megapixel Live MOS sensor Professional functions Compact and ergonomic
SP AF 17-50mm F/2.8 XR Di-II VC LD Aspherical [IF] (Model B005)
![SP AF 17-50mm F/2.8 XR Di-II VC LD Aspherical [IF] (Model B005)](/thumbs/72/66333745.jpg "SP AF 17-50mm F/2.8 XR Di-II VC LD Aspherical [IF] (Model B005)") SP AF 17-50mm F/2.8 XR Di-II VC LD Aspherical [IF] (Model B005) Thank you for purchasing the Tamron lens as the latest addition to your photographic equipment. Before using your new lens, please read the
SP AF 17-50mm F/2.8 XR Di-II VC LD Aspherical [IF] (Model B005) Thank you for purchasing the Tamron lens as the latest addition to your photographic equipment. Before using your new lens, please read the
New Features Guide. Version 3.30 BL
 New Features Guide Version 3.30 Features added or changed as a result of firmware updates may no longer match the descriptions in the documentation supplied with this product. Visit our website for information
Quick Start Guide. Follow these steps for a quick start with your camera. Attach the strap. Charge the battery. Insert the battery.
 1 cv Table of Contents Quick Start Guide... 3 Copying Pictures to a Computer... 8 ViewNX... 12 Buttons and Dials... 13 The Quick Settings Display... 16 The Command Dials... 18 Release Mode... 23 Using
New Features Guide. Version 1.10 BL
 New Features Guide Version 1.10 Features added or changed as a result of firmware updates may no longer match the descriptions in the documentation supplied with this product. Visit our website for information
DVR 808HD Digital Camcorder
 DVR 808HD Digital Camcorder User Manual 2009-2016 Sakar International, Inc. All rights reserved. Windows and the Windows logo are registered trademarks of Microsoft Corporation. All other trademarks are
EF180mm f/3.5l MACRO USM
 EF180mm f/3.5l MACRO USM ENG Instruction Thank you for purchasing a Canon product. The Canon EF180mm f/3.5l MACRO USM lens is a high-performance telephoto macro lens for EOS cameras that can be used for
Quick Start Guide for Shooting Video with the Panasonic GH4
 Quick Start Guide for Shooting Video with the Panasonic GH4 Two options for using this camera: Option 1: The simplest method is to use the C1 Preset that has been entered into the camera. Option 2: Put
User Manual V K Camera with an Integrated 3-axis Gimbal
 User Manual V 1.1 4K Camera with an Integrated 3-axis Gimbal Table of Contents Introduction 3 At a Glance 3 Charging the Battery 4 Status Battery LED Indicator Description 4 Check the Battery Level 5 Insert
Terrific Panasonic Tx L37g10b Service Manual
 Terrific Panasonic Tx L37g10b Service Manual Download: panasonic-tx-l37g10b-service-manual.pdf Read: panasonic tx l37g10b service manual Free access ebook for panasonic tx l37g10b service manual in rear
Digital Photography. University of Utah Student Computing Labs Macintosh Support
 Digital Photography Digital Photography University of Utah Student Computing Labs Macintosh Support mac@scl.utah.edu www.macos.utah.edu We Will Cover Features to look for in a digital camera Camera accessories
ViviCam X014N Digital Camera
 ViviCam X014N Digital Camera User Manual 2009-2011 Sakar International, Inc. All rights reserved. Windows and the Windows logo are registered trademarks of Microsoft Corporation. All other trademarks are
Getting Started. Using Camera. Select Camera. Detect Personal & Pet. Continuous AF. Album 7-1. Shoot photos or videos.
 Camera Getting Started Shoot photos or videos. Detect Personal & Pet Locks focus on the face of a person or pet. Register people's faces; related information appears in Viewfinder upon face detection.
LET S FOCUS ON FOCUSING
 LET S FOCUS ON FOCUSING How A Lens Works The distance between the center of the lens and the focal point is called the FOCAL LENGTH. Images are only sharp where the focal plane meets the focal point. To
1. Introduction P Package Contents 1.
 1 Contents 1. Introduction ------------------------------------------------------------------------------- P. 3-5 1.1 Package Contents 1.2 Tablet Overview 2. Using the Tablet for the first time ---------------------------------------------------
28056 Digital Camera
 28056 Digital Camera User Manual HASBRO and its logo and NERF are trademarks of Hasbro and are used with permission. 2012 Hasbro. All rights reserved. Windows and the Windows logo are registered trademarks
Autofocus Modes. The focus and exposure can then be adjusted to fit that face no matter what portion of the picture it is in.
 Autofocus Modes Face detection The camera automatically detects the person s s face. The focus and exposure can then be adjusted to fit that face no matter what portion of the picture it is in. Multi-area
Just some thoughts about cameras. Please contact me if you have any questions.
 Just some thoughts about cameras Please contact me if you have any questions. leah.rachlis@asd20.org Every student will need to have a camera to use for Digital Photography Class. It does not need to be
ViviCam X029-10MP Digital Camera
 ViviCam X029-10MP Digital Camera User Manual 2009-2012 Sakar International, Inc. All rights reserved. Windows and the Windows logo are registered trademarks of Microsoft Corporation. All other trademarks
ViviCam S327 Digital Camera
 ViviCam S327 Digital Camera User Manual 2009-2012 Sakar International, Inc. All rights reserved. Windows and the Windows logo are registered trademarks of Microsoft Corporation. All other trademarks are
EF-S60mm f/2.8 MACRO USM COPY ENG. Instruction
 EF-S60mm f/2.8 MACRO USM ENG Instruction Thank you for purchasing a Canon product. The Canon EF-S60mm f/2.8 MACRO USM lens is a macro lens that can be used for normal photography and close-up pictures
 Basic Specifications Number of pixels Approximately 10.3 mega pixels (gross), Approximately 9.1 mega pixels (effective) Image Sensor 1/2.3 Super HAD CCD Processor BIONZ Scan System Interlace scan Total
New Features Guide. Version 2.00 BL
 New Features Guide Version 2.00 Features added or changed as a result of firmware updates may no longer match the descriptions in the documentation supplied with this product. Visit our website for information
2014 All Rights Reserved. Windows and the Windows logo are registered trademarks of Microsoft Corporation. All other trademarks are the property of
 2014 All Rights Reserved. Windows and the Windows logo are registered trademarks of Microsoft Corporation. All other trademarks are the property of their respective companies. 1 2 Thank you for purchasing
DVR 508NHD Digital Camcorder
 DVR 508NHD Digital Camcorder User Manual 2009-2012 Sakar International, Inc. All rights reserved. Windows and the Windows logo are registered trademarks of Microsoft Corporation. All other trademarks are
Press Release. Brilliant images and additional colour modes
 Press Release New Stylish Cyber-shot DSC-T30 Shoots Sharper Pictures with Sony s Double Anti-Blur Technology The camera offers a large 3-inch LCD screen and STAMINA that takes up to 420 shots Hong Kong,
DVR 548HD Digital Video Recorder
 DVR 548HD Digital Video Recorder User Manual 2009-2011 Sakar International, Inc. All rights reserved. Windows and the Windows logo are registered trademarks of Microsoft Corporation. All other trademarks
ViviCam S131 Digital Camera
 ViviCam S131 Digital Camera User Manual 2009-2012 Sakar International, Inc. All rights reserved. Windows and the Windows logo are registered trademarks of Microsoft Corporation. All other trademarks are
Please read this manual carefully before use and keep it for future reference. Please format your SD card first in our camera when you start to use
 1 Please read this manual carefully before use and keep it for future reference. Please format your SD card first in our camera when you start to use our camera, or format it in computer. Table of Content
Chapter 12-Close-Up and Macro Photography
 Chapter 12-Close-Up and Macro Photography Close-up images all taken with Hipstamatic on the iphone Close-up and Macro Examples All taken with close-up filter or reverse mount lens Macro Close-up Photography
Casio Releases Freestyle Digital Camera. Superb for Creating Portraits of Friends and Family
 NEWS RELEASE For Immediate Release Casio Releases Freestyle Digital Camera Superb for Creating Portraits of Friends and Family Rotating Monitor and Frame for Totally Flexible Shooting Style, Make-up Mode
5.2. Click these tabs to jump to the Table of Contents, Index or start of each chapter.
 5.2 Click this button to advance to the next page. Click this button to return to the previous page. (Since this is the starting page, the [Back] button cannot be used.) Click these tabs to jump to the,
CAMERAS. A new Camera for H1, H2 and H2F Photographers. Wide range of high performance lenses. Superior Viewfinder program.
 CAMERAS A new Camera for H1, H2 and H2F Photographers The H4X camera body is designed as an upgrade to the current H1, H2 and H2F camera users. It is based on the H4D camera body and it provides new features
The New 5.0 Megapixel DiMAGE G500
 The New 5.0 Megapixel DiMAGE G500 The new DiMAGE G500 is a responsive, easy-to-use digital camera that provides high-quality 5 megapixel images. In spite of the size of this stylish compact camera, the
STYLUS flagship sets standard for high-end compacts. Olympus STYLUS XZ-2 takes category by storm Ultra-bright, ultra-easy and ultra-high quality
 PRESS INFORMATION STYLUS flagship sets standard for high-end compacts Olympus STYLUS XZ-2 takes category by storm Ultra-bright, ultra-easy and ultra-high quality Hamburg, 17 September 2012 The high-end
Panasonic DMC-TZ330. Claudio Di Veroli User Manual v.1.2 August ABRIDGED FUNCTIONS OF BUTTONS AND DIALS
 Panasonic DMC-TZ330 Claudio Di Veroli User Manual v.1.2 August 2016 1. ABRIDGED FUNCTIONS OF BUTTONS AND DIALS 2. BASIC INFORMATION AND PREPARATIONS 2 3 Arrows, Q.Menu, Menus 4 Colours in this Manual:
App for a Smartphone or Tablet Terminal EXILIM Connect 2.0
 App for a Smartphone or Tablet Terminal EXILIM Connect 2.0 User s Guide EN This manual uses a typical CASIO camera and smartphone for explanations. Certain details (display contents, etc.) may differ on
Movie Guide DIGITAL CAMERA. About This Guide
 DIGITAL CAMERA Movie Guide About This Guide This is a guide to movie-related features and how to configure them. Detailed information on such topics as taking photographs and camera specifications can
Using Your Digital Camera
 Using Your Digital Camera Presented by Tallahassee Senior Center Volunteer Instructor: Dr. Mike Francis Email: drmikef@comcast.net http://www.maf1.com/dcc 1 Digital Camera Topics for Everyone Camera Components
Moving to the Mac A GUIDE FOR NEW USERS OF MAC OS X. [Type here]
![Moving to the Mac A GUIDE FOR NEW USERS OF MAC OS X. [Type here]](/thumbs/90/103934001.jpg "Moving to the Mac A GUIDE FOR NEW USERS OF MAC OS X. [Type here]") [Type here] Moving to the Mac A GUIDE FOR NEW USERS OF MAC OS X This guide is aimed at those who are new to using Mac s. It assumes that you have prior knowledge of using a computer, probably a PC. The
[Type here] Moving to the Mac A GUIDE FOR NEW USERS OF MAC OS X This guide is aimed at those who are new to using Mac s. It assumes that you have prior knowledge of using a computer, probably a PC. The
ViviCam T026 Digital Camera
 ViviCam T026 Digital Camera User Manual 2010 Sakar International, Inc. All rights reserved. Windows and the Windows logo are registered trademarks of Microsoft Corporation. All other trademarks are the
New Features Guide. Version 4.20
 New Features Guide Version 4.20 Features added or changed as a result of firmware updates may no longer match the descriptions in the documentation supplied with this product. Visit our website for information
Press Release Sony Introduces New Cyber-shot Digital Cameras T Series with Industry s First Smile Shutter Mode Hong Kong, August 22, 2007
 Press Release Sony Introduces New Cyber-shot Digital Cameras T Series with Industry s First Smile Shutter Mode Sony s latest Cyber-shot T200 and T70 shoot photos automatically with smile shutter mode while
CAPTURE TOMORROW AUTOFOCUS GUIDE
 M I R R O R L E S S R E I N V E N T E D CAPTURE TOMORROW AUTOFOCUS GUIDE FOCUS MODES FOR Z 7 CAMERA Focus option Name Use for: How it works AF-S Single AF Stationary Subjects Press the shutter-release
1. Introduction P Package Contents 1.
 1 Contents 1. Introduction ------------------------------------------------------------------------------- P. 3-5 1.1 Package Contents 1.2 Tablet Overview 2. Using the Tablet for the first time ---------------------------------------------------
Compact digital still camera with built-in flash and 4.0x Optical/4.1x Digital/16x Combined Zoom
 Canon Powershot G6 Digital Camera Compact digital still camera with built-in flash and 4.0x Optical/4.1x Digital/16x Combined Zoom IMAGE CAPTURE DEVICE Type 1/1.8 inch type Charge-Coupled Device (CCD)
DVR 520 / 1.8 Digital Video Recorder
 DVR 520 / 1.8 Digital Video Recorder User Manual 2010 Sakar International, Inc. All rights reserved. Windows and the Windows logo are registered trademarks of Microsoft Corporation. All other trademarks
EOS REBEL T6i (W) EOS 750D (W)
 EOS 750D (W)") EOS REBEL T6i (W) EOS 750D (W) Wi-Fi/NFC Function Instruction Manual E INSTRUCTION MANUAL Introduction What You Can Do Using the Wireless LAN Functions This camera s wireless LAN functions let you perform
EOS REBEL T6i (W) EOS 750D (W) Wi-Fi/NFC Function Instruction Manual E INSTRUCTION MANUAL Introduction What You Can Do Using the Wireless LAN Functions This camera s wireless LAN functions let you perform
(and what the numbers mean)
") Using Neutral Density Filters (and what the numbers mean) What are ND filters Neutral grey filters that effectively reduce the amount of light entering the lens. On solid ND filters the light-stopping
Using Neutral Density Filters (and what the numbers mean) What are ND filters Neutral grey filters that effectively reduce the amount of light entering the lens. On solid ND filters the light-stopping
CAMERA-DC2 Digital Camera Instruction Manual
 CAMERA-DC2 Digital Camera Instruction Manual 80 Little Falls Road, Fairfield, NJ 07004 800.631.0868 www.hamiltonbuhl.com Read manual carefully before using the product and keep for future reference. 80