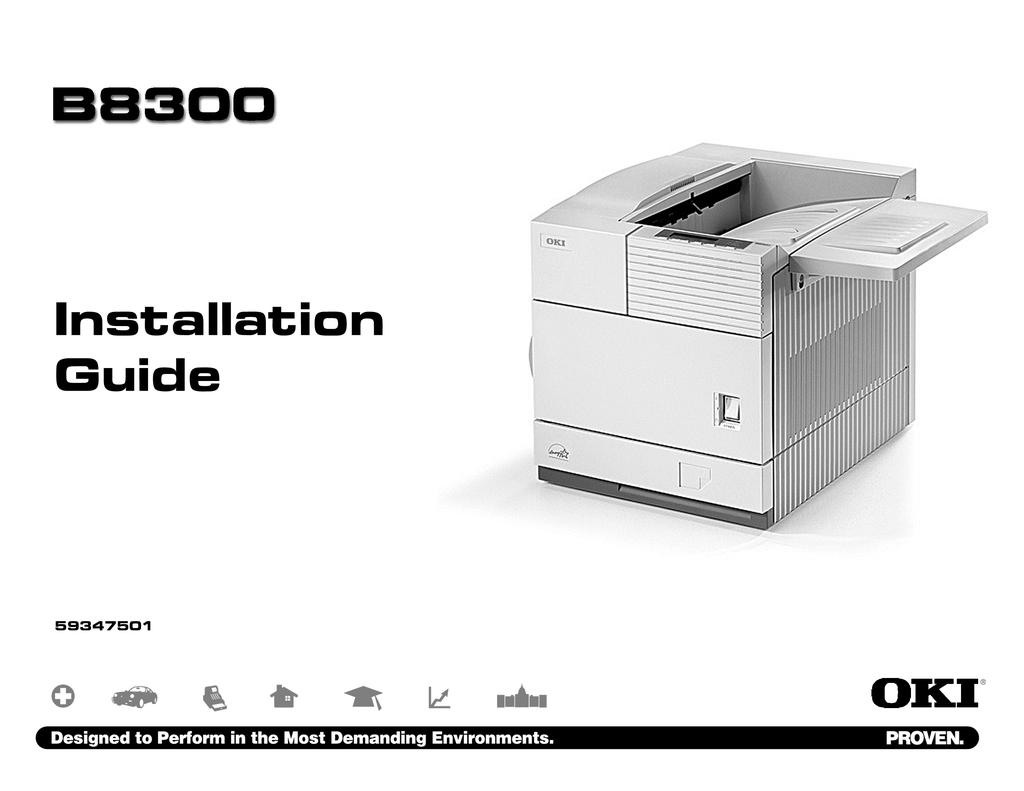
Installation Manual for B8300 and Its Peripheral Devices
|
|
|
- Vincent Dennis
- 5 years ago
- Views:
Transcription
1
2 Installation Manual for B8300 and Its Peripheral Devices Finishing device Duplex/bypass device Finishing device To install the devices efficiently, follow the procedure below. Some peripheral devices may have been installed as standard devies depending on the main unit model. Part of descriptions and illustrations may be different. Main unit Finishing device Main unit Start of installation Duplex device Paper feeding device Paper feeding device Main unit, paper feeding device, and power supply unit. B83MP / Power Suply Unit... (P. ) B83LT / Power Suply Unit... (P. 3) B83TT / Power Suply Unit... (P. 4) Main unit... (P. 5) Duplex/bypass device installed? Yes Install duplex/pypass device. B83D...(P. 7) B83DB...(P. 8) [Electrical setting/adjustment] ) Installation of driver software, setting, and operation check Main unit / B83H...(P. 3) No ) Paper guide position adjustment/off center adjustment Finishing device installed? No Yes Install finishing device. B83MB/Power Suply Unit... (P. 9) B83F/Power Suply Unit... (P. 0) B83SS... (P. ) B83THP / USP / FHP / FBP.(P. ) B83MP / B83LT / B83TT / B83D / B83DB...(P. 4 & 5) End Hard Disk : When installing a paper feeding device, an optional power supply unit or a duplex/bypass device, be sure to reattach the rear cabinet, the, and the harness cover of the main unit at the end of installation as needed. : When installing electrical devices, be sure to install them one at a time. 3: Only off center adjustment is needed for B83D.
3 B83MP Installation Manual When installing a finisher or a mail-bin stacker with B83MP, a power supply unit is needed. <Parts included> 3. Connect the main unit of the printer to the multi purpose drawer. <>Attach the two rear mounting plates using a supplied screw for each. Rear mounting plate 4. Connect the harness to the main unit of the printer. <> Remove the screw that fixes the harness cover of the main unit of the printer and then slide the harness cover up to remove it. * If another peripheral device must be installed, carry out the following step at the end of the installation work. 6. Adjust the position of the paper guides of the paper tray. <> To use the setting mode, insert the power plug of the main unit of the printer to the outlet and turn the main switch on while pressing the [MENU] key and the [OK] key of the operation panel of the main unit of the printer. Front mounting plates: pcs. Rear mounting plates: pcs. s (M4x8): 4 pcs. <> Press the [MENU] key several times to display "SIZE ADJUSTMENT A" and press the [OK] key.. Turn off the main switch of the main unit of the printer. Turn the main switch located on the front side of the main unit to the position. Then, remove the power plug of the main unit from the outlet.. Put the main unit of the printer on the multi purpose drawer. <> Pull out the paper tray of the main unit until it stops and then remove it by lifting both ends of the tray. Rear mounting plate Insert the mounting plate under the tray frame. Tray frame Mounting plate <> Pull out the multi purpose drawer until it stops and attach the two front mounting plates using a supplied screw for each. Then, remove the lock of the paper tray and close the tray. <> Connect the connector of the relay harness of the multi purpose drawer to CN0 (blue connector) of the PCU PWB of the main unit of the printer. CN0 * Cut out the harness cover as Connector <3> "MAXIMUM SIZE" is displayed. Pull out the paper tray and extend the paper guides to the maximum. Then, return the paper tray into the main unit and press the [OK] key. <4> "MINIMUM SIZE" is displayed. Pull out the paper tray again and narrow the paper guides to the minimum. Then, return the paper tray into the main unit and press the [OK] key. <5> Press the [BACK/CLEAR] key to exit the setting mode. If the setting above is not carried out, the paper detection function will not operate. Front mounting plate Rear guide For installation of a finisher or a mail-bin stacker, see its installation manual. <> Hold the main unit of the printer at the positions shown in the illustration and put the main unit on the multi purpose drawer so that the front side and the left side of the main unit are aligned to those of the multi purpose drawer. Front side Front mounting plate 5. Attach the harness cover. Reattach the harness cover to its original position and fix it with the removed screw. Paper guide 7. Carry out the off center adjustment. <3> Reattach the paper tray of the main unit of the printer. Rear side For installation of the main unit, it must be held by two persons and installed carefully. * Fix the harness securely to the wire saddle.
4 3 B83LT Installation Manual Start installation after checking that the DATA and COMMUNICATION indicators on the operation panel are neither lit nor blinking. For installation, a power supply unit is needed. <Parts included> Left adjuster: pc. Adjuster covers: 4 pcs. Front mounting plates: pcs.. Turn off the main switch of the main unit of the printer. Turn the main switch located on the front side of the printer to the position. Then remove the power plug from the outlet.. Attach the adjusters and adjust them. <> Insert the left adjusters to the stand/paper drawer. <> Turn each adjuster to lower it until it touches the floor. <3> Attach the four adjuster covers. Be sure to attach the left adjuster to prevent overturning. The lower tray cannot be pulled out unless the adjuster is lowered to the specified position. 3. Put the main unit of the printer on the stand/paper drawer. <> Pull out the paper tray of the main unit until it stops and then remove it by lifting both ends of the tray. Left paper guides: pcs. <> Hold the main unit of the printer at the positions shown in the illustration and put the main unit on the stand/paper drawer so that the front side and the left side of the main unit are aligned to those of the stand/paper drawer. 3 3 Rear mounting plates: pcs. s (M4x8): 4 pcs. Right paper guides: pcs. 3 Front side 3 4. Connect the main unit to the stand/paper drawer. <>Attach the two rear mounting plates using a supplied screw for each. Stand frame Rear mounting plate Insert the rear mounting plates under the Stand frame. <>Pull out the upper tray of the stand/paper drawer until it stops, and attach the two front mounting plates using a supplied screw for each. Then, remove the lock of the paper tray and close the tray. Front mounting plate <3> Reattach the paper tray of the main unit. 5. Remove the rear cabinet of the stand/paper drawer and remove the. <> Remove the four screws that fix the rear cabinet and then remove the rear cabinet. 6. Attach the power supply unit. Rear mounting plate Rear mounting plate Front mounting plate <> Remove the screw that fixes the and then remove the. <3> Cut out the as Attach the power supply unit to the brackets and secure it using the three supplied screws. Bracket 7. Connect the power supply unit harness to the PCU PWB of the main unit of the printer. <> Remove the screw that fixes the harness cover of the main unit of the printer and slide the harness cover up to remove it. Cut out the harness cover as <> Connect the optional power supply harness connector to CN (red connector) of the PCU PWB of the main unit of the printer. <3> Reattach the harness cover to its original position and fix it with the removed screw. At this time, ensure that the optional power supply harness are arranged as shown in the Fix the harness securely to the wire saddle. Optional power supply harness 8. Connect the relay harness of the stand/paper drawer to the power supply unit. Connect the relay harness of the stand/paper drawer to the connector of the power supply unit. Relay harness of the stand/paper drawer 9. Attach the rear cabinet of the stand/paper drawer. <> Pass the cord of the power supply unit through the hole of the rear cabinet and attach the rear cabinet to the stand/paper drawer. CN Connector Connector of the power supply connector <> Attach the to the rear cabinet of the stand/paper drawer and fix it with the removed screw. 0. Connect the AC cord of the power supply unit to the main unit of the printer. Connect the AC cord of the power supply unit to the inlet connector of the main unit of the printer at the location. Attach the paper guides to the lower tray. Remove the four screws for packing. (See the right ) Insert the left paper guides and right paper guides to the front and rear guide slots for the paper size to be used. (See the illustration below.) (For the AB system, set the guides to A4. For the inch system, set the guides to LT.) Left paper guides. Adjust the position of the paper guides of the upper paper tray of the stand/paper drawer. <> To use the setting mode, insert the power plug of the main unit of the printer to the outlet and turn the main switch on while pressing the [MENU] key and the [OK] key of the operation panel of the main unit of the printer. <> Press the [MENU] key several times to display "SIZE ADJUSTMENT A" and press the [OK] key. <3> "MAXIMUM SIZE" is displayed. Pull out the paper tray and extend the paper guides to the maximum. Then, return the paper tray into the unit and press the [OK] key. <4> "MINIMUM SIZE" is displayed. Pull out the paper tray again and narrow the paper guides to the minimum. Then, return the paper tray into the unit and press the [OK] key. (The rear guide need not be adjusted.) AC cord Right paper guides Paper guide * If another peripheral device must be installed, carry out the following step at the end of the installation work. Rear guide Rear side Bracket If the setting above is not carried out, the paper detection function will not operate. Paper guides For installation of the main unit, it must be held by two persons and installed carefully. s s Power supply unit 3. Carry out the off center adjustment.
5 4 B83TT Installation Manual Start installation after checking that the DATA and COMMUNICATION indicators on the operation panel are neither lit nor blinking. For installation, a power supply unit (AR-DC) is needed. 4. Connect the main unit to the stand/paper drawer. 6. Attach the power supply unit. Attach the two rear mounting plates using a supplied screw for each. Rear mounting plate Attach the power supply unit to the brackets and secure it using the three supplied screws. Bracket Bracket 9. Attach the rear cabinet of the stand/paper drawer. <> Pass the cord of the power supply unit through the hole of the rear cabinet and attach the rear cabinet to the stand/paper drawer. <> Attach the to the rear cabinet of the stand/paper drawer and fix it with the removed screw. <Parts included> Rear mounting plate Left adjuster: pc. Front mounting plates: pcs.. Turn off the main switch of the main unit of the printer. Turn the main switch located on the front side of the printer to the position. Then remove the power plug from the outlet.. Attach the adjusters and adjust them. <> Insert the left adjusters to the stand/paper drawer. <> Turn the five adjusters to lower them until they touch the floor. <3> Attach the four adjuster covers. Be sure to attach the left adjuster to prevent overturning. The lower tray cannot be pulled out unless the adjuster is lowered to the specified position. 3. Put the main unit of the printer on the stand/paper drawer. <> Pull out the paper tray of the main unit until it stops and then remove it by lifting both ends of the tray. <> Hold the main unit of the printer at the positions shown in the illustration and put the main unit on the stand/paper drawer so that the front side and the left side of the main unit are aligned to those of the stand/paper drawer. 3 4 Rear mounting plates: pcs. Adjuster covers: 4 pcs. s (M4x8): 4 pcs. Front side Rear side 3 3 Insert the rear mounting plates under the Stand frame. <>Pull out the upper tray of the stand/paper drawer until it stops, and attach the two front mounting plates using a supplied screw for each. Then, remove the lock of the paper tray and close the tray. Remove the locks of the middle tray and the lower tray similarly. Front mounting plate <3> Reattach the paper tray of the main unit. 5. Remove the rear cabinet of the stand/paper drawer and remove the. <> Remove the four screws that fix the rear cabinet and then remove the rear cabinet. Stand frame Mounting plate Front mounting plate <> Remove the screw that fixes the and then remove the. <3> Cut out the as s s Power supply unit 7. Connect the power supply unit harness to the PCU PWB of the main unit of the printer. <> Remove the screw that fixes the harness cover of the main unit of the printer and slide the harness cover up to remove it. Cut out the harness cover as <> Connect the optional power supply harness connector to CN (red connector) of the PCU PWB of the main unit of the printer. <3> Reattach the harness cover to its original position and fix it with the removed screw. At this time, ensure that the optional power supply unit harness is arranged as shown in the Fix the harness securely to the wire saddle. Optional power supply harness Connector 8. Connect the relay harness of the stand/paper drawer to the power supply unit. Connect the relay harness of the stand/paper drawer to the connector of the power supply unit. CN Connector of the power supply connector 0. Connect the AC cord of the power supply unit to the main unit of the printer. Connect the AC cord of the power supply unit to the inlet connector of the main unit of the printer at the location. Adjust the position of the paper guides of the upper paper tray of the stand/paper drawer. <> To use the setting mode, insert the power plug of the main unit of the printer to the outlet and turn the main switch on while pressing the [MENU] key and the [OK] key of the operation panel of the main unit of the printer. <> After pressing the [MENU] key several times to display "SIZE ADJUSTMENT A" in the message display and press the [OK] key. <3> "MAXIMUM SIZE" is displayed. Pull out the paper tray and extend the paper guides to the maximum. Then, return the paper tray into the unit and press the [OK] key. <4> "MINIMUM SIZE" is displayed. Pull out the paper tray again and narrow the paper guides to the minimum. Then, return the paper tray into the unit and press the [OK] key. (The rear guide need not be adjusted.) If the setting above is not carried out, the paper detection function will not operate. AC cord Paper guides 3. Carry out the off center adjustment. * If another peripheral device must be installed, carry out the following step at the end of the installation work. Rear guide For installation of the main unit, it must be held by two persons and installed carefully. Relay harness of the stand/paper drawer
6 5. Select an installation location. B8300 Digital Printer Main Unit Installation Manual Installation requirements Selection of installation location is important to the performance of the machine. Consider the following conditions. Environment () Avoid locations subject to direct sunlight as plastic parts may be deformed. () Avoid high temperature and high humidity locations or where temperatures change rapidly such as near a heater or air conditioner. Rapid changes can cause paper to be become damp and condensation to form within the machine resulting in misfeeds and deterioration of image quality.. Remove the main unit from the carton (requires two people) <> Remove the cushioning materials from the right and left of the front side. <3> Remove the packing tape from the paper tray, pull out the paper tray until it stops and remove it by tilting it upward. <> Remove the locking tape from the right and left sidesof the tray. Then, remove the top of the carton and lower the plastic bag covering the machine while the machine is still on the carton base. 4. Install the main unit. (Be sure to carry out this step after the paper feeding device has been connected to the main unit.) <> Remove the remainder of packing tape from the operation panel. <> Raise the lever of the left door to unlock it and open the left door. <3> Open the front cover. Standard conditions: Conditions most adequate for use of the machine Acceptable temperature and humidity range: 0%Å`85% Max. 60% at 35Åé Humidity Temperature One person must lift by the empty front tray pocket with the right hand and steady the machine with the left hand placed at the upper left of the machine. The other person must lift with the right hand by using the lifting recess in the rear of the machine and also steady the machine with the left hand as shown in the Front side <4> Rotate the developer unit lock lever down. (3) Avoid a dusty location and a location subject to vibration. If dust enters the machine, deterioration of image quality or a failure may occur. (4) Do not install the machine in a location that is not stable. Be sure to install the machine on a level surface to maintain proper functions. (5) Avoid poorly ventilated areas. (6) Avoid areas near combustibles or any ammonia present. Rear side Space around the machine Install the machine so that the rear side is at least 30 cm form any wall or other object to allow the machine cooling fan and ventilation to be effective. Allow sufficient space around the machine for operation and servicing. <5> Remove the protective covering from the toner/drum cartridge. Stand Ensure that the machine is leveled using a level or the like. If the machine is not placed on a level surface, the toner density control may not function properly, resulting in poor image quality. If the machine is not placed on a level surface, the toner density control may not function properly, resulting in bad influence on the quality. Grounding () Be sure that the machine is properly grounded. () Use a proper ground such as the grounding terminal on an outlet or according to local grounding requirements. Caution Removal of this machine and carrying it must be always performed by two persons. 3. Check the parts included. <> Check that the following items are included with this machine. Drum / Toner cartridge Developer cartridge CD-ROM Safety and Warranty information User Guide (may be on CD-ROM) <6> Shake the toner/drum cartridge horizontally approximately 5 times.
7 <7> Insert the toner/drum cartridge into the main unit. <> Remove the sealing tape from the developer cartridge in the direction indicated by the arrow. 5. Load paper. <> Pull out the paper tray. Gently pull out the paper tray until it stops. * If another peripheral device must be installed, carry out the following step at the end of the installation work. 6 <> Insert the power plug into an outlet. <8> Remove the drum protective paper in the direction indicated by the arrow. <3> Return the developer unit lock to its original position. <> Load paper into the tray. Do not exceed the maximum height line. (up to 500 sheets of OKI recommended paper can be loaded) Caution If the outlet is also used for lighting fixtures, the lighting fixtures may flicker. Use an outlet which is not connected to lighting fixtures. <3> Turn on the main switch of the main unit. Automatic level adjustment of toner density sensor will start and a message indicating [WARMING UP] will appear on the operation panel. After the level adjustment is complete, the ready indicator will light up. <4> Close the front cover. Gently close the cover. Caution While automatic adjustment of the toner density sensor is being done, do not turn the power to the machine off. This will cause improper adjustment. <9> Remove the supplied developer cartridge from the packing case and remove the protective materials A and B. 7. Check the printer operation A <0> Shake the developer cartridge horizontally approximately 5 times and insert it into the machine. B <5> Apply pressure to the fusing roller. Raise the right and left levers of the fusing unit in the direction indicated by the arrow. 6. Connecting the machine to a computer. <> Connect the machine to the computer When connecting to a parallel port: The parallel interface of this machine conforms to IEEE-STD Use a commercially available shielded type parallel interface cable conforming to the specifications of both the machine and the computer. The connector on this machine is a 36-pin Amphenol female connector. 8 For installation of printer drivers on the computer refer to the Operation manual (for printer operation and general information) supplied with the machine. After driver installation, execute a test print to ensure normal printing For the specifications of the connector on the computer, see the operation manual of the computer. <6> Close the left door. Parallel interface connector <> Remove the sealing tape from the toner/drum cartridge by pulling it in the direction indicated by the arrow. <7> Turn the lock pin a /4 turn and remove it while pressing down on the pressure plate. Remove the lock pin while holding down on the paper pressure plate and insert the paper tray into the main unit. TEL LINE
8 B83D Installation Manual 3. Attach the duplex module to the main unit of the printer. <> Hang the hooks located at the upper part of the duplex module on the openings of the left door of the main unit of the printer. Hook Hook <6> Reattach the harness cover to its original position and fix it with the removed screw. 7 Carry out the installation after checking that the DATA indicator on the operation panel is neither lit nor blinking. For installing B83D, an optional desk (multi purpose drawer, stand/3 x 500 sheet paper drawer or stand/mpd & 000 sheet drawer) must have been installed. Ensure that the front mounting plates and the rear mounting plates included with the optional stand/paper drawer are securely attached. Check that the left adjuster supplied with an optional stand/drawer has been attached. Parts included M4 s (M4x8) : pcs. <> Push the lower part of the duplex module to insert the positioning bosses securely into the main unit of the printer. <3> Tighten the two screws built in the duplex module. 4. Connect the harness to the main unit of the printer. <> Remove the screw that fixes the harness cover of the main unit of the printer and then slide the harness cover up to remove it. Positioning boss Duplex module Positioning boss Relay harness * If another peripheral device must be installed, carry out the following step at the end of the installation work. 5. Carry out the off center adjustment.. Turn off the main switch of the main unit of the printer. Turn the main switch located on the front side of the main unit of the printer to the position. Then, remove the power plug of the main unit of the printer from the outlet. <> Cut out the harness cover as. Remove the left side cover of the main unit of the printer. Unlock the lock release lever of the main unit of the printer and then pull out the left door. Slide the two upper covers up to remove them. Remove the lower cover by inserting a flat-blade screwdriver at three locations ( ) shown in the Then, close the left door. Top covers Left door <3> Connect the connector of the relay harness of the duplex module to the CN (white connector) of the PCU PWB of the main unit of the printer. <4> Insert the snap bands to the locations shown in the illustration and fix them. Relay harness connector Snap bands CN PCU PWB <5>Secure the earth harness using a supplied M4 screw. Lower cover Lock release lever M4 Ground harness
9 B83DB Installation Manual Carry out the installation after checking that the DATA indicator on the operation panel is neither lit nor blinking. For installing B83DB, an optional desk (multi purpose drawer, stand/3 x 500 sheet paper drawer or stand/mpd & 000 sheet drawer) must have been installed. Ensure that the front mounting plates and the rear mounting plates included with the optional stand/paper drawer are securely attached.. Turn off the main switch of the main unit of the printer. Turn the main switch located on the front side of the main unit of the printer to the position. Then, remove the power plug of the main unit of the printer from the outlet.. Remove the left side cover of the main unit of the printer. Unlock the lock release lever of the main unit of the printer and then pull out the left door. Slide the two upper covers up to remove them. Remove the lower cover by inserting a flat-blade screwdriver at three locations ( ) Then, close the left door. Top covers Lower cover Left door Lock release lever Parts included Exit tray M4 s : pcs. Check that the left adjuster supplied with an optional stand/drawer has been attached. 4. Connect the harness to the main unit of the printer. <> Remove the screw that fixes the harness cover of the main unit of the printer and then slide the harness cover up to remove it. <> Process the harness cover as <3> Connect the connector of the relay harness of the duplex module to the CN (white connector) of the PCU PWB of the main unit of the printer. <4> Insert the snap bands to the locations shown in the illustration and fix them. <5>Secure the earth harness using the supplied M4 screw. Relay harness connector Snap bands CN PCU PWB 5. Attach the exit tray. * If another peripheral device must be installed, carry out the following step at the end of the installation work. 6. Adjust the position of the paper guides of the bypass tray. <> To use the setting mode, insert the power plug of "ON" the main unit of the printer to the outlet and turn the main switch on while pressing the [MENU] key and the [OK] key of the operation panel of the main unit of the printer. <> After pressing the [MENU] key several times to display "SIZE ADJUSTMENT A" in the message display, press the [ ] key to display "SIZE ADJUSTMENT B" and press the [OK] key. <3> "MAXIMUM SIZE" is displayed. Since "MAXIMUM SIZE" is displayed with a number, press the [ ] key or the [ ] key to change the number so that the number is equal to the value of [MAX] written on the label( NOTE) and then press the [OK] key. <4> Since "P SIZE" is displayed with a number, press the [ ] key or the [ ] key to change the number so that the number is equal to the value of [P] written on the label( NOTE) and then press the [OK] key. <5> Since "P SIZE" is displayed with a number, press the [ ] key or the [ ] key to change the number so that the number is equal to the value of [P] written on the label( NOTE) and then press the [OK] key. <6> Since "MINIMUM SIZE" is displayed with a number, press the [ ] key or the [ ] key to change the number so that the number is equal to the value of [MIN] written on the label( NOTE) and then press the [OK] key. If the setting above is not carried out, the paper detection function will not operate Attach the duplex module to the main unit of the printer. <> Hang the hooks located at the upper part of the duplex module on the openings of the left door of the main unit of the printer. <> Push the lower part of the duplex module to insert the positioning bosses securely into the main unit of the printer. <3> Tighten the two screws built in the duplex module. Hook Positioning boss Duplex module Hook Positioning boss <6> Reattach the harness cover to its original position and fix it with the removed screw. Relay harness M4 Ground harness ( NOTE) Illustration of label sticking position (Back surface of the bypass tray extension) MAX Label P MIN 7. Carry out the off center adjustment. P
10 B83MB Installation Manual Start installation after checking that the DATA and COMMUNICATION indicators on the operation panel are neither lit nor blinking. For installation of B83MB, an optional stand/paper drawer (stand/mpd & 000 sheet paper drawer, stand/3 x 500 sheet paper drawer or multi purpose drawer) must have been installed. Also if a multi purpose drawer has been installed, a power supply unit is needed additionally. <Parts included> Tray: pc.. Turn off the main switch of the main unit of the printer. Turn the main switch located on the front side of the main unit to the position. Then, remove the power plug of the main unit from the outlet.. Remove the upper cabinet of the stand/paper drawer. <> Pull out the paper tray of the stand/paper drawer. Remove the four screws of the cabinet attached to the right side of the main unit of the printer and remove the cabinet. Mounting plates: pcs. s A (M4x8): 5 pcs. Cabinet B: pc. <3> Hold the grip of the mailbin stacker and place the mailbin stacker on the stand/paper drawer temporarily. Then, push the lower part to attach the mail-bin stacker by sliding it toward the exit tray of the main unit. At this time, align the mail-bin stacker with the exterior line of the stand/paper drawer. <4> Open the front cover of the mail-bin stacker and fix the stacker with three screws A at the positions shown in the Then, close the front cover and close the paper tray of the stand/paper drawer. A (Front side) A 4. Attach the tray. Grip Place. <5> Attach the mounting plates to the positions shown in the illustration and fix them with screws A. (Rear side) Mounting plate Stand frame Push. Grip s A Mounting plate Push. Insert the mounting plate under the desk frame. 6. Attach the power supply unit. Attach the power supply unit to the brackets and secure it using the supplied three screws. Bracket Ç Ç Ç ÇØïî <> Remove the screw that fixes the harness cover of the main unit of the printer and slide the harness cover up to remove it. <> Connect the power supply unit harness connector to CN (red connector) of the PCU PWB of the main unit of the printer. Bracket s Optional power supply unit 7. Connect the power supply unit harness to the PCU PWB of the main unit of the printer. CN Connector <> Remove the AC cord of the power supply unit from the inlet connector of the main unit of the printer. Remove the four screws that fix the rear cabinet and then remove the rear cabinet. 9. Arrange the harness of the mail-bin stacker. <> Pass the harness of the mail-bin stacker between the power supply unit and the frame of the stand/paper drawer and connect it to the connector of the power supply unit. <> Fit the snap band attached to the mail-bin stacker at the position shown in the illustration to fix the harness. 0. Attach the rear cabinet of the stand/paper drawer. <> Pass the AC cord of the power supply unit as shown in the illustration and fix the rear cabinet of the stand/paper drawer with the screws. (* Similar work for the multi purpose drawer) Snap band Mail-bin stacker harness Power supply unit connector (* Similar work for the multi purpose drawer) <> Attach the to the rear cabinet of the stand/paper drawer and fix it with the removed screw. 9 <> Mount screw B to the position shown in the 3. Attach the mail-bin stacker. <> Remove the paper exit actuator from the main unit of the printer. <> Raise the relay unit at the side of the mail-bin stacker. Do not press on the relay unit while it is raised. (Doing so may deform or damage the unit.) Relay unit B Actuator Tray Steps 5 and after are the procedure to be carried out when a multi purpose drawer has been installed. If a stand/mpd & 000 sheet paper drawer or a stand/3 x 500 sheet paper drawer has been installed, carry out steps 8 and after. 5. Process the attached to the rear cabinet of the stand/paper drawer. Remove the two screws that secure the rear cabinet and remove the rear cabinet. Remove the screw that fixes the and then remove the. Process the as Rear cabinet <3> Reattach the harness cover to its original position and fix it with the removed screw. At this time, ensure that the power supply unit harness is arranged as shown in the Fix the harness securely to the wire saddle. Optional power supply harnesses 8. Remove the and then remove the rear cabinet of the stand/paper drawer. <> Remove the screw that fixes the and then remove the AC inlet cover. (* Similar work for the multi purpose drawer). Connect the AC cord of the optional power supply unit to the main unit of the printer. <> Connect the AC cord of the power supply unit to the inlet connector of the main unit of the printer at the location AC cord (* Similar work for the multi purpose drawer) (* Similar work for the multi purpose drawer)
11 B83F Installation Manual <Parts included> Start installation after checking that the DATA and COMMUNICATION indicators on the operation panel are neither lit nor blinking. For installation of B83F, an optional stand/paper drawer (stand/mpd & 000 sheet paper drawer, stand/3 x 500 sheet paper drawer or multi purpose drawer) must have been installed. Also if a multi purpose drawer has been installed, a power supply unit is needed additionally. Tray : pc. s A (M4x8): 5 pcs. B: pc. Stapling position labels: sheets <3> Hold the grip of the finisher and place the finisher on the stand/paper drawer temporarily. Then, push the lower part to attach the finisher by sliding it toward the exit tray of the main unit. At this time, align the finisher with the exterior line of the stand/paper drawer. <4> Open the front cover of the finisher and fix the finisher with three screws A at the positions Then, close the front cover and close the paper tray of the stand/paper drawer. Grip <5> Attach the mounting plates to the positions shown in the illustration and fix them with screws A. Mounting plates Place. (Rear side) Push. Grip Push. Steps 6 and after are the procedure to be carried out when a multi purpose drawer has been installed. If a stand/mpd & 000 sheet paper drawer or a stand/3 x 500 sheet paper drawer has been installed, carry out steps 9 and after. 6. Process the attached to the rear cabinet of the stand/paper drawer. Remove the two screws that secure the rear cabinet and remove the rear cabinet. Remove the screw that fixes the and then remove the. Process the as Rear cabinet 0. Remove the and then remove the rear cabinet of the stand/paper drawer. <> Remove the screw that fixes the and then remove the AC inlet cover. <> Remove the AC cord of the power supply unit from the inlet connector of the main unit of the printer. Remove the four screws that fix the rear cabinet and then remove the rear cabinet. 0 Tray : pc.. Turn off the main switch of the main unit of the printer. Turn the main switch located on the front side of the main unit to the position. Then, remove the power plug of the main unit from the outlet.. Remove the upper cabinet of the stand/paper drawer. <> Pull out the tray of the stand/paper drawer. Remove the four screws attached to the right on the top of the stand/paper drawer and remove the cabinet. <> Mount screw B to the position shown in the Mounting plates: pcs. Cabinet Staple cartridge: pc. B s A (Front side) s A 4. Insert the staple cartridge. Stand frame s A Insert the mounting plate under the desk frame. <> Pull out the staple unit. <> Remove the sealing tape from the staple cartridge. <3> Insert the staple cartridge. <4> Slide the release lever to the left and return the staple unit. Mounting plate 7. Attach the power supply unit. <> Remove the screw that fixes the harness cover of the main unit of the printer and slide the harness cover up to remove it. Process the harness cover as s Attach the power supply unit to the brackets and secure it using the supplied three screws. Bracket Bracket s Optional power supply unit 8. Connect the power supply unit harness to the PCU PWB of the main unit of the printer. (* Similar work for the multi purpose drawer) 0. Arrange the harness of the finisher. <> Pass the harness of the finisher between the power supply unit and the frame of the stand/paper drawer and connect it to the connector of the power supply unit. <> Fit the snap band attached to the finisher at the position shown in the illustration to fix the harness.. Attach the rear cabinet of the stand/paper drawer. <> Pass the AC cord of the power supply unit as shown in the illustration and fix the rear cabinet of the stand/paper drawer with the screws. Finisher harness Snap band (* Similar work for the multi purpose drawer) Power supply unit connector <> Attach the to the rear cabinet of the stand/paper drawer and fix it with the removed screw. 3. Attach the finisher. <> Remove the paper exit actuator from the main unit of the printer. <> Raise the relay unit at the side of the finisher. Do not press on the relay unit while it is raised. (Doing so may deform or damage the unit.) Relay unit Actuator 5. Attach the trays. Attach tray and tray to the positions shown in the Tray Tray <> Connect the power supply unit harness connector to CN (red connector) of the PCU PWB of the main unit of the printer. <3> Reattach the harness cover to its original position and fix it with the removed screw. At this time, ensure that the power supply unit harness is arranged as shown in the Fix the harness securely to the wire saddle. CN Optional power supply harnesses Connector. Connect the AC cord of the optional power supply unit to the main unit of the printer. <> Connect the AC cord of the power supply unit to the inlet connector of the main unit of the printer at the location shown in the AC cord (* Similar work for the multi purpose drawer)
12 B83SS Installation Manual For installation of B83SS, an optional stand/paper drawer (stand/mpd & 000 sheet drawer or stand/3 x 500 sheet paper drawer) and a duplex module B83D must have been installed. Also a power supply unit is needed. <Parts included> Lock securing plate: pc. Plate R: pc. Stapling position labels: sheets Staple unit: pc. 4. Attach the grounding plate to the stand/paper drawer. Remove the two screws that fix the exterior of the stand/paper drawer. Then, attach the front mounting plate and the rear mounting plate to the stand/paper drawer using screws C (two for each). Exterior fixing screw s C Rear grounding plate 5. Install the staple unit to the finisher. <> Remove the two pieces of packing tape from the locations Packing tape Exterior fixing screw s C Front grounding plate <> Open the front cover of the finisher and insert the staple unit. <4> Cut out the two mounting holes for the connecting plate at the lower part of the stand/paper drawer in a similar way to step 3. <5> Attach the finisher connecting plate to the stand/paper drawer using two screws C. s C 8. Check and adjust the height of the finisher. Move the finisher toward the printer and check to see if the guide pin of the locking plate is inserted smoothly to the connecting hole of the finisher. If it is not inserted smoothly, use the following procedure to adjust the height. Stand/paper drawer Connecting plate Connecting hole Guide pin. If the guide pin of the lock securing plate is not aligned with the connecting hole of the finisher: <> Loosen the screw at the rear adjusting portion. Cap <4>If the gap becomes uniform, tighten the screws at the adjusting portions and reattach the caps and sub covers. Sub cover Cap Rear side at adjusting portion 9. Paste the stapling position labels. Paste the labels to the positions Sub cover Cap Height adjusting screw Front side at adjusting portion Front cover: pc. s A (M4x6): 6 pcs. Front grounding plate: pc. s B (M4x0): pcs. <> Remove the screw from the right side of the duplex module. Rear grounding plate: pc. s C (M4x8): 7 pcs. Connecting plate: pc. s D (M4x0 with rosette): pcs.. Turn off the main switch of the main unit of the printer. Turn the main switch located on the front side of the main unit to the position. Then remove the power plug of the main unit from the outlet.. Attach the lock securing plate to the duplex module. Packing tape 6. Attach the cover to the finisher. <> Attach the plate R to the position shown in the illustration and secure it using two screws A. <> Attach the front cover to the finisher, and secure the upper part using two screws B and the lower part using two screws A. s B Front cover <> Remove the cap using a flat-blade screwdriver or the like and adjust the height adjusting pin so that the guide pin is positioned to the center of the connecting hole of the finisher. <3> Loosen the screw at the front adjusting portion. <4> Adjust the height adjusting pin so that the exterior lines are aligned as <5> If the guide pin can be inserted smoothly, tighten the screws at the front and rear adjusting portions and mount the caps. Front side at adjusting portion Height adjusting screw Height adjusting screw at adjusting portion Exterior lines Front cover Cap Rear side 0. Remove the from the rear cabinet of the stand/paper drawer. Remove the screw that fixes the and then remove the.. Connect the finisher connector. <> Attach the lock securing plate to the duplex module using the screws C and D (one for each). D 3. Work the stand/paper drawer. Open the pawl of the left adjuster to both sides to unlock it that is located at the lower left of the stand/paper drawer and remove the left adjuster. Cut out the two mounting holes of the stand/paper drawer using a screwdriver or the like and remove burrs using a flat-blade screwdriver or the like. Left adjuster Pawl C Lock securing plate Mounting holes Mounting holes s A s A 7. Connect the finisher to the stand/paper drawer. <> Remove the cover from the finisher stand. <> Attach the connecting plate to the finisher using two screws A. <3> Reattach the cover to its original position. s A Cover Connecting plate Plate R Finisher stand Exterior lines. If the guide pin of the locking plate matches to the connecting hole of the finisher: <>Push the finisher into the main unit. <>If the gap between the main unit of the printer and the finisher is not uniform at the top and the bottom, remove the caps from the front side and the rear side of the finisher stand using a flatblade screwdriver or the like and remove the screw of the sub covers on the front side and the rear side to remove the sub covers. <3>Then, loosen the four screws at the adjusting portions indicated in the illustration and turn the height adjusting screws on the front side and the rear side so that the gap becomes uniform. Finisher stand Gap Gap <> Connect the finisher connector to the stand/paper drawer. <> Tighten the screw of the connector. Connector. Turn on the main switch of the main unit. Insert the power plug of the main unit to the outlet. Turn on the main switch of the main unit. "ON"
13 B83THP / USP / FHP / FBP Installation Manual Parts included For installation of B83THP / USP / FHP / FBP, a saddle stitch finisher B83SS must have been installed. <> Remove the four front cabinet securing screws, pull out the staple unit until it stops, then remove the pawl of the front cabinet in the direction indicated by the arrow and remove the front cabinet. <3> Remove the three screws that fix the rear cabinet and remove the rear cabinet. At this time, remove the relay harness through the opening of the rear cabinet. Pawl Staple unit s Front cabinet s 6. Connect the harness of the punch module to the PWB of the finisher. Remove the clamps that fix the harness, handle the wiring of harness A (purple) and harness B (orange), and fix them with the clamps. Harness B (orange) Harness A (purple) <4> Reattach the jam handling dial and close the front cover. 8. Reattach the front cover to the right front of the finisher. Attach the front cover using the screws A and B (two for each). Jam handling dial Front cover Harness A (purple): pc. (M4 x 6 with rosette) : pc.. Turn off the main switch of the main unit of the printer. Turn the main switch located on the front side of the main unit to the position. Then remove the power plug of the main unit from the outlet. Loosen the screw and remove the connector of the finisher. Dust box label: sheet Harness B (orange): pc.. Remove the front cover from the right front of the finisher. Remove the screws A and B (two for each) that secure the finisher front cover and remove the front cover. s B Front cover Hole punch position label: sheets s Connector <4> Remove the three rear cabinet securing screws, remove the pawl in the direction indicated by the arrow, and remove the rear cabinet. At this time, remove the relay harness through the opening of the rear cabinet. 4. Remove the top cover. <> Remove the four top cover securing screws and remove the top cover. Top cover s 5. Attach the punch module. Rear cabinet Opening for relay harness Relay harness <> Remove the four pawls from the top cover and separate the cover into the upper and lower portions. Reuse the upper portion. Pawl Top cover Pawl Pawl Clamps Harness B (orange) Clamps Harness A (purple) 7. Reattach the covers that have been removed. <> Hang the two pawls of the top cover and secure them using the two screws. <> Pass the relay harness to the rear cabinet and secure the rear cabinet using the three screws. <3> Remove the lock release lever that has been attached to the front cabinet. Reattach the front cabinet to its original position, push in the staple unit, and attach it using the two screws. Insert the protrusion (B) of the lock release lever that has been removed before to the hole (C) of the latch arm. After attaching it, move the lever to check that it moves smoothly. Pawl Top cover s B s A 9. Paste the dust box label to the top cover. Paste the supplied dust box label to the location indicated in the 0. Connect the connector to the stand/paper drawer and connect the AC cord of the power supply unit to the main unit of the printer. Connect the connector of the relay harness of the finisher to the stand/paper drawer and tighten the screws of the connector. AC cord 3. Remove the front cabinet and the rear cabinet from the finisher. <> Open the front door of the finisher and remove the jam handling dial. s A <> Insert the two bosses of the punch unit into the boss holes of the finisher and fix the punch module using three screws. (Note) For the screws, use a supplied screw and the two screws that have been removed in step 4. Boss hole Boss Boss hole Boss If the lever does not move smoothly, remove the lock release lever by releasing the pawl at the lower part of the lock release lever using a flatblade screwdriver or the like and then insert it again. Staple unit s Latch arm Opening for relay harness Relay harness Pawl (D) s Connector (C) Punch module Jam handling dial (with rosette) (supplied with this module) s Front cabinet Lock release lever (A) Projection (B)
14 B83HD Installation Manual Start installation after checking that the DATA and COMMUNICATION indicators on the operation panel are neither lit nor blinking. 3. Remove the control PWB unit. Remove the five screws that fix the control PWB unit to the main unit of the printer. Then, hold the two grips and pull out the printer control PWB unit to remove it from the main unit. s Grip (Example) MFP control PWB s Grip 5. Attach the control PWB. Attach the control PWB unit to the main unit of the printer and fix it using five screws. s 3 Parts included 4. Mount the HDD expansion PWB to the control PWB. (Example) MFP control PWB PWB fixing screws: 3 pcs.. Turn off the main switch of the main unit of the printer. Turn the main switch located on the front side of the main unit to the position. Then remove the power plug from the outlet.. Remove the cables connected to the control PWB unit. Remove all the cables connected to the control PWB unit of the main unit of the printer. In case of printer control PWB Grounding plate: pcs. screws: pcs. In case of MFP control PWB The procedure (shape of PWB) varies with the printer control PWB and the MFP control PWB. In case of printer control PWB... <> Remove the screw at the position shown in the illustration among the screws that secure the hard disk to the HDD expansion PWB. <> Attach the supplied grounding plate to the HDD PWB as shown in the illustration and secure it using the screw that has been removed in step <>. <3> Remove the three screws shown in the illustration among the screws that fix the printer control PWB. <4> Mount supplied three PWB fixing screws to the positions from HDD expansion PWB which three screws have been removed. <5> Insert the HDD expansion PWB to the connector of the printer control PWB. <6> Fix the HDD expansion PWB to the PWB fixing screws using the three screws that have been removed in step. <7> Secure the grounding plate that has been attached to the HDD expansion PWB to the controller mounting plate using the supplied screw. In case of MFP control PWB... <> Remove the three screws HDD expansion PWB shown in the illustration among the screws that fix the MFP control PWB. <> Mount supplied three PWB fixing screws to the positions from which three screws have been removed. <3> Insert the HDD expansion PWB to the connector of the MFP control PWB. <4> Fix the HDD expansion PWB to the PWB fixing screws using the three screws that have been removed in step. 6. Connect the cables to the control PWB. Connect all the cables that have been removed in step to the original positions of the printer control PWB unit. In case of printer control PWB 7. Turn on the main switch of the main unit of the printer. Insert the power plug of the main unit of the printer to the outlet. Then, turn the main switch located on the front side of the main unit to the "ON" position. 8. Check the operation. "ON" In case of MFP control PWB * If another peripheral device must be installed, carry out the following step at the end of the installation work. "ON" For setting change of the printer drivers on the computer, see the supplied operation manual. Then, execute printing from the computer using the print hold function to check for proper printing.
15 4 Electrical Setting/ Adjustment/ Operation Check [] Installation of driver software, setting, and operation check Applied model: Main unit Carry out installation of driver software and check of printing <> Insert the power plug into an outlet. Caution If the outlet is also used for lighting fixtures, the lighting fixtures may flicker. Use an outlet which is not connected to lighting fixtures. <> Turn on the main switch of the main unit. Automatic level adjustment of toner density sensor will start and a message indicating [WARMING UP] will appear on the operation panel. After the level adjustment is complete, the ready indicator will light up. Caution While automatic adjustment of the toner density sensor is being done, do not turn the power to the machine off. This will cause improper adjustment. <3>Check the printer operation For installation of printer drivers on the computer refer to the Operation manual (for printer operation and general information) supplied with the machine. After driver installation, execute a test print to ensure normal printing. Applied model: B83HD Carry out installation of driver software and check of printing For setting change of the printer drivers on the computer, see the supplied operation manual. Then, execute printing from the computer using the print hold function to check for proper printing. [] Paper guide position adjustment and off center adjustment For Printer Models [Applied models] B83MP/ B83LT / B83TT/ B83D / B83DB Applied models: B83MP/ B83LT / B83TT Adjust the position of the paper guides of the paper tray of B83MP or the upper paper tray of stand/paper drawer B84LT / B83TT. <> To use the setting mode, insert the power plug of the main unit of the printer to the outlet and turn the main switch on while pressing the [MENU] key and the [OK] key of the operation panel of the main unit of the printer. <> Press the [MENU] key several times to display "SIZE ADJUSTMENT A" and press the [OK] key. <3> "MAXIMUM SIZE" is displayed. Pull out the paper tray and extend the paper guides to the maximum. Then, return the paper tray into the main unit and press the [OK] key. <4> "MINIMUM SIZE" is displayed. Pull out the paper tray again and narrow the paper guides to the minimum. Then, return the paper tray into the main unit and press the [OK] key. If the setting above is not carried out, the paper detection function will not operate. Paper guides Rear guide Applied model: B83DB Adjust the position of the paper guides of the bypass tray. <> To use the setting mode, insert the power plug of the main unit of the printer to the outlet and turn the main switch on while pressing the [MENU] key and the [OK] key of the operation panel of the main unit of the printer. <> After pressing the [MENU] key several times to display "SIZE ADJUSTMENT A" in the message display, press the [ ] key to display "SIZE ADJUSTMENT B" and press the [OK] key. <3> "MAXIMUM SIZE" is displayed. Since "MAXIMUM SIZE" is displayed with a number, press the [ ] key or the [ ] key to change the number so that the number is equal to the value of [MAX] written on the label ( NOTE) and then press the [OK] key. <4> Since "P SIZE" is displayed with a number, press the [ ] key or the [ ] key to change the number so that the number is equal to the value of [P] written on the label ( NOTE) and then press the [OK] key. <5> Since "P SIZE" is displayed with a number, press the [ ] key or the [ ] key to change the number so that the number is equal to the value of [P] written on the label ( NOTE) and then press the [OK] key. <6> Since "MINIMUM SIZE" is displayed with a number, press the [ ] key or the [ ] key to change the number so that the number is equal to the value of [MIN] written on the label ( NOTE) and then press the [OK] key. If the setting above is not carried out, the paper detection function will not operate. ( NOTE) Illustration of label sticking position (Back surface of the bypass tray extension) "ON" MAX P Label P MIN Then, carry out the off center adjustment.
KM-4800w. Installation Guide
 KM-4800w Installation Guide TABLE OF CONTENTS page 1 Installation Requirements 2 2 Unpacking 3 2. 1 Unpacking 3 2. 2 Confirmation of Accessories 5 3 Leveling the Machine 7 4 Setup of the Roll Deck 9 5
Main Menu. Menu II. UNPACKING AND SETUP II-5. RADF MR-3021/3022
 PRECAUTIONS UNPACKING ACCESSORIES SETUP CLEARANCE ADJUSTMENT OPERATION CHECK SKEW ADJUSTMENT LEADING EDGE POSITION ADJUSTMENT HORIZONTAL POSITION ADJUSTMENT COPY RATIO ADJUSTMENT There is no difference
Clearing paper jams. Identifying paper jam areas. Printing. Using color. Paper handling. Maintenance. Troubleshooting. Administration.
 By carefully selecting print media and loading them properly, you should be able to avoid most paper jams. If jams do occur, follow the steps outlined in this section. 1 To resolve the paper jam messages,
EPSON ActionLaser Read This First. eepa POLLUTION PREVENTER
 EPSON ActionLaser 1400 Read This First eepa POLLUTION PREVENTER This booklet is to help you set up your printer and begin printing quickly. It also gives you instructions for routine maintenance. If you
VJ-1618 INSTALLATION MANUAL
 Please read this manual before using Thank you for purchasing a MUTOH product. This manual explains the steps for unpacking, mounting and basic installation before using the MUTOH Full-color inkjet printer
VJ-1614 INSTALLATION MANUAL
 VJ-6 INSTALLATION MANUAL Please read this manual before using Thank you for purchasing a MUTOH product. This manual explains the steps for unpacking, mounting and basic installation before using the MUTOH
VJ-1604 INSTALLATION MANUAL
 Please read this manual before using Thank you for purchasing a MUTOH product. This manual explains the steps for unpacking, mounting and basic installation before using the MUTOH Full-color inkjet printer
Removal and Installation8
 8 Screw Types 8-4 Top Cover Assembly 8-5 Left Hand Cover 8-6 Right Hand Cover 8-10 Front Panel Assembly 8-14 Left Rear Cover 8-15 Right Rear Cover 8-16 Extension Cover (60" Model only) 8-17 Media Lever
INSTALLATION MANUAL. I. Outline of installation procedures. d-color MF201. Applied Machine: d-color MF201 PC-105. Machine DF-612
 d-color MF201 INSTALLATION MANUAL Be sure to correctly follow the procedures in order as explained in this installation manual. If you do not follow the procedure in order, the image trouble
Epson SureColor F6070 Setup Guide
 Epson SureColor F6070 Setup Guide 2 Unpacking and Assembling the Printer Read all of these instructions before using your printer. Also be sure to follow all warnings and instructions marked on the printer
MONARCH 9416 XL QUICK REFERENCE
 MONARCH 9416 XL QUICK REFERENCE This Quick Reference contains ribbon loading, supply loading, and general care, maintenance, and troubleshooting procedures for the 9416 XL Thermal Direct and 9416 XL Thermal
New Ricoh 1060 Copier. August 2004
 New Ricoh 1060 Copier August 2004 Step By Step Turn Main Power Switch ON Press operation switch to make ON indicator light up You may turn just the operation switch off at night DO NOT turn main power
AR-5015 N AR-5120 DIGITAL LASER COPIER OPERATION MANUAL GETTING STARTED MAKING COPIES STATUS INDICATORS GENERAL INFORMATION OPTIONAL EQUIPMENT MODEL
 MODEL AR-5015 N AR-5120 DIGITAL LASER COPIER OPERATION MANUAL GETTING STARTED MAKING COPIES STATUS INDICATORS GENERAL INFORMATION OPTIONAL EQUIPMENT Page 2 13 28 36 55 AR-5015 N AR-5120 CAUTIONS Follow
Contents. Cancel a Print Job... 25
 Contents Ordering Replacement Supplies....................................... 1 Network Configuration.............................................. 2 Operation Panel....................................................
User Guide. Set Up & Start Up Basic Copier Operations Key Operator Functions
 User Guide Set Up & Start Up Basic Copier Operations Key Operator Functions Toshiba America Business Solutions, Inc. 2006 Training and Dealer Development SET UP & START UP Turning the System On Turning
Rack Installation Instructions
 Rack Installation Instructions For System Storage EXP2512 and EXP2524 Express Storage Enclosures Use the instructions in this document to install an IBM System Storage EXP2512 Express Storage Enclosure
Assembly and Setup Manual
 M-12 Series Copyboard / C-12 Series Captureboard Assembly and Setup Manual This is the installation and assembly manual for the M-12 series Copyboard and C-12 series Captureboard. (The copyboard and/or
AR-163 DIGITAL COPYING MACHINE OPERATION MANUAL GETTING STARTED MAKING COPIES STATUS INDICATORS GENERAL INFORMATION OPTIONAL EQUIPMENT MODEL
 MODEL AR-63 DIGITAL COPYING MACHINE OPERATION MANUAL GETTING STARTED MAKING COPIES STATUS INDICATORS GENERAL INFORMATION OPTIONAL EQUIPMENT Page 3 8 35 53 CAUTIONS Follow the cautions below when using
ES1624 MFP Setup and Installation Guide
 ES1624 MFP Setup and Installation Guide Installation Overview Notes, Cautions, and Warnings...4 Select Location...4 Checking Package Contents...4 Scanning Unit... 4 Printing Unit... 4 Setting Up the Printing
Serial ATA Hot Swap Drive Cage Upgrade Kit for: Intel Server Chassis SC5200 Intel Server Chassis SC5250-E
 Serial ATA Hot Swap Drive Cage Upgrade Kit for: Intel Server Chassis SC5200 Intel Server Chassis SC5250-E A Guide for Technically Qualified Assemblers of Intel Identified Subassemblies/Products Order Number:
Assembly and Setup Manual
 M-11 Series Copyboard/C-11 Series Captureboard Assembly and Setup Manual This is the installation and assembly manual for the M-11 series/c-11 series. To the Customer Specialized techniques are required
AR-164 DIGITAL LASER COPIER/PRINTER OPERATION MANUAL
 MODEL AR-64 DIGITAL LASER COPIER/PRINTER OPERATION MANUAL GETTING STARTED MAKING COPIES SPECIAL FEATURES STATUS INDICATORS GENERAL INFORMATION OPTIONAL EQUIPMENT Page 3 8 38 46 65 FOR YOUR RECORDS... To
MX-8000 User Manual MX Rev
 MX-8000 Rev. 070202 Greeting Thank you for purchasing PAITEC USA products. This manual is prepared to provide guidelines on how to properly operate and maintain MX-8000. Copyright Any of the contents should
Fuser. Figure Remove the fuser assembly (1 of 2) 184 Chapter 5 Removal and replacement ENWW
 184 Chapter 5 Removal and replacement ENWW") Fuser 1. Remove the following assemblies. Scanner assembly. For the HP LaserJet 3015, see Scanner assembly. For the LaserJet 3020 and 3030, see Scanner assembly. Left cover. See Printer side covers. Rear
Fuser 1. Remove the following assemblies. Scanner assembly. For the HP LaserJet 3015, see Scanner assembly. For the LaserJet 3020 and 3030, see Scanner assembly. Left cover. See Printer side covers. Rear
To connect the AC adapter:
 Replacing the AC Adapter Replacing the AC Adapter 3 Plug the power cord into a wall outlet. The power indicator turns on. To connect the AC adapter: Connect the power cord to the AC adapter. Power indicator
MICROLINE 320/390FB User Manual (English)
") MICROLINE 320/390FB User Manual (English) MICROLINE 320/390FB User Manual (English) English Table of Contents Note to Customers... E-2 Important Safety Instructions... E-3 Important Wiring Instructions...
MICROLINE 320/390FB User Manual (English) MICROLINE 320/390FB User Manual (English) English Table of Contents Note to Customers... E-2 Important Safety Instructions... E-3 Important Wiring Instructions...
1. Front panel display. 2. Information button Some of the status messages that appear in the front panel are listed below:
 Front Panel s This topic includes: "Status s" on page 4-59 "Errors and Warnings" on page 4-60 Your printer s front panel provides you with information and troubleshooting help. When an error or warning
Loading paper and specialty media Learning about the printer. Stop all printer activity. 7 Back button Return to the previous screen.
 Quick Reference Use the 6 Stop or Cancel button To Stop all printer activity. Loading paper and specialty media Learning about the printer Using the printer control panel 0 Use the 9 To Display View the
IBM. Rack Installation Instructions
 IBM Rack Installation Instructions Review the documentation that comes with your rack cabinet for safety and cabling information. When installing your server in a rack cabinet, consider the following:
Moving your printer 1. Remove cables. Printing Moving the printer. Using color. Paper handling. 1 Turn the printer off. Maintenance.
 Moving the printer Moving your printer 1 If you re going to move the printer, you must remove the supplies and attached options to prevent damage to the printer. Use the following steps to remove the options
Table of Contents. Unpacking and Inspection Setup Loading the Media Mount the Printer on the Wall... 16
 WPL25/WHC25 Table of Contents Unpacking and Inspection... 1 Setup... 5 Loading the Media... 6 Mount the Printer on the Wall... 16 LED and Button Functions... 17 Troubleshooting... 18 Unpacking and Inspection
3.1 Removal Procedures Removing EF-102 from the Main Body Removing Parts from the Tray
 Contents 1 Introduction 1.1 Introduction... 1-2 1.2 Safety Precautions... 1-3 1.2.1 Notices for Safety... 1-3 1.2.2 Precautions When Replacing Units... 1-4 1.2.3 Caution Labels and Indicators... 1-6 2
Field Service Guide Supplement for the NS 7000/030
 AUSPEX Field Service Guide Supplement for the NS 7000/030 Copyright 1998, Auspex Systems, Inc. All rights reserved. Part number 850550. Important Notice The installation or replacement procedures in this
Contents-1. 1 Introduction. 2 Installing Fusing Unit EF Removing Fusing Unit EF Copy/Print Operation.
 Contents 1 Introduction 1.1 Introduction... 1-2 1.2 Safety Precautions... 1-3 1.2.1 Notices for Safety... 1-3 1.2.2 Precautions When Replacing Units... 1-4 1.2.3 Warning and Caution Labels... 1-6 2 Installing
AR-201 DIGITAL COPYING MACHINE OPERATION MANUAL GETTING STARTED MAKING COPIES STATUS INDICATORS GENERAL INFORMATION OPTIONAL EQUIPMENT MODEL
 MODEL AR-0 DIGITAL COPYING MACHINE OPERATION MANUAL GETTING STARTED MAKING COPIES STATUS INDICATORS GENERAL INFORMATION OPTIONAL EQUIPMENT Page 3 8 36 55 CAUTIONS Follow the cautions below when using this
Setup Guide. Confirming the Installation Space. Installation space (W x D x H) 70.5 x 66.3 x 61.5 inches (1790 x 1684 x 1560 mm) 23.
 70.5 x 66.3 x 61.5 inches (1790 x 1684 x 1560 mm) 23.") Introductory Information Setup Guide ENGLISH Read this manual before attempting to operate the printer. Keep this manual in a handy location for future reference. Caution Instructions in this Setup Guide
Introductory Information Setup Guide ENGLISH Read this manual before attempting to operate the printer. Keep this manual in a handy location for future reference. Caution Instructions in this Setup Guide
VJ-1624 INSTALLATION MANUAL
 VJ-6 INSTALLATION MANUAL Please read this manual before using Thank you for purchasing a MUTOH product. This manual explains the steps for unpacking, mounting and basic installation before using the MUTOH
Unpack the machine and its components. Cassette/Multi-purpose tray
 Set-Up Sheet Thank you for purchasing the Canon imageclass D320. To get your machine ready for use, please follow the instructions in this Set-Up Sheet before referring to any other documentation. Unpack
Copier Operations Guide
 Copier Operations Guide TeamWorks Copier Service Rockville, Maryland TeamWorks@mcpsmd.org 2 1. Exposure glass Place single-page originals here face down for copying. 2. Auto Document Feeder (ADF) The ADF
AL-1670 DIGITAL LASER COPIER/PRINTER COPIER OPERATION MANUAL GETTING STARTED MAKING COPIES SPECIAL FEATURES STATUS INDICATORS GENERAL INFORMATION
 MODEL AL-670 DIGITAL LASER COPIER/PRINTER COPIER OPERATION MANUAL GETTING STARTED MAKING COPIES SPECIAL FEATURES STATUS INDICATORS GENERAL INFORMATION Page 6 0 9 49 FOR YOUR PROTECTION... To aid in reporting
Rack Installation Instructions
 Rack Installation Instructions Review the documentation that comes with your rack cabinet for safety and cabling information. When installing your server in a rack cabinet, consider the following: v Two
POS TERMINAL MODEL UP ("V" version) SHARP CORPORATION CODE: 00ZUP5300VIME CONTENTS
 SHARP CORPORATION CODE: 00ZUP5300VIME CONTENTS") CODE: 00ZUP5300VIME POS TERMINAL MODEL UP-5300 ("V" version) CONTENTS 1. Removing the Rear display filter................................................1 2. Replacing the Rear display filter................................................1
CODE: 00ZUP5300VIME POS TERMINAL MODEL UP-5300 ("V" version) CONTENTS 1. Removing the Rear display filter................................................1 2. Replacing the Rear display filter................................................1
SERVICE MANUAL THEORY OF OPERATION PF Ver. 1.0
 SERVICE MANUAL THEORY OF OPERATION 2005.04 Ver. 1.0 After publication of this service manual, the parts and mechanism may be subject to change for improvement of their performance. Therefore, the descriptions
Liebert XDA Air Flow Enhancer. User Manual
 Liebert XDA Air Flow Enhancer User Manual Technical Support Site If you encounter any installation or operational issues with your product, check the pertinent section of this manual to see if the issue
Set-Up Instructions. Set-Up Instructions. Unpack the machine and its components.
 Set-Up Instructions Thank you for purchasing the Canon FAXPHONE L80. To get your machine ready for use, please follow the instructions in this document before referring to any other documentation. Unpack
Megatouch FORCE Monitor Chassis Board Replacement
 Megatouch FORCE Monitor Chassis Board Replacement Visit the Merit Industries, Inc. Web site http://www.meritind.com merit industries, inc. PM0337-01 Rev C Table of Contents FORCE Classic Monitor Chassis
JanusRAID SA-6692J Hardware User Manual
 JanusRAID SA-6692J Hardware User Manual 42-30000-5067 SATA II JBOD enclosure Version 1.1 SA-6692J SATA II JBOD enclosure Hardware User Manual Table of Contents Preface... i Chapter 1 System Requirements
MULTIFUNCTIONAL DIGITAL COLOR SYSTEMS. Troubleshooting Guide
 MULTIFUNCTIONAL DIGITAL COLOR SYSTEMS Troubleshooting Guide 2008, 2009 TOSHIBA TEC CORPORATION All rights reserved Under the copyright laws, this manual cannot be reproduced in any form without prior written
6 Removal and replacement
 6 Removal and replacement This chapter contains information about the following topics: Removal and replacement strategy User-replaceable parts Covers and external components Main assemblies Motors and
Getting Started. Read Me First. series. Canon Inkjet Premium Photo Printer. 1 Preparation...P.1. Install the Print Head... P.3
 Canon Inkjet Premium Photo Printer series 1 Preparation...P.1 Getting Started Read Me First Symbols Used in This Document Prohibited actions. Instructions including important information. In this guide,
Assembling the Rack-Mounted MAP/100P
 MAP/00P MAP/00P - COMPACT COMPACT COMPACT scixp00 KLC 0799 MAP/00P MAP/00P Click the graphic for a larger view. Sample Rack-Mounted MAP/00P The following sections and graphics contain the information needed
User Safety. Electrical Safety. Phaser 4500 Laser Printer
 User Safety Your printer and the recommended supplies have been designed and tested to meet strict safety requirements. Attention to the following information will ensure the continued safe operation of
9-pin dot matrix printer
 9-pin dot matrix printer All rights reserved. No part of this publication may be reproduced, stored in a retrieval system, or transmitted in any form or by any means, electronic, mechanical, photocopying,
Service & Maintenance
 Service & Maintenance Internal Amplifier External (Peavey) Amplifier Core & HDD Monitor UPS Dollar Bill Acceptor Coin Mechanism Cleaning Fans & Filter G1-1 Internal Amplifier Amplifier Removal 1. Disconnect
Troubleshooting Guide
 MULTIFUNCTIONAL DIGITAL COLOR SYSTEMS Troubleshooting Guide ES9455 MFP 03 Oki Data Corporation All rights reserved Under the copyright laws, this manual cannot be reproduced in any form without prior written
SERVICE MANUAL THEORY OF OPERATION MB Ver. 1.0
 SERVICE MANUAL THEORY OF OPERATION 2005.04 Ver. 1.0 After publication of this service manual, the parts and mechanism may be subject to change for improvement of their performance. Therefore, the descriptions
Guide to the Printer. Installing Options. Connecting the Printer Cables. Configuration. Paper and Other Media. Replacing Consumables
 Operating Instructions Hardware Guide 1 Guide to the Printer 2 Installing Options 3 Connecting the Printer Cables 4 Configuration 5 Paper and Other Media 6 Replacing Consumables 7 Cleaning the Printer
APES-14 HD-6500 & HD-7000 Version Operator s Training Manual
 APES-14 HD-6500 & HD-7000 Version Operator s Training Manual Issue A1 09/03 PDI Part # 900600 Performance Design Inc. 2350 East Braniff St. Boise Idaho 83716 This manual contains very important safety
The Nureva Span ideation system. Installation guide. Single panoramic system
 The Nureva Span ideation system Installation guide Single panoramic system Important SAFETY WARNINGS Prior to the installation of this product, the installation instructions should be completely read and
VJ-1304 INSTALLATION MANUAL
 Please read this manual before using Thank you for purchasing a MUTOH product. This manual explains the steps for unpacking, mounting and basic installation before using the MUTOH Full-color inkjet printer
System Storage EXP3000 Rack Installation Instructions
 System Storage EXP3000 Rack Installation Instructions Review the documentation that comes with your rack cabinet for safety and cabling information. When you install the IBM System Storage EXP3000 in a
MUTOH EUROPE N.V. Tel.:32-(0) Fax:32-(0)
 Fax:32-(0)") MUTOH INDUSTRIES LTD. Tel.:8-(0)-570-00 Fax:8-(0)-570-00 E-mail:ibd@mutoh.co.jp http://www.mutoh.co.jp MUTOH AMERICA INC. Tel.:-80-968-777 Fax:-80-968-7990 E-mail:sales@mutoh.com http://www.mutoh.com MUTOH
MUTOH INDUSTRIES LTD. Tel.:8-(0)-570-00 Fax:8-(0)-570-00 E-mail:ibd@mutoh.co.jp http://www.mutoh.co.jp MUTOH AMERICA INC. Tel.:-80-968-777 Fax:-80-968-7990 E-mail:sales@mutoh.com http://www.mutoh.com MUTOH
Replacing the SATA PCI Controller Card
 Replacing the internal controller PCI card may be performed by a single administrator; no tools are necessary. Caution There are static-sensitive electronics inside the unit. Before you handle any parts,
Zebra XiIII-Series Printer Safety and Quick Reference Guide
 Zebra XiIII-Series Printer Safety and Quick Reference Guide GB Contents Specifications...75 Electrical...75 Environmental Range...75 Fuses...75 Warnings...76 Installation...76 Use of Shielded Data Cables...76
FOR YOUR PROTECTION...
 FOR YOUR PROTECTION... To aid in reporting this compact copier in case of loss or theft, please record below the model number and serial number located on the back of the unit. We also suggest you record
Quick Installation Guide Direct and Transfer Thermal Printer
 Quick Installation Guide Direct and Transfer Thermal Printer Overview The enclosed printer is currently comprised of two models: 203dpi (dots per inch) model 300dpi (dots per inch) model Unpacking 1. Remove
Oracle <Insert Picture Here>
 Slide 1 Oracle Slide 2 WZT-6509 version B Sun Fire Nehalem and Westmere Rack-Mount Server Installation and Replacement Welcome to the installation and replacement
Lexmark X203n and X204n Series. Maintenance Guide
 Lexmark X203n and X204n Series Maintenance Guide February 2011 www.lexmark.com Contents...3 Cleaning the exterior of the printer...3 Cleaning the scanner glass...4 Cleaning the ADF separator rollers...5
Hard Drive user manual
 Hard Drive Docking Kit user manual Models 451147 & 451154 Model 451147 Model 451154 MAN-451147/451154-UM-0408-01 introduction Thank you for purchasing the MANHATTAN Hard Drive Docking Kit, Model 451147
TONER CARTRIDGE REMANUFACTURING INSTRUCTIONS HP LASERJET 4600 TONER CARTRIDGE
 HP LASERJET 4600 TONER CARTRIDGE REMANUFACTURING INSTRUCTIONS HP LASERJET 4600 TONER CARTRIDGE REMANUFACTURING THE HP LASERJET 4600 TONER CARTRIDGE By Javier Gonzalez and the Technical Staff at UniNet
3M Add-On Terminals 4220P (100, 200, 300 & 400 pairs)
") 3M Add-On Terminals 4220P (100, 200, 300 & 400 pairs) Instructions August 2011 3 78-8130-2330-1-C 1.0 General 1.1 The 3M Add-On Terminals 4220P-100, 4220P-200, 4220P-300 and 4220P-400 are designed to expand
3M Add-On Terminals 4220P (100, 200, 300 & 400 pairs) Instructions August 2011 3 78-8130-2330-1-C 1.0 General 1.1 The 3M Add-On Terminals 4220P-100, 4220P-200, 4220P-300 and 4220P-400 are designed to expand
Thanks for shopping with Improvements! Lighted Canterbury Christmas Greenery Doorway Arch Item #548443
 Thanks for shopping with Improvements! Lighted Canterbury Christmas Greenery Doorway Arch Item #548443 IMPORTANT, RETAIN FOR FUTURE REFERENCE: READ CAREFULLY. PARTS LIST: 2 Metal Plate Stands 5 Greenery
1. Unpacking the System
 1. Unpacking the System To prevent shipping damage the system is packed in multiple boxes. Chassis The chassis in shipped in one box by itself. The chassis is shipped assembled. Inside the chassis you
Océ User manual. Océ CS2024. Quick Start Guide
 Océ User manual Océ CS2024 Quick Start Guide Océ Technologies B.V. Copyright 2005, Océ-Technologies B.V. Venlo, The Netherlands. All rights reserved. No part of this work may be reproduced, copied, adapted,
K Service Source. Color StyleWriter 2200
 K Service Source Color StyleWriter 2200 K Service Source Basics Color StyleWriter 2200 Basics Overview - 1 Overview The Color StyleWriter 2200 is a desktop color bubblejet printer for personal use. It
X940e, X945e. Maintenance Guide
 X940e, X945e Maintenance Guide July 2010 www.lexmark.com Contents...3 Storing supplies...3 Checking the status of supplies...3 Checking the status of supplies from the control panel... 3 Printing a menu
DIGITAL Server Rackmount Installation Guide
 DIGITAL Server Rackmount Installation Guide Part Number: ER-PCSRA-IA. E01 Digital Equipment Corporation December 1997 The information in this document is subject to change without notice and should not
Océ CS9060. User s Guide. Eco Solvent
 Océ CS9060 User s Guide Eco Solvent Océ CS9060 - INSTALLATION GUIDE Thank you for purchasing a Océ CS9060 Eco Solvent Printer! Please read this manual before using the printer, otherwise things might go
Datacard CR500 Instant Issuance System. User Reference Guide. July Rev B
 Datacard CR500 Instant Issuance System User Reference Guide July 2015 527495-001 Rev B Datacard CR500 User Reference Guide The CR500 Instant Issuance System Contents The CR500 Instant Issuance System The
00-Cover&Contents 7/16/99 7:37 PM Page 1. LASER PRINTER ML-5000A Setup Guide
 00-Cover&Contents 7/16/99 7:37 PM Page 1 LASER PRINTER ML-5000A Setup Guide 01-Setup 7/20/99 9:25 AM Page 2 Control Locations and Functions Front View Automatic Paper Feeder Holds 150 sheets of paper.
K Service Source. StyleWriter
 K Service Source StyleWriter K Service Source Basics StyleWriter Basics Introduction - 1 Introduction The StyleWriter is a serial bubble jet ink-on-demand printer. The StyleWriter prints up to 1/3 page
LASER PRINTER. Operation Manual (for copier) Be sure to become thoroughly familiar with this manual to gain the maximum benefit from the product.
 Be sure to become thoroughly familiar with this manual to gain the maximum benefit from the product.") LASER PRINTER Operation Manual (for copier) Be sure to become thoroughly familiar with this manual to gain the maximum benefit from the product. Before installing this product, be sure to read the installation
LASER PRINTER Operation Manual (for copier) Be sure to become thoroughly familiar with this manual to gain the maximum benefit from the product. Before installing this product, be sure to read the installation
Peel/Rewind Upgrade Kit
 Peel/Rewind Upgrade Kit Installation Instructions This kit includes the parts and documentation necessary to install the Peel/Rewind upgrade kit on the following printers: ZM400 ZM600 Read these instructions
1 Getting Started Installing & Configuring
 Before you begin Installation and Setup Instructions for E-Series 60-Drive Trays E760 and E5660 controller-drive trays DE6600 expansion drive trays Unpack & Prepare Install Hardware Connect Drive Trays
Cutter Option Installation Instructions
 This kit includes the parts and documentation necessary to install the cutter option on the Zebra XiII, XiIII, and XiIIIPlus-Series printers. NOTE: The Cutter Option is not available for the 96XiIII. Adding
3100 MFP option. Printer and Scanner Setup Guide. January
 3100 MFP option Printer and Scanner Setup Guide January 2003 www.lexmark.com English Edition: January 2003 The following paragraph does not apply to any country where such provisions are inconsistent with
Xerox Corporation 701 S. Aviation Boulevard El Segundo, CA by Xerox Corporation. All rights reserved Copyright protection claimed includes
 Xerox Corporation 701 S. Aviation Boulevard El Segundo, CA 90245 1994 by Xerox Corporation. All rights reserved Copyright protection claimed includes all forms and matters of copyrightable material and
Laser Beam Printer. User's Guide
 Laser Beam Printer User's Guide Contents Turning the Printer ON/OFF (For 5910/5910F).......................... 3 Turning the Printer ON.................................................. 3 Turning the Printer
Use the To. 4 Keypad Enter numbers, letters, or symbols on the printer. Stop all printer activity. 6 Indicator light Check the status of the printer.
 Quick Reference Learning about the printer Using the control panel Use the To 4 Keypad Enter numbers, letters, or symbols on the printer. 5 Stop or Cancel button Stop all printer activity. 6 Indicator
Rack Installation Instructions
 Rack Installation Instructions Review the documentation that comes with your rack cabinet for safety and cabling information. Before installing your server in a rack cabinet, review the following guidelines:
Removal and Installation 8
 Removal and Installation 8 8 Introduction 8-2 Service Calibration Guide to Removal and Installation 8-4 Window 8-8 Covers and Trims 8-12 Rear Tray 8-31 Rear Cover 8-32 Media Lever 8-33 Media Lever Position
Written By: Walter Galan
 imac Intel 21.5" EMC 2428 CPU Replacement Replace the CPU in your imac Intel 21.5" EMC 2428. Written By: Walter Galan ifixit CC BY-NC-SA www.ifixit.com Page 1 of 33 INTRODUCTION Use this guide to upgrade
DNS User Manual. Version Dec DataON Storage, storage division of Area Data Systems.
 DNS-2670 User Manual Version Dec. 2015 DataON Storage, storage division of Area Data Systems. Contents 1 Introduction... 1 1.1 System Overview... 3 1.1.1 System Top View...3 1.1.2 Front View...4 1.1.3
Section. Service & Maintenance. - Core & Hard Disk Drive (HDD) - Amplifier - Monitor - UPS - Dollar Bill Acceptor - Fan Filter G - 1
 - Amplifier - Monitor - UPS - Dollar Bill Acceptor - Fan Filter G - 1") Section G Service & Maintenance - Core & Hard Disk Drive (HDD) - Amplifier - Monitor - UPS - Dollar Bill Acceptor - Fan Filter G - 1 Core Removal Core & HDD 1. Open the door. 2. Perform shutdown procedure.
Section G Service & Maintenance - Core & Hard Disk Drive (HDD) - Amplifier - Monitor - UPS - Dollar Bill Acceptor - Fan Filter G - 1 Core Removal Core & HDD 1. Open the door. 2. Perform shutdown procedure.
REMOVE COVERS. 1. Remove three screws from the Side Panel (L). 2. Slide the Side Panel (L) backward, and raise it to remove from the printer.
. 2. Slide the Side Panel (L) backward, and raise it to remove from the printer.") REMOVE COVERS 1. Remove three screws from the Side Panel (L). 2. Slide the Side Panel (L) backward, and raise it to remove from the printer. 3. Fully open the Top Cover. 4. Release the tab on the right
REMOVE COVERS 1. Remove three screws from the Side Panel (L). 2. Slide the Side Panel (L) backward, and raise it to remove from the printer. 3. Fully open the Top Cover. 4. Release the tab on the right
MULTIFUNCTIONAL DIGITAL COLOR SYSTEMS. Troubleshooting Guide
 MULTIFUNCTIONAL DIGITAL COLOR SYSTEMS Troubleshooting Guide 03-05 TOSHIBA TEC CORPORATION All rights reserved Under the copyright laws, this manual cannot be reproduced in any form without prior written
Gateway Profile 4 service guide
 Gateway Profile 4 service guide Customizing Troubleshooting Contents Replacing Components in Your Gateway Profile 4.................. 1 About this guide.....................................................
A T & T C A T P R I N T E R
 AT&T CAT PRINTER Unpacking 1. Do not plug the printer in just yet. We ll tell you when you can. 2. Lift the access cover and remove the clear smudge strips from the front panel and cover. Smudge strip
Snap Server 4400 Power Supply
 Snap Server 4400 Power Supply Snap Server 4400 Note You can set up your system to send an e-mail alert in the event of a hardware failure. For details, see the section on e-mail notification in your Administrator
Smartphone Photo Printer Item No
 Smartphone Photo Printer Item No. 205984 Safety Precautions Safety Precautions Denotes the possibility of serious injury or death Please keep you away at least 20cm distance from printer when printing.