Version VITUS AUDIO. It s all about Music. SL-101 Owner s Manual
|
|
|
- Amberlynn Jones
- 6 years ago
- Views:
Transcription
1 Version 5 VITUS AUDIO It s all about Music SL-101 Owner s Manual

2 SIGNATURE SERIES LINESTAGE SL-101 Owner s Manual Vitus Audio P.O. Box 2052 DK-7400 Herning, Denmark Phone: Fax: info@vitusaudio.com Web: All rights reserved. No part of this publication may be reproduced, stored in or introduced into a retrieval system, or transmitted in any form, or by any means (electronic, mechanical, photocopying, recording or otherwise) without the prior written permission of Vitus Audio. Any person who does any unauthorised act in relation to this publication may be liable to criminal prosecution and civil claims for damages. Information contained in this manual is subject to change without notice, and whilst it is checked for accuracy, no liabilities can be accepted for errors. i
3 Table of Content Replacing a blown fuse 13 INTRODUCTION About this Manual 1 Foreword 2 Introduction to the Signature Series 2 WARRANTY Initial Warranty 14 Extended Warranty 14 Warranty Exclusions 14 GETTING STARTED Getting Service 14 What s Included 3 Unpacking from Crates 3 Connecting the SL Overall gain in your SL TECHNICAL DETAILS Specifications 15 Pictures 16 Rear Panel 4 OPERATION Normal Mode 5-6 Menu Mode 7 How it works, examples 8-11 Volume bypass mode 12 Safety Notice 12 Mains Supply Voltage 12 SERVICE Maintenance 13 Main Fuses 13 ii
4 INTRODUCTION About this Manual This is your SL-101 owner s manual. The following pages will describe, as succinctly as possible, how to get your SL-101 operating fast and simple. Although some operations are self explanatory, we strongly suggest you read this manual to avoid any damage to the unit. The manual is designed to be helpful. If there are points you feel we could cover better, or that we have missed out please tell us. Important Notice! Important information is presented like this ignoring this may cause you to damage the unit, or invalidate the warranty. 1
5 INTRODUCTION Foreword First of all, thank you for choosing the Vitus Audio SL-101 Linestage, we are sure you will enjoy it for many years to come. When purchasing a Vitus Audio product, you are guaranteed a musical performance, which exceeds the current musical standards. Vitus Audio is dedicated to musical performance rather than technical details and high performance measures. We believe that many manufactures are blinded by the current available theory, instead of looking for new answers. At Vitus Audio everything works until proven not to. This way we always try to push the limits and explore the unexplored. As a result of this, many of the solutions we use today are considered to be impossible to ever get working, however they have convinced many people and reviewers world wide of the opposite. Before any of our new topologies are implemented in our products, they are carefully reviewed by our dedicated listening panel. This way we can guarantee the correct level of musically performance and robustness. Generally we're after super neutral, super detailed and super dynamic reproduction without "loosing" the nerve in the music which often is a drawback of many high end amplifiers. Our real strongholds is complete silence, unbelievable depth and width in the soundstage resulting in a far more open sound with higher resolution - you could say, closer to the artist. As a result of above, our amps do not "focus" on any specific frequencies - i.e. no extension of top nor bas, which of coarse results in high clarity of the midrange since it's "naturally present"! Introduction to the Signature Series The Vitus Audio Signature Series is a true high-end series of products, which build on our true dedication to neutral music reproduction. Every detail is carefully thought through, and all choices made during development, where based purely on listening, and not measuring. Only the best available materials are used to ensure an overall quality which will last for many years, when treated right. 2
6 GETTING STARTED What s included SL-101 Linestage Owner s Manual Unpacking from Crate Firstly the top of the crate needs to be removed. This is done by simply cutting the tape on the sides and top very carefully. When the top has been removed, it s possible to remove the protective foam top which give you directly access to the amplifier. When the amplifier has been removed from its crate, store the crate for later usage. Connecting your SL-101 When placed on its shelf, connect all sources to the inputs of the SL-101, (labelled INPUT 1 to 5 on the rear panel.). Also connect the output of the SL-101, (labelled OUT PUT 1 to 2 on the rear panel), to your power amplifiers input. As the SL-101 is balanced from input to output, we recommend you use the balanced output only. We have only included the RCA output for compability reasons. Overall gain in your SL-101 The overall gain of the SL-101 has been optimised using our SP-100 Phonostage stage and SM-101 Mono Power Amplifiers. Should you find the gain inadequate it can easily be adjusted by your local dealer. 3

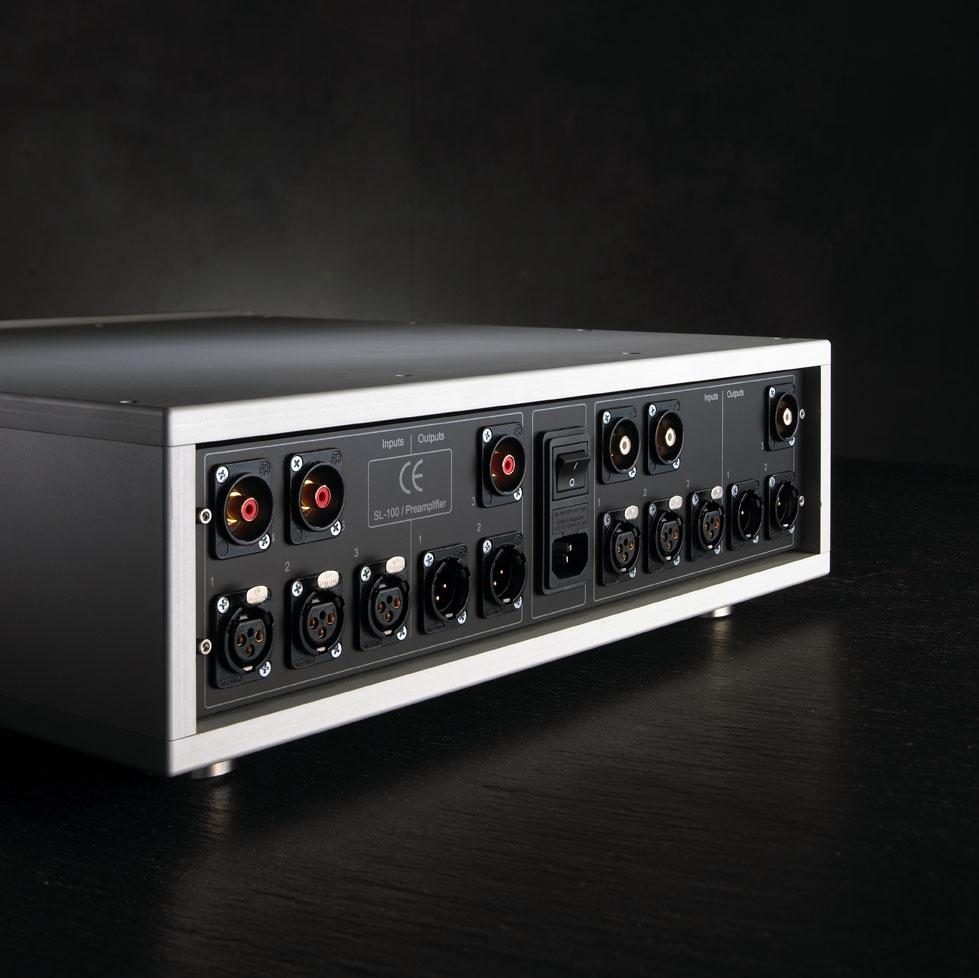
7 GETTING STARTED Rear Panel Figure 1 SL-101 Rear panel 4

8 OPERATION Normal mode Figure 2 SL-101 Left Front. Functions Left Front In normal mode there are 3 basic functions/buttons available on the left front: 1. INPUT Selects between the 5 different inputs. 2. MENU Switches to Menu Mode. 3. STANDBY Sets the unit into standby mode. 5
9 OPERATION Normal mode (Continued) Figure 3 SL-101 Right Front. Functions Right Front In normal mode there are 3 basic functions/buttons available on the right front: 4. Turns volume UP. 5. MUTE Mutes the output. 6. Turns the volume DOWN. The topology of the volume control used in the SL-101 is very different compared to the standard. It uses a series of fixed resistor networks which are changed via relays. Regardless of the level of the volume, only 1 fixed resistor is in series with the signal path, which give the best performance possible. As shifting relays will generate small clicks at certain points, the signal is muted during operation. It is almost inaudible. This volume control gives you superior sound quality over traditional digital and analogue potentiometers. 6
10 OPERATION Menu mode Figure 4 SL-101 Left Front. Functions When the MENU button is pushed once in Normal mode, one enters the Menu Mode. In the Menu mode there are 3 basic functions/buttons: 1. Scrolls forward in the menu. 2. SELECT Enters & Exits submenus and selects wanted settings. 3. Scroll backward in the menu. In one of the sub-menus it is possible to change the text in the display. This is done by using the following buttons: 1. Increase the selected character. 2. MUTE Go to the next character in the display. 3. Decrease the selected character. 7
11 OPERATION How it works: (Menu mode continued) In Menu mode there are 7 different menus: 1. INPUT Enable/disable different inputs. 2. OFFSET Select a offset-gain for different inputs. 3. TEXT Change the text for different inputs. 4. DB Selects between Level and db readout of the volume. 5. SW ver. Show the software version. 6. Bright. Selects brightness level on the display from LOGO Turns Logo on and off. When the menu button is pressed once, the display will show MENU in the display. Use the or button to shuffle up or downwards through the different sub menus. To select one of the sub menus press the Select button again. When in one of the sub menus again use the or button to select between the different options and press, Select to activate your choice. Example 1: (Changing Brightness, default setting is level 1) Press Menu once. Press twice. (Display will show MENU ) (Display will show Bright ) Press Select. (Display will show Bright 1 ) Press twice. (Display will show Bright 3 ) Press Select once. Press twice. (Display will show Bright ) (Display will show MENU ) Press Select once. (Display will show Line 1 ) 8
12 OPERATION How it works: (Menu mode continued) Example 2: (Changing text for input 3) Press Menu once. Press three times. (Display will show MENU ) (Display will show Text ) Press Select. (Display will show Line 1 ) Press twice (Display will show Line 3 ) Press Mute once (Display will show _Line 3, and _ will start to blink.) Press and hold or (Right front) (The first character in the display will cycle through the alphabet from A-Z to 0-9 to a-z. When the correct character is found release or.) Press Mute a number of times (For each press, the selected character will move one place to the right, which makes it possible to change the other characters of the selected input-text.) To accept the change of the input text, press Mutes a number of times until you have moved through all the characters in the display, or press Select once. Display will show Line 3. Press three times. Press Select once. Press three times. (Display will show Back ) (Display will show Text ) (Display will show MENU ) Press Select once. (Display will show Line 1 ) Press Input twice (Display will show the new text of Line 3 in the display) 9
13 OPERATION How it works: (Menu mode continued) Example 3: (Changing offset-gain of the inputs) If the inputs have different gains, it is possible to set different offset-values for the different inputs. The offset-value can be set to -6.0, -4.5, -3.0, -1.5, 0.0, 1.5, 3.0, 4.5, 6.0 db or BYPASS. If there is a higher gain of one input than another, ones can set the offset value to a negative value, the volume will then automatically turn down. When BYPASS is selected, the volume control of the selected input is bypassed, and the gain is set to 0.0 db. The following example illustrates how to change the offset-values: The volume of Line 2 is 3 db higher than the volume of Line 1 and the volume of Line 3 is 1.5 db lower than the volume of Line 1. For this example to be accurate, all the offset-values are 0.0 db and Line 1 is selected before starting. Press Menu once. Press twice. (Display will show MENU ) (Display will show Offset ) Press Select. (Display will show Line 1 ) Press once. (Display will show Line 2 ) Press Select once. Press twice. (Display will show 0.0 db ) (Display will show -3.0 db ) Press Select once. (Display will show Line 2 ) Press once. (Display will show Line 3 ) Press Select once. Press once. (Display will show 0.0 db ) (Display will show 1.5 db ) Press Select once. (Display will show Line 3 ) Press three times. Press Select once. Press twice. (Display will show Back ) (Display will show Offset ) (Display will show MENU ) Press Menu once. (Display will show Line 1 ) 10
14 OPERATION How it works: (Menu mode continued) Press Input once (Change to Line 2, the volume changes to -3.0 db) Press Input once (Change to Line 3, the volume changes to 1.5 db) When changing between the three inputs; Line 1, Line 2 and Line 3, the output will be at the same level. Example 4: (disabling inputs) If only some of the inputs is used, it is possible to disable the other inputs. By doing this, the system will skip the disabled inputs, and jump to the next input. when pressing Input. The following example illustrates how to disable Line 4 and Line 5. Press Menu once. Press once. (Display will show MENU ) (Display will show Input ) Press Select. (Display will show Line 1 ) Press twice. (Display will show Line 5 ) Press Select once. Press once. (Display will show L 5 ON ) (Display will show -L 5 OFF ) Press Select once. (Display will show Line 5 ) Press once. (Display will show Line 4 ) Press Select once. Press once. (Display will show L 4 ON ) (Display will show L 4 OFF ) Press Select once. (Display will show Line 4 ) Press twice. Press Select once. Press once. (Display will show Back ) (Display will show Input ) (Display will show MENU ) Press Menu once. (Display will show Line 1 ) By doing this it will only be possible to change between Line 1, Line 2 and Line 3. 11
15 OPERATION Volume bypass mode The Vitus Audio SL-101 internal volume control can be bypassed independently for each input. In case you have a source with an internal volume control, such as a surround-preamp. This can be done from the Offset submenu. When shifting one of the inputs into bypass mode WARNING is flashing in the display, followed by a rolling text: Read Manual Enter Code. The reason for this is the much higher gain once the damping of the volume is removed which is equal to volume 0 db this can easily damage both the amplifier and speakers connected to the amplifier if you don t have a Preamplifier or equal device connected. Important Notice! Should any such damage occur, Vitus Audio A/S cannot be held responsible for these. The Code needed for changing to bypass mode is simply: Pushing the following buttons at the same time: 1. Class A / AB 2. MENU 3. Standby 4. MUTE If this code is not entered, the software will automatically jump back to the VOL Menu Switching back to normal mode (bypass off) does not require the code. Safety Notice The Vitus Audio SL-101 contains no user serviceable parts. Do not attempt to open the case as there are potentially dangerous voltages present inside. In the event of the unit developing a fault, please consult your dealer. Mains Supply Voltage Any unit may be set for operation on either 100V, 115V or 230V A.C. Units are shipped set for the mains supply voltage according to the destination. The voltage setting can be updated later by your dealer, if necessary. 12
16 SERVICE Maintenance Vitus Audio products are designed to run for many years without the need for regular maintenance. Our products contain no user serviceable part except from the mains fuse. Should your SL-101 show signs of miss function, pls. contact your dealer or Vitus Audio. Mains Fuse Accessible from the outside of the amplifier, just above the power inlet, you will find the mains fuse. Should the fuse blow, it can easily be replaced by the user. The fuse would only blow if power surges occur, or if there is a fault in the unit. Normally power surges cause no other damage, but if the fuse blows repeatedly on replacement, the unit must have a malfunction. In this situation the unit must be returned to Vitus Audio for repair. Fuse Type: 20 x 5mm 500mA F HRC fuse (two is needed) Important Notice! Should the fuse blow, it s very important that it s replaced with same type and rating. Failure to do so could result in damage to the unit, risk of dire or electric shock and will invalidate the guarantee. Replacing a blown fuse Remove the power cable, use a small flat bladed screwdriver to pry up the tap on the fuse carrier and pull it out. Pull the blown fuses out of the carrier and dispose of them. Fit the new fuses in the clip and push the carrier back into the unit so that it clicks home. 13
17 WARRANTY Initial Warranty Vitus Audio warrants this product against defects in materials and workmanship for a period of 1 year from receipt by the first owner. During the warranty period, Vitus Audio will repair or, at our absolute discretion replace, a faulty product. Warranty repairs must only be carried out by Vitus Audio. For details please contact Vitus Audio. Extended Warranty The period of the warranty cover can be extended to 3 years from the original shipping date at no extra cost, by registering your products with Vitus Audio through our web at Should you sell the unit within the extended warranty period, the remaining period of the extended warranty can be transferred to the new owner, by completing an Owner Registration Transfer form which also will be available through our web during Warranty Exclusions The Warranty on this SL-101 shall be void if: The product is misused in any way. Any unauthorised modifications or repairs are carried out. The product is serviced or repaired by others than Vitus Audio. The unit is returned inadequately packed. The product is not used in accordance with the Operating Conditions stated in this owner s manual. Getting Service Should it be necessary to return a unit for service or repair pls. provide model, serial number and a detailed description of the problem? When returning a unit, the original crates should be used. Replacement crates can be purchased from Vitus Audio. During the Warranty period, there will normally be no charges for parts or labour. 14
18 SPECIFICATIONS Specifications INPUTS 2 RCA Unbalanced 3 XLR Balanced INPUT IMPEDANCE RCA 10KΩ XLR 300KΩ + 300KΩ OUTPUTS 1 RCA Unbalanced 2 XLR Balanced OUTPUT IMPEDANCE RCA 75Ω XLR 75Ω GAIN RCA -40dB to +6dB XLR -40dB to +12dB NOISE SNR > 110dB DISTORTION THD+N < 0,01% POWER CONSUMPTION Standby < 30 W Operation < 40 W DIMENTIONS Width 435mm Depth 402mm Height 130mm (Including feet) Weight 24kg 15

19 16 PICTURES
RCD-100. Owner s Manual
 RCD-100 Owner s Manual 2 RCD-100 Version 1 All rights reserved. No part of this publication may be reproduced, stored in or introduced into a retrieval system, or transmitted in any form, or by any means
RCD-100. Owner s Manual
 RCD-100 Owner s Manual 2 RCD-100 Version 1 All rights reserved. No part of this publication may be reproduced, stored in or introduced into a retrieval system, or transmitted in any form, or by any means
RP-101. Owner s Manual
 RP-101 Owner s Manual All rights reserved. No part of this publication may be reproduced, stored in or introduced into a retrieval system, or transmitted in any form, or by any means (electronic, mechanical,
RD-100. Owner s Manual
 RD-100 Owner s Manual 2 RD-100 Version 1 All rights reserved. No part of this publication may be reproduced, stored in or introduced into a retrieval system, or transmitted in any form, or by any means
SCD-025. Owner s Manual
 SCD-025 Owner s Manual on a personal note Certificate..............4 from the creator Foreword.............. 5 All rights reserved. No part of this publication may be reproduced, stored in or introduced
S300i. Two Channel Integrated Audio Amplifier
 User's Guide S300i e.one Two Channel Integrated Audio Amplifier Series Bel Canto Design, LTD. 212 Third Avenue North Minneapolis, MN 55401 Phone: (612) 317.4550 Fax: (612) 359.9358 www.belcantodesign.com
Cantata m100 Amplifier
 Cantata m100 Amplifier Getting Started Guide www.resolutionaudio.com +1.415.553.4100 Safety Information CAUTION RISK OF ELECTRICAL SHOCK DO NOT OPEN CAUTION: TO REDUCE THE RISK OF ELECTRICAL SHOCK, DO
CADENZA PRE AMPLIFIER OWNER S MANUAL
 --------------------------------------------------------------------------- CADENZA PRE AMPLIFIER OWNER S MANUAL ------------------------------------------------------------------------------- Viola Audio
dcs Scarlatti Clock Digital Audio Master Clock User Manual Software Release 1.0x June 2010
 dcs Scarlatti Clock Digital Audio Master Clock User Manual Software Release 1.0x Data Conversion Systems Ltd. 2007-2010 Price UK 8.00 / Euro 12.00 All rights reserved. No part of this publication may be
VITUS AUDIO REFERENCE SERIES. Vitus Audio Reference Series : RP- 101 Phono Stage ,00
 VITUS AUDIO REFERENCE SERIES Valido da dicembre 2015 Vitus Audio Reference Series : RP- 101 Phono Stage 11.690,00 Phono stage Pre Amplifier 1x Balanced input (XLR) 1x Unbalanced input (RCA) Impedance :
CONTENTS & INSTALLATION
 I NTRODUCTION Thank you for buying this Linn product. As with all our products, the Linn PRETEK preamplifier was designed and manufactured to outperform the competition. You will find that it is capable
dcs Puccini U-Clock System Clock with USB Converter User Manual Software Release 1.0x October 2008
 dcs Puccini U-Clock System Clock with USB Converter User Manual Software Release 1.0x Data Conversion Systems Ltd. 2008 Price UK 8.00 / Euro 12.00 All rights reserved. No part of this publication may be
high fidelity engineering since 1974 cd player
 TM high fidelity engineering since 1974 I n s t r u c t i o n M a n u a l cd player FA-310108-MCX-CD-instruction.indd 1 1/31/2008 4:39:34 PM FA-310108-MCX-CD-instruction.indd 2 1/31/2008 4:39:39 PM PACKAGED
dcs Puccini U-Clock System Clock with USB Converter User Manual Software Release 1.04 onwards October 2010
 dcs Puccini U-Clock System Clock with USB Converter User Manual Software Release 1.04 onwards Data Conversion Systems Ltd. 2008-2010 Price UK 8.00 / Euro 12.00 All rights reserved. No part of this publication
BURSON. Burson Soloist Headphone Amplifier / Pre Amplifier. User Manual. Want free warranty extension? Please read page 6 for details I II III
 Burson Soloist Headphone Amplifier / Pre Amplifier User Manual Want free warranty extension? Please read page 6 for details BURSON I II III L M H HHHISOLOI Thank You. All of us at Burson Audio would like
INTERPRETER CONTROL UNIT MODEL PL ICU 2 2 (2 INPUTS 2 OUTPUTS) INSTRUCTION MANUAL Technical Data Warranty Information
 INSTRUCTION MANUAL Technical Data Warranty Information") INTERPRETER CONTROL UNIT MODEL PL ICU 2 2 (2 INPUTS 2 OUTPUTS) INSTRUCTION MANUAL Technical Data Warranty Information 2 INTERPRETER CONTROL UNIT - MODEL PL ICU 2 2 INSTRUCTION MANUAL Congratulations on
INTERPRETER CONTROL UNIT MODEL PL ICU 2 2 (2 INPUTS 2 OUTPUTS) INSTRUCTION MANUAL Technical Data Warranty Information 2 INTERPRETER CONTROL UNIT - MODEL PL ICU 2 2 INSTRUCTION MANUAL Congratulations on
PRe6. Multi-Channel Analog Pre-Amplifier
 User's Guide and Warranty Information PRe6 Multi-Channel Analog Pre-Amplifier Bel Canto Design, LTD. 212 Third Avenue North Minneapolis, MN 55401 Phone: (612) 317.4550 Fax: (612) 359.9358 www.belcantodesign.com
Dual Channel Active Direct Box. Artcessories. User's Manual
 Dual Channel Active Direct Box Artcessories User's Manual IMPORTANT SAFETY INSTRUCTION READ FIRST This symbol, whenever it appears, alerts you to the presence of uninsulated dangerous voltage inside enclosure-voltage
USER MANUAL. GOLDMUND MIMESIS 22 HISTORY Analog Preamplifier
 USER MANUAL GOLDMUND MIMESIS 22 HISTORY Analog Preamplifier Thank you for purchasing the Goldmund MIMESIS 22H ANALOG PREAMPLIFIER. Please take some time to read this manual. It will provide you with useful
dcs P8i Mk2 Upsampling SACD/CD Player User Manual Software Release 2.0x March 2011
 dcs P8i Mk2 Upsampling SACD/CD Player User Manual Software Release 2.0x March 2011 Data Conversion systems Ltd. 2005-2011 Price UK 8.00 / Euro 12.00 All rights reserved. No part of this publication may
Ares. Modular Audiophile System. by Thrax Audio. Operating Manual. Manual issued 15/03/2018 CAUTION
 Ares Modular Audiophile System by Thrax Audio Operating Manual Manual issued 15/03/2018 CAUTION THE UNIT CONTAINS NO USER SERVICEABLE PARTS. DO NOT REMOVE THE COVERS. LETHAL VOLTAGES ARE PRESENT WITHIN
MPF-1, Mains Power Filter User Manual
 1/7 Important Safety Information 2/7 Protect the power cable from being walked on or pinched particularly at the plugs, convenience receptacles, and at the point where they exit from the apparatus. Refer
PS8 - II. Professional Power Sequencer. User s Manual
 PS8 - II Professional Power Sequencer User s Manual IMPORTANT SAFETY INSTRUCTIONS READ FIRST This symbol, whenever it appears, alerts you to the presence of uninsulated dangerous voltage inside the enclosure.
DUAL MONO POWER AMPLIFIER INSTRUCTIONS FOR USE
 A3.2 CR DUAL MONO POWER AMPLIFIER C R MUSICAL FIDELITY A3.2 DUAL MONO POWER AMPLIFIER POWER INSTRUCTIONS FOR USE Thank you for purchasing the Musical Fidelity A3.2 CR Power Amplifier. Used properly and
USER MANUAL GOLDMUND MIMESIS 27.8 Preamplifier
 USER MANUAL GOLDMUND MIMESIS 27.8 Preamplifier INTRODUCTION Thank you for purchasing the Goldmund MIMESIS 27.8 preamplifier. You have acquired one of the best preamplifier ever made for professional and
Beresford Capella Headphone amplifier
 Beresford Capella Headphone Amplifier Owner s Reference manual REV 1.7 Introduction The Capella is a high end headphone amplifier designed for audiophile listening. It can accept audio signals from an
The Discrete DAC. User Guide. Check our website for the most recent user guides, firmware, and drivers:
 The Discrete DAC User Guide Check our website for the most recent user guides, firmware, and drivers: www.msbtechnology.com Technical support email is: techsupport@msbtech.com 05.21.18 Technical specifications
User Guide. Control Box. RoscoLED TM.
 RoscoLED TM Control Box User Guide This guide applies to the following RoscoLED Control Box models: RoscoLED Control Box 300W/Static White (293 22250 0000) RoscoLED Control Box 400W/VariWhite (293 22260
BS 181 SINGLE CHANNEL POWER SUPPLY USER MANUAL
 BS 181 SINGLE CHANNEL POWER SUPPLY USER MANUAL Issue 2011 ASL Intercom BV DESIGNED & MANUFACTURED BY: ASL Intercom B.V. Zonnebaan 42 3542 EG Utrecht The Netherlands Tel: +31 (0)30 2411901 Fax: +31 (0)30
MA V 30W Mixer Amplifier Order code: CRAM02 MA V 60W Mixer Amplifier Order code: CRAM03 USER MANUAL
 www.cleveracoustics.co.uk MA 130 100V 30W Mixer Amplifier Order code: CRAM02 MA 160 100V 60W Mixer Amplifier Order code: CRAM03 USER MANUAL WARNING FOR YOUR OWN SAFETY, PLEASE READ THIS USER MANUAL CAREFULLY
CPA 40 Two Channel Amplifier
 www.cleveracoustics.co.uk CPA 40 Two Channel Amplifier Order code: CRAM01 USER MANUAL WARNING FOR YOUR OWN SAFETY, PLEASE READ THIS USER MANUAL CAREFULLY BEFORE YOUR INITIAL START-UP! CAUTION! Keep this
VK-3iX WARRANTY REGISTRATION FORM
 VK-3iX WARRANTY REGISTRATION FORM Unit Serial Number: Customer Name: Address: Date of Purchase: Purchased From: Dealer Name: Address: IMPORTANT NOTE: In order to receive the full five year product warranty,
PRe3. Two Channel Analog Pre-Amplifier
 User's Guide PRe3 e.one Two Channel Analog Pre-Amplifier Series Bel Canto Design, LTD. 212 Third Avenue North Minneapolis, MN 55401 Phone: (612) 317.4550 Fax: (612) 359.9358 www.belcantodesign.com Info@belcantodesign.com
POWER AMPLIFIER INSTRUCTIONS FOR USE
 INTRODUCTION A3 CR POWER AMPLIFIER INSTRUCTIONS FOR USE Thank you for purchasing the Musical Fidelity A3 CR power amplifier. Used properly and carefully, it should give you many years of outstanding musical
VK-300X WARRANTY REGISTRATION FORM
 VK-300X WARRANTY REGISTRATION FORM Unit Serial Number: Customer Name: Address: Date of Purchase: Purchased From: Dealer Name: Address: IMPORTANT NOTE: In order to receive the full five year product warranty,
dcs Puccini U-Clock System Clock with 24/192 USB Converter User Manual Software Release 2.0x July 2013
 dcs Puccini U-Clock System Clock with 24/192 USB Converter User Manual Software Release 2.0x Data Conversion Systems Ltd. 2008-2013 Price UK 8.00 / Euro 12.00 All rights reserved. No part of this publication
poly-planar Marine Audio System
 ME-52 Expansion Amplifier 1 ME-52 Expansion Amplifier Introduction: The ME-52 is a 2 channel audio amplifier capable of delivering up to 25W RMS per channel. It s compact, water resistant design allows
PING all-in-one music system
 PING all-in-one music system USER GUIDE Congratulations on your new Consonance! Every Consonance product is based on a simple philosophy: The audio reproduction instrument shall reproduce the original
USER MANUAL. DV-HAS HDMI Audio Separator LIT Bergen Boulevard, Woodland Park, NJ Tel FAX Web:
 USER MANUAL DV-HAS HDMI Audio Separator 244 Bergen Boulevard, Woodland Park, NJ 07424 Tel 973-785-4347 FAX 973-785-3318 Web: www.fsrinc.com LIT1460 Proprietary Information All information in this manual
Oracle DAC 1000 D/A Converter + Pre-amplifier
 Oracle DAC 1000 D/A Converter + Pre-amplifier ORACLE AUDIO TECHNOLOGIES OWNER'S MANUAL INTRODUCTION Thank you for purchasing the Oracle DAC 1000 D/A converter + pre-amplifier. Please read carefully the
TVA2.1 2-Channel Digital Amplifier Installation Manual
 TVA2.1 2-Channel Digital Amplifier Installation Manual SAFETY INSTRUCTIONS WARNING: TO REDUCE THE RISK OF FIRE OR ELECTRIC SHOCK, DO NOT EXPOSE THIS APPLIANCE TO RAIN OR MOISTURE. CAUTION: TO REDUCE THE
Note: Unit is set at the factory for 120V operation. Be sure to change the fuse. (2A rating) before switching to 230V operation.
 before switching to 230V operation.") Note: Unit is set at the factory for 120V operation. Be sure to change the fuse (2A rating) before switching to 230V operation. (2) FCC Statement 1. This device complies with Part 15 of the FCC Rules.
Note: Unit is set at the factory for 120V operation. Be sure to change the fuse (2A rating) before switching to 230V operation. (2) FCC Statement 1. This device complies with Part 15 of the FCC Rules.
passive or tube remote preamp
 SAGA passive or tube remote preamp a passive relay-stepped attenuator? Yes. A hybrid tube buffer preamp? Yes again. And remote control? Yep, that s included as well. Saga is a seeress in norse mythology,
What s in the Box. Table of Contents
 Table of Contents 1. What s in the Box 2. Warning 2. Overview 3. Quick Start Guide 4. Rear Panel 5. Front Panel 5. DC trigger 5. Logo trim tool 6. Troubleshooting Guide 7. Warranty and Service 8. Contact
Burson Audio DA-160 Audio DAC User Manual
 Burson Audio DA-160 Audio DAC User Manual www.bursonaudio.com Want free warranty extension? Please read page 7 for details. Burson Audio U1 U2 C T H L THANK YOU...3 TEAM BURSON...3 UNPACKING...4 THE ACCESSORY
AI 320 INTEGRATED AMPLIFIER
 INTRODUCTION Thank you for choosing the Stello AI:320 from April Music. The AI:320 is one of the finest integrated amplifiers available on the market today. It will give the true meaning to the reproduction
The Reference DAC. User Guide. Check our website for the most recent user guides, firmware, and drivers:
 The Reference DAC User Guide Check our website for the most recent user guides, firmware, and drivers: www.msbtechnology.com Technical support email is: techsupport@msbtech.com 05.29.18 Technical specifications
The Martin Experience. Martin Audio CMX1A Cinema Controller MARTIN AUDIO. All material Martin Audio Ltd. Subject to change without notice.
 CONTENTS () Page No 1 INTRODUCTION 2 2 UNPACKING 2 3 MAINS CONNECTION 3 4 INPUT CONNECTIONS 4 5 OUTPUT CONNECTIONS 4 6 CMX1A OPERATION 5 7 SCREEN COMPENSATION EQ 5 8 WARRANTY 5 9 TECHNICAL SPECIFICATIONS
KINKI STUDIO EX-M1 INTEGRATED AMPLIFIER INSTRUCTION MANUAL. - We are from China -
 EX-M1 INTEGRATED AMPLIFIER INSTRUCTION MANUAL - We are from China - PREFACE 前言 Thank you for purchasing the EX-M1 Integrated Audio Amplifier. Please take some time to read this manual. It can provide you
JuiceRack & JuiceBlock 500 series Power Supplies. Operating Manual V 1.1
 JuiceRack & JuiceBlock 500 series Power Supplies Operating Manual V 1.1 Contents 1 Safety instructions... 3 2 Foreword... 4 2.1 Important Notes:... 4 3 Introduction... 5 3.1 Setup... 5 3.2 Mains Voltage...
ayon CD-1 Top Loading Vacuum Tube Class-A CD-Player Owner s Operating Manual Ayon Audio Hart Gratkorn Austria Phone:
 ayon CD-1 Top Loading Vacuum Tube Class-A CD-Player Owner s Operating Manual Ayon Audio Hart 18 8101 Gratkorn Austria Phone: +43 3124 24954 www.ayonaudio.com WARNING PRECAUTION AND SAFETY TO PREVENT SHOCK
User Manual. Bluetooth Soundstage
 User Manual Bluetooth WELCOME You have made an excellent choice with the purchase of this quality EnVivo brand product. By doing so you now have the assurance and peace of mind, which comes from purchasing
Primare A20 Integrated Amplifier User Guide
 > Primare A20 Integrated Amplifier User Guide i > Preface COPYRIGHT AND ACKNOWLEDGMENTS Copyright 2000 Primare Systems AB. All rights reserved. Primare Systems AB Idavägen 17D SE-352 46 Växjö Sweden The
A good hi-fi works well enough to deliver these benefits. It also helps you appreciate music you never thought you would.
 M USIC is very important for people. It stimulates the imagination, helps them relax, can change their mood, and of course provides entertainment and pleasure. A good hi-fi works well enough to deliver
BS 15 BASIC SERIES USER MANUAL FOR THE SINGLE CHANNEL BELTPACK CONTENTS
 BASIC SERIES USER MANUAL FOR THE BS 15 SINGLE CHANNEL BELTPACK CONTENTS 1.0 GENERAL DESCRIPTION... 3 2.0 UNPACKING... 3 3.0 INSTALLATION... 3 4.0 FRONT PANEL CONTROLS... 4 5.0 REAR PANEL CONNECTORS...
Berkeley Audio Design Alpha DAC Reference Series 2 User Guide for Software Rev 2.00
 Berkeley Audio Design Alpha DAC Reference Series 2 User Guide for Software Rev 2.00 The Berkeley Audio Design Alpha DAC Reference Series has unprecedented time domain resolution. That resolution allowed
OLi POWA-5 Active Monitors
 Active Monitors User Manual : English Contents Important Information... 3 Front & Rear Panels... 4 Remote Control... 5 Connecting Your Speakers... 6 Bluetooth Function... 7 Use with ipod / MP3... 8 Use
WIR RX15-2 Receiver MHz or 2.8 MHz
 WIR RX15-2 Receiver - 2.3 MHz or 2.8 MHz Safety Information HEARING SAFETY: CAUTION! Instructions For Use and Care This product is designed to amplify sounds to a high volume level which could potentially
2 CHANNEL, CLASS D AMPLIFIERS PA2X25 PA2X60 PA2X125 PA2X150. pulseaudio1.com vanco1.com
 2 CHANNEL, CLASS D AMPLIFIERS PA2X25 PA2X60 PA2X125 PA2X150 pulseaudio1.com vanco1.com 800.626.6445 DEAR CUSTOMER Thank you for purchasing this product. For optimum performance and safety, please read
Owner s manual. SDAI 2175 Semi Digital Amplifier Integrated
 Owner s manual SDAI 2175 Semi Digital Amplifier Integrated 2 Table of Contents Operating Voltage 4 Unpacking the SDAI 2175 4 Serial Number Registration 4 Introduction 5 Accessories 6 Front Panel 7 - Controls
User Guide for Software Rev 3.00
 Berkeley Audio Design Alpha DAC Reference Series 2 MQA User Guide for Software Rev 3.00 The Berkeley Audio Design Alpha DAC Reference Series MQA s unmatched time domain resolution, low noise digital processing
Marshall Electronics. Operating Instructions. Warranty. AR-AM1 Analog Audio Monitor
 Warranty Marshall Electronics warranties to the first consumer that this AR-AM1 Audio Monitor will, under normal use, be free from defects in workmanship and materials, when received in its original container,
Marshall Electronics. AR-AM1 Analog Audio Monitor. Operating Instructions
 Marshall Electronics AR-AM1 Analog Audio Monitor 1 Operating Instructions 2 This page left intentionally blank Contents Product Overview...5 Features...5 Installation and Initial Setup...5 Unpacking...
INSTRUCTION MANUAL CM-60. Monitor. Ultra Stereo Labs, Inc. 181 Bonetti Drive San Luis Obispo, CA Telephone
 CM-60 Monitor INSTRUCTION MANUAL Quality Cinema Products Ultra Stereo Labs, Inc. 181 Bonetti Drive San Luis Obispo, CA 93401 Telephone 805.549.0161 e-mail usl@uslinc.com One Year Limited Warranty Ultra
Warranty Information. Thank You
 Model: CD168 Tube CD Player Owner s Manual 0 1 01 : 28 VACUUM TUBE CD PLAYER CD Raysonic Inc. P.O.BOX 46565, Toronto, Ontario M1T 3V8 Canada sales@raysonicaudio.com Raysonic Inc. P.O.BOX 46565, Toronto,
user guide Meridian 556 Stereo Power Amplifier
 user guide Meridian 556 Stereo Power Amplifier Sales and service in the UK Meridian Audio Ltd Stonehill Stukeley Meadows Cambs PE18 6ED England Tel (01480) 52144 Fax (01480) 459934 Sales and service in
user guide Meridian 555 Power Amplifier
 user guide Meridian 555 Power Amplifier Sales and service in the UK Meridian Audio Ltd Stonehill Stukeley Meadows Cambs PE18 6ED England Tel (01480) 52144 Fax (01480) 459934 World Wide Web http://www.meridian.co.uk
dcs Rossini Clock Digital Audio Master Clock User Manual Software Release 1.0x February 2016
 dcs Rossini Clock Digital Audio Master Clock User Manual Software Release 1.0x Data Conversion Systems Ltd. 2015-2016 Price UK 10.00 All rights reserved. No part of this publication may be reproduced,
XC4100 INSTALLATION/OWNER'S MANUAL AM/FM/Cassette Receiver
 XC4100 INSTALLATION/OWNER'S MANUAL AM/FM/Cassette Receiver Preparation XC4100 INSTALLATION Please read entire manual before installation. Before You Start Disconnect negative battery terminal. Consult
REBIS AUDIO RA303 COMPRESSOR, LIMITER, EXPANDER, GATE OPERATORS MANUAL. Introduction 2. Installation 3. Earthing 3. Position 3. Operation Compressor 4
 REBIS AUDIO RA303 COMPRESSOR, LIMITER, EXPANDER, GATE OPERATORS MANUAL CONTENTS Page Introduction 2 Installation 3 Earthing 3 Position 3 Operation Compressor 4 Operation Expander/Gate 6 Stereo Link 7 Guarantee
The Select DAC User Guide
 The Select DAC User Guide Check our website for the most recent user guides, firmware, and drivers: www.msbtechnology.com Technical support email is: techsupport@msbtech.com 04.13.17 Technical specifications
Various regulation agencies require us to bring the following information to your attention. Please read carefully.
 1 We would like to take this opportunity to thank you for selecting the CDA825 CD-player. We at Copland wish you many enjoyable hours in the company of fine music. Please read this owners manual before
Antenna Distributor ORDERCODE D1444
 Antenna Distributor ORDERCODE D1444 Congratulations! You have bought a great, innovative product from DAP Audio. The DAP Audio TAS series bring excitement to any venue. Whether you want simple plug-&-play
MODEL 805 USER MANUAL
 MODEL 805 USER MANUAL All Rights Reserved Page 1 of 12 UNPACKING & INSPECTION Save all packing materials they are required for returns and warranty service. Inspect the 805 and packing materials for any
To avoid damage due to lightning, the power supply should be unplugged during an electrical storm.
 FootSim User Guide 2 Year Limited Warranty Sound Sculpture Musical Instrument Products (Sound Sculpture) warrants the FootSim to the original purchaser to be free of defects in material and workmanship
PO Box 409 Hanover, MD TEL (410)
") ME-50 Expansion Amplifier 1 ME-50 Expansion Amplifier Introduction: The ME-50 is a 2 channel audio amplifier capable of delivering up to 25W RMS per channel. It s compact, waterproof design allows for
ME-50 Expansion Amplifier 1 ME-50 Expansion Amplifier Introduction: The ME-50 is a 2 channel audio amplifier capable of delivering up to 25W RMS per channel. It s compact, waterproof design allows for
CD 3.1x/II CD PLAYER OWNER S INFORMATION
 CD 3.1x/II CD PLAYER OWNER S INFORMATION ! IMPORTANT SAFETY INFORMATION! HUMIDITY: DO NOT STORE OR OPERATE THIS UNIT IN AREAS OF HIGH HUMIDITY, OR IN CLOSE PROXIMITY TO WATER/DAMPINESS. DO NOT EXPOSE THE
BGS 20T 100V/8Ω Background Music Loudspeakers
 BGS 20T 100V/ Background Music Loudspeakers User Manual Order codes: CRSP45 - White housing CRSP46 - Black housing Safety advice WARNING FOR YOUR OWN SAFETY, PLEASE READ THIS USER MANUAL CAREFULLY BEFORE
Leader in Audio Engineering KRC-HR PREAMPLIFIER
 Leader in Audio Engineering KRC-HR PREAMPLIFIER OWNER S REFERENCE TABLE OF CONTENTS 2 3 4 5 INTRODUCTION UNPACKING THEATER-THROUGHPUT SETUP BASIC INSTALLATION 6 INPUT/OUTPUT CONNECTIONS 7 8 9 10 11 12
MASELEC MTC-6 master transfer and monitor system
 MASELEC MTC-6 master transfer and monitor system http://www.maselec.com/ Mases Electronics Ltd. Bishopswood, Cannon Hill Close, Bray, Berks SL6 2DH, England. Tel/Fax: +44 (0) 1628-770 104. E-mail: leif@maselec.com
Contents. Table of. Welcome to Ayre Connections and Installation Controls and Operation Customization and Configuration...
 Table of Contents Welcome to Ayre............................. 2 Connections and Installation.......................... 3 Controls and Operation........................... 7 Customization and Configuration........................
EVOLUTION 50A. Instruction Manual. Integrated Amplifier. Rev 1.0a
 EVOLUTION 50A Integrated Amplifier Instruction Manual Rev 1.0a Thank you for purchasing a Creek Audio EVOLUTION 50A Integrated Amplifier. You are now in possession of a State of the Art performance product.
INFRARED WIRELESS HEADPHONES
 INFRARED WIRELESS HEADPHONES 3319131 OWNER S MANUAL INTRODUCTION This system gives you complete freedom to enjoy your music without the inconvenience and limitations of headphone cables. To ensure the
HA-10 Vacuum Tube Headphone Amp
 HA-10 Vacuum Tube Headphone Amp Made in USA HA-10 Vacuum Tube Headphone Amp 2 Copyrights & Trademarks Copyright Hagerman Audio Labs 2008. All rights reserved. No part of this document may be photocopied,
VIDAR OWNER S MANUAL STEREO OR MONO POWER AMP NOW, THAT S NOT A HINT THAT A THOR AMP IS COMING.
 VIDAR STEREO OR MONO POWER AMP In Norse mythology, VIDAR WAS THE STRONGEST GOD BEHIND THOR. NOW, THAT S NOT A HINT THAT A THOR AMP IS COMING. WE PROBABLY WOULDN T SURVIVE THE COPYRIGHT LITIGATION. AND
Thank You. Warranty Information
 Model: CD128 Tube CD Player Owner s Manual 0 1 01 : 28 VACUUM TUBE CD PLAYER CD Raysonic Inc. P.O.BOX 46565, Toronto, Ontario M1T 3V8 Canada sales@raysonicaudio.com Raysonic Inc. P.O.BOX 46565, Toronto,
CM/CS SERIES. Compact 100V amplifiers. Item ref: UK, UK, UK User Manual. CM/CS Series User Manual
 CM/CS SERIES Compact 100V amplifiers Item ref: 953.100UK, 953.101UK, 953.102UK User Manual Caution: Please read this manual carefully before operating Damage caused by misuse is not covered by the warranty
Infiniti. Wireless Pedestal Sound Rocker. User Manual Item no:
 Infiniti Wireless Pedestal Sound Rocker User Manual Item no: 5106001 Thank you for purchasing the X-Rocker Infiniti! We know you will enjoy your X-Rocker experience as much as we do! Get ready to experience
INDUSTRIAL DIGITAL AUDIO PLAYER. háxüá Zâ wx
 INDUSTRIAL DIGITAL AUDIO PLAYER háxüá Zâ wx Contact Information Alf Electro-Technical Services CC t/a ALFTECH Corporate Headquarters Address (Physical): 30 Irene Ave., Somerset West, 7130, CAPE, South
Two Channel 48 Volt Phantom Power Supply. Artcessories. User's Manual
 Two Channel 48 Volt Phantom Power Supply Artcessories User's Manual IMPORTANT SAFETY INSTRUCTION READ FIRST This symbol, whenever it appears, alerts you to the presence of uninsulated dangerous voltage
HAGERMAN T E C H N O L O G Y. Archiver. Variable EQ Phono Preamp with USB. Made in USA
 HAGERMAN T E C H N O L O G Y Archiver Variable EQ Phono Preamp with USB Made in USA Archiver Variable EQ Recording Phonostage 2 Copyrights & Trademarks Copyright Hagerman Technology LLC 2007. All rights
PREMIUMAUDIOVIDEOANDPOWERPRODUCTS V-RVC-PRO. Owners Manual
 PREMIUMAUDIOVIDEOANDPOWERPRODUCTS V-RVC-PRO Owners Manual IMPORTANT NOTE: THIS OWNER'S MANUAL IS PROVIDED AS AN INSTALLATION AND OPERATING AID. FACTOR ELECTRONICS DOES NOT ASSUME ANY RESPONSIBILITY AS
USER MANUAL GOLDMUND TELOS Integrated Amplifier
 USER MANUAL GOLDMUND TELOS 390.5 Integrated Amplifier INTRODUCTION Thank you for purchasing the Goldmund TELOS 390.5 Integrated Amplifier. You have acquired one of the best integrated amplifiers ever made
OPERATING INSTRUCTIONS PA AMPLIFIER P-1812
 OPERATING INSTRUCTIONS PA AMPLIFIER P-1812 Please follow the instructions in this manual to obtain the optimum results from this unit. We also recommend that you keep this manual handy for future reference.
Installation & User Manual for. the Model TM-1 Sound Monitor
 Installation & User Manual for the Model TM-1 Sound Monitor FFUUSSEE PRO GAIN TM-1 Monitor Back View Data Port 1 AMP GAIN Page 2 of 10 Processor Inputs Amplifier Inputs Power Data Port 2 12 VAC / 800mA
PREMIUMAUDIOVIDEOLIGHTINGANDPOWERPRODUCTS
 FACTOR ELECTRONICS PREMIUMAUDIOVIDEOLIGHTINGANDPOWERPRODUCTS V-RVC Owners Manual IMPORTANT NOTE: THIS OWNER'S MANUAL IS PROVIDED AS AN INSTALLATION AND OPERATING AID. FACTOR ELECTRONICS DOES NOT ASSUME
CDI DriveCore Series. Features \\\\\\\\\\\\\\\\\\\\\\\\\\\\\\\\\\\\\\\\\\\\\\\\\\\\\\\\\\\\\\\\\\\\\\\\\\\\\\\\\\\\\\\\\\
 CDI DriveCore Series Features \\\\\\\\\\\\\\\\\\\\\\\\\\\\\\\\\\\\\\\\\\\\\\\\\\\\\\\\\\\\\\\\\\\\\\\\\\\\\\\\\\\\\\\\\\ DriveCore Technology Crown s proprietary DriveCore technology eliminates hundreds
TABLE OF CONTENTS. Congratulations on your purchase of the Audio Note CDT ZERO Transport.
 Congratulations on your purchase of the Audio Note CDT ZERO Transport. Audio Note is highly critical of the digital medium as presented by compact disc; we sincerely hope that you too will find this transport
JEFF ROWLAND D E S I G N G R O U P
 JEFF ROWLAND D E S I G N G R O U P Coherence Stereo Preamplifier Owner s Manual Introduction Welcome to the Jeff Rowland Design Group family and congratulations on your purchase of what is unquestionably
Marshall Electronics. Operating Instructions. Warranty. AR-AM4 Analog Audio Monitor
 Warranty Marshall Electronics warranties to the first consumer that this AR-AM4 Audio Monitor will, under normal use, be free from defects in workmanship and materials, when received in its original container,