Combined pitch bend/modulation joystick GLOBAL) or carry out an action (WRITE, TAP TEMPO) Keyboard
|
|
|
- Terence Joseph
- 6 years ago
- Views:
Transcription
1


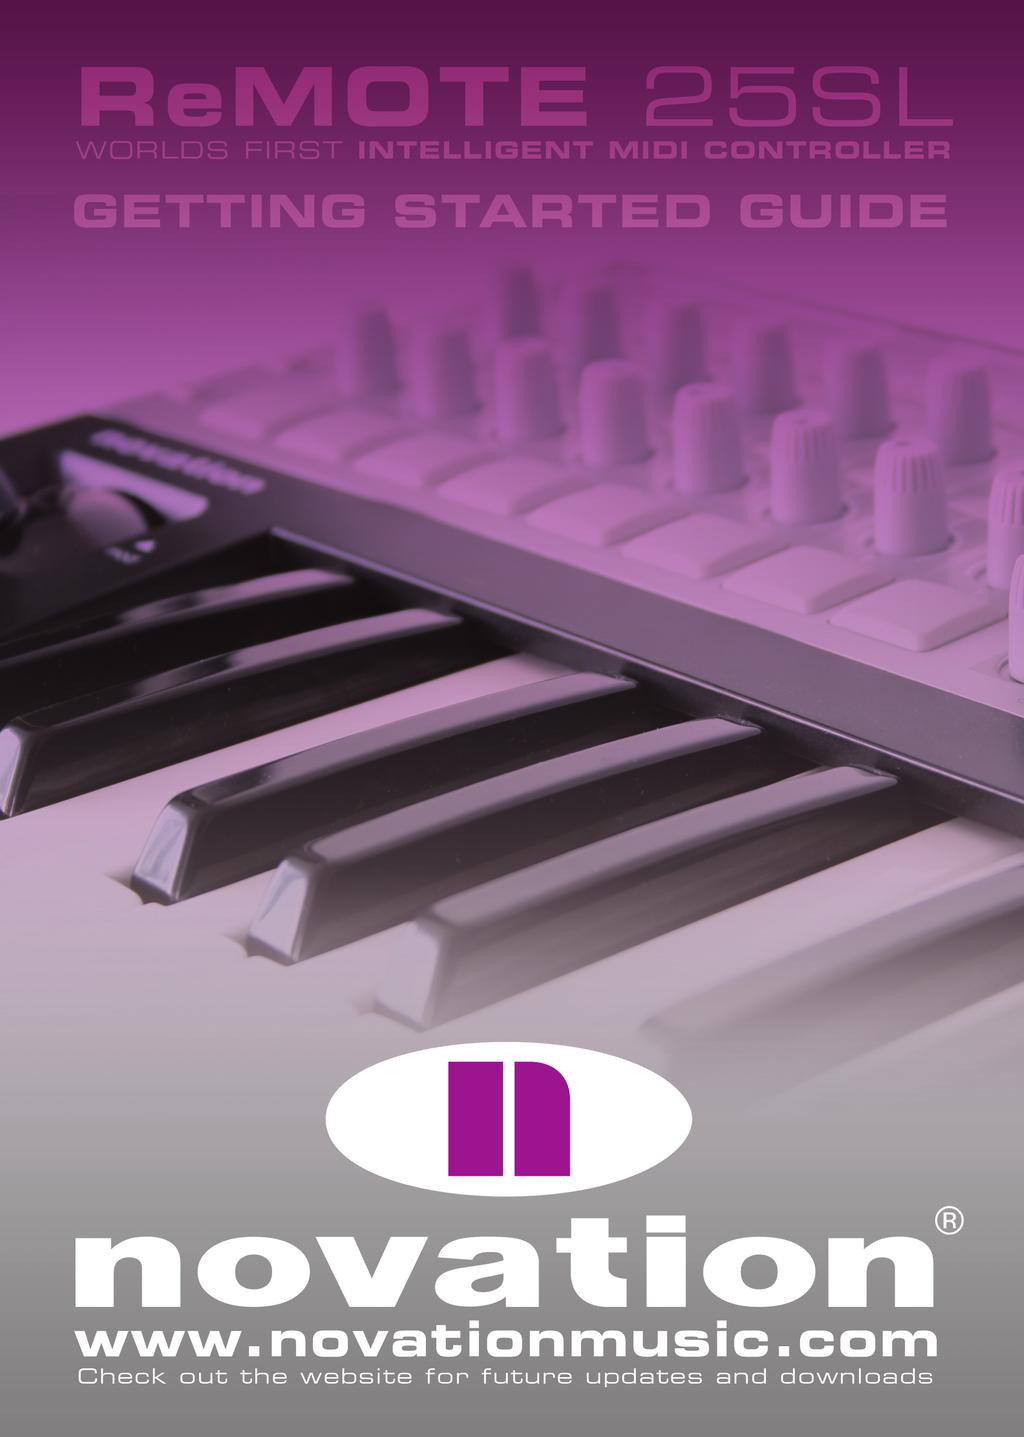
2 CONNECTING TO A COMPUTER If wanting to use your ReMOTE SL to control software then the setup couldn t be simpler. As the unit is MIDI class compliant, no drivers are required so the only action to take is connection over USB. Using the supplied USB cable, connect the ReMOTE SL to one of the computer s USB ports. Power will be supplied over USB so an external power supply (PSU) is not required. If in use, Sustain and/or Expression pedals can also be connected to the rear panel inputs. Now, the ReMOTE SL will appear as a MIDI device in the sequencer or music application in use and effortless controlling can begin! PC users should note that the SL will appear as a MIDI device named USB Audio Device. CONNECTING TO EXTERNAL HARDWARE If wanting to control hardware MIDI devices (e.g. sound modules) with the ReMOTE SL then an external power supply (Novation PSU-, not supplied) will need connecting first or batteries will need inserting. To insert batteries, turn the SL over, remove the battery cover and install 4 C-size batteries. Once done, the ReMOTE SL can be connected using standard MIDI cables (not supplied) to and from the hardware device. FRONT PANEL DIAGRAM 2 A 1 2 B 3 A 3 B 4 A 4 B Mode/Action buttons select the mode (PLAY, EDIT, TEMPLATE, Combined pitch bend/modulation joystick GLOBAL) or carry out an action (WRITE, TAP TEMPO) 7 Assignable X/Y Touchpad can control up to 4 simultaneous 2 A/B LCD Screens view control data and Menus parameters (2 on each axis) 3 A/B Scroll up/down buttons move between Menu pages 8 Keyboard 4 A/B Row select buttons select row of controls to display on the 9 Data/Tempo encoder - press to select Template/Program/ LCD screen above in PLAY mode Bank/Tempo change mode (depending on illuminated LED alongside) in PLAY mode. Rotate to select Template/Program/ Transport controls assignable MIDI buttons used for Bank/Tempo Transport control in relevant Templates 10 Octave up/down buttons - transpose keyboard up and down an octave 2
 3 USB port 8 MIDI Out (Port 1) 4 Sustain pedal input 9 MIDI In (Port 1) USING THE SL If you are not familiar with Novation controllers, the ReMOTE SL is a comprehensive hardware")
3 REAR PANEL DIAGRAM External power supply (PSU) input Expression pedal input 2 Power select switch - selects between battery/ PSU, OFF and USB (from left to right) MIDI Out (Port 2) 7 MIDI Thru (Port 1) 3 USB port 8 MIDI Out (Port 1) 4 Sustain pedal input 9 MIDI In (Port 1) USING THE SL If you are not familiar with Novation controllers, the ReMOTE SL is a comprehensive hardware surface for easy and rapid remote control of any sequencing software, plug-ins or external MIDI devices. There are 40 (3 programmable, 4 automap) onboard memory slots, all of which have been factory preset so that the ReMOTE SL works with all popular software and hardware from the moment the unit is first powered up. This means that some or all of the ReMOTE SL s assignable controls (pots, encoders, buttons, trigger pads, joystick, Touchpad and Transport controls) have been assigned the relevant MIDI data to act as a logical remote control for the destination software or hardware. These saved MIDI settings are referred to as Templates. All Templates can be edited on the unit itself or using the Template Editor (available for free from whilst brand new Templates can also be created by the same means and saved in any of the 3 (Numbers 1-3) standard Template memory slots. If you are familiar with Novation controllers, the SL employs the same fundamental modes of operation, with several obvious improvements. Two large LCD screens can display 1 assignable controls names and values simultaneously, whilst also allowing multiple edit Menu pages to be simultaneously viewed and modified. Generally, the left screen displays data and the right screen shows instructions. Modes are activated using the central vertical column of buttons, with the data encoder at the bottom now only used for one of four functions in PLAY mode and not as an option select for the edit menus (see PLAY mode section). Another major development is the enhanced software interactivity, where in some applications (Cubase SX3 and Reason 3, more to follow) automatic MIDI mapping means that simply pressing one button or clicking once with the mouse is all that s required to switch from controlling one plug-in or instrument to another. In other words, the automap Template does all the hard work for you so that no Templates need to be created or repeatedly called up and all plug-in sections automatically and intelligently map to known areas of the SL control surface. (For full details, consult the ReMOTE SL User Guide on the Resources CD or visit The Mode/Action buttons running down the centre of the SL call up the four modes (PLAY, Template Individual EDIT, TEMPLATE Common edit and GLOBAL) and perform two actions (WRITE and TAP TEMPO). The currently active mode is indicated by the LED alongside the buttons. The default setting is PLAY mode, which will be active when the unit first powers up. If wanting to activate individual Template edit mode, press the EDIT button and so on. The contrast of the LCD screens can be adjusted in GLOBAL mode (see GLOBAL mode section). 3
4 PLAY MODE This is the main mode of operation, in which different Templates can be selected and the ReMOTE SL can be used as a control surface for multiple plug-ins/instruments. The DATA/TEMPO encoder has four functions, indicated by the four LEDs alongside. The default encoder function is Template select, so rotating the encoder will scroll through the 40 onboard Templates, displaying the number on the left LCD and the name on the right. Pressing the encoder will change its action to one of three other choices: MIDI BANK select (sending MIDI Bank change messages; calling up Sound Banks on a software synth), MIDI PROGRAM select (sending MIDI Program change messages; calling up sounds on a software synth) and MIDI TEMPO select (sending MIDI Tempo messages). Use the ROW SELECT buttons to display names and values of a particular row of eight controls on the LCD screens, and use the scroll up/down buttons to change to additional screens where more details about the MIDI data assigned to each control is shown. Moving a control in a row that the values for which are not displayed will make that row the currently selected one shown on the screen above. AUTOMAP WITHIN PLAY MODE Templates on the ReMOTE SL are the Automap Templates. Once Automap has been setup for a particular application (see section below), these Templates will automatically load when that application is booted up, and all instruments and sections within the session will be sensed by the SL and mapped to it. If using Automap with Reason 3 then simply mouse click on the MIDI In column of a particular section of the rack (within the sequencer section in the Reason software) to make this section active on the SL. If using Automap with Cubase SX3 then simply press the scroll up and down buttons on the top right of the SL to change between controlling different VSTs. Press the row select buttons on the SL once to call up a particular row s names and values on the screen above. Pressing the row select buttons repeatedly will change the function of some rows as controls can have up to 3 different MIDI values in Automap mode. Note that for the current version of Cubase, buttons on the SL cannot be used in Automap mode, only pots, encoders, sliders and trigger pads. The currently supported applications (Oct 200) are Cubase SL3/SX3 (version or later) and Reason 3 (version or later). Check the website for updates as other popular platforms are expected to follow shortly. SETTING UP AUTOMAP MODE On the Resources CD, there is an Installer (ReMOTE SL Setup) which will set up Automapping for either or both of the applications (Reason 3 and Cubase SL/SX 3). Double click the relevant version of the Installer (.exe file for PC and.dmg file for Mac) then simply check or uncheck the boxes when the Automap setup window appears during the install process. The ReMOTE SL must be selected as the MIDI controller within the application in use. See sequencer documentation if unsure of the MIDI setup process. Full details are available in the SL user guide on the Resources CD/Novation website. EDIT MODE (TEMPLATE INDIVIDUAL EDIT) This is the Template Individual Edit Mode, in which the nature of each assignable control (the data assigned to it and the way it behaves when pressed/moved/rotated) in any of the 3 standard Templates (Numbers 1-3) can be defined. Pressing the EDIT button when using a particular Template will move to the edit mode for that Template so that it can be modified. To call up a particular control for editing (slider, pot, trigger pad etc.), simply hold down the EDIT button and move the control. Once activated, the Menu pages for that control will be displayed on the left LCD screen, with instructions on the right screen. To edit the control options, simply use the controls directly below each option on the screen; the buttons above and below the encoder increase and decrease the option respectively, whilst the encoder and pot will scroll through options. (See diagram on next page.) 4
5 LCD SCREEN X BUTTONS INCREASE X ENCODERS INCREASE X/ DECREASE X BUTTONS DECREASE X POTS INCREASE X/ DECREASE X CONTROLS THAT EFFECT X Press the scroll up/down keys to the left of the screen to move to the additional edit page(s) for each control. The DATA/TEMPO encoder is inactive in this mode. TEMPLATE MODE (TEMPLATE COMMON EDIT) Pressing the TEMPLATE button activates the Template Common edit mode, in which the universal settings across all controls within a Template can be modified. Press the scroll up/down buttons to move to additional pages and modify settings using the same means listed above. The SL has been expanded to allow for further User options with regards to override MIDI channel settings and routing. There are now two (universal) options for each control (in addition to the full range of individual options): COMMON and KEYBOARD. Any control now has the option of using the COMMON or KEYBOARD MIDI channel and the COMMON or KEYBOARD routing setting. Within each factory Template, controls can be set to COMMON or KEYBOARD, as well as assigned an individual MIDI channel or routing option, to allow for quick changes to multiple controls simultaneously. The COMMON and KEYBOARD MIDI channel and routing can be set within the pages in this (TEMPLATE) Mode. (See User Guide for full details.) GLOBAL MODE (GLOBAL EDIT) Pressing the GLOBAL button repeatedly alternates between two different sets of Global edit Menu pages. The first is the set of General Parameters pages, where the main ReMOTE SL settings such as Memory protect, port routing and display timeout can be defined. The second is the set of Keyboard Zones pages, where the settings of up to 4 keyboard zones can be defined. Press the scroll up/down buttons to move to additional pages and modify settings using the same means listed above. The facility to update the Operating System and receive/dump Templates is found within the General parameters pages in GLOBAL Mode. Press the GLOBAL button followed by the scroll up button (repeatedly) to the left of the left LCD screen to access. To adjust the contrast of the screens, press the GLOBAL button once and then use the first or last encoder or pot to set the left and right screen value, respectively, between 0 and 1. The GLOBAL memory protect must be off to save this setting. Press the left scroll up button (next to the left screen) once, then use the first encoder/ pot/button to set memory protect to OFF. Once this is done, the WRITE button can be used to save GLOBAL settings.
6 WRITE BUTTON The WRITE button is used to save the current Template or Global settings into the onboard memory. To save the current Template (individual and common) settings, press the WRITE button in PLAY, EDIT or TEMPLATE mode (but not GLOBAL mode), making sure that the Memory Protect is set to OFF in the Global settings. Then, to name the Template and select its number, use the buttons directly below the relevant areas of the left hand screen to move the cursor left and right as well as select the character type (upper case, lower case etc.), and the buttons/pot/encoder below the name and number to scroll through characters and numbers. Once done, press the WRITE button again to save the Template settings. Pressing the WRITE button whilst in GLOBAL mode (with GLOBAL memory protect off) will save the currently selected Global settings. TAP TEMPO BUTTON The Tap Tempo button provides another means of setting the Tempo of a track. Simply tap the button repeatedly to send a MIDI Tempo message based on the timing of each tap. OCTAVE UP/DOWN Use the Octave up and down buttons to transpose the ReMOTE SL keyboard across the entire MIDI note range. The content of this User Guide is correct as of 31/10/0. Novation products are subject to continual updates in order to achieve maximum usability. As such, certain sections of this document may be incorrect at the time of reading. Check for updates.
OS 4.1 AND AUTOMAP UNIVERSAL 2.0
 OS 4.1 AND AUTOMAP UNIVERSAL 2.0 Rev-02 ReMOTE SL USER GUIDE FOR ReMOTE SL OS 4.1 AND AUTOMAP UNIVERSAL 2.0 CONTENTS 1 INTRO 2 REGISTRATION 3 HARDWARE OVERVIEW 3.1 FRONT PANEL OVERVIEW 3.2 REAR PANEL CONNECTIONS
CONTENTS Template Parameter Edit 1 Page PROG CHG Messages. (just buttons/trigger pads/pedals) 1. Introduction
 1. Introduction") CONTENTS 1. Introduction 2. Connecting the ReMOTE SL 2. 1 Using the SL as a MIDI interface 2. 2 MIDI I/O within the sequencer 2. 3 Advanced routing options 3. Controlling with the ReMOTE SL 3. 1 PLAY Mode
CONTENTS 1. Introduction 2. Connecting the ReMOTE SL 2. 1 Using the SL as a MIDI interface 2. 2 MIDI I/O within the sequencer 2. 3 Advanced routing options 3. Controlling with the ReMOTE SL 3. 1 PLAY Mode
MIDIPLUS Co, Ltd.
 MIDIPLUS Co, Ltd. http://www.midiplus.com.tw CONTENTS Preface... 1 What s in the Box?... 1 O62 Keyboard Overview... 1 Chapter 1:Quick Start... 2 1.1 O62 Overview... 2 1.1.1 Front panel Overview... 2 1.1.2
User Guide. English. Manual Version 1.0
 User Guide English Manual Version 1.0 Table of Contents (Click a chapter/section to skip to it.) Introduction... 5 Box Contents... 5 Support... 5 About This User Guide... 5 Initial Setup... 6 1. Software/Driver
Copyright: Novation E.M.S Limited 2003 ReMOTE User Guide Version 1.5. Features and specifications subject to change without notice due to improvements
 Copyright: Novation E.M.S Limited 2003 ReMOTE User Guide Version 1.5 Features and specifications subject to change without notice due to improvements www.novationmusic.com CONTENTS Contents Introduction...
QuantiChord. MIDI Chord Quantizer App & Audio Unit MIDI effect for ios
 QuantiChord MIDI Chord Quantizer App & Audio Unit MIDI effect for ios Presentation... 1 Application setup... 2 MIDI connections between ios applications... 2 MIDI over WiFi on macos... 3 MIDI over USB
Cubase SX / 02R96 Setup and Operation V2
 Page 1 Cubase SX / 02R96 Setup and Operation This document describes setup and operation for remote control of Cubase SX from the 02R96 digital mixing console. These instructions apply to 02R96 V2.0 or
COPYRIGHT AND LEGAL NOTICES. Trademarks. Disclaimer. English
 Novation A division of Focusrite Audio Engineering Ltd. Windsor House, Turnpike Road, Cressex Business Park, High Wycombe, Bucks, HP12 3FX. United Kingdom Tel: +44 1494 462246 Fax: +44 1494 459920 e-mail:
KORG KROME Music Workstation - Product Specifications
 KORG KROME Music Workstation - Product Specifications Keyboard KROME-73 System 73-key: Natural Touch Semi Weighted keyboard *velocity sensitive is supported, after touch is not supported *Standard C1 -
HALion 4. Version history Known issues & solutions. Januar 2013 Steinberg Media Technologies GmbH
 HALion 4 Version history Known issues & solutions Januar 2013 Steinberg Media Technologies GmbH Table of contents About... 3 HALion 4.5.4... 4 Issues resolved... 4 HALion 4.5.3... 5 Improvements... 5 Issues
Introduction: -The Beat Kangz
 Introduction: Thank you for choosing Beat Thang Virtual as part of your creative process. As artists ourselves, we know how important this decision is. We understand that you have many products to choose
Push. Figure A4.1 Push.
 Push Figure A4.1 Push. Push is a hardware controller designed by Ableton and Akai to drive Live s Session View. Simply connect the Push unit using the provided USB cable to your computer and off you go.
QUICKSTART GUIDE ENGLISH
 QUICKSTART GUIDE ENGLISH WWW.AKAIPRO.COM BOX CONTENTS LPK25 USB cable Software CD SOFTWARE CD Safety Instructions & Warranty Information PC Users: To install the Akai Professional LPK25 Editor, open the
Editor User Guide. Manual Version 1.0
 Editor User Guide Manual Version 1.0 Table of Contents User Guide... 4 Introduction... 4 Support... 4 Installation... 4 Windows... 4 macos... 4 Setup... 5 Features... 6 Graphical Interface... 6 Operation...
MainStage 2. Exploring MainStage
 MainStage 2 Exploring MainStage KKApple Inc. Copyright 2011 Apple Inc. All rights reserved. Your rights to the software are governed by the accompanying software license agreement. The owner or authorized
User Guide. Manual Version 1.0
 User Guide Manual Version 1.0 Table of Contents Introduction... 3 System Requirements and Product Support... 3 Installation... 3 Windows... 3 Mac OS X... 3 Quick Start... 4 Operation... 5 Global Controls...
Axiom DirectLink for Cubase User Guide
 Axiom DirectLink for Cubase User Guide Legal Notices This guide is copyrighted 2010 by Avid Technology, Inc., with all rights reserved. Under copyright laws, this guide may not be duplicated in whole or
FRONT PANEL OVERVIEW...1 REAR PANEL OVERVIEW...3 HOOKUP DIAGRAM...4 DISPLAYING INFORMATION...6
 TABLE OF CONTENTS FRONT PANEL OVERVIEW...1 REAR PANEL OVERVIEW...3 HOOKUP DIAGRAM...4 DISPLAYING INFORMATION...6 OCTAVE AND TRANSPOSITION...6 NOTE...6 NOTE AFTERTOUCH (Channel Pressure)...6 CONTROL CHANGE...6
System Version February 14, 2017
 KRONOS 61/73/88 KRONOS X 61/73/88 KRONOS 2 61/73/88/PLATINUM/LS/GOLD System Version 3.1.2 February 14, 2017 Changes Since KRONOS System Version 3.1.1 Disk mode In system version 3.1.1 only, when installing
Cubase SX3 / DM2000 V2 Setup and Operation
 Cubase SX3 / DM2000 V2 Setup and Operation Page 1 Cubase SX3 / DM2000 V2 Setup and Operation This document describes setup and operation for remote control of Cubase SX from the DM2000 digital mixing console.
Preface. What s in the Box? BK492 Keyboard Overview
 CONTENTS Preface... 1 What s in the Box?... 1 BK492 Keyboard Overview... 1 Chapter 1:Quick Start... 2 1.1 BK492 Overview... 2 1.1.1 Front panel Overview... 2 1.1.3 Controllers description... 3 1.2 Minimum
25/37/49/61-note velocity-sensitive piano-style keys USB MIDI controller keyboard. ikeyboard 3. ikeyboard 4. ikeyboard 5. ikeyboard 6.
 25/37/49/61-note velocity-sensitive piano-style keys USB MIDI controller keyboard ikeyboard 3 ikeyboard 4 ikeyboard 5 ikeyboard 6 User manual Important Safety Instructions 1. Read this manual thoroughly
Prophet '08 PlugSE Editor
 Prophet '08 PlugSE Editor SoundTower PlugSE for Prophet 08 Synthesizer VST (PC/Mac) AudioUnits (Mac) SoundEditor, PlugSE, and ipad Products Reach Inside... SoundTower Inc. 2012 www.soundtower.com Special
TB-303. Software Bass Line Owner s Manual Roland Corporation 01
 TB-303 Software Bass Line Owner s Manual 2019 Roland Corporation 01 Introduction For details on the settings for the DAW software that you re using, refer to the DAW s help or manuals. About Trademarks
INSTRUCTIONS FOR MIDI INTERFACE
 INSTRUCTIONS FOR MIDI INTERFACE MICROMOOG USING THE MIDI INTERFACE - - - When you turn on the synthesiser for the first time, you will be in omni-on mode for receive (all channels). When you select a receive
QuNeo Reference Manual
 QuNeo Reference Manual QuNeo Version 1.2.2 March 2013 Keith McMillen, Daniel McAnulty, Conner Lacy, Jimmy Allison, Jasmin Blasco, Andrew Calvo, Chuck Carlson, Diane Douglas, Tom Ferguson, Steven Fruhwirth,
QuNeo Reference Manual
 QuNeo Reference Manual QuNeo Version 1.2 BETA December 2012 Keith McMillen, Daniel McAnulty, Conner Lacy, Jimmy Allison, Jasmin Blasco, Andrew Calvo, Chuck Carlson, Diane Douglas, Tom Ferguson, Steven
Procussion operation manual Basic Operation 15 BASIC OPERATION
 Basic Operation 15 BASIC OPERATION 16 Main Controls 17 BASIC OPERATION MAIN CONTROLS MIDI ACTIVITY EDIT MENU SELECT CURSOR CONTROL VOLUME CONTROL I/O MASTER EDIT ENTER C01 Vol127 Pan=K CURSOR DATA VOLUME
MIDIPLUS Co, Ltd.
 MIDIPLUS Co, Ltd. http://www.midiplus.com.tw Index Preface... 1 What s in the Box?... 1 AK490 Keyboard Overview:... 1 Chapter 1:Quick Start... 2 1.1 AK490 Overview... 2 1.1.1 Front panel Overview... 2
KARMA Motif Using the Remote Mode S70/S90 XS
 KARMA Motif Using the Remote Mode S70/S90 XS Revision 07-Oct-2014 by Stephen Kay www.karma-lab.com Overview Note: the use of S90 XS in this document refers to either an S70 XS or an S90 XS. The information
CALIFORNIA PROP65 WARNING:
 Index Introduction 3 Box Content SE49 Features Minimum System Requirements Getting Started 4 Connection and Power Nektar DAW integration Using SE49 as a Generic USB MIDI Controller Keyboard, Octave, Transpose
Axiom. User Guide. English
 Axiom User Guide Table of Contents.......................................................................... 3 Introduction...................................................................... 3 What
MOTIF XS Editor VST Owner s Manual
 MOTIF XS Editor VST Owner s Manual Contents What is the MOTIF XS Editor VST?...2 Data Structure of the MOTIF XS Editor VST...3 Starting the MOTIF XS Editor VST...4 An Example of MOTIF XS Editor VST in
Worlde TUNA MINI MIDI Controller User s Manual
 HANGZHOU WORLDE DIGITAL PIANO CO.,LTD WEBSITE: WWW.WORLDE.COM.CN EMAIL:SALES@WORLDE.COM.CN TEL:86 571 88730848 Worlde TUNA MINI MIDI Controller User s Manual -1- Contents 1. INTRODUCTION... 3 2. FEATURES...
vst-ch4_a.qxd 10/7/02 4:58 PM Page 90
 vst-ch4_a.qxd 10/7/02 4:58 PM Page 90 4 Meet your hosts This chapter describes the installation and basic use of VST Instruments within two of the main MIDI + audio sequencers, Steinberg s Cubase VST and
MIDI HARMONISER PLUGIN
 Obelisk by FrozenPlain 1 MIDI HARMONISER PLUGIN www.frozenplain.com Obelisk by FrozenPlain 2 1 - WHAT IS OBELISK? Obelisk is a MIDI plugin instrument. Rather than produce audio, it produces MIDI. Obelisk
3.0stand-alone music production instrument
 , English, Control Surface Details 3.0stand-alone music production instrument, 14 Channel Expandable Mixer, Analog Polysynth, Graintable Polysynth, Digital Samplers, Mastering Tools, REX-loop Player, Drum
Digitakt OS 1.07 Release Information
 Digitakt OS 1.07 Release Information Elektron Music Machines March 9, 2018 How to upgrade: Upgrading from within the OS Select SYSTEM in the SETTINGS menu, and then select OS UPGRADE. Send the SysEx firmware
MOX6/MOX8 Editor VST Owner s Manual
 MOX6/MOX8 Editor VST Owner s Manual Contents What is the MOX6/MOX8 Editor VST?...2 Data Structure of the MOX6/MOX8 Editor VST...3 Starting the MOX6/MOX8 Editor VST...4 An Example of MOX6/MOX8 Editor VST
Digitakt OS 1.06 Release Information
 Digitakt OS 1.06 Release Information Elektron Music Machines February 12, 2018 How to upgrade: Upgrading from within the OS Select SYSTEM in the SETTINGS menu, and then select OS UPGRADE. Send the SysEx
Editor v User's Manual.
 Editor v. 1.00 User's Manual www.genuinesoundware.com - 1/42 Welcome to the user's manual for the GSi DMC-122 Editor. This application for Windows and OS X operating systems lets you configure every aspect
x0xb0x Bassline Synthesizer ( Sokkos OS ) User Manual
 User Manual") x0xb0x Bassline Synthesizer ( Sokkos OS 1.9.1 ) User Manual Contents Synthesizer Section 1. Knobs, buttons & LED s 1.1 Function knob 1.2 Bank knob 1.3 Tempo knob & LED 1.4 Bank LED s 1.5 Buttons & LED
x0xb0x Bassline Synthesizer ( Sokkos OS 1.9.1 ) User Manual Contents Synthesizer Section 1. Knobs, buttons & LED s 1.1 Function knob 1.2 Bank knob 1.3 Tempo knob & LED 1.4 Bank LED s 1.5 Buttons & LED
CZPL PATCH LIBRARY OWNER S MANUAL
 CZPL PATCH LIBRARY OWNER S MANUAL Firmware Version 4.05 This manual is a complete guide to using your CZPL for the Casio CZ series. Your CZPL is also a fully functional PL88 Universal Patch Library. For
LED Commander 16/2 DMX controller. user manual
 LED Commander 16/2 DMX controller user manual Musikhaus Thomann Thomann GmbH Hans-Thomann-Strasse 1 96138 Burgebrach Germany Telephone: +49 (0) 9546 9223-0 E-mail: info@thomann.de Internet: www.thomann.de
New Features in Nuendo 4.2
 New Features in Nuendo 4.2 Cristina Bachmann, Heiko Bischoff, Marion Bröer, Sabine Pfeifer The information in this document is subject to change without notice and does not represent a commitment on the
QuNeo Reference Manual
 QuNeo Reference Manual QuNeo V0.98 BETA May 2012 Keith McMillen, Daniel McAnulty, Conner Lacy, Jasmin Blasco, Andrew Calvo, Chuck Carlson, Diane Douglas, Tom Ferguson, Matthew Hettich, Sarah Howe, Alex
Appendix 1: Upgrading the system software
 THE APPENDICES A.1 THE APPENDICES Appendix 1: Upgrading the system software Infection Music strongly recommends that you read through this section before you attempt to perform any kind of software upgrade.
FaderPort. Quick Start Guide. English.
 FaderPort www.presonus.com English Table of Contents 1 Introduction 1 1.1 About This Guide 1 1.2 What s in the Box 1 2 Hookup 2 2.1 Getting Started 2 3 Connections and Controls 3 3.1 Controls 3 3.2 Connections
GETTING STARTED GUIDE. Features of the SP6
 GETTING STARTED GUIDE This Getting Started Guide will give you a quick overview of the SP6. A full manual with additional information is available from www.kurzweil.com. Features of the SP6 FlashPlay technology
Akai Pro Advance Series and VIP - Setup with Logic Pro X
 Akai Pro Advance Series and VIP - Setup with Logic Pro X Akai Professional's Advance Keyboards are like nothing else you've ever played. Along with the VIP software, the Advance series gives you unprecedented
Editor: Alesis D4/DM5 TECH PUB
 OPCODE Editor: Alesis D4/DM5 TECH PUB This Galaxy Plus Editors module adds support for the Alesis D4 and DM5 drum modules. The D4 and DM5 each contain over 500 sampled drum and percussion sounds, which
OPERATION MANUAL VST / AU
 OPERATION MANUAL VST / AU This manual is under construction. If you want to help to improve it contact: info@audiorealism.se Introduction AudioRealism Bass Line 3 (ABL3) is an emulation of a classic pattern
User Guide
 www.nektartech.com www.nektartech.com User Guide Table of Contents Introduction 4 Box Content 4 Panorama T4/T6 Features 4 Minimum System Requirements 4 Getting Started 5 Connection and Power 5 Getting
Axiom DirectLink for Reason and Record User Guide
 User Guide Legal Notices This guide is copyrighted 2010 by Avid Technology, Inc., with all rights reserved. Under copyright laws, this guide may not be duplicated in whole or in part without the written
NATIVE INSTRUMENTS North America, Inc Sunset Boulevard 5th Floor Los Angeles, CA USA
 MANUAL Disclaimer The information in this document is subject to change without notice and does not represent a commitment on the part of Native Instruments GmbH. The software described by this document
Minimum Requirements. Installation & Release Notes. 1 Axe-Edit 3.0 Getting Started Axe-Edit 3.0 Getting Started. Mac Minimum Requirements
 Welcome to Axe-Edit 3.0, the official software editor for the Fractal Audio Systems Axe-Fx II. Re-written from the ground up, version 3.0 is stable, reliable, and easily able to keep pace with future updates.
Using the 01X with Cubase SX 3. To all 01X users thank you for your continued use of the Yamaha 01X Digital Mixing Studio!
 Supplementary Manual Using the 01X with Cubase SX 3 To all 01X users thank you for your continued use of the Yamaha 01X Digital Mixing Studio! Since the 01X was first released, software programs that can
Portable Music Studio
 Everything you need, all in one. いつでも どこでも 作曲 Instruction Manual (08-2018) Portable Music Studio 1 Contents Features... 3 Basic Controls...4 - Menus and saving.. 5 Pattern Mode... 6 Global Pattern Settings...7
Smart Pianist FAQ. Availability of certain functions differs depending on the connected instrument.
 Smart Pianist FAQ Here is a list of frequently asked questions, in Q & A format. For details on the instrument and specific operation instructions, refer to the Owner s Manual. NOTE Availability of certain
MOOG SUB 37 - FIRMWARE UPDATE UPDATE INSTRUCTIONS FOR WINDOWS (Skip to the next section for Mac OSX instructions)
") MOOG SUB 37 - FIRMWARE UPDATE 1.2.0 WHAT YOU WILL NEED A computer A program for sending MIDI SysEx data to your Sub 37. We recommend Bome SendSX for Windows, or SysEx Librarian for Macintosh. DOWNLOAD
MOOG SUB 37 - FIRMWARE UPDATE 1.2.0 WHAT YOU WILL NEED A computer A program for sending MIDI SysEx data to your Sub 37. We recommend Bome SendSX for Windows, or SysEx Librarian for Macintosh. DOWNLOAD
NATIVE INSTRUMENTS North America, Inc Sunset Boulevard 5th Floor Los Angeles, CA USA
 MANUAL Disclaimer The information in this document is subject to change without notice and does not represent a commitment on the part of Native Instruments GmbH. The software described by this document
Seaboard RISE Creator Manual
 Seaboard RISE Creator Manual 1 Introduction Hello creator, and welcome to the Creator Manual for the Seaboard RISE. We think of the people who buy and use ROLI s products as creators more than customers.
Crazy8 User Manual Mar 2017
 Crazy8 User Manual Mar 2017 Welcome! Welcome to Crazy8, your crazy companion to handle all your sequencing needs! Be sure to check out the walkthrough videos on the Crazy8 page Twisted-electrons.com/crazy8
Recording KMO in cubase, on Windows seven 32 bits, with Motif XF in remote mode.
 Recording KMO in cubase, on Windows seven 32 bits, with Motif XF in remote mode. On this example, I m using firewire drivers on Motif XF. If you are using usb drivers, you need to change the following:
USO RESTRITO. Getting Started
 Getting Started Original Manual: Synkron Revision and Quality Control: C. Bachmann, H. Bischoff, S. Pfeifer, C. Schomburg The information in this document is subject to change without notice and does not
Exploring the FP-7. Roland Corporation US Exploring the FP-7 page 1
 Exploring the FP-7 1. IT S A PIANO by default (every time you turn it on). a. Touch i. Modeled from grand piano (not vertical) ii. Gravity based system with NO springs iii. Progressively weighted (as a
USB / MIDI / CV KEYBOARD CONTROLLER
 USB / MIDI / CV KEYBOARD CONTROLLER 1. MAX49 2. AC 3. USB 4. CD (Vyzex AKAI CONNECT ) 5. DVD (Ableton Live Lite Akai Edition) 6. () AC () () () () 1. CD CD 2. : Windows : CD Vyzex installer (.exe) Mac:
StepPolyArp Unit. Step Polyphonic Arpeggiator / Sequencer App & Audio Unit MIDI effect for ios
 StepPolyArp Unit Step Polyphonic Arpeggiator / Sequencer App & Audio Unit MIDI effect for ios Presentation... 1 Application setup... 2 MIDI connections between ios applications... 2 MIDI over WiFi on macos...
User Guide. English ( 3 16 ) Appendix English ( )
 Appendix English ( )") User Guide English ( 3 16 ) Appendix English ( 17 19 ) USB SUSTAIN C17 POWER ON OFF User Guide (English) Box Contents Oxygen 25 USB Cable Ableton Live Lite Software Download Card Quickstart Guide Safety
User Guide English ( 3 16 ) Appendix English ( 17 19 ) USB SUSTAIN C17 POWER ON OFF User Guide (English) Box Contents Oxygen 25 USB Cable Ableton Live Lite Software Download Card Quickstart Guide Safety
The all-in-one music production station that goes anywhere you want. USER MANUAL
 The all-in-one music production station that goes anywhere you want. USER MANUAL Contents Table of Contents Contents 2 English 4 Power adapter information 4 irig Keys I/O 4 Register your irig Keys I/O
Spreading a Sample Across the Pads
 ÂØÒňΠMV-8000 Workshop Spreading a Sample Across the Pads 2005 Roland Corporation U.S. All rights reserved. No part of this publication may be reproduced in any form without the written permission of
Hauptwerk AU/VST Plug-in Tutorial. Cubase
 Hauptwerk AU/VST Plug-in Tutorial Cubase 1 Tutorial: Basic sequencing with Cubase on Mac OS X or Windows (with audio via the Hauptwerk VST Link, MIDI via the Hauptwerk VST Link) This tutorial features
QUICK-START GUIDE RELOOP MIXON4
 QUICK-START GUIDE RELOOP MIXON4 Installation and Setup The Reloop MIXON4 is a class compliant USB plug and play device for Mac, however requires drivers for Windows. You will find these on Reloop s website.
Main Features. 8 Assignable Knobs Deliver Real-time Control of Your Musical Software
 Table of Contents Main Features... 3 Preparation... 4 Using a Wireless Connection... 4 Using a USB Connection... 5 Software setup... 6 Functions and Operation of Controls... 7 Keyboard... 8 Touchpad...
V-STATION USER MANUAL
 V-STATION USER MANUAL Table of Contents Introduction Requesting your personalized PowerCore plug-in........ 4 Installing the - OS X.............................. 4 Installing the - Microsoft Windows XP.................
MOX6/MOX8 Remote Editor Owner s Manual
 MOX6/MOX8 Remote Editor Owner s Manual Contents Special Notices... 1 What is the MOX6/MOX8 Remote Editor?... 2 Data structure of the MOX6/MOX8 Remote Editor... 2 Operation flow from starting the application
NATIVE INSTRUMENTS North America, Inc Sunset Boulevard 5th Floor Los Angeles, CA USA
 MANUAL Disclaimer The information in this document is subject to change without notice and does not represent a commitment on the part of Native Instruments GmbH. The software described by this document
Specifications. It s the sound.
 This guide will help you hook up the Artis/Artis7 to your sound system and MIDI system, give you a quick overview, and show you how to start playing music with the Artis. A full manual for the Artis can
SL Editor. Quick Guide
 SL Editor by Quick Guide Introduction This Quick Guide applies to the software application SL Editor, that allows you to edit all the features of the SL and also to access to parameters not avaiable on
KURZWEIL Artis PlugSE
 KURZWEIL Artis PlugSE SoundTower PlugSE for KURZWEIL Artis Stage Piano VST (PC/Mac) AudioUnits (Mac) SoundEditor, PlugSE, and ipad Products Reach Inside... SoundTower Inc. 2014 www.soundtower.com Special
IMPORTANT NOTE: If you are new to using pkcomponents and/or MT Player or if you need Support, please refer to the pkc-general Manual.
 Preset: pkc-lrn v1.0.0 NOTE: There are 2 versions of this Preset. pkc-lrn is the default version. pkc-lrn[thru] is the same as the default version except that it passes Thru MIDI from a 2nd controller.
User Guide. English. Manual Version 1.1
 User Guide English Manual Version 1.1 Table of Contents Introduction... 4 Editing the Controls... 10 Information & Support... 4 Installation... 4 Overview... 10 Graphical User Interface... 10 Control Panel...
Kameleono. User Guide Ver 2.1
 Kameleono Ver 2.1 Table of Contents Overview...4 MIDI Processing Chart...5 Kameleono Inputs...5 Kameleono Core...5 Kameleono Output...5 Getting Started...6 Installing...6 Manual installation on Windows...6
Documentation Addendum (Covers changes up to OS v1.20)
") Fusion Documentation Addendum (Covers changes up to OS v1.20) This page is intentionally left blank. About this Addendum: The Fusion s operating system is upgradeable and allows us to add features and
Fusion Documentation Addendum (Covers changes up to OS v1.20) This page is intentionally left blank. About this Addendum: The Fusion s operating system is upgradeable and allows us to add features and
User Manual. Drum Machine
 User Manual Drum Machine Overview Interface Overview Interface 1 Nithonat s interface is split into three parts: Internal sequencer Responsible for editing patterns in Int.Seq. mode. Internal sequencer
KX Editor Owner s Manual
 KX Editor Owner s Manual Contents What is the KX Editor?...2 Data structure of the KX Editor...2 Operation flow from starting the application to closing it...3 Using the Preset Control Templates...6 KX
GETTING STARTED GUIDE. Specifications
 SE GETTING STARTED GUIDE This guide will help you hook up the Forte SE to your sound system and MIDI system, give you a quick overview, and show you how to start playing music with the Forte SE. A full
Keyboard Controllers. 61-Key USB/MIDI Master Controller Keyboard with Motorized Faders and Touch-Sensitive Pads
 61 semi-weighted full-size keys featuring expressive velocity and after-touch functionality 9 motorized 60 mm touch-sensitive faders to control your DAW mixer, drawbar organ, soft synths or effect units
Manual for the TimeFreezer FX. Introduction - The Idea of Time Freezing.
 Introduction - The Idea of Time Freezing. Infinite sound... Did you ever want to stop a sound just like a snapshot, so that it stays forever, without looping effects and without sounding like a synthesizer?
MPC1000 Product Overview
 Product Overview Product Description The Akai Professional MPC1000 Music Production Center combines a 64-Track MIDI Sequencer and a 32-voice Stereo Digital Sampler, with 16 velocity and pressure sensitive
Chapter 2: Basic Operation...17
 Chapter 1: Introduction...1 Top Panel...1 Front Panel...7 Rear Panel...8 Bottom Panel...9 Output Connectivity Example...10 Analog Input Connectivity Example...10 Digital Connectivity Example...11 USB Connectivity...11
MOTIF XF Editor Owner s Manual
 MOTIF XF Editor Owner s Manual Contents What is the MOTIF XF Editor?...2 Studio Manager...2 Studio Connections...2 About Open Plug-in Technology...3 Data Structure of the MOTIF XF Editor...4 Starting the
Digitakt OS 1.10 Release Information
 Digitakt OS 1.10 Release Information Elektron Music Machines June 29, 2018 How to upgrade: Upgrading from within the OS Select SYSTEM in the SETTINGS menu, and then select OS UPGRADE. Send the SysEx firmware
Disaster Area Designs DMC- 3XL & DMC- 4 Gen2 Quick Start Guide Rev 2.04 May 2015 Firmware v2.02c
 Disaster Area Designs DMC- 3XL & DMC- 4 Gen2 Quick Start Guide Rev 2.04 May 2015 Firmware v2.02c DMC- 3XL Gen2 QUICK START Thank you for purchasing a DMC controller! The DMC- 3XL Gen2 and DMC- 4 Gen2 are
Pro Tools Setup for Impact LX+
 Pro Tools Setup and Troubleshooting: Impact LX+ Pro Tools Setup for Impact LX+ First you will need to set the Impact LX+ keyboard to USB Port Setup Mode 3 1. Hold 'Shift/Mute' and press the 'Patch>' button
NATIVE INSTRUMENTS North America, Inc Sunset Boulevard 5th Floor Los Angeles, CA USA
 MANUAL Disclaimer The information in this document is subject to change without notice and does not represent a commitment on the part of Native Instruments GmbH. The software described by this document
KARMA Motif Getting Started
 KARMA Motif Getting Started Revision 07-Oct-2014 by Stephen Kay www.karma-lab.com Prerequisites Please perform the steps in the Installation and First Launch tutorial before beginning this one. Note: the
Smart Pianist FAQ. Availability of certain functions differs depending on the connected instrument.
 Smart Pianist FAQ Here is a list of frequently asked questions, in Q & A format. For details on the instrument and specific operation instructions, refer to the Owner s Manual. NOTE Availability of certain
JX-3P. PLUG-OUT Software Synthesizer Owner s Manual Roland Corporation 01
 JX-3P PLUG-OUT Software Synthesizer Owner s Manual 2018 Roland Corporation 01 Introduction When using the JX-3P for the first time, you must specify the MIDI Input/Output setting in the Setting window
Seaboard RISE. Creator Manual. October, 2015 Version 1
 Seaboard RISE Creator Manual October, 2015 Version 1 Introduction Hello creator, and welcome to the Creator Manual for the Seaboard RISE. We think of the people who buy and use ROLI s products as creators