Table of Contents. TellerScan TS240 User Manual Rev
|
|
|
- Eunice Lawrence
- 5 years ago
- Views:
Transcription

1 December 2013_
2 Table of Contents About the TellerScan TS Radio Frequency Interference... 4 TellerScan TS240 System Requirements... 4 TellerScan TS240 Included Equipment... 5 External View of the TellerScan TS Rear View of the TellerScan TS TellerScan TS240 Initial Setup... 7 New User Notice... 7 Cable Connections and Scanner Placement... 7 Installing the 1 Line Printer Ink Cartridge... 8 Installing the 1 Line Printer Ink Cartridge (continued)... 9 Installing the 4 Line Printer Ink Cartridge Installing the Ink Cartridge (continued) Installing the Franker Roller Testing the Scanner Installing the Optional USB Driver Installing ScanLite LED Status Indicator LED Status Indicator LED Status Indicator (continued) Loading Items into the Scanner Accessing the TellerScan TS Accessing the Internal Document Path Accessing the Cameras Accessing the Cameras (continued) Closing the Camera Door TellerScan TS240 Routine Maintenance TellerScan TS240 Maintenance Overview Inspect the TS240 Document Track Cleaning the TS240 Camera Cleaning the TS240 Drive Rollers Using a Cleaning Card Cleaning the TS240 Drive Rollers Using a Cleaning Swab Replacing the SADR Discrimination Roller Page 2
3 TellerScan TS240 Troubleshooting Document Feeding Problems Clearing Jams Image Quality MICR Errors Using the Diagnostic Pop Up TellerScan TS240 Frequently Asked Questions Is Using a Check Jogger Recommended? What is the Typical Cleaning Interval? What is the LED Status Light Sequence? What About Avoiding MICR Read Head Interference? How Long Does the Ink Cartridge Last? What is the Entry Tray Capacity? What is the Exit Pocket(s) Capacity? How Many Checks Per Minute Should My TS240 Scan? TellerScan TS240 Specifications Digital Check Contact Information Page 3
4 About the TellerScan TS240 The TellerScan TS240 is an easy-to-use, high volume check scanner that automatically scans the front and/or back side of checks and reads the MICR (Magnetic Ink Character Recognition) code line. The images and data are then transmitted through a USB (Universal Serial Bus) interface to the PC. The TS240 has an auto feeder that handles up to 100 items and a 100 item exit pocket. The TS240 is rated at up to 100 documents per minute (DPM) scanning speed. Speeds will vary based on the length of the document, applications used, the PC processing speeds and specific scanner model. The TS240 does not have an On / Off Switch, but will become fully activated when the USB cable is connected to a powered on PC. The TS240 is automatically powered off when the PC powers down as it senses the loss of power to the USB port. Radio Frequency Interference The TS240 could generate or use radiate radio frequency energy. If the unit is not installed and used properly, that is, in strict accordance with the instructions in this manual it could cause harmful interference to radio communications. It has been tested and found to comply with the limits for Class B digital devices pursuant to Subpart J of Part 15 of FCC Rules, which are designed to provide reasonable protection against harmful interference when operated in a commercial environment. Operation of this equipment in a residential area is not likely to cause interference due to its Class B rating. TellerScan TS240 System Requirements Recommended 2.4 GHz Dual Core Processor or faster 2 GB RAM or more Minimum 1.6 GHz Pentium IV class processor or faster 1 GB RAM 10 GB free disk space 1.5 GB free disk space Windows 7 or 8 (64 bit) Windows XP, Windows Vista, Windows 7 or 8 USB 2.0 port DCC API or newer USB 2.0 port DCC API for Energy Star models DCC API for standard models Page 4


 or MS0095 (4")


5 TellerScan TS240 Included Equipment The TellerScan TS240 includes the following equipment in the box: TellerScan TS240 check scanner 100v-240v 50/60hz voltage sensing, external power supply and cord USB 2.0 cable Ink cartridge - MS0083 (1 line printer) or MS0095 (4 line printer) depending on model Note: Ink cartridges are included only with Inkjet models Franker stamp Note: Ink cartridges are included only with Franker models Page 5


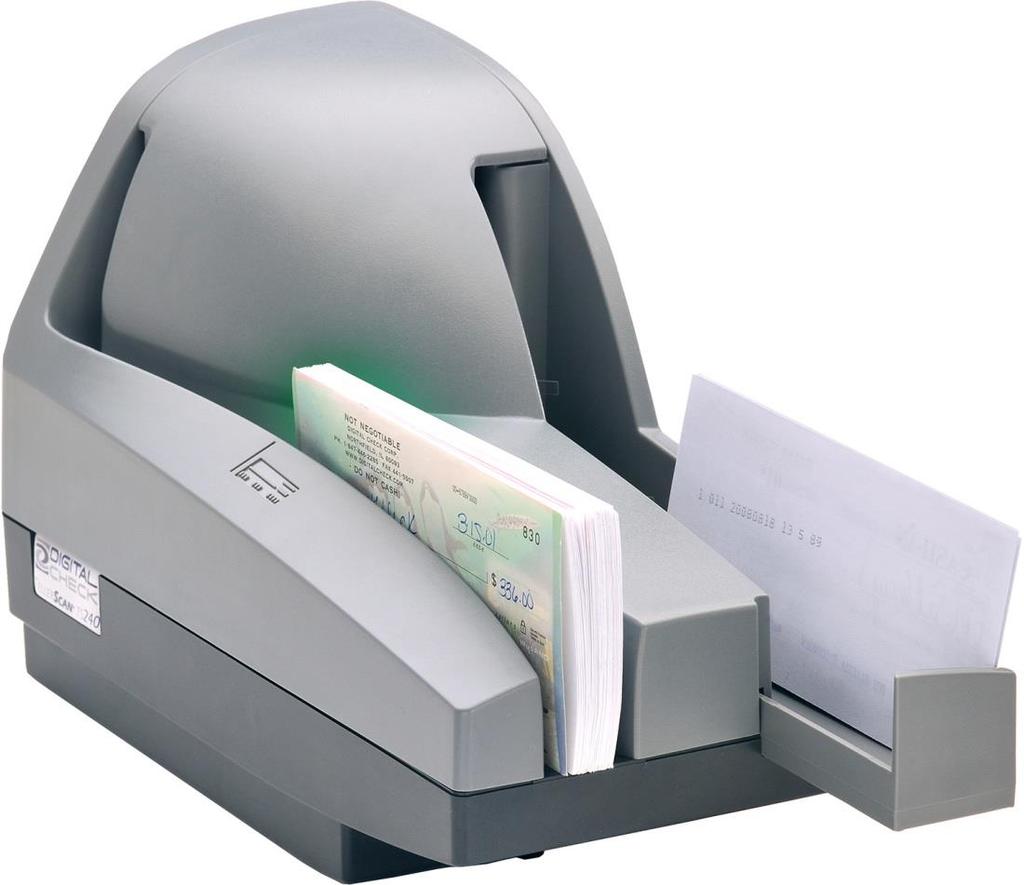
6 TellerScan TS240 Features External View of the TellerScan TS240 Rear View of the TellerScan TS240 Page 6
7 TellerScan TS240 Initial Setup New User Notice PLEASE NOTE: Do not connect the USB cable from the scanner to your PC before installing the drivers or the scanning application / software. Digital Check does not provide scanning software. Please contact your bank or other solution provider for further assistance with installing the driver or getting the scanning software set up or installed. Digital Check provides only an optional driver installation utility and a separate demonstration program. See the Installing the Optional USB Driver section or the Installing Scanlite2 section for additional information. Cable Connections and Scanner Placement Note: Do not connect the USB cable from the scanner to your PC before installing the drivers or the scanning application / software. Place the unit on a flat surface near the PC and away from direct light sources such as spot lights or desk lamps. Place the scanner in a position that is at least 6 inches away from any power supply, other electronic devices, pneumatic tubes at the teller window, etc. Connect the Power Cord for the external Power Supply to the Power Supply and then plug the connector into the rear Power Connection port. Connect the USB cable by plugging it into the rear USB port. Page 7

8 Installing the 1 Line Printer Ink Cartridge Note: This step only applies to TellerScan TS240s that have the optional inkjet configuration. Follow these instructions when installing the ink cartridge for the first time, or when replacing an empty cartridge. Inkjet platform style might vary based on production. The cartridges are installed the same way for all TS240 1 line platform styles. Step 1: Lift up on the Center Cover to remove it and provide access to the Ink Cartridge Platform. Step 2: Open the ink cartridge pouch and remove the protective tape covering the ink nozzles. Be careful not to touch the ink nozzle with your fingers or allow it to come in contact with anything else. Page 8
9 Installing the 1 Line Printer Ink Cartridge (continued) Step 3: Insert the nozzle end of the cartridge into the platform while keeping the end of the cartridge tilted slightly upward. Push down on the rear of the cartridge until it clicks twice and snaps into position. Step 4: Verify that the cartridge is properly installed. The cartridge should appear tilted at a slight angle when fully seated. Replace the Center Cover by setting it back on the unit vertically. Note: If the scanner has to be transported by common carrier from one place to another or will experience extended periods of inactivity, it is advisable to remove the ink cartridge from the scanner and seal it in an airtight bag. If the cartridge has not been used for an extended period of time, it might be necessary to clean the inkjet nozzles by gently blotting them with a towel dampened with water or using Digital Checks Inkjet Cleaning Swabs (PN: IS0032 available at Page 9

 Cartridge must be at room temperature (65-80 degrees) before being installed 2.) Insert the 4 line print cartridge 3.")
 The scanner is now ready to be used Step 1: Lift up on the Center Cover to remove it and provide access to the Ink Cartridge Platform.")
10 Installing the 4 Line Printer Ink Cartridge Follow these instructions when installing the ink cartridge for the first time, or when replacing an empty cartridge. Note: The following steps must be followed when installing a new cartridge, replacing a cartridge or prior to troubleshooting any application related inkjet errors. 1.) Cartridge must be at room temperature (65-80 degrees) before being installed 2.) Insert the 4 line print cartridge 3.) Wait 10 seconds (the cartridge will perform a self-check during this period) 4.) The scanner is now ready to be used Step 1: Lift up on the Center Cover to remove it and provide access to the Ink Cartridge Platform. Step 2: Open the ink cartridge pouch and remove the protective tape covering the ink nozzles. Be careful not to touch the ink nozzle with your fingers or allow it to come in contact with anything else. Page 10


11 Installing the Ink Cartridge (continued) Step 3: Press on the Push to Open blue tab on the side of the inkjet platform to open the latch. Step 4: Carefully insert the cartridge into the platform from the top with the contacts facing down. Make sure that the cartridge is fully seated by pressing on the top of the cartridge. Step 5: Close and secure the top latch. Press down on the Push to Close section of the latch. Replace the Center Cover by setting it back on the unit vertically. Note: If the scanner has to be transported by common carrier from one place to another or will experience extended periods of inactivity, it is advisable to remove the ink cartridge from the scanner and seal it in an airtight bag. If the cartridge has not been used for an extended period of time, it might be necessary to clean the inkjet nozzles by gently blotting them with a towel dampened with water or using Digital Checks Inkjet Cleaning Swabs (PN: IS0032 available at Page 11


12 Installing the Franker Roller Note: This step only applies to TellerScan TS240s that have the optional franker configuration. Follow these instructions when installing the franker roller for the first time, or when replacing an empty franking roller. Step 1: Remove the Center and Outer scanner covers. Locate and remove the White Nylon Thumbscrew. Step 2: Swing out the outer Camera Door. Locate the Franker Roller Mounting Post. Hold the Franker Roller with the tab facing out and lined up with the Metal Spring. Snap the Franker Roller onto the Mounting Post. Step 3: Rotate the Franker Roller until it touches the Metal Spring (as shown). Step 4: Close the Camera Door and screw the White Nylon Thumbscrew back in place. Replace the Center and Outer scanner covers. Page 12
13 Testing the Scanner Installing the Optional USB Driver PLEASE NOTE: Do not connect the USB cable from the scanner to your PC before installing the drivers or the scanning application / software. Digital Check does not provide scanning software. Please contact your bank or other solution provider for further assistance with installing the driver or getting the scanning software set up or installed. Digital Check provides only an optional driver installation utility and a separate demonstration program. Step 1: Download or Run the TellerScan USB Driver installation file from Step 2: If the scanner is currently connected to the PC, disconnect the USB cable from the PC. Turn the power off on any locally attached USB devices, such as printers, scanners or multifunction devices. This will help eliminate any possible conflicts between the various USB devices connected to the PC during the driver installation. Step 3: If downloaded / saved to a local drive, double-click on the TellerScanDriver.exe file to start the installation sequence. Follow the on-screen steps to complete the installation. Step 4: With the USB and Power Supply cables connected to the PC, the status LED on the scanner should now be active. Windows should now detect a new hardware device. The scanner is ready to be used with a scanning application or a Digital Check demo program. Installing ScanLite2 The Digital Check demo program (ScanLite2) is a basic utility that allows you to scan and view images and test the various scanner functions. ScanLite2 is also useful for cleaning the scanner. See the Cleaning the TS240 Drive Rollers section for additional information. Step 1: Download or Run the ScanLite2 installation file from Step 2: If downloaded / saved to a local drive, double-click on the ScanLite2.exe file to start the installation sequence. Follow the on-screen steps to complete the installation. Step 3: ScanLite2 will launch automatically after installation, or it can be started from a shortcut that is placed on the Desktop during the installation process. Note: ScanLite2 does not save any image or MICR data to the PC. Once the scanned item disappears from the screen or the utility is shutdown, the data is removed / cleared. Page 13

14 LED Status Indicator LED Status Indicator Off or No LED: The USB cable is not connected and/or no power to the scanner. Red LED: Scanner USB and Power Supply cables are properly connected. This is the default state when an application is not controlling the scanner or has not yet acquired the scanner. Note: Both ends of the USB cable must be plugged in for the LED light to turn Red. If the LED does not turn Red, check and reseat the end of the USB cable going into the PC and into the scanner and that the PC is turned on. Then, check that the Power Supply cables are connected properly and the source is live. Page 14
15 LED Status Indicator (continued) Green LED: The scanning application has successfully acquired the scanner and it is ready to be used. Additional LED Information: After the TellerScan TS240 is synchronized with the application; the LED is used to detect the presence of documents in the entry pocket and will turn Orange when a document has been loaded. Once the scan cycle has started, the items in the Entry Tray should feed into the path one at a time. When the last has been scanned, the scanning process will stop and the items should be stacked in the Exit Tray. A flashing Red LED indicates an error. Select an eject option within the application, if available, or look for a document in the path. If there is a stopped or jammed item in the path, remove it from the scanner. See the Accessing the TellerScan TS240 section for additional information on how to open up and access the scanner. If the LED is still showing a Red color after clearing a document jam, press and hold the Reset button for 1-2 seconds to restart the scanner. Page 15

 by sliding them into the Entry Tray with the front of the item facing out and away from the scanner.")
16 Loading Items into the Scanner The TS240 s automatic feeder can handle up to 100 items at a time. Please follow the steps below to ensure proper feeding. Step 1: Slide out the Exit Tray to expand the length of the tray to accommodate larger or business size checks. Remove all rubber bands, staples, paper clips, etc. Straighten any bent corners or excessively wrinkled documents. Step 2: Align / jog the items to prepare them for scanning. Step 3: The leading and bottom edges of items should be aligned. Place the item(s) by sliding them into the Entry Tray with the front of the item facing out and away from the scanner. Step 4: Aligned items must be inserted flat into the Entry Tray and slid forward until they stop or are pulled into the scanner. Page 16


17 Accessing the TellerScan TS240 Accessing the Internal Document Path The TellerScan TS240 has two covers, the Center cover and Outer cover. These can be removed separately or together by lifting / pulling up on the covers. Accessing the Cameras Note: Older models might have a white nylon thumbscrew in place of the latch shown below. Step 1: With the Center and Outer; covers removed, locate the blue Camera Door Latch and the tab part of the latch to unlock the camera door assembly. Page 17


18 Accessing the Cameras (continued) Step 2: Carefully swing open the camera door once it is unlocked. Note: Look for the white strip behind the glass, which is the camera. Be careful not to scratch the glass when cleaning or accessing the camera for any reason. Closing the Camera Door Note: Verify that the Camera Door is locked or closed all of the way after opening or if experiencing document jams in this section of the scanner. Step 1: Close the Camera Door by swinging it back into its original position. Step 2: Lock the Camera Door by pinching the lower part of the camera assembly together. Press on the area of the door that has the blue dot. The Camera Door will click into place and should not move or feel loose. Page 18

19 TellerScan TS240 Routine Maintenance TellerScan TS240 Maintenance Overview Over time, ink, dirt and dust particles will collect on the scanner rollers and in the document track. Therefore, it is necessary to clean these areas to ensure reliable performance. Perform a periodic inspection of the document track and use a Digital Check cleaning card to clean the scanner rollers. Using a can of compressed air will help keep the document track clean. Inspect the quality of the captured images on a regular basis. If the image quality drops off, clean the camera glass by following the procedure below. Inspect the TS240 Document Track In addition to routine drive roller cleaning, a periodic inspection of the entire document track area is also recommended. The use of a flashlight will enhance the visual inspection in the camera section and throughout the document track. Remove any staples, paperclips, debris etc. that might have accumulated during use. Have a can of compressed air available to blow out the document track on a regular basis. Blow the dust toward the entry and exit pockets starting from the center of the path by the ink cartridge platform. Cleaning the TS240 Camera To clean the cameras, use a Digital Check cleaning swab or a clean cloth to wipe the camera glass. Be careful not to scratch the glass when cleaning or accessing the camera for any reason. See the Accessing the Cameras section for additional information on opening the assembly prior to cleaning. Page 19
 for regular cleaning maintenance. Note: Use a scanning application or Digital Check s ScanLite2 utility to start the scanner motors so that the rollers are turning during the cleaning process.")

20 Cleaning the TS240 Drive Rollers Using a Cleaning Card Use the Digital Check scanner cleaning swabs (PN: IS0030) and the cleaning cards (PN: IS available at for regular cleaning maintenance. Note: Use a scanning application or Digital Check s ScanLite2 utility to start the scanner motors so that the rollers are turning during the cleaning process. Step 1: Insert the cleaning card into the scanner. Hold onto the card in order to scrub the 2 Entry Drive rollers. Keep holding onto the card so that it does not feed into the scanner. Step 2: Feed the cleaning card through the scanner another 6-8 times. Allow the card to scan all of the way through, flipping the card between cycles, top to bottom or to a clean side after each pass though the scanner. Discard the cleaning card(s) after use. Page 20
 and the cleaning cards (PN: IS0028 - available at www.digitalcheck.com) for regular cleaning maintenance.")
21 Cleaning the TS240 Drive Rollers Using a Cleaning Swab Note: Use the cleaning swabs for a more thorough cleaning of the scanner rollers. This can be done every few cleaning cycles. Use the Digital Check scanner cleaning swabs (PN: IS0030) and the cleaning cards (PN: IS available at for regular cleaning maintenance. Note: Use a scanning application or Digital Check s ScanLite2 utility to start the scanner motors so that the rollers are turning during the cleaning process. Step 1: Use a cleaning swab on the 2 Entry Drive rollers, the 4 Main Drive rollers and on the White Plastic Guide rollers. See the Accessing the TellerScan TS240 section for additional information on how to open up and access the scanner. Discard the cleaning swab(s) after use. Page 21


22 Replacing the SADR Discrimination Roller Note: The SADR Discrimination roller is user replaceable. Typically only needed for scanners that have been in service for longer periods of time or higher volume remote deposit or teller windows. (PN: available at SADR Roller Part Number Step 1: Remove the Center and Outer scanner covers to provide access to the SADR Discrimination roller. See the Accessing the TellerScan TS240 section for additional information on how to open up and access the scanner. Step 2: Lift or pull up on the SADR Discrimination roller to remove. There are no tools required for removal. Step 3: Replace the worn SADR Discrimination roller with a new roller. The roller has a D shape to it and will fit on the metal shaft in only one direction. Orient the roller to the correct position and push down on the roller until it comes to a stop. Page 22
23 TellerScan TS240 Troubleshooting Document Feeding Problems The TS240 features an auto-feeder and will not require any user adjustments. If you notice feeding problems, check the documents for bent or folded edges, debris in the scanner document track and that all items have been properly jogged / aligned and inserted correctly. If feeding problems are still experienced, try cleaning the drive rollers. See the Cleaning the TS240 Drive Rollers section for additional information. It might also be necessary to replace the discriminator feed roller and retest. See the service manual or contact Technical Support for additional information. Clearing Jams If a jam occurs, the paper path must be cleared. To do this, try to advance the jammed document by pressing the Eject button on the scanner. If the document does not exit the track, grab the document with both hands and carefully wiggle the document back and forth while lifting up. See the Accessing the TellerScan TS240 section for additional information on how to open up and access the scanner. Image Quality If you notice either streaking or fading on the images, the camera glass might require cleaning. See the Cleaning the TS240 Cameras section for additional information. MICR Errors Confirm that the document has known working MICR ink/toner. If MICR errors are still occurring, verify that the TS240 power supply or another device s power supply is at least 6 or more inches away from the scanner. Next, inspect the MICR assembly for debris, particularly metal objects. If no debris is found, inspect the assembly itself for damage or incorrect position or wiring. Drive up teller pneumatic tubes and static build-up can also cause MICR errors, verify that the scanner is at least 6 inches away from these types of devices as well. Using the Diagnostic Pop Up The Diagnostics will show a variety of PC and scanner information. This information can be copied and pasted into an to send to support. Note: To enable the diagnostic pop up the scanning application has to be active and fully connected with the scanner. Step 1: Press and hold the Shift key. Step 2: Power cycle the scanner using the Reset Button or disconnecting and then reconnecting the Power Supply cable. Step 3: Release the Shift key. The scanner diagnostics pop up should now be showing on the PC. Page 23
24 TellerScan TS240 Frequently Asked Questions Is Using a Check Jogger Recommended? Yes, to provide consistent alignment of documents, increase productivity and to reduce operator fatigue. Digital Check recommends using our MJ1000 Check Jogger (PN: available at What is the Typical Cleaning Interval? The recommended cleaning interval for the TS240 is approximately every 8,000-10,000 scans. Use a combination of the Digital Check Cleaning Swabs and Cleaning Cards to clean the drive rollers. See the Cleaning the TS240 Drive Rollers section for additional information. What is the LED Status Light Sequence? The proper LED sequence is for the LED to turn Red when the Power Supply and USB cables are connected to the scanner and to an outlet and the PC. This is followed by the LED turning Green once the application or scanning software is running and detects the scanner. If the LED does not turn Red, check the USB and Power Supply cable connection and the power source. What About Avoiding MICR Read Head Interference? Keep the TS240 Power Supply and others, small desk fans, pneumatic tubes at the teller window or similar devices at least 6-12 inches away from the scanner to keep them from interfering with the magnetic read head. How Long Does the Ink Cartridge Last? Once opened, the practical life of the ink cartridge is six to twelve months depending on usage and environment. However, the rated character yield on the inkjet cartridge is between 5-7 million characters. Do not shake or drop to cartridge which can cause the printing to fail. Digital Check recommends keeping a spare cartridge on hand in case the current cartridge cannot be used. What is the Entry Tray Capacity? The entry tray can accept up to 100 standard checks in good condition at a time. What is the Exit Pocket(s) Capacity? Up to 100 standard checks in good condition at a time can be stacked in either of the exit pockets. How Many Checks Per Minute Should My TS240 Scan? The TS240 has a rated throughput speed of up to 50, 75,100 or 150 documents per minute (DPM) depending on the specific model (TS240-50, TS240-75, TS , TS ). Actual throughput will vary depending on the PC configuration, physical size of the items scanned, simple or complex endorsement and the speed of the application. Page 24
25 TellerScan TS240 Specifications Unit Size: Height: 7.50 (19.05 cm) Width: 5.10 (12.95 cm) Length: (28.19 cm) Weight: 5.20 lbs. (2.40 kg) Paper Size: Document Height: ( mm) Image Capture Height: Up to 4.17 (106 mm) Document Length: ( mm) Document Weight: lb. bond ( gsm) Document Thickness: ( mm) Document Capacity: Entry Pocket (Check Feeder): Up to 100 items Exit Pocket: Up to 100 items (Optional) Printer: Programmable, single line or four line inkjet printer with user replaceable cartridge (Optional) Franker: User replaceable red ink stamp In-Line MICR Recognition: (Magnetic Ink Character Recognition) for E13B (North America) and CMC7 (Europe) Optical Character Recognition to enhance MICR Read, further enhanced using DCC s Best Read API function Transport Speed: inches per second (50 cm), inches per second (72.5 cm) dpm Throughput: TS / 50 documents per minute TS / 75 documents per minute TS / 100 documents per minute TS / 150 documents per minute Standard Interface: Standard USB 2.0, Scan Modes: Batch Capture Mode and Single Item Hand Drop Mode Scanning Method: Concurrent Two-Sided Duplex (2 Scan Modules) Scan Module: Contact Image Sensor (CIS) Resolution: 300 dpi (850 Pixel Linear Array) Light Source: Tri-Color LEDs (Optional Front Ultraviolet Camera) Image Resolution Optical: 300 x 300 dpi - 8 bit grayscale 300 x 300 dpi - 24 bit color Image Resolution by Software Scaling: 240 x 240 (Scan at 300 dpi and scaling down to 240) 200 x 200 (Scan at 300 dpi and scaling down to 200) 120 x 120 (Scan at 300 dpi and scaling down to 120) 100 x 100 (Scan at 300 dpi and scaling down to 100) Supported Compression: JPEG (24 bit color, 8 bit grayscale) BMP (24 bit color, 4 or 8 bit grayscale) TIFF Group 4 B/W DCC API Requirements: DCC API or newer for Energy Star models DCC API or newer for standard models Supported Operating Systems: Windows XP, Windows Vista (32 / 64 bit), Windows 7 (32 / 64 bit), Windows 8 (32 / 64 bit), Mac OS X (10.6 or newer) Ubuntu 7.05 (or newer), Red Hat AS, OpenSuse Electrical: Power consumption: 45 Watts Input Voltage: 100 to 240 VAC, 50/60 Hz Separate Standard Power Supply: Auto sensing for voltage Product Warranty: 1 year or 4 million item scans Mean Time To Repair (MTTR): 15 minutes Environmental: Operating Temperature: F (15-32 C) Operating Humidity: 35-85% non-condensing Certifications: Safety: UL, cul, CE FCC: Class A EMC: IEC CE Efficiency: CEC V 115V - Power Supply RoHS Compliant Page 25
 446-2286 Fax: (847) 441-5507 Manufacturing Facility Digital Check Corp.")
26 Digital Check Contact Information Digital Check Corp. Corporate Headquarters Digital Check Corp. 630 Dundee Road Suite 210 Northbrook, IL Phone: (847) Fax: (847) Manufacturing Facility Digital Check Corp A Trademark Street Rancho Cucamonga, CA Phone: (909) Fax: (909) Visit us at Purchase Consumables Additional Product Information Technical Support and More TellerScan is a trademark of Digital Check Corp. All other trademarks are the property of their respective owners. Page 26
TellerScan TS240 User Manual. October 2017_Rev
 October 2017_ Table of Contents About the TellerScan TS240... 4 FCC - Class B... 4 Industry Canada - Class B... 4 TellerScan TS240 System Requirements... 4 TellerScan TS240 Included Equipment... 5 External
CheXpress CX30 User Manual December 2013_Rev
 December 2013_ Contents About the CheXpress CX30... 4 Radio Frequency Interference... 4 CheXpress CX30 System Requirements... 4 CheXpress CX30 Included Equipment... 5 CheXpress CX30 Features... 6 External
TellerScan TS500 User Manual. April 2016_Rev
 April 2016_ Table of Contents Declaration of Conformity... 4 About the TellerScan TS500... 5 FCC - Class B... 5 Industry Canada - Class B... 5 TellerScan TS500 System Requirements... 5 TellerScan TS500
CheXpress CX30 Small Business Remote Deposit Check Scanner. User Manual September 2009 Rev
 CheXpress CX30 Small Business Remote Deposit Check Scanner User Manual September 2009 Rev. 091509 1 TABLE OF CONTENTS CheXpress CX30 Equipment...3 About the CheXpress CX30 Scanner....4 CheXpress Installation...6
TellerScan 240 Countertop Check Scanner. User Manual September 2009 Rev
 TellerScan 240 Countertop Check Scanner User Manual September 2009 Rev. 091509 1 Table of Contents TellerScan 240 Equipment...3 TellerScan 240 Equipment Checklist...3 TellerScan 240 System Requirements...3
TellerScan 215 & / 100 Countertop Check Scanners
 TellerScan 215 & 230-65 / 100 Countertop Check Scanners User s Guide April, 2006 Version 2.0 1 TABLE OF CONTENTS TellerScan 215 & 230 Equipment... 3 Inside the TellerScan 215 & 230 Scanner...5 TellerScan
Remote Deposit Service
 Remote Deposit Service Start Up Guide *Screen shots are shown for illustrative purposes only and may vary based on the version of Windows you are currently using. Step 1: Confirm your PC meets system
MantraJet 1100 CD/DVD autoprinter Operator s manual
 MantraJet 1100 CD/DVD autoprinter Operator s manual Rev 1.00 May 7, 2008 Table of contents 1. Specifications.. Page 2 2. Unpacking you MantraJet 1100 Page 3 3. Using your autoprinter for the first time.
ScanPartner 600C Image Scanner. User s Manual
 ScanPartner 600C Image Scanner User s Manual Version 1.0 (Doc. No. 250-0062-0) Table of Contents 1. INTRODUCTION 3-4 2. INSTALLATION AND CONNECTIONS. 5-13 2.1 Shipping Bracket 5 2.1.1 Removing the Shipping
ScanPartner 600C Image Scanner. User's Manual
 ScanPartner 600C Image Scanner User's Manual Version 1.0 Fujitsu Computer Products of America, Inc. Notice FCC Class B Computing Devices (Federal Communications Commission Radio Frequency Interference
Manual for MantraJet 1100 CD/DVD auto-printer
 Manual for MantraJet 1100 CD/DVD auto-printer Rev 1.03 September 7, 2010 Table of contents Specifications...3 Unpacking MantraJet 1100...4 Quick installation reference MantraJet 1100...7 Installation of
AstroJet TM M2 Quick Start Guide
 AstroJet TM M2 Quick Start Guide Step 1 Remove Printer and Accessories from packaging. Place Printer on a flat, even surface. Step 2 Remove Service Station Transport Tab 1. Open Top Cover. 2. Open Print
User's Guide QL-700. ENG ver.a.
 User's Guide QL-700 Be sure to read and understand this guide before using the machine. We recommend that you keep this guide nearby for future reference. www.brother.com ENG ver.a Thank you for purchasing
HP Deskjet F2100 All-in-One series. Basics Guide
 HP Deskjet F2100 All-in-One series Basics Guide Hewlett-Packard Company notices The information contained in this document is subject to change without notice. All rights reserved. Reproduction, adaptation,
MONARCH 9416 XL QUICK REFERENCE
 MONARCH 9416 XL QUICK REFERENCE This Quick Reference contains ribbon loading, supply loading, and general care, maintenance, and troubleshooting procedures for the 9416 XL Thermal Direct and 9416 XL Thermal
ImageScan Pro 800ix Series High-Speed ADF Scanner. Installation and Setup Guide. Installation and Setup Guide
 ImageScan Pro 800ix Series High-Speed ADF Scanner Installation and Setup Guide Installation and Setup Guide Box Contents: 1. Scanner 2. USB Cable 3. AC Adapter 4. Stacker Tray 5. Installation Guide 6.
CANADIAN D.O.C. WARNING
 Each product and program carries a respective written warranty, the only warranty on which the customer can rely. Avery Dennison Corp. reserves the right to make changes in the product, the programs, and
Getting started. JetScan 150. Currency scanner. User guide
 Getting started JetScan 150 Currency scanner User guide 1 Safety information, power specifications High voltage inside. Risk of electric shock. Turn power OFF and unplug power cord from machine before
SmartSource Adaptive Installation and Operations Guide. December
 SmartSource Adaptive Installation and Operations Guide December 2016 82221953-004 NO WARRANTIES OF ANY NATURE ARE EXTENDED BY THIS DOCUMENT. Any product or related information described herein is only
MX-8000 User Manual MX Rev
 MX-8000 Rev. 070202 Greeting Thank you for purchasing PAITEC USA products. This manual is prepared to provide guidelines on how to properly operate and maintain MX-8000. Copyright Any of the contents should
AstroJet L1 Quick Start Guide
 AstroJet L1 Quick Start Guide Step 1 Remove Printer and Accessories from packaging Place Printer on a level, stable surface. Make sure Printer is level. Step 2 Install Ink Drip Tray Assembly 1. Open Ink
SmartSource Series Installation and Operations Guide
 SmartSource Series Installation and Operations Guide January 2017 4326 9562-008 2017 Digital Check Corp. All rights reserved. NO WARRANTIES OF ANY NATURE ARE EXTENDED BY THIS DOCUMENT. Any product or related
AstroJet S1 Quick Start Guide
 AstroJet S1 Quick Start Guide Step 1 Remove Printer and Accessories from packaging Place Printer on a level, stable surface. Make sure Printer is level. Step 2 Assemble Ink Drip Tray Assembly 1. Select
CANADIAN D.O.C. WARNING
 Each product and program carries a respective written warranty, the only warranty on which the customer can rely. Avery Dennison Corp. reserves the right to make changes in the product, the programs, and
hp photosmart 7150 basics guide
 hp photosmart 7150 basics guide control panel The following table is a quick reference guide to the buttons that appear on your printer s control panel. CANCEL RESUME POWER contents 1 get started.........................................
Chapter 7: Fundamental Printers and Scanners
 Chapter 7: Fundamental Printers and Scanners IT Essentials: PC Hardware and Software v4.1 1 Chapter 7 Objectives 7.1 Describe the types of printers currently available 7.2 Describe the installation and
K Service Source. Color StyleWriter 2200
 K Service Source Color StyleWriter 2200 K Service Source Basics Color StyleWriter 2200 Basics Overview - 1 Overview The Color StyleWriter 2200 is a desktop color bubblejet printer for personal use. It
GENERAL INSTALLATION
 Welcome: This Hardware Installation and Trouble Shooting Guide provides step by step instructions for the installation of all supported scanners. In conjunction with the Operator Manual included with the
Datacard CR500 Instant Issuance System. User Reference Guide. July Rev B
 Datacard CR500 Instant Issuance System User Reference Guide July 2015 527495-001 Rev B Datacard CR500 User Reference Guide The CR500 Instant Issuance System Contents The CR500 Instant Issuance System The
X940e, X945e. Maintenance Guide
 X940e, X945e Maintenance Guide July 2010 www.lexmark.com Contents...3 Storing supplies...3 Checking the status of supplies...3 Checking the status of supplies from the control panel... 3 Printing a menu
Getting Started. Read Me First. series. Canon Inkjet Premium Photo Printer. 1 Preparation...P.1. Install the Print Head... P.3
 Canon Inkjet Premium Photo Printer series 1 Preparation...P.1 Getting Started Read Me First Symbols Used in This Document Prohibited actions. Instructions including important information. In this guide,
User Guide. Set Up & Start Up Basic Copier Operations Key Operator Functions
 User Guide Set Up & Start Up Basic Copier Operations Key Operator Functions Toshiba America Business Solutions, Inc. 2006 Training and Dealer Development SET UP & START UP Turning the System On Turning
Gateway Profile 4 service guide
 Gateway Profile 4 service guide Customizing Troubleshooting Contents Replacing Components in Your Gateway Profile 4.................. 1 About this guide.....................................................
Mercury Helios ASSEMBLY MANUAL & USER GUIDE
 Mercury Helios ASSEMBLY MANUAL & USER GUIDE TABLE OF CONTENTS INTRODUCTION...1 1.1 MINIMUM SYSTEM REQUIREMENTS 1.1.1 Apple Mac Requirements 1.1.2 PC Requirements 1.1.3 Supported PCIe Cards NOTE: Boot Camp
APPENDIX FOLDING AND INSERTING MACHINE SI 68
 APPENDIX FOLDING AND INSERTING MACHINE SI 68 MAXIFEEDER MF-2 OPERATOR MANUAL 1. FUNCTION The MaxiFeeder is intended to be used for Business Reply Envelopes (BRE), but also "standard" documents can be processed
Monarch 9414 Printer. TC9414EM 7/99 Rev. AB 1999 Monarch Marking Systems, Inc. All rights reserved.
 Monarch 9414 Printer TC9414EM 7/99 Rev. AB 1999 Monarch Marking Systems, Inc. All rights reserved. Each product and program carries a respective written warranty, the only warranty on which the customer
ID-100 AND ID-150 DESKTOP DOCUMENT SCANNER USER S GUIDE. Revision 11 Release Date April 13, 2011
 ID-100 AND ID-150 DESKTOP DOCUMENT SCANNER USER S GUIDE Revision 11 Release Date April 13, 2011 AssureTec Technologies, Inc. 200 Perimeter Road, Manchester, NH 03103-3326 USA (603) 641-8443 Copyright 2009-2011
K Service Source. StyleWriter
 K Service Source StyleWriter K Service Source Basics StyleWriter Basics Introduction - 1 Introduction The StyleWriter is a serial bubble jet ink-on-demand printer. The StyleWriter prints up to 1/3 page
THUNDERBAY 4. Assembly Manual & User Guide
 THUNDERBAY 4 Assembly Manual & User Guide CONTENTS Introduction...1 1.1 Minimum System Requirements 1.1.1 Apple Mac Requirements 1.1.2 PC Requirements 1.1.3 Supported Drives 1.2 Package Contents 1.3 About
Copyright 2013 Esselte Leitz GmbH & Co. KG. All rights reserved.
 Copyright 2013 Esselte Leitz GmbH & Co. KG. All rights reserved. Mac, ipad, AirPrint, and OS X are trademarks of Apple Inc., registered in the U.S. and other countries. Google and Google Cloud Print are
Lexmark Z51. Color Jetprinter. User s Guide for OS/2
 Lexmark Z51 Color Jetprinter User s Guide for OS/2 First Edition (October 1998) The following paragraph does not apply to any country where such provisions are inconsistent with local law: LEXMARK INTERNATIONAL,
EPSON ActionLaser Read This First. eepa POLLUTION PREVENTER
 EPSON ActionLaser 1400 Read This First eepa POLLUTION PREVENTER This booklet is to help you set up your printer and begin printing quickly. It also gives you instructions for routine maintenance. If you
HP Photosmart c3180 Main Circuit Board Replacement
 HP Photosmart c3180 Main Circuit Board Replacement Replacing a faulty main circuit board. Written By: Jim ifixit CC BY-NC-SA www.ifixit.com Page 1 of 26 TOOLS: Spudger (1) T10 Torx Screwdriver (1) ifixit
Opening the Computer 1 Before you open your computer, shut it down by choosing Apple (apple) > Shut Down.
 > Shut Down.") Opening the Computer 1 Before you open your computer, shut it down by choosing Apple (apple) > Shut Down. Warning: Always shut down your Power Mac G5 before opening it to avoid damaging its internal components
Opening the Computer 1 Before you open your computer, shut it down by choosing Apple (apple) > Shut Down. Warning: Always shut down your Power Mac G5 before opening it to avoid damaging its internal components
USER GUIDE. USB 2.0 CD-ROM Slim External Drive
 USB 2.0 CD-ROM Slim External Drive USER GUIDE Visit our Website at www.targus.com Features and specifications subject to change without notice. 2007 Targus Group International, Inc. and Targus, Inc. LISTED
Getting Started. Read Me First. series. Photo Printer
 Photo Printer series Getting Started Read Me First Make sure to read this manual before using the printer. Please keep it in hand for future reference. Contents 1 Preparation 2 Turn the Power On 3 Install
Getting Started. Read Me First. series. Photo Printer
 Photo Printer series Getting Started Read Me First Make sure to read this manual before using the printer. Please keep it in hand for future reference. Symbols Used in This Document Instructions including
DATA DOUBLER. Apple Mac mini (2009)
") DATA DOUBLER Apple Mac mini (2009) TABLE OF CONTENTS Introduction... 1 1.1 Hardware Compatibility 1.1.1 Host Computer Compatibility 1.1.2 Drive Compatibility 1.2 Package Contents 1.3 About This Manual
DATA DOUBLER Apple Mac mini (2009) TABLE OF CONTENTS Introduction... 1 1.1 Hardware Compatibility 1.1.1 Host Computer Compatibility 1.1.2 Drive Compatibility 1.2 Package Contents 1.3 About This Manual
JanusRAID SA-6692J Hardware User Manual
 JanusRAID SA-6692J Hardware User Manual 42-30000-5067 SATA II JBOD enclosure Version 1.1 SA-6692J SATA II JBOD enclosure Hardware User Manual Table of Contents Preface... i Chapter 1 System Requirements
HP Photosmart Premium Fax All-in-One Printers (C410a, C410b, C410c, C410d, C410e) - Product Specifications Product Specifications
 - Product Specifications Product Specifications") HP Photosmart Premium Fax All-in-One Printers (C410a, C410b, C410c, C410d, C410e) - Product Specifications Product Specifications Figure 1: HP Photosmart Premium Fax All-in-One printer series (C410) Image
HP Photosmart Premium Fax All-in-One Printers (C410a, C410b, C410c, C410d, C410e) - Product Specifications Product Specifications Figure 1: HP Photosmart Premium Fax All-in-One printer series (C410) Image
User Manual. Rack Mount Display Monitor - 4K RMP-161-4K17. 7U 17.3 inch Rack Mount Display Monitor
 User Manual Rack Mount Display Monitor - 4K RMP-161-4K17 7U 17.3 inch Rack Mount Display Monitor Options : - DC 9~36V power input - Touchscreen - AR hardness glass Contents < Part. 1 > RMB-17W-4K 1.1 Package
HP OfficeJet Enterprise Color MFP X585
 HP OfficeJet Enterprise Color MFP X585 Improve print quality If the product is having print-quality problems, try the following solutions in the order presented to resolve the issue. If the product is
MERCURY PRO. Assembly Manual & User Guide
 MERCURY PRO Assembly Manual & User Guide CONTENTS Introduction... 1 1.1 Minimum System Requirements 1.1.1 Apple Mac Requirements 1.1.2 PC Requirements 1.1.3 Supported Optical Drives 1.2 Package Contents
Start Here. Unpack. 1 Make sure you have these items: 2 Remove all the packing materials and tape.
 Epson Stylus Pro 3880 Start Here Unpack 1 Make sure you have these items: Printer Power cord CD-ROM User's Guide Ink cartridges Rear sheet guide Limited Warranty Warning: The printer weighs about 43 pounds
The NDP Quantum Series
 The NDP Quantum Series State-of-the-Art Technology Taking Performance to New Levels. The ideal platform for centralized check processing centers in small to mid-size financial institutions, for regional
Setup Guide. Confirming the Installation Space. Installation space (W x D x H) 70.5 x 66.3 x 61.5 inches (1790 x 1684 x 1560 mm) 23.
 70.5 x 66.3 x 61.5 inches (1790 x 1684 x 1560 mm) 23.") Introductory Information Setup Guide ENGLISH Read this manual before attempting to operate the printer. Keep this manual in a handy location for future reference. Caution Instructions in this Setup Guide
Introductory Information Setup Guide ENGLISH Read this manual before attempting to operate the printer. Keep this manual in a handy location for future reference. Caution Instructions in this Setup Guide
HiTi P310W. user manual V_0.1.
 HiTi P310W user manual www.hiti.com V_0.1 TABLE OF CONTENTS Chapter 1. Important Safety Instruction Environments 1-1 Handling Instruction 1-2 Handling Instruction for Consumable and Printed Output 1-3
OWC Mercury Helios 2 ASSEMBLY MANUAL & USER GUIDE
 OWC Mercury Helios 2 ASSEMBLY MANUAL & USER GUIDE TABLE OF CONTENTS 1. INTRODUCTION...1 1.1 MINIMUM SYSTEM REQUIREMENTS 1.1.1 Apple Mac Requirements 1.1.2 PC Requirements 1.1.3 Supported PCIe Cards 1.2
Afinia Label L901 Label Printer Quick Start Guide
 Afinia Label L901 Label Printer Quick Start Guide Ver. 1.1 Page 2 Step 1 Remove Printer and Accessories from packaging Items included: Printer USB cable One ink set (CMYKK) Quick Start Guide Network cable
ip3600 series Getting Started =Read Me First= Photo Printer
 Photo Printer ip3600 series Getting Started =Read Me First= Make sure to read this manual before using the printer. Please keep it in hand for future reference. Symbols The following symbols are used to
THUNDERBAY 4. Assembly Manual & User Guide
 THUNDERBAY 4 Assembly Manual & User Guide TABLE OF CONTENTS INTRODUCTION...1 1.1 MINIMUM SYSTEM REQUIREMENTS 1.1.1 Apple Mac Requirements 1.1.2 PC Requirements 1.1.3 Supported Drives: up to four 3.5 SATA
Domino One-Pocket Currency Discriminator
 Domino One-Pocket Currency Discriminator H This manual contains important information on safety measures and operational features of the Kolibri Domino 1-pocket currency discriminator. Please read it carefully
OWC Mercury Pro Optical ASSEMBLY MANUAL & USER GUIDE
 OWC Mercury Pro Optical ASSEMBLY MANUAL & USER GUIDE Copyright 2015 Other World Computing All Rights Reserved. Other World Computing s Limited Warranty is not transferable and subject to limitations. TABLE
SPECIAL APPLICATION MANUAL PART NUMBER: TNP121UL. Tilt N Plug Jr. Table Top Interconnect Box USER'S GUIDE
 MANUAL PART NUMBER: 400-0429-001 TNP121UL Tilt N Plug Jr. Table Top Interconnect Box USER'S GUIDE INTRODUCTION Your purchase of the UL Listed TNP121UL, Tilt N Plug Jr. Interconnect Box is greatly appreciated.
3 Maintenance. Chapter contents
 3 Maintenance Chapter contents Life expectancies of consumables..................... 40 User-replaceable parts.............................. 40 Replacing the printer pickup roller................ 41 Replacing
Operator s Handbook. Monarch FreshMarx 9417 Food Freshness System. TC9417OH Rev. AE 1/ Avery Dennison Corp. All rights reserved.
 Operator s Handbook Monarch FreshMarx 9417 Food Freshness System TC9417OH Rev. AE 1/2015 2013 Avery Dennison Corp. All rights reserved. Each product and program carries a respective written warranty, the
KIP 2300 USB3. User Guide. Version QA.1
 KIP 2300 USB3 User Guide Version QA.1 We highly appreciate your purchasing our KIP 2300 Image Scanner. This User's Manual contains functional and operational explanation for KIP 2300 Image Scanner. Read
Removal and Installation8
 8 Screw Types 8-4 Top Cover Assembly 8-5 Left Hand Cover 8-6 Right Hand Cover 8-10 Front Panel Assembly 8-14 Left Rear Cover 8-15 Right Rear Cover 8-16 Extension Cover (60" Model only) 8-17 Media Lever
User Manual. Rack Mount Display Monitor RMP-161-F17A. 6U 17.3 inch Rack Mount Display Monitor. Options : - AV, S-video input - Touchscreen
 User Manual Rack Mount Display Monitor RMP-161-F17A 6U 17.3 inch Rack Mount Display Monitor Options : - AV, S-video input - Touchscreen Contents < Part. 1 > RMP-161-F17A 1.1 Package Content 1.2 Structure
LASERJET ENTERPRISE MFP M630
 LASERJET ENTERPRISE MFP M630 Maintenance kit replacement manual M630dn M630f M630z M630h Copyright and License 2014 Copyright Hewlett-Packard Development Company, L.P. Reproduction, adaptation, or translation
Lexmark X203n and X204n Series. Maintenance Guide
 Lexmark X203n and X204n Series Maintenance Guide February 2011 www.lexmark.com Contents...3 Cleaning the exterior of the printer...3 Cleaning the scanner glass...4 Cleaning the ADF separator rollers...5
If you have questions about your KCD-2000 and its operation, please contact technical support at
 This manual contains important information on safety measures and operational features of the KCD-2000 4-way counterfeit detector. Please read it carefully before operating your machine and keep it for
EC9000i / 9100i / 9600i Series Scanners User Guide
 EC9000i / 9100i / 9600i Series Scanners User Guide March 2015 Compliance statements Copyright 2015 by RDM Corporation. All rights reserved. No part of this publication may be reproduced, stored in a retrieval
KIP 720. User Guide. Version QA.1
 KIP 720 User Guide Version QA.1 Thank you for purchasing KIP 720. This USER'S GUIDE contains functional and operational explanations for KIP 720. Please read this USER'S GUIDE carefully before using KIP
Moving your printer 1. Remove cables. Printing Moving the printer. Using color. Paper handling. 1 Turn the printer off. Maintenance.
 Moving the printer Moving your printer 1 If you re going to move the printer, you must remove the supplies and attached options to prevent damage to the printer. Use the following steps to remove the options
OM0083. TellerScan 240. Countertop Check Scanner. Service Manual. DIGITAL CHECK CORPORATION 466 Central Avenue Northfield, IL 60093
 OM0083 TellerScan 240 Countertop Check Scanner Service Manual DIGITAL CHECK CORPORATION 466 Central Avenue Northfield, IL 60093 Foreword This service manual has been prepared to provide information necessary
KM-4800w. Installation Guide
 KM-4800w Installation Guide TABLE OF CONTENTS page 1 Installation Requirements 2 2 Unpacking 3 2. 1 Unpacking 3 2. 2 Confirmation of Accessories 5 3 Leveling the Machine 7 4 Setup of the Roll Deck 9 5
LabelMax SP2 User Manual
 LabelMax SP2 User Manual 1 GENERAL... 3 1.1 COPYRIGHT DECLARATION... 3 1.2 COMPLIANCES... 3 1.3 INTRODUCTION... 3 2 GETTING STARTED... 4 2.1 UNPACKING AND INSPECTION... 4 2.2 EQUIPMENT CHECKLIST... 4 2.3
QUICK REFERENCE. Getting Started
 QUICK REFERENCE This Quick Reference contains supply loading information and care and maintenance procedures for the Monarch Pathfinder Ultra Silver 6032 printer. For more detailed information, refer to
HP LaserJet 3390/3392 Getting Started Guide
 HP LaserJet 3390/3392 Getting Started Guide HP LaserJet 3390/3392 all-in-one Start Guide Copyright Information 2006 Copyright Hewlett-Packard Development Company, L.P. Reproduction, adaptation or translation
VJ-1614 INSTALLATION MANUAL
 VJ-6 INSTALLATION MANUAL Please read this manual before using Thank you for purchasing a MUTOH product. This manual explains the steps for unpacking, mounting and basic installation before using the MUTOH
1. Review the printer safety information in the Regulatory Compliance document provided with your printer.
 QUICK REFERENCE This Quick Reference contains supply loading information and general care and maintenance procedures for the Monarch Pathfinder Ultra Platinum 6039 printer. For more detailed information,
easyraid Q24P2-U4R4 Hardware Manual
 easyraid Q24P2-U4R4 Hardware Manual 42-30000-5105 SCSI Channel to Serial ATA II Disk Array System Version 1.0 easyraid Q24P2-U4R4 U320 SCSI Channel to Serial ATA II Disk Array System Hardware User Manual
Installing imac Intel 27" EMC 2390 Dual HDD or
 Installing imac Intel 27" EMC 2390 Dual HDD or SSD Drive Installing a secondary HDD or SSD in the mid 2010 27" imac EMC 2390. Written By: Brett Hartt ifixit CC BY-NC-SA www.ifixit.com Page 1 of 23 INTRODUCTION
VJ-1604 INSTALLATION MANUAL
 Please read this manual before using Thank you for purchasing a MUTOH product. This manual explains the steps for unpacking, mounting and basic installation before using the MUTOH Full-color inkjet printer
DEPOSITPARTNER INSTALLATION GUIDE Web Application for Windows Operating Systems
 DEPOSITPARTNER INSTALLATION GUIDE Web Application for Windows Operating Systems STEP 1: SCANNER DRIVER INSTALLATION NOTE: In order for the scanner to work properly, the scanner drivers must be installed
TT230SM THERMAL TRANSFER PRINTER USER S MANUAL
 TT230SM THERMAL TRANSFER PRINTER USER S MANUAL Operations Overview Unpacking and Inspection This printer has been specially packaged to withstand damage during shipping. Please carefully inspect the packaging
Replacement Instructions
 imac G5 Inverter, 20-inch Replacement Instructions Follow the instructions in this document carefully. Failure to follow these instructions could damage your equipment and void its warranty. Note: Online
Changing the Size of the Paper in the Paper Tray For Local Printing For Network Printing (WorkCentre PE120i only)...1.
...1.") Quick Start Guide CONTENTS Step 1: Unpacking... 1.3 Step 2: Installing the Toner Cartridge... 1.5 Step 3: Loading Paper... 1.7 Changing the Size of the Paper in the Paper Tray.. 1.9 Step 4: Connecting
Quick Start Guide CONTENTS Step 1: Unpacking... 1.3 Step 2: Installing the Toner Cartridge... 1.5 Step 3: Loading Paper... 1.7 Changing the Size of the Paper in the Paper Tray.. 1.9 Step 4: Connecting
Loading paper and specialty media Learning about the printer. Stop all printer activity. 7 Back button Return to the previous screen.
 Quick Reference Use the 6 Stop or Cancel button To Stop all printer activity. Loading paper and specialty media Learning about the printer Using the printer control panel 0 Use the 9 To Display View the
User Manual. Trinocular Stereo Microscope
 User Manual Trinocular Stereo Microscope Model V434 XV434 Series MicroscopeNet.com Table of Contents i. Caution.. 1 ii. Care and Maintenance... 2 1. Component Illustration... 3 2. Installation 4 3. Operation....6
Mercury Elite Pro mini ASSEMBLY MANUAL & USER GUIDE
 Mercury Elite Pro mini ASSEMBLY MANUAL & USER GUIDE TABLE OF CONTENTS 1. INTRODUCTION... 1 1.1 MINIMUM SYSTEM REQUIREMENTS 1.1.1 Mac Requirements 1.1.2 PC Requirements 1.2 PACKAGE CONTENTS 1.3 ABOUT THIS
SmartSource Series Capabilities Overview
 SmartSource Series Capabilities Overview January 2017 4326 9539-008 2017 Digital Check Corp. All rights reserved. This document is not a contract and does not create any representations or warranties by
hp photosmart 230 basics guide
 hp photosmart 230 basics guide contents get started............................................... 1 welcome..................................................... 1 quick reference................................................
Assembly Manual & User Guide
 Assembly Manual & User Guide TABLE OF CONTENTS 1. INTRODUCTION... 1 1.1 MINIMUM SYSTEM REQUIREMENTS 1.1.1 Apple Mac Requirements 1.1.2 PC Requirements 1.2 PACKAGE CONTENTS 1.3 ABOUT THIS MANUAL 1.4 FRONT
Instructions for SVC-KIT-0020
 Kaleidescape, Inc. July 22, 2010 Instructions for SVC-KIT-0020 Title Time to complete 1U Server Power Supply Replacement 1 hour Procedure to complete Locate Parts and Tools Service Kit Parts Power supply
PIX-55. Atomic Time Clock. Operation Manual
 PIX-55 Atomic Time Clock Operation Manual Proprietary Notice This document contains proprietary information and such information may not be reproduced in whole or part without the written permission from
Table of Contents. Unpacking and Inspection Setup Loading the Media Mount the Printer on the Wall... 16
 WPL25/WHC25 Table of Contents Unpacking and Inspection... 1 Setup... 5 Loading the Media... 6 Mount the Printer on the Wall... 16 LED and Button Functions... 17 Troubleshooting... 18 Unpacking and Inspection
ASTRO UW-1C and RW-1C LABEL PRINTER UNWINDER & WINDER
 ASTRO UW-1C and RW-1C LABEL PRINTER UNWINDER & WINDER OPERATOR MANUAL ASTRO MACHINE CORP. 630 Lively Blvd. Elk Grove Village, IL 60007 Phone: (847) 364-6363 Fax: (847) 364-9898 www.astromachine.com SAFETY
Installation and Operations Guide SmartSource Elite Series Professional Elite Merchant Elite Ultraviolet Elite. January
 Installation and Operations Guide SmartSource Elite Series Professional Elite Merchant Elite Ultraviolet Elite January 2017 8227 4907-003 NO WARRANTIES OF ANY NATURE ARE EXTENDED BY THIS DOCUMENT. Any