PFPDARM3 Product Illustration
|
|
|
- Grant George
- 5 years ago
- Views:
Transcription


1 PFPDARM3 Product Illustration page 1 of 15
2 PFPDARM3 Components & Fasteners 1x 1x 4x 4x 8x 4x 1 each TOOLS REQUIRED Phillips Screwdriver 1/2" Wrench 1/2" Socket Wrench 3/32" (2.38mm) 3/16" (4.76mm) 1/8" (3.17mm) Ø ½" Ø ½" page 2 of 15
 slatwall bracket screws.")

3 STEP 1 Install to Slatwall. Use the Phillips Screwdriver to loosen (but not remove) slatwall bracket screws. The upper and lower slatwall brackets will move apart. With screws still installed, hook the slat wall bracket onto the slatwall. Use the Phillips Screwdriver to tighten screws, drawing upper and lower slatwall brackets toward one another. page 3 of 15
4 STEP 2 Installation Instructions for Monitors with the following hole mounting patterns: 75mm VESA FPMPMI Standard Hole Mount* 100mm VESA FPMPMI Standard Hole Mount* Custom - does not comply with VESA FPMPMI hole pattern standards* * VESA (Video Electronics Standard Association) FPMPMI (Flat Panel Monitor Physical Mounting Interface) page 4 of 15
5 STEP 2 continued Remove monitor pivot from slide bracket. page 5 of 15
6 STEP 2a For monitors with a 75mm VESA FPMPMI hole pattern: Attach monitor directly to pivot. 4x M4 x 10mm page 6 of 15
7 STEP 2b For monitors with a 100mm VESA FPMPMI hole pattern: Attach 75 to 100mm adapter plate to pivot. 4x #8-32 x 3/16" 3/32" (2.38mm) Attach monitor to adapter plate/pivot assembly. 4x M4 x 10mm page 7 of 15
8 STEP 2c For monitors that are not compliant with VESA FPMPMI hole pattern standards: contact your APW Wright-line customer service representative. page 8 of 15


9 STEP 3 Re-attach pivot (with monitor installed) to slide bracket. NOTE: Make sure that the curve on the back of the pivot wraps around the slide bracket. Do not overtighten the pivot knob. page 9 of 15
10 Optional Slide Bracket Mounting Locations The height of the monitor in relation to the slat wall can be changed according to need. This illustration shows the lowest and highest slide bracket positions and points out mounting holes. Note that the highest levels are achieved by mounting the slide bracket up-side-down (relative to orientation of product as it is shipped). 6" (152.4mm) To change location of slide bracket, use a 1/8" hex wrench to remove screws. Move slide bracket to desired position, and secure with screws. Slide bracket allows 6" of vertical adjustment of monitor while mounted to slat wall. To adjust monitor height: While supporting monitor with one hand, loosen monitor pivot knob with the other hand, move monitor up or down to desired location. Tighten monitor pivot knob. page 10 of 15


11 STEP 4 Use clips and ties to manage cables as needed according to your equipment configuration. NOTE: Leave enough slack in cables to allow free movement. page 11 of 15
12 PFPDARM3 Adjustment Overview APW-wright line products are factoryset to provide positive pivot control and a smooth moving force throughout the entire range of motion. To customize your installation, you will evaluate the operation of three separate functions: the side-to-side movement of the monitor, the up and down movement of the monitor and the movement of the monitor from a portrait (vertical screen) to a landscape (horizontal screen) orientation. Adjustment 1 Monitor Side-to-Side Adjustment 2 Monitor Up and Down Specific adjustment procedures for each function follow. Adjustment 3 Monitor Portrait/Landscape page 12 of 15
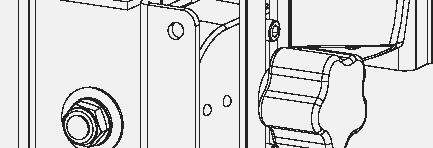
13 Adjustment 1 Monitor Side-to-Side 3/16" 1/2" Remove pivot cover. Use 1/2" socket wrench to hold nut at bottom and 3/16" hex wrench at top to tighten or loosen, as needed. Replace pivot cover. page 13 of 15
14 Adjustment 2 Monitor Up and Down 1/2" 1/2" Remove pivot covers. Use two 1/2" wrenches to tighten or loosen, as needed. (Replace pivot covers.) page 14 of 15
15 Adjustment 3 Monitor Portrait/Landscape NOTE: Since the portrait/landscape feature is factory-set, adjustment is usually unnecessary - proceed with these instructions only if the monitor rotates too easily or with great difficulty. Remove monitor from pivot (or from the 75 to 100mm adaptor plate, if used). 1/2" Use 1/2" wrench to tighten or loosen, as needed. Reattach monitor to pivot (or to the 75 to 100mm adaptor plate, if used.) page 15 of 15
EVOLVE1-M MONITOR ARM
 EVOLVE1-M MONITOR ARM EVOLVE1-M Rev A 2/17 Model EVOLVE1-M-SLV Model EVOLVE1-M-BLK Model EVOLVE1-M-WHT ASSEMBLY AND ADJUSTMENT EVOLVE1-M MONITOR ARM PARTS AND TOOLS PLEASE REVIEW these instructions before
Installation and Assembly: 2 x 2 Video Wall Ceiling Mount for 40" - 55" flat Panel Displays
 Installation and Assembly: 2 x 2 Video Wall Ceiling Mount for 40" - 55" flat Panel Displays Model: DS-VWT955-2X2 EXTENSION COLUMN (SOLD SEPARATELY) COMPATIBILITY Display width must be a minimum of 36"
ASSEMBLY AND ADJUSTMENT
 EDGE-WALL MONITOR ARM EDGE-WALL Rev A 2/17 Model EDGE-WALL-SLV ASSEMBLY AND ADJUSTMENT EDGE-WALL MONITOR ARM PLEASE REVIEW these instructions before beginning the installation. Check that all parts and
CLIMB2 DUAL MONITOR SIT/STAND WORKSTATION
 CLIMB2 DUAL MONITOR SIT/STAND WORKSTATION CLIMB2 Rev A 3/17 Model CLIMB2-SLV ASSEMBLY AND ADJUSTMENT CLIMB2 PARTS AND TOOLS PLEASE REVIEW these instructions before beginning the assembly and adjustment
Sit-Stand Monitor Arm
 Sit-Stand Monitor Arm Product ID: ARMSTSCP1 This sit-stand monitor arm transforms your desk or tabletop into an ergonomic workstation. The monitor arm features a keyboard tray and easy height adjustment
Assembly Instructions for #5630 Medication PalWOW
 Assembly Instructions for #5630 Medication PalWOW Before assembling, please familiarize yourself with all the parts and check to make sure you have all the parts as listed below. A B A & B - The box in
MD-BD13B / DUAL SEGMENT TWIN-ARM. For (33-69 cm) LCD desktop computer monitors. User Manual
 LCD desktop computer monitors. User Manual") MD-BD13B / DUAL SEGMENT TWIN-ARM MONITOR mount For 13 27 (33-69 cm) LCD desktop computer monitors User Manual Thank you for choosing Gabor. The Gabor MD-BD13B mounts two 13 27 (33 69 cm) LCD computer monitors
MD-BD13B / DUAL SEGMENT TWIN-ARM MONITOR mount For 13 27 (33-69 cm) LCD desktop computer monitors User Manual Thank you for choosing Gabor. The Gabor MD-BD13B mounts two 13 27 (33 69 cm) LCD computer monitors
Installation Guide Mounting Kit for Mounting Philips Avalon CTS Cordless Fetal Transducer System on Wall, 2'' Post, Rail, or Slide-on Mounting Plate
 Installation Guide Mounting Kit for Mounting Philips Avalon CTS Cordless Fetal Transducer System on Wall, 2'' Post, Rail, or Slide-on Mounting Plate The purpose of this guide is to: 1. Describe mounting
2 x Dynamic Arms on 135 Post with C-Clamp
 Installation Guide AWMS-2-D13-C 2 x Dynamic Arms on 135 Post with C-Clamp COMPONENT CHECKLIST RANGE A AWM-LC Post Clamp B AWM-AD Dynamic Arm (x2) C AWM-P13 135 Post D AWM-FC C-Clamp CONTENTS C-Clamp Page
Dell Wyse Client VESA Mounting Bracket for Dell P Series Monitor Installation Instructions
 Dell Wyse Client VESA Mounting Bracket for Dell P Series Monitor Installation Instructions This VESA mounting bracket (P bracket) is used for mounting a Wyse client to the Dell P Series Monitor or the
Dual TV/Monitor Desk Mount Stand (Duplex Series) Model: DE9E2S-S
 Model: DE9E2S-S") Dual TV/Monitor Desk Mount Stand (Duplex Series) Model: DE9E2S-S Instruction Manual Images may different from actual product Disclaimer It is Dyconn s intention to have all the correct information represented
Dual TV/Monitor Desk Mount Stand (Duplex Series) Model: DE9E2S-S Instruction Manual Images may different from actual product Disclaimer It is Dyconn s intention to have all the correct information represented
INSTALLATION INSTRUCTIONS
 INSTALLATION INSTRUCTIONS 19 20 21 01 07 22 23 13 10 12 08 17 18 11 02 14 15 04 03 16 WELCOME PARTS LIST Thank you for purchasing this HealthPoint Technology Cabinet from Humanscale! Before you begin installing
MD-BSL15W / SPRING-LOADED TWIN-ARM. For ( cm) LCD desktop computer. User Manual
 LCD desktop computer. User Manual") MD-BSL15W / SPRING-LOADED TWIN-ARM MONITOR mount For 15 27 (38.1 68.6 cm) LCD desktop computer User Manual Thank you for choosing Gabor. The Gabor MD-BSL15W mounts two 15 27 (38.1 68.6 cm) LCD computer
MD-BSL15W / SPRING-LOADED TWIN-ARM MONITOR mount For 15 27 (38.1 68.6 cm) LCD desktop computer User Manual Thank you for choosing Gabor. The Gabor MD-BSL15W mounts two 15 27 (38.1 68.6 cm) LCD computer
Universal Tablet Mount Accessory for Flex TechBridge
 Assembly Instructions Universal Tablet Mount Accessory for Flex TechBridge Universal Tablet Mount Accessory Universal Tablet Mount Accessory mounted on Flex Arm CONTENTS Important User Information...........................2
Installation Guide. Universal Camera Mount Bracket
 3875 Cypress Drive Petaluma, CA 94954 800.228.2555 707.773.1100 Fax 707.773.1180 www.gcx.com Installation Guide Universal Camera Mount Bracket The purpose of this guide is to describe the assembly and
NAV-1 Lens Support. NAV-2 Lens Support BEFORE YOU BEGIN
 INSTALLATION Lens Support INSTRUCTIONS The Lens Support is compatible with any RPA projector mount. The readily adapts to the following ScreenStar Conversion Lens from Navitar: SSW08 and SST120. LENS SUPPORT
Eaton LCD Lift Flat Panel Display System. Installation Guide
 Eaton LCD Lift Flat Panel Display System Eaton LCD Lift Flat Panel Display System Installation Guide Copyright 2011 Eaton Corporation, Worcester, MA, USA. All rights reserved. Information in this document
LARGE S URGE-PROTECTOR S HELTER
 LARGE S URGE-PROTECTOR S HELTER The weather-resistant Large Surge-Protector Shelter (simply referred to as the shelter in this manual) provides protection from the elements for Surge Protectors (not included)
Quick Installation Guide
 Full Motion Single Monitor Arm, Pole Mount Quick Installation Guide Please Review the entire Quick Installation Guide prior to installation. If you have any questions regarding the compatibility of this
A-dec 586 Ceiling Monitor Mount
 Installation Guide A-dec 586 Ceiling Monitor Mount Recommended Tools 7/16" wrench Socket set and ratchet with 6" extension Phillips head and standard screwdrivers Diagonal cutters Level 3/8" drill with
Wall-Mounted Sit-Stand Desk - Single Monitor
 Wall-Mounted Sit-Stand Desk - Single Monitor Product ID: WALLSTS1 This wall-mounted sit-stand desk is perfect for areas that don t have enough space for a traditional sitstand desk. Its compact, wall-mounted
7403 K321. Display Wall Mount. Kit Instructions. Issue A
 7403 K321 Display Wall Mount Kit Instructions Issue A ii Revision Record Issue Date Remarks A Nov 2008 First issue 1 Introduction This kit is used in to secure a 7403 Display Head on a vertical surface.
Quick Installation Guide
 Full Motion Dual Monitor Arm, Pole Mount Quick Installation Guide Please Review the entire Quick Installation Guide prior to installation. If you have any questions regarding the compatibility of this
Assembly and Setup Manual
 M-11 Series Copyboard/C-11 Series Captureboard Assembly and Setup Manual This is the installation and assembly manual for the M-11 series/c-11 series. To the Customer Specialized techniques are required
G12/G12x USER S MANUAL
 G12/G12x USER S MANUAL TABLE OF CONTENTS SECTION 1 SLIDE CONFIGURATION SECTION 2 SLIDE CONFIGURATION ACCESSORIES SECTION 3 TABLETOP CONFIGURATION SECTION 4 TABLETOP CONFIGURATION ACCESSORIES SECTION 5
A-dec 584 Monitor Mount on a Central Cabinet
 Installation Guide A-dec 584 Monitor Mount on a Central Cabinet Before You Begin This procedure applies to the A-dec Inspire TM 592 Central Console and the standard and tall Preference cabinet central
Quad Monitor Desk Stand - 13" to 24" Installation Instructions
 Quad Monitor Desk Stand - 13" to 24" Installation Instructions 04-0885A 1 Unpacking Carefully remove the contents and lay out on cardboard or other protective surface Check package contents against the
Quick Installation Guide
 Full Motion Dual Monitor Arm, Pole Mount Quick Installation Guide Please Review the entire Quick Installation Guide prior to installation. If you have any questions regarding the compatibility of this
TV Brackets by equip The perfect solution to securely mount your TV
 TV Brackets by equip The perfect solution to securely mount your TV No matter what s the size, if you want your TV in a fix position or want it to tilt, we have the solution you re been looking for. intro
Installation Guide Philips MP20/30/40/50/60/70 IntelliVue M-Series Arm Rail Mount Kit
 Installation Guide Philips MP20/30/40/50/60/70 IntelliVue M-Series Arm Rail Mount Kit The purpose of this guide is to: 1. Describe attachment of Table Top Mount to Mounting Adapter on Arm (page 2). 2.
ALL-FLEX ELECTRIC TABLE BASE
 ALL-FLEX ELECTRIC TABLE BASE FLEX2 V3 Rev 01 7 /17 Model FLEX2-SLV-V3 Model FLEX2-BLK-V3 Model FLEX2-WHT-V3 ASSEMBLY AND OPERATION ALL-FLEX ELECTRIC TABLE BASE PARTS AND TOOLS PLEASE REVIEW these instructions
Motorized Ceiling TV Mount
 Motorized Ceiling TV Mount Instruction Manual SKU: MOUNT-E-FD55 Scan the QR code with your mobile device or follow the link for helpful videos and specifications related to this product. https://vivo-us.com/products/mount-e-fd55
Cycles Integrated LCD Screen Option. Cardio Theater Integrated Bracket Assembly Instructions
 Recumbent Upright Cycles Integrated LCD Screen Option Cardio Theater Integrated Bracket Assembly Instructions Table of Contents 1 2 3 4 5 6 7 Before You Begin... 4 Obtaining Service... 4 Unpacking the
Flat Panel Static Wall Mount MSP-SS (GSM-210)
") INSTALLATION INSTRUCTIONS Flat Panel Static Wall Mount (GSM-2) The static wall mount fits most 23 to 30 displays. The mount was designed to adapt to the VESA 75mm/0mm, 0mm/0mm, and 200mm/0mm compliant
INSTALLATION INSTRUCTIONS Flat Panel Static Wall Mount (GSM-2) The static wall mount fits most 23 to 30 displays. The mount was designed to adapt to the VESA 75mm/0mm, 0mm/0mm, and 200mm/0mm compliant
C764i Integrated LCD Screen Option. Cardio Theater Integrated Bracket Assembly Instructions
 C764i Integrated LCD Screen Option Cardio Theater Integrated Bracket Assembly Instructions Table of Contents 1 2 3 4 5 6 7 Before You Begin... 3 Obtaining Service... 3 Unpacking the Equipment... 3 Important
CHIEF Stand. K3F220/K3G220 (2x2) K3G320 (3x2) EX241UN / -H Multi-Screen Installation Manual
 K3G320 (3x2) EX241UN / -H Multi-Screen Installation Manual") CHIEF Stand K3F220/K3G220 (2x2) K3G320 (3x2) EX241UN / -H Multi-Screen Installation Manual Contents General Information and Cautions. 3 Chapter 1 Removing the Bezel 4 Purpose. 4 How to Remove the Bezel......................5
CHIEF Stand K3F220/K3G220 (2x2) K3G320 (3x2) EX241UN / -H Multi-Screen Installation Manual Contents General Information and Cautions. 3 Chapter 1 Removing the Bezel 4 Purpose. 4 How to Remove the Bezel......................5
The Minimalist, Modular, Wall-Mounted Standing Desk
 The StandCrafted Installation Manual Last Update: 03/04/2016 www.standcrafted.com support@standcrafted.com DISCLAIMERS Copyright StandCrafted LLC. All rights reserved. This document is solely intended
Planar Model A480-PL Professional Grade Home Cinema Conversion Lens System
 AKPro system with ATH1 transport shown Planar Model A480-PL Professional Grade Home Cinema Conversion Lens System USER MANUAL AND INSTALLATION GUIDE Including the UH480 Lens, ATH1 Transport and AKPro Projector
Universal Desktop and Monitor Stand
 Universal Desktop and Monitor Stand Installation Instructions Kit P/N: 114-6013 Kit Contents Kit Contents: (1) Stand Assembly (1) VESA Monitor Bracket (1) Bottom Bracket (1) Top Bracket (1) Clamp Bracket
Cone Beam Volumetric Tomography and Panoramic Dental Imaging System
 Installation Manual Installation Manual Installation Manual Installation Manual Installation Manual Cone Beam Volumetric Tomography and Panoramic Dental Imaging System Gendex CB-500 Installation Manual
Extra Large Full Motion TV Mount for Televisions
 8008981 TV Size Range: 47 ~ 84 Maximum Weight Capacity: 60 kg/132 lbs Maximum Mounting Pattern: 800 mm x 600 mm (31.4 x 23.6 ) Distance to the Wall: 5.5-45 cm Extra Large Full Motion TV Mount for 47-84
DUAL-ARM MONITOR MOUNT For in. ( cm) desktop computer monitors
 desktop computer monitors") LeviTouch DM-502 DUAL-ARM MONITOR MOUNT For 15 27 in. (38.1 68.6 cm) desktop computer monitors User Manual Thank you for choosing Gabor. The Gabor Dual-Arm Desktop Mount can securely support two monitors
LeviTouch DM-502 DUAL-ARM MONITOR MOUNT For 15 27 in. (38.1 68.6 cm) desktop computer monitors User Manual Thank you for choosing Gabor. The Gabor Dual-Arm Desktop Mount can securely support two monitors
TABLE OF CONTENTS SECTION 1 TABLETOP CONFIGURATION SECTION 2 TABLETOP CONFIGURATION ACCESSORIES SECTION 3 SLIDE CONFIGURATION
 S6 USER S MANUAL TABLE OF CONTENTS SECTION 1 TABLETOP CONFIGURATION SECTION 2 TABLETOP CONFIGURATION ACCESSORIES SECTION 3 SLIDE CONFIGURATION SECTION 4 SLIDE CONFIGURATION ACCESSORIES SECTION 5 RACK MOUNT
Cutter Option Installation Instructions
 This kit includes the parts and documentation necessary to install the cutter option on the Zebra XiII, XiIII, and XiIIIPlus-Series printers. NOTE: The Cutter Option is not available for the 96XiIII. Adding
Articulating TV/Monitor Clamp/Grommet Desk Mount Model: DE640S (Hydro Series)
") Articulating TV/Monitor Clamp/Grommet Desk Mount Model: DE640S (Hydro Series) Instruction Manual Images may be different from actual product Disclaimer It is Dyconn s intention to have all the correct
Articulating TV/Monitor Clamp/Grommet Desk Mount Model: DE640S (Hydro Series) Instruction Manual Images may be different from actual product Disclaimer It is Dyconn s intention to have all the correct
HeRO. solo/duet. Version 3.1 Customer Assembly & Maintenance Procedure
 HeRO solo/duet Version 3.1 Customer Assembly & Maintenance Procedure Table of Contents 1. Purpose 3 2. Scope 3 3. Materials 3 4. Assembly Procedure Desktop Mount 3 5. Assembly Procedure Pole Mount 4 6.
KRONOS 6752 LIFT DESK
 KRONOS 6752 OWNER S MANUAL Product Registration Registering your new BDI product allows us to send you important product updates, service information and helpful hints related to your BDI products. Register
Installation Guide GE Healthcare Solar 8000M Keypad Mounting Kit for 15'' and 18'' Flat Panel Displays
 Installation Guide GE Healthcare Solar 8000M Keypad Mounting Kit for 15'' and 18'' Flat Panel Displays The purpose of this guide is to: 1. Describe attachment of Keypad to Keypad Mounting Bracket (page
Wall Mount Kit for Touch Panel Controller. Installation Guide
 Wall Mount Kit for Touch Panel Controller Installation Guide Table of Contents Getting Started... 1 SKUs Used... 2 Connections... 3 Powering a Touch Panel Controller... 3 Communication Connections... 3
Instructions for installing your QuiltCam on your Gammill quilt machine.
 Instructions for installing your QuiltCam on your Gammill quilt machine. The items include with your QuiltCam Items included in all packages: QuiltCam Control Box, See Figure 1 Power Supply, Figure 2 Video
TV & Office Solutions by equip solutions with a high value of benefit
 TV & Office Solutions by equip solutions with a high value of benefit The brand equip stands for a product development driven by quality management and continuous adjustments to the requirements of the
Nikon Focus Drive Manual
 Nikon Focus Drive Manual PRIOR SCIENTIFIC INC., 80 RESERVOIR PARK DRIVE, ROCKLAND, MA 02370-1062 TELEPHONE 781-878-8442 FAX 781-878-8736 WWW.PRIOR.COM Table of Contents Safety Information...1 Unpacking
DIGITAL OBSERVATION GUARD LOW PROFILE PAN TILT KIT USER MANUAL
 DIGITAL OBSERVATION GUARD LOW PROFILE PAN TILT KIT USER MANUAL Version 2.1 June 4, 2013 0 Table of Contents Low Profile Pan Tilt Kit Description... 3 Low Profile Pan Tilt Unit Basic Operation... 4 Mounting
3500 Series Tripod Kit
 3500 Series Tripod Kit You re on steady ground 1 INTRODUCTION Thank You for choosing Oben! This versatile and durable Oben tripod and ballhead is a compact and lightweight kit that sets up quickly, folds
Articulated Freestanding Dual Monitor Desk Stand - 13" to 27" Installation Instructions
 Articulated Freestanding Dual Monitor Desk Stand - 13" to 27" Installation Instructions 04-1019A 1 Unpacking Carefully remove the contents and lay them out on cardboard or other protective surface Check
Triple-Monitor Arm. Greater comfort and productivity Product ID: ARMTRIO
 Triple-Monitor Arm Product ID: ARMTRIO Create the ultimate ergonomic comfort while freeing up valuable desk space with this triple-monitor arm. You can set up three computer monitors (each up to 24 ) and
Articulated Freestanding Triple Monitor Desk Stand - 13" to 27" Installation Instructions
 Articulated Freestanding Triple Monitor Desk Stand - 13" to 27" Installation Instructions 04-1020A 1 Unpacking Carefully remove the contents and lay them out on cardboard or other protective surface Check
Nov. 07, 2013 p. 5 - changed the B axis unit value to from Changed by Randy per Frank s request.
 Correction notes Nov. 07, 2013 p. 5 - changed the B axis unit value to 45.1389 from 40.0000. Changed by Randy per Frank s request. Jan. 22, 2018 p. 5 - changed the B axis unit value and corresponding picture
Treadmill Integrated LCD Screen Option. Cardio Theater Integrated Bracket Assembly Instructions
 Treadmill Integrated LCD Screen Option Cardio Theater Integrated Bracket Assembly Instructions Table of Contents 1 2 3 4 5 6 Before You Begin... 4 Obtaining Service... 4 Unpacking the Equipment... 4 Important
Desk Mount Articulating Dual Monitor Arm with Cable Management & Height Adjust
 Desk Mount Articulating Dual Monitor Arm with Cable Management & Height Adjust ARMDUAL *actual product may vary from photos DE: Bedienungsanleitung - de.startech.com FR: Guide de l'utilisateur - fr.startech.com
Warning Before Installation. Package Contents EN - 1. Refer to your user s manual for the operating temperature.
 5000020G Warning Before Installation English Power off the Network Camera as soon as smoke or unusual odors are detected. Do not place the Network Camera on unsteady surfaces. Do not insert sharp or tiny
INSTALLATION INSTRUCTIONS YAMAHA Speaker Adapter Accessory Model: PAC-Y2
 INSTALLATION INSTRUCTIONS YAMAHA Speaker Adapter Accessory BEFORE YOU BEGIN CAUTION! The instructions provided in this document outline the installation of the PAC-Y2 Lateral Shift Accessory to specific
Ultra short throw lens installation
 Ultra short throw lens installation The ultra short throw lens 0.36 UST GS (P/N: 140-133108-XX) allows you to position your projector as close as possible to your screen or display. Unless otherwise indicated,
Remote Control Motorized TV Ceiling Mount
 INSTALLATION MANUAL Remote Control Motorized Ceiling Mount CAUTION: DO NOT EXCEED RATED LISTED WEIGHT. SERIOUS INJURY OR PROPERTY DAMAGE MAY OCCUR! DEHA-400E 15 200x200 300x300 400x200 400x400 55" MAX
Assembly and Setup Manual
 M-12 Series Copyboard / C-12 Series Captureboard Assembly and Setup Manual This is the installation and assembly manual for the M-12 series Copyboard and C-12 series Captureboard. (The copyboard and/or
Monitor Mount with Articulating Arm and Laptop Riser
 Monitor Mount with Articulating Arm and Laptop Riser ARMUNONB *actual product may vary from photos FR: Guide de l utilisateur - fr.startech.com DE: Bedienungsanleitung - de.startech.com ES: Guía del usuario
ASSEMBLY INSTRUCTIONS, ELO SELF SERVICE STAND
 ASSEMBLY INSTRUCTIONS, ELO SELF SERVICE STAND E062324 ELO-STAND-SELF-SERVICE-DESKTOP E062510 ELO-STAND-SELF-SERVICE-FLOOR EXT E062704 KIT-EMV-CRADLE-VF-MX915-ING-ISC250 E062899 KIT-EMV-INGENICO IPP350
Section. Service & Maintenance. - Core & Hard Disk Drive (HDD) - Amplifier - Monitor - UPS - Dollar Bill Acceptor - Fan Filter G - 1
 - Amplifier - Monitor - UPS - Dollar Bill Acceptor - Fan Filter G - 1") Section G Service & Maintenance - Core & Hard Disk Drive (HDD) - Amplifier - Monitor - UPS - Dollar Bill Acceptor - Fan Filter G - 1 Core Removal Core & HDD 1. Open the door. 2. Perform shutdown procedure.
Section G Service & Maintenance - Core & Hard Disk Drive (HDD) - Amplifier - Monitor - UPS - Dollar Bill Acceptor - Fan Filter G - 1 Core Removal Core & HDD 1. Open the door. 2. Perform shutdown procedure.
13 MMC for PC Option Modules
 Part Number M.1300.8684 MMC for PC Option Modules Manual V3.0 The information in this document is also available in the MMC for PC Hardware Manual. 13 MMC for PC Option Modules 13.1 General The MMC for
Adapter Kit for PanelView 1200/1200e Touch Screen Terminal Cutout
 Installation Instructions Adapter Kit for PanelView 1200/1200e Touch Screen Terminal Cutout Catalog Numbers 2711-NR5T, 2711P-RAT12E2 Topic Page About This Publication 1 Important User Information 2 About
Tyler - Middle Mount For Bell 407, 206 & 206L Series Helicopters FAA STC # SH3246NM
 MIDDLE MOUNT 407 / JET RANGER / LONG RANGER INSTALLATION MANUAL Tyler - Middle Mount For Bell 407, 206 & 206L Series Helicopters FAA STC # SH3246NM PLEASE RETURN THIS MANUAL WITH EQUIPMENT This manual
Desk Mount Articulating Dual Monitor Arm with Cable Management & Height Adjust
 Desk Mount Articulating Dual Monitor Arm with Cable Management & Height Adjust ARMDUAL *actual product may vary from photos DE: Bedienungsanleitung - de.startech.com FR: Guide de l'utilisateur - fr.startech.com
INSTALLATION INSTRUCTIONS: E KIT-EMV-INGENICO ICMP CRADLE-PAYPOINT E KIT-EMV-VERIFONE E355 CRADLE-PAYPOINT
 E953516 KIT-EMV-INGENICO ICMP CRADLE-PAYPOINT E002639 KIT-EMV-VERIFONE E355 CRADLE-PAYPOINT 1 1- Add payment module to bracket (1) 2 Screws, X2 3- Add payment module/bracket (1) to bracket (2) with 2 screws
Installation Guide Philips MP60/70 IntelliVue VHM Arm Rail Mount Kit
 Installation Guide Philips MP60/70 IntelliVue VHM Arm Rail Mount Kit The purpose of this guide is to: 1. Describe attachment of Table Top Mount to Mounting Adapter (page 2) 2. Describe attachment of Down
Cisco TelePresence VX Clinical Assistant TM
 Cisco TelePresence VX Clinical Assistant TM ACCESSORIES INSTALLATION GUIDE Drawer Module, PC Cabinet Module, PC Shelf, and Storage Pods...2 Laptop Shelf...3 Scope Hooks, WAP Mount, and Splash Cover...4
GCX Mounting Assembly Installation Guide. Pedestal Mount for Philips IntelliVue MP5/20/30/40/50/60/70, MX400/450/500/550/600/700/800
 3875 Cypress Drive Petaluma, CA 94954 800.228.2555 707.773.1100 Fax 707.773.1180 www.gcx.com GCX Mounting Assembly Installation Guide Pedestal Mount for Philips IntelliVue MP5/20/30/40/50/60/70, MX400/450/500/550/600/700/800
ASSEMBLY ASSEMBLY INSTRUCTIONS ASSEMBLY INSTRUCTIONS
 ASSEMBLY ASSEMBLY INSTRUCTIONS INSTRUCTIONS ASSEMBLY INSTRUCTIONS VOX INFINITY L-SHAPE 7230 DESK Workstations, WORKSTATIONS, desks, DESKS, AND and TABLES tables WITH with POWERED powered ADJUSTMENT adjustment
How to add a Second Drive to a Mac mini (2012) using the OWC Data Doubler SSD/2.5 Installation Kit
 using the OWC Data Doubler SSD/2.5 Installation Kit") Instructional Video Series How to add a Second Drive to a Mac mini (2012) using the OWC Data Doubler SSD/2.5 Installation Kit Skill Level: Challenging Time to Complete: Approximately 45 Minutes Required
Instructional Video Series How to add a Second Drive to a Mac mini (2012) using the OWC Data Doubler SSD/2.5 Installation Kit Skill Level: Challenging Time to Complete: Approximately 45 Minutes Required
IBM. Rack Installation Instructions
 IBM Rack Installation Instructions Review the documentation that comes with your rack cabinet for safety and cabling information. When installing your server in a rack cabinet, consider the following:
Setup Information Panosaurus May 3, 2011
 Setup Information Panosaurus 2.0 www.gregwired.com May 3, 2011 Please take the time to read all of the setup information to ensure success and ease of use of this tripod head. Much of the setup is a one
ViewPoint Monitoring Console System
 ViewPoint Monitoring Console System with sit/stand capability flexible, scalable system provides operators with the ability to sit or stand for optimum operator effectiveness features: Bays adjust from
Rack Installation Instructions
 Rack Installation Instructions Review the documentation that comes with your rack cabinet for safety and cabling information. When installing your server in a rack cabinet, consider the following: v Two
TruVision 360 Camera Bracket Installation Manual
 TruVision 360 Camera Bracket Installation Manual P/N 1072843A-EN REV 1.0 ISS 25SEP14 Copyright 2014 United Technologies Corporation. Interlogix is part of UTC Building & Industrial Systems, a unit of United
MAIN OPERATING INSTRUCTIONS
 MAIN OPERATING INSTRUCTIONS MPT-9 Mechanical Pan Tilt Unit 1. INTRODUCTION You have bought an MPT-9 Mechanical Pan Tilt Unit out of the wide range of Cambo Video products. We expect that you will achieve
A TCP/IP network CAT 5 cable If the network is faster than 10baseT a switching hub will be needed Static IP address
 Requirements A TCP/IP network CAT 5 cable If the network is faster than 10baseT a switching hub will be needed Static IP address Power Up A Reader with an Ethernet adaptor installed and the network cable
Laserlyte-Flex Userguide
 Laserlyte-Flex Userguide 1. Product Overview Thank you for purchasing the Laserlyte Flex alignment system. This module emits a spot or pattern in the visible wavelength range. If you have any queries or
Zebra XiII-Series Printer Quick Reference Guide
 Zebra XiII-Series Printer Quick Reference Guide Contents Media and Ribbon Loading...67 Media Loading...67 Ribbon Loading...70 Operator Controls...72 Front Panel Keys...72 Front Panel Lights...72 Calibration...74
The QSR kitchen video bracketing options can be assembled to fit your specific kitchen environment needs.
 QSR Kitchen Video Bracket Configurations and Instructions The QSR kitchen video bracketing options can be assembled to fit your specific kitchen environment needs. A variety of mounting solution configurations
Model MSP-PSBTW100 Flat Panel Display Wall Mount Interface Brackets
 I N S T R U C T I O N M A N U A L Model MSP-PSBTW100 Flat Panel Display Wall Mount Interface Brackets The Model MSP-PSBTW100 is an interface for use with static and tilt wall mounts. Display mounting is
User s Guide. for RackMac Pro 4U Rack Enclosure for New Mac Pro
 User s Guide for RackMac Pro 4U Rack Enclosure for New Mac Pro Contents 1 Introduction 1 2 RackMac Pro Description 2 External Features Computer Mounting Module 5/64-Inch Hex Wrench Mac Pro Bottom Cover
S Series Stand Assembly Instructions
 S Series Stand Assembly Instructions Contents Stand Base Column Transducer holder Magnetic screwdriver, Allen bit & Phillips bit Grommets (4) Allen wrench 8mm Phillips-head screws (4) 12mm Allen-head screws
DaNI Robot Camera. User Guide V0512
 DaNI Robot Camera User Guide 60018 V0512 Materials Included Camera (includes hardware that will not be used) Modem (with power supply that will not be used) Power converter 6" Velcro strip Adhesive tab
Arecont Vision HSG2 Installation Manual
 0 P age HSG2 Installation Manual A. Arecont Vision HSG2 Housing B. Flat washer C. Spring washer D. Machine screw E. Two (2) rubber plugs F. RJ45 Cable G. Two-sided hexagonal wrench 2. Open the HSG2 housing
 Photography tripod Why do I Need a Tripod? http://www.bhphotovideo.com/explora/video/buying-guides/what-look-when-you-are-looking-videotripod Tripod Tricks? http://vimeo.com/videoschool/lesson/110/tripod-tricks
Sockets & Accessories
 Sockets & Accessories Sidchrome socket sets give you the choice of socket you need to get the job done. Our sets have been designed with flexibility, quality and portability in mind. You can easily carry
INSTALLATION MANUAL DATAVAULT DATAVAULT - BARE JOBSITE STORAGE SOLUTIONS
 JOBSITE STORAGE SOLUTIONS ALWAYS ON THE JOB INSTALLATION MANUAL 118-01 DATAVAULT 118-02 DATAVAULT - BARE Werner Co. 724-588-2000 93 Werner Rd. 888-523-3371 toll free/ llamada gratuita Greenville, PA 16125
AS7.P CF20 NPT DOCK AS7.P CF20 DPT DOCK AS7.P CF20 NPT DOCK WITH SCREEN LOCK AS7.P CF20 DPT DOCK WITH SCREEN LOCK AS7
 AS7.P020.100 CF20 NPT DOCK AS7.P020.102 CF20 DPT DOCK AS7.P020.200 CF20 NPT DOCK WITH SCREEN LOCK AS7.P020.202 CF20 DPT DOCK WITH SCREEN LOCK AS7.P020.001 CF20 SCREEN LOCK ARM PANASONIC TOUGHBOOK CF20
INSTALLATION MANUAL. LO SIDE BOX ADD-ON KIT For driver or passenger side configurations TRUCK STORAGE SOLUTIONS FOR THE WAY YOU WORK
 TRUCK STORAGE SOLUTIONS FOR THE WAY YOU WORK INSTALLATION MANUAL LO SIDE BOX ADD-ON KIT For driver or passenger side configurations Model: QDKSBDO1 -or- QDKSBP01 Part No. 24-0327 Rev. A ECN 5430 ATTENTION:
MBE Mounts and Adapters
 MBE Mounts and Adapters MBE Series en Installation Guide MBE Mounts and Adapters Table of Contents en 3 Table of Contents 1 Important safety instructions 4 2 MBE Series Mounts and Adapters 6 2.1 Unpacking
Star Trac Fitness E-ST 5090 Stepper. Install Guide
 Star Trac Fitness E-ST 5090 Stepper Install Guide STAR TRAC E-ST STEPPER Install Guide E-ST 5090 E Series Stepper ASSEMBLY AND SETUP The following parts are included with the base STAR TRAC E-ST STEPPER: