Software Version: Service Manager 9.40; Universal CMDB or later For the supported Windows and Unix operating systems
|
|
|
- Lester Barnett
- 6 years ago
- Views:
Transcription

")
1 HP Service Manager Software Version: Service Manager 9.40; Universal CMDB or later For the supported Windows and Unix operating systems HP Universal CMDB Integration Guide (Using Service Manager 9-x Adapter) Document Release Date: February 2015 Software Release Date: February 2015
2 Legal Notices Warranty The only warranties for HP products and services are set forth in the express warranty statements accompanying such products and services. Nothing herein should be construed as constituting an additional warranty. HP shall not be liable for technical or editorial errors or omissions contained herein. The information contained herein is subject to change without notice. Restricted Rights Legend Confidential computer software. Valid license from HP required for possession, use or copying. Consistent with FAR and , Commercial Computer Software, Computer Software Documentation, and Technical Data for Commercial Items are licensed to the U.S. Government under vendor's standard commercial license. Copyright Notice Hewlett-Packard Development Company, L.P. Trademark Notices Adobe is a trademark of Adobe Systems Incorporated. Microsoft and Windows are U.S. registered trademarks of Microsoft Corporation. Oracle and Java are registered trademarks of Oracle and/or its affiliates. UNIX is a registered trademark of The Open Group. Linux is the registered trademark of Linus Torvalds in the U.S. and other countries. For a complete list of open source and third party acknowledgements, visit the HP Software Support Online web site and search for the product manual called HP Service Manager Open Source and Third Party License Agreements. Documentation Updates The title page of this document contains the following identifying information: Software Version number, which indicates the software version. Document Release Date, which changes each time the document is updated. Software Release Date, which indicates the release date of this version of the software. To check for recent updates or to verify that you are using the most recent edition of a document, go to: This site requires that you register for an HP Passport and sign in. To register for an HP Passport ID, go to: Or click the New users - please register link on the HP Passport login page. You will also receive updated or new editions if you subscribe to the appropriate product support service. Contact your HP sales representative for details. Support Visit the HP Software Support Online website at: This website provides contact information and details about the products, services, and support that HP Software offers. HP Software online support provides customer self-solve capabilities. It provides a fast and efficient way to access interactive technical support tools needed to manage your business. As a valued support customer, you can benefit by using the support website to: Search for knowledge documents of interest Submit and track support cases and enhancement requests Download software patches Manage support contracts Look up HP support contacts Review information about available services Enter into discussions with other software customers Research and register for software training Most of the support areas require that you register as an HP Passport user and sign in. Many also require a support contract. To register for an HP Passport ID, go to: To find more information about access levels, go to: HP Software Solutions Now accesses the HPSW Solution and Integration Portal website. This site enables you to explore HP Product Solutions to meet your business needs, includes a full list of Integrations between HP Products, as well as a listing of ITIL Processes. The URL for this website is HP Service Manager (Service Manager 9.40; Universal CMDB or later) Page 2 of 273
3 Contents Chapter 1: Introduction 10 Who Should Read this Guide 10 Purpose of the Integration 10 Supported Use Cases 11 Enabling ITIL Processes 12 Managing Planned Changes 12 Managing Unplanned Changes 12 Retrieving Service Manager Ticket Information 13 Retrieving Actual State of UCMDB CIs 13 Accessing UCMDB CIs from Service Manager 13 Core Features 14 Push 14 Federation 14 Population 15 How CI information is Synchronized Between UCMDB and Service Manager 15 CI Information Usage 16 High-Level Components of the Integration 16 Relationships Between Integration Components 17 What Information is Stored in UCMDB 18 What Information is Stored in Service Manager 18 Chapter 2: Integration Setup 19 Integration Requirements 20 How to Upgrade Your Integration 20 Integration Setup Overview 26 HP Service Manager Setup 27 How to Create an Integration User Account 27 How to Add the UCMDB Connection Information 28 HP Universal CMDB Setup 29 How to Create an Integration Point in UCMDB 30 How to Update the Time Zone and Date Format for the Integration Adapter 33 HP Service Manager (Service Manager 9.40; Universal CMDB or later) Page 3 of 273
4 Populating UCMDB with Service Manager CI Data 35 How to Define Population Jobs in UCMDB 35 View Service Manager CI Data in UCMDB 37 How to Schedule CI Population Jobs 38 Pushing UCMDB CI Data to Service Manager 38 How to Define Data Push Jobs in UCMDB 39 How to View UCMDB CI Data in Service Manager 42 How to Schedule Data Push Jobs 43 Federating Service Manager Ticket Data to UCMDB 44 Federation queries 45 Examples of Using Federation 45 Example 1: Federate All SM Incident Tickets 45 Example 2: Federate SM Incident Tickets that Affect a UCMDB Business Service CI 50 Example 3: Federate SM Incident, Change and Problem Ticket Data of UCMDB CIs 55 Example 4: Get Related SM Ticket Data of a UCMDB CI 58 Chapter 3: Multi-Tenancy (Multi-Company) Setup 61 Multi-Tenancy (Multi-Company) Support 61 Implementing Multi-Tenancy in the UCMDB-SM Integration 62 Mandanten SM Security Layer 62 What Multi-Tenant Information is Stored in UCMDB 63 What Multi-Tenant Information is Stored in Service Manager 63 Unique Logical Names 63 Synchronization of Company Records 64 UCMDB Customer ID 65 UCMDB User ID and Password 66 Company Code 66 CI Reconciliation Rules 66 Company Information Pushed to CI and CI Relationship Records 67 Company Information Replicated to Incident Records 67 Schedule Records 67 Tenant-Specific Discovery Event Manager (DEM) Rules 67 Multi-Tenancy Functional Use Cases 68 Multi-Tenancy Requirements 69 Setting up the Multi-Tenancy Integration in UCMDB 70 HP Service Manager (Service Manager 9.40; Universal CMDB or later) Page 4 of 273
5 How to Install Separate Data Flow Probes for Each Tenant 70 How to Start Tenant-Specific Data Flow Probes 72 How to Configure IP Ranges for Tenant-Specific Data Flow Probes 72 How to Configure Multi-Tenancy for Population 73 Setting up the Multi-Tenancy Integration in Service Manager 73 How to Start the Process Schedule 74 How to Configure the Service Manager System Information Record 75 How to Add Tenant-Specific UCMDB User ID and Password Values 76 How to Add UCMDB Customer ID values to Existing Companies 77 How to Synchronize Existing Companies from Service Manager to UCMDB 78 How to View Whether Company Information is in UCMDB 79 How to Resynchronize an Existing Company with UCMDB 79 How to Inactivate a Synchronized Company 80 How to Reactivate an Inactive Company 81 How to Add Tenant-Specific DEM Rules 81 Chapter 4: Standards and Best Practices 83 UCMDB-SM Configuration Best Practices 83 CI Name Mapping Considerations 84 Bi-Directional Data Synchronization Recommendations 84 Push Scheduling Recommendations 86 Push in Clustered Environments 87 Dedicated Web Services 87 Step-by-Step Cluster Configuration Process 88 How to Configure Web Clients 88 How to Configure the Debugnode 89 Connecting to Multiple SM Processes 89 Initial Load Configurations 89 Push Performance in a Single-Threaded Environment 90 Implementing Multi-Threading 91 Push Performance in Multi-Threaded Environments 92 Push Performance in Multiple SM Processes Environments 92 How to set up SM DEM Rules for Initial Loads 93 How to Configure Differential/Delta Load DEM Rules 94 Fault Detection and Recovery for Push 95 How to Enable Lightweight Single Sign-On (LW-SSO) Configuration 96 HP Service Manager (Service Manager 9.40; Universal CMDB or later) Page 5 of 273
6 Frequently Asked Questions 96 When is a New CI Created in HP Service Manager 97 Can I Analyze the Reason for a CI Deletion in SM 97 How do I Monitor Relationship Changes Between UCMDB and SM 98 What Kinds of Relationships are Pushed from UCMDB to SM 98 What is a Root CI Node 99 What is a Root Relationship 99 What is the friendlytype Specified in an XSLT File 99 What is the Virtual-Compound Relationship Type Used in a UCMDB-SM Integration Query 99 When do I Need the Population Feature 100 Can I Populate Physically Deleted CIs from SM to UCMDB 100 How do I Keep the Outage Dependency Setting of a CI Relationship in SM 101 How do I Create an XSL Transformation File 103 How do I Use the Load Fields Button to Add Multiple Managed Fields 109 What is the Purpose of the <container> Element in a Population XSLT File 109 Can I Populate Sub-Item Deletions 110 What will Happen if a Population Job Fails or Succeeds with Warnings 111 Known Issues and Limitations 111 Chapter 5: Tailoring the Integration 115 Integration Architecture 115 Integration Class Model 115 Integration queries 115 Queries for Push 116 Queries for Actual State 118 Queries for Population 119 Query Requirements 120 Service Manager Web Services 121 Managed Fields 121 Service Manager Reconciliation Rules 125 Performance Implications 126 Dependence on DEM Rules 127 Service Manager Discovery Event Manager Rules 127 Change the Conditions Under Which a DEM Rule Runs 127 Change the Action the DEM Rule Takes 128 Update the List of Managed Fields for a CI Type 128 HP Service Manager (Service Manager 9.40; Universal CMDB or later) Page 6 of 273
7 Create Custom JavaScript to Open Change or Incident Records 128 Default values to create a new CI 128 Default values to create a new change 129 Default values to create a new incident 129 Integration Tailoring Options 130 How to Update the Integration Adapter Configuration File (sm.properties) 131 How to Add DEM Reconciliation Rules 135 Add Discovery Event Manager Rules 137 DEM Rules 138 Action if matching record does not exist 138 Action if record exists but unexpected data discovered 139 Action if record is to be deleted 139 Duplication Rules 140 CI Attributes Displayed in Change and Incident Records 141 Searching for Change and Incident Records Opened by the Integration 142 How to Add a CI Attribute to the Integration for Data Push 142 How to Add the CI Attribute to the UCMDB Class Model 143 How to Add the CI Attribute to the Query Layout 144 How to Add the CI Attribute to the Service Manager Table 146 How to Create a Web Service Field to Support the CI Attribute 148 How to Add a Managed Field to Support the CI Attribute 150 How to Map the CI Attribute to a Web Service Field 152 How to Add a CI Type to the Integration for Data Push 157 How to Add the CI Type to the UCMDB Class Model 158 How to Create a Query to Synchronize the CI Type 161 How to Add the CI Type s Attributes to the Query Layout 165 How to Add the CI Type in Service Manager 168 How to Create Web Service Fields to Support the CI Type 171 How to Add Managed Fields to Support the CI Type 173 How to Map the CI Type s Query to an XSL Transformation File 175 How to Map the CI Type s Attributes to Web Service Fields 177 How to Add a CI Type s Relationship Types to the Integration for Data Push 184 How to Add a Push Mapping Entry for Each Relationship Type of the CI Type 184 How to Create a Query to Push Each Relationship Type of the CI Type 185 How to Map Each Relationship Type Query to an XSL Transformation File 188 How to Add Custom queries to Data Push Jobs 190 HP Service Manager (Service Manager 9.40; Universal CMDB or later) Page 7 of 273
8 How to Add a CI Attribute to the Integration for Population 190 Create a Web Service Field to Support the CI Attribute 191 How to Map the CI Attribute to the Web Service Field 191 How to Add a CI Type to the Integration for Population 194 Create a Query to Populate the CI Type 195 How to Map the CI type's Query to an XSL Transformation File 195 How to Map the CI Type's Attributes to Web Service Fields 200 How to Add a CI Type s Relationship Types to the Integration for Population 210 How to Map Each Relationship Type's Attributes to Web Service Objects 210 How to Define a Query Mapping for Each Relationship Type 212 How to Customize UCMDB ID Pushback for a CI Type 215 How to Disable the UCMDB ID Pushback Feature for a Specific CI Type 215 How to Define a Custom Pushback Web Service and xslt File for a Specific CI Type 216 How to Add Custom queries to Integration Population Jobs 216 How to Add an Attribute of a Supported CI Type for Federation 217 Chapter 6: Troubleshooting 225 Troubleshooting Data Push Issues 225 How to Check the Error Message of a Failed Push Job 226 How to Check the Error Messages of Failed CIs/CI Relationships in a Push Job 227 How to Check the Push Log File 231 How to Re-push Failed CI/CI Relationship Records 236 Typical Push Errors and Solutions 237 Query not Configured in smsyncconffile.xml 238 Nonexistent XSLT File Name Defined for a Query in smsyncconffile.xml 239 Request Name not Found for a Query in smsyncconffile.xml 240 Wrong Service Manager WS Request Name Defined in smsyncconffile.xml 242 XSLT file not Well Formed 243 Wrong UCMDB Attribute Name in XSLT File 245 Wrong Service Manager Field Name in XSLT File 246 Empty Value for No Nulls Key in Service Manager 247 CI Logical Name Truncated or CI not Pushed due to Logical Name Truncation 250 Service Manager Database Case-Sensitivity Issue 251 Global ID and Customer ID Missing in XSLT 251 Troubleshooting Population Issues 252 How to Check the Error Message of a Failed Population Job 252 HP Service Manager (Service Manager 9.40; Universal CMDB or later) Page 8 of 273
9 How to Check the Population Log File 253 Typical Error Messages and Solutions 259 No Query Configured in smpopconffile.xml 259 Nonexistent XSLT File Name Defined for a Query in smpopconffile.xml 260 No Retrieve Type Request Defined for a Query in smpopconffile.xml 261 Wrong Request Name of retrievekeysqueryname Configured for a Query in smpopconffile.xml 262 Wrong Request Name of retrievelistqueryname Configured for a Query in smpopconffile.xml 263 XSLT File not Well Formed 265 Wrong UCMDB Attribute Name in XSLT File 267 Wrong Service Manager Field Name in XSLT File 267 Wrong Universal CMDB Attribute Data Type in XSLT File 268 UCMDB CI Attribute sm_id not Mapped to the Right Service Manager Field in XSLT 270 Send Documentation Feedback 272 HP Service Manager (Service Manager 9.40; Universal CMDB or later) Page 9 of 273
10 Chapter 1: Introduction This chapter provides an overview of the HP Universal CMDB (UCMDB) - HP Service Manager (SM) integration (also referred to as the Universal CMDB (UCMDB) integration or UCMDB-SM integration throughout this document). This chapter includes: "Who Should Read this Guide" below "Purpose of the Integration" below "How CI information is Synchronized Between UCMDB and Service Manager" on page 15 Who Should Read this Guide This guide is intended for a system implementer or system administrator who will be establishing and maintaining a connection between the UCMDB and Service Manager systems. This guide assumes that you have administrative access to both systems. The procedures in this guide may duplicate information available in your UCMDB and Service Manager help systems, but is provided here for convenience. Note: This document replaces the following documents that have been published before this release: HP Universal CMDB Integration Guide (for Service Manager 9.30, dated July 2011) UCMDB-SM Integration Standards and Best Practices Guide (dated 31 May 2010) Purpose of the Integration An integration between HP Universal CMDB (UCMDB) and HP Service Manager enables you to share information about the actual state of a configuration item (CI) between your UCMDB system and a Service Manager system. CIs commonly include IT services, hardware and software. Any organization that wants to implement the best practices Configuration Management and Change Management ITIL processes can use this integration to verify that CIs actually have the attribute values the organization has agreed to support. HP Service Manager (Service Manager 9.40; Universal CMDB or later) Page 10 of 273
11 Chapter 1: Introduction You can use this integration to automate the creation of Service Manager change or incident records to update or rollback CIs that have unexpected attribute values. Service Manager allows you to programmatically define what actions you want to take whenever a CI s actual state does not match the expected state as defined in the CI record. The integration offers several different ways for users to view CI actual state information: By default, the integration automatically updates the managed fields of Service Manager CI records as part of the regular UCMDB synchronization schedule. You can choose the option to configure the integration to automatically create change or incident records instead. A Service Manager user can view the current actual state of a CI by looking at the Actual State section in the CI record. When you open the Actual State section, Service Manager makes a web services request to UCMDB and displays all CI attributes the request returns. Service Manager only makes the web service call when you open this section. A Service Manager user can use the View in UCMDB option to log in to the UCMDB system and view the current CI attributes from UCMDB. The Service Manager user must have a valid UCMDB user name and password to log in to the UCMDB system. Supported Use Cases This section describes use cases that are supported by the UCMDB-SM integration. The supported use cases provide the core business processes that are enabled by the UCMDB-SM integration. There are four main business use cases supported by the UCMDB-SM integration. They are as follows: Planned Change: A change created in SM through the formal SM change process. Unplanned Change: A change or incident that occurred in SM and does not conform to the formal SM change process. Retrieving SM Ticket Information: The ability to view SM ticket information in UCMDB. Actual State: The ability to view the UCMDB CI information in SM. All of the use cases provide important functionalities that enable the user to perform ITIL (IT Infrastructure Library) processes. The ITIL processes refer to a set of best practices that define and outline how organizations should manage their IT. HP Service Manager (Service Manager 9.40; Universal CMDB or later) Page 11 of 273
12 Chapter 1: Introduction Enabling ITIL Processes By activating CI push from UCMDB to SM the user facilitates ITIL processes such as Incident, Problem and Change Management in SM. SM utilizes the data pushed from UCMDB in the following modules: Incident Management: the Service Desk operator (SD Agent) selects the Service and the Affected CI for the specific Incident record. Problem Management: the SD agent selects the Service and the Primary CI for the specific Problem record. Change Management: the SD agent selects the Service and the Affected CI(s) for the specific Change record. In each of the previously mentioned ITIL processes, SM utilizes CI information for Service, Affected CIs and Primary CIs that all originate in UCMDB. Managing Planned Changes The purpose of the Planned Change use case is to provide IT organizations a formal process by which changes to the IT infrastructure are introduced after thorough review and analysis. This is performed according to the Change Management process defined in ITIL v3. A Planned Change is initiated by the SM user through the formal Change Management process module in SM. This is followed by the actual change implementation. The actual changes are discovered by a discovery tool such as HP DDMA, and then updated in UCMDB and the relevant modifications are pushed to SM. Once the user has validated the change, the user closes the relevant planned change in SM. Managing Unplanned Changes The purpose of the Unplanned Change use case is to provide IT organizations a formal process by which all changes that occur to the IT infrastructure are both logged and conventionalized through the organizations formal approval process. An Unplanned Change is a change that is recognized by a Discovery tool such as DDMA. The change is first updated and visible in UCMDB and then the data is pushed to SM. SM recognizes the change and as a result an Incident or Change record is generated. HP Service Manager (Service Manager 9.40; Universal CMDB or later) Page 12 of 273
13 Chapter 1: Introduction These Changes are seen also in the SM Pending Changes section in the Configuration Item form, once approved they are moved to the SM Historic Changes section. Retrieving Service Manager Ticket Information Retrieving SM ticket information from within UCMDB provides all HP Software applications users with access to this information by using UCMDB's federation capabilities and supporting APIs. These applications include Business Service Management (BSM), Asset Manager (AM), Operations Orchestration (OO), etc. SM ticket data is accessed from within UCMDB using UCMDB federation capabilities. SM ticket data includes Incident, Problem and Change records as well as a key set of their attributes. UCMDB enables users to create reports/views that combine the federated ticket data from SM with CI information from UCMDB. Retrieving Actual State of UCMDB CIs The purpose of Actual State is to enable SM users insight into CIs current state as detected by Discovery Tools and populated in UCMDB. This state provides up-to-date information that may vary from the information displayed in SM both in content and in scope. The Actual State of the CI is displayed in SM in order to enable the user to validate the current state of the CI that resides in UCMDB or in another data repository. SM users retrieve the Actual State of CIs from UCMDB or additional data sources by viewing the CI's Actual State section in the SM Configuration Item form. Accessing UCMDB CIs from Service Manager SM users can open the UCMDB User Interface in the context of a specific CI, by clicking the View in UCMDB button in the SM CI record. When the user clicks the View in UCMDB button, a UCMDB login screen displays; After the user enters a UCMDB username and password, UCMDB displays a topological view of the specific CI together with all related CIs that are linked to it. Tip: You can configure Lightweight Single Sign-On (LW-SSO) for the integration, so that Service Manager web client users can bypass the UCMDB login screen after clicking the View in UCMDB button. For more information, see "How to Enable Lightweight Single Sign-On (LW-SSO) Configuration" on page 96. If the UCMDB Browser URL is specified in the SM System Information Record, this button is replaced by the View in UCMDB Browser button. When you click the View in UCMDB Browser button, a UCMDB HP Service Manager (Service Manager 9.40; Universal CMDB or later) Page 13 of 273

14 Chapter 1: Introduction Browser login screen displays; After you enter a UCMDB Browser username and password, the CI is displayed in the UCMDB Browser UI. Core Features This section explains the rudimentary concepts behind the Federation, Push, and Population features as they pertain to the integration. This section includes: "Push" below "Federation" below " Population" on the next page Push UCMDB can automatically discover most types of CIs available in Service Manager. This integration enables you to push these types of CIs from UCMDB to Service Manager. The following figure shows how data is pushed from UCMDB to Service Manager (SM). The data is physically pushed (copied) from UCMDB to SM. Once the data is physically located in SM, the data is utilized by the SM user that consumes this information in various SM processes. Note: CI Type and Attribute Push Only information that is physically present in UCMDB can be pushed to SM. Federation With the federation feature, UCMDB pulls various ticket information (for example, Incident, Problem, and Change ticket information) from SM. This enables users to see Ticket information in UCMDB as Ticket CIs that are connected to the relevant Nodes. HP Service Manager (Service Manager 9.40; Universal CMDB or later) Page 14 of 273
15 Chapter 1: Introduction When data is federated (reflected or mirrored) from SM to UCMDB, the data is not physically present in UCMDB, instead it is passed over to UCMDB through Web Services. Population You can also use this integration to populate those types of CIs that UCMDB cannot automatically discover or CIs that have been created in Service Manager before you have a UCMDB system deployed. For more information, see "When do I Need the Population Feature" on page 100. Population is the reverse of Push. The following figure shows how data is populated from SM to UCMDB. One SM CI record with multiple attributes is transferred to UCMDB as multiple CI records. How CI information is Synchronized Between UCMDB and Service Manager This section explains how CI information is transferred between the UCMDB and Service Manager systems. This section includes: "CI Information Usage" on the next page "High-Level Components of the Integration" on the next page "Relationships Between Integration Components" on page 17 "What Information is Stored in UCMDB" on page 18 "What Information is Stored in Service Manager" on page 18 HP Service Manager (Service Manager 9.40; Universal CMDB or later) Page 15 of 273

16 Chapter 1: Introduction CI Information Usage When referring to the concept of CI information it is important to make the distinction between a UCMDB CI and a Service Manager (SM) CI. The UCMDB model represents a topology that contains a number of CI types and relationships. The UCMDB topology can be represented in Service Manager as a single entity. Multiple CIs from UCMDB and their attributes are merged into a single record in SM and the relevant UCMDB attributes are mapped to their appropriate counterparts in the SM record. The above figure shows the correlation between the UCMDB topological model and its representation of the Computer Instance together with its parallel representation in SM. The SM computer CI contains all of the UCMDB information that is passed through the integration. In the push flow, in the UCMDB topological view several CIs such as Node, IP, Interface, Location, File System, CPU, Disk Device and their Relationships are converted into a single SM computer record with the IP, MAC Address and Location, File System, CPU and Disk Device attributes. In the population flow, the conversion is reversed. High-Level Components of the Integration The following diagram shows the high-level components of the UCMDB integration, and illustrates the interactions between UCMDB and Service Manager. HP Service Manager (Service Manager 9.40; Universal CMDB or later) Page 16 of 273

17 Chapter 1: Introduction Relationships Between Integration Components The following figure illustrates the relationships between the Service Manager Adapter components in UCMDB and the associated components in Service Manager. The Service Manager Adapter includes configuration files, which are used to map UCMDB entities to their counterparts in Service Manager during data push, as well as map Service Manager CIs to UCMDB entities during population. The configuration files utilize UCMDB queries that define a superset of data relevant for the integration. HP Service Manager (Service Manager 9.40; Universal CMDB or later) Page 17 of 273
18 Chapter 1: Introduction What Information is Stored in UCMDB Your UCMDB system stores the actual state of CIs and CI relationships as CI attributes. Typically, UCMDB uses one or more integrations and discovery mechanisms (feeders) to automatically detect CI attribute values. The UCMDB-SM integration only uses a subset of the CI attributes available in a UCMDB system. For more information, see "Tailoring the Integration" on page 115. What Information is Stored in Service Manager Your Service Manager system stores the managed or expected state of CIs and CI relationships as attribute values in a CI record. To be part of the integration, a CI attribute in your UCMDB system must map to a managed field in the Service Manager CI record. You can add, remove, or update the managed fields that are part of the integration by tailoring the Service Manager web services that manage the integration. Service Manager runs according to a set of rules that define what actions you want the system to take whenever a CI s actual state does not match the expected state as defined in the CI record. You define these rules from the Discovery Event Manager (DEM) in Service Manager where you can do the following: Automatically update a CI record to match the attribute values listed in the actual state. (This is the default behavior.) Automatically create a change record to review the differences between the actual state and the managed state. Automatically create an incident record to review the differences between the actual state and the managed state. HP Service Manager (Service Manager 9.40; Universal CMDB or later) Page 18 of 273
19 Chapter 2: Integration Setup Before implementing the integration in your production environment, you can set up the integration in a test environment using the out-of-the-box integration configurations. This chapter describes the basic integration setup tasks without any tailoring or multi-tenancy configurations. It covers the following topics: "Integration Requirements" on the next page "How to Upgrade Your Integration" on the next page "Integration Setup Overview" on page 26 "HP Service Manager Setup" on page 27 "HP Universal CMDB Setup" on page 29 "Populating UCMDB with Service Manager CI Data" on page 35 "Pushing UCMDB CI Data to Service Manager" on page 38 "Federating Service Manager Ticket Data to UCMDB" on page 44 Tip: Before you proceed to implementing the integration in your production environment, you can refer to the following chapters for further information: "Multi-Tenancy (Multi-Company) Setup" on page 61, which describes how you set up the integration in multi-tenancy mode. "Standards and Best Practices" on page 83, which describes best practices for implementing the integration and also provides Frequently-Asked-Questions information. "Tailoring the Integration" on page 115, which describes how you can tailor the integration to better suit your business needs. "Troubleshooting" on page 225, which provides information on troubleshooting data push and population issues. HP Service Manager (Service Manager 9.40; Universal CMDB or later) Page 19 of 273
20 Chapter 2: Integration Setup Integration Requirements The supported product versions of this integration are listed in the following table. Supported product versions Service Manager UCMDB UCMDB Integration Content Pack CP12, CP13, CP14, CP15, , 9.32, 9.33, 9.34, CP12, CP13, CP14, CP15, You must set up the following required components to establish an integration between UCMDB and Service Manager. HP Universal CMDB installation Add a UCMDB Probe for the population feature if you do not already have one. HP Service Manager installation Add the UCMDB URL to the System Information Record. See "How to Add the UCMDB Connection Information" on page 28. Network connection between the HP Universal CMDB and HP Service Manager systems. For instructions on installing and configuring your systems, see the UCMDB and Service Manager documentation. How to Upgrade Your Integration The UCMDB Integration Enhancement Content Pack for Service Manager 9.30 is already included in the Service Manager 9.32 or later applications, except for several code changes, which are not included in order for backward compatibility. This means, to take advantage of the integration enhancement introduced since SM 9.32, extra steps are required to upgrade your existing SM-UCMDB integration after you upgrade to Service Manager applications 9.32 or later for the first time. This section describes these upgrade tasks. Note: If you have already applied the UCMDB Integration Enhancement Content Pack for Service Manager 9.30, the integration has been upgraded and you need to do nothing. If you do not 1 The UCMDB Integration Content Pack is available from the HP Live Network at: For instructions on installing the content package, see the Service Manager 9.30 Applications Patch Manager Guide for Content Patches shipped with the content pack release. HP Service Manager (Service Manager 9.40; Universal CMDB or later) Page 20 of 273
21 Chapter 2: Integration Setup want to upgrade your existing integration, you need to do nothing and your integration can continue to work as before. This task includes the following steps: "Modify the definitions of certain CI types in Service Manager." below "Copy data to the joinnode table" on page 24 "Align the SM CI relationship data model with the UCMDB data model." on page 24 "Update the cirelationship dbdict." on page Modify the definitions of certain CI types in Service Manager. The SM-UCMDB integration enhancement uses the joinnode table for data mappings of the following CI types: mainframe, networkcomponents, storage, and computer. The new data mappings require certain changes be made to these CI types in Service Manager 9.40, as described in the following tables. Note: For backward compatibility, the definitions of all out-of-box CI types in the current version of Service Manager are identical to those in Service Manager Changes required for Mainframe CI types Field Old Value New Value Removed Subtypes Format Name configurationitem configurationitemnode LPAR Attr File mainframe node Join Def joinmainframe joinnode Bulk Update Format Name device.mainframe.bulkupdate device.node.bulkupdate Added subtypes for Mainframe are: Logical Partition CPC HP Service Manager (Service Manager 9.40; Universal CMDB or later) Page 21 of 273
22 Chapter 2: Integration Setup Changes required for Network Components CI types Field Old Value New Value Removed Subtypes Format Name configurationitem configurationitemnode LB Attr File networkcomponents node Join Def joinnetworkcomponents joinnode Bulk Update Format Name device.networkcomponents.bulkupdate device.node.bulkupdate Added subtypes for Network Components are: LoadBalancer Bandwidth Manager CSU/DSU Ethernet FDDI KVM Switch Multicast Enabled Router Token Ring Voice Gateway Voice Switch VPN Gateway Wireless Access Point HP Service Manager (Service Manager 9.40; Universal CMDB or later) Page 22 of 273
23 Chapter 2: Integration Setup Changes required for Storage CI types Field Old Value New Value Removed Subtypes Format Name configurationitem configurationitemnode N/A Attr File storage node Join Def joinstorage joinnode Bulk Update Format Name device.storage.bulkupdate device.node.bulkupdate Added subtypes for Storage are: SAN Gateway SAN Router SAN Switch Storage Array Changes required for Computer CI types Field Old Value New Value Removed Subtypes Format Name configurationitem configurationitemnode N/A Attr File computer node Join Def joincomputer joinnode Bulk Update Format Name device.computer.bulkupdate device.node.bulkupdate Added subtypes for Computer is: Virtualized System To use the integration enhancement, you must modify the following device type definitions in Service Manager: computer, networkcomponents, mainframe, and storage: HP Service Manager (Service Manager 9.40; Universal CMDB or later) Page 23 of 273
24 Chapter 2: Integration Setup a. Log in to Service Manager as a system administrator. b. Navigate to Configuration Management > Resources > Device Types, and then click Search. c. Select one of the CI types (computer, networkcomponents, mainframe, and storage), and update its definition as described in the above tables. d. Repeat the steps above for the rest of the four CI types. 2. Copy data to the joinnode table This task in optional. It is required only if you want to use the joinnode-based data mappings. If you want to use the original tables instead of joinnode (see the above tables), this task is not needed; instead, you need to modify the data mappings of the Service Manager 9.xx adapter in UCMDB. To copy your data from relevant tables to the joinnode table: a. Log in to Service Manager as a system administrator. b. In Database Manager, in the Table field type cidatacopy, and then click Search. The Copy CI Type Data form opens. c. Click Search. A list of records displays: joincomputer, joinmainframe, joinnetworkcomponents, and joinstorage. d. Select each record from the list, update or add source/target fields as needed, and click the Copy Data button. One of the following messages occurs: i. A message like <XXX> records were successfully copied, and <YYY> records were ignored within xxx ms, where XXX and YYY represent the numbers of records copied and ignored. ii. An error message: Configuration validation failed, and no records were copied. Please check your Source Fields/Target Fields settings and run Copy Data again. e. If the error message occurs, correct your Source Fields/Target Fields settings, and click Copy Data again until all of your records have been successfully processed. 3. Align the SM CI relationship data model with the UCMDB data model. HP Service Manager (Service Manager 9.40; Universal CMDB or later) Page 24 of 273
25 Chapter 2: Integration Setup To use the integration enhancement, you need to manually update several records in Service Manager to align the SM CI relationship data model (relationship types and subtypes) with that of UCMDB, in order for easy data mapping between the two products. a. Log in to Service Manager as a system administrator. b. In Script Library, open the EnableUcmdbIntegrationUI script. c. Click Execute. Running this script will automatically rename each record in the table below to <record_name>.bak.932, and replace them with new records with the original record names. Records replaced and renamed Record Type Format Record Name CM.relationship CM.relationship.qbe CM.relationship.type CM.relationship.type.qbe datamodeventrel.relationship.detail datamodeventrel.relationship.qbe am.downstream.relationships.vj am.upstream.relationships.vj Extaccess Format Control Relationship CM.relationship CM.relationship.type datamodevent.relationship d. Verify that the CI relationship form looks like the following: HP Service Manager (Service Manager 9.40; Universal CMDB or later) Page 25 of 273
26 Chapter 2: Integration Setup If you tailored any of these records in the above table, open the <record_name>.bak.932 record to identify the differences, and merge your customizations in the new record. 4. Update the cirelationship dbdict. The data length of CI relationship name in Service Manager is 40 characters, which is not sufficient for the integration. If a CI relationship name exceeds this data length, either the relationship name is truncated after push or the relationship cannot be pushed to Service Manager due to a duplicate key error. You need to manually increase the data length in Service Manager: a. Open the cirelationship table in Database Dictionary. b. Increase the data length of the relationship.name field from 40 to an appropriate value (recommended value: 300). c. Save the record. Integration Setup Overview The integration requires setup on both the UCMDB and Service Manager systems. This task includes the following steps: HP Service Manager (Service Manager 9.40; Universal CMDB or later) Page 26 of 273
27 Chapter 2: Integration Setup 1. Set up the Service Manager system. See "HP Service Manager Setup" below. 2. Set up the UCMDB system. See "HP Universal CMDB Setup" on page Run the UCMDB population jobs to synchronize CIs to UCMDB. See "Populating UCMDB with Service Manager CI Data" on page Run the UCMDB data push jobs to transfer CIs to Service Manager. See "Populating UCMDB with Service Manager CI Data" on page 35. HP Service Manager Setup You must complete the following tasks from your Service Manager system to support the integration. 1. Create a dedicated integration user account in Service Manager. See "How to Create an Integration User Account" below. 2. Add the UCMDB connection information to the system information record. See "How to Add the UCMDB Connection Information" on the next page. How to Create an Integration User Account This integration requires an administrator user account for UCMDB to connect to Service Manager. This user account must already exist in both UCMDB and Service Manager. To create a dedicated integration user account in Service Manager: 1. Log in to Service Manager as a system administrator. 2. Type contacts in the Service Manager command line, and press ENTER. 3. Create a new contact record for the integration user account. a. In the Full Name field, type a full name. For example, UCMDB905x. b. In the Contact Name field, type a name. For example, UCMDB905x. c. Click Add, and then OK. 4. Type operator in the Service Manager command line, and press ENTER. HP Service Manager (Service Manager 9.40; Universal CMDB or later) Page 27 of 273
28 Chapter 2: Integration Setup 5. In the Login Name field, type the username of an existing system administrator account, and click Search. The system administrator account is displayed. 6. Create a new user account based on the existing one. a. Change the Login Name to the integration account name you want (for example, ucmdb). b. Type a Full Name. For example, UCMDB. c. In the Contact ID field, click the Fill button and select the contact record you have just created. d. Click Add. e. Select the Security tab, and change the password. f. Click OK. The integration user account is created. Later you will need to add this user account (username/password) in UCMDB, and then specify this user account in the Credentials ID field when creating an integration point in UCMDB. See "How to Create an Integration Point in UCMDB" on page 30. How to Add the UCMDB Connection Information The integration requires the UCMDB connection information to obtain CI attribute information from the UCMDB system, and display it in the Actual State section in the Service Manager configuration item form. Caution: If you do not specify the correct connection information, an error, instead of UCMDB CI information, will display in the Actual State section. Note: The integration with UCMDB Browser is supported only for Service Manager 9.31 or later. This task includes the following steps: 1. Log in to Service Manager as a system administrator. 2. Click System Administration > Base System Configuration > Miscellaneous > System Information Record. 3. Click the Active Integrations tab. HP Service Manager (Service Manager 9.40; Universal CMDB or later) Page 28 of 273
29 Chapter 2: Integration Setup 4. Select the HP Universal CMDB option. The form displays the UCMDB web service URL field. 5. In the UCMDB webservice URL field, type the URL to the HP Universal CMDB web service API. The URL has the following format: server name>:<port>/axis2/services/ucmdbsmservice Replace <UCMDB server name> with the host name of your UCMDB server, and replace <port> with the communications port your UCMDB server uses. 6. In UserId and Password, type the user credentials required to manage CIs on the UCMDB system. For example, the out-of-the-box administrator credentials are admin/admin. 7. Optionally, if you want to enable an integration to the UCMDB Browser, in the UCMDB Browser URL field, type your UCMDB Browser URL in the following format: browser server name>:<port>/ucmdb-browser For example: The UCMDB Browser has two themes. By default, it uses the dark color theme; if you want to use the light color theme, use this format for the UCMDB Browser URL: browser server name>:<port>/ucmdb-browser/?theme=light Note: If you specify the UCMDB Browser URL here, the View in UCMDB Browser button will replace the View in UCMDB button in CI records synchronized from UCMDB; only when you leave this field empty, the View in UCMDB button will appear. 8. Click Save. Service Manager displays the message: Information record updated. 9. Log out of the Service Manager system. 10. Log back into the Service Manager system with an administrator account. The Actual State section and the View in UCMDB Browser CI records pushed from UCMDB. or View in UCMDB button will be available in HP Universal CMDB Setup You must complete the following tasks from your UCMDB system to support the integration. HP Service Manager (Service Manager 9.40; Universal CMDB or later) Page 29 of 273
30 Chapter 2: Integration Setup 1. Create an integration point between UCMDB and Service Manager. See "How to Create an Integration Point in UCMDB" below. 2. Update the configuration files of the adapter. See "How to Update the Time Zone and Date Format for the Integration Adapter" on page 33. How to Create an Integration Point in UCMDB A default UCMDB installation already includes the ServiceManagerAdapter9-x package. To use the integration package, you must create an integration point listing the connection properties for the integration. Caution: For data population, this integration supports the use of only one probe for your Service Manager system. In other words, you should not run population jobs on different probes by setting up multiple integration points with different probes for your Service Manager system. Only one probe is allowed for one Service Manager system. To create an integration point: 1. Log in to UCMDB as an administrator. 2. Add the integration user account that you created in Service Manager. a. Click Administration > Users and Roles. b. Click the Add New User button. c. For User Name and Password, type the user name and password you created in Service Manager. See "How to Create an Integration User Account" on page 27. d. Click Next, and then in the Role List select Admin. e. Click Finish. The integration user account is added. 3. Navigate to Data Flow Management > Integration Studio. UCMDB displays a list of existing integration points. 4. Click the New Integration Point button. UCMDB displays a New Integration Point properties window. HP Service Manager (Service Manager 9.40; Universal CMDB or later) Page 30 of 273
31 Chapter 2: Integration Setup 5. Complete the integration and adapter property fields as described in the following table. Integration and adapter properties (UCMDB or later) Field name Integration Name Integration Description Is required? Yes No Description Type the name (unique key) of the integration point. For example, sm_integration. Type a description of current integration point. Adapter Yes For UCMDB 9.05: Select HP BTO Products or HP Software Products > Service Manager > Service Manager 9.xx. For UCMDB 10: Select HP Software Products > Service Manager > Service Manager 9.xx. Note: This adapter, which supports CI/relationship Data Push from UCMDB to Service Manager, and Population and Federation from Service Manager to UCMDB, is available out-of-the-box only in UCMDB version 9.05 or later. Is Integration Activated Yes Enable this option to indicate the integration point is active. Hostname/IP Yes Type the hostname or IP address of the Service Manager server. For example, localhost. Port Yes Type the communications port of the Service Manager server. For example, HP Service Manager (Service Manager 9.40; Universal CMDB or later) Page 31 of 273
32 Chapter 2: Integration Setup Integration and adapter properties (UCMDB or later), continued Field name Is required? Description URL Override No This field value (if any) supersedes the Hostname/IP and Port settings described above. Use this field If you want UCMDB to connect to Service Manager in any combinations of the following ways: Connect to Service Manager over HTTPS or over both HTTP and HTTPS Connect to multiple Service Manager server nodes (vertically scaled environment) Connect to one single Service Manager server node through multiple ports (horizontally scaled environment) For more information, see "Push in Clustered Environments" on page 87. Type one or more Service Manager web services URLs (separated by a semicolon) in this field. The following are two example values of this field (each URL should use this format: http(s)://<hostname>:<port>/sc62server/ws): Credentials ID Data Flow Probe Yes Yes Click Generic Protocol, click the Add button to add the integration user account you created, and then select it. This account must exist in both Service Manager and UCMDB. See "How to Create an Integration User Account" on page 27. Select the name of the Data Flow Probe used to run population jobs. You should have already added the data flow probe for the integration after installing UCMDB. See "Integration Requirements" on page Click Test Connection to make sure that a successful connection is created. HP Service Manager (Service Manager 9.40; Universal CMDB or later) Page 32 of 273
, in CI Type Retrieval Mode select Retrieve CIs of selected CI Type. 9.")
33 Chapter 2: Integration Setup 7. Click OK. The integration point is created and its details are displayed. 8. Click the Federation tab, and complete the following configuration. a. In Supported and Selected CI Types, select the following CI types as needed from Managed Object > ItProcessRecord: i. Incident ii. iii. Problem Request for Change b. For each CI type you selected (Incident, Problem, or Request for Change), in CI Type Retrieval Mode select Retrieve CIs of selected CI Type. 9. Click the Population and Data Push tabs, to view the default integration job details. Note: UCMDB creates several default population and data push jobs when creating an integration point. If needed, you can create a new job for the integration point. For information about creating integration jobs, see "How to Define Data Push Jobs in UCMDB" on page 39 and "How to Define Population Jobs in UCMDB" on page Click the Save Integration Point icon. How to Update the Time Zone and Date Format for the Integration Adapter The integration uses an integration user account to connect UCMDB to Service Manager. You specified this user account in the Credentials ID setting when creating an integration point. See "How to Create an Integration Point in UCMDB" on page 30. You must make sure that this integration user account uses the same time zone and date format in both Service Manager and UCMDB. To do so, you define the HP Service Manager (Service Manager 9.40; Universal CMDB or later) Page 33 of 273

34 Chapter 2: Integration Setup same time zone and date format in the integration adapter configuration file and in the integration user s operator record in Service Manager. To update the time zone and date format for the integration adapter: 1. Check or change the time zone and date format of the integration user in Service Manager. a. Log in to Service Manager as a system administrator. b. Navigate to System Administration > Ongoing Maintenance > Operators. The Operators form opens. c. For Login Name, type the integration user name (for example, ucmdb) you set in the integration point (the Credentials ID field). d. Click Search. Service Manager displays the record of the operator. e. Click the Login Profiles tab. f. View or change the operator s Time Zone and Data Format field values. 2. Set the time zone and date format for the adapter in UCMDB. a. Log in to UCMDB as an administrator. b. Navigate to Data Flow Management > Adapter Management > ServiceManagerAdapter9-x > Configuration Files > servicedeskconfiguration.xml. HP Service Manager (Service Manager 9.40; Universal CMDB or later) Page 34 of 273
35 Chapter 2: Integration Setup c. At the bottom of the file, locate the elements <date_pattern> and <time_zone>, and update the values according to the integration user s time zone/date format setting in Service Manager. The date pattern and time zone are in java format pattern used by java.text.simpledateformat. Out-of-the-box, the date format and time zone values in servicedeskconfiguration.xml are: MM/dd/yy HH:mm:ss, and US/Mountain. Populating UCMDB with Service Manager CI Data In addition to pushing CI data from UCMDB to Service Manager, this integration also supports the population of CI data (including CIs and CI relationships) from Service Manager to UCMDB. The integration can then update the list of CIs in UCMDB if new CIs or new attribute values are found in Service Manager. The population of data from Service Manager to UCMDB is defined in the Integration Studio in UCMDB. You can manually run the population jobs, however HP recommends that you schedule these jobs to keep your CIs and CI attributes up to date. This task includes the following steps: 1. Define CI/CI Relationship population jobs in UCMDB. See "How to Define Population Jobs in UCMDB" below. 2. View the transferred CI/CI Relationship data in UCMDB. See "View Service Manager CI Data in UCMDB" on page Schedule CI population jobs to keep CIs and CI attributes up to date. See "How to Schedule CI Population Jobs" on page 38. How to Define Population Jobs in UCMDB A CI/CI relationship population job copies certain types of CIs/CI relationships from Service Manager to UCMDB. To define a CI or CI relationship population job: 1. Log in to UCMDB as an administrator. 2. Navigate to Data Flow Management > Integration Studio. UCMDB displays a list of existing integration points. HP Service Manager (Service Manager 9.40; Universal CMDB or later) Page 35 of 273
36 Chapter 2: Integration Setup 3. Open an integration point. 4. Click the Population tab, and add a new job as follows. Note: UCMDB creates several default population and data push jobs when creating an integration point. The following table lists the default population jobs and their queries. If needed, you can create, update or remove queries for each job. For information about tailoring population queries, see "Create a Query to Populate the CI Type" on page 195. Queries for CI / CI relationship population Integration Job SM Configuration Item Population job Queries for CI / CI relationship population Out-of-the-box, the following queries are available for this job, which populates CI records from Service Manager to UCMDB: SM Business Service Population: Populates CIs of the bizservice type. SM RunningSoftware Population: Populates CIs of the RunningSoftware type. SM Computer Population: Populates CIs of the computer type. SM Relations Population job Out-of-the-box, the following queries are defined for this job, which populates CI Relationship records from Service Manager to UCMDB: SM Biz To Biz With Containment: Populates CI relationships in which a bizservice CI contains another. SM Biz To Biz With Usage: Populates CI relationships in which a bizservice CI uses another. SM Biz To Computer With Containment: Populates CI relationships in which a bizservice CI contains a computer CI. SM Biz To Computer With Usage: Populates CI relationships in which a bizservice CI uses a computer CI. SM Computer To Computer With Connects: Populates CI relationships in which a computer CI connects to another. a. Click the New Integration Job button. b. Type a Name for the integration job. For example, CI_Population_Job1. HP Service Manager (Service Manager 9.40; Universal CMDB or later) Page 36 of 273
37 Chapter 2: Integration Setup c. Click the Add Query button to add existing queries to the job (see the above table). d. Select the Allow Integration Job to delete removed data check box for the query. e. Click OK to save the job. 5. Run the job manually to see if the integration job works properly. a. To populate all relevant data for the job, click the button. b. To populate only CI data changes since the job last ran, click the button. 6. Wait for the job to complete, and click the Refresh button multiple times as needed until the job is completed. Note: When the job is completed, the job status becomes one of the following: Succeeded, Passed with failures, or Failed. 7. Click the Statistics tab to view the results, and if the job failed, click the Query Status tab and Job Errors tab for more information. For details, see "Troubleshooting Population Issues" on page Click OK. If the job is completed successfully, you can view the transferred CI data in UCMDB and schedule the job so that it can run automatically. View Service Manager CI Data in UCMDB After a population job is successfully completed, you can search for the Service Manager CI records in UCMDB, and verify that their attributes are correctly populated. The Service Manager CI Identifierfield is populated to the Name field on the Configuration Item Properties pane in UCMDB. Note: To see the entire attribute mappings of a CI type, you can open the CI type s population XSLT file (for example, business_service_population.xslt) and the root population xslt file (cmdb_root_ attributes_population.xslt), where the UCMDB attribute field names and the mapped Service Manager web service field caption names are defined. For more information, see "Tailoring the Integration" on page 115. HP Service Manager (Service Manager 9.40; Universal CMDB or later) Page 37 of 273
38 Chapter 2: Integration Setup How to Schedule CI Population Jobs You can schedule CI population jobs to match the discovery/maintenance schedule of your Service Manager feeders. For example, if your Service Manager feeders send CI data updates on a daily schedule, then the population jobs should also run on a daily schedule. By using a matching schedule you can ensure that your UCMDB system always has the most current CI data. This task includes the following steps: 1. Log in to UCMDB as an administrator. 2. Navigate to Data Flow Management > Integration Studio. UCMDB displays a list of integration points. 3. Open an integration point. 4. Click the Population tab, and select a population job from the list. 5. Click the Edit Integration Job button. 6. Select the Scheduler enabled option. 7. Select the scheduling options you want to use. For example, select Repeat every: Day and Ends: Never. 8. Select a Time Zone. 9. Click OK. Pushing UCMDB CI Data to Service Manager The integration requires a one-time transfer of CIs from UCMDB to Service Manager to populate the Service Manager system with CIs. The integration will then update the list of CIs in Service Manager when UCMDB discovers new CIs or new attribute values. The integration accomplishes the push of CI data using data push jobs in the UCMDB system. HP recommends that you schedule these jobs to keep your CIs and CI attributes up to date. This task includes the following steps: 1. Define CI/CI Relationship data push jobs. See "How to Define Data Push Jobs in UCMDB" on the next page. HP Service Manager (Service Manager 9.40; Universal CMDB or later) Page 38 of 273
39 Chapter 2: Integration Setup 2. View the CI/CI Relationship data pushed from UCMDB. See "How to View UCMDB CI Data in Service Manager" on page Schedule data push jobs to keep CI/CI Relationship data up to date. See "How to Schedule Data Push Jobs" on page 43. How to Define Data Push Jobs in UCMDB Data push jobs copy CI or CI Relationship records from your UCMDB system to your Service Manager system. To define a CI or CI relationship push job: 1. Log in to UCMDB as an administrator. 2. Navigate to Data Flow Management > Integration Studio. UCMDB displays a list of existing integration points. 3. Select the Integration Point you created for Service Manager. For example, sm_integration. 4. Click the Data Push tab. 5. Follow these steps to add a new data push job: a. Click the New Integration Job button. Note: UCMDB creates a default data push job when creating an integration point. The following table lists the default data push job and its queries. If needed, you can create, update or remove queries for the push job. To access these out-of-the-box queries for push, go to Modeling > Modeling Studio > Resources, select Queries for Resource Type, and then navigate to Root > Integration > SM Sync > 9.xx. For information about tailoring data push queries, see "How to Create a Query to Synchronize the CI Type" on page 161. Queries for CI / CI relationship push Integration job Integration job Queries Queries HP Service Manager (Service Manager 9.40; Universal CMDB or later) Page 39 of 273
40 Chapter 2: Integration Setup Queries for CI / CI relationship push, continued Integration job SM Push job Queries Out-of-the-box, the following queries are available for this job, which pushes CI/CI Relationship records from UCMDB to Service Manager: SM Mainframe Push: pushes CIs of the mainframe type. SM Network Component Push: pushes CIs of the network component type. SM Running Software Push: pushes CIs of the running software type. SM Business Service Push: pushes CIs of the business service type. SM Computer Push: pushes CIs of the computer type. SM Storage Push: pushes CIs of the storage type. SM Switch Push: pushes CIs of the switch type. SM Net Printer Push: pushes CIs of the net printer type. SM Cluster Push: pushes CIs of the cluster type. SM Mobile Device Push: pushes CIs of the mobile device type. SM Local Printer Push: pushes CIs of the local printer type. Out-of-the-box, the following queries are available for this job, which pushes CI Relationship records from UCMDB to Service Manager: SM Layer2 Topology Relations Push: pushes compound CI relationships between nodes. SM Business Service Relations Push: pushes CI relationships whose upstream CI type is business service. SM CRG Relations Push: pushes CI relationships whose upstream CI type is cluster. SM Node Relations Push: pushes direct CI relationships whose upstream CI type is node. HP Service Manager (Service Manager 9.40; Universal CMDB or later) Page 40 of 273
41 Chapter 2: Integration Setup b. In the Name field, type a unique name for the job. For example, CI_Push_Job1. c. Click the Add Query button to add existing queries to the job. d. Select the Allow Integration Job to delete removed data option for each query. e. Click OK to save the job. 6. Run the job manually to verify that the integration job works properly. Caution: If you have a huge amount of CI data in your UCMDB system, and this is your first time to push CI /CI Relationship data to Service Manager, it is recommended to select the Add the record option instead of Open a change or Open an incident for Action if matching record does not exist in each Discovery Event Manager Rules definition. Otherwise unnecessary performance problems might occur. For details, see "Add Discovery Event Manager Rules" on page 137. a. To push all relevant data for the job, click the button. b. To push only data that was changed since the job last ran, click the button. Tip: You can stop a running push job by pressing the Stops the selected job button. 7. Wait for the job to complete, and click the Refresh button multiple times as needed until the job is completed. Note: When the job is completed, the job status becomes one of the following depending on the results: Succeeded, Passed with failures, or Failed. 8. Click the Statistics tab to view the results; if any errors occur click the Query Status tab and Job Errors tab for more information. For details, see "Troubleshooting Data Push Issues" on page Click OK. If the job is completed successfully, you can view the UCMDB CI data in Service Manager, and schedule the job so that it can run automatically. HP Service Manager (Service Manager 9.40; Universal CMDB or later) Page 41 of 273
42 Chapter 2: Integration Setup How to View UCMDB CI Data in Service Manager After a push job is successfully completed, you can search for and verify the pushed CI/CI relationship data in Service Manager. CI records pushed from UCMDB contains a View in UCMDB or View in UCMDB Browser button, which enables you to access UCMDB or UCMDB Browser to view the CI information. Note: If you specified the UCMDB Browser URL in the System Information Record in SM, the View in UCMDB Browser button displays; otherwise the View in UCMDB button displays. The UCMDB Browser is a lightweight UI designed for simple access to UCMDB configuration information. This is a tool for searching, locating and consuming configuration related data. It is an optional add-on to UCMDB. For more information, refer to the UCMDB Browser documentation. To view UCMDB CI data in Service Manager: 1. Log in to Service Manager as a system administrator. 2. Navigate to Configuration Management > Search CIs. 3. Open a CI record pushed from UCMDB. 4. If the View in UCMDB button is available, view the CI record in UCMDB. a. Click the View in UCMDB button. The UCMDB login screen opens. b. Type a UCMDB username and password to log in. The CI record opens in UCMDB. You can view its properties. Note: You can enable Lightweight Single Sign-On (LW-SSO) for the integration so that Service Manager web client users can bypass the UCMDB login screen. For details, see "How to Enable Lightweight Single Sign-On (LW-SSO) Configuration" on page If the View in UCMDB Browser button is available, view the CI record in the UCMDB Browser. a. Click the View in UCMDB Browser button. The UCMDB Browser login screen opens. b. Type a UCMDB Browser username and password to log in. The CI record opens in the UCMDB Browser. You can view its properties and other information. HP Service Manager (Service Manager 9.40; Universal CMDB or later) Page 42 of 273
43 Chapter 2: Integration Setup 6. Open the Actual State section. Service Manager makes a web services request to UCMDB and displays all CI attributes the request returns. Note: The web services request uses the UCMDB webservice URL and account (for example, admin/admin) defined in the System Information Record in Service Manager. See "How to Add the UCMDB Connection Information" on page 28. How to Schedule Data Push Jobs It is a best practice to schedule the data push jobs to match the discovery schedule of your Service Manager feeders. For example, if your Service Manager feeders send CI data updates on a daily schedule, the data push jobs should also run on a daily schedule. By using a matching schedule you can ensure that your Service Manager system always has the most current CI data. UCMDB allows you to schedule updates directly from a data push job. This task includes the following steps: 1. Log in to UCMDB as an administrator. 2. Navigate to Data Flow Management > Integration Studio. UCMDB displays a list of integration points. 3. Select the integration point you created for the UCMDB-SM integration. For example, SM Integration. 4. Click the Data Push tab. 5. Select a push job. For example, SM Configuration Item Push Job. 6. Click the Edit Integration Job button. Tip: UCMDB allows you to define two different schedules for two types of data push: Changes Sync, and All Data Sync. For recommendations on push scheduling, see "Push Scheduling Recommendations" on page Define a schedule for Changes Sync. a. Click the Changes Sync tab. b. Select the Scheduler enabled option. HP Service Manager (Service Manager 9.40; Universal CMDB or later) Page 43 of 273
44 Chapter 2: Integration Setup c. Select the scheduling options you want to use. 8. Click All Data Sync tab, and select the scheduling options you want to use. 9. Click OK to save the data push job. 10. Repeat step 6 to step 9 for the rest of data push jobs of the integration point. 11. Save the integration point. Federating Service Manager Ticket Data to UCMDB Federation does not physically copy data from Service Manager (SM) to UCMDB; it only retrieves SM data for displaying in UCMDB. Out-of-the-box, the UCMDB-SM integration supports federation for the Incident, Problem, and RequestForChange external CI types in UCMDB. If you have enabled these CI types for federation when creating your integration point, in UCMDB you can retrieve Incident, Problem, and Change record data from SM. Out-of-the-box, each of the CI types (Incident, Problem, or Change) supports federation of a subset of their attributes in Service Manager; however, the integration can federate more attributes if tailored as such. This section includes: HP Service Manager (Service Manager 9.40; Universal CMDB or later) Page 44 of 273
45 Chapter 2: Integration Setup "Federation queries" below "Examples of Using Federation" below "How to Add an Attribute of a Supported CI Type for Federation" on page 217 Federation queries Federation uses queries to determine what data to retrieve from Service Manager. To retrieve specific ticket data from Service Manager, you need to create a query first. Out-of-the-box, sample federation queries are available from UCMDB: Modeling > Modeling Studio > Resources > View > Service Desk. Examples of Using Federation You can use the federation feature in many different ways. The following are only examples of using the feature. This section includes: "Example 1: Federate All SM Incident Tickets" below "Example 2: Federate SM Incident Tickets that Affect a UCMDB Business Service CI" on page 50 "Example 3: Federate SM Incident, Change and Problem Ticket Data of UCMDB CIs" on page 55 "Example 4: Get Related SM Ticket Data of a UCMDB CI" on page 58 Example 1: Federate All SM Incident Tickets This example illustrates how you retrieve information of all Incident records that exist in Service Manager. 1. Log in to UCMDB as an administrator. 2. Navigate to Modeling > Modeling Studio > Resources. 3. For Resource Type, select Queries from the list. 4. Click New > Query. HP Service Manager (Service Manager 9.40; Universal CMDB or later) Page 45 of 273

46 Chapter 2: Integration Setup 5. On the CI Types tab, go to ItProcessRecord > Incident, and drag it to the query pane on the right side. 6. Specify Service Manager as the data source for the Incident query node. a. Select the Incident query node, click the Data Sources tab on the lower right pane, and then click Edit. b. Select the Select integration points option, and then select your integration point name (for example, sm_integration). Click OK. HP Service Manager (Service Manager 9.40; Universal CMDB or later) Page 46 of 273
47 Chapter 2: Integration Setup 7. Click the Save button, and then type a query name and select a location in which to save the query (for example, select the Root > Integration > SM Query folder). HP Service Manager (Service Manager 9.40; Universal CMDB or later) Page 47 of 273


48 Chapter 2: Integration Setup 8. Select the Incident query node, and then click the Calculate Query Result Count button. UCMDB returns the query result count. For example, the following figure shows that there are a total of 131 Incident records in Service Manager. HP Service Manager (Service Manager 9.40; Universal CMDB or later) Page 48 of 273

49 Chapter 2: Integration Setup 9. Right-click the Incident query node, and select Show Element Instances. UCMDB displays a list of all Incident records that exist in Service Manager. HP Service Manager (Service Manager 9.40; Universal CMDB or later) Page 49 of 273

50 Chapter 2: Integration Setup 10. Select an Incident ticket from the list, and click the Properties button to view its details. Example 2: Federate SM Incident Tickets that Affect a UCMDB Business Service CI The following example illustrates how to federate a list of Service Manager Incident records whose Affected Service or Affected CI field contains a UCMDB Business Service CI. 1. Log in to UCMDB as an administrator. 2. Navigate to Modeling > Modeling Studio > Resources. 3. For Resource Type, select Queries from the list. HP Service Manager (Service Manager 9.40; Universal CMDB or later) Page 50 of 273


51 Chapter 2: Integration Setup 4. Click New > Query. 5. On the CI Type tab, go to ConfigurationItem > BusinessElement > Service > BusinessService, and drag it to the query pane on the right side. 6. Go to ItProcessRecord > Incident, and drag the icon to the query pane. 7. Click the Create Relationship button. 8. Select the Incident query node, and drag the arrow from this node to the BusinessService node to create a regular relationship between the nodes. a. Select Regular Relationship, and click OK. b. Select Membership, and optionally enter a relationship name (for example, Membership_1). HP Service Manager (Service Manager 9.40; Universal CMDB or later) Page 51 of 273
 option is selected. HP Service Manager (Service Manager 9.")
52 Chapter 2: Integration Setup Click OK. 9. Specify UCMDB as the data source for the BusinessService query node. a. Select the BusinessService query node. b. On the lower right pane, click the Data Sources tab and then click Edit. c. Make sure that the Local data source (UCMDB only) option is selected. HP Service Manager (Service Manager 9.40; Universal CMDB or later) Page 52 of 273
.")
53 Chapter 2: Integration Setup d. Click OK. 10. Similarly, specify your integration point as the data source for the Incident query node (for example, sm_integration). HP Service Manager (Service Manager 9.40; Universal CMDB or later) Page 53 of 273


54 Chapter 2: Integration Setup 11. Click the Calculate Query Result Count button. The number of SM Incidents and the number of their affected UCMDB Business Service CIs are displayed. HP Service Manager (Service Manager 9.40; Universal CMDB or later) Page 54 of 273

55 Chapter 2: Integration Setup 12. Click the Preview button to view the query result. 13. Select each SM Incident record from either the CI Selector pane or the query pane, and click the Properties button to view its details. 14. Select each UCMDB CI record from either the CI Selector pane or the query pane, and on the Related CIs tab click Show Related CIs. Example 3: Federate SM Incident, Change and Problem Ticket Data of UCMDB CIs The following example illustrates how you retrieve information of SM Incident, Change and Problem tickets that affect a UCMDB Business Service CI. HP Service Manager (Service Manager 9.40; Universal CMDB or later) Page 55 of 273

56 Chapter 2: Integration Setup 1. Log in to UCMDB as an administrator. 2. Navigate to Modeling > Modeling Studio > Resources. 3. For Resource Type, select Queries from the list. 4. Click New > Query. 5. On the CI Type tab, go to ConfigurationItem > BusinessElement > Service > BusinessService, and drag it to the query pane on the right side. 6. Go to ItProcessRecord, and drag Incident, Problem, and RequestForChange to the query pane. 7. Click the Create Relationship button to create regular relationships between the BusinessService node and the other nodes as shown in the following figure. 8. For the BusinessService node, specify UCMDB as the data source. 9. For the Incident, Problem, and RequestForChange nodes, specify your integration point as the data source. 10. Save the query. HP Service Manager (Service Manager 9.40; Universal CMDB or later) Page 56 of 273


57 Chapter 2: Integration Setup 11. Optionally, edit the BusinessService node properties as needed. a. Select the BusinessServic node, and click Edit on the lower right pane. b. Click the Cardinality tab. The default Cardinality setting is displayed. c. If you wish, change either or both of the AND operators to OR. d. This will change the filter criteria and therefore the query result. 12. Click the Preview button to view the query result. HP Service Manager (Service Manager 9.40; Universal CMDB or later) Page 57 of 273

58 Chapter 2: Integration Setup 13. Select each SM Incident record from either the CI Selector pane or the query pane, and click the Properties button to view its details. 14. Select each UCMDB CI record from either the CI Selector pane or the query pane, and on the Related CIs tab click Show Related CIs to view its related CIs in both SM and UCMDB. Example 4: Get Related SM Ticket Data of a UCMDB CI The following example illustrates how you retrieve SM ticket data related to a UCMDB CI by using the Get Related CIs functionality. 1. Log in to UCMDB as an administrator. 2. Navigate to Modeling > IT Universe Manager. 3. On the Search CIs tab, search for a UCMDB CI that has associated ticket(s) in Service Manager. For example, enter bs in the CI Name field, click Search, and double-click the CI to open it. 4. Click the Show Get Related CIs pane button. The Get Related CIs pane is displayed. HP Service Manager (Service Manager 9.40; Universal CMDB or later) Page 58 of 273


59 Chapter 2: Integration Setup 5. Click the Select target Integration Points for related CIs button. 6. Select the Select integration points option, and then select both UCMDB and your integration point. Click OK. HP Service Manager (Service Manager 9.40; Universal CMDB or later) Page 59 of 273

60 Chapter 2: Integration Setup 7. Click Show Related CIs. The CI s related SM tickets and UCMDB CIs are displayed. 8. Select each SM ticket record from the query pane, and click the Properties button to view its details. HP Service Manager (Service Manager 9.40; Universal CMDB or later) Page 60 of 273
61 Chapter 3: Multi-Tenancy (Multi-Company) Setup The UCMDB-SM Integration supports a multi-tenancy configuration in which both the Service Manager and UCMDB systems track Configuration Items (CIs) and Configuration Item Relationships (CIRs) by company ID. In a multi-tenancy configuration, you can tailor the integration so that each tenant only sees and works with the CIs and CIRs that match their company ID. Multi-tenancy is intended for managed service providers (MSPs) who wish to offer Configuration Management as a service to multiple tenants. This chapter includes: "Multi-Tenancy (Multi-Company) Support" below "Multi-Tenancy Requirements" on page 69 "Setting up the Multi-Tenancy Integration in UCMDB" on page 70 "Setting up the Multi-Tenancy Integration in Service Manager" on page 73 Multi-Tenancy (Multi-Company) Support Multi-tenancy is when a single instance of software runs on a server, serving multiple client organizations (also referred to as tenants). Multi-tenancy contrasted with a multi-instance architecture where separate software instances or hardware systems are set up for different client organizations. When implementing a multi-tenant architecture, a software application is designed to virtually partition its data and configuration so that each client organization works with a customized virtual application instance. The following figure illustrates an example multi-tenant integration deployment. HP Service Manager (Service Manager 9.40; Universal CMDB or later) Page 61 of 273

62 Chapter 3: Multi-Tenancy (Multi-Company) Setup Explanation Every tenant configured in UCMDB works with the relevant tenant in SM. If UCMDB did not configure tenants, the tenant configuration must be activated in order to transfer the configuration from SM to UCMDB automatically. This function is performed once only by the system administrator. In the event that UCMDB tenant configuration already exists and the SM configuration does not exist, SM tenant must be manually configured according to the UCMDB configuration. Implementing Multi-Tenancy in the UCMDB-SM Integration SM stores the company records that describe each tenant in the multi-tenant configuration. The Service Manager system is the definitive source for company records and pushes all new company IDs to the UCMDB system creating the equivalent entity in UCMDB. SM tracks the company ID of each CI and relationship in a multi-tenant configuration. CI records inherit the company ID of the UCMDB feeder that discovered them. Relationship records inherit the company ID of the parent CI in the relationship. Mandanten SM Security Layer Mandanten is an SM software layer that is used to filter the customer ID from the CI information. SM uses the Mandanten to ensure that operators only see CI and relationship records where the CI's company ID matches the operator's company ID. If the view is restricted with Mandanten, then Service Manager also restricts the view to all other related records such as change requests and incidents. HP Service Manager (Service Manager 9.40; Universal CMDB or later) Page 62 of 273
63 Chapter 3: Multi-Tenancy (Multi-Company) Setup What Multi-Tenant Information is Stored in UCMDB Your UCMDB system stores a company ID attribute for each CI and CIR. The company ID determines what adapter and synchronization schedule your UCMDB system uses to update CI data. Each CI and relationship record can only have one company ID. The UCMDB system obtains a company ID from the Service Manager system. If more than one tenant (company) shares the same CI, each tenant has their own unique CI record describing the CI. In effect, the UCMDB system creates multiple CI records to track one managed asset. Each tenant s CI record is unique to that tenant and lists the company's unique company ID. What Multi-Tenant Information is Stored in Service Manager Your Service Manager stores the company records that describe each tenant in the multi-tenant configuration. The Service Manager system is the definitive source of company IDs and pushes new and updated information to your UCMDB system. Service Manager tracks the company ID of each CI and relationship in a multi-tenant configuration. CI records inherit the company ID of the UCMDB feeder that discovered them. Relationship records inherit the company ID of the parent CI in the relationship. In a best practices implementation, Service Manager uses Mandanten to ensure that operators only see CI and relationship records where the CI s company ID matches the operator s company ID. If you restrict the view with Mandanten, then Service Manager also restricts the view to all other related records such as change requests and incidents. Unique Logical Names Service Manager requires that all CIs have unique logical names. If the logical name generation process produces a duplicate logical name value, Service Manager appends an underscore and a number to the end of logical name to make it unique. For example, if two CIs would have the logical name mytesthost, then the second CI will instead have the name mytesthost_1. A second duplicate CI would have the name mytesthost_2. HP Service Manager (Service Manager 9.40; Universal CMDB or later) Page 63 of 273
64 Chapter 3: Multi-Tenancy (Multi-Company) Setup Synchronization of Company Records If your system meets all the conditions for multi-tenancy support, Service Manager creates a schedule record to push the company ID of the company record to your UCMDB system. Service Manager uses the following rules to determine whether to push the company ID to your UCMDB system. Conditions where Service Manager synchronizes company ID with UCMDB Conditions UCMDB-SM integration enabled Multi-company mode enabled in Service Manager You create a new company record in Service Manager UCMDB-SM integration enabled You update an existing company record that has not been synchronized with UCMDB Multi-company mode enabled in Service Manager UCMDB-SM integration enabled Multi-company mode enabled in Service Manager You disable the option to show a company in multi-company lists on a company synchronized with UCMDB UCMDB-SM integration enabled Multi-company mode enabled in Service Manager You select the option to resynchronize with UCMDB on an existing company record UCMDB-SM integration enabled Multi-company mode enabled in Service Manager You enable the option to show a company in multi-company lists for an inactivated company Tenant information synchronized? Yes Yes Yes Yes Yes Schedule record created and action taken in UCMDB Synch Company with UCMDB - <UCMDB Company ID> Add new company ID Synch Company with UCMDB - <UCMDB Company ID> Add new company ID Inactivate Company with UCMDB - <UCMDB Company ID> Inactivate existing company ID Synch Company with UCMDB - <UCMDB Company ID> Add new company ID Synch Company with UCMDB - <UCMDB Company ID> Reactivate company ID HP Service Manager (Service Manager 9.40; Universal CMDB or later) Page 64 of 273
65 Chapter 3: Multi-Tenancy (Multi-Company) Setup Conditions where Service Manager synchronizes company ID with UCMDB, continued Conditions UCMDB-SM integration disabled Tenant information synchronized? No Schedule record created and action taken in UCMDB None Multi-company mode enabled in Service Manager You update an existing company record that has already been synchronized with UCMDB UCMDB-SM integration disabled No None Multi-company mode enabled in Service Manager You create a new company record in Service Manager UCMDB-SM integration enabled No None Multi-company mode enabled in Service Manager You disable the option to show a company in multi-company lists on a company not synchronized with UCMDB UCMDB-SM integration enabled No None Multi-company mode disabled in Service Manager You create a new company record in Service Manager UCMDB Customer ID When you enable the multi-tenancy integration, Service Manager displays a new field in each company record called UCMDB Customer ID. In order to synchronize a company record with UCMDB, you must first provide a value for this field. After you provide a UCMDB Customer ID value this field becomes read-only. You cannot change a company's UCMDB Customer ID after you set it. This field only accepts numeric data up to ten characters long. Service Manager requires the field value to be a unique positive whole number. You cannot enter duplicate values or use decimals, negative numbers, or zero. HP Service Manager (Service Manager 9.40; Universal CMDB or later) Page 65 of 273
66 Chapter 3: Multi-Tenancy (Multi-Company) Setup Your UCMDB system automatically uses the UCMDB customer ID of 1 when running in single tenant mode. You can reuse this default value in your multi-tenant implementation by assigning a Service Manager company to have this UCMDB customer ID value. Out-of-the-box, no Service Manager company has the UCMDB customer ID of 1. UCMDB User ID and Password When you enable the multi-tenancy integration, Service Manager displays two new fields in each company record called UCMDB UserId and UCMDB Password. These fields allow you to specify the connection information you want Service Manager to use when requesting information for the Actual State section. Any user name and password you enter in these fields must be valid for your UCMDB system. The user name and password you provide in the Company Information record takes precedence over the user name and password you provide in the System Information record. This allows managed service providers to control access to the UCMDB system on a tenant-by-tenant basis. If you do not provide a company-specific UCMDB user name and password, Service Manager uses the credentials you provided in the System Information record. Company Code The multi-tenancy integration requires that each company record has a unique Company Code (company field) value. Since Company Code is a required field, your existing company records should already have Company Code values. However you should ensure that each company record has a unique Company Code value. Caution: You should not change the Company Code value after you have enabled the multi-tenancy integration because this will cause your Service Manager data to become out of synch. CI Reconciliation Rules When multi-tenancy is enabled, Service Manager only reconciles the CIs whose company ID matches the company ID in the data push job. For example, when pushing CIs from company 2, the reconciliation rules only apply to the Service Manager CI records that have the company code corresponding to company number 2. HP Service Manager (Service Manager 9.40; Universal CMDB or later) Page 66 of 273
67 Chapter 3: Multi-Tenancy (Multi-Company) Setup Company Information Pushed to CI and CI Relationship Records When you enable the multi-tenancy integration, Service Manager inserts the SM Company Code value in CI and relationship records during data push. Service Manager uses the UCMDB Customer ID to look up the matching SM Company Code value. Company Information Replicated to Incident Records When you enable the multi-tenancy integration and select the option to create incidents when UCMDB discovers new, updated, or deleted CIs, Service Manager inserts the SM Company Code value in the incident record during replication. Service Manager uses the UCMDB Customer ID to look up the matching SM Company Code value. Schedule Records Service Manager uses the problem schedule processor to manage the synchronization of company IDs to your UCMDB system. You can manually enable the problem schedule processor from the System Status form. When the synchronization criteria are met as described in Table "Conditions where Service Manager synchronizes company ID with UCMDB" on page 64, Service Manager creates a Synch Company with UCMDB - <UCMDB Company ID> schedule record (for example, Synch Company with UCMDB ). If you inactivate a company, Service Manager creates a Inactivate Company with UCMDB - <UCMDB Company ID> schedule record (for example, Inactivate Company with UCMDB ). The problem schedule processor processes the new schedule record on the next background process iteration. If your Service Manager system cannot connect to your UCMDB system for some reason, it will reschedule the company synchronization at the next scheduled interval (the out-box interval is 5 minutes). The problem schedule processor updates the schedule record with the status rescheduled. If the Service Manager system receives any other error message while connecting to the UCMDB system, it updates the schedule record with the status application failed due to error - check msglog for possible messages. Tenant-Specific Discovery Event Manager (DEM) Rules You can implement the condition field function in order to create SM DEM rules that are specific to a particular tenant in a multi-tenancy UCMDB-SM integration. HP Service Manager (Service Manager 9.40; Universal CMDB or later) Page 67 of 273
68 Chapter 3: Multi-Tenancy (Multi-Company) Setup Tenant rules vary according to SM tenant configuration requirements, for each record information type pushed from UCMDB to SM different tenants can configure different DEM tenant rules. Each tenant can have its own set of unique requirements and therefore may implement different processes through the integration. One tenant may require the addition of CIs directly to SM while another tenant may require opening changes for each CI. The following table shows a sample set of DEM rules that illustrate how to accomplish this. Tenant-specific DEM rules DEM rule ID Action on new CI Condition ucmdbnode_advantage Add CI company in $L.file= advantage ucmdbnode_hp Create change company in $L.file= HP Note: DEM Rules When creating DEM rules make sure to create separate DEM rules for each tenant. Multi-Tenancy Functional Use Cases The following table describes the necessary actions to perform in various deployment situations to address multi-tenancy issues. Multi-tenancy use cases Deployment Integration Type UCMDB with multitenancy rules Description When implementing a UCMDB-SM deployment that has existing multi-tenancy rules in UCMDB and does not have multi-tenancy rules configured in SM, the user creates multi-tenancy rules in SM manually and according to the rules in UCMDB. SM without multitenancy rules HP Service Manager (Service Manager 9.40; Universal CMDB or later) Page 68 of 273
69 Chapter 3: Multi-Tenancy (Multi-Company) Setup Multi-tenancy use cases, continued Deployment Integration Type SM with multitenancy rules Description When implementing a UCMDB-SM deployment that has existing multi-tenancy rules in configured SM and does not have multi-tenancy rules configured in UCMDB, the user creates multi-tenancy rules in UCMDB manually as well as according to the rules previously configured in SM. UCMDB without multitenancy rules UCMDB without multitenancy rules SM without multitenancy rules When implementing a UCMDB-SM deployment that does not have multi-tenancy rules configured in UCMDB or in SM, the user configures the rules in SM. During the configuration process using the SM multi-tenancy wizard the user can create corresponding tenancy configuration in UCMDB. By creating corresponding tenancy configurations in SM the user also creates a corresponding tenant in UCMDB. Multi-Tenancy Requirements Your system must meet the following requirements in order for the integration to support multitenancy. HP Universal CMDB version 8.02 or later system HP Service Manager version 9.20 or later system Integration enabled between UCMDB and Service Manager Multi-company mode enabled on the Service Manager system Problem schedule process running on the Service Manager system For additional information about the multi-tenancy integration, you can visit the HP Software Support Online web site or refer to the Service Manager help. HP Service Manager (Service Manager 9.40; Universal CMDB or later) Page 69 of 273
70 Chapter 3: Multi-Tenancy (Multi-Company) Setup Setting up the Multi-Tenancy Integration in UCMDB You need to perform the following tasks in UCMDB to set up the multi-tenancy integration. 1. Install a separate data flow probe for each tenant the integration will support. See "How to Install Separate Data Flow Probes for Each Tenant" below. 2. Start tenant-specific data flow probes. See "How to Start Tenant-Specific Data Flow Probes" on page Configure IP address ranges for tenant-specific data flow probes. See "How to Configure IP Ranges for Tenant-Specific Data Flow Probes" on page Configure multi-tenancy for population. See "How to Configure Multi-Tenancy for Population" on page 73. How to Install Separate Data Flow Probes for Each Tenant If you plan to support a multi-tenant configuration, you must install a separate data probe for each tenant. Out-of-the-box, the UCMDB installer only installs one data flow probe and service. To install additional data flow probes and start them from your operating system command prompt: 1. Log in to the host of your UCMDB system as an administrator. 2. Insert the HP Universal CMDB Setup Windows DVD into the system disc drive. 3. Start the Data Flow Probe installer (HPUCMDB_DataFlowProbe_x.xx.exe). 4. Follow the on-screen instructions to complete the wizard, but use the following values for each data flow probe you wish to install. a. Type a unique path for each installation folder. b. Use the same UCMDB application server address for each data flow probe. c. Type a valid data flow probe address. d. Type a unique name for each data flow probe identifier. e. Create a unique customer Data Flow Probe domain for each probe (Clear the Use Default CMDB Domain option). HP Service Manager (Service Manager 9.40; Universal CMDB or later) Page 70 of 273
71 Chapter 3: Multi-Tenancy (Multi-Company) Setup f. Use the same probe gateway and probe manager settings for each probe (for example, use combined or separate processes). See the HP Universal CMDB Deployment Guide for complete installation instructions. 5. Repeat step 3 and step 4 for each data flow probe you wish to install. 6. Open the probe s DiscoveryProbe.properties file in a text editor. By default, this file is located in the following folder: <UCMDB installation folder>\<data flow probe installation folder>\conf For example, C:\hp\UCMDB\DataFlowProbe\conf. Note: The <data flow probe installation folder> must be unique for each tenant. 7. Edit the following properties in the configuration file. Discovery Probe properties set for each tenant Property servername customerid appilog.collectors.probe.name applilog.collectors.domain appilog.collectors.local.ip appilog.collectors.probe.ip appilog.collectors.rmi.port appilog.collectors.rmi.gw.port appilog.collectors.probe.html.port appilog.collectors.local.html.port appilog.collectors.probeusespecific RMIPortFrom appilog.collectors.bigbrother.port Value Verify the name of the UCMDB server Type the customer ID for the tenant this data flow probe supports Verify the probe name is unique such as server + tenant ID Verify the domain name of the data flow probe Verify the data flow probe gateway name Verify the data flow probe manager name Type a unique port for each probe Type a unique port for each probe Type a unique port for each probe Type a unique port for each probe Type a unique port for each probe or type 0 to have the system automatically select it Type a unique port for each probe HP Service Manager (Service Manager 9.40; Universal CMDB or later) Page 71 of 273

72 Chapter 3: Multi-Tenancy (Multi-Company) Setup 8. Save the configuration file. 9. Repeat step 6 to step 8 for each tenant s data flow probe. How to Start Tenant-Specific Data Flow Probes To start tenant-specific data flow probes: 1. Open the OS command prompt and navigate to the probe s bin folder. For example, C:\hp\UCMDB\DataFlowProbe1\bin. 2. Type gateway console. 3. Repeat step 1 to step 2 for each data flow probe you want to start. How to Configure IP Ranges for Tenant-Specific Data Flow Probes To configure IP ranges for tenant-specific data flow probes: 1. Log in to UCMDB as an administrator using the company ID of the tenant whose data flow probe you want to configure. 2. Navigate to Data Flow Management > Data Flow Probe Setup. 3. Expand the data flow probe domain containing the probe you want to start. For example, Customer2. 4. Expand the Probe node and select the data flow probe you want to start. For example, Probe2Customer2. 5. Click the Add IP range button. HP Service Manager (Service Manager 9.40; Universal CMDB or later) Page 72 of 273
73 Chapter 3: Multi-Tenancy (Multi-Company) Setup 6. Type an IP range you want the Data Flow Probe to scan. Optionally, add any IP ranges you want to exclude. 7. Click OK to save the IP range. 8. Repeat step 1 to step 7 for each data flow probe you want to configure. How to Configure Multi-Tenancy for Population To support multi-tenancy for population, you need to configure the basicquerycondition setting for each query defined in the population configuration file (smpopconffile.xml). To configure multi-tenancy for population: 1. Log in to UCMDB as an administrator. 2. Navigate to Data Flow Management > Adapter Management > ServiceManagerAdapter9-x > Configuration Files. 3. Click the smpopconffile.xml file. 4. For each query defined in this file, update the basicquerycondition setting by adding the following: and company= "{customerid}" For example: basicquerycondition="type="bizservice"and company= "{customerid} "" 5. Save the configuration file. Note: When you create or edit and then save a configuration file in Adapter Management, UCMDB automatically restarts the adapter with the new configuration file. Setting up the Multi-Tenancy Integration in Service Manager You need to perform the following tasks in Service Manager to set up the multi-tenancy integration. Multi-tenancy support is an optional feature of the integration intended for Managed Service Providers (MSPs) who want to offer Configuration Management as a service to their tenants. In a multi-tenancy HP Service Manager (Service Manager 9.40; Universal CMDB or later) Page 73 of 273
74 Chapter 3: Multi-Tenancy (Multi-Company) Setup configuration, each CI and CIR record has a corresponding company ID. Out-of-the-box, Service Manager allows all operators to view CI data regardless of the company ID. If you wish to restrict access to CI data by company ID, you must enable Mandanten and use the company ID field as a restricting query. See the Service Manager help for more information about multi-company mode and Mandanten. You must complete the following tasks from your Service Manager system to enable multi-tenancy support for the integration. 1. Start the process schedule. See "How to Start the Process Schedule" below. 2. Configure the Service Manager System Information Record. See "How to Configure the Service Manager System Information Record" on the next page. 3. Add tenant-specific UCMDB ID and password values to company records (optional). See "How to Add Tenant-Specific UCMDB User ID and Password Values" on page Add UCMDB Customer ID values to existing company records. See "How to Add UCMDB Customer ID values to Existing Companies" on page Synchronize existing company records with UCMDB. See "How to Synchronize Existing Companies from Service Manager to UCMDB" on page Verify that Service Manager synchronized company records with UCMDB (optional). See "How to View Whether Company Information is in UCMDB" on page Resynchronize existing company records with UCMDB (as needed). See "How to Resynchronize an Existing Company with UCMDB" on page Inactivate company records you do not want to be part of the integration (as needed). See "How to Inactivate a Synchronized Company" on page Reactivate inactive company records you want to be part of the integration (as needed). See "How to Reactivate an Inactive Company" on page Add tenant-specific DEM rules. See "How to Add Tenant-Specific DEM Rules" on page 81. How to Start the Process Schedule This integration needs the process schedule in order to synchronize company records from Service Manager to UCMDB. Make sure the process is started before you synchronize company records. To start the process schedule: HP Service Manager (Service Manager 9.40; Universal CMDB or later) Page 74 of 273
75 Chapter 3: Multi-Tenancy (Multi-Company) Setup 1. Log in to Service Manager as a system administrator. 2. From the System Navigator, click System Status. A list of the currently started schedules is displayed. 3. Click the Refresh Display button to refresh the list. 4. If the problem schedule is not in the list, do the following: a. Click the Start Scheduler button. b. Double-click the process schedule. A message displays that indicates the process schedule is started. How to Configure the Service Manager System Information Record To enable the integration to support multi-tenancy, you must provide additional information in the Service Manager System Information Record. Caution: In order to enable multi-tenancy support, you must use HP Universal CMDB version 8.02 or greater. Earlier versions of HP Universal CMDB will produce an error message if you attempt to run them in multi-tenancy mode. To provide additional information in the Service Manager System Information Record: 1. Log in to Service Manager as a system administrator. 2. Navigate to System Administration > Base System Configuration > Miscellaneous > System Information Record. 3. Click the General tab. 4. Enable the Run in Multi-Company Mode option. 5. Click the Active Integrations tab. 6. Select the HP Universal CMDB option. The form displays the UCMDB web service URL field. HP Service Manager (Service Manager 9.40; Universal CMDB or later) Page 75 of 273
76 Chapter 3: Multi-Tenancy (Multi-Company) Setup 7. In the UCMDB web service URL field, type the URL to the synchronize CIs web service API. The URL has the following format: server name>:<port>/axis2/services/ucmdbsmservice Replace <UCMDB server name> with the host name of your UCMDB server, and replace <port> with the communications port your UCMDB server uses. 8. In UserId and Password, type the user credentials required to manage CIs on the UCMDB system. For example, the out-of-the-box administrator credentials are admin/admin. 9. In the Multi-tenant web service URL field, type the URL to the synchronize company IDs web service API. The URL has the following format: server name>:<port>/axis2/services/ucmdbmanagementservice Replace <UCMDB server name> with the host name of your UCMDB server, and replace <port> with the communications port your UCMDB server uses. 10. Type the user name and password required to synchronize company IDs on the UCMDB system. For example, the out-of-the-box system administrator credentials for UCMDB 9.x are sysadmin/sysadmin. 11. Click Save. Service Manager displays the message: Information record updated. 12. Log out of the Service Manager system, and log in again with an administrator account. 13. Click System Status > Display Options > All Tasks. 14. Type k in the Command field next to the problem schedule process and click Execute Commands. Wait a few minutes for the problem schedule process to close. 15. Click Start Scheduler. 16. Double-click the problem schedule process. The system now supports multi-tenancy for UCMDB. How to Add Tenant-Specific UCMDB User ID and Password Values You can provide a tenant-specific UCMDB user name and password for Service Manager to use when requesting information for the Actual State section. If you provide no credentials, Service Manager uses the credentials in the System Information Record for all tenants. HP Service Manager (Service Manager 9.40; Universal CMDB or later) Page 76 of 273
77 Chapter 3: Multi-Tenancy (Multi-Company) Setup Note: Any credentials you provide in the company record take precedence over credentials you provide in the System Information Record. The UCMDB UserId and UCMDB Password fields are available only when you have enabled the multi-tenancy integration. To add tenant-specific UCMDB user name and password: 1. Log in to Service Manager as a system administrator. 2. Navigate to System Administration > Base System Configuration > Companies. 3. Type the search criteria you want to use to find company records. For example, leave the search form blank to search all company records. 4. Click Search. 5. Type the user name you want this company to use to connect to UCMDB in the UCMDB UserId field. 6. Type the password for the UCMDB user name in the UCMDB Password field. 7. Click Save. 8. Repeat step 3 through step 7 for each company you want to provide credentials for. How to Add UCMDB Customer ID values to Existing Companies You can use the following steps to add a UCMDB Customer ID value to your existing Service Manager company records. 1. Log in to Service Manager as a system administrator. 2. Navigate to System Administration > Base System Configuration > Companies. 3. Type the search criteria you want to use to find company records. For example, leave the search form blank to search all company records. 4. Click Search. 5. Type a numeric value in the UCMDB Customer ID field for this company. 6. Click Save. HP Service Manager (Service Manager 9.40; Universal CMDB or later) Page 77 of 273
78 Chapter 3: Multi-Tenancy (Multi-Company) Setup 7. Service Manager prompts to confirm that you want to synchronize the record with UCMDB. Click Yes if you want to synchronize the company now, or click No if you want synchronize the company later. 8. Click Next to go to the next company in the record list. 9. Repeat step 5 through step 8 for each company in the record list. How to Synchronize Existing Companies from Service Manager to UCMDB Your Service Manager system may already contain company records that you want to use with the multi-tenancy integration. If you update any field in a company record that has not yet been synchronized to UCMDB, Service Manager prompts whether you want to synchronize the company to UCMDB. Note: Service Manager will not prompt you to synchronize the company record if you have disabled the option to show the company in multi-company lists, or if there is a pending schedule record associated with the company. See "How to Inactivate a Synchronized Company" on page 80 for more information. This task includes the following steps: 1. Log in to Service Manager as a system administrator. 2. Navigate to System Administration > Base System Configuration > Companies. 3. Type the search criteria you want to use to find company records. For example, leave the search form blank to search all company records. 4. Click Search. 5. Select a company record to update. 6. Update the company record. 7. Click Save. Service Manager prompts to confirm that you want to synchronize the record with UCMDB. Note: Service Manager saves the company record regardless of your synchronization choice. HP Service Manager (Service Manager 9.40; Universal CMDB or later) Page 78 of 273
79 Chapter 3: Multi-Tenancy (Multi-Company) Setup How to View Whether Company Information is in UCMDB When you enable the multi-tenancy integration, Service Manager displays a read-only field in each company record that lists whether the UCMDB Customer ID has been synchronized with your UCMDB system. Note: The UCMDB Customer ID field is visible only when you enable the multi-tenant UCMDB integration. To view whether company information is in UCMDB: 1. Log in to Service Manager as a system administrator. 2. Navigate to System Administration > Base System Configuration > Companies. 3. Type the search criteria you want to use to find company records. For example, leave the search form blank to search all company records. 4. Click Search. 5. Review the status of the Synched with UCMDB field. If the check box is checked, then Service Manager has already synchronized the company ID with your UCMDB system. If the check box is unchecked, then Service Manager has yet to add this company to your UCMDB system. Note: For more information about synchronization failures, see "Schedule Records" on page 67. How to Resynchronize an Existing Company with UCMDB Service Manager provides you a means to resynchronize company records with your UCMDB system in case you lose UCMDB data for some reason. For example, you might intentionally remove UCMDB data during integration testing, or you might need to recover data after a disaster. You can force Service Manager to synchronize companies with your UCMDB system with the Re-synch with UCMDB option. To resynchronize an existing company with UCMDB: 1. Log in to Service Manager as a system administrator. 2. Navigate to System Administration > Base System Configuration > Companies. HP Service Manager (Service Manager 9.40; Universal CMDB or later) Page 79 of 273
80 Chapter 3: Multi-Tenancy (Multi-Company) Setup 3. Type the search criteria you want to use to find company records. For example, leave the search form blank to search all company records. 4. Click Search. 5. Select a company record to synchronize. 6. Click the Re-synch button next to the Synched with UCMDB? check box. Note: The Re-synch button is available only from company records that have already been synchronized with UCMDB and have the Synched with UCMDB check box checked. If your UCMDB system already has a company with this ID value, it will ignore the resynchronization request. Service Manager will also ignore a resynchronization request if there is an existing schedule record to resynchronize the company with UCMDB. In this case, it displays the message A schedule record has already been added to re-synch this company with UCMDB. How to Inactivate a Synchronized Company After you have synchronized a company record with UCMDB you can no longer delete the record. Instead, you can inactivate a company record, which causes the UCMDB system to cease all further CI updates for the company. Any existing CI data for the company remains in the UCMDB system associated with the inactive UCMDB Customer ID, but both the company and any associated CIs will no longer be visible from the UCMDB system. To inactivate a synchronized company: 1. Log in to Service Manager as a system administrator. 2. Navigate to System Administration > Base System Configuration > Companies. 3. Type the search criteria you want to use to find company records. For example, leave the search form blank to search all company records. 4. Click Search. 5. Select a company record to inactivate. 6. Select No from Show Company in Multi-Company Lists. 7. Click Save. HP Service Manager (Service Manager 9.40; Universal CMDB or later) Page 80 of 273
81 Chapter 3: Multi-Tenancy (Multi-Company) Setup 8. If this company was previously synchronized with UCMDB, Service Manager prompts you to confirm the inactivation. 9. Click Yes to confirm the inactivation or No to cancel your changes. How to Reactivate an Inactive Company You can reactivate any inactive companies on your Service Manager system to include them in the multi-tenancy integration. You must also synchronize the company with UCMDB for UCMDB to process any CI updates for this company. To reactivate an inactive company: 1. Log in to Service Manager as a system administrator. 2. Navigate to System Administration > Base System Configuration > Companies. 3. Type the search criteria you want to use to find company records. For example, leave the search form blank to search all company records. 4. Click Search. 5. Select a company record to reactivate. 6. Select Yes from Show Company in Multi-Company Lists. 7. Click Save. Service Manager prompts you to reactivate the company with UCMDB. 8. Click Yes. Service Manager creates a schedule record to reactivate the company. How to Add Tenant-Specific DEM Rules You can use the condition field to create DEM rules that are specific to a particular tenant in a multitenancy UCMDB-SM integration. For example, one tenant may want to add CIs directly to Service Manager while another tenant may want to open changes for each CI. The following sample DEM rules illustrate how to accomplish this. Tenant-specific DEM rules DEM rule Id Action on new CI Condition ucmdbnode_advantage Add CI company in $L.file= advantage ucmdbnode_hp Create change company in $L.file= HP HP Service Manager (Service Manager 9.40; Universal CMDB or later) Page 81 of 273
82 Chapter 3: Multi-Tenancy (Multi-Company) Setup Tip: It is a best practice to create a separate DEM rule for each tenant. HP Service Manager (Service Manager 9.40; Universal CMDB or later) Page 82 of 273
83 Chapter 4: Standards and Best Practices This chapter includes: "UCMDB-SM Configuration Best Practices" below "Frequently Asked Questions" on page 96 "Known Issues and Limitations" on page 111 UCMDB-SM Configuration Best Practices This section provides best practices and recommendations for successfully implementing this integration in various environments. This section provides you with valuable understandings and techniques that will enhance the UCMDB-SM integration as well as solve common problems by providing solutions and workarounds to these issues. These practices and recommendations may vary slightly according to each implementation, as the specific system requirements and settings alter per system environment. This section includes: "CI Name Mapping Considerations" on the next page "Bi-Directional Data Synchronization Recommendations" on the next page "Push Scheduling Recommendations" on page 86 "Push in Clustered Environments" on page 87 "Initial Load Configurations" on page 89 "How to Configure Differential/Delta Load DEM Rules" on page 94 "Fault Detection and Recovery for Push" on page 95 "How to Enable Lightweight Single Sign-On (LW-SSO) Configuration" on page 96 HP Service Manager (Service Manager 9.40; Universal CMDB or later) Page 83 of 273
84 Chapter 4: Standards and Best Practices CI Name Mapping Considerations UCMDB allows duplicate CI names while Service Manager requires unique logical names. Before pushing UCMDB CIs, you need to define a correct CI name mapping for them. For example, many UCMDB CIs (such as CIs of the Running Software, CRG, Switch, or Router type) have the same display label. To prevent duplicate CI names from occurring in Service Manager when pushing UCMDB CIs, the following mappings are provided out-of-the-box: CRG mapping Out-of-the-box, UCMDB CRG records are mapped to Service Manager as follows: If a Cluster exists for a CRG, the CRG is mapped to this CI logical name: <Cluster display label>_<crg display label>; If the CRG does not have a Cluster, but has several IP addresses, the CRG is mapped to the following (where the IP addresses are sorted alphabetically): <IpAddress1>_..._<IpAddressN>.<authoritativeDnsName>_<CRG display label> (when IpAddress.authoritativeDnsName exists) <IpAddress1>_..._<IpAddressN>_<CRG display label> (when IpAddress.authoritativeDnsName does not exist) If neither a Cluster nor an IP address exists for the CRG, it is mapped directly to <CRG display label>. Running Software mapping Running Software CIs are prefixed with their root container node display label when mapped to a Service Manager CI: <Node display label>_<running Software display label>. Switch & Router mapping Switch or Router type CI records in UCMDB are prefixed with their MAC adresses when mapped to a Service Manager CI: <MACAddress1>_..._<MACAddressN>_<Switch or Router display label>, where the MAC addresses are sorted alphabetically. Bi-Directional Data Synchronization Recommendations The UCMDB-SM integration supports bi-directional data synchronization between UCMDB and Service Manager (SM). HP recommends that you follow the following best practices to avoid unnecessary problems due to improper use of the data push and population features: HP Service Manager (Service Manager 9.40; Universal CMDB or later) Page 84 of 273
85 Chapter 4: Standards and Best Practices For CIs/CI Relationships that UCMDB can automatically discover, use UCMDB as the data source. Do not make changes to them in Service Manager, instead always let UCMDB discover their changes and push the changes to SM. For CIs/CI Relationships that UCMDB cannot automatically discover, use SM as the data source. Do not make changes to them in UCMDB, instead always make changes to them in SM and populate the changes to UCMDB. For CIs/CI Relationships that are already created in SM and UCMDB can automatically discover, run a one-time population to synchronize them to UCMDB, and then use UCMDB as their data source. Caution: Problems like the following may occur if you do not follow these best practices: Problem 1: [Population Adapter] After CIs/CI Relationships are pushed from UCMDB, if you directly make changes in SM to these records without ever populating them back to UCMDB first, the changes cannot be populated to UCMDB. Workaround: Changing these UCMDB records in SM is not recommended; however if you need to do so you can do the following to solve this issue: After the records are pushed to SM, populate them back to UCMDB first before making any changes to them in SM. This way the changes can then be populated to UCMDB. Problem 2: [Population Adapter] After a Composition relationship between a Node CI (node 1) and Running Software CI is pushed to SM, if you change the upstream CI of the relationship from node 1 to node 2 and then run a change population to populate this change, the Running Software CI will be removed in UCMDB. Workaround: It is recommended that you remove the running software in UCMDB and create a new one instead of directly replacing the container of the running software in SM. If you cannot avoid doing so, do the following: After you change the upstream CI of the relationship from node 1 to node 2, do not directly run the change population. Follow these steps to avoid this issue: HP Service Manager (Service Manager 9.40; Universal CMDB or later) Page 85 of 273
86 Chapter 4: Standards and Best Practices 1. Update the Running Software CI in SM (or simply save it to mark it as updated). 2. Run a Running Software CI change population. This will create node 2 (if it does not already exist in UCMDB) and a new Composition relationship between node 2 and this Running Software CI. 3. Run a change population to synchronize the relationship change to UCMDB. The relationship between node 1 and the Running Software CI will be removed, and the new relationship created in step 2 will remain. If you have run the change population after changing the upstream CI of the relationship from node 1 to node 2, and as a result the Running Software CI has been removed in UCMDB, follow these steps to solve this issue: 1. Update the Running Software CI in SM (or simply save it to mark it as updated). 2. Run a Running Software CI change population. This will create the Running Software CI, node 2 (if it does not already exist in UCMDB) and a new Composition relationship between node 2 and this Running Software CI. Push Scheduling Recommendations Push jobs are run using two main methods, the first method is by manually executing the push job and the second is by scheduling the push job. All push jobs can potentially produce a strain on the UCMDB and SM systems therefore; HP recommends that you adhere to the following guidelines: Scheduler time frames It is important for you to understand the function of the Scheduler time frame concept. Running push jobs creates an increase in system activity and may affect application responsiveness. In order to enable users to effectively interact with applications HP recommends the following guidelines: In order to reduce system strain, schedule the UCMDB to SM push to run at non-peak usage hours, preferably when system usage is at a minimum. Scheduler frequency It is important to be aware of the business requirements when configuring the schedule frequency. The scheduler frequency depends on infrastructure environment changes that must be synchronized between UCMDB and SM. HP Service Manager (Service Manager 9.40; Universal CMDB or later) Page 86 of 273
87 Chapter 4: Standards and Best Practices Define the scheduling frequency based on the business requirements for consuming up-to-date CI information. Most implementations require a daily update. When scheduling small IT systems that are prone to frequent changes, the scheduling frequency may need to be increased. Push Job dependencies UCMDB Push Jobs do not support dependencies between each other. Each Push Job is considered a separate task and users cannot define job dependencies. For example, that one job is dependent on another or upon completion before the next job is run. It is important that both CI queries and their dependent Relationship queries exist in the same Job in order to avoid relationships not being pushed to Service Manager. UCMDB always pushes the CI queries before their dependent Relationship queries. Note: Suffix usage The out-of-the-box job for CI push uses queries that end with the Push suffix, for example, SM Computer Push. Queries that create relationships between the CIs uses an extra Relations suffix, for example, SM Node Relations Push. Push in Clustered Environments A clustered SM environment is comprised of multiple servlets running in parallel with a load balancer that dispatches user requests to any available servlet. You must configure the UCMDB-SM integration to point to a specific servlet and not to the SM loadbalancer. In order to perform this, you must first create a dedicated web service listener. This section includes: "Dedicated Web Services" below "Step-by-Step Cluster Configuration Process" on the next page "Connecting to Multiple SM Processes" on page 89 Dedicated Web Services A Service Manager system configured for vertical or horizontal scaling uses a load balancer to redirect client connection requests to an available SM process. However, most Web Services clients cannot handle a redirect request and will fail if they use the SM load balancer as the endpoint URL. HP Service Manager (Service Manager 9.40; Universal CMDB or later) Page 87 of 273
88 Chapter 4: Standards and Best Practices HP recommends creating one or more SM processes dedicated to Web Services requests. The user must configure the relevant external web service clients to connect directly to the dedicated Service Manager processes. Step-by-Step Cluster Configuration Process How to Configure Web Clients To configure the relevant external web clients: 1. Stop the Service Manager service. 2. Open the sm.cfg file, and create a dedicated SM process to listen for Web Services requests using the -debugnode parameter. The following entries create a dedicated process listening on ports and Explanation The code excerpt illustrates the various settings for each of the SM process listeners (web services) that enable SM clients to connect to the SM service. Line 01 defines the load balancer port (13080). Lines 02 and 03 define the SM ports to which non-dedicated SM clients are redirected by the SM load balancer. Line 04 defines the debugnode port that is utilized by the dedicated SM clients. Note: Debugnode parameter The debugnode parameter tells the SM load balancer not to forward any client connection requests to this Service Manager process. Only clients that directly connect to the process can access this port. HP Service Manager (Service Manager 9.40; Universal CMDB or later) Page 88 of 273
89 Chapter 4: Standards and Best Practices How to Configure the Debugnode To configure the debugnode: 1. Start the SM service. 2. Configure any external web service clients to connect directly to the SM processes running in debugnode. When performing an integration using UCMDB, the UCMDBService Manager Adapter for SM should be configured to connect to the debugnode port. For example, for normal connections set the endpoint URL to: qualified host name>:13085/sm/7/<service Name> and for SSL-encrypted connections set the URL to: qualified host name>:13445/sm/7/<service Name>. These clients may include UCMDB (for push purposes), Connect-It and additional applications. Connecting to Multiple SM Processes If you want to have better performance, you can connect to multiple Service Manager processes. The integration supports in both Service Manager vertical or horizontal load balancer environment. You can create more than one SM processes dedicated to Web Services requests, and configure the field URL Override of integration point with the dedicated SM processes. This field value (if any) overrides the Hostname/IP and Port settings. The following is an example value of this field, which connects two SM processes: qualified host name1>:13080/sm/7/ws; qualified host name2>:13082/sm/7/ws Initial Load Configurations Before the configuration process can begin, you must first assess the amount of CI and relationships data is to be transferred from UCMDB to SM and ascertain the iteration process that is required based on the volume. You must first assess whether all of the data can be pushed in a single iteration. This is ascertained by the amount of data that is included in the push queries and the amount of time you have to push this data. This section includes: HP Service Manager (Service Manager 9.40; Universal CMDB or later) Page 89 of 273
90 Chapter 4: Standards and Best Practices "Push Performance in a Single-Threaded Environment" below "Implementing Multi-Threading" on the next page "Push Performance in Multi-Threaded Environments" on page 92 "Push Performance in Multiple SM Processes Environments" on page 92 "How to set up SM DEM Rules for Initial Loads" on page 93 Note: The performance data presented in this document is based on tests that were performed at HP and is provided for reference only. The integration performance may significantly differ in your environment depending on your hardware configuration. Push Performance in a Single-Threaded Environment The Push of 22,500 UCMDB root CIs (roots in queries) and/or Relationships in a single-threaded environment takes about an hour and is performed in a linear fashion. See the following table: Performance data in a single-threaded environment Number of root CIs/CI Relationships pushed per hour Multi-threading settings in sm.properties 22,500 number.of.concurent.sending.threads=1 min.objects.for.concurent.sending=50 number.of.chunks.per.thread=3 To view or edit the sm.properties file in UCMDB, navigate to Data Flow Management > Adapter Management > ServiceManagerAdapter9-x > Configuration Files > sm.properties. Number of Root CIs and Relationships/22,500 The push time (in hours) in any given environment is calculated as follows: If the push of a single planned query has the potential of breaching the permitted time frame the data must be divided into several queries. Each query must be pushed individually. This query division is performed by creating several queries, each with different node conditions that enable data filtering. Once all queries are pushed for the first time, the Initial Load process is complete. Note: Applying node conditions HP Service Manager (Service Manager 9.40; Universal CMDB or later) Page 90 of 273
91 Chapter 4: Standards and Best Practices When applying node conditions to the various SM Sync Queries, you must make sure that all of the information is included in the queries, so that all relevant data is copied to SM. Implementing Multi-Threading In order to improve performance, the Service Manager Adapter utilizes multiple threads for the push of CI and Relationship data to SM. The following section explains these settings and how to configure them for maximum performance. The multi-threading configuration is defined in the sm.properties file on the UCMDB server. To view or edit the file in UCMDB, navigate to Data Flow Management > Adapter Management > ServiceManagerAdapter9-x > Configuration Files > sm.properties. The following are example multi-threading definitions in the sm.properties file: Explanation The code excerpt illustrates the relevant multi threading settings on the UCMDB server. Line 01 defines the number of parallel threads UCMDB will open to SM for CI push. Setting this parameter to 1 disables multi-threading, while a values of 2 or higher enables multi-threading. Line 02 defines the minimum number of SM objects needed to use multiple threads as opposed to a single thread. Line 03 defines the number of chunks per thread. This number multiplied by the number of threads gives you the total number of CI data chunks. The total number of chunks = number.of.chunks.per.thread * number.of.concurent.sending.threads The integration implements a queue mechanism as follows: The data passed from UCMDB to SM is divided into equal chunks, and these chunks are placed in a queue. Each available thread pulls the next chunk from the queue until all threads are available. Once this process has completed, the push is complete. The mechanism is designed to minimize idle time of each thread. As each thread processes its chunk in parallel, some threads may finish before others and it is inefficient for them to wait for each other. HP Service Manager (Service Manager 9.40; Universal CMDB or later) Page 91 of 273
92 Chapter 4: Standards and Best Practices Caution: Defining too many threads It is ineffective to over-increase the number of threads as this causes the SM server to overload. In enterprise environments where the SM server processing the push data is very robust the number of threads can be increased to 10 and in some cases even 20; however, you must take into account that increasing the number of threads raises CPU usage on the SM server during push, which may reduce the application performance. Push Performance in Multi-Threaded Environments The push of 60,000 UCMDB root CIs (roots in queries) and/or Relationships in an out-of-the-box multithreaded environment takes about an hour and is performed in a linear fashion. See the following table: Performance data in an out-of-the-box multi-threaded environment Number of root CIs/Relationships pushed per hour Multi-threading settings in sm.properties (default) 60,000 number.of.concurent.sending.threads=6 min.objects.for.concurent.sending=50 number.of.chunks.per.thread=3 The push time (in hours) in any given environment is calculated as follows: Number of Root CIs and Relationships/60,000 Push Performance in Multiple SM Processes Environments The Push of 190,000 UCMDB root CIs (roots in queries) and/or Relationships in a multi-threaded environment with multiple SM processes takes about an hour and is performed in a linear fashion. See the following table: Performance data in a multiple SM processes environment Number of root CIs/Relationships pushed per hour SM processes Multi-threading settings in sm.properties (default) 190,000 2 server hosts, with each host running 3 processes number.of.concurent.sending.threads=90 min.objects.for.concurent.sending=50 number.of.chunks.per.thread=3 HP Service Manager (Service Manager 9.40; Universal CMDB or later) Page 92 of 273
93 Chapter 4: Standards and Best Practices For more information about defining multiple SM processes for the integration, see "How to Create an Integration Point in UCMDB" on page 30. The push time (in hours) in any given environment is calculated as follows: Number of Root CIs and Relationships/190,000 How to set up SM DEM Rules for Initial Loads SM Discovered Event Manager Rules (DEM Rules) enable the user to define the appropriate action to take for each event type that is reported to SM. Each CI and relationship record pushed from UCMDB to SM is analyzed against the existing SM records and open Change requests. SM rules define the appropriate action to be taken for each type of CI data update sent to SM. To view or update the SM Discovered Event Manager Rules: 1. Log in to Service Manager as a system administrator. 2. Navigate to Tailoring > Web Services > Discovered Event Manager Rules. 3. Press ENTER or click the Search button. A list of all the Discovered Event Manager Rules is displayed. Each rule is usually linked to a CI Type or a subset of CIs of the same type. 4. Click on the individual CI Discovered Event Manager Rule to view its details. To set up DEM Rules for initial loads: Tip: When performing Initial Loads, HP recommends setting the SM Discovered Event Manager Rules to add newly reported CIs as described below. This minimizes the noise of an Initial Load, that could potentially create tens of thousands of Changes/Incidents. For each of the Discovered Event Manager Rules, perform the following steps: 1. Select the relevant Discovered Event Manager Rule. 2. Go to the Action if matching record does not exist section, select the Add the record option. 3. In the Action if record does not exist but unexpected data discovered section, select the Log Results and Update Record option. HP Service Manager (Service Manager 9.40; Universal CMDB or later) Page 93 of 273
94 Chapter 4: Standards and Best Practices 4. In the Action if record is to be deleted section, select the Delete Record option. 5. Save the Discovered Event Manager Rule record. How to Configure Differential/Delta Load DEM Rules Tip: Once the Initial Load or Data Load of the CI data is completed, HP recommends applying Differential/Delta Load settings. These settings apply to all data loaded from UCMDB to SM. These loads send only updates regarding modifications discovered in the IT infrastructure from UCMDB to SM. To set up the SM DEM Rules for Differential/Delta Loads: 1. Log in to Service Manager as a system administrator. 2. Navigate to Tailoring > Web Services > Discovered Event Manager Rules. 3. Press Enter or click the Search button. A list of all the Discovered Event Manager Rules in SM is displayed. 4. For each of the Discovered Event Manager Rules, perform the following steps: a. Select the relevant Discovered Event Manager Rule. b. In the Action if matching record does not exist section, select the appropriate action required for each newly detected CI. If uncertain, select the Add the record option. c. In the Action if record does exist but unexpected data discovered section, select the appropriate action for each CI that was modified, resulting in an unexpected or incorrect result. The recommended best practice is to select the Open a Change option. d. In the Action if record is to be deleted section, select the appropriate action required for each CI that was removed/deleted. The recommended best practice is to select the Delete Record option for CI Relationship, and select the Update record to the selected status option for CI. e. Save the Discovered Event Manager Rule record. HP Service Manager (Service Manager 9.40; Universal CMDB or later) Page 94 of 273
95 Chapter 4: Standards and Best Practices Fault Detection and Recovery for Push Universal CMDB provides a fault detection and recovery mechanism since version 9.05: individual CI failures no longer cause the entire push to fail, and you can review all failed CIs in the Universal CMDB studio and then re-push them. Duplicated logical.name issue A typical fault you may encounter is the duplicated logical name issue because of the different unique key fields used in Universal CMDB and Service Manager: CI logical.name in Service Manager is unique, and it usually maps to CI display label in Universal CMDB (which is not unique). HP recommends that you follow the following guidelines (listed from highest to lowest priority) to resolve this issue: Make sure that each display label field value in UCMDB is unique; If uncertain of the above, in the adapter mapping configuration (XSLT file) avoid direct mapping between Universal CMDB display label and SM logical name. Map SM logical name to another Universal CMDB field that is unique; Add a prefix or suffix to UCMDB display label value; Note: Out-of-the-box, the SM logical name of Running Software is mapped with a prefix of DNS name: <xsl:variable name="fulldnsname" select="nodes/node/@primary_dns_name"/> <xsl:for-each select="@display_label"> <CIIdentifier><xsl:value-of select="$fulldnsname"/>_ <xsl:value-of select="."/> </CIIdentifier> </xsl:for-each> If you cannot do any of the above, you can use the UCMDB Fault Detection and Recovery mechanism together with the Duplication Rule setting of DEM rules (see the following). To set up DEM Rules for duplicated logical names: 1. Log in to Service Manager as a system administrator. 2. Navigate to Tailoring > Web Services > Discovered Event Manager Rules > Duplication Rule tab. 3. For each of the Discovered Event Manager Rules, perform the following steps: a. Go to the Action if logical name is duplicated section, and select the Return Error option. b. Save the Discovered Event Manager Rule record. HP Service Manager (Service Manager 9.40; Universal CMDB or later) Page 95 of 273
96 Chapter 4: Standards and Best Practices Note: After you run a push job, CIs with a duplicated logical name are reported as failed CIs with a duplicated name exception. You can review the failed CIs in the Universal CMDB studio, fix the errors by either changing the data in Universal CMDB or in the adapter mapping configuration file (XSLT), and then re-push the failed CIs. How to Enable Lightweight Single Sign-On (LW-SSO) Configuration You can enable LW-SSO for the integration so that users can directly view UCMDB CI records from the Service Manager web client by clicking the View in UCMDB button, without providing a UCMDB username and password. Note: LW-SSO is not supported for the Service Manager Windows client. To enable LW-SSO for the integration: 1. For each Service Manager user account that needs LW-SSO, create a user account in UCMDB with the same username. The passwords in the two systems can be different. 2. Enable LW-SSO in the Service Manager Web tier. For details, see the Configure LW-SSO in the Service Manager Web tier topic in the Service Manager help. 3. Enable LW-SSO in UCMDB. For details, see the HP Universal CMDB Deployment Guide. Frequently Asked Questions This section provides answers to frequently asked questions about the UCMDB-SM integration. This section includes: "When is a New CI Created in HP Service Manager " on the next page "Can I Analyze the Reason for a CI Deletion in SM" on the next page "How do I Monitor Relationship Changes Between UCMDB and SM" on page 98 "What Kinds of Relationships are Pushed from UCMDB to SM" on page 98 "What is a Root CI Node" on page 99 HP Service Manager (Service Manager 9.40; Universal CMDB or later) Page 96 of 273
97 Chapter 4: Standards and Best Practices "What is a Root Relationship" on page 99 "What is the friendlytype Specified in an XSLT File" on page 99 "What is the Virtual-Compound Relationship Type Used in a UCMDB-SM Integration Query" on page 99 "When do I Need the Population Feature" on page 100 "Can I Populate Physically Deleted CIs from SM to UCMDB" on page 100 "How do I Keep the Outage Dependency Setting of a CI Relationship in SM" on page 101 "How do I Create an XSL Transformation File" on page 103 "How do I Use the Load Fields Button to Add Multiple Managed Fields" on page 109 "What is the Purpose of the <container> Element in a Population XSLT File" on page 109 "Can I Populate Sub-Item Deletions" on page 110 "What will Happen if a Population Job Fails or Succeeds with Warnings" on page 111 When is a New CI Created in HP Service Manager CIs are created in SM under the following circumstances: A CI is manually added to SM through the Configuration Management module. UCMDB reports a newly discovered CI according to the following: When a new CI is reported and the Discovered Event Manager Rules are set to Add the Record. When a new CI is reported, the Discovered Event Manager Rules are set to Open an Incident and the Incident has been closed. When a new CI is reported, the Discovered Event Manager Rules are set to Open a Change and the Change has been verified. Can I Analyze the Reason for a CI Deletion in SM No. HP Service Manager (Service Manager 9.40; Universal CMDB or later) Page 97 of 273
98 Chapter 4: Standards and Best Practices SM opens a change request on the deleted CI and includes the following information: Delete event for CI CI Name triggered by discovery. Workaround An SM change request does not contain a description of the reason for deletion, however it is possible to extract specific information about CI deletions from the UCMDB History Database. UCMDB data provides information about the user or the discovery pattern that initiated the CI deletion. How do I Monitor Relationship Changes Between UCMDB and SM To understand the relationship change in SM, a distinction must be made between the various types of Relationship Changes: The second endpoint of the relationship has Changed, so instead of CI X being linked to CI Y through a relationship, now CI X is related to CI Z. An attribute of a relationship has changed. The first type of Relationship change is supported by the UCMDB-SM integration, therefore, such Relationship Changes can either invoke CI relationship updates, or perform the creation of Incidents or Changes, which are then reviewed and monitored. The second is also supported, but it is not covered out-of-the-box; you can configure the Universal CMDB query to expose such attributes of the relationship, and configure the Service Manager WSDL to expose the mapped field, and then configure the adapter mapping configuration in the XSLT. However such Relationship Attribute Changes cannot perform the creation of Incidents or Changes, and only supports invoking CI relationship updates directly. What Kinds of Relationships are Pushed from UCMDB to SM Any kinds of Relationships are pushed from UCMDB to SM under the following conditions: The relationship appears in a Push Query located in the SM Sync folder in the UCMDB Query Manager. The relationship is named Root in the Push Query. HP Service Manager (Service Manager 9.40; Universal CMDB or later) Page 98 of 273
99 Chapter 4: Standards and Best Practices The relationship is mapped to an appropriate target in SM in the UCMDB configuration files (XML and XSLT files). The out-of-the-box relationships that are pushed from UCMDB to SM are relationships between two CIs such as: Between Business Services and Applications; Between Business Service and Host; Between an Application and a Network Component; or Between Host, Network Components and Printers. What is a Root CI Node A Root Node is a TQL Node that represents the CI type that is created through push to SM from the TQL structure. The rest of the TQL structure contains information that can be incorporated within the Root CI type and is used to enrich the record in SM with additional information and or attributes. What is a Root Relationship A Root Relationship is a Relationship within a query and created in SM through push. It represents a Relationship between two Root CIs. Only the relationships marked with Root are pushed to SM. What is the friendlytype Specified in an XSLT File friendlytype is another name for the UCMDB CI Type. These friendly-types are usually pushed into the SM Device subtype field/attribute. What is the Virtual-Compound Relationship Type Used in a UCMDB-SM Integration Query When more than two UCMDB CI entities are connected in series, the Virtual-Compound represents the relationship between the first and last entities. This is a virtual relationship, as no physical representation exists. HP Service Manager (Service Manager 9.40; Universal CMDB or later) Page 99 of 273
100 Chapter 4: Standards and Best Practices The Virtual-Compound relationship type is a relationship that links two CI type entities that have a logical relationship. See the following figure: Explanation The illustration shows an example of a Virtual-Compound relationship. The relationship in SM is created directly between the Host and the Business Service. When do I Need the Population Feature You need the population feature under any of the following circumstances: You have done modeling in SM, especially when you are in the planning and design phases, and you want your models to be reflected in UCMDB; You want to implement the UCMDB-SM integration, however you have already invested in your SM CMDB and do not want to lose that investment; You want to continue to maintain some parts of the SM CMDB while maturing your UCMDB/Discovery implementation. Can I Populate Physically Deleted CIs from SM to UCMDB No. Physical deletions of CIs are allowed in SM, but SM cannot get such deletion changes and the population feature will not synchronize such changes to UCMDB. Physical deletions of CIs can be considered as exceptions, which only occur after you create CIs by mistake. Normally, you delete a CI by setting its status to something like Disposed/Retired. In case such CIs have been populated to UCMDB, it is your responsibility to remove them manually from UCMDB. HP Service Manager (Service Manager 9.40; Universal CMDB or later) Page 100 of 273
101 Chapter 4: Standards and Best Practices How do I Keep the Outage Dependency Setting of a CI Relationship in SM Out-of-the-box, CI relationships that are pushed from UCMDB to SM do not have outage dependency information by default. If you need such information, you can set the DEM rule of the CI Relationship WSDL as follows: 1. Log in to Service Manager as a system administrator. 2. Navigate to Tailoring > Web Services > Discovered Event Manager Rules. 3. Open the ucmdbrelationship record. 4. On the Rules tab, select Add the record, and set dependency as true. This will set the Outage Dependency of each CI Relationship to true, and set the number of dependent downstream CIs to 1 (because UCMDB only supports one-to-one relationships). If you want to set outage dependency only for some relationships, for example, if you want to configure outage dependency for relationships that starts from Business Service, you can configure the adapter configuration file (XSLT) and WSDL definition; you can also configure outage dependency per relationship type (UCMDB query). HP Service Manager (Service Manager 9.40; Universal CMDB or later) Page 101 of 273

102 Chapter 4: Standards and Best Practices 1. In the WSDL definition, expose fields outage.dependency and outage.threshold. 2. In the XSLT file, set the exposed outage fields. For example, if you want to set the outage dependency to true and threshold to 1 for Business Service relationships, you simply need to change the mapping of query and XSLT in the smsyncconffile.xml file: <tql name="applicationrelationsdata" xslfile="bizservice_relations.xslt"> <request type="create" name="createrelationship"/> <request type="update" name="updaterelationship"/> <request type="delete" name="deleterelationship"/> </tql> 3. In the bizservice_relations.xslt file, use the following OutageDependency and OutageThreadhold settings: <xsl:stylesheet version='1.0' xmlns:xsl=' <xsl:template match="/relation"> <model> <keys/> <instance> <ParentCI><xsl:value-of select="@parentid"/></parentci> <ChildCIs> <ChildCIs><xsl:value-of select="@childid"/></childcis> </ChildCIs> HP Service Manager (Service Manager 9.40; Universal CMDB or later) Page 102 of 273
103 Chapter 4: Standards and Best Practices <RelationshipType>Logical</RelationshipType> <RelationshipSubtype><xsl:value-of </instance> </model> </xsl:template> </xsl:stylesheet> <OutageDependency>true</OutageDependency> <OutageThreadhold>1</OutageThreadhold> How do I Create an XSL Transformation File You create an XSL transformation file in Adapter Management. You can copy the content of an existing XSL transformation file to the new file and then make necessary edits. To create an XSL transformation file: 1. Log in to UCMDB as an administrator. 2. Navigate to Data Flow Management > Adapter Management. ServiceManagerAdapter9-x > Configuration Files. 3. Click the Create new resource button. 4. Select New Configuration File. 5. Enter a name for the file. The file name should use this format: <AdapterID>/<filename>. For example: ServiceManagerAdapter9-x/test_relation_population.xslt. 6. In the Package field, select the adapter name. For example, ServiceManagerAdapter9-x. 7. Click OK. A file extension warning dialog is displayed. 8. Click Yes to continue. UCMDB creates the new XSL transformation file in the Configuration Files folder of the adapter. For example, ServiceManagerAdapter9-x > Configuration Files > ServiceManagerAdapter9-x/test_ relation_population.xslt. HP Service Manager (Service Manager 9.40; Universal CMDB or later) Page 103 of 273
104 Chapter 4: Standards and Best Practices 9. Copy the content of an existing XSL transformation file to the new file. For example, for population you can copy the content of an out-of-the-box population XSL transformation file. 10. Make necessary edits to the new file. Caution: Invalid XML When removing XSL elements from an XSLT file, keep in mind that the remaining XML should be a valid XML file, which will be used to translate the UCMDB Query Definition. See the following for an example. Out-of-the-box, the businessservice_to_computer_containment_population.xslt file is as the following: <xsl:stylesheet version="1.0" xmlns:xsl=" <xsl:template match="/retrievecirelationship1to1listresponse"> <topology> <xsl:for-each select="instance"> <xsl:choose> <xsl:when test="upstreamci.subtype='infrastructure Service'"> <ci class="infrastructure_service"> <attribute name="name" type="string"><xsl:value-of select= "upstreamci.logical.name"/></attribute> <attribute name="sm_id" type="string"><xsl:value-of select="upstreamci.id"/></attribute> <link direction="outgoing" linktype="containment"> <ci class="node"> <attribute name="name" type="string"><xsl:valueof select= "downstreamci.logical.name"/></attribute> <attribute name="sm_id" type="string"><xsl:value-of select="downstreamci.id"/> </attribute> </ci> </xsl:when> </ci> </link> HP Service Manager (Service Manager 9.40; Universal CMDB or later) Page 104 of 273
105 Chapter 4: Standards and Best Practices <xsl:when test="upstreamci.subtype='application Service'"> <ci class="business_application"> <attribute name="name" type="string"><xsl:value-of select= "upstreamci.logical.name"/></attribute> <attribute name="sm_id" type="string"><xsl:value-of select="upstreamci.id"/></attribute> <link direction="outgoing" linktype="containment"> <ci class="node"> <attribute name="name" type="string"><xsl:valueof select= "downstreamci.logical.name"/></attribute> <attribute name="sm_id" type="string"><xsl:value-of select="downstreamci.id"/> </attribute> </ci> </ci> </link> </xsl:when> <xsl:otherwise> <ci class="business_service"> <attribute name="name" type="string"><xsl:value-of select= "upstreamci.logical.name"/></attribute> <attribute name="sm_id" type="string"><xsl:value-of select="upstreamci.id"/></attribute> <link direction="outgoing" linktype="containment"> <ci class="node"> <attribute name="name" type="string"><xsl:valueof select= "downstreamci.logical.name"/></attribute> <attribute name="sm_id" type="string"><xsl:value-of select="downstreamci.id"/> </attribute> </ci> HP Service Manager (Service Manager 9.40; Universal CMDB or later) Page 105 of 273
106 Chapter 4: Standards and Best Practices </ci> </link> </xsl:otherwise> </xsl:choose> </xsl:for-each> </topology> </xsl:template> </xsl:stylesheet> The file becomes an invalid XML file if you change it to the following: <xsl:stylesheet version="1.0" xmlns:xsl=" <xsl:template match="/retrievecirelationship1to1listresponse"> <topology> <xsl:for-each select="instance"> <xsl:choose> <xsl:when test="upstreamci.subtype='infrastructure Service'"> <ci class="infrastructure_service"> </xsl:when> <xsl:when test="upstreamci.subtype='application Service'"> <ci class="business_application"> </xsl:when> <xsl:otherwise> <ci class="business_service"> </xsl:otherwise> </xsl:choose> <attribute name="name" type="string"><xsl:value-of select="upstreamci.logical.name"/> </attribute> <attribute name="sm_id" type="string"><xsl:value-of select="upstreamci.id"/></attribute> <link direction="outgoing" linktype="containment"> <ci class="node"> HP Service Manager (Service Manager 9.40; Universal CMDB or later) Page 106 of 273
107 Chapter 4: Standards and Best Practices <attribute name="name" type="string"><xsl:valueof select= "downstreamci.logical.name"/></attribute> <attribute name="sm_id" type="string"><xsl:value-of select= "downstreamci.id"/></attribute> </ci> </xsl:for-each> </topology> </xsl:template> </xsl:stylesheet> </ci> </link> Sample usages of XSLT For your reference, the following are some samples of using XSLT functionalities in this integration. Using choose to set CI subtypes: <Type>switch</Type> <xsl:variable name="prefix" select="'value>'"/> <xsl:variable name="suffix" select="'</value'"/> <Subtype> <xsl:choose> <xsl:when Switch</xsl:when> <xsl:when switch',$suffix))">frame Relay Switch</xsl:when> <xsl:when Switch</xsl:when> <xsl:otherwise><xsl:value-of </xsl:choose> </Subtype> Getting the substrings from a string: HP Service Manager (Service Manager 9.40; Universal CMDB or later) Page 107 of 273
108 Chapter 4: Standards and Best Practices <xsl:variable name="calculatedlocation" <Building> <xsl:value-of select="substring-after($calculatedlocation,' Building:')"/> </Building> <Floor> <xsl:value-of select="substring-before(substring-after ($calculatedlocation,'floor:'),' Building:')"/> </Floor> <Room> <xsl:value-of select="substring-before(substring-after ($calculatedlocation,'room:'),' Floor:')"/> </Room> Reading the value mappings from an XML file: The SM_CIT_Subtype_list.xml file defines the value mappings for subtypes: <lists> <list name="citype_bizservice"> <entry ucmdb="businessapplication" sm="application Service"/> <entry ucmdb="businessservice" sm="business Service"/> <entry ucmdb="infrastructureservice" sm="infrastructure Service"/> </list> </lists> The business_service_push.xslt file uses this mapping definition XML file: <xsl:variable name="cilists" select="document('sm_cit_subtype_list.xml')/lists"/> <xsl:variable name="cit" <xsl:for-each <Subtype><xsl:value-of </xsl:for-each> Tip: For more information about XSL transformations, visit the following site: HP Service Manager (Service Manager 9.40; Universal CMDB or later) Page 108 of 273
109 Chapter 4: Standards and Best Practices How do I Use the Load Fields Button to Add Multiple Managed Fields Service Manager stores the list of managed fields in the ucmdbintegration web service, which consists of a number of web services objects. You can add more managed fields to DEM Rules so that Service Manager can monitor changes in more CI attributes in UCMDB and trigger the actions defined in relevant DEM Rules. You can manually add managed fields that are exposed in associated WSDL definitions to DEM Rules; however, you can use the Load Fields button to automatically (and therefore correctly) add managed fields to DEM Rules. 1. Click the Managed Fields tab of the DEM Rule. 2. Click the Load Fields button. 3. If the table (in the Table Name field) of the DEM rule record has only one WSDL definition associated to it, all fields exposed in the WSDL definition are immediately added to the Managed Fields list. A message displays: <XX> new fields loaded. 4. If the table has more than one WSDL definition associated to it, the Managed Fields Importing wizard opens, and a list of WSDL definitions (ucmdbintegration web service objects) is displayed. a. Select one or more objects, and click Next. b. All new fields that can be added from the selected web service objects are displayed. c. If you want to add all of the fields, click Finish; if you want to ignore some of them, change their Action value from Add to Ignore, and then click Finish. A message displays: <XX> new fields loaded. 5. Save the DEM Rule record. What is the Purpose of the <container> Element in a Population XSLT File Out-of-the-box, in the runningsoftware_population.xslt file, there is a container element: <link direction="incomming" linktype="composition"> <ci class="node"> <container tql="sm Computer Population" keyfields="ciidentifier"> HP Service Manager (Service Manager 9.40; Universal CMDB or later) Page 109 of 273
110 Chapter 4: Standards and Best Practices <linktql>sm Computer To Software With Composition</linkTql> <linkretrievecondition>downstreamci.logical.name="<xsl:value-of select="ciidentifier"/> "</linkretrievecondition> </link> </ci> <linkvaluefields>upstreamci.logical.name</linkvaluefields> </container> In UCMDB, RunningSoftware CIs must exist together with a Root Container (Node), however Service Manager allows RunningSoftware CIs without a Node. The current integration adapter synchronizes CIs and Relationships separately; when populating a RunningSoftware CI, the integration has no chance to check if a relationship exists between the CI and a Node. With the <container> element, the integration populates RunningSoftware CIs together with a container. Can I Populate Sub-Item Deletions Yes. Service Manager and UCMDB store CI information in different data structures, and therefore one SM CI may be synchronized to UCMDB as several CIs. For example, during population, an SM computer CI record is synchronized to a Node CI in UCMDB, and the computer CI s attributes to CIs such as IP, Interface, Location, etc (which are referred to as sub-items of the Node CI.). In this case, the Node CI is the root CI. The integration allows you to populate sub-item deletions to UCMDB (for example, if you delete the IP Address attribute value of a computer, the corresponding IP CI record in UCMDB will be deleted too). To do so, you need to specify a root in the CI type s population xslt file, using parameter isroot="true". For example, for Computer CIs, the node should be specifed as the root. Out-of-the-box, only the computer_population.xslt file requires the node CI be specified as the root, as shown below: <ci class="node" isroot="true"> HP Service Manager (Service Manager 9.40; Universal CMDB or later) Page 110 of 273
111 Chapter 4: Standards and Best Practices What will Happen if a Population Job Fails or Succeeds with Warnings When a population job fails: The failure prevents the remaining population tasks from running. The next job run will start from the last Success time. If pagination occurs (that is, the tasks are divided into multiple pages), the tasks will run again and again within the first page from the last Success time (once the end of the first page is reached, no new tasks will be executed). When a population job succeeds with warnings: A warning does not prevent the remaining population tasks from running. The next job run will run all tasks again starting from the last Success time. If pagination occurs (the tasks are divided into multiple pages), the tasks on all pages will be re-run (including those that were successfully completed last time). Known Issues and Limitations The following table lists the known issues and limitations of this integration. Known Issues and Limitations Global ID Known Issue/Limitation Workaround QCCR1E72246 [Population Adapter] Cannot populate deleted CIs in a full population. While you run a full population, if there are CIs that have been deleted since the last job run in Service Manager, the deleted CIs in Service Manager will not be populated to UCMDB. However, the data push feature first pushes deleted CIs while running a full push. In UCMDB, manually delete all CIs that were populated from SM by using appropriate filter criteria and then run a full population. Warning: You must be very careful when using this workaround. HP Service Manager (Service Manager 9.40; Universal CMDB or later) Page 111 of 273
112 Chapter 4: Standards and Best Practices Known Issues and Limitations, continued Global ID Known Issue/Limitation Workaround QCCR1E72222 QCCR1E72327 NodeRole is case-sensitive when mapping Node's NodeRole in UCMDB to Node's Subtype in SM. Steps to reproduce this issue: 1. Create a Node in UCMDB. 2. Set the Node's NodeRole property to "Printer". 3. Run a data push in UCMDB to push Node CIs. 4. Check the CI's attributes in SM. Result: The CI's subtype is "Node", which should be "Net Printer". When the NodeRole is "printer", the result is correct. When you run a full population for the first time to synchronize a large amount of CIs, if some of the CIs have an invalid attribute value (for example, IP address), the population job will ignore such CIs and run to completion with a Failed status and with errors logged on the Job Errors tab; In addition, the last job execution time will not be logged because the job is run for the first time but fails. As a result, after fixing the invalid attribute values in Service Manager, you will not have a chance to repopulate the failed CIs through a change (delta) population. This is because when you run a change population, a full population will be executed instead (because the last job execution time is null). Use lower-case names for NodeRole (printer). Not available at this time. HP Service Manager (Service Manager 9.40; Universal CMDB or later) Page 112 of 273
113 Chapter 4: Standards and Best Practices Known Issues and Limitations, continued Global ID Known Issue/Limitation Workaround QCCR1E84364 QCCR1E72511 When Run in Multi-Company Mode is enabled in the System Information Record in Service Manager (SM), the UCMDB integration fails to create changes or incidents in SM because the configuration item data modification event fails. The following error occurs: ERROR TypeError: lib.ucmdbconfiguration.isenable is not a function at char 1 If you set the use.global.id parameter in the adapter's sm.properties file to True, the federation feature does not work. To solve this issue, manually update a JavaScript: 1. Log in to Service Manager as a system administrator. 2. Go to Tailoring > Script Library, and open the discoveryevent script. 3. In this file, replace all instances of string lib.ucmdbconfiguration.isenable with lib.ucmdbconfiguration.isenable d. Note: You can find the string in lines 43, 86 and Click Compile to make sure the code is correct, and then click Save. 5. Log off and log back in. Set the parameter to False to solve this issue. When you deploy the adapter on the UCMDB standalone server (which is defined as a global-id generator by default), globalid and ucmdbid are the same thing. For this reason, setting this parameter to false can meet all of your needs satisfied by setting the parameter to true. When you deploy the adapter on a nonstandalone UCMDB (for example, BSM's RTSM), setting this parameter to true is not supported. In addition, HP does not recommend integrating the nonstandalone CMDB (for example, BSM's RTSM) with Service Manager. HP Service Manager (Service Manager 9.40; Universal CMDB or later) Page 113 of 273
114 Chapter 4: Standards and Best Practices Known Issues and Limitations, continued Global ID Known Issue/Limitation Workaround QCCR1E72578 QCCR1E73004 The data length of CI relationship name in Service Manager is 40 characters, which is not sufficient for the integration. Installing this content pack does not automatically increase this data length in Service Manager. If a CI relationship name exceeds the data length, either the relationship name is truncated after push or the relationship cannot be pushed to Service Manager due to a duplicate key error. Double quotes in UCMDB CI names (for example: "laptop - 003") are removed when the CIs are synchronized to SM. Manually increase the data length in Service Manager: Open the cirelationship table in Database Dictionary, and increase the data length of the relationship.name field from 40 to an appropriate value (recommended value: 300). Not available at this time. HP Service Manager (Service Manager 9.40; Universal CMDB or later) Page 114 of 273
115 Chapter 5: Tailoring the Integration You can tailor the HP Universal CMDB integration to meet your business needs by adding or removing managed CI types, attributes, and relationship types. This chapter describes the integration architecture and tailoring options for data push, population, and federation. This section includes: "Integration Architecture" below "Integration Tailoring Options" on page 130 Integration Architecture Before you tailor the integration, you should understand how the following components of the out-ofthe-box integration work. "Integration Class Model" below "Integration queries" below "Service Manager Web Services" on page 121 "Service Manager Reconciliation Rules" on page 125 "Service Manager Discovery Event Manager Rules" on page 127 Integration Class Model UCMDB 9.x or later no longer uses a private class model of CI types to manage integration CIs, as was required in prior versions. Instead, the integration uses the standard UCMDB managed objects and maps them to Service Manager CI types and attributes with queries and transformation files. Integration queries This section describes out-of-the-box queries used for data push, Actual State, and population. This section includes: HP Service Manager (Service Manager 9.40; Universal CMDB or later) Page 115 of 273
116 Chapter 5: Tailoring the Integration "Queries for Push" below "Queries for Actual State" on page 118 "Queries for Population" on page 119 "Query Requirements" on page 120 Queries for Push For the push feature, the integration uses a collection of queries to gather CI attribute information from Universal CMDB and send it to the Service Manager system. To access the out-of-the-box data push queries, navigate to Modeling > Modeling Studio, select Queries for Resource Type, and then navigate to the Root > Integration > SM Sync > 9.xx folder. If you want to change what CI/Relationship types or attributes are part of the integration, you must also edit the integration queries to support your updated CI/CI Relationship types and attributes. Out-of-the-box queries for data push Query name SM Running Software Push SM Business Service Push SM Business Service Relations Push Description This query gathers CI attributes from Running Software CIs. This query gathers CI attributes from business service CIs. This query gathers relationships between the following components: Business service and Running Software CIs Business service and node CIs Two or more business services The query includes compound relationships because the relationships can extend through a group. HP Service Manager (Service Manager 9.40; Universal CMDB or later) Page 116 of 273
117 Chapter 5: Tailoring the Integration Out-of-the-box queries for data push, continued Query name SM Computer Push SM Switch Push Description This query gathers CI attributes from the node CI type with NodeRole containing desktop, server, virtualized_system or not set. It also gathers related CI attributes from the following CI types through containers and links: IPAddress, Interface, CPU, FileSystem, DiskDevice, and Location. This query gathers CI attributes from the node CI type with NodeRole containing atm_ switch, frame_relay_switch, or lan_switch. It also gathers related CI attributes from the following CI types through containers and links: IPAddress, Interface, CPU, FileSystem, DiskDevice, and Location. SM Storage Push This query gathers CI attributes from the node CI type with NodeRole containing san_ switch, san_gateway, san_router or exact CI type equal to storage Array. It also gathers related CI attributes from the following CI types through containers and links: IPAddress, Interface, CPU, FileSystem, DiskDevice, and Location. SM Net Printer Push SM Mainframe Push SM Mobile Device Push SM Network Component Push This query gathers CI attributes from the node CI type with NodeRole containing printer. It also gathers related CI attributes from the following CI types through containers and links: IPAddress, Interface, CPU, FileSystem, DiskDevice, and Location. This query gathers CI attributes from the node CI type with exact CI type equal to Mainframe Logical Partition, or Mainframe CPC. It also gathers related CI attributes from the following CI types through containers and links: IPAddress, Interface, CPU, FileSystem, DiskDevice, and Location. This query gathers CI attributes from the node CI type with NodeRole containing pda_ handheld. It also gathers related CI attributes from the following CI types through containers and links: IPAddress, Interface, CPU, FileSystem, DiskDevice, and Location. This query gathers CI attributes from the node CI type with NodeRole containing router, adsl_modem, appletalk_gateway, bandwith_manager, cable_model, csu_dsu, ethernet, fddi, firewall, hub, kvm_switch, load_balancer, multicast_enabled_router, nat_router, token_ring, undefined_network_ component, voice_gateway, voice_switch, or vpn_gateway. It also gathers related CI attributes from the following CI types through containers and links: IPAddress, Interface, CPU, FileSystem, DiskDevice, and Location. HP Service Manager (Service Manager 9.40; Universal CMDB or later) Page 117 of 273
118 Chapter 5: Tailoring the Integration Out-of-the-box queries for data push, continued Query name SM Cluster Push Description This query gathers CI attributes from the node CI type with exact CI type equal to ClusterResourceGroup. It also gathers related CI attributes from the following CI types through containers and links: IPAddress, Interface, CPU, FileSystem, DiskDevice, Location, and Cluster. SM Node Relations Push This query gathers relationships between the following components: Node and Printer CIs Node and RunningSoftware CIs The root class of the relationship is composition. SM CRG Relations Push SM Layer2 Topology Relations Push SM Local Printer Push This query gathers relationships between the following components: Node and Cluster Resource Group CIs. The query includes compound relationships because the relationships can extend through a group. This query gathers relationships between the following components: Two or more nodes. The query includes compound relationships because the relationships can extend through a group. This query gathers CI attributes from printer CIs. It also gathers related CI attributes from the Node CI type. Queries for Actual State Out-of-the-box, the following queries (see the table below) are used for retrieving CI information from UCMDB to the Actual State section of the Service Manager Configuration Item (CI) form. Service Manager retrieves CI Actual State information by calling a UCMDB web service that retrieves CI data according to these queries. The queries are located in the Integration > SM Query folder in the UCMDB Modeling Studio. HP Service Manager (Service Manager 9.40; Universal CMDB or later) Page 118 of 273
119 Chapter 5: Tailoring the Integration Out-of-the-box queries for Actual State Query name localprinterextendeddata applicationextendeddata businessserviceextendeddata hostextendeddata Description This query gathers real-time extended information from Printer CIs in UCMDB. This query gathers real-time extended information from RunningSoftware CIs in UCMDB. This query gathers real-time extended information from business service CIs in UCMDB. This query gathers real-time extended information (such as Asset, Party, Location, LogicalVolume, WindowsService, Printer, InstalledSoftware, FileSystem, IPAddress, Interface, DiskDevice, and Cpu) from the node CI type in UCMDB. Queries for Population For CI/CI Relationship population, the integration does not need queries to save CI/CI Relationship attribute information to Universal CMDB; however in the population configuration file the following query names are mapped to relevant population XSL transformation files (see the following table). Queries for population Query name SM Business Service Population SM Computer To Computer With ConnectM Running Software Population SM Computer Population SM Biz To Biz With Containment SM Biz To Biz With Usage SM Biz To Computer With Containment SM Biz To Computer With Usage Description This query defines the CI store structure of business service CIs. This query defines the CI store structure of running software CIs. This query defines the CI store structure of computer CIs. This query defines the CI store structure of CI relationships in which a bizservice CI contains another. This query defines the CI store structure of CI relationships in which a bizservice CI uses another. This query defines the CI store structure of CI relationships in which a bizservice CI contains a computer CI. This query defines the CI store structure of CI relationships in which a bizservice CI uses a computer CI. HP Service Manager (Service Manager 9.40; Universal CMDB or later) Page 119 of 273
120 Chapter 5: Tailoring the Integration Queries for population, continued Query name SM Biz To Software With Containment SM Biz To Software With Usage SM Computer To Computer With Connects SM Computer To Software With Composition CLIP Down Time Population CI To Down Time CI With Connection Description This query defines CI store structure of CI relationships in which a bizservice CI contains a RunningSoftware CI. This query defines CI store structure of CI relationships in which a bizservice CI uses a RunningSoftware CI. This query defines the CI store structure of CI relationships in which a computer CI connects to another. This query defines the CI store structure of CI relationships in which a RunningSoftware CI is contained within a computer CI and the RunningSoftware CI cannot exist without the container. This query defines the CI store structure of ScheduledDowntime CIs. This query defines the CI store structure of CI relationships in which a ScheduledDowntime CI connects to an affected CI. Query Requirements The integration requires that any custom queries you create meet certain formatting conditions. Any queries that you want to include in the integration must meet these conditions: To query CIs, a query must contain one CI type labeled Root. The Root node is the main CI that the UCMDB synchronizes. All other CIs are contained CIs of the Root CI. To query relationships, a query must contain one or more relationships labeled Root. A query must contain only the Root CI and CIs that are directly connected to it. The Root CI is always the top node of the TQL hierarchy. A TQL graph cannot have cycles. If a query synchronizing relationships has cardinality, it must be cardinality 1...*. Additional cardinality entries must have an OR condition between them. If you only want the integration to synchronize specific CIs, you must configure the condition on the query to filter such CIs. HP Service Manager (Service Manager 9.40; Universal CMDB or later) Page 120 of 273
121 Chapter 5: Tailoring the Integration Service Manager Web Services Service Manager uses web services messages to get and receive CI information from your UCMDB system. Out-of-the-box, UCMDB sends more CI attribute information than the Service Manager system actually manages. Service Manager users can view all of the CI attribute information the UCMDB system sends from the Actual State section of the CI record. Service Manager publishes several web services for use by the UCMDB-SM integration. The UCMDB system uses the web services to map UCMDB CI types and CI attributes to web services objects the Service Manager system recognizes. If you add UCMDB CI types or CI attributes that you want Service Manager to manage, then you must update one or more of these web services to define them as web services objects. See the Service Manager Web Services Guide for more information about publishing web services. Managed Fields Note: Managed fields are used only for the data push feature. A Service Manager managed field is a field where the system compares the CI attribute value in the incoming UCMDB web services message to the value in a Service Manager CI record. If the values in the web services message do not match those in the CI record, Service Manager runs a Discovery Event Manager (DEM) rule to determine what action to take. The DEM rule determines which of the fields that are published as web services objects are fields managed by the integration. Only value changes in managed fields trigger the DEM rule. The ucmdbintegration web service consists of a set of web services objects, each of which defines a list of web service fields. Out-of-the-box, the integration uses only part of them (see the Mappings between Service Manager web service objects, tables, and DEM rules table), some of them (along with their relevant DEM Rules) have been deprecated (see the Deprecated ucmdbintegration web service objects for data push table), and some are used for population or federation (see the ucmdbintegration web service objects used for population or federation table). Mappings between Service Manager web service objects, tables, and DEM rules This web service object Publishes fields from this table And uses this DEM rule ID Relationship cirelationship ucmdbrelationship ucmdbrunningsoftware device ucmdbrunningsoftware ucmdbbusinessservice joinbizservice ucmdbbusinessservice ucmdbnode joinnode ucmdbnode HP Service Manager (Service Manager 9.40; Universal CMDB or later) Page 121 of 273
122 Chapter 5: Tailoring the Integration Deprecated ucmdbintegration web service objects for data push This web service object Publishes fields from this table Recommended replacement (object) ucmdbapplication device ucmdbrunningsoftware ucmdbcomputer ucmdbcomputer ucmdbnode UcmdbDevice device ucmdbrunningsoftware ucmdbnetwork joinnetworkcomponents ucmdbnode ucmdbprinter joinofficeelectronics ucmdbnode ucmdbintegration web service objects used for population or federation This web service object Publishes fields from this table And is used for Requires a DEM Rule? cirelationship1to1 cirelationship1to1 Population No ucmdbidpushback device Population No UcmdbChange cm3r Federation No UcmdbChangeTask cm3t Federation No UcmdbIncident probsummary Federation No UcmdbProblem rootcause Federation No The following sections list the fields published as web services objects used for data push (see the Mappings between Service Manager web service objects, tables, and DEM rules table) and indicate whether they are managed fields in an out-of-the-box Service Manager system. You can use this reference to determine if you need to publish a field as a web service object, and also if you need to create a DEM rule for the object. Object Name: Relationship Service Manager publishes the following fields from the cirelationship table: Web service and managed fields of the Relationship object Field published as web service object relationship.name logical.name Caption used in web service messages RelationshipName ParentCI Is the field a managed field? related.cis ChildCIs Yes relationship.subtype RelationshipSubtype HP Service Manager (Service Manager 9.40; Universal CMDB or later) Page 122 of 273
123 Chapter 5: Tailoring the Integration Object Name: ucmdbrunningsoftware Service Manager publishes the following fields from the device table: Web service and managed fields of the ucmdbrunningsoftware object Field published as web service object ucmdb.id Caption used in web service messages UCMDBId Is the field a managed field? ci.name ApplicationName Yes type subtype company Type Subtype CompanyId logical.name CIIdentifier Yes product.version vendor version id 1 ProductVersion Vendor Version CIName Object Name: ucmdbbusinessservice Service Manager publishes the following fields from the joinbizservice table: Web service and managed fields of the ucmdbbusinessservice object Field published as web service object ucmdb.id Caption used in web service messages UCMDBId Is the field a managed field? ci.name ServiceName Yes type subtype company Type Subtype CustomerId logical.name CIIdentifier Yes 1 This attribute is used only for the population feature. HP Service Manager (Service Manager 9.40; Universal CMDB or later) Page 123 of 273
124 Chapter 5: Tailoring the Integration Web service and managed fields of the ucmdbbusinessservice object, continued Field published as web service object vendor id 1 Caption used in web service messages ServiceProvider CIName Is the field a managed field? Object Name: ucmdbnode Service Manager publishes the following fields from the joinnode table: Web service and managed fields of the ucmdbnode object Field published as web service object ucmdb.id type subtype company Caption used in web service messages UCMDBId Type Subtype CustomerId Is the field a managed field? logical.name CIIdentifier Yes default.gateway DefaultGateway Yes network.name DNSName Yes building Building Yes room Room Yes floor Floor Yes location Location addlipaddr[addlipaddress] AddlIPAddress Yes addlipaddr[addlsubnet] AddlSubnet Yes addlmacaddress AddlMacAddress Yes bios.id BIOSId Yes operating.system OS Yes 1 This attribute is used only for the population feature. HP Service Manager (Service Manager 9.40; Universal CMDB or later) Page 124 of 273
125 Chapter 5: Tailoring the Integration Web service and managed fields of the ucmdbnode object, continued Field published as web service object Caption used in web service messages Is the field a managed field? os.version OSVersion Yes physical.mem.total PhysicalMemory Yes serial.no. vendor cpu[cpu.id] cpu[cpu.name] cpu[cpu.clock.speed] file.system[mount.point] file.system[disk.type] file.system[file.system.type] file.system[disk.size] asset.tag SerialNo Vendor CpuID CpuName CpuClockSpeed MountPoint DiskType FilesystemType DiskSize AssetTag machine.name HostName Yes disk.device[model.name] disk.device[disk.vendor] disk.device[disk.name] id 1 isvisualization istatus ModelName DiskVendor DiskName CIName IsVisualization AssetStatus Service Manager Reconciliation Rules Service Manager reconciliation rules allow the integration to identify CI records in your Service Manager system that match CIs in your UCMDB system. Service Manager attempts to reconcile CI records with 1 This attribute is used only for the population feature. HP Service Manager (Service Manager 9.40; Universal CMDB or later) Page 125 of 273
126 Chapter 5: Tailoring the Integration every push of CI attributes from your UCMDB system. The integration uses the following workflow to match UCMDB CIs with Service Manager CIs. 1. The UCMDB system sends a web service message to Service Manager containing the latest CI attribute data. 2. Service Manager scans the web service message for the CI ucmdb.id value. Note: Out-of-the-box, Service Manager does not display the ucmdb.id field on CI record forms to prevent users from changing the value. If you want to add this value to your forms, you can find the ucmdb.id field defined in the device table. HP recommends that you make this a readonly field. 3. Service Manager searches for an existing CI record that has the same ucmdb.id value. 4. If Service Manager finds a CI with a matching ucmdb.id value, no reconciliation is needed. Service Manager compares the UCMDB CI attributes to the Service Manager managed fields and runs the appropriate Discovery Event Manager (DEM) rules as needed. 5. If Service Manager cannot find a CI with a matching ucmdb.id value, it runs the reconciliation rules. 6. Service Manager searches for an existing CI record with the same reconciliation field values. 7. If Service Manager finds a CI with a matching reconciliation field value, it updates the CI record with the ucmdb.id value of matching UCMDB CI. Service Manager compares the UCMDB CI attributes to the Service Manager managed fields and runs the appropriate DEM rule as needed. 8. If Service Manager cannot find a CI with a matching reconciliation field value, it runs the DEM rule for Action if matching record does not exist. Out-of-the-box, the DEM rule has Service Manager create a new CI record. Service Manager creates the CI record using the ucmdb.id value of incoming UCMDB CI. Performance Implications Because Service Manager attempts to reconcile CIs with every push, the number of reconciliation fields you have will affect the integration s performance. The more reconciliation rules you have, the more searches Service Manager must perform to match CIs. To improve the performance of reconciliation searches, you should choose reconciliation fields that are unique keys of the underlying Service Manager table. For example, if you want to reconcile CI records in the device table, use the logical.name field as a reconciliation field because it is a unique key. See "How to Add DEM Reconciliation Rules" on page 135 to create a reconciliation rule. HP Service Manager (Service Manager 9.40; Universal CMDB or later) Page 126 of 273
127 Chapter 5: Tailoring the Integration Dependence on DEM Rules Service Manager uses the Action if matching record does not exist DEM rule whenever it cannot reconcile CIs. You should review the DEM settings and decide if they meet your business standards prior to the initial push of CIs from UCMDB to Service Manager. For example, you can have Service Manager create a change request for every CI in the initial CI push by selecting the Open a change option. Service Manager Discovery Event Manager Rules You only need to create Discovery Event Manager (DEM) rules if you want to accomplish any of the following custom actions: "Change the Conditions Under Which a DEM Rule Runs" below "Change the Action the DEM Rule Takes" on the next page "Update the List of Managed Fields for a CI Type" on the next page "Create Custom JavaScript to Open Change or Incident Records" on the next page Change the Conditions Under Which a DEM Rule Runs Service Manager will run a DEM rule only if the condition field evaluates to true. Out-of-the-box, no DEM rule has a condition statement that restricts when the rule runs, and all the integration DEM rules will always run by default. You can update a DEM rule's condition statements if you want to restrict when Service Manager runs your DEM rules. For example, adding the following condition to the ucmdbnode DEM rule restricts the rule to desktop CIs. subtype in $L.file= Desktop You can also use the condition field to create multiple DEM rules that apply to the same table name. For example, the following DEM rules both apply to the joinnode table. DEM rules using different conditions to affect the same table DEM rule Id Table Name Condition ucmdbnode joinnode subtype in $L.file!= Desktop ucmdbdesktop joinnode subtype in $L.file= Desktop HP Service Manager (Service Manager 9.40; Universal CMDB or later) Page 127 of 273
128 Chapter 5: Tailoring the Integration Typically, you will only need to add conditions if your business processes require the integration to take different actions with certain CI types or SLAs. Change the Action the DEM Rule Takes Out-of-the-box, the integration DEM rules take the following actions: Add a CI record when the UCMDB data does not match an existing Service Manager CI record Open a Change or log results and update a CI record when the UCMDB CI attribute data does not match the CI attribute data in the Service Manager CI record Delete a CI record when the UCMDB data specifies that the CI has been deleted You can change the integration DEM rules to meet your business processes. For example, you could use the ucmdbnode DEM rule to open a change when the integration finds a non-desktop CI with unexpected data, and use the ucmdbdesktop DEM rule to log results and update the record when the integration finds a desktop CI with unexpected data. Caution: If you want to use the Change Management verification and Change Management validation features of the integration, your DEM rules must use the Open a Change option for the Action if record exists but unexpected data discovered event. Update the List of Managed Fields for a CI Type If you add CI attributes to your UCMDB system that you want to include in the integration, you must also create matching managed fields in Service Manager. Each managed field must have a corresponding web services object definition in order to receive CI attribute updates from your UCMDB system. See "How to Add a CI Attribute to the Integration for Data Push" on page 142 and "How to Add a CI Type to the Integration for Data Push" on page 157 for information on how to add managed fields. Create Custom JavaScript to Open Change or Incident Records Service Manager uses the discoveryevent JavaScript to create CI names and to set the values of required fields when opening change or incident records. Out-of-the-box, the script uses the following default values. Default values to create a new CI You can update the createciname and populatenewci functions to set the following CI values. HP Service Manager (Service Manager 9.40; Universal CMDB or later) Page 128 of 273
129 Chapter 5: Tailoring the Integration Default values used to create a new CI CI attribute record.logical_name record.assignment record.istatus record.os_name Default value defined in discoveryevent System generated ID number AUTO Installed Value in record.operating_system Default values to create a new change You can update the populatechange function to set the following change values. Default values used to create a new change CI attribute change.category change.reason Default value defined in discoveryevent Unplanned Change Value in reason change.initial_impact 3 change.severity 3 change.coordinator change.requested_by change.status Change.Coordinator discovery initial Default values to create a new incident You can update the populateincident function to set the following incident values. Default values used to create a new incident CI attribute incident.category incident.subcategory incident.product_type incident.assignment Default value defined in discoveryevent incident hardware missing or stolen Hardware HP Service Manager (Service Manager 9.40; Universal CMDB or later) Page 129 of 273
130 Chapter 5: Tailoring the Integration Default values used to create a new incident, continued CI attribute Default value defined in discoveryevent incident.initial_impact 3 incident.severity 3 incident.logical.name incident.site_cateogry incident.contact_name incident.affected_item Value of id C ANALYST, INCIDENT MyDevices Integration Tailoring Options The integration offers the following tailoring options: "How to Update the Integration Adapter Configuration File (sm.properties)" on the next page "How to Add DEM Reconciliation Rules" on page 135 "Add Discovery Event Manager Rules" on page 137 "How to Add a CI Attribute to the Integration for Data Push" on page 142 "How to Add a CI Type to the Integration for Data Push" on page 157 "How to Add a CI Type s Relationship Types to the Integration for Data Push" on page 184 "How to Add Custom queries to Data Push Jobs" on page 190 "How to Add a CI Attribute to the Integration for Population" on page 190 "How to Add a CI Type to the Integration for Population" on page 194 "How to Add a CI Type s Relationship Types to the Integration for Population" on page 210 "How to Customize UCMDB ID Pushback for a CI Type" on page 215 "How to Add Custom queries to Integration Population Jobs" on page 216 "How to Add an Attribute of a Supported CI Type for Federation" on page 217 HP Service Manager (Service Manager 9.40; Universal CMDB or later) Page 130 of 273
131 Chapter 5: Tailoring the Integration How to Update the Integration Adapter Configuration File (sm.properties) The integration uses a properties file (sm.properties) as a configuration file of the adapter. Out-of-thebox, this file has been set up based on best practices, so usually you can keep the default parameter values. Optionally, you can update the parameter values to better suit your needs. To update the sm.properties file: 1. Log in to UCMDB as an administrator. 2. Navigate to Data Flow Management > Adapter Management > ServiceManagerAdapter9-x > Configuration Files. 3. Click the properties configuration file: sm.properties. 4. Update the parameter values as needed. For a list of the parameters, see the following table. Parameters in the sm.properties file Parameter Default value Comment timeout.minutes 10 The integration connection timeout value (in minutes). HP Service Manager (Service Manager 9.40; Universal CMDB or later) Page 131 of 273
132 Chapter 5: Tailoring the Integration Parameters in the sm.properties file, continued Parameter Default value Comment number.of.concurent.sending.threads 6 The number of concurrent threads used for the data push feature. 1: Disabled 2 or higher: Enabled Note: If you are connecting to multiple Service Manager instances to improve the CI data push performance (see the URL Override configuration in "How to Create an Integration Point in UCMDB" on page 30), you are recommended to increase this value for optimized performance. For example, set it to 12 if you are connecting to two Service Manager instances. min.objects.for.concurent.sending 50 The minimum number of Service Manager objects that is required to use concurrent sending instead of single thread sending. Note: It is used for the push feature. number.of.chunks.per.thread 3 The number of chunks per thread used for the push feature. HP Service Manager (Service Manager 9.40; Universal CMDB or later) Page 132 of 273
133 Chapter 5: Tailoring the Integration Parameters in the sm.properties file, continued Parameter Default value Comment number.of.cis.per.request 1000 The maximum number of objects retrieved from Service Manager by ID. Note: It is used for the population and federation features. Do not set it to a number greater than 1000 in case the request has a 64K limit. use.global.id false If set to true, globalid instead of ucmdbid is used in the integration. For more information about the differences between UcmdbID and GlobalID, see the UCMDB documentation. type.of.expand.enum 2 It configures the value mapping rule for the UCMDB enum type. 0: The feature will be disabled 1: The enum type will expand to {value} 2: The enum type will expand to {index}-{value} Note: It is used for the push feature. HP Service Manager (Service Manager 9.40; Universal CMDB or later) Page 133 of 273
134 Chapter 5: Tailoring the Integration Parameters in the sm.properties file, continued Parameter Default value Comment use.type.label true It configures whether the generated source XML uses the real CI/Relationship type directly or uses the label that is defined in the query. If set to false, the real type is used directly instead of the label. op.pagination.switch on It indicates if pagination (client driven) is enabled. on: Enabled. off: Disabled. Note: It is used for the population feature. pop.pagination.recordcount 1000 The maximum number of records displayed on each page when pagination is enabled. Note: It is used for the population feature. pop.createci.key sm_id The UCMDB field of a CI record that stores the Service Manager CI ID. Note: It is used for the population feature. HP Service Manager (Service Manager 9.40; Universal CMDB or later) Page 134 of 273
135 Chapter 5: Tailoring the Integration Parameters in the sm.properties file, continued Parameter Default value Comment ucmdbid.pushback.request UpdateucmdbID PushBackRequest The web service request for pushing the UCMDB ID back to Service Manager. Note: It is used for the population feature. ucmdbid.pushback.xslt ucmdbid_ pushback.xslt The xslt configuration file for pushing the UCMDB ID back to Service Manager. Note: It is used for the population feature. check.sm.connections false It indicates whehter to check the SOAP connections to Service Manager instances before running a job. You can enable it under any of the following circumstances: Your Service Manager is running in High Availability mode (with load balancing), and you want to connect UCMDB to multiple Service Manager instances. You want UCMDB to not run a job when no integration connections are available, rather than run the job and then report a failure. How to Add DEM Reconciliation Rules It is possible that your Service Manager system already contains CI records that match CIs in your UCMDB system. Rather than add duplicate CI records to your Service Manager system, you can configure Service Manager to reconcile CI records between the two systems based on the values of specific fields. HP Service Manager (Service Manager 9.40; Universal CMDB or later) Page 135 of 273
136 Chapter 5: Tailoring the Integration Service Manager always attempts to reconcile CI records based on the unique key field of the Service Manager table and the ucmdb.id field. You can specify additional fields to reconcile on from the DEM Reconciliation Rules form. If Service Manager finds a matching value in any one of these fields, it updates the Service Manager CI record with the attributes from the incoming UCMDB record. When multi-tenancy is enabled, Service Manager only reconciles the CIs whose company ID matches the company ID in the data push job. For example, when pushing CIs from company 2, the reconciliation rules only apply to the Service Manager CI records that have the company code corresponding to company number 2. In order to specify reconciliation fields, you will need to be familiar with the table and field names in both your Service Manager and UCMDB systems. If you want to reconcile on a particular attribute from the UCMDB system, you should verify that there is a corresponding Service Manager managed field for the attribute. Without such a mapping, Service Manager will not know to search for matching values in the CI record. Note: Not all UCMDB attributes have a corresponding field in Service Manager. You may need to tailor your Service Manager system to add a matching field if one does not already exist. Using join tables for reconciliation When setting reconciliation rules, if the device type you are reconciling has a joindef definition (as defined in the devtype table), use the join table name instead of the device table. For example, if you want to reconcile computer CIs, use the joincomputer table instead of the device table. Sequence of reconciliation A reconciliation rule specifies what Service Manager table and field you want to search for matching CI values. It also specifies the sequence in which you want Service Manager to process reconciliation rules. By default, Service Manager processes rules in alphabetical order by field name. For example, Service Manager will reconcile CIs against the asset.tag field before reconciling CIs on the ci.name field. To change the order in which Service Manager reconciles CIs, you can add a numeric value to the sequence field. For example, the following reconciliation rules ensure that Service Manager processes CIs by the ci.name field prior to reconciling them against the asset.tag field. Sample reconciliation rules ordered by sequence Table Name Field Name Sequence joincomputer ci.name 1 joincomputer asset.tag 2 A Discovery Event Manager (DEM) reconciliation rule allows you to specify which Service Manager fields you want to use to determine if an existing CI record matches a CI in a UCMDB system. An administrator HP Service Manager (Service Manager 9.40; Universal CMDB or later) Page 136 of 273
137 Chapter 5: Tailoring the Integration typically specifies reconciliation rules prior to starting UCMDB data push jobs so that Service Manager will not create duplicate CI records. To create a DEM reconciliation rule: 1. Log in to Service Manager as a system administrator. 2. Navigate to Tailoring > Web Services > DEM Reconciliation Rules. Service Manager displays the DEM Reconcile Record form. 3. In Table Name, type the name of the Service Manager table containing the field you want to reconcile on. 4. In Field Name, type the name of the Service Manager field containing the values you want to reconcile on. 5. In Sequence, type a number to specify what order you want Service Manager to run this rule. Note: If you do not specify a sequence value, Service Manager will process field names alphabetically. 6. Click New. Service Manager creates the reconciliation rule. Add Discovery Event Manager Rules Service Manager uses the Discovery Event Manager (DEM) to define which actions the system should perform when the actual state of an incoming configuration item (CI) record differs from the managed state of a CI record in HP Service Manager. The DEM rules allow you to define whether the Service Manager system adds, updates, or deletes CI records based on incoming UCMDB data. For CI records only, the DEM rules also allow you to define how Service Manager should handle duplicated logical names. This section includes: "DEM Rules" on the next page "Duplication Rules" on page 140 "CI Attributes Displayed in Change and Incident Records" on page 141 "Searching for Change and Incident Records Opened by the Integration" on page 142 HP Service Manager (Service Manager 9.40; Universal CMDB or later) Page 137 of 273
138 Chapter 5: Tailoring the Integration DEM Rules Service Manager offers the following rules options: Action if matching record does not exist This is the action you want Service Manager to take if it cannot find a matching CI record. Add the record:(default) Service Manager will add a CI record when it cannot find a matching record. See "How to Add DEM Reconciliation Rules" on page 135 to define what fields Service Manager uses to match CI records. Add the record, and set dependency as true: This option is available only for synchronization of CI relationship data. Service Manager adds the CI relationship record and enables outage dependency for the record by doing the following: Checks the Outage Dependency check box; Sets the number of dependent downstream CIs to 1. This is because UCMDB only supports oneto-one CI relationships. Open an Incident:Service Manager opens an incident for someone to review the new CI record. The incident enables someone to investigate whether the new CI record is compliant with your business HP Service Manager (Service Manager 9.40; Universal CMDB or later) Page 138 of 273
139 Chapter 5: Tailoring the Integration practices. Open a Change:Service Manager opens an unplanned change for someone to review the new CI record. The change allows you to investigate whether the new CI record is compliant with your business practices. If the CI record is compliant, the change can be approved. If the CI record is not compliant, then the change can be denied and the CI record removed. The change record lists both the current and proposed attribute values. Action if record exists but unexpected data discovered This is the action you want Service Manager to perform if it does not find a matching CI attribute value. Open a Change: (Default) Service Manager opens an unplanned change to review the actual state of the CI record. The change allows someone to investigate whether the new attribute value is compliant with your business practices. If the value is compliant, the change can be approved. If the value is not compliant, then the change can be denied and the CI attribute value reverted to its managed state. Log Results and update record:service Manager logs the results of the actual state of the CI record, and then updates the CI record. Open an Incident:Service Manager opens an Incident to investigate the actual state of a CI record and determines what actions must be performed or initiated to bring the record into compliance with Service Manager. Action if record is to be deleted This is the action you want Service Manager to perform if an external event specifies that the record needs to be deleted. Delete record: (Default for CI Relationship records) This option is available for synchronization of both CI and CI Relationship records. Service Manager automatically deletes the CI/CI Relationship record. Open an Incident: This option is available only for synchronization of CI Relationship records. Service Manager opens an incident to investigate the deleted record and determines which actions must be performed or initiated to bring the record into compliance with Service Manager. Open a Change: This option is available only for synchronization of CI Relationship records. Service Manager opens an unplanned change to review the deleted record. The change allows someone to HP Service Manager (Service Manager 9.40; Universal CMDB or later) Page 139 of 273
140 Chapter 5: Tailoring the Integration investigate whether the deleted record is compliant with your business practices. If the record is compliant, the change can be approved. If the record is not compliant, then the change can be denied and the record added back to the system. Update record to the selected status: (Default for CI records) This option is available only for synchronization of CI records. Service Manager updates the status of the CI record to a value selected from the drop-down list (for example, Retired/Consumed), rather than delete the record permanently. Note: Values available from the drop-down list are defined in the ICM Status global list. Open a Change to update record to the selected status: This option is available only for synchronization of CI records. Service Manager opens an unplanned change to update the CI record s status to a value selected from the drop-down list (for example, Retired/Consumed). The change allows someone to investigate whether the requested status change is compliant with your business practices. Once the change has been approved and closed, Service Manager automatically changes the CI record to the selected status. If the change has been denied, Service Manager makes no changes to the CI record. Open an Incident to update record to the selected status: This option is available only for synchronization of CI records. Service Manager opens an incident to update the record s status to a value selected from the drop-down list (for example, Retired/Consumed). Once the incident has been closed, Service Manager automatically updates the CI record to the selected status. Duplication Rules UCMDB may create two completely separate yet legit CI records that happen to have the same name. The UCMDB name field is mapped to the logical.name field (which must be unique) in Service Manager. Pushing the two CI records to Service Manager would cause a duplicate logical name problem. You have several ways to avoid this problem. See the following table. HP Service Manager (Service Manager 9.40; Universal CMDB or later) Page 140 of 273
141 Chapter 5: Tailoring the Integration Solutions to the duplicate logical name problem Product side UCMDB Solution Change the names directly in UCMDB or change the UCMDB reconciliation rule to make sure the names are not the same. This is highly recommended. In the integration adapter mapping configuration (xslt) file, avoid mapping the UCMDB name field to the SM logical name field directly in either of these ways: Map another UCMDB unique attribute to the SM logical.name field, and map the UCMDB name field to another SM field; Add a prefix to the name. The following are examples. UCMDB switches or routers are simply named as Router or Switch and identified by their underlying MACs. You can configure their SM logical name to be <MAC> + <name>. UCMDB databases often have the same name (due to the implementation of clusters and Oracle RACs). You can configure their SM logic name to be <full DNS name> + <name>. Service Manager Use the duplication rule options in DEM Rules in Service Manager. Service Manager offers the following duplication rule options on the Duplication Rule tab in each DEM rule with a Table Name other than cirelationship : Action if logical name is duplicated (CI with different ucmdb ID): This is the action you want Service Manager to perform if the logical name is already used by another CI record when a CI record is added or updated. Rename to <name>_[renamed]_1/2/3: (Default) Service Manager changes the logical name by adding a suffix. Return Error: Service Manager returns a duplicate key error to UCMDB. CI Attributes Displayed in Change and Incident Records Service Manager displays a Change Details section on the corresponding change or a CMDB Changes section on the corresponding incident when you configure DEM to open either change records or incident records when it discovers CI attribute changes through the UCMDB-SM integration. Service Manager only displays a tab for CI attributes when the UCMDB-SM integration is enabled and you have HP Service Manager (Service Manager 9.40; Universal CMDB or later) Page 141 of 273
142 Chapter 5: Tailoring the Integration defined a rule in the Discovery Event Manager to create a change or incident record when a CI is added, updated, or deleted. Both the Change Details and CMDB Changes sections display the current CI attribute values alongside the actual attribute values discovered by UCMDB. You can use this information to approve or deny a change or escalate an incident to the proper assignment group. Searching for Change and Incident Records Opened by the Integration You can use the following search criteria to find change and incident records opened by the UCMDB-SM integration. Search options available for change and incident records Record type Change Incident Search option available Search for records with the category unplanned change. Search for records using the generated by the UCMDB integration option. How to Add a CI Attribute to the Integration for Data Push You can use the following steps to add a CI attribute to the integration. 1. Does the CI attribute already exist in the UCMDB class model? Yes. Go to Step 3. No. Go to Step Add the CI attribute to the UCMDB class model. See "How to Add the CI Attribute to the UCMDB Class Model" on the next page. 3. Add the CI attribute to the query layout. See "How to Add the CI Attribute to the Query Layout" on page Add the CI attribute to the Service Manager table. See "How to Add the CI Attribute to the Service Manager Table" on page Create a web service field to support the CI attribute. See "How to Create a Web Service Field to Support the CI Attribute" on page 148. HP Service Manager (Service Manager 9.40; Universal CMDB or later) Page 142 of 273

143 Chapter 5: Tailoring the Integration 6. Add a managed field to monitor changes in the CI attribute. See "How to Add a Managed Field to Support the CI Attribute" on page Map the CI attribute to a web service field. See "How to Map the CI Attribute to a Web Service Field" on page 152. How to Add the CI Attribute to the UCMDB Class Model The integration only uses a subset of the CI attributes available from your UCMDB system. Out-of-thebox, the integration consists of CI attributes that are typically managed from a Service Manager system such as host name and host DNS name. Before creating a new UCMDB CI attribute, you should determine if there are any existing CI attributes in your UCMDB system that provide the data you want. In most cases, there is an existing attribute tracking the data you want to add to the integration. For example, if you review the attributes of the Node CI type, you see that there are many attributes available to be added to the integration. The following steps illustrate how to add a new CI attribute to an existing CI type. This scenario is not the expected typical case. Typically, you would add an existing CI attribute to the integration. Note: The integration does not require any special steps to add a CI attribute to the UCMDB class model. You can use the standard CI attribute creation procedures to add a CI attribute. For more information on CI attribute creation, see the HP Universal CMDB CI Attribute Customization Guide. To add a CI attribute to the UCMDB class model: HP Service Manager (Service Manager 9.40; Universal CMDB or later) Page 143 of 273
144 Chapter 5: Tailoring the Integration 1. Log in to UCMDB as an administrator. 2. Navigate to Modeling > CI Type Manager. 3. Select the CI type to which you want to add a new CI attribute from the CI Types navigation tree. For example, ConfigurationItem > InfrastructureElement > RunningSoftware > Database. 4. Click the Attributes tab. 5. Click the Add button. The Add Attribute window opens. 6. In Attribute Name, type the unique name you want to use for the new CI attribute. For example, database_owner. Caution: The name cannot include any of the following characters: / \ [ ] : < > + = ;,? *. 7. In Display Name, type the name you want UCMDB to display in the interface. For example, Database Owner. 8. In Description, type a description of the new CI attribute. This is an optional field. For example, System user who owns the database. 9. In Attribute Type, select either Primitive or Enumeration/List. For example, select Primitive and select string. 10. In Value Size, type the maximum character length the attribute can have. For example, In Default Value, type the value to be used when no other value is available. For example, leave the default value blank. 12. Click OK to save the attribute. 13. Click the Save button to save attribute changes to the CI type. How to Add the CI Attribute to the Query Layout To add a CI attribute to the integration, you must add this attribute to the layout setting from the query that synchronizes the CI type. You must know what CI type contains the CI attributes you want to add to the integration. HP Service Manager (Service Manager 9.40; Universal CMDB or later) Page 144 of 273
145 Chapter 5: Tailoring the Integration Keep a list of the attributes that you enable, because you will need to create a matching XSL transformation for each attribute you enable. To add a CI attribute to the query layout: 1. Log in to UCMDB as an administrator. 2. Navigate to Modeling > Modeling Studio. 3. For Resource Type, select Queries. 4. From the Queries navigation tree, click Integration > SM Sync > 9.xx. 5. Select the query that manages the CI type whose attributes you want to add to the integration. For example, SM Computer Push. UCMDB displays the TQL graph for the integration query. 6. Select the node from the query layout that contains the CI attribute you want to add to the integration. For example, Root. 7. Right-click the node and select Query Node Properties. The Query Node Properties window opens. 8. Click Element layout tab. The Layout Settings tab opens. 9. Select the CI attribute you want to include in the integration from the Available Attributes list, and click the Add button to add it to Specific Attributes list. For example, OsVendor. HP Service Manager (Service Manager 9.40; Universal CMDB or later) Page 145 of 273

146 Chapter 5: Tailoring the Integration 10. Click OK to save the node properties. 11. Click the Save button to save the query. How to Add the CI Attribute to the Service Manager Table The integration uses only a subset of the CI attributes available from your Service Manager system. Before creating a new Service Manager CI attribute, you should determine if there are any existing CI attributes in your Service Manager system that provide the data you want. In most cases, there is an existing attribute tracking the data you want to add to the integration. For example, if you review the attributes of the Computer CI type, you see that there are many attributes available to be added to the integration. HP Service Manager (Service Manager 9.40; Universal CMDB or later) Page 146 of 273
147 Chapter 5: Tailoring the Integration The following steps illustrate how to add a new CI attribute to an existing CI type. The integration does not require any special steps to add a CI attribute to the Service Manager table. You can use the standard table attribute creation procedures to add a CI attribute. For more information on table attribute creation, see the Service Manager help and Service Manager Tailoring Best Practices Guide. To add a CI attribute to the Service Manager table: 1. Log in to Service Manager as a system administrator. 2. Navigate to Tailoring > Database Dictionary. 3. In File Name, type the name of the table where you want to add the new CI attribute. For example, node. HP Service Manager (Service Manager 9.40; Universal CMDB or later) Page 147 of 273
148 Chapter 5: Tailoring the Integration 4. Click the Search button. The node dbdict record opens. 5. Click the Fields tab. 6. Click the New Field/Key button. The Add Attribute window opens. 7. In Name, type the name you want to use for the new CI attribute. For example, os.manufacturer. Caution: The name cannot include any of the following characters: ' / \ [ ] : < > + = ;,? *. 8. In Type, select a type from the list. For example, select character. 9. Click the Add Field button to save the attribute. 10. Click the OK button to save attribute changes to the table. How to Create a Web Service Field to Support the CI Attribute UCMDB uses the Service Manager ucmdbintegration web service to send CI data. This web service publishes the objects that match the out-of-the-box CI types and CI attributes provided by the UCMDB- SM integration. For a list of the out-of-the-box web service fields and their mappings to Service Manager tables, see "Managed Fields" on page 121. If you add a CI attribute to the integration on your UCMDB system, you must create a corresponding web service field on your Service Manager system to receive the incoming CI data from UCMDB. Each web service field must map to a valid Service Manager table and column. To create a web service field for the OSVendor attribute described in previous sections: 1. Log in to Service Manager with an administrator account. 2. Navigate to Tailoring > Web Services > WSDL Configuration. The External Access Definition form opens. 3. For Service Name, type ucmdbintegration. 4. Click Search. Service Manager displays a record list of the objects that make up the ucmdbintegration web service. HP Service Manager (Service Manager 9.40; Universal CMDB or later) Page 148 of 273
149 Chapter 5: Tailoring the Integration 5. Select an existing web service object to which you want to add the CI attribute. For example, select ucmdbnode. 6. Click the Fields tab. Service Manager displays the fields published as web service fields. 7. Select an empty row in the Fields list. 8. For Field, select the Service Manager column name where you want to store the incoming CI attribute values. For example, os.manufacturer. Note: Service Manager displays the fields from all join tables associated with the table listed in the Name field. For example, for joinnode Service Manager displays the fields from the device and node tables. 9. For Caption, type the name you want Service Manager to use when publishing the field as a web service field. For example, OSVendor. Caution: The Caption name must match the object name you listed in the XSL transformation file in Universal CMDB, or Service Manager will not receive any CI updates from your Universal CMDB system. 10. Click Save. The new web service field is available immediately; you do not need to restart the Service Manager system. HP Service Manager (Service Manager 9.40; Universal CMDB or later) Page 149 of 273

150 Chapter 5: Tailoring the Integration How to Add a Managed Field to Support the CI Attribute In order for a CI attribute you add to the integration to trigger the automated Change Management validation and verification processes, you must add a managed field for the CI attribute. Service Manager managed fields are part of the Discovery Event Manager Rules. For a list of fields that trigger Change Management validation and verification, see "Service Manager Discovery Event Manager Rules" on page 127. To add a managed field to the integration: 1. Log in to Service Manager with an administrator account. 2. Navigate to Tailoring > Web Services > Discovered Event Manager Rules. Service Manager displays a record search/creation form. 3. Click Search to display a list of all Discovery Event Manager rules. HP Service Manager (Service Manager 9.40; Universal CMDB or later) Page 150 of 273
151 Chapter 5: Tailoring the Integration 4. Select the rule ID that matches the web services object where you mapped the incoming CI attribute. For example, ucmdbnode. See "How to Create a Web Service Field to Support the CI Attribute" on page 148. Service Manager displays the rules for this web service object. 5. Click the Managed Fields tab. Service Manager displays the list of fields that trigger Change Management validation and verification. 6. Select an empty row in the Managed Fields list. 7. For Field Name, select the caption name of the Service Manager column that you previously selected to store the incoming CI attribute values. For example, Os Manufacturer. Note: Service Manager displays the fields from all join tables associated with the table listed in the Table Name field. For example, joinnode displays fields from the device and computer tables. Tip: If you want to add all fields that are exposed in the WSDL definition, you can click the Load Fields button. For more information, see "How do I Use the Load Fields Button to Add Multiple Managed Fields" on page If the field you use to store the incoming CI attribute is an array of structure, use the Structure field to select the name of the array of structure where the column can be found. For example, Os Manufacturer is a primitive character field and therefore does not need to identify an array of structure name. 9. If the field you use to store the incoming CI attribute is an array of structure, use the Index field to select the index number that identifies the column in the array of structure. For example, Os Manufacturer is a primitive character field and therefore does not need to identify an array of structure index. 10. Click Save. HP Service Manager (Service Manager 9.40; Universal CMDB or later) Page 151 of 273

152 Chapter 5: Tailoring the Integration How to Map the CI Attribute to a Web Service Field The integration uses an adapter to transform UCMDB CI attributes to web services objects recognized by Service Manager. The adapter in turn specifies what XSL transformation files the integration should use to convert UCMDB queries into properly formatted Service Manager web services messages. Out-of-the-box, each integration query has a corresponding XSL transformation file that maps to a particular CI type in UCMDB. In addition, each attribute for which you enabled calculation requires its own entry in the XSL transformation file. Without an XSL transformation entry, Service Manager cannot receive any CI attribute updates from your UCMDB system. If you want to add a new attribute to the integration, you must edit the XSL transformation file for the parent CI type and add an entry for the CI attribute. For information about which CI types each query manages, see "Queries for Push" on page 116. In order to create a proper XSL mapping, you must be familiar with the service and object names Service Manager publishes as web services. For information HP Service Manager (Service Manager 9.40; Universal CMDB or later) Page 152 of 273
153 Chapter 5: Tailoring the Integration on publishing tables and columns as web service objects, see the Service Manager Web Services Guide available from the Service Manager help. The following steps illustrate how to map a UCMDB CI attribute called host_vendor to a Service Manager web service object called OSVendor. To map a CI attribute to a web service field: 1. Log in to UCMDB as an administrator. 2. Navigate to Data Flow Management > Adapter Management > ServiceManagerAdapter9-x > Configuration Files. 3. Double-click the XSL transformation file that manages the parent CI type of your CI attribute. For example, open computer_push.xslt to add an attribute to the SM Computer Push query. 4. Find the element that defines the Service Manager table name where the integration will store CI attribute values. For example, the element <file.device> will store CI attributes in the Service Manager device table. 5. Within the table naming element (<file.device>), you will see an element of the following format that defines how to transform each UCMDB CI attribute into a web service object: <xsl:for-each select="@ci_attribute_name"> <SMAttributeName><xsl:value-of select="."/></smattributename> is the name of attribute in the UCMDB system. SMAttributeName is the name of a web service attribute published by the Service Manager system. Caution: The web service attribute name is case-sensitive. CI attributes in the computer_push.xslt XSL transformation file are illustrated in the following screenshot: HP Service Manager (Service Manager 9.40; Universal CMDB or later) Page 153 of 273

154 Chapter 5: Tailoring the Integration CI attributes in the sm_node_attributes.xslt XSL transformation file are illustrated in the following screenshot: HP Service Manager (Service Manager 9.40; Universal CMDB or later) Page 154 of 273

155 Chapter 5: Tailoring the Integration Matching CI attributes in the ucmdbnode web service are illustrated in the following screenshot: HP Service Manager (Service Manager 9.40; Universal CMDB or later) Page 155 of 273
156 Chapter 5: Tailoring the Integration 6. Copy an existing XSL transformation element to use it as a template to create a new transformation entry. 7. Paste the new XSL transformation element within the proper table naming element. For example, <file.node>. 8. Update the CI attribute name and web service object name within the new element to match the attribute you want to add to the integration. For example, create the following XSL transformation element to add an attribute to the integration. <xsl:for-each select="@os_vendor"> <OSVendor><xsl:value-of select="."/></osvendor> </xsl:for-each> HP Service Manager (Service Manager 9.40; Universal CMDB or later) Page 156 of 273

157 Chapter 5: Tailoring the Integration New attribute in the computer_push.xslt XSL transformation file is illustrated in the following screenshot: 9. Save the XSL transformation file. Note: When you create/edit and then save a configuration file in Adapter Management, UCMDB automatically restarts the adapter with the new configuration file. How to Add a CI Type to the Integration for Data Push You can use the following steps to add a CI type to the integration. HP Service Manager (Service Manager 9.40; Universal CMDB or later) Page 157 of 273
158 Chapter 5: Tailoring the Integration 1. Does the CI type already exist in the UCMDB class model? Yes. Go to Step 3. No. Go to Step Add the CI type to the UCMDB class model. See "How to Add the CI Type to the UCMDB Class Model" below. 3. Add CI attributes to the CI type as needed. See "How to Add a CI Attribute to the Integration for Data Push" on page Create a query to synchronize the CI type. See "How to Create a Query to Synchronize the CI Type" on page Add the CI type s attributes to the query layout. See "How to Add the CI Type s Attributes to the Query Layout" on page Add the CI type to Service ManagerService Manager. See "How to Add the CI Type in Service Manager" on page Create web service fields to support the CI type. See "How to Create Web Service Fields to Support the CI Type" on page Add managed fields to support the CI type. See "How to Add Managed Fields to Support the CI Type" on page Map the CI type s query to an XSL transformation file. See "How to Map the CI Type s Query to an XSL Transformation File" on page Map the CI type s attributes to web service fields. See "How to Map the CI Type s Attributes to Web Service Fields" on page Add custom queries to integration data push jobs. See "How to Add Custom queries to Data Push Jobs" on page 190. How to Add the CI Type to the UCMDB Class Model Before creating a new UCMDB CI type, you should determine if there are any existing CI types in your UCMDB system that provide the CI attributes you want. In most cases, you can create links to one or more existing CI types to create a new logical CI type for use by the integration. The following steps illustrate how to create a new CI type called SM RDBMS based on an existing CI type called database. HP Service Manager (Service Manager 9.40; Universal CMDB or later) Page 158 of 273
159 Chapter 5: Tailoring the Integration Note: The integration does not require any special steps to add a CI type to the UCMDB class model. You can use the standard CI type creation procedures to add a CI type. For more information on CI type creation, see the HP Universal CMDB CI Attribute Customization Guide. To add a CI type to the UCMDB class model: 1. Log in to UCMDB as an administrator. 2. Navigate to Modeling > CI Type Manager. 3. Select the base CI type you want to use for your new CI type from the CI Types navigation tree: Managed Object > ConfigurationItem > Infrastructure Element > Running Software > Database. 4. Click the New button. The Create Configuration Item Type window opens. 5. In Name, type the unique name you want to use for the new CI type. For example, sm_rdbms. Caution: The name cannot include any of the following characters: / \ [ ] : < > + = ;,? *. 6. In Display Name, type the name you want UCMDB to display in the interface. For example, SM RDBMS. 7. In Description, type a description of the new CI type. This is an optional field. For example, Hosts running relational databases. 8. In Base CI Type, verify that the proper base CI type is selected. Your new CI type will inherit the attributes of the base CI type you select here. For example, Database. 9. Click Next. The wizard displays a list of CI attributes from the base CI type. 10. Add, edit, or remove CI attributes as needed for the new CI type. For example, accept the default attributes inherited from Database. 11. Click Next. The wizard displays a list of qualifiers from the base CI type. 12. Add or remove qualifiers as needed for the new CI type. For example, accept the default qualifiers. 13. Click Next. The wizard displays a list of icons associated with the CI type. 14. Select the icons associated with this CI type. For example, accept the default abstract class icon. HP Service Manager (Service Manager 9.40; Universal CMDB or later) Page 159 of 273

160 Chapter 5: Tailoring the Integration 15. Click Next to add any menu item properties or label definitions as needed. For example, accept the default settings from the base CI type. 16. Click Finish to create the CI type. 17. Select your new CI type from the tree. For example, SM RDBMS. 18. Browse to an existing CI type you want to link to, and control-click it to add it to your selection. For example, Node. Note: Choose an existing CI type that has the attributes that you want to be part of your new logical CI type. 19. Right-click one of the selected CI types, and click Add/Remove Relationship. The Relationships window opens. 20. Create an SM Link relationship from the existing CI type to the new CI type. For example, from Node to SM RDBMS. Note: You need to create a new SM Link relationship if it does not exist. HP Service Manager (Service Manager 9.40; Universal CMDB or later) Page 160 of 273

161 Chapter 5: Tailoring the Integration 21. Click OK to create the relationship. 22. Click the Save button to save the CI type. How to Create a Query to Synchronize the CI Type The integration uses queries to gather CI attribute values and pass them to your Service Manager system. You must create a query for any CI type you add to the integration. Any query you create must conform to the "Query Requirements" on page 120. The following steps illustrate how to create a new query called rdbmsdata for the SM RDBMS CI type described in previous sections. 1. Log in to UCMDB as an administrator. 2. Navigate to Modeling > Modeling Studio. 3. From the Queries navigation tree, click Integration > SM Sync. 4. Right-click SM Sync, and select the New > Query. The Query Definition window opens. 5. Find the CI type that will be the root node of your query from the CI Type Selector. This CI type is typically the one that provides the most attributes for the CI. For example, Managed Object > ConfigurationItem > InfrastructureElement > RunningSoftware > Database > SM RDBMS. HP Service Manager (Service Manager 9.40; Universal CMDB or later) Page 161 of 273
162 Chapter 5: Tailoring the Integration 6. Drag the root CI type from the CI Type Selector and drop it into the empty Editing pane. UCMDB displays the icon of the CI type. 7. Select the CI type, and click Edit from the Information Pane. The Node properties window opens. 8. Change the Element name to Root. HP Service Manager (Service Manager 9.40; Universal CMDB or later) Page 162 of 273
163 Chapter 5: Tailoring the Integration 9. Click OK to save the node properties. 10. Find any additional CI types you want to add to the query from the CI Type Selector. These CI types typically provide additional CI attributes. For example, Managed Object > ConfigurationItem > Infrastructure Element > Node. 11. Drag the additional CI type from the CI Type Selector and drop it into the empty Editing pane. UCMDB displays the icon of the additional CI type. HP Service Manager (Service Manager 9.40; Universal CMDB or later) Page 163 of 273

164 Chapter 5: Tailoring the Integration 12. Create relationships between the Root CI type and the additional CI types as needed. For example, create an SM Link between Root and Node. a. Select Root and control-click the additional CI type. For example, Node. b. Right-click one of the selected items, and click Add Relationship. The Add Relationship window opens. c. Select SM Link. d. Type a Relationship Name. For example SM Link. e. Click OK to add the relationship. 13. Repeat step 10 to step 12 for each additional CI type you want to add to the query. For example, SM RDBMS does not need any additional CI types. HP Service Manager (Service Manager 9.40; Universal CMDB or later) Page 164 of 273
165 Chapter 5: Tailoring the Integration 14. Click the Save button to save the query. 15. In Query Name, type the unique name you want to use for the new query. For example, rdbmsdata. 16. In Description, type a description of the new query. This is an optional field. For example, Query for hosts running relational databases. 17. In the folder tree, select the folder in which you want to save the query. For example, Root > Integration > SM Sync. 18. Click OK. UCMDB adds your new query to the Queries list. How to Add the CI Type s Attributes to the Query Layout To add a CI attribute to the integration, you must enable the calculation layout setting from the query that synchronizes the CI type. Because you must enable calculation for each attribute you want to add to the integration, you should be familiar with the integration CI types and the CI attributes that they contain. Tip: Keep a list of the attributes that you enable, because you will need to create a matching XSL transformation for each one. HP Service Manager (Service Manager 9.40; Universal CMDB or later) Page 165 of 273
166 Chapter 5: Tailoring the Integration The following steps illustrate how to enable calculation for attributes of the SM RDBMS CI type described in previous sections. To add a CI type s attributes to the query layout: 1. Log in to UCMDB as an administrator. 2. Navigate to Modeling > Modeling Studio. 3. From the Queries navigation tree, click Integration > SM Sync. 4. Select the query that manages the CI type whose attributes you want to add to the integration. For example, rdbmsdata. UCMDB displays the query for the integration. 5. Select the Root node from the query layout, and then click the Edit button from the Information Pane. The Node properties window opens. Caution: Your integration query must contain a node called Root. See "Query Requirements" on page 120 for more information. 6. Click the Element Layout tab, and select the option Select attributes for layout. 7. Select Specific Attributes from the Attributes condition list, and from the Available Attributes list select each CI attribute you want to add to the Specific Attributes list. For example, select the Product Name, Application Version Description, Vendor, Version, Description, The Database Instance Name, and Port attributes. HP Service Manager (Service Manager 9.40; Universal CMDB or later) Page 166 of 273

167 Chapter 5: Tailoring the Integration 8. Click OK to save the query node properties. 9. Select any additional nodes that contain CI attributes you want to add to the integration. For example, Node. 10. Click the Edit button from the Information Pane. The Node properties window opens. 11. Click Element Layout tab, and select the option Select attributes for layout. 12. Select Specific Attributes in Attributes condition, and from the Available Attributes list select each CI attribute you want to add to the Specific Attributes list. For example, select attributes for the OS Vendor, and name attributes. 13. Click OK to save the query node properties. 14. Repeat step 9 to step 13 for each additional node that contains CI attributes that you want to add to the integration. HP Service Manager (Service Manager 9.40; Universal CMDB or later) Page 167 of 273
168 Chapter 5: Tailoring the Integration 15. Click the Save button to save the query. How to Add the CI Type in Service Manager Before creating a new Service Manager CI type, you should determine if there are any existing CI types in your Service Manager system that provide the CI attributes you want. In most cases, you can reuse the existing CI types for the integration. The integration does not require any special steps to add a CI type to Service Manager. You can use the standard CI type creation procedures to add a CI type. For more information on CI type creation, see the HP Service Manager online help. To add a new CI type in Service Manager: 1. Create a table for storing the specific attributes of this new CI type. 2. Create a join definition to join the device table. 3. Create an erddef definition that defines a relationship between the two tables. 4. Create a view form and a bulk update form for the new CI type. 5. Add the CI type. The following steps illustrate how to create a new CI type called RDBMS. Note: This example is provided only as an illustration of the steps. The best practice is to reuse the existing Service Manager CI type RunningSoftware to map with UCMDB CI type SM RDBMS. To create a table in Service Manager: 1. Log in to Service Manager as a system administrator. 2. Navigate to Tailoring > Database Dictionary. 3. In File Name, type the table name you want to add. For example, rdbms. 4. Click the New button. 5. Click the Fields tab. 6. Click the New Field/Key button. The Add Field window opens. HP Service Manager (Service Manager 9.40; Universal CMDB or later) Page 168 of 273
169 Chapter 5: Tailoring the Integration 7. In Name, type a field name you want to add. For example, logical.name, which is mandatory for joining the device table. Caution: The name cannot include any of the following characters: ' / \ [ ] : < > + = ;,? *. 8. In Type, select a type from the list. For example, select character. 9. Click the Add Field button to save the attribute. 10. Repeat step 7 to step 9 for each attribute you wish to add. For example, dbinstance and port. 11. Click the Keys tab. 12. Place the cursor on the first line of the structure, and click the New Field/Key button. The Add Key window opens. 13. In Type, select unique from the list. 14. In Fields list, type the name of a field that you want to use as the unique key. For example, logical.name. 15. Click Add Key button to save the key. 16. Click the OKbutton to save attribute changes to the table. To create a join definition in Service Manager: 1. Log in to Service Manager as a system administrator. 2. Navigate to Tailoring > Database Manager. 3. In Table, type the table name joindefs. 4. Click the Search button. 5. In Join Table Name, type a name for the join definition. For example, joinrdbms. 6. In File Names, select the names of the tables to join. For example, device and rdbms. 7. Click Add to save the join definition. To create an ERD definition in Service Manager: HP Service Manager (Service Manager 9.40; Universal CMDB or later) Page 169 of 273
170 Chapter 5: Tailoring the Integration 1. Log in to Service Manager as a system administrator. 2. Navigate to Tailoring > Database Manager. 3. In Table, type the table name erddef. 4. Click the Search button. 5. In First Filename, type the name of the first table of the join definition. For example, device. 6. In Second Filename, type the name of the second table of the join definition. For example, rdbms. 7. In Relationship type, select a value from the list. For example, One to One. 8. In Field Names from First Filename, add the unique field name of first table. For example, logical.name. 9. In Field Names from Second Filename, add the unique field name of the second table. For example, logical.name. 10. Click the Add button to save the ERD definition. To create forms for view and bulk update in Service Manager: Create a view form named configurationitemrdbms, and a bulk update form named device.rdbms.bulkupdate. You can create them in Forms Designer based on existing view forms and bulk update forms. To view the form names of an existing CI type in Service Manager, click Configuration Management > Resources > Device Types > Search, and then open the CI type record. To access Forms Designer in Service Manager, type fd in the command line or go to Tailoring > Forms Designer. For more information about creating forms in Service Manager, see the Service Manager online help and the Tailoring Best Practices Guide. To add a CI type to Service Manager: 1. Log in to Service Manager as a system administrator. 2. Navigate to Configuration Management > Administration > Add New Device Type, and click Next. 3. In Device Type Name, type a descriptive name for the new CI type. For example, RDBMS. 4. In Device Type, type a name for the new CI type. For example, rdbms. HP Service Manager (Service Manager 9.40; Universal CMDB or later) Page 170 of 273
171 Chapter 5: Tailoring the Integration 5. Click Next. 6. In View Form, type the name of the view form you created for the new CI type. For example, configurationitemrdbms. 7. In Bulk Update Form, type the name of the bulk update form you created for the new CI type. For example, device.rdbms.bulkupdate. 8. Click Next. 9. In Attribute File, select the table you created for the CI type. For example, rdbms. 10. Click Next. 11. Click Next to keep the default setting for Fields Specific to the Attribute File. 12. In Join Def Record, select the join definition you created for this CI type. For example, joinrdbms. 13. Click Next. 14. In Subtypes, add necessary subtypes for the CI type. For example, Oracle and SQL Server. 15. Click Next. 16. Check the Activate Device Type check box. 17. Click Next to save the new CI type. How to Create Web Service Fields to Support the CI Type In order to add a CI type to the integration, you must create a Service Manager web service object for each CI attribute for which you created an XSL transformation on the UCMDB system. Service Manager uses the web service object to determine which Service Manager table and column to store the incoming CI attribute values. The following steps illustrate how to create a web service object necessary to support the SM RDBMS CI type described in previous sections. Note: This example of creating a new web service object (ucmdbrdbms) is provided only as an illustration of the steps. The best practice is to reuse the existing Service Manager web service object ucmdbrunningsoftware to map with Universal CMDB CI type SM RDBMS. To create web service fields to support your new CI type: HP Service Manager (Service Manager 9.40; Universal CMDB or later) Page 171 of 273
172 Chapter 5: Tailoring the Integration 1. Log in to Service Manager with an administrator account. 2. Navigate to Tailoring > Web Services > WSDL Configuration. 3. In Service Name, type ucmdbintegration. 4. In Name, select the name of the join file you have created for the new CI type. For example, joinrdbms. 5. In Object Name, type a name. For example, ucmdbrdbms. 6. Click the Allowed Actions tab, and specify the actions as shown in the following figure. Caution: For UCMDB integration WSDL configurations, be sure to use the Create only action type for the add and save actions, and Application Pass Through for the delete action. For more information about the action types, see the Service Manager Web Services Guide. 7. Click Add to create the WSDL configuration. 8. Click the Fields tab, select fields from the list and type a caption for each of them, as shown in the following figure. HP Service Manager (Service Manager 9.40; Universal CMDB or later) Page 172 of 273

173 Chapter 5: Tailoring the Integration 9. Click Save to save WSDL configuration changes. The new web service fields are now available to the integration. How to Add Managed Fields to Support the CI Type In order for your custom CI type to trigger the automated Change Management validation and verification processes, you must add a managed field for each CI attribute within your CI type. Service Manager managed fields are part of the Discovery Event Manager Rules. For a list of fields that trigger Change Management validation and verification, see "Service Manager Discovery Event Manager Rules" on page 127. The following steps illustrate how to add the managed fields for the SM RDBMS CI type described in the previous sections. To add managed field to support your CI type: 1. Log in to Service Manager as a system administrator. 2. Navigate to Tailoring > Web Services > Discovered Event Manager Rules. 3. In ID, type the ID you want to create for the new Discovered Event Manager Rule. For example, ucmdbrdbms. HP Service Manager (Service Manager 9.40; Universal CMDB or later) Page 173 of 273
174 Chapter 5: Tailoring the Integration 4. In Table Name, select the table or join definition you want to associate to the new Discovered Event Manager Rule. For example, joinrdbms. 5. Click New. 6. Click Next. 7. Click the Managed Fields tab. Note: The list of fields you will add here will trigger Change Management validation and verification. 8. Select an empty row in the Managed Fields list. 9. For Field Name, select the caption names of the Service Manager fields that you previously selected to store the incoming CI attribute values. See "How to Create Web Service Fields to Support the CI Type" on page 171. Note: Service Manager displays the fields from all join tables associated with the table specified in the Table Name field. For example, for the joinrdbms table, the fields from the device and rdbms tables are available from the Field Name list. Tip: If you want to add all fields that are exposed in the WSDL definition, you can click the Load Fields button. For more information, see "How do I Use the Load Fields Button to Add Multiple Managed Fields" on page If the field you use to store the incoming CI attribute is an array of structure, use the Structure field to select the name of the array of structure where the column can be found. For example, Vendor is a primitive character field and therefore does not need to identify an array of structure name. 11. If the field you use to store the incoming CI attribute is an array of structure, use the Index field to select the index number that identifies the column in the array of structure. For example, Vendor is a primitive character field and therefore does not need to identify an array of structure index. HP Service Manager (Service Manager 9.40; Universal CMDB or later) Page 174 of 273

175 Chapter 5: Tailoring the Integration 12. Click Save. How to Map the CI Type s Query to an XSL Transformation File The integration uses a configuration file called smsyncconffile.xml to map each Universal CMDB query to an XSL transformation file. In order for custom queries to be part of the integration, you must add a mapping entry for each query in the configuration file. The following steps illustrate mapping the query rdbmsdata described in previous sections to the Service ManagerucmdbRDBMS web service. Tip: Wildcard support for query names in smsyncconffile.xml When adding a query name in the smsyncconffile.xml file, you can use a wildcard (an asterisk) in the query name. This is helpful in the debugging phase when you may have updated an out-of-thebox query and saved it as several query names. For example, if you have saved the <Query_name> query to <Query_name>_1, and <Query_name>_2, you can specify the query name as <Query_ name>* in the configuration file, and the integration will automatically use this mapping entry on all of the three queries. Note: Out-of-the-box, all query names in the smsyncconffile.xml file are suffixed with a wildcard (an asterisk). To map a query to an XSL transformation file: HP Service Manager (Service Manager 9.40; Universal CMDB or later) Page 175 of 273
176 Chapter 5: Tailoring the Integration 1. Log in to UCMDB as an administrator. 2. Navigate to Data Flow Management > Adapter Management > ServiceManagerAdapter9-x > Configuration Files. 3. Click the smsyncconffile.xml file. 4. Add a query mapping element to the file by copying an existing one. A query mapping element uses the following format: <tql name="query" xslfile="xsl_file"> <!-- Description of mapping --> <request type="create" name="create_web_service"/> <request type="update" name="update_web_service"/> <request type="delete" name="delete_web_service"/> </tql> Query is the name of the UCMDB query you created. XSL_File is the name of the XSL transformation file the integration will use to map Universal CMDB attributes to Service Manager web service fields. Create_web_service is the name of the Service Manager web service you want to the integration to use to create CIs from this query. Update_web_service is the name of the Service Manager web service you want to the integration to use to update CIs in this query. Delete_web_service is the name of the Service Manager web service you want to the integration to use to delete CIs from this query. See the following screenshot for an excerpt of smsynchconffile.xml: HP Service Manager (Service Manager 9.40; Universal CMDB or later) Page 176 of 273

177 Chapter 5: Tailoring the Integration 5. Add or update query mapping elements for each query you want to add to the integration. For example, the following query creates a mapping between the rdbmsdata query and the rdbms_ push.xslt file. <tql name="rdbmsdata" xslfile="rdbms_push.xslt"> <!-- this is database tql --> <request type="create" name="createucmdbrdbmsrequest"/> <request type="update" name="updateucmdbrdbmsrequest"/> <request type="delete" name="deleteucmdbrdbmsrequest"/> </tql> 6. Save the configuration file. Note: When you create/edit and then save a configuration file in Adapter Management, UCMDB automatically restarts the adapter with the new configuration file. How to Map the CI Type s Attributes to Web Service Fields The integration uses the Service Manager Adapter to transform UCMDB CI attributes to web services objects recognized by Service Manager. The Service Manager Adapter Service Manager Adapter uses XSL transformation files to convert UCMDB queries into a properly formatted Service Manager web HP Service Manager (Service Manager 9.40; Universal CMDB or later) Page 177 of 273
178 Chapter 5: Tailoring the Integration services messages. Out-of-the-box, each integration query has a corresponding XSL transformation file. In addition, each attribute you enable for synchronization from Advanced layout settings requires its own entry in the XSL transformation file. If you want to add a CI type to the integration, you must create a matching XSL transformation file that defines how the Service Manager Adapter transforms each CI type into a Service Manager web service object. See "Integration queries" on page 115 for information about which CI types each query manages. In order to create a proper XSL mapping, you must be familiar with the service and object names Service Manager publishes as Web services. See the Service Manager help for information on publishing tables and columns as Web service objects. The following steps illustrate creating an XSL transformation file for the rdbmsdata query described in previous sections. To map a CI type s attributes to web service fields: 1. Log in to UCMDB with an administrator account. 2. Navigate to Data Flow Management > Adapter Management. 3. Click the Create New Resource button. 4. Select New Configuration File. 5. Select the ServiceManagerAdapter9-x package. 6. Enter the full file name: <AdapterID>/<filename>. For example, ServiceManagerAdapter9- x/rdbms_push.xslt. 7. Copy the content of an existing XSL transformation file (for example, runningsoftware_ push.xslt) to the new XSL transformation file. 8. Find the CI type definition element in the new file. The CI type definition element uses the following format: <xsl:template match="/ci_type_name"> CI_type_name is the name of CI type in the UCMDB system. The following is an example from the runningsoftware_push.xslt file: <xsl:template match="/running_software"> 9. Update the CI type name to match the CI type you want to add to the integration. For example, create the following CI type definition element to add the database CI type to the integration. HP Service Manager (Service Manager 9.40; Universal CMDB or later) Page 178 of 273
179 Chapter 5: Tailoring the Integration <xsl:template match="/sm_rdbms"> 10. Add or update table naming elements as needed. By default, UCMDB sends CI attribute data to the Service Manager device table. If you want to send CI attributes to one of the join tables of device, you must add an element to specify the table name using the format <file.table_name>. For example, you do not need to specify an additional jointable to define a database CI type since Service Manager does not use a separate jointable to manage database CI types. 11. Find the elements that transform UCMDB CI attributes into Service Manager web service fields. The CI attribute transformation elements use the following format: <xsl:for-each select="@ci_attribute_name"> <WSFieldName><xsl:value-of select="."/></wsfieldname> is the name of attribute in the UCMDB system. WSFieldName is the name of a web service field published by the Service Manager system. The following figures show an example. CI attributes in runningsoftware_push.xslt shows one CI attribute named product_name is mapped to a web service field with a caption of ApplicationName; Mapping CI attributes in the ucmdbrunningsoftware web service object shows the web service field name and caption defined in the ucmdbrunningsoftware web service object; Mapping CI attributes in the UCMDB RunningSoftware CI type shows how the product_name attribute is mapped in the RunningSoftware CI type in UCMDB. See the following screenshot for CI attributes in runningsoftware_push.xslt: HP Service Manager (Service Manager 9.40; Universal CMDB or later) Page 179 of 273

180 Chapter 5: Tailoring the Integration Refer to the following screenshot to map CI attributes in the ucmdbrunningsoftware web service object: HP Service Manager (Service Manager 9.40; Universal CMDB or later) Page 180 of 273

181 Chapter 5: Tailoring the Integration Refer to the following screenshot to map CI attributes in the UCMDBRunningSoftware CI type: HP Service Manager (Service Manager 9.40; Universal CMDB or later) Page 181 of 273

182 Chapter 5: Tailoring the Integration 12. Add or update CI attribute transformation elements for each CI attribute you want to add to the integration. For example, create the following XSL transformation elements for the database CI type. Sample XSL transformation elements for database CIs UCMDBattribute port Sample transformation elements <xsl:for-each </xsl:for-each> <Port><xsl:value-of select="."/></port> database_dbsid <xsl:for-each </xsl:for-each> <DBInstance><xsl:value-of select="."/></dbinstance> description <xsl:for-each <Description><xsl:value-of select="."/> </Description> </xsl:for-each> HP Service Manager (Service Manager 9.40; Universal CMDB or later) Page 182 of 273

183 Chapter 5: Tailoring the Integration New attribute mappings in rdbms_push.xslt are illustrated in the following screenshot: 13. Save the new XSL transformation file. Note: When you create/edit and then save a configuration file in Adapter Management, UCMDB automatically restarts the adapter with the new configuration file. HP Service Manager (Service Manager 9.40; Universal CMDB or later) Page 183 of 273
184 Chapter 5: Tailoring the Integration How to Add a CI Type s Relationship Types to the Integration for Data Push Once you have added a new CI type to the integration and have created relationships between it and other CI types in UCMDB, for each of these relationship types you need to perform the following tasks so that UCMDB can push the relationships to Service Manager. As an example, the following steps illustrate how you add a relationship type named Ownership (between the Cost and CostCategory CI types) to the integration for data push. These steps assume that you have already added the Cost and CostCategory CI types to the integration and have created an Ownership relationship between them in UCMDB. 1. Add a mapping entry for each relationship type in the push relationship mapping definition file. See "How to Add a Push Mapping Entry for Each Relationship Type of the CI Type" below. 2. Create a query to push relationships of the CI type. See "How to Create a Query to Push Each Relationship Type of the CI Type" on the next page. 3. Map the relationship query to an XSL transformation file in the push configuration file. See "How to Map Each Relationship Type Query to an XSL Transformation File" on page 188. How to Add a Push Mapping Entry for Each Relationship Type of the CI Type For data push, the SM_CIT_Subtype_list.xml file defines how UCMDB relationship types are mapped to SM ones. Note: This XML file can be found from Adapter Management > ServiceManagerAdapter9-x > Configuration Files. If this file does not contain a mapping entry for a new relationship type, you need to add an entry for it. To add a push mapping entry for the Ownership relationship type: 1. Log in to UCMDB as an administrator. 2. Navigate to Data Flow Management > Adapter Management > ServiceManagerAdapter9-x > Configuration Files. 3. Double-click the SM_CIT_Subtype_list.xml file. HP Service Manager (Service Manager 9.40; Universal CMDB or later) Page 184 of 273

185 Chapter 5: Tailoring the Integration 4. Go to the RelationshipType list section, and add a mapping entry for Ownership. <list name="relationshiptype"> <!--ucmdb is link display lable, ucmdbtype is link type, sm is the relationship type. compound link will use root_* as the lable --> <entry ucmdb="aggregation" ucmdbtype="aggregation" sm="aggregation" />... <entry ucmdb="ownership" ucmdbtype="ownership" sm="ownership" />... </list> Where: ucmdb: the display name of the UCMDB relationship type (see Name and Display Name of Ownership). ucmdbtype: the name of the UCMDB relationship type (see Name and Display Name of Ownership). sm: the name of the relationship type in Service Manager. Name and Display Name of Ownership are illustrated in the following screenshot: 5. Click OK to save the file. How to Create a Query to Push Each Relationship Type of the CI Type Once you have created CI Relationship types for the new CI type, you must create a query for each relationship type to push it to Service Manager. HP Service Manager (Service Manager 9.40; Universal CMDB or later) Page 185 of 273

186 Chapter 5: Tailoring the Integration Note: Any query you create must conform to the "Query Requirements" on page 120. To create a new query called cost_costcategory_ownership_relation_push for Ownership relationships between the Cost and CostCategory CI types: 1. Log in to UCMDB as an administrator. 2. Navigate to Modeling > Modeling Studio. 3. Click New > Query. The Query Definition pane displays. 4. From the CI Type Selector, drag the Cost and CostCategory CI types to the query pane. 5. Create an Ownership relationship from Cost to CostCategory. a. Click the Create Relationship button. b. Click the Cost node, and drag the arrow from it to the CostCategory node. c. Select Regular Relationship, and click OK. d. Select Connection > Ownership, and click OK. An Ownership relationship is created between HP Service Manager (Service Manager 9.40; Universal CMDB or later) Page 186 of 273
, and then click OK. 8.")

187 Chapter 5: Tailoring the Integration the CI types. 6. Right-click the relationship arrow, and select Relationship Properties. 7. Change the element name from Ownership to Root (or a name starting with Root_ ), and then click OK. 8. Click the Save button, and save the query as described in the following. a. Enter a query name. For example, cost_costcategory_ownership_relation_push. b. Select the Integration > SM Sync > 9.xx folder. HP Service Manager (Service Manager 9.40; Universal CMDB or later) Page 187 of 273

188 Chapter 5: Tailoring the Integration c. Click OK. The query is now created. You are ready to map this query to an XSL transformation file. How to Map Each Relationship Type Query to an XSL Transformation File Once you have created a query for a relationship type, you need to map the query to an XSL transformation file as described in the following steps. Tip: Out-of-the-box, there is a common XSL transformation file (common_relations.xslt), which is used for pushing all types of CI relationships. For this reason, you do not need to create a new XSL transformation file; instead, you only need to map the new relationship query to this existing XSLT file. 1. Navigate to Data Flow Management > Adapter Management > ServiceManagerAdapter9-x > Configuration Files. 2. Click the smsyncconffile.xml file. 3. Add a query mapping entry by copying an existing one for relationship push. For example, copy the following query mapping entry. <tql name="sm Layer2 Topology Relations Push*" xslfile="common_relations.xslt"> HP Service Manager (Service Manager 9.40; Universal CMDB or later) Page 188 of 273

189 Chapter 5: Tailoring the Integration </tql> <request type="create" name="createrelationship"/> <request type="update" name="updaterelationship"/> <request type="delete" name="deleterelationship"/> 4. Change the query name to the name of the query you created for the relationship type. For example, cost_costcategory_ownership_relation_push. <tql name="cost_costcategory_ownership_relation_push" xslfile="common_ relations.xslt"> </tql> <request type="create" name="createrelationship"/> <request type="update" name="updaterelationship"/> <request type="delete" name="deleterelationship"/> 5. Click OK to save the configuration file. Now, you have added the new relationship type to the integration. Next, you need to add the new relationship query to a data push job (see the following figure and "How to Add Custom queries to Data Push Jobs" on the next page). Refer to the following screenshot to add a new relationship query to a data push job. HP Service Manager (Service Manager 9.40; Universal CMDB or later) Page 189 of 273
190 Chapter 5: Tailoring the Integration How to Add Custom queries to Data Push Jobs In order for the integration to send your custom CI types and attributes to your Service Manager system, you must add your custom queries to the data push job between your Changes data store and your Service Manager data store. The following steps illustrate how to add an custom query named rdbmsdata, which is described in the previous sections. To add custom queries to a data push job: 1. Log in to UCMDB as an administrator. 2. Navigate to Data Flow Management > Integration Studio. 3. Click the name of your Service Manager integration point. For example, SM Integration. 4. Click the Data Push tab. 5. Click the name of your data push job. For example, SM Configuration Item Push job. 6. Click the Edit button. 7. Click the Add button. 8. Click Integration > SM Sync > rdbmsdata. 9. Click OK to add the custom query. 10. Enable the Allow Integration Job to delete removed data option for the query. 11. Click OK to close the Update Job Definition window. How to Add a CI Attribute to the Integration for Population To add a CI attribute to the integration for population, perform the following tasks: 1. Create a web service field to support the CI attribute. See "Create a Web Service Field to Support the CI Attribute" on the next page. 2. Map the CI attribute to the web service field. See "How to Map the CI Attribute to the Web Service Field" on the next page. HP Service Manager (Service Manager 9.40; Universal CMDB or later) Page 190 of 273
191 Chapter 5: Tailoring the Integration Create a Web Service Field to Support the CI Attribute UCMDB uses the Service Manager ucmdbintegration web service to retrieve CI data from Service Manager. This web service publishes the objects that match the out-of-the-box CI types and CI attributes provided by the UCMDB integration. If you want to populate an additional CI attribute from Service Manager to your Universal CMDB system, you must create a corresponding web service field on your Service Manager system to provide the CI data from Service Manager. Each web service field must map to a valid Service Manager table and column. For the steps of creating a web service field, see "How to Create a Web Service Field to Support the CI Attribute" on page 148. How to Map the CI Attribute to the Web Service Field The integration uses an adapter to transform Service Manager web service fields to Universal CMDB CI attributes. The adapter in turn specifies what XSL transformation files the integration should use to convert Service Manager web services messages into a properly formatted Universal CMDB CI and/or relationship. Out-of-the-box, each integration query has a corresponding XSL transformation file that maps to a particular CI type in Universal CMDB. Without an XSL transformation entry, Universal CMDB cannot receive any CI attribute updates from your Service Manager system. Unlike for the Push feature, you do not need to create real queries for Population on the UCMDB server. If you want to add a new attribute to the integration, you must edit the XSL transformation file for the parent CI type and add an entry for the CI attribute. For information about which CI types each population query manages, see "Integration queries" on page 115. In order to create a proper XSL mapping, you must be familiar with the service and object names that Service Manager publishes as Web services. For information on publishing tables and columns as Web service fields, see the Service Manager help. The following steps illustrate how to map a UCMDB CI attribute called host_vendor to a Service Manager web service field called OSVendor. To map a CI attribute to a web service field: 1. Log in to UCMDB as an administrator. 2. Navigate to Data Flow Management > Adapter Management. HP Service Manager (Service Manager 9.40; Universal CMDB or later) Page 191 of 273
192 Chapter 5: Tailoring the Integration 3. Navigate to the Service Manager Adapter configuration files path: ServiceManagerAdapter9-x > Configuration Files. 4. Click the XSL transformation file that manages the parent CI type of your CI attribute. For example, open computer_population.xslt to add an attribute to the SM Computer Population query. 5. Find the element that defines the name of the Universal CMDB CI Type where the integration will store CI attribute values. For example, the element <ci class="node"> will store CI attributes in the Universal CMDB Node CI Type. 6. Within the ci naming element (<ci class="node">), you will see an element of the following format that defines how to transform each web service field into an Universal CMDB CI attribute: <attribute name="ucmdb_ci_attribute_name" type="ucmdb_ci_attribute_type" ignoreciifempty="true"> <xsl:value-of select="smattributename "/></attribute> UCMDB_CI_attribute_name is the name of attribute in the Universal CMDB system. UCMDB_CI_attribute_type is the type of attribute of the Universal CMDB system which this integration supports. Currently the following types are supported: String, StringList, Integer, Long, Double, Boolean, IPAddress, Date, Float, and IntList. ignoreciifempty is a parameter that specifies whether or not to ignore the CI during population if this attribute has an empty value (true: ignore; false: not ignore). Note: A StringList is a list of strings separated by a semicolon (;). For example, str1;str2;str3. An IntList is a list of integers separated by a semicolon (;). For example, 1;2;3. For information about time zone and date format configuration of the Date type, see "How to Update the Time Zone and Date Format for the Integration Adapter" on page 33. SMAttributeName is the name of a web service attribute published by the Service Manager system. CI attributes in the computer_population.xslt file are illustrated in the following screenshot: HP Service Manager (Service Manager 9.40; Universal CMDB or later) Page 192 of 273

193 Chapter 5: Tailoring the Integration Refer to the following screenshot to match CI attributes in the ucmdbnode web service object: 7. Copy an existing XSL transformation element to use it as a template to create a new transformation entry. HP Service Manager (Service Manager 9.40; Universal CMDB or later) Page 193 of 273

194 Chapter 5: Tailoring the Integration 8. Paste the new XSL transformation element within the proper table naming element. For example, <ci class="node">. 9. Update the CI attribute name and web service field name within the new element to match the attribute you want to add to the integration. For example, create the following XSL transformation element to add the os_vendor attribute to the integration. <attribute name="os_vendor" type="string"><xsl:value-of select="file.node/osvendor"/></attribute> New attribute in the computer_population.xslt file is illustrated in the following screenshot: 10. Save the XSL transformation file. When you create/edit and then save a configuration file in Adapter Management, UCMDB automatically restarts the adapter with the new configuration file. How to Add a CI Type to the Integration for Population You can use the following steps to add a CI type to the integration for population. 1. Create a query to populate the CI type. See "Create a Query to Populate the CI Type" on the next page. 2. Map the CI type's query to an XSL transformation file. See "How to Map the CI type's Query to an XSL Transformation File" on the next page. 3. Map the CI type's attributes to web service fields. See "How to Map the CI Type's Attributes to Web Service Fields" on page 200. HP Service Manager (Service Manager 9.40; Universal CMDB or later) Page 194 of 273
195 Chapter 5: Tailoring the Integration Create a Query to Populate the CI Type Unlike for push, for population the integration does not require you to create custom queries in Universal CMDB to save CI attribute values. The population feature only needs the smpopconffile.xml file and population XSL transformation files to synchronize CI/CI Relationship types and attributes; however for each CI/CI Relationship type you still need to define a query mapping in the smpopconffile.xml file, and the query does not necessarily have to exist in UCMDB. It is simply a query name, which will appear in the query list when you add queries to a population job. HP still recommends you to create queries to help you better understand what CI types or attributes are part of population. For information on how to create a query in UCMDB, see "How to Create a Query to Synchronize the CI Type" on page 161. How to Map the CI type's Query to an XSL Transformation File The integration uses a configuration file called smpopconffile.xml to map each Universal CMDB query to an XSL transformation file. In order for custom queries to be part of the integration, you must add a mapping entry for each query in the configuration file. To map the query rdbmsdata described in previous sections to the Service ManagerucmdbRDBMS web service: To map a query to an XSL transformation file: 1. Log in to UCMDB with an administrator account. 2. Navigate to Data Flow Management > Adapter Management > ServiceManagerAdapter9-x > Configuration Files > smpopconffile.xml. 3. Add a query mapping element by copying an existing one. A query mapping element uses the following format: <tql name="query" xslfile="xsl_file"> <request type="retrieve" datatype="data_type" retrievefilelist="retrieve_sm_tables" retrievekeysqueryname="retrieve_keys_web_service" retrievelistqueryname="retrieve_objects_web_service" HP Service Manager (Service Manager 9.40; Universal CMDB or later) Page 195 of 273
196 Chapter 5: Tailoring the Integration ballquerycondition="full_query_condition" changedupdatequerycondition="changed_update_condition" changeddeletionquerycondition="changed_deletion_condition"/> </tql> Query is a query name. The query does not have to exist in UCMDB. XSL_File is the name of the XSL transformation file that the integration will use to map Service Manager web service fields to Universal CMDB attributes. Data_Type is the type of the object retrieved from Service Manager. The possible values are ci and relationship. Retrieve_SM_Tables is the table name list in the Service Manager web service configuration; if you define the WSDL on a join definition, you need to list all the table names of the join definition to which the fields of XSLT mapping belongs; if you define the WSDL on a simple table, simply leave Retrieve_SM_Tables empty. You can also check this by opening the WSDL URL: server>:<port>/sm/7/<object name>.wsdl. For example, out-of-the-box, the instance type of ucmdbnode is as shown in the following figure, so the Retrieve_SM_Tables value is file.device, file.node. SM tables of the ucmdbnode instance type in the ucmdbnode WSDL are illustrated in the following screenshot: HP Service Manager (Service Manager 9.40; Universal CMDB or later) Page 196 of 273

197 Chapter 5: Tailoring the Integration Retrieve_keys_web_service is the name of the Service Manager web service that you want the integration to use to retrieve a CI Key list from Service Manager. Retrieve_Objects_web_service is the name of the Service Manager web service that you want the integration to use to retrieve a CI Object list from Service Manager. Basic_Query_Condition is an internal Query Condition of Service Manager that you want the integration to use to retrieve a CI list from Service Manager for a CI type; it is used as the basic condition for a full or changes population. HP Service Manager (Service Manager 9.40; Universal CMDB or later) Page 197 of 273

198 Chapter 5: Tailoring the Integration Full_Query_Condition is an additional internal Query Condition of Service Manager. Along with the Basic_Query_Condition, it is used to retrieve a list of all CIs from Service Manager for a full population. Changed_Update_Condition is an additional internal Query Condition of Service Manager; along with the Basic_Query_Condition, it is used to retrieve a list of updated CIs from Service Manager since the last job execution; it includes both updated CIs and newly created CIs. It is used for a changes population. Changed_Deletion_Condition is an additional internal Query Condition of Service Manager; along with the Basic_Query_Condition, it is used to retrieve a list of deleted CIs from Service Manager since the last job execution. It is used for a changes population. The following figure shows an excerpt of the smpopconffile.xml: 4. Add or update query mapping elements for each query you want to add to the integration. For example, the following query creates a mapping between the rdbmsdata query and the rdbms_ population.xslt file. <tql name="rdbmsdata" xslfile="rdbms_population.xslt"> <request type="retrieve" datatype="ci" retrievefilelist="file.device,file.rdbms" retrievekeysqueryname="retrieveucmdbrdbmskeyslistrequest" retrievelistqueryname="retrieveucmdbrdbmslistrequest" HP Service Manager (Service Manager 9.40; Universal CMDB or later) Page 198 of 273

199 Chapter 5: Tailoring the Integration basicquerycondition="type#"rdbms"" fullquerycondition="istatus~="disposed/retired"" changedupdatequerycondition="(devicemodtime>'{fromdate}' or (devicemodtime=null and created.by.date>'{fromdate}')) and istatus~="disposed/retired"" changeddeletionquerycondition="devicemodtime>'{fromdate}' and istatus="disposed/retired""/> </tql> The following figure shows the above-mentioned query mapping elements in the smpopconffile.xml file: The following figure shows an excerpt of the ucmdbrdbms WSDL for your reference: HP Service Manager (Service Manager 9.40; Universal CMDB or later) Page 199 of 273

200 Chapter 5: Tailoring the Integration 5. Save the configuration file. Note: When you create/edit and then save a configuration file in Adapter Management, UCMDB automatically restarts the adapter with the new configuration file. How to Map the CI Type's Attributes to Web Service Fields The integration uses the Service Manager Adapter to transform Service Manager web services objects to Universal CMDB CI attributes. The Service Manager Adapter uses XSL transformation files to convert a properly formatted Service Manager web services messages into Universal CMDB CI. Out-of-the-box, each integration query has a corresponding XSL transformation file. In addition, each attribute you want to populate to Universal CMDB requires its own entry in the XSL transformation file. HP Service Manager (Service Manager 9.40; Universal CMDB or later) Page 200 of 273
201 Chapter 5: Tailoring the Integration If you want to add a CI type to the integration, you must create a matching XSL transformation file that defines how the Service Manager Adapter transforms each Service Manager web service field into a CI type. In order to create a proper XSL mapping, you must be familiar with the service and object names that Service Manager publishes as Web services. For information on publishing tables and columns as Web service fields, see the Service Manager Web Services Guide. To create an XSL transformation file for the SM RDBMS CI type, which is described in previous sections: 1. Log in to UCMDB as an administrator. 2. Navigate to Data Flow Management > Adapter Management. 3. Click the Create new resource button. 4. Select New Configuration File. 5. Select the ServiceManagerAdapter9-x package. 6. Enter the full file name using this format: <AdapterID>/<filename>. For example, ServiceManagerAdapter9-x/rdbms_population.xslt. 7. Copy the content of an existing XSL transformation file to use it as a template to create the new transformation file. For example, copy the content of business_service_population.xslt to the new file. 8. Find the web service response name definition element, which uses the following format: <xsl:template match="/sm_webservice_response_name"> SM_WEBSERVICE_RESPONSE_NAME is the name of web service response in the Service Manager system. The following figure shows an example of Web Service response definition in business_service_ population.xslt: HP Service Manager (Service Manager 9.40; Universal CMDB or later) Page 201 of 273
202 Chapter 5: Tailoring the Integration 9. Update the web service response name to match the response name that you want to add to the integration. For example, you can create the following CI type definition element to add the database response of retrieve object list to the integration. <xsl:template match="/retrieveucmdbrdbmslistresponse"> 10. Find the Universal CMDB CI type definition element, which uses the following format: <ci class="ucmdb_ci_type_name"> UCMDB_CI_TYPE_NAME is the CI type name in the Universal CMDB System. The following figure shows an example CI type definition in business_service_ population.xslt: 11. Update the Universal CMDB CI type definition name to match the name you want to add to the integration. For example, create the following CI type definition element to add the database response of retrieve object list to the integration. HP Service Manager (Service Manager 9.40; Universal CMDB or later) Page 202 of 273
203 Chapter 5: Tailoring the Integration <ci class="sm_rdbms"> Note: Do not use any variables in the CI type definition name. The CI type definition name must be a fixed value. 12. Find the elements that transform Service Manager web service fields into Universal CMDB CI attributes. The CI attribute transformation elements use the following format: <attribute name="ucmdb_ci_attribute_name" type="ucmdb_ci_attribute_type" ignoreciifempty="true"> <xsl:value-of select="smattributename "/></attribute> UCMDB_CI_attribute_name is the name of the CI attribute in the Universal CMDB system. UCMDB_CI_attribute_type is the type of the CI attribute in the Universal CMDB system that this integration supports. Currently the following types are supported: String, StringList, Integer, Long, Double, Boolean, IPAddress, Date, Float, and IntList. ignoreciifempty is a parameter that specifies whether or not to ignore the CI during population if this attribute has an empty value (true: ignore; false: not ignore). Note: A StringList is a list of strings separated by a semicolon (;). For example, str1;str2;str3. An IntList is a list of integers separated by a semicolon (;). For example, 1;2;3. For information about setting a time zone and date format for the Date type, see "How to Update the Time Zone and Date Format for the Integration Adapter" on page 33. SMAttributeName is the name of a web service attribute published by the Service Manager system. See the following figure for an example of CI attributes in business_service_population.xslt: HP Service Manager (Service Manager 9.40; Universal CMDB or later) Page 203 of 273


204 Chapter 5: Tailoring the Integration Refer to the following screenshot to match CI attributes in the Universal CMDB BusinessService CI type: Refer to the following screenshot to match CI attributes in the Service Manager ucmdbbusinessservice web service: HP Service Manager (Service Manager 9.40; Universal CMDB or later) Page 204 of 273

205 Chapter 5: Tailoring the Integration 13. In the SM RDBMS population example, there are no sub items of a CI. If you want to populate the sub items of a CI, for example, to populate the IP addresses of a computer together with the computer CI, you need to add a link element under the ci element. A link transformation element uses the following format: <link direction="link_direction" linktype="ucmdb_link_type"> <ci class="ucmdb_sub_ci_type_name"> <attribute name="ucmdb_ci_attribute_name" type="ucmdb_ci_attribute_type"> <xsl:value-of select="smattributename "/></attribute> <attribute name="ucmdb_ci_attribute_name2" type="ucmdb_ci_attribute_ type2"> <xsl:value-of select="smattributename 2"/></attribute> </ci> </xsl:for-each> </link> Link_Direction is the direction between a parent CI and sub CI. The supported directions are: outgoing: The link direction is from an upstream CI to the current downstream CI (for example, from node to ip_address). incoming: The link direction is from a downstream CI to the current upstream CI. UCMDB_Link_type is the relationship type in the Universal CMDB system. HP Service Manager (Service Manager 9.40; Universal CMDB or later) Page 205 of 273

 is illustrated in the following screenshot: HP Service Manager (Service Manager 9.")
206 Chapter 5: Tailoring the Integration The following figures show the out-of-the-box configurations for populating the Computer CI together with its IP addresses: Link definition in the import xslt file (ips_mapping_population.xslt) is illustrated in the following screenshot: HP Service Manager (Service Manager 9.40; Universal CMDB or later) Page 206 of 273
207 Chapter 5: Tailoring the Integration Refer to the following screenshot to match CI attributes and links in the Service Manager WSDL ( server>:<port>/sm/7/ucmdbnode.wsdl): Refer to the following screenshot to match CI links in UCMDB at the TQL level: Note: The figure above is provided only to give you a graphic view of how relevant CIs are stored in UCMDB. You do not need to create the query, since the population feature does not require it. HP Service Manager (Service Manager 9.40; Universal CMDB or later) Page 207 of 273

208 Chapter 5: Tailoring the Integration Refer to the following screenshot to match CI type and attributes in the UCMDB CI Type (IpAddress): 14. Add or update the CI attribute transformation elements for each CI attribute you want to add to the integration. For example, you can use the following XSL transformation elements for the database CI type. Sample XSL transformation elements for database CIs UCMDB attribute discovered_ product_name product_name Sample transformation elements <attribute name="discovered_product_name" type="string"> <xsl:value-of select="file.device/ciidentifier"/></attribute> <attribute name="product_name" type="string"> <xsl:value-of select="file.device/applicationname"/></attribute> HP Service Manager (Service Manager 9.40; Universal CMDB or later) Page 208 of 273

209 Chapter 5: Tailoring the Integration Sample XSL transformation elements for database CIs, continued UCMDB attribute application_ version vendor version dbinstance port description Sample transformation elements <attribute name="application_version" type="string"> <xsl:value-of select="file.device/productversion"/></attribute> <attribute name="vendor" type="string"> <xsl:value-of select="file.device/vendor"/></attribute> <attribute name="version" type="string"> <xsl:value-of select="file.device/version"/></attribute> <attribute name="dbinstance" type="string"> <xsl:value-of select="file.rdbms/dbinstance"/></attribute> <attribute name="port" type="string"> <xsl:value-of select="file.rdbms/port"/></attribute> <attribute name="description" type="string"> <xsl:value-of select="file.rdbms/description"/></attribute> Attribute mappings in rdbms_population.xslt are illustrated in the following screenshot: HP Service Manager (Service Manager 9.40; Universal CMDB or later) Page 209 of 273
210 Chapter 5: Tailoring the Integration 15. Save the XSL transformation file. Note: When you create/edit and then save a configuration file in Adapter Management, UCMDB automatically restarts the adapter with the new configuration file. How to Add a CI Type s Relationship Types to the Integration for Population Once you have added a new CI type to the integration for population, you need to add the new CI type s relationship types to the integration. For each relationship type, perform the following tasks. As an example, the following steps describe how to add the Ownership relationship type to the integration; these steps assume that you have already added the Cost and CostCategory CI types to the integration for population. 1. Create an XSL transformation file to map each relationship type s attributes to web service objects. See "How to Map Each Relationship Type's Attributes to Web Service Objects" below. 2. Add a query mapping for each relationship type to the population configuration file. See "How to Define a Query Mapping for Each Relationship Type" on page 212. How to Map Each Relationship Type's Attributes to Web Service Objects This example illustrates how to create an XSL transformation file to map the attributes of the Ownership relationship type to web service objects. 1. Log in to UCMDB as an administrator. 2. Navigate to Data Flow Management > Adapter Management. 3. Click the Create new resource button. 4. Select New Configuration File. 5. Select the ServiceManagerAdapter9-x package. HP Service Manager (Service Manager 9.40; Universal CMDB or later) Page 210 of 273
211 Chapter 5: Tailoring the Integration 6. Enter the full file name using this format: <AdapterID>/<filename>. For example, ServiceManagerAdapter9-x/cost_to_costcategory_population.xslt. 7. Click Yes to ignore the file extension warning. The file is added to the Configuration Files folder. 8. Copy the content of an existing relationship population XSLT file (for example, computer_to_ computer_connects_population.xslt) to the new XSLT file. Note: In the next step, you will update the <ci class> names and linktype value. <xsl:stylesheet version="1.0" xmlns:xsl=" <xsl:template match="/retrievecirelationship1to1listresponse"> <topology> <xsl:for-each select="instance"> <ci class="node"> <attribute name="name" type="string"><xsl:value-of select= "upstreamci.logical.name"/></attribute> <attribute name="sm_id" type="string"><xsl:value-of select= "upstreamci.id"/></attribute> <link direction="outgoing" linktype="tcp"> <ci class="node"> <attribute name="name" type="string"><xsl:value-of select= "downstreamci.logical.name"/></attribute> <attribute name="sm_id" type="string"><xsl:value-of select= "downstreamci.id"/></attribute> </ci> </ci> </link> </xsl:for-each> </topology> </xsl:template> </xsl:stylesheet> HP Service Manager (Service Manager 9.40; Universal CMDB or later) Page 211 of 273
212 Chapter 5: Tailoring the Integration 9. Change the <ci class> names to cost and cost_category, and linktype to ownership.... <ci class="cost"> <attribute name="name" type="string"><xsl:value-of select= "upstreamci.logical.name"/></attribute> <attribute name="sm_id" type="string"><xsl:value-of select= "upstreamci.id"/></attribute>... <link direction="outgoing" linktype="ownership"> <ci class="cost_category"> ci class: the name (not display name) of the each CI type involved in the relationship. It should be the Name field value on the General Details tab of the CI type definition. linktype: the name of the relationship type. It should be the Name field value on the General Details tab of the relationship type definition. Note: In this example, you do not need to change the link direction (outgoing). This is because the relationship (Ownership) direction is from cost to cost_category, that is, from a <ci class> outside of the <link> element to a <ci class> inside it). 10. Save the XSL transformation file. How to Define a Query Mapping for Each Relationship Type For each relationship type of the new CI type, you need to define a query mapping in the smpopconffile.xml file. 1. Log in to UCMDB as an administrator. 2. Navigate to Data Flow Management > Adapter Management > ServiceManagerAdapter9-x > Configuration Files > smpopconffile.xml. 3. In the smpopconffile.xml file, add a query mapping for the relationship type, by copying an existing query mapping element. Note: In the next step, you will update the highlighted values with values of the new relationship type. HP Service Manager (Service Manager 9.40; Universal CMDB or later) Page 212 of 273
213 Chapter 5: Tailoring the Integration <tql name="sm Biz To Biz With Usage" xslfile="businessservice_to_businessservice_usage_population.xslt"> <request type="retrieve" datatype="relationship" retrievekeysqueryname="retrievecirelationship1to1keyslistrequest" retrievelistqueryname="retrievecirelationship1to1listrequest" basicquerycondition="upstreamci.type="bizservice" and downstreamci.type="bizservice" and relationship.subtype="usage"" fullquerycondition="status~="removed"" changedcreationquerycondition="create.datetime>'{fromdate}' and status~="removed"" changedupdatequerycondition="created.datetime<='{fromdate}' and update.datetime>'{fromdate}' and status~="removed"" changeddeletionquerycondition="update.datetime>'{fromdate}' and status="removed""/> </tql> 4. Update the TQP mapping element with the values of the new relationship type. Note: For the query name, you can enter any descriptive name as you like (for example, SM Cost to CostCategory with Ownership). This query does not really exist, since population does not require it. The upstreamci.type, downstreamci.type, and relationship.subtype values are defined in the cirelationship1to1 table in Service Manager. <tql name="sm Cost to CostCategory with Ownership" xslfile="cost_to_costcategory_population.xslt"> <request type="retrieve" datatype="relationship" retrievekeysqueryname="retrievecirelationship1to1keyslistrequest" retrievelistqueryname="retrievecirelationship1to1listrequest" basicquerycondition="upstreamci.type="cost" and downstreamci.type="costcategory" and relationship.subtype="ownership"" fullquerycondition="status~="removed"" HP Service Manager (Service Manager 9.40; Universal CMDB or later) Page 213 of 273

214 Chapter 5: Tailoring the Integration changedcreationquerycondition="create.datetime>'{fromdate}' and status~="removed"" changedupdatequerycondition="created.datetime<='{fromdate}' and update.datetime>'{fromdate}' and status~="removed"" changeddeletionquerycondition="update.datetime>'{fromdate}' and status="removed""/> </tql> 5. Save the population configuration file. Note: When you create/edit and then save a configuration file in Adapter Management, UCMDB automatically restarts the adapter with the new configuration file. Now the relationship type is added to the integration for population. Next, you need to add the relationship query name you specified in the population configuration file (in this example, SM Cost to CostCategory with Ownership) to a relationship population job, so that the integration can populate this type of relationships to UCMDB. See the following figure and also "How to Add Custom queries to Integration Population Jobs" on page 216. Refer to the following screenshot to add a new relationship query name to a relationship population job: HP Service Manager (Service Manager 9.40; Universal CMDB or later) Page 214 of 273
215 Chapter 5: Tailoring the Integration How to Customize UCMDB ID Pushback for a CI Type Out-of-the-box, UCMDB pushes the UCMDB ID of each CI type back to Service Manager during population, by calling a Service Manager web service (ucmdbidpushback) based on the ucmdbid.pushback.request and ucmdbid.pushback.xslt settings in the sm.properties file in UCMDB (see "How to Update the Integration Adapter Configuration File (sm.properties)" on page 131). To better suit your business needs, you can make the following tailorings to the ucmdb id pushback feature, using the <idpushbackconfigurations> element in the ServiceDeskConfiguration.xml file: "How to Disable the UCMDB ID Pushback Feature for a Specific CI Type" below "How to Define a Custom Pushback Web Service and xslt File for a Specific CI Type" on the next page Note: For a specific UCMDB class (CI type), its definitions in the ServiceDeskConfiguration.xml file supercede the following global settings in the sm.properties file: idpushbackenable: In the sm.properties file, this setting is not present; however, out-of-thebox, it is set to true for all CI types. idpushbackrequest: In the sm.properties file, its out-of-the-box value is UpdateucmdbIDPushBackRequest. idpushbackxslt: In the sm.properties file, the out-of-the-box value is ucmdbid_pushback.xslt. How to Disable the UCMDB ID Pushback Feature for a Specific CI Type You may want to disable the pushback feature for certain UCMDB CI types, for example, UCMDB classes that are mapped to a sub-item type (IP Address, CPU, etc.) in Service Manager. Doing so can aviod unnecessary system overload. To disable the pushback feature for a UCMDB CI type (class), use this format: <idpushbackconfiguration ucmdbclassname="<ucmdbclassname>" idpushbackenable="false"/> Where, <ucmdbclassname> is the name of the UCMDB CI type. Here are the out-of-the-box settings in the ServiceDeskConfiguration.xml file: <idpushbackconfigurations> <idpushbackconfiguration ucmdbclassname="interface" idpushbackenable="false"/> HP Service Manager (Service Manager 9.40; Universal CMDB or later) Page 215 of 273
216 Chapter 5: Tailoring the Integration <idpushbackconfiguration ucmdbclassname="cpu" idpushbackenable="false"/> <idpushbackconfiguration ucmdbclassname="disk_device" idpushbackenable="false"/> <idpushbackconfiguration ucmdbclassname="file_system" idpushbackenable="false"/> <idpushbackconfiguration ucmdbclassname="ip_address" idpushbackenable="false"/> </idpushbackconfigurations> To enable the pushback feature for a CI type, set idpushbackenable="true" for it. How to Define a Custom Pushback Web Service and xslt File for a Specific CI Type There are occasions when you need to define a custom pushback web service and XSLT for a specific CI type (class), for example, when a CI type you want to populate is not stored in the device table in Service Manager. This is because the out-of-the-box ucmdbidpushback web service is based on the device table. For example, you have tailored the integration in order to populate the Functional Group from Service Manager to UCMDB. If the Functional Group in Service Manager is not stored in the device table, you can define a custom web service and XSLT like the following: <idpushbackconfigurations> <idpushbackconfiguration ucmdbclassname="functional_group" idpushbackenable="true" idpushbackrequest="updateucmdbidpushbackforfunctionalgrouprequest" idpushbackxslt="ucmdbid_pushback_functionalgroup.xslt"/>... </idpushbackconfigurations> Note: To support your pushback customizations, you need to create the specified custom web service record in Service Manager and XSLT file in UCMDB. How to Add Custom queries to Integration Population Jobs In order for the integration to send your custom Service Manager web service object and fields to your UCMDB system, you must add your custom queries to the population job between your Service Manager data store and your UCMDB data store. The following steps illustrate how to add the custom rdbmsdata query described in previous sections. To add custom queries to population job definitions: HP Service Manager (Service Manager 9.40; Universal CMDB or later) Page 216 of 273
217 Chapter 5: Tailoring the Integration 1. Log in to UCMDB as an administrator. 2. Navigate to Data Flow Management > Integration Studio. 3. Double-click the name of your Service Manager integration point. For example, SM Integration. 4. Click the Population tab. 5. Select a population job. For example, SM Configuration Item Population job. 6. Click the Edit Integration Job button. 7. Click the Add button. The query names configured in the smpopconffile.xml file are listed. 8. Click Root > rdbmsdata. 9. Click OK to add a custom query. 10. Click OK to close the Update Job Definition window. How to Add an Attribute of a Supported CI Type for Federation Out-of-the-box, the integration supports federation for three external CI types in UCMDB: Incident, Problem, and RequestForChange. For each of the supported CI types, there is a list of attributes in UCMDB that you can map to Service Manager web service objects for federation. The following figure shows the out-of-the-box UCMDB CI attributes available for the Incident CI type. Incident CI attributes supported for federation are illustrated in the following screenshot: HP Service Manager (Service Manager 9.40; Universal CMDB or later) Page 217 of 273
218 Chapter 5: Tailoring the Integration For example, to add an SM Incident attribute for federation, you need to expose the field in the SM UcmdbIncident web service object and then map it to an appropriate UCMDB attribute (if one does not already exist, you need to create it in UCMDB first). The following figure shows the fields that are exposed in the UcmdbIncident web service object in Service Manager: HP Service Manager (Service Manager 9.40; Universal CMDB or later) Page 218 of 273
 file for federation, by mapping it to a new UCMDB attribute named details.")
219 Chapter 5: Tailoring the Integration You can expose more fields so that more Incident attributes can be federated to UCMDB. As an example, the following describes how to add the action field in the Service Manager probsummary (Incident) file for federation, by mapping it to a new UCMDB attribute named details. Note: On the Incident form in Service Manager, the action field is labeled Description, which describes the incident ticket in more detail. See the following figure. To add an attribute of a supported CI type for federation: 1. Add the SM attribute to its web service object. The following example describes how to expose the SM action field of Incident in the UcmdbIncident web service object. HP Service Manager (Service Manager 9.40; Universal CMDB or later) Page 219 of 273
220 Chapter 5: Tailoring the Integration a. Log in to Service Manager as a system administrator. b. Navigate to Tailoring > Web Services > WSDL Configuration. c. Enter the following field values, and then click Search. o Service Name: ucmdbintegration o Name: probsummary The UcmdbIncident web service object is displayed. d. On the Fields tab, add the following row: o Field: action. o Caption: Description e. Save the web service object. 2. Map the SM attribute to a UCMDB attribute. The following example describes how to map the SM action attribute to a new UCMDB attribute named details. HP Service Manager (Service Manager 9.40; Universal CMDB or later) Page 220 of 273
221 Chapter 5: Tailoring the Integration a. Log in to UCMDB as an administrator. b. Navigate to Modeling > CI Type Manager. c. Browse to ItProcessRecord > Incident, and open its properties pane. d. Click the Add button to add a new attribute named details to the Incident CI type. o name: details o Display Name: Details o Description: Incident details o Attribute Type: Primitive > List of strings (this is because the action field in SM is an array) e. Save the Incident CI type record. f. Navigate to Data Flow Management > Adapter Management > ServiceManagerAdapter9-x > Configuration Files. g. Click the ServiceDeskConfiguration.xml file. HP Service Manager (Service Manager 9.40; Universal CMDB or later) Page 221 of 273
222 Chapter 5: Tailoring the Integration h. Add a mapping entry for the details attribute in the Incident attributemappings section, as shown in the following. <ucmdbclassconfiguration ucmdbclassname="incident"> <attributemappings> <attributemapping ucmdbattributename="reference_number" servicedeskattributename="incidentid"/> <attributemapping ucmdbattributename="name" servicedeskattributename="briefdescription"/>... <attributemapping ucmdbattributename="incident_status" servicedeskattributename="imticketstatus" converterclassname="com.mercury.topaz.fcmdb.adapters. servicedeskadapter.converter.propertyvalueconverterfirstletter ToUpperAndReplaceUnderscoreWithSpace" reversedconverterclassname="com.mercury.topaz.fcmdb.adapters. servicedeskadapter.converter.propertyvalueconverterfirstletter ToLowerAndReplaceSpaceWithUnderscore"/>... <attributemapping ucmdbattributename="urgency" servicedeskattributename="urgency"/> <attributemapping ucmdbattributename="details" servicedeskattributename="description"/> </attributemappings> Tip: The attribute mapping entry uses the following format: <attributemapping ucmdbattributename="details" servicedeskattributename="description"/> Where: ucmdbattributename is the UCMDB attribute name in the Incident CI type definition to which you want to map the SM attribute; servicedeskattributename is the field caption you defined in the SM web service object. For an SM attribute (for example, problem.status) that is a drop-down list, the attribute mapping uses the following format (you only need to change the attribute names): HP Service Manager (Service Manager 9.40; Universal CMDB or later) Page 222 of 273
223 Chapter 5: Tailoring the Integration <attributemapping ucmdbattributename="incident_status" servicedeskattributename="imticketstatus" converterclassname="com.mercury.topaz.fcmdb.adapters. servicedeskadapter.converter.propertyvalueconverterfirstletter ToUpperAndReplaceUnderscoreWithSpace" reversedconverterclassname="com.mercury.topaz.fcmdb.adapters. servicedeskadapter.converter.propertyvalueconverterfirstletter ToLowerAndReplaceSpaceWithUnderscore"/> i. Click OK to save the file. Now the Description (field name: action) attribute of SM Incident has been added to the integration for federation. You can run an Incident federation query in the UCMDB Modeling Studio to see if the SM Description data is properly federated. For details, see "Examples of Using Federation" on page 45. The following figure shows an example where the Description of an SM incident ticket has been federated to UCMDB as Details: HP Service Manager (Service Manager 9.40; Universal CMDB or later) Page 223 of 273

224 Chapter 5: Tailoring the Integration HP Service Manager (Service Manager 9.40; Universal CMDB or later) Page 224 of 273
225 Chapter 6: Troubleshooting When data push and population errors occur, you can check the error messages and the integration log files to identify the root causes and fix the errors. This chapter describes the general troubleshooting steps, as well as typical errors and solutions. This section includes: "Troubleshooting Data Push Issues" below "Troubleshooting Population Issues" on page 252 Troubleshooting Data Push Issues When data push errors or problems occur, you can check the error messages and the log file to figure out the root causes and then fix the errors. This integration uses the following error codes for data push. Data push error codes Error code Description -1 Unspecified error. 0 Success. 3 Resource unavailable. 28 Not authorized. 51 Record modified since last retrieved. 70 Invalid SOAP action / unrecognized application action. 71 Validation failed. 881 CI does not exist in Service Manager. 882 Unable to remove the relationship because at least one of CIs involved in the relationship does not exist in Service Manager. When a data push job has failed, the job status becomes Failed. Troubleshoot the failed job as follows: HP Service Manager (Service Manager 9.40; Universal CMDB or later) Page 225 of 273
226 Chapter 6: Troubleshooting Check the error messages of the failed job in the Universal CMDB studio. See "How to Check the Error Message of a Failed Push Job" below. Check the log file for more details. See "How to Check the Push Log File" on page 231. When a data push job was completed, but with partial records failed, the job status becomes Passed with failures. Troubleshoot the failed records as follows: Check the error messages of failed CIs in the Universal CMDB studio. See "How to Check the Error Messages of Failed CIs/CI Relationships in a Push Job" on the next page. Check the log file for more details. See "How to Check the Push Log File" on page 231. Once you have fixed the issues with the failed records, you can re-push them one by one or in batches. For details, see "How to Re-push Failed CI/CI Relationship Records" on page 236. How to Check the Error Message of a Failed Push Job To check the error message of a failed job: 1. Log in to UCMDB as an administrator. 2. Navigate to Data Flow Management > Integration Studio. 3. Select the integration point for this integration from Integration Point list. 4. Click the Data Push tab. 5. Select the job from Integration Jobs. 6. Click the Job Errors sub-tab, and double-click the Severity of a message from the list. A popup window displays the detailed error message of this failed job. Following is an excerpt of a sample error message indicating that an XSLT file was not found. HP Service Manager (Service Manager 9.40; Universal CMDB or later) Page 226 of 273

227 Chapter 6: Troubleshooting How to Check the Error Messages of Failed CIs/CI Relationships in a Push Job When a data push job is completed with partial records failed, in the Universal CMDB studio, you can check the source CI XML of Universal CMDB, the XSLT-transformed XML and the response XML from Service Manager to see if the failure is caused by data issues. To check the error messages of failed records in a data push job: 1. Log in to UCMDB as an administrator. 2. Navigate to Data Flow Management > Integration Studio. 3. Select the integration point for this integration from Integration Point list. 4. Click the Data Push tab. 5. Select the job from Integration Jobs. 6. Click the Query Status sub-tab. 7. Double-click a query with failures. The Error Message and CI Count for each failed CI Type are displayed. HP Service Manager (Service Manager 9.40; Universal CMDB or later) Page 227 of 273

 contains an empty value. HP Service Manager (Service Manager 9.")
228 Chapter 6: Troubleshooting 8. Double-click an error message. A list of failed records is displayed. 9. Double-click a failed record. The detailed error message of the record is displayed. The following is a sample error message that indicates a validation failure, and the root cause is that a not-null key (key definition #18 of the device table) contains an empty value. HP Service Manager (Service Manager 9.40; Universal CMDB or later) Page 228 of 273

229 Chapter 6: Troubleshooting HP Service Manager (Service Manager 9.40; Universal CMDB or later) Page 229 of 273

230 Chapter 6: Troubleshooting HP Service Manager (Service Manager 9.40; Universal CMDB or later) Page 230 of 273

231 Chapter 6: Troubleshooting How to Check the Push Log File You need to set the Development adapter log level to DEBUG so that you can check the source tree XML file of UCMDB, the XSLT-transformed XML file, and the response XML file from Service Manager. Tip: You are recommended to enable the Development Mode for the integration point so that the above-mentioned three XML files are in a good format. See the following for the steps. To set the Development adapter log level to DEBUG: HP Service Manager (Service Manager 9.40; Universal CMDB or later) Page 231 of 273

232 Chapter 6: Troubleshooting 1. Log in to the UCMDB server host as an administrator. 2. Navigate to the <UCMDB installation folder>\ucmdbserver\conf\log\fcmdb.properties file. For example: C:\HP\UCMDB\UCMDBServer\conf\log\fcmdb.properties. 3. Open the fcmdb.properties file in a text editor. 4. Update the log4j.category.fcmdb.adapters log level to DEBUG. 5. Save the file. To enable the Development Mode for the integration point: 1. Log in to UCMDB as an administrator. 2. Navigate to Data Flow Management > Integration Studio. 3. Select the integration point for this integration. 4. Click the Edit Integration Point button. 5. For Development Mode, select True from the list. 6. Click the OK button to save the integration point. To check the push log file: HP Service Manager (Service Manager 9.40; Universal CMDB or later) Page 232 of 273

233 Chapter 6: Troubleshooting 1. Log in to the UCMDB server host as an administrator. 2. Navigate to the <UCMDB installation folder>\ucmdbserver\runtime\log\fcmdb.adapters.<integration_point_name>.log file. For example: C:\HP\UCMDB\UCMDBServer\runtime\log\fcmdb.adapters.SM Integration.log 3. Open the log file in a text editor. 4. Search for text strings Source tree XML:, Transformed XML:, and Response message from SM:. The following is a sample log file. HP Service Manager (Service Manager 9.40; Universal CMDB or later) Page 233 of 273

234 Chapter 6: Troubleshooting HP Service Manager (Service Manager 9.40; Universal CMDB or later) Page 234 of 273
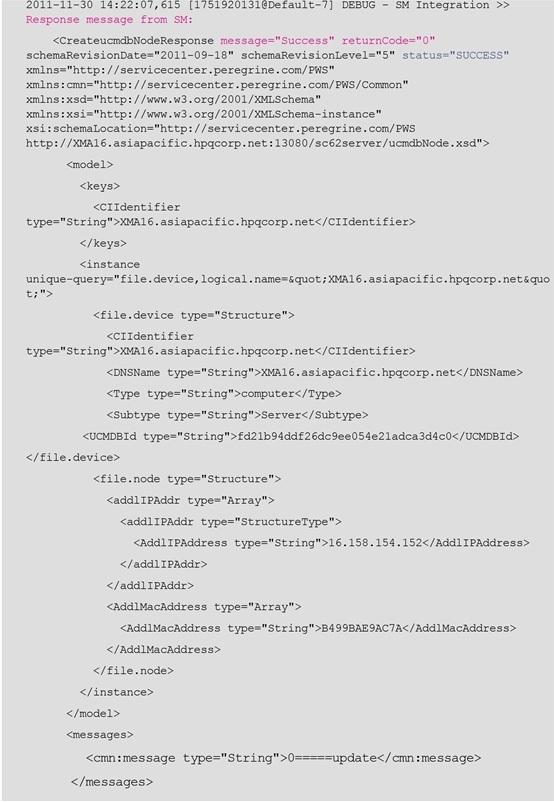
235


236 Chapter 6: Troubleshooting How to Re-push Failed CI/CI Relationship Records The push error handling mechanism allows you to re-push failed CI/CI Relationship records either one by one or in batches. To re-push failed data in a query of a data push job: 1. Select the data push job. 2. On the Query Status tab, double-click the failed query. The query failure details (Error Message, CI Type, and CI Count) are displayed. 3. Double-click the Error Message, to see more details of the failed records. 4. Double-click each failed record to see the detailed error message of the record. HP Service Manager (Service Manager 9.40; Universal CMDB or later) Page 236 of 273
, select the error message of the query, and then click the Push selected failed data button to re-push all failed")
237 Chapter 6: Troubleshooting 5. Fix the issues with each failed record according to the error information. 6. Select a failed record, and then click the Push selected failed data button to re-synchronize the record. Alternatively, click the query name link (in this example, SM Node Relations Push ), select the error message of the query, and then click the Push selected failed data button to re-push all failed records in the query. Typical Push Errors and Solutions This section describes typical error messages that may occur during data push, as well as their solutions. This section includes: "Query not Configured in smsyncconffile.xml" on the next page "Nonexistent XSLT File Name Defined for a Query in smsyncconffile.xml" on page 239 "Request Name not Found for a Query in smsyncconffile.xml " on page 240 "Wrong Service Manager WS Request Name Defined in smsyncconffile.xml" on page 242 "XSLT file not Well Formed" on page 243 "Wrong UCMDB Attribute Name in XSLT File" on page 245 "Wrong Service Manager Field Name in XSLT File" on page 246 "Empty Value for No Nulls Key in Service Manager" on page 247 HP Service Manager (Service Manager 9.40; Universal CMDB or later) Page 237 of 273


238 Chapter 6: Troubleshooting "CI Logical Name Truncated or CI not Pushed due to Logical Name Truncation" on page 250 "Service Manager Database Case-Sensitivity Issue" on page 251 "Global ID and Customer ID Missing in XSLT" on page 251 Query not Configured in smsyncconffile.xml Sample configuration The query used for populating business service CIs is named SM Business Service Push, however you have not configured it (or have commented it out) in the smsyncconffile.xml file: Error message The push job fails with a Failed status. From both the log file and the detail error message of the failed job in the Universal CMDB studio (see "How to Check the Error Message of a Failed Push Job" on page 226), you receive an error like the following: HP Service Manager (Service Manager 9.40; Universal CMDB or later) Page 238 of 273

239 Chapter 6: Troubleshooting Solution Search for text No mapping is found for TQL to find the query name that is not yet configured, and then configure the query name in the smsyncconffile.xml file. For instructions on how to add a mapping for a query, see "How to Map the CI Type s Query to an XSL Transformation File" on page 175. Nonexistent XSLT File Name Defined for a Query in smsyncconffile.xml Sample configuration The XSLT file for populating business service CIs is named business_service_push.xslt, however you have configured a wrong name business_service_push_wrong_name.xslt in smsyncconffile.xml. Error message The data push job fails with a Failed status. From both the log file and the detail error message of the failed job in the Universal CMDB studio (see "How to Check the Error Message of a Failed Push Job" on page 226), you receive an error like the following: HP Service Manager (Service Manager 9.40; Universal CMDB or later) Page 239 of 273

240 Chapter 6: Troubleshooting Solution Search for text java.io.filenotfoundexception: Resource: to find the wrong XSLT file name, and then correct the XSLT file name in the smsyncconffile.xml file. For instructions on how to configure an XSLT file name for a query, see "How to Map the CI Type s Query to an XSL Transformation File" on page 175. Request Name not Found for a Query in smsyncconffile.xml Sample configuration The Service Manager web service request of the Create type is named CreateucmdbBusinessServiceRequest, however you have not configured it (or have commented it out) in the smsyncconffile.xml file. HP Service Manager (Service Manager 9.40; Universal CMDB or later) Page 240 of 273
,")

241 Chapter 6: Troubleshooting Error message The data push job fails with a Failed status. From both the log file and the detail error message of the failed job in the Universal CMDB studio (see "How to Check the Error Message of a Failed Push Job" on page 226), you receive an error like the following: Solution In the error message find the query name for which a request name was not found, and then in the smsyncconffile.xml file add the request name for the query name. For instructions on how to configure a request for a query, see "How to Map the CI Type s Query to an XSL Transformation File" on page 175. HP Service Manager (Service Manager 9.40; Universal CMDB or later) Page 241 of 273

242 Chapter 6: Troubleshooting Wrong Service Manager WS Request Name Defined in smsyncconffile.xml Sample configuration The Service Manager web service request of the Create type is named CreateucmdbBusinessServiceRequest, however you have configured a wrong request name CreateucmdbBusinessServiceRequest_wrongname in the smsyncconffile.xml file. Error message The data push job is completed with a Passed with failures status. From both the log file and the detailed error messages of the failed CIs in the Universal CMDB studio (see "How to Check the Error Messages of Failed CIs/CI Relationships in a Push Job" on page 227), you receive an error like the following: HP Service Manager (Service Manager 9.40; Universal CMDB or later) Page 242 of 273

243 Chapter 6: Troubleshooting Solution In the Transformed XML section of the error message, check the Request name (which is configured as CreateucmdbBusinessServiceRequest_wrongname in this sample), and make sure that the request name specified in smsyncconffile.xml is the exact name defined in the WSDL. For instructions on how to configure a Service Manager web service request for a query, see "How to Map the CI type's Query to an XSL Transformation File" on page 195. XSLT file not Well Formed Sample configuration HP Service Manager (Service Manager 9.40; Universal CMDB or later) Page 243 of 273

, you receive an error like the following: In addition, you can find more detailed error message in the log file to see which XSLT file is not well formed.")
244 Chapter 6: Troubleshooting The end tag of instance should be </instance>, however you have configured a wrong end tag </instance_wrong_end_tag>. Error message The data push job fails with a Failed status. From both the log file and the detailed error message of the failed job in the Universal CMDB studio (see "How to Check the Error Message of a Failed Push Job" on page 226), you receive an error like the following: In addition, you can find more detailed error message in the log file to see which XSLT file is not well formed. You should see something like following: HP Service Manager (Service Manager 9.40; Universal CMDB or later) Page 244 of 273
. You can easily find and fix any validation issues.")

245 Chapter 6: Troubleshooting Solution Search for text Not valid XSLT file to find the XSLT file name, and then validate the XSLT file in an XML editor (for example, XMLSpy). You can easily find and fix any validation issues. Wrong UCMDB Attribute Name in XSLT File Sample configuration The Universal CMCB attribute name is provider, however you have configured a wrong attribute named provider_wrong. HP Service Manager (Service Manager 9.40; Universal CMDB or later) Page 245 of 273

246 Chapter 6: Troubleshooting Error message You will NOT get any error messages either in the log file or in the Universal CMDB studio, however the Universal CMDB attribute value will not be pushed to Service Manager. Solution If you find a UCMDB attribute value that cannot be pushed to Service Manager, double-check the UCDMB attribute name and Service Manager field name of the mapping in the XSLT file. For instructions on how to configure an attribute mapping, see "How to Map the CI Attribute to a Web Service Field" on page 152. Wrong Service Manager Field Name in XSLT File Sample configuration The Service Manager field name is ServiceProvider, however you have configured a wrong attribute named ServiceProvider_wrong in the XSLT file. This error also commonly occurs since the attribute is case-sensitive. HP Service Manager (Service Manager 9.40; Universal CMDB or later) Page 246 of 273

247 Chapter 6: Troubleshooting Error message You will NOT get any error messages either in the log file or in the Universal CMDB studio, however, the Universal CMDB attribute value will not be pushed to Service Manager. Solution If you find a Universal CMDB attribute value that cannot be pushed to Service Manager, check both the Universal CDMB attribute name and Service Manager field name of the mapping in the XSLT file. For instructions on how to configure an attribute mapping, see "How to Map the CI Attribute to a Web Service Field" on page 152. Empty Value for No Nulls Key in Service Manager Sample configuration In Service Manager you have configured a No Nulls key for field testnotnullfield of the device table, however you have not mapped this field in the XSLT file. HP Service Manager (Service Manager 9.40; Universal CMDB or later) Page 247 of 273
,")
248 Chapter 6: Troubleshooting Error message The data push job is completed with a Passed with failures status. From both the log file and the detailed error messages of the failed CIs in the Universal CMDB studio (see "How to Check the Error Messages of Failed CIs/CI Relationships in a Push Job" on page 227), you receive an error like the following. HP Service Manager (Service Manager 9.40; Universal CMDB or later) Page 248 of 273

249 Chapter 6: Troubleshooting HP Service Manager (Service Manager 9.40; Universal CMDB or later) Page 249 of 273
 this key is for, and then make sure that a non-null value has been mapped")
250 Chapter 6: Troubleshooting Solution Find the key number in the <messages> section to see which No Nulls key has a NULL value. For example, if you find a message Key #1 is empty, check the first key definition of the device table to see which field(s) this key is for, and then make sure that a non-null value has been mapped to the field(s) in the XSLT file. For instructions on how to configure an attribute mapping, see "How to Map the CI Attribute to a Web Service Field" on page 152. CI Logical Name Truncated or CI not Pushed due to Logical Name Truncation Sample configuration The length of a UCMDB CI name exceeds 200 characters, which is the maximum allowed field length for logical.name (CI Identifier) in Service Manager. When this CI is pushed to Service Manager, the CI name is truncated. Two UCMDB CIs have the same CI name that is 200 characters in length. When the second CI is pushed, it is supposed to be renamed if the DEM Duplication Rule is configured so; however, the renamed logical name will be truncated to be same as the first CI s logical name. As a result, the second CI will not be able to be pushed to Service Manager due to an invalid duplicate key error. Error message You receive an error message that contains this string: This record contains an invalid duplicate key. Solution HP Service Manager (Service Manager 9.40; Universal CMDB or later) Page 250 of 273
251 Chapter 6: Troubleshooting Update the CI type s XSL transformation file so that, before running a push, the integration can make sure that all CI names are significantly less than 200 characters in length. Service Manager Database Case-Sensitivity Issue Sample configuration Your Service Manager database is case-insensitive. You have two UCMDB CIs with a name of CINAME1 and ciname1, respectively. When running a push job to push these CIs, the integration considers the second CI a duplicate of the first one, and therefore either renames it or returns an error according to the Duplication Rule setting of the relevant DEM Rule record. Solution HP recommends using a case-sensitive Service Manager database to avoid this issue. Global ID and Customer ID Missing in XSLT Sample configuration You create an XSL transformation file for push without the following element: <!--import:cmdb_root_attributes.xslt--> The cmdb_root_attributes.xslt file contains Global ID and Customer ID, which are required for data push: <UCMDBId><xsl:value-of select="@id"/></ucmdbid> <CustomerId><xsl:value-of select="@customer_id"/></customerid> Error message No error message occurs, however when you update or delete a CI record in UCMDB, the update or deletion will not be pushed to Service Manager. Solution In the XSL transformation file, include the missing element: <!--import:cmdb_root_attributes.xslt--> HP Service Manager (Service Manager 9.40; Universal CMDB or later) Page 251 of 273
252 Chapter 6: Troubleshooting Troubleshooting Population Issues When population errors or problems occur, you can check the error messages and the population log file to identify the root causes and then solve the problems. When a population job has failed, the job status becomes Failed. Troubleshoot the failed job as follows: Check the error message of the failed job in the Universal CMDB studio. See "How to Check the Error Message of a Failed Population Job" below and "Typical Error Messages and Solutions" on page 259. Check the log file for more details. See "How to Check the Population Log File" on the next page. How to Check the Error Message of a Failed Population Job While a population job fails, you can check the detailed error messages in the Universal CMDB studio. To check the error message of a failed population job: 1. Log in to UCMDB as an administrator. 2. Navigate to Data Flow Management > Integration Studio. 3. Select the integration point for this integration. 4. Click the Population tab. 5. Select the failed job from Integration Jobs, and click the Job Errors sub-tab. 6. Double-click an error message from the list. A pop-up window opens to display the error details. The following is a sample error message about a non-existing XSLT file: HP Service Manager (Service Manager 9.40; Universal CMDB or later) Page 252 of 273

253 Chapter 6: Troubleshooting How to Check the Population Log File You can set the Development adapter log level to DEBUG to check the incoming CI XML file of Service Manager, and the XSLT-transformed XML file. Tip: You are recommended to enable the Development Mode for the integration point so that the above-mentioned two XML files are in a good format. To set the adapter log level to DEBUG: HP Service Manager (Service Manager 9.40; Universal CMDB or later) Page 253 of 273

254 Chapter 6: Troubleshooting 1. Log in to the UCMDB server host as an administrator. 2. Navigate to the <UCMDB installation folder>\dataflowprobe\conf\log \fcmdb.properties file. For example: C:\HP\UCMDB\DataFlowProbe\conf\log\fcmdb.properties 3. Open the fcmdb.properties configuration file in a text editor. 4. Update the log4j.category.fcmdb.adapters log level to DEBUG: 5. Save the file. 6. Wait a while for the change to take effect. To enable the Development Mode of the integration point: For detailed steps, see "How to Check the Push Log File" on page 231. To check the population log file: 1. Log in to the UCMDB server host as an administrator. 2. Navigate to the <UCMDB installation folder>\dataflowprobe\runtime\log\fcmdb.adapters.<integration_point_name>.log file. For example: C:\HP\UCMDB\DataFlowProbe\runtime\log\fcmdb.adapters.SM Integration.log 3. Open the log file in a text editor. HP Service Manager (Service Manager 9.40; Universal CMDB or later) Page 254 of 273
255 Chapter 6: Troubleshooting 4. Search for text strings Source SM CI XML, Transformed XML, Source tree XML for ID Pushback, Transformed XML for ID Pushback and Response message from SM For ID Pushback. The log looks like the following: HP Service Manager (Service Manager 9.40; Universal CMDB or later) Page 255 of 273

256 Chapter 6: Troubleshooting HP Service Manager (Service Manager 9.40; Universal CMDB or later) Page 256 of 273

257 Chapter 6: Troubleshooting HP Service Manager (Service Manager 9.40; Universal CMDB or later) Page 257 of 273

258 Chapter 6: Troubleshooting HP Service Manager (Service Manager 9.40; Universal CMDB or later) Page 258 of 273
259 Chapter 6: Troubleshooting Typical Error Messages and Solutions The following describes typical error messages that may occur during population, and their solutions. This section includes: "No Query Configured in smpopconffile.xml " below "Nonexistent XSLT File Name Defined for a Query in smpopconffile.xml" on the next page "No Retrieve Type Request Defined for a Query in smpopconffile.xml" on page 261 "Wrong Request Name of retrievekeysqueryname Configured for a Query in smpopconffile.xml" on page 262 "Wrong Request Name of retrievelistqueryname Configured for a Query in smpopconffile.xml" on page 263 "XSLT File not Well Formed" on page 265 "Wrong UCMDB Attribute Name in XSLT File" on page 267 "Wrong Service Manager Field Name in XSLT File" on page 267 "Wrong Universal CMDB Attribute Data Type in XSLT File" on page 268 "UCMDB CI Attribute sm_id not Mapped to the Right Service Manager Field in XSLT" on page 270 No Query Configured in smpopconffile.xml Error message If you have not yet added a query to your job, you cannot select this query from the list while you create or update your job. If you have already added this query to your job before removing it from smpopconffile.xml, you will get a Failed status while you run this population job. In addition, in the Universal CMDB studio, you will get an error message like the following (see "How to Check the Error Message of a Failed Population Job" on page 252): HP Service Manager (Service Manager 9.40; Universal CMDB or later) Page 259 of 273

260 Chapter 6: Troubleshooting Solution Search for text is not supported by this adapter to find the query name that has not yet been configured, and then configure it in the smpopconffile.xml file. For instructions on how to add a mapping to a query, see "How to Map the CI type's Query to an XSL Transformation File" on page 195. Nonexistent XSLT File Name Defined for a Query in smpopconffile.xml Error message You will get a Failed status while you run the population job. In addition, from both the population log file (see "How to Check the Population Log File" on page 253) and the Universal CMDB studio (see "How to Check the Error Message of a Failed Population Job" on page 252), you will get an error message like the following: HP Service Manager (Service Manager 9.40; Universal CMDB or later) Page 260 of 273

 and the Universal CMDB studio (see \"How to Check the Error Message of a Failed Population Job\"")
261 Chapter 6: Troubleshooting Solution Search for text No XSLT file is found to find the wrong XSLT file name, and then correct the name in the smpopconffile.xml file. For instructions on how to configure an XSLT file name for a query, see "How to Map the CI type's Query to an XSL Transformation File" on page 195. No Retrieve Type Request Defined for a Query in smpopconffile.xml Error message You will get a Failed status while you run the population job. In addition, from both the population log file (see "How to Check the Population Log File" on page 253) and the Universal CMDB studio (see "How to Check the Error Message of a Failed Population Job" on page 252), you will get an error message like the following: HP Service Manager (Service Manager 9.40; Universal CMDB or later) Page 261 of 273

262 Chapter 6: Troubleshooting Solution Search for text No request was configured for operation to find the query name for which a retrieve type request is missing, and then add the missing request name in the smpopconffile.xml file. For instructions on how to configure a request for a query, see "How to Map the CI type's Query to an XSL Transformation File" on page 195. Wrong Request Name of retrievekeysqueryname Configured for a Query in smpopconffile.xml Error message You will get a Failed status while you run the population job. In addition, from both the population log file (see "How to Check the Population Log File" on page 253) and the Universal CMDB studio (see "How to Check the Error Message of a Failed Population Job" on page 252), you will get an error message like the following: Further more, you can find more detailed error message in the log file that indicates which request of retrieving CI keys is wrong. The following is an example: HP Service Manager (Service Manager 9.40; Universal CMDB or later) Page 262 of 273

263 Chapter 6: Troubleshooting Solution Search for text Web Service Request XMl For getting SM CI keys to find the wrong request name, and then specify the right request name in the smpopconffile.xml file for the query name. For instructions on how to configure a request for a query, see "How to Map the CI type's Query to an XSL Transformation File" on page 195. Wrong Request Name of retrievelistqueryname Configured for a Query in smpopconffile.xml Error message You will get a Failed status while you run the population job. In addition, from both the population log file (see "How to Check the Population Log File" on page 253) and the Universal CMDB studio (see "How to Check the Error Message of a Failed Population Job" on page 252), you will get an error message like the following: HP Service Manager (Service Manager 9.40; Universal CMDB or later) Page 263 of 273


264 Chapter 6: Troubleshooting Further more, you can find more detailed error message in the log file that indicates which request of retrieving a CI list is wrong. The following is an example. Solution HP Service Manager (Service Manager 9.40; Universal CMDB or later) Page 264 of 273

265 Chapter 6: Troubleshooting Search for text Web Service Request XMl For getting SM CI List to find the wrong request name, and then specify the right request name in the smpopconffile.xml file for the query name. For instructions on how to configure a request for a query, see "How to Map the CI type's Query to an XSL Transformation File" on page 195. XSLT File not Well Formed Sample configuration The end tag of ci should be </ci>, however you configured a wrong end tag </ci_wrong>. Error message If you have not yet created your integration point, when you create it an error message similar to the following example will occur in the Universal CMDB studio or the log file, causing the creation to fail. If you have already created your integration point, but not yet activated it, you can no longer activate it, because when you attempt to activate it you will get a detailed error message in the probe error log file (probe-error.log), similar to the following example. If you have created and activated your integration point, you will get a Failed status when you run the population job. In addition, from both the population log file (see "How to Check the Population Log File" on page 253) and the Universal CMDB studio (see "How to Check the Error Message of a Failed Population Job" on page 252), you will get an error message similar to the following example. HP Service Manager (Service Manager 9.40; Universal CMDB or later) Page 265 of 273


266 Chapter 6: Troubleshooting Solution Search for text Got SAXException while parsing the XSLT file to find the name of the problematic XSLT file, and then validate the file in an XML editor (for example, XMLSpy). You can easily find and fix any validation issues. HP Service Manager (Service Manager 9.40; Universal CMDB or later) Page 266 of 273

267 Chapter 6: Troubleshooting Wrong UCMDB Attribute Name in XSLT File Sample configuration The UCMDB attribute name is provider, however you configured a wrong attribute provider_wrong. This error also occurs if you configure an attribute name in the wrong case because attribute names are case-sensitive. Error message You will NOT get any error messages either in the log file or the Universal CMDB studio, however the Service Manager field value will not be populated to Universal CMDB. Solution If you find that a Service Manager field value cannot be populated to Universal CMDB, check both the UCDMB attribute name and the Service Manager field name of the mapping in the XSLT file. For instructions on how to configure an attribute mapping, see "How to Map the CI Attribute to the Web Service Field" on page 191. Wrong Service Manager Field Name in XSLT File Sample configuration The Service Manager field name is ServiceProvider, however you configured a wrong attribute ServiceProvider_wrong: HP Service Manager (Service Manager 9.40; Universal CMDB or later) Page 267 of 273

268 Chapter 6: Troubleshooting Error message You will NOT get any error messages either in the log file or the Universal CMDB studio, however the Service Manager field value will not be populated to Universal CMDB. Solution If you find that a Service Manager field value cannot be populated to Universal CMDB, check both the UCDMB attribute name and the Service Manager field name of the mapping in the XSLT file. For instructions on how to configure an attribute mapping, see "How to Map the CI Attribute to the Web Service Field" on page 191. Wrong Universal CMDB Attribute Data Type in XSLT File Sample configuration The data type of Universal CMCB attribute provider is String, however you configured a wrong type Integer: HP Service Manager (Service Manager 9.40; Universal CMDB or later) Page 268 of 273

269 Chapter 6: Troubleshooting Error message The CIs will be populated to Universal CMDB, but the field value with a wrong data type configuration will not be populated to Universal CMDB. When you run the population job, you will get a Failed status. In addition, from both the population log file (see "How to Check the Population Log File" on page 253) and the Universal CMDB studio (see "How to Check the Error Message of a Failed Population Job" on page 252), you will get an error message similar to the following: Solution Search for text The value "xxx" of field "yyy" is not to find the name of the attribute with a wrong data type, and then specify the right data type in the XSLT file. For instructions on how to configure an attribute data type, see "How to Map the CI Attribute to the Web Service Field" on page 191. HP Service Manager (Service Manager 9.40; Universal CMDB or later) Page 269 of 273

270 Chapter 6: Troubleshooting UCMDB CI Attribute sm_id not Mapped to the Right Service Manager Field in XSLT The Service Manager CI ID must be mapped to Universal CMDB CI attribute sm_id, because it is used to push the Universal CMDB CI ID back to Service Manager. Out-of-the-box, this attribute mapping is configured in XSLT file cmdb_root_attributes_ population.xslt, which is imported by the other XSLT files as a common field mapping, and the Service Manager CI ID field is exposed as the caption CIName. Sample configuration If you configured the mapping for sm_id in one of the following ways: You did not configure the mapping for sm_id; You did not expose the Service Manager CI ID field in the Service Manager web service; You exposed the Service Manager CI ID field with a caption other than CIName; The Service Manager CI ID field was exposed in the web service as the caption CIName, but you configured a wrong name (for example, CIName_wrong) in the XSLT file (see the following figure). Error message When you run the population job, you will get a Failed status. In addition, from both the population log file (see "How to Check the Population Log File" on page 253) and the Universal CMDB studio (see "How to Check the Error Message of a Failed Population Job" on page 252), you will get an error message similar to the following: HP Service Manager (Service Manager 9.40; Universal CMDB or later) Page 270 of 273

271 Chapter 6: Troubleshooting Solution Search for text The Universal CMDB attribute "sm_id" of CI type to find the CI type, and then configure the attribute mapping for this CI Type in the XSLT file. For instructions on how to configure an attribute mapping, see "How to Map the CI Attribute to the Web Service Field" on page 191. HP Service Manager (Service Manager 9.40; Universal CMDB or later) Page 271 of 273
HP Service Manager. Universal CMDB Integration Guide (Using Service Manager Enhanced Generic Adapter)
") HP Service Manager Software Version: Service Manager 9.40; Universal CMDB 10.20 or later For the supported Windows and Unix operating systems Universal CMDB Integration Guide (Using Service Manager Enhanced
HP Service Manager Software Version: Service Manager 9.40; Universal CMDB 10.20 or later For the supported Windows and Unix operating systems Universal CMDB Integration Guide (Using Service Manager Enhanced
HP Service Manager Software
 HP Service Manager Software for the Windows and Unix operating systems Software Version: 9.20 HP Universal CMDB to HP Service Manager Integration Guide Document Release Date: June 2010 Software Release
HP Business Availability Center
 HP Business Availability Center for the Windows and Solaris operating systems Software Version: 8.00 Embedded UCMDB Applets Using Direct Links Document Release Date: January 2009 Software Release Date:
HP Universal CMDB. Software Version: Content Pack (CP18) Universal Discovery Content Guide - HP Integrations
 Universal Discovery Content Guide - HP Integrations") HP Universal CMDB Software Version: Content Pack 18.00 (CP18) Universal Discovery Content Guide - HP Integrations Document Release Date: December 2015 Software Release Date: December 2015 Legal Notices
HP Universal CMDB Software Version: Content Pack 18.00 (CP18) Universal Discovery Content Guide - HP Integrations Document Release Date: December 2015 Software Release Date: December 2015 Legal Notices
HP Universal CMDB. Software Version: Content Pack (CP18) Discovery and Integrations Content Guide - Discovery Activities
 Discovery and Integrations Content Guide - Discovery Activities") HP Universal CMDB Software Version: Content Pack 18.00 (CP18) Discovery and Integrations Content Guide - Discovery Activities Document Release Date: December 2015 Software Release Date: December 2015 Legal
HP Universal CMDB Software Version: Content Pack 18.00 (CP18) Discovery and Integrations Content Guide - Discovery Activities Document Release Date: December 2015 Software Release Date: December 2015 Legal
Universal CMDB. Software Version: Content Pack (CP20) Discovery and Integrations Content Guide - Discovery Activities
 Discovery and Integrations Content Guide - Discovery Activities") Universal CMDB Software Version: Content Pack 20.00 (CP20) Discovery and Integrations Content Guide - Discovery Activities Document Release Date: June 2016 Software Release Date: June 2016 Legal Notices
Universal CMDB Software Version: Content Pack 20.00 (CP20) Discovery and Integrations Content Guide - Discovery Activities Document Release Date: June 2016 Software Release Date: June 2016 Legal Notices
HP Service Manager. Software Version: 9.41 For the supported Windows and UNIX operating systems. Collaboration Guide
 HP Service Manager Software Version: 9.41 For the supported Windows and UNIX operating systems Collaboration Guide Document Release Date: September 2015 Software Release Date: September 2015 Legal Notices
HP Universal CMDB. Software Version: DDMI to Universal Discovery Migration Walkthrough Guide
 HP Universal CMDB Software Version: 10.22 DDMI to Universal Discovery Migration Walkthrough Guide Document Release Date: December 2015 Software Release Date: December 2015 Legal Notices Warranty The only
HP AutoPass License Server
 HP AutoPass License Server Software Version: 9.0 Windows, Linux and CentOS operating systems Support Matrix Document Release Date: October 2015 Software Release Date: October 2015 Page 2 of 10 Legal Notices
HP Service Manager. Software Version: 9.41 For the supported Windows and UNIX operating systems. SM Reports help topics for printing
 HP Service Manager Software Version: 9.41 For the supported Windows and UNIX operating systems SM Reports help topics for printing Document Release Date: September 2015 Software Release Date: September
HP Operations Orchestration
 HP Operations Orchestration Software Version: 7.20 HP Business Availability Center Integration Document Release Date: July 2008 Software Release Date: July 2008 Legal Notices Warranty The only warranties
HP Service Manager. Process Designer Tailoring Best Practices Guide (Codeless Mode)
") HP Service Manager Software Version: 9.41 For the supported Windows and UNIX operating systems Process Designer Tailoring Best Practices Guide (Codeless Mode) Document Release Date: September 2015 Software
HP Service Manager Software Version: 9.41 For the supported Windows and UNIX operating systems Process Designer Tailoring Best Practices Guide (Codeless Mode) Document Release Date: September 2015 Software
HP Service Manager Integration Suite (SMIS)
") HP Service Manager Integration Suite (SMIS) Software Version: 9.40 For the supported Windows and Linux operating systems Developer Guide Document Release Date: December 2014 Software Release Date: December
HP Service Manager Integration Suite (SMIS) Software Version: 9.40 For the supported Windows and Linux operating systems Developer Guide Document Release Date: December 2014 Software Release Date: December
HP Project and Portfolio Management Center
 HP Project and Portfolio Management Center Software Version: 9.30 HP Demand Management User s Guide Document Release Date: September 2014 Software Release Date: September 2014 Legal Notices Warranty The
HP Business Service Management
 HP Business Service Management For the Windows and Linux operating systems Software Version: 9.23 Multi-Tenancy Using BSM - Best Practices Document Release Date: December 2013 Software Release Date: December
HP Operations Orchestration Software
 HP Operations Orchestration Software Software Version: 7.51 HP Service Manager Integration Guide Document Release Date: August 2009 Software Release Date: August 2009 Legal Notices Warranty The only warranties
HP Service Manager. Software Version: 9.40 For the supported Windows and Unix operating systems. Knowledge Management help topics for printing
 HP Service Manager Software Version: 9.40 For the supported Windows and Unix operating systems Knowledge Management help topics for printing Document Release Date: January 2015 Software Release Date: January
HP SM Service Catalog-PPM Center Project Proposal Integration Solution
 HP SM Service Catalog-PPM Center Project Proposal Integration Solution Software Version: 1.01 For the supported Windows operating system Configuration Guide Document Release Date: September 2015 Software
OMi Management Pack for Microsoft SQL Server. Software Version: For the Operations Manager i for Linux and Windows operating systems.
 OMi Management Pack for Microsoft Software Version: 1.01 For the Operations Manager i for Linux and Windows operating systems User Guide Document Release Date: April 2017 Software Release Date: December
HP Operations Orchestration
 HP Operations Orchestration Software Version: 10.20 Windows and Linux Operating Systems Shell Wizard Guide Document Release Date: November 2014 Software Release Date: November 2014 Legal Notices Warranty
HP Asset Manager Software License Optimization Best Practice Package
 HP Asset Manager Software License Optimization Best Practice Package For the Windows operating system Software Version: 9.4.12.4 Technical Details of Software Counters Document Release Date: August 2014
HP Database and Middleware Automation
 HP Database and Middleware Automation For Windows Software Version: 10.10 SQL Server Database Refresh User Guide Document Release Date: June 2013 Software Release Date: June 2013 Legal Notices Warranty
HP Operations Orchestration
 HP Operations Orchestration For Windows and Linux operating systems Software Version: 9.07.0006 System Requirements Document Release Date: April 2014 Software Release Date: February 2014 Legal Notices
HP ALM Synchronizer for Agile Manager
 HP ALM Synchronizer for Agile Manager Software Version: 2.10 User Guide Document Release Date: August 2014 Software Release Date: August 2014 Legal Notices Warranty The only warranties for HP products
HP Data Center Automation Appliance
 HP Data Center Automation Appliance DCAA at-a-glance Express Edition Software Version: 1.00 Release Date: April 2015 Legal Notices Warranty The only warranties for HP products and services are set forth
OMi Management Pack for Oracle Database. Software Version: Operations Manager i for Linux and Windows operating systems.
 OMi Management Pack for Oracle Database Software Version: 1.10 Operations Manager i for Linux and Windows operating systems User Guide Document Release Date: June 2017 Software Release Date: February 2014
HP Universal CMDB Configuration Manager
 HP Universal CMDB Configuration Manager Software Version: 10.22 User Guide Document Release Date: December 2015 Software Release Date: December 2015 Legal Notices Warranty The only warranties for HP products
Installation Guide. OMi Management Pack for Microsoft Skype for Business Server. Software Version: 1.00
 OMi Management Pack for Microsoft Skype for Business Server Software Version: 1.00 For Operations Manager i for Linux and Windows operating systems Installation Guide Document Release Date: July 2017 Software
HP Business Service Management
 HP Business Service Management Software Version: 9.26 Getting Started With BPM - Best Practices Document Release Date: September 2015 Software Release Date: September 2015 Legal Notices Warranty The only
HP Operations Orchestration Software
 HP Operations Orchestration Software Software Version: 7.51 HP SiteScope Integration Guide Document Release Date: August 2009 Software Release Date: August 2009 Legal Notices Warranty The only warranties
HP Service Test Management
 HP Service Test Management for the Windows operating system Software Version: 11.00 Installation Guide Document Release Date: February 2011 Software Release Date: February 2011 Legal Notices Warranty The
Release Notes. Operations Smart Plug-in for Virtualization Infrastructure
 Operations Smart Plug-in for Virtualization Infrastructure Software Version: 12.04 Operations Manager for Windows, HP-UX, Linux, and Solaris operating systems Release Notes Document Release Date: August
HP Real User Monitor. Software Version: Real User Monitor Sizing Guide
 HP Real User Monitor Software Version: 9.26 Real User Monitor Sizing Guide Document Release Date: September 2015 Software Release Date: September 2015 Real User Monitor Sizing Guide Legal Notices Warranty
HP Network Node Manager i Software Step-by-Step Guide to Scheduling Reports using Network Performance Server
 HP Network Node Manager i Software Step-by-Step Guide to Scheduling Reports using Network Performance Server NNMi 9.1x Patch 2 This document shows an example of building a daily report for the ispi Performance
HP Operations Orchestration
 HP Operations Orchestration Software Version: 7.20 HP Network Node Manager (i series) Integration Document Release Date: July 2008 Software Release Date: July 2008 Legal Notices Warranty The only warranties
HP Enterprise Integration module for SAP applications
 HP Enterprise Integration module for SAP applications Software Version: 2.60 User Guide Document Release Date: December 2010 Software Release Date: December 2010 Legal Notices Warranty The only warranties
HP ALM Client MSI Generator
 HP ALM Client MSI Generator Software Version: 1.00 User Guide Document Release Date: October 2010 Software Release Date: October 2010 Legal Notices Warranty The only warranties for HP products and services
HPE Intelligent Management Center v7.3
 HPE Intelligent Management Center v7.3 Service Operation Manager Administrator Guide Abstract This guide contains comprehensive conceptual information for network administrators and other personnel who
HP Service Manager. Software Version: 9.41 For the supported Windows and UNIX operating systems. Service catalog help topics for printing
 HP Service Manager Software Version: 9.41 For the supported Windows and UNIX operating systems Service catalog help topics for printing Document Release Date: September 2015 Software Release Date: September
HP Automation Insight
 HP Automation Insight For the Red Hat Enterprise Linux and SUSE Enterprise Linux operating systems AI SA Compliance User Guide Document Release Date: July 2014 Software Release Date: July 2014 Legal Notices
SiteScope Adapter for HP OpenView Operations
 SiteScope Adapter for HP OpenView Operations for the UNIX and Windows Operating System Software Version: 1.00, 1.01 User s Guide Document Release Date: 24 November 2009 Software Release Date: December
HP UFT Connection Agent
 HP UFT Connection Agent Software Version: For UFT 12.53 User Guide Document Release Date: June 2016 Software Release Date: June 2016 Legal Notices Warranty The only warranties for Hewlett Packard Enterprise
For the Windows, Oracle Enterprise Linux, Red Hat Enterprise Linux, and SUSE Linux Enterprise operating systems Software Version: 10.01, CP 12.
 HP Universal CMDB For the Windows, Oracle Enterprise Linux, Red Hat Enterprise Linux, and SUSE Linux Enterprise operating systems Software Version: 10.01, CP 12.00 Discovery and Integration Content Guide
HPE Operations Bridge Reporter
 HPE Operations Bridge Reporter Software Version: 10.00 Windows and Linux operating systems Support Matrix Document Release Date: June 2017 Software Release Date: December 2015 Legal Notices Warranty The
HP Operations Orchestration Software
 HP Operations Orchestration Software Software Version: 7.51 HP Operations Manager Integration Guide Document Release Date: August 2009 Software Release Date: August 2009 Legal Notices Warranty The only
HP ALM. Software Version: Tutorial
 HP ALM Software Version: 12.20 Tutorial Document Release Date: December 2014 Software Release Date: December 2014 Legal Notices Warranty The only warranties for HP products and services are set forth in
HP ITSM Deployment Manager
 HP ITSM Deployment Manager Software Version: 2.0 For supported Windows operating systems HP ITSM Deployment Manager Quick Start Guide Document Release Date: December 2014 Software Release Date: December
OMi Management Pack for Microsoft Active Directory. Software Version: Operations Manager i for Linux and Windows operating systems.
 OMi Management Pack for Microsoft Active Directory Software Version: 1.00 Operations Manager i for Linux and Windows operating systems User Guide Document Release Date: June 2017 Software Release Date:
HP Operations Orchestration
 HP Operations Orchestration For the Linux or Windows operating systems Software Version: 9.02 Document Release Date: October 2011 Software Release Date: October 2011 Legal Notices Warranty The only warranties
HP Operations Manager
 HP Operations Manager Software Version: 9.22 UNIX and Linux operating systems Java GUI Operator s Guide Document Release Date: December 2016 Software Release Date: December 2016 Legal Notices Warranty
HP Network Node Manager ispi Performance for Quality Assurance Software
 HP Network Node Manager ispi Performance for Quality Assurance Software Intelligent Response Agent for the Windows and Linux operating systems Software Version: 9.20 Installation Guide Document Release
HP Service Health Reporter
 HP Service Health Reporter Software Version: 9.40 Windows and Linux operating systems Configuration Guide Document Release Date: October 2015 Software Release Date: January 2015 Legal Notices Warranty
HPE Operations Agent. Concepts Guide. Software Version: For the Windows, HP-UX, Linux, Solaris, and AIX operating systems
 HPE Operations Agent Software Version: 12.02 For the Windows, HP-UX, Linux, Solaris, and AIX operating systems Concepts Guide Document Release Date: December 2016 Software Release Date: December 2016 Legal
HP ALM Lab Management
 HP ALM Lab Management Software Version: 12.00 Lab Management Guide Document Release Date: March 2014 Software Release Date: March 2014 Legal Notices Warranty The only warranties for HP products and services
HP UFT Web Add-in Extensibility
 HP UFT Web Add-in Extensibility Software Version: 12.52 Windows operating systems Developer Guide Document Release Date: January 2016 Software Release Date: January 2016 Legal Notices Warranty The only
HP Network Node Manager i Software Step-by-Step Guide to Custom Poller
 HP Network Node Manager i Software Step-by-Step Guide to Custom Poller NNMi 9.1x Patch 2 This document includes two examples. The first example illustrates how to use Custom Poller to monitor disk space.
HP Enterprise Collaboration
 HP Enterprise Collaboration For the Windows operating system Software Version: 1.1 Support Matrix Document Release Date: August 2012 Software Release Date: August 2012 Support Matrix Legal Notices Warranty
Using UCMDB Integration Studio to Setup Integration with Service Manager
 Using UCMDB Integration Studio to Setup Integration with Service Manager Exercise 2.2 To: From: Subject: C. Michael, C. Michael DanBury, CMDB Manager Jennifer Falcon, System Administrator Universal CMDB
HP Enterprise Integration Module for SAP Solution Manager
 HP Enterprise Integration Module for SAP Solution Manager Software Version: 12.01 User Guide Document Release Date: March 2015 Software Release Date: March 2015 Legal Notices Warranty The only warranties
Project and Portfolio Management Center
 Project and Portfolio Management Center Software Version: 9.42 Program Management Configuration Guide Go to HELP CENTER ONLINE http://admhelp.microfocus.com/ppm/ Document Release Date: September 2017 Software
HP ALM Performance Center
 HP ALM Performance Center Software Version: 12.53 Quick Start Document Release Date: May 2016 Software Release Date: May 2016 Legal Notices Warranty The only warranties for Hewlett Packard Enterprise Development
HP Service Quality Manager Solution V3.2.1
 HP Service Quality Manager Solution V3.2.1 Service Management Foundation Installation and Configuration Guide Edition: 1.1 For Windows 64bit & Linux 64bit Operating System March 2015 Copyright 2015 Hewlett-Packard
HPE Intelligent Management Center
 HPE Intelligent Management Center Service Health Manager Administrator Guide Abstract This guide provides introductory, configuration, and usage information for Service Health Manager (SHM). It is for
IDE Connector Customizer Readme
 IDE Connector Customizer Readme Software version: 1.0 Publication date: November 2010 This file provides information about IDE Connector Customizer 1.0. Prerequisites for IDE Connector Customizer The Installation
HPE Enterprise Integration Module for SAP Solution Manager 7.1
 HPE Enterprise Integration Module for SAP Solution Manager 7.1 Software Version: 12.55 User Guide Document Release Date: August 2017 Software Release Date: August 2017 HPE Enterprise Integration Module
HP ALM. Software Version: patch 2. Business Views Microsoft Excel Add-in User Guide
 HP ALM Software Version: 12.21 patch 2 Business Views Microsoft Excel Add-in User Guide Document Release Date: September 2016 Software Release Date: September 2016 Legal Notices Warranty The only warranties
HPE StoreEver MSL6480 Tape Library CLI Utility Version 1.0 User Guide
 HPE StoreEver MSL6480 Tape Library CLI Utility Version 1.0 User Guide Abstract This document explains how to install and use the HPE StoreEver MSL6480 Tape Library CLI utility, which provides a non-graphical
Intelligent Provisioning 3.10 Release Notes
 Intelligent Provisioning 3.10 Release Notes Part Number: 881705-002 Published: February 2018 Edition: 1 Copyright 2017, 2018 Hewlett Packard Enterprise Development LP Notices The information contained
HPE ilo Federation User Guide for ilo 5
 HPE ilo Federation User Guide for ilo 5 Abstract This guide explains how to configure and use the HPE ilo Federation features. It is intended for system administrators, Hewlett Packard Enterprise representatives,
Additional License Authorizations
 Additional License Authorizations For HPE Cloud Center software products Products and suites covered PRODUCTS E-LTU OR E-MEDIA AVAILABLE * NON-PRODUCTION USE CATEGORY ** HPE Cloud Service Automation (previously
HP Intelligent Management Center Remote Site Management User Guide
 HP Intelligent Management Center Remote Site Management User Guide Abstract This book provides overview and procedural information for Remote Site Management, an add-on service module to the Intelligent
HP ALM. Software Version: Tutorial
 HP ALM Software Version: 12.50 Tutorial Document Release Date: September 2015 Software Release Date: September 2015 Legal Notices Warranty The only warranties for HP products and services are set forth
HP OpenView Service Desk
 HP OpenView Service Desk OpenView Operations Integration Administrator s Guide Software Version: 5.10 For the Windows and UNIX Operating Systems Manufacturing Part Number: None Document Release Date: August
HP Intelligent Management Center SOM Administrator Guide
 HP Intelligent Management Center SOM Administrator Guide Abstract This guide contains comprehensive conceptual information for network administrators and other personnel who administrate and operate the
HPE Application Performance Management
 HPE Application Performance Management Software Version: 9.30 APM Extensibility Guide Document Release Date: July 2016 Software Release Date: July 2016 Legal Notices Warranty The only warranties for Hewlett
HPE ControlPoint. Software Version: Support Matrix
 HPE ControlPoint Software Version: 5.5.1 Support Matrix Document Release Date: December 2017 Software Release Date: December 2017 Legal notices Warranty The only warranties for Hewlett Packard Enterprise
HP Service Manager. Software Version: 9.41 For the supported Windows and UNIX operating systems. Tailoring Best Practices Guide
 HP Service Manager Software Version: 9.41 For the supported Windows and UNIX operating systems Tailoring Best Practices Guide Document Release Date: September 2015 Software Release Date: September 2015
Additional License Authorizations
 Additional License Authorizations For HPE Cloud Center and HPE Helion Cloud Suite software products Products and suites covered PRODUCTS E-LTU OR E-MEDIA AVAILABLE * NON-PRODUCTION USE CATEGORY ** HPE
HP Records Manager. Kofax Capture Template. Software Version: 8.1. Document Release Date: August 2014
 HP Records Manager Software Version: 8.1 Kofax Capture Template Document Release Date: August 2014 Software Release Date: August 2014 Legal Notices Warranty The only warranties for HP products and services
HP LeftHand SAN Solutions
 HP LeftHand SAN Solutions Support Document Installation Manuals VSA 8.0 Quick Start - Demo Version Legal Notices Warranty The only warranties for HP products and services are set forth in the express warranty
HP Application Lifecycle Management. Upgrade Best Practices
 HP Application Lifecycle Management Upgrade Best Practices Document Release Date: October 2010 Legal Notices Warranty The only warranties for HP products and services are set forth in the express warranty
HPE FlexNetwork MSR Router Series
 HPE FlexNetwork MSR Router Series Comware 7 OAA Configuration Guides Part number: 5998-8789 Software version: CMW710-E0407 Document version: 6W100-20160526 Copyright 2016 Hewlett Packard Enterprise Development
HP OpenView Storage Data Protector A.05.10
 HP OpenView Storage Data Protector A.05.10 ZDB for HP StorageWorks Enterprise Virtual Array (EVA) in the CA Configuration White Paper Edition: August 2004 Manufacturing Part Number: n/a August 2004 Copyright
HPE ALM Excel Add-in. Microsoft Excel Add-in Guide. Software Version: Go to HELP CENTER ONLINE
 HPE ALM Excel Add-in Software Version: 12.55 Microsoft Excel Add-in Guide Go to HELP CENTER ONLINE http://alm-help.saas.hpe.com Document Release Date: August 2017 Software Release Date: August 2017 Legal
IDOL Site Admin. Software Version: User Guide
 IDOL Site Admin Software Version: 11.5 User Guide Document Release Date: October 2017 Software Release Date: October 2017 Legal notices Warranty The only warranties for Hewlett Packard Enterprise Development
HPE ComputeSensor. User Guide. Software Version: 3.02 Windows and Linux operating systems. Document Release Date: August 2017
 HPE ComputeSensor Software Version: 3.02 Windows and Linux operating systems User Guide Document Release Date: August 2017 Software Release Date: August 2017 Legal Notices Warranty The only warranties
HPE Operations Bridge Reporter
 HPE Operations Bridge Reporter Software Version: 10.21 Windows and Linux operating systems Disaster Recovery Guide Document Release Date: October 2017 Software Release Date: August 2017 Legal Notices Warranty
HP QuickTest Professional
 HP QuickTest Professional Software Version: 10.00 Installation Guide Manufacturing Part Number: T6513-90038 Document Release Date: January 2009 Software Release Date: January 2009 Legal Notices Warranty
HPE Network Virtualization
 HPE Network Virtualization Software Version: 9.10 Installation Guide Document Release Date: June 2016 Software Release Date: June 2016 HPE Network Virtualization Legal Notices Warranty The only warranties
HP ProLiant Agentless Management Pack (v 3.2) for Microsoft System Center User Guide
 for Microsoft System Center User Guide") HP ProLiant Agentless Management Pack (v 3.2) for Microsoft System Center User Guide Abstract This guide provides information on using the HP ProLiant Agentless Management Pack for System Center version
HP ProLiant Agentless Management Pack (v 3.2) for Microsoft System Center User Guide Abstract This guide provides information on using the HP ProLiant Agentless Management Pack for System Center version
HP P4000 Remote Copy User Guide
 HP P4000 Remote Copy User Guide Abstract This guide provides information about configuring and using asynchronous replication of storage volumes and snapshots across geographic distances. For the latest
HP Business Service Management
 HP Business Service Management For the Windows and Linux operating systems Software Version: 9.22 RTSM Best Practices Document Release Date: April 2013 Software Release Date: April 2013 Legal Notices Warranty
Using the Server Automation Red Hat Importer
 Server Automation Software version: 10.21 1 Document release date: March 2016 Software release date: March 2016 1 This functionality is introduced for SA 10.22 and above. It is also available for SA 10.21
Legal Notices. The information contained herein is subject to change without notice.
 Legal Notices Warranty The only warranties for HP products and services are set forth in the express warranty statements accompanying such products and services. Nothing herein should be construed as constituting
Intelligent Provisioning 3.00 Release Notes
 Intelligent Provisioning 3.00 Release Notes Part Number: 881705-001b Published: October 2017 Edition: 3 Copyright 2017 Hewlett Packard Enterprise Development LP Notices The information contained herein
HP Operations Manager
 HP Operations Manager Software Version: 9.1x and 9.2x UNIX and Linux operating systems High Availability Through Server Pooling Document Release Date: December 2016 Software Release Date: December 2016
Enterprise Integration Module for SAP Solution Manager 7.2
 Enterprise Integration Module for SAP Solution Manager 7.2 Software Version: 12.53-12.55 User Guide Go to HELP CENTER ONLINE http://admhelp.microfocus.com/alm Document Release Date: May 2018 Software Release
ForeScout Extended Module for ServiceNow
 ForeScout Extended Module for ServiceNow Version 1.1.0 Table of Contents About this Integration... 4 Use Cases... 4 Asset Identification... 4 Asset Inventory True-up... 5 Additional ServiceNow Documentation...
HP Project and Portfolio Management Center
 HP Project and Portfolio Management Center Software Version: 8.00 Generating Fiscal Periods Document Release Date: July 2009 Software Release Date: July 2009 Legal Notices Warranty The only warranties
ALM. Tutorial. Software Version: Go to HELP CENTER ONLINE
 ALM Software Version: 12.55 Tutorial Go to HELP CENTER ONLINE http://admhelp.microfocus.com/alm/ Document Release Date: August 2017 Software Release Date: August 2017 ALM Legal Notices Disclaimer Certain