User Guide. 4th Edition, March 2005 Copyright , 2Simple Software/think ICT Ltd. PAGE
|
|
|
- Oscar Cobb
- 6 years ago
- Views:
Transcription


1 User Guide a 4th Edition, March 2005 Copyright , 2Simple Software/think ICT Ltd. info@2simple.com PAGE
2 2Investigate User Guide Copyright , 2Simple Software/thinkICT Ltd. All Rights Reserved. PAGE
3 Copyright Notice The software described in this document is a proprietary product from 2Simple Software and is furnished to the user under a licence for use as specified in the licence agreement. The software may be used or copied only in accordance with the terms of the agreement. No part of this document may be reproduced, transmitted, transcribed, stored in any retrieval system, or translated into any language without the written permission of 2Simple Software Ltd. Trademarks - 2Simple, 2Simple Software, 2Simple logo, 2Investigate are trademarks of 2Simple Software. - Microsoft and MS Windows are trademarks of Microsoft Corp. - Acrobat Reader is a trademark of Adobe Systems Inc. - Lotus Screencam is a trademark of IBM Corp. All other trademarks and registered trademarks mentioned in this document are the property of their respective owners. Third (UK) Edition, June , 2Simple Software Ltd. Author: Sean Naghibi, 2Simple Software Ltd. Portions by Tony Gordon, 2Simple USA INV_UG_006a 2Simple Software Enterprise House 2 The Crest Hendon, London NW4 2HN PAGE 1
4 PAGE 2
5 Table of Contents Chapter 1 Installing 2Investigate 4 Chapter 1 System specification 9 Chapter 2 Getting Started with 2Investigate 10 Chapter 3 Creating a new Database 14 Chapter 4 Opening an Existing Database 21 Chapter 5 Working with Cards 23 Chapter 6 Viewing a Database 31 Chapter 7 Modifying a Database 34 Chapter 8 Finding, Sorting and Grouping 38 Chapter 9 Graphing and Charting 46 Chapter 10 Database Statistics 51 Chapter 11 Making Reports 53 Chapter 12 Menu Commands 57 Chapter 13 Teacher Options Menu 63 Chapter 14 Lotus Screencam Help 68 PAGE 3
6 Chapter 1 Installing 2Investigate & Technical Details PAGE 4


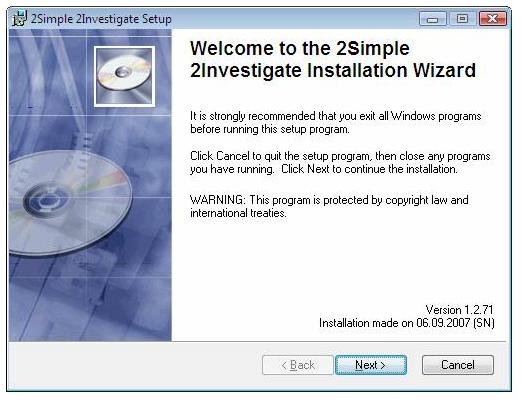
7 Installation for stand-alone machines 1. Put the CD in the drive 2. If nothing happens click 'Start' - 'Run' 3. Type D:\setup.exe (If your CD drive is drive E, type e:\setup.exe etc). 4. Click OK 5. Follow the instructions on screen to complete the installation. This will install your software & add a link from the 'start menu' to 2Investigate. PAGE 5
8
9 Installation - Networks 2Investigate is designed to work on ALL networks. Please refer to for more detail on the instructions below as well as other useful support info. For further help, please contact us via our website or support@2simple.com Three ways to install 2Investigate on a network: 1) Use the MSI included on the cd to allocate the program across all machines on a network. This is our recommended method for installing across a network for all 2Simple programs, and has the benefit of not needing to go to each machine to install the software (unlike methods 2 and 3). You can download detailed instructions for this from our support website. The MSI is designed for Windows 2000 and 2003 domain architecture, with Win clients. 2) Install on each local machine. This may be the best option if you have a small number of computers or do not have a Windows 2000 / 2003 domain architecture. 3) Install on server only. While this method is supported for 2Investigate, it can be time-consuming as it is still necessary to visit each machine and install certain files locally (see below). Note that this method is not possible for all 2Simple programs see our support site for more information. Install the software on the server and create shortcuts to the program for the clients. On each local machine run the appropriate DLL installer (available from our support site). PAGE 7
10
11 System Requirements The minimum and recommended specifications are set out below: System Minimum Recommended Operating System Windows 95 W95, 98, Me, NT4 (SP-3), 2000 or XP / Vista Memory 16Mb RAM 64Mb or greater RAM Hard-disk space 96Mb 96Mb or greater Display 640x480 pixels, 16 colours 800x600 pixels, True Colour (32bit) Sound none Microphone and speakers Includes MSI for WIN2000, other MSIs available on request. PAGE 9
12 Chapter 2 Getting Started with 2Investigate PAGE 10

13 2Investigate 2Investigate is an innovative database program that demonstrates the concept of a Database in a visual manner. The program allows you to setup a database and maintain, organise or classify the information in a number of formats, and all of this is undertaken in a manner that lets the user see the relationships between the information elements being gathered in the records. 2Investigate uses electronic records or cards to store information. Each card can have a number of fields that define the information stored in each card. The fields can be text, numeric or a pull-down list of defined answers. The information stored in 2Investigate databases are not simple records but are presented as graphical format cards. The user entering information can create graphics to illustrate each card, or import graphics from an external source. In addition, users can also add a sound file to each card, or record of brief oral description. In addition, 2Investigate allows sharing of information with other users in a networked environment. When two or more workstations run 2Investigate at the same time and share access to the same database file on a network, they will see a shared view of the information, and can see the changes or additions being made by others in Real-time (as it happens). PAGE 11

14 2Investigate Start 2Investigate using the Icon on the desktop, or from the Start Programs 2Simple Software 2Investigate menu. Once the program is launched, you will see: PAGE 12

15 2Investigate When 2Investigate initially loads, you will be presented with this menu: You are given 4 choices. These are: Start a new Database This option will load a 3 step Wizard which will assist you creating your Database. Open an existing Database This option will allow you to open a database that has already been created either on the host machine or over the network. This is explained in the next chapter. Open Last Database This option will allow you to open the last database used. Watch a video on how to make a Database If you are having difficulty, or simply want to know how to use 2Investigate to setup and use a database, you can watch a video tutorial on making a simple database. This option is highly recommended if you are a new user. PAGE 13
16 Chapter 3 Creating a New Database PAGE 14

 Custom")

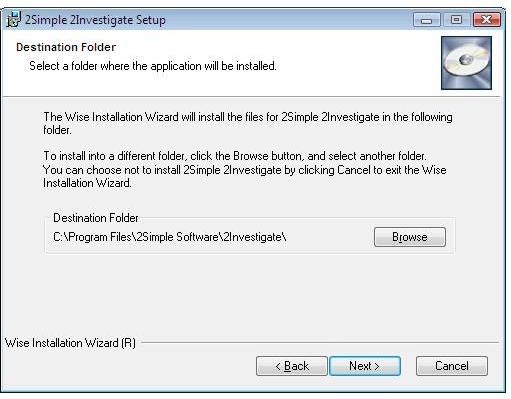
17 Creating a New Database Starting a New Database Using the Wizard Once you have chosen to create a new database, you will be presented with a 3-Step Wizard as seen below: Once the Wizard starts, click on Next to continue... Now enter a name for your Database (choose something that is easy to remember) You can choose to save the file in one of two locations (if you are not sure, check the Custom Directory option and click Finish) Custom Directory This option will create & save your new Database in My Documents folder of the host computer. On the Network This option will give you more flexibility by allowing you to save your Database on another computer, drive or folder. PAGE 15
18 Creating a New Database Once you click finish, the Number of Fields box will open. You can define up to 12 fields for each entry in a database. Sometimes, you will only need a few fields; for more complex tasks, you might need all 12! Remember: The fields need to align with the information you intend to collect. You can name each field (the fieldname can be up to 16 characters in length), to match the data to be collected. For example, in a database about zoo animals, you might have fields for animal, type, number of legs, living environment, etc. PAGE 16

19 Creating a New Database Setting the Field Information 1. Number of Fields This option allows you to set the fields within your database. By default there are 3 fields but you can increase or decrease the value by using the buttons. You can have up to 12 fields. 2. Field names Now that you have decided on the numbers of fields in your database, you can decide what information is to be gathered in each field. Choose Field names that will indicate exactly what information you want students to enter into the card. For example, in a Zoo database, you might have fields for Name of animal, number of Legs, where it Lives, etc. A field name can be up to 16 characters in length. PAGE 17

20 3. Entering field names The value for each field name can be entered by clicking the allowing you to edit the fields. Creating a New Database button. The following dialogue box will appear Let s enter a value for this field, for example, Legs : PAGE 18

21 Creating a New Database 3. Entering Field Names (Continued) 2Investigate allows you to select the format of the data to be entered by the students. There are three choices: Abc - Letters and numbers: This means the field can contain letters or numbers. For example, in a Zoo database, you could enter Lion. This field setting would also allow numbers to be entered as well. If you are not sure what data is to be entered, this is a good setting to use. 123 Numbers only: This means the field can only contain numbers. List of answers This allows the use of predetermined selections. For example, a database about a zoo might have answers that an animal could live on Land or in Water or Both. Once you have entered your selection, click OK to continue. PAGE 19

22 Creating a New Database 4. Read Only Database By selecting this option you can make the Database Read only. This means once this Database has been saved and opened once again, the Delete Card option will be disabled thus preventing the students from deleting any cards from this Database. However they can still add or edit cards within the database. This setting is useful in a multi-user setting where many students are entering data, and you do not want inadvertent deletions. Automatic Saving When you name your database, it is automatically saved. As new cards are added, or the database is edited, the changes are saved automatically. PAGE 20
23 Chapter 4 Opening an Existing Database PAGE 21

24 Open a Database As well as creating a database, you can open an existing 2Investigate database. To open an existing database, click on File Open Select the drive and the folder where the saved work will be found, and you will see a 2Investigate database icon and the database name. Select it and click on OK, and your database will open in 2Investigate. Opening one of the many sample databases will allow you to try out the sorting and classifying features found in the next chapters: click on File Open Samples 2Investigate PAGE 22
25 Chapter 5 Working with Cards Adding, Editing, Deleting and Using Sound PAGE 23
26 2Investigate uses cards to collect information that is then stored in a database. Each card can have up to 12 fields or characteristics. Each field name can be up to 16 characters long. The fields will have already been created when the database was setup. The type of information users are to enter in each field can be defined by the person setting up the database. Data entered can be text or number or selected from a pull down list of answers. Working with Cards This chapter will show you how to add, change, illustrate and make your cards speak! Here is an example of a Database Card as it will be displayed on-screen First Field Entry Image Each card will display the entry in the first field and an image (if created or imported). PAGE 24


27 Working with Cards Let s start by adding a card to a database: Select Card Add Card from the menu: Click on the white rectangle to access the drawing feature (or to import an image - importing details on next page). 2Investigate has a powerful built-in paint tool that allows you to create an image to suit the card being entered. PAGE 25


28 Working with Cards You can import an external image from elsewhere on your computer, or from an external source such as the Clipart on 2Investigate CD-ROM. Click on Import to use an external image... Here is the lion imported from the 2Investigate CD... You can import variety of image formats such as BMP, WMF, GIF & JPG formats. Card Limit 2Investigate has a limit of 99 cards per database. PAGE 26


29 Working with Cards To Delete a Card You can easily delete cards from your database. Simple click on Card Delete Card: A dust bin will appear on the top corner of the screen. All you have to do to delete a card is select your card and drag it behind the dust bin as shown. PAGE 27
30 Working with Cards Once you move the card behind the dust bin, you will be prompted to confirm your deletion. Repeat the process if you wish to delete more cards. If the dust bin obscures some cards, you can move the bin anywhere on the screen. Simply click on the bin and hold the mouse button and drag at the same time to anywhere on the screen. To hide the dust bin, click on the X on the dust bin. PAGE 28
31 Working with Cards Adding/Recording Sound One of the great features of 2Investigate is the ability to add sound to the cards in a database. You can add sound files to a card, or you can record your own sound within 2Investigate. For this feature to function, you will need a multimedia-type workstation equipped with a microphone and speakers. To add sound to a new card, create a new card: click on Card Add When the new card dialogue box opens, you will see a tab that allows you to Add/Edit Sound. Click on this tab. To add sound to an existing card: Double click on a card, and the edit box will open allowing you to click on Add/Edit Sound tab. Sound Options: You have two options for adding a sound: Add a Pre-Recorded Sound This option requires you to have a sound file somewhere on your computer, a disk or CD-ROM. The file has to be in Windows WAV file format. Record Your Own Sound This option allows you to record your own sound provided you have the right hardware on the host workstation. PAGE 29

32 Working with Cards To add a pre-recorded sound, simply click on Add Sound, navigate to the file on your computer, and you can play the sound to see if you are happy with it. When ready click on OK to add the sound. To remove the sound, click on the button Remove Sound. To record your sound choose the option Record your own sound. Simply click on Record to start recording. When finished click on Stop Recording you can play it back and when you are happy with it simply click on OK to add it to your card. To remove the sound, click on the button Remove Sound. PAGE 30
33 PAGE 31 Chapter 6 Viewing Information Card or Table View
34 Viewing Information The information stored in a database can be viewed in two ways. 2Investigate defaults to the card view of information stored. It is possible to view information in a table as well. Card View Table View With a database open, click on the table view button on the menu bar to see the information displayed in a table form. This displays the information entered for each field, record by record. PAGE 32

35 Viewing Information The field names are shown at the top of the table, and the information for each record is shown. If there are many field names, or a lot of information has been entered, some descriptions may be truncated to fit on the screen. You can view all the information entered by returning to the card view, and double clicking on a card. PAGE 33
36 Chapter 7 Modifying a Database PAGE 34

37 Modifying a Database Sometimes you will need to modify the settings of an existing database. This is easily achieved. For example, if we want to add an extra field in our Zoo database, decide on the additional field that you want to add: for example, we want to add a field for wings to our database. Remember we had the following fields in the original Zoo database: Name Legs Lives To add a new field to our database called Wings we: Click on Card Design Cards Click on the in the Number of Fields section to add a new field to the database. PAGE 35
38 Modifying a Database Click on the button. Enter the Field name as Wings. Since we can use unique answers, we check the option box: and enter our two possible choices: YES or NO. When ready, click on OK. PAGE 36

39 Modifying a Database Notice that a new button appears next to the new field which contains a possible choice of answers (circled). When ready click on OK. If you add a new field to a card, the previously entered cards will not have an entry for that field. Users will have to revisit cards already entered to add the new information. For example, if we pick the Lion, we will see a new field (circled above). We can then update by adding the new information to this card. PAGE 37
40 Chapter 8 Finding, Sorting and Grouping PAGE 38


41 Finding Sorting and Grouping In this Chapter you will learn how to Find, Sort or Group cards. Let s start with the Arrange Command. Arrange Cards For display and presentation purposes, you may want to rearrange the position of the cards within your database. To do this, click on: Card Arrange Cards You will be presented with a dialogue box which will allow you to arrange cards on the screen in 5 different ways: Top Bottom Left Right Random This option is useful to keep track of all the cards on the screen once you have many entries. The example shows Arrange Right PAGE 39

42 Finding Sorting and Grouping Find Option 2Investigate allows you to do a powerful search on the cards within your database. For example, to find a card in our Zoo database. Click on Edit Find from menu and you will be presented with the Find dialogue box: 1. The drop down menu will contain the fields settings from the database structure. For example, in our Zoo database, we can choose from Name, Legs and Lives. 2. The find command allows the use of powerful search terms such as: Is Is not Includes Starts with Ends with Comes before Comes after PAGE 40
43 Finding Sorting and Grouping 3. Finally we put in the name of the subject. In this case, Lion. Then click OK and the results will be displayed. For accurate results, please make sure you type the name exactly as it appears in the database otherwise 2Investigate will not find a match. PAGE 41
.")
44 Finding Sorting and Grouping We can go a step further and undertake more complex searches by adding additional parameters to the original find command: For example, to Find using two expressions, we would enter something like this: Name is Lion and Legs = 4 You can choose to show the results in a Venn Diagram. Simply make your selection and click on Make Venn Diagram check box (Circled above). PAGE 42

45 Finding Sorting and Grouping You can control the speed of the Find by using the slider that appears in a window while the data is being organised to match the find command. PAGE 43

46 Finding Sorting and Grouping To Sort Data within a database. Sorting allows the simple classification of the cards by one field or parameter. This is not to be confused with the more powerful Find command that allows many parameters to be considered at the same time. You can visually sort the data within the database: click Data Sort You can sort data based on your field settings. For example, our Zoo database will have fields for Name, Legs and Lives and we can sort the information in those fields in two ways: Going Up Going Down PAGE 44

47 Finding Sorting and Grouping Grouping Cards You can Group the cards by field names. In our example, the animals in our Zoo database can be grouped by their Name, Legs, Lives fields: PAGE 45
48 Chapter 9 Graphing and Charting PAGE 46

49 Graphing and Charting Graphing and Charting 2Investigate allows the creation of graphs and charts in a variety of formats including pie charts and 3D bar graphs. The Graphing wizard simplifies this process. Simply select the field you want to graph or chart, add a title, label the axes, and when ready, click on OK and within a few seconds your graph is created on screen. Let s see how this is done. To make a graph or chart, you need to have a database open and when ready click: Data Make Graph PAGE 47

50 Graphing and Charting Select the field you want to use from the drop down menu. Click on Next when ready... Select a graph type you want. You have a choice of three types of chart or graph: Bar Chart Line Chart Pie Chart When ready, click on Next... PAGE 48

51 Graphing and Charting Now you can enter a title for your graph as well as descriptions for the X and Y axes of your graph. When ready, Click on OK for your graph to be created... Remember: X and Y Axes cannot be titled in Pie Charts PAGE 49

52 Graphing and Charting Animals database represented in a Pie Chart PAGE 50
53 Chapter 10 Database Statistics PAGE 51

54 Database Statistics Statistics You can calculate statistics from the information stored in a database. The output can be seen as a count or a percentage. Open a database, and then: click on Data Statistics This will open a dialogue box where you can select the field that you want to analyse. If the data format is text, then the options are limited to Count or Percentage. If the information is Numeric, then a much wider range of statistics can be derived, including: Mean Maximum Minimum Range Total The data can be copied for use in other applications by clicking on the Copy Data button. PAGE 52
55 Chapter 11 Making Reports PAGE 53
. The data can be copied and pasted into the clipboard or imported into any text based Windows application.")
56 Reporting Information Making Reports It is important to be able to take information from a 2Investigate database and use it with other software tools being used by students. Your students can make reports based on the fields in their database(s). The data can be copied and pasted into the clipboard or imported into any text based Windows application. To start, click on Data Reports There are three tabs: Design Report, View Reports & Jotter. Let us look at the Design Report function first: From the Design Report tab, select the fields needed for the report. Each field will need to be Inserted by clicking the Insert button. PAGE 54

57 Reporting Information PLEASE NOTE: as you click on the Insert field button, the text output from the database doesn t insert spaces between values, so you might find it easier to read if a space is inserted between values. For example: if you insert <<Name>> and then tap the space bar to add a space before inserting <<Eye Colour>> the report will look like Louisa Auburn rather than LouisaAuburn. When you have inserted all the fields you want, click on View Reports to see the report. This will give you a listing as data which can be copied into other programs. PAGE 55
58 Reporting Information To use the data, simply click on the Copy Data button which will copy the information into the clipboard and all you have to do is to paste it into any text based application: for example, NotePad. PAGE 56
59 Chapter 12 Menu Commands PAGE 57

60 Menu Commands Although all the information in this section can be found in other chapters of the User Guide, this section summarises all the Menu Commands available to the user, organised under the main Menu headings. The File Menu allows the user to: New - Open a new database. Will open the Design a New Database wizard. Open - Opens an existing database. Will open a file browsing window allowing the user to select an existing 2Investigate database. Print - Enables printing of the screen, individual card, or a graph or chart on the default printer. The default printer is set using the teacher options menu. Exit - Exit the program. PAGE 58
61 Menu Commands The Card Menu allows the user to: Add Card - Add a card to a database. Allows a new card to be added, and information entered for each field (remember, the fields are setup when a new database is created using the File New command. Delete Card - Delete a card from the database. This will allow the user to delete a card from the database. If the Read Only option is set in the Teacher Options, then this feature will not be available (the text will be grayed out if Read Only is enabled). If this feature is active, when you click on this Delete Card, a Dust Bin will appear on the desktop (you can move it anywhere by clicking on it, and dragging while the left mouse button is pressed). To delete a card, click and drag it behind the bin, and you will be asked if you want to delete the card: click Yes and the card will be deleted. You can hide the Bin by clicking on the X on the lid. Design Cards - Allows the user to alter the structure of an existing database. If you find that you need additional fields, or need to change the input characteristics of a field, then the Design Card command allows you to change the database to meet your needs. Arrange Cards - Cards can be arranged on screen in a number of ways. Allows you to select from a pull down menu how cards are shown on the screen. Choose from Top, Bottom, Left, Right, Randomly, Tiled views. PAGE 59

62 Menu Commands The Card Menu (continued): Find - A powerful search tool that allows the user to search for information using one or more field. A database can store a lot of information, and this information can be organised using many fields. Finding information can be difficult if you cannot search for a number of pieces of information at the same time. The Find command allows searches to be undertaken using sophisticated search command features such as is, is not, includes, and more. In addition, the Find Command allows you to search on multiple items using and and or combination search tools. You can combine up to three levels of search in the Find command. PAGE 60

63 Menu Commands The Data Menu allows the user to: Sort - Sort by field, ascending or descending. Users can select to sort information by field, and then by ascending or descending format. In all cases, a tiled display will result with the cards organised according to the format selected. Group - View the Cards by number, by field. The Group command allows the user to classify or group cards by field. A powerful visual tool for classifying information by a single characteristic. Make Graph - Create graphs from information stored. Allows users to make graphs organised by field. A simple to use wizard guides users through the process of creating a graph. The graph can be titled, as can the axes. Report - Extract information for use elsewhere. The Report command allows the user to output information, field-by-field, from the database. This information can be copied into other programs. Statistics - Show statistical information on a database. If the data is text, users can obtain statistical information on count and percentage. If the data is numeric, then a much wider range of statistical information is available such as mean, minimum, maximum, total, etc. PAGE 61
64 Menu Commands The Help Menu allows the user to: Help - Find information on program features. PAGE 62
65 Chapter 13 Teacher Options PAGE 63

66 Teacher Options Teachers or authorised users can configure a number of 2Investigate s options according to their needs. To gain access to the options, simply simultaneously press the following keys: Teacher s Options consist of 12 elements that can be changed. The following pages detail the options and the default settings. PAGE 64
67 Teacher Options 1. Hide Refresh Option This feature is used in a multi-user environment, where users can update the database for all users as they enter new data. If you are working in a shared folder environment, you can uncheck this box to enable users to see changes being made across the network. Default is Hide. 2. Sound Options If you are using a multimedia computer, this option allows the user to record sounds on a database card. If you do not have access to a computer-based microphone, or you do not want this feature enabled, then uncheck the box. Default is Show Add Sound. 3. Read Only Option If you want to allow a database to be read only then check this box. Read only allow students to add or edit cards, but not to delete them. This feature is useful if you have many users entering data on similar topics. Default is Enabled. 4. Enabled Case Sensitivity When sorting or classifying information, upper or lower case spelling is accepted. If you need to differentiate between upper and lower case spelling then enable case sensitivity. Default is Not Enabled. PAGE 65

68 Teacher Options 5. Card Caption/Border Colour This option allows you to change the colour of the captions of each card created in your database. This is a useful option if the colour of the caption blends with the background colour thus making it hard to read the captions. Simply click on the button where you will be presented with a choice of colours. You WILL need to restart 2Investigate for changes to take effect. There is an option to allow you to change the colour of the card borders to suit your needs as well. Default not applicable (N/A). 6. Default Printer Selection This drop down box will list all the available printers installed on your machine. This allows you to select the default printer for 2Investigate. PAGE 66
69 Teacher Options 7. Change Teacher s Options Keys When you press CTRL+Shift+O, you launch the Teacher s Options panel. You can change this key by choosing a different letter. You will need to restart 2Investigate for the change to take effect. Default CTRL+Shift+O. 8. Set Folder Access Options You can stop students from browsing other folders by checking this option. Default is allow browsing. 9. Set Jotter Options Allows you to disable print, save or copy. Default is enabled. 10. Set Report Options You can control whether users can print in the report menu with this option. Default is enabled. 11. Show Add a Card Reminder If you do not want the add a card reminder pop-up box to appear, then check this box. Default is show reminder. 12. Working Directory This option allows you to set the working directory where files are stored. 13. About Shows the version information for the copy of 2Investage being used. Useful if you are reporting a problem. PAGE 67
70 Chapter 14 Lotus Screencam Help PAGE 68
71 Lotus ScreenCam Help 2Investigate comes with a number of video tutorials which can be viewed with Lotus ScreenCam. It is important that you become familiar with this tool as it plays a major role in teaching you how to use 2Investigate. Lotus ScreenCam has a very easy to use control panel. You will not see the toolbar on the desktop (it is usually hidden behind the video being Played). You can find the Control Panel on the Windows Program Bar when a video tutorial is playing. Mouse Required Can use Keyboard Exit Important tips: If the cursor disappears, press ALT key to bring it back. Press the Spacebar to Stop/Play a video. Play/Pause Fast Forward Volume Control Click on the (X) on the top corner of the Player to exit ScreenCam. Rewind Segment Stop PAGE 69
72 2Simple Software Enterprise House 2 The Crest Hendon, London NW4 2HN Tel: (+44) Fax: (+44) info@2simple.com PAGE 70
Introduction. 2 Installation Getting started. 5 Curriculum Links 6
 Contents Introduction. 2 Installation... 3-4 Getting started. 5 Curriculum Links 6 Factoroids. 7 Dividers. 8 FracWall... 9 BondBubbles... 10 SeqSnake. 11 FunkyPlatform.. 12 Personalisation Options General.
Windows XP. A Quick Tour of Windows XP Features
 Windows XP A Quick Tour of Windows XP Features Windows XP Windows XP is an operating system, which comes in several versions: Home, Media, Professional. The Windows XP computer uses a graphics-based operating
IVT by Max Wainewright (c) 2003
 2003") 1 www.2simple.com IVT by Max Wainewright (c) 2003 1. Introduction 2. Overview of the Software 3. Installation 4. Getting Started 5. 2paint 6. 2publish 7. 2count 8. 2go 9. 2graph 10. 2question 11. Opening
1 www.2simple.com IVT by Max Wainewright (c) 2003 1. Introduction 2. Overview of the Software 3. Installation 4. Getting Started 5. 2paint 6. 2publish 7. 2count 8. 2go 9. 2graph 10. 2question 11. Opening
Start Menu Log off Turn Off Computer Run Search Help and Support
 Windows Basics Start Menu Start Menu Log off - Log off the current user. Turn Off Computer - shutdown, restart and standby. Run - Used to manually start executable files (programs). Search - Search your
Windows Me Navigating
 LAB PROCEDURE 11 Windows Me Navigating OBJECTIVES 1. Explore the Start menu. 2. Start an application. 3. Multi-task between applications. 4. Moving folders and files around. 5. Use Control Panel settings.
Introducing Activstudio
 Introducing Activstudio Version 3 COPYRIGHT INFORMATION Introducing Activstudio Version 3 Copyright 2007 Promethean Limited. All rights reserved. If this guide is distributed with Activstudio software,
ECDL Module 6 REFERENCE MANUAL
 ECDL Module 6 REFERENCE MANUAL Presentation Microsoft PowerPoint XP Edition for ECDL Syllabus Four PAGE 2 - ECDL MODULE 6 (USING POWERPOINT XP) - MANUAL 6.1 GETTING STARTED... 4 6.1.1 FIRST STEPS WITH
The Fundamentals. Document Basics
 3 The Fundamentals Opening a Program... 3 Similarities in All Programs... 3 It's On Now What?...4 Making things easier to see.. 4 Adjusting Text Size.....4 My Computer. 4 Control Panel... 5 Accessibility
Read&Write 5 GOLD FOR MAC MANUAL
 Read&Write 5 GOLD FOR MAC MANUAL ABBYY FineReader Engine 8.0 ABBYY Software Ltd. 2005. ABBYY FineReader the keenest eye in OCR. ABBYY, FINEREADER and ABBYY FineReader are registered trademarks of ABBYY
Unit 21 - Creating a Navigation Bar in Macromedia Fireworks
 Unit 21 - Creating a Navigation Bar in Macromedia Fireworks Items needed to complete the Navigation Bar: Unit 21 - House Style Unit 21 - Graphics Sketch Diagrams Document ------------------------------------------------------------------------------------------------
File Management Tutorial
 Just a reminder... Files: any individual item on your computer that contains data. E.g. document, photo, spreadsheet, email, PowerPoint, etc. File Management Tutorial Folders: containers for your files
Introduction to Windows
 Introduction to Windows Naturally, if you have downloaded this document, you will already be to some extent anyway familiar with Windows. If so you can skip the first couple of pages and move on to the
Tech Day Camtasia. What is Camtasia Studio?
 Tech Day 2008 Camtasia What is Camtasia Studio? Camtasia Studio is a video-based screen capturing software program. It is analogous to using a video camera to record your screen. However, unlike using
VISTA OPERATING SYSTEM
 VISTA OPERATING SYSTEM 1 VISTA OPERATING SYSTEM Software that helps the computer carry out operating tasks Similar to a Air Traffic Controller Manages input/output Displays info on the monitor Saves data
E-FORM GETTING STARTED GUIDE THE COMPLETE ELECTRONIC TAX FORM DVD
 E-FORM GETTING STARTED GUIDE THE COMPLETE ELECTRONIC TAX FORM DVD Updated November 2014 Copyright 2014-2015 Thomson Reuters. All Rights Reserved. Thomson Reuters disclaims any and all liability arising
RWT Network System Installation Guide
 RWT Network System Installation Guide Copyright 2003, Talking Fingers, Inc. Page 1 of 48 This document is Copyright 2003 by Talking Fingers, Inc. All rights are reserved. This document may not be copied
POWERPOINT BASICS: MICROSOFT OFFICE 2010
 POWERPOINT BASICS: MICROSOFT OFFICE 2010 GETTING STARTED PAGE 02 Prerequisites What You Will Learn USING MICROSOFT POWERPOINT PAGE 03 Microsoft PowerPoint Components SIMPLE TASKS IN MICROSOFT POWERPOINT
Computer Basics Microsoft Windows CB 200
 Computer Basics Microsoft Windows CB 200 Table of Contents Using Windows... 3 Desktop... 3 Taskbar... 4 The Start menu... 4 The Quick Launch bar... 5 The System Tray... 6 Customization... 6 How to Use
ClickFORMS Quickstart Tutorial
 ClickFORMS Quickstart Tutorial A ClickFORMS Tutorial 2003 by Bradford Technologies. All Rights Reserved. No part of this document may be reproduced in any form or by any means without the written permission
KODAK Software User s Guide. Software Version 9.0
 KODAK Create@Home Software User s Guide Software Version 9.0 Table of Contents 1 Welcome to KODAK Create@Home Software Features... 1-1 Supported File Formats... 1-1 System Requirements... 1-1 Software
Make Your Pictures Come to Life with Photo Story 3
 Page 1 of 6 Click Here to Install Silverlight United States Change All Microsoft Sites Search Microsoft.com Submit Windows Media Home For Home Windows Media Player Music & Video Cool Devices For Professionals
Introduction to the. Managed XP Service (For Students) Mark Morley Bob Booth December 2004 AP-Win7. University of Sheffield.
 Mark Morley Bob Booth December 2004 AP-Win7. University of Sheffield.") Introduction to the Managed XP Service (For Students) Mark Morley Bob Booth December 2004 AP-Win7 Contents University of Sheffield 1. INTRODUCTION... 4 2. USING A MANAGED SERVICE MACHINE... 5 2.1 LOGGING
Introduction to the Managed XP Service (For Students) Mark Morley Bob Booth December 2004 AP-Win7 Contents University of Sheffield 1. INTRODUCTION... 4 2. USING A MANAGED SERVICE MACHINE... 5 2.1 LOGGING
AL-1633/1644 Online Manual Start
 AL-6/6 Online Manual Start Click this "Start" button. Introduction This manual describes the printer and scanner functions of the AL-6/6 digital multifunctional system. For information on the following
Introduction to Personal Computing
 Introduction to Personal Computing Academic Computing Services www.ku.edu/acs Abstract: This document explains the basics of the Microsoft Windows operating system. It is intended for users who are either
Basic Windows 95 Skills
 Building Mouse Skills Click press left mouse button once used to select options in menus or to move your cursor Double click press left mouse button twice without moving the mouse pointer used on icons
SMART Recorder. Record. Pause. Stop
 SMART Recorder The recorder is used to record actions that are done on the interactive screen. If a microphone is attached to the computer, narration can be recorded. After the recording has been created,
Adobe Acrobat Reader 4.05
 Adobe Acrobat Reader 4.05 1. Installing Adobe Acrobat Reader 4.05 If you already have Adobe Acrobat Reader installed on your computer, please ensure that it is version 4.05 and that it is Adobe Acrobat
PowerPoint Tips and Tricks
 PowerPoint Tips and Tricks Viewing Your Presentation PowerPoint provides multiple ways to view your slide show presentation. You can access these options either through a toolbar on your screen or by pulling
Contents. Introducing Clicker Paint 5. Getting Started 7. Using The Tools 10. Using Sticky Points 15. Free resources at LearningGrids.
 ClickerPaintManualUS.indd 2-3 13/02/2007 13:20:28 Clicker Paint User Guide Contents Introducing Clicker Paint 5 Free resources at LearningGrids.com, 6 Installing Clicker Paint, 6 Getting Started 7 How
Creating Interactive PDF Forms
 Creating Interactive PDF Forms Using Adobe Acrobat X Pro for the Mac University Information Technology Services Training, Outreach, Learning Technologies and Video Production Copyright 2012 KSU Department
CitiDirect Basics: Comprehensive Guide
 CitiDirect Online Banking CitiDirect Basics: Comprehensive Guide Table of Contents Overview...1 Additional Resources...1 Basics Guides...1 Online Help...1 CitiDirect Customer Support...2 Local Language
Mind Power Math: Middle School Algebra, Part 1
 Mind Power Math: Middle School Algebra, Part 1 Mind Power Math: Middle School contains four CDs: Mind Power Math: Basic Mathematics includes arithmetic topics traditionally taught at the middle school
Policy Commander Console Guide - Published February, 2012
 Policy Commander Console Guide - Published February, 2012 This publication could include technical inaccuracies or typographical errors. Changes are periodically made to the information herein; these changes
DataMaster for Windows
 DataMaster for Windows Version 3.0 April 2004 Mid America Computer Corp. 111 Admiral Drive Blair, NE 68008-0700 (402) 426-6222 Copyright 2003-2004 Mid America Computer Corp. All rights reserved. Table
CAMPAGNE. Fundraising software solutions
 CAMPAGNE a s s o c i a t e s Fundraising software solutions Copyright 2002, Campagne Associates, Ltd. All rights reserved Information in this manual is subject to change without notice and does not represent
School Installation Guide ELLIS Academic 5.2.6
 ELLIS Academic 5.2.6 This document was last updated on 2/16/11. or one or more of its direct or indirect affiliates. All rights reserved. ELLIS is a registered trademark, in the U.S. and/or other countries,
NDA ISSUE 1 STOCK # MATWorX 32 User s Guide. December, NEC America, Inc.
 NDA-24215 ISSUE 1 STOCK # 151942 MATWorX 32 User s Guide December, 1997 NEC America, Inc. LIABILITY DISCLAIMER NEC America, Inc. reserves the right to change the specifications, functions, or features,
Making Windows XP work for you
 Making Windows XP work for you With each version of Windows that has been released over the past several years, Microsoft and other developers have been made aware of the issues surrounding accessibility
Design and Print Instruction Manual
 Diamond Design Design and Print Instruction Manual Contents Installation 1 Installing the Diamond Design Software 2-3 Installing the ORIGINAL Argox OS-214 printer drivers 4 Installing the EXCEL Argox OS-314
Getting Started With DO Analyser Software Version 4
 Getting Started With DO Analyser Software Version 4 Getting Started With The DO Analyser Sofware Version 4 Jochen Arndt SiS Sensoren Instrumente Systeme GmbH Schwentinental The author and publisher have
DesignPro Tools for Xerox Elixir Technologies Corporation. All rights reserved.
 Follow the Crop Marks DesignPro Tools for Xerox Getting Started Guide C 1998-2008 Elixir Technologies Corporation. All rights reserved. Elixir Technologies Corporation 721 East Main Street Ventura, CA
Intermediate/Advanced. Faculty Development Workshop FSE Faculty retreat April 18, 2012
 Intermediate/Advanced Faculty Development Workshop FSE Faculty retreat April 18, 2012 Remote Desktop Sharing Quick Reference Guide for Moderators The Moderator or a Participant may request control of another
SlickEdit Gadgets. SlickEdit Gadgets
 SlickEdit Gadgets As a programmer, one of the best feelings in the world is writing something that makes you want to call your programming buddies over and say, This is cool! Check this out. Sometimes
Kidspiration 3 Basics Website:
 Website: http://etc.usf.edu/te/ Kidspiration is the visual learning tool for K-5 learners from the makers of Inspiration. With Kidspiration, students can build graphic organizers such as webs, concept
ULTRA Desktop. User s Guide Release 3.0
 ULTRA Desktop User s Guide Release 3.0 etranslate, Inc. 945 Bryant Street San Francisco California 94013 USA Tel 415.371.0000 Fax 415.371.0008 2000, 2001 by etranslate, Inc. All rights reserved. etranslate,
DEPARTMENT OF EDUCATION. Schedules
 DEPARTMENT OF EDUCATION EDUCATOR CERTIFICATION Contents Revision History... 2 Revision History Chart... 2 1. How do I get started?... 3 2. Selecting a Schedule?... 5 3. Viewing the selected results...
OnPoint s Guide to MimioStudio 9
 1 OnPoint s Guide to MimioStudio 9 Getting started with MimioStudio 9 Mimio Studio 9 Notebook Overview.... 2 MimioStudio 9 Notebook...... 3 MimioStudio 9 ActivityWizard.. 4 MimioStudio 9 Tools Overview......
WINDOWS NT BASICS
 WINDOWS NT BASICS 9.30.99 Windows NT Basics ABOUT UNIVERSITY TECHNOLOGY TRAINING CENTER The University Technology Training Center (UTTC) provides computer training services with a focus on helping University
WinView. Getting Started Guide
 WinView Getting Started Guide Version 4.3.12 June 2006 Copyright 2006 Mincom Limited All rights reserved. No part of this document may be reproduced, transferred, sold or otherwise disposed of without
PowerPoint Creating Presentations 25
 Contents Contents 3 PowerPoint 00 7 What is PowerPoint? 8 PowerPoint Requirements 9 New and Improved Features 0 Installing PowerPoint 00 Starting PowerPoint 00 3 Exploring the Ribbon 4 003 Commands in
VISTA OPERATING SYSTEM
 VISTA OPERATING SYSTEM 1 VISTA OPERATING SYSTEM Software that helps the computer carry out operating tasks Similar to a Air Traffic Controller Manages input/output Displays info on the monitor Saves data
Process Eye Professional. Recall
 Process Eye Professional Recall Process Eye Professional Recall User Manual SP104010.101 August 2005 As part of our continuous product improvement policy, we are always pleased to receive your comments
CROMWELLSTUDIOS. Content Management System Instruction Manual V1. Content Management System. V1
 Content Management System Instruction Manual V1 www.cromwellstudios.co.uk Cromwell Studios Web Services Content Management System Manual Part 1 Content Management is the system by which you can change
Using Adobe Photoshop
 Using Adobe Photoshop 2 In this section we ll look at some essential things you need to know in order to use Photoshop effectively. First of all, we ll take a look at customising Photoshop s settings and
Karlen Communications
 Karlen Communications Karen McCall, M.Ed. Adding Images to Training Material Phone: E-mail: Web: info@karlencommunications.com karlencommunications.com This material copyright 2009 Karen McCall, Karlen
Using Windows 7 Explorer By Len Nasman, Bristol Village Computer Club
 By Len Nasman, Bristol Village Computer Club Understanding Windows 7 Explorer is key to taking control of your computer. If you have ever created a file and later had a hard time finding it, or if you
2010 by Microtek International, Inc. All rights reserved.
 2010 by Microtek International, Inc. All rights reserved. Microtek and DocWizard are trademarks of Microtek International, Inc. Windows is a registered trademark of Microsoft Corporation. All other products
Migration Manager For Domino to Exchange User Guide v2.2.5
 Migration Manager For Domino to Exchange User Guide v2.2.5 TABLE OF CONTENTS SYSTEM REQUIREMENTS... 3 SUPPORTED VERSIONS... 3 Lotus Notes & Domino... 3 MS Outlook & Exchange... 3 INSTALLATION & LICENSING...
Using PowerPoint to Create an Interactive Multimedia Portfolio Ben Johnson
 Using PowerPoint to Create an Interactive Multimedia Portfolio Ben Johnson www.psd.k12.co.us/staff/benj Getting Started 1. Launch PowerPoint from the start button. Select the Design Template radio button.
SAMPLE ICDL 5.0. International Computer Driving Licence. Module 4 - Spreadsheets Using Microsoft Excel 2010
 ICDL 5.0 International Computer Driving Licence Module 4 - Spreadsheets Using Microsoft Excel 2010 This training, which has been approved by ECDL Foundation, includes exercise items intended to assist
In the Insight console, access advanced features by right-clicking on a student computer in either the Detail or Thumbnail view.
 On the teacher computer, there is small Insight icon in the taskbar. The taskbar is located in the bottom right corner of the computer screen. Double-click the icon to open Insight. You can right-click
Trace Debug Tools Version 1.2 Installation Guide
 Trace Debug Tools Version 1.2 Installation Guide Copyright 2000-2002 ARM Limited. All rights reserved. Proprietary Notice Words and logos marked with or are registered trademarks or trademarks owned by
Operating Instructions
 Providing presentation solutions V iewer Software Program Operating Instructions NIPPON AVIONICS CO., LTD. 1 This manual describes the functions and operations for conducting presentations using ip Viewer.
Convert to PDF 3.0. User Guide. PEERNET Inc.
 User Guide PEERNET Inc. Copyright 2005-2013 Updated: 1/9/2013 Table of Contents Welcome... to Convert to PDF 1 Legal... Notices 2 System... Requirements 3 Activating... Convert to PDF 4 Launching the Activation
Application of Skills: Microsoft PowerPoint 2013 Tutorial
 Application of Skills: Microsoft PowerPoint 2013 Tutorial Throughout this tutorial, you will progress through a series of steps to create a presentation about yourself. You will continue to add to this
EASY SCROLL SILVERLINE KEYBOARD
 Method when using for the first time Chapter 1. Uninstalling old drivers and devices (3.1) 2. Connecting (3.2) 3. Software Installation in Windows (3.3) 4. Checking after the installation (4.0)! 1 Introduction
Word 2007/10/13 1 Introduction
 Objectives Word 2007/10/13 1 Introduction Understand the new Word 2007 Interface Navigate the Office button Learn about the Quick Access menu Navigate the Ribbon menu interface Understand the I-beam Learn
Teacher Manual. Teacher Manual Knowledge Adventure, Inc. All rights reserved
 Teacher Manual Under the copyright laws, neither the documentation nor the software may be copied, photocopied, reproduced, translate, or reduced to any electronic medium or machine readable form, in whole
MCDOUGAL LITTELL EASYPLANNER USER S GUIDE
 MCDOUGAL LITTELL EASYPLANNER USER S GUIDE 1 Introduction The McDougal Littell EasyPlanner allows you to quickly and easily access Resource materials such as tests, quizzes, books, and other supporting
2. This tutorial will teach you the basics of PowerPoint and how to hyperlink and embed (insert) videos into your PowerPoint.
 videos into your PowerPoint.") 37 Creating Your Own PowerPoint for Macintosh and PC Computers and unitedstreaming Video Clips Tutorial created using PowerPoint 2000. This tutorial will work with similar images, messages, and navigation
37 Creating Your Own PowerPoint for Macintosh and PC Computers and unitedstreaming Video Clips Tutorial created using PowerPoint 2000. This tutorial will work with similar images, messages, and navigation
Information Communications Technology (CE-ICT) 6 th Class
 6 th Class") Information Communications Technology (CE-ICT) 6 th Class Lecture 1: Microsoft(MS) Windows Operating System (OS) Lecturer: Sophia Agenda for Today Microsoft Windows Operating System Windows Desktop Launching
Information Communications Technology (CE-ICT) 6 th Class Lecture 1: Microsoft(MS) Windows Operating System (OS) Lecturer: Sophia Agenda for Today Microsoft Windows Operating System Windows Desktop Launching
Sedao Ltd. QuickChange PROject. User Manual for QuickChange PROject version 2.1.5
 Sedao Ltd QuickChange PROject User Manual for QuickChange PROject version 2.1.5 Contents What is QuickChange PROject?... 2 Simple Artwork Creation... 5 Creating a project... 7 QuickChange PROject Template
Before Installing the Software
 Before Installing the Software Before using the printer, the printer drivers and status monitor software must be installed. The software is on the Software Installation CD-ROM included with your printer.
New User Orientation PARTICIPANT WORKBOOK
 New User Orientation PARTICIPANT WORKBOOK INTEGRATED SOFTWARE SERIES New User Orientation PARTICIPANT WORKBOOK Version 2.0 Copyright 2005 2009. Interactive Financial Solutions, Inc. All Rights Reserved.
User Guide. Web Intelligence Rich Client. Business Objects 4.1
 User Guide Web Intelligence Rich Client Business Objects 4.1 2 P a g e Web Intelligence 4.1 User Guide Web Intelligence 4.1 User Guide Contents Getting Started in Web Intelligence 4.1... 5 Log into EDDIE...
Microsoft PowerPoint 2013 Beginning
 Microsoft PowerPoint 2013 Beginning PowerPoint Presentations on the Web... 2 Starting PowerPoint... 2 Opening a Presentation... 2 File Tab... 3 Quick Access Toolbar... 3 The Ribbon... 4 Keyboard Shortcuts...
CENTAUR S REAL-TIME GRAPHIC INTERFACE V4.0 OPERATOR S MANUAL
 CENTAUR S REAL-TIME GRAPHIC INTERFACE V4.0 OPERATOR S MANUAL TABLE OF CONTENTS Installation... 6 Introduction to Centaur s real-time Graphic Interface... 6 Computer Requirements... 7 Operating System
Resource Center & Messaging System
 SOS 2009 User Manual Resource Center & Messaging System Alpha Omega Publications MMVI Alpha Omega Publications, Inc. Switched-On Schoolhouse 2009, Switched-On Schoolhouse. Switched-On, and their logos
Scholastic Interactive Teaching System User s Guide
 Scholastic Interactive Teaching System User s Guide For use with READ 180 Next Generation version 2.1 or later, READ 180 Enterprise Edition version 2.1 or later, System 44 version 2.1 or later, Expert
Microsoft Windows 8.1 Foundation. Windows 8.1 Foundation For Business Users SAMPLE
 Microsoft Windows 8.1 Foundation Windows 8.1 Foundation For Business Users WINDOWS 8.1 FOUNDATION FOR BUSINESS USERS PAGE 2 2013 Cheltenham Group Pty. Ltd. All trademarks acknowledged. E&OE. No part of
Learning Worksheet Fundamentals
 1.1 LESSON 1 Learning Worksheet Fundamentals After completing this lesson, you will be able to: Create a workbook. Create a workbook from a template. Understand Microsoft Excel window elements. Select
1 - The Windows XP Desktop
 1 - The Windows XP Desktop Above in fig 1.1 you can see an example of the Windows XP desktop, when you first switch on your machine and Windows XP loads it usually looks similar to that shown in our example,
Working with Mailbox Manager
 Working with Mailbox Manager A user guide for Mailbox Manager supporting the Message Storage Server component of the Avaya S3400 Message Server Mailbox Manager Version 5.0 February 2003 Copyright 2003
Click Here to Begin OS X. Welcome to the OS X Basics Learning Module.
 OS X Welcome to the OS X Basics Learning Module. This module will teach you the basic operations of the OS X operating system, found on the Apple computers in the College of Technology computer labs. The
Interactive Tourist Map
 Adobe Edge Animate Tutorial Mouse Events Interactive Tourist Map Lesson 1 Set up your project This lesson aims to teach you how to: Import images Set up the stage Place and size images Draw shapes Make
BusinessObjects Frequently Asked Questions
 BusinessObjects Frequently Asked Questions Contents Is there a quick way of printing together several reports from the same document?... 2 Is there a way of controlling the text wrap of a cell?... 2 How
Articulate Presenter Pro
 Articulate Presenter Pro Summary Articulate Presenter converts PowerPoint to Flash. It allows the user to integrate narration and interactivity into any PowerPoint presentation. It uses templates to embed
FileMaker. Mobile 2.1. User s Guide. For Windows, Mac, Palm OS, and Pocket PC. Companion for Palm OS and Pocket PC
 For Windows, Mac, Palm OS, and Pocket PC FileMaker Mobile 2.1 Companion for Palm OS and Pocket PC User s Guide 2000-2002 FileMaker, Inc. All Rights Reserved. FileMaker, Inc. 5201 Patrick Henry Drive Santa
User Guide. FTR Reporter For more information, visit
 FTR Reporter 5.7.1 For more information, visit www.fortherecord.com TABLE OF CONTENTS INTRODUCTION... 5 Overview... 5 About This Document... 5 GETTING STARTED... 6 Installation... 6 Starting Reporter...
Microsoft Windows 10 Foundation. Windows 10 Foundation For Business Users SAMPLE
 Microsoft Windows 10 Foundation Windows 10 Foundation For Business Users WINDOWS 10 FOUNDATION FOR BUSINESS USERS PAGE 2 2015 Cheltenham Group Pty. Ltd. All trademarks acknowledged. E&OE. No part of this
User Guide for Accessing Cisco Unity Connection Voice Messages in an Application
 User Guide for Accessing Cisco Unity Connection Voice Messages in an Email Application Release 9.x Published June, 2013 Americas Headquarters Cisco Systems, Inc. 170 West Tasman Drive San Jose, CA 95134-1706
Resource Center & Messaging System
 SOS 2012 User Manual Resource Center & Messaging System Alpha Omega Publications MMVI Alpha Omega Publications, Inc. Switched-On Schoolhouse 2012, Switched-On Schoolhouse. Switched-On, and their logos
Publishing Electronic Portfolios using Adobe Acrobat 5.0
 Step-by-Step Publishing Electronic Portfolios using Adobe Acrobat 5.0 2002, Helen C. Barrett Here is the process we will use to publish a digital portfolio using Adobe Acrobat. The portfolio will include
Adobe Dreamweaver CS5 Tutorial
 Adobe Dreamweaver CS5 Tutorial GETTING STARTED This tutorial focuses on the basic steps involved in creating an attractive, functional website. In using this tutorial you will learn to design a site layout,
Windows Key e: Press and hold down the Windows (Start) Key and tap the letter e one time. Release these keys and Windows File Explorer will open.
 Key and tap the letter e one time. Release these keys and Windows File Explorer will open.") Copyright 2009 BOSMA Enterprises Chapter 14 Windows File Explorer Key Terms Windows Key e: Press and hold down the Windows (Start) Key and tap the letter e one time. Release these keys and Windows File
Copyright 2009 BOSMA Enterprises Chapter 14 Windows File Explorer Key Terms Windows Key e: Press and hold down the Windows (Start) Key and tap the letter e one time. Release these keys and Windows File
Introduction to Microsoft PowerPoint 2000
 Introduction to Microsoft PowerPoint 2000 TABLE OF CONTENTS Accessing PowerPoint 2000... 3 Starting a Presentation... 3 About the Editing Screen in Normal Screen View... 4 About Menu Displays in PowerPoint
Working with Pages... 9 Edit a Page... 9 Add a Page... 9 Delete a Page Approve a Page... 10
 Land Information Access Association Community Center Software Community Center Editor Manual May 10, 2007 - DRAFT This document describes a series of procedures that you will typically use as an Editor
D CLIENT for DIRECTOR/DIRECTOR PRO Series Publishing System Operator s Guide
 D CLIENT for DIRECTOR/DIRECTOR PRO Series Publishing System Operator s Guide The DIRECTOR/DIRECTOR PRO is a state-of-the-art CD/DVD publishing system and duplicator. It is designed to create, duplicate
Print Manager Plus 2010 Workgroup Print Tracking and Control
 INTRODUCTION: This is intended to assist in the initial installation or evaluation of Print Manager Plus 2010 Workgroup Edition. This will guide you through tracking your printing whether your workgroup
Intro to Microsoft Word
 Intro to Microsoft Word A word processor is a computer program used to create and print text documents that might otherwise be prepared on a typewriter. The key advantage of a word processor is its ability