Mimecast Personal Portal (MPP)
|
|
|
- Irene Little
- 6 years ago
- Views:
Transcription
1 Mimecast Personal Portal (MPP) Mimecast Personal Portal (MPP) Advanced Bounce Viewer Managed Senders Moderated On Hold Personal On Hold Rejection Viewer Calendars Exchange Folders File Archive Logging In Mail Compose Online Inbox and Online Sent Items Saved Searches Search Wild Card Characters Navigation Settings Smart Tags User Quick Start Guide Powered by 1
2 Mimecast Personal Portal (MPP) This page was not added to the PDF due to the following tag(s): article:topic-guide Updated: Wed, 02 Jul :40:50 GMT Powered by 2
3 Advanced Overview The MPP Advanced menu allows you to access the following viewers: Managed Senders Personal On Hold Moderated On Hold Bounce Viewer Rejection Viewer Click on the links listed above for more information. Updated: Wed, 02 Jul :40:50 GMT Powered by 3
4 Bounce Viewer Overview Bounced s are inbound or outbound s that Mimecast has accepted, but cannot deliver to the recipient's mail server. When an fails in delivery, it is classified as a Bounced , and a notification is sent to the sender of the message. The Bounce Viewer provides information about messages that Mimecast was unable to deliver. This can be useful to determine why an did not reach the intended recipient. For example: You send an outbound , and Mimecast is unable to deliver the message. A notification is sent by Mimecast advising you that the delivery has failed. You can verify these details, and the reason for the bounce in the MPP Bounce Viewer. How do I use this viewer? To access the viewer, click on the Bounce Viewer link in the Advanced accordion menu. A list of s that have bounced within the last month is displayed by default. The Bounce Viewer information includes the following: Updated: Wed, 02 Jul :40:50 GMT Powered by 4
5 Field Name Description From Sender of the message To Recipient of the message Subject Subject of the message Mail Flow Direction Inbound s Outbound s Attachments Indicates any associated attachments Size The total size of the message and attachments Received The date and time that the was received by Mimecast Bounce Type Hard Bounce (Permanent failure on initial delivery attempt) Soft Bounce (Permanent failure after several delivery attempts) Updated: Wed, 02 Jul :40:50 GMT Powered by 5
6 Field Name Description The reason for the delivery failure. The message may have failed due to Administrator/User action, where the delivery attempt was prevented by manual intervention: Bounce Reason Failed in delivery on the first attempt (a Hard Bounce, with a 500 series SMTP error code e.g. a large attachment) Failed in delivery after multiple attempts (a Soft Bounce), with the reason for the failure The list of s presented in the Bounce viewer can be grouped by using the Filter drop-down menu in the toolbar. Click on an item to view more information within the Message Properties: Note: s that have been bounced (both outbound and inbound) are still available in the Mimecast Archive, as the was originally accepted by Mimecast before the delivery attempts took place. The bounce information however is only available for one month in the Bounce Viewer. Bounce_Viewer Powered by 6
7 Managed Senders Overview Managed Senders can be used to control the addresses and domains that send you s. A Block policy prevents unwanted s from being received, and a Permit policy is used to bypass Spam checks performed on incoming s. These policies will only apply to your mailbox. The benefit of creating your own Managed Senders lists is that you can control your own mailbox, and your Administrator does not need to be contacted to block or allow specific addresses or domains. Note: Permitted Senders are legitimate external senders that you wish to accept s from. When you send an to an external recipient, Mimecast also automatically adds the external address to the Auto-Allow database. If this external recipient then sends you an , all spam checks are bypassed. This is useful to prevent legitimate s from being placed on Hold incorrectly. Creating Managed Senders To view or create a Managed Sender: 1. Click on Managed Senders option in the Advanced accordion menu. A full list of policies is displayed, detailing the From and To addresses, as well as whether they are Permitted, Auto or Blocked. Bounce_Viewer Powered by 7
8 Indicators provide information for each item: Listing Indicator Description Manual A Blocked Sender that you have manually added to the list Auto A Blocked Sender that has been automatically blocked by Mimecast Manual A Permitted Sender that you have manually added to the list Auto A Permitted Sender that has been automatically added by Mimecast (Auto Allow) A filter is available to adjust the entries displayed in the list: Additionally, the Search Text field can be used to look for a specific address or domain. 2. Click on the Create... button. This opens the New Permitted or Blocked Senders tab. From here, multiple entries can be added to either the Permitted or Blocked Senders Addresses or Domains section: Bounce_Viewer Powered by 8
9 Note: A domain name can also be added to either list. For example, to permit s from anyone with a yahoo.com address, you can add the text yahoo.com into the Domains Permitted section. Note that only the text following sign is required. Care should be taken when Permitting entire domains such as yahoo.com, as these may be used for sending inappropriate and unwanted messages. Alternatively, the senders addresses can be added individually to these lists. 3. Click on the Save button to activate the policy. Amending Managed Senders There may be occasions when you need to edit an entry in your Managed Senders list. For example, your company could be using the Digest (or quarantine summary), and you may have incorrectly clicked on one of the links to Permit or Block a sender. Bounce_Viewer Powered by 9
10 By using the toolbar, or right-clicking on an entry, you are able to delete items, or change their status from Permit to Block, or visa versa. To edit your entries, choose one of the following actions: Check the box to the left of the address(es), and use the available buttons in the toolbar to Delete, change to Permit, change to Block the address(es) you have selected: Right-click on the specific address, and select the required action from the list: Note: It is also possible to right-click on any in the Online Inbox, Online Sent Items or Archive Search results to add this address to the Block or Permit policy. Managed_Senders Powered by 10
11 Moderated On Hold Overview The Moderated Hold Queue allows you to manage s placed on Hold for another user or groups of users. To view these s, you should be configured as a Content Overseer by your Administrator. An example of use is a personal assistant tasked with managing s on hold for a superior officer. Alternatively, the internal support team of the organization can be configured to manage the hold queue for all other users. How do I use this viewer? As a designated overseer, you will be able to access these s by clicking the Moderated On Hold option from the Advanced accordion menu. A list of s is presented in the right-hand window. Click on any of the s in the list to view the contents, and use the Release button to deliver the message to the intended recipient. Alternatively, use the Delete button to remove the item from the list. To view more detailed information on the above actions, view the article Personal On Hold. Moderated_On_Hold Powered by 11
12 Personal On Hold Overview Administrators may have created certain policies to ensure that possible junk or spam s are not delivered directly to your Inbox, but are instead held in a quarantine mailbox (or hold queue). The Personal On Hold Queue allows you to Review, Reject or Release these s, as well as add the sender to the Permitted/Blocked sender list. Alternatively, you can leave these s in this queue as they will automatically be moved after 14 days. How do I use this viewer? To view the s currently on Hold, click on the Personal On Hold option in the Advanced accordion menu. s in the queue will be listed, and the following information is available: Moderated_On_Hold Powered by 12

13 Field Name Description Reason Displays the type of policy that has triggered the Hold action, e.g. Spam Policy From Sender of the message To Recipient of the message Subject Subject of the message Size Size of the message Received Date and time the message was received Click on one of the s in the list to display the Message Properties and Content. Use the buttons in the toolbar to View, Release or Delete the original . A Release action will release the from the queue, and deliver the message to your mailbox. The Delete button will reject the message, and remove it from the Hold Queue. Moderated_On_Hold Powered by 13
14 Note: These once-off actions to Release or Delete s on Hold will only take effect on the current s in the list. You also have the option to add one or multiple senders to your Managed Senders lists. To add a single sender, right click on the message and choose the Block Sender or Permit Sender option from the menu. Alternatively, select the checkboxes next to each message in the list view to mark the messages. Once you have selected all the required messages, click on the Block Sender or Permit Sender button in the toolbar. The addresses will be added to the appropriate list. Personal_On_Hold Powered by 14
15 Rejection Viewer Overview The Rejection Viewer will display any messages sent to your address that Mimecast has rejected. This generally applies to inbound s. Rejected s are rejected in protocol, which means that the content of the has not been accepted. A Non-Delivery Report will be generated by the sending mail server, and returned to the original sender of the . The Rejection information will detail why Mimecast rejected an . If the was legitimate, the Administrator can use this information to address the cause for the rejection, and allow the through on the next send attempt. Note: For rejected s, the data has not been accepted by Mimecast, and therefore the message cannot be retrieved - it must be resent by the original sender. How do I use this viewer? To access the Rejection Viewer, click on the Rejection Viewer link in the Advanced accordion menu. The Rejection information is retained for a maximum of one month, and by default displays the current day's rejections: Personal_On_Hold Powered by 15
16 Use the Search field and adjust the date ranges to find a specific rejected in the list. Click on an item in the list, or right-click on an item and select Open to view the Rejection Properties: Note: To ensure that s that have previously been rejected are accepted on subsequent attempts, contact your Mimecast Administrator. Rejection_Viewer Powered by 16
17 Calendars Overview Depending on the Mimecast Product your organization has purchased, Mimecast can be configured to display your personal Calendar folders in a read-only view in MPP. Note: Mimecast does not currently support archiving of Calendars. How do I use Calendars? When you select the Calendars accordion menu in the left navigation pane, your default Calendar is displayed in read-only view in the contents page. Your primary (or default) Calendar within Outlook, is identified as My Calendar in the list of available Calendars. If you have multiple Calendars these will be listed, and are available for selection. Rejection_Viewer Powered by 17

18 Note: If you are unsure if Calendar Sync has been implemented, please contact your Mimecast Administrator. Calendar Views To view your Calendar, navigate to the Calendar accordion menu. By default, the view displayed will show the current weeks worth of events: Icons There are a number of icons within the MPP Calendars view: Icon Description Recurring event (repeats on a regular basis) Attachment saved within an event Rejection_Viewer Powered by 18
19 Icon Description Meeting event Calendar Toolbar The Calendar toolbar allows you to configure a number of settings for your Calendar view, as discussed below: Toolbar Option Description Refresh MPP currently has a standard 15 minute auto refresh feature, but the Refresh button will immediately refresh the current view Today Highlights or displays the current day View Date Click on the View Date button to display a Calendar Control box, which can be used to select a date Navigate through the Calendar in several ways. For example: Click on the left Navigation or right arrows to go backwards or forwards in time Click directly on Calendar itself to select a specific day view Select the View Date button (as described above) Rejection_Viewer Powered by 19
20 Toolbar Option Description Date Field The date range display varies according to the Calendar view setting selected Day/Week/Month View options are Day, Week or a Month view Calendar Events You are able to view your Calendar details, however no changes can be made, or new items added. To view an event: Hover over the Calendar event which provides the basic details e.g. event name and time Right-click or double-click the event, to open the Calendar item in a new tab A single click will open the event item in a new window Clicking on the event displays the following details: Field Description Location Displays the location of the event (left blank if there is no data) Rejection_Viewer Powered by 20
21 Field Description All Day If checked, this indicates that the event is an all-day event with no quoted start or end time Start Date Displays the start date and time of the event End Date Displays the end date and time of the event When Only displayed for recurring events, this field indicates the frequency of the recurrence (e.g. daily, weekly, monthly), and the day(s) of the recurrence Organizer Shows the event organizer, in format: "Username" Attendees Lists all invited meeting attendees including the event organizer, in format: "Username" (left blank if there is no data) Attachments Only displayed if an attachment has been saved in the event, otherwise, this field will not be listed Notes Displays any notes associated with the event (left blank if there is no data) Event Attachments A Calendar event can also include an attachment which is accessible from the Event Details. Click on the attachment to access it, or alternatively, expand the list of attachments using the arrow icon. If the attachment is an image, a thumbnail preview is also displayed. Click on the Save icon to open or save the attachment. Calendar Settings There are certain MPP settings which affect your Calendar view. These include: Time Zone / Daylight Savings Time Rejection_Viewer Powered by 21
22 Date Format Time Format First Day of Week For details regarding these settings and how they are configured, view the full article. Powered by 22
23 Exchange Folders Overview Depending on the Mimecast product your organization has purchased, Mimecast can be configured to display your mailbox folder structure in MPP. This allows you to access your in the same folders as you access them in your mailbox, even if your mail server is unavailable. How do I access my Exchange Folders? To view your Exchange Folders, click the expansion arrow next to Exchange Folders accordion menu: Powered by 23
24 If configured, this list expands to display your folders as they appear in your mailbox. Many of the folders that are displayed are default folders within your mail server, such as Inbox and Sent Items. Click on the expansion arrow next to Inbox to view your personal sub-folders. Note: If you are unsure if Folder Sync has been implemented in your organization, please contact your Administrator. Select a folder to display the s in the Contents page (on the right), and then select an to read the contents of the message. Using the same controls as available in Online Inbox and Online Sent items, these s can be Replied to, Forwarded and can also be used to create Blocked or Permitted Sender Policies. Note: Use the calendar controls at the top of the screen to filter the s to be displayed in the folder. Exchange Folder Settings Folder structures replicated to Mimecast can be set to display in two ways: Live View or Full View. These views can be configured by clicking on the MPP Settings link in the top right corner: Live View - displays the folder structure and s that were last replicated. (This will be a fairly current view.) Full View - displays all folders and s that were present at any point in the mailbox history. This allows you to view s in their folder structure even if they have since been deleted from your mailbox, or moved within the folders. By adjusting the view to Full View, you are able to display all s (in their folders) prior to any changes made, or alternatively you can choose to display the current folder structure, by selecting Live View. If the mail server fails, you can still work with s in their folder structure. Note: It is not possible to add or modify existing Exchange folders, as this information is synced to Mimecast from your organization's Exchange server. Exchange_Folders Powered by 24
25 File Archive Overview Your Administrator can configure Mimecast to archive your files along with your s. Files from your My Documents, Network Shared Drives and SharePoint repositories will be available within MPP, and it is also possible to use your MPP Settings to link your Box.net and Dropbox account files. These files will be available in a separate view in MPP, and are accessible from any of the user tools. How do I use File Archive? Select the MPP File Archive menu from the navigation pane. This option will only be visible if enabled by your Administrator: Exchange_Folders Powered by 25

26 A page opens in the right-hand pane which shows all the files that have been archived. Use the search filter at the top of the page to search for specific files, and click on the relevant item to download and view the attachment. Note: Mimecast does not overwrite different versions of the same file. Therefore for a file which has changed, you should select the most recent copy. For more information on working with File Archiving, view the full User Guide. File_Archive Powered by 26
27 Logging In Overview Mimecast Personal Portal (MPP) can be accessed in two different ways; either by navigating to the direct web address, or via the Mimecast website. Navigating directly to MPP Utilize one of the following links to access MPP directly. This is based on the location of your organization's Mimecast account: (for European Union customers) (for North American customers) (for South African customers) (for Offshore customers) Accessing MPP via the Mimecast Website Alternatively, follow the steps below to access MPP via the Mimecast website: 1. Open a web browser, and enter the address for the Mimecast website: File_Archive Powered by 27
28 2. Click the Login button in the top right corner of the page: 3. Within the Mimecast Personal Portal section, select your region, then click the Continue button: 4. Once the page has loaded, the main login screen is displayed. Complete your details as described below. Logging in to MPP To avoid login issues, Mimecast suggests adding the MPP web address to the Trusted Sites within your browser. Note: MPP requires the use of cookies and Javascript to provide full functionality. Periodically, Mimecast enhances MPP functionality. The current MPP version is listed in the bottom-right corner of the login screen: File_Archive Powered by 28
29 Enter your address in the login screen, then click Next: In the Password field, enter the password that has been provided by your Administrator. This is either your Mimecast Cloud password, or your Domain (Network) password. The drop down field must be selected for the type of password that you will be using. Note: If you are unsure which password to use, select the Domain Password option. Click the Log In button to display the MPP console. For more information, view the related article on MPP Navigation. Logging_In Powered by 29
30 Mail Overview The Mail menu provides access to common tasks, including: Compose Online Inbox and Online Sent Items Search Saved Searches Click on one of the above links for more information. Note: If enabled by your Administrator, Delegate Mailboxes can also be accessed within MPP. For more information, view the Navigation article. Powered by 30
31 Compose Overview MPP can be used to send and receive s in the event of a mail server outage, or for situations when you are unable to access your . Composing s To compose an , select the Compose option from the Mail accordion menu on the left. This will open a blank message in a new tab: Powered by 31
32 The standard fields are available, such as To, CC, Subject and the Message body. When completing the To field, you can either select the address from the Global Address List (click on the Address Book button) or type directly into the To field within the Compose window. MPP will auto-fill the address if this is a known address. The message body of the will be formatted in HTML, but has rich text formatting options. Use the icons to amend the font size and type, as well as format the as required. s can also be formatted in Plain Text by selecting the appropriate toolbar button. Toolbar Options The Compose window toolbar options are discussed below: Button Description Send Sends the message to the recipient(s) specified in the To, CC or BCC fields Attach Used to attach files to your message: Powered by 32
33 Button Description In the Attachments window, click on the Choose File button, then Browse to locate and attach the required file(s). Note: To embed the attachment within the body, first upload the attachment, and then drag and drop the associated thumbnail image to the appropriate position in the body. Either simply type in the address in the To field (and Mimecast will auto-complete it if this is a known address), or click on the Address Book button to use the Global Address List (if your Mimecast account is configured for Directory Connections). Address Book Note: The Global Address List displays all addresses for internal users known to Mimecast, which may not be identical to the Global Address List accessed from Microsoft Outlook. To locate a specific address, enter text in the search field of the Address Book window, and press the Enter key on the keyboard. Select the correct address from the list, then click To, CC or BCC buttons. Once the address(es) have been entered, click Done to add the address(es) to the appropriate field(s), and return to your message. Powered by 33
34 Button Description Show BCC Displays the BCC field in the Compose window By default, the Compose window will allow you to create messages in HTML. Plain Text Clicking the Plain Text button will convert the to plain text mode. This button will then change to Rich Text to convert the message body to rich text. CCM Mode Allows you to send s using Closed Circuit Messaging (CCM) delivery. The default setting is "Off". Powered by 34
35 Note: Depending on what your Administrator has configured, you may be BCC'd on all s sent from MPP. This is to ensure that your Inbox has an exact a copy of all s sent. This setting is enabled by default, however can be disabled by your Administrator. Compose Powered by 35
36 Online Inbox and Online Sent Items Overview MPP displays your Archive in two main folders: Online Inbox and Online Sent Items. The Online Inbox contains all messages you have received, from when your organization first implemented Mimecast. The Online Sent Items contains all sent messages. By default, messages are displayed in reverse date order with the most recently received displayed first. Note: If enabled by your Administrator, Delegate Mailboxes may also be accessed within MPP. For more information, view the Navigation article. How do I use these viewers? To view the contents of the Online Inbox or Online Sent Items, select the appropriate option from the Mail accordion menu. Note: The last 30 days worth of s are displayed in these viewers. To view older s, use the Archive Search. Compose Powered by 36


37 In the contents page, you will see a list of all the s you have either received or sent, which are stored in your Mimecast Archive. You are able to click on these to view them, respond to them and perform other actions, all described below. Note: The length of time that Closed Circuit Messaging (CCM) messages are displayed within MPP is configurable by your Administrator. By default, all CCM s are accessible. Use the top level toolbar to sort, and change the displayed view: Sort the columns by clicking on the column name Search the displayed page by entering text into the search field and hitting the Enter key. By default, Mimecast will search all messages over the last month. You can alter this time period by clicking on the From and To date field, and selecting a specific date from the Calendar. Alter the number of messages displayed on each page by clicking on the down arrow for Page size, and select from 5 to 50 (the default is 15) Navigate through the various pages of messages, by clicking on the left or right arrows to go backwards or forwards Refresh the page, by clicking the reload icon Select multiple s by clicking on the check box next to each message. Once selected, the Forward, Permit Senders, Block Senders and Print buttons become available. Alternatively, these options are also available by rightclicking on a message and selecting the relevant option. Compose Powered by 37
38 Note: The search field allows you to enter text to search for in your messages. You can utilize an asterisk (*) as a wildcard, which allows a wider search capability. For example, if you were looking for messages that contained the words 'information' and 'info', you could enter info* into the search box. The asterisk will ensure that every message that contains a word starting with 'info' will be returned. A wildcard cannot however be used as the first or the second character in the search text. Icons There are a number of icons within MPP: Icon Description Message Sent (Outbound) Message Received (Inbound) Internal Message Message with Attachment CCM Message (Archived messages only) Responding to s From the Online Inbox and Online Sent Items, you are able to manage and respond to your s. This includes Open, Reply, Reply All, Forward, Permit Sender or Block Sender. Their are various ways these options can be accessed: Highlighting the message, which will display the in the preview pane. Use the preview pane drop-down menu to Reply, Reply All or Forward the . Double-clicking on a message, which will open the in a new tab. A toolbar is provided which allows you to Reply, Reply All or Forward the . Right-clicking on the and selecting from the various menu options as listed below: Compose Powered by 38

39 While viewing a message, either via the preview pane or via a separate tab, you can use the Reply or Reply All buttons. Alternatively, right click and select the Reply or Reply All option. By default, the response will be in Rich Text, however, this can be changed by clicking on the Plain Text button. When either the Reply or Reply All is selected, the cursor is placed at the start of the message, ready for you to start your reply. Forwarding s You also have the option to forward one or multiple messages to other recipients. To forward a single message, view the message you wish to forward, and then click on the Forward button. Alternatively, right click on the message and choose the Forward option from the menu. To forward multiple messages, select the checkboxes next to each message in the list view to mark the messages. Once you have selected all the required messages, click on the Forward button. The messages you have selected will be created as attachments to a new message. Managing Permitted or Blocked Senders You also have the option to add one or multiple senders to your Managed Senders lists. To add a single sender, right click on the message and choose the Block Sender or Permit Sender option from the menu. Alternatively, select the checkboxes next to each message in the list view to mark the messages. Once you have selected all the required messages, click on the Block Sender or Permit Sender button. The addresses will be added to the appropriate list. Note: s cannot be deleted from Mimecast. Online_Inbox_and_Online_Sent_Items Powered by 39
40 Saved Searches Overview Saved Searches can be used to store and organize saved Archive Searches. Your search parameters can be saved for future repeated use, without having to complete the parameters for the search each time. For more information about performing Archive Searches, view the full article. How do I create a Saved Search? 1. Complete the Archive Search criteria as described in the Search article 2. Click the Save button in the toolbar for either a Basic or Advanced Search: Online_Inbox_and_Online_Sent_Items Powered by 40
41 3. Enter a name for the Saved Search in the Description field: 4. Click the Save Search button. The search results will be saved within the root of the Saved Searches option in the Mail accordion menu: Click on the Saved Searches root folder to view a list of any searches that have been saved to the root. To view the current search results, click on the name of the search to display the search criteria, then click the Search button to load the search results. Managing Saved Searches Once saved, you are able to manage your Saved Searches and perform the following actions: Edit Search criteria Move Searches Delete Searches Online_Inbox_and_Online_Sent_Items Powered by 41

42 Edit Search Criteria To change the parameters of an existing Saved Search, choose one of the following options: Select the Search Right-click on the search, and select the Edit Search option: Note: Right-clicking on the Saved Search also allows you to Move or Delete the Search. Managing Search Folders Multiple Saved Searches can be organized into folders for ease of reference. When you click on a Search Folder, you will see the following toolbar: Button Description New Folder Creates a new folder Delete Folder Deletes the folder and all existing content Edit Folder Changes the name of the search folder Move Folder Moves the folder to a different location New Search Creates a new search in the selected folder Online_Inbox_and_Online_Sent_Items Powered by 42
, and then click the New Folder button.")

43 New Folder To create a new folder, click on the New Folder button, enter a description for the new folder and then click on the Create button: The new folder is displayed in the navigation menu listed under the Saved Searches menu option: Note: To create a sub-folder, click on an existing folder name (for example, General Search, as above), and then click the New Folder button. The new folder will be created under the folder selected (for example, 2011, as above). Delete Folder Deleting a Saved Search folder will also delete any saved searches within the folder. When you click the Delete Folder button, MPP will confirm the request: Online_Inbox_and_Online_Sent_Items Powered by 43
44 Click the OK button to remove the folder. Edit an Existing Folder Renaming existing folders can be done by selecting the folder in the navigation menu, and then clicking the Edit Folder button. This displays the edited folders window: Change the name in the Description field and click the Update button. Move a Folder To change the location of a folder, select the folder you wish to move and click the Move Folder icon. The Select A Folder window opens: Expand Saved Searches, and select the relevant high level folder that your folder should be moved to. Saved_Searches Powered by 44
45 Search Overview Mimecast stores your messages in your personal Archive which can be searched from MPP. This includes all messages that have been sent and received since Mimecast was deployed. If your organization has ingested historical data, you will also be able to see messages from before the Mimecast implementation date. Therefore, even if your company has policies in place to delete s from your account after a certain amount of time, you can search for these s in your Mimecast Archive. Note: You cannot use MPP to delete s from the Mimecast Archive. How do I Search? You can search for an in your Archive in two ways: Entering a search term in the Quick Search bar at the top of the screen Using the Search menu to perform a basic or advanced search Saved_Searches Powered by 45

46 You are also able to perform a basic search across your Online Inbox and Online Sent Items as described in this related article. Quick Search The Quick Search is always available and is not dependent on the screen you are currently viewing. By entering text in the Search field, a search is performed across all aspects of the (including the subject, headers, body, attachments, attachment name, attachment type) across the last year's worth of s. The results will be displayed in a separate tab, called Search Results. The same options to display, sort and manage the s are available in the Search Results screen. Search menu To perform an advanced search of your Archive: 1. Navigate to the Mail accordion menu, and select the Search option. 2. Complete the fields as described below: Field Description Text This field is used to specify the text to search for and allows searches to be performed using Boolean search parameters. When entering the text, it can be entered exactly, or if you re not sure, you have the ability to use some wild card characters. Saved_Searches Powered by 46
47 Field Description Note: The following terms are automatically excluded from the search: "a", "an", "and", "are", "as", "at", "be", "but", "by", "for", "if", "in", "into", "is", "it", "no", "not", "of", "on", "or", "such", "that", "the", "their", "then", "there", "these", "they", "this", "to", "was", "will", "with". These common words are not indexed by Mimecast when an is archived, and therefore are ignored when the search query is performed. This also applies when using phrases (as described in the example list above). Sent Allows you to enter a From address, To address, or using the With option, both From and To addresses Date Specifies the date and time range of s to search through. The default range is set to 1 year Files Select Optional to search through all messages (with and without attachments). If you select None, the search is performed through all messages that don't have an attachment. The Any option searches through all messages that have any attachment. 3. Click the Search button at the top of the Archive Search window to initiate the search and display the results in the existing window. To run the search in a new window, click the drop-down arrow first: Please Note: Recent items that haven t been indexed and archived yet will not be included in the search. The results are displayed in a new tab titled Search Results. A Refresh button is available to update search results, and the Edit Search option can be used to modify the current search parameters. Reset Search The Reset button clears the search criteria that have been entered. Saved_Searches Powered by 47
48 Advanced Search To perform an Advanced Search, click on the Advanced Search button from the Basic Search screen. The Basic Search options are enhanced with additional fields: Field Description Allows you to select through which mailbox or Smart Tag you would like to search. Type Note: To be able to search through an alternate mailbox or Smart Tag, the Administrator will need to have configured Delegated Mailboxes or Smart Tags for you. Include Aliases Selected by default, this option ensures that your search is performed across all the addresses linked to your primary address. For example, your primary address may be and you may have the address as an alias Route You can select to search through Any, Inbound, Outbound or Internal messages only Saved_Searches Powered by 48
49 Field Description Use the Sort field to determine the order in which the search results are presented. Sort Note: Deviating from the default Descending Date (recent first) search order may result in a short delay before the results are displayed. Save For more information on Saved Searches, view the full article. Search Filters Search Filters can be used in the Text field in all the search options described above to assist you with enhancing your search results. For example, you could search for the word 'proposal' in the subject line only of an . Search Filter Description subject: Searches the subject line only headers: Searches the message headers only body: Searches the message body only to: Searches items to a particular person/address only from: Searches items from a particular person/address only Saved_Searches Powered by 49
50 Search Filter Description with: Searches items to or from a particular person/address only doc: Searches through attachment name, attachment content and attachment type only Combining Filters You can combine filters to perform more specific searches. In the example below, s are returned only if the subject line contains the word 'case' and the recipient address for the message is 'a@b.com': IMPORTANT NOTE: A space is required after each search filter used. AND Parameter By default, the AND parameter will be used. If more than one word is used in the search, both of the words must be present in s in order to be returned in the results: OR Parameter Instead of the default AND parameter, you can also specify the OR parameter. This returns results that contain either one of the words searched for: Wildcards Wildcards are supported when used in the search term. The example below will only return the items that have words in them that start with "mat". For Example, "Matter", "Material", "Mathematics", etc. Saved_Searches Powered by 50
51 Note: Archive Searches can only start with valid search text. Wildcards or other search parameters, such as '!', used as the first character in the search string will cause the search to fail. Exclude Parameter To exclude a particular term, you can use the minus sign (-). In the example below, this will search through all messages and only returns the items that have red mentioned in them but only if green wasn t mentioned in the same message: Exact Parameter To perform an exact search you can place your search term between quotation marks. In the example below, this will search through all messages and only returns the items that have dark red mentioned in them in exactly that order: Search Powered by 51
52 Wild Card Characters The following Wild Card characters are supported when performing an Archive Search: Wild Card Character Text Entered Search Results Returned An asterisk * to indicate unknown letters docu* Results containing words beginning with docu such as "document" A space between words implies an AND option training exercise Results containing both "training" and "exercise", but the words may not be adjacent to one another Use the OR option between words to extend your search fred OR jim OR joe Results containing either "fred", "jim" or "joe", or a combination of these words Entering text within quotation marks allows you to search for exact phrases "knowledge base" Results containing the exact phrase "knowledge base" Searching for Calendar items Content-Type: text/calendar Results containing Calendar items Search/Wild_Card_Characters Powered by 52
53 Navigation Overview Mimecast Personal Portal (MPP) consists of a Navigation Menu on the left and the Contents Panel on the right. Each frame is independent, and may expand in height and width. Scroll bars will appear within the frame as required, to allow the full content of the frame to be viewed. Note: MPP sessions are set to expire after a period of inactivity. This will automatically end the MPP session and forces you to log in again. For additional navigation details when sending or receiving s, view the article on Online Inbox and Online Sent Items. Quick Links The Quick Links toolbar (in the top-right corner of your MPP screen) provides access your Settings, the Knowledge Base and the ability to Log out. By default, your primary address is displayed. Search/Wild_Card_Characters Powered by 53
54 Delegate Mailboxes If Delegate Mailbox Access has been configured, a drop-down menu is displayed, which allows you to select from other addresses that the Administrator has configured for you: Once the alternative address is selected, and orange indicator is shown: Navigation for the Delegate address is the same as for the primary address, and is covered in detail below. Note: s that have been sent through Mimecast that have a changed Sensitivity level (i.e. to Personal, Private or Confidential) will not be displayed in the Delegate Mode. Navigation Mode There are four accordion menu groups on the left that can be expanded to show all options. Once a menu option is selected, the page on the right will adjust based on what has been selected. Menus with an arrow icon indicate that the option can be expanded to display sub-menu items. Note: For Delegated addresses, only the Mail menu is shown. Menu Menu Item Description Compose Creates new messages Search/Wild_Card_Characters Powered by 54
55 Menu Menu Item Description Online Inbox The default view which displays all received s Online Sent Items Displays all sent s Search Searches your personal Archive Saved Archive Searches Saved Searches (Note: This option is not available for Delegated addresses) Calendars A read-only view of Exchange calendars (Depending on your organization's Mimecast Product, will determine if your replicated Calendars list is displayed.) Exchange Folders A read-only view of Exchange folders, which are listed under the Exchange Folders menu. (Depending on your organization's Mimecast Product, will determine if your replicated Exchange folders are displayed.) Smart Tags Permission-based folders used to share data or view archived files and documents. Smart tags will only be displayed if you have access to view the contents Search/Wild_Card_Characters Powered by 55
56 Menu Menu Item Description User Files Archive Displays files archived from user My Documents folders Shared Files Archive Displays files archived from shared network folders SharePoint Archive Displays files archived from SharePoint file repositories Dropbox Archive Displays files archived from Dropbox accounts Box Archive Displays files archived from Box accounts Managed Senders Displays a list of personal Permit and Block lists ( addresses and domains) Personal On Hold Lists messages being held for review, which can either be rejected or released Moderated On Hold A facility for Content Overseers to manage messages that other users have on Hold Bounce Viewer Lists s that Mimecast has been unable to deliver Rejection Viewer Lists s that have been rejected by Mimecast Search/Wild_Card_Characters Powered by 56

57 The Contents Page The contents page displays the options selected from the navigation menu (on the left), such as composing an , reading a received or viewing a Calendar. By default, after logging in, the Online Inbox is displayed which lists all received s. Page Tab Navigation It is important to note that your Mimecast session behaves as any web page as you navigate within MPP. Assuming that you have several tabs open (e.g. Online Inbox, Compose, Calendar) and are currently viewing the Calendar tab, using the browser Back button will cycle the tabs in reverse order to reach the Compose tab. Using the browser Refresh control will refresh the MPP session and only display the Online Inbox. In the top right of the contents window, you are also able to scroll through the tabs by using the arrow icons, or jump to a specific tab by either clicking on the tab, or using the quick navigation drop-down arrow, and selecting the relevant page: Page Controls For any menu option with multiple pages of results, various controls are available where appropriate. This includes: Search Bar Page Controls Calendar Controls Search Bar Most pages contain a search box which allows you to search the list for a specific entry. To use the search facility, type the relevant text in the box, and hit the Enter key to perform the search. You are also able to adjust the date range to one of the pre-configured time frames (e.g. 1 Month), or by using the Calendar controls. The results will show only those items found based on the search criteria. Search/Wild_Card_Characters Powered by 57
58 Page Controls MPP provides a default of 15 entries per page. You can adjust this up to a value of 50 using the depth selector. This option can be found at the top right side of the contents window. You can also navigate between the displayed results using the page forward and back arrows. The total number of rows available is also shown. Calendar Controls Calendar Controls assist with managing the results displayed in certain windows. By default, these pages will show a month of results. This range can be changed by clicking on the From or To Date, which will then launch a Calendar Control. Using this Calendar, you can adjust the range by selecting the appropriate dates. Powered by 58
59 Settings Overview MPP Settings can be used to control certain settings for your MPP view, such as the default page displayed when logging in, or the timezone for s. Note: MPP Settings are cookie based and stored within your browser. If these cookies are removed, or if MPP is accessed from a different browser, the default Settings are applied when you log in. How do I use Settings? To access these controls, click on the Settings link in the top right corner of your MPP screen: Powered by 59
60 This launches the Settings page which can be configured as detailed below: Settings Complete the fields as described below: Field Description Outlook Folders replicated to Mimecast can be set to display in two ways: Exchange Folders 1. Live View - displays the folder structure and s that were last replicated (this will be a fairly current view) 2. Full View - displays all folders and s that were present at any point within the mailbox history For more information on working with Exchange Folders, click here. MPP provides the option of setting the location of an preview pane. Preview The display is then split to show a list of the messages and a preview of a selected message, in the same window. Powered by 60
61 Field Description The preview pane can be set to appear Below List, On Right or None. If the option None is selected, messages that are clicked on will be opened in a new tab. A specific page can be configured to display when you first log in. Home Page You can choose from the items in the list, then click on the Apply button. Note: By default Online Inbox is configured as the home page. The Time Zone setting determines what time is displayed in MPP, taking into account international time zones and Daylight Savings Time (DST) as appropriate. By default, this is set to Auto Detect. Auto Detect uses your local computer's time zone and DST offsets to display times. It may however be useful to change this setting manually in the following situations: Time Zone if you wish to view your calendar in a different city when planning an international meeting To change the Time Zone setting: 1. Select the double arrows next to the Time Zone label. This opens a new window that lists all the available cities to choose from Powered by 61

62 Field Description 2. Either choose a predefined city, or use the Search box to find your nearest city 3. Select your preferred location from the list. In this example, London has been selected 4. Select the Apply button to save your settings 5. To restore the default Auto Detect setting, clear the previous selection by clicking on the X icon next to the Time Zone label. You may wish to change the date format of how s are displayed. The date format is derived from your browser s regional settings. The options are: Date Format yyyy-mm-dd (e.g ) dd/mmyyyy (e.g. 12/08/2010) mm/dd/yyyy (e.g. 08/12/2010) Time Format You may wish to change the time format of how s are displayed. The time format is derived from your browser s regional settings. The options are: 12-hour clock (e.g. 4:35 pm) Powered by 62
63 Field Description 24-hour clock (e.g. 16:35) First Day of Week This option sets the first day of the week to be used when viewing your Calendars, and ranges from Sunday to Saturday. The default is set to Monday. Note: To save the settings, remember to click the Apply button once you have made your selection. Language Enables you to switch the language options for MPP between English and Spanish. Change Cloud Password When logging into MPP, you can either use your network password (if configured for your account), or a Mimecast Cloud (local) password. There may be scenarios when your network credentials cannot be used, for example if your company Directory server is down. For these situations, a Mimecast Cloud password is required. Your Administrator will inform you if this password can be used. You will have two options depending on whether you already have a Cloud password configured, as described in the following sections: Changing your Cloud Password If you already have a Cloud password configured, you are able to reset this password, and will be presented with the Change Cloud Password box: 1. Enter the current Cloud password into the Previous Password field Powered by 63

64 2. Enter the new Cloud password into the New Password field Note: These passwords cannot be the same. 3. Re-enter your new cloud password into the Confirm Password field Note: The value in the New Password field and this field must be the same. 4. Click the Change Password button. Creating a Cloud Password If you have logged in with your network password, and do not have a Cloud password configured, you will be presented with a Create Cloud Password box. 1. Enter a Cloud password into the New Password field. 2. Enter the same cloud password into the Confirm Password field. Note: The value in the New Password field and this field must be the same. 3. Click the Change Password button. Note: Your Administrator must enable this feature for you. Box and Dropbox Sync Setup If your Administrator has enabled access to Dropbox and Box File Archiving, the following setup options will be available: Enter your Box or Dropbox logon name in the available field, and click the Login button. A pop-up window is then displayed which allows you to enter your password, and authorize Mimecast to archive your files to the Archive: Powered by 64
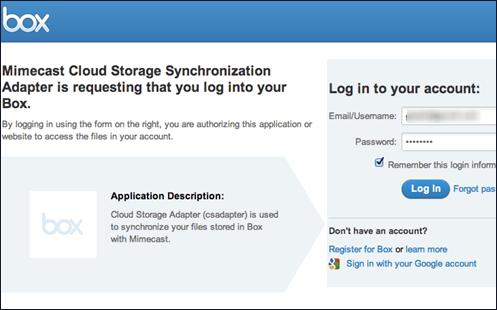
65 BOX Powered by 65
66 DROPBOX Note: Because this login page is displayed as a pop-up, it is important to ensure that your browser is configured to allow pop-ups. Once you have authorized Mimecast to access your Box or Dropbox account, a folder called Mimecast is created. Any files copied into this folder will be archived by Mimecast: Powered by 66

67 BOX DROPBOX A folder will then be created in your MPP File Archive menu called Box Archive or Dropbox Archive. Your personal archive is listed below the relevant folder using your company address: Powered by 67
68 Note: Sub-folders that are created in your Mimecast folder in Dropbox or Box will not be visible. Powered by 68
69 Smart Tags Overview Smart Tags are permission-based folders used to share data that you are not the sender or recipient of. Using MPP, you can access the content of these s, as well as forward the to additional recipients. Permission to access Smart Tags can only be assigned by Mimecast Administrators. Note: s in a Smart Tag can not be deleted or modified. How do I use Smart Tags? There are many reasons why Smart Tags could be implemented: The Administrator may need to allow staff to access s that were sent or received by other user accounts or addresses. For example, if your organization uses a generic address, such as sales@company.com, or info@company.com, it is possible to assign permissions to other others in the business to access the s sent to or from these generic addresses. Project team members may need to be able to access all s relating to a specific project, regardless of which team member sent or received these s. Powered by 69
70 To access your Smart Tags, click on the Smart Tags accordion menu option, and select the tag by clicking on the arrow icon. Smart Tags will only be displayed if the Administrator has assigned permissions for your address to view the tags. Tagged s will be displayed, and can be search, viewed, and forwarded to additional recipients. For more information on working with s, view the full article on Navigation. Smart_Tags Powered by 70
71 User Quick Start Guide Overview Mimecast Personal Portal (MPP) is a webmail portal that allows you to search your personal Archive, manage your personal Permit/Block lists, and continue to send and receive in the event of a mail server outage, or for situations when you are unable to access . Accessing MPP MPP can be accessed in two different ways; either by navigating to the direct URLs, as listed below, or via the Mimecast website: Log In Directly Utilize one of the following links to access MPP directly. This depends on your location, and will be provided to you by your Administrator: (for European Union customers) (for North American customers) (for South African customers) (for Offshore customers) Logging via the Mimecast Website 1. Open a web browser, and enter the address for the Mimecast website: 2. Click the Login button near the top right side of the page: 3. Within the Mimecast Personal Portal section, select your Region using the drop-down menu, and then click the Continue button: Smart_Tags Powered by 71

72 4. Once the page has loaded, the main login screen is displayed. Logging in Enter your address in the login screen, then click Next: In the Password field, enter the password that has been provided by your Administrator. This is either your Mimecast Cloud password, or your Domain (Network) password. The drop down field must be selected for the type of password that you will be using. Smart_Tags Powered by 72

73 Note: If you are unsure which password to use, select the Domain Password option. Click the Log In button. Menu Options and Navigation MPP consists of a Navigation Menu on the left and the Contents Panel on the right. For each menu option selected, a new page is opened: Note: This guide assumes full access to all MPP menus and options. Your functionality will vary according to your organization s purchased Mimecast product. Please contact your Mimecast Administrator with any queries. Composing s To compose an , click on the Compose option (in the Mail accordion menu) and complete the necessary fields, such as To, Subject and the message body itself. Use the icons in the Compose toolbar to add attachments, look for an address in you address list, or to send the . Smart_Tags Powered by 73
 and Online Sent Items (emails that")
74 Note: The To field can be completed using the Global Address Book, or simply type the address and Mimecast will autocomplete this field if it is a recently used address. Online Inbox & Online Sent Items All the s that exist in your personal Archive are accessible in two main folders: Online Inbox ( s that you have received) and Online Sent Items ( s that you have sent). By default, messages are listed in reverse date order with the latest displaying first. The default page displayed is the Online Inbox. Click on an to view the contents, and use the toolbar to Reply, Reply All or Forward the message. Alternatively, rightclicking on any allows you to Open, Reply, Reply All, Forward the , or Permit or Block the sender. Search Options Mimecast keeps your messages in your personal Archive. Search for an in your Archive in two ways: Enter a search term in the Quick Search bar at the top of the MPP screen Use the Search menu option to perform an advanced Archive search Quick Search Enter the basic text and click the Search button. This searches all aspects of the message (subject, headers, body, attachment, attachment name, attachments type) across the last year's worth of Smart_Tags Powered by 74
Mimecast Personal Portal (MPP ) User Guide
 User Guide") Mimecast Personal Portal (MPP ) User Guide Information in this document is subject to change without notice. No part of this document may be reproduced or transmitted in any form or by any means, electronic
Mimecast Personal Portal (MPP ) User Guide Information in this document is subject to change without notice. No part of this document may be reproduced or transmitted in any form or by any means, electronic
TurnkeyMail 7.x Help. Logging in to TurnkeyMail
 Logging in to TurnkeyMail TurnkeyMail is a feature-rich Windows mail server that brings the power of enterprise-level features and collaboration to businesses and hosting environments. Because TurnkeyMail
Getting Started The Outlook Web Access Window
 QUICK Source Microsoft Outlook Web Access in Exchange Server 2003 Getting Started The Outlook Web Access Window ❶ ❷ ❸ ❹ ❺ ❻ ❼ ❽ Using the Reading Pane The Reading Pane allows you to view your e-mail messages
School Mail System. - Access through Outlook Web Access. User Guide FOR. Education Bureau (EDB)
") School Mail System - Access through Outlook Web Access User Guide FOR Education Bureau (EDB) Version: 1.1 February 2008 The Government of the Hong Kong Special Administrative Region The contents of this
School Mail System - Access through Outlook Web Access User Guide FOR Education Bureau (EDB) Version: 1.1 February 2008 The Government of the Hong Kong Special Administrative Region The contents of this
2013 edition (version 1.1)
") 2013 edition (version 1.1) Contents 1 Introduction... 3 2 Signing in to your Office 365 account... 3 2.1 Acceptable Use Policy and Terms of Use... 4 3 Setting your profile and options... 4 3.1 Settings:
2013 edition (version 1.1) Contents 1 Introduction... 3 2 Signing in to your Office 365 account... 3 2.1 Acceptable Use Policy and Terms of Use... 4 3 Setting your profile and options... 4 3.1 Settings:
Help for Users & Domain Administrators
 Help for Users & Domain Administrators Help Documentation This document was auto-created from web content and is subject to change at any time. Copyright (c) 2018 SmarterTools Inc. Help for Users & Domain
Outlook Web Access Exchange Server
 Outlook Web Access Exchange Server Version 2.0 Information Technology Services 2008 Table of Contents I. INTRODUCTION... 1 II. GETTING STARTED... 1 A. Logging In and Existing Outlook Web Access... 1 B.
. Help Documentation. This document was auto-created from web content and is subject to change at any time. Copyright (c) 2019 SmarterTools Inc.
 2019 SmarterTools Inc.") Help Documentation This document was auto-created from web content and is subject to change at any time. Copyright (c) 2019 SmarterTools Inc. Email Email Overview SmarterMail users can send and receive
Help Documentation This document was auto-created from web content and is subject to change at any time. Copyright (c) 2019 SmarterTools Inc. Email Email Overview SmarterMail users can send and receive
HGC SUPERHUB HOSTED EXCHANGE
 HGC SUPERHUB HOSTED EXCHANGE EMAIL OUTLOOK WEB APP (OWA) 2010 USER GUIDE V2013.6 HGC Superhub Hosted Email OWA User Guide @ 2014 HGC. All right reserved. Table of Contents 1. Get Started... 4 1.1 Log into
Continuity. Mimecast Training. Student Workbook. V Mimecast. All rights reserved
 Continuity Mimecast Training Student Workbook V 1.2 2013 Mimecast. All rights reserved Information in this document is subject to change without notice. No part of this document may be reproduced or transmitted
AN INTRODUCTION TO OUTLOOK WEB ACCESS (OWA)
") INFORMATION TECHNOLOGY SERVICES AN INTRODUCTION TO OUTLOOK WEB ACCESS (OWA) The Prince William County School Division does not discriminate in employment or in its educational programs and activities against
INFORMATION TECHNOLOGY SERVICES AN INTRODUCTION TO OUTLOOK WEB ACCESS (OWA) The Prince William County School Division does not discriminate in employment or in its educational programs and activities against
Comodo Antispam Gateway Software Version 2.12
 Comodo Antispam Gateway Software Version 2.12 User Guide Guide Version 2.12.112017 Comodo Security Solutions 1255 Broad Street Clifton, NJ, 07013 Table of Contents 1 Introduction to Comodo Antispam Gateway...3
Comodo Comodo Dome Antispam MSP Software Version 2.12
 Comodo Comodo Dome Antispam MSP Software Version 2.12 User Guide Guide Version 2.12.111517 Comodo Security Solutions 1255 Broad Street Clifton, NJ, 07013 Table of Contents 1 Introduction to Comodo Dome
. Help Documentation. This document was auto-created from web content and is subject to change at any time. Copyright (c) 2018 SmarterTools Inc.
 2018 SmarterTools Inc.") Help Documentation This document was auto-created from web content and is subject to change at any time. Copyright (c) 2018 SmarterTools Inc. Email Email Overview SmarterMail users can send and receive
Help Documentation This document was auto-created from web content and is subject to change at any time. Copyright (c) 2018 SmarterTools Inc. Email Email Overview SmarterMail users can send and receive
Comodo Antispam Gateway Software Version 2.11
 Comodo Antispam Gateway Software Version 2.11 User Guide Guide Version 2.11.041917 Comodo Security Solutions 1255 Broad Street Clifton, NJ, 07013 Table of Contents 1 Introduction to Comodo Antispam Gateway...3
OUTLOOK WEB ACCESS UOW USER GUIDE INDEX
 OUTLOOK WEB ACCESS UOW USER GUIDE INDEX ACCESSING MAIL... 2 SETTING UP... 2 OPTIONS... 3 VIEWING... 4 ARRANGE MESSAGES... 4 CREATING/SENDING A NEW MESSAGE... 5 REPLYING TO MESSAGES... 5 FORWARDING MESSAGES...
Microsoft Outlook Basics
 Microsoft Outlook 2010 Basics 2 Microsoft Outlook 2010 Microsoft Outlook 2010 3 Table of Contents Getting Started with Microsoft Outlook 2010... 7 Starting Microsoft Outlook... 7 Outlook 2010 Interface...
Webmail 7.0 is an online client which runs in your web browser. Webmail 7.0 allows you to access your , contact list, and calendar from
 Webmail 7.0 is an online email client which runs in your web browser. Webmail 7.0 allows you to access your email, contact list, and calendar from any computer with an internet connection and a web browser.
Outlook Web App. Getting Started. QUICK Source. Microsoft. in Exchange Server 2010
 QUICK Source Microsoft Outlook Web App in Exchange Server 2010 Getting Started The Outlook Web App Window u v w x y u v w x y Browser Toolbars allow the user to navigate in the browser. Outlook Web Access
USER GUIDE. Accessing the User Interface. Login Page https://www.contentcatcher.com. Resetting your Password. Logging In
 USER GUIDE This guide walks through the user interface of ContentCatcher, and the features and parameters contained therein. Accessing the User Interface The ContentCatcher user interface is a secure web-based
OUTLOOK HOW DO I? 2013
 OUTLOOK HOW DO I? Click on a Link to take you to that Section OUTLOOK - GENERAL... 2 GENERAL How Do I Navigate the 2010 Outlook Screen?... 2 GENERAL: How Do I Change the Reading Pane View?... 7 GENERAL:
USER GUIDE. EBMS SECURE MailGate
 USER GUIDE EBMS SECURE EMAIL MailGate USER REGISTRATION When a secure email is sent to a new user, Secure Mailbox generates a notification and sends it to their email account. The notification contains
SwatCal. Swarthmore College s integrated mail and calendar system
 SwatCal Swarthmore College s integrated mail and calendar system [SWATCAL] Learn how to use Swarthmore College s integrated email and calendar system. Import/export your meeting maker calendar, create
Outlook 2010 Cheat Sheet. USC Marshall School of Business Academic Information Services. Table of Contents
 USC Marshall School of Business Academic Information Services Outlook 2010 Cheat Sheet Aside from a few new features such as Quick Steps and Conversation View, the biggest change in Outlook 2010 from previous
Office 365 Features. Click the links below for an online overview:
 Office 365 Features http://www.jeffersonstate.edu/resources-for-instructors-de/ The Microsoft Office 365 Outlook Web App (OWA) allows users to access their mailbox using a web browser from any computer
Outlook Web Access Getting Started
 Getting Started Outlook Web Access Getting Started First, open up the web browser of your choice. Then, enter the following URL: http://mailserver.pts.edu Outlook Web Access Login To log in, you will simply
SECTION 5 USING STUDENT
 SECTION 5 USING STUDENT EMAIL 5. USING STUDENT EMAIL On enrolling at the University all students automatically have an email account created. Account creation depends on a student successfully enrolling
How to Use: Outlook Web Access (OWA)
") How to Use: Outlook Web Access (OWA) All About Me Day April 19. 2012 What is Outlook Web App 2010? The Outlook Web App allows you to access your College e-mail and calendar from any computer that has Internet
How to Use: Outlook Web Access (OWA) All About Me Day April 19. 2012 What is Outlook Web App 2010? The Outlook Web App allows you to access your College e-mail and calendar from any computer that has Internet
Using the Control Panel
 Using the Control Panel Technical Manual: User Guide Creating a New Email Account 3. If prompted, select a domain from the list. Or, to change domains, click the change domain link. 4. Click the Add Mailbox
Outlook 2007 Web Access User Guide
 Outlook 2007 Web Access User Guide Table of Contents Page i TABLE OF CONTENTS OUTLOOK 2007 MAIL... 1 Launch Outlook Web Access... 1 Screen Elements... 2 Inbox... 3 Read Mail... 3 Delete a Message... 3
OUTLOOK WEB ACCESS (OWA) USER S GUIDE. Exchange 2003 Version - OWA Guide
 USER S GUIDE. Exchange 2003 Version - OWA Guide") OUTLOOK WEB ACCESS (OWA) USER S GUIDE Exchange 2003 Version - OWA Guide TABLE OF CONTENTS WHAT S NEW IN OWA 2003?...2 General...2 Inbox and Message Composition...2 Tasks...2 INTRODUCTION TO OWA...3 Web-Based
OUTLOOK WEB ACCESS (OWA) USER S GUIDE Exchange 2003 Version - OWA Guide TABLE OF CONTENTS WHAT S NEW IN OWA 2003?...2 General...2 Inbox and Message Composition...2 Tasks...2 INTRODUCTION TO OWA...3 Web-Based
GROUPWISE INSTRUCTIONS
 Viewing the GroupWise Home Desktop From the Folder List on the left-hand side of the screen, [Click] on the yourname HOME FOLDER The Home view provides panels of shortcut views which can be customized.
OWA - Outlook Web Access
 OWA - Outlook Web Access Introduction Outlook Web App (OWA) is the web-based version of the Outlook 2010 email client. To access OWA, you need a web brower and an internet connection. Logging In Go to
USER MANUAL. Learn how to use the user-side features of GFI OneConnect.
 USER MANUAL Learn how to use the user-side features of GFI OneConnect. The information and content in this document is provided for informational purposes only and is provided "as is" with no warranties
Outlook Web Access (OWA) PTHS District 209
 PTHS District 209") Outlook Web Access (OWA) PTHS District 209 Table of Contents Welcome to Outlook Web Access (OWA)... 1 To Access Your Proviso E-mail:... 1 If You Use Windows 95 or 98 or 2000 at Home... 2 About the Navigation
Outlook Web Access (OWA) PTHS District 209 Table of Contents Welcome to Outlook Web Access (OWA)... 1 To Access Your Proviso E-mail:... 1 If You Use Windows 95 or 98 or 2000 at Home... 2 About the Navigation
Parish . User Manual
 Parish Email User Manual Table of Contents LOGGING IN TO PARISH EMAIL... 3 GETTING STARTED... 3 GENERAL OVERVIEW OF THE USER INTERFACE... 3 TERMINATE THE SESSION... 4 EMAIL... 4 MESSAGES LIST... 4 Open
Outlook Web Access -User Guides-
 Nilai University College (Nilai Education Sdn. Bhd) Outlook Web Access -User Guides- Prepared By IT Department (Infrastructure Team) VERSION: 1.0 All rights reserved. This document is a proprietary product
Outlook 2007 Department of Computer Science and Engineering 2008
 Outlook 2007 Department of Computer Science and Engineering 2008 This document was prepared by the Department of Computer Science and Engineering for faculty and staff at the University of South Carolina
New Web Outlook. Look and Feel: You can personalize your Web Outlook by using Themes. Click on Options and select the desired Theme.
 New Web Outlook Look and Feel: You can personalize your Web Outlook by using Themes. Click on Options and select the desired Theme. Reading Messages: You can double click to view an email message. Options
OUTLOOK WEB APP (OWA): MAIL
: MAIL") Office 365 Navigation Pane: Navigating in Office 365 Click the App Launcher and then choose the application (i.e. Outlook, Calendar, People, etc.). To modify your personal account settings, click the Logon
Office 365 Navigation Pane: Navigating in Office 365 Click the App Launcher and then choose the application (i.e. Outlook, Calendar, People, etc.). To modify your personal account settings, click the Logon
700 Fox Glen Barrington, Illinois ph: [847] fx: [847] Webmail System User Guide
![700 Fox Glen Barrington, Illinois ph: [847] fx: [847] Webmail System User Guide](/thumbs/75/72263861.jpg "700 Fox Glen Barrington, Illinois ph: [847] fx: [847] Webmail System User Guide") 700 Fox Glen Barrington, Illinois 60010 ph: [847] 842-9570 fx: [847] 842-0190 www.excaltech.com support@excaltech.com Webmail System User Guide Last Updated November 7, 2017 -2- Table of Contents Welcome
700 Fox Glen Barrington, Illinois 60010 ph: [847] 842-9570 fx: [847] 842-0190 www.excaltech.com support@excaltech.com Webmail System User Guide Last Updated November 7, 2017 -2- Table of Contents Welcome
Office365 End User Training & Self-Service Migration Manual Simplified
 Office365 End User Training & Self-Service Migration Manual Simplified Version 1.0 University Systems and Security 5/25/2016 1 P a g e Table of Contents 2 P a g e Table of Contents Introduction to Office365...
Using Your New Webmail
 Using Your New Webmail Table of Contents Composing a New Message... 2 Adding Attachments to a Message... 4 Inserting a Hyperlink... 6 Searching For Messages... 8 Downloading Email from a POP3 Account...
Microsoft Outlook 2010 Outlook Web Access (OWA)
") Microsoft Outlook 2010 Outlook Web Access (OWA) A quick reference guide to becoming familiar with the Microsoft Outlook Web Access interface including logging in, understanding tools for composing email
Microsoft Outlook 2010 Outlook Web Access (OWA) A quick reference guide to becoming familiar with the Microsoft Outlook Web Access interface including logging in, understanding tools for composing email
Introduction. Logging in. WebMail User Guide
 Introduction modusmail s WebMail allows you to access and manage your email, quarantine contents and your mailbox settings through the Internet. This user guide will walk you through each of the tasks
User Guide. BlackBerry Workspaces for Windows. Version 5.5
 User Guide BlackBerry Workspaces for Windows Version 5.5 Published: 2017-03-30 SWD-20170330110027321 Contents Introducing BlackBerry Workspaces for Windows... 6 Getting Started... 7 Setting up and installing
. Help Documentation. This document was auto-created from web content and is subject to change at any time. Copyright (c) 2019 SmarterTools Inc.
 2019 SmarterTools Inc.") Help Documentation This document was auto-created from web content and is subject to change at any time. Copyright (c) 2019 SmarterTools Inc. Mail Folders A folder in SmarterMail is the general method
Help Documentation This document was auto-created from web content and is subject to change at any time. Copyright (c) 2019 SmarterTools Inc. Mail Folders A folder in SmarterMail is the general method
Outlook: Communication Management Made Easy
 Applied Systems Client Network SEMINAR HANDOUT Outlook: Communication Management Made Easy Prepared for ASCnet Applied Systems Client Network 801 Douglas Avenue #205 Altamonte Springs, FL 32714 Phone:
Hostopia WebMail Help
 Hostopia WebMail Help Table of Contents GETTING STARTED WITH WEBMAIL...5 Version History...6 Introduction to WebMail...6 Cookies and WebMail...6 Logging in to your account...6 Connection time limit...7
EVERY NATION OUTLOOK WEB ACCESS (OWA) USER S GUIDE
 USER S GUIDE") EVERY NATION OUTLOOK WEB ACCESS (OWA) USER S GUIDE Exchange 2003 Version Revised September 2005 TABLE OF CONTENTS WHAT S NEW IN OWA 2003?...2 General...2 Inbox and Message Composition...2 Tasks...2 INTRODUCTION
EVERY NATION OUTLOOK WEB ACCESS (OWA) USER S GUIDE Exchange 2003 Version Revised September 2005 TABLE OF CONTENTS WHAT S NEW IN OWA 2003?...2 General...2 Inbox and Message Composition...2 Tasks...2 INTRODUCTION
IBM Notes Client V9.0.1 Reference Guide
 IBM Notes Client V9.0.1 Reference Guide Revised 05/20/2016 1 Accessing the IBM Notes Client IBM Notes Client V9.0.1 Reference Guide From your desktop, double-click the IBM Notes icon. Logging in to the
Life After Webmail Reference Guide
 Life After Webmail Reference Guide (An Introduction to Outlook Web Access 2007 Client User Interface) https://owa.wiu.k12.pa.us Westmoreland Intermediate Unit Information Technology Services 102 Equity
Quick Tips & Tricks. Important You must use SEMICOLONS ( ie; ) to separate address when sending mail to multiple users
 to separate address when sending mail to multiple users") Quick Tips & Tricks Important You must use SEMICOLONS ( ie; ) to separate email address when sending mail to multiple users Customize Mail View Click, View, and then highlight Current View Click, Customize
Quick Tips & Tricks Important You must use SEMICOLONS ( ie; ) to separate email address when sending mail to multiple users Customize Mail View Click, View, and then highlight Current View Click, Customize
Introduction to 9.0. Introduction to 9.0. Getting Started Guide. Powering collaborative online communities.
 Introduction to 9.0 Introduction to 9.0 Getting Started Guide Powering collaborative online communities. TABLE OF CONTENTS About FirstClass...3 Connecting to your FirstClass server...3 FirstClass window
Along the top of the Inbox is a toolbar with icons for commonly used functions within .
 Outlook Inbox Once you log on to Outlook on the Web, the default page is your Outlook Inbox. For detailed information about logging into your account see: Getting Started - Logging On. The Inbox Viewer
UNIVERSITY OF WOLLONGONG MICROSOFT OUTLOOK
 UNIVERSITY OF WOLLONGONG MICROSOFT OUTLOOK 2007 EMAIL Table of Contents INTRODUCTION... 2 WHAT S NEW... 2 MOBILE DEVICES... 2 OVERVIEW OF OUTLOOK... 3 NAVIGATION PANE... 3 VIEWING MAIL... 4 READING PANE...
GroupWise 2012 Guide. February IT Training and Empowerment Petra Gainsford
 GroupWise 2012 Guide February 2014 IT Training and Empowerment Petra Gainsford Table of Contents GroupWise 2012 1 GroupWise Login... 1 2 Accessing your Mail... 1 2.1 Reading E-Mail...1 2.2 Creating Messages...1
Introduction to Apple Mail with IMAP
 Introduction to Apple Mail with IMAP Version 4 October 2008 Massachusetts Institute of Technology Getting Started This Quick Start class assumes that: 1. Apple Mail is configured for use at MIT. If you
Organising your inbox
 Outlook 2010 Tips Table of Contents Organising your inbox... 1 Categories... 1 Applying a Category to an E-mail... 1 Customising Categories... 1 Quick Steps... 2 Default Quick Steps... 2 To configure or
Chapter 1: Fundamentals
 Chapter 1: Fundamentals Module A: Getting around The replaces the menus and toolbars of older Outlook versions. Folder pane To-Do bar Ribbon Reading pane The is/are the primary way to access various areas
University Information Technology (UIT) Proofpoint Frequently Asked Questions (FAQ)
 Proofpoint Frequently Asked Questions (FAQ)") University Information Technology (UIT) Proofpoint Frequently Asked Questions (FAQ) What is Proofpoint?... 2 What is an End User Digest?... 2 In my End User Digest I see an email that is not spam. What
University Information Technology (UIT) Proofpoint Frequently Asked Questions (FAQ) What is Proofpoint?... 2 What is an End User Digest?... 2 In my End User Digest I see an email that is not spam. What
SCOUT ASSOCIATION OF HONG KONG SERVICE USER TRAINING 2013
 SCOUT ASSOCIATION OF HONG KONG EMAIL SERVICE USER TRAINING 2013 TRAINING AGENDA A. Getting started in Webmail 1. Outlook Web Access (OWA) Email Account Logon Page 2. OWA General Feature 3. Reset Password
Oracle Connector for Outlook User s Guide
 Oracle Connector for Outlook 2003 User s Guide MIT IS&T Oracle Connector for Outlook Release Team Revised: January 7, 2005 MIT IS&T Oracle Connector for Outlook Release Team MIT-OCFO-2003-UG.doc Revised
An Overview of Webmail
 An Overview of Webmail Table of Contents What browsers can I use to view my mail? ------------------------------------------------------- 3 Email size and storage limits -----------------------------------------------------------------------
Exchange Tools. Mimecast Training. Student Workbook. V 1.2
 Exchange Tools Mimecast Training Student Workbook V 1.2 Information in this document is subject to change without notice. No part of this document may be reproduced or transmitted in any form or by any
Depending on your version of Internet Explorer, you will get a Security Alert box.
 You can move straight through this tutorial using the space bar on the keyboard, the key, or the Left/Right Arrow Keys. Use the buttons below if you want to view specific modules within the tutorial.
This document contains information that will help you to create and send graphically-rich and compelling HTML s through the Create Wizard.
 This document contains information that will help you to create and send graphically-rich and compelling HTML emails through the Create Email Wizard. or warranty by AT&T and is subject to change. 1 Contents
700 Fox Glen Barrington, Illinois ph: [847] fx: [847] Webmail System User Guide
![700 Fox Glen Barrington, Illinois ph: [847] fx: [847] Webmail System User Guide](/thumbs/77/75887523.jpg "700 Fox Glen Barrington, Illinois ph: [847] fx: [847] Webmail System User Guide") 700 Fox Glen Barrington, Illinois 60010 ph: [847] 842-9570 fx: [847] 842-0190 www.excaltech.com support@excaltech.com Webmail System User Guide Last Updated May 10, 2010 -2- Table of Contents Welcome and
700 Fox Glen Barrington, Illinois 60010 ph: [847] 842-9570 fx: [847] 842-0190 www.excaltech.com support@excaltech.com Webmail System User Guide Last Updated May 10, 2010 -2- Table of Contents Welcome and
Outlook Skills Tutor. Open Outlook
 Outlook Skills Tutor Lakewood School District Open Outlook Working with the Inbox Receiving new email Sorting your Inbox Reading email Using the Reading Pane Sending, replying to, and forwarding messages
Outlook Web Access User s Guide- Paris ISD
 Outlook Web Access User s Guide- Paris ISD 2009-10 Microsoft s Outlook Web Access is the new web-based program that Paris ISD will use for E-mail. You can access your email and folders from any computer
AccessMail Users Manual for NJMLS members Rev 6
 AccessMail User Manual - Page 1 AccessMail Users Manual for NJMLS members Rev 6 Users Guide AccessMail User Manual - Page 2 Table of Contents The Main Menu...4 Get Messages...5 New Message...9 Search...11
5.0 INTRODUCTION 5.1 OBJECTIVES 5.2 BASIC OPERATIONS
 Lab Course UNIT 5 E-MAIL Stucture Page No. 5.0 Introduction 152 5.1 Objectives 152 5.2 Basic Operations 152 5.3 Managing Contacts 156 5.4 Lab Exercises 162 5.5 Summary 163 5.6 Further Reading 163 5.0 INTRODUCTION
Microsoft Outlook 2003 Microsoft screen shots used in accordance with Microsoft rules to be viewed at URL
 Microsoft Outlook 2003 Microsoft screen shots used in accordance with Microsoft rules to be viewed at URL http://www.microsoft.com/permission/copyrgt/cop-img.htm#screenshot Compiled by: Charmaine Morris
Outlook - an Introduction to Version 2003 Table of Contents
 Outlook - an Introduction to E-mail Version 2003 Table of Contents What is Outlook Starting Outlook The Navigation Pane Getting Help Creating and Sending a Message Using the College Exchange Directory
Warrick County School Corp.
 Warrick County School Corp. Ou Microsoft Outlook Web Access Guide Getting StartedStyarted Go to the Warrick County School Corp. Home Page (www.warrick.k12.in.us) and click the Web Mail link. Logging In
Outlook 2016 for Mac: Basics
 Outlook 2016 for Mac: Basics FINAL 2015. All Rights Reserved. California State University, Bakersfield June 24, 2015 REVISION CONTROL Document Title: Author: File Reference: O2016 Outlook Mac Basics Staff
2 Accessing Oracle Webmail
 Oracle Collaboration Suite Using Oracle Webmail Release 2 (9.0.4.2) Part No. B10897-02 March 2004 You can use Oracle Webmail to: Compose and manage messages Create and manage message folders Manage public
WEBMAIL INTERFACE MANUAL GUIDE
 WEBMAIL INTERFACE MANUAL GUIDE (Mobile Version) Mail Hosting Service 2016. All rights reserved. Power by Support Mail team (support mail@ntt.co.th) NTT Communications (Thailand) Co.,Ltd. Library of instructions
QUICK REFERENCE CARD. Introduction to Outlook Web Access
 QUICK REFERENCE CARD Introduction to Outlook Web Access Page 1 of 12 Launching OWA In order to launch Outlook Web Access, you will need to do the following. Double Click on the Internet Explorer Icon on
1. Open Outlook by clicking on the Outlook icon. 2. Select Next in the following two boxes. 3. Type your name, , and password in the appropriate
 1 4 9 11 12 1 1. Open Outlook by clicking on the Outlook icon. 2. Select Next in the following two boxes. 3. Type your name, email, and password in the appropriate blanks and click next. 4. Choose Allow
Oracle Beehive. Webmail Help and Release Notes Release 2 ( )
") Oracle Beehive Webmail Help and Release Notes Release 2 (2.0.1.7) E20318-01 July 2012 Document updated July 2012 Oracle Beehive Webmail is a Web-based e-mail application that provides instant anytime access
Oracle Beehive Webmail Help and Release Notes Release 2 (2.0.1.7) E20318-01 July 2012 Document updated July 2012 Oracle Beehive Webmail is a Web-based e-mail application that provides instant anytime access
Microsoft Office Outlook 2010
 Starting Microsoft Outlook 2010 with XP Click on Start, E-mail Microsoft Outlook or Start, All Programs, Microsoft Office, Microsoft Outlook. Starting Microsoft Outlook 2010 with Windows 7 Click on the
BASIC NAVIGATION & VIEWS...
 Content Overview VISUAL TOUR... 5 NEW FEATURES IN OUTLOOK 2010... 6 BASIC NAVIGATION & VIEWS... 7 SETTING PREFERENCES... 7 Creating an Outlook Shortcut... 7 Choosing a Startup View... 7 CUSTOMIZING INBOX
Outlook Getting Started QUICK. Source. Microsoft
 Microsoft QUICK Outlook 2010 Source Getting Started The Outlook Window u v w x z Using the Backstage View The Backstage view allows you to quickly manage Outlook settings, such as Account Settings, Mailbox
Calendar Basics Outlook 2016 for Windows
 Calendar Basics Outlook 2016 for Windows Texas Christian University Information Technology Table of Contents Navigate the Calendar... 1 Create and Edit New Calendar Items... 2 New Appointment... 2 Add
Outlook Web App (Exchange 2010) User Guide Computer Training Solutions Version Revision Date
 User Guide Computer Training Solutions Version Revision Date") Outlook Web App (Exchange 2010) Computer Training Solutions Version 1.7 Revision Date 2014-December-1 Table of Contents QUICK REFERENCE... 2 OUTLOOK WEB APP URL... 2 MANITOBA EHEALTH SERVICE DESK... 2
Outlook Web App (Exchange 2010) Computer Training Solutions Version 1.7 Revision Date 2014-December-1 Table of Contents QUICK REFERENCE... 2 OUTLOOK WEB APP URL... 2 MANITOBA EHEALTH SERVICE DESK... 2
Microsoft Entourage 2008
 Microsoft Entourage 2008 Prepared by Computing Services at the Eastman School of Music May 2008 1 Table of Contents Appearance of Microsoft Entourage... 4 Email... 4 Reading New Email... 4 Sending a New
Table of Contents COURSE OVERVIEW... 3 LESSON 1: OUTLOOK 2010 CALENDAR INTERFACE... 5
 Table of Contents COURSE OVERVIEW... 3 LESSON 1: OUTLOOK 2010 CALENDAR INTERFACE... 5 OPEN OUTLOOK CALENDAR... 5 Ribbon... 6 Navigation Pane... 6 Appointment Area... 6 Task Pane... 6 To-Do Bar... 6 THE
MailEnable Connector for Microsoft Outlook
 MailEnable Connector for Microsoft Outlook Version 1.41 This guide describes the installation and functionality of the MailEnable Connector for Microsoft Outlook. Features The MailEnable Connector for
Comodo Antispam Gateway Software Version 2.1
 Comodo Antispam Gateway Software Version 2.1 User Guide Guide Version 2.1.010215 Comodo Security Solutions 1255 Broad Street Clifton, NJ, 07013 Table of Contents 1 Introduction to Comodo Antispam Gateway...
Office365 End User Training & Self-Service Migration Manual
 Office365 End User Training & Self-Service Migration Manual Version 1.0 University Systems and Security 5/25/2016 1 P a g e Table of Contents 2 P a g e Table of Contents Introduction to Office365... 4
Explore the OWA user interface
 Explore the OWA user interface 1. Instant Search box: Helps you quickly find items in Microsoft Outlook. The Instant Search pane is always available in all of your Outlook folders, such as Mail, Calendar,
Outlook: Web Access. Outlook: Web Access AIS Vienna
 Outlook: Web Access AIS Vienna Table of Contents Introduction to OWA...1 Log On... 1 OWA Workspace... 2 Hiding/Displaying the Reading Pane... 3 Collapsing/Expanding the Outlook Bar... 4 Log Off... 5 Sending
OFFICE 365 OWA. Office 365 Outlook Web App. Initial Welcome Screen
 Office 365 Outlook Web App Office 365 Outlook Web App (OWA) is a mail, calendaring and scheduling program. In addition, OWA offers connectivity to other cloud features of Office 365 such as SharePoint.
Office 365: . Accessing and Logging In. Mail
 Office 365: Email This class will introduce you to Office 365 and cover the email components found in Outlook on the Web. For more information about the Microsoft Outlook desktop client, register for a
User Manual. [Outlook Web App 2013] Central Information Systems Division
![User Manual. [Outlook Web App 2013] Central Information Systems Division](/thumbs/88/115898574.jpg "User Manual. [Outlook Web App 2013] Central Information Systems Division") [Outlook Web App 2013] Central Information Systems Division Table of Contents 1. To Login... 4 2. To Logout... 5 3. Change Password... 5 4. Email Messaging... 6 4.1 Create a New Mail... 6 4.2 To Save Mail
[Outlook Web App 2013] Central Information Systems Division Table of Contents 1. To Login... 4 2. To Logout... 5 3. Change Password... 5 4. Email Messaging... 6 4.1 Create a New Mail... 6 4.2 To Save Mail
Navigation Bar Icons
 Outlook 2016 Main Screen Navigation Bar Icons Mail Calendar Contains mail-related folders like your Inbox, Sent Items and Search Folders. Use the Favorite Folders at the top of the pane for easy access
ASTRA USER GUIDE. 1. Introducing Astra Schedule. 2. Understanding the Data in Astra Schedule. Notes:
 ASTRA USER GUIDE 1. Introducing Astra Schedule Astra Schedule is the application used by Academic Space Scheduling & Utilization to schedule rooms for classes and by academic colleges, schools, and departments
Outlook Calendar 2013
 Outlook Calendar 2013 Work Together Add appointments, view and share calendars Open Calendar View your calendar Create an appointment Change appointment details How other staff see your calendar Open another
Outlook 2010 Calendar
 Outlook 2010 Calendar Table of Contents The Calendar... 4 The Week View... 5 Day View... 6 Month View... 7 Schedule View... 8 Scheduling Appointments... 9 Appointments... 10 Meetings... 10 Creating Appointments/Meetings...