WEB TIME SUPERVISOR GUIDE
|
|
|
- Brandon Moore
- 6 years ago
- Views:
Transcription

1 Revised 02/23/2018 WEB TIME SUPERVISOR GUIDE CLIENT RESOURCE PAYLOCITY.COM
2 TABLE OF CONTENTS Web Time... 3 Home Employees Reports Web Kiosk Setup Glossary Index

3 WEB TIME Use Web Time to quickly and easily manage time and attendance. Paylocity Web Time is available 24 hours a day from any Internet connection. Employees may clock in and out, review schedules, review hours, submit timesheets, view vacation, sick, and personal time, and submit time off requests. Administrators and Supervisors manage employee data, approve employee time cards, generate employee schedules, organize company departments, track vacation, sick, and personal time, and generate reports. Users may not have access to all of the options described in this user guide. Each company determines which options are available and each user's security group determines the display of information. In order to maintain confidentiality, employees must contact their Company Administrator with questions. Paylocity is not authorized to speak directly with employees. Actions Use the supervisor dashboard or select the menus across the top of the screen to navigate through Web Time. Use the header shortcuts to access selected screens. Select User Preferences from the Account Profile to customize the display of header shortcuts. Enter information in the Search field to find specific employees or screens. Select Applications to access Web Pay. Select User Preferences to customize the display. Select Log Out to log out of the application. Multiple Pages of Information If there are multiple pages of information, arrow keys allow users to change pages to view all information. 3

4 Click the back arrow with an adjacent vertical line to access the first page. Click the back arrow to access the prior page. Click the forward arrow to access the next page. Click the forward arrow with an adjacent vertical line to access the last page. Use the drop down to select the number of records to display on the page. The default display can be configured in Preferences. Search Actions Enter information in the Search field to find specific employees, menu items, or configuration screens. Click the applicable item in the list to navigate to the selected screen or employee. Search for Reports Actions Enter information in the Search field to find specific reports. 4
5 Filters Filter by Date Range Select the Date Range radio button to filter data by date range. Select or enter the start and end dates. Click the arrow icon adjacent to the calendar to display the date range. Click Last Week, This Week, or Next Week to display the selected week. Filter by Pay Period Select the Pay Period radio button to filter data by pay period. Select or enter the date. Click the arrow icon adjacent to the calendar to display the pay period containing the selected date. Click Prev, Current, or Next to display the previous pay period, the current pay period, or the next pay period. Filter by one or more fields such as employee name, cost center, employee group, payroll policy, and salary type. Enter or select the required criteria in one or more fields. Click Search to display the information that matches the criteria. To save the search, enter a name for the search and click Save. Users may select a saved search from the drop down. Depending on company configuration, users may be able to filter borrowed employees in the Time Card Approval and Group Time Card screens. 5


6 Dashboard Filters Filter the supervisor dashboard. Actions Select options from the applicable drop downs. Click Apply Filters. 6


7 View the filtered display. To save the search, enter a name for the search and click Save. Click the X adjacent to the filter to delete the selected filter. Click Reset to return to the default display. Users may select a saved search from the drop down. Saved Filters Actions Users may select a saved search from the drop down. Select a saved search and click Delete to remove the saved search. Click the filter icon to display or hide the filter section. Click Show All to display all information. 7
8 Click Reset to return to the default display. User Preferences Actions Hover over the initials or image in the top right corner of any Web Time page and click User Preferences. Select the number of records to display on each page from the Default # of Records per Page drop down. Select the Date Format. Select the Time Format. Select the Duration Format. Select the Name Format. Select the header shortcuts from the drop downs. Home is hard coded as Shortcut 1 and cannot be configured. Select the Default Dashboard via the drop down: Supervisor or Employee. Click Update to apply the changes and close the window. Click Cancel to discard any changes and close the window. 8


9 Help Access training documents and videos. *In order to maintain confidentiality, employees must contact their Company Administrator with questions. Paylocity is not authorized to speak directly with employees. 9
10 Account Access Visit the Administrator Training Documents page within the Web Time module to access the Web Time Administrator Login, Web Time Employee Login, and Web Time Registration PDF documents. Login Page Help Actions 1. Click the information icon (i) next to Company ID or Help at the bottom of the page to open the Help drawer for additional login assistance. Click Close to close the drawer. 2. Click Need Help? within the Company ID and Username fields for assistance with retrieving your user account information. Populate all the required fields, click into the box next to I m not a robot, and click Send One-Time Passcode. *If you do not have a user account, or have multiple user accounts, this retrieval method will not work. Enter the one-time passcode and answer the challenge question as applicable. Click Continue to navigate back to the main login page. The Company ID and Username fields will be populated with your user account information. 3. Click Privacy Policy to review the Privacy Policy drawer. Click Close to close the drawer. 4. Click Supported Browsers to view the supported browsers via the drawer. Click Close to close the drawer. 5. From a mobile device, tap on the Apple or Google Play icons to navigate to the respective app store to download the Paylocity Mobile Application (App). Paylocity Mobile is required to be enabled for the company you are assigned to for use of the app. 10
11 Feedback Quickly provide any feedback on user experience within a page. Actions 1. Click Feedback from near the top right of any page. 2. Click the thumbs up or thumbs down icons to offer a reaction to the page. 3. In the text field, input any feedback. 4. Click Submit to send the feedback. 11

12 What's New? Provides information on new features or updates for specific pages. Actions 1. Click What's New? from near the top right of applicable pages for a page to slide out on the existing page. An orange dot indicates that there have been updates made to the page being viewed. Once the button is clicked with the orange dot, the dot will disappear. The content and button, however, will remain to refer back to. 12

13 2. Depending on the content, a description with images, links to additional resources or a tour of the changes may appear to communicate any updates. 13
14 Important Notes Pages which do not have any new features or updates will not have a What's New? button. 14
15 HOME Visit the Administrator Training Documents page within the Web Time module to access the Web Time Employee Guide PDF for information regarding the employee features available in Web Time. Supervisor Dashboard Description Monitor and respond to critical time and labor events. Actions Select Insights to view Total Hours By Pay Type, Scheduled vs Actual, or Status Board Totals. Select My Employees to view the current status of each employee. Select Missed Punches to view employees with missing punches. Select Pending Time Off Requests to view, approve, or deny pending time off requests. Select Attendance Exceptions to view the number of tardy and absence exceptions for employees with generated schedules. *Not available if Attendance Points are enabled. If Attendance Points are enabled, click on the number to view any attendance point occurrences in the selected timeframe. *Not available if Attendance Exceptions are enabled. Select Dashboard Settings to configure the number of days to display for attendance exceptions and default chart to appear on the Home screen. Select Invalid Terminal Punches to view the invalid terminal punches. Filter the display of employees. 15

16 Scheduled vs Actual Description View scheduled hours compared to actual hours worked for the past 7 days. Select Scheduled or Actual for the chart to only reflect one category. Actions Select Insights to view Total Hours By Pay Type, Scheduled vs Actual, or Status Board Totals. Select My Employees to view the current status of each employee. Select Missed Punches to view employees with missing punches. Select Pending Time Off Requests to view, approve, or deny pending time off requests. Select Attendance Exceptions to view the number of tardy and absence exceptions for employees with generated schedules. Select Dashboard Settings to configure the number of days to display for attendance exceptions and default chart to appear on the Home screen. Select Invalid Terminal Punches to view the invalid terminal punches. Filter the display of employees. 16
17 Dashboard Settings Configure the number of days to display for attendance exceptions and default chart to appear on the Home screen. Actions Enter or select the number of days of history to display from Select the default chart to appear on the Home screen. Click Save to apply the selections. Click Cancel to discard any changes. Select Insights to view Total Hours By Pay Type, Scheduled vs Actual, or Status Board Totals. Select My Employees to view the current status of each employee. Select Missed Punches to view employees with missing punches. Select Pending Time Off Requests to view, approve, or deny pending time off requests. Select Attendance Exceptions to view the number of tardy and absence exceptions for employees with generated schedules. Select Invalid Terminal Punches to view the invalid terminal punches. Filter the display of employees. 17

18 Status Board Totals Description View recent activity. Click View Status Board to view specific employee details. Actions Select Insights to view Total Hours By Pay Type, Scheduled vs Actual, or Status Board Totals. Select My Employees to view the current status of each employee. Select Missed Punches to view employees with missing punches. Select Pending Time Off Requests to view, approve, or deny pending time off requests. Select Attendance Exceptions to view the number of tardy and absence exceptions for employees with generated schedules. Select Invalid Terminal Punches to view the invalid terminal punches. Select Dashboard Settings to configure the number of days to display for attendance exceptions and default chart to appear on the Home screen. Filter the display of employees. 18


19 Status Board Display the number of employees in each status. Actions Click the employee name link to access the employee time card. Filter the display of employees. Click the applicable column header to sort by the selected column. 19

20 My Employees Description Display the current status of each employee. The Pay Type column displays the non-work pay type used when employees are using benefit time. Actions Click the employee name link to access the employee time card. Filter the display of employees. Click View Status Board to view specific employee details. Missed Punches Description Display employees with missing punches. Actions Click the Employee name link to access the employee time card to fix a missing punch. Filter the display of employees. Click the applicable column header to sort by the selected column. 20

21 Pending Time Off Requests Description View, approve, or deny pending time off requests. Actions Check the box adjacent to the applicable time off request and click Approve Selected or Deny Selected to approve or deny the entire time off request. Click the Employee name link to access the employee time card. Users may also select Time Off Request Calendar from the Employees menu to view, approve, or deny time off requests. Filter the display of employees. Click the applicable column header to sort by the selected column. Click Expanded View to access the Time Off Request List to view additional detail and approve or deny time off requests. 21

22 Attendance Exceptions Description Display the number of tardy and absence exceptions for employees with generated schedules. Actions Select Dashboard Settings to configure the number of days to display for attendance exceptions from Click the Employee name link to access the employee time card to fix a missing punch. Filter the display of employees. Click the applicable column header to sort by the selected column. Click Expanded View for all attendance exception history for the employees. 22

23 Ensure Employees do not Appear on the Absence(Current Day) Report To ensure that employees with schedules who work more time than they are scheduled for do not appear on the Absence(Current Day) report, the employee settings section of the payroll policy the employees are assigned to requires an adjustment. Contact a Paylocity representative, your dedicated Account Manager (AM) or Web Time Implementation Consultant (IC) if the Web Time database is still being implemented, to have the number of minutes entered in the Maximum Shift Minutes field (Payroll Policies page > Employee Settings) that employees can work in a shift to avoid a missed clock out notification. Attendance Points Displays the number of attendance point occurrences. Actions Check the box next to Group by Employee to view point occurrences by employee. Do not check the box and adjust the other column filters to see the preferred listing. 23


24 Click Export to copy the data to an excel sheet. Via the Timeframe drop down, choose the time period to display for the point occurrences. The Attendance Points number in the menu will represent the points in the timeframe selected. Click the cog to add a custom timeframe to the drop down. 24

25 1. Click to access Dashboard Settings. 2. Add the desired timeframe in the Attendance Points - Days of History field. 3. Click Save. 4. A notification will appear to indicate that the preferences were saved. 5. Once back on the Attendance Points page, click the Timeframe drop down and select the newly added timeframe. Click the employee's name to access the Employee Time Card page to view the time period when attendance point occurrences happened. Example: Occurrence Date was 1/11/16 and today is 2/10/16. When clicking on the employee's name, the time 25

26 card page will display the pay period 1/11/16 was in along with the other applicable dates. View the Occurrence Date and Name columns, along with the point value associated with them. When Attendance Points are enabled, the Attendance Exceptions category will not appear on the Supervisor Dashboard. Accumulated attendance points for an occurrence can be forgiven by clicking Yes in the Forgive column. Once Yes is selected, the point value will go to zero. Invalid Terminal Punches Display invalid terminal punches. These can be punches on hardware clocks with the wrong badge number. Actions Check the box adjacent to the record and click Clear Records to clear the record. 26

27 Click the Employee Name link to access the employee time card to make any necessary changes. Click Expanded View to view additional detail. Filter the display of employees. Click the applicable column header to sort by the selected column. 27
28 EMPLOYEES Employee Time Card Description View employee totals, manage punches, add pay type transactions, add, edit, or delete employee time, change cost centers, add supervisor notes, send a message to a single employee, view benefit balances, add pay adjustments, manage employee schedules, and approve time. Users may filter by date range or pay period. Actions Use the employee search box to select a specific employee. Click the employee drop down arrow to select a specific employee. Click Select Filter to limit the display of employees. View the comments employees send through their timesheet. Click Add Punch to add a punch or a matching punch. Select a Pay Type from the drop down or click Add Pay Type Transaction to enter time associated with a non-work pay type. Click Send a Message to send a message to a single employee. Click Save to apply the updated information. Click Discard Changes to discard the changes. Click Audit Trail to view the audit trail. Click Preferences to customize the display of the time card. If Attendance Points are enabled, hover over the warning icon to see attendance point occurrences. 28

29 Select an Employee There are different options to access the desired employee. Actions Search Field 1. Enter one or more letters in the employee search text field to search for a specific employee via a drop down. 2. Click on the employee's name to display the employee's time card. 29

30 Arrow or Drop Down Search 1. Click the back arrow with an adjacent vertical line to access the first employee. 2. Click the back arrow to access the previous employee. 3. Click the forward arrow to access the next employee. 4. Click the forward arrow with an adjacent vertical line to access the last employee. 5. Click the employee drop down arrow to see the list of employees and then click the employee s name to select the employee from the list. 30

31 Important Notes To find an inactive employee record, click into the Include Inactive Employees check box before choosing a search option above. Select Filter Actions 1. Click Select Filter in the Employee Time Card to select a saved filter. 31


32 Comments View the comments employees send through their timesheet. Add a Punch Actions 1. Click Add Punch. 32

33 2. Select the Action Type. 3. Select or enter the Date. 4. Enter the Time. 5. Select the Cost Center. 6. If applicable, check the Add Matching Punch box. 7. Check the Supervisor Approved box. 8. Enter the Supervisor Note. 9. Enter the number of days to repeat this punch. 10. Check the Include Weekends box to include weekends when repeating the punch. 11. Click Add to apply the punch to the employee time card. 12. Click Add More to apply the punch to the employee time card and remain on this screen to add more punches. 13. Click Cancel to discard any changes and close the window. 33

34 14. A message will appear indicating that the time card has been updated successfully. Add a Matching Punch Actions 1. Select the Action Type. 2. Select or enter the Date. 3. Enter the Time. 4. Select the Cost Center. 5. Check the Add Matching Punch box. 6. Select the Action Type. 7. Select or enter the Date. 8. Enter the Time. 34
35 9. Check the Supervisor Approved box. 10.Enter the Supervisor Note. 11.Enter the number of days to repeat this punch. 12. Check the Include Weekends box to include weekends when repeating the punch. 13. Click Add to apply the punch to the employee time card. 14. Click Add More to apply the punch to the employee time card and remain on this screen to add more punches. 15. Click Cancel to discard any changes and close the window. 35

36 16. A message will appear indicating that the time card has been updated successfully. 36
37 Add a Pay Type Transaction Actions 1. Click Add Pay Type Transaction. 2. Select the Pay Type. 3. Select or enter the Date. 4. Enter the # of Hours. 5. Select the Cost Center. 6. Select the Pay Level. 7. Make a selection from the Apply to Overtime drop down. 8. Check the Supervisor Approved box. 9. Enter the Supervisor Note. 10. Enter the number of days to repeat this punch. 11. Check the Include Weekends box to include weekends when repeating the punch. 12. Click Add to apply the punch to the employee time card. 13. Click Add More to apply the punch to the employee time card and remain on this screen to add more punches. 14. Click Cancel to discard any changes and close the window. 37

38 15. A message will appear indicating that the time card has been updated successfully. Important Notes Pay Type Transactions can be added to time cards which already have hours on them. Add, Edit, or Delete Time Actions 1. Click the applicable cell to add, edit, or delete time. 2. Click the Transfer cell to edit the cost center. 3. Click Save to apply the changes to the employee time card. 4. Click Discard Changes to discard the changes. 38


39 5. Users may also right-click and make a selection. 6. A message will appear indicating that the timesheet has processed and update has been updated successfully. Attendance Points View Attendance Points in the Employee Time Card to see the point occurrences for the given date range or pay period. Actions Review the point occurrences by hovering over the applicable icons on the time card. *This can also be performed on the Group Time Card page. 39


40 Click on the Attendance Points tab at the bottom of the employee's time card to view the point occurrences for the applicable date range or pay period. Click Export to copy the data for the employee to an excel sheet. Accumulated attendance points for an occurrence can be forgiven by clicking Yes in the Forgive column. Once Yes is selected, the point value will go to zero. A notification will appear to indicate that the occurrence has been forgiven or unforgiven depending on the type of occurrence. For example, a -1 value is forgiven and returned to a value of 0. A 1 value is unforgiven and returned to a value of 0. Supervisor Note Actions Users may right-click to add a supervisor note to the employee time card. 40


41 Depending on company configuration, users may compose the supervisor note or choose a note from the company-defined list. Hover over the Notes icon to display the time card note. Approve Employee Time Card Approve a single employee time card. 41

42 Actions Approve All Time Entries 1. Check the box adjacent to the Date title and click Save to approve all time displayed on the employee's time card. 2. A message will appear indicating that the time card has been added to the approval process and saved successfully. Approve Only Applicable Entries 1. To approve one or more time entries but not all time entries on the employee's time card, check the box adjacent to the applicable time entries and click Save to approve the selected time. 42

43 2. A message will appear indicating that the time card has been added to the approval process and saved successfully. Important Notes Use Time Card Approvals or Group Time Card to approve multiple employee time cards. If time cards appear in a wrong status, this could be due to user error. Review the Audit Trail to see if a user mistakenly changed the status of the time cards. Send a Message to a Single Employee Actions 1. Enter the Message. 2. Select or enter the Expires On date. 3. Click Send to submit the message to the employee. 4. Click Cancel to discard the message and close the window. 5. A message will appear indicating that the message was sent successfully. Important Notes 43
 sign to view the details. 3. Click the minus (-) sign to collapse the detail information. 4. Click the X to close the window. 5.")
44 Use the Message Center to send a message to a group of employees. Audit Trail Actions 1. Click Audit Trail in Employee Time Card to view the audit trail. 2. Click the plus (+) sign to view the details. 3. Click the minus (-) sign to collapse the detail information. 4. Click the X to close the window. 5. Check the Show System Changes box to display system changes. 44

45 Important Notes When an employee uses the mobile app to punch, the audit trail will display that it was a mobile punch via the Changed By column. 45

46 Preferences Click Preferences to customize the display of the Employee Time Card. Actions 1. Select the Punch Rounding display. 2. Select the Time Card Format. 3. Select the Cost Center display. 4. Select which Totals display. 5. If Photo Capture is enabled and photos should appear next to employee clock in and clock out actions, check the box next to Display Photos. 6. Click Refresh to save the updated preferences. 46
47 Meal Premiums Use the Employee Time Card to view the work week for employees who have been assigned to the California meal premium payroll policy. Actions 1. Click the Preferences drop down to display the estimated meal premium and approved meal premium columns. 47

48 Important Notes A meal premium will show up as a pay type once a supervisor has approved the time card. If an employee does not receive the estimated meal premium, it is likely due to the fact that a supervisor did not approve the employee's time card. 9/80 Work Schedule Use the Employee Time Card to view the 9/80 work schedule for employees who have been assigned to a payroll policy that has the 9/80 Overtime rule enabled on the Payroll Policies page. 48

 if still in Web Time implementation. Benefit Balances Select Benefit Balances in the Employee Time Card to view benefit balances.")
49 Example This screen shot displays an employee who works a total of 9 days, with one day off on Friday 11/13, in a two-week span. Eight of the days total 9 hours each, while there is one day, Friday 11/20, that totals 8 hours. Actions The 9/80 Overtime rule can only be enabled for a payroll policy by contacting your dedicated Account Manager (AM), or Web Time Implementation Consultant (IC) if still in Web Time implementation. Benefit Balances Select Benefit Balances in the Employee Time Card to view benefit balances. Pay Adjustments Select Pay Adjustments in the Employee Time Card to add or edit pay adjustments. Actions Add Pay Adjustments 49

50 1. Click Add Pay Adjustment to create a new pay adjustment. 2. Select the Type. 3. Select or enter the Date. 4. Enter the Amount. 5. Adjust the Cost Center by clicking the magnifying glass if the pay adjustment applies to a cost center assignment other than the default cost center assignment. 6. Enter an applicable Note. 7. Click Add to apply the pay adjustment to the employee time card. 8. Click Cancel to discard the changes and close the window. 9. A message will appear indicating that the new pay adjustment has been saved successfully. Edit Pay Adjustments 1. Click the Date link to edit the pay adjustment. 50


51 2. Update the Type. 3. Select or enter the Date. 4. Update the Amount. 5. Adjust the Cost Center by clicking the magnifying glass if the pay adjustment applies to a cost center assignment other than the default cost center assignment. 6. Enter an applicable Note. 7. Click Save to apply the updated pay adjustment to the employee time card. 8. Click Cancel to discard the changes and close the window. 9. A message will appear indicating that the updated pay adjustment has been saved successfully. Delete Pay Adjustments 51

52 1. Click the Date link to delete the pay adjustment. 2. Click Delete to remove the pay adjustment. 3. A message will appear indicating that the pay adjustment has been deleted successfully. Manage Employee Schedule Select Schedule in the Employee Time Card to add or edit shifts. Actions Add Shift 1. To add a shift, click Add Shift. 52


53 2. Select or enter the Date. 3. Enter the Start Time. 4. Enter the End Time. 5. Select the Cost Center. 6. Click Save to add the shift to the selected employee. 7. Click Save & Add More to add multiple shifts. 8. Click Cancel to discard any changes and close the window. 9. A message will appear indicating that the new shift has been saved successfully. 53


54 Edit Shift 1. To edit a shift, click into the applicable Start Time and End Time fields and click Save. 2. A message will appear indicating that the updated shift has been saved successfully. Delete Shift 1. To delete a shift, click the X to highlight the shift and click Save to delete the shift. 2. A message will appear indicating that the shift has been deleted and saved successfully. Timecard Approvals Description Approve time cards for multiple employees. Users may filter the display of information. Actions Select Approve in the first column to select all employees with unapproved time and click Save to approve all employee time cards displayed on this page. When there are multiple pages of employees, enter the page number or use the arrow icons to access the additional employee pages for approval. 54

55 To approve one or more time cards but not all time cards, check the box adjacent to the applicable employees and click Save to approve the time cards. After clicking Save, a notification will appear indicating that the selected time cards have been submitted for approval process. Important Notes Users may also approve multiple employee time cards in Group Time Card. Applicable employees will only appear on this page if time has been entered on their time cards for the selected time period. If a number of employees are appearing with unapproved time cards, make sure to check the filter for the page. If All is selected for Employee Status, inactive Web Time employees may appear. To display more time card records, navigate to User Preferences by clicking on your avatar or photo in the top right corner of any page to change the Default # of Records per page to the desired amount. Users may approve a single employee time card in Employee Time Card. If time cards are unapproved for a pay period that has been closed, and they need to be approved, re-open the pay period via the Payroll > Open Pay Periods page. Group Time Card Description Manage employee time card activity for the selected date. Users may filter the display of information. 55
56 Actions 1. Select or enter the date. Click Previous, Today, or Next to display the selected day. 2. Click Mass Transaction Editor to update several time cards at one time. 3. Click the plus sign (+) to add a row. 4. Select Approve All in the first column to select all employees with unapproved time and click Save to approve all employee time cards displayed on this page. When there are multiple pages of employees, enter the page number or use the arrow icons to access the additional employee pages for approval. 5. To approve one or more time cards but not all time cards, check the box adjacent to the applicable employees and click Save to approve the time cards. Users may also select to approve only one shift for the employee. 6. Click the employee Name link to access the employee time card. 7. Edit the Pay Type and the applicable Amount. 8. Click the applicable In or Out cell to add, edit, or delete time. 9. Click the Transfer cell to edit the cost center. 10. Click Save to apply the updated information. 11. Click Discard Changes to eliminate any pending changes initiated. 12. If Attendance Points are enabled, hover over the flag to see attendance point occurrences. 56

57 Important Notes Users may also approve multiple employee time cards in Time Card Approvals. Users may approve a single employee time card in Employee Time Card. 57


58 Mass Transaction Editor Description Edit several employee time cards at one time in the group time card. Actions 1. Check the boxes next to the employees in the Available Employees section to place their records in the Selected Employees section. 2. Click Continue. 3. Select the transaction type. 4. Click Continue. 58

59 5. Enter the details. 6. Click Preview Transaction. 7. Verify the transaction. 8. Click Save to apply the updated information. 9. Click Cancel to discard any changes and close the window. 59


60 10. A message will appear indicating that the transactions have been saved successfully. Employee Scheduler Description Create and manage employee schedules for multiple employees to take advantage of punch rounding, attendance exceptions, and schedule reporting capabilities. Actions Filter the scheduler display of employees. Add a new shift. Edit an existing shift. Copy and paste a shift. Delete a shift or a week of shifts for an employee. Add shifts to schedules before making them visible to employees via schedule publishing. View the estimated gross wages of scheduled work hours. View and correct errors for schedule conflicts such as overlapping shifts. 60
61 Create schedule templates based on the existing schedule to be added to the Schedule Templates page. Undo or Redo actions for each session on the page. Use the Options menu to export approved time off requests, configure the Scheduler page display, etc. Export all schedules to a PDF for saving and/or printing for the applicable time frame. Review total scheduled hours by day and week cumulatively or for each individual employee. 61


62 Scheduler Search Quickly find the schedule (s) you are looking with applicable filters via the search field. Actions Filter One Employee Looking to review one employee's schedule for the week: Jed McLeod. 1. Click into the Type to filter... field under the Name column to bring up a list of filters. 62


63 2. Type in the name of the employee and click Enter on your device. The employee's name and schedule appears for review. 3. Click the X next to the filter to remove and find another employee. Filter a Specific Group of Employees Looking to review the schedules of the Central Division's Administration Branch. 1. Click into the Type to filter... field under the Name column to bring up a list of filters. 2. Click Division for the division options to appear. For this example, click Central. 63


64 3. Click back into the Type to filter... field and click Branch for the branch options to appear. For this example, click Administration. 64


65 4. Review the schedules of the filtered search as applicable. Scheduler Errors Any schedules which contain errors, such as when there is an overlapping shift, will be reflected on the error counter on the top right of the Scheduler page next to Options. Actions Identify and Fix the Error Employee Alan Penebaker has overlapping shifts for Friday. 1. Check the error counter to see if there is an error. In this case, the counter is displaying one error on the page for the selected time period. Click the number or Errors to filter the display to only those shifts with errors in the given week. 65

66 The red indicator next to the overlapping shifts communicates that there is an error with the shift configuration. 2. Click on the shift that should be deleted and click X Delete Shift. 3. Once the error has been corrected, the error counter will reduce by one. In this case, it moves to zero. 4. Click Save to apply the update. The action will auto-save if you continue performing other actions on the page. Important Notes If publishing is enabled on the Scheduler page, overlapping shifts can be saved, but not published. 66
67 Add a New Shift Apply a new, recent, or favorite shift to an employee's schedule. Actions Add New Shift 67

68 1. Click into an empty date field and select + Add Shift. 2. Select the Start Time by selecting a time once clicking the clock icon or manual entry. 3. Select the End Time by selecting a time once clicking the clock icon or manual entry. 4. Click into the Cost Centers field to choose any applicable cost centers or job codes by selecting from the cost center list or by typing and selecting the cost center. 5. Click Apply. 6. Click Save on the main Scheduler page to apply the update. The action will auto-save if you stay on the page and continue performing other actions. 68

69 Add Favorite or Recent Shift There are multiple different ways to add favorite shifts. Add Favorite Shift from the Main Scheduler Page 1. Click into an empty date field and select one of the applicable shifts from the Favorite Shifts section. 2. Click Save on the main Scheduler page to apply the update. The action will auto-save if you stay on the page and continue performing other actions. Add Favorite Shift from See All Section 1. Click into an empty field and click See All to view all Favorite Shifts available. 2. Click the applicable shift for it to be added to the empty field on the schedule. 69

70 3. Click Save on the main Scheduler page to apply the update. The action will auto-save if you stay on the page and continue performing other actions. Add Favorite or Recent Shift 1. Click into an empty date field and select + Add Shift. 2. Navigate to the Favorite Shifts and Recent Shifts sections to select a shift. 70
71 3. Once the favorite or recent shift has been selected, the Start Time and End Time fields, along with the Shift Hours section, will populate accordingly. 4. Click Apply. 5. Click Save on the main Scheduler page to apply the update. The action will auto-save if you stay on the page and continue performing other actions. Add Shifts to Multiple Employees 1. Click + Add Shifts. 2. Via the Select Days section, click on which day (s) the shift applies to. 3. Enter the Start Time or select it by clicking on the clock icon and selecting the time. 4. Enter the End Time or select it by clicking on the clock icon and selecting the time. 5. Click into the Add Cost Center field if the shift should be applied to a specific cost center arrangement. 6. If applicable, click Yes to replace all existing shifts for the selected days. In the below example, any previously assigned Tuesday and Thursday shifts for the applicable employees will be replaced by this new shift. 71
72 7. In the Assign Employees section, click into the Type to filter... field to choose which employees to display in the Available Employees section. If all available employees should be assigned to the shift, click + Add All to add any employees from the Available Employees section to the Selected Employees section. Click X Remove All to unassign the employees. 8. In the Assign Employees section, click into the box of individual employees to add them to the Selected Employees section. 9. Click Apply to add the shifts. The new shifts will appear on the employee schedules and auto-save after Apply is clicked. Important Notes Shifts manually added via any of the above actions will appear with a green color bar on the Employees > Employee Schedules page. Any shift added from a schedule template to an employee s schedule will appear with a purple color bar on the Employees > Employee Schedules page. If the shift is edited, the shift will change to a green color bar. 72
73 If Employee Availability has been enabled via the Scheduler Configuration page, and an employee has indicated preferences for when he or she is unavailable, the times will display in gray above the scheduled shifts for the applicable days. Orange shading will display when a shift has been scheduled during a time the employee has indicated as unavailable. When clicking into a day to add or configure an existing shift, the time period the employee has entered as being unavailable will appear at the top. 73

74 Edit an Existing Shift Quickly make an adjustment to an existing shift. Actions 1. Click into the field for the applicable shift and click the pencil icon. 2. Adjust the Start Time by selecting a time once clicking the clock icon or via manual entry. 3. Adjust the End Time by selecting a time once clicking the clock icon or via manual entry. 4. Click into the Cost Centers field to choose any applicable cost centers or job codes by selecting from the cost center list or by typing and selecting the cost center. If no cost centers or job codes are selected, "--" will appear underneath the shift entry. 74
75 5. Click Apply. 6. Click Save on the main Scheduler page to apply the update. The action will auto-save if you continue performing other actions on the page. Important Notes If Employee Availability has been enabled via the Scheduler Configuration page, and an employee has indicated preferences for when he or she is unavailable, the times will display in gray above the scheduled shifts for the applicable days. Orange shading will display when a shift has been scheduled during a time the employee has indicated as unavailable. 75


76 When clicking into a day to add or configure an existing shift, the time period the employee has entered as being unavailable will appear at the top. Copy and Paste a Shift Copy and paste an existing shift on an employee's schedule to an open shift. Actions 1. Click on the shift that will be copied and click Copy Shift. 76


77 2. Click into the applicable empty field and click Paste Shift. 3. Click Save on the main Scheduler page to apply the update. The action will auto-save if you stay on the page and continue performing other actions. Delete a Scheduled Shift Remove a previously assigned shift from an employee's schedule. Actions 1. Locate the applicable employee with the shift that should be removed via scrolling down the page or the search field. 2. Click on the shift that should be removed and click X Delete Shift. 77

78 3. Click Save on the main Scheduler page to apply the update. The action will auto-save if you stay on the page and continue performing other actions. Delete a Week of Shifts Remove a previously assigned week of shifts from an employee's schedule. Actions 1. Locate the applicable employee with the week of shifts that should be removed via scrolling down the page or the search field. 2. Click on the horizontal ellipsis next to the employee name to display the menu of options. 3. Click X Delete Week. 4. Click Save on the main Scheduler page to apply the update. The action will auto-save if you stay on the page and continue performing other actions. Estimated Wages for Scheduled Hours View the estimated gross wages of scheduled work hours. Actions 1. Click Options, and then click View Settings to open the drawer. 2. In the Display Totals as: section, select Estimated Wages and click Apply. 78
79 3. View the estimated weekly wages for the scheduled shifts per employee in the Total column on the applicable employee line. 4. View the estimated daily wages for all the scheduled shifts at the bottom of the page under the applicable day column. 5. View the estimated weekly wages for all employees with scheduled shifts in the Total column. 79


80 Important Notes The wages are an estimate based only on the scheduled hours as entered in Web Time. The actual hours worked do not factor into the calculation. The base wage rate is used for the calculation, which includes the rate synced from Web Pay to Web Time. The calculation will take into account other rates such as OT1, OT2, cost center default rates, employee cost center override rates, holiday rates, and shift differential rates. When a shift is configured for a week, the calculation for wages will be updated. Administrators or Supervisors must also have rights to View/Edit Rates of Pay per their Feature Access Template assignment to be able to enable Estimated Wages via the Options button If hourly rates are not synced to Web Time from Web Pay, estimated wages will display as $0 for employees. Wages will be calculated as far as 8 weeks into the future per employee. Anything after 8 weeks will not show estimated wages. If schedule publishing is enabled, the estimated wages for the shift (s) will appear in the publishing window along with the hours. 80

81 Scheduler Options Click Options to manage templates, export approved time off requests to a calendar application, and configure settings for the Scheduler page. Actions Manage Templates 1. Click Manage Templates to quickly navigate to the Schedule Templates page. Export Time Off Requests 1. Click Export Time Off Requests (.ICS) to export any approved time off requests for the selected timeframe to an applicable calendar application (Outlook, Google Calendar, etc.). 2. Click the prompt to open the calendar application and see the requests in your calendar. Outlook example View Settings 1. Click View Settings to configure shift display options and data display options to customize your view of the page. 2. Click into the boxes for any of the options to make changes. 3. Click Apply to save the update (s). 81

82 Important Notes All boxes of the View Settings page are checked by default. Create Templates from Scheduler Page A schedule template can be created from an existing schedule on the Scheduler page. Actions 1. Click the horizontal ellipsis next to the employee's name. 2. Click Create Template. In this example, the 7:00 am-4:00 pm schedule with the applicable cost centers will be made into a template that can be assigned to other employees. 82
83 The Create Template drawer that appears on the Schedule Templates page appears right on the Scheduler page for configuration. The schedule is pre-populated based off the Scheduler page. 3. Make any further adjustments and assign to the applicable employees as you would when creating a template on the Schedule Templates page. 4. Click Save for the template to become available on the Schedule Templates page. Important Notes 83

84 The display of the schedule template on the Schedule Templates page will depend on whether Yes or No was selected in the Private box of the Create Template drawer. If Yes was selected, only the user who created the template will be able to view and configure the template. If No was selected, any user with rights to the Schedule Templates page can view and configure the template. Print Schedules Quickly download a PDF to print the schedules for the selected employees in the selected time frame. Actions 1. Click the Print icon. 2. A prompt will appear to download and open the PDF. Click the prompt to open. 3. View the PDF and print the full schedule. Hour totals for the days and week will appear at the bottom of the PDF. Schedule Publishing Allows for the ability to create a schedule for employees without it displaying for employees to see until Publish is clicked on the Scheduler page. Actions 1. Add the shifts to the applicable employees on the Scheduler page. 84

85 The added shifts will appear with diagonal shading until they are published. Once published, the shading will disappear. As the shifts are added, the Publish counter at the top right of the Scheduler page will display the number of employees with unpublished schedules. 2. Click Publish to see the Publish Summary. The Publish Summary displays the employees with unpublished schedules, as well as the total number of shifts and hours for the unpublished schedules. 3. Click Publish for the schedules to be viewable to the employees. Important Notes Publish cannot be clicked if there are scheduler errors in the given week. Correct the errors and Publish will be able to be clicked. 85


86 Once an employee s schedule is published for a week, each subsequent update to the employee s schedule for that week will be automatically published for the employee to view. Copy and Paste a Week Copy and paste a week's full of shifts from one employee to another employee. Actions Copy and Paste Actions 1. Click the horizontal ellipsis next to the employee's week of shifts that are to be copied. 2. Click Copy Week. 3. Click on the horizontal ellipsis next to the employee who should have the previously copied week pasted. 4. Click Paste Week. The image below shows the week was pasted as intended. 5. Click Save on the main Scheduler page to apply the update. The action will auto-save if you stay on the page and continue performing other actions. Or Utilize Keyboard Shortcuts 86


87 1. Click within the Name column of the employee's schedule for the week and click Ctrl C from the keyboard. 2. Click within the Name column of the applicable employee's schedule to select. If more than one employee will have the scheduled week of shifts pasted to, hold Ctrl and then click into the Name column of the applicable employees. 3. Click Ctrl V to paste the shifts. Schedule Templates Description Add or edit schedule templates that can be assigned to employees. Users may filter the display of information. Actions Click the schedule template in the Template column to view and/or edit the details. Click + Create Template under the search field to add a new schedule template. Click the X from the Actions column to delete a schedule template that is not assigned to any employees. 87
88 Important Notes Any shift added from a schedule template to an employee s schedule will appear with a purple color bar on the Employees > Employee Schedules page. If the shift is edited, the shift will change to a green color bar. Add Schedule Templates Actions 1. Click + Create Template. 2. Enter the Template Name. 3. Select an Owner by starting type the name of the individual and choosing from the drop down menu that appears. 4. Choose whether or not the schedule template should be Private by clicking Yes or No. Private: Only the user who creates the schedule template will be able to configure the schedule template. Public: Any user with applicable security rights to the Schedule Templates page can configure the schedule template. 5. Click + Add Week to begin building the schedule template. 88
89 If times will change from week to week once the schedule template is added and assigned, continue to click + Add Week as necessary. Click the horizontal ellipsis next the number in the Week column to duplicate a week of shifts to an additional week or to delete a week. 6. Click + Add Shift within the fields to create a new shift. 7. Click on any entered to shift to copy the shift, delete the shift, or to add an additional shift to the day. If a shift is copied, click into an open field, click, and select Paste Shift. 8. Click the Assign tab and click the names in the Available Employees section to assign them to the template. To assign all of the available employees to the template, click + Add All Employees from the Available Employees section. 9. Click the Manage tab and click Edit for the applicable employees to choose the Active From and Active To dates via the calendars or manual entry. Click Update to apply the changes. 10. Click Save to create the template. 89
90 Add Shift to Schedule Template Actions Add New Shift 1. Filter the schedule template via the Type to filter... field if necessary. 2. Click on the existing schedule template to modify the details. 3. Click in an open field to add a shift. 4. Click + Add Shift. 90
91 5. Enter the Start Time and End Time via selections from the clock icon or manual entry. Select a favorite or recent shift if applicable. 6. Add any labor levels via the Add Labor Level field. 7. Click Apply to add the shift to the template. The shift has been added to the template. 8. Click Save to apply the update. Copy and Paste a Shift 1. Filter the schedule template via the Type to filter... field if necessary. 2. Click on the existing schedule template to modify the details. 91

92 3. Click on an existing shift and select Copy Shift. 4. Click into an opening field and click Paste Shift. 5. Click Save to apply the update. 92
93 Edit Schedule Templates Actions 1. Filter the schedule template via the Type to filter... field if necessary. 2. Click on the existing schedule template to modify the details. 3. Update the Template Name. 4. Update whether or not the schedule template should be Private by clicking Yes or No. Private: Only the user who creates the schedule template will be able to configure the schedule template. 5. Click + Add Week to add additional an additional week. 6. Click into an entered shift to copy, delete, or add an additional shift to the day. 7. From the Manage tab, click Edit next to any assigned employees to configure the start and end dates of the schedule template. Click Delete to remove the employee from the schedule template assignment. 8. Click the Assign tab to add any employees to schedule template. 9. Click Save to apply the updates. 93
 of the employee (s). 3. Click + Assign Repeating Schedule. 4.")
94 Assign Schedule Templates Description Assign schedule templates to employees. Users may filter the display of information. Actions Assign template to selected employees 1. Use the Type to filter... field to search for the applicable employee or group of employees. 2. Click into the box (es) of the employee (s). 3. Click + Assign Repeating Schedule. 4. Click into the box of the available schedule template to expand the details of the template. 5. Leave Yes selected in the Repeat Indefinitely box for the template to remain indefinitely assigned, or click No to enable the Active To field to appear. 6. Enter a date into the Active From field via a selection from the calendar or manual entry. If No was selected in #6, enter a date into the Active To field via a selection from the calendar or manual entry. If more than one week is set up on the template, choose the Starting Week for the template assignment via the drop down. 94
 of the employee (s). 3. Click X Remove Repeating Schedule. The check mark under the Templates column will be removed. Edit Schedule Template Assignment 1.")
95 7. Click Save to assign the template. Delete all assignments from selected employees 1. Use the Type to filter... field to search for the applicable employee or group of employees. 2. Click into the box (es) of the employee (s). 3. Click X Remove Repeating Schedule. The check mark under the Templates column will be removed. Edit Schedule Template Assignment 1. Click the employee's name from the Employee column who has a schedule template assignment. 95
96 2. Remove the check from any existing boxes if an assignment will be removed. 3. Check the box of the new assignment. 4. Leave Yes selected in the Repeat Indefinitely box for the template to remain indefinitely assigned, or click No to enable the Active To field to appear. 5. Enter a date into the Active From field via a selection from the calendar or manual entry. If No was selected in #4, enter a date into the Active To field via a selection from the calendar or manual entry. 6. Click Save to assign the template. View Schedule Template Assignment 1. Use the Type to filter... field to search for the applicable employee or group of employees. 2. Click to expand to view the schedule template details. 96

97 Time Off Request Calendar Description View and edit the time off requests for your employees. Actions Click the employee name link to approve, deny or edit the employee time off request. Users may also approve time off requests in Pending Time Off in the Supervisor Dashboard. Click the date to request time off for an employee. Company administrators may limit time off requests. View time off requests. Click the +2 more link to view additional detail. Filter information. Click the filter icon to hide or display the search filters. Check the box adjacent to each Request Status that should appear in the calendar. Pending requests appear in yellow highlight. Approved requests appear in green highlight. Denied requests appear in red highlight. Canceled requests appear in gray highlight with strikethrough text. Click Show List View to view a list of time off requests. Select Show Schedule Summary from the drop down for daily scheduled and time off approved hours in the calendar. Clicking Download Requests offers the ability to download approved time off requests in the selected timeframe to an applicable calendar application (Outlook, Google Calendar, icloud, etc.). Click Return to Dashboard to return to the Supervisor Dashboard. 97
98 Approve, Deny, or Cancel Time Off Requests Actions Click Delete Request to delete the entire time off request. Click Detailed View to partially approve or deny the time off request. Click Approve to approve the entire time off request. Click Deny to deny the entire time off request. 98
99 Click Cancel Request to cancel the entire approved time off request. Click Detailed View to cancel part of the approved time off request. Click Add to Calendar to download the approved time off request to your calendar application (Outlook, Google Calendar, icloud, etc.). 99

100 Time Off Request Details Actions Check the box adjacent to each applicable date. Click Approve to approve the selected dates of the time off request. Click Deny to deny the selected dates of the time off request. Enter applicable notes in the Supervisor Comments field. Click the red X to cancel an approved time off request. 100

101 Time Off Request List Actions Check the box adjacent to the applicable time off request and click Approve or Deny to approve or deny the entire time off request. Click the Submitted link to approve or deny the employee time off request. Filter the display of information. Click the filter icon to hide or display the search filters. Check the box adjacent to each Request Status that should appear in the list. Click Show Calendar View to view the Time Off Request Calendar. Click Return to Dashboard to access the Supervisor Dashboard. 101

102 Show Time Off Request Summary Actions Select Show Time Off Request Summary from the drop down for the time off request calendar. 102
103 Click the date to request time off for an employee. Company administrators may limit time off requests. Filter information. Click the filter icon to hide or display the search filters. Click Show List View to view a list of time off requests. Select Show Schedule Summary from the drop down for daily scheduled and time off approved hours in the calendar. Clicking Download Requests offers the ability to download approved time off requests in the selected timeframe to an applicable calendar application (Outlook, Google Calendar, icloud, etc.). Click Return to Dashboard to access the Supervisor Dashboard. Request Time Off For an Employee Actions 1. Use the employee search field or drop down to select a specific employee. 103

104 2. Select the benefit Type from the drop down. 3. Enter the number of Hours. 4. Enter the Start time. 5. Click Submit to submit and approve the time off request. 6. Click Edit Request to request multiple days off. 7. A message will appear indicating that the time off request has been saved successfully. Employee Time Off Request Details Actions 1. Select the Benefit Type from the drop down. 2. Enter applicable Notes. 3. Select Single Day or Multiple Days. 4. Check the Include Weekends box if the time off request will include weekend days and the time off balance should be affected by the weekend hours. 5. Select or enter the Start Date. 6. Select or enter the End Date for multiple day requests. 7. Enter the Hours per Day. 8. Enter the Start Time. 9. Enter the End Time. 10. Click Add New Request. 104

105 11. Verify the Request information is correct. 12. Click Submit to send the time off request for approval. 13. Click Delete to change the details of the time off request. 14. Click Cancel to discard the request and close the window. 105

106 15. A message will appear indicating that the time off request has been saved successfully. Blackout Types Choose the blackout type for the time off requests in the selected time period. Actions Hard Blackout 1. The Hard Blackout date displays a lock icon. 106


107 2. The Hard Blackout date prevents employees from requesting time off. Soft Blackout 1. The Soft Blackout date displays a warning icon. 2. The Soft Blackout period allows employees to request time off but they are warned that time off request approvals may be limited. Employee Info View information applied to employee records. Depending on whether or not a Web Time company is integrated with Web Pay will determine editing capabilities on the Employee Info page for employees. 107


108 Actions 1. Find the applicable employee record via the Employee Search page. 2. Click on the employee via the Employee Name column to view demographic and payroll information. Regular Employee - Web Time integrated with Web Pay Use the sidebar navigation menu on the left side of the page to navigate through the menu options. Fields which cannot be edited have been carried over from Web Pay via enhanced integration. To make changes to those fields, access the applicable pages in Web Pay. Custom Fields can be edited via Web Time. Enter information into the applicable fields and click Apply. 108
109 Temporary Employee - Web Time integrated with Web Pay 1. Enter information into any of the fields that can be edited within any of the sidebar categories. Status and Employee Number, for example, cannot be changed via this page. 2. Click Apply to save the changes. 109
110 Non-Employees - Web Time integrated with Web Pay In addition to Custom Fields, the Feature Access Template and Permission to Employee Groups can be configured on the Employee Info page for non-employees on companies with enhanced integration. Actions 1. Select Permissions from the sidebar menu. 2. Via the Feature Access Template drop down menu, select the Feature Access Template. 3. Via the Available Groups section click on any employee groups the non-employee should have access to. 4. Click Apply at the bottom left of the page to save the updates. 110
111 All Employees - Web Time Only Companies 1. Enter information into any of the fields that can be edited. A majority of the fields can be edited. If the Allow Worked Holiday Override box is not checked within the payroll policy, the Holiday Override Minutes field within the Payroll Policy section will not be able to be edited. 111
112 2. Click Apply to save the changes. 112

113 Employee Search Search for applicable employees to view their employee information. For Web Time companies not integrated with Web Pay, employees can be added via this page. Actions Search for Employees Configure the filters in the Search Employees menu and click Apply Filters to find the applicable employees to edit. If searching for a group of employees, a list of the employees matching the selected filters will appear. To search directly for an employee, type the first or last name of the employee into the search field and click Search. 113


114 Click the icon under the Actions column on the line of the applicable employee for quick access to the Scheduler page, Employee Time Card page, and Punch Map. Click on the employee's name in the Employee Name column for demographics. Add Employees - Web Time Companies not Integrated with Web Pay Actions 1. Access the Employees > Employee Search page. 2. Click + Add Employee. 114
115 3. Enter the First Name. 4. Enter the Last Name. 5. Enter the Employee Number. 6. Enter the Badge Number if necessary. 7. To allow for the user to access Web Time, click Yes in the Allow Web Access box. 8. Enter the Login user name. 9. Enter the password into the Password and Confirm Password fields. 10. Click Save to apply the changes and return to the Employee Search page, or click Save & Add Details to open the Employee Info page to enter additional employee-related information. 1. Use the sidebar navigation to access the different sections of the Employee Info page. 2. Enter information into the applicable fields and click Apply within any of the sections to save the updates. 115
116 Important Notes Save will only be able to be clicked once all required fields are populated. 116

117 Message Center Send a message to a group of employees. Users may filter the display of information. Actions 1. Select the employees who will receive the message by checking the boxes next to the employee names. 2. Click Send Group Message. 3. Verify the list of employees. 4. Click into the Recipients field to open a drop down to add more employees to the group message. 5. Click the X next to the employee name in the Recipients field to remove the employee from the group. 117

118 6. Compose the message. 7. Select or enter the Expiration Date. 8. Click Send to submit the message to the selected employees. 9. Click Reset to clear the Recipients and Message field. 10. Click Cancel to discard the changes and close the window. 118

119 11. A message will appear indicating that the message has been sent successfully. Important Notes Use the Employee Time Card to send a message to a single employee. Punch Map View employee mobile punches. To enable web punching on mobile devices, users must be assigned to a mobile policy. Actions Use the filters to view specific employees, groups, dates, times, punch types, and cost centers. Available punches may include In (I), Out (O), Lunch (L), Break (B), and Transfer (T). Select the applicable punch to view the details. Click the x to close the punch detail screen when punches appear on the map. 119

120 Punch Import Import punch history via a CSV file. Actions 1. Type punch into the Search field and click Punch Import once it appears. Can also be found via Employees > Punch Import. Import File 1. Click Import File to open the Import File drawer. 2. Select the File Map from the drop down. 120


121 Select File will not be able to be clicked if a file map is not selected. 3. Click Select File to browse your computer and select the CSV file. 4. Review the Import File drawer to verify the uploaded information and any errors or warnings. CSV files containing errors will not be able to be imported, and Import will not be able to be clicked in #5 when errors exist. An example of an error would be if an Employee ID is not listed or recognized. If there are any errors, click the error counter to open the Import File Error Log drawer to view the line (s) and value (s) causing the error (s). To correct the file, click Download Error File to download a CSV file containing the Errors and Warnings column, make the adjustment to the applicable record (s) on the CSV file, and repeat steps

122 CSV files with warnings only can be imported successfully. Within the Import File drawer, click on the Warning counter to access the Import File Error Log drawer to see the warning message and download the file to correct if necessary. An example of a warning would be if an employee's last name is not matching the last name attached to the employee ID. 5. Click Import after the review is complete to close the drawer. The imported file will appear on the main Punch Import page. Once the Processing column indicates Success, the punches have been imported to the employee record (s). Refresh the Punch Import page, if necessary, to see the Success status appear. View Results of a Successful Import 1. Click the icon within the Action column for any non-queued import to review the details of the import via the Import Results drawer. 122


123 2. Click Download Result File to view the imported data via a CSV excel sheet. 3. Click Close from the Import Results drawer to return to the main Punch Import page. Navigate to the Employees > Employee Time Card page and search for the employee. Select the applicable Date Range or Pay Period to see the imported record. The 12/20/17 record appears as imported. The imported punch history can also be viewed by employee via the Group Time Card page. Important Notes Only CSV file formats are accepted for importing. CSV files can have different column names or be listed in a different order since they are mapped to the system using a configured file map. From the current day, data from the punch import file can be imported for the last 31 days and 31 days into the future. Punch data that does not meet this criteria will generate an error and not be able to be imported. 123
124 Cost Center codes on the CSV file are required to match what is already being used in the system. Configure File Maps Create and configure file mapping to ensure that the punch import CSV file columns map as intended to employee time cards once it is imported. Actions 1. Type punch into the Search field and click Punch Import once it appears. Can also be found via Employees > Punch Import. Create File Maps 1. Click Configure File Maps to open the Configure File Maps drawer. 2. Click + Create File Map. 3. Enter a Map Title. 4. Click Select file from computer to browse your computer and select the CSV file. 5. Once selected, click into the box next to File contains header row if a header row exists on the uploaded CSV file. If not checked, and the file contains a header, the header data will be included as a part of the other data and create errors on the Preview Import Map page. 6. Click Next. 7. Click on the drop down menus to select what fields in the system the columns from the CSV file should map to. 124
125 Employee ID, Punch Date, Punch Time, and Punch Type are required to be mapped. Next will only be able to be clicked once the required fields are mapped. All other fields are optional fields to be imported. 8. Once the fields from the drop down menus have been selected, click Confirm. 9. Click Next. 10. Click on the drop down menus to select the punch types in the system the punch types listed on the CSV file should map to. 11. Once the fields from the drop down menus have been selected, click Confirm. 12. Click Next. 13. Review the preview of the import mapping. 14. Click Finish to save the file map and return to the main Punch Import page. *Punch data from the uploaded file will not be imported once Finish is clicked. The punch data will 125

126 be required to be imported using the new file map after clicking Import File on the main Punch Import page. Click Configure File Maps to view the created file map. Edit File Maps 1. Click Configure File Maps to open the Configure File Maps drawer. 2. Click on the icon within the Edit column of the applicable file map. 3. Enter a Map Title. 4. Click Select file from computer to browse your computer and select the CSV file. 5. Once selected, click into the box next to File contains header row if a header row exists on the uploaded CSV file. If not checked, and the file contains a header, the header data will be included as a part of the other data and create errors on the Preview Import Map page. 6. Click Next. 126
127 7. Click on the drop down menus to select what fields in the system the columns from the CSV file should map to. Employee ID, Punch Date, Punch Time, and Punch Type are required to be mapped. Next will only be able to be clicked once the required fields are mapped. All other fields are optional fields to be imported. 8. Once the fields from the drop down menus have been selected, click Confirm. 9. Click Next. 10. Click on the drop down menus to select the punch types in the system the punch types listed on the CSV file should map to. 11. Once the fields from the drop down menus have been selected, click Confirm. 12. Click Next. 127


128 13. Review the preview of the import mapping. 14. Click Finish to save the file map and return to the main Punch Import page. *Punch data from the uploaded file will not be imported once Finish is clicked. The punch data will be required to be imported using the updated file map after clicking Import File on the main Punch Import page. Delete File Maps 1. Click Configure File Maps to open the Configure File Maps drawer. 2. Click X within the Delete column of the applicable file map. 3. Click OK once the prompt appears to permanently delete the file map. Select a Default File Map 128

129 Choose which file map will be the default selection after clicking Import File on the main Punch Import page. 1. Click Configure File Maps to open the Configure File Maps drawer. 2. Click the radio button in the Default column of the applicable file map. 3. Click Close to close the drawer. Once clicking Import File, the default file map appears without needing to select from the drop down menu. Important Notes Creating a file map will not import any of the data on the uploaded CSV file. Import File will be required to be clicked on the Punch Import page to begin the process of importing the CSV file with the applicable file map. 129

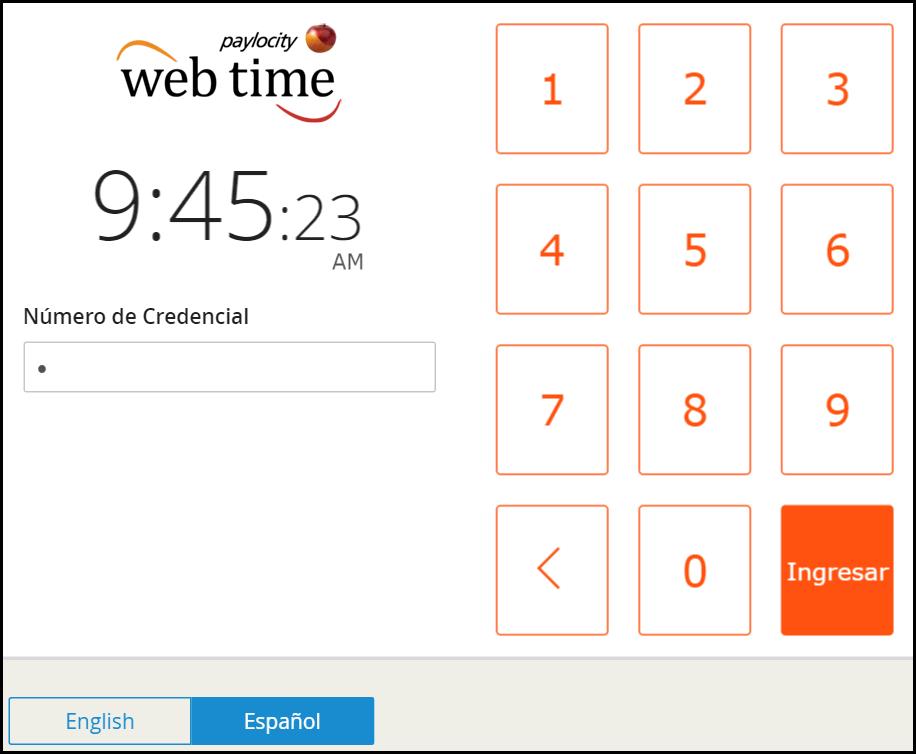
130 REPORTS Reports Description Access available reports, schedule, and report generations for the company. Reports can run immediately, at a scheduled time, or on a recurring schedule. *Generated reports will remain available in the Reports Pickup area for two weeks from the time it was generated. Actions Click the report link to schedule the report. Check the box adjacent to a report and click Delete to delete the report. Enter information in the Search field to find specific reports. Request and Schedule Generate a Report Actions 1. Enter the name for the report. This will be the name of the report after it is generated. 2. Select if the report will be Public or Private. 3. Select which employees will be represented in the report. 4. Select how the file should be formatted (PDF, Excel, RTF, TIFF, or CSV). 5. Select types of filters needed for the report. 6. Select date ranges for the report. Select Current Pay Period if the report should include data from the current pay period. Select Previous Pay Period if the report should include data from the previous pay period. 130
131 7. Indicate how the report should be delivered (one time or recurring). 8. Enter a date to generate the report. 9. Administrators can request an notification when the report is ready. 10. Click Generate my report. Search for Reports Actions Enter information in the Search field to find specific reports. 131

132 WEB KIOSK SETUP Web Kiosk PIN Enable user PINs for Web Kiosk. Actions 1. Login to Web Kiosk on the applicable device. *The link to Web Kiosk is different than the standard Web Time login: 2. Click the three dots at the top right of Web Kiosk to access Kiosk Administration. 132

133 *Spanish language Kiosk Administration access screen 133
134 3. Enter the Company ID. 4. Enter the Instance Name. 5. Enter the Kiosk Password. 6. Click PIN Enrollment. Click Shut Down Web Kiosk to exit out of the existing Web Kiosk instance. *Recommended when moving the Web Kiosk instance to a new device. 134


135 *Spanish language Kiosk Administration screen 7. Enter the Badge Number. 8. Enter the PIN. 9. Confirm PIN. 135


136 10. Click Save to apply the updated information. 11. Click Cancel to discard the changes and close the window. *Spanish language Kiosk Administration PIN Enrollment screen Web Kiosk Photo Capture Allows for a photo to be taken of an employee after punching in or out. Offers managers the ability to reduce the instances of employees punching in or out for other employees. Actions How Photo Capture Works A video stream from the device's camera will appear when the employee accesses web kiosk to punch in or out using the kiosk. 136

137 A photo is taken by the device's camera and stored in the Punch Photo Gallery via the Employees menu once the employee logs into the Web Kiosk Employee Dashboard to clock in or out. Use the Payroll Policy Duration drop down to filter by payroll policy or date range. Use the calendar next to the dates to select the applicable timeframe. If a specific payroll policy (Hourly, Salary, Non-Exempt, etc.) is selected via the Payroll Policy Duration drop down, click Current to go to the existing pay period for the selected payroll policy. If Use Date Range is selected via the Payroll Policy Duration drop down, click This Week or This Month to see photo galleries associated with the chosen timeframe. 137


138 Hover over the camera icon adjacent to the applicable punch on the Employee Time Card and Group Time Card pages to view the photo associated with the punch. Web Kiosk Tip Entry Enable Tip Entry to allow tipped employees to enter their cash tips at the end of their shifts. Actions How Tip Entry Works The Tip Entry screen only appears when employees are clocking out. 138

139 Can be applied to only certain employee groups if not all employee groups require tip entry. Entered tips by tipped employees appear as pay adjustments on the employee time card page for managers to view. 139

140 Employees have up to 24 hours to edit previously entered tips via the History section of the Web Kiosk Employee Dashboard. The entered tips land in payroll when hours are transferred from Web Time. Web Kiosk Description Clock in and out at a computer kiosk using web kiosk. Actions Badge Number and PIN Login 1. Enter the Badge Number. 2. Enter the PIN when applicable. 3. Click Login. 140

141 *Spanish language badge number login 141
142 142

143 *Spanish language badge number and PIN login 143
144 Request Time Off *Depending on company configuration, this may or may not be available. 1. Log into Web Kiosk and click expand to display the Time Off section if necessary. 2. Select Request to request time off. 3. Select the Type from the drop down. 4. Select Single Day or Multiple Days. 144

145 5. Check the Include Weekends box if the time off request will include weekend days and the time off balance should be affected by the weekend hours. 6. Select or enter the Start Date. 7. Select or enter the End Date for multiple day requests. 8. Enter the Start Time. 9. Enter the applicable End Time. 10. Enter the Hours Per Day. 11. Enter applicable Notes. 12. Click Submit Request to submit the time off request. 13. Click Reset to clear the selected and/or entered data. Touchscreen Login 1. Depending on company configuration, users may tap directly on the touchscreen to enter Web Kiosk. 145

146 2. When the touchscreen is enabled and a PIN is required, users must first click into the applicable field before using the touchscreen for proper entry into the Badge Number or PIN field. 3. Click Login. *Spanish language badge number and touch enabled login 146
147 147
148 *Spanish language badge number, PIN, and touch enabled login 148
149 Web Kiosk Employee Dashboard 1. Select the number icon in the upper right portion of the page to view any unread messages from a supervisor. *A bell icon will appeare when there are no unread messages. 2. Select Logout to end the session. 3. Select Clock In to enter time at the start of a day or after returning from lunch. Click or tap Clock Out at the end of the day or when departing for lunch. 4. Selecting Clock In + Transfer offers the chance to clock in for a different cost center than the assigned cost center, along with a Notes field to explain the reasoning behind the entry. *Depending on company configuration, Transfer or Clock In + transfer may or may not be available punch options. 149
150 150
151 5. Select Manual to create a manual punch using an applicable punch type and a different cost center if necessary. 151
152 6. Use the Notes field to enter information after selecting Clock In or Clock Out. *Depending on company configuration, this may or may not be displayed. 152
153 7. Quickly view the Last Punch information underneath the clock. 8. Select History for a quick look at recent punch history. *Depending on company configuration, this may or may not be displayed. 9. Review your schedule by day, week, or month. *Depending on company configuration, the schedule view may be hidden, minimized, or maximized upon logging in. 10. Request time off, view the status of time off requests, or check time off balances. *Depending on company configuration, time off requests may only be available at certain times of the day or not at all. 11. Select Comments to add notes for the pay period. *Depending on company configuration, this may or may not be displayed. 12. Select Timesheet to view hours worked for the week. Click My Timesheet to have a weekly summary sent to you via . Depending on company configuration, the Timesheet option may or may not be available. The personal and/or work address the timesheet will send to is dependent on how your preferences were set up by a company administrator or supervisor. Preview of the timesheet

154 13. Select Submit to send the comments to the applicable supervisor. 14. Select Clear to discard previously entered comments. 154

155 *Spanish language employee dashboard view 155
Requesting Time Off: Employee Navigation Salaried Non-Exempt
 Requesting Time Off: Employee Navigation Salaried Non-Exempt Logging on Log in using your Clemson Primary* Username and Password. URL: https://clemson.kronos.net (*To determine your Primary Username, go
Marquette University Time and Attendance
 2016 Marquette University Time and Attendance TM02 Manager/Timekeeper Functions This guide helps you learn the most commonly used manager/timekeeper functions in EmpCenter Time and Attendance. The intended
USER GUIDE Time and Attendance User Administration Human Capital Management Suite
 USER GUIDE Time and Attendance User Administration Human Capital Management Suite Ormed Information Systems Ltd. Version 1.2 (January 2015) What s Inside What s Inside...1 Introduction...2 Procedures...3
California Institute of Technology
 California Institute of Technology Human Resources Using Kronos Workforce Timekeeper A User Guide for Payroll Activity Monitors (PAM) Effective 05/18/11 Page 1 of 51 Using Workforce Timekeeper A Guide
Employee Dashboard User Manual
 Employee Dashboard User Manual Employee Dashboard... 2 The Actions Bar... 2 Actions... 4 Punch tab... 4 Clock In... 4 Clock Out... 5 Begin Break... 5 Transfer... 6 End Break... 6 Begin Meal... 7 End Meal...
NOVAtime 5000 Employee Web Services
 NOVAtime 5000 Employee Web Services Table of Contents Logging In... 2 Accessing Employee Web Services... 3 Using the Dashboard... 3 Viewing Your Timesheet... 4 4.1 Timesheet Summary... 5 Viewing Accrual
FrogTime Manager Training Manual
 FrogTime Manager Training Manual Student & Biweekly Temporary Employees 1 2 Goal: To accurately and efficiently manage employees time Table of Contents Section I- Manage Time... 4 Pre-Payroll Processing
Quick Reference Card for Managers
 Time & Attendance Quick Reference Card for Managers Navigator Version 7.0 The following instructions describe a typical Navigator configuration. The names and location of widgets and commands may differ
Marquette University Time and Attendance
 2012 Marquette University Time and Attendance TM01 Employee Time and Attendance This guide helps you learn the most commonly used employee functions in EmpCenter Time and Attendance. The intended audience
Employee Functions. TM01 Time and Attendance
 2013 Employee Functions TM01 Time and Attendance Learn EmpCenter navigation fundamentals and employee functions related to reporting time, activities, and absences in the system. Experience the EmpCenter
California Institute of Technology
 California Institute of Technology Human Resources Using Kronos Workforce Timekeeper A User Guide For Viewing Customized Displays The Workforce Timekeeper display is customized according to Caltech s time
Publication Date: 9/13/16
 Publication Date: 9/13/16 TABLE OF CONTENTS Page Employee Training PowerPoint Presentation.. 1 How To Job Aids (Also available on County Website): How to Log on and sign off 38 How to navigate MY TIMECARD...
Objective: The purpose of this handbook is to provide your bi-weekly paid employees with a detailed guide to using the TimeNet system.
 Employee Handbook 1 Objective: The purpose of this handbook is to provide your bi-weekly paid employees with a detailed guide to using the TimeNet system. 2 3 Terminology... 4 Logging into Timenet... 5
V23 Basic User Guide
 UNCLASSIFIED // FOR OFFICIAL USE ONLY V23 Basic User Guide Distribution authorized to U.S. Government Agencies only, to protect SLDCADA technical or operational data, computer software, and documentation
TIMEaccess Bi-Weekly Supervisors Training Guide Friday, February 01, 2013
 TIMEaccess Bi-Weekly Supervisors Friday, February 01, 2013 Notice 2013, Southern Methodist University. All Rights Reserved. Published 2013. The information contained in this document is proprietary to
Parent Student Portal User Guide. Version 3.1,
 Parent Student Portal User Guide Version 3.1, 3.21.14 Version 3.1, 3.21.14 Table of Contents 4 The Login Page Students Authorized Users Password Reset 5 The PSP Display Icons Header Side Navigation Panel
Quick Reference Card for Timestamp Hourly View Employees
 Time & Attendance Quick Reference Card for Timestamp Hourly View Employees Navigator Version 7.0 The following instructions describe a typical Navigator configuration. The names and location of widgets
CMHC Scheduler Users Kronos Version 8 Upgrade Instructions
 CMHC Scheduler Users Kronos Version 8 Upgrade Instructions Page Accessing Kronos Version 8 2 Logging On 3 CMHC Approver, Editor, & Scheduler Navigation 4 Scheduler-CMHC Navigation 5 Scheduling Dept/Job
California Institute of Technology
 California Institute of Technology Human Resources Using Kronos Workforce Timekeeper A User Guide For System Requirements Operating System Kronos is compatible for use with PC s (running Windows 2000 or
UltraTime Enterprise WebTime User Guide
 UltraTime Enterprise WebTime User Guide This guide will explain how to use the WebTime view of UltraTime Enterprise. Sample screens have been provided for guidance. The WebTime time entry screen is the
Astra Schedule User Guide Scheduler
 Astra Schedule User Guide 7.5.12 Scheduler 1 P a g e ASTRA SCHEDULE USER GUIDE 7.5.12... 1 LOGGING INTO ASTRA SCHEDULE... 3 LOGIN CREDENTIALS... 3 WORKING WITH CALENDARS... 4 CHOOSING A CALENDAR AND FILTER...
Quick Tips for Teammates
 Quick Tips for Teammates Table of Contents Introduction... 3 MyTmT... 5 Log In to MyTmT... 6 Home Page... 7 My Timecard... 11 My Schedule... 12 My Time Off... 13 My Availability... 15 My Edited Punches...
RITIS Training Module 4 Script
 RITIS Training Module 4 Script Welcome to the Regional Integrated Information System or RITIS Module 04 CBT. To begin, select the start button or press Shift+N on your keyboard. This training module will
ETS-TA Time and Attendance Module
 PENTAGON 2000 SOFTWARE Pentagon 2000 Software 15 West 34 th Street 5 th Floor New York, NY 10001 Phone 212.629.7521 Fax 212.629.7513 TITLE: Time and Attendance PART: General System MODULE: BUILD 9.0.0.27
KRONOS GUIDE HOURLY WEB USERS
 Kronos site: https://workforce.union.edu/wfc/logon KRONOS GUIDE HOURLY WEB USERS Login: Use your Union College username and password Changing Date Range Use the drop-down in the upper-right to change the
Leave Requests. Employee Self Service
 Purpose Use this procedure to create and submit a leave request for full or partial day(s) to a designated approver for approval via email. You will receive an email notification when the leave request
Kronos iseries Central V7.0.0 V New Features
 Kronos iseries Central V7.0.0 V7.0.3- New Features Base Timekeeper Application Appending Kronos iseries Central Company Archive When performing housekeeping of the Kronos iseries Central application users
Employee My Information and ESS. South West Healthcare. Moyne Health Services. Colac Area Health. Terang and Mortlake Health Service
 KRONOS Employee My Information and ESS South West Healthcare Moyne Health Services Colac Area Health Terang and Mortlake Health Service Timboon and District Healthcare Service Version 4 10/02/2017 Page
Oracle Exempt Timecard Entry
 Oracle Exempt Timecard Entry Table of Contents Login... 2 Navigator Page... 4 Time Entry... 5 Save a Timecard... 12 Timecard Review in Time Entry... 13 Submit a Timecard for Approval... 14 Updating a Timecard
ADP Vantage HCM: Navigation for Time Managers
 ADP Vantage HCM: General Navigation 2 Login Page 2 Basic User Interface 3 Privacy, Legal, Feedback, Copyright 3 Preferences, Support, Logout 4 Menus and Activity Options 8 Messages, Calendar, My Profile
Asset and Work Order Maintenance Management Suite Training Manual for Technicians
 Asset and Work Order Maintenance Management Suite Training Manual for Technicians Welcome! Welcome to the erportal Asset and Work Order Maintenance Management Software Suite erportal is a powerful software
1 Supervisor Handbook
 Supervisor Handbook 1 Objective: The purpose of this handbook is to provide your timekeepers and approvers with the essential information that they will need to complete their normal tasks within TimeNet.
Arkansas State University Time Tracker for Supervisors
 Arkansas State University Time Tracker for Supervisors Contents Helpful Information... 2 Accessing Time Tracker... 3 Your Dashboard... 4 Approving/Denying Requests... 5 Viewing Hours Worked... 7 Employee
Employee Handbook. By checking the box beside the option located under the button and
 Clocking in/out Employee Handbook Employees can clock in or clock out using either the computer/portal or the badge reader. Instructions on how to clock in or out using the computer/portal follow. Please
Manager Training Package
 Table of Contents Manager Training Package Goal: To accurately and efficiently manage employees time Manager Training Package Section II- Manage Tools... 3 Reports... 4 Running a Report... 4 Saving a Report...
GETTING STARTED WITH TIME TRACKING (TIME WORKLET OPTION) WHO NEEDS TO RECORD TIME ACCESSING YOUR TIMESHEET
 WHO NEEDS TO RECORD TIME ACCESSING YOUR TIMESHEET") GETTING STARTED WITH TIME TRACKING (TIME WORKLET OPTION) This guide covers how to: Record and submit your hours worked using the Time Worklet. Submit requests for time off (absences). Change and correct
GETTING STARTED WITH TIME TRACKING (TIME WORKLET OPTION) This guide covers how to: Record and submit your hours worked using the Time Worklet. Submit requests for time off (absences). Change and correct
MANAGER TIMECLOCK. URL:apps49-test:8080/manager30/login.aspx
 MANAGER TIMECLOCK URL:apps49-test:8080/manager30/login.aspx Type in your Novell ID (10 characters only) and 1234 (general password) To reset your password click on the View tab Click on Change Pin Enter
WebClock Full User Guide
 WebClock Clock Functions Basic WebClock Usage WebClock Full User Guide WebClock located at: https://62026.tcplusondemand.com/app/webclock/#/employeelogon/62026/1 ID/Badge Number is the user s Employee
DSS User Guide. End User Guide. - i -
 DSS User Guide End User Guide - i - DSS User Guide Table of Contents End User Guide... 1 Table of Contents... 2 Part 1: Getting Started... 1 How to Log in to the Web Portal... 1 How to Manage Account Settings...
NORTH EAST I.S.D. PAYROLL DEPARTMENT KRONOS WORKFORCE CENTRAL V 8 TIME AND ATTENDANCE SUPERVISORS QUICK REFERENCE
 NORTH EAST I.S.D. PAYROLL DEPARTMENT KRONOS WORKFORCE CENTRAL V 8 TIME AND ATTENDANCE SUPERVISORS QUICK REFERENCE 1. Log in information will remain the same. 2. User Name is 6-digit employee ID number
Marquette University Time and Attendance
 2016 Marquette University Time and Attendance TM01 Student Employee Time and Attendance This guide helps you learn the most commonly used student employee functions in EmpCenter Time and Attendance. The
Service Minder Plus Features/Helpful Hints
 Service Minder Plus Features/Helpful Hints This manual covers helpful hints and use of features. Note: These items will be addressed during the training sessions. This document is meant to be used as an
PARAPROFESSIONAL SUBSTITUTE TIME AND ATTENDANCE WORK INSTRUCTIONS
 NORTH EAST I.S.D. Workforce Central PARAPROFESSIONAL SUBSTITUTE TIME AND ATTENDANCE WORK INSTRUCTIONS Kronos Substitute Guide 8-08 1 EMPLOYEE WORK INSTRUCTIONS Kronos Substitute Guide 8-08 2 PIN PUNCHING
Kronos Instructions for Employees. Table of Contents. Recording Your Time.10. Viewing Your Timecard.2-3 Totals & Schedule Definitions.
 Kronos Instructions for Employees Table of Contents Logging on to Kronos.2 Recording Your Time.10 Viewing Your Timecard.2-3 Totals & Schedule Definitions.4-5 Approving Your Timecard..5 Accruals...6 Requesting
Kronos User Guide Biweekly Employees
 1. What is Kronos? 2. Accessing Kronos 3. Navigate Through the System 4. Enter Your Time 5. Pay Codes 6. Transfers 7. Review Your Timecard 8. View a Different Date in Your Timecard 9. Approve your Timecard
My Sysco Reporting Job Aid for CMU Customers. My Sysco Reporting. For CMU Customers (Serviced by Program Sales)
") My Sysco Reporting For CMU Customers (Serviced by Program Sales) 1 Accessing My Sysco Reporting... 2 Logging In... 2 The Reporting Dashboard... 3 My Sysco Reporting Process... 6 Generating a Report...
My Sysco Reporting For CMU Customers (Serviced by Program Sales) 1 Accessing My Sysco Reporting... 2 Logging In... 2 The Reporting Dashboard... 3 My Sysco Reporting Process... 6 Generating a Report...
TOTALPASS PROXIMITY USER GUIDE
 TOTALPASS PROXIMITY USER GUIDE TotalPass Small Business Premium Icon Time Systems, Inc. sales@icontime.com www.icontime.com Copyright 2015 Icon Time Systems, Inc. All rights reserved. Reproduction of this
Web Access User Guide for Employees
 Web Access User Guide for Employees 11/1/12 TABLE OF CONTENTS FUNCTIONS PAGE # Logging In 1 Forgot Username/Password 1 Changing Your Password 1 Logging Out 1 What is Available To You? 1 My Pay Statements
Help Contents Manual
 Help Contents Manual TimeClick 18 018 Last Updated: February 18 1 Table of Contents WHAT TO EXPECT WITH THIS MANUAL... 4 Resources Found on Website and Blog... 4 Contact Customer Support Team... 4 PREFERENCES...
It is recommended that you save this URL in your browser s Favorites Menu.
 Employee Guide Notice The information in this document is subject to change without notice. MPAY Inc. shall not be liable for any technical or editorial errors contained herein or for incidental or consequential
Scheduling. End-User Guide 2018 Practice Engine Systems, Inc.
 Scheduling End-User Guide 2018 Practice Engine Systems, Inc. CONTENTS Change History... 4 Scheduling Dashboard... 5 User Name Dashboard Widget... 6 Profile Dashboard Widget... 7 Preferred Locations tab...
Workforce Central Navigating My Timecard- Student
 Navigating My Timecard- Student With Workforce Central, you can use the My Timecard widget to view your time entry data, make edits, and address or view exceptions within your timecard. Accessing the My
The carousel has been replaced with the Open Workspaces drop-down, which is located on the right of the last tab in the action bar.
 Kronos Updates Kronos Version 8.1.3 HTML Java free Flash Free o HTML Delegation Widget is unavailable at this time. It is set to release by the end of 2019. o Until Delegation for timekeeping is released
ReadyTalk for HubSpot User Guide
 ReadyTalk for HubSpot User Guide Revised March 2016 2 Contents Overview... 3 Configuring ReadyTalk & HubSpot... 4 Configure Sync for Additional Webinar Data... 6 How to Setup the Sync for Additional Webinar
Board of Regents of the University System of Georgia etime Employee User Guide
 Board of Regents of the University System of Georgia etime Employee User Guide Project View Time Card for Benefitted Bi-Weekly Employees (Non Manager or Non Supervisor) 1 Log On Access the etime Timesheets
ClockIt-Online User Guide
 ClockIt-Online User guide V5.4 Page 1 Content Purpose...4 Terminology...4 Logging in...5 Dashboard...6 Navigation...6 My account...8 Company duty roster...9 Open shifts...11 Prerequisite...11 Applying
Release Notes. TimeForce Version 2.8.1
 Release Notes TimeForce Version 2.8.1 Publication Record Software Version Publication Date Description 2.8.1 May 2009 Release notes for Qqest Software Systems TimeForce May 2009 release 2009 Qqest Software
PARTNER PORTAL TOOLKIT
 Revised 7/26/2018 PARTNER PORTAL TOOLKIT Financial Advisors WWW.PAYLOCITY.COM TABLE OF CONTENTS Partner Portal Toolkit... 3 User Accounts... 4 Partner Portal... 5 Select Company or Set... 6 Recent Hires...
Administrator Manual
 Administrator Manual CURA Technical Support Email: cura_support@mindscope.com Phone: 1.888.322.2362 x 55 Administrator Manual Page 1 Table of Contents The Setup Module... 3 Skills... 3 Adding or Modifying
TimeTarget Zeus ESS 1. Login Your time target Login can be found by clocking into Existing TimeTarget Kiosk
 TimeTarget Zeus ESS 1. Login Your time target Login can be found by clocking into Existing TimeTarget Kiosk Please book mark the following link s on to your computer or Mobile. Desktop https://humanforce.fham.com.au
TIM EMPLOYEE MANUAL SHRA AND EHRA EXEMPT EMPLOYEES <SHRA AND EHRA EXEMPT EMPLOYEES>
 TIM EMPLOYEE MANUAL SHRA AND EHRA EXEMPT EMPLOYEES August, 2018 CONTENTS... 1 INTRODUCTION TO TIM... 3 LOGGING INTO TIM... ERROR! BOOKMARK NOT DEFINED. SIGNING OUT OF TIM...
TimeSaver Training - Employee - Hourly View Timecard
 Good day. Welcome to TimeSaver Training. This recording is intended to provide you with an overview of Kronos TimeSaver version 8. To begin, open TimeSaver from the icon on your desktop. Enter your Employee
USER GUIDE DISPATCH PORTAL RELEASE V5.42
 USER GUIDE DISPATCH PORTAL RELEASE V. 07 Table of Contents Introduction... Prerequisites... Login... Home Dashboard... Hubs... Routes... Create Routes... Jobs... Create Jobs... Cloning a Job... Job Status...
Getting Started with dotstaff Client Manager Guide
 Getting Started with dotstaff Client Manager Guide Key Buttons Add Save Open Calendar Refresh Accept Reject Edit Mark Disputed Send for Include Include Remove Remove Save as View Rate NEW Approval All
Quick Tips for DC Teammates
 Quick Tips for DC Teammates Table of Contents Introduction... 3 MyTmT... 4 Log In to MyTmT... 5 Home Page... 6 My Timecard... 11 My Schedule... 12 My Time Off... 13 My Availability... 16 My Edited Punches...
RITIS Training Module 10 Script. To return to the Florida Analytics main page, select Florida Analytics Tools in the upper left corner of the page.
 RITIS Training Module 10 Script Welcome to the Regional Integrated Transportation Information System or RITIS Module 10 CBT. To begin, select the start button or press Shift+N on your keyboard. To return
Gradebook Entering, Sorting, and Filtering Student Scores March 10, 2017
 Gradebook Entering, Sorting, and Filtering Student Scores March 10, 2017 1. Entering Student Scores 2. Exclude Student from Assignment 3. Missing Assignments 4. Scores by Class 5. Sorting 6. Show Filters
California Institute of Technology
 California Institute of Technology Human Resources Using Kronos Workforce Timekeeper For Exception Reporting User Guide Workforce Timekeeper (Kronos) software enables employees to use an industrystandard
TimeClock Plus Leave Requests
 Purpose This document will walk you through the process for adding Leave Requests for time off, how to view your requests, as well as the approval process for submitting leave. You will be able to add
1 Supervisor Handbook
 Supervisor Handbook 1 2 Objective: The purpose of this handbook is to provide your timekeepers and approvers with the essential information that they will need to complete their normal tasks within TimeNet.
Online Demo Scheduling Tool: User Guide
 Unrestricted Internal Use - Carestream Health, 2013 1 Online Demo Scheduling Tool: User Guide This document provides step by step instructions on how to successful use the Online Demo Scheduling tool for
WEB PAY EMPLOYEE GUIDE
 Revised 4/14/2017 WEB PAY EMPLOYEE GUIDE Client Resource WWW.PAYLOCITY.COM TABLE OF CONTENTS WEB PAY... 2 SELF SERVICE PORTAL... 9 HOME... 26 EMPLOYEES... 35 PAYROLL... 108 NOTIFICATIONS... 113 GLOSSARY...
Creating a Roster (1 of 5) A Creating a New Roster. B Opening / Navigating to a Roster. 7 Select the From date for the roster(s) 3 4 Click on Find
 A Creating a New Roster. B Opening / Navigating to a Roster. 7 Select the From date for the roster(s) 3 4 Click on Find") Creating a Roster ( of ) A Creating a New Roster master group and the View Rosters task group unit from the drop down list Click on Find correct Template number of s to be created From date for the (s)
Creating a Roster ( of ) A Creating a New Roster master group and the View Rosters task group unit from the drop down list Click on Find correct Template number of s to be created From date for the (s)
Carpenters Pension Fund of Illinois
 Carpenters Pension Fund of Illinois Online Remittance Processing Page 1 Instructions Carpenters Pension Fund of Illinois Online Remittance Processing Contents Logging In... 3 Agree to Terms of Use... 4
New User Orientation PARTICIPANT WORKBOOK
 New User Orientation PARTICIPANT WORKBOOK INTEGRATED SOFTWARE SERIES New User Orientation PARTICIPANT WORKBOOK Version 2.0 Copyright 2005 2009. Interactive Financial Solutions, Inc. All Rights Reserved.
TriO. Out of Office System User Guide
 TriO Out of Office System User Guide About TriO Out of Office Tracking System Reports that can be run by date, person, hierarchy, home locations, and destination locations Email notification of requests/approvals
RITIS Training Module 9 Script
 RITIS Training Module 9 Script Welcome to the Regional Integrated Information System or RITIS Module 09 CBT. To begin, select the start button or press Shift+N on your keyboard. This training module will
TimeClock Plus Leave Requests
 Purpose This document will walk users through adding Leave Requests for vacation as well as showing requests as well as the approval process for submitting leave. Users will be able to add leave requests,
My Time Off. Associates Quick-Reference Card. View Leave Balance. Request Time Off. My Time Off. Access My Time Off
 My Time Off Click here for the Managers Quick-Reference Card Click here for directions for Unavailable Days Associates Quick-Reference Card My Time Off This quick-reference outlines how to view and submit
Kronos Version 8 Upgrade Instructions
 Kronos Version 8 Upgrade Instructions Page Accessing Kronos Version 8 2 Logging On 3 Salaried Employee Navigation 4 Manager Navigation 5 Managing Timecards Navigation 6 Managing Timecard Alerts 7-1 - ACCESSING
PRODUCT USER GUIDE
 TO PLACE AN ORDER CALL: 866-487-4751 OR VISIT: WWW.TIMECLOCKEXPERTS.COM PRODUCT USER GUIDE www.icontime.com 1.800.847.2232 Table of Contents CONTENTS Introduction... 2 Home Page... 3 PART I: Setting up
Findmyshift - Getting started with Findmyshift
 Findmyshift - Getting started with Findmyshift Managers Creating your first roster Adding staff to your team Inviting your staff to log in Choosing your settings Entering shifts Publishing shifts Handling
Business Online Banking User Guide
 Business Online Banking User Guide Table of Contents Contents Overview... 2 Logging In... 2 Additional Login Information... 5 Home/Dashboard... 6 Top Line Tool Bar... 6 Bulletins... 7 Dashboard... 8 Accounts...
USPTO Accommodation Point User Guide VERSION 1.0
 USPTO Accommodation Point User Guide VERSION 1.0 ii PUBLISHED BY MicroPact, Inc. 12901 Worldgate Drive, Suite 800, Herndon, VA 20170 COPYRIGHT MICROPACT, INC. All rights reserved. No part of the contents
Ge#ng Started Guide New Users and Starter Edi/on
 Ge#ng Started Guide New Users and Starter Edi/on Goal Thank you for taking the time to use Viewpath as your project management solution. Our goal in providing this guide is to help streamline the process
Employee User s Guide
 Employee User s Guide September 06 Table of Contents Table of Contents Chapter 1 Introduction... 3 System Overview... 3 About this Guide... 3 Conventions Used in this Guide... 4 Chapter 2... 5 Getting
Navigator ~ Version 8.1 *Manager/Supervisor* Training Manual
 Navigator ~ Version 8.1 *Manager/Supervisor* Training Manual Vincennes University Payroll Office 2018 Topic Page Number Deadlines for Human Resources and Payroll 3 Logging In/Sign Out 4 Manager: Accessing
TOTALPASS SMALL BUSINESS PREMIUM SOFTWARE UPDATE CHANGE LOG
 TOTALPASS SMALL BUSINESS PREMIUM SOFTWARE UPDATE CHANGE LOG TotalPass Small Business Premium Time Clock Updates Occasionally, Icon Time Systems releases new updates for your employee time clock. These
Online Labor Redistributions Entry Reference Guide
 Online Labor Redistributions Entry Reference Guide Contents: Submitting a Labor Redistribution... 2 Changing Multiple Pay Periods... 13 Additional Search Criteria... 17 Overview: The on-line labor redistribution
Copyright 2018 Icon Time, Inc. All rights reserved.
 Copyright 2018 Icon Time, Inc. All rights reserved. Reproduction of this document in whole or in part is strictly prohibited. This document may contain typographical or copy errors. TotalPass, Icon Time,
Page Topic 02 Log In to KidKare 02 Using the Navigation Menu 02 Change the Language
 Page Topic 02 Log In to KidKare 02 Using the Navigation Menu 02 Change the Language help.kidkare.com 03 Enroll a Child 03 Withdraw a Child 03 View Pending and Withdrawn Children 04 View Kids by Enrollment
Banner 9 Navigation Guide
 Banner 9 Navigation Guide North Orange County Community College District Information Services Table of Contents Introduction... 3 Login Procedure... 3 Banner 9 Dashboard (Home Page)... 4 Toggle Menu Descriptions...
NEXTIVA ANALYTICS USER GUIDE. nextiva.com/support
 NEXTIVA ANALYTICS USER GUIDE nextiva.com/support Contents Logging In... 2 Landing Page... 2 Reporting... 3 Total Count Chart... 4 Count by Day Chart... 4 Hourly Average Chart... 4 Counts by State Chart...
User Guide Product Design Version 1.7
 User Guide Product Design Version 1.7 1 INTRODUCTION 3 Guide 3 USING THE SYSTEM 4 Accessing the System 5 Logging In Using an Access Email 5 Normal Login 6 Resetting a Password 6 Logging Off 6 Home Page
Anchor User Guide. Presented by: Last Revised: August 07, 2017
 Anchor User Guide Presented by: Last Revised: August 07, 2017 TABLE OF CONTENTS GETTING STARTED... 1 How to Log In to the Web Portal... 1 How to Manage Account Settings... 2 How to Configure Two-Step Authentication...
Wise Technologies Ltd.,
 User manual Wise Timetable online system Wise Technologies Ltd., In front of you is a short document for all the users and administrators of Wise Timetable, describing the important part of the whole system:
Installing the Sample Files
 (610) 594-9510 Installing the Sample Files Our sample files are available for you to download from the Internet onto your own computer. Each course has a set of sample files which have been compressed
Acuity 504. User Guide. Administrators 504 Coordinators Teachers. MSB Customer Care msb-services.
 TM Acuity 504 User Guide Administrators 504 Coordinators Teachers MSB Customer Care 800.810.4220 support@ Copyright 2014 MSB All rights reserved 1 Copyright MSB 2014 Table of Contents MSB Mission Statement...
ADP Vantage HCM. Navigation for Practitioners
 ADP Vantage HCM Navigation for Practitioners Introduction This is a high-level look at the various navigation features associated with ADP Vantage HCM. The features available are dependent upon your job
My Team And Manager Reports Rev 2
 My Team And Manager Reports 20141210 Rev 2 1 Contents My Team Overview... 3 My Team Search... 7 Action Items... 8 Tasks Overview... 8 Assign Training... 11 Profile Overview... 13 Transcript... 15 Calendar