Horizon Administrator User Guide
|
|
|
- Shavonne Morrison
- 6 years ago
- Views:
Transcription
1 Horizon Administrator User Guide
2 Contents Overview... 8 System Specifications... 8 Horizon URL... 8 Hardware User Guides... 8 Domain... 8 Standard Features... 9 Login Screen... 9 Forgotten Password... 9 Changing Your Password... 9 My Details Directory Search Dashboard customisation Core Functionality Search Feature Delete Edit Creating CSV file for Bulk Upload Digital signatures in call recordings What a digital signature will not do How the signing procedure works Administrative Features Setting up the Horizon GUI or portal Administrator Roles for the Horizon Portal User Add Users Adding DECT handset users Edit Users Bulk Upload Users Reset your user s password (as an admin) Administrative Tab Department To Set up a Department Adding a Department Deleting a Department Add or remove Users from Departments Call Policies External Directory Adding single contact to the external company directory Adding multiple contacts to the external company directory Delete contact(s) form external company directory Corporate Directory Contact Error Alpha Tagging Subscription Centre Number Management... 42
3 Company Voice Portal Set up Company Voice Portal Set up Voic for a user Change users Voic Password Setup Voic from Handset Amend Voic Settings Voic Mailbox Options When playing a voic message Company Profile Groups Auto Attendant Recording an Auto Attendant via my phone Call Pickup Set up a Call Pickup Group Add or remove users from Call Pickup Group Delete Call Pickup Call Parking Set up Call Park Settings Edit Call Park Settings Delete Call Park Add or remove users to Call Parking Group Hunt Groups Create New Hunt Group Call forwarding for Hunt Group and Call Queue Groups Call Waiting for a Hunt Group To set up a user with call waiting Applying a Schedule to a Hunt Group Setup Voic for a Hunt or Call Queue Group Listening to your Hunt Groups Voic Instant Conference Group Editing a Conference Group New Call Barge Functionality Site Management Setting up the Site DDIs Schedules Daily Weekly Monthly Yearly How to set up a schedule Editing Schedules Deleting Schedules Authorisation and Account Codes Manage Account Code Users Switch to Account Codes Account Code
4 Set Up Account Code Switch Off Account Codes Authorisation Code Switch to Authorisation Codes Call Policy Call Barring Hot Desking Setup Hot Desking for a Site Disable and Enable Hot Desking Create New Hot Desk Login to Hot Desk on Horizon User Administrator Login to Hot Desk on Polycom Handsets Login to Hot Desk on Horizon Voice Portal Music on Hold To set up Music on Hold Create an Audio File Sound Recorder Audacity Convert Audio File Manage Numbers Recorded Calls Bulk call recording download and delete Deleted users and call recording Call Recording Users Access and notification control to call recordings Call Queuing Add Users to Call Queue Groups Adding announcements to a Call Queue Group Setup Voic for a Call Queue Group Alternative Number Presentation Implementation of Alternative Number Presentation Nuisance Call Management for Horizon Call Groups Device Customisation setting up a user Call Paging Blacklist Numbers Receptionist Soft Client Assign the Receptionist Soft Client bolt-on to a user Reset Receptionist Password Managing the favourites or fixed contacts Desktop and Mac Soft Client Assign the Desktop Soft Client bolt-on to a user Mobile Soft Client Assign the Mobile Soft Client bolt-on to a user Integrator Soft Client Assign the Integrator Soft Client bolt-on to a user Integrator CRM Soft Client
5 Assign the Integrator CRM Soft Client bolt-on to a user Horizon TAPI Driver Soft Clients Passwords Using 3G and 4G networks with Soft Clients Using Wi-Fi Networks with Soft Clients Call Centre Options Setting up a Call Centre Estimated Wait Timer option for Call Queues End User Features Call Forward Set up Call Forwarding via the GUI Profiles Setup Availability Profiles Available in Office Available Out of Office Busy Unavailable Directory and Contacts Add a Contact My Features Remote Office How to give a user permission to use the feature How to enable/disable the feature as an Admin How to enable/disable the feature as a User How to make outgoing calls How to receive calls Call Setup Call Handling Incoming Calls Settings Outgoing Calls Settings Call Transfer Activate or Deactivate Call Transfer Diversion Inhibitor In Call Settings Voic Settings Twinning Restrict by Number Restrict by Schedule Blacklist Incoming Call Settings Do Not Disturb via the Horizon portal Call Notify Change address for Call Notify by Sequential Ring How do I set my number to find me over multiple devices? Set Up Sequential Ringing
6 Specific Numbers or Schedules Sequential Ringing Busy Lamp BLFs on Polycom BLFs on Cisco devices Speed Dial Set Up User 1 or 2 Digit Dialling Set Up User Bulk 2 Digit Dialling Outgoing Call Settings Automatic Call Back Number Withheld Anonymous Call Rejection Turn Anonymous Call Rejection On or Off using GUI Click to Dial Device Customisation Device Customisation - Polycom Assigning a Speed Dial to a Line Key on a handset Resetting Line Keys Configuration on a handset Assigning a Speed Dial to a Side Car Line Key Resetting Layout on a side car Assigning Soft Key Options Resetting the Soft Key layout Device Customisation - Cisco Assigning a Speed Dial to a Line Key on a handset Resetting Line Keys Configuration on a handset Assigning a Speed Dial to a Side Car Line Key Resetting Layout on a side car Assigning Soft Key Options Resetting the Soft Key layout How to remove missed calls notifications from Cisco SPA handsets User Reset Password Statistics Performance Calls Made/Retrieved Daily Calls How many Calls are getting through? Where are my Callers? Advanced Statistics Statistic Dashboard Admin End User Monitoring calls over my sites and users Inbound Statistics Calls Received Calls Received per hour How many calls are getting through? Where are my callers located?
7 Outbound Statistics How many Outbound calls have I made? How many calls am I making each hour? How many of our calls are getting through? Where are, we calling? Programmable Keys for Polycom 450 and 650 and Cisco 504 and Glossary Appendix 1 - Icons Appendix 2 - Short Codes

8 Overview Horizon is a complete communications service for business that provides an extensive range of fixed and mobile telephony capabilities via an easy-to-use web portal. The purpose of this document is to provide the Horizon Administrator and user with all the information required to manage their Horizon Service. System Specifications Browser: Internet Explorer 6.0, 7.0, 8.0, 9.0, Mozilla FireFox, Safari, Chrome, Opera. Please note that when setting up and editing schedules whilst using Internet Explorer, you will receive the following error message. This is perfectly normal and you should select to stay on this page. If you use other browsers to access the Horizon user portal, you will not encounter this error message. Horizon URL Hardware User Guides For Cisco phones, see the CD included with the phone For Polycom phones, see the link below Domain When setting up a domain you need to follow: Domain name may only contain letter, digit and -. No longer than 80 characters The domain needs to start with a letter Capital letters should not be used


9 Standard Features Login Screen This will be the first screen that all Horizon-users will see. Depending on what login credentials you have entered, you will be redirected to the administrator or the end users home page. If it is the first time you ve logged in, then you will be taken to the initial login setup. For an Administrator, you will be asked to change your password from the one initially provided to you and you used to log in with. For an end user, you will be asked to set up call handling, twinning and you will also need to change your password. Anything you setup on initial login can be changed later. Forgotten Password If you have forgotten your password, you can request a new password that will be sent directly to your . This can be done by simply selecting the forgotten password on the login page. Then you will need to input your username and . The needs to be the one connected with your account and then you will be sent a new password. Changing Your Password To change your password as an administrator you click on Change Password in the top right corner of any page. Then you need to input your old password followed by your new password. For an end user, you need to go to My Details which is in the top right corner of every page. Then select Change Password, and input your old password and what you would like to change it to.


10 My Details My details are only viewable as an end user and this page displays basic information about you as a user. You can change your password from this screen. Directory Search Throughout the system there is a directory search icon that will let you search your directory and then input the contact s number into that function. To perform this feature, click on the icon and then a directory search window will open. You can search using 5 different fields: name, extension, first name, last name and group. If you search by name or number, you will search contacts and groups. If you search just by group, it will search for the group name and display all users that fit the other criteria. Dashboard customisation The dashboard that you are presented with when you login can be customised to ensure you achieve the best view for your specific needs. To do, this simply hover over the title of a section you would want to move and drag it to your preferred place on the screen.


11 Core Functionality These features appear on many pages and will commonly be found as the home page for a function. From here you can perform all the actions you need to create, edit or delete a service. The main pages where this layout is used are: Call Groups Users Devices Directory Search Feature A common first page for a function is the list page which shows a search feature and all the services or users that have been setup. The result shown will depend on what you search for. If you search with all fields empty, you will get a full list of services. If you edit a text field and then search, your results will change based upon the criteria entered. From this screen, you are also able to edit, delete and add. To add a new service, use the blue add button under the list.
12 Delete To delete a service, select a check box next to the service you want to delete. You can delete multiple services at one time. Once you have selected the services you want to delete, click the Delete Selected button. Edit To edit a service, you need to click on the Edit button next to the service which will take you to the same page as adding a service. For users, there are a few extra features that can be edited. Creating CSV file for Bulk Upload To do any bulk upload you need to use a csv file, which are commonly created using either Excel or notepad. If you are using Excel then it should look like the example below, with the headings on the first row and then information for each user or device on all other rows. Each device or user needs its own line and each heading needs its own column. If you are creating it in notepad then it will have a similar layout with headings on the first line, each heading separated by a comma. Then you will have each new entry on the next line. At the end of each user or device you do not finish with a comma, just leave it blank and add the next device or user on a new line. Digital signatures in call recordings To further enhance the security of call recordings on Horizon, a secure digital signature has been added to all call recording files. The application of this digital signature will happen to all files at the end of the audio file processing, and if a customer needs to prove that it has not been altered, an authenticity check can be run by the support teams. This check can still also be made if our standard storage retention limit of 3 months has been exceeded. For customers who are required to prove the authenticity of call recordings by the FCA (Financial Conduct Authority), this new feature will prove that a recording has not been altered in transit from Gamma to the customer s premise. What a digital signature will not do 1) It does not encrypt the content of the actual audio file. The file can be played back by anyone who has access to the recording in the Horizon interface 2) The assurance around the validity of the file is based around on the Gamma network security and processes. In that process, Gamma is a trusted party and its ISO 27k security processes ensures that no employee can alter/change the files How the signing procedure works The recording, in mp3 format, is signed with the corresponding metadata (present in the same file) by the AudioConverter. Then the signature is written into a special field in the mpg3 file s ID3v2 tag. N.B the metadata can be used for linking a call recording to call data stored in our reporting system (should it be required).

13 On verification, the signature is fetched and removed from the mp3. The remaining data in the file (which is equal to that before signing) is validated for the now fetched signature data. Administrative Features This section of the document will contain all features that can be performed as an administrator. Please note that call setup is discussed later in the document as this can be performed by all type of users. All these features can be found on the menu which is located on administrator screen. This is the administrator s home screen where you can direct yourself around to configure different functions. Setting up the Horizon GUI or portal As the company administrator setting up the Horizon system can be a sizeable task if a clear indication of what is required is not provided. Below we have provided a list and hierarchy of how you should establish your Horizon system:
14 Company Administration Site Management User Management Group Management Company Administration The ability to define for the company the call profiles, service options, company portal, and company voice portal amongst other key information and options. Site Management The ability to define per site the main site DDI, and additional key information such as Schedules, Music on Hold, and Call Barring User Management The ability to create users of the system and assign them a phone to activate the devices supplied. You can also assign a telephone number, decide on any call barring, and give them optional services such as Voic , controlled from the system login provided. Group Management The ability to manage incoming calls and present a profile image for you company using Auto Attendants and Hunt Groups. Administrator Roles for the Horizon Portal There are two levels of administration access for your Horizon portal. - the company administrator who can view all sites and users on the Horizon portal - the site administrator who can view all users within a particular site on the Horizon portal. The company administrator has all the administration capabilities for the company as a whole and the site administrator has the following facilities for their respective sites within the company. Manage users create and delete users on that particular site only View device management View, search, download and delete Recorded Calls for users at that particular site View site but they cannot change the site name For both types of administrator, the login credentials are sent by to the specific person.

15 User As an administrator, you can add new users to the system which will allow them to use the Horizon system. For anyone who wants to use this system they will need to have a user account set up. A user s account is active only when it has an extension and a service pack assigned to it. And only then will the user be ed with details such as username, password, PIN and URL. Add Users To start this process, you need to click Add User from the menu or on the list user page. There is an add button which will take you to the same page. On the first page, you will need to fill in all the account details including the user s username and the that login credentials should be sent to. Alternatively, you can simply put in your own and then forward it when you wish/are ready to. After you have filled in the account details you will automatically be taken to the assign number input fields. To proceed, click Create and Continue. This is where you give the user a DDI number and an extension. The number display shows all available numbers that are assigned to the site. You can also change what is displayed when the user calls another user; this is defaulted as their name.


16 Once you have assigned a number to a user, you need to select what service pack they will have and whether they can have access to voice mail. Please note that Gamma Business Communications only offer the Premium service pack. Also from this screen you can request more service packs. If you request more this way, you will need to go back and edit the user to complete all the remaining forms. The next step in adding a user is to select what permissions they can have. Below you can see what permissions you can give to a user. Always Forward To allows all incoming numbers to be forwarded to another designated number. Advance call setup will give the user more options to configure personally. If this is turned off, the administrator is still able to edit the features. Profiles give the user permission to set up 4 profiles that will perform different actions if that profile is


17 selected. For example, if a profile is set to busy then it will forward a specified number to a different number. Remote office allows users to use an external number as their own number. This allows users to use mobiles as their main number so all calls will be redirected to there, depending on what other features have been set up. The final section is to assign the user with a device. You can assign a device that has already been added or create a new device. For existing devices, you just need to select what device you would like to give them by using the drop down that displays all devices that have been added. To create a new device you will need to select what brand the device is, what model and what MAC address. The Codec in the phone converts speech from the handset to a digital format (IP packets) and vice versa. You will need to ensure that the maximum number of simultaneous incoming and outgoing calls does not exceed the bandwidth/codec combination arranged by your Communications Supplier. Bandwidth estimate for various codecs are: G.729 codec - 30 to 50 kb/s depending on contention ratio of broadband service. G.711 codec 90 to 150kb/s depending on contention ratio of broadband service. G.722 codec. This can only be used on external calls if the other phone in the call can support G.722. Usually 100 to 175kb/s will suffice depending on contention ratio in this case. Please note that if the wrong Codec is selected and there is not enough bandwidth available you may encounter poor quality external calls over all calls from your site.

18 Once actioned you can then click Finish and Edit to edit the user functions further, or Finish and Show List to view a list of all users. Adding DECT handset users There are two options when adding DECT handset users. Either one Horizon subscription is required per base station and any additional DECT handsets (up to 5) that are associated with the base station will use this single subscription, user account and phone number. Or up to 5 different Horizon users can be registered to the same base station and each Horizon user can be assigned a one to one relationship with a DECT handset. To set up users with one Horizon subscription and additional DECT handsets that are associated with the base station using one single subscription, follow the set-up process detailed above in the Add Users section. To set up the DECT solution where each handset has its own user and subscription, you simply assign a Horizon user to the base station as per the set-up process detailed above in the Add Users section i.e. go to the User area of the portal and search for the user who will have the base station/handset.

 for")
19 Then click the Phone tab and search for and select the Yealink W52P and MAC address then click Save. You then see the following confirmation screen and confirmation of the handset registration position (HRP) for the user you just assigned.


20 Repeat the process until all Horizon users you wish to associate are assigned, remembering that users are assigned to a handset registration position in the order you assign them. Once all users are assigned, you can search and filter on the DECT base station s MAC address to see the full list of user's and their HRP via the user s screen on the Horizon portal. Once a DECT base station has been assigned its full quota of users, the MAC address will no longer be available for selection under the Phone tab of the Edit User section. The device management screen will also show the list of associated users as per the below screenshot.


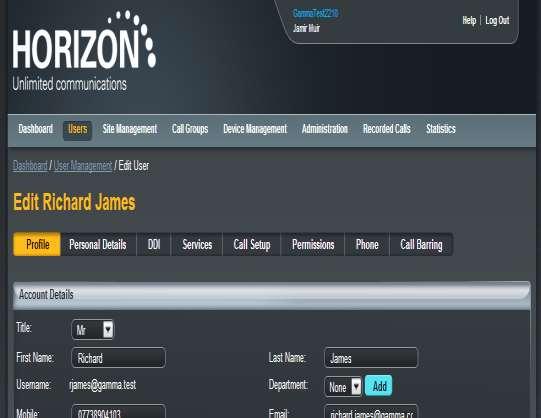
21 Edit Users Once a user has been created, they can be edited, when needed. The edit screen has the same screens as adding a user, as well as a few additional options. These include a personal details screen where you can add more information about a user, such as address. Call setup is also an additional screen but this will be discussed later in this document. The final difference is call barring which allows you to give the user fewer calling permissions than the site. Unlike adding a user, when editing, you can jump to the area you need. The first section is profile where you can change any of the core information about the user. You are also able to reset their password and their voic PIN. Their new password or PIN will be sent to the address that is registered to that user. The next section is personal details where you can add additional information about each user. This includes Address, City, State/County, Country, and Post Code.


22 The next screen is editing DDI, which allows you to change a user s number or display details. You can remove or change their number or change their extension. You are also able to change what is displayed when this user calls another user as well as change a user s service pack and optional extras. The next option is call setup which is explained later in this document. Like adding a user, you can select what permissions they have and change what phone they are using if needed. The final option is call barring which allows you to override the site call plan for each individual user. You can select these settings for when a user is making a call or transferring a call and you can turn on: Allow Freephone calls This allows users to make any calls that will not have a charge Allow national calls That will allow the user to make any call to anywhere nationally Allow international calls This give the user permission to make any international call Allow chargeable directory service calls Includes services such as any 118 or 123 Allow Premium calls Includes any number beginning 09 Bulk Upload Users As an Administrator, you can bulk upload several users. This will reduce the level of effort in the creation of a large number of users. This allows you to add multiple users to the system all at once. It should be noted that you are only able to upload users to the same site. Users can be uploaded with new devices or assigned devices that are available. Horizon provides you with download templates for uploading users with a new or existing device so that you can just edit them and then upload those files with all the details you want to upload. You are only able to

23 upload users with new devices if you are a portal administrator therefore administrators are only allowed to add users with existing devices. To upload users the first thing you need to do is select what site you would like the users to be on. This will make an extra button appear so you can view what available numbers that site has. Once you have done that you will need to create the csv file that you will upload. Once you have these spread sheets open, you will then need to create a Comma Separated Values (.csv) file with the corresponding headings shown below. These files are easily created in Microsoft Excel and if you fill in the relevant column headings you can then populate the required information. Once created if you save the file as.csv you are then able to use the Upload button to add this to the system. Once you have clicked Upload you will be taken to one of two screens. One screen will tell you the upload has been successful and show you what users you are adding. The other screen will display what errors you have in your file. If you get the error in user upload, you will need to edit the csv file based upon what the error message is. So in this example you would need to check the number that the user has been given. The first column is to tell you what row that user was created on to make it easier to update the user. To re upload the csv file click on try again and it will take you back to the previous screen. If your upload is successful, you will be presented with a confirmation screen and this will let you check that all your uploads are correct. Once you have checked all the users are as expected, click confirm and all the users will have been created and you will return to the bulk user upload home page.


24 Reset your user s password (as an admin) As an Administrator, you can reset your user s passwords to the Horizon portal. Go to Users and then "List Users" Select "Edit" on the user you want to reset the password for.

25 Select "Reset Password".


26 Administrative Tab This section covers features that are only available for an administrator to change and that will have an affect across the company. All these features can be found on the administrator tab on the main menu. From here you can get to all the features by clicking on one of the yellow buttons. Department Departments can be added to the company and then used across any site. This will just give an indication of what department a user or service is in. To Set up a Department Hover over Administration option in the menu and select "Departments". Alternatively, you can click on "Administration" and then select the "Departments" button. Enter the name of the new department and then click "Add".


27 Once your new department has been created, this will show in the list of Departments at the top of the screen. Adding a Department To add a new department to your company, you need to input the name of the department in the name field and then click Add. Once you have done this your new department has been created and will be displayed in the department box.

28 Deleting a Department Hover over Administration option in the menu and select "Departments". Alternatively, you can click on "Administration" and then select the "Departments" button. Select the Department that you are wishing to delete by using the tick-box next to it and then click "Delete Selected". Once your department has been delete, this will no longer show in the list of Departments at the top of the screen.

29 Add or remove Users from Departments Hover over "Users" and select "List Users". Select the User who you want to add or remove to/from a department and click "Edit".

30 Once the User profile has loaded up, ensure that you're on the "Profile" tab and then you can use the Department drop down menu to select if you want the User to be assigned to a department, or none at all. You can also add a new department from this screen by clicking the "Add" button. Once you've made your changes, click "Save". Call Policies Call Policies allow you to alter whether the users within your company are hidden when making an external call. You are also able to override the feature for different sites so you can have different settings for each site.


31 You can turn on blocking call name for external calls by clicking on the on/off switch and then saving it. If you would like to change this feature for a site, click on the Edit button next to the sites name. This only applies within a company. If you want to override company settings, you need to set override company call policy to on and then select block caller name to on or off. If you have it on, then you need to select whether you want the person receiving the call to be presented with the user s number or the sites number. External Directory As an administrator, you can add external directories that will be displayed on all user s directory. The end user s directory also displays all the users as well so there is no need to add them to the directory. Horizon provides three types of directory, two that are updated by the company administrator and one by end users. The below table explains the differences, who is responsible for updating/maintaining and which users' device the directory additions will be available from.
32 Directory type Who updates Overview Who the directory is available to Company directory Company admin The company directory is a list of all users within the Horizon company All users within the company External company directory Company admin The external company directory allows an admin to add external contacts to a directory that all Horizon users can access All users within the company User directory End user The user directory allows end users to add contacts unique to them The individual user only Adding single contact to the external company directory Hover over Administration option in the menu and select "Directory". Alternatively, you can click on "Administration" and then select the "Directory" button. Click "Add"

33 Type in the First Name, Last Name, Number, Extension and fields and then click Add. Adding multiple contacts to the external company directory Hover over Administration option in the menu and select "Directory". Alternatively, you can click on "Administration" and then select the "Directory" button.
34 Click "Add" Click "Download Template" to download a csv file (to be edited in Excel). Ensure that you save the document as a.csv file and not an Excel file as this will not work.


35 Locate the csv template you've just downloaded and open it up. Fill in the cells with all the contacts you wish to have in your directory. Save the file. Ensure that you keep the file as a csv file Click "Browse".

36 Locate the file where you saved it. Click "Upload"

37 Check and then confirm that you wish to import the contacts by clicking the "Confirm" button. A message will appear to confirm that the contacts have been uploaded successfully.

38 Delete contact(s) form external company director y Hover over Administration option in the menu and select "Directory". Alternatively, you can click on "Administration" and then select the "Directory" button. Locate the contacts which you wish to delete and tick the box next to the contact. Then click the "Delete Selected" button.


39 There is no prompt to say that you are going to delete these contacts, they will be deleted as soon as you click the button Confirmation message displayed


40 Corporate Directory Contact Error Administrators and end users can add contacts to their Corporate Directory, which in turn, transfers the numbers to the directory that can be accessed via the handset. If you find that a contact cannot be seen on the handset but can be seen on the Portal, it is possible that the contact details have one of the following restrictions: - A contact must not have a first name greater than 15 characters - A contact cannot contain spaces - A contact cannot contain special characters such as -,/. s If a contact has not been made visible to the phone, the icon will be displayed on the Administrators portal confirming that further validation is needed to confirm the contact as a valid entry To amend the contact, the administrator needs to simply edit their details and click the Save button which will then re-upload this amended contact to the system. Alpha Tagging It is possible to view a caller s name and number when an external call is received to a Horizon user if the caller s details are held within the Horizon corporate directory.


41 Alpha tagging is also possible on outbound calls provided the contact is within the Horizon corporate directory however it is worth noting that any outbound alpha tagging does not work on if the call is made from either an IP DECT handset or from the soft clients Subscription Centre Subscription centre allows you to manage your subscriptions. You can view the number of remaining subscriptions and add more if you wish. Select the subscription centre from the main menu which is under the administration option. You will be taken to a page where you can view how many available subscriptions you have and how many are currently being used. If you want to find out more information about a service, click on More Info next to the service. If you select the service, it will display all the features that users have and if you select one of them it will give you a small definition about the features that are available.


42 From there you can select request more or show users and if you select show users you will see a table that displays all users. If you click Request More, which can also be found on the subscription centre home page, you can add more services by clicking the plus or minus icons or just entering the number of subscriptions you want into the box. When you have completed the form, click on continue and you will be asked to confirm the order. Once an order has been confirmed the main administrator will be contacted with your request. Number Management The number management section allows you to move DDI numbers between different sites so they can be used for different features. The home page will display all available numbers your company has, showing them as a range or individual numbers. To assign a number to a site click on Assign, if you select a range it will give you the option of assigning all the numbers in that range or select individual numbers in that range. If you select a single number, it will ask you what site you want to assign that number to.
43 Once you have selected all numbers you want to assign to a site click Assign and then the numbers will be free to use for any user or service that has the site allocated. Company Voice Portal The voice portal provides an interactive voice response application that can be called by a user from any phone, to manage their services and voice mailbox, or to change their PIN. The voic menu is as follows. Welcome to your voic system, please enter your passcode, then press #. If you re not calling from your own phone please press * 1. Voice Mailbox 2. Change Express Profile 3. Record Your Name (greeting) 4. Change Call Forwarding Options 7. Change Hoteling Options (Hot Desking) 8. Change Passcode 9. Exit Please enter your new passcode, then press # The attached document has the full menu listing for the voic portal. Horizon Voic Map.pdf For this feature to work across a site then the site DDI needs to have been set up. To set up a DDI for a site you just need to go to site management and select a site and then there will be a box that says Site DDI. To set this

 application that can be called by any user, from any phone.")
44 up you need to give the voice portal a site and then assign it a free number from that site, even though the voice portal is set to a site, all sites are still able to access it. You are also able to give the voice portal an extension. To use the voice portal, either press the message key on your desk phone, or if you are outside the office, dial the Voice Portal DDI then enter your extension number followed by your 6-digit voice portal passcode. Set up Company Voice Portal The Company Voice Portal provides an interactive voice response (IVR) application that can be called by any user, from any phone. The IVR allows the user to manage their services and voice mailbox, as well as changing their pass code if needed. For this feature to work throughout a site, the site DDI needs to have been setup under the Site Management section. Don t forget that for voic to work, the company voice portal must be set up first. To setup the Company Voice Portal you simply need to assign it to a site, and select a free number, whilst giving it an extension if required for easier internal access. Select "Administration" and then "Voice Portal". Select the Site you want to set up the Company Voice Portal for.


45 Select the number you want to have for the Company Voice Portal. Then enter the extension number you want for the Company Voice Portal and click save. Set up Voic for a user Login to the Horizon portal and from the user s menu, select list users.
46 Select the user that you want to set up Voic for and click "Edit". Click on "Services" and ensure that you have got ensure Voic services left, and then tick the tick box.

47 Click "Call Setup" and under the Incoming Calls header, click "Settings". From here you can select when you want to send calls to your voic (i.e. when you are busy or when you do not answer). If you want to adjust any of the Voic settings, look at the Amend Voic Settings section. Now select "Call Handling" and then you can set what you'd like the call to do. Please note that Horizon does not display voic s in its system, but enables a voic to function or access via the Horizon devices. Each voic message is stored for 30 days and will then be automatically deleted. This applies to all messages left on the voice portal, including saved messages. If you wish to save certain messages, we recommend using the Notification Settings" when editing a user which will send an with a file of the voic by selecting "Notify Me at the address".
48 The maximum amount of storage capacity allowed for each mailbox is 100 minutes and after this, the caller will be unable to leave a voic message. The maximum length of any one message is 2 minutes. Change users Voic Password Login to the Horizon portal and from the Users menu item, select "List Users". Select the user that you want to change the user password for Voic and click "Edit". Select "Call Setup" and then click the "Voic Settings" link and then "Change Voic Passcode".

49 Setup Voic f rom Handset It is possible to setup voic by using the handset including personalised name greetings, no answer greetings and busy greetings. This can apply to both the user s DDI and a group DDI. Firstly, dial the company Voice portal (either press the envelope icon, dial the extension or full DDI) The Voice Portal will ask for an ID - this is the user or group's extension number The Voice Portal will now ask you for a password If the user does not know their password, then this can always be reset in the "Edit User" tab on the Horizon Portal For a hunt group the passcode can be manually set in the "Edit Hunt Group" page under the Voic tab. If the user is accessing this voic box for the first time, then the Voice Portal will ask the user to change the passcode. The Voice Portal will then proceed to ask the user to record a personalised name greeting. The user must go through this to proceed. After this is complete, the user should be presented with this message - "You are now ready to use your voic system. To access your voice mailbox, press 1". Press 1 to listen to your messages, to change your mailbox busy greeting, press 2 and to change your mailbox no answer greeting press 3 Finally, you will need to specify on the Horizon Portal what message you would wish to use during "No Answer" and "Busy" actions Please Note: Voic s have a 30-day limit and will then be automatically deleted. This applies to all messages left on the voice portal, including saved messages. If you wish to save certain messages, we recommend using the "Notification Settings" when editing a user to send an with a file of the voic by selecting "Notify Me at the address".

50 The maximum amount of storage capacity allowed for each mailbox is 30 minutes and the maximum length of any one message is 2 minutes. The user can skip to the end of the voic message by pressing 6. Amend Voic Settings You can amend the audio file that is used on the Voic announcement and what address you would like to use to be notified when you have a voic . Login to the Horizon portal and from the Users menu item, select "List Users". Select the user that you want to set up Voic for and click "Edit". Click "Call Setup" and under the Settings header, click "Voic Settings".
51 Voic Mailbox Options Key Action 1 Voic Box 2 Change Express Profile 3 Change Greeting Name 4 Change Call Forwarding Options 7 Change Hotelling Options 8 Change Passcode 9 Exit When playing a voic message Key Action 1 Will rewind the message 2 Will pause/play the message 3 Will skip 5 seconds of the message 4 Play the message again 5 Play the message information (date/time/number called from) 6 Skip to the end of the message


52 Company Profile The company profile page displays basic information about the company. This page is editable so you can update the company administrator if necessary. It will also display how many users you have registered. To edit any of the information simply edit the text boxes, click Save and your company information will be updated. Groups There are several groups which provide a variety of features to the users. To configure a group, you need to click on the yellow button that is under the group header you want to modify. Auto Attendant Auto attendant allows callers to be automatically transferred to another person without the intervention of an operator or receptionist. When you are setting up an auto attendant you select what options will represent each keypad number and then record a message giving a prompt for each keypad option. There is no limit on the number of Auto Attendants; however, there is a limit of up to 3 levels. When creating an auto attendant, you need to select a site which will responsible for this service. All users across all sites can use an auto attendant. Once you have selected a site, you will need to fill in the details about it, such as name, username and a department. Once you have completed the details, you need to plan the dialling scope.


53 When completing the account page, you will need to select the menu options that handle business hours and holiday settings. To set up, select one of the different menus either business hours, or out of business hours. Then the business hours and holiday section pop up. You can select a schedule that has already been created by selecting the schedule in the drop down, or you can create a new schedule by clicking the plus symbol. To see how you create schedules see the schedule chapter. Once the correct schedule is selected, you need to fill in the menu options. When selecting one of the options, enter a number you would like the call to be forwarded to. When you have selected all the options, click Continue for the next step.
54 The options which can be implemented here are: Transfer with Prompt NOT CURRENTLY AVAILABLE This will allow the user to hear a recorded message played once they have selected a menu item, i.e. please hold whilst we connect you. Transfer without Prompt This will forward the call to the required destination once a menu item is selected. This destination could be a user, call group i.e. hunt group or new auto attendant. Transfer to Operator This will forward the call to the Company Operator as defined under the Company Management section. Name Dialling This will allow the caller to type in a name based on your dialling scope through the Horizon handset, i.e. my name Chris would be typed from the handset as Extension Dialling This will allow the caller to type in a user s extension, allowing the call to connect to this extension based on your dialling scope. Repeat Menu This option will replay the call recording associated to this auto attendant to effectively replay the menu items to the caller Exit This option will effectively terminate the call on behalf of the caller None This option will mean the menu option will take no effect on the call routing of the call Once you have set this up for Business hours then you would need to click on the After Hours tab which will allow you to define this also. Clicking on the Continue button will then allow you to define a number for the auto attendant, extension for internal call routing, and display name for presentation once the call is delivered. The next section is to assign your auto attendant a DDI number, an extension as well as a caller display name. You will need to select an available number that is attached to the site responsible for the auto attendant. The caller display will be displayed on the device receiving the call.

55 The final page to establish your auto attendant is to upload the audio file to be played when the call is connected. This step can be bypassed if recording your message via a phone. To upload this, you ll need to record a file in the following format:.wav format Encoded with CCITT u-law Formatted at khz, 8 Bit mono, 7 kb/sec Recording an Auto Attendant via my phone After setting up your Auto Attendant without a file recording you can record an Auto Attendant message through a phone allocated to the same site as the Auto Attendant. To action this, you must first setup the Company Voice Portal pass code which has now been added as a definable option under the Administration/Voice Portal option.

56 Prior to recording an Auto Attendant through your phone please note that you can only do this from an internal phone and when recording for an Auto Attendant that is on the same site as the phone you are calling from. In some cases, you may need to ensure all Auto Attendants are assigned to a single site where your voice recording resource is located, if looking to manage multiple multi-site Auto Attendants. To access the Company Voice Portal to record a message for the required Auto Attendant you: 1. Dial the Company Voice Portal number as established for the Company 2. At the prompt enter the Voice Portal 4-digit extension for the Company Voice Portal 3. Enter the pass code defined 4. Press menu option 1 to change the Auto Attendant greeting 5. At the prompt for the Auto Attendant enter the 4-digit extension of the Auto Attendant you would like to record. 6. Press 1 to record business hours greeting 7. Press 2 to record an out of hours greeting 8. Once recorded looked to review prior to saving 9. Test the Auto Attendant by calling the incoming number and routing to test that this has been recorded correctly and adjust through points 1 8 if required. Call Pickup Call Pickup allows users to answer any ringing call within their call pickup group. This function can only be set up by the Administrator. This feature can pick up calls in a Call Waiting state, i.e. when a user is on the phone, as well as when a number is physically ringing. Each user is only able to be in one call pickup group and these can be created through the Call Pickup button. To pick up a ringing call, users dial *98 which connects them to the caller. If more than one line in the call pickup group is ringing, the call that has been ringing the longest is picked up. Each user is only able to be in one call pickup group. There is also Directed Call Pickup, which is the Horizon Shortcodes *97 followed by an extension number (i.e. *973354) will direct call pick up to extension 3354.

57 A call pick up group is created though the group option and can only have users from the site it is created in. Call pick up is only available by Site only. Set up a Call Pickup Group Hover over Call Groups option in the menu and select "Call Pickup". Alternatively, you can click on "Call Groups" and then select the "Call Pickup" button. Click "Add" Type in the name of the Call Pickup group and select the relevant site.

58 Once you've selected the site, the "Select Users" table will auto-populate all the users listed against that site. Select the users you wish to have access to Call Park and then click "Add Selected". Click "Create".


59 You'll get a message to confirm if the Call Pickup group has been created successfully or not. If it has, it will tell you that you have "x" amount of subscriptions remaining. Add or remove users from Call Pickup Group To add or remove users from a Call Pickup Group, hover over Call Groups option in the menu and select "Call Pickup". Alternatively, you can click on "Call Groups" and then select the "Call Pickup" button.

60 Select the Call Pickup Group which you wish to add/remove users to and click "Edit". Select the Users you wish add to the Call Pickup Group and click the "Add Selected" button. Once you've done this click "Save".

61 To remove a User(s), click the "x" next to the User you wish to remove and then click "Save". Delete Call Pickup Hover over Call Groups option in the menu and select "Call Pickup". Alternatively, you can click on "Call Groups" and then select the "Call Pickup" button. Select the Call Pickup Name you wish to delete and click the "Delete Selected" button.


62 Click "Confirm" Confirmation will appear on the Call Pickup page.

63 Call Parking The call park service allows a user to hold a call for an extended period. During this time, the user can freely make and receive other calls and invoke other features without limitation. When notified, any user can retrieve the parked call from any extension. A call park group is site specific and each user can only be in one call parking group. When delivering, a call using the call park feature, it will show who originally parked the call and it will show the incoming call as call park via user. To park a call, you need to enter *68 and then enter the extension of the call you would like to park. Then you will be able to use your phone as normal. To retrieve the parked call, enter *88 and then you will be reconnected to the call. Set up Call Park Settings Hover over Call Groups option in the menu and select "Call Parking". Alternatively, you can click on "Call Groups" and then select the "Call Parking" button. Click "Add"

64 Type in the name of the Call Parking group and select the site which you wish to do this against. Call Parking is by Site only. Once you've selected the site, the "Select Users" table will auto-populate all the users listed against that site. Select the users you wish to have access to Call Park and then click "Add Selected".

65 Click "Create". You'll get a message to confirm if the Call Parking group has been created successfully or not. If it has, it will tell you that you have "x" amount of subscriptions remaining.

66 Edit Call Park Settings Please note that Call Park settings cannot be changed between Sites, and are created at Company level. To edit call park settings, hover over Call Groups option in the menu and select "Call Parking". Alternatively, you can click on "Call Groups" and then select the "Call Parking" button. Scroll to the bottom of the page. The settings you can change are: Display parked called to user for - range from 2 to 15 seconds.

67 Recall user who parked call after - free text. Click "Save". Delete Call Park Hover over Call Groups option in the menu and select "Call Parking". Alternatively, you can click on "Call Groups" and then select the "Call Parking" button. Select the Call Parking Name you wish to delete and click the "Delete Selected" button.


68 Click "Confirm" Confirmation will appear on the Call Parking page.

69 Add or remove users to Call Parking Group Hover over Call Groups option in the menu and select "Call Parking". Alternatively, you can click on "Call Groups" and then select the "Call Parking" button. Select the Call Parking Group which you wish to add/remove users to and click "Edit". Select the Users you wish add to the Call Parking Group and click the "Add Selected" button.
70 Once you've done this click "Save". To remove a User(s), click the "x" next to the User you wish to remove and then click "Save". Hunt Groups Horizon can establish a variety of hunt groups to route calls to multiple locations when an incoming call is received. Each user will be called in order of the group until a free user is reached and this process can be done in one of 5 ways.

71 Circular o Sends incoming calls to users per their position in a list. After a call, has been send to the last user on the list, the next call is sent to the user at the top of the list. Circular will continue the order even when a different call comes in. Regular o Sends incoming calls to the next available user in the hunt group. Regular hunt group will re-start from the top when a new call is made. Simultaneous o Sends incoming calls to all users in the group at the same time. Once the call has been answered, the remaining calls to other users are released. The maximum number of users per hunt group is 15 in this case Uniform o Sends the current incoming call to the user who has been idle the longest. After a user has answered a call they move to the bottom of the queue Weighted o Assign calls to users per percentages you assign on the Hunt Group When creating a hunt group, you will need to complete all the account information. This will include what site the hunt group is based on, even though it has a site, all users can be added to it. You will also need to assign the hunt group with a name, a username and a caller ID. The caller ID will be what is displayed on the device of who makes the call. Once you have completed this screen click Continue to carry on making the hunt group. When the next page loads, you will get a feedback message that will tell you how many hunt group subscriptions you have left. Create New Hunt Group Once you have created the hunt group you will need to select what options you want the hunt group to have and this is where you select what ring order they will have. To select a ring order, simply click on what option you would like. If you highlight over an option, it will give you a description of what that option will do. You are also able to select what happens when there is no answer. This includes selecting when it skips to then next agent and you can select anywhere between 1 20 rings. If you don t have this feature activated it will skip to the next agent if the


72 previous contact rejects the call. You are also able to select whether you want to forward to another number after x rings long. This allows you to send all calls to a new number in or outside the hunt group. Once you have selected all the options, you will need to select what users you want in the hunt group. Depending on what option you have selected, this screen may have a few changes. Firstly, to add a user you will need to search for the user you want to add in the left-hand search box, then select the user and click Add Selected. You can remove a selected user by clicking on the cross that is connected to their name. For circular and regular hunt group this is where you select what order you want them to ring them in. To change the order, click and hold the user and then drag them to the position you would like them to be in. For the weighted option, you will get a slider attached to all users to select what percentage you want them to have. To select what percentage, you want to assign them click on the slider and then slide the bar to whatever percentage you would like the user to be on. The total needs to add up to 100%.

73 The final step in creating a hunt group is to assign a contact number. This is the number that people will dial to ring the hunt group and activate the ring option. You need to select a number from the site the hunt group is created as well as an extension. Please note that if you would like to add a schedule to a hunt group, you will need to ensure that you have Group Advanced Settings subscriptions available.

74 Call forwarding for Hunt Group and Call Queue Groups This feature allows you to configure a night service option for Hunt Groups and call queue groups. Your account does need to have a spare Group Advanced Settings subscription and the functionality can be activated via the Horizon GUI at any given point. For example, if the receptionist is going on a break/lunch or when they leave the premises at the end of the day. Call forward will forward to the number selected. Schedules will work as usual until night service is invoked. A Hunt Group or Call Queue Group can only have a Schedule or Call Forward activated; they cannot have both Call Forwarding will always forward the call to the number selected, where "Schedule" will only forward the call during the active schedules. Red means that call forwarding is inactive. Once you're in Horizon, go to "Call Groups" and select "Hunt Group" if you want to apply Call Forward to a Hunt Group, or "Call Queue Groups" if you want to apply this to a call queue group. Select the Hunt or Call Queue Group that you're wanting to set up Call Divert for by clicking the "Edit" button that relates to that Group.


75 Once you're in the Edit Hunt Group or Edit Call Queue Group screen, select "Advanced Settings". To apply a Call Forward to the Hunt/Call Queue Group, we need to Enable Virtual Package. This will then allow you to apply Call Divert by giving you the "Call Forwarding" and "Schedule" options to activate and edit. If this is your first time here, you'll need to click Edit first to set either option up.

76 From here, select "Use the following schedule". You should apply the out of hours schedule in the "Closed Hours". With this you're telling Horizon what times you want it to forward calls. "Additional Routing" allows you to set up another schedule to run alongside the main schedule, such as Bank Holidays. If you haven't set up a schedule yet, you can use the "+" icon to set up a new schedule. Enter the telephone number you want to forward to in the "Forward To" text box. Enter the telephone number you want to forward incoming calls to in the "Forward To" text box. Note: on the Hunt Group list: Green is active. Call Schedule is never shown Red status indicates Call Forwarding is inactive


77 Please note that forwarding cannot be implemented via a button on the Horizon handset currently. Call Waiting for a Hunt Group You are also able to turn on call waiting which will mean if a call is forwarded to someone already on a call it will display they have an incoming call on their device. From the Call Groups menu option, select "Hunt Group". Select the Hunt Group that you wish to edit and click on the "Edit" button.
78 Select "Options" and then scroll to the bottom of the page. Here you can switch Call Waiting on or off. To set up a user with call waiting From the Users drop down in the menu, select "List Users". Select the user you wish to set up Call Waiting for and click "Edit".


79 Select "Call Setup" and then with the menu populated on the left-hand side, select "Settings" under In Call Options. From here, you can either Enable or Disable call waiting. Applying a Schedule to a Hunt Group This applies when applying a schedule, to either a hunt group that you have already created or one that you want to create. Please note that if you are want to use a Hunt Group with a schedule then you will need some "Group Advanced Settings" licenses. Go to "Call Groups" and select "Hunt Group".


80 Select the Hunt Group that will have the schedule applied by clicking the "Edit" button that relates to that Hunt Group. Once you are in the Edit Hunt Group screen, select "Advanced Settings". To apply a schedule to the Hunt Group, we need to Enable Virtual Package. This will then allow you to apply a schedule by giving you the "Schedule" option. Click "Schedule".


81 From here, select "Use the following schedule". You should apply the out of hours schedule in the "closed hours". With this you are telling Horizon what times you want it to forward calls. Additional routing allows you to set up another schedule to run alongside the main schedule, such as Bank Holidays. If you have not actually set up a schedule yet, you can use the "+" icon to set up a new schedule. To implement a call schedule against a hunt group, you simply need to Edit the schedule you wish to implement by defining the closed hours and additional routing. All other times not defined will be classed as Open and will route the call per the programming given. Once defined you can also now easily switch between call forwarding and call scheduling for immediate implementation of different routing. Setup Voic for a Hunt or Call Queue Group From the Call Groups menu item, select either Hunt Groups or Call Queue Groups.
82 Select the Hunt or Call Queue Group that you want to set up Voic for and click "Edit". Click on "Voic " from here you can edit the Settings, and if you want to enable voic .
83 Listening to your Hunt Groups Voic If you would like to access the Horizon hunt group mailbox from a Horizon phone on the same company, take the following steps: Dial the extension of the voice portal Press star '*' Enter extension of the hunt group Enter voic passcode for the hunt group The process is slightly different if you dial the Voice Portal DDI externally. You will be prompted to enter the extension number as soon as you dial the voice portal and there is no need to press '*'. Instant Conference Group This allows you to set up a conference with up to 15 different people all from remote locations. You may choose to use this to create incident bridges or similar instant conference groups for your company. The conference group can be started by any user calling the conference number, which will then trigger calls to other group members. To set up an instant conference group select it from the group home page and you will be taken to the list page, from there click the Add button and it will start the process. The first section is to complete all the account settings as this is the standard information for the group. You need to select what site you want the group to be on, but all users from all sites can still be in the group as it is not site specific. For the group details, you need to select what you want it to be called, what user name you want it to have

84 and what department you want it to be in. You also need to give it a caller ID as this is what will be displayed on the devices receiving a call. The next section is to input what options you would like. This allows you to set up a maximum time before a call is cut out. This will allow you to get calls to cut out if they have not been answered so the phone does not keep ringing until the conference call has ended. The next step will allow you to add the numbers you want within the conference group. You can input a contact number into the text box and then click Add, or search your directory for a number. The final page is to assign a number and an extension for people to call the conference group. You need to select an available number from the site you assigned the group to.


85 Editing a Conference Group From the Call Groups drop down in the menu, select "Instant Conference Group". Select the "Edit" button that corresponds to the Instant Conference Group that you wish to edit.


86 New Call Barge Functionality The Call Barge feature allows an assigned user to connect into an existing call and setup a Three-Way Call. There will the following sets of users: - Managing Users those users who can barge-in on calls - Monitored Users those users who are configured to be monitored The administrator will be able to create one Call Barge group per company and assign as many users as required into each Call Barge user category. A Call Barge user can be both a Monitored and a Managing User and it is not site specific. The administrator can find the Call Barge set up screen under the Call Groups menu: Once selected they will be presented with the following screen Here the administrator can select and add users into the relevant category.

87 To barge into a call, the "Managing User" will need to key *33 plus the extension number of a Monitored User. When the warning tone is activated, the monitored user will hear a tone during the barge-in of a managing user and when deactivated the managing user will join the call silently. Please note this will override the status of the bargein intrusion tone set up via a Call Centre Supervisor Client and vice versa. In addition, the default option is On. Account Options Select Numbers Assign Numbers Under the Account option, you can change the name, department and caller ID. Under the Options option, you can change the Maximum Call Time for Unanswered Calls. Under the Select Numbers option, you can change the CLIs that are assigned to the Instant Conference Group. Under the Assign Numbers option, you can change the current number and extension numbers. Site Management The site management page allows you to manage options specific to just a single site. When you first go to the site management page you will need to select what site you would like to manage. Once you have selected what site to edit, you will be taken to a page where you can select what feature you would like to configure. From this page, you are also able to assign a site with a DDI. Click on Current Site DDI and a small box will appear and then you can select an available number from the site. You are also able to go to the create user page or create group page to quickly redirect yourself. To set up one of the other features just click on the yellow button and you will be redirected to that page. On each one of those pages you can select a button on the top right corner that will take you back to this page.


88 Setting up the Site DDIs As the company administrator, you can set the Company Site DDI by selecting on the Current Site DDI Choose One tab. Once clicked you can then select a Site DDI from the list of numbers allocated to your company s profile, before clicking on the Update button to implement this for this site. When this has been set within the main site management screen you will be able to see the current site DDI and edit this as required by clicking on the tab Schedules The schedule allows you to define an event or series of events so that some of your features can be different depending on the time, such as opening and closing hours. You can make these events a regular occurrence or you can setup Holiday events to allow for different routing during different times of the year. You can set up time and holiday events so that you can have one recording playing during work time and another being played after. You can create recurrence of an event so you only need to create your work hours once and


89 then duplicate it for every working day. You can set events to daily, weekly, monthly or yearly recurrence and this allows you to set up for such events as Christmas and just keep the same settings. The schedule home page displays all the events that you have created for this site. On the calendar, it displays all the events and each instants of the event and then under the calendar, it displays all the schedules you have created. For example, if you create a schedule called bank holiday at the bottom it will just display bank holiday and what colour you have assigned to it. On the calendar, it will display a coloured box for each bank holiday. The calendar is being displayed in the month view but you can change it to week or day view. Using the arrows in the top right corner you can move the calendar back and forward so in month view it will take you to another month, then you can select on today to return to today s date.


90 To create an event, using work hours as an example, you click on Add New and you will get another window open where you can create the schedule. You need to give the schedule a name and select whether it is holiday or time, in the instants of working hours, it would be a time. Then you need to select a colour and then click create. You will then be redirected to a new event window where you can create your new event. This window is where you can select the event and what recurrence it has. You will need to input the name of the event, and whether it is all day event. If you uncheck this box you will be able to input a time that you want the schedule to have, so in our example you would use 09:00 17:00. You are also able to select the date it should start on if it recurs, if it doesn t then select the date you want the even to occur on. If you select recurrence one of four windows will be open. Daily This is the daily recurrence window and you can select how often it recurs as well as how long until it stops recurring. Weekly This window allows you to setup weekly recurrence and you can set up on what days you want it to recur on. You can also set up how long until it stops recurring Monthly This is the monthly recurrence and you can set whether you want an event to occur on a specific date or on a specific day in the month (second Friday). You are also able to set up the duration of the recurrence. Yearly The yearly window allows you to set recurrence on a yearly base. You can select what date you would like the event to recur on, or by date (the first Wednesday of every April). You are also able to set up for how long the recurrence lasts for. Once you have selected all the details you wanted for a schedule and you have saved the event, you will be able to view the event on the calendar. If you want to edit an event, you can either select the schedule the event is under. You are also able to click on the individual event you want to update and this will open the event directly. Please note the following when creating a schedule: An All-Day Event is from 00:00 until 23:59 on the selected day.

91 To define hours (such as office hours), untick the "All Day Event" box and define the time. Also, select the "Weekly" option and tick all the days you wish to have selected. Recommended if you want an out of hours schedule - select all days apart from Saturday, as Monday morning would need to be covered. Example Schedule, Out of Hours (Weekends and 17:00 until 09:00 weekdays) As we are choosing the times when calls will route to your defined alternative out of office number, we need to specify out of office times. To do this, you'll create a schedule as you would do above. Then, when you are setting up the Event of this schedule, you should ensure that All Day Event is un-ticked and then select "Weekly". Select all days except Saturday. The start time should be 17:00 and the end time would be 09:00. Sunday has been selected as cover would be needed on Monday morning until 9am. This now covers all days outside of business hours except for Saturday and Sunday until 17:00. Go back to Events and then select "Add New". Enter a name for this event, ensuring that "All Day Event" stays ticked and do not change the start or the end date. From the "Recurs" drop down, select "Weekly" and then select the Saturday and Sunday tick boxes and click "Create". These schedules can now be used to create an out of hours voic . If you create a hunt group with nobody assigned to it, select "Forward all calls to voic " under the voic settings, and then forward the out of hours calls on your main hunt group number to this hunt group, this effectively creates a dedicated out of hours company voic . How to set up a schedule Once in the Horizon GUI, select "Site Management" Select the site which is to have the schedule Select "Schedules"

92 You always create your schedules as "Open", so make sure that the "Open Hours" tab is selected and click "+ Add" Name the Schedule something memorable. The schedule needs to be set to "Open", even if you are setting up a schedule for outside of business hours. Select the colour you would like to assign to the schedule for appearing on the calendar and then click "+ Create".

, untick the \"All Day Event\" box and define the time. Also, select the \"Weekly\" option and tick all the days you wish to have selected.")
93 Now you can Add Events to the schedule, therefore building the schedule. Name the event and if the event is all day, then keep this ticked. If it is between two times, untick the All-Day Event option and this will give you extra options under the Start and End Date fields which allows you to set the time. Select how often you want the event to occur and then click create. Please note the following when creating a schedule: An All-Day Event is from 00:00 until 23:59 on the selected day. To define hours (such as office hours), untick the "All Day Event" box and define the time. Also, select the "Weekly" option and tick all the days you wish to have selected. It is recommended if you want an out of hours schedule - select all days apart from Saturday, as Monday morning would need to be covered. Example Schedule showing Out of Hours (Weekends and 17:00 until 09:00 weekdays) Your first event should cover week day evenings, in this case from 17:00 today until 09:00 tomorrow. We want this to recur every Monday, Tuesday, Wednesday, Thursday, Friday and Sunday and to never stop recurring.


94 Select "Add" when on the Events screen. For your second event, you need to cover from 00:00 until 09:00. We again want this to recur every Monday, Tuesday, Wednesday, Thursday, Friday and Sunday.

95 We have left all day Saturday and Sunday from 09:00 until 17:00 that do not have a schedule, so again we create a new Event For Saturday, set up an All-Day Event, which is from 00:00 to 23:59 to recur every Saturday.

96 For Sunday, set up an event to run from 09:00 to 17:00 to recur every Sunday. Please note that the schedule for Auto Attendants is slightly different, and this section of the page is only to serve as an example


97 Editing Schedules The schedule allows you to define events so that some of the Horizon features can be different depending on the time and/or day, such as opening and closing hours. You can make these events a regular occurrence or you can also set up Holiday events to allow for different routing during different times of the year. If you have already got schedules set up which you wish to edit, follow the below guide. Add Auto Attendant Once in the Horizon GUI, select "Site Management" Select the Site of whose schedule you want to edit. Select "Schedules". Select "Edit"

98 "Schedule Setup" will allow you to change the name, type and colour of the schedule. "Events" will allow you to delete an event by selecting the schedule's tick box and then press "Delete selected", or add a new schedule by clicking Add New.


99 "Add Event" will allow you to add an event to the schedule. Deleting Schedules The schedule allows you to define events so that some of the Horizon features can be different depending on the time and/or day, such as opening and closing hours. You can make these events a regular occurrence or you can also set up Holiday events to allow for different routing during different times of the year. If you have already got schedules set up which you wish to edit, follow the below guide. Add Auto Attendant Once in the Horizon GUI, select "Site Management" Select the Site of whose schedule you want to edit. Select "Schedules". Select "Edit" Authorisation and Account Codes Authorisation and accounts codes allow you to set up the need for authorisation on outgoing calls or the option of inputting an account code with outgoing calls. Authorisation and account code are only used for outgoing calls. You are only able to have one of these features active at one time and they need to be set up by the Administrator. Please note that if an authorisation code is active, the functionality applies to all call types except 999 calls which can still be placed without the use of the code. To enable this feature, click "Site Management".
100 Select the Site which you wish to apply the Account Code to and click the "Manage" button. Click the Authorisation Codes button. In the Code Length field, select how many digits you want the Authorisation Code to be (range is 2 to 14). Click the "Enable" button.
101 In the Authorisation Codes table, select "Use". Click "Manage Codes" In the Add Code table, type in your desired code and a description to help you remember what the code is. Click the "Add" button. Click "Back".
102 Click Save. Manage Account Code Users From this screen, you can put users into one of two groups; Mandatory or Optional. Click "Site Management".

103 Select the Site which you wish to change the users for the Account Code to and click the "Manage" button. Click the Authorisation Codes button. Click the "Managed Users" button. Select the users you want to be added to the appropriate list and click the relevant "Add Selected" button for Mandatory or Optional Users.

104 To remove a user from a list, click the "X" that appears next to the user s name. Click "Save" once you've made your changes.


105 You need to select the on/off switch so it is on, and then select how long you would like the code to be. To input a code, you need to enter what you would like the code to be and a description for the code, and then click Add. To configure which option you would like and select what users you want in the group, you need to click on Manage Structure. This will allow you to select which type of code structure you want active and then manage users. Switch to Account Codes From this screen, you can switch to Account Codes as only one code structure may be used at a time. When you switch from one structure to another, any selected users will be preserved. Click "Site Management".
106 Select the Site which you wish to switch to Account Code for and click the "Manage" button Click the Authorisation Codes button.

107 Click the "Switch to this" button. Once this has been switched, the Account Codes button will now show as "Manage Users" and the Authorisation Codes button will show as "Switch to this".


108 Account Code Using account codes enables the tracking of calls made outside the company by prompting users for an account code. For account code, you have two different types of users: ones that need to mandatory enter the account code and others who have the option of adding the code. When making a call, if users are in the mandatory group they will be asked to enter the account code before the call is connected. If the user is in the optional group, you have the option of making calls which are not monitored. For the account code to be tracked the user will need to enter *71 then the account code they are using and finally the number they would like to ring. To add a contact to one of the options, you need to select what user you would like to add and then click the Add Selected button which is associated with the group. Set Up Account Code Click "Site Management".
109 Select the Site which you wish to apply the Account Code to and click the "Manage" button. Click the Authorisation Codes button. In the Code Length field, select how many digits you want the Account Code to be (range is 2 to 14). Click the "Enable" button


110 In the Account Codes table, select "Use". Click "Manage Codes" In the Add Code table, type in your desired code and a description to help you remember what the code is. Click the "Add" button.

111 Click "Back". Click Save. To delete a code, you tick the box next to the code and then click "Delete Selected". To manage the users that need to dial the code, go to the Manage Account Code Users section

112 Switch Off Account Codes Click "Site Management". Select the Site which you wish to manage the Account Code for and click the "Manage" button. Click the Authorisation Codes button.

113 Switch the "Enable Codes" button to "Off" and click "Save". Authorisation Code Authorisation codes are used to perform authorisation of calls made outside the group by prompting users for an authorisation code. Calls are not connected unless a valid code is entered. All users within this group will be asked to enter the authorisation code before the call is connected. To add a contact to the group you need to select which contact you would like to add and then click Add Selected. Switch to Authorisation Codes From this screen, you can switch to Authorisation Codes as only one code structure may be used at a time. When you switch from one structure to another, any selected users will be preserved. Click "Site Management".
114 Select the Site which you wish to manage the Account Code for and click the "Manage" button. Click the Authorisation Codes button. Click the "Switch to this" button

115 Once this has been switched, the Authorisation Codes button will now show as "Manage Users" and the Account Codes button will show as "Switch to this". Call Policy Call policy allows you to override the company s policies for each individual site; this allows you to vary the activation of blocking callers name for external calls for each site. To do this you need to set override company call policy to on and then set the setting to whatever you would like it to be for the site you have selected. You are only able to select the display site phone number if the site DDI has been set. Call Barring You can set call barring for each site. This allows you to change whether a site can make certain types of call and in what instants they can be transferred.

116 You can edit several different features; you activate these features by clicking on the on/off switch: Allow Freephone calls This allows users to make any calls that will not have a charge Allow national calls This allows users to make any call to anywhere nationally Allow international calls This allows users to make any international call Allow chargeable directory service calls This allows users to dial services such as any 118 or 123 Allow Premium calls This allows users to dial any number beginning 09 Allow 084 calls Allow 087 calls This allows users to make an 084 call This allows users to make an 087 call Hot Desking This feature allows the user to use any phone and not just the one on their desk i.e. it allows users to switch between desks, based on their own needs. A hot desk needs to be set up on your site by the administrator so that the device can be assigned to a user. If you use the Polycom 450 and 650, when hot desking the extension will appear as the guest's extension number. Every other handset it will still appear as the host's extension number, even if the guest is logged in Setup Hot Desking for a Site By design, all users are added to the Horizon Platform as "Hosts" and "Guests". This provides the ability for all devices in all locations under one enterprise to be used in a hot desk environment. These are:
117 Host - when this is designated to a user it allows other users with the "Guest" service assigned to them to associate their service profile with this user. Guest - when this is designated to a user it allows the user to associate their service profile with other devices that are assigned as a Host. By design, all users are added to the Horizon Platform as Hosts and Guests. This provides the ability for all devices in all locations under one enterprise to be used in a hot desk environment. For security purposes - there will be an option to disable a user from being used as a host device. To disable a user, please see the Disable and Enable Hot Desking section. You can set up pre-configured hot desks which a user can come in and use as they need. To create a hot desk, select "List Users" from the Users drop down in the menu Select the user whose handset you want to be set up for Hot Desking and click "Edit". Click on "Profile" and then under the "Settings" table, ensure that Enable Hot Desk is set to "Yes" if you want this handset to be a Hot Desk, or "No" if you don't. Click Save.

118 Disable and Enable Hot Desking At Admin level, the Host can also force a disassociation with the Guest and also stop their handset from being used as a host. To do this, you select "Users" from the menu. The "Profile" of the user includes the option to "Enable Hot Desk". Select Yes or No based on what you are wishing for, and click save.


119 Create New Hot Desk Once you have completed these settings click Continue and then you will be moved to the next page where you will need to assign the hot desk with a number and an extension. You are also able to select what will be displayed on the phone and in the directory by changing the caller id. The final section is to assign a device to the hot desk; you need to select what vendor it is, what model and what codec it is using. You will also need to input the mac address for the device. If you have available device, then you can assign that device to the desk.
120 Login to Hot Desk on Horizon User Administrator From the Users drop down in the menu, select "List Users". Select the user whose handset you want to be hot desk and click "Edit".


121 Click on "Call Setup" and then under the "Settings" table, select "Hot Desk". To search for a hot desking phone, you can use on the hosts First Name, Last Name, Extension and MAC address. Once you've clicked search, the available Hosts are displayed below Host. To make the association, you simply click on the blue tick next to the Host you want to hot-desk with. Once you've selected which Host you want to hot-desk, the next page gives further detail on the association. From here you can see what the current hot-desk device is, how long you've been connected and how much time you've got remaining before you are automatically logged off.
. You can also end the hot-desking session here by selecting \"Stop Using\".")

122 You can "Enforce Association Limit" on this screen as well, which will log you out automatically after the time that you set (this is a minimum of 1 hour and a maximum of 12 hours). You can also end the hot-desking session here by selecting "Stop Using". Login to Hot Desk on Polycom Handsets Before you can use the soft key, the device profile needs to be edited on the Broadsoft Application Server and the following attributes to be added: feature.hoteling.enabled="1" hoteling.reg="1" Press "GuestIn" Enter your Voice Portal User ID and Password and press OK

123 If successful, the screen will look like the image across from this step. The time limit is based on those inherited from the Host device. The maximum limit is 12 hours. To log out, select "GuestOut" If invalid login credentials are entered 5 times, the account will be locked Login to Hot Desk on Horizon Voice Portal Requirements The voice portal is accessed by a user account with the Guest service assigned. The voice portal is accessed from the host user's device (it must have the Host service assigned and enabled). Access the voice portal using their allocated user name and password. If the Guest has not been associated with the device previously, you'll need to hit the escape ('*') key and enter your own credentials. If you are already associated with the device, simply enter your user credentials. Select option 7 - "Access Hotelling"
124 Select one of the following options: 1 - the operator will check if there is an on-going association with this Host. 2 - the Guest an associate with the host (the association limit value is inherited from the host) 3 - the Guest can end the association with the host. Once the association has been made with the host phone, Guests using Polycom 650 & 450 handsets will visibly see their own extension number on the Host device display. Guests using other handsets will continue to see the display name and extension number of the Host. Music on Hold Music on Hold allows an administrator to set up and maintain an audio source that can be played to held parties when calls are on hold. Music on hold is set up on a per site basis so you are unable to set up music on hold for the whole company. It can also be set up so that you have different music on hold whether the call is coming from an internal or external phone. You are also able to select if the music plays depending on the state of the caller. Please note that Gamma accepts no responsibility for the gathering of copyrights and licenses required for the music held within the Horizon system. When creating a file for use with Horizon it needs to be in the following format:.wav encoded with CCITT u-law formatted at 8 KHz sample rate, 8 bit mono, 7 kb/sec The short code for deactivation of music on hold per call is *60. You can use either the system default or upload a custom audio file. To keep the system default, select use system default to upload a custom file you need to select custom audio file then uploads your file. To upload a file, you click on Browse and then select the file you would like to upload. Uploaded files must be in WAV format and encoded with CCITT a-law and needs to be formatted at khz, 8 Bit Mono, 7 kb/sec. For internal calls, to use a different type of music on hold, you need to select the checkbox at the top of the internal calls section; otherwise external calls will be defaulted for both.


125 To set up Music on Hold Select "Site Management" Select the site that you want the Music on Hold for, and click the "Manage" button. Select "Music on Hold".

 Audio Recording Software.")
126 From here, you can select when you want Music on Hold to be enabled, if you want to use the System Default or if you want to have a custom audio file for External and Internal calls. Create an Audio File You can create your own audio recordings and upload these to Horizon to use. You will need to convert the audio file to a recognised format once you've created the audio file. To create an audio file, you'll need the following: A PC A Microphone (USB Connection Recommended) Audio Recording Software. What software to use: There are numerous recording packages available online for free and at a cost.


127 Windows has a basic application installed called Sound Recorder which can be found under Start > All Programs > Accessories > Entertainment > Sound Recorder. Another good quality free package is Audacity which can be downloaded from here: This is a not a Gamma product and we can offer no support or advice on using this software. Sound Recorder Open the application by going to Start Menu > All Programs > Accessories > Entertainment > Sound Recorder Click the record button and begin your recording. When you have finished your recording, click on the stop button.


128 To play your recording back press the Play button. If you are happy click on File > Save As. Chose a location to save the file, enter a name and click save If you've found that when you're recording that no audio is being picked up, then click on Edit > Audio Properties. From the drop-down menu ensure the correct device is selected under Sound Recording.


129 Audacity Audacity can be downloaded, free of charge, from It is more powerful than Windows Sound Recorder and has lots of advanced features. Open Audacity Click on the record button to begin your recording.

130 The red bar will move along the screen and the blue line will show the level of recording. When the recording is finished press the stop button. You can then click File > Save Project As, this will let you save it as an.aup file. This will open in Audacity and allow you to carry on working on the project. You can also click Export as MP3 this will save your recording as an.mp3 file. This will save your project as an.mp3 file which can then be played using a variety of software. Horizon does not recognise mp3 files but you can convert audio files page to a suitable file for Horizon. Convert Audio File An audio file which you want to use and upload to the Horizon portal needs to be in a certain file format with certain attributes. This guide gives you advice on how to convert the file, as well as information on what the file attributes are to be. We have provided information for several programmes. Converting programme - SoX (SOund exchange). This is a guide on how to use 3rd Party software. Gamma offer no further support to SoX. If you require further assistance, please use the SoX website. Once you've downloaded SoX, unzip the file and this will create a directory for SoX. You do not need to do anything further after you've unzipped the file, as the program will work straight from this directory. The file attributes that are required for audio files that can be uploaded and used in the Horizon portal are:.wav format Encoded with CCITT u-law Formatted at khz, 8 Bit mono, 7 kb/sec Below is a step by step guide on how to get a file with these attributes.


131 Copy the sound file that you wish to use (either mp3 or wav) into the SoX directory that has been created when you've unzipped the file. See the screenshot for an example. Open a command prompt in your "sox" directory. To do this, if you press and hold the <shift> button and then right click on the "SoX" directory, then click the "Open command window here" option. When command prompt has loaded up, type in the following command: sox.exe -V test-input-file.wav -e u-law -r c 1 test-output-file.wav At command prompt invoke the following command, making sure that the correct input file is named and your required output file too. Make sure that the correct input file is named. In this example, this is the "test-input-file.wav" area of code. Also, make sure that your required output file is named what you want as well. This is the last bit of code, in this example "test-output-file.wav". The output of command prompt should look like this:

132 You've created the file that will be able to be used in Horizon and are now able to upload this to use. The file will be created in the SoX directory that you've been working from since you've downloaded the application. Converting programme Audacity This is a guide on how to use 3rd Party software. Gamma offer no further support to Audacity. If you require further assistance, please use the Audacity website. We found the following format works well with Audacity: Mono 8000KHZ 32 Bit float U Law You can edit the audio file by: 1. Change from Stereo to Mono 2. Change the Sample Rate 3. Change the Bit Rate 4. Change the Audio format 5. Export File You will need to change it to Mono by selecting Tracks tab and then select Stereo to Mono

.")
133 The Sample rate will need to be changed. Go to the resample tab and set to 8000 You can also change the Bit Rate at the bottom of the page (Project Rate). In this example, it was set to 8000.
 Select the encoding as ULaw Save the file and upload it to Horizon.")

134 To change the file from Alaw to Ulaw, go to File Export and then save the file type as other uncompressed files. Select options Then save as a Wav file by selecting the Header as WAV (Microsoft) Select the encoding as ULaw Save the file and upload it to Horizon. Manage Numbers Manage Numbers allows you to see all the numbers that are allocated to that site and see whether they are free or being used by a user or service. This screen allows you to release any numbers, which are assigned to that site, and then you can reassign them to another site. Numbers are displayed as either a range of numbers or individual numbers and you can choose to either release the full range or select number individually.


135 To release a number, you click on release selected, or release all depending on which option you want. If you click release all it will simply release all numbers for reallocation. If you click on release selected, you will be taken to a screen where you will be asked to select which numbers you want to select. Once you have selected all the numbers you click on release and then all the numbers will be available to reallocate to a new site. If you want to see how to reallocate numbers, go to the Number Management section under administrative features. Recorded Calls Recorded calls allow you to be able to view and download calls that have been made to an outside number. You can set up the recorded call via call setup and decide how many of the calls you want recording. You can search for call recordings across multiple users. You will be able to select whether you want to download inbound or outbound calls, a start date and time or a particular phone number.

136 Once you have selected the search criteria you want and have clicked the Search button, you will be able to view all calls to fit your criteria. To download a call just check the call or calls you would like to download and then click download selected or download bulk. This can be used once a search has been made and the results displayed on screen. You can download up to 1,000 inbound calls or up to 1,000 outbound calls at once. You can also delete up to 1,000 call recordings at once. You will be able to see which recordings have been downloaded in bulk within the summary panel showing the timestamp of the first and the last call recording downloaded by the search. Please be aware the time taken to download will vary depending on the size and amount of the files.

137 Please note that: The Admin user must be logged onto the Horizon GUI for the download to be completed successfully When a user selects both for the direction, the calling/called field will be disabled The Available downloads button is always visible even if the user does not have recordings available the Horizon GUI can only display results for 3 months' worth of searches. If a search is requested above this time, a warning message will appear. If recordings for more than 3 months are required, then two searches would need to be performed Horizon call recordings can be stored for 3, 6 or 12 months with the default being 3 months If you download a single file you will receive a file in an mp3 format, if you download a selection you will get a zip file with multiple mp3 files. Depending on your browser, it will depend on where the file will go. For Firefox and Chrome, it will go to your download folder or where ever you have assigned your download files to go to. For Internet Explorer and Opera, you will be asked where they would like to save the file. For Safari, the default download location will be either your documents or download folder, this will different if you have changed it. The mp3 files name includes basic information about the call each section is separated by an underscore and it is in this order: DDI for the person making the call DDI for the person receiving the call The date the call was made The time the call was made. So, if you want to search for a recording to a certain number you will need to perform a file search and search for the number.


138 Bulk call recording download and delete This service allows an administrator to select up to a 14-day consecutive period and the entire volume of recordings associated to the specified period is downloaded to the administrator s PC desktop in the form of a ZIP file. Once the batch has downloaded the administrator will then have the option to delete the call recordings from the storage platform via the History tab. The following provides an overview of the service and its use. The service can be accessed by navigating to the Recorded Calls tab and selecting Bulk Download This will then take the user through to the main Bulk Download page where the user can request downloads. To request a download, enter the required date range and hit Bulk Download This will then start to download the recordings to the user's browser.


139 The download pop up will provide information on the file size and the time outstanding to complete the request. Once the downloaded has completed the ZIP file can be extracted and saved to a location of the administrator s choice. There is also a Download History section that will provide key information about the date and time a Bulk Download request was made, who made it, the date range selected and status. An administrator is also given the option to delete the recordings from the storage facility should they wish to. To delete recording between the From and To dates simply click the delete button.


140 If delete is selected the user will be receive this prompt asking them to confirm the deletion before the recordings are removed from the platform. The In Progress tab will show Call Recording downloads that are in progress and once completed they will appear on the Download History tab. A user will not be able to download the current day recordings to ensure that recordings that have not been downloaded and saved cannot be accidently deleted. Deleted users and call recording When a user is deleted or the number is unassigned from a user or call group, the administrator is limited when searching for their recordings. You are unable to search for numbers recordings using either the number or the username fields. The recordings will only be visible when searching against: Calling/Called Number Start Date/Time End Date/Time Direction


141 The filename contains the number_calling number_being_called yymmdd hhmmss<i/o>, where O = outbound and I= inbound. Call Recording Users To set up call recording for a user you need to go to the call set up page for that user and select call recording from the menu. You can set up so that the caller can decide when the call is recorded, if pause/resume is required or select a percentage of calls that are recorded. You just need to select the option you want for that user and then click save. To record a call on demand the person making the call needs to input *1 at any point during the call. This feature is only available if you have given call recording to the DDI of a user. For pause and resume, the command is *3 to pause and *7 to resume. Please note that call recording is possible for both inbound and outbound calls, over users, hunt groups and auto attendants. The call recording storage is chargeable and that 900 Megabytes is approximately 4,500 to 5,000 minutes assuming approximately 185kbyte per minute.


142 Access and notification control to call recordings It is possible for the Horizon Administrator to decide if any support users can access the customer s call recording download and delete options. There is also the option to notify all company Administrators if a support user has entered a company's call recording area. Any company Administrator entering a valid username and password via the Horizon portal directly will always see the Recorded Calls tab and be presented with the 3rd Party Support Permission option under the Administration drop down. The Horizon portal also provides an audit log of who is enabling and disabling the options.

143 Please note these options will only appear on the portal if the company has call recording enabled. If an Administrator chooses to enable the notification as below then every time a support user attempts to search, download or delete from within the call recordings area, an will be sent to all Administrators as detailed below. It will detail the ID of the user, what action they performed and the date it happened.


144 Call Queuing Call Queuing subscriptions will show in the subscription centre to be assigned to specific users who will use the group. To then establish a Call Queue Group, you simply need to go to the Group Management section, and click on Call Queue Group, and Add This will then put you into the setup wizard for the Call Queue Group, where you can assign the Call Queue Group to a site, and provide it with a name and Calling ID for presenting calls to the handsets. Clicking on continue, you can then set up the Call Queue settings, allowing you to establish the size of the queue, whether you would like constant ring tone or announcements, and overflow settings.

145 Overflow settings should always be set as this will define the treatment of the call should the queue be full (i.e. 26 th caller) or encounter other unavailability. Clicking on continue will then establish the group and allow you to allocate users. The Call Queue Group when dialled will ensure all users are contacted through a simultaneous call to them, routing to the first user to answer

146 Finally, once users are assigned you simply need to assign an available number and extension to the service, and click Finish and Show List Your Call Queue Group is now established, and further editing i.e. to add announcements or the ability to deactivate the group is then made available Further actions can then be taken through editing the Call Queue Group. Call recording can be implemented through the Call Recording tab, however it should be noted that this will record the full call including time on hold if implemented.
 to breakout from")

147 Voic can also be enabled, and the option to send all queued calls to Voic applied. Once a Voic is enabled in the system further options are also available under the Options tab to allow a user to Dial 0 (as default) to breakout from the queue and leave a Voic against the Group Voic . Finally, if a schedule is to be applied to enable the calls to be forwarded to another number outside of core opening hours this can also be enabled assuming the additional advanced settings tab has been applied. Add Users to Call Queue Groups From the Call Groups drop down in the menu, select "Call Queue Group".


148 Select the Call Queue Group that you want to add a user to and click on the "Edit" button. Click "Users"


149 If you want to remove a use, click on the "X" next to the user name. Click "Save" once you're done. Adding announcements to a Call Queue Group Once a Call Queue Group is established, and you have not selected to implement constant ringtone, the standard Horizon announcements will be implemented.


150 If you would like to upload your own custom announcements this can be actioned through editing the Call Queue Group and clicking on the announcement tab. Within here you can then enable or disable the announcements, as well as uploading the custom files for the various types of messages


151 r All messages uploaded will be played in sequence and looped for the length of time the user is on hold. Audio files must be uploaded in the following format:.wav format Encoded with CCITT u-law Formatted at khz, 8 Bit Mono, 7kb/sec Setup Voic for a Call Queue Group From the Call Groups menu item, select Call Queue Groups.
152 Select the Call Queue Group that you want to set up Voic for and click "Edit". Click on "Voic " from here you can edit the Settings, and if you want to enable voic .
153 Alternative Number Presentation There are three options for number presentation from Horizon: Presenting a number which has been assigned to the Company Presenting a number which has been assigned to the site Presenting any number that conforms to the regulations specified in Ofcom s General Conditions and these include 01, 02, 03, 07, 08 and +44 numbers The maximum length of the alternative number is 19 digits and the minimum length allowed is 2 (i.e. just the prefix). Please note that with a +44 prefix, only the following are allowed: The following numbers are not allowed: 070, 076, and international number 09 premium rate numbers

154 In summary, Ofcom s General Conditions mean the number must be: A dial able number or A number that has been received from the public network and passed on unchanged It will have been allocated either to the caller or if allocated to a 3 rd party, only used with the 3 rd party s explicit permission It must not be a number that generates and excessive call charges (i.e. one prefixed 090 or 091) It is supported by an underlying network number and service For calls to the Emergency Services Operator, we will continue to pass through the Horizon site number allocated by the company administrator where the address information has been provided. If alternative number presentation is required, we do need to receive a signed Number Presentation Statement confirming that the number complies with the Ofcom General Conditions. Implementation of Alternative Number Presentation This functionality can be controlled at the user level, provided the company administrator has granted suitable permissions. This means, where users are working on specific marketing campaigns for example, they are in control of the number presented without the need to raise IT support requests. From the administrator s view, a new field has been added under the DDI section under the existing presentation options. Using this section, the new functionality can be activated, amended and then saved, or if required, deactivated so that the default site or company presentation is used.

155 The administrator also has a permission option where they can grant the user the ability to control their own number presentation. If this is selected a new button will appear on the dashboard of the user s access as per below. When clicked, the user can then access the screen to activate, and amend.


156 Please note that where the service is not active, the previous defaults of either a company or site CLI will be presented for outgoing call for this user. Nuisance Call Management for Horizon Call Groups Nuisance call management provides the ability to reject incoming calls from a user defined list and/or anonymous numbers directly via the Hunt, Auto Attendant, Call Queue and Call Centre type call groups as part of the Advanced Settings option. Incoming calls with a caller ID found to exactly match a number on the Blacklist will be rejected with an appropriate announcement before automatically terminating the call. The end user can enter up to a maximum of 12 numbers onto the Blacklist per Call Group instance. Incoming calls where the caller ID is anonymous or withheld can also be set to reject to an appropriate announcement before being terminated. Please note that the announcements are system wide and cannot be customised on a per Company or Call Group basis. Nuisance Call Management is available to a Company as part of the Virtual Power Pack (VPP) subscription and you can check if there are any spare VPP's to assign via the Administration>Subscription Centre menu on the Horizon Portal. To configure NCM, select the Call Group type from the drop-down menu on the Horizon Portal and choose the specific category the Call Group number is configured as.


157 To set up the NCM option for a Call Group find the particular group you wish to modify and click edit The NCM feature can be found under the Advanced Settings tab for all four Call Group types.


158 If not already, enable the Virtual Package by toggling the button to on and the relevant options will appear for the Call Group. Click on the Nuisance Call Management edit button for the configuration panel. You can add specific numbers to the Blacklist of numbers by typing them freehand into the highlighted panel and clicking the button, there is also the option to add numbers from the Company Directory via the icon. To delete a number from the Blacklist click the icon. To enable or disable the NCM feature you now just need to toggle the appropriate button between on and off. The options are: Will only reject those incoming calls where the callers ID exactly matches a number in the Blacklist Will reject those incoming calls where the callers ID exactly matches a number in the Blacklist or the callers ID is anonymous or withheld. Will only reject those incoming calls where the callers ID is anonymous or withheld.
159 Device Customisation setting up a user The handset customisation includes two key options for both handsets and expansion units: Assigning line or Busy Lamp Field (BLFs) keys Assigning soft keys to the device which are the action keys across the bottom of the screen From the Users drop down in the menu, select "List Users". Select the user you wish to give access to and click "Edit". Click "Phone" to bring up the specific options for the User.


160 Click "Device Configuration" to access the options. Call Paging Call Paging is a feature that allows a user to call numerous users all at the same time with one way audio (i.e. only the caller can speak). This only works if the user has an IP phone assigned to a user and not a soft client. Once a call is placed then all handsets set up to receive a call in the call paging group will be answered automatically on loud speaker Please note that there is a limit of 100 users regardless of the size of the Horizon company so for example if a company had 20 users and had a page group which had 6 page groups nested within it and if all 20 users are added to these groups, it will not work as the cumulative number of users will go above 100. There is no site level limitation on users in a page group and any user in a company can belong to any page group. Before you start this process, you need to make sure that you have added the Call Paging subscription. The basic process is: 1) Create and name a group 2) Define the users who can send call pages (sending users) 3) Define the will be receiving the call pages (receiving users) 4) Define the extension for the call group 5) Save the group Under Call Groups select Page Group


161 Click "+ Add" Select the Site that you want the Call Paging group to be on, enter the name of the group and user name, and how you'd like it to appear on the screen of your Horizon device.
162 You can now select your "Sending users". These are your users that can make a call from this group to those "Receiving User" (see next step). Add everyone that you want to be able to send a call page and then "+Add Selected" and once all users are in the right-hand table you can click "Continue" You can now select the "Receiving Users", these will be the people that get the call page when the call page extension is dialled


163 Now you should give the group a unique extension number so that when it is dialled by one of the "Sending Users" a call is initiated to all the "Receiving Users" in the group. Blacklist Numbers It is only possible to blacklist a certain number at user level. It is not possible to set a blacklist at company or site level. Go to the main dashboard and then select user management. Then click edit on the desired user. Then click call set up


164 Select Blacklist from list on the left Enter the number to be blacklisted in the field and select add and then save

165 If you want to reject calls that have the DDI withheld, select Settings Then enable the Reject withheld numbers option and click Apply

166 Receptionist Soft Client The receptionist soft client will help you to manage incoming calls over a single or multiple sites. It provides the ability to: - Monitor incoming calls to key numbers over all Horizon sites - Monitor fixed or dynamic users over all Horizon sites - Monitor call queues and adjust priority of callers within these queues - Add notes to contacts to show related information such as leave - Establish and manage conference calls in the site Please note there is a separate Receptionist soft client user guide which details how to use the soft client functionality and should be read in conjunction with this administrator user guide. The information below details the administrator functions to assign the bolt-on and reset the user s password. Assign the Receptionist Soft Client bolt-on to a user Click "Users" and then "List Users".


167 Select the user which you wish to add or remove the receptionist soft client bolt-on for and click the "Edit" button. Click the "Services" link.

168 In the Optional Extras table, you'll see Receptionist. If this is not appearing, then you should request more boltons by clicking on the request more link. Once you've ticked the Receptionist option then click "Save". This then assigns the Receptionist bolt on to that user. The user is sent an with their logon details including the password. Unfortunately, the password cannot be changed but it can be saved once the user logs onto the soft client. Reset Receptionist Password Click "Users" and then "List Users". Select the user which you wish to reset the password for and click the "Edit" button.


169 On the "Profile" page click "Reset Receptionist Password". Managing the favourites or fixed contacts Within the contact section on the Receptionist soft client, there is a Favourites tab which allows you to have up to 200 fixed contacts that will always be visible without the need to dynamic monitor them via the address book. To manage this list, Click "Users" and then "List Users".


170 Select the user which you wish to reset the password for and click the "Edit" button. Click "Call Setup" from the menu bar.


171 Select "Receptionist" from the "Settings" menu. This will then present you with a list of users on the left-hand side which you can add as a favourite. This is done by selecting the tick box and of all the users you want to add and then click "Add Selected". This will move the user over to the right side. Click "Save". Log into your Receptionist soft client and your new favourites will be showing under the favourites tab.

172 Desktop and Mac Soft Client The desktop and Mac soft clients allow the user to make and receive calls from their PC (using an appropriate headset), as well as quickly accessing key settings for their Horizon service. This is an ideal bolt-on for users who often work remotely from different locations where it is not practical to install a handset or who are regularly on the move with access to Wi-Fi (e.g. hotel stays). In addition, the desktop soft client also provides presence and instant messaging between users who also have the desktop soft client (or mobile soft client). The key features provided are as follows: Make and receive calls Instant messaging and presence (includes Group Chat with up to 4 participants) Horizon company directory (with Click to Call from soft client or desk phone) Call history (with Click to Call from soft client or desk phone) Desktop dialler Settings management o Twinning o Remote office o Forward calls o DND o Withhold my number Please note there is a separate desktop soft client user guide which details how to use the soft client functionality and should be read in conjunction with this administrator user guide. The information below details the administrator functions applicable for this soft client. Assign the Desktop Soft Client bolt -on to a user In the 'Phone' tab, select the 'Manage Soft Clients' button.

 or Mac soft client.")

173 Tick the 'Desktop Client' check box to assign the user the relevant desktop (PC) or Mac soft client. Select the appropriate Codec from the drop-down list.
.")
174 You can now change the Codec, if you wish, or save to confirm. You will see a confirmation notice which also advises how many bolt on licenses you have remaining. Please note: A local install will require admin rights on the relevant machine for the initial installation of an executable file (.exe). Users must check with their network administrators before installing the software, as some users may not be able to run.exe files. The client can be also deployed using Microsoft Group Policy Management Tool.
175 Mobile Soft Client The mobile soft client app allows a user to make and receive calls on a mobile device, as well as accessing key settings for their service. It provides all the same functionality as the desktop soft client above, except for Click to Call and Group Chat. This is an ideal bolt-on for users who often work remotely or who are regularly on the move with access to Wi-Fi (e.g. hotel stays). Please note there is a separate mobile soft client user guide which details how to use the soft client functionality and should be read in conjunction with this administrator user guide. The information below details the administrator functions applicable for this soft client. Assign the Mobile Soft Client bolt -on to a user In the 'Phone' tab, select the 'Manage Soft Clients' button. Tick the 'Mobile Client' check box to assign the user the Mobile Client. Select the appropriate Codec from the drop-down list

176 You can now change the Codec, if you wish, or save to confirm. You will see a confirmation notice which also advises how many bolt on licenses you have remaining.. Integrator Soft Client Integrator is a powerful desktop soft client that allows a user to control their Horizon service from their desktop without having to log into their Horizon portal or navigate through phone menus. In addition, the software integrates with a user's Microsoft Outlook programme making contacts easily accessible and drillable from Outlook and the
177 desktop. This provides any business user with significant productivity gains with finding and dialling contacts made quick and easy using the click to dial functionality from the desktop. Accessing key features and settings becomes very quick and easy, and finding and dialling contacts very fast - helping users to work more efficiently and be more productive. Telephony presence (with Click to Dial) is also provided for up to 20 work colleagues definable by each user. Furthermore, for those businesses who use Microsoft Lync, they will enjoy the benefit provided by the integration of Horizon s phone status with a user s Lync status (on a call or Do Not Disturb). Key features provided are: - Click to Dial from Outlook - Screen popping from Outlook contacts and Horizon Company Directory - Desktop Address with Click to Dial (searches Horizon Company Directory and Outlook Contacts) - Click to Dial from web pages - In-call control features hang up, hold, deflect, consult and transfer - Desktop contacts search with Click to Dial - Desktop call history - Desktop feature control Do Not Disturb and Forward All Calls - Telephony Presence (with Click to Dial) - Desktop Recent Call Search - Integration with MS Lync status (on a call or DND) Please note there is a separate Integrator soft client user guide which details how to use the soft client functionality and should be read in conjunction with this administrator user guide. The information below details the administrator functions applicable for this soft client. Assign the Integrator Soft Client bolt -on to a user The Integrator soft client can be selected from the Users section on the Horizon Administrator portal. You can allocate the soft client to specific user accounts using Edit End User Permissions. Select "Edit" on the user you want to use Integrator.
178 Select "Permissions" Click on the switch that corresponds to "This User can use Integrator". This will then load up an "Integrator Version" table at the bottom of the page. Select the version of Integrator that you wish. Both versions will appear here, but will be greyed out if you've not selected it at Company level Click Save.
179 Once the user has been allocated the feature by the administrator, they will be sent an / s from the Horizon system. The confirmation will contain a link that the user needs to follow to download the client locally. Alternatively, the user can access the download link from the end user Horizon portal. Once downloaded the user should follow the on-screen instructions provided by the executable file. Further information is available in the Integrator User Guide. Please note: A local install will require admin rights on the relevant machine for the initial installation of an executable file (.exe). Users must check with their network administrators before installing the software, as some users may not be able to run.exe files. The client can be also deployed using Microsoft Group Policy Management Tool.
180 Integrator CRM Soft Client Integrator CRM provides the full functionality and associated benefits of Integrator, as well as providing integration with 20 of the top Customer Relationship Management (CRM) systems in the UK market today. The additional CRM functionality provides screen popping and Click to Dial from the chosen CRM and integrates it with certain desktop features such as desktop contacts searching. Please note there is a separate Integrator soft client user guide which details how to use the soft client functionality and should be read in conjunction with this administrator user guide. The information below details the administrator functions applicable for this soft client. Assign the Integrator CRM Soft Client bolt -on to a user The Integrator CRM soft client can be selected from the Users section on the Horizon Administrator portal. You can allocate the soft client to specific user accounts using Edit End User Permissions. Select "Edit" on the user you want to use Integrator. Select "Permissions"
181 Click on the switch that corresponds to "This User can use Integrator". This will then load up an "Integrator Version" table at the bottom of the page. Select the version of Integrator that you wish. Both versions will appear here, but will be greyed out if you've not selected it at Company level Click Save. Once the user has been allocated the feature by the administrator, they will be sent an / s from the Horizon system. The confirmation will contain a link that the user needs to follow to download the client locally. Alternatively, the user can access the download link from the end user Horizon portal.


182 Once downloaded the user should follow the on-screen instructions provided by the executable file. Further information is available in the Integrator User Guide. Please note: A local install will require admin rights on the relevant machine for the initial installation of an executable file (.exe). Users must check with their network administrators before installing the software, as some users may not be able to run.exe files. The client can be also deployed using Microsoft Group Policy Management Tool. Horizon TAPI Driver The Horizon TAPI driver has been designed to complement Horizon and provides simple telephony and call control integration via applications that can make use of a TAPI interface. There are number of CRM applications that are known to have TAPI interfaces and the known applications that are compatible with Horizon are as below:

183 The extent of the integration is entirely dependent on the specific application and Gamma cannot provide any advice, help and assistance in configuring the application. The onus is on the application vendor or the customer s IT team to make use of the TAPI driver interface. In order to install the TAPI driver, the user will need administrative rights to the PC. Note: The TAPI driver is a 1st party service only and the Horizon TAPI Driver cannot be used in a 3 rd party mode. The TAPI driver can be used in conjunction with the standard Horizon Integrator but not the CRM version and for clarity the Horizon TAPI does not provide any end user features, for example click to dial. It is simply a middleware driver and all capability is dependent on the CRM application itself. To assign the subscription to a user logon on the Horizon portal and the subscription will now be available to assign via the Users> Services tab. Check the box next to the Horizon TAPI driver subscription and hit save to assign the service. Once the TAPI subscription has been assigned to the user, they may receive up to two s In all cases, they will receive a welcome message and a link to download the software plus the user name.
 in which case their existing client password should be used.")
184 A second will be sent to provide the password unless they are already a client user (i.e. Integrator, Receptionist etc.) in which case their existing client password should be used. Once the user has received the above notifications they can then follow the Horizon TAPI user guide to install and configure the software.
185 Soft Clients Passwords A single password (that is separate to a user s Horizon portal password) is generated per user by the system for use with ALL software clients (Integrator, Integrator CRM, Desktop soft client and the mobile soft client). If a user is using more than one client (Integrator and the mobile soft client, for example) then only the assignment of the first client will result in a password being generated; this will be received before a confirmation with download instructions. For all subsequent clients, only the confirmation will be sent. Using 3G and 4G networks with Soft Clients Please carefully consider the following advice on the use of mobile and desktop clients: We cannot guarantee any aspect of setting up and conducting a Horizon call over any mobile network, whether using a Horizon mobile client or desktop client on a tethered laptop. Mobile networks provide no prioritisation of signalling and voice payload packets and some networks will either block or slow down VoIP packets. Before you report a call quality or availability issue on a desktop or mobile client, please ensure you have checked that a mobile network is not being used to connect to the platform, as we are unable to provide support for such incidents. Using the clients over 3/4G will consume data that may either result in charges being raised by your mobile operator or be counted against your monthly data allowance. The amount of data transferred during a call will be dependent on codec used: Codec Duration of call 5 min 10 min 30 min G MB 8.3 MB 24.8 MB G MB 3 MB 9 MB Using Wi-Fi Networks with Soft Clients Please carefully consider the following advice on the use of desktop and mobile clients: We cannot guarantee the call quality when Horizon calls are made over Wi-Fi, owing to limitations of Wi-Fi as a transport mechanism for VoIP packets. We also expect the quality of Wi-Fi connections to vary (office Wi-Fi, home Wi-Fi and public Wi-Fi hotspots). You need to consider how Horizon is used over Wi-Fi and your user expectations must be set accordingly. For office Wi-Fi, although this should be business grade, we do not recommend that Wi-Fi is the only way to access the Horizon platform; a wired service should always be available. We expect home Wi-Fi to perform reasonably well but this will depend on other applications being used at the same time. Public Wi-Fi will vary a great deal and will dependant on the number of users using the serving access point and subsequent bandwidth contention.
186 Call Centre Options Horizon Call Centre is an extensive range of inbound call centre capabilities that can be configured and managed via the Horizon web portal. This additional bolt-on enables businesses to easily manage their call centre environments, boost productivity of call centre agents and the overall efficiency of their call centre and help them deliver a first-rate service to their customers. Horizon Call Centre key features and benefits: Queue up to 50 calls at one time - to help ensure your customers don t lose calls Flexible and intelligent call distribution - so the right calls get through to the right people Easily take calls for multiple departments from one device Agents can quickly and seamlessly escalate difficult queries to a senior member of staff Track staff performance including number of calls received and activity completed Report on different periods throughout the day - to help identify peak periods and potential additional resource needs Agent Log in/out Agent Available/Unavailable/Wrap Up Full reporting available using with the Akixi 2000 functionality There are three options available: Call Centre agent is required for every user that is part of a call centre (i.e. agents as well as supervisors) and is charged as a monthly rental per user Agent soft client is optional and is a way of answering calls using the PC i.e. logging in/out, changing agent status and escalating calls. It is the only way to log an agent into multiple call centres (logging in from a handset will log an agent into all call centres at once) Supervisor soft client is optional and allows monitoring of call queues, call barge and monitoring agents in one place The Call Centre bolt-on can be used with all Polycom VVX handsets and the Cisco 504 to enable agents to log in/out via the handset. It also provides the following features: Agent ACD State Agent state is used to determine the agent s availability to take calls. Agents can set their state through the web portal or through a client. Agent Guard Timer Settings The guard timer allows a configurable delay between the time an agent becomes available and the time a call is delivered to the agent. Agent Hold and Retrieve This feature prevents agents from putting a call centre call on hold and leaving the caller on hold indefinitely. The agent must take the call off hold or return the call to the queue.
187 Agent Sign-in/Sign-out Agents can log in and out from the call centre so that calls are only presented to agents who are on duty Agent Unavailable Codes When agents change their ACD status to unavailable, they may be required to provide the reason for their unavailability by entering an unavailable code. Administrators can also define default codes to be assigned to agents who become unavailable Allow Agents to Join Call Centres This setting determines whether agents can join a call centre. Allow Call Waiting on Agents This will allow a call to wait while an agent is currently on a call Allow Calls to Agents in Wrap Up State In peak times, this can be used to get calls through to agents even if they are on wrap up Basic Announcements The queued callers are provided with an initial greeting, followed by music or advertisements and periodic comfort announcements. All announcements can be played in audio or video format, based on the call centre profile and the capabilities of the caller s endpoint. Bounced Calls Calls that are delivered to an agent but not answered as specified, are prioritized ahead of other non-bounced calls in the queue. Call Centre Access This feature allows agents to join call centres to which they are assigned using the GUI, Agent Client or Akixi if joining the call centre is enabled. Call Centre Support for Agent and Supervisor Clients There will be specific clients on the desktop available for agents and supervisors. Call Distribution to Agents When at least one agent is available to receive calls, incoming calls are handled per the selected policy, which can be one of the following: circular, linear (regular), simultaneous, uniform, or weighted call distribution. Call Escalation to Supervisor Agents can escalate a call to a supervisor by dialling #83 (default). The current call is placed on hold. Call Queuing When all call centre agents are busy, incoming calls can be queued until they can be presented to an available agent Distinctive Ringing Distinctive Ringing can be provided to an agent when the call is routed from the call centre. The Distinctive Ringing policy has precedence over the Priority Alert service assigned and configured to a user who is also an agent. The
188 agent s Priority Alert service does not modify Distinctive Ringing set by the Call Centre service when the call comes from the call centre Emergency Escalation Agents can emergency escalate a call to a supervisor by pressing a key. The original call is not placed on hold and the supervisor is immediately conferenced into the call. Geographic Distribution The Call Centre service allows agents to be geographically distributed so agents can answer calls from home, a satellite office, or any other location in a transparent fashion. Outlook Contact Integration Contracts from outlook will be available in the clients Overflow When a call centre cannot accept any more calls or when calls are not handled within a specified amount of time, these overflow calls can be forwarded to a configurable overflow phone number, receive busy treatment, or be provided with a ringing tone. Set Maximum ACD Wrap-up Timer An agent can set their own wrap up time, with the maximum predetermined by the administrator Standard Agent Availability Setting Agents can be configured to have their state automatically changed to unavailable after a configurable number of bounced calls, upon activation of Do Not Disturb service, or when they are answering or receiving personal calls Stranded Calls When all agents in the call centre group log out, queued calls can be automatically sent to the specified phone number, receive busy treatment, or left in the queue Supervisor Support Supervisors can be assigned to more than one call centre and can select the call centres and agents they want to supervise. Uniform Call Distribution Priority Scope The Call Centre service can use call centre or agent scope to determine the next available agent when using the Uniform Call Distribution policy Voice Mail A call centre will have voice mail available. Akixi Reporting for Call Centre In addition to the standard Akixi reporting, the following reports are available if the Akixi ACD agent licenses are taken: - Hunt Group List - includes stats on agents signed in, in available and n/a state plus reporting on ACD counts and times - ACD Agent reporting on the group that the agent is logged into, current ACD state plus supervisors can sign agents in and out


189 - ACD wall board provides additional tiles for agent s availability and wrap-up - ACD N/A code usage - summarises the reasons for agent s non-availability - Presence /ACD agent BLF allows the supervisor to change agent s state or for the agent to view the state of their colleagues More information on the Call Centre functionality and set up can be found in the separate Horizon Call Centre User Guide. Setting up a Call Centre From the Call Groups drop down in the menu, select "Call Centre". Click "Add" to add a new Call Centre.

190 You'll now be presented with the wizard to get the basic settings of your call centre set up. Select the Site that you want the Call Centre to be on, and give the Call Centre a unique name and username. The different settings determine how the calls are sent to each agent. The options are: Circular: Regular: sends calls in a fixed order. The call is sent to the first available user on the list, starting with the user following the last user to receive a call sends calls to users in the order they are listed. The call is sent to the first user in the list, always starting with the first user. Simultaneous: sends calls to all users within a group. The first user to pick up the phone will have the call routed to them. Uniform: Weighted: sends calls to the user who has been idle the longest. Once a call is completed that user will be moved to the bottom of the list. Calls received but not routed through the Hunt Group will not be applied to this routing. sends calls to users based on weighted % of calls to answer. For example, out of 10 calls 2 users may be weighted as 40% and 60% meaning 4 calls and 6 calls are delivered as defined to the associated users.
191 Queue Length is the number of calls that can be queued at one time. Each caller will move ahead in the queue, as calls ahead of them are answered. This can be a maximum of 50. Play ringing when offering call allows callers to either hear ringing or an entrance message. Reset caller statistics upon entry to queue is used for reporting, and is useful if you are purely measuring performance of the call centre. This will reset the caller s statistics, such as wait time, upon the call entering the call centre. Allow agents to join Call Centres allow agents to choose which call centres to join using the GUI, Agent Client or Akixi. If this feature is off, then when the agent signs in they will automatically join all call centres at once. Allow Call Waiting on agents give the options for agents to have a 2nd call waiting while on a call. Might be used if a DDI call need to get through, but most call centres would not allow this and it is not recommended. Enable maximum ACD wrap-up timer: X seconds gives Agents the option to select wrap up, which will give them a short period before the next call comes through (The maximum time is 3600 seconds / 60 minutes). This may be used to place an order or carry out some administration following the previous call. This option sets the maximum amount of time an agent can be on wrap up. Automatically set agent state to (Available or Unavailable or Wrap-Up) after call this determines what happens after a call. The agent can remain in available, ready for the next call or automatically switch to unavailable where they would have to switch to available themselves. Wrap up is also an option. Here the agents for the call centre are selected. Any user who has the Call Centre agent license associated with them will appear on the list on the left. Click on the users required, then press add selected. They will then move to the box on the right. The Barge-In Exempt feature is disabled for all the assigned Agents, so the supervisors will be able to Barge-In to their calls. For the agent to be able to use the call centre application (agent client), the Call Centre Agent Client must be assigned to this user. Next the Call Centre supervisors are selected. The list on the left will contain all users. A supervisor does not need a Call Centre Agent License. Simply select which users are required, hit add selected and they will appear on the box on the right of the screen. A supervisor can monitor agents, all queues and have calls escalated to them. The Call Centre Supervisor Client licence must be assigned to this user to activate this functionality. Without the Supervisor Client, a user who is selected as a Supervisor can still have calls escalated to them, but cannot monitor queues or agents.

192 Here the Horizon administrator can assign the agents to be managed by specific supervisors. Each supervisor can supervise any agent and each agent can have more than one supervisor. Select the supervisor from the dropdown menu, then choose which agents they will manage from the users that will appear in the left-hand box. Once done, click Add Selected and they will appear on the right-hand side of the screen Press the Save Current Supervisor button, then repeat for each supervisor


193 This is the last step where the administrator must select the phone number and extension for the call centre. The screen will show the list of phone numbers available. The extension can be typed in. Worth noting for the call centre, an outbound call from an agent will not display the Phone Number selected here. This is for inbound calls only. Once you've done this you've completed the setup of your call centre with its basic functionality

 and then")
194 Estimated Wait Timer option for Call Queues Estimated wait message (EWM) provides an option to enable playing EWM periodically and there is a field to specify the message playing frequency in seconds. This field can be set between 10 and 600 seconds. By default, the service will be left in a disable condition. To configure the EWM service please go to the Horizon Company>Call Groups> Call Centre Find and select the Call Centre you wish to edit Then go to the Announcements>Estimated Wait area of the Horizon GUI and set the "Play updated wait message every" field value (anything between 10 and 600 seconds is valid) and then from here you have the option to either:
.")
195 Enable the Announce the queue position or Announce the wait time to callers in the queue. The estimated wait time is calculated as below: EWT = ([position in queue * average call handling time] / [number of agents available or wrap-up]). If the EWM option is selected, the following behaviours are applied for the EWM announcement and the service will operate to the below conditions: The EWM announcement is played periodically when the call is queued or when the call is bounced back to the queue because an agent is unavailable The EWM announcement is played periodically at the specified interval The estimated wait time or queue position is re-evaluated immediately before an announcement is played The updated EWM announcement is not played when the queued call reaches the high-volume threshold. The high-volume announcement is played instead, if enabled. Once the queued call transitions out of the high-volume condition, the EWM announcement is played again The updated EWM announcement is stopped when the agent is available, the call is offered to the agent, and the caller hears ring back (if play ringing when offering call is enabled). The updated EWM announcement is played again if the call bounced back to the queue The updated EWM announcement is stopped when the overflow condition is met, such as when a call has been waiting in the queue longer a configured threshold. The overflow announcement is played if configured The updated EWM announcement is stopped when the caller terminates the call. The updated EWM announcement is not played if the Stranded Call policy chooses not to leave the call in the queue
196 The updated EWM announcement is played before or after the comfort message announcement if they conflict; however, it does not interrupt/replace the comfort message The updated EWM announcement is played with music playing in between the announcements if Music on Hold is enabled The updated EWM announcement is played with digit collection enabled to allow the caller to escape the queue by pressing a digit. For instance, pressing 0 when the EWM announcement is playing or during digit collection duration allows the call to exit the queue. Any other key pressed is ignored Announce queue positions When Play Updated EWM is selected, the periodic queue position announcement adheres to the following conditions: If the queue position is less than or equal to the specified queue position X, the position of the call in the queue is played back in the EWM announcement. The announced queue position is immediately calculated before an announcement is played If the position in the queue is higher than the specified queue position X and the play high volume message option is enabled, the high-volume message is played to the caller If the position in the queue is higher than the specified queue position X and the play high volume message option is not enabled, no announcement is played to the caller If the position in the queue transitions out of the high-volume condition, the announced queue position is immediately calculated before an announcement is played Announce wait time When the Play Updated EWM is true, the periodic estimated wait time announcement adheres to the following conditions: If the estimated wait time is less than or equal to the specified X minutes, the estimated wait time is announced to the caller. The estimated wait time is immediately evaluated before an announcement is played If the estimated wait time is higher than the specified X minutes and the play high volume message option is selected, the high-volume message will be played to the caller If the estimated wait time is higher than the specified X minutes and the play high volume message option is not selected, no announcement is played to the caller If the estimated wait time transitions out of the high-volume condition, the announced wait time is immediately calculated before an announcement is played

197 End User Features This section details the features that an end user would have available to them if the administrator has given them permissions to view advanced options. If that feature is turned off then they will only be able to change call handling via the user s login, but will still be able to change all of these features via an administrative login. This is the homepage for end users; this is where they can set up all the settings they would like. From here you can go into call setup, to configure and activate different features, and you are also able to create your own directory. The home page gives you a few quick options that you can perform. Call Forward The Call Forwarding feature allows you to forward incoming calls to several your choice, or to a voic message box. Users have the option to activate and deactivate the service by dialling a feature access code or configuring the service via their web interface or simply pressing a key on the phone. If activated a user must specify the forwarding number. Call forwarding can only be set up by the Administrator. Short codes: *52* Anonymous Call Rejection (ACR) *53* Call Waiting *77 Anonymous Call Rejection Activation *43 Call Waiting Persistent Activation *87 Anonymous Call Rejection Deactivation #43 Call Waiting Persistent Deactivation #8 Automatic Call Back Deactivation *54* Calling Line ID Delivery Blocking
198 #9 Automatic Call Back Menu Access *67 Calling Line ID Delivery Blocking per Call *72 Call Forwarding Always Activation *31 Calling Line ID Delivery Blocking Persistent Activation *73 Call Forwarding Always Deactivation #31 Calling Line ID Delivery Blocking Persistent Deactivation *21* Call Forwarding Always Interrogation *65 Calling Line ID Delivery Per Call *21 Call Forwarding Always to Voic Activation *70 Cancel Call Waiting #21 Call Forwarding Always to Voic Deactivation *99 Clear Voice Message Waiting Indicator *90 Call Forwarding Busy Activation *57 Customer Originated Trace *91 Call Forwarding Busy Deactivation *55 Direct Voic Transfer *67* Call Forwarding Busy Interrogation *97 Directed Call Pickup *40 Call Forwarding Busy to Voic Activation *80 Diversion Inhibitor #40 Call Forwarding Busy to Voic Deactivation *78 Do Not Disturb Activation *92 Call Forwarding No Answer Activation *79 Do Not Disturb Deactivation *93 Call Forwarding No Answer Deactivation #58 Group Call Park *61* Call Forwarding No Answer Interrogation *66 Last Number Redial *41 Call Forwarding No Answer to Voic Activation #41 Call Forwarding No Answer to Voic Deactivation *12 Location Control Activation *13 Location Control Deactivation *94 Call Forwarding Not Reachable Activation *60 Music on Hold Per Call Deactivation *95 Call Forwarding Not Reachable Deactivation *610 No Answer Timer *63* Call Forwarding Not Reachable Interrogation *71 Per Call Account Code *88 Call Park Retrieve *51 Selective Call Rejection (Blacklist) *68 Call Park *75 Speed Dial 100 *98 Call Pickup *74 Speed Dial 8 *11 Call Retrieve *62 Voic Portal Access #92# Call Return from Number Deletion *86 Voic Retrieval *69 Call Return Number Deletion
199 Set up Call Forwarding via the GUI Click "Users" and then "List Users" Select the user which you wish to apply the Call Forwarding feature to and click the "Edit" button. Click the "Call Setup" link.
200 Select "Call Handling" and within the Incoming Calls menu. From the Call Handling menu, you can edit the Call Forwarding features. These are: When I'm Busy - you can forward calls to voic or a specific number when you are on another call. When I Don't Answer - you can forward calls to voic or a specific number when you don't answer after a certain number of rings. When I'm Unreachable - you can forward calls to a specific number (not voic ) when your handset is not registered or powered on (e.g. If your internet access is down, incoming calls would go to this number). Click "Apply" when you are happy with your changes.

201 Profiles Profiles allow you to pre-configure settings of different way of dealing with incoming calls. You can set up to four different profiles depending on the type of situation. Available In Office o This profile is for users working from their desks where their devices are located. The users can redirect incoming calls to voice mail when they are busy, or unable to answer the call. Alternatively, users can choose to have their calls redirected to a selected phone number or URL (for example, to an Auto Attendant) Available - Out of office o This profile is for users working away from their desks for an extended period. In this case, users are interested in getting all their calls sent to their temporary locations. Busy o This profile is for users who are temporarily unavailable to take calls, for instance when they are in a meeting. In this context, users are interested in screening their calls so only the most important ones come through. Hence, the busy profile allows the users to select up to three parties for which calls can come through. Unavailable o This profile is to be used outside of business hours, or while users are on vacation or holidays. In this case, users are interested in sending all their calls directly to voice mail or to a specified phone number and provide callers with a distinctive greeting, informing them of their unavailability, or regular business hours. Each profile includes preferences for managing the relevant incoming call functions (for example: Call Forwarding, Busy, No Answer Always and Selective Voice Messaging, Simultaneous Ringing and Call Notify which can be configured through a single easy-to-use web page).


202 If a user elects to use Pre-set Availability Profiles, then this takes preference over all other service settings associated with processing incoming calls To select a profile there is a drop down under the main menu and is called profile, this feature will only be available if your administrator gave you permission to use them. You can also click on the manage profile button and that will take you to the profile page and you can also activate and deactivate your profiles from there. This is also the page where you can edit what the four different profiles do by clicking on the Edit button. Setup Availability Profiles Select "Users" and then "List Users". Search for the User that you want to set up Profiles for, and then click the "Edit" button. Ensure that "This User can use Profiles" is turned "On" if you want the user to be able to use Profiles, or "Off" if you don't want a user to use Profiles.


203 Available in Office Available in office has three different features you can configure depending on your needs. These are a general setting, what happens when you are busy and when you don t answer. Settings allows you to enter another number so it rings that number at the same time, you could use your mobile for example. You can search your directory using the directory model window to select a number. You are also able to select whether you want to send the call to voice mail or to forward it to another number. If you want to send it to voice mail you must have the voice mail set up. This feature can be set for when you are busy, on a call, or when you don t answer. To save all setting that you have set up, click on the Apply button. Available Out of Office In available out of office, you can set whether you want the call to go to voice mail or be forwarded to another number. If you select send to voice mail you need to have your voice mail set up. To forward to another number select that option and then input the number you would like the call to be forwarded to. You are also able to set up an system, where you receive an if someone calls, just select the checkbox and input your address.


204 Busy If you select your profile to busy you can set your number to go to voice mail, but you can make up to 3 different numbers forwarded to a new number. To send all calls to voice mail select the check box send all calls to voice mail. Note for this feature to work you need to have your voice mail set up. Then if you want a number to be diverted to your mobile, service or another user then input the number you would like it to be forwarded to. Then add up to three numbers you want to be forwarded to, you can either enter the numbers or search your directory. You can also set it up to send you an when you receive a call. Unavailable The unavailable profile allows you to send calls to voice mail and then forward up to three numbers to another number. It also allows you to set up a different greeting message. To send calls to voice mail, select the check box that sends calls to voice mail. Note that you need to have voice mail set up for this feature to work. Then if you want to forward up to three numbers to a new number then fill in the text box of where you would like it to be forwarded to, and then add up to three new numbers. You can either add a known number or search your directory for a contact that you would like to be forwarded to the alternative number. If you want to select a different greeting message, there are two options at the bottom of the page and select one of them depending on what you would like the message to be.

205 Directory and Contacts The end user s directory is a place where you can add, edit or view all contacts that you have added as well as other users within the same company. You are also able to view contacts that your administrator has added. You are only able to edit and delete the contacts that you have added. Add a Contact To add a new contact, you need to click Add New Contact which will take you to the page where you fill in the details of a contact. To add a new contact, you only need to add a first and last name as well as the number they can be contacted on. You can also add an extension and an to the user if you require extra details about them.


206 My Features The 'my features' page displays all the features that you currently have available. You can select a feature and it will give you a small description about the feature. The features have been separated into the different categories depending if it affects an incoming call, an outgoing call or changes something while you are in a call. Remote Office This service enables users to access and use their horizon profile and services from any device, online, or offline, such as a mobile phone. This feature can be turned on or off by the administrator, and from an end users screen, the feature can be found on the main menu, if it is active. To set up a remote office you just need to input a phone number, be it a mobile or a hotel number, and then click on the activate button. Once active it will state that it is active and you will be able to deactivate it or upgrade if you want to change the number. Remote office allows a Horizon user to use any phone as their 'Horizon phone' - meaning they won't need to pay locally for calls and their Horizon number will be presented on outgoing calls. This can be particularly useful in the likes of hotels, where calls can often be costly. How to give a user permission to use the feature Log into the Horizon company as an Admin directly through Select users > list users.
207 Locate the relevant user and click 'edit'. Click 'Permissions'.


208 The permission 'This user can use Remote Office' can be set to on, to give the user access, or off to restrict access. Admin users can always enable/disable this for end users. How to enable/disable the feature as an Admin Log into the Horizon company as an Admin directly through Select users > list users.


209 Locate the relevant user and click 'edit'. Click 'Call Setup' then under settings select 'Remote Office'.

210 You can then input the phone number you'd like to use for remote office and click 'Activate'.


211 This is the phone number that incoming calls to your Horizon number will ring to. Outgoing calls will ring this number before connecting to the destination number. Please see the making/receiving calls section for further info. How to enable/disable the feature as a User Log into the Horizon Portal using your username/password. Select 'Remote office' from the menu.


212 If this menu item is not present it means the user does not have permission to use Remote Office - please refer to the 'How to give a user permission to use the feature' guide for instructions on how to do this. You can then input the phone number you'd like to use for remote office and click 'Activate'. This is the phone number that incoming calls to your Horizon number will ring to. Outgoing calls will ring this number before connecting to the destination number. Please see the making/receiving calls section for further info. Remote office will then be active - you can update the number by entering a new one and clicking 'update'. How to make outgoing calls Log into the Horizon Portal using your username/password. Outgoing calls must be made through the Horizon Portal using click to dial. You can either enter the number you'd lick to call and lick the blue 'dial' button, or click the blue telephone icon next to someone from your directory.

213 The tick will indicate the call has been triggered successfully. The user will then;


214 1. Receive an incoming call on their remote office number 2. When answered, Horizon will then call out to the destination number 3. The call can then proceed as normal How to receive calls Incoming calls will be delivered directly to the number that's been enabled for Remote Office. Please note that if a user has a restriction to mobile phones (calling them or transferring to them) then Remote Office to a mobile will not work and a "Call cannot be completed" message will be displayed. Call Setup The call set up screen can be found on either the end users screen, from the main menu, or from an administrator login which can be found when editing a user. From here you can edit some of the core features that an end user would use. These features will vary depending on the service pack that the user has and whether the administrator has given permission to the user to edit all their own features. Call Handling This service enables a user to define criteria that causes certain incoming calls to be redirected to user-specified destinations. You are able to set up two different options; for when you are busy and for when you don t answer. The when I m busy option works when you are already on a call and the person making the call will be either forwarded to another number, send the call to a voice mail or have no affect. You are also able to select the same options for when I don t answer but you are able to select after how many rings an action is performed. Incoming Calls Settings These are all the other settings that a Standard user can set that will affect incoming calls. Enabling music for calls on hold will enable music on hold provided the feature has been set up for the site you are associated with. Present incoming caller s ID for external calls and present incoming caller s ID for internal calls will allow users to see your caller ID.


215 Outgoing Calls Settings From the outgoing call settings, you can decide if you would like your number to be withheld or not. This will mean that the person you are making the call to will be unable to view your number. Call Transfer Call transfer recall will allow you to transfer a call and receive the call back if no one answerers the call. From this page, you can also limit the use of this feature for each individual user. You will need to enable call transfer to set up a recall, and then you will need to select the dropdown and select after how many rings you want call to return to you. Busy camp will affectively allow you to park a call. This means that if you transfer a call to a user who is busy then the call will be put on hold and if the call ends within the time Busy Camp is enabled, the call will be successfully transferred. Blind transfer will allow you to transfer a call without answering it. If you turn on Use Diversion Inhibitor for Blind Transfer this will turn that feature off. Consultative Calls allows you to transfer a call and tell the caller that they are being transferred. Diversion Inhibitor for Consultative Calls will turn this feature off.

216 Activate or Deactivate Call Transfer From the Users drop down in the menu, select "List Users". Select the user you wish to activate or deactivate Call Transfer for and click "Edit".

217 Select "Call Setup" and then with the menu populated on the left-hand side, select "Call Transfer" under the "In Call Options" heading. Once you're here, you can set Call Transfer Recall to "On" of "Off". If you select On, you'll be presented with two more options; Number of Rings before Recall and Enable Busy Camp. Number of Rings before Recall gives you the option to select the number of rings you want before the call is routed back to yourself. Enable Busy Camp is if you want the call to hold a call in a queue for a designated amount of time (seconds) if the user you are transferring to is busy (engaged tone). Diversion Inhibitor Diversion Inhibitor provides the option to prevent calls being redirected, despite how the User you are transferring the call to has their settings. There are two settings for Diversion Inhibitor. These are: Use Diversion Inhibitor for Blind Transfer - this is where you want to transfer a call to an extension number, removing all redirections in place, without going through to the extension first. Use Diversion Inhibitor for Consultative Calls - this is where you want to transfer a call to an extension number, removing all redirections in place, speaking to the user who owns the extension number first. This function can only be set up by the Administrator. Short code: Diversion Inhibitor *80 From the "Users" menu option, select "List Users".

218 Select the user that you want to edit and click the corresponding "Edit" button. Select "Call Setup"


219 Under the "In Call Options" table, select "Call Transfer". From here you can select if you want to user Diversion Inhibitor for Blind Transfer and/or Consultative Calls. In Call Settings The in call settings page will let you enable call waiting, which will allow you to see incoming calls on your device and the person ringing will just hear a ringing tone. This enables you to put one call on hold while you speak to the other call.


220 Voic Settings The voice mail option allows you to configure your own voice mail. You can set up the system so you can play your own recording, which must be a WAV and encoded with CCITT u-law. They should be formatted at khz, 8 Bit Mono, 7 kb/sec. Or you can also keep it as the system default message. From this screen, you can set it up so that you are notified by when you have received a voice message. You are also able to change your PIN from here if needed. On a Polycom phone, you can press the message button which will take you to your messaging service. When accessing your voice portal via an external number pressing the hash key # will not always be needed but will help speed up the process. The longest voice message that you can receive is 2 minutes, once you reach the limit a message will play to inform you that the limit has been reached. If the administrator decided to only give the end user access to some features, then they will only be able to edit: Call Handling Twinning Hot Desking Speed Dial Blacklist. The full list of features is still edited by an administrator. Twinning This service allows you to connect up to 4 additional numbers so that all devices will ring at once so you can be reached where ever you are. To activate this feature just input the name for the additional number and the number you would like to ring as well. If you click on the cog you will be able to go to the advance option page where you can set up addition features. For the twinning feature to work correctly you are unable to use extensions.


221 The advance features allow you to set it up so that your devices only call if they are from certain numbers. You can set this up independently for each number. You are also able to set up a schedule for the numbers so they only become active during certain times. This can also be set up for each number independently. Restrict by Number The restrict number section can be used for multiple features and is the same for features. To set up restriction on the incoming number, select only twin for the following numbers and then input the numbers that you want this feature to work for. This will allow you to set up so that your twinned number will only ring from callers you want it to. You are unable to use extensions for this feature. Restrict by Schedule Restrict by Schedule works for multiple features and works the same for all features. To set up a schedule you need to click on use twinning on this number only when I m available. Then you will need to click on a schedule that you would like to use. This means that your number will only be activated during that time scale. You can click on a plus logo which will take you to a page where you can create a new event and schedule. Follow the schedule setup that is under the site management.

222 Blacklist Your blacklist feature allows you to block any number you like so that the number will be automatically blocked. To add a number, either search your directory by clicking the directory button, or add a known number. Once you have input a number click the Add button and then the Save button. You are unable to block extensions, only DDIs and if a number is withheld, you will need to turn on the reject withheld feature for them to be blocked. Incoming Call Settings Reject Withheld Numbers This means that all numbers that have withheld their number will be rejected. Enabling music for calls on hold will enable music on hold provided if the feature has been set up for the site you are associated with. Present incoming caller s ID for external calls - will present incoming caller s ID for internal calls and will allow users to see your caller ID when making outgoing calls. Distinctive Ring for External Calls it is possible to assign different internal and external ring-tones, all users have distinctive ring assigned however the distinctive ringing feature will be disabled by default. They can then enable/disable the distinctive ring for external calls via the Horizon GUI (provided they have the advanced call setup permissions enabled) by going to Call Setup then Incoming Calls and then Settings.
223 The first time that a user enables the feature, the distinctive ring criteria must be created for this user. This will allow distinctive ring to be applied to any external phone number. For call centre, hunt groups and call queue groups, you activate it by using the advanced settings page. Please note that distinctive ring does not work on Yealink or Cisco DECT handsets. Do not disturb Do Not Disturb (DND) allows users to set their phone as unavailable so that incoming calls are given a busy treatment i.e. sending the call to your voice mail or forward them to another number. Users have the option to activate and deactivate the service by dialling a feature access code or configuring the service via their web interface or by pressing the DND button on phones which support it. This can be activated and deactivated using the handset directly (if applicable), the voice portal or the GUI. Short codes via the handset: To activate - *78 To deactivate - *79 Do Not Disturb via the Horizon portal From the Users drop down in the menu, select "List Users". Select the user you wish to set up Do Not Disturb for and click "Edit".


224 Select "Call Setup" and then with the menu populated on the left-hand side, select "Settings" under Incoming Calls. From here, you can either Enable or Disable Do Not Disturb. Call Notify You can set up a call notify, which will notify you with an that you have been called. You are also able to set it up so it only works at certain times and for certain numbers. Call notify can only be set up by the Administrator. From the Users drop down in the menu, select "List Users".
225 Select the user you wish to set up Call Notify by for and click "Edit". Select the Call Set Up click, and from the menu that is populated on the right-hand side, click "Advanced" under "Incoming Calls" and then click "Call Notify".
226 Using the radio button, select if you want Call Notify by on or off. If you select On, you'll get some more options. You should enter your address into the Notify text box. If you want it to notify you at certain times, you can set up Schedules and select this by using the "Use call notify on this number only when I'm available". If you want to be notified by of a call from a certain number(s) within your directory, you can do this as well by selecting "Notify me only for these numbers" and using the textbox and the Add button, or you can search your directory by clicking the directory icon. To view advance options where you can set selective numbers or set times using a schedule, view restrict by number and restrict by schedule. Change address for Call Notify by From the Users drop down in the menu, select "List Users".

227 Select the user you wish to set up Call Notify by for and click "Edit". Select the Call Set Up click, and from the menu that is populated on the right-hand side, click "Advanced" under "Incoming Calls" and then click "Call Notify". Ensuring that the radio button is set to "On", you just type over the address in the text box and click "Save".

228 Sequential Ring Sequential Ringing enables users to define a "find me" list of phone numbers that are alerted sequentially for incoming calls that match specified criteria. While the service searches for the user the calling party is provided with a greeting followed by periodic comfort announcements. This feature will ring a contact number and then move on to the next number in the list after a pre-set number of rings has been met. You will need to activate the feature by selecting the on/off switch so on is displayed. Then you need to input up to 5 numbers that you can be reached on. You can either select these numbers from your directory or input your own numbers. The settings option allows you to select the number of rings a number will receive before moving onto the next number. The caller can also interrupt the search to leave a message by pressing a DTMF key. The user must set the number of rings after which the sequence will continue to the next phone number.
229 If you click on the advance button you will be able to select advance options where you can input whether you want this feature to work for certain numbers only and at certain times of the day. To set up this feature look at sections restrict by number and restrict by schedule. How do I set my number to find me over multiple devices? This can be achieved using sequential ringing located under Call Setup in the Horizon systems. Sequential ringing works in the same way a Hunt Group would, in that you can define a set of numbers for an incoming call to try when an incoming call is made to your number. Set Up Sequential Ringing Hover over "Users" and then click "List Users". Locate the User you want to set up Sequential Ringing for. You can do this by scrolling through the User list, or you can use the search facility presented on the page. Click the "Edit" button next to the User you wish to set up Sequential Ringing for.

230 Click "Call Setup" Under the "Incoming Calls" section of the side-menu, click "Advanced" and then "Sequential Ringing".
231 Set the "Enable Sequential Ring" tab to "On", enter the user s telephone numbers and how many rings before you move onto the next number then click "Save". Specific Numbers or Schedules Sequential Ringing Hover over "Users" and then click "List Users".
232 Locate the User you want to set up Sequential Ringing for. You can do this by scrolling through the User list, or you can use the search facility presented on the page. Click the "Edit" button next to the User you wish to set up Sequential Ringing for. Click "Call Setup"

233 Under the "Incoming Calls" section of the side-menu, click "Advanced" and then "Sequential Ringing". Set the "Enable Sequential Ring" tab to "On", enter the user s telephone numbers and how many rings before you move onto the next number then click "Advanced".


234 Select "Apply to these numbers" if you want Sequential Ringing for when a specific number calls you, "Use ringing during a schedule" for when a call comes to you during a certain schedule. You can use both at the same time, or just choose one. Click "Save" when you've completed this.


235 Busy Lamp Busy Lamp allows you to monitor other users to see if they are available or on a call. This feature is only available to a phone that supports it. When implemented, the phone will show the user s caller id on the pre-defined line keys on your device. This line key can also be used as a speed dial to contact your colleague s number quickly when transferring a call or when needing to speak to them directly. This function is set up by the Administrator only. Cisco handset available Cisco handset unavailable Polycom handset available Polycom handset unavailable The maximum number of BLFs is 50 where supported by the relevant hardware. The programming of these BLFs is done within the Horizon interface under the Busy Lamp Field section. BLFs on Polycom 650


236 A total of 46 Busy Lamp Fields can be made available to the end user by attaching 3 side car units to the Polycom 650. BLFs on Cisco devices A total of 50 Busy Lamp Fields can be made available to the end user by attaching 2 side car units to the Cisco 5XX range of devices. Please note when using Cisco sidecars, contacts monitored on hidden pages on the side car (e.g. buttons in the above single unit example) will not be visible to monitor unless the second page button is pushed. To set up a busy lamp, hover over "Users" and then click "List Users". Locate the User you want to set up with Busy Lamp. You can do this by scrolling through the User list, or you can use the search facility presented on the page. Click the "Edit" button next to the User you wish to set up Sequential Ringing for.


237 Click "Call Setup" Under the "Incoming Calls" section of the side-menu, click "Advanced" and then "Busy Lamp". Horizon will detect to see if the user s device is compatible for Busy Lamp. If not, you'll be returned with an error message. If the handset is compatible for Busy Lamp, select if you have a Sidecar installed, and then what users you want to be "monitored". Click Save


238 You can also see the number of sidecars there are available and view contacts assigned to the maximum of BLFs available on the attached devices. An indicator of BLFs used is also shown in the bottom right hand corner of the screen. Speed Dial Each user can set up their own speed dial so they can call people quicker, using either 1 digit or 2 digit numbers. To make a call using 1 digit dialling, just enter the number and then push the dial button on your device. To use the 2-digit dialling, enter a hash (#) and then the 2 digits, and then press the dial button on your device.


239 To set up your speed dial, click on the 1 digit or 2 digit dialling tab and then click the Add New to add a new speed dial entry. Then you can add a new contact by inputting their name and number or by selecting a contact from your directory. Set Up User 1 or 2 Digit Dialling Hover over "Users" and then click "List Users". Locate the User you want to set up 1 Digit Dialling for. You can do this by scrolling through the User list, or you can use the search facility presented on the page. Click the "Edit" button next to the User you wish to set up 1 Digit Dialling for.
240 Click "Call Setup" Under the "Outgoing Calls" section of the side-menu, click "Speed Dial".


241 1 Digit Dialling is defaulted. Click "Add New" for 1 digit dialling. For 2-digit dialling, click the 2 Digit Dialling tab and then click "Add New". Click the "Search Directory" icon.
 and click \"Search\".")

242 Use the Search Directory fields (minimum of one field must be completed) and click "Search". Click the radio button next to the User you want to assign to the telephone number and click "Select".

243 Click Save. Set Up User Bulk 2 Digit Dialling Hover over "Users" and then click "List Users". Locate the User you want to set up 2 Digit Dialling for. You can do this by scrolling through the User list, or you can use the search facility presented on the page. Click the "Edit" button next to the User you wish to set up 2 Digit Dialling for. Click "Call Setup" Under the "Outgoing Calls" section of the side-menu, click "Speed Dial". Under the "Upload Multiple 2 Digit Dialling" area of the GUI, click "Download Template". This is a csv file and needs to stay a csv when it is uploaded once completed Click the "Search Directory" icon. Use the Search Directory fields (minimum of one field must be completed) and click "Search". Click the radio button next to the User you want to assign to the telephone number and click "Select". Click Save. Outgoing Call Settings Outgoing call settings allows you to set up some configurations that will affect your outgoing calls.
244 Automatic Call Back If you call another Horizon user within your company and they are busy, Automatic Call back allows you to be notified when they are off the phone. This function can be set up by the Administrator for a user Menu Access #9 Deactivation #8 Click "Users" and then "List Users". Select the user which you wish to apply the Automatic Call Back option for and click the "Edit" button. Click the "Call Setup" link.


245 Select "Settings" under the "Outgoing Calls" tab. Within the settings menu, change the corresponding radio button to "Enable Automatic Call-back" to On or Off, and then click "Apply". The information message "Your settings have been updated successfully" will be displayed once the Automatic Call Back feature has been turned on or off.


246 Number Withheld You are also able to make your number withheld which will allow you to hide your number when making outgoing calls. Anonymous Call Rejection Anonymous Call Rejection enables a user to reject calls from anonymous parties who have explicitly restricted their Caller ID. By activating the service via a web interface callers without available caller identification are informed that the user is not accepting calls at that time. The user s phone does not ring and the user sees or hears no indication of the attempted call. This service does not apply to calls from within the group Short codes: Activate *77 Deactivate *87 Turn Anonymous Call Rejection O n or Off using GUI Click "Users" and then "List Users".
247 Select the user which you wish to apply the Anonymous Call Rejection for and click the "Edit" button. Click the "Call Setup" link.

248 Select "Settings" and within the Incoming Calls menu, change the corresponding radio button to "Reject Withheld Numbers" and then click "Apply". The information message "Your settings have been updated successfully" will be displayed once the Anonymous Call Rejection has been turned on or off.


249 Click to Dial Click to Dial enables a user to use the Horizon GUI to call someone within the Horizon directory. To do this, you just click on the telephone icon that is next to the user. Device Customisation The Administrator or user (if granted permission by the administrator) can configure line keys for options such as Busy Lamp Fields or Speed Dials only and soft key options such as feature short cuts, redial, DND and Group Pickup for their device via the Horizon interface and these will be stored on the device during firmware updates.
250 Unlike other services, you can also configure the phone for different call states such as Idle or Connected. The customisation is dependent upon the type of handset please see the following sections for details however the following handsets can be customised: - Cisco Polycom Soundpoint Cisco Polycom Soundpoint Cisco Cisco SPA500S side car - Polycom VVX Polycom VVX 410 and Polycom VVX 500 (line keys only) - Polycom VVX Polycom Soundstation side car Device Customisation - Polycom It is possible to configure and reset line keys on the handset, line keys on the side cars and also the soft keys on the handset. Assigning a Speed Dial to a Line Key on a handset Note: when you save your new line keys, your device will automatically restart if the device is not in use. If the device is in use, Horizon will wait until the device is free and then restart. Click Device Customisation Button Click Line Key Button

251 Click on a line key

252 Line Keys 1 and 2 are disabled as they are already pre-programmed for your telephone line. You'll be presented with a pop-up window. Select the speed dial option from the dropdown. Enter your speed dial name and number

253 The Horizon Portal will update the label for the line key with the entered speed dial name Remember to click "Save" once you are finished Resetting Line Keys Configuration on a handset Please be aware that when resetting the layout, the device's configuration and all speed dials are removed, however any Busy Lamp Field users will still be present. Each of the "Reset Layout" buttons are for that screen only. For example, clicking "Reset Layout" on the device screen will only affect that screen and not the side cars. Click Device Customisation Button
254 Click Line Key Button Click on "Reset Layout"
255 Confirm that you would like to reset the layout by clicking "Yes" You will see a notification that the layout has been reset

256 You will receive a notification that the device will reset and this may occur twice. Remember to click "Save" once you are finished

257 Assigning a Speed Dial to a Side Car Line Key. You must have a side car set up to access the side car screens. Individual BLF's cannot be defined at line key locations. Instead they will populate in the next free line key available that is set to the Busy Lamp Field. Assign a side car if not already done. Click the "Side Car" button Click on a line key number.


258 Select the speed dial option from the drop down. Click the "Save" button to update the configuration.

259 Click save on device screen to restart the device to download the latest configuration If your device is not restarted the configuration will automatically be downloaded at midnight. Resetting Layout on a side car The layout will be reset for the side car you have selected and not all the side cars that are attached to your device. You must click save to take the update.


260 It will only remove speed dials and busy lamp fields will appear in order of free line keys - so if you have busy lamp fields on your 2nd device they will change position This user guide starts from the selected device side car (User List > Edit > Phone Tab > Device Customisation > Side Car) Click "Reset Layout" Click "Yes" in the pop up window that appears to confirm the action and a description on what will happen.


261 The configuration file will remove any speed dials that have been assigned to that selected side car. Click "Save" on side car page to restart the device for the changes to appear on the device. If Save is not clicked the device will automatically restart at midnight and download the updated configuration file. Assigning Soft Key Options Click the 'Device Customisation' Button
262 Click the 'Soft Key' Button. The user can select the device state for which to configure the soft keys. Click on a Soft Key.

263 A pop up window will appear. Select a soft key option. Click Save.

 will be")
264 The Horizon Portal will update the label for the soft key with the selected value. The "More" button can be clicked on to apply options to the other soft keys on the device Click 'Save' to restart the device. If the user does not click 'Save', the new device configuration (containing the speed dials) will be applied at midnight Resetting the Soft Key layout. Click the 'Reset <Device State> Layout' Button


265 A pop up window will appear informing what will be reset - Click 'Yes'. The GUI will reset the layout for that state and the configuration file will update. Click 'Save' to restart the device.


266 Device Customisation - Cisco It is possible to configure and reset line keys on the handset, line keys on the side cars and also the soft keys on the handset. Assigning a Speed Dial to a Line Key on a handset Note: when you save your new line keys, your device will automatically restart if the device is not in use. If the device is in use, Horizon will wait until the device is free and then restart. Click Device Customisation Button Click Line Key Button


267 Click on a line key Line Keys 1 and 2 are disabled as they are already pre-programmed for your telephone line. You'll be presented with a pop-up window. Select the speed dial option from the dropdown.
268 Enter your speed dial name and number The Horizon Portal will update the label for the line key with the entered speed dial name

269 Remember to click "Save" once you are finished When you save your new line keys, your device will automatically restart if the device is not in use. If the device is in use Horizon will wait until the device is free and then restart. Resetting Line Keys Configuration on a handset Please be aware that when resetting the layout, the device's configuration and all speed dials are removed, however any Busy Lamp Field users will still be present. Each of the "Reset Layout" buttons are for that screen only. For example, clicking "Reset Layout" on the device screen will only affect that screen and not the side cars. Click Device Customisation Button Click Line Key Button Click on "Reset Layout"

270 Confirm that you would like to reset the layout by clicking "Yes" You will see a notification that the layout has been reset


271 You will receive a notification that the device will reset and this may occur twice. Remember to click "Save" once you are finished Assigning a Speed Dial to a Side Car Line Key. You must have a side car set up to access the side car screens. Individual BLF's cannot be defined at line key locations. Instead they will populate in the next free line key available that is set to the Busy Lamp Field. Assign a side car if not already done. Click the "Side Car" button

272 Click on a line key number. Note the images show both the SPA500s and SPA500DS Select the speed dial option from the drop down. Note: Validation takes place on empty name, special characters, empty number and invalid number. The user can assign shortcuts to options such as *83 Click the "Save" button to update the configuration.

273 Click save on device screen to restart the device to download the latest configuration If your device is not restarted, the configuration will automatically be downloaded at midnight.


274 Resetting Layout on a side car The layout will be reset for the side car you have selected and not all the side cars that are attached to your device. You must click save to take the update. It will only remove speed dials and busy lamp fields will appear in order of free line keys - so if you have busy lamp fields on your second device, they will change position. This user guide starts from the selected device side car (User List > Edit > Phone Tab > Device Customisation > Side Car) Click "Reset Layout" note the images show both the SPA500S and SPA500DS Click "Yes" in the pop up window that appears to confirm the action and a description on what will happen. The configuration file will remove any speed dials that have been assigned to that selected side car.


275 Click "Save" on side car page to restart the device for the changes to appear on the device. If Save is not clicked the device will automatically restart at midnight and download the updated configuration file. Assigning Soft Key Options The 'more' button can be clicked to apply options to the other soft keys on the device Click the 'Device Customisation' Button Click the 'Soft Key' Button.


276 The user can select the device state for which to configure the soft keys. Click on a Soft Key. A pop up window will appear. Select a soft key option. Click Save. The Horizon Portal will update the label for the soft key with the selected value.
 will be applied at midnight Resetting the Soft Key layout.")
277 Click 'Save' to restart the device. If the user does not click 'Save', the new device configuration (containing the speed dials) will be applied at midnight Resetting the Soft Key layout. Click the 'Reset <Device State> Layout' Button A pop up window will appear informing what will be reset - Click 'Yes'.


278 The Horizon portal will reset the layout for that state and the configuration file will update. Click 'Save' to restart the device. How to remove missed calls notifications from Cisco SPA handsets It is possible to remove the missed calls notification on the Cisco SPA phones by completing the following: Go to the Settings button under the voic key Choose Preferences


279 At the bottom, there is a Missed Call Banner selection Select the off option and save Please note this is a LOCAL setting and will be lost whenever the handset firmware is updated. It is also only applicable on Cisco handsets. User Reset Password Go to log in and select "My Details". Select "Change Password". Enter your old password and new password in the relevant boxes and click "Change".


280 Statistics The statistic page allows you to view information about the calls your company has received from, and made to, external numbers. There are four different graphs on the main statistics page. The advanced statistics page offers more detailed information about every internal or external call your company has made. You will also find some summary graphs on the dashboard. Performance On the performance page, you will see four graphs which show: calls made/retrieved, daily calls, how many calls are getting through and where are my callers. You can refine the results so that they only show calls related to either a site or a user. To search for a specific user s calls, just select the user from the directory window and click on update. To search by site, select it from the dropdown and then click update. You can view both inbound and outbound calls in all the graphs; to change what information is displayed just select either inbound or outbound from the tab menu under the search options. Calls Made/Retrieved This graph displays all external calls, and you can select if you want to view the calls on a monthly or weekly basis. By default, the graph will show monthly stats. To change this just click on the drop-down box and change it to weekly. On the weekly graph, there is a red trend line. This displays the average of the previous 4 weeks worth of calls which allows you to easily see an average of how many calls your company is making or receiving. If you hover over one of the bars it will display the total number of calls.


281 Daily Calls The daily call graph displays the 6 previous days worth of calls including today. Each day is in a different colour on the graph and you are also able to turn days off on the graph so they don t get displayed. To do this click on the day from the key and then the line on the graph will be hidden. To show the days calls again just re click on the name. If you hover over a point on the graph it will display the day and time of what that point represents and display how many calls were during that time. How many Calls are getting through? This graph will display how many calls were answered, how many were unanswered and how many were engaged. This information is displayed for the previous 6 days as well as today. As with the previous graph, you can hide certain bars just by clicking on the name within the key. If you hover over the bar it will display how many calls that bar represents. Where are my Callers? The final graph on the page displays the location where calls are being placed to and being received from. This will display either a geographical location, based upon the area code for the DDI, or what phone network a mobile device is using. If you click a segment of the pie it will display how many callers, you have received calls from. Advanced Statistics The Advanced statistics functionality allows you to search, view and download call data for calls that the company has made or received. When searching the calls, you can select from a range of options such as date, where you can select a start date and end date and it will display all the calls within that range. By default, this is set to search for calls over the last week. You can also filter calls by call type, where you can select inbound, outbound or both. You can also filter results on external or internal calls by changing the call scope. The final search criterion enables you to view calls by user or site.


282 Within this screen you will then can select one or all the following search criteria: By clicking on the Search button you will then be provided with a table of results based on your search criteria. Click the download button to get a copy of your call data. This will be downloaded onto your system in a.csv file to your default download folder. Statistic Dashboard
. The top ten callers display the top ten callers within the company.")


283 Admin On the dashboard, there are four statistic panels, two of which show top ten callers and the others show the same information as on the statistics page: one gives how many calls are getting through, the other graph showing calls per week is a little different as it shows data for fewer weeks (six instead of twenty-six). The top ten callers display the top ten callers within the company. Only external calls are recognised and you can either view the top ten callers by number of calls or the time they have spent on calls. There are two different panels one which displays outbound calls and the other inbound calls. End User On an end user s dashboard, they will be able to see some basic information about their calls. It will show the previous ten calls, inbound and outbound, as well as a graph to display how many calls you have placed and answered. From this panel, you can call any of the displayed numbers just by clicking on the dial button. Monitoring calls over my sites and users There are several ways you can monitor calls over both sites and users, and from the home page you can access a simple summary screen of calls made over the whole of your company as shown below

284 If you would then like to burrow into your company, sites, and user further you can access the Statistic link where you can either view summary graphs under Performance or if setup on Advanced Stats this link so you can burrow in to the raw data. Within the Performance screen 4 graphs appear which can be customised by the top search criteria to select either a Site or a User who you would like to see the performance of By clicking on the Update button once selected the graphs will then adjust to show the relevant detail for that search selection. Please note that for all call statistics, there is an issue in reporting calls routing to Hunt Groups. Instead of showing a single call, this will show multiple calls depending on the number of hops the call makes.


285 Inbound Statistics Calls Received This graph simply shows on a weekly or monthly view; how many calls are being received to the search criteria selected. Calls Received per hour This graph shows over the course of each day of the week, shown by different coloured lines, how many calls have been received per hour of the day. This report helps to show when your busy periods are for the search criteria selected. How many calls are getting through? This report shows how many calls are getting through on a 7-day rolling cycle. For each day on the graph scale 3 coloured lines will be shown, depicting whether calls were answered, unanswered or engaged, for the search


286 criteria you have selected. This report helps users to see if they have sufficient staff to take incoming business, or whether their incoming routing plan is handling the calls being delivered. Where are my callers located? This graph shows in a pie chart format where your customers are calling from based on the search criteria selected. Several different colours will show on this chart to depict the various caller locations, and can add value to marketing campaigns and survey if you have advertised a specific number for that particular use.


287 Outbound Statistics How many Outbound calls have I made? This report shows on either a weekly or monthly basis how many outbound calls have been made from the search criteria you have entered. How many calls am I making each hour? This graph shows over the course of a week how many calls are being made from the search criteria you have selected. A different coloured line will show for each day and will highlight when the busy periods are for the search criteria selected.


288 How many of our calls are getting through? This graph shows how many calls are being answered, unanswered, or hitting an engage tone, based on a 7-day rolling cycle. For each day 3 different lines will show the results for that day based on the search criteria you have submitted. Where are, we calling? This graph shows where your most frequently dialled locations are, based on the search criteria submitted. This will show as a coloured pie chart. Programmable Keys for Polycom 450 and 650 and Cisco 504 and 525. This will allow you to program keys on the right-hand side of your handsets to dial numbers of your choice.
Enterprise Voice SUBSCRIBER GUIDE
 Enterprise Voice SUBSCRIBER GUIDE Conterra Networks Enterprise Voice SUBSCRIBER GUIDE 3 TABLE OF CONTENTS Table of Contents Introduction... 6 Logging in... 6 Navigation Bar, Sub-Menu and Page Layout...
IP Centrex User Guide Release 2.1
 IP Centrex User Guide Release 2.1 2014 by Cox Communications. All rights reserved. No part of this document may be reproduced or transmitted in any form or by any means, electronic, mechanical, photocopying,
ENTERPRISE SUBSCRIBER GUIDE
 ENTERPRISE SUBSCRIBER GUIDE Enterprise Subscriber Guide 880 Montclair Road Suite 400 Birmingham, AL 353 www. TABLE OF CONTENTS Table of Contents Introduction...6 Logging In...6 Navigation Bar, Sub-Menu
Hosted Voice End User Guide Version 1.0 April End User Guide
 Hosted Voice End User Guide Version 1.0 April 2013 End User Guide Contents 1 Introduction... 1 2 Introducing CommPortal... 2 2.1 Accessing and Logging In... 2 2.2 Using CommPortal... 2 2.3 Getting help...
COMMAND CENTRAL. Commander Smart SIP ADMINISTRATOR GUIDE
 COMMAND CENTRAL Commander Smart SIP ADMINISTRATOR GUIDE Command Central Requirements... 3 Devices... 3 Browsers... 3 How to log into your account... 4 The Command Central Dashboard... 7 Managing Enterprise
End User Guide - Commportal
 End User Guide - Commportal Table of contents Table of contents 3 1 Introducing CommPortal 6 1.1 Accessing 6 1.2 Logging In 6 1.3 Using CommPortal 7 1.4 Getting Help 9 1.5 Refreshing a Page 9 1.6 Logging
1 Page. Digital Voice Services Business User Guide
 1 Page Digital Voice Services Business User Guide Feature Access Codes *62 Voice Portal *86 Direct Voice Mail Retrieval *77 Anonymous Call Rejection Activation *87 Anonymous Call Rejection Deactivation
Managing your PBX- Administrator
 Managing your PBX- Administrator ACCESSING YOUR PBX ACCOUNT Navigate to https://voip.ancero.com/ and log in to the Ancero Utility VoIP portal account. If you would like your web browser to keep you logged
My Phone. My Phone - Overview. Signing In
 My Phone - Overview The Optus Loop My Phone portal gives you full access to your personal phone service settings, allowing you to customise and manage your service to suit your specific requirements. Within
Group Administrators
 Hosted VoIP Phone System Blue Platform Admin Portal Guide for Group Administrators Table of Contents 1 About this Guide... 6 2 Accessing the Hosted VoIP Phone System Admin Portal... 7 3 Hosted VoIP Admin
First Communications Cloud IP PBX User Guide (Polycom)
") First Communications Cloud IP PBX User Guide (Polycom) 2017 Property of First Communications Contents Introduction... 3 General Phone Operations... 4 Polycom VVX 300 Series... 4 Polycom VVX 300 Series
First Communications Cloud IP PBX User Guide (Polycom) 2017 Property of First Communications Contents Introduction... 3 General Phone Operations... 4 Polycom VVX 300 Series... 4 Polycom VVX 300 Series
Call settings administrator guide. BT One Phone
 1 Call settings administrator guide BT One Phone 2 What s in this guide 1. Welcome to the BT One Phone 3 2. An introduction to the BT One Phone portal 4 3. Getting started 5 4. Call settings overview 9
Call Center Administration
 Hosted VoIP Phone System Blue Platform Admin Portal Guide for Call Center Administration 1 Table of Contents 1 About this Guide... 3 2 Accessing the Hosted VoIP Phone System Administration Portal... 4
The TELUS Business Connect Mobile solution. Admin guide
 The TELUS Business Connect Mobile solution Admin guide Table of contents. Part Getting started 4 Introduction 5 Admin homepage 5 Main functions 5 Admin Portal 5 My Extension 6 Do Not Disturb 7 RingOut
Call Centres (ACD) Manual
 Manual") Call Centres (ACD) Manual Description Use the Call Centre ACD feature if you want to allow a Site to distribute incoming calls to multiple Users from a single central phone number. TelephoneSystems.Cloud
Call Centres (ACD) Manual Description Use the Call Centre ACD feature if you want to allow a Site to distribute incoming calls to multiple Users from a single central phone number. TelephoneSystems.Cloud
Telair Hosted Voice. Cloud Telephony Administrator Guide. Telair Pty Ltd "Committed to delivering what we promise"
 Telair Hosted Voice Cloud Telephony Administrator Guide Table of Contents Features... 4 Feature Overview... 4 User Interface Overview... 5 Offices and Users... 7 Offices... 7 Users... 8 Call Routing...
Altice Business Hosted Voice. End User Guide. v
 Altice Business Hosted Voice End User Guide v03-27-18 Contents 1 Introduction... 1-1 1.1 Accessing... 1-1 1.2 Logging into CommPortal BG Admin... 1-2 2 Introducing CommPortal... 2-1 2.1 Accessing... 2-1
IP Centrex Administrator Guide Release 2.0
 IP Centrex Administrator Guide Release 2.0 2012 by Cox Communications. All rights reserved. No part of this document may be reproduced or transmitted in any form or by any means, electronic, mechanical,
Group Administrators Guide The PBX Call Central Userguide
 The PBX Call Central Userguide QUICK START GUIDE Your Start Up configuration After your purchase of the Hosted Phone service, the Hosted Phone team configured a basic phone system to get you started. This
Digital Voice Services Residential User Guide
 Digital Voice Services Residential User Guide 2 P a g e * Feature Access Codes *11 Broadworks Anywhere (pulling call to alternate phone) *62 Access Voicemail *72 Call Forwarding Always Activation *73 Call
Connected Office Voice. Key System Administrator Guide
 Connected Office Voice Key System Administrator Guide Connected Office Voice Key Admin Guide Table of Contents 8 Part 1: Getting Started 9 Introduction 10 Installing Your Phones 10 Box Contents 11 Attaching
C L O U D V O I C E B U S I N E S S P O R T A L
 C L O U D V O I C E B U S I N E S S P O R T A L S I T E F E A T U R E S G U I D E V E R S I O N 2. 0 Contents Introduction... 8 Overview... 8 Audience... 8 Account Codes... 9 Description... 9 Description
Easy Attendant User Guide
 Welcome Easy Attendant will provide your business with a convenient and virtual means to answer your business incoming telephone calls. Easy Attendant is an easy to use solution that combines advanced
Administrator Portal User Guide
 Administrator Portal User Guide Table of Contents... 1 Portal Navigation... 4 Home Page... 4 User Administration... 8 Creating a New User... 8 Creating an ATA Device... 28 Adtran ATA/Router Devices...
managedip Hosted TDS Table of Contents Administrator User Guide
 Table of Contents Administrator Hierarchy... 2 Enterprise Set Up... 3 Group Set Up... 4 Department Set Up... 7 User Set Up... 8 Group Services... 9 Configuration of Group Services... 9 Auto Attendant...
ActivePBX Administrator s Guide
 ActivePBX Administrator s Guide CONTENTS Preface... v Document Conventions... v Glossary Conventions... v 1. Accessing the Admin Web Portal... 6 Logging in to the Web Portal... 7 Understanding the Admin
Hosted PBX Administrator Guide
 Hosted PBX Administrator Guide Table of Contents 1 INTRODUCTION... 1-1 1.1 PURPOSE OF THIS GUIDE... 1-1 1.2 OTHER GUIDES... 1-1 2 COMMPORTAL BUSINESS GROUP ADMINISTRATOR (BG ADMIN)... 2-1 2.1 ACCESSING
End User Guide Cloud PBX
 End User Guide Entrust ICT(EICT) reserves the right to change product specifications, functions, or features, at any time, without notice. Please refer to your EICT representatives for further details.
Digital Telephone User Guide
 Digital Telephone User Guide 1 P. O. Box 99, Conway, AR 72033 (501) 450-6000 ConwayCorp.com * Feature Access Codes *11 Broadworks Anywhere (pulling call to alternate phone) *62 Access Voicemail *72 Call
ENA SmartVoice User Guide
 TABLE OF CONTENTS SECTION 1: INTRODUCTION... 1 SECTION 2: MAKING CALLS... 2 Internally... 2 Externally... 2 Emergency Calls... 2 Speaker Phone... 2 Ending Calls... 2 SECTION 3: ANSWERING CALLS... 3 Using
Virtual Communications Express Admin Guide: Getting Started Welcome to Verizon Virtual Communications Express!
 Welcome to Verizon Virtual Communications Express! Virtual Communications Express is an easy-to-use service designed to enhance communications with your coworkers, customers, and suppliers. It can help
End User Guide. FastFind Links. Using Your Desk Phone. Using the User Web Portal. Voic . Answering Rules and Time Frames. Contacts.
 End User Guide Using Your Desk Phone FastFind Links Using the User Web Portal Voicemail Answering Rules and Time Frames Contacts Phones Music On Hold Call History Profile CONTENTS Contents... ii Introduction...
1 P age NEXTIVA CALL CENTER. Supervisor User Guide. nextiva.com/support 2015 NEXTIVA, ALL RIGHTS RESERVED
 1 P age NEXTIVA CALL CENTER Supervisor User Guide nextiva.com/support 2015 NEXTIVA, ALL RIGHTS RESERVED 2 P age Creating Employees... 3 Creating an Employee... 3 Assigning Licenses to Employees... 7 Schedules...
CALL FEATURES USER GUIDE. Houston Dallas Austin San Antonio Oklahoma City
 CALL FEATURES USER GUIDE Houston Dallas Austin San Antonio Oklahoma City Table of Contents Account / Authorization Codes.... 3 Advanced Hunting.... 4 Anonymous Call Rejection... 4 Anywhere.... 5 Auto Attendant...
The guide is divided into sections which describe how to configure and manage different aspects of the Hosted PBX service for your business group.
 Welcome This guide is intended to help Business Group Administrators of FairPoint Communications Hosted PBX service to perform the various tasks needed to administer the system, such as: Managing lines,
He lios. Complete Cloud Telephony Solution. Simply packed with clever features to help you make the most of your telephone communications
 Complete Cloud Telephony Solution NIMBOS COMMUNICATIONS LTD Tel: 03330 433550 Simply packed with clever features to help you make the most of your telephone communications Introduction Helios is a cost
O1 Communications, Inc.
 O1 Communications, Inc. VoiceStream Service Installation Overview Welcome to your VoiceStream Service!...2 Service Installation Overview.2 VoiceStream Portals the key to configuring and managing your service...
Table of Contents. HostedVoIP_End_User_Portal_0816rev4.doc Page 2 of 81
 . CenturyLink Hosted VoIP End User Portal User Guide Table of Contents Portal Navigation... 4 Home Page Navigation... 4 Call Logs... 6 Exporting Call Logs... 7 Call Settings... 8 Call Waiting... 9 Auto
User Guide Business Hosted Voice DOCUMENT VERSION: 4.0
 User Guide Business Hosted Voice DOCUMENT VERSION: 4.0 DATE OF ISSUE: 30 NOVEMBER 2018 Welcome! We want to help your business connect. We re sure you will enjoy the benefits of these services. Plus our
BUSINESS PHONE USER S MANUAL
 Wire your business for success Find great business services inside. BUSINESS PHONE USER S MANUAL INSIDE: - PHONE PLANS - HOW TO ACCESS YOUR FEATURES ONLINE CLICK BUSINESS.CABLEONE.NET TODAY! BUSINESS CARE
Virtual Office Phone Service Setup Guide
 Setup Guide A guide for the Phone System Administrator Version 4.0, July 2010 Table of Contents Welcome to 8x8 Virtual Office!...3 Activate Your 8x8 IP Phones...3 The 8x8 Self Service Portal...4 Set Up
This guide is intended to support you setting up a new Nebula IP System from the Nebula portal.
 Nebula IP Hosted Telephony Nebula IP System includes all the features you will find on most modern PBX s as well as some more, but where hosted solutions really excel is in the flexibility you will gain
AT&T Collaborate glossary
 Common terms associated with the AT&T Collaborate SM service. A B C D E F G H I J K L M N O P Q R S T U V W X Y Z A account codes A feature that lets administrators track and manage outgoing calls to keep
AirePBX End User Guide
 AirePBX End User Guide Third Quarter 2012 Contents 1 Introduction 1-1 2 Making calls 2-1 1. Internally 2-1 2. Externally 2-1 3. Emergency calls 2-1 4. Speaker phone 2-1 5. Ending calls 2-1 3 Answering
Version 1.2, 28 February Far South Networks
 COM.X IP PBX END USER GUIDE Version 1.2, 28 February 2014 Document History Version Date Description of Changes 1.0 10/01/01 First release 1.1 10/10/08 Added instructions for remote voice mailbox access,
Hosted PBX Administrator s Guide. IVR DID Management CALL QUEUES. 1 Ally Communications Hosted PBX Administrator's Guide
 Hosted PBX Administrator s Guide CALL QUEUES IVR DID Management 1 CONTENTS Preface Document Conventions Glossary Conventions 1. Accessing the Admin Web Portal Logging in to the Web Portal Understanding
Cox Business VoiceManager SM User Reference Guide
 Cox Business VoiceManager SM User Reference Guide Dear Customer: Thank you for choosing Cox Business VoiceManager, SM provided by Cox Business. VoiceManager is phone service that gives you complete control
Residential Voice SUBSCRIBER GUIDE
 Residential Voice SUBSCRIBER GUIDE RESIDENTIAL VOICE SUBSCRIBER GUIDE TABLE OF CONTENTS Table of Contents Getting Started... 6 Requirements... 6 First Login... 6 Features Management... 0 Basic Features...
A Guide to Voice Edge s Most Popular Features
 A Guide to Voice Edge s Most Popular Features Page 1 10/31/2017 Table of Contents GETTING STARTED... 4 WELCOME LETTERS... 4 VOICEMAIL... 4 SETTING UP VOICEMAIL... 4 RECORDING THE GREETING... 5 CHECKING
User Guide Get Started Manage Your Inbound Cal Features Using Schedules Find Administrators and Contacts
 Get Started...2 Log In...3 What a User Can Do in the Customer Portal...6 About Premier...7 Use Premier...8 Use the AT&T IP Flexible Reach Customer Portal...10 Search Overview...13 Glossary...16 Frequently
IP 530 User Manual Document No. 099 Version No. V5.51/1210/1. Copyright SpliceCom Ltd
 IP 530 User Manual Document No. 099 Version No. V5.51/1210/1 Copyright SpliceCom Ltd SpliceCom Ltd The Hall Business Centre, Berry Lane Chorleywood, Herts WD3 5EX Tel: 01923 287700 Website: www.splicecom.com
COMMAND CENTRAL. Commander Phone USER GUIDE
 COMMAND CENTRAL Commander Phone USER GUIDE Getting Started How to log into your Command Central account The Command Central Dashboard Feature Quick Set Call Logs Help guides Contacts and Speed dials My
Table of Contents DVX-2005F IPPBX
 Table of Contents Chapter 1Feature Codes... 1 1.1 Blacklist... 1 1.2 Pickup Call... 2 1.3 Call Parking... 3 1.4 Call Transfer... 4 1.5 Conference... 5 1.6 Voicemail... 6 1.7 One Touch Recording... 7 1.8
Version 1.2, 28 February Far South Networks
 COM.X IP PBX END USER GUIDE Version 1.2, 28 February 2014 Document History Version Date Description of Changes 1.0 10/01/01 First release 1.1 10/10/08 Added instructions for remote voice mailbox access,
Analogue Telephone Adapter (MP 118)
") Analogue Telephone Adapter (MP 118) Analogue Telephone Adapter (ATA) Overview ou can connect traditional analogue telephones and similar customer-premise devices such as fax machines, to the Optus Loop
Analogue Telephone Adapter (MP 118) Analogue Telephone Adapter (ATA) Overview ou can connect traditional analogue telephones and similar customer-premise devices such as fax machines, to the Optus Loop
Hosted VoIP End User Guide
 Hosted VoIP End User Guide Table of Contents: 1. Online Portal User Guide...pg 1 2. System Dial Codes... pg 6 3. Phone User Guides: a. PolyCom Guide... pg 7 b. Cisco Guide... pg 10 c. Yealink Guide...
CommPortal User Guide
 CommPortal User Guide Broadband and Voice Applications Turn your web browser into your personal call center CommPortal is an interactive web program that allows you to check your VoiceMail, set preferences
ADMINISTRATOR PORTAL GUIDE
 ADMINISTRATOR PORTAL GUIDE 1504 Providence Highway, Suite 19, Norwood, MA 02062 Toll Free: 866-303-8600 www.votacall.com Table of Contents 1) Introduction... 3 a) Guide Explanation... 3 b) Access to site...
Virtual Office Phone Service Setup Guide
 Setup Guide A guide for the Phone System Administrator Version 6.0, November 2010 Table of Contents Welcome to 8x8 Virtual Office!...3 8x8 Virtual Office Softphone...3 Activate Your 8x8 IP Phones...3 The
Reference Guide. IP Phone/Calling Features Voice Mail Personal Assistant Toolbar. Dialing. Your Phone Calling Features.
 TelNet OfficeEdge Complete Polycom SoundPoint 550 IP Phone. Reference Guide IP Phone/Calling Features Voice Mail Personal Assistant Toolbar Dialing To dial phone number or extension Lift your handset and
BT Cloud Phone. User guide for the Admin portal
 BT Cloud Phone User guide for the Admin portal 2 What s in this guide 999 or 112 emergency calls Each BT Cloud Phone number is registered to a specific address, so when you make a 999 or 112 call that
C u s t o m e r H a n d b o o k
 Customer Handbook TABLE OF CONTENTS Welcome...4 Billing Information...5 Contact Us...6 Payment Options...7 Comprehensive and Customizable...8 Quick Start Guide...9 Audio Conferencing...11 Anywhere...12
SELF-HELP GUIDe USER MANUAL HBT CUSTOMER PORTAL. Meet the future. Today.
 SELF-HELP GUIDe USER MANUAL HBT CUSTOMER PORTAL Meet the future. Today. Part of Telkom Business Connexion s Next Generation Networks and Services is the new Hosted Business Telephony (HBT) service. HBT
Table of Contents. End_User_Portal_0617rev4.doc Page 2 of 78
 . CenturyLink End User Portal User Guide Table of Contents Portal Navigation... 4 Home Page Navigation... 4 Call Logs... 6 Exporting Call Logs... 7 Call Features... 8 Call Recording... 8 Call Settings...
Hosted Voice. Premium Feature Pack
 Premium Feature Pack Purpose: To provide an explanation and example of each feature and service that Spectrum Enterprise offers. Each item will provide the reader with the following: 1. Overview of the
3CX Phone System User Guide
 3CX Phone System User Guide 31 Gloster Court, Dartmouth, NS B3B 1X9 Canada Toll free: 1-800-675-4025 Tel: 902-468-2252 Fax: 902-468-2557 cabcosales@cabco.ca 1 cabco.ca Contents Page Quick Start Guide 3
Manage User Features
 As an administrator for the AT&T Collaborate service, you can manage features for each user from the Users widget on the Collaborate homepage. First, you assign a feature to the user, and then turn the
AT&T IP Flexible Reach Department Administrator Guide
 AT&T IP Flexible Reach Department Administrator Guide 1 Contents Get Started... 5 Log In... 6 What a Department Administrator Can Do... 8 About Premier... 11 Use Premier... 12 Use the AT&T IP Flexible
Service Installation OVERVIEW
 Service Installation OVERVIEW Table of Contents Welcome to your DOTVOX Service!... 3 Service Installation Overview... 3 DOTVOX Portals the Key to Configuring and...3 Managing Your Service Four Steps to
Digital Voice Services Residential User Guide
 Digital Voice Services Residential User Guide TECH SUPPORT - 888.855.9997 734.324.7190 WYANDOTTECABLE.COM Feature Access Codes *62 Voice Portal *86 Direct Voice Mail Retrieval *77 Anonymous Call Rejection
Featureline. Site User Guide To make an external call press 9 followed by the telephone number
 Featureline Site User Guide To make an external call press 9 followed by the telephone number Call forwarding for when I m out and about - well that s a real bonus We find it s the best way of dealing
Quick Reference Guide.
 TelNet OfficeEdge Complete Cisco SPA500 series phone. Quick Reference Guide. IP Phone/Calling Features VoiceMail Personal Assistant Toolbar Dialing Your Phone Calling Features To dial phone number or extension
HughesFlex Cloud PBX Quick Start Guide
 HughesFlex Cloud PBX Quick Start Guide www.hughesflex.com 309-277-4111 info@hughestel.com WELCOME Welcome to HughesFlex Cloud PBX! This guide is intended to get you up and running with the basic features
Hosted IP Phone System Administrator Portal Reference Manual (Polycom)
") Hosted IP Phone System Administrator Portal Reference Manual (Polycom) POPP.com, Inc. All rights reserved. Service 24x7 @ 763-797-7900 or 1-800-234-POPP Page 1 of 50 9/27/18 Table of Contents 1 Introduction
Hosted IP Phone System Administrator Portal Reference Manual (Polycom) POPP.com, Inc. All rights reserved. Service 24x7 @ 763-797-7900 or 1-800-234-POPP Page 1 of 50 9/27/18 Table of Contents 1 Introduction
AT&T IP Flexible Reach User Guide
 AT&T IP Flexible Reach User Guide 1 Get Started... 4 Log In... 5 What a User Can Do in the Customer Portal... 7 About Premier... 8 Use Premier... 9 Use the AT&T IP Flexible Reach Customer Portal... 11
User Features. Hosted VoIP Services. Business Portal Guide Document Version 1.1a. GCI Network Solutions Ltd. Global House. 2 Crofton Close.
 Hosted VoIP Services User Features Business Portal Guide Document Version 1.1a GCI Network Solutions Ltd Global House 2 Crofton Close Lincoln Lincolnshire LN3 4NT www.gcicom.net 2014 GCI Network Solutions
Group Administrator Guide
 Get Started... 4 What a Group Administrator Can Do... 7 About Premier... 10 Use Premier... 11 Use the AT&T IP Flexible Reach Customer Portal... 14 Search and Listing Overview... 17 What s New in the Group
 Complete business communications, simply delivered, remarkably supported. Future Office Hosted Telephony Service, Future Office, is the most efficient and effective way to manage your voice communications.
Hosted Fax Mail. Blue Platform. User Guide
 Hosted Fax Mail Blue Platform Hosted Fax Mail User Guide Contents 1 About this Guide... 2 2 Hosted Fax Mail... 3 3 Getting Started... 4 3.1 Logging On to the Web Portal... 4 4 Web Portal Mailbox... 6 4.1
Getting Started with your vtalk
 Welcome Congratulations on purchasing a vtalk! We re glad to have you as part of the vtalk family. This guide will run you through how to setup your vtalk and get your business running in no time at all.
PCS 60 User Manual. Version 3.2. April 2009 Part No. DOC-MN-PCS60-00
 Version 3.2 April 2009 Part No. DOC-MN-PCS60-00 Document No. 005 Version No. V3.2/0409/4 Copyright SpliceCom Ltd SpliceCom Ltd The Hall Business Centre, Berry Lane Chorleywood, Herts WD3 5EX Tel: 01923
Medusabusiness MVP HOSTED MVP3 VOICE. Services Handbook
 Medusabusiness MVP3 2018 HOSTED MVP3 VOICE Services Handbook MARCH 2018 Medusabusiness MVP3 2018 VOICE SERVICES We are pleased to present our range of hosted voice services called MVP3. Our services are
HOSTED VOICE. Group Administrator User Guide. Technology working for you. Easy to get. Easy to use. 1 GETTING STARTED
 Group Administrator User Guide Technology working for you. Welcome to the Hosted Voice Group Administrator User Guide. While Hosted Voice is a fully managed service, there are many tasks you can perform
Hosted Voice. Mobility Feature Pack
 Mobility Feature Pack Purpose: To provide an explanation and example of each feature and service that Spectrum Enterprise offers. Each item will provide the reader with the following: 1. Overview of the
QUICK START GUIDE NTS HOSTED PBX CALL MANAGER. Welcome. Getting Oriented
 QUICK START GUIDE NTS HOSTED PBX Welcome Welcome to NTS Hosted PBX! This guide is intended to get you up and running with the basic features associated with the product. For more in-depth information,
Voic Plus User Guide
 Voicemail Plus User Guide Version: 2.0_CA Revised: 25 September 2007 Notices Copyright 2007 Vonage. All rights reserved. No part of this documentation may be reproduced in any form or by any means or used
COMMPORTAL. A better way to stay connected. SELF SERVICE GUIDE
 COMMPORTAL A better way to stay connected. SELF SERVICE GUIDE 1 TABLE OF CONTENTS WHAT IS COMMPORTAL... HOME TAB... ACCOUNT PHONE + SETTINGS, NO REPLY + BUSY STATUS, + ADVANCED SETTINGS. MESSAGES TAB...
BT CLOUD PHONE. USER GUIDE FOR MY EXTENSION.
 BT CLOUD PHONE. USER GUIDE FOR MY EXTENSION. WHAT S IN THIS GUIDE. 1. Welcome to BT Cloud Phone. 3 2. Express setup. 4 3. Accessing the BT Cloud Phone Portal. 5 4. My Extension Dashboard. 6 4.1 Overview:
Reference Guide. IP Phone/Calling Features Voic . Dialing. Your Phone Calling Features. Phone Views. To dial phone number or extension.
 TelNet OfficeEdge Complete Polycom VVX400 Series IP Phone. Reference Guide. IP Phone/Calling Features Voicemail Dialing Your Phone Calling Features To dial phone number or extension Lift your handset and
Extension User Guide. S-Series Extension User Guide
 Extension User Guide Sales Tel: +86-592-5503309 E-mail: sales@yeastar.com Support Tel:+86-592-5503301 E-mail: support@yeastar.com Web: http://www.yeastar.com Version: 1.0 Revised: 2016.06 1 Contents 1.
FEATURELINE CORPORATE.
 FEATURELINE CORPORATE. SITE USER GUIDE. This user guide provides you with all the information you need to get the most from your Featureline Corporate Phone. BTB-186 UG - Featureline Corporate AW.indd
Vision WebPartner User Manual for SIP phones. Vision 1.7 May 2018
 Vision WebPartner User Manual for SIP phones Vision 1.7 May 2018 WebPartner User Manual for SIP phones Document No. 036 Version No. v1.7/0518/1 Copyright Splicecom Ltd Splicecom Ltd The Hall Business Centre,
Solutions Reference Guide. IP TalkSM. Voic & Navigator Web Portal
 IP Talk SM Solutions Reference Guide IP TalkSM Voicemail & Navigator Web Portal Table of Contents Voicemail Accessing Your Voicemail................... 1 Voicemail Main Menu........................ 2
Hosted PBX Quick Start Guide
 Hosted PBX Quick Start Guide P 800.892.0163 628 Oregon Street, Hiawatha, KS 66434 www.rainbowtel.net Polycom VVX 300 6 line, Monochrome screen for utility applications Polycom VVX 500 12 line, color screen
Customer Administration Portal User Guide
 User Guide User Guide Table of Contents Section 1: Customer Administration Portal Access... 1 1.1 Log-in...1 1.2 Edit Profile...1 Section 2: Customer Administration Portal Overview... 2 2.1 Administrator
Com.X PBX. End User Guide. Version 1.1, 8 September Far South Networks
 Com.X PBX End User Guide Version 1.1, 8 September 2010 Document History Version Date Description of Changes 1.0 10/01/01 Preliminary 1.1 10/10/08 Added instructions for remote voice mailbox access, completed
Featureline Compact. Site User Guide To make an external call press 9 followed by the telephone number
 Featureline Compact Site User Guide To make an external call press 9 followed by the telephone number Call forwarding for when I m out and about - well that s a real bonus We find it s the best way of
Harvard Phone Account USER GUIDE
 Harvard Phone Account USER GUIDE INTRODUCTION Welcome Welcome to managing your phone and going mobile. This guide describes how to use your Self Service interface to: View basic telephone information such
A complete communications service for your business
 A complete communications service for your business Easily control your fixed and mobile telephony WHAT IS HORIZON? Horizon is a complete communications service for business that provides an extensive
Auto Attendant. Blue Platform. Administration. User Guide
 Blue Platform Administration User Guide Contents 1 About Auto Attendant... 3 1.1 Benefits... 3 2 Accessing the Auto Attendant Admin Portal... 4 3 Auto Attendant Admin Portal Interface... 5 4 Auto Attendant