DrugPak Web. Client Portal Documentation. Version 1.0
|
|
|
- Vernon Cobb
- 6 years ago
- Views:
Transcription
1 DrugPak Web Client Portal Documentation Version 1.0 Page 1
2 Contents Setup... 4 Login... 6 Company Detail... 9 Companies Contacts Display/Add/Change/Delete Display Add Change Delete Companies Addresses Display/Add/Change/Delete Display Add Change Delete Display Random Profiles Companies Participants Overview Companies Participants New Participant Companies Participants Update/Change Participant Information Overview Employment Vitals Companies Participants Testing Category Update/Change Identification Add/ Update/Delete Add Update Delete Occupations Add /Delete Page 2
3 Add Delete Companies Participants Addresses Add/Update/Delete Add Update Delete Companies Participants Phone Add/Delete/ Update Add Update Delete Locations Results Reporting - Rules Add Add Result Letter Rules Delete Page 3
4 Setup 1. You will receive an with a temporary password and a link your client portal 2. Click the blue here link to open Client Portal. The system will request that you change your password. Enter the temporary password provided in the into the Current Password field. In the example above the Current password is r5}flfarjc. Enter your new password in the New Password field, and type it again in the Repeat Password field to verify your new password. Click the blue button labeled Change Password to set your password. Page 4
5 3. The Welcome to Screenhubb Client Portal window will be displayed. Page 5


6 Login 1. Go to the following web address: 2. Place your credentials into the Login section and click the blue Login button. Page 6
7 3. The Welcome to Screenhubb Client Portal window will be displayed. 4. Click the Companies Tab to display your company information. Page 7

8 5. Click the Reports tab to display the Available Reports and the On Demand reports tabs. Page 8
9 Company Detail 1. Click the Companies Tab on the tab. This will display all the companies you have access to view. Click on the company name. 2. The Company Detail window will be displayed. The user can view/change/add the following: Contacts Addresses View Random Profiles Participants Locations View Results Reporting rules Page 9
10 Companies Contacts Display/Add/Change/Delete Display 1. Click the Companies Tab on the tab. This will display all the companies you have access to view. Click on the company name. 2. The Company Detail window will be displayed. Page 10

11 3. Click the <Contacts> tab. The Contacts for this company will be displayed. Companies Contacts Display/Add/Change/Delete Add 1. To add a contact, click the Add Contact button. Page 11
12 2. The Contact window will be displayed. Enter the following information into the provided fields: a. <Name> - Contact s full name (Required data) b. <Phone> - Contact s phone number and extension if applies c. <Fax> - Contact s face number and extension if applies d. < > - Contact s e. <Type> - Contact Type Use the selection box to choose from the following choices: Primary, DER, Secondary DER, or Additional. f. <Client Portal> - Click the check box to Allow access to the Client Portal. 3. Click the Save button to add the new contact. If the contact was successfully added the information will be displayed in the fields and your will have a update button displayed. Page 12
13 Companies Contacts Display/Add/Change/Delete Change 1. Click into the field of the contact that you wish to change. In the example below, the address will be changed. 2. Replace the current information in the field with the new or updated information. 3. When all information has been updated click the Update button. This will save any changes made to this contact. Page 13

14 Companies Contacts Display/Add/Change/Delete Delete 1. Click the Trash Can icon in the upper right of the contact window to be deleted. 2. The system will ask you Are you sure you want to delete this contact?. Click Yes to delete or No to cancel the delete and return to the contact window. Page 14
15 Companies Addresses Display/Add/Change/Delete Display 1. Click the Companies Tab to display your company information. 2. Select the company by clicking the name in the Company List window. 3. The Company Overview window will be displayed. Click the <Addresses> tab. Page 15
16 Companies Addresses Display/Add/Change/Delete Add 1. To add an address, click the Add New button in the Addresses window. 2. The New Address window will be displayed. Enter the following information into the provided fields: a. <Line 1> - Street address (Required data) b. <Line 2> - Additional street address c. <Postal/Zip Code> - Your zip code or postal code for a non-us address (Required data) d. <City> - City (Required data) e. <State> - Select the state where the company is located using the selection box f. <Country> - Select the country where the company is located using the selection box g. <Phone> - Location phone number h. <Fax> - Location fax number i. <Type> - Select between Billing or Shipping using the selection box. Page 16
17 3. To set this location as your companies default address click the check box beside Set as default address 4. To save the new location click the Save button and the new address is added. Page 17
18 Companies Addresses Display/Add/Change/Delete Change 1. Click into the field of the address record to be changed. 2. Once you have clicked into the field standard edit functions apply. Make changes to the field and press the <Tab> key on your key board. 3. Click the Update associated with this address record to save the changes. Page 18
19 Companies Addresses Display/Add/Change/Delete Delete 1. Find the Address Record to be deleted in the address window. 2. Click the <Trash Can> in the upper right of the record display window. Note: When you hover your cursor over the trash can icon it will change colors from blue to orange. 3. The system will prompt you Are you sure you want to delete this address?. Click Yes to delete the address record. Click No to abort the delete operation. 4. The system will display the following message after a successful record delete. Click the Close button to clear the message. Page 19
20 Display Random Profiles 1. From the Company Overview window click the Random Profiles tab. This will display a summary of all the random profiles pulled for your company. Page 20
21 Companies Participants Overview 1. Click the <Companies> tab on the menu bar. 2. Select the company by clicking the name in the Company List window. 3. The Company Overview window will be displayed. Click the <Participant> tab and the tab will be highlighted orange. The following tabs will be displayed: a. +New Participant Allows user to add a participant record b. Actions Allows user to perform the following: i. Mark selected Active ii. Mark selected Inactive c. Bulk Actions Allows user to bulk import participants via Excel or CSV file format. The user can also update participants using these options. Participants can be marked active, inactive, or terminated based on the options selected by the user. The user can also update data fields in participant table using Bulk Actions. Page 21

22 Participants Overview Window 4. Participant Search Find a participant record using the First Name, Last Name, or Last four digits of the Social Security Number. Page 22
 ii. <Middle Name> - Participant s middle name iii.")
23 Companies Participants New Participant 1. Click the <New Participant> tab from the Participants overview window. 2. The +New Participant window will be displayed. Enter the following information into the provided fields: a. General i. <First Name> - Participant s first name (Required data) ii. <Middle Name> - Participant s middle name iii. <Last Name> - Participant s last name (Required data) iv. <Date of Birth> - Participant s date of birth v. <Gender> - Choose one of the following using the selection box: Male, Female, Unknown vi. <Phone Number> - Participant s phone number vii. <Phone Type> - Choose one of the following using the selection box: Day, Evening, Other, Fax Page 23

24 b. Identification i. <Social Security Number> - Participant s Social Security number ii. <Alternate ID> - An alternate form of identification for this participant. iii. <License Number> - Participant s driver s license number iv. <License Expires> - Date participants drivers licence expires v. <Country> - Country that issued license vi. <State> - State that issued license c. Employment i. <Hire Date> - Participant s date of hire ii. <Termination Date> - Participant s date of termination iii. <Physical Exam Date> - Date the participant s physical exam was completed d. Regulatory Status i. <Testing Authority> - Choose one of the following using the selection box: Not specified Health and Human Services Nuclear Regulatory Commission Page 24
25 Federal Motor Carrier Safety Administration (DOT) Federal Aviation Administration (DOT) Federal Transit Administration (DOT) Pipeline and Hazardous Materials Safety Administration (DOT) United States Coast Guard (DOT) Federal Railroad Administration (DOT) Sports Department of Transportation (DOT) Health Care Administration Florida Wildlife Rehabilitators None ii. <Occupation> - Based on Testing Authority. Choose one of the following using the selection box: Driver Flight Crewmember Flight Attendant Flight Instructor Aircraft Dispatcher Aircraft Maintenance Ground Security Coordinator Aviation Screener Air Traffic Controller Operation/Maintenance/Emergency Response Engine Service Train Service Dispatcher/Operation Name Other [Includes yardmasters, hostlers (non-engineer craft), bridge tenders] Switch tenders, and other miscellaneous employees performing 49 CFR (c) defined covered service Crewmember Revenue Vehicle Operation Revenue Vehicle and Equipment Maintenance Revenue Vehicle Control/Dispatch Page 25
 Applicant Decision Pending Not Hired Leave of")
26 CDL/Non-Revenue Vehicle Armed Security Personnel Regulated Position Non-DOT e. Random Testing i. <Status> - Choose one of the following using the selection box: Active (Included in Random Selections) Applicant Decision Pending Not Hired Leave of Absence Terminated Inactive <Type> Person Group Page 26
27 3. Click the +Add participant button to save the new participant. The participant will be added to the participant list in the Participant Overview Window. 4. For instructions on how to add the following data to a Participant record please see the Companies Participants Update/Change Participant Information section of this documentation: a. Address b. Phone Page 27

28 Companies Participants Update/Change Participant Information Overview 1. Use the search box to find the participant that you wish to update or change. You can search for the participant via First name, Last Name, or Last four numbers of the Social Security Number. Enter the search data and click the Search Icon. 2. All participants that meet the search criteria will be displayed in the list. To change the participant record, click the participants name. Page 28

29 3. The Participant Overview window will be displayed. 4. The following information can be accessed or viewed from the Participant Overview window: <Employment> - Participant s Employment Information: Location: Status, Pre-Employment Test, Hired, Terminated, Physical Exam. Page 29
30 a. <Vitals> - Participant s name, date of birth, and gender b. <Testing Category> - Shirt and Employment Type Page 30
31 c. <Occupations> - The occupations that the participant is associated with. Page 31
32 Companies Participants Update/Change Participant Information PLEASE NOTE: Altering employment or testing will re-assess the participant's random pools, and automatically assign them to eligible profiles. Employment 1. Click into data field to be changed. The following fields are available for editing: a. <Location> Click the location name to change/select the location. b. <Status> - Participant s current status. Select one of the following from the drop-down box: Active Applicant Decision Pending Not Hired Leave of Absence Terminated Inactive c. <Pre-Employment Test> - Positive, Negative, Unknown, Not Required. d. <Hired> - Participant s date of hire e. <Terminated> Participant s termination date f. <Physical Exam> - Participant s date of physical exam 2. Click the Save Changes button to save changes made to the Employment data. Page 32
33 Companies Participants Update/Change Participant Information Vitals 1. In the Vitals display window, click into the field you wish to change. Standard edit functions apply to these fields. 2. Make the desired changes to the data and click the Tab button on your keyboard. 3. Click the Save Changes button save the changes. Page 33
34 Companies Participants Update/Change Participant Information Companies Participants Testing Category Update/Change 1. From the Participant Details window select the Testing Category window. Choose the new data for each data element using the selection box beside each field. a. <Testing Authority> - Use selection box to choose the Testing Authority. b. <Occupation> - Use selection box to choose data. c. <Shift> - Use selection box to choose shift. d. <Employment Type> - Use selection box to choose Salary or Non-Salary. 2. Click the Save Changes button to save changes made to the Testing Category Page 34
35 Identification Add/ Update/Delete Add 1. Click the blue + button on the top left of the Identification window. 2. The Add New ID window will be displayed. Enter the following information into the provided fields: a. <ID Type> - Choose one of the following using the selection box i. Alternate ID ii. Social Security Number iii. Drivers License iv. Employee ID b. <ID Number> - Enter the appropriate ID number for the ID type. c. <Expires> - If applicable enter expiration date in mm/dd/yyyy format. d. <Country> - If applicable choose the Country using the selection box. e. <State> - If applicable choose the state using the selection box. Page 35
36 3. Click the Save button to add the New ID. Page 36
37 Identification Update/Add/Delete Update 1. The identification window contains the Participant s unique identification sources. The system will allow for the following types of identification: a. Social Security Number b. Alternate ID c. Drivers License d. Employee ID 2. To update an identification source, click the pencil icon associated with the source. This will display the Modify ID window. a. Click into the data field to be changed. b. Standard edit functions apply to these fields c. After changing the data press the Tab key on your keyboard d. Click the Save button to save your changes Page 37
38 3. Make changes to the record and click the Save button to save the changes. Page 38
39 Identification Update/Add/Delete Delete 1. Click the red colored trash can icon that corresponds with the record to be deleted. 2. The system will ask you Are you sure you want to delete this ID?. Click OK to delete or Cancel to cancel the delete and return to the Identification window. Page 39
40 3. If the record is successfully deleted the ID Removed message will be displayed. Click the Close button to clear this message. Page 40
41 Occupations Add /Delete Add 1. Click the blue + button on the top left of the Identification window. 2. The Add Occupation window will be displayed. Use the drop-down selector to choose the <Testing Authority> and the <Occupation>. Click the Save changes button to save the occupation record. Page 41
42 Occupations Add/ Delete Delete 1. Click the red Trash Can icon beside the occupation to be deleted. 2. The system will display the Are you sure window. Click Yes to remove this occupation from the participant. Click No to abort the process and return to the participant record window. Page 42
43 Companies Participants Addresses Add/Update/Delete Add 1. From the Participant Details window select the <Address> tab. 2. Click the Add New button and the New Address window will be displayed. Enter the following information into the provided fields: a. <Line 1> - Street address (Required data) b. <Line 2> - Additional street address c. <Postal/Zip Code> - Zip code or postal code for a non-us address (Required data) d. <City> - City (Required data) e. <State> - Select the state where the company is located using the selection box f. <Country> - Select the country where the company is located using the selection box g. <Type> - Select between Billing or Shipping using the selection box. Page 43
44 3. Click the Save button to add the address record. Page 44
45 Companies Participants Addresses Update 1. Click into the field of the data to be changed. Standard edit functions apply to these fields. Make the changes to the field then click the Tab key on the keyboard. 2. When the address updates are complete click the Update button to save your changes. Page 45
46 Companies Participants Addresses Delete 4. Click the Trash Can icon in the upper right corner of the address record to be deleted. Page 46

47 5. The system will ask you Are you sure you want to delete this address? Click OK to delete or Cancel to cancel the delete and return to the participant window. 6. If the record is successfully delete the Address Removed message will be displayed. Click the Close button to clear this message. Page 47


48 Companies Participants Phone Add/Delete/ Update Add 1. From the Participant Details window select the <Phone> tab. 2. Click the Add New button. 3. The Add Phone Number window will be display. To change the Phone Number Type select one of the following items from the selection box: a. <Evening> b. <Day> c. <Fax> d. <Other> 4. Click into the Phone Number field and enter the number. Page 48

49 5. Click the Save button to add the new phone number. The phone number will be added to the current phone number list. Page 49

50 Companies Participants Phone Update/Add/Delete Update 1. From the Participant Details window select the <Phone> tab. 2. Click the Update icon associated with the phone number to be changed. 3. The Edit Phone Number window will be display. To change the Phone Number Type select one of the following items from the selection box: a. <Evening> b. <Day> c. <Fax> d. <Other> Page 50
51 4. To change the phone number, click into Phone Number field and change the number. 5. Click the Save button to save the changes made to the Phone Number. Page 51

52 Companies Participants Phone Update/Add/Delete Delete 1. From the Participant Details window select the <Phone> tab. 2. Click the red Trash Can icon beside the record to be deleted. 3. The system will ask you Are you sure you want to delete this phone number? Click OK to delete or Cancel to cancel the delete and return to the participant window. Page 52
53 Locations 1. Click the Locations tab to display locations associated with the parent organization. Page 53
54 Results 1. Click the Results tab to display the following: Pending Randoms Completed Randoms Other Results Page 54
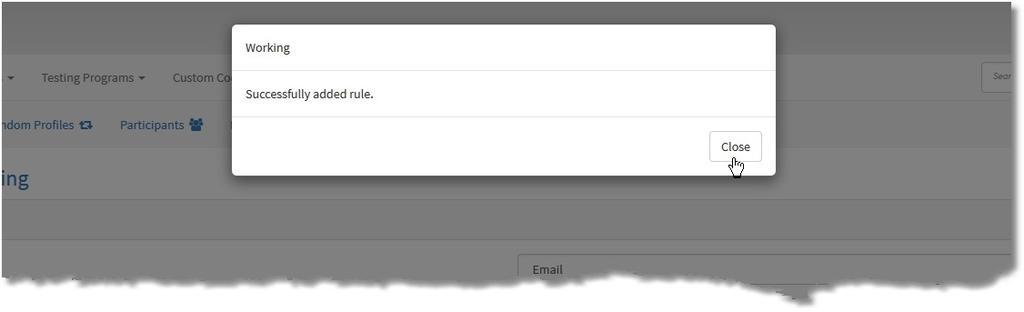
55 Reporting - Rules Add 1. Click the <Reporting> tab on the menu bar. 2. A Reporting Rule allows the user to define the following: a. <Selection Routing Method> - Choose from the selection box how this report should be delivered: , Fax, Text Messaging b. <Select Contact> - Choose from the selection box a contact for this company. c. <Select Report> - Choose from the selection box the report that will be linked to this rule. 3. Note: The number of rules per report is unlimited. After the rule, has been built select the Add Rule button to save this rule. 4. The system will display the message Successfully added rule after a reporting rule is successfully added and the rule will be listed in the Current Reporting Rules list. Page 55
56 Page 56

57 Companies Reporting Rules Add/Delete Add Result Letter Rules 1. The Result Letter has two additional options that the user can define: a. <Result Status> - Choose from the selection box one of the following: All, Non-Negative, or Negative. b. <DOT Status> - Choose from the selection box one of the following: All, DOT, or Non-DOT. 2. When the Result Letter rule has been built, select the Add Rule button to save this rule. 3. The system will display the message Successfully added rule after a reporting rule is successfully added and the rule will be listed in the Current Reporting Rules list. Page 57
58 Companies Reporting Rules Add/Delete Delete 1. From the Company Overview window select the <Reporting> tab. The reporting rule window will be displayed. 2. Click the red Trash Can icon that corresponds with the reporting rule to be deleted. 3. The system will ask you Are you sure you want to delete this reporting rule? Click OK to delete or Cancel to cancel the delete and return to the document window. Page 58

59 4. The system will display the message Successfully deleted rule after a reporting rule is successfully deleted and the rule will be removed from the Current Reporting Rules list. Click the Close button to close this box. Page 59
DrugPak 6.0 Users Manual by Scanlon Associates
 DrugPak 6.0 Users Manual by Scanlon Associates Version 6.0.70725 I DrugPak 6.0.70725 Table of Contents Part I DrugPak Main Module 2 1 Main Screen... 2 Status Bar... 2 Navigator Bar... 2 Database Control...
Admin Control Panel Overview 4. Organization 5. Interview Questions 6
 Table of Contents Admin Control Panel Overview 4 Organization 5 Interview Questions 6 Adding an Interview Question 6 Removing an Interview Question 7 Editing an Interview Question 7 Locations 7 Modifying
Specialty Contractor User Manual. Table of Contents. Specialty Contractor User Manual Version 1 11/16/15
 Specialty Contractor User Manual Welcome to the C3 Training Database for Construction Career Collaborative! This software is where you keep track of your employees' training and safety credentials, project
CFC Charitable Giving User Guide
 United States Office of Personnel Management CFC Charitable Giving User Guide 2017 CFC September 2017 1 Table of Contents How to Use this Manual Page 3 About the CFC Page 4 CFC Zones Page 4 CFC Approved
Professional Development
 Contents Profile Creation... 2 Forgot My Password?... 4 Forgot My Email?... 5 Dashboards... 6 Transcript & Content... 7 Workshop Search... 7 Registration... 8 Workshop Creation... 8 Global Reports... 12
Go to click on the Online Giving icon at the bottom of the page, A new window will open up that looks like this:
 Go to www.newlifeodessa.org, click on the Online Giving icon at the bottom of the page, A new window will open up that looks like this: 1. At the bottom of the area, under Log In, click Need an Account
Aerial iexchange Users Guide
 Aerial iexchange Users Guide 2014.1 How to Run the Util\\\ \user Disclaimer How to reach us Copyright Information contained in this document is subject to change without notice and does not present a commitment
HPHConnect for Employers User s Guide
 HPHConnect for Employers User s Guide Copyright 2017 Harvard Pilgrim Health Care, Inc. All rights reserved. Harvard Pilgrim Health Care and the Harvard Pilgrim Health Care logo are trademarks of Harvard
Colorado Access Provider Portal Guide
 Colorado Access Provider Portal Guide coaccess.com 1 CONTENTS INTRODUCTION... 3 SYSTEM REQUIREMENTS... 3 NEW PROVIDER REGISTRATION... 4 Provider Information... 4 New Provider Registration... 4 New Registration...
TRS-ACTIVECARE ENROLLMENT
 TRS-ACTIVECARE ENROLLMENT EMPLOYEE CURRENTLY ENROLLED WITH TRS-ACTIVECARE: ACCESSING THE WELLSYSTEMS ENROLLMENT PORTAL TO UPDATE ENROLLMENT GENERAL INSTRUCTIONS Welcome to the WellSystems Enrollment Portal.
HOW TO COMPLETE YOUR ONLINE BACKGROUND CHECK SUBMISSION
 HOW TO COMPLETE YOUR ONLINE BACKGROUND CHECK SUBMISSION COMPLETING A BACKGROUND CHECK FOR UNC-CHAPEL HILL Please follow the guide below. If you are still in need of assistance, please contact the UNC-Chapel
AVS Integrated Airman Certification and Rating Application (IACRA)
") AVS Integrated Airman Certification and Rating Application (IACRA) INSTRUCTION MANUAL March 16, 2012 Version 8.3 DEPARTMENT OF TRANSPORTATION FEDERAL AVIATION ADMINISTRATION OFFICE OF REGULATION AND CERTIFICATION
AVS Integrated Airman Certification and Rating Application (IACRA) INSTRUCTION MANUAL March 16, 2012 Version 8.3 DEPARTMENT OF TRANSPORTATION FEDERAL AVIATION ADMINISTRATION OFFICE OF REGULATION AND CERTIFICATION
isupplier Portal User Guide
 isupplier Portal User Guide Revised: December 13, 2013 isupplier Portal User Guide Table of Contents Overview...3 Registering for isupplier Portal......3 Logging into isupplier Portal for the first time.......4-5
InformationNOW Census
 InformationNOW Census Overview This document covers the options available under the Census menu in InformationNOW. People Module The People module stores all persons in the database, including students,
iosphone & Android App First Time Login Guide
 iosphone & Android App First Time Login Guide If you have logged onto your Admin America portal before please skip to page 4 If you have not logged onto your Admin America portal before please continue
Volunteer Management Information System. AVCC User Guide
 Volunteer Management Information System AVCC User Guide Contents 1.0 - Welcome to VMIS... 4 Glossary... 4 VMIS Registration... 5 Army Family Web Portal (AFWP) & AFWP Accounts... 5 Single Sign-On (SSO)...
Parent Portal Account Registration and Password Reset/Account Look-up
 Introduction Parents and guardians of Miami-Dade County Public School (M-DCPS) students are encouraged to open a Parent Portal account. The Portal contains valuable student information including the Electronic
SEARCH & APPLY FOR TEMPORARY HIRE APPLICANT POOL
 SEARCH & APPLY FOR TEMPORARY HIRE APPLICANT POOL Overview This step-by-step guide demonstrates how to apply for the Temporary Hire Applicant Pool as an external applicant. External Applicants are individuals
Pennsylvania. Special Olympics Pennsylvania - Vsys Software User Manual
 Pennsylvania Special Olympics Pennsylvania - Vsys Software User Manual Applicable to all Vsys software programs including Terminal Service, Vsys One, Vsys Anywhere, and the Online Volunteer Portal Created
Oracle Insurance QuickView Service Ordering User Guide. Version 8.0
 Oracle Insurance QuickView Service Ordering User Guide Version 8.0 February 2009 Oracle Insurance QuickView Service Ordering User Guide Version 8.0 Part # E14966-01 Library # E14885-01 E14886-01 February
PNC BENEFIT PLUS: HEALTH SAVINGS ACCOUNT EMPLOYER GUIDE. Welcome to the PNC BeneFit Plus Employer Portal!
 PNC BENEFIT PLUS: HEALTH SAVINGS ACCOUNT EMPLOYER GUIDE Welcome to the PNC BeneFit Plus Employer Portal! The Employer Portal is a powerful, easy-to-use self-service solution that gives you the tools to
Upgraded emanda Frequently Asked Questions
 Upgraded emanda Frequently Asked Questions Table of Contents 1. General... 1 2. Access and Security... 1 3. Logging In... 1 4. Contact Permissions... 2 5. Inbox... 3 6. Orders (Booking Requests)... 3 7.
Logon Issues? Contact the Global HRIS Department at Password resets? Contact the Helpdesk at
 2016 Benefits Open Enrollment Instructions for Oracle Employee Self-Service All Employees must go in to Self Service and enroll for benefits. Follow the steps in the table below to begin your 2016 Benefits
TrainingFinder Real-time Affiliate Integrated Network (TRAIN) Administrator Handbook. Version 3.2 (3/26/08) Public Health Foundation
 Administrator Handbook. Version 3.2 (3/26/08) Public Health Foundation") TrainingFinder Real-time Affiliate Integrated Network (TRAIN) Administrator Handbook Version 3.2 (3/26/08) Public Health Foundation Table of Contents About This Handbook 5 TRAIN Administrative Basics 6
TrainingFinder Real-time Affiliate Integrated Network (TRAIN) Administrator Handbook Version 3.2 (3/26/08) Public Health Foundation Table of Contents About This Handbook 5 TRAIN Administrative Basics 6
Phly.com User Guide Insured Version
 Please use the following index links to quickly access the information being looked for: My PHLY Registration My PHLY Home Auto Rental Add/Delete Vehicle(s) Claims Online Bill Pay Electronic Billing Instructions
Cardinal Contact - Internal
 Page 1 of 10 Cardinal Contact Cardinal Contact is North Idaho College s communication tool for notifying employees, students, and community members of emergencies. Login to Cardinal Contact and setup your
Oracle Banking Digital Experience
 Oracle Banking Digital Experience FCUBS Originations Auto Loan User Manual Release 18.1.0.0.0 Part No. E92727-01 January 2018 FCUBS Originations Auto Loan User Manual January 2018 Oracle Financial Services
Administrator Quick Guide
 1 Administrator Quick Guide Login Screen The first page employees will see when visiting their training site is the login screen. This is where employees must enter their username and password to access
Charitable Registration User Guide
 Charitable Registration User Guide Table of Contents Chapter 1 Online Charitable Registration... 3 A. Creating an Account... 3 I. Employer Identification Number (EIN)... 3 II. Step 2: Create Account...
County Pool Application ANDAR INSTRUCTIONS MANUAL. LINK TO ANDAR SIGN ON PAGE:
 2018-2019 County Pool Application ANDAR INSTRUCTIONS MANUAL LINK TO ANDAR SIGN ON PAGE: https://epledge.unitedwayatlanta.org/begin.jsp TABLE OF CONTENTS 1. Welcome and What is ANDAR? 2 2. Helpful tips
Accounting s Customer Portal
 Accounting s Customer Portal User Guide Updated August 2016 1 Table of Contents Table of Content... 2 Customer Portal Registration... 3 Activation Procedure... 6 Log In Enter Credentials... 7 Forgot Password...
Navigating through ClinixPM Module 1
 Navigating through ClinixPM Module 1 Table of Contents Logging into ClinixPM... 3 ClinixPM Home Page Overview... 6 Overview of the ClinixPM screens... 9 Task Bar Icons... 9 Master Menu:... 11 Sub Menus:...
CONNEXXUS TRAVELER PROFILE GETTING STARTED GUIDE FOR TRAVELERS / ARRANGERS Contents
 CONNEXXUS TRAVELER PROFILE GETTING STARTED GUIDE FOR TRAVELERS / ARRANGERS Contents Introduction... 2 Accessing a Travel Profile... 2 Navigating within the Connexxus Traveler Profile Page... 4 Required
Web Portal User Guide
 Web Portal User Guide Table of Contents I. Introduction 2 II. User Account 3 III. Accessing Web Portal 5 IV. Eligibility 6 V. Authorization 1. Create Authorization 2. View Authorization 9 20 VI. Claim
Patient Registration
 Patient Registration Adding a Patient Adding a new patient through SequelMed can be accomplished through just a few steps: Defining the Patient Attaching a Plan (optional) Attaching Documents (optional)
2015 Independence Blue Cross Sales Sentinel User Guide FLEXIBLE BENEFITS PLANS
 2015 Independence Blue Cross Sales Sentinel User Guide FLEXIBLE BENEFITS PLANS SALES SENTINEL LINK The Sales Sentinel link below should be used for Flexible Benefits Plans affiliated selling agents and
403(b) & 457 TPA Participant Website Instructions
 & 457 TPA Participant Website Instructions") 403(b) & 457 TPA Participant Website Instructions 403(b) & 457 TPA Participant Website Instructions In order to access the website via the login page (above), please do the following: Go to the main Envoy
403(b) & 457 TPA Participant Website Instructions 403(b) & 457 TPA Participant Website Instructions In order to access the website via the login page (above), please do the following: Go to the main Envoy
ASA User Guide Schools Desk
 ASA User Guide Schools Desk Table of Contents Login to ASA... 2 Features of ASA Schools Desk... 4 Create an Unjustified Absence Referral... 7 View current Unjustified Absence Referral... 14 Logout of ASA...
Short Term Loan Equipment
 Enable Online with RTL User Notes Assessors Short Term Loan Equipment 1 Table of Contents Short Term Loan Equipment... 1 Login... 3 Key points to note... 4 Creating a Service Request... 4 Product Selection...
JOB AID A reference guide to Guardian Anytime tasks
 JOB AID A reference guide to Guardian Anytime tasks Contents ADMINISTRATION... 3 HOW TO SELF-REGISTER FOR GUARDIAN ANYTIME... 3 HOW TO ASSIGN ACCESS TO AN INDIVIDUAL VIA GUARDIAN ANYTIME... 6 HOW TO ACCESS
Welcome to the C3 Training Database, brought to you by the Construction Career Collaborative!
 C3 Training Database Contractor User Manual 12/06/2017 Welcome to the C3 Training Database, brought to you by the Construction Career Collaborative! The training database will help you keep track of your
ivisions Employee Guide Portal Employee User Guide Town of Needham Terry Wolfson Created: 1/27/2014 Updated: 10/5/2016
 ivisions Employee Guide Portal Employee User Guide Town of Needham Terry Wolfson Created: 1/27/2014 Updated: 10/5/2016 Contents What is ivisions?... 2 Registering to ivisions Portal... 3 Logging into the
2. This will bring you to a new window asking what type of policy you are inserting. Personal Policies. Commercial Policies. All Other Policies
 How to Insert a New Client File To insert a new client file you can do this one of two ways. The first way is to manually insert the client file through Hawksoft. You would use this method if you are writing
Cvent Passkey. Event Dashboard. Single Page (New) Dashboard
 Dashboard") Cvent Passkey Event Dashboard Single Page (New) Dashboard Table of Contents Title Page Summary 3 Getting Access 4 Creating an Account 5 Accessing the Event Dashboard 6 Dashboard Overview 7 Website Preview
Cvent Passkey Event Dashboard Single Page (New) Dashboard Table of Contents Title Page Summary 3 Getting Access 4 Creating an Account 5 Accessing the Event Dashboard 6 Dashboard Overview 7 Website Preview
Change Requests. Originator User Guide
 Change Requests Originator User Guide Table of Contents Table of Contents Log In... 1... 1 Lock Extension Requests... 1 Product Change Requests... 4 Float Down Change Requests... 8 Profile Change Requests...13
A BETTER WAY TO TAKE CARE OF BUSINESS. Employers Online Enrollment Center Guide
 A BETTER WAY TO TAKE CARE OF BUSINESS Employers Online Enrollment Center Guide Quick Reference 3 What do you want to do? 3 Step-by-step guide 4 Sign on 4 Your landing page 5 Enroll new members 6 Add a
Disabled American Veterans Membership System User Manual for National Service Officers and Transition Service Officers
 Disabled American Veterans Membership System User Manual for National Service Officers and Transition Service Officers Disabled American Veterans 2 12/21/2005 Table of Contents Basic Web Application Usage...
From the Online Tools list, scroll down to SBS Connect, and click on the Register for SBS Connect link. The SBS Connect login screen loads.
 SBS EXTERNAL HEALTHCARE REVIEW USER GUIDE Create New Account Register an Entity View Attachment Upload Attachment SBS CONNECT CREATE NEW ACCOUNT Before using SBS Connect for the first time, 1) create an
State Grant in Aid (SGIA) Program - SP5 Entry/Exit Workflow using ClientPoint (Families)
 Program - SP5 Entry/Exit Workflow using ClientPoint (Families)") This document provides instructions for entering the following information into HMIS using the ServicePoint 5 software: Entering each family member s information into your agency s program for the first
This document provides instructions for entering the following information into HMIS using the ServicePoint 5 software: Entering each family member s information into your agency s program for the first
isystoc User Guide
 isystoc 4.3.1 User Guide Table of Contents isystoc 4.3.1 User Guide...4 About isystoc...5 Logging into isystoc...6 Automatic Logout / Refresh...7 isystoc Icons...8 Using isystoc...9 Search Options...10
WEB PAY EMPLOYEE GUIDE
 Revised 4/14/2017 WEB PAY EMPLOYEE GUIDE Client Resource WWW.PAYLOCITY.COM TABLE OF CONTENTS WEB PAY... 2 SELF SERVICE PORTAL... 9 HOME... 26 EMPLOYEES... 35 PAYROLL... 108 NOTIFICATIONS... 113 GLOSSARY...
Welcome to e-people 4. What is e-people? 4. Accessing e-people 4. AHS Accounts 4
 User Guide Table of contents Welcome to e-people 4 What is e-people? 4 Accessing e-people 4 AHS Email Accounts 4 How to Access Your AHS Email Account Externally 4 AHS Outlook Web Access Log Off 5 How to
MillinPro+ USER GUIDE. A Complete Web-Based Platform for Managing Medical Bills and Insurance Claims
 MillinPro+ A Complete Web-Based Platform for Managing Medical Bills and Insurance Claims MILLIN ASSOCIATES, LLC USER GUIDE 2010-2012 Copyrights Reserved Millin Associates, LLC Document Change History Version
A Complete Guide E Way Bill Registration & Generation
 A Complete Guide E Way Bill Registration & Generation STEP 1 First of all click on the sign in option and input valid credentials i.e. ID & password. GST eway bill is mandatory bill to be generated for
HeadMaster: Setting HeadMaster Up Part I
 HeadMaster: Setting HeadMaster Up Part I 1 Copyright Copyright 2014 ACS Technologies Group, Inc. All rights reserved. Reproduction of any part of this publication by mechanical or electronic means, including
ACT Test Accessibility and Accommodations System (TAA) User Guide
 User Guide") ACT Test Accessibility and Accommodations System (TAA) User Guide www.act.org ACT Test Accessibility and Accommodations System (TAA) User Guide Table of Contents Overview... 2 Introduction to the Test
ACT Test Accessibility and Accommodations System (TAA) User Guide www.act.org ACT Test Accessibility and Accommodations System (TAA) User Guide Table of Contents Overview... 2 Introduction to the Test
State of New Hampshire Client Coordinated Entry Intake Form Workflow for Families
 This document provides instructions for performing the following tasks in HMIS using the ServicePoint 5.11 software: Entering each family member s information into the coordinated entry project for the
XRMS Open Source. User Manual v March 2006
 XRMS Open Source User Manual v 1.99 28 March 2006 Copyright Information Copyright 2005-2006 XRMS Development Team. Some rights reserved. Licensed under the GNU Free Documentation License [http://www.gnu.org//copyleft/fdl.html].
CAMPUS PORTAL QUICK REFERENCE GUIDE: STUDENT PORTAL
 CAMPUS PORTAL QUICK REFERENCE GUIDE: STUDENT PORTAL 1 CONTENTS How to Set Up Your Portal Web Account... 3 How to Personalize Your Homepage... 4 How to View Holds Applied to Your Portal Account... 4 How
GSA QMAC. Transportation Service Provider (TSP) TransPort Integrator User Guide. TransPort Integrator Service. Version 3.0
 TransPort Integrator User Guide. TransPort Integrator Service. Version 3.0") GSA QMAC TransPort Integrator Service Transportation Service Provider (TSP) TransPort Integrator User Guide Version 3.0 Change Log Version # Date of Change Section Description of Change Changed By 1.0
GSA QMAC TransPort Integrator Service Transportation Service Provider (TSP) TransPort Integrator User Guide Version 3.0 Change Log Version # Date of Change Section Description of Change Changed By 1.0
Agency User Manual. Version 2.0
 Agency User Manual Version 2.0 October 2015 Copyright Information 2015 by. All rights reserved. This document is the copyrighted property of the. It should not be duplicated, used, or disclosed in whole
PowerSchool Student and Parent Portal User Guide. https://powerschool.gpcsd.ca/public
 PowerSchool Student and Parent Portal User Guide https://powerschool.gpcsd.ca/public Released June 2017 Document Owner: Documentation Services This edition applies to Release 11.x of the PowerSchool software
FINANCE MANAGER. Bidding Manual Finance Manager.
 FINANCE MANAGER Bidding Manual 2009 Finance Manager Table of Contents Start Page... 5 Setup Which Files Should Be Completed First?... 7 Item Categories... 8 Unit of Measure... 11 Buildings... 13 Requestors...
2. Type in User Name and Password [Password is case-sensitive]. 7. Type in any Additional Comments. 8. Click the Review Tab to review your order.
![2. Type in User Name and Password [Password is case-sensitive]. 7. Type in any Additional Comments. 8. Click the Review Tab to review your order.](/thumbs/72/67555501.jpg "2. Type in User Name and Password [Password is case-sensitive]. 7. Type in any Additional Comments. 8. Click the Review Tab to review your order.") Log In 1. Open your Internet web browser and type in the following address: https://www.marshfieldlabs.org/reference 2. Type in User Name and Password [Password is case-sensitive]. 3. Click Log In. NOTE:
Log In 1. Open your Internet web browser and type in the following address: https://www.marshfieldlabs.org/reference 2. Type in User Name and Password [Password is case-sensitive]. 3. Click Log In. NOTE:
USER GUIDE DISPATCH PORTAL RELEASE V5.42
 USER GUIDE DISPATCH PORTAL RELEASE V. 07 Table of Contents Introduction... Prerequisites... Login... Home Dashboard... Hubs... Routes... Create Routes... Jobs... Create Jobs... Cloning a Job... Job Status...
TB Surveillance & Control
 TB Surveillance & Control User s Manual TB Surveillance & Control Health District Information System HDIS (Windows Ver. 4.0 ) Copyright 1998 by CHC Software, Inc All Rights Reserved CHC Software, Inc.
Applicant Tracking & Onboarding. Payroll. Time & Attendance. IOIPay ESS 2.0 Administrators' Guide. Human Resources. Employee Self-Service
 Applicant Tracking & Onboarding Payroll IOIPay ESS 2.0 Administrators' Guide Time & Attendance Human Resources Employee Self-Service Next Steps 1. Visit www.ioipay.com 2. Click on the Employer Login tab
Provider Portal User Guide. For the Provider Portal External Use
 Provider Portal User Guide For the Provider Portal External Use IT Department Issued January 2017 mynexus 2017. All rights reserved. Version 1.4 Revised 07122017 Contents Getting Started with the Portal...
WorkplaceNL s Certification Training Registry
 WorkplaceNL s Certification Training Registry A How-to Guide for Training Providers and Trainers Table of Contents Training Provider Overview 3 step process... 3 Step 1 How to Add a Class Schedule... 3
BACKGROUND SCREENING PROVIDER VIEW MANUAL
 DCF BACKGROUND SCREENING BACKGROUND SCREENING PROVIDER VIEW MANUAL USER GUIDE INTRODUCTION The purpose of the Background Screening Provider View System is to provide caretaker providers with the ability
Plan Central Employer Portal Learning Guide
 Plan Central Employer Portal Learning Guide Contents Introduction... 2 Enhancements to the New Plan Central... 2 User Roles... 3 Printer Friendly... 3 Accessing Plan Central... 3 Plan Central Welcome Page...
USER GUIDE CLIENT PORTAL RELEASE V5.42
 USER GUIDE CLIENT PORTAL RELEASE V. 0 Table of Contents Introduction... Document Purpose... Document Scope... Prerequisites... Client Portal Login Credentials... Browser Requirements... Login... Client
NANP Administration System (NAS) User Registration Guide 2.6v
 User Registration Guide 2.6v") NANP Administration System (NAS) User Registration Guide 2.6v November 8, 2017 TABLE OF CONTENTS 1.0 Introduction... 4 1.1 Purpose... 4 1.2 NAS Overview... 4 1.3 Content Summary... 4 1.4 Problem Solving...
NANP Administration System (NAS) User Registration Guide 2.6v November 8, 2017 TABLE OF CONTENTS 1.0 Introduction... 4 1.1 Purpose... 4 1.2 NAS Overview... 4 1.3 Content Summary... 4 1.4 Problem Solving...
Raptor University. Volunteer Admin Training. Instructor: RAPTOR TECHNOLOGIES, LLC
 Raptor University Volunteer Admin Training Instructor: RAPTOR TECHNOLOGIES, LLC This presentation includes the detailed instruction of the following tasks to get you started using Raptor: Navigating Volunteer
PLEASE DATE ALL PAPERWORK THE DATE OF YOUR 1 ST NEW HIRE ORIENTATION
 PLEASE DATE ALL PAPERWORK THE DATE OF YOUR 1 ST NEW HIRE ORIENTATION All paperwork must be printed and completed in blue or black ink only. Follow the instructions for all new hire paperwork and please
Test Information and Distribution Engine
 SC-Alt Test Information and Distribution Engine User Guide 2018 2019 Published January 14, 2019 Prepared by the American Institutes for Research Descriptions of the operation of the Test Information Distribution
HCSIS Provider Access Updates Tip Sheet
 Every activity in this tip sheet can be performed by the Provider Registration Data Entry Role. This tip sheet assumes that providers have already signed up in the Provider Access website. The activities
 To Access Oracle: Access Oracle at: http://oraprod.district.aps:8051/oa_html/appslocallogin.jsp Enter your Username o Your Username is normally your First Initial, Middle, Full Last Name (For Example:
First access Minnesota State Employee Home by logging in with your Star ID and password, you will land on the Employee Home screen.
 Introduction provides the ability to search for a SWIFT vendor on the web using several different search criteria options such as the vendor s legal (location) name, Doing Business As (DBA) name, location
Help Guide Rev
 Help Guide Rev. 1.0 07152014 Home Page The home page displays your vehicle(s) on a satellite map. The information box, showing vehicle information will already be opened. The information box displays your
DISCOVR-e USER MANUAL. Vanderbilt University Human Research Protection Program
 DISCOVR-e USER MANUAL Vanderbilt University Human Research Protection Program Table of Contents Introduction and Overview... 3 Log into the System... 4 Investigator Dashboard... 5 Submitting a New Study...
Table of Contents 1. ABOUT THE GIS PANGEA SYSTEM 5 2. HOME DASHBOARD OVERVIEW MANAGER DASHBOARD OVERVIEW 66
 Table of Contents 1. ABOUT THE GIS PANGEA SYSTEM 5 PANGEA SYSTEM REQUIREMENTS 5 PANGEA MOBILE COMPATIBILITY 6 LOGGING IN TO PANGEA 6 MANAGING USER ACCOUNT SECURITY AND DELEGATE INFORMATION 13 ABOUT SESSION
Please contact your Athletic Trainer with any questions or for assistance throughout this process.
 Current students - you KNOW your ID and Password? CLICK HERE Current students - you DO NOT KNOW your ID and Password? CLICK HERE New students - you DO NOT have a NExTT account? CLICK HERE Please contact
User Manual - Contractors
 www.gfi.be www.gfi.be User Manual - Contractors Contractors Portal Total Created for: Total Date: 23/03/2015 Version: 1.1 1. Document Management Revision history Version Date Object Updated by 1.0 06/02/2015
AeroLogic Jumpseat Tool
 AeroLogic Jumpseat Tool 2 / 19 Table of Content 1. Introduction... 3 1.1. Administration and Control... 3 1.2. Philosophy and Content... 3 2. Login Request... 3 2.1. First time Login Request... 3 2.2.
Chapter 10: Dynamic Learning Maps (DLM ) Appendix
 Appendix") 10.1 Chapter 10: Dynamic Learning Maps (DLM ) Appendix This Appendix contains information specific to the Dynamic Learning Maps (DLM) program. This information may not apply to you if you are a member
10.1 Chapter 10: Dynamic Learning Maps (DLM ) Appendix This Appendix contains information specific to the Dynamic Learning Maps (DLM) program. This information may not apply to you if you are a member
Molina Agent User Guide
 Molina Agent User Guide REGISTERING and LOGGING IN Welcome to Sentinel Elite! Sentinel is accessible at www.sentinelelite.com. If you are new to Sentinel please register as a new agent. Once selected,
Using the Administrative Module
 Armatus Instructional Manual Using the Administrative Module 1 Using the Administrative Module Armatus Instructional Manual Using the Administrative Module 2 Using the Administrative Module Table of Contents
FSA Online Open Enrollment
 FSA Online Open Enrollment The Open Enrollment period for your FSA is August 15 th September 15 th. Open enrollment will end at 9:00 PM PST on the date shown. To begin your enrollment, you will need to
ORACLE ESS INSTRUCTIONS Oracle Employee Self Service (ESS) is accessible via the Landry s Employee Portal from anywhere with an internet access.
 is accessible via the Landry s Employee Portal from anywhere with an internet access.") ORACLE ESS INSTRUCTIONS Oracle Employee Self Service (ESS) is accessible via the Landry s Employee Portal from anywhere with an internet access. Step 1. To log in via the Landry s Employee Portal, go to
ORACLE ESS INSTRUCTIONS Oracle Employee Self Service (ESS) is accessible via the Landry s Employee Portal from anywhere with an internet access. Step 1. To log in via the Landry s Employee Portal, go to
Employee Services Portal Administrator Guide
 Employee Services Portal Administrator Guide Contents Edit employee access & password... 3 Using the portal to provide electronic W-2s... 5 Setup the portal... 5 Reset the portal for a new tax year...
ONE ID Identity and Access Management System
 ONE ID Identity and Access Management System Local Registration Authority User Guide Document Identifier: 2274 Version: 1.8 Page 1 Copyright Notice Copyright 2011, ehealth Ontario All rights reserved No
Employee Self Service. Getting Started Guide
 Employee Self Service Getting Started Guide https://ess.sccoe.org About Employee Self Service (ESS) Employee Self Service is a secure website where CUSD employees can view their personnel data. This site
MyCardUpdate User Guide Triple E Technologies, LLC
 MyCardUpdate User Guide Triple E Technologies, LLC Version 030316.02 Triple E Technologies, LLC P.O. Box 2677 Post Falls, ID 83877 Phone: 208.777.9300 Fax: 208.777.9304 2017 Triple E Technologies, LLC
11 September CADET - Rehire. The following procedures are used for the CADET Rehire process.
 CADET - Rehire The following procedures are used for the CADET Rehire process. This process is used for accessing cadets that had previously been issued an Employee ID number. Only complete data entries
How to Enroll into Health Benefits via Employee Self Service: New Hire Event Employee Self Service (ESS):
:") Employee Self Service (ESS): Online New Hire Benefits Enrollment allows fast and convenient processing of your New Hire Benefits Enrollment elections through Employee Self Service (ESS). ESS is an online
Employee Self Service (ESS): Online New Hire Benefits Enrollment allows fast and convenient processing of your New Hire Benefits Enrollment elections through Employee Self Service (ESS). ESS is an online
Employee Onboarding in Workday-United States
 After you are hired, you will receive an email with information about your Workday user account. A second email is sent with your temporary password along with the link to login at https://www.myworkday.com/wasteconnections
UAB Self Service Application Changing your Personal Information
 Changing your Personal Information The gives employees access to view and change their personal information in the Administrative Systems. Personal information which can be changed includes first and last
Armatus 2.0 Administrator Procedures
 2015 Armatus 2.0 Administrator Procedures Praesidium 2015. All rights reserved. Armatus 2.0 Administrator Procedures Overview Introduction This guide shows you how to perform tasks in Armatus 2.0 Administrator
Customer Account Center User Manual
 Customer Account Center User Manual 1 P age Customer Account Center User Manual Contents Creating an Account & Signing In... 3 Navigating the Customer Account Center Dashboard... 7 Account Information...