Access to RTE s Information System by software certificates under Microsoft Windows Seven
|
|
|
- Cory Boyd
- 5 years ago
- Views:
Transcription
1 by software certificates under Microsoft Windows Seven PKI User guide Version 3, June 17 th 2016 Programmes & SI (PSI) TOUR MARCHAND 41 RUE BERTHELOT COURBEVOIE CEDEX TEL : FAX : LONG
2 Page : 2/160 SUMMARY A. Foreword 6 1. Introduction Purpose of the document Context Warning regarding security practices The actors 8 The client 8 Registration Authority (RA) 8 Certification Authority (CA) 8 B. Certificates management procedures 9 2. Certificates management process Foreword Software certificate request 10 Preliminary steps 10 General diagram Certificates renewal Revocation of certificates 12 Case of revocation 12 Revocation request 12 C. Workstation configuration Installation and configuration of the workstation Network configuration 14 General configuration 14 Specificity of the VPN access Software configuration 16 D. Web access to the RTE Information System Microsoft Internet Explorer Preliminary configuration 18 Configuration of the security settings 18 Adding trusted sites Installing RTE s CA root certificate 22 Download and install 22 Visualization and verification of RTE s CA root certificate Installing your personal certificate 29
3 Page : 3/160 Authentication on the retrieval interface 29 Downloading of your certificate 31 Installation of your personal certificate 32 Visualization and verification of your software certificate Using your certificate 41 Authentication and encryption 41 Example of access to an RTE web application Additional operations 43 Export of your personal certificate 43 Deleting your personal certificate Connecting to the SSL VPN 51 Foreword 51 Prerequisite 51 First connection 54 Using the SSL VPN Mozilla Firefox Preliminary configuration Installing RTE s CA root certificate 61 Download and install 61 Visualization and verification of RTE s CA root certificate Installing your personal certificate 68 Authentication on the retrieval interface 68 Downloading of your certificate 70 Installation of your personal certificate 72 Visualization and verification of your software certificate Using your certificate 77 Authentication and encryption 77 Example of access to an RTE web application Additional operations 79 Defining the master password for personal security 79 Export of your personal certificate 82 Deleting your personal certificate Connecting to the SSL VPN 87 Foreword 87 Prerequisite 88 First connection 91 Using the SSL VPN 95 E. exchanges with RTE s Information System Using your certificate to exchange s Certificate usage principle Decryption and signature verification of a received message 99
4 Page : 4/ Encryption and signing of a sent message Steps to configure your client Microsoft Outlook Installing RTE s CA root certificate Installing your personal certificate account configuration Installing RTE s application certificate Using the certificate: sending a signed-encrypted Mozilla Thunderbird Installing RTE s CA root certificate 108 Downloading RTE s CA root certificates 108 Installing RTE s current CA certificate 109 Visualization of RTE s CA root certificate Installing your personal certificate account configuration Installing RTE s application certificate Using the certificate: sending a signed-encrypted Lotus Notes Installing RTE s CA root certificate Installing your personal certificate 125 Creation of a PKCS#12 file readable by Notes 125 Installing the PKCS#12 file in Notes 126 Visualization of the certificate account configuration Installing RTE s application certificate Using the certificate: sending a signed-encrypted Lotus Notes Installing RTE s CA root certificate Installing your personal certificate 138 Creation of a PKCS#12 file readable by Notes 138 Installing the PKCS#12 file in Notes 139 Visualization of the certificate account configuration Installing RTE s application certificate Using the certificate: sending a signed-encrypted 149 F. Appendixes Secure environment (PKI) Concepts and objects managed by a PKI 151 What is a secure process? 151 The importance of dual-keys 152 Certificates 154
5 Page : 5/ Documentation Glossary Incidents management and support Support Frequently Asked Questions (FAQ) Error codes returned by 160
6 Page : 6/160 A. FOREWORD
7 Page : 7/ Introduction 1.1 Purpose of the document This document is intended for the end user who wants to access RTE s Information System by using software certificates under Microsoft Windows Seven. This document allows the holder to: Understand the context and principles of a secure environment (authentication, confidentiality, integrity and non-repudiation) and the general operation of a Public Key management Infrastructure (PKI). Learn to install and use his software certificates in the following environments: o o o Microsoft Windows Seven. Browsers: Internet Explorer and Mozilla Firefox for secure accesses via the HTTPS protocol. Clients: Microsoft Outlook, IBM Lotus Notes, and Mozilla Thunderbird for secure exchanges in S/MIME format (a standard for cryptography and digital signatures concerning s encapsulated in MIME format). NOTE Throughout this document, the word "you" is the user of the certificate. 1.2 Context Under the law of February 10, 2000 ( ) and the implementing decree of 16 July 2001, the operator of the public transport network has an obligation to preserve the confidentiality of economic, commercial, industrial, financial or technical information of which the disclosure would be likely to undermine the rules of free and fair competition and nondiscrimination required by law. 1.3 Warning regarding security practices Each software certificate holder has its own private key, all (certificate and associated private key) is generated by RTE and made available for download by the wearer as a passwordprotected file (PKCS # 12 file, extension "p12"). Then, each software certificate holder shall take all necessary precautions to prevent: the violation of his private key, the loss of his private key, the divulgation of his private key, the alteration of his certificate, the misuse of his certificate. Each software private key and its associated certificate have to be stored on hard disk and protected by a password known only by the certificate holder.
8 Page : 8/160 The Certification Authority (CA) "RTE Certification Authority" takes no responsibility for disputes related to misuse of private keys. 1.4 The actors The life cycle management of a certificate is based on three entities: the client (i.e. your company), the Registration Authority (RA), the Certification Authority (CA). NOTE To understand, one can draw a parallel with the allocation of official credentials: the applicant citizen of a credential is the Client; the town is the Registration Authority and the prefecture is the Certification Authority. The client The client issues certificates requests for holders. It may also issue requests for revocation of the certificates (see Section B: certificate management procedures). Registration Authority (RA) The Registration Authority (RTE s manager of customer relations and the Operator) collects the certificates requests, affixes a date of validity for certificates and verifies the identity of their holders. Certification Authority (CA) The Certification Authority (RTE) is responsible and liable for certificates signed in its name and of the PKI s operation. It sets policy for the management and use of certificates. RTE certification authority is called: CN = RTE Certification Authority, O = RESEAU DE TRANSPORT D'ELECTRICITE
9 B. CERTIFICATES MANAGEMENT PROCEDURES Programmes & SI (PSI) TOUR MARCHAND 41 RUE BERTHELOT COURBEVOIE CEDEX TEL : FAX : LONG
10 Page : 10/ Certificates management process 2.1 Foreword The main processes used to manage all the digital certificates issued to holders are: obtaining a certificate (obtaining one or more certificates), renewal of a certificate (replacement by a new certificate for a new validity period and a new key pair) revocation of a certificate (end of certificate validity). 2.2 Software certificate request Preliminary steps Beforehand, the following steps must be performed, The company representative issues an access request : The company representative must have completed and signed the request forms access to RTE IS services and applications" sent by his Customer Relations Manager, and then sent it back to him. In these forms, the company representative specifies in particular: o a Contact who will receive all information necessary to retrieve the certificate (see Erreur! Source du renvoi introuvable.), o a Certificate , o a Chosen password, necessary to the retrieval of the certificate by the holder We have registered your request : Following receipt of the forms we have created your account(s) to access the applications.
11 Page : 11/160 General diagram After the certificate request has been saved and validated by us (within 5 working days), a notification is sent to the address "Contact " entered in the access request form (see 2.2.1). This mall is entitled "Access to RTE s IS services" and contains: a summary of the certificate of removal procedure, the "Certificate " and "Retrieval Code" requested by the website to retrieve your certificate, the Password" protecting the PKCS # 12 file (a ".p12" extension) that you downloaded when you retrieved your certificate. Please remember that this password is different from the password to retrieve the certificate. In case of loss or non-receipt of this message, contact the RTE Hotline. Exchange scenarios The holder has to connect from his workstation on the certificate retrieval website and download his private key and the associated certificate to his workstation in the form of the PKCS#12 file (extension "p12"). 2.3 Certificates renewal The lifespan of the certificates is limited to 3 years, to ensure a high level of security. Forty days before the expiration date of a certificate, an electronic message is sent to the contact to inform the holder of the forthcoming expiry of his software certificate. In case, changes must be made concerning the holder s information, then the company representative contacts RTE s responsible for customer relations to inform him of the changes. Otherwise, an is sent to the contact with the information necessary for the retrieval of his new certificate.
12 Page : 12/ Revocation of certificates Case of revocation The company representative must issue a revocation request when any of the following occurs: Change of the holder, Loss, theft, compromise or suspected compromise (possible, probable or certain) of his private key or associated certificate, Death or cessation of business of the certificate holder, Loss of the activation data, defective or lost support. Revocation request To revoke a certificate, the company representative should call the RTE Hotline. When the certificate is revoked, an is sent to the contact to notify the holder of the revocation of his certificate.
13 Page : 13/160 C. WORKSTATION CONFIGURATION
14 Page : 14/ Installation and configuration of the workstation All operations of this chapter are to be performed only once by a computer specialist with Administrator privileges on your workstation, upon receipt of your "PKI Access Kit". Also note that only a few chapters of this manual concern you: the chapters corresponding to the software you use. All operations are done under the Windows Session of the certificate holder. 3.1 Network configuration General configuration The web browser access uses - in a way that is transparent to the user - a software certificate authentication system for access to the RTE portal and encryption of data exchanged via the Internet (HTTPS protocol). Mail exchanges between RTE and the user are routed over the Internet (SMTP protocol, S/MIME format). Specificity of the VPN access IMPORTANT NOTE Messaging and antivirus gateways, firewalls and content analyzers should be configured not to alter or reject messages that are encrypted and signed S/MIME (application / x-pkcs7-mime,.p7s,.p7m) and not to prohibit the flow of HTTPS data (port 443). The network administrator may be requested to perform these operations. The VPN allows from your workstation to establish a secure connection (based on the authentication to a dedicated site) to RTE s IS via the Internet. Access to the SSL VPN requires that your workstation can resolve the address secure.iservices.rte-france.com. To see if this is the case, open your Start menu, type run in the search bar and click the icon "Run."


15 Page : 15/160 In the window that appears, enter the command: cmd /k ping secure.iservices.rte-france.com Click the OK button. A window appears containing the information: If the first line begins with "Sending a query 'ping' on secure.iservices.rtefrance.com" the address secure.iservices.rte-france.com is resolved. Your workstation is configured properly. If the first line begins with "Ping request could not find the host secure.iservices.rte-france.com." the address secure.iservices.rte-france.com is not resolved. Please contact your IT support so that they make the necessary changes.
16 Page : 16/160 In addition to this test, you need to install on your workstation the module JIS (Juniper Installation Service) available on the RTE customer site. Refer to the section concerning the browser you are using for more details: if you are using Internet Explorer if you are using Mozilla Firefox. 3.2 Software configuration The software configuration required for your workstation is as follows: Operating Systems: Microsoft Windows Seven 32 bits without SP or with SP1 Microsoft Windows Seven 64 bits without SP or with SP1 Web browser either: Microsoft Internet Explorer 11 Mozilla Firefox > 45 ESR client either: Microsoft Outlook 2013 Mozilla Thunderbird > 45 ESR IBM Lotus Notes 8.5 or 9 NOTE In general, consulting messages on a webmail like interface does not allow to sign your messages.
17 Page : 17/160 D. WEB ACCESS TO THE RTE INFORMATION SYSTEM Please refer directly to the chapter associated with the browser you are using for your default Web exchanges with RTE: Chapter 4 if you are using Microsoft Internet Explorer as web browser Chapter 5 if you are using Mozilla Firefox as web browser
18 Page : 18/ Microsoft Internet Explorer 4.1 Preliminary configuration Configuration of the security settings This section is about the configuration of the workstation to support the SSL standard, allowing access to sites with an encrypted connection (HTTPS protocol). In the browser, select the menu "Tools> Internet Options":

19 Page : 19/160 Select the tab Advanced : In the section Security, make sure that the boxes TLS 1.0, TLS 1.1 and TLS 1.2 are ticked, as shown above. Adding trusted sites In order to log on to the web sites with your software certificate, it is imperative to add these sites to the list of trusted sites. The Trusted Sites zone allows the declaration of sites names you consider safe. In this section, you must be logged into the workstation with the Windows account that will use the software certificate. To do this: open Internet Explorer and click the menu "Tools> Internet Options".

20 Page : 20/160 In the window that appears, click the "Security" tab. select the "Trusted Sites" icon and click the "Sites" button.

21 Page : 21/160 The following window appears: In the field Add this website to the zone, enter the URL corresponding to the PKI: Update this URL when the PKI will be replaced by a new one. Then click Add. The site then appears in the list Websites as shown below. Proceed in the same way to add the following websites: this is the internet portal this is the SSL VPN connection portal

22 Page : 22/160 The 3 websites shall now appear in the list Websites. Click Close, then OK. 4.2 Installing RTE s CA root certificate Download and install RTE s CA root certificate must now be installed in your browser so that RTE is recognized as a trusted Certificate Authority To do so, please go to the following address: IMPORTANT NOTE It is imperative to respect the case (upper / lower case) of the site s address. The download window appears: Click the "Save" button and choose a location to save the file "Certification_Autority_RTE_2048.cer" containing the root certificate. Once the download is completed, the following window appears: Click "Open folder" to go to the directory where you saved the file.


23 Page : 23/160 Right-click the "Certification_Autority_RTE_2048.cer" file you just downloaded and choose "Install Certificate". The installation wizard of the certificate is displayed: Click Next. Select "Place all certificates in the following store" and click "Browse".

24 Page : 24/160 In the window that appears, select "Trusted Root Certification Authorities" and click "OK". Once you have chosen the certificate store, you get the following window:
25 Page : 25/160 Click «Next». Click "Finish", the next window will display the imported root certificates.
26 Page : 26/160 Click OK. Visualization and verification of RTE s CA root certificate The root certificate that you just imported, is stored in the Trusted Root Certification Authorities store of Internet Explorer. To view them, click the menu "Tools > Internet Options". A window appears. Go to the "Content" tab and click the "Certificates" button.
27 Page : 27/160


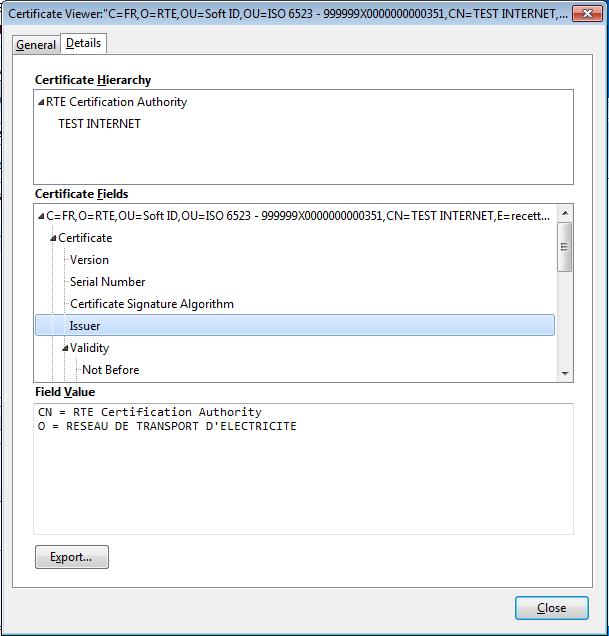
28 Page : 28/160 In the window that appears, go to the tab "Trusted Root Certification Authorities". Select the certificate "RTE Certification Authority". Click the button "View" then click the "Details" tab.
29 Page : 29/160 To ensure the authenticity of this certificate, carefully check that the thumbprint "SHA1" or "MD5" related to the certificate "RTE Certification Authority" is identical to those presented below. Digital hashes of the certificate «RTE Certification Authority» SHA1 39:83:D6:10:A2:C4:D5:60:45:A0:C1:D0:E3:FA:E1:42:45:8A:37:12 MD5 77:4C:12:7D:FD:1D:36:9E:8A:21:85:73:7C:2D:44:77 If this is not the case: delete the certificate and call the Hotline. 4.3 Installing your personal certificate Authentication on the retrieval interface The software certificate request must have been completed in accordance with the procedure of chapter Erreur! Source du renvoi introuvable.. To proceed to the retrieval you need the following information (see Erreur! Source du renvoi introuvable.): The chosen password you or your administrator have chosen and supplied to RTE in the form to request access to RTE s IS (see Erreur! Source du renvoi introuvable.). Certificate , Retrieval code and Password for the PKCS#12 file included in the Access to RTE s IS services. For your convenience you can copy and paste different values being careful not to copy any space at the beginning or end. To create your certificate and the associated private key, log on the certificate retrieval website: IMPORTANT NOTE It is imperative to respect the case (upper / lower case) of the site s address.
30 Page : 30/160 Click the button Retrieval of your personal certificate. Fill the field «Certificate » with the value indicated in the Access to RTE s IS services. Click Send.
. Finally click Send.")
31 Page : 31/160 Fill the fields: Retrieval code as indicated in the Access to RTE s IS services. Chosen password which is the password you or your company representative chose and provided to RTE in the form to request access to RTE s IS (see 2.2.1). Finally click Send. Downloading of your certificate The following page appears. Click Download. In the window that appears, click Save. Choose a directory to save your certificate, then click "Save." A window shows the progress of the download. Once the download is completed, click "Open Folder".

32 Page : 32/160 The folder containing your personal certificate appears. Installation of your personal certificate Go to the download folder of the file. IMPORTANT NOTE Once downloaded, the PKCS#12 file (extension ".P12") containing your certificate and its associated private key must be stored on a removable media (USB stick or an external hard drive), that you have to put into a safe in order to protect access to it. Also keep the mail "Access to RTE's IS services" that contains the password. Double-Click the "name_certificate.p12" file containing your certificate. If the double-click does not launch the Certificate Installation wizard, right-click the "name_certificate.p12" file and choose "Install PFX".

33 Page : 33/160 Click Next. The name of the file containing your certificate is automatically filled, click Next.
![Page : 34/160 The window below appears: In the field Password, enter the Password present in the email Access to RTE s IS services. The case Enable strong private key protection. [ ] is optional.](/docs-images/80/81942707/images/34-0.jpg "Tick it if you wish to define a password that will be asked before every use of your private key in Internet Explorer. The case Mark this key as exportable. [ ] is optional.")
34 Page : 34/160 The window below appears: In the field Password, enter the Password present in the Access to RTE s IS services. The case Enable strong private key protection. [ ] is optional. Tick it if you wish to define a password that will be asked before every use of your private key in Internet Explorer. The case Mark this key as exportable. [ ] is optional. Tick it if you wish to be able to export you private key later (see chapter to export). Tick the case Include all extended properties. Click Next.

35 Page : 35/160 Select "Automatically select the certificate store based on the type of certificate" and click "Next". Finally, click Finish.

36 Page : 36/160 If you previously ticked the case Enable strong private key protection, then the following window appears: Click the button Set security level. Select the case High then click Next.

37 Page : 37/160 Enter a name for the private key to protect and a password then click the "Finish" button. Warning: this password is required upon each use of the certificate. Click OK. Finally, the following window appears: Click OK. Your certificate, your private key and RTE s CA root certificate have been successfully imported in Internet Explorer.
38 Page : 38/160 Visualization and verification of your software certificate Regardless of the browser used, the content of the downloaded certificate is obviously the same, only the presentation of information on the screen differs. In the case of downloading with Internet Explorer, open the certificate store via the menu "Tools> Internet Options", "Content" tab, button "Certificates..." Select your certificate then click View.

39 Page : 39/160 It is valid for 3 years from the date of withdrawal.
 indicate that your certificate has been correctly installed.")
40 Page : 40/160 The "Certification Path" tab allows checking the validity of your certificate. The "Certificate status" and the complete visualization of the certification path (2 levels) indicate that your certificate has been correctly installed. As well as the root certificate, which confirms that everything has been configured correctly. The tab "Details" allows you to view the full name of the holder and the address to which are attached the certificate.

41 Page : 41/ Using your certificate Authentication and encryption Steps to follow run Internet Explorer, enter the URL to RTE s application or to RTE s customer service portal : during the authentication, the browser will ask you to select the certificate to use for authentication then (if it has been defined) the certificate store protection password, if multiple certificates are presented, you must choose the one supplied for the application you wish to access (use the button Display certificate to visualize its content). Once authentication is completed, all data you send or receive will be encrypted. Example of access to an RTE web application Enter the URL of the application (starting with https ) in the Internet Explorer address bar then press Return. Then, Internet Explorer asks you to select a certificate enabling you to authenticate to the requested site.

42 Page : 42/160 The line click here to view certificate properties lets you view the content of the selected certificate. Click the OK button to access the application. The window below asks for the password that protects the private key associated with your certificate if it has been set. The home page is then securely displayed (appearance of the closed padlock to the right of the URL entry field):
43 Page : 43/ Additional operations Export of your personal certificate This section explains how to save the certificate with its private key and the root certificate. The procedure is to generate a file in PKCS#12 format (".pfx" extension), protected by a password. You can only export your certificate and private key if you checked "Mark this key as exportable" when Installing your personal certificate (see 4.3.3). In Internet Explorer, click the menu "Tools> Internet Options..." Then, click the "Content" tab and then the "Certificates" button.
44 Page : 44/160

45 Page : 45/160 Another window appears. Select your certificate, then click "Export...". Click Next.


46 Page : 46/160 Select "Yes, export the private key" and then click "Next". Select the check box "Include all certificates in the certification path if possible" and then click "Next".

47 Page : 47/160 Enter a password of your choice to protect the PKCS#12 file, and then click "Next". Select the location of the PKCS#12 file, and then click "Next".
48 Page : 48/160 Finally, click the "Finish" button. Click "OK". You have exported to a file in PKCS#12 format, protected by a password, your certificate's private key and the root of the CA. These elements have therefore been exported, but remain present in the Internet Explorer s store. Deleting your personal certificate This section details the procedure to remove a certificate and its private key from Internet Explorer s Certificate store. IMPORTANT NOTE Before deleting your personal certificate, make sure to have a copy. If this is not the case, refer to to export your certificate and private key as a PKCS#12 file.
49 Page : 49/160 In Internet Explorer, go to "Tools> Internet Options". A window appears. Click the Content tab, then the Certificates button:

50 Page : 50/160 Select the certificate to delete and click Remove. Click Yes.
51 Page : 51/160 The certificate is removed from the certificates list. 4.6 Connecting to the SSL VPN Foreword The connection via SSL VPN is a service for establishing a secure communications channel to RTE s FrontOffice via the Internet. This channel is established after authenticating with your certificate from a dedicated website (see section 4.4). Once the channel is established all communications with the requested RTE service will be encrypted. The use of SSL VPN requires the installation of a dedicated tool, installed during the first login to the site. The application is called Windows Secure Application Manager (WSAM). SSL VPN enables secure access to your mailboxes hosted on RTE s FrontOffice. Prerequisite The website secure.iservices.rte-france.com must be declared as a trusted site (see 4.1.2). IMPORTANT NOTE Before your first connection, you must verify that your workstation can resolve the address secure.iservices.rte-france.com (see section 3.1).

52 Page : 52/160 JIS (Juniper Installation Service) is a Windows service made available on the RTE customer site. This service allows, once installed, to update future WSAM versions without requiring the intervention of a person with administrator privileges on the machine. To do so, download the executable under the link: And decompress the compressed file: Once the file is executed, the following window appears, asking you the authorization to start the service. Click Run.
53 Page : 53/160 Once the file is executed, the following window appears. Click «Yes». This will enable the service to start installing. It will be automatically activated at every operating system launch. Click Close to close the window.

54 Page : 54/160 First connection This paragraph applies only to your first login to the SSL VPN with Internet Explorer. IMPORTANT The first connection must be made by a computer specialist with Administrator rights on your workstation in order to install the WSAM application. Before continuing, you need to disable ActiveX controls. To do so, press the "Alt" key on your keyboard. A menu bar at the top of the window. Then click the Tools button, and make sure "ActiveX Filtering" is off. " Launch your browser and go to the following website: The following window appears: Select your certificate then click OK.

55 Page : 55/160 If necessary, this window will ask for the password that protects the private key associated to your certificate. The browser displays a link to install WSAM:


56 Page : 56/160 If no manual intervention is performed, the following installation pop-up appears: If necessary, the following window appears: Click Yes. The Juniper client then installs and the installation of the WSAM application starts:

57 Page : 57/160 Wait during the installation. If the following window appears, click Yes : Once the installation is completed, the following page appears: If your Internet access requires authentication to a proxy, a window appears asking your login and password. Enter them and confirm. Then, the icon appears in your taskbar.
58 Page : 58/160 Click the "Sign out" button (top right of the page) to end the session: Using the SSL VPN Establishing the connection Launch your browser and go to the following website: The following window appears: Select your certificate then click OK.
59 Page : 59/160 If necessary, a window will ask you the password that protects the private key associated with your certificate. If necessary, the window below appears. Click Yes. The WSAM application launches automatically and the following page appears: If your Internet access requires authentication to a proxy, a window appears asking your login and password. Enter them and confirm. Then, the icon appears in your taskbar. Notes: The certificate is only used to establish the connection to the SSL VPN. To close the SSL VPN session, click the Sign out button (top right of the page).
60 Page : 60/ Use case to access hosted mailboxes The SSL VPN can be used to access mailboxes hosted on the FrontOffice with a standard client. Access to hosted mailboxes requires the SSL VPN connection to be established (see ). The account configuration in your mail client is then to be made with the following parameters: Mail server type : POP Server POP server address : pop.services.rte-france.com SMTP server address : smtp.services.rte-france.com When your access to RTE s FrontOffice is provided, you will receive your login name, your password and your address. NOTE Because the messages are transferred through a secure channel, sending and receiving messages do not require the use of a certificate to encrypt messages.
 is disabled by default in recent versions of Firefox.")
61 Page : 61/ Mozilla Firefox 5.1 Preliminary configuration The SSL standard, allowing access to sites with an encrypted connection (protocol HTTPS) is disabled by default in recent versions of Firefox. The supported versions of Firefox are specified in Erreur! Source du renvoi introuvable.. The standards supported by default are: TLS 1.0 to TLS 1.2. In case of problems, thank you to notify the issue to the support. 5.2 Installing RTE s CA root certificate Download and install RTE s CA root certificate must now be installed in your browser so that RTE is recognized as a trusted Certificate Authority To do so, please go to the following address: Select Save file then click OK. A location to save the file Certification_Autority_RTE_2048.cer will eventually be requested.

62 Page : 62/160 Once the file is downloaded, click the menu Tools to right corner of the window then click the icon Options :

63 Page : 63/160 A window appears. Choose the Advanced tab then the subcategory Certificates. Click the «View certificates» button. Select the Authorities tab and click Import.
64 Page : 64/160 Select the previously saved file. A dialog box is displayed, in which you must select the three check boxes "Trust this CA to identify [...]" to trust RTE's CA.
65 Page : 65/160 Visualization and verification of RTE s CA root certificate Click the "View" button to verify that the certificate that you are going to trust is the RTE root certificate: To ensure that you have downloaded the real RTE CA's root certificate, check carefully that the "SHA1" or "MD5" hashes displayed is identical to the one shown below. Hashes of RTE s CA root certificate are recalled here: SHA1 39:83:D6:10:A2:C4:D5:60:45:A0:C1:D0:E3:FA:E1:42:45:8A:37:12 MD5 77:4C:12:7D:FD:1D:36:9E:8A:21:85:73:7C:2D:44:77 If this is not the case: click Close to go back to the precedent window and click Cancel then call RTE s Hotline.
.")
66 Page : 66/160 If, after verification, the hash of the certificate that you imported matches the "SHA1" or "MD5" hash above, it is possible to consult the details of the certificate by clicking on the "Details" tab: By clicking on the "Close" button, you return to the initial window: "Downloading certificate" (see above). In this window, click the "OK" button: the RTE CA's root certificate is then installed in Mozilla Firefox. To view the certificate later in Mozilla Firefox, go to the "Tools" menu on the top right of the window then click the "Options" icon:
67 Page : 67/160 A window appears. Select the Advanced tab then the subcategory Certificates. Click the View certificates button.
68 Page : 68/160 In the Authorities tab you can verify that the root certificate RTE Certification Authority is well saved on your PC ( Software Security Device ) and view it by clicking on View. 5.3 Installing your personal certificate Authentication on the retrieval interface The software certificate request must have been completed in accordance with the procedure of chapter Erreur! Source du renvoi introuvable.. To proceed to the retrieval you need the following information (see Erreur! Source du renvoi introuvable.): The chosen password you or your administrator have chosen and supplied to RTE in the form to request access to RTE s IS (see Erreur! Source du renvoi introuvable.). Certificate , Retrieval code and Password for the PKCS#12 file included in the Access to RTE s IS services. For your convenience you can copy and paste different values being careful not to copy any space at the beginning or end. To create your certificate and the associated private key, log on the certificate retrieval website: IMPORTANT NOTE It is imperative to respect the case (upper / lower case) of the site s address.
69 Page : 69/160 Click the button Retrieval of your personal certificate. Fill the field «Certificate » with the value indicated in the Access to RTE s IS services. Click Submit.
70 Page : 70/160 Fill the fields: Retrieval code as indicated in the Access to RTE s IS services. Chosen password which is the password you or your company representative chose and provided to RTE in the form to request access to RTE s IS (see 2.2.1). Finally, click Submit. Downloading of your certificate The following page appears. Click Download. In the window that appears, click Save then OK.
71 Page : 71/160 Choose a directory to save your certificate, then click "Save". IMPORTANT NOTE Once downloaded, the PKCS#12 file (extension ".P12") containing your certificate and its associated private key must be stored on a removable media (USB stick, an external hard drive), that you have to put into a safe in order to protect access to it. Also keep the mall "Access to RTE's IS services" that contains the password.
72 Page : 72/160 Installation of your personal certificate In Firefox, go to the menu "Tools" on the top right of the window and click the "Options" icon: A window appears. Choose the tab Advanced then the subcategory Certificates. Click View Certificates.

73 Page : 73/160 Click Import. Go to the folder you saved your certificate in, select your certificate name_certificate.p12 and click Open.
74 Page : 74/160 If necessary, the window below will ask you the access password to the Mozilla Firefox certificate store: Enter it and click OK. The window below appears. Enter the Password present in the Access to RTE s IS services then click OK. Your certificate and its associated private key have been successfully imported in Mozilla Firefox s certificate store. Visualization and verification of your software certificate Regardless of the browser used, the content of the downloaded certificate is obviously the same, only the presentation of information on the screen differs.
75 Page : 75/160 In the case of Mozilla Firefox, go to the Tools menu (top-right corner of the window) then click the Options icon: A window appears. Choose the Advanced tab then the Certificates subcategory. Then click the View Certificates button.

76 Page : 76/160 Select the tab Your Certificates. The certificate is a software certificate: indeed, the "Software Security Dev " indication appears at the right of its name. You can view it by selecting it and clicking "View. The first tab «General» displays the following message This certificate has been verified for the following uses. It is valid for 3 years from the date of withdrawal.
77 Page : 77/160 The second tab «Details» displays the certification hierarchy with RTE's root CA certificate. This ensures that all certificates have been installed correctly, and that all the correct conditions of your certificate are met. 5.4 Using your certificate Authentication and encryption Steps to follow run Mozilla Firefox, enter the URL to RTE s application or to RTE s customer service portal : during the authentication, the browser will ask you to select the certificate to use for authentication then (if it has been defined) the certificate store protection password, if multiple certificates are presented, you must choose the one supplied for the application you wish to access (use the button Display certificate to visualize its content). Once authentication is completed, all data you send or receive will be encrypted.


78 Page : 78/160 Example of access to an RTE web application When you access the https homepage, you will be asked to choose your certificate. Select your certificate from the drop down list entitled Choose a certificate to present as identification then click OK. The following window will ask you the access password to the Mozilla Firefox certificate store if it was defined

79 Page : 79/160 The home page is then securely displayed, (appearance of the closed padlock to the left of the URL entry field): 5.5 Additional operations Defining the master password for personal security To protect the private key associated with your certificate it is strongly recommended to set a personal security password.

80 Page : 80/160 To do this, click the Tools menu on the top right of the window and click on the Options icon: A window appears. Choose the Security tab. If Use a master password is already checked, it means you already have a personal security password, and you have nothing to do.

81 Page : 81/160 Otherwise, check the Use a master password case. The following window appears: Enter your new master password in both fields and click OK. Your personal security password is now defined. You can change your personal security password at any time by going to the menu Tools on the top right of the window and clicking the Options icon.
82 Page : 82/160 A window appears. Choose the Security tab and click Change Master Password. Export of your personal certificate This section explains how to save the certificate with its private key and the root certificate. The procedure is to generate a file in PKCS#12 format (".pfx" extension), protected by a password. Go the Tools menu at the top-right corner of the window then click the Options icon:

83 Page : 83/160 A window appears. Choose the Advanced tab then the Certificates subcategory. Then click View Certificates. Select your certificate and click Backup : Choose a folder and a name for the output file in PKCS#12 format (extension «.p12»):

84 Page : 84/160 Click Save. If necessary, the following window will ask you the access password to the Mozilla Firefox certificate store: Then the following window appears: Enter a password of your choice to protect access to the PKCS#12 file and click OK.
85 Page : 85/160 Your certificate, your private key and the CA s root certificate are exported in the PKCS#12 generated file (extension.p12 ). Deleting your personal certificate This section details the procedure to remove a certificate and its private key from Mozilla Firefox s Certificate store. IMPORTANT NOTE Before deleting your personal certificate, make sure to have a copy. If this is not the case, refer to Erreur! Source du renvoi introuvable. to export your certificate and private key as a PKCS#12 file. Go to the Tools menu at the top-right corner of the window then click the Options icon:

86 Page : 86/160 A window appears. Choose the Advanced tab then the Certificates subcategory. Then click View Certificates.... Select your certificate and click Delete.


87 Page : 87/160 Validate by clicking OK. The certificate is then removed from the list of certificates. 5.6 Connecting to the SSL VPN Foreword The connection via SSL VPN is a service for establishing a secure communications channel to RTE s FrontOffice via the Internet. This channel is established after authenticating with your certificate from a dedicated website (see section 5.4). Once the channel is established all communications with the requested RTE service will be encrypted. The use of SSL VPN requires the installation of a dedicated tool, installed during the first login to the site. The application is called Windows Secure Application Manager (WSAM). SSL VPN enables secure access to your mailboxes hosted on RTE s FrontOffice.
88 Page : 88/160 Prerequisite In order to connect to the SSL VPN with Firefox, Java SE Runtime Environment (JRE) or higher needs to be installed on your workstation. If this is not the case, you can download the latest version on Oracle s website: IMPORTANT NOTE Before your first connection, you must verify that your workstation can resolve the address secure.iservices.rte-france.com (see section 3.1).

89 Page : 89/160 JIS (Juniper Installation Service) is a Windows service made available on the RTE customer site. This service allows, once installed, to update future WSAM versions without requiring the intervention of a person with administrator privileges on the machine. To do so, download the executable under the link: And decompress the compressed file: Once the file is executed, a window appears that asks the authorization to start the service. Click Execute :

90 Page : 90/160 The following window appears. Click Yes. This enables the service installation to start. This service will be automatically activated at every operating system launch. Click Close to close the window.
91 Page : 91/160 First connection This paragraph applies only to your first login to the SSL VPN with Mozilla Firefox. IMPORTANT The first connection must be made by a computer specialist with Administrator rights on your workstation in order to install the WSAM application. Launch your browser and go to the following website: The following window appears: Select your certificate from the dropdown list entitled Choose a certificate to present as identification and click OK. If necessary, the following window will ask you the access password to the Mozilla Firefox certificate store.


92 Page : 92/160 If a window asking you permission to execute a script from Juniper Network, Inc. appears, click Yes. If the next red icon appears, click it in the address bar. Then in the dropdown menu of the message, select "Allow and remember». If necessary, the following window appears:

93 Page : 93/160 If the window below appears: click Yes. The installation of the WSAM application starts: If your Internet access requires authentication to a proxy, a window appears asking your login and password. Enter them and confirm. Then the window below appears: Then, the icon appears in your taskbar which means you are now connected to the SSL VPN.
 to end the")
94 Page : 94/160 Click the "Sign out" button (top right of the page) to end the session:
95 Page : 95/160 Using the SSL VPN Establishing the connection Run your browser and access the following website: The following window appears: Select your certificate from the dropdown list entitled Choose a certificate to present as identification and click OK. If necessary, the following window will ask you the access password to the Mozilla Firefox certificate store. If a window appears asking you permission to execute a script from Juniper Network, Inc. : click Allow. If the window below appears: click Yes.
96 Page : 96/160 If your Internet access requires authentication to a proxy, a window appears asking your login and password. Enter them and confirm. Then the window below appears: Then, the icon appears in your taskbar which means you are now connected to the SSL VPN. Notes: The certificate is only used to establish the connection to the SSL VPN. To close the SSL VPN session, click on the Sign out button (top right of the page).
97 Page : 97/ Use to access hosted mailboxes The SSL VPN can be used to access mailboxes hosted on the FrontOffice with a standard client. Access to hosted mailboxes requires the SSL VPN connection to be established (see Erreur! Source du renvoi introuvable.). The account configuration in your mail client is then to be made with the following parameters: Mail server type : POP Server POP server address : pop.services.rte-france.com SMTP server address : smtp.services.rte-france.com When your access to RTE s FrontOffice is provided, you will receive your login name, your password and your address. NOTE Because the messages are transferred through a secure channel, sending and receiving messages do not require the use of a certificate to encrypt messages.
98 Page : 98/160 E. EXCHANGES WITH RTE S INFORMATION SYSTEM This section only applies if you need to exchange signed-encrypted with RTE applications. After reading the chapter 6 (overview), directly refer to the chapter associated with the client that you use for your mail exchanges with RTE: Chapter 7 if you use Microsoft Outlook 201 as client. Chapter 8 if you use Mozilla Thunderbird as client. Chapter 9 if you use Lotus Notes 8.5 as client. Chapter 10 if you use Lotus Notes 9 as client.
99 Page : 99/ Using your certificate to exchange s 6.1 Certificate usage principle Using your personal certificate, its associated private key, RTE s CA certificate and RTE s application certificate, you can: decrypt and verify the signature of s you receive from RTE applications, encrypt and sign s you send to RTE applications. 6.2 Decryption and signature verification of a received message Decryption and verification of the signature of a message are disjoint processes. When you receive an encrypted-signed message: you decrypt the message with the private key associated to your personal certificate, you verify the message signature with the certificate of the sender (that of the RTE application) contained in the message, and with the certificate you own of the issuing CA that you trust. These two processes are done automatically when you open a signed-encrypted with a properly configured client that supports the secure format S/MIME. IMPORTANT NOTE To verify the signature of a message you need to own the right certificate and trust the CA that issued the certificate of the sender. 6.3 Encryption and signing of a sent message Encrypting and signing message are two disjoint processes. When you send an encryptedsigned message: you sign the message with the private key associated to your personal certificate, you encrypt the message with the recipient s certificate (RTE s application certificate). The certificate of the recipient can be obtained in several ways. RTE applications transmit to you their certificate by sending a signed message: that is the way you will get their certificate. In doing so, when you receive a signed message, use "Add sender to contacts" to save at the same time its certificate, which you can use to send encrypted messages to him. IMPORTANT NOTE Encrypting a message requires to possess a valid certificate corresponding to the recipient's address.
100 Page : 100/ Steps to configure your client In order to be able to exchange signed-encrypted s with RTE, the steps are as follows: Install RTE s CA certificate, so that your mail client trusts RTE s applications certificates and is able to verify the signature of signed-encrypted s you receive from them. Install your personal certificate, so your mail client can decrypt the messages from RTE and sign messages to RTE. Configure the account you will use to exchange with RTE so that your client always encrypts and signs messages to the RTE applications using the standard S/MIME. Install RTE s application certificate, so that your client can encrypt s you send to RTE applications. To perform these steps, please refer directly to one of the following chapters: the one concerning the client that you use for your mail exchanges with RTE.


101 Page : 101/ Microsoft Outlook Installing RTE s CA root certificate Outlook 2013 uses the same certificate store as Internet Explorer. Install RTE s CA root certificate in Internet Explorer by following the procedure described in chapter 4.2 if not already done. 7.2 Installing your personal certificate Outlook 2013 uses the same certificate store as Internet Explorer. Install your personal certificate in Internet Explorer by following the procedure described in chapter if not already done account configuration Start Outlook 2013 and click the menu File > Options > Trust Center then click Trust Center Settings. In the left column, click security, then click the Settings button.

102 Page : 102/160 Click the two Choose buttons in order to select your personal certificate for signing and encryption. A list of selectable certificates is presented to you (you can also display a certificate from the list to view its contents and make sure you choose the right one).

103 Page : 103/160 Make sure the settings are similar to the ones above (S/MIME, check boxes, certificates, algorithms); if the field Security Settings Name is empty, enter a label such as RTE Certification. Finally click OK. Check the boxes Encrypt contents and attachments for outgoing messages and Add digital signature to outgoing messages, then click OK.
104 Page : 104/160 All your s sent to RTE applications using the default account will now be encrypted and signed. 7.4 Installing RTE s application certificate After receiving the first encrypted and signed message from an application, you must install the certificate of the issuing application. For this, you need to add the address of the application to your address book by clicking the sender of the received with the right mouse button and then Add to Outlook contacts :
105 Page : 105/160 Click General : Click Certificates :
106 Page : 106/160 Click Save & Close to save. All your encrypted s sent to this application will be encrypted automatically with the application s certificate.
107 Page : 107/ Using the certificate: sending a signed-encrypted To encrypt and sign a message: first create a new message by clicking New. To sign and encrypt your message, verify that both icons below are activated or click on them to activate.


108 Page : 108/ Mozilla Thunderbird 8.1 Installing RTE s CA root certificate RTE s CA root certificate must first be installed for Thunderbird to be able to verify the signature of s sent by RTE. IMPORTANT NOTE It is imperative to respect the case (upper / lower case) of the following websites addresses. Downloading RTE s CA root certificates With your web browser go to the address below to download the file Certification_Autority_RTE_2048.cer containing RTE s current CA certificate: With Internet Explorer: Click the "Save" button and choose a location to save the file "Certification_Autority_RTE_2048.cer" With Mozilla Firefox: Select Save file then click OK. A location to save the file Certification_Autority_RTE_2048.cer will eventually be requested.
109 Page : 109/160 Installing RTE s current CA certificate The first certificate you just downloaded must be installed in Thunderbird certificate store. In the menu "Tools" on the top right of the window click Options : A window appears. Choose the Advanced tab then the Certificates subcategory. Click the button View Certificates.

110 Page : 110/160 Select the Authorities tab and click Import. Select the previously saved file Certification_Autority_RTE_2048.cer and click Open.
111 Page : 111/160 A dialog box is displayed, in which you must select the three check boxes "Trust this CA to identify [...]" to trust RTE's CA. Click the "View" button to verify that the certificate that you are going to trust is the RTE root certificate: To ensure that you have downloaded the real RTE CA's root certificate, check carefully that the "SHA1" or "MD5" hashes displayed is identical to the one shown below.
112 Page : 112/160 Digital hashes of the certificate «RTE Certification Authority» SHA1 39:83:D6:10:A2:C4:D5:60:45:A0:C1:D0:E3:FA:E1:42:45:8A:37:12 MD5 77:4C:12:7D:FD:1D:36:9E:8A:21:85:73:7C:2D:44:77 If this is not the case: click Close to go back to the precedent window and click Cancel then call RTE s Hotline. If this is the case, click Close to return to the initial window: "Downloading certificate" (see above). In this window click the "OK" button: RTE CA's root certificate is then installed. Visualization of RTE s CA root certificate To view the certificate later in Mozilla Thunderbird, go to the "Tools" menu on the top right of the window then click the "Options" icon: A window appears. Select the Advanced tab then the subcategory Certificates.

113 Page : 113/160 Click the View Certificates button. In the Authorities tab you can verify that the root certificate RTE Certification Authority is well saved on your PC ( Software Security Device ) and view it by clicking on View.
114 Page : 114/ Installing your personal certificate To be able to import your certificate in Mozilla Thunderbird, you must have the file name_certificate.p12 downloaded with your browser when retrieving your certificate (see Erreur! Source du renvoi introuvable. for Internet Explorer, Erreur! Source du renvoi introuvable. for Mozilla Firefox). Start Mozilla Thunderbird, go to the menu "Tools" on the top right of the window and click the "Options" icon: A window appears. Choose the Advanced tab then the Certificates subcategory. Click View Certificates.
115 Page : 115/160 In the Your certificates tab, click Import. In the drop-down menu File type select PKCS$12 Files (*.p12;*.pfx) : Go to the folder you saved your certificate in, select your certificate name_certificate.p12 and click Open.

116 Page : 116/160 If necessary, the window below will ask you the access password to the Mozilla Thunderbird certificate store: Click OK. N.B.: if there is no master password, Thunderbird will ask you to define one. Enter the password protecting the PKCS#12 file and click OK. Your certificate and its associated private key have been successfully imported in Mozilla Thunderbird s certificate store.

117 Page : 117/160 Verify this is the right certificate by clicking on View.

118 Page : 118/160

119 Page : 119/ account configuration To sign and encrypt with your certificate, it must be associated with the account corresponding to the address specified in the Certificate subject. For this, start Mozilla Thunderbird, press the Alt key on your keyboard, a menu bar appears at the top of the window. Click Tools then Account Settings.


120 Page : 120/160 A window appears. Select the Security item of the account you use to exchange with RTE: Click Select to open the following window: Select your certificate in the drop-down list and click OK. The following message appears:


121 Page : 121/160 Click Yes to automatically define the same certificate to decrypt received s. NOTE Although for encryption, the text indicates that your certificate will be used to encrypt and decrypt messages sent, it will not actually be used to decrypt messages received. All your s sent to RTE applications using this account will now be encrypted and signed. 8.4 Installing RTE s application certificate After receiving the first encrypted and signed message from an application, the application certificate installs automatically. However you can add the application s address to your address book by right-clicking the sender of the received and then clicking Add to Address Book : The contact has been added to the address book.
122 Page : 122/160 To verify that the application certificate is correctly installed, go to the menu Tools (top-right corner of the window) and click Options : A window appears. Choose the Advanced tab then the Certificates subcategory. Then click View Certificates. A window appears. Click the People tab.

123 Page : 123/160 Every time an encrypted is sent to this application, the application s certificate will be used automatically to encrypt it.

124 Page : 124/ Using the certificate: sending a signed-encrypted To encrypt and sign a message, first create a new message by clicking Write. Click the Security tab to verify the options: Encrypt this message and Digitally sign this message. These options should be checked by default, if not: check them.
125 Page : 125/ Lotus Notes Installing RTE s CA root certificate RTE s root certificate will be installed by «crossed certification» when you received your first signed-encrypted from the application (see Erreur! Source du renvoi introuvable.). Note: The «Crossed certificate» is a process which makes a user able to install the certificate of another entity while he receives message form that entity. Messages sent to that specific entity will be encrypted with that «Crossed certificate». 9.2 Installing your personal certificate Creation of a PKCS#12 file readable by Notes Lotus Notes can install a certificate and its associated private key only from a PKC #12 file that contains RTE's CA. This is not the case for the file name_certificate.p12 you downloaded when you retrieved your certificate. To generate a file accepted by Lotus Notes, install RTE's CA and your certificates in a browser and then export your personal certificate as a PKCS#12 file. Depending on the browser you are using, perform one of the procedures below. With Microsoft Internet Explorer : o Install RTE s CA root certificate, see 4.2. o o Install your personal certificate making sure to check the case Mark this key as exportable., see Export your certificate in a PKCS#12 file making sure to check the case Include all certificates in the certification path if possible, see With Mozilla Firefox : o Install RTE s CA root certificate, see 5.2. o Install your personal certificate, see 5.3. o Export your certificate to a PKCS#12 file, see (RTE s CA will automatically be included).

126 Page : 126/160 Installing the PKCS#12 file in Notes Start Lotus Notes and access to File > Security > User Security : If requested, enter your Notes password:
127 Page : 127/160 The following window appears: Click Your Identity then Your Certificates : Select Your Internet Certificates in the drop-down list to display the Internet certificates already imported.

128 Page : 128/160 In general, the list will be empty. Click the Get Certificates button and select Import Internet Certificates : A window appears asking you to select a PKCS#12 file (extension.pfx or.p12 ) Select the file you generated at containing your personal certificate, its private key and RTE s CA root certificate:

129 Page : 129/160 Click Open and in the window below choose the format: PKCS 12: Click Continue. The PKCS12 file s password is requested: Click OK and the window below is displayed:
 appears in the window: Click Cancel to go")
130 Page : 130/160 Your certificate, you want to import, and the root certificate, are listed. If you click Advanced Details the content of the selected certificate (yours) appears in the window: Click Cancel to go back to the previous window.

131 Page : 131/160 To see the content of the root certificate, you must select it: And click Advanced Details :

132 Page : 132/160 Click Close to go back to the main screen: Click Accept All. Enter your Notes password and click OK. Click OK, the window below appears:
133 Page : 133/160 The certificate, now visible here, has successfully been imported. Click OK to end the import. Visualization of the certificate To view your certificate, in Lotus Notes access the menu File > Security > User Security, then click the item Your Identity and Your Certificates. Select Your Internet Certificates in the drop-down list. Select your personal certificate and click the Advanced Details button. The certificate s details are then presented in the window below:

134 Page : 134/ account configuration If you have multiple certificates used to sign your sent messages, you have to set by default the one that will serve for exchanges with RTE. In Lotus Notes, open the menu File > Security > User Security, then click Your Identity and Your Certificates : Select Your Internet Certificates in the drop-down list to display your Internet certificates that are already imported. Select your certificate and click the Advanced Details button.
135 Page : 135/160 If you only have one certificate, the case Use this certificate as your default signing certificate will be grey and checked. If not, check it, as above, and click OK. 9.4 Installing RTE s application certificate When you select, for the first time, a signed and encrypted message you received a dialog box similar to the one below appears, allowing you to give your trust to the issuer: For this, you must click on the Cross certify button. Then, when you display this signed received message, you will need to choose the Add Sender to Contacts in the menu by right-clicking on the , which will add the issuer and its certificate to your book Address.


136 Page : 136/160 The following window appears: Only verify that the case Include X.509 certificates when encountered is checked and click OK. Whenever an encrypted will be sent to this application, its installed certificate will now automatically be selected to perform the encryption.


137 Page : 137/ Using the certificate: sending a signed-encrypted When composing a message, you can sign and encrypt it if you own your signature certificate (see the import procedure for your certificate above) and that of your correspondent. For that, when you write a new message, you must click the Delivery Options button. Check the Sign and Encrypt cases as shown below: Click OK. The rest of the mailing process has no more particularity, Notes then automatically signs and encrypts your message transparently.
138 Page : 138/ Lotus Notes Installing RTE s CA root certificate RTE s root certificate will be installed by crossed certification when you received your first signed-encrypted from the application (see Erreur! Source du renvoi introuvable.). Note: The «Crossed certificate» is a process which makes a user able to install the certificate of another entity while he receives message form that entity. Messages sent to that specific entity will be encrypted with that «Crossed certificate» Installing your personal certificate Creation of a PKCS#12 file readable by Notes Lotus Notes can install a certificate and its associated private key only from a PKC #12 file that contains RTE's CA. This is not the case for the file name_certificate.p12 you downloaded when you retrieved your certificate. To generate a file accepted by Lotus Notes, install RTE's CA and your certificates in a browser and then export your personal certificate as a PKCS#12 file. Depending on the browser you are using, perform one of the procedures below. With Microsoft Internet Explorer : o Install RTE s CA root certificate, see 4.2. o o Install your personal certificate making sure to check the case Mark this key as exportable. see Export your certificate in a PKCS#12 file making sure to check the case «Include all certificates in the certification path if possible» see With Mozilla Firefox : o Install RTE s CA root certificate, see 5.2. o Install your personal certificate, see 5.3. o Export your certificate to a PKCS#12 file, see (RTE s CA will automatically be included).

139 Page : 139/160 Installing the PKCS#12 file in Notes Start Lotus Notes and access to File > Security > User Security : If requested, enter your Notes password.


140 Page : 140/160 The following window appears: Click Your Identity then Your Certificates : Select Your Internet Certificates in the drop-down list to display the Internet certificates already imported. In general, the list will be empty.

. Select the file you generated at 9.2.")
141 Page : 141/160 Click the Get Certificates button and select Import Internet Certificates : A window appears asking you to select a PKCS#12 file (extension.pfx or.p12 ). Select the file you generated at containing your personal certificate, its private key and RTE s CA root certificate:

142 Page : 142/160 Click Open and in the window below chose the format PKCS 12: Click Continue. The PKCS12 file s password is requested: Click OK and the window below is displayed: Your certificate, you want to import, and the root certificate, are listed. If you click Advanced Details the content of the selected certificate (yours) appears in the window:

143 Page : 143/160 Click Close to go back to the previous window. To see the content of the root certificate, you must select it: And click Advanced Details :


144 Page : 144/160 Click Close to go back to the main screen: Click Accept All. If necessary, enter your Notes password and click OK. Click OK, the window below appears:
145 Page : 145/160 The certificate, now visible here, has successfully been imported. Click OK to end the import. Visualization of the certificate To view your certificate, in Lotus Notes access the menu File > Security > User Security, then click the item Your Identity and Your Certificates. Select Your Internet Certificates in the drop-down list. Select your personal certificate and click the Advanced Details button. The certificate s details are then presented in the window below:
146 Page : 146/ account configuration If you have multiple certificates used to sign your sent messages, you have to set by default the one that will serve for exchanges with RTE. In Lotus Notes, open the menu File > Security > User Security, then click Your Identity and Your Certificates : Select Your Internet Certificates in the drop-down list to display your Internet certificates that are already imported. Select your certificate and click the Advanced Details button.
147 Page : 147/160 If you only have one certificate, the case Use this certificate as your default signing certificate will be grey and checked. If not, check it, as above, and click OK Installing RTE s application certificate When you select, for the first time, a signed and encrypted message you received a dialog box similar to the one below appears, allowing you to give your trust to the issuer: For this, you must click on the Cross certify button. Then, when you display this signed received message, you will need to choose the Add Sender to Contacts feature, which will add the issuer and its certificate to your book Address.


148 Page : 148/160 The following window appears: Click OK.
Access to RTE s Information System by software certificates under Microsoft Windows 7
 by software certificates under Microsoft Windows 7 PKI User guide Version 4, 01/01/2017 Programmes & SI (PSI) TOUR MARCHAND 41 RUE BERTHELOT - 92411 COURBEVOIE CEDEX TEL : 01.78.66.50.00 - FAX : 01.78.66.50.64
Smart card access to RTE s IS under Microsoft Windows 7
 Smart card access to RTE s IS under Microsoft Windows 7 PKI User guide Version 3, June 17 th 2016 Programmes & SI (PSI) TOUR MARCHAND 41 RUE BERTHELOT - 92411 COURBEVOIE CEDEX TEL : 01.78.66.50.00 - FAX
Accessing the IS by smart card with Microsoft Windows Vista
 Index 1.4, 16/07/2009 This document is the property of RTE. No part of it may be disclosed, reproduced or published without RTE's express written authorisation. Programmes & IS (PIS) TOUR MARCHAND 41 RUE
PKI Contacts PKI for Fraunhofer Contacts
 Fraunhofer Competence Center PKI PKI Contacts PKI for Fraunhofer Contacts User manual for communication partners of the Fraunhofer-Gesellschaft Author[s]: Uwe Bendisch, Maximilian Gottwald As at: 03.02.2017
Registration and Renewal procedure for Belfius Certificate
 Registration and Renewal procedure for Belfius Certificate Table of contents TABLE OF CONTENTS... 2 1. INTRODUCTION... 3 2. CONTACT... 3 3. CONFIGURATION... 3 4. REGISTRATION PROCEDURE... 4 4.1 PRE-REQUISITES...
Odette CA Help File and User Manual
 How to Order and Install Odette Certificates For a German version of this file please follow this link. Odette CA Help File and User Manual 1 Release date 31.05.2016 Contents Preparation for Ordering an
VII. Corente Services SSL Client
 VII. Corente Services SSL Client Corente Release 9.1 Manual 9.1.1 Copyright 2014, Oracle and/or its affiliates. All rights reserved. Table of Contents Preface... 5 I. Introduction... 6 Chapter 1. Requirements...
This help covers the ordering, download and installation procedure for Odette Digital Certificates.
 This help covers the ordering, download and installation procedure for Odette Digital Certificates. Answers to Frequently Asked Questions are available online CONTENTS Preparation for Ordering an Odette
Managing Certificates
 CHAPTER 12 The Cisco Identity Services Engine (Cisco ISE) relies on public key infrastructure (PKI) to provide secure communication for the following: Client and server authentication for Transport Layer
RB Digital Signature Proxy Guide for Reporters
 RB Digital Signature Proxy Guide for Reporters Table of Contents RB-DSP registration workflow.... 1 Obtaining your certificate.... 2 Using Firefox to obtain your certificate.... 2 Using Internet Explorer
How to Configure SSL Interception in the Firewall
 Most applications encrypt outgoing connections with SSL or TLS. SSL Interception decrypts SSL-encrypted traffic to allow Application Control features (such as the Virus Scanner, ATD, URL Filter, Safe Search,
Exostar LDAP Proxy/Secure Setup Guide September 2017
 Exostar LDAP Proxy/Secure Email Setup Guide September 2017 Copyright 2017 Exostar, LLC All rights reserved. 1 Table of Contents Email Encryption Set-up Outlook 2003... 4 Digitally Signing an Email... 4
IceWarp SSL Certificate Process
 IceWarp Unified Communications IceWarp SSL Certificate Process Version 12 Printed on 20 April, 2017 Contents IceWarp SSL Certificate Process 1 Choosing the Proper Certificate Type... 2 Creating your CSR
VMware AirWatch Cloud Connector Guide ACC Installation and Integration
 VMware AirWatch Cloud Connector Guide ACC Installation and Integration Workspace ONE UEM v1810 Have documentation feedback? Submit a Documentation Feedback support ticket using the Support Wizard on support.air-watch.com.
CertAgent. Certificate Authority Guide
 CertAgent Certificate Authority Guide Version 6.0.0 December 12, 2013 Information in this document is subject to change without notice and does not represent a commitment on the part of Information Security
HP Instant Support Enterprise Edition (ISEE) Security overview
 Security overview") HP Instant Support Enterprise Edition (ISEE) Security overview Advanced Configuration A.03.50 Mike Brandon Interex 03 / 30, 2004 2003 Hewlett-Packard Development Company, L.P. The information contained
HP Instant Support Enterprise Edition (ISEE) Security overview Advanced Configuration A.03.50 Mike Brandon Interex 03 / 30, 2004 2003 Hewlett-Packard Development Company, L.P. The information contained
USER MANUAL FOR SECURE E MAIL MICROSOFT OUTLOOK (2003)
") YATANARPON TELEPORT COMPANY LTD., YATANARPON CERTIFICATION AUTHORITY USER MANUAL FOR SECURE E MAIL MICROSOFT OUTLOOK (2003) Yatanarpon Teleport Company Ltd., Hlaing Universities Campus, Hlaing Township,
YATANARPON TELEPORT COMPANY LTD., YATANARPON CERTIFICATION AUTHORITY USER MANUAL FOR SECURE E MAIL MICROSOFT OUTLOOK (2003) Yatanarpon Teleport Company Ltd., Hlaing Universities Campus, Hlaing Township,
SSL Certificates Certificate Policy (CP)
") SSL Certificates Last Revision Date: February 26, 2015 Version 1.0 Revisions Version Date Description of changes Author s Name Draft 17 Jan 2011 Initial Release (Draft) Ivo Vitorino 1.0 26 Feb 2015 Full
SSL Certificates Last Revision Date: February 26, 2015 Version 1.0 Revisions Version Date Description of changes Author s Name Draft 17 Jan 2011 Initial Release (Draft) Ivo Vitorino 1.0 26 Feb 2015 Full
FedLine Web Certificate Retrieval Procedures
 Version 2.0 Contents Federal Reserve Bank Certificate Retrieval Overview and Preparation Procedures... 2 Certificate Creation Procedures... 3 Installing the Federal Reserve Banks Certificate Authority
VMware Workspace ONE UEM VMware AirWatch Cloud Connector
 VMware AirWatch Cloud Connector VMware Workspace ONE UEM 1811 You can find the most up-to-date technical documentation on the VMware website at: https://docs.vmware.com/ If you have comments about this
Workspace ONE UEM Integration with OpenTrust CMS Mobile 2. VMware Workspace ONE UEM 1811
 Workspace ONE UEM Integration with OpenTrust CMS Mobile 2 VMware Workspace ONE UEM 1811 You can find the most up-to-date technical documentation on the VMware website at: https://docs.vmware.com/ If you
QUICK SET-UP VERIFICATION...3
 TABLE OF CONTENTS 1 QUICK SET-UP VERIFICATION...3 2 INSTALLING CERTIFICATES...3 3 IF YOU USE MS INTERNET EXPLORER...3 3.1 INSTALLING THE CERTIFICATE...3 3.2 SSL3 ACTIVATION:...3 3.3 JAVASCRIPT ACTIVATION...3
KeyA3 Certificate Manager
 3 PKI. .........KeyA3 Certificate Manager... -... --... --... User PIN --... SO PIN --... -... --... User PIN...... -- -- --... --... --... -- ... --... --... --... E-mail...Mozilla Thunderbird -...K3PKCS
VMware AirWatch Integration with RSA PKI Guide
 VMware AirWatch Integration with RSA PKI Guide For VMware AirWatch Have documentation feedback? Submit a Documentation Feedback support ticket using the Support Wizard on support.air-watch.com. This product
VMware AirWatch Integration with OpenTrust CMS Mobile 2.0
 VMware AirWatch Integration with OpenTrust CMS Mobile 2.0 For VMware AirWatch Have documentation feedback? Submit a Documentation Feedback support ticket using the Support Wizard on support.air-watch.com.
CertAgent. Certificate Authority Guide
 CertAgent Certificate Authority Guide Version 7.0 July 5, 2018 Information in this document is subject to change without notice and does not represent a commitment on the part of Information Security Corporation.
PKI Configuration Examples
 PKI Configuration Examples Keywords: PKI, CA, RA, IKE, IPsec, SSL Abstract: The Public Key Infrastructure (PKI) is a general security infrastructure for providing information security through public key
Entrust Connector (econnector) Venafi Trust Protection Platform
 Venafi Trust Protection Platform") Entrust Connector (econnector) For Venafi Trust Protection Platform Installation and Configuration Guide Version 1.0.5 DATE: 17 November 2017 VERSION: 1.0.5 Copyright 2017. All rights reserved Table of
Entrust Connector (econnector) For Venafi Trust Protection Platform Installation and Configuration Guide Version 1.0.5 DATE: 17 November 2017 VERSION: 1.0.5 Copyright 2017. All rights reserved Table of
Administration. STILOG IST, all rights reserved
 2 Table of Contents I. Admin Center... 1 1. ACCESS... 1 Starting the Admin Center application... 1 2. General Settings... 2 Home page... 3 Client... 4 Application... 5 VPPortal... 6 3. Password Configuration...
Sophos Mobile Control SaaS startup guide. Product version: 7
 Sophos Mobile Control SaaS startup guide Product version: 7 Contents 1 About this guide...4 2 About Sophos Mobile Control...5 3 What are the key steps?...7 4 Change your password...8 5 Change your login
Deposit Wizard TellerScan Installation Guide
 Guide Table of Contents System Requirements... 2 WebScan Overview... 2 Hardware Requirements... 2 Supported Browsers... 2 Driver Installation... 2 Step 1 - Determining Windows Edition & Bit Count... 3
Public Key Infrastructure PKI. National Digital Certification Center Information Technology Authority Sultanate of Oman
 Public Key Infrastructure PKI National Digital Certification Center Information Technology Authority Sultanate of Oman Agenda Objectives PKI Features etrust Components Government eservices Oman National
FUJITSU Cloud Service S5. Introduction Guide. Ver. 1.3 FUJITSU AMERICA, INC.
 FUJITSU Cloud Service S5 Introduction Guide Ver. 1.3 FUJITSU AMERICA, INC. 1 FUJITSU Cloud Service S5 Introduction Guide Ver. 1.3 Date of publish: September, 2011 All Rights Reserved, Copyright FUJITSU
IBM. Security Digital Certificate Manager. IBM i 7.1
 IBM IBM i Security Digital Certificate Manager 7.1 IBM IBM i Security Digital Certificate Manager 7.1 Note Before using this information and the product it supports, be sure to read the information in
Certificate Retrieval Procedures
 `` Certificate Retrieval Procedures Version 2.2 2018 Federal Reserve Banks Contents Federal Reserve Bank Certificate Retrieval Overview and Preparation Procedures... 2 Certificate Creation Procedures...
Chapter 9. Protecting Attachments
 PROTECTING EMAIL ATTACHMENTS Chapter 9. Protecting Email Attachments This chapter describes the Workshare Protect functionality with regard to identifying content risk in emails and their attachments.
Dell License Manager Version 1.2 User s Guide
 Dell License Manager Version 1.2 User s Guide Notes, Cautions, and Warnings NOTE: A NOTE indicates important information that helps you make better use of your computer. CAUTION: A CAUTION indicates either
Public. Atos Trustcenter. Server Certificates + Codesigning Certificates. Version 1.2
 Atos Trustcenter Server Certificates + Codesigning Certificates Version 1.2 20.11.2015 Content 1 Introduction... 3 2 The Atos Trustcenter Portfolio... 3 3 TrustedRoot PKI... 4 3.1 TrustedRoot Hierarchy...
SafeConsole On-Prem Install Guide
 SafeConsole On-Prem Install Guide This guide applies to SafeConsole 5.0.5 Introduction This guide describes how to install a new SafeConsole server on Windows using the SafeConsole installer. As an option,
CLIQ Web Manager. User Manual. The global leader in door opening solutions V 6.1
 CLIQ Web Manager User Manual V 6.1 The global leader in door opening solutions Program version: 6.1 Document number: ST-003478 Date published: 2016-03-31 Language: en-gb Table of contents 1 Overview...9
Cisco CTL Client setup
 Cisco CTL Client setup This chapter provides information about Cisco CTL client setup. About Cisco CTL Client setup, page 2 Remove etoken Run Time Environment 3.00 for CTL Client 5.0 plug-in, page 2 Cisco
Sophos Mobile Control SaaS startup guide. Product version: 6.1
 Sophos Mobile Control SaaS startup guide Product version: 6.1 Document date: September 2016 Contents 1 About this guide...4 2 About Sophos Mobile Control...5 3 What are the key steps?...7 4 Change your
SafeConsole On-Prem Install Guide. version DataLocker Inc. July, SafeConsole. Reference for SafeConsole OnPrem
 version 5.2.2 DataLocker Inc. July, 2017 SafeConsole Reference for SafeConsole OnPrem 1 Contents Introduction................................................ 2 How do the devices become managed by SafeConsole?....................
Registration and Renewal procedure for Belfius Certificate
 Registration and Renewal procedure for Belfius Certificate GTU Environment Table of contents TABLE OF CONTENTS... 2 1. INTRODUCTION... 3 2. CONTACT... 3 3. REGISTRATION PROCEDURE... 4 3.1 PRE-REQUISITES...
User guide NotifySCM Installer
 User guide NotifySCM Installer TABLE OF CONTENTS 1 Overview... 3 2 Office 365 Users synchronization... 3 3 Installation... 5 4 Starting the server... 17 2 P a g e 1 OVERVIEW This user guide provides instruction
NetExtender for SSL-VPN
 NetExtender for SSL-VPN Document Scope This document describes how to plan, design, implement, and manage the NetExtender feature in a SonicWALL SSL-VPN Environment. This document contains the following
Workspace ONE UEM Notification Service 2. VMware Workspace ONE UEM 1811
 Workspace ONE UEM Email Notification Service 2 VMware Workspace ONE UEM 1811 You can find the most up-to-date technical documentation on the VMware website at: https://docs.vmware.com/ If you have comments
SECARDEO. certbox. Help-Manual. Secardeo GmbH Release:
 certbox Help-Manual Secardeo GmbH Release: 02.12.2014 certbox Help Manual 02.12.2014 Table of Contents 1 Search and retrieve Public Key Certificates... 1 1.1 Search by an e-mail address... 1 1.2 Download
Implementing Messaging Security for Exchange Server Clients
 Implementing Messaging Security for Exchange Server Clients Objectives Scenario At the end of this lab, you will be able to: Protect e-mail messages using S/MIME signing and encryption Manage e-mail attachment
WAM!NET Submission Icons. Help Guide. March 2015
 WAM!NET Submission Icons Help Guide March 2015 Document Contents 1 Introduction...2 1.1 Submission Option Resource...2 1.2 Submission Icon Type...3 1.2.1 Authenticated Submission Icons...3 1.2.2 Anonymous
Instructions For Configuring Your Browser Settings and Online Banking FAQ's
 Instructions For Configuring Your Browser Settings and Online Banking FAQ's Instructions By Browser Type Google Chrome Firefox Internet Explorer 8 Internet Explorer 9 Safari Online Banking FAQ's Google
Schneider Electric Floating License Manager
 Schneider Electric Floating License Manager EIO0000001078 11/2012 Schneider Electric Floating License Manager User Manual 12/2012 EIO0000001078.01 www.schneider-electric.com The information provided in
WP doc5 - Test Programme
 European Commission DG Enterprise IDA PKI European IDA Bridge and Gateway CA Pilot Certipost n.v./s.a. Muntcentrum 1 B-1000 Brussels Disclaimer Belgium p. 1 / 29 Disclaimer The views expressed in this
Schneider Electric License Manager
 Schneider Electric License Manager EIO0000001070 11/2012 Schneider Electric License Manager User Manual 12/2012 EIO0000001070.01 www.schneider-electric.com The information provided in this documentation
e-frr SYSTEM USER GUIDE
 e-frr SYSTEM USER GUIDE for Electronic Submission of Financial Return Version 1.5 Jun 2015 Table of Contents 1. Introduction... 4 2. Background... 4 3. System Purpose... 4 4. Baseline Specification of
User Guide for Accessing Cisco Unity Connection Voice Messages in an Application
 User Guide for Accessing Cisco Unity Connection Voice Messages in an Email Application Release 9.x Published June, 2013 Americas Headquarters Cisco Systems, Inc. 170 West Tasman Drive San Jose, CA 95134-1706
AirWatch Mobile Device Management
 RSA Ready Implementation Guide for 3rd Party PKI Applications Last Modified: November 26 th, 2014 Partner Information Product Information Partner Name Web Site Product Name Version & Platform Product Description
Welch Allyn RetinaVue Network
 Welch Allyn RetinaVue Network EMR Deployment Portal Guide Software version 1.X 2018 Welch Allyn. All rights are reserved. To support the intended use of the product described in this publication, the purchaser
Guide Installation and User Guide - Mac
 Guide Installation and User Guide - Mac With Fujitsu mpollux DigiSign Client, you can use your smart card for secure access to electronic services or organization networks, as well as to digitally sign
RTE Customer Services Portal
 Version 2.0 20/10/2010 This document is the property of RTE. Any distribution, reproduction and publication, even in part, is forbidden, except with the written authorisation of RTE. Programmes & SI (PSI)
Configuring Certificate Authorities and Digital Certificates
 CHAPTER 43 Configuring Certificate Authorities and Digital Certificates Public Key Infrastructure (PKI) support provides the means for the Cisco MDS 9000 Family switches to obtain and use digital certificates
How to Set Up External CA VPN Certificates
 To configure a client-to-site, or site-to-site VPN using s created by External CA, you must create the following VPN s for the VPN service to be able to authenticate Before you begin Use an external CA
Secure Web Gateway. SWG User Guide. Release Manual Version v
 Secure Web Gateway SWG User Guide Release 10.2.0 Manual Version v 10.2.0.1 M86 SECURITY SECURE WEB GATEWAY SWG USER GUIDE 2012 M86 Security All rights reserved. 828 W. Taft Ave., Orange, CA 92865, USA
Dohatec CA. Export/Import Procedure etoken Pro 72K FOR USERS OF ETOKENS [VERSION 1.0]
![Dohatec CA. Export/Import Procedure etoken Pro 72K FOR USERS OF ETOKENS [VERSION 1.0]](/thumbs/83/87091309.jpg "Dohatec CA. Export/Import Procedure etoken Pro 72K FOR USERS OF ETOKENS [VERSION 1.0]") Dohatec CA Export/Import Procedure etoken Pro 72K FOR USERS OF ETOKENS [VERSION 1.0] 1 1 Digital Certificate Certificates issued by Dohatec CA are in X.509 v3 format. In Microsoft windows machines, these
Dohatec CA Export/Import Procedure etoken Pro 72K FOR USERS OF ETOKENS [VERSION 1.0] 1 1 Digital Certificate Certificates issued by Dohatec CA are in X.509 v3 format. In Microsoft windows machines, these
Setting up IMAP Mail in Outlook
 Setting up IMAP Mail in Outlook Setting up the Certificate in Internet Explorer 1. Open up Internet Explorer. Browse to https://intranet.yourschooldomain.school.nz. You will get a Certificate Error. Click
VMware AirWatch Certificate Authentication for EAS with ADCS
 VMware AirWatch Certificate Authentication for EAS with ADCS For VMware AirWatch Have documentation feedback? Submit a Documentation Feedback support ticket using the Support Wizard on support.air-watch.com.
BROWSER-BASED SUPPORT CONSOLE USER S GUIDE. 31 January 2017
 BROWSER-BASED SUPPORT CONSOLE USER S GUIDE 31 January 2017 Contents 1 Introduction... 2 2 Netop Host Configuration... 2 2.1 Connecting through HTTPS using Certificates... 3 2.1.1 Self-signed certificate...
Common Access Card for Xerox VersaLink Printers
 Common Access Card for Xerox VersaLink Printers System Configuration Guide Version 1.3 NOVEMBER 2017 2017 Xerox Corporation. All rights reserved. Unpublished rights reserved under the copyright laws of
Key Management and Distribution
 Key Management and Distribution Raj Jain Washington University in Saint Louis Saint Louis, MO 63130 Jain@cse.wustl.edu Audio/Video recordings of this lecture are available at: http://www.cse.wustl.edu/~jain/cse571-14/
Genesys Security Deployment Guide. What You Need
 Genesys Security Deployment Guide What You Need 12/27/2017 Contents 1 What You Need 1.1 TLS Certificates 1.2 Generating Certificates using OpenSSL and Genesys Security Pack 1.3 Generating Certificates
VMware AirWatch Certificate Authentication for Cisco IPSec VPN
 VMware AirWatch Certificate Authentication for Cisco IPSec VPN For VMware AirWatch Have documentation feedback? Submit a Documentation Feedback support ticket using the Support Wizard on support.air-watch.com.
Send documentation comments to
 CHAPTER 6 Configuring Certificate Authorities and Digital Certificates This chapter includes the following topics: Information About Certificate Authorities and Digital Certificates, page 6-1 Default Settings,
Security Digital Certificate Manager
 System i Security Digital Certificate Manager Version 6 Release 1 System i Security Digital Certificate Manager Version 6 Release 1 Note Before using this information and the product it supports, be sure
Jetbrains License Server User Guide
 Jetbrains License Server User Guide Copyright 2008, JetBrains s.r.o. All rights reserved Introduction JetBrains License Server is a web application that can be used as a central point to distribute licenses
3.1 Getting Software and Certificates
 3 Configuring the Remote Client On the remote client you have to download the Sophos SSL VPN Client software including configuration data from the UTM User Portal. Then you install the software package
for Unclassified Systems
 DoD Public Key Enablement (PKE) Reference Guide InstallRoot 5.0 User Guide Contact: dodpke@mail.mil URL: http://iase.disa.mil/pki-pke InstallRoot 5.0 User Guide for Unclassified Systems 7 December 2015
Configuring the Cisco APIC-EM Settings
 Logging into the Cisco APIC-EM, page 1 Quick Tour of the APIC-EM Graphical User Interface (GUI), page 2 Configuring the Prime Infrastructure Settings, page 3 Discovery Credentials, page 4 Security, page
Hypertext Transfer Protocol Over Secure Sockets Layer (HTTPS)
") Hypertext Transfer Protocol Over Secure Sockets Layer (HTTPS) This chapter provides information about Hypertext Transfer Protocol over Secure Sockets Layer. HTTPS, page 1 HTTPS for Cisco Unified IP Phone
Hypertext Transfer Protocol Over Secure Sockets Layer (HTTPS) This chapter provides information about Hypertext Transfer Protocol over Secure Sockets Layer. HTTPS, page 1 HTTPS for Cisco Unified IP Phone
Transport Gateway Installation / Registration / Configuration
 CHAPTER 4 Transport Gateway Installation / Registration / Configuration This chapter covers the following areas: Transport Gateway requirements. Security Considerations When Using a Transport Gateway.
Version Installation Guide. 1 Bocada Installation Guide
 Version 19.4 Installation Guide 1 Bocada Installation Guide Copyright 2019 Bocada LLC. All Rights Reserved. Bocada and BackupReport are registered trademarks of Bocada LLC. Vision, Prism, vpconnect, and
TIBCO Managed File Transfer Internet Server Transfer and File Share Clients User's Guide
 TIBCO Managed File Transfer Internet Server Transfer and File Share Clients User's Guide Software Release 8.1 March 2018 Two-Second Advantage 2 Important Information SOME TIBCO SOFTWARE EMBEDS OR BUNDLES
Using VMware View Client for Mac
 May 2012 View Client for Mac This document supports the version of each product listed and supports all subsequent versions until the document is replaced by a new edition. To check for more recent editions
Policy Settings for Windows Server 2003 (including SP1) and Windows XP (including SP2)
 and Windows XP (including SP2)") Web 2 Policy Settings for (including SP1) and XP (including SP2) This document was written by Conan Kezema. and XP together introduce more than 270 new administrative template policy settings for you to
Web 2 Policy Settings for (including SP1) and XP (including SP2) This document was written by Conan Kezema. and XP together introduce more than 270 new administrative template policy settings for you to
Management Console User Guide
 Secure Web Gateway Management Console User Guide Release 10.2.0 Manual Version v 10.2.0.1 M86 SECURITY SECURE WEB GATEWAY MANAGEMENT CONSOLE USER GUIDE 2012 M86 Security All rights reserved. 828 W. Taft
راهنماي استفاده از توکن امنيتي کيا 3 در نرمافزارهاي مبتني بر PKI توکن امنيتي سخت افزاري
 راهنماي استفاده از توکن امنيتي کيا 3 در نرمافزارهاي مبتني بر PKI توکن امنيتي سخت افزاري Certificate Manager KeyA3 SO PIN E-mail Mozilla Thunderbird K3PKCS SSL E-mail SSL Adobe Acrobat Mozilla Firefox PDF
IBM Client Security Solutions. Client Security Software Version 1.0 Administrator's Guide
 IBM Client Security Solutions Client Security Software Version 1.0 Administrator's Guide December 1999 1 Before using this information and the product it supports, be sure to read Appendix A - U.S. export
Transport Gateway Installation / Registration / Configuration
 CHAPTER 2 Transport Gateway Installation / Registration / Configuration This chapter covers the following areas: Transport Gateway requirements. Security Considerations When Using a Transport Gateway.
KYOCERA Net Admin User Guide
 KYOCERA Net Admin User Guide Legal Notes Unauthorized reproduction of all or part of this guide is prohibited. The information in this guide is subject to change without notice. We cannot be held liable
Connect to Wireless, certificate install and setup Citrix Receiver
 Connect to Wireless, certificate install and setup Citrix Receiver This document explains how to connect to the Wireless Network and access applications using Citrix Receiver on a Bring Your Own Device
How to Configure S/MIME for WorxMail
 How to Configure S/MIME for WorxMail Windows Phone 8.1 This article describes how to configure S/MIME (Secure/Multipurpose Internet Mail Extensions) for WorxMail Windows Phone 8.1. Note: This feature works
Guide Installation and User Guide - Windows
 Guide Installation and User Guide - Windows With Fujitsu mpollux DigiSign Client, you can use your smart card for secure access to electronic services or organization networks, as well as to digitally
Managed Access Gateway. User Guide
 Managed Access Gateway User Guide Version 2.2 Exostar, LLC November 3, 2011 Table of Contents Table of Contents... ii Purpose... 1 Log-in to your MAG Account... 2 Additional MAG Login Options... 2 First
How to Configure Mutual Authentication using X.509 Certificate in SMP SAP Mobile Platform (3.X)
") How to Configure Mutual Authentication using X.509 Certificate in SMP SAP Mobile Platform (3.X) Author: Ali Chalhoub Global Support Architect Engineer Date: July 2, 2015 Document History: Document Version
How to Configure Mutual Authentication using X.509 Certificate in SMP SAP Mobile Platform (3.X) Author: Ali Chalhoub Global Support Architect Engineer Date: July 2, 2015 Document History: Document Version
WORKSTATION SETUP GUIDE FOR ACCESSING THE MIBGAS PLATFORM. Date: 15/12/2016. Version: 4.1 MERCADO IBÉRICO DEL GAS
 WORKSTATION SETUP GUIDE FOR ACCESSING THE MIBGAS PLATFORM Date: 15/12/2016 Version: 4.1 Alfonso XI, 6. 28014 Madrid (España) www.mibgas.es T (+34) 91 268 26 01 CONTENTS 1 INTRODUCTION 2 2 PRIOR REQUISITES
MTR CORPORATION E-Tendering User Guide for Suppliers
 MTR CORPORATION E-Tendering User Guide for Suppliers TABLE OF CONTENTS SYSTEM REQUIREMENT... 2 NEW SUPPLIER / CONTRACTOR REGISTRATION... 20 LOGON FOR REGISTERED SUPPLIER / CONTRACTOR... 24 UPDATE USER
Sophos Mobile Control Installation guide
 Sophos Mobile Control Installation guide Product version: 1.0 Document date: May 2011 Contents 1 Introduction... 3 2 The Sophos Mobile Control server... 4 3 Set up Sophos Mobile Control... 13 4 Apple Push
vfire 9.5 Prerequisites Guide Version 1.1
 vfire 9.5 Prerequisites Guide Table of Contents Version Details 4 Copyright 4 About this Guide 5 Intended Audience 5 Standards and Conventions 5 Introduction 6 Web Server Deployment 7 Hardware Requirements
Enabling Microsoft Outlook Calendar Notifications for Meetings Scheduled from the Cisco Unified MeetingPlace End-User Web Interface
 Enabling Microsoft Outlook Calendar Notifications for Meetings Scheduled from the Cisco Unified MeetingPlace End-User Web Interface Release 7.1 Revised: March 5, 2013 1:53 pm This document describes the
Workspace ONE UEM Certificate Authentication for Cisco IPSec VPN. VMware Workspace ONE UEM 1810
 Workspace ONE UEM Certificate Authentication for Cisco IPSec VPN VMware Workspace ONE UEM 1810 You can find the most up-to-date technical documentation on the VMware website at: https://docs.vmware.com/
Instructions for Configuring Your Browser Settings and Online Security FAQ s
 Instructions for Configuring Your Browser Settings and Online Security FAQ s General Settings The following browser settings and plug-ins are required to properly access Digital Insight s webbased solutions.