Internet Banking Cash Management Training Customer Documentation
|
|
|
- Ira Hood
- 5 years ago
- Views:
Transcription
1 Fiserv Internet Banking Cash Management Training Customer Documentation
2
3 Table of Contents General Information... 2 Cash Management... 3 ACH... 3 ACH Batch... 4 ACH Origination... 8 ACH Process ACH Import ACH Import Process ACH Filter Exceptions ACH International Batch ACH International Origination ACH Management Wire Wire List Wire Transfer Multi-Wire Transfer Wire Process Wire Transfer File Positive Pay Positive Pay Import Positive Pay Exceptions Security Token Enrollment Token Activation Security Maintenance Change Password Miscellaneous Users Transfer Multi-Transfers Transfer Process Order Money Import File Format Services Session Report Alerts... 77
4 1-2 General Information Once account information is viewed, it will follow through to the next option selected. There is a 10-minute time limit on any screen, regardless of keystrokes. Once ten minutes has elapsed and the next selection is made, it will return to the login screen with a message that the session has timed out. The bank logo is located in the top left corner of the screen. When this logo is clicked, it will go back to the bank s web page if it is set up in Visual Settings > Site it also exits Internet Banking. All Internet Banking pages (including the sign-on) are secure pages. The internet browser used must support 128-bit encryption. All fields within Internet Banking are case sensitive except for the User ID field. The sites will be down every Wednesday from 3:30-5:30 AM CT for weekly backups. Buttons and their functionality: Submit Submits or accepts the information entered on the screen. Reset Puts all fields back to their previous values. Cancel Cancels the transaction currently being displayed. Delete Deletes a stored value or information within a field. The URL addresses to get to the Customer Side. Your banks routing number would follow the equals sign. If it starts with a zero please drop this:


5 Cash Management When the customer clicks on Cash Management they will get a list of the options they have available. From this screen they can click on the individual options and it will give them a brief explanation of each of the options. These are also links to those screens. The bank can control which options the customers have access to under Maintenance>Access Types. ACH

6 1-4 ACH Batch This feature allows customers to input and submit ACH batch information to transmit to the processing bank. The batches set up on this screen will follow through to the ACH Origination screen. Note: An asterisk denotes the field is required. The Batch Name is a mandatory 25-character field that identifies the batch. No special characters should be used in this field. If the customer attempts to set up a batch with the same name as one that already exists, they will receive an error message The Transaction Class codes are used to identify various types of debit and credit entries. The bank will control what codes the customer will be able to chose. The options available are PPD(+)-Prearranged Payment and Deposit Entry, CCD(+)- Corporate Credit or Debit, CTX(+)-Corporate Trade Exchange, TAX(CCD+)-Tax Payment, CIE(+)-Customer Initiated Entry, WEB(+)-Internet Initiated Entry, TEL- Telephone Initiated Entry, ARC-Account Receivable Entry, RCK-Re-Presented Check Entry and BOC-Back Office Conversion. The + symbol indicates that the option may have an addenda record. This is only a reference and will not be passed to the origination file. In the Account field the customer would select which account would be debited or credited with these batch transactions. The Company Name field is a mandatory 16-character field and the customer can change it when they create or change a batch. This name will display in the reference field on the transaction to identify the originator. The Company Discretionary Data field is an optional 20-character field. This field can be used to provide additional information to the receiver when identifying the transaction.

7 The Company Identification field is a mandatory 10-character field and is usually the TIN of the originating company. The Company Description field is a mandatory 10-character field. This field may be used to identify the purpose of the batch. The Date Scheduled field sets the effective date for the batch. For recurring batches this date will establish the first time the batch will be processed. There is a calendar link available that the customer can use to select the date. The Frequency field will determine how often this batch will process. The options available to your customers are Once, Daily, Weekly, Every Two Weeks, Monthly, End of Month, Quarterly, Semi-Annually, and Annually. The Date Scheduled Process field will determine how the batch is process if the Date Scheduled falls on a weekend or holiday. The Expiration Date field can be used with recurring batches and determines when the batch will no longer be processed. There is a calendar link available that the customer can use to select the date. The Build Summary check box will allow the customer to send down ACH Batch information in a summary format which would interface one debit or one credit per batch to the banks offsetting account. If this field is not selected the batch will be submitted in a detailed batch format. The detail format will generate an entry for each item in the batch. The bank will have the ability to build tooltips that will display as a question mark on the right side of the field. When the customer hovers over the icon the information will display. These can built on the bank side under Visual Settings>Site>Menus. The [Submit] saves the batch and adds it to the list at the bottom of the page. Once it is saved the customer has the option to process the batch at a later date. The pending approval section indicates that the batch has been scheduled but has not been approved for processing. The processing is done on the ACH Process screen. The ACH section will show all of the batches, the date they were last processed, the effective date, account, number of origination items, the total amount and frequency. Each column can be sorted by clicking on the column header.

8 1-6 If the customer would like to see detailed information regarding the batch, they can click on the account number. This will show them all of the origination items in the batch. Each column can be sorted by clicking on the column header. If a Cash Management User clicks the account number they will see the details of the batch along with the ACH risk limits that the customer set up for them. If the customer needs to change any batch information or the effective date of the batch they would select the batch by clicking on the name under the Batch column. Once the batch information appears on the screen they can change any of the fields except for Batch Name. They can then click [Submit] to save the new information or [Cancel] to ignore the changes that were made. They will also have an option to [Delete] the batch. If they chose delete they will receive a validation screen: By clicking [Yes] the batch and all origination items tied to that batch will be deleted. By clicking [No] the customer will be returned to the ACH Batch screen.
![Altering a Scheduled Batch If the batch has already been scheduled and the customer chooses to change the Date Scheduled they will receive a validation screen: By clicking on [Yes] the](/docs-images/83/87095151/images/9-0.jpg "scheduled batch will be overwritten with the data they changed and will need to be approved for processing on the ACH Process screen.")
![By clicking on [No] they will receive a second validation screen: If they choose [Yes] from here a copy of the batch will be created and assigned a new batch name.](/docs-images/83/87095151/images/9-1.jpg "The new batch will be in the Pending Approval section on the ACH Process screen. If they choose [No] the transaction is cancelled and no changes are made.")
9 Altering a Scheduled Batch If the batch has already been scheduled and the customer chooses to change the Date Scheduled they will receive a validation screen: By clicking on [Yes] the scheduled batch will be overwritten with the data they changed and will need to be approved for processing on the ACH Process screen. By clicking on [No] they will receive a second validation screen: If they choose [Yes] from here a copy of the batch will be created and assigned a new batch name. The new batch will be in the Pending Approval section on the ACH Process screen. If they choose [No] the transaction is cancelled and no changes are made. The disclosure text for the ACH Batch screen can be set up on the bank side under Maintenance>Disclosures>ACH Batch.

10 1-8 ACH Origination This screen is where a customer adds recipient information to an ACH batch. Note: An asterisk denotes the field is required. The Batch field is a drop down box that will contain all of the batches that the customer has set up. The Name field is mandatory and would contain the name of the individual or company that is the recipient. The Identification field can be used for information that is specific to the recipient, for example their employee number or TIN. The Account field is for the recipients account information. It can be hold alpha or numeric characters. The Routing Number field is a mandatory 9-digit field and would contain the recipients bank routing number. The Amount field would be the amount that would be credited or debited for this recipient. If the Transaction Code is a Prenote, the customer would need to enter The Transaction Code field would determine if this is a deposit or withdrawal for this recipient. The bank would control the options available in this field and they are Checking Deposit, Prenote Checking Deposit, Checking Withdrawal, Prenote Checking Withdrawal, Savings Deposit, Prenote Savings Deposit, Saving Withdrawal, Prenote Savings Withdrawal, Loan Payment, Prenote Loan Payment, GL Deposit, Prenote GL Deposit, GL Payment, and Prenote GL Payment. Prenote transactions are zero dollar transactions that can be used to verify the existence of and accuracy of the account number and routing number. If there are discrepancies the bank will receive notification to pass on to the customer.


11 If the batch Transaction Class is set up as an ARC-Accounts Receivable Entry, BOC-Back Office Conversion or RCK-Re-presented Check Entry there will be a mandatory 15-digit Check Number field that the customer will have to enter. The Expiration Date field will only appear for batches with a Transaction Class of PPD or CCD and that can offer Loan Payment or Prenote Loan Payment transaction codes. It is an optional field but if it is populated the Include check box will be disabled when the batch is processed on that date or in the future. The Addenda field can be used to enter detail information associated with the transaction and it can hold up to 80 characters. The Include box will be defaulted in with a check mark and would mean that this entry would be included in the batch. If the customer removes the check mark from the box this recipient would not be included in the batch. The Submit button will save the recipient information that was entered. The bank will have the ability to build tooltips that will display as a question mark on the right side of the field. When the customer hovers over the icon the information will display. These can be built on the bank side under Visual Settings>Site>Menus. **For Internet Explorer 6.0 the tooltips may appear behind the dropdown boxes on certain fields. The Import button will allow the customer to import batch information from another program. Once they click on [Import] they will be taken to an import screen: They can select the file format from the drop down box and then they would click [Browse] to locate their file. After the file name is populated in the Import File field, they would click on [Preview] this will show them the details of their file:
![1-10 From this screen they can remove the check mark under the Import column next to any recipient(s) they would not want to import then click [Import].](/docs-images/83/87095151/images/12-0.jpg "They will then be taken back to the ACH Origination screen where they will be able to see the date of the last successful import and all of the recipient information at the bottom of the screen.")
12 1-10 From this screen they can remove the check mark under the Import column next to any recipient(s) they would not want to import then click [Import]. They will then be taken back to the ACH Origination screen where they will be able to see the date of the last successful import and all of the recipient information at the bottom of the screen. Note: The customer will always be adding to a batch and never overwriting or deleting recipients with the import feature. If the imported file has a duplicated recipient that was already set up under ACH Origination, both entries will show up in the batch. If the customer needs to make any changes to the recipient information they can do this quickly from the bottom of the screen once they have selected a batch. They can remove or add a check mark under the Include column to suspend or activate a recipient. They can also change the amount that is being deposited or withdrawn. After the customer has made their changes they can click [Update] to save them. To change recipient information or delete the recipient, they would click on the name under the Recipient column. This would bring the information up to the fields at the top of the screen where the customer can edit or click [Delete] to remove them. If they have edited the recipient information, the customer would need to click [Submit] to save the change.


![By clicking on [Yes] the scheduled batch will be overwritten with the data they changed and](/docs-images/83/87095151/images/13-2.jpg "will need to be approved for processing on the ACH Process screen.")
13 If a Cash Management user is setting up origination items and the amount exceeds their transaction limits they will receive an error message. Altering Origination Items on a Scheduled Batch If the origination item that the customer is editing is in a batch that has already been scheduled they will get a validation screen. By clicking on [Yes] the scheduled batch will be overwritten with the data they changed and will need to be approved for processing on the ACH Process screen. By clicking on [No] they will receive a second validation screen.
14 1-12 On this screen the customer would select the new effective date by typing in the information or using the calendar icon. If they choose [Yes] from here a copy of the batch will be created and assigned a new batch name. The new batch will be in the Pending Approval section on the ACH Process screen. If they choose [No] the transaction is cancelled and no changes are made. The disclosure text for the ACH Origination screen can be set up on the bank side under Maintenance>Disclosures>Cash Management ACH.

, Withheld Federal Income Tax (09455), and US Corporate Income Tax Deposit (11206). Once the code is selected the field options for the amount will change.")
15 Tax Batches If the customer has set up a tax batch, the origination screen will have different fields. The Tax ID Number field will default in with the information that was set up on the ACH Batch screen in the Company Identification field. The Type Code field is a drop down box that would include all of the following options: Unemployed Tax Return (09405), Quarterly Tax Return (94105), Quarterly Tax Return (94107), Quarterly Tax Return (94104), Withheld Federal Income Tax (09455), and US Corporate Income Tax Deposit (11206). Once the code is selected the field options for the amount will change. If the Type Code selected is Unemployed Tax Return (09405), Withheld Federal Income Tax (09455) or US Corporate Income Tax Deposit (11206) the customer would see the following fields:

16 1-14 If the Type Code selected is one of the Quarterly Tax Return options the customer would see the following fields: The Expiration Date field would be the last day of the tax period. The Amount or Social Security, Medicare and Withheld fields would need to be filled in by the customer based on their tax information. The Submit button will save the recipient information that was entered. The Import button will allow the customer to import tax information. The Include box will be defaulted in with a check mark and would mean that this entry would be included in the batch. If the customer removes the check mark from the box this recipient would not be included in the batch but would be saved and could be added for any future processing. The different Quarterly Federal Tax options are as follows: = A deficiency assessed by IRS = Federal tax deposit = Payment due on a return or an IRS Notice

17 ACH Process This screen allows the customer to process, monitor or remove batches. The batches can show in three sections Pending Approval, Scheduled or Pending. The Pending Approval section will contain batches that have been submitted and need to be either approved or declined for processing. The Date Transmit will show the date that the batch will be released to you. They can also change the effective date of the batch before processing it. If the customer wants to see the recipient items in the batch they can click on the number in the Items column. The Risk column will show if the customer is exceeding the credit or debit risks that have been set up by you on the bank side. If this information is followed by (Allowed) it shows that the customer has been set up to exceed their limits. All the columns can be sorted by clicking on the column header. The customer would select the batch they want to approve or decline by placing a check mark in the box under the Include column. If they want to select all batches they can mark the box in the Include column header.
![1-16 Once they have selected the batch(s) to process they would click on [Approve] and receive a validation message.](/docs-images/83/87095151/images/18-0.jpg "By clicking on [Yes] they will receive a confirmation screen.")
![By clicking [No] it will cancel this request and take them back to the ACH Process Screen and the batch will remain in the Pending Approval section.](/docs-images/83/87095151/images/18-1.jpg "If they want to remove a batch before processing, they can place a check mark by it on the Pending Approval section and click [Decline].")
![They will receive a validation screen. By clicking [Yes] it will remove the batch from the Pending Approval section.](/docs-images/83/87095151/images/18-2.jpg "Risk Limits If the user is trying to process the batch and it is over the limit that was set up for them they will receive an error message and will not")
18 1-16 Once they have selected the batch(s) to process they would click on [Approve] and receive a validation message. By clicking on [Yes] they will receive a confirmation screen. By clicking [No] it will cancel this request and take them back to the ACH Process Screen and the batch will remain in the Pending Approval section. If they want to remove a batch before processing, they can place a check mark by it on the Pending Approval section and click [Decline]. They will receive a validation screen. By clicking [Yes] it will remove the batch from the Pending Approval section. By clicking [No] it will cancel this request and take them back to the ACH Process Screen and the batch will remain in the Pending Approval section. Risk Limits If the user is trying to process the batch and it is over the limit that was set up for them they will receive an error message and will not be able to process the batch.

19 The bank can also allow a customer to exceed their limits. If the customer is allowed to exceed, they will receive a warning message. The batch would be processed and the bank would receive a bank mail alerting them that the customer has exceeded their established limit. After the batch has been approved it will be stored in a file until the effective date. The stored file will be released to the bank 2-business days prior to the effective date if the batch is all credits. If the batch is all debits or debits and credits in the same batch it will be released 1-business day prior to the effective date. Entries to the clearing accounts and the customer will be included in the Internet Banking Proof File on the effective date. The Scheduled ACH section contains batches that have been approved and are scheduled with future effective dates. The customer can unselect batches that they do not want to process by removing the check mark in the Include column and clicking [Update]. They will receive the following validation screen:
![1-18 By clicking [No] the customer will be taken back to the ACH Process Screen and the batch will remain in the Scheduled ACH section with the check mark.](/docs-images/83/87095151/images/20-0.jpg "By clicking [Yes] the batch will remain in the Scheduled section but will not have a check mark next to it.")
20 1-18 By clicking [No] the customer will be taken back to the ACH Process Screen and the batch will remain in the Scheduled ACH section with the check mark. By clicking [Yes] the batch will remain in the Scheduled section but will not have a check mark next to it. It would drop off of the ACH Process screen on the Date Transmit and would not be set to you. If the customer wants to reverse this they would just need to replace the check mark and click [Update]. If the customer makes any changes to a scheduled batch on the ACH Batch and/or ACH Origination screens, the batch will be moved back into the Pending Approval section and would not transmit to you until the customer approved it.

![They would place a check mark next to the batch in the Include column and click [Remove] and get the following validation screen: By clicking [No] the customer will be taken back to the ACH Process](/docs-images/83/87095151/images/21-2.jpg "screen and the batch will remain in the Pending ACH section.")
21 The Pending ACH section contains ACH batches, imported batches and external transfers that have a current Date Transmit and will be released to you for processing. Once you receive the batches they will drop off this screen. If the batch is still showing on this screen the customer can remove it before it is processed. They would place a check mark next to the batch in the Include column and click [Remove] and get the following validation screen: By clicking [No] the customer will be taken back to the ACH Process screen and the batch will remain in the Pending ACH section. By clicking on [Yes] the batch will be removed from processing and the customer will receive the following message: The disclosure text for the ACH Process screen can be set up on the bank side under Maintenance>Disclosures>Cash Management>ACH Process.


22 1-20 ACH Import This screen allows a customer to import an ACH file into Internet Banking for processing. The batch must be in a NACHA format to be imported. If it is not the customer can set up the format so it can be imported. They can do this under Cash Management>Miscellaneous>Import File Format. They could then pick the format from the drop down box for File Format. If the customer selects a format they have set up, they would get the following screen: The ACH Batch field is a drop down box where they can chose the batch name they want to import this file under. This would need to be set up under Cash Management>ACH>ACH Batch. The Date Scheduled field sets the effective date for the batch. Then the customer would click on [Browse ] to locate their file and bring it in to the import screen. After they click on [Preview] they will see the imported file or files.

23 By clicking on View Detail the customer will get another screen where they can see all of the recipients in each of the batches. It will show details such as account numbers and routing numbers. From the ACH Import Batch screen the customer can select the batches they want to include in the imported file by check marking the box under the Import column then clicking [Submit]. They will then be taken back to the ACH Import screen. Risk Limits If the customer or user is trying to import a batch and it is over the limit that was set up for them they will receive an error message and will not be able to import the batch. The bank can also allow a customer to exceed their limits. If the customer is allowed to exceed, they will receive a warning message. The batch would still be imported. The disclosure text for ACH Import screen can be set up on the bank side under Maintenance>Disclosures>Cash Management ACH Import. The customer will be able to import files with the following ACH SEC codes:
24 1-22 ARC (Accounts Receivable Entry) identifies a Single Entry debit entry initiated by an Originator to a Consumer Account of the Receiver pursuant to a source document provided to the Originator by the Receiver via the U.S. mail or at a drop box location. BOC (Back Officer Conversion) identifies a Single Entry debit entry initiated by an Originator pursuant to a source document provided to the Originator by the Receiver at a point-of-purchase or manned bill payment location to affect a transfer of funds from an account of the Receiver through subsequent conversion to an ACH debit during a back office processing. CBR (Corporate Cross-Border Payment) identifies credit or debit entries initiated to effect a payment exchanged between payment systems participants of different countries, via an Originating Gateway Operator and a Receiving Gateway Operator, to or from a corporate account of a Receiver. For additional information, go to Click the FedACH link and then click the FedACH International Services link. CCD(+) (Cash Concentration or Disbursement) entry is a credit or debit entry initiated by an organization to consolidate funds of that organization from other sources, or to fund the accounts of these sources. The (+) identifies that the CCD may be an entry with an Addenda record. The (+) symbol is only a reference and will not be passed to the origination file. CIE (Customer Initiated Entry) identifies credit entries initiated by an Originator (usually an individual or service provider on behalf of an individual) to pay for an obligation of the individual. CTX(+) (Corporate Trade Exchange) entry is a credit or debit entry initiated by an organization to pay or collect an obligation destined for an account of another organization. An Addenda record may be created with the detail record. We will allow only one addenda record per entry detail record. The (+) identifies that the CTX may have an Addenda record. The (+) symbol is only a reference and will not be passed to the origination file. PBR (Consumer Cross-Border Payment) identifies credit or debit entries initiated to effect a payment exchanged between payment systems participants of different countries, via an Originating Gateway Operator and a Receiving Gateway Operator, to or from a consumer account of a Receiver. For additional information, go to Click the FedACH link and then click the FedACH International Services link. PPD(+) (Prearranged Payment and Deposit Entry) entry is a credit or debit entry initiated by an organization based on a standing, or a single authorization from the receiver of the transaction. The (+) identifies that the PPD may be an entry with an Addenda record. The (+) symbol is only a reference and will not be passed to the origination file.
25 RCK (Re-presented Check Entry) identifies a Single Entry debit constituting a presentment notice of an item eligible under NACHA Rules - Article Two, Section 2.8 (Re-presentment Check Entries). TAX (CCD+) entry is a credit entry that allows you to set up batch information for tax payments. The (+) identifies that all Tax Payments will have an Addenda record. The (+) symbol is only a reference and will not be passed to the origination file. TEL (Telephone-Initiated Entry) identifies a Single-Entry debit initiated by an Originator pursuant to an oral authorization obtained over the telephone to affect a transfer of funds from a Consumer Account of Receiver. This type of entry may only be used for a Single Entry for which there is no standing authorization for the origination of ACH entries to the Receiver s account. A TEL entry may only be used when there is an Existing Relationship between the Originator and the Receiver, or when there is not an Existing Relationship between the Originator and the Receiver, when the Receiver initiates the telephone call. WEB (Internet-Initiated Entry) identifies debit entries initiated by an Originator pursuant to an authorization that is obtained for the Receiver via the Internet to affect a transfer of funds from a Consumer Account of a Receiver. All incoming files will be read for format accuracy and if valid, delivered to the bank in a combined file. A file will be accepted if the effective date is in the past or on a non-business day, and can be modified before it is processed. The customers could receive the following error messages when importing ACH batches: ERROR: Uploading File The uploaded file has a zero file size. ERROR: Importing File line size is [xx] The lines in the file are not 94 bytes long. ERROR: Importing File (5) The transaction class (SEC code) is invalid. ERROR: Importing File (5) On Line [xx] The 5 record has invalid data. ERROR: Importing File (5) Invalid Company Information Invalid company name, company identification and/or company description fields. ERROR: Importing File (6) No records in File The file does not contain any 6 records. ERROR: Importing File (6) Invalid Transaction Code An invalid transaction code exists in the file. The valid tran codes are: 27, 37, 28, 38, 22, 32, 23 and 33. ERROR: Importing File (6) On Line [xx] The 6 record has invalid data.
26 1-24 Error Importing File (8) The detail and addenda record counts do not match what the batch trailer record indicates. The detail record debits or credits totals do not match what the batch trailer record indicates. ERROR: Importing File (8) On Line [xx] The 8 record has invalid data. ERROR: Importing File (8) Calculated 6 records do not match the total in the 8 record. Error Importing File (9) The batch counts do not match what the file trailer record indicates. The total debits or credits do not match what the file trailer record indicates. ERROR: Importing file (9) Calculated totals do not match the 9 record. ERROR: Importing File (10) An invalid record type exists. The valid record types are: 1 and 5 through 9.


27 ACH Import Process This screen will display the files that have been imported into Internet Banking from the ACH Import screen and allow the customer to process them. The screen will show the Date Effective that was set up in the file, the customer or user who imported the batch, the date and time it was imported and the file name. To process the file the customer clicks on the Date Effective. This will take the customer to the following screen: The customer will be able to choose one of their accounts from the drop down box. The date effective can be changed by typing in a new date or using the calendar icon. There is general information about the batch on this screen, if the customer would like more details they can click on the View Detail link. The build summary selection box allows the customer to submit the ACH Import batches in a summary format that will interface one debit or one credit per batch to the account they selected. If it is not selected the import batches will be submitted in a detailed format and will generate an entry for each item in the import batch.
![1-26 Once the customer has the correct account and effective date entered for the batch they would click on [Process]. They will then receive a validation screen.](/docs-images/83/87095151/images/28-0.jpg "By clicking [No] they will be taken back to the ACH Import Process screen and the file will not be processed. If they click [Yes] they will receive a confirmation screen.")
28 1-26 Once the customer has the correct account and effective date entered for the batch they would click on [Process]. They will then receive a validation screen. By clicking [No] they will be taken back to the ACH Import Process screen and the file will not be processed. If they click [Yes] they will receive a confirmation screen. It will then be stored until the effective date. The stored file will be released to you 2-business days prior to the effective date if the batch is all credits. It will be released 1-business day prior to the effective date if the batch is all debits or debits and credits in the same batch. The disclosure text for ACH Import Process screen can be set up on the bank side under Maintenance>Disclosures>Cash Management ACH Import Process.

29 ACH Filter Exceptions Vision Banks Only - This feature allows the customer to review and make decisions regarding any ACH Exceptions identified each business day. The customer will be able to have any ACH be accepted from a specific Company ID and Company Name. If an ACH is presented that is not from the specified company or companies it will be an exception. All of the exceptions will default in as No in the Approved column on this screen. The customer can change them by selecting Yes in the drop down box. When the customer completes their review they would click [Submit] to save the changes they have made. If any items have been changed to Yes, a bank mail message will be sent to you. All of the items that are marked as No will be returned as rejected. These items will remain on this screen until the following day when a new exception file is interfaced. The disclosure text for ACH Filter Exceptions screen can be set up on the bank side under Maintenance>Disclosures>Cash Management ACH Filter Exceptions.

30 1-28 ACH International Batch This feature allows customers to build international ACH batches. **Each country has different requirements for the setup of an international batch and it is critical that you contact your Federal Reserve Representative or correspondent relationship for instructions prior to letting customers originate International ACH Files. Additional information for you to review can be located at: The Batch field is a mandatory 25-character field. The customer can enter a name that identifies the batch. The Transaction Class field is a drop down box and will allow the customer to pick from two codes they are as follows: CBR (Corporate Cross-Border Payment) identifies credit or debit entries initiated to effect a payment exchanged between payment systems participants of different countries, via an Originating Gateway Operator and a Receiving Gateway Operator, to or from a corporate account of a Receiver. PBR (Consumer Cross-Border Payment) identifies credit or debit entries initiated to effect a payment exchanged between payment systems participants of different countries, via an Originating Gateway Operator and a Receiving Gateway Operator, to or from a consumer account of a Receiver.
31 The Account field allows the customer to select which account will be debited or credited with this transaction. The Service Class field identifies the general classification of dollar entries to be exchanged. The customer will have three selections: Credits Only = 220 Credits and Debits = 200 Debits Only = 225 The Company Name field is a mandatory 16-digit field and can be changed if it is different then what is defaulted in. This name displays in the reference field on the transaction to identify the originator of this transaction. The Foreign Exchange Indicator field indicates the foreign exchange conversion methodology applied to a cross-border entry. FF Fixed to Fixed = Entry is originated in a fixed value amount and is to be received in the same fixed-value amount in the same currency denomination. FV Fixed to Variable = Entry is originated in a fixed value amount and is to be received in a variable amount resulting from the execution of the foreign exchange conversion. The Foreign Exchange Reference Indicator field is used to indicate the content of the Foreign Exchange Reference field. Values for this field are: 1) Foreign Exchange Rate, 2) Foreign Exchange Reference Number, and 3) Space Filled. The Foreign Exchange Reference is the description that corresponds with the Reference Indicator. The ISO (International Organization for Standardization) Destination Country field is used to identify the country where the entry will be received. The following options are available to the customer: CA = Canada AT = Austria NL = Netherlands MX = Mexico DE = Germany CH = Switzerland GB = United Kingdom (Great Britian)
32 1-30 The Company Identification field is a mandatory field and is usually the tax identification number of the originating company. The Company Description field is a mandatory and would be a label that describes the purpose of the batch. The ISO (International Organization for Standardization) Destination Currency field is used to identify the currency denomination in which the entry is to be received. These will correspond with the country selected: CAD = Canada EUR = Austria EUR = Netherlands MXN = Mexico EUR = Germany CHF = Switzerland GBP = United Kingdom (Great Britian) The Date Scheduled field sets the effective date for the batch. For recurring batches, this effective date will establish the first time that a batch is automatically processed. The customer can type in the date or use the calendar icon to select the date. The Frequency field allows the customer to select how often they want the batch to process. The options are once, daily, weekly, every two weeks, monthly, end of month, quarterly, semi-annually and annually. The Date Scheduled Process field will allow the customer to select how to process the batch when the effective date falls on a weekend or holiday. The Date Expire field determines when a recurring batch will expire and no longer automatically process. A batch with a one time occurrence will not have an expiration date. The customer can type in the date or use the calendar icon to select the date. This is not a required field. The Build Summary field will allow the batch to be sent in a summary format that would interface one debit or one credit per batch to the account. If this field is not selected, the batch will be submitted in a detailed format. The detail format will generate an entry for each item in the ACH Batch.
33 The customer can click [Submit] to save the batch. It will be added to the list of batches at the bottom of the screen. Once the batch is saved, it can be processed immediately or at a later date. The disclosure text for the ACH International Batch screen can be set up on the bank side under Maintenance>Disclosures>Cash Management ACH International Batch.

34 1-32 ACH International Origination This screen will allow customer to set up recipient information for the international batches they have set up. The Batch field allows the customer to select the batch they want to add to or edit from a drop down box. The Name field is where the customer would enter the individual or company that will be the recipient of this entry. The Account field is for the recipient account number. The customer can enter in an account number consisting of numeric characters 0-9 and alpha characters A-Z. The Originating Gateway Routing Number field displays the financial institution routing number of the ISO Country Destination that was created in the international batch = Canada = Mexico = Austria = Germany = Netherlands = Switzerland = United Kingdom (Great Britian)
35 Enter the amount in the Amount field. The Transaction Code field determines what type of transaction this will be, deposits or withdrawals. The Addenda Transaction Type field allows the customer to pick from the following options: Annuity, Business/Commercial, Deposit, Loan, Miscellaneous, Mortgage, Pension, Rent/Lease, Salary/Payroll and Tax. The Foreign Receiving DFI Identification field is used to identify the foreign RDFI International entry. This entry will be a unique format by country can be up to 11 characters. The Include box will default in as check marked, which means this item will be included in the batch. If the customer removes the check mark, the item will not be included in the batch. Once they have all of the recipient information entered the customer would click [Submit] to save any changes. The recipient information will be saved at the bottom of the screen. Similar to the ACH Origination screen, the customer will be able to alter recipient amounts and include and remove them from batches quickly at the bottom of the screen. To alter the recipient information, the customer would click on the recipient to bring their information back up to the top of the screen. When the customer has all of the information for the batch set up, they would return to Cash Management>ACH>ACH International Batch. On the bottom of the screen they would click on their batch and populate all of the batch fields with the information and click on [Process]. The processing of the batch will be affected by the risk limits that the bank has set up for the customer. If the customer exceeds the limits they will receive an error message and will not be able to process the batch. If the bank has allowed them to exceed the limits they have set up they will receive a warning message. The batch will be processed and the bank will receive a mail message advising that the customer has exceeded their limit. The disclosure text for ACH International Origination can be set up on the bank side under Maintenance>Disclosures>Cash Management ACH International Origination.

36 1-34 ACH Management This feature allows a customer to perform all of the ACH steps from one screen. The Add Batch button allows the customer to access the ACH Batch screen. The Include check boxes allow the customer to select or deselect the batches in the upper portion of the screen. This makes it possible for the customer to process or delete multiple batches at the same time. The Date Effective must be populated prior to processing the batch. If the customer clicks [Delete] it will delete the batch and all of the origination items tied to it. By clicking on the Batch Name the customer will be taken to the ACH Origination screen where they can edit or delete recipient information. If the customer clicks on the number of Items in the batch they will be taken to the ACH Detail screen. The Edit link will display the ACH Batch screen and will allow the customer to edit their batch information. By clicking on [Close] the batch will be updated and the customer will be taken back to the ACH Management screen. The Delete link will allow the customer to delete the batch. The customer will receive a validation screen before the batch is deleted.
![The Search link can be used to search for specific recipient information. Once the customer clicks the link they will be able to enter in one or more search criteria and click [Submit].](/docs-images/83/87095151/images/37-0.jpg "The customer will get a list of the batches that the recipient is tied to.")
37 The Search link can be used to search for specific recipient information. Once the customer clicks the link they will be able to enter in one or more search criteria and click [Submit]. The customer will get a list of the batches that the recipient is tied to. The customer can click on the batch name to go to the ACH Batch screen or click on the recipients name to go to the ACH Origination screen. The Scheduled ACH and Pending ACH sections function as they do on the ACH Process screen. The Scheduled section shows the future dated batches and the customer can remove them from processing. The Pending section will show all of the batches that will be released to the bank. The customer will be able to remove them before the bank receives them. The columns on the ACH Management screen can be sorted if the customer clicks on the heading titles. The disclosure text for the ACH Management screen can be set up on the bank side under Maintenance>Disclosures>Cash Management ACH Management.
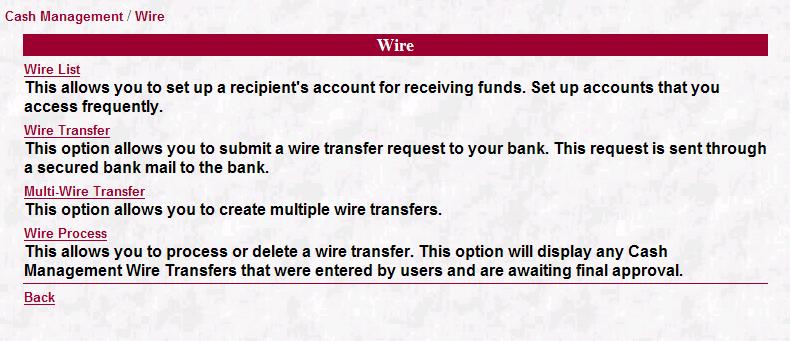
38 1-36 Wire


39 Wire List This screen will allow the customer to input Wire Transfer recipient information. The customer would enter the name, address, city, state, zip code, account number and any special instructions for the wire recipient. Special characters are allowing in the special instructions fields. In the Recipient Bank Information the customer would enter in the recipients bank routing number or they can use the routing number search icon. Any combination of the search fields can be used in conjunction with each other to narrow the search for a routing number. If the search results exceed 100 hits the customer will be prompted to narrow their search by adding more criteria. [Cancel] clears the search screen allowing the customer to start over and [Close] will return the customer to the Wire List screen.

40 1-38 Once the customer has their search results they can click on one of the routing numbers and it will populate this bank information on the Wire List screen and the search screen will close. If the recipient requires intermediary bank information, that can be filled out at the bottom of the screen. The customer can use the search function for the routing number in this section as well. After all of the information is entered the customer can click [Submit] to save this recipient. A list of recipients will be displayed at the bottom of the screen. If the customer needs to change any recipient information or delete a recipient they would click on the name under the Recipient column.


41 Wire Transfer This screen allows a customer to set up Wire transactions for processing. The customer would select the account that they are wiring the funds from in the Account drop down box. The Sender Name will default in but the customer can change it. The Amount field would be the amount that the customer wants to wire to the recipient. Under the Recipient information the customer can set up new recipient information or select recipients from the drop down box. If a recipient is selected it will pull in the information that was set up on the Wire List screen.

42 1-40 If the customer is entering new recipient information and they check the Add to Recipient List box at the bottom of the screen, the new recipient information will be saved for future use and will display on the bottom of the Wire List screen. If the customer is setting up the recipient information from this screen they will have access to the Routing Number Search icons that they had on the Wire List screen. An Intermediary Bank is not always required and generally only needs to be populated if the recipient specifies the intermediary information. In the Date Scheduled field the customer will enter the date they want the wire transfer to occur on. The Schedule drop down box allows the customer to select the frequency of this wire transfer. If the batch is set up with a recurring frequency the customer can also set up an Expiration Date for the batch. Once the information is set up they would click on [Submit]. If the wire is scheduled for the current date it will display at the bottom of the screen in the pending table. If it is a future dated or recurring wire it will show in the recurring section. By clicking on the date listed under the Date Schedule column the customer would have the option to edit or delete the wire. Changes are only allowed to transfers scheduled for a future date. If the wire transfer is recurring, the Date Schedule will advance automatically on the list at the bottom of the screen. If the wire transfer list displays "********" in the Date Schedule, the wire transfer was created with an invalid or closed account or the transfer has expired. In all conditions this wire transfer cannot be edited the only option would be to delete this wire transfer. The disclosure text for the Wire Transfers screen can be set up on the bank side under Maintenance>Disclosures>Cash Management Wire Transfer.

43 Multi-Wire Transfer This feature allows the customer to set up multiple wire transfers at one time. All of the customers wire recipients will display. From this screen the customer would place a check mark next to the recipients that they want to send wires to. Under the Payment Date they can type in the date or use the calendar icon. Then they would choose the account they want the wire to come out of and enter in the amount of the wire. When all wires are setup, the customer can click [Submit] and they will receive a confirmation message The disclosure text for the Wire Process screen can be set up on the bank side under Maintenance>Disclosures>Cash Management Multi Wire.


![box next to the account number and then click on the [Process] button.](/docs-images/83/87095151/images/44-2.jpg "They will get a validation screen.")
44 1-42 Wire Process The Cash Management Wire Process screen displays both current and future dated Wire Transfers that were submitted and are waiting to be processed. To process the wires the customer or user will need to place a check mark in the box next to the account number and then click on the [Process] button. They will get a validation screen. If they click [No] the wires will not be processed and the customer will go back to the Wire Process screen and see the following message:
![If they click [Yes] they will get a confirmation screen with the details and a confirmation for each wire that was processed.](/docs-images/83/87095151/images/45-0.jpg "Once a wire is processed you will receive a Bank Mail message.")

45 If they click [Yes] they will get a confirmation screen with the details and a confirmation for each wire that was processed. Once a wire is processed you will receive a Bank Mail message. Any wires not processed or removed will remain listed on the Wire Process screen until a decision is made on them. If the customer wants to remove the wire from the process screen they can click on [Remove]. They will get a validation screen: If they click [No] they will be taken back to the process screen and their wire will still be there to process.
![1-44 If they click [Yes] they will be taken back to the](/docs-images/83/87095151/images/46-0.jpg "process screen and see a confirmation for the wire being")
46 1-44 If they click [Yes] they will be taken back to the process screen and see a confirmation for the wire being removed.


47 Wire Transfer File If you have it set up to receive the wires through a transfer file, once a wire transfer is processed it appears in the Pending section on the Wire Process screen. The wire transfer will remain in the pending section until the Date Scheduled. Once you have requested the IBWIRE.DAT file it would drop off this screen. If it is a recurring wire transfer once you have requested the IBWIRE.DAT file the wires would appear at the top of the screen waiting to be processed for the next Date Scheduled. If the customer clicks [Remove] instead of [Process] for a recurring wire it will only remove the wire from dropping the next time you request your IBWIRE.DAT file. It will change the Date Scheduled to the next recurring date. If the customer wants to delete a recurring wire they would have to do this on the Wire Transfer screen. Wire Risk Limits If the customer or user is trying to process the wire and it is over the limit that was set up for them they will receive an error message and will not be able to process the batch. If you allow a customer to exceed their limits, they will receive a warning message. The batch would be processed and you would receive a bank mail alerting you that the customer has exceeded their established limit.
48 1-46 The disclosure text for the Wire Process screen can be set up in Maintenance > Disclosures > Cash Management Wire Process on the bank side.

49 Positive Pay Daily Positive Pay is used in conjunction with standard bank account reconciliation services. The customer can use accounting and database software to send you a positive pay file that lists all the checks written against their account, since the last issue file. That file would include a record of each check s issue date, amount, check number and account. When a check is presented for payment, you can compare it against the positive pay file. Any discrepancies in a check s information trigger a flag. You can notify the customer on the discrepancy and ask them to verify the authenticity of that check.

![In the File Format the customer will select their file format. Then they would click on [Browse] to locate their file.](/docs-images/83/87095151/images/50-1.jpg "Once they locate the file they have two options.")
![They can click [Process] to import the file or they can click [Preview] to see all of the information in the file.](/docs-images/83/87095151/images/50-2.jpg "From this preview screen they can click [Back] which will return them to the Import screen.")
50 1-48 Positive Pay Import **This feature is for Vision banks that have contracted for Account Reconciliation. The Positive Pay Import feature will allow customers to import their list of checks into Internet Banking. In the File Format the customer will select their file format. Then they would click on [Browse] to locate their file. Once they locate the file they have two options. They can click [Process] to import the file or they can click [Preview] to see all of the information in the file. From this preview screen they can click [Back] which will return them to the Import screen. If they click [Process] they will get a confirmation screen. There is a View Detail link on the confirmation screen that the customer can click on to see the detail of the file. When the click [Back] it will take them to the import screen.
51 Standard Issue File Format: Account number, check number, date, amount, processing code, and payee name. Date field needs to be in MMDDYY format and valid processing codes are surrounded by quotation marks and are as follows: for none, I for Issue, R for Remove, C for Change, and V for Void. A processing code of will be read as Issue. Example: The account number is 24984, check number 1540, date is 4/15/03, amount of $56.00, processing code is Issue and the payee is ABC Construction. So the customer would set up the file as: I ABC Construction The disclosure text for the Positive Pay Import screen can be set up in Maintenance > Disclosures > Positive Pay Import on the bank side.

52 1-50 Positive Pay Exceptions **This feature is for Vision banks that have contracted for Account Reconciliation. The Positive Pay Exceptions review option will provide users with an interactive view of any positive pay exception items identified each business day. Exceptions will reflect the Account, Check number, Date Posted, Amount, Exception Reason and Approved column. The default will come in as a Yes. The customer will have the option to indicate Yes or No for payment of the check. Items not approved for payment (marked as No ) will be returned as fraudulent by the bank. The exception reasons are Multiple Cleared, Cleared Not Issued, Amount Different and No Serial Number. Any items marked as No and then submitted will automatically generate a bank mail message for you to review. The items that are marked as Yes will remain on the Positive Pay Exception screen until the next days IBPP.DAT file is processed. This will allow customers to return back to the Positive Pay Exceptions screen to make additional approval changes. An Imported On Date is displayed on the Positive Pay Exceptions screen to assist customers in knowing what day s exceptions they are viewing. The disclosure text for the Positive Pay Exceptions can be set up in Maintenance > Disclosures > Positive Pay Exceptions on the bank side.

53 Security

![Once the customer has entered in their information and they click [Submit] they will receive a confirmation message.](/docs-images/83/87095151/images/54-1.jpg "The disclosure text for the Token Enrollment screen can be set up on the bank side under Maintenance>Disclosures>Cash")
54 1-52 Token Enrollment The Token Enrollment screen allows Cash Management customers to sign up or request a multifactor password security token. The request will generate a bank mail message. Once the customer has entered in their information and they click [Submit] they will receive a confirmation message. The disclosure text for the Token Enrollment screen can be set up on the bank side under Maintenance>Disclosures>Cash Management>Security>Token Enrollment(Top) and Token Enrollment(Bottom).


55 Token Activation The Token Activation screen will allow a Cash Management customer to activate a token for their users. Once the token is activated the user will be required to use it to access Internet Banking. If a Cash Management user is set up as a Security Administrator they will be able to activate tokens for other Cash Management users. If they are not the administrator the User ID field will default in their user name only. Once the chose the user from the drop down box they would enter the serial number from the back of the token. They will not need to enter any dashes just the number. The Token Password is generated when they press on the token button and this would be entered in the next field. Then the customer or user would select the account that the token charge would be applied to and click [Submit]. **Note: Once a token is activated the Token Fee will be generated for that customer the next time a transfer file is requested. If your bank is not charging a fee for the token, the Charge Account field will not display.

56 1-54 The next screen will display the Host Validation Code. This code needs to match the 4 digit code that would display on the token when they press the button again. The disclosure text for the Token Activation screen can be set up on the bank side under Maintenance>Disclosures>Cash Management>Security>Token Activation.

![After they enter this on the screen and click [Continue] the next screen will display their host response code. This code must match what shows on their token after they push the button a second time.](/docs-images/83/87095151/images/57-1.jpg "If they match and the customer clicks on [Login] they will then be taken into Internet Banking. If the codes do not match they can click on [Cancel] and they will be taken back to the login screen.")
57 Token Login If you are utilizing tokens for the multifactor authentication the next screen that the customer will see after they enter their User ID is the password screen and they will be prompted to enter their token password here. After they enter their password they would need to enter their token password. They can get this by pushing the button on their token. After they enter this on the screen and click [Continue] the next screen will display their host response code. This code must match what shows on their token after they push the button a second time. If they match and the customer clicks on [Login] they will then be taken into Internet Banking. If the codes do not match they can click on [Cancel] and they will be taken back to the login screen. The disclosures for the token screens can be set up on the bank side under Maintenance>Disclosures > Token Login.


58 1-56 Security Maintenance Cash Management Users can use this screen if they want to change the image, phrase and/or challenge questions and answers they set up when the initially logged into Internet Banking. If a Cash Management user is set up as a Security Administrator they will be able to change these options for other Cash Management users. If they are not the administrator the User ID field will default in their user name only. By clicking [Change Image/Phrase], the user will see their current image and authentication phrase. They can then search through over 38,000 RSA s images to select a different image.

59 The Image Saved for Further Review section allows them to save up to four images while searching before deciding on the final image. Once they have their image and/or change their phrase they can click [Submit] to save the changes. The next time the Cash Management user logs into Internet Banking, they will see the new image and/or phrase. By selecting [Change Questions/Answers], the customer will see the current questions. The customer can make changes to the questions and/or answers and click [Submit] to save the changes. The next time the customer is challenged, they will see the questions they selected. The disclosure text for the Security Maintenance screens can be set up on the bank side under Maintenance>Disclosures>Cash Management>Security>Security Maintenance, Security Maintenance Questions and Security Maintenance Images.

60 1-58 Change Password Cash Management users can use this screen to change their password. The passwords for Cash Management users would have the same requirements as the customer passwords. The disclosure text for the Security Maintenance screens can be set up on the bank side under Maintenance>Disclosures>Cash Management>Security>Change Password.
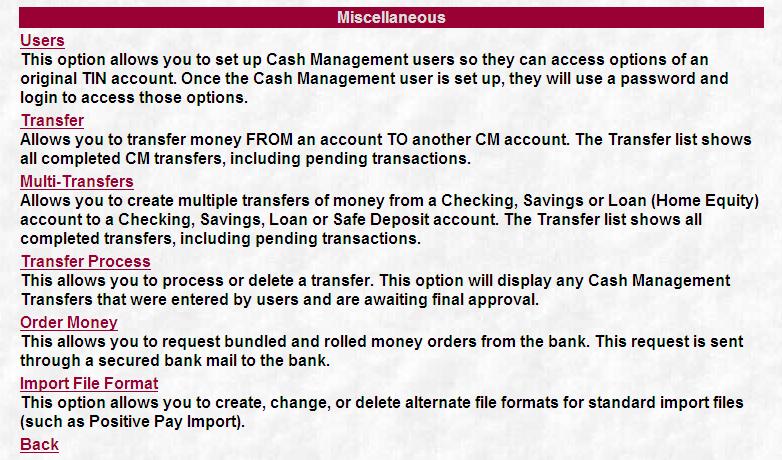
61 Miscellaneous

62 1-60 Users The User screen will allow a customer to set up additional users. They can select options that the new user will have access to under their TIN. In the User field the customer would put in the Cash Management users name. This will become part of the User ID for this particular user. This should be set up all in lower case and cannot contain any special characters. The Security Administrator box allows the user to change other Cash Management Users security settings under Cash Management Token Activation and Cash Management Security Maintenance. In the ACH Deposit and ACH Withdrawal Transaction Limits the customer will need to enter the maximum dollar amount per each ACH Origination and ACH Import this user will be allowed to set up. If the user exceeds the limit, an error message will display and prohibit them from submitting the data. In the Wire Transfer Transaction Limit the customer can enter the maximum dollar amount this user will be allowed when setting up a wire transfer. If the user exceeds this limit, an error message will display and prohibit them from submitting the wire transfer. In the Transfer Transaction Limit field the customer can enter the maximum dollar amount this user will be allowed when setting up an account transfer. If the user exceeds this limit, an error message will display and prohibit them from submitting the transfer on the Transfer and Multi-Transfer screen under Cash Management. The transaction limits will not apply to the Transfer and Multi- Transfer screens under Accounts. The customer can enter the maximum dollar amount that the user can create per effective date in the ACH Deposit and ACH Withdrawal Risk Limits. An error message displays if the user exceeds the limit on the ACH Batch and/or ACH Import screens. In the Wire Transfer Risk field the customer can enter the maximum dollar amount that the user can wire per effective date. An error message displays if the user exceeds the limit on the Wire Transfer screen.

63 The customer can enter the maximum dollar amount that the user can transfer in the Transfer Risk field. An error message will display if the user exceeds the limit on the Transfer and Multi-Transfer screens under Cash Management. The risk limits will not apply to the Transfer and Multi-Transfer screens under Accounts. The Restrict Wire Recipient Edit box will restrict the user from being able to edit the wire recipient, recipient bank information and intermediary bank fields on the Wire Transfer screen. The Restrict ACH Effective Date Field In ACH Process box will restrict the user from being able to edit the date effective field on the ACH Process screen. The next section of the Cash Management User screen allows the customer to select the options the user will have access to. The first box in each column must be marked which will then select all of the options under the header. The customer can then remove the marks next to the options they want to restrict.


![Once everything is set up for the user the customer will click [Submit] and confirmation and the user s temporary password will display at the top of the screen.](/docs-images/83/87095151/images/64-2.jpg "This password is not case sensitive and the user will not need to enter the dashes on the initial login. The user will login with their user name and the customer s user ID.")
64 1-62 The customer will be able to select the screen that will display when the user logs in from the Default Screen drop down box. This can be setup specifically for job functions for each Cash Management User. Cash Management will be the default unless it is changed. The Account Access boxes will give the customer the ability to select which accounts can be accessed by the user. The account access and transfer boxes will be defaulted in as not selected. Once everything is set up for the user the customer will click [Submit] and confirmation and the user s temporary password will display at the top of the screen. This password is not case sensitive and the user will not need to enter the dashes on the initial login. The user will login with their user name and the customer s user ID. For example if the customer s user ID was penny1 the above user would use testuser@penny1 as their user ID. All of the users will show at the bottom of the screen. This allows the customer the ability to change user settings, delete users, reset their login attempts and/or passwords.

65 Once a user is selected from this list the password aging information will display at the bottom of the screen. The Last Password Change is the date the last time the user password is reset or changed. The Password Locked In is the date that a password can be changed after the initial user set up or password reset. Password Expires is the date that the existing password will expire and the user will be forced to change it. The customer will need to make sure that they are marking the Change Password option under the Cash Management column for each of the users they set up. The Password Warning is the date that a warning message will start to display. The parameters you set up on the bank side of Internet Banking under Maintenance>Customer ID/Password will determine these dates. A new Cash Management user will have to login for the first time and reset their initial password for these password fields to populate and display on this screen. The customer will also be able to [Submit] changes, [Delete] a user, [Reset Password] and [Reset Login] attempts. Cash Management Multifactor Authentication If the bank forces tokens for Cash Management users, the new user will need an active token before they will be allowed to log in. If the customer goes through the RSA multifactor authentication when they login the Cash Management User will also go through this security feature. Since each user will have their own image, phrase, and challenge questions the customer will need to make sure that they are marking the Security Maintenance option under the Cash Management column for each of the users they set up. If the user becomes locked out of the RSA multifactor authentication, the customer or user will need to contact you to have this reset on the bank side under Maintenance>Change Security.


66 1-64 Transfer The Cash Management Transfer screen allows customers to have a separation of duties for transfers made by their users. The feature is very similar to the feature under Accounts>Transfer with the main difference being that the transfer is processed on a separate screen. Once the transfer is set up and the user clicks [Submit] they will get a confirmation message. Transfers scheduled for today s date will appear in the Pending Cash Management Transfer portion of the screen.

67 Recurring Transfers will display in the Recurring Cash Management Transfers section of the screen. It will also display in the Pending Process Cash Management Transfers section until it is processed. The Date Schedule column will advance automatically after its occurrence. The recurring transfers can be deleted or altered just by clicking on the Date Scheduled under the Recurring Cash Management Transfers section. This will repopulate the transfer information into the fields at the top of the screen so the user can make changes or click [Delete] to remove it. The Cash Management customer will be able to see all Cash Management Transfers; however, a Cash Management user will only see the pending and recurring transfers for the accounts they have been given access to when they were set up.

68 1-66 Cash Management Transfer Risk Limits The Transfer screen will check the Risk Limit that was set up for the user. If they exceed their limit they will get an error message and the transfer will not be submitted. The disclosure text for the Transfer screen can be set up on the bank side under Maintenance>Disclosures>Cash Management> Miscellaneous>Transfer.


69 Multi-Transfers The Cash Management Multi-Transfers screen allows customers to have a separation of duties for multi-transfers made by their users. The feature is very similar to the feature under Accounts>Multi-Transfers with the main difference being that the multi-transfers are processed on a separate screen. Once the Transfers are submitted, a confirmation message will appear at the top of the Multi Transfer screen.


70 1-68 At the bottom of the Multi-Transfer screen the user will be able to see any pending or recurring transfers they have entered on the multi-transfers and transfer screen. It will also display in the Pending Process Cash Management Transfers section until it is processed. If it is a recurring transfer the date that appears under the Date Schedule column will advance automatically after its occurrence. Transfers that appear in the Recurring Cash Management Transfers list can only be edited or deleted from the Cash Management>Miscellaneous> Transfer screen. The Cash Management customer will be able to see all Cash Management Transfers; however, a Cash Management user will only see the pending and recurring transfers for the accounts they have been given access to when they were set up. Cash Management Transfer Risk Limits The Multi-Transfers screen will check the Risk Limit that was set up for the user. If they exceed their limit they will get an error message and none of the transfers will be submitted. The disclosure text for the Multi-Transfers screen can be set up on the bank side under Maintenance>Disclosures>Cash Management> Miscellaneous>Multi-Transfers.


71 Transfer Process The Cash Management Transfer Process screen will display any Transfers that were entered on the Cash Management Transfer or Cash Management Multi- Transfers screens. The user can complete each transfer by placing a check in the box next to the account number and then clicking either [Process] or [Delete]. Transfers that have been processed will appear in the Pending Transfers section of this screen. The transfers will remain in the pending section until the Date Scheduled for the transfer to drop in the IBPCS.DAT when it is requested. The Cash Management customer will be able to see all Cash Management Transfers; however, a Cash Management user will only see the pending and recurring transfers for the accounts they have been given access to when they were set up. Once the user clicks [Process] they will get a validation screen. If they chose [No] they will be taken back to the Transfer Process screen and get a message stating Transfer Process Canceled.
![1-70 If they chose [Yes] they will get a confirmation screen that will show the details of the transfer.](/docs-images/83/87095151/images/72-0.jpg "Cash Management Transfer Risk Limits The Transfer Process screen will check the Risk Limit that was set up for the user.")

72 1-70 If they chose [Yes] they will get a confirmation screen that will show the details of the transfer. Cash Management Transfer Risk Limits The Transfer Process screen will check the Risk Limit that was set up for the user. If they exceed their limit they will get an error message and the transfer will not be processed. The disclosure text for the Transfer Process screen can be set up on the bank side under Maintenance>Disclosures>Cash Management> Miscellaneous>Transfer Process.

73 Order Money This option allows the Cash Management customer to submit a request to order money. You would receive this request through the secure bank mail. The customer can select the account they would like you to debit for this order. They can then enter a date or use the calendar icon to select a date when this order is needed. Then they would enter the amount of Cash or Coin that they need. The screen will automatically calculate the Total of the Order Money that is selected. The Instruction field can be used to specify desired pickup time and location or any other information regarding the order. After they have filled out the screen they can click [Submit] and the request will be sent to your bank mail. The customer will see a confirmation screen with the details of their request. The disclosure text for the Order Money screen can be set up on the bank side under Maintenance> Disclosures>Cash Management> Miscellaneous>Order Money.


74 1-72 Import File Format The Import File Format screen allows the Cash Management customer to set up formats that will convert their ACH Import and Positive Pay files into the standard format once they are imported into Internet Banking. They will have the option of setting up delimited or fixed length formats. To set up a format the customer would select they type of file they will be importing Positive Pay or ACH Import in the File Type drop down box. Then enter in a name for the format in the Description field. In the Import File Format drop down box they would chose either Fixed Length or one of the Delimited options and click [Submit]. If they chose a fixed length format the next screen will allow them to set the number of header and footer lines and the starting position and length for each field in their file.

75 If they chose one of the delimited formats the next screen will allow the customer to set the number of header and footer lines. They would then enter in the field number which would indicate where that particular field starts in the file. After entering all of the information the customer clicks [Submit]. This will save their format at the bottom of the screen where they could access it to make any changes or delete it. Once it has been saved on this screen the customer will also see it in the drop down boxes on the ACH Import and Positive Pay Import screens. **Note: When the customer sets up the file they will be importing into Internet Banking, the following fields must be formatted correctly: Date Fields as MM/DD/YY Account number as numeric only Amount as numeric with two decimal places (55.00) Check number as numeric only The disclosure text for the Import File Format screen can be set up on the bank side under Maintenance>Disclosures>Cash Management> Miscellaneous>Import File Format.

76 1-74 Services When the customer clicks on Services they will see a list of the options they have available and a general description for each.


77 Session Report This screen will display the transactions and activity the customer has completed within Internet Banking. There is a years worth of activity history. The customer would enter in a date range in the From and To fields. The activity will display in time order with the most recent transactions displaying first. The customer can click on the Date of a specific transaction and pull up additional information or details regarding that item. If a customer utilizes Cash Management they can see the items in their processed ACH batches from this screen. When they click on the date of a processed ACH Batch, they will see the general details for that batch.

78 1-76 In the lower left hand corner of this screen there is a link labeled View Detail. When they click on this it will display the items. They can click on the Hide Detail link to go back to the original view.
.")
79 Alerts This function allows the customer to set up alerts based on different modules. These alerts will be sent to the address that the customer selects during the set up. There are five Cash Management alert modules they are ACH, ACH Filter, Positive Pay, CM Transfer and Wire. (due to exceeded amount limit, invalid account number or invalid date). ACH will allow the customer to monitor batch activity such as when batches are submitted for processing and when batches are processed just to list a few. ACH Filter will allow the customer to monitor when ACH exceptions are available for review in Internet Banking. Positive Pay will allow the customer to monitor when exceptions are available for review in Internet Banking. CM Transfer will allow the customer to monitor each time a Cash Management transfer is submitted for processing or when Cash Management transfers are processed. Wire will allow the customer to monitor each time a wire is submitted for processing or when a wire is processed.
ACH ORIGINATION USER GUIDE May 17, 2017
 ACH ORIGINATION USER GUIDE May 17, 2017 1 Log In... 3 Create A Batch... 4 NACHA File Upload... 5 NACHA File Format... 5 Manual Creation... 10 Import Option... 12 Establish Import Layout... 12 Import Transactions
N Touch Treasury ACH User Guide
 N Touch Treasury ACH User Guide Revised 12-15-17 TreasurySupport@NTouchBanking.com (833) 846-2699 ACH Within Payments > ACH, you can create ACH payments and templates, import layouts, view templates, ACH
CASH MANAGEMENT User Guide
 CASH MANAGEMENT User Guide Login Process... 4 Logging On for the First Time... 4 Company Administrator Activities... 8 Creating New Cash Users... 8 Resetting Cash User Password... 12 Modifying Cash User
BUSINESS BANKING ONLINE. Deskside User Guide
 BUSINESS BANKING ONLINE Deskside User Guide INTRODUCTION TO BUSINESS BANKING ONLINE Business Banking Online (BBOL) offers our business customers both large and small the tools and features needed to manage
INBUSINESS BANKING SYSTEM
 Introducing your new INBUSINESS BANKING SYSTEM Companion Guide to Business Banking Video Tutorials Updated 0.09.8 WELCOME TO THE INBUSINESS SYSTEM The InBusiness System will help you efficiently and securely
O N L I N E B A N K I N G C A S H M A N A G E M E N T End-User Guide
 ONLINE BANKING CASH MANAGEMENT End-User Guide TABLE OF CONTENTS LogIn Process...1 Company Login... 1 Cash User Login... 3 Cash Management User Single Sign On... 4 Navigation...5 Account Listing Page...6
Needham Bank Business Online Banking
 Needham Bank Business Online Banking Published December 2017 Contents ACH & NB Business Online Banking Terminology... 2 Getting Started... 4 Participants... 5 Creating a Participant... 5 Updating a Participant...
ACH Payments. User Guide
 ACH Payments User Guide Table of Contents Overview... 2 Supported SEC Codes... 2 Create Batch... 2 Creating a Free Form Batch... 3 Creating a Batch from a Template... 14 Manage Batch Templates... 21 Transaction
Overview. Business Online Banking BASIC OVERVIEW PAGE 1
 Overview Business Online Banking BASIC OVERVIEW PAGE 1 Basic Overview Business Online Banking Main navigation: My Accounts, Move Money, and Additional Services. Admins have full access to all accounts
InBusiness Banking System Companion Guide to Business Banking Video Tutorials
 Banking System Companion Guide to Business Banking Video Tutorials Great Things Happen! Updated 05.5.6 Welcome to the InBusiness System The InBusiness System will help you efficiently and securely manage
Online Banking Procedures
 Table of Contents Online Banking Procedures... 2 1.1 Sign into Online Banking- No Token...2 1.2 Sign into Online Banking- Token...3 1.3 Change Account Nickname...5 Stop Payments... 7 1.4 New Stop Payments...7
ONLINE TREASURY MANAGER ACH USER MANUAL
 ONLINE TREASURY MANAGER ACH USER MANUAL www.suntrust.com The information contained in this manual is the property of SunTrust Bank, Inc. Reproduction, manipulation, adjustment or transfer transmission,
ACH Batch Instructions...3 Creating an ACH Batch...3 Creating a Recurring ACH Batch...4 Activating an ACH Batch...4 Approving an ACH Batch...
 ACH Batch Instructions...3 Creating an ACH Batch...3 Creating a Recurring ACH Batch...4 Activating an ACH Batch...4 Approving an ACH Batch...4 ACH Pass-Thru Instructions...5 Uploading a Pass-Thru ACH File...5
ONLINE BANKING COMMERCIAL CASH MANAGEMENT ACH END-USER GUIDE
 ONLINE BANKING COMMERCIAL CASH MANAGEMENT ACH END-USER GUIDE 1 P a g e TABLE OF CONTENTS CASH MANAGER ACH... 3 CREATE ACH BATCH... 4 ACH BATCH LIST... 4 MANUALLY CREATE AN ACH BATCH... 5 UPLOADING A NACHA
CASH MANAGEMENT USER GUIDE
 CASH MANAGEMENT USER GUIDE Updated February 2018 100 Church Street German Valley, IL 61039 www.germanamericanstatebank.com Member FDIC Table of Contents Login Process 3 First Time Login (New SSO) 3 Logging
ACH. Treasury Solution
 ACH Treasury Solution V.5.24.2017 Contents ACH Overview... 3 Payments can be created using Treasury Solutions by three methods....3 Enhanced ACH Features...3 Payment Options...3 ACH Service Application...
ACH USER GUIDE. Creating an ACH Batch. cash management
 Creating an ACH Batch 1. Once you are logged into your Online Banking account, select Cash Management, ACH, and then ACH Batch on the main navigation menu. Then follow the easy steps below to create a
BUSINESS ONLINE & MOBILE BANKING ACCOUNT ACCESS
 PO Box 1149 Bellevue, NE 68005-1149 402.292.8000 800.228.0392 www.sacfcu.com BUSINESS ONLINE & MOBILE BANKING ACCOUNT ACCESS Conduct your credit union business from your personal computer anytime from
Treasury Management User Guide. Online Banking
 Treasury Management User Guide Online Banking Released August 2018 Treasury Management... 4 Logging in to Treasury Management...5 Helpful Hints...10 User Menu... 12 Profile and Preferences... 12 Notification
Payments & Transfers User Guide
 Payments & Transfers User Guide Table of Contents Payee Maintenance...1 ACH Payments...4. Batch Creation...4 Creating a Manual Batch...4 Transaction Import...6 Templates & Recurring Payments... 7 Wire
Easthampton Savings Bank Online Business Banking User Guide
 Easthampton Savings Bank Online Business Banking User Guide Page 1 of 100 Table of Contents SECURITY...6 PASSWORD TAB FUNCTIONALITY...6 SECURE DELIVERY TAB FUNCTIONALITY...9 CHALLENGE CODE TAB FUNCTIONALITY...10
Business Online Banking
 First State Community Bank Business Online Banking End User Guide Table of Contents Logging In... 3 Navigation... 5 Account Activity Options... 7 Transactions... 8 Transfers... 9 Stop Payments...10 Statements...12
Reference Guide (IRIS)
") Reference Guide For Santander Bank s Interactive Reporting & Initiation Services (IRIS) Equal Housing Lender. Santander Bank, N.A. is a Member FDIC and a wholly owned subsidiary of Banco Santander, S.A.
Reference Guide For Santander Bank s Interactive Reporting & Initiation Services (IRIS) Equal Housing Lender. Santander Bank, N.A. is a Member FDIC and a wholly owned subsidiary of Banco Santander, S.A.
ACH USER GUIDE. Creating an ACH Batch. cash management
 Creating an ACH Batch 1. Once you are logged into your Online Banking account, select Cash Management, ACH, and then ACH Batch on the main navigation menu. Then follow the easy steps below to create a
Business Online Banking
 » Flagstar business Banking Business Online Banking Reference Guide Flagstar Bank Corporate Headquarters 5151 Corporate Drive Troy, MI 48098 (888) 324-4100 flagstar.com/business Member FDIC 1 Table of
The Guide below is to help assist Users in navigating our Cash Management Online Banking
 The Guide below is to help assist Users in navigating our Cash Management Online Banking If you have questions please call or email our Cash Management Support Team at 1-844-213-5198 or CEN-CMOperations@my100bank.com
3. Which SEC Code requires seven mandatory Addenda Records a. BOC b. ARC c. IAT d. ENR
 1. What is the correct sequence of the records on an ACH File transmission? a. Company Batch Header, Company Batch Control, Entry Detail, Addenda(s), File Header, File Control b. File Header, Company Batch
Simply e C A S H M A N A G E M E N T U S E R G U I D E
 Simply e C A S H M A N A G E M E N T U S E R G U I D E Simply e Cash Management Rev. 06/01/15 Simply e Cash Management Rev. 06/01/15 Table of Contents 1. WELCOME TO 7 1A. TYPES OF ACTIVITY 7 1B. GETTING
This product is the proprietary material of CheckCare Enterprises, LLC. And is not to be distributed or copyrighted without written permission from
 CheckCare ACH Gateway Reference Secure Pay Edition This product is the proprietary material of CheckCare Enterprises, LLC. And is not to be distributed or copyrighted without written permission from CheckCare
Company and User Set Up. Company Policy. NOTE: The Company Policy controls the companylevel feature entitlements and dollar limits.
 Company and User Set Up Company Policy NOTE: The Company Policy controls the companylevel feature entitlements and dollar limits. 1. Select Commercial and then Company Policy. 2. Select a transaction type
FirstNet for Business
 Page 1" First State Community Bank FirstNet for Business End-User Guide Page 2" Table of Contents" Logging In... 3% Changing Your Password... 4% Cash User Login Screen... 4% Navigation... 7% Account Listing
Section VIII: ACH Payment Processing
 Section VIII: ACH Payment Processing Contents About ACH Payments... 2 About the Automated Clearing House... 2 ACH Terms and Features... 2 Workflow Example: ACH Payroll Application... 4 To Add a Database...
inistrator s Guide BUSINESS SERVICES by Gesa Credit Union
 ACH Ad Gesa@Work inistrator s Guide BUSINESS SERVICES by Gesa Credit Union Gesa@Work ACH Administrator s Guide Overview Introduction to ACH With Gesa s online banking service, Gesa@Work, your company will
SYSTEM LOGIN/PASSWORD SUPPORT
 SYSTEM LOGIN/PASSWORD SUPPORT Why am I unable to log into the system? What if I forgot my password? Why do I need to create Security Questions/Answers? Why does it ask me if I want to remember this computer?
ach user guide business gateway TABLE OF CONTENTS
 business gateway ach user guide TABLE OF CONTENTS User Service Permissions... 2 Copy a Batch... 5 ACH File Pass-Thru...10 ACH Batches... 3 Delete a Batch... 5 ACH File Pass-Thru Approval..11 Add a Batch...
Business Online Banking User Guide
 Business Online Banking User Guide Table of Contents 1. WELCOME!... 3 1A. TYPES OF ACTIVITIES 3 1B. GETTING STARTED 3 1C. IF YOU NEED HELP 3 2. TRANSACTION ACTIVITY... 4 2A. ACCESSING YOUR BUSINESS ACCOUNTS
Business ebanking Administrator User Guide
 Business ebanking Administrator User Guide 2 Table of Contents About Business ebanking... 3 Minimum System Requirements... 3 System Considerations... 4 Company User Sign On... 4 About Sign On... 4 Signing
Business Online User Guide July 2017
 Business Online User Guide July 2017 Business Online Account Holder 1 Introduction.. 1 Types of Activity 1 Log In 2 Multifactor Authentication. 2 MFA Device Print Security 2 MFA Enrollment 3 Registered
Supervisor s Guide. supervisor s guide (continued) Welcome to NBT Online Banker for Business! Supervisor Functions NBT ONLINE BANKER FOR BUSINESS
 Welcome to NBT Online Banker for Business! Supervisor Functions NBT ONLINE BANKER FOR BUSINESS") supervisor s guide () NBT ONLINE BANKER FOR BUSINESS Supervisor s Guide Welcome to NBT Online Banker for Business! This Supervisor s Guide was created to provide your organization s designated Online Supervisor
supervisor s guide () NBT ONLINE BANKER FOR BUSINESS Supervisor s Guide Welcome to NBT Online Banker for Business! This Supervisor s Guide was created to provide your organization s designated Online Supervisor
Business ebanking User Guide
 Business ebanking User Guide If you have any questions, please contact Business ebanking Support at 1-800-593-4345 Contents About Business Online Banking... 3 System Requirements/Considerations... 4 Password
Integrated ACH. Business Concentration Consumer Pre-authorized Debit
 Integrated ACH Our new Integrated ACH Module will allow you to complete a host of electronic funds transfer activities via an easy to learn process outlined in the next several pages. Payment Options Transactions
First State Bank of Blakely, Inc. Cash Manager. User Guide
 First State Bank of Blakely, Inc. Cash Manager User Guide Table of Contents Logging In... 1 Changing Your Password... 2 Cash User Login Screen... 3 Cash Management User Single Sign On... 4 Navigation...
Business ebanking Online Wire Transfers
 Business ebanking Online Wire Transfers This guide instructs users how to originate Wire transfers through Business ebanking. If you need support, please contact Treasury Services Support at (877) 920
Business ebanking ACH Origination Services (includes ACH Uploads)
") Business ebanking ACH Origination Services (includes ACH Uploads) This guide instructs users how to originate ACH Payments and Collections though Templates. Contact Business Client Services for assistance
Business ebanking ACH Origination Services (includes ACH Uploads) This guide instructs users how to originate ACH Payments and Collections though Templates. Contact Business Client Services for assistance
VERIFICATION METHOD. Deskside User Guide
 VERIFICATION METHOD Deskside User Guide OVERVIEW Our company considers the security of your financial information a top priority. We employ extensive security measures designed to provide a safe and reliable
accessmoney Manager ACTION PAGES
 accessmoney Manager ACTION PAGES 1 accessmoney Manager Action Pages accessmoney Manager Action Pages are quick reference pages that provide information for the major components of accessmoney Manger. Click
CashLink Quick Reference Guide
 CashLink Quick Reference Guide Navigating your Account Summary Page After you log in, you will see the Account Summary Page screen. This screen gives you access to all other functions and displays important
Business ebanking Guide Administration
 Business ebanking Guide Administration Revised 2/2016 Table of Contents ABOUT BUSINESS EBANKING... 4 MINIMUM SYSTEM REQUIREMENTS... 5 APPROVED OS AND BROWSERS FOR COMPANY USERS... 6 SYSTEM CONSIDERATIONS...
Hickory Point Bank & Trust. ACH MANAGER User Guide
 Hickory Point Bank & Trust ACH MANAGER User Guide Introduction Benefits Home Page Funds Management Inquire ACH Transfer Change ACH Transfer New ACH Transfer New ACH Transfer using Existing Transfer Delete
Business Online and Mobile Banking User Guide
 Business Online and Mobile Banking User Guide 1. Online Enrollment 2. Login Process & Device Registration 3. Accounts & Accounts Details and Transaction History 4. Activity Center 5. Secure Messages 6.
POSITIVE PAY U S E R G U I D E
 POSITIVE PAY U S E R G U I D E Positive Pay User Guide Getting Started... 3 Administration... 3 Company Administration... 3 Manage Users... 3 Communication... 4 Manage Alerts... 5 Positive Pay Check...
ACH Rules Compliance Audit Requirements Request for Comment
 ACH Rules Compliance Audit Requirements Request for Comment Proposed Modifications to the Rules May 11, 2018 (Proposed effective date January 1, 2019, to apply to audits due by December 31, 2019) ARTICLE
BBVA Compass Spend Net Payables
 User Guide BBVA Compass Spend Net Payables User Guide Vault Services Table of Contents Introduction 2 Technical Requirements 2 Getting started 3 Sign In 3 General Navigation 4 Upload/Create Payment 5
PLCU Business Online
 PLCU Business Online Contents Logging In... 2 Online Agreement... 3 Password Change... 3 Watermark Selection... 3 Multi-Factor Authentication Security Question Collection... 4 My NetTeller... 5 My NetTeller
ACH MANAGER Quick Reference Guide Please refer to ACH Manager User Guide for detailed instructions Rev. 04/14/2017
 Customer Support General Customer Service: o MidWestOne Service Center 1-800-247-4418 or 319-356-5800 o Treasury Management Phone 1-319-356-5964 o Treasury Management e-mail : tmsupport@midwestone.com
PINACLE. ACH Bulk Load Tip Card USING ACH BULK LOAD STEP 1 - CREATING A NACHA FILE TREASURY MANAGEMENT
 PINACLE ACH Bulk Load Tip Card USING ACH BULK LOAD The ACH Bulk Load feature allows you to import an ACH-formatted file. The ACH file that you import can contain one or more batches within the file. Each
Online Banking Guide Commercial Banking Business Banking Government Banking
 Online Banking Guide Commercial Banking Business Banking Government Banking Effective April 16, 2013 1 Login Users may login directly from www.unibank.com Select Online Banking. Enter your existing login
BUSINESS ACH. ibanking
 BUSINESS ACH ibanking January 23, 2017 Table of Contents Business ACH & ibanking Terminology... 3 End User Guide... 4 Getting Started... 4 Participants... 4 Creating a participant... 4 The Participants
BUSINESS ADVANTAGE USER GUIDE
 Table of Contents Getting Started... Account Summary...5 Navigation Tools...6 Account History...8 Quick Reference Guide...9 Frequently Asked Questions... Need Help?... Getting Started. Visit.. In the Online
huntington Business security suite user guide
 huntington Business security suite user guide Contents Welcome 3 Section 1: Getting Started Logging In 5 Section 2: ACH Positive Pay Overview 7 Filters 8 managing exceptions 11 warehouse 14 approvals 15
Creating International Wire Transfer Payments Reference Guide
 Creating International Wire Transfer Payments Reference Guide Table of Contents Creating and Working with International Wire Transfers 3 Overview 3 Creating a Freeform Payment or Template 3 Approving or
User s Guide. (Virtual Terminal Edition)
") User s Guide (Virtual Terminal Edition) Table of Contents Home Page... 4 Receivables Summary... 4 Past 30 Day Payment Summary... 4 Last 10 Customer Transactions... 4 View Payment Information... 4 Customers
User s Guide (Virtual Terminal Edition) Table of Contents Home Page... 4 Receivables Summary... 4 Past 30 Day Payment Summary... 4 Last 10 Customer Transactions... 4 View Payment Information... 4 Customers
Get the most from your Health Savings Account. Your guide to your HSA and online account access
 Get the most from your Health Savings Account Your guide to your HSA and online account access 1 Health Savings Account Investments Contents Getting started... 2 Accessing the BBPadmin Online Portal...
epnplugin v Financial Software Payments Module for QuickBooks Sales Receipts
 epnplugin v3.1.58 Financial Software Payments Module for QuickBooks Sales Receipts eprocessing Network LLC 7/2/2012 epnplugin 3 Sales Receipts Table of Contents OVERVIEW... 3 REQUIREMENTS & PREPARATIONS...
Creating ACH Transactions
 ACH Creating ACH Transactions There are two ways to send an ACH file within Online Business Banking which depends on what options you selected on your enrollment form. If you do not have software that
User Guide #PeopleFirst
 ADVANCED BUSINESS ONLINE BANKING User Guide #PeopleFirst TABLE OF CONTENTS LOGIN Login Instructions 3 ACCOUNT BALANCES AND TRANSACTION DETAILS Balance Snapshot 4 Important Account Balances 4 Recent Transactions
Business ebanking Essentials Transfers and Payments
 Business ebanking Essentials Transfers and Payments Table of Contents OVERVIEW... 2 ACH... 3 ACH Payments... 3 Create Payment ACH Template... 4 Making an ACH Payment... 6 Approve ACH Transactions... 8
Alerts Webster Web-Link Descriptions
 Treasury & Payment Solutions Quick Reference Guide Alerts Webster Web-Link Descriptions This Quick Reference Guide describes the Security and Operational Alerts that are sent from Web-Link, including what
Mountain Credit Union MCU Online Banking
 Mountain Credit Union MCU Online Banking End-User Guide 2011.11a Contents Login... 1 Login Screen... 1 Online Agreement... 2 Password Change... 2 Watermark Selection... 2 Multi Factor Authentication Security
Chapter. Chapter 4: Banking
 Chapter 4 Chapter 4: Banking Chapter 4 4.1 Banking Methods Banking Methods This chapter of the WinFlexOne Administrative Guide discusses the following: Two types of banking methods: 1. plan service provider
Business ebanking ACH Origination Services (Tax Payments)
") Business ebanking ACH Origination Services (Tax Payments) This guide instructs users how to originate ACH Payments and Collections though Templates. Contact Business Client Services for assistance 855.336.9460.
Business ebanking ACH Origination Services (Tax Payments) This guide instructs users how to originate ACH Payments and Collections though Templates. Contact Business Client Services for assistance 855.336.9460.
Revised (10/17) ACH Direct User Guide
 ACH Direct User Guide") Revised (10/17) ACH Direct User Guide Table of Contents Page 1. Introduction to ACH Direct 4 1.1 Overview of ACH Direct 4 1.2 Getting Started on ACH Direct 9 2. Corporate Administration 12 2.1 Viewing
Revised (10/17) ACH Direct User Guide Table of Contents Page 1. Introduction to ACH Direct 4 1.1 Overview of ACH Direct 4 1.2 Getting Started on ACH Direct 9 2. Corporate Administration 12 2.1 Viewing
JHA Payment Solutions ipay Solutions. Business Bill Pay. Funds Verification CSL Client Reference Guide. September 2018
 JHA Payment Solutions ... 1 Enrollment Process... 2 Home Page... 3 Message Center... 4 Attention Required... 4 Shortcut Method... 4 Scheduled... 4 History... 4 Since You Last Logged In... 4 Payees Tab...
Online Banking Guide for Commercial Customers
 store information used on a regular basis. The form that is created can then be used to create a One-Time or Scheduled/Recurring Batch On the main page highlight Transfers Select Create an ACH Template
OVERVIEW TIMING AND DEADLINES PERMISSIONS, LIMITS, AND APPROVALS PROCEDURES REPORTS STOP PAYMENTS PROCEDURES...
 TABLE OF CONTENTS TABLE OF CONTENTS... 1 ACCESSING THE SYSTEM... 4 LOGGING IN... 4 FIRST TIME LOG-IN ONLY... 4 UPDATING USER PROFILE, USER PASSWORD, AND SECURITY QUESTIONS... 6 ESTABLISHING USER PREFERENCES...
ACH Processing using third party software Quick Reference Guide
 ACH Processing using third party software Quick Reference Guide Direct Send Feature The Direct Send feature allows customers who are using a third party software that creates their NACHA ACH file to be
FirstSite. Quick Reference Guide: Initiating ACH Payments. Create a One-Time or Repetitive ACH Payment:
 FirstSite Quick Reference Guide: Initiating ACH Payments FirstSite offers the ability to make payments via ACH (Automated Clearing House) transfer. ACH credits (disbursements) must be initiated by 2 p.m.
QNB Bank-ONLINE AGREEMENT
 This is an Agreement between you and QNB Bank ("QNB"). It explains the rules of your electronic access to your accounts through QNB Online. By using QNB-Online, you accept all the terms and conditions
NetTeller Online Banking
 NetTeller Online Banking End-User Guide for Episys Jack Henry & Associates, Inc. 2011.11a Contents Login... 1 Login Screen... 1 Online Agreement... 2 Password Change... 2 Watermark Selection... 2 Multi-Factor
ACH Templates Enhanced Business Online Banking
 ACH Templates Enhanced Business Online Banking ACH TEMPLATES PAGE 1 ACH Templates Enhanced Business Online Banking ACH templates help reduce errors and provide efficiency. Create the template first, and
Health savings account contribution guide Version 8.0
 Health savings account contribution guide Version 8.0 Table of contents Getting started...3 Step 1: Sign up for the Account Number File (ANF)...3 Step 2: Select a contribution method...4 Step 3: Submit
Gate City Bank Online Business Banking
 Gate City Bank Online Business Banking i Table Of Contents Table of Contents Online Business Banking... 5 Online Business Banking Overview... 5 Features and Services... 5 FREE* Online Business Banking...
Online Banking Wire Transfer Enrollment
 Online Banking Wire Transfer Enrollment Revised 9/2016 Page 1 Overview Wire Transfers (also referred to as Wire Transfer Payments) are a trusted instrument for transferring funds quickly and conveniently
CentralNET Business ACH USER GUIDE
 CentralNET Business ACH USER GUIDE Table of Contents Central Bank Holiday Schedules... 3 Memorandum... 3 ACH User Setup... 4 Methods of Creating your ACH... 6 Database Setup... 6 I. Creating & Editing
CoreFirst Bank & Trust
 CoreFirst Bank & Trust New Commercial Internet Banking Frequently Asked Questions ACCOUNT OVERVIEW 1. Q: Why are some of my account numbers highlighted and marked with an asterisk A: Highlighted account
Online Banking Commercial User s Guide UUX/Treasury Release 4.11
 Online Banking Commercial User s Guide UUX/Treasury Release 4.11 www.enterprisebank.com OVERVIEW In this user guide, we will cover the commercial online banking features. We will show how to manage users
Mobile Banking Frequently Asked Questions
 Mobile Banking Frequently Asked Questions What types of Mobile Banking does Midwest BankCentre offer? We offer three types of Mobile Banking: Mobile Apps allows you to easily connect to Midwest BankCentre
Business Manager ACH and Tax Payment Services Guide Peoples Bank Customer Support
 Peoples Bank Business Manager ACH and Tax Payment Services Guide Peoples Bank Customer Support 800.584.8859 Revised 10/2011 Table of Contents Secure Token Registration... 3 Company Administrator s Process...
First Mid Bank & Trust Commercial Online Banking User Guide
 Commercial Online Banking: Corporate First Mid Bank & Trust Commercial Online Banking User Guide Table of Contents Getting Started... 1 Before You Begin... 1 Installation... 2 Registration... 4 Commercial
First Financial Bank Transaction Management System User Guide
 First Financial Bank Transaction Management System User Guide Please note: The options available to you in the Transaction Management System (TMS) depend upon your product configuration. This modular approach
ACH NOW. Merchant USER GUIDE V
 ACH NOW Merchant USER GUIDE V3.0.0.15 Regal Technologies, LLC Postal Box 670 Severna Park, Maryland 21146-0670 USA Telephone (410) 975-0688 Toll Free (866) 766-1066 Fax (240) 331-9166 www.regaltek.com
SANTANDER TREASURY LINK USER GUIDE
 SANTANDER TREASURY LINK USER GUIDE Welcome to Santander Treasury Link Santander Treasury Link is a secure Web application that allows you to manage accounts, payments, transfers, reports, and users. This
Business Bill Pay User Guide
 Business Bill Pay User Guide Convenience doesn t just happen 9 to 5, it works overtime. Business Bill Pay is designed to help small businesses manage their bills and account information. This user guide
Vendor Inquiry and Reports Munis Version 11.2
 Objective This document gives you step by step instructions for using the Vendor Inquiry/Reports program to query the vendor master table for information regarding a specific vendor(s) and how to produce
P2P Instructions. 4. Select Person to Person
 P2P Instructions 1. To utilize P2P, you need to first be enrolled in digital banking. Sign up at www.ucbankmn.com or enroll directly through our mobile app. (To learn more about digital banking see https://www.ucbankmn.com/eservices/online-banking.)
Online Banking Quick Reference Guide
 Online Banking Quick Reference Guide Sign-On to Online Banking On the initial Sign-On page, sign on to online banking as follows: 1. Type your ID in the SIGN ON ID field. Note: If you cannot remember your
ESL ACH Origination User Guide
 accounts and make payments to your vendors. Refer to this User Guide for instructions on how to use this service. Creating a Template Managing Templates o Searching for a template o Filtering a template
JHA Payment Solutions. OneClick Funds Verification CSL. Client Training Guide. ipay Solutions. January 2017
 JHA Payment Solutions OneClick Product Training... 1 Optional Services and Features... 2 Enrollment Process... 2 Landing Page... 3 Messages... 4 IVR Number... 4 Attention Required... 4 Add a Payee...
Client Resource Guide. NACHA File Format FORMATTING GUIDE 8/31/17
 Client Resource Guide NACHA File Format FORMATTING GUIDE 8/31/17 ACH FILE STRUCTURE The ACH format is fixed length ASCII, record length 94, Block 10. The file layout is as follows: File Header Record Batch
ShelbyNext Financials: Accounts Payable Best Practices (Course #N210)
") ShelbyNext Financials: Accounts Payable Best Practices (Course #N210) Presented by: Carmen Dea, Shelby Consultant 2017 Shelby Systems, Inc. Other brand and product names are trademarks or registered trademarks
ShelbyNext Financials: Accounts Payable Best Practices (Course #N210) Presented by: Carmen Dea, Shelby Consultant 2017 Shelby Systems, Inc. Other brand and product names are trademarks or registered trademarks