Gigaset Router / en / A31008-E105-B / cover_front_router.fm / s Be inspired
|
|
|
- Godfrey Marshall Austin
- 5 years ago
- Views:
Transcription

1 s Be inspired
2 Table of Contents Table of Contents Safety precautions The Gigaset Router Features and Benefits Applications Trademarks Getting started System Requirements Package Contents Front Panel Rear Panel Connecting the System Overview of the Steps to Install a Network Connecting the Gigaset Router Configuring Client PCs TCP/IP Configuration Configuring the Gigaset Router Selecting the Language for the User Interface Navigating in the Web Browser Interface Making Configuration Changes Basic Setup Time Zone Broadband Type Advanced Setup System WAN LAN NAT Firewall Tools Configuring Client TCP/IP Installing TCP/IP Windows 95/98/ME Windows Setting up TCP/IP to Work with the Gigaset Router Windows 95/98/ME Windows Windows XP Configuring your Computer with Windows 95/98/ME Configuring your Computer in Windows Configuring your Computer with Windows XP
3 Table of Contents Configuring your Computer with Windows NT Manual IP Configuration Verifying your TCP/IP Connection Appendix Troubleshooting Specifications Service (Customer Care) Guarantee certificate (United Kingdom) Guarantee certificate (Ireland)
4 Safety precautions Safety precautions Only use the power adapter supplied for the Gigaset Router. Note the connection values when connecting the device to the mains. Protect the device from dampness. Never open the device. For electrical safety reasons it may only be opened by authorised service technicians. Make sure to include the operating instructions if you pass your Gigaset Router on someone else. Dispose of the Gigaset Router in an environmentally safe manner. The Gigaset Router Congratulations on your purchase of the Gigaset Router. Siemens is proud to provide you with a powerful yet simple communication device for connecting your local area network (LAN) to the Internet. For those who want to surf the Internet at the lowest possible cost, the Gigaset Router is the convenient, easy solution. The Gigaset Router provides Internet access to multiple users by sharing a single-user account (depending on your Internet Service Provider). The Gigaset Router features a WAN interface that allows you to connect either a DSL or cable modem. The Gigaset Router provides extensive firewall protection and Virtual Private Network (VPN) services. The Gigaset Router provides many cost-effective functions and management benefits. It is simple to configure and can be up and running in minutes. Features and Benefits Internet connection to DSL or cable modem via a 10/100 Mbps WAN port Local network connection via 10/100 Mbps Ethernet switch ports 3
5 The Gigaset Router DHCP for dynamic IP configuration, and DNS for domain name mapping Firewall with Stateful Packet Inspection, client privileges, hacker prevention, DoS, and NAT NAT also enables multi-user access with a single-user account, and virtual server functionality (providing protected access to Internet services such as web, mail, FTP, and Telnet) Virtual Private Network support using PPTP, L2TP, or IPSec pass-through User-definable application sensing tunnel supports applications requiring multiple connections Parental controls allow the user to bar certain web sites alerts when the user s network is being compromised Easy setup through a web browser on any operating system that supports TCP/IP Compatible with all popular Internet applications Applications Many advanced applications are provided by the Gigaset Router, such as: LAN Access The Gigaset Router provides connectivity to 10/100 Mbps devices, making it easy to create a network in small offices or homes. Internet Access This device supports Internet access through a DSL or cable connection. Since many DSL providers use PPPoE to establish communications with end users, the Gigaset Router includes a built-in client for this protocol, eliminating the need to install this service on your computer. Shared IP Address The Gigaset Router shares a single IP address with up to 253 users. Using only one ISP account, multiple users on your network can simultaneously browse the Internet. Virtual Server If you have a static IP address, you can set up the Gigaset Router to act as a virtual host for network address translation. Remote users access various services at your site using the static IP address. Then, depending on the requested service (or port number), the Gigaset Router routes the request to the appropriate server (at an internal network IP address). This secures your network from direct attack by hackers, and provides more flexible management by allowing you to change internal network IP addresses without affecting outside access to your network. 4
6 The Gigaset Router User-Definable Application Sensing Tunnel You may define special applications that require multiple connections such as Internet gaming, video conferencing, and Internet telephony. The Gigaset Router will then sense the application type and open a multi-port tunnel for it. DMZ Hosts Support Allows a networked computer to be fully exposed to the Internet. This function is used when the special application sensing tunnel feature is insufficient to allow an application to function correctly. Security The Gigaset Router supports security features that deny Internet access to specified users, or drop requests for specific services. The Gigaset Router s firewall also blocks common hacker attacks. Virtual Private Network The Gigaset Router supports three of the most commonly used VPN protocols PPTP, L2TP, and IPSec. These protocols allow remote users to establish a secure connection to their corporate network. If your service provider supports VPNs, then any of these protocols can be used to create an authenticated and encrypted tunnel for passing secure data over the Internet (i.e., a traditionally shared data network). The VPN protocols supported by the Gigaset Router are briefly described below. Point-to-Point Tunneling Protocol Provides a secure tunnel for remote client access to a PPTP security gateway. PPTP includes provisions for call origination and flow control required by ISPs. Layer Two Tunneling Protocol Includes most of the features provided by PPTP, but has less overhead and is more suited for managed networks. IP Security Provides IP network-layer encryption. IPSec can support large encryption networks (such as the Internet) by using digital certificates for device authentication. Trademarks All product and company names are trademarks or registered trademarks of their respective holders. 5
7 Getting started Getting started System Requirements You must meet the following minimum requirements: Computer with an Ethernet network card. Web browser, such as Microsoft Internet Explorer 5.5 or above, Netscape Communicator 6.0 or above for configuring your Gigaset Router. Cable/DSL modem and access data provided by your Internet Service Provider (ISP). Package Contents If any of the items are missing or damaged, contact your local Siemens distributor. Gigaset Router Power adapter One Ethernet cable (CAT-5) Installation CD including this User Guide Quick Installation Guide If possible, retain the carton and original packing materials in case there is a need to return the product. Before installing the Gigaset Router, verify that you have the items listed under "Package Contents". Also be sure that you have the necessary cabling. 6
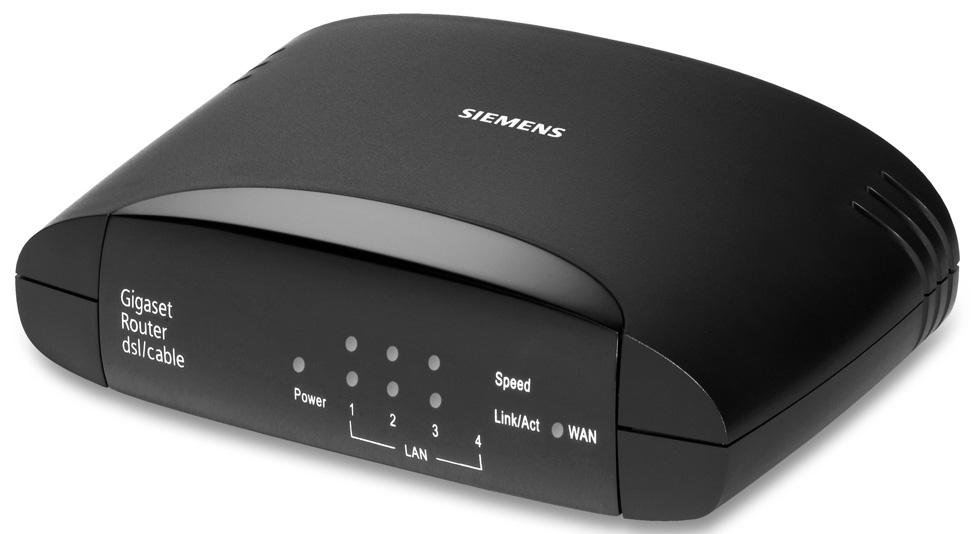
8 Getting started Front Panel LED Indicators The Gigaset Router includes LED indicators on the front panel that simplify installation and network troubleshooting. Check the power and port indicators as shown in the following table. LED Condition Status Power On The Gigaset Router is receiving power. (Green) WAN (Green) On The WAN port has established a valid network connection. Flashing The WAN port is transmitting or receiving traffic. Link/Act On The indicated LAN port has established a valid network connection. Flashing The indicated LAN port is transmitting or receiving traffic. Speed On The indicated LAN port is operating at 100 Mbps. Off The indicated LAN port is operating at 10 Mbps. 7
9 Getting started Rear Panel 6V 1A Reset WAN LAN 4 LAN 3 LAN 2 LAN 1 Item 6V 1A Reset WAN LAN Description Connect the included power adapter to this port. Warning: Using the wrong type of power adapter may cause damage. Use this button to reset the power or restore the default factory settings. Reboot by pushing 1 second. Return all settings to the factory defaults by pushing 5 seconds. WAN port (RJ-45). Connect a cable modem, DSL modem, or an Ethernet router to this port. Four 10/100 Mbps switch ports with automatic detection (RJ-45). Connect devices on your local area network to these ports (such as a PC, hub, or switch). 8
10 Getting started Connecting the System The Gigaset Router can be positioned at any convenient location in your office or home. No special wiring or cooling requirements are needed. You should, however comply with the following guidelines: Only operate the Gigaset Router in covered areas with a temperature range of +5 to +40 C. Keep the Gigaset Router away from any heating devices. A 220/230 V~ mains socket and a connection to the DSL modem, cable modem or LAN must be available at the installation site of the Gigaset Router. Stand the Gigaset Router on a non-slip mat or pad. The device feet generally do not mark any surfaces with which they come into contact. However, some furniture surfaces may contain substances that will attack and soften the devices s plastic feet. Device feet affected in this way may mark furniture surfaces. Carefully position the leads so no one can trip over them. Nothing should be placed on top of these leads. You should also remember to turn off the power, remove the power cord from the outlet, and keep your hands dry when handling the Gigaset Router. Overview of the Steps to Install a Network 1. Please have your Internet Service Provider access data on hand. 2. Install DSL or cable modem. Please refer to the User Guide of your modem for installation information. 3. Install Ethernet network card. Please refer to the User Guide of your product for installation information. 4. Connect the Gigaset Router. 5. Set up the network. 6. Configure the Gigaset Router. 7. Optionally: Connect and configure further PCs. The Gigaset Router installation (steps 4-6) will take about 10 to 15 minutes. 9
11 Getting started Connecting the Gigaset Router i Before you start to connect your Gigaset Router to PCs make sure that a wired network adapter is connected to the PC. Please refer to your product s User Guide for more information. 1. Connect the LAN: You can connect the Gigaset Router to your PC, or to a hub or switch. Connect an Ethernet cable from one of the LAN ports on the rear of the Gigaset Router (LAN 1 - LAN 4) to your computer s Ethernet network card. 2. Connect the WAN: Connect the WAN port at the rear of the Gigaset Router to your cable/dsl modem using an Ethernet cable. 3. Power on: Plug the power adapter cable into the socket on the Gigaset Router. Plug the other end of the power adapter cable into a power outlet. 3. 6V 1A Reset WAN LAN 4 LAN 3 LAN 2 LAN 1 2. Gigaset Router 1. Internet Access Device 10
12 Getting started Attach to your Network using Ethernet cabling The four LAN ports on the Gigaset Router can auto-negotiate the connection speed to 10 Mbps Ethernet or 100 Mbps Fast Ethernet, as well as the transmission mode to halfduplex or full-duplex. Use Ethernet cables to connect any of the four LAN ports on the Gigaset Router to an Ethernet adapter on your PC. Otherwise, you can cascade any of the LAN ports on the Gigaset Router to an Ethernet hub or switch, and then connect your PC or other network equipment to the hub or switch. When inserting an RJ-45 plug, be sure the tab on the plug clicks into position to ensure that it is properly seated.! Do not plug a phone jack connector into any RJ-45 port. This may damage the Gigaset Router. Instead, use only Ethernet cables with RJ-45 connectors. i Use 100-ohm shielded or unshielded Ethernet cable with RJ-45 connectors for all connections. Use Category 3, 4 or 5 for connections that operate at 10 Mbps, and Category 5 for connections that operate at 100 Mbps. Make sure each Ethernet cable does not exceed 100 meters (328 feet). Connect to the Internet If Internet services are provided through a DSL or cable modem, use unshielded or shielded Ethernet cable (Category 3 or higher) with RJ-45 plugs to connect the broadband modem directly to the WAN port on the Gigaset Router. Use either straightthrough or cross-over cable depending on the port type provided by the modem. i When connecting to the WAN port, use 100-Ohm Category 3, 4 or 5 shielded or unshielded Ethernet cable with RJ-45 connectors at both ends for all connections. Connecting the Power Adapter Plug the power adapter cable into the power socket on the Gigaset Router, and the other end into a power outlet. Check that the indicator marked (Power) on the front panel is on. If the power indicator does not light up, refer to "Troubleshooting" on page
13 Configuring Client PCs Configuring Client PCs TCP/IP Configuration To access the Internet through the Gigaset Router, you must configure the network settings of the computers on your LAN to use the same IP subnet as the Gigaset Router. The default network settings for the Gigaset Router are: IP Address: Subnet Mask: i These settings may be changed to suit your network requirements, but you must first configure at least one computer as described in the chapter "Configuring the Gigaset Router" to access the Gigaset Router s web configuration interface (see page 13). If you have not previously configured TCP/IP for your computer, refer to "Configuring Client TCP/IP" on page 47. All PCs connected to the Gigaset Router must be in the same IP subnet as the Gigaset Router. You can set the IP address for client PCs either by automatically obtaining an IP address from the Gigaset Router s DHCP service or by manual configuration. See "Setting up TCP/IP to Work with the Gigaset Router" on page

14 Configuring the Gigaset Router Configuring the Gigaset Router After you have configured TCP/IP on a client computer, use a web browser to configure the Gigaset Router. The Gigaset Router can be configured by any Java-supported browser including Internet Explorer 5.5 or above, or Netscape Navigator 6.0 or above. Using the web management interface, you may configure the Gigaset Router and view statistics to monitor network activity. To access the Gigaset Router s management interface, enter the IP address of the Gigaset Router in your web browser For some browsers, it may be necessary to include :80 after the IP address. For example: 13

15 Configuring the Gigaset Router Then click LOGIN (the default is no password). 14
16 Selecting the Language for the User Interface Configuring the Gigaset Router 1. If you want to display the user interface in German, French, Italian or Spanish, click on the flag of the desired country on the first page. A new window is displayed where you can select the language. 2. Insert the installation CD into your CD ROM drive. 3. Click Browse and select your language file. 4. Then click Refresh and in the following window click OK, to confirm your selection. 5. Refresh the web page. The user interface will now be displayed in the desired language. Navigating in the Web Browser Interface The Gigaset Router s management interface features a Basic Setup and an Advanced Setup section. Use Basic Setup if you want to quickly set up the Gigaset Router for use with a cable modem or DSL modem. Advanced Setup supports more advanced functions like hacker attack detection, IP and MAC address filtering, intrusion detection, virtual server setup, virtual DMZ hosts, as well as other advanced functions. Making Configuration Changes Configurable parameters have a dialog box or a drop-down list. Once a configuration change has been made on a page, be sure to click the APPLY or NEXT button at the bottom of the page to enable the new setting. i To ensure proper screen refresh after a command entry, make sure that Internet Explorer 5.0 is configured as follows: Under the menu Tools - Internet Options - General - Temporary Internet Files - Settings, the setting for Check for newer versions of stored pages should be Every visit to the page. 15
17 Configuring the Gigaset Router Basic Setup Time Zone Click on Basic Setup. The first item in the Basic Setup is the setting for Time Zone. For accurate timing of client filtering and log events, you also need to set the country. Select your country. Click NEXT. 16

18 Configuring the Gigaset Router Broadband Type Select the type of broadband connection you are using. 17

19 Configuring the Gigaset Router DSL Modem Fixed-IP xdsl Some DSL Internet Service Providers may assign a fixed (static) IP address for your gateway. If you have been provided with this information, choose this option and enter the assigned parameters. PPPoE DSL Enter the PPPoE user name and password assigned by your Service Provider. The service name is optional but may be required by some Service Providers. Leave the default values unless you have particular reason to change them. Enter a Maximum Idle Time to define a maximum period of time after which the Internet connection is closed down automatically if no data is transmitted. Deactivate the Auto-reconnect option, if you want to prevent programs, such as the Web browser, Messenger or , from automatically re-establishing a connection to the Internet. This will help you to save costs if you are not on a flat rate plan. Click FINISH to complete the setup. 18

20 Configuring the Gigaset Router PPTP Enter the parameters provided to you by your Internet Service Provider. Click NEXT. Click FINISH to complete the setup. 19

21 Configuring the Gigaset Router Cable Modem Your ISP may have given you a host name. If so, enter it in this field. Click FINISH to complete the setup. 20
22 Configuring the Gigaset Router Advanced Setup Use the Web user interface to define system parameters, manage and control the Gigaset Router and its ports, and to monitor network conditions. The following tables outline the selections available from this program. Navigation bar Home Status Basic Setup Advanced Setup Logout Menu System WAN LAN NAT Firewall Tools Description Goes to the start page. Provides WAN connection type and status, firmware and hardware version numbers, system IP settings, as well as DHCP, NAT, Firewall info. Displays the number of attached clients, the firmware versions, the physical MAC address for each media interface, and the hardware version and serial number. Shows the security and DHCP client log. Starts Basic Setup. Starts Advanced Setup. You can log off with this function. Description Sets the local time zone, the password for administrator access, and the IP address of a PC that will be allowed to manage the Gigaset Router remotely. Specifies the Internet connection type: (1) Dynamic IP, (2) PPPoE, (3) Static IP address, or (4) Bridge. Sets the TCP/IP configuration of the Gigaset Router s LAN interface and all DHCP clients. Shares a single ISP account with multiple users, sets up virtual servers. Configures a variety of security and specialized functions, including Access Control, Hacker Prevention and DMZ. Contains options to backup & restore the current configuration, restore all configuration settings to the factory defaults, update system firmware or reset the system. 21
23 Configuring the Gigaset Router System Time Zone Sets the country for the Gigaset Router. The information about the country is necessary for the timing of log entries and client access control. 22
24 Configuring the Gigaset Router Password Settings Use this menu to restrict access based on a password. The default is no password. For security reasons you should assign one before using the Gigaset Router to access the Internet. Passwords can contain from 3 12 alphanumeric characters and are not case sensitive. i If your password is lost, or you cannot gain access to the user interface, press the Reset button on the rear panel (holding it down for at least five seconds) to restore the factory defaults (default is no password). Warning: The reset will set all data to the factory defaults. 23
25 Configuring the Gigaset Router Remote Management Allows a remote PC to configure, manage, and monitor the Gigaset Router using a standard web browser. i You must know the current IP address, which is assigned by your Internet Service Provider to allow remote management. If you specify an IP address of , any host can manage the Gigaset Router. Check Enabled and enter the IP address of the remote host. Click APPLY. 24
26 Configuring the Gigaset Router WAN Specify the WAN connection type provided by your Internet Service Provider, then click More Configuration to enter detailed configuration parameters for the selected connection type. Dynamic IP The host name is optional, but may be required by some ISPs. The default MAC address is set to the WAN s physical interface on the Gigaset Router. Use this address when registering for Internet service, and do not change it unless required by your ISP. If your ISP used the MAC address of an Ethernet card as an identifier when first setting up your broadband account, connect only the PC with the registered MAC address to the Gigaset Router and click the Clone MAC Address button. This will replace the current Gigaset Router MAC address with the already registered Ethernet card MAC address. If you are unsure of which PC was originally set up by the broadband technician, call your ISP and request they register a new MAC address for your account. Register using the default Gigaset Router MAC address. 25
27 Configuring the Gigaset Router PPPoE DSL Enter the PPPoE user name and password assigned by your Service Provider. The Service Name is normally optional, but may be required by some service providers. Leave the default values unless you have a particular reason to change them. Enter a maximum idle time, after which the Internet connection is dropped when no data is transmitted. Deactivate the Auto-reconnect option if you want to prevent programs, such as the Web browser, Messenger or , from automatically re-establishing a connection to the Internet This will help you to save costs if you are not on a flat rate plan. 26

28 Configuring the Gigaset Router PPTP Point-to-Point Tunneling Protocol (PPTP) allows secure remote access over the Internet by simply dialing into a local point provided by an ISP. Using the above screen allows client PCs to establish a normal PPTP session and provides hassle-free configuration of the PPTP client on each client PC. 27
29 Configuring the Gigaset Router Static IP Address If your Internet Service Provider has assigned a fixed IP address, enter the assigned address and subnet mask for the Gigaset Router, then enter the gateway address of your ISP. You may need a fixed address if you want to provide Internet services, such as a web server, or FTP server. 28
30 Configuring the Gigaset Router DNS Domain Name Servers map numerical IP addresses to the equivalent domain name (e.g., Your ISP should provide the IP address of one or more domain name servers. Enter those addresses on this screen. 29
31 Configuring the Gigaset Router LAN LAN IP Use the LAN menu to configure the LAN IP address for the Gigaset Router and to enable the DHCP server for dynamic client address allocation. Set the Lease Time. The Lease Time describes the time period in which your computer will keep the assigned IP address unchanged. For home networks this may be set to Forever, which means there is no time limit on the IP address lease. IP Address Pool A dynamic IP start address may be specified by the user, e.g (default value). Once this start IP address has been assigned, IP addresses running from to will be part of the dynamic IP address pool. IP addresses from to , and to will be available as static IP addresses. Remember not to include the address of the Gigaset Router in the client address pool. Also remember to configure your client PCs for dynamic IP address allocation. 30
32 Configuring the Gigaset Router NAT Address Mapping Allows one or more public IP addresses to be shared by multiple internal users. Enter the Public IP address you wish to share in the Global IP field. In the line below this enter a range of internal IPs that will share the global IP from. i The address mapping feature makes sense only if the Gigaset Router gets one or more static IP addresses from the Internet Service Provider. 31
33 Configuring the Gigaset Router Virtual Server If you configure the Gigaset Router as a virtual server, remote users accessing services such as web or FTP at your local site via public IP addresses can be automatically redirected to local servers configured with private IP addresses. In other words, depending on the requested service (TCP/UDP port number), the Gigaset Router redirects the external service request to the appropriate internal server and port. The WAN interface must have a fixed IP address to properly utilize this function. For example, if you set Type/Public Port to TCP/80 (HTTP or web) and the Private IP/Port to /8080, then all HTTP requests from outside users will be transferred to port 8080 on Therefore, by just entering the IP Address provided by the ISP, Internet users can access the service you provide at the internal address and port to which the Gigaset Router redirects them. Some of the more common TCP service ports include: HTTP: 80, FTP: 21, Telnet: 23 and POP3:
34 Configuring the Gigaset Router Enabling Special Applications Some applications, such as Internet gaming, videoconferencing, Internet telephony and others, require multiple connections. These applications cannot work with Network Address Translation (NAT) enabled. If you need to run applications that require multiple connections, use the following screen to specify the additional public ports to be opened for each application. Specify the port normally associated with an application in the Trigger Port field, select the protocol type as TCP or UDP, then enter the public ports associated with the trigger port to open them for inbound traffic. 33

35 Configuring the Gigaset Router Firewall The firewall does not significantly affect system performance, so we advise enabling it to protect your network users. Only if your firewall is disabled, select Enable and click the APPLY button to open the Firewall submenus. The Gigaset Router s firewall provides the following functions: Access control for the connected PCs URL Blocking Ping lock Filtering by schedule Filtering packets (TCP, FTP, H.323, TFTP) Alert notification by DMZ (Demilitarized Zone). i When you select the Enable radio button of the Enable or disable Firewall module function field, be sure to press the APPLY button. Otherwise the settings will not be applied. Access Control 34

36 Configuring the Gigaset Router Using this option allows you to specify different privileges for the client PCs. The following items are included in the Access Control screen: Normal Filtering Table MAC Filtering Table Remote Management Displays the IP address and filtering status of the connected client PC Displays the MAC address of the client PC Allows you to set the IP address of an administrator for remote management Click on Add PC and define the appropriate settings for client PC services (as shown in the following screen). 35
37 Configuring the Gigaset Router URL Blocking Use the above screen to block access to the Web sites specified in the table. 36
38 Configuring the Gigaset Router Schedule Rule You can filter Internet access for local clients based on the Rule Name, and time of day. 1. Click on Add Schedule Rule. 2. Define the appropriate settings for a schedule rule (as shown in the following screen). 37
39 Configuring the Gigaset Router 3. Click OK and then the APPLY button to save your settings (as shown on previous page). 38

40 Configuring the Gigaset Router Intrusion Detection The Intrusion Detection feature of the Gigaset Router limits the access of incoming traffic from the WAN port. When the SPI feature is turned on, all incoming packets will be blocked unless certain types of traffic are checked by the users. When the user checks certain types of traffic, only that particular type of traffic initiated from the Internal LAN will be allowed. For example, if the user only checks FTP service from the Stateful Packet Inspection, all incoming traffic will be blocked except the FTP connections initiated from the local LAN. Stateful Packet Inspection This option allows you to select different application types that are using dynamic port numbers. If you need to use the Stateful Packet Inspection (SPI) for blocking packets, check the radio button in the Enable SPI and Anti-DoS firewall protection field and then check the inspection type that you need, such as Packet Fragmentation, TCP Connection, UDP Session, FTP service, H.323 Service and TFTP Service. 39
41 Configuring the Gigaset Router Hacker Prevention Feature The Gigaset Router firewall inspects packets at the application layer, and maintains TCP and UDP session information, including timeouts and number of active sessions, providing the ability to detect and prevent certain types of network attacks. Note: The firewall does not significantly affect system performance, so we advise enabling the prevention features to protect your network users. When hackers attempt to enter your network, we can alert you by Enter your address via which the Gigaset Router can alert you in case of hacker access. Specify your servers and address of SMTP server. 40

42 Configuring the Gigaset Router DMZ (Demilitarized Zone) If you have a client PC that cannot run an Internet application properly from behind the firewall, then you can open the client up to unrestricted two-way Internet access. Enter the IP address of a DMZ host to this screen. Adding a client to the DMZ (Demilitarized Zone) may expose your local network to a variety of security risks, so only use this option as a last resort. 41
43 Configuring the Gigaset Router Tools Use the Tools menu to back up the current configuration, restore a previously saved configuration, restore factory settings, update firmware and reset the Gigaset Router. Configuration Tools Choose a function and click APPLY. Backup allows you to save the Gigaset Router s configuration to a file. You can then check Restore to restore the saved backup configuration file. Restore to factory defaults resets the Gigaset Router to the original settings. 42
44 Configuring the Gigaset Router Firmware Upgrade This tool permits easy downloading of the latest firmware to the router. Download the upgrade file from the Siemens website ( and save it to your hard drive. Browse for the file and then click APPLY. Check the Status page Information section to confirm that the upgrade process was successful. 43
45 Configuring the Gigaset Router Reset Click APPLY to reset the Gigaset Router. The reset will be complete when the power LED stops blinking. i If you use the Reset button on the rear panel, the Gigaset Router performs a power reset. If the button is held depressed for over 5 seconds, all the LEDs will illuminate and the factory settings will be restored. Warning: The reset will set all data to the factory defaults. 44
46 Configuring the Gigaset Router Status The Status screen displays WAN/LAN connection status, firmware, and hardware version numbers, illegal attempts to access your network, as well as information on DHCP clients connected to your network. The following items are included on this screen: Disconnect Connect Disconnects an existing connection to the WAN. Establishes a connection to the WAN. 45
47 Configuring the Gigaset Router INTERNET GATEWAY INFORMATION Security Log Save Clear Refresh DHCP Client Log Displays WAN connection type and status. Displays system IP settings, as well as DHCP and Firewall status. Displays the number of attached clients, the firmware versions, the physical MAC address for each media interface, as well as the hardware version and serial number. Displays illegal attempts to access your network. Click on this button to save a security log file. Click on this button to delete the access log. Click on this button to refresh the screen. Displays information on all DHCP clients on your network. 46

48 Configuring Client TCP/IP Configuring Client TCP/IP If you have not previously installed the TCP/IP protocols on your client PCs, refer to the following section. If you need information on how to configure a TCP/IP address on a PC, refer to "Setting up TCP/IP to Work with the Gigaset Router" on page 50. Please note that the screenshots here may not exactly match your system. Installing TCP/IP Windows 95/98/ME 1. Click Start - Settings - Control Panel. 2. Double-click the Network icon and select the Configuration tab in the Network window. 3. Click the Add button. 4. Double-click Protocol. 47

49 Configuring Client TCP/IP 5. Select Microsoft in the manufacturers list. Select TCP/IP in the Network Protocols list. Click the OK button to return to the Network window. 6. The TCP/IP protocol will be listed in the Network window. Click OK to complete the installation procedure and restart your PC to enable the TCP/IP protocols. The operating system may prompt you to restart your system. Click Yes and the computer will shut down and restart. 48


50 Configuring Client TCP/IP Windows Click the Start button and choose Settings, then click Control Panel. 2. Double click the Network and Dial-up Connections icon, then Local Area Connection icon, and press the Properties button in the General tab. 3. Click the Install button to add the network component to your PC. 4. Double click on Protocol to add the TCP/IP protocol. 5. Choose Internet Protocol (TCP/IP) in the Network Protocol list. Click the OK button to return to the Network window. 6. The TCP/IP protocol will be listed in the Network window. Click OK to complete the install procedure. 49

51 Configuring Client TCP/IP Setting up TCP/IP to Work with the Gigaset Router Windows 95/98/ME 1. Click Start - Settings - Control Panel. 2. Double-click the Network icon. Select the TCP/IP line that has been assigned to your network card on the Configuration tab of the Network window. 3. Choose the wireless network adapter. 4. Click the Properties button. 5. You may dynamically assign TCP/IP address settings to a client, or you can manually configure a client with address settings to meet your specific network requirements. (Note that the default IP address of the Gigaset Router is ) 50
52 Configuring Client TCP/IP Windows Click the Start button and choose Settings, then click Control Panel. 2. Double click the Network and Dial-up Connections icon, then Local Area Connection icon, and press the Properties button in the General tab. 3. Select the TCP/IP protocol in the Local Area Connection Properties window. 4. Click the Properties button to set the TCP/IP protocol for the Gigaset Router. 5. You can dynamically assign TCP/IP address settings to a client, or you can manually configure a client with address settings to meet your specific network requirements. (Note that the default IP address of the Gigaset Router is ) 51
53 Configuring Client TCP/IP Windows XP 1. Click the start button and choose Control Panel. 2. Select the Network and Internet Connections icon, then click the Network Connections icon. 3. Then double-click on the LAN connection with which you are connected to the router. 4. Click the Properties button in the General tab. 5. Select Internet Protocol (TCP/IP) in the Local Area Connection Properties window. 6. Click the Properties button to set the TCP/IP protocol for the Gigaset Router. 7. You can dynamically assign TCP/IP address settings to a client, or you can manually configure a client with address settings to meet your specific network requirements. (Note that the default IP address of the Gigaset Router is ) 52

54 Configuring your Computer with Windows 95/98/ME Configuring Client TCP/IP You may find that the instructions here do not exactly match your version of Windows. This is because these steps and screenshots were created in Windows 98. Windows 95 and Windows Millennium Edition are very similar, but not identical, to Windows 98. Step 1. Configure TCP/IP Settings After you have completed the hardware setup by connecting your devices, you need to configure the computer to connect to the Gigaset Router. You need to determine how your ISP issues your IP address. Many ISPs issue these numbers automatically using a networking technology known as Dynamic Host Control Protocol, or DHCP. Other ISPs will specify your IP address and associated numbers, which you must enter manually. This is also known as a static IP address. How your ISP assigns your IP address determines how you will configure your computer. 1. From the Windows desktop, click Start - Settings - Control Panel. 2. Double-click the Network icon. 53

55 Configuring Client TCP/IP 3. On the Network window Configuration tab, double-click the TCP/IP entry for your network card. 54
56 Configuring Client TCP/IP 4. Click the IP Address tab. If Obtain an IP address automatically is already checked, your computer is already configured for DHCP. Click Cancel to close each window, and skip to "Step 2. Disable HTTP Proxy" on page Make a note of the current IP Address and Subnet Mask. 55
57 Configuring Client TCP/IP 6. Click the Gateway tab and record the numbers listed under Installed gateways. 7. Click the DNS Configuration tab. Record the DNS servers listed under DNS Server Search Order. 56

58 Configuring Client TCP/IP 8. Click the IP Address tab and then check Obtain an IP address automatically. Click OK. 9. Windows may need your Windows 95/98/ME CD to copy some files. After it finishes copying, it will then prompt you to restart your system. Click Yes and the computer will shut down and restart. Step 2. Disable HTTP Proxy You will need to verify that the "HTTP Proxy" feature of your web browser is disabled. This is so that your web browser will be able to view the configuration pages inside your Gigaset Router. The following steps are for Internet Explorer and for Netscape. Determine which browser you use and follow the appropriate steps. 57
59 Configuring Client TCP/IP Internet Explorer: 1. Open Internet Explorer. Click Tools - Internet Options. 2. In the Internet Options window, click the Connections tab. Click the LAN Settings button. 3. Clear all the check boxes and click OK. Click OK again to close the Internet Options window. 58


60 Configuring Client TCP/IP Netscape: 1. Open Netscape. Click Edit, then click Preferences. 2. In the Preferences window, under Category, double-click Advanced, then click Proxies. Check Direct connection to the Internet. Click OK. 3. Repeat these steps for each Windows 95/98/ME computer connected to your Gigaset Router. Step 3. Obtain IP Settings from your Gigaset Router Now that you have configured your computer to connect to your Gigaset Router, it needs to obtain new network settings. By releasing old IP settings and renewing them with settings from your Gigaset Router, you will also verify that you have configured your computer correctly. 1. Click Start - Run. 2. Type WINIPCFG and click OK. It may take a minute or two for the IP Configuration window to appear. 3. From the dropdown menu, select your network card. Click Release and then Renew. Verify that your IP address is now x (where x means 2-254), your Subnet Mask is and your Default Gateway is These values confirm that your Gigaset Router is functioning. Click OK to close the IP Configuration window. 59

61 Configuring Client TCP/IP Configuring your Computer in Windows 2000 Step 1. Configure TCP/IP Settings After you have completed the hardware setup, you need to configure your computer to connect to the Gigaset Router. You also need to determine how your ISP issues your IP address. Many ISPs issue these addresses automatically, using a networking technology known as Dynamic Host Configuration Protocol, or DHCP. Other ISPs will specify your IP address and associated numbers, which you must enter manually. This is also known as a static IP address. How your ISP assigns your IP address determines how you will configure your computer. 1. From the Windows desktop, click Start - Settings - Control Panel. 2. Double-click the Network and Dial-up Connections icon. 60


62 Configuring Client TCP/IP 3. Double-click the icon that corresponds to the connection to your Gigaset Router. 4. Click Properties. 61

63 Configuring Client TCP/IP 5. Double-click Internet Protocol (TCP/IP). 62

64 Configuring Client TCP/IP 6. All the information that you need to record is on the Internet Protocol (TCP/IP) Properties screen. If Obtain an IP address automatically and Obtain DNS server address automatically are already checked, your computer is already configured for DHCP. Click Cancel to close each window, and skip to "Step 2. Disable HTTP Proxy" on page Check Obtain an IP address automatically and Obtain DNS server address automatically. Click OK. Click OK or Close to close each window. Step 2. Disable HTTP Proxy You will need to verify that the "HTTP Proxy" feature of your web browser is disabled. This is so that your web browser will be able to view the configuration pages inside the Gigaset Router. The following steps are for Internet Explorer and for Netscape. Determine which browser you use and follow the appropriate steps. 63
65 Configuring Client TCP/IP Internet Explorer: 1. Open Internet Explorer. Click Tools - Internet Options. 2. In the Internet Options window, click the Connections tab. Next, click the LAN Settings button. 3. Clear all the checkboxes. 4. Click OK, and then click OK again to close the Internet Options window. 64
66 Configuring Client TCP/IP Netscape: 1. Open Netscape. Click Edit, then click Preferences. 2. In the Preferences window, under Category, double-click Advanced, then click Proxies. Select Direct connection to the Internet. Click OK. Step 3. Obtain IP Settings From Your Gigaset Router Now that you have configured your computer to connect to your Gigaset Router, it needs to obtain new network settings. By releasing old IP settings and renewing them with settings from your Gigaset Router, you will also verify that you have configured your computer correctly. 1. From the Windows desktop, click Start - Programs - Accessories - Command Prompt. 2. In the Command Prompt window, type IPCONFIG /RELEASE and press the ENTER key. 65
67 Configuring Client TCP/IP 3. Type IPCONFIG /RENEW and press the ENTER key. Verify that your IP address is now x (where x means 2-254), your Subnet Mask is and your Default Gateway is These values confirm that your Gigaset Router is functioning. 4. Type EXIT and press the ENTER key. 66

68 Configuring Client TCP/IP Configuring your Computer with Windows XP Step 1. Configure TCP/IP Settings After you have completed the hardware setup, you need to configure your computer to connect to your Gigaset Router. You also need to determine how your ISP issues your IP address. Many ISPs issue these numbers automatically, using a networking technology known as Dynamic Host Configuration Protocol, or DHCP. Other ISPs will specify your IP address and associated numbers, which you must enter manually. This is also known as a static IP address. How your ISP assigns your IP address determines how you will configure your computer. 1. From the Windows desktop, click the start button. Choose Control Panel. 2. Select the Network and Internet Connections icon, then click the Network Connections icon. 67

69 Configuring Client TCP/IP 3. Double click on the LAN connection with which you are connected to the router. 68


70 Configuring Client TCP/IP 4. Click Properties. 5. Double-click Internet Protocol (TCP/IP). 69

71 Configuring Client TCP/IP 6. All the information that you need to record is on the Internet Protocol (TCP/IP) Properties dialog box. If Obtain an IP address automatically and Obtain DNS server address automatically are already selected, your computer is already configured for DHCP. Click Cancel to close each window, and skip to "Step 2. Disable HTTP Proxy" on page Select Obtain an IP address automatically and then Obtain DNS server address automatically. Then click OK. Click OK or Close to close each window. Step 2. Disable HTTP Proxy You will need to verify that the "HTTP Proxy" feature of your Web browser is disabled. This is so that your Web browser will be able to view the configuration pages inside your Gigaset Router. The following steps are for Internet Explorer and for Netscape. Determine which browser you use and follow the appropriate steps. 70


72 Configuring Client TCP/IP Internet Explorer: 1. Open Internet Explorer and click the Stop button. Click Tools, then Internet Options. 2. In the Internet Options window click the Connections tab. Next, click the LAN Settings button. 3. Clear all the checkboxes. 4. Click OK, and then click OK again to close the Internet Options window. 71
73 Configuring Client TCP/IP Step 3. Obtain IP Settings from your Gigaset Router Now that you have configured your computer to connect to your Gigaset Router, it needs to obtain new network settings. By releasing any old IP settings and renewing them with settings from your Gigaset Router, you will also verify that you have configured your computer correctly. 1. From the Windows desktop, click the Start button, then Programs, then Accessories, and then click Command Prompt. 2. In the Command Prompt window, type IPCONFIG /RELEASE and press the ENTER key. 72

74 Configuring Client TCP/IP 3. Type IPCONFIG /RENEW and press the ENTER key. Verify that your IP address is now x (where x means 2-254), your Subnet Mask is and your Default Gateway is These values confirm that your Gigaset Router is functioning. 4. Type EXIT and press ENTER to close the Command Prompt window. 73

75 Configuring Client TCP/IP Configuring your Computer with Windows NT 4.0 Step 1. Configure TCP/IP Settings After you have completed the hardware setup, you need to configure your computer to connect to your Gigaset Router. You need to determine how your ISP issues your IP address. Many ISPs issue these numbers automatically using a networking technology known as Dynamic Host Configuration Protocol, or DHCP. Other ISPs will specify your IP address and associated numbers, which you must enter manually. This is known as a static or fixed IP address. How your ISP assigns your IP address determines how you will configure your computer. 1. From the Windows desktop click Start - Settings - Control Panel. 2. Double-click the Network icon. 74

76 Configuring Client TCP/IP 3. Click on the Protocols tab. 4. Double-click TCP/IP Protocol. 5. Click on the IP Address tab. 75

77 Configuring Client TCP/IP 6. In the Adapter dropdown list, be sure your Ethernet adapter is selected. 7. If Obtain an IP address automatically is already checked, your computer is already configured for DHCP. Click Cancel to close each window, and skip to "Step 2. Disable HTTP Proxy" on page 77. In the TCP/IP Properties dialog box, click the IP address tab to locate your IP Address, Subnet Mask and Default Gateway. Record these values. 76

78 Configuring Client TCP/IP 8. Click the DNS tab to see the primary and secondary DNS servers. Record these values. 9. After writing down your IP settings, click the IP address tab. Check Obtain an IP address automatically and click OK. Click OK again to close the Network window. 10. Windows may copy files and will then prompt you to restart your system. Click Yes and your computer will shut down and restart. Step 2. Disable HTTP Proxy You will need to verify that the "HTTP Proxy" feature of your web browser is disabled. This is so that your web browser will be able to view the Gigaset Router configuration pages. The following steps are for Internet Explorer and for Netscape. Determine which browser you use and follow the appropriate steps. 77


79 Configuring Client TCP/IP Internet Explorer: 1. Open Internet Explorer. Click Tools - Internet Options. 2. In the Internet Options window, click the Connections tab. Next, click LAN Settings. 3. Clear all the checkboxes. 4. Click OK, and then click OK again to close the Internet Options window. 78
80 Configuring Client TCP/IP Netscape: 1. Open Netscape. Click Edit, then click Preferences. 2. In the Preferences window, under Category double-click Advanced, then click Proxies. Check Direct connection to the Internet. Click OK. Step 3. Obtain IP Settings from your Gigaset Router Now that you have configured your computer to connect to your Gigaset Router, it needs to obtain new network settings. By releasing old IP settings and renewing them with settings from the Gigaset Router, you will also verify that you have configured your computer correctly. 1. On the Windows desktop, click Start - Programs - Command Prompt. 2. In the Command Prompt window, type IPCONFIG /RELEASE and press the ENTER key. 79
81 Configuring Client TCP/IP 3. Type IPCONFIG /RENEW and press the ENTER key. Verify that your IP address is now x (where x means 2-254), your Subnet Mask is and your Default Gateway is These values confirm that the Gigaset Router is functioning. 4. Type EXIT and press ENTER to close the Command Prompt window. 80
, and use 255.255.255.0 for the subnet mask.")


82 Configuring Client TCP/IP Manual IP Configuration 1. Check Specify an IP address on the IP Address tab. Enter an IP address based on the default network x (where x is between 2 and 254), and use for the subnet mask. 2. On the Gateway tab, add the IP address of the Gigaset Router (default: ) in the New gateway field and click Add. 3. On the DNS Configuration tab, add the IP address for the Gigaset Router and click Add. This automatically relays DNS requests to the DNS server(s) provided by your ISP. Otherwise, add specific DNS servers in the DNS Server Search Order field and click Add. 4. After finishing TCP/IP setup, click OK, and then reboot the computer. After that, set up other PCs on the LAN according to the procedures described above. 81
83 Configuring Client TCP/IP Verifying your TCP/IP Connection After installing the TCP/IP communication protocols and configuring an IP address in the same network as the Gigaset Router, use the Ping command to check if your computer has successfully connected to the Gigaset Router. The following example shows how the Ping procedure can be executed in an MS-DOS window. From the Windows desktop, click Start - Programs - Accessories - Command Prompt. In the Command Prompt window, type the Ping command: ping If a message similar to the following appears: Pinging with 32 bytes of data: Reply from : bytes=32 time=2ms TTL=64 a communication link between your computer and the Gigaset Router has been successfully established. If you get the following message, Pinging with 32 bytes of data: Request timed out. there may be something wrong in your installation procedure. Check the following items in sequence: 1. Is the Ethernet cable correctly connected between the Gigaset Router and the computer? The LAN LED on the Gigaset Router and the Link LED of the network card on your computer must be on. 2. Is TCP/IP properly configured on your computer? If the IP address of the Gigaset Router is , the IP address of your PC must be from and the default gateway must be If you can successfully Ping the Gigaset Router you are now ready to connect to the Internet! 82
84 Appendix Appendix Troubleshooting This chapter describes common problems you may encounter and possible solutions to them. The Gigaset Router can be easily monitored through panel indicators to identify problems. If you cannot resolve any connection problems after checking the indicators, then refer to the other sections in the following table. Symptom Action Power LED is OFF Power adapter has failed or is disconnected. Check that the power adapter is connected to the Gigaset Router and to an outlet. If the power indicator does not light when the power cord is plugged in, you may have a problem with the power outlet, power cord or power adapter. If the unit powers off after running for a while, check for loose power connections, power losses or surges at the power outlet. If you cannot isolate the problem, then the power adapter may be defective. In this case, contact the Service for assistance (see page 87). LINK/Act LED is OFF Verify that the Gigaset Router and attached device are powered up. Make sure the cable is plugged into both the Gigaset Router and the corresponding device. Verify that the proper cable type is used and that its length does not exceed the specified limits. Make sure that the network interface on the attached device is configured for the proper communication speed and duplex mode. Check the adapter on the attached device and cable connections for possible defects. Replace any defective adapter or cable if necessary. 83
85 Appendix Symptom Action Cannot Ping the Gigaset Router from the attached LAN, or the Gigaset Router cannot Ping any device on the attached LAN Verify that the IP addresses are properly configured. For most applications, you should use the Gigaset Router s DHCP function to dynamically assign IP addresses to clients on the LAN. However, if you manually configure IP addresses on the LAN, verify that the same network address (network component of the IP address) and subnet mask are used for both the Gigaset Router and the LAN devices. Make sure the device you want to Ping (and the device from which you are Pinging) have been configured for TCP/IP. Cannot connect using the web browser Be sure to have configured the Gigaset Router with a valid IP address, subnet mask and default gateway. Check that you have a valid network connection to the Gigaset Router and that the port you are using has not been disabled. Check the network cabling between the management station and the Gigaset Router. Forgot or lost the password Press the Reset button on the rear panel (holding it down for at least five seconds) to restore the factory defaults. Warning: This operation will reset all data to the factory defaults. 84
86 Appendix Specifications Standards IEEE Base-T Ethernet IEEE 802.3u 100Base-TX FastEthernet IEEE b WAN Interface 10Base-T RJ-45 port LAN Interfaces 10Base-T/100Base-TX 4 RJ-45 ports LAN data transfer rate is up to 10/20 Mbps (10Base-T half/full duplex) or 100/200Mbps (100Base-TX with half/full duplex) Management Browser-based management Both DHCP Server and Client provided Advanced Features Dynamic IP Address Configuration DHCP, DNS Firewall Client privileges, hacker prevention, logging Virtual Server via NAT & NAPT Virtual Private Network PPTP, L2TP, IPSec passthrough Instrusion Detection, Alerting, Parental Control Indicator Panel LAN (Link, Activity), WAN (Link, Activity), Power Dimensions 143 mm x 90 mm x 38,5 mm Weight 200 g Input Power 6 V 1A Maximum Current 0.04 A RMS max. at 110V/240 V Power Consumption 5 Watts max. at VAC Internet Standards RFC 826 ARP, RFC 791 IP, RFC 792 ICMP, RFC 768 UDP, RFC 793 TCP, RFC TELNET, RFC 1321 MD5, RFC 1497 BOOTP Extension, RFC 1570 PPP LCP Extension, RFC 1631 NAT, RFC1661 PPP, RFC 1700 Assigned Numbers, RFC 1866 HTML, RFC 1945 HTTP, RFC 1994 CHAP, RFC 2131 DHCP, RFC 2637 PPTP Temperature Operating 5 to 40 C Storage -40 to 70 C Humidity 5 % to 95 % (non-condensing) Safety EN60950 Compliances Immunity: EN /3, EN /3/4/5/6/8/11 85

87 Appendix Particular conditions applying to your country have been taken into account. The device s compliance with the essential requirements of the R&TTE directive is confirmed by the CE symbol. Extract from the original declaration "Hereby Siemens AG declares that the above mentioned product is in compliance with the essential requirements and other relevant provisions of the Directive 1999/5/EC" The Declaration of Conformity (DoC) has been signed. If required, a copy of the original DoC can be obtained through the company hotline. 86
RX3041. User's Manual
 RX3041 User's Manual Table of Contents 1 Introduction... 2 1.1 Features and Benefits... 3 1.2 Package Contents... 3 1.3 Finding Your Way Around... 4 1.4 System Requirements... 6 1.5 Installation Instruction...
DSL/CABLE ROUTER with PRINT SERVER
 USER S MANUAL DSL/CABLE ROUTER with PRINT SERVER MODEL No:SP888BP http://www.micronet.info 1 Content Table CHAPTER 0:INTRODUCTION... 4 FEATURES... 4 MINIMUM REQUIREMENTS... 4 PACKAGE CONTENT... 4 GET TO
Broadband Router DC-202. User's Guide
 Broadband Router DC-202 User's Guide Table of Contents CHAPTER 1 INTRODUCTION... 1 Broadband Router Features... 1 Package Contents... 3 Physical Details...3 CHAPTER 2 INSTALLATION... 5 Requirements...
CHAPTER 7 ADVANCED ADMINISTRATION PC
 ii Table of Contents CHAPTER 1 INTRODUCTION... 1 Broadband ADSL Router Features... 1 Package Contents... 3 Physical Details... 4 CHAPTER 2 INSTALLATION... 6 Requirements... 6 Procedure... 6 CHAPTER 3 SETUP...
Broadband Router User s Manual. Broadband Router User s Manual
 Broadband Router User s Manual Table of Contents 1 Introduction... 1 1.1 Features... 1 1.2 Package Contents... 2 1.3 LEDs & Connectors of Broadband Router... 2 1.4 System Requirements... 2 1.5 Installation
4-Port Cable/DSL Router DX-E401. Product Name [French] Product Name [Spanish] USER GUIDE GUIDE DE L UTILISATEUR GUÍA DEL USUARIO
![4-Port Cable/DSL Router DX-E401. Product Name [French] Product Name [Spanish] USER GUIDE GUIDE DE L UTILISATEUR GUÍA DEL USUARIO](/thumbs/73/68868635.jpg "4-Port Cable/DSL Router DX-E401. Product Name [French] Product Name [Spanish] USER GUIDE GUIDE DE L UTILISATEUR GUÍA DEL USUARIO") 4-Port Cable/DSL Router Product Name [French] Product Name [Spanish] DX-E401 USER GUIDE GUIDE DE L UTILISATEUR GUÍA DEL USUARIO 2 Introduction Dynex 4-Port Cable/DSL Router Introduction This router enables
4-Port Cable/DSL Router Product Name [French] Product Name [Spanish] DX-E401 USER GUIDE GUIDE DE L UTILISATEUR GUÍA DEL USUARIO 2 Introduction Dynex 4-Port Cable/DSL Router Introduction This router enables
High Speed. Internet BroadBand Router. User Guide
 High Speed Internet BroadBand Router User Guide FCC Warning This equipment has been tested and found to comply with the regulations for a Class B digital device, pursuant to Part 15 of the FCC Rules. These
VG422R. User s Manual. Rev , 5
 VG422R User s Manual Rev 1.0 2003, 5 CONGRATULATIONS ON YOUR PURCHASE OF VG422R... 1 THIS PACKAGE CONTAINS... 1 CONFIRM THAT YOU MEET INSTALLATION REQUIREMENTS... 1 1. INSTALLATION GUIDE... 2 1.1. HARDWARE
4-Port Broadband user manual Model
 4-Port Broadband Router user manual Model 524537 INT-524537-UM-0309-02 introduction Thank you for purchasing the INTELLINET NETWORK SOLUTIONS 4-Port Broadband Router, Model 524537. Combining a router,
LKR Port Broadband Router. User's Manual. Revision C
 LKR-604 4-Port Broadband Router User's Manual Revision C 1 Contents 1 Introduction... 4 1.1 Features... 4 1.2 Package Contents... 4 1.3 Finding Your Way Around... 5 1.3.1 Front Panel... 5 1.3.2 Rear Panel
Broadband Router. User s Manual
 Broadband Router User s Manual 1 Introduction... 4 Features... 4 Minimum Requirements... 4 Package Content... 4 Note... 4 Get to know the Broadband Router... 5 Back Panel... 5 Front Panel... 6 Setup Diagram...7
Wireless-G Router User s Guide
 Wireless-G Router User s Guide 1 Table of Contents Chapter 1: Introduction Installing Your Router System Requirements Installation Instructions Chapter 2: Preparing Your Network Preparing Your Network
The Administration Tab - Diagnostics
 The Administration Tab - Diagnostics The diagnostic tests (Ping and Traceroute) allow you to check the connections of your network components. Ping Test. The Ping test will check the status of a connection.
LevelOne FBR-1405TX. User s Manual. 1-PORT BROADBAND ROUTER W/4 LAN Port
 LevelOne FBR-1405TX 1-PORT BROADBAND ROUTER W/4 LAN Port User s Manual 1 Introduction... 4 Features... 4 Minimum Requirements...4 Package Content... 4 Note...4 Get to know the Broadband Router... 5 Back
LevelOne Broadband Routers
 LevelOne Broadband Routers FBR-1100TX FBR-1400TX FBR-1401TX FBR-1700TX User's Guide TABLE OF CONTENTS CHAPTER 1 INTRODUCTION... 1 Features of your LevelOne Broadband Router... 1 Package Contents... 4
LevelOne FBR User s Manual. 1W, 4L 10/100 Mbps ADSL Router. Ver
 LevelOne FBR-1416 1W, 4L 10/100 Mbps ADSL Router User s Manual Ver 1.00-0510 Table of Contents CHAPTER 1 INTRODUCTION... 1 FBR-1416 Features... 1 Package Contents... 3 Physical Details... 3 CHAPTER 2
Conceptronic C100BRS4H Quick Installation Guide. Congratulations on the purchase of your Conceptronic 4-ports Broadband Router.
 Conceptronic C100BRS4H Quick Installation Guide Congratulations on the purchase of your Conceptronic 4-ports Broadband Router. The enclosed Hardware Installation Guide gives you a step-by-step explanation
LevelOne. User's Guide. Broadband Router FBR-1402TX FBR-1403TX
 LevelOne Broadband Router FBR-1402TX FBR-1403TX User's Guide Table of Contents CHAPTER 1 INTRODUCTION... 1 LevelOne Broadband Router Features... 1 Package Contents... 3 Physical Details...4 CHAPTER 2 INSTALLATION...
CE APPROVED.4 INTRODUCTION.5 PACKAGE CONTENTS. 6 PRE - INSTALLATION CHECKLIST. 6 SYSTEM REQUIREMENTS. 6 FEATURES AND BENEFITS.11 SETUP WIZARD.
 Web Edition Dec. 2002 Contents CE APPROVED...4 INTRODUCTION...5 PACKAGE CONTENTS... 6 PRE - INSTALLATION CHECKLIST... 6 SYSTEM REQUIREMENTS... 6 FEATURES AND BENEFITS... 7 4 - PORT CABLE/XDSL ROUTER...9
LevelOne FBR-1405TX. User s Manual. 1 PORT BROADBAND ROUTER W/4 LAN Port. Version: 1.0
 LevelOne FBR-1405TX 1 PORT BROADBAND ROUTER W/4 LAN Port User s Manual Version: 1.0 Introduction... 3 Features... 3 Minimum Requirements... 3 Package Content... 3 Get to know the Broadband Router... 4
Introduction... 3 Features... 3 Minimum Requirements... 3 Package Content... 3 Get to know the Broadband Router... 4 Back Panel... 4 Front Panel...
 Introduction... 3 Features... 3 Minimum Requirements... 3 Package Content... 3 Get to know the Broadband Router... 4 Back Panel... 4 Front Panel... 5 Setup Diagram... 6 Getting started... 7 Chapter 1...
Express EtherNetwork TM DI-604
 Express EtherNetwork TM DI-604 4-Port Ethernet Broadband Router Manual Rev. 040903 Building Networks for People Contents Introduction... 3 Package Contents... 6 Hardware Description... 7 Reset... 8 Getting
Multi-Homing Broadband Router. User Manual
 Multi-Homing Broadband Router User Manual 1 Introduction... 4 Features... 4 Minimum Requirements... 4 Package Content... 4 Note... 4 Get to know the Broadband Router... 5 Back Panel... 5 Front Panel...
Introduction... 3 Features... 3 Minimum Requirements... 3 Package Content... 3 Note... 3 Get to know the Broadband Router... 4 Back Panel...
 Introduction... 3 Features... 3 Minimum Requirements... 3 Package Content... 3 Note... 3 Get to know the Broadband Router... 4 Back Panel... 4 Front Panel... 5 Setup Diagram... 6 Getting started... 7 Chapter
Introduction... 3 Features... 3 Minimum Requirements... 3 Package Content... 3 Get to know the Broadband Router... 4 Back Panel... 4 Front Panel...
 Introduction... 3 Features... 3 Minimum Requirements... 3 Package Content... 3 Get to know the Broadband Router... 4 Back Panel... 4 Front Panel... 5 Setup Diagram... 6 Getting started... 7 Chapter 1...
IP806GA/GB Wireless ADSL Router
 IP806GA/GB Wireless ADSL Router 802.11g/802.11b Wireless Access Point ADSL Modem NAT Router 4-Port Switching Hub User's Guide Table of Contents CHAPTER 1 INTRODUCTION... 1 Wireless ADSL Router Features...
A Division of Cisco Systems, Inc. Broadband Router. with 2 Phone Ports. User Guide WIRED RT41P2-AT. Model No.
 A Division of Cisco Systems, Inc. WIRED Broadband Router with 2 Phone Ports User Guide Model No. RT41P2-AT Copyright and Trademarks Specifications are subject to change without notice. Linksys is a registered
TEW-211BRP. Wireless AP Router. User s Manual
 TEW-211BRP Wireless AP Router User s Manual Version 1.4 - Jan 2002 CONTENTS Introduction...3 Hardware Installation...5 General Wireless AP Router System Connection...6 Wireless AP Router Default Settings
Broadband Router DC 202
 Broadband Router DC 202 Full Manual Table of Contents DC-202 xdsl/cable Broadband router REQUIREMENTS...4 INTRODUCTION...4 DC-202 Features...4 Internet Access Features...4 Advanced Internet Functions...5
Multi-Function Wireless Router. User's Guide. Wireless Access Point Broadband Internet Access. 4-Port Switching Hub
 Multi-Function Wireless Router Wireless Access Point Broadband Internet Access 4-Port Switching Hub User's Guide Table of Contents CHAPTER 1 INTRODUCTION... 1 Wireless Router Features... 1 Package Contents...
Introduction... 3 Features... 3 Minimum Requirements... 3 Package Content... 3 Note... 3 Get to know the Broadband Router... 4 Back Panel...
 Introduction... 3 Features... 3 Minimum Requirements... 3 Package Content... 3 Note... 3 Get to know the Broadband Router... 4 Back Panel... 4 Front Panel... 5 Setup Diagram... 6 Getting started... 7 Chapter
DC-228. ADSL2+ Modem/Router. User Manual. -Annex A- Version: 1.0
 DC-228 ADSL2+ Modem/Router -Annex A- User Manual Version: 1.0 TABLE OF CONTENTS 1 PACKAGE CONTENTS...3 2 PRODUCT LAYOUT...4 3 NETWORK + SYSTEM REQUIREMENTS...6 4 DC-228 PLACEMENT...6 5 SETUP LAN, WAN...7
Introduction... 3 Features... 3 Minimum Requirements... 3 Package Content... 3 Get to know the Broadband Router... 4 Back Panel... 4 Front Panel...
 Introduction... 3 Features... 3 Minimum Requirements... 3 Package Content... 3 Get to know the Broadband Router... 4 Back Panel... 4 Front Panel... 5 Setup Diagram... 6 Getting started... 7 Chapter 1...
Configuring the Wireless Barricade Router LAN
 Configuring the Wireless Barricade Router LAN LAN IP Use the LAN menu to configure the LAN IP address for the Wireless Barricade and to enable the DHCP server for dynamic client address allocation. Set
Internet Broadband Router
 Internet Broadband Router XRT-401D User s Manual 1 Copyright Copyright (C) 2003 PLANET Technology Corp. All rights reserved. The products and programs described in this User s Manual are licensed products
Downloaded from manuals search engine
 Table of Contents CHAPTER 1 INTRODUCTION... 1 Broadband Router Features... 1 Package Contents... 3 Physical Details... 4 CHAPTER 2 INSTALLATION... 6 Requirements... 6 Procedure... 6 CHAPTER 3 SETUP...
ZyWALL 70. Internet Security Appliance. Quick Start Guide Version 3.62 December 2003
 ZyWALL 70 Internet Security Appliance Quick Start Guide Version 3.62 December 2003 Introducing the ZyWALL The ZyWALL 70 is the ideal secure gateway for all data passing between the Internet and the LAN.
Broadband Router. with 2 Phone Ports WIRED. Installation and Troubleshooting Guide RT31P2. A Division of Cisco Systems, Inc. Model No.
 A Division of Cisco Systems, Inc. Broadband Router with 2 Phone Ports WIRED Installation and Troubleshooting Guide Model No. RT31P2 Copyright and Trademarks Specifications are subject to change without
Wireless Broadband Router User Guide
 Wireless Broadband Router User Guide The information furnished by SMC Networks, Inc. (SMC) is believed to be accurate and reliable. However, no responsibility is assumed by SMC for its use, nor for any
LevelOne WBR User s Manual. 11g Wireless ADSL VPN Router. Ver
 LevelOne WBR-3407 11g Wireless ADSL VPN Router User s Manual Ver 1.00-0510 Table of Contents CHAPTER 1 INTRODUCTION... 1 Wireless ADSL Router Features... 1 Package Contents... 5 Physical Details... 6 CHAPTER
ADSL Modem. User Guide AM300. Model No. WIRED
 WIRED User Guide Model No. AM300 Copyright and Trademarks Specifications are subject to change without notice. Linksys is a registered trademark or trademark of Cisco Systems, Inc. and/or its affiliates
LevelOne FBR-1413TX. User Manual. 1W,4L Broadband Router V1.0
 LevelOne FBR-1413TX 1W,4L Broadband Router User Manual V1.0 1 Copyright The contents of this publication may not be reproduced in any part or as a whole, stored, transcribed in an information retrieval
UIP1869V User Interface Guide
 UIP1869V User Interface Guide (Firmware version 0.1.8 and later) Table of Contents Opening the UIP1869V's Configuration Utility... 3 Connecting to Your Broadband Modem... 5 Setting up with DHCP... 5 Updating
Contents. 2 NB750 Load Balancing Router User Guide YML817 Rev1
 Contents CHAPTER 1. INTRODUCTION... 4 1.1 Overview... 4 1.2 Hardware... 6 1.2.1 Front Panel View... 6 1.2.2 Rear Panel View... 7 1.2.3 Hardware Load Default... 7 1.3 Features... 8 1.3.1 Software Feature...
TCP/IP CONFIGURATION 3-6
 TCP/IP CONFIGURATION 3. Type IPCONFIG /RENEW and press the Enter key. Verify that your IP Address is now 192.168.2.xxx, your Subnet Mask is 255.255.255.0 and your Default Gateway is 192.168.2.1. These
Multi-Function Wireless A/P Router User s Guide
 Multi-Function Wireless A/P Router User s Guide Model CNWR-811P Wireless Access Point Router W / Printer Sharing TABLE OF CONTENTS CHAPTER 1 INTRODUCTION...1 CNWR-811P Features...1 Package Contents...3
USER GUIDE SMC7004VBR
 Cable/DSL Broadband Router Built-in 4-Port 10/100Mbps Switch USER GUIDE SMC7004VBR Copyright Information furnished by SMC Networks, Inc. (SMC) is believed to be accurate and reliable. However, no responsibility
OZENDA 11g Wireless ADSL Firewall Router
 OZENDA 11g Wireless ADSL Firewall Router Model: AR4505GW OZENDA 11g Wireless ADSL Firewall Router TABLE OF CONTENTS Introduction................................. 1-1 About the ADSL Router.....................................
MIMO Wireless Broadband Route r User s Manual 1
 MIMO Wireless Broadband Router User s Manual 1 Introduction...4 Features...4 Minimum Requirements...4 Package Content...4 Note...4 Get to know the Broadband Router...5 Back Panel...5 Front Panel...6 Setup
A Division of Cisco Systems, Inc. ADSL Modem. User Guide WIRED AM200. Model No.
 A Division of Cisco Systems, Inc. WIRED User Guide Model No. AM200 Copyright and Trademarks Specifications are subject to change without notice. Linksys is a registered trademark or trademark of Cisco
Wireless Broadband Router
 LW6005A-R2 Wireless Broadband Router Manual 1 Introduction... 4 Features... 4 Minimum Requirements... 4 Package Content... 4 Note... 4 Get to know the Broadband Router... 5 Back Panel... 5 Front Panel...
Manual Overview. This manual contains the following sections:
 Table of Contents Manual Overview This manual contains the following sections: Section 1 - Product Overview describes what is included with the DIR-130 router, and things to consider before installing
4-Port Router. Share your broadband Internet connection. E Wired. Ethernet. Ethernet. User Manual. F5D5231-4_uk
 4-Port Router Share your broadband Internet connection User Manual E Wired Ethernet Ethernet 10/100 Mbps F5D5231-4_uk Table of Contents 1 Introduction............................................. 1 Benefits
D-Link DI-804 Broadband Router User s Manual
 D-Link DI-804 Broadband Router User s Manual Rev.01 ( March,2001 ) 6RDI804 01 Contents Introduction...4 Package Contents...5 Introduction to Broadband Router Technology...6 Introduction to Firewalls...6
D-Link DI-704UP. Express EtherNetwork TM Broadband Router with USB Print Server. Manual. Building Networks for People
 D-Link DI-704UP Express EtherNetwork TM Broadband Router with USB Print Server Manual Building Networks for People Contents Package Contents...3 Introduction...4 Features and Benefits...5 LEDs...6 Connections...7
Wireless-B Broadband Router
 Wireless-B Broadband Router Version 1.0 Trademarks Microsoft, Windows, and Windows NT are registered trademarks of Microsoft Corporation. Other brand and product names are registered trademarks or trademarks
The Applications and Gaming Tab - Port Range Forward
 The Applications and Gaming Tab - Port Range Forward The Applications and Gaming Tab allows you to set up public services on your network, such as web servers, ftp servers, e-mail servers, or other specialized
802.11N Wireless Broadband Router
 802.11N Wireless Broadband Router Pre-N Wireless Access Point Broadband Internet Access WPS 4-Port Switching Hub User's Guide Table of Contents CHAPTER 1 INTRODUCTION... 1 Wireless Router Features... 1
Internet Broadband Router
 Internet Broadband Router XRT-401D/402D/104D User s Manual 1 Copyright Copyright (C) 2004 PLANET Technology Corp. All rights reserved. The products and programs described in this User s Manual are licensed
ZyWALL 10W. Internet Security Gateway. Quick Start Guide Version 3.62 December 2003
 Internet Security Gateway Quick Start Guide Version 3.62 December 2003 Introducing the ZyWALL The is the ideal secure gateway for all data passing between the Internet and the LAN. By integrating NAT,
English version. Introduction. Contents of the box. LW050/LW050UK Sweex Wireless Broadband Router 54 Mbps
 LW050/LW050UK Sweex Wireless Broadband Router 54 Mbps Introduction First of all, many thanks for purchasing this Sweex Wireless Broadband Router 54 Mbps. The Sweex Wireless Broadband Router 54 Mbps enables
Notice according to GNU/GPL-Version 2
 Copyright by Edimax Technology Co, LTD. all rights reserved. No part of this publication may be reproduced, transmitted, transcribed, stored in a retrieval system, or translated into any language or computer
TL-R860 Cable/DSL Router
 TL-R860 Cable/DSL Router Rev: 1.1.0 19100100342 COPYRIGHT & TRADEMARKS Specifications are subject to change without notice. is a registered trademark of TP-LINK TECHNOLOGIES CO., LTD. Other brands and
10/100 4-Port. User Guide. VPN Router RV042. A Division of Cisco Systems, Inc. Model No. Downloaded from manuals search engine
 A Division of Cisco Systems, Inc. WIRED 10/100 4-Port VPN Router User Guide Model No. RV042 Copyright and Trademarks Linksys is a registered trademark or trademark of Cisco Systems, Inc. and/or its affiliates
Contents. Cable/DSL Firewall Router
 Contents Default Settings & Facts... 3 NetComm Cable/DSL Firewall Router Quick Start... 4 One page setup for Telstra Bigpond Cable... 4 One page setup for Optus Cable... 5 One page setup for most ADSL
SAGEM TM 1500 SAGEM TM 1500WG
 SAGEM F@st TM 1500 SAGEM F@st TM 1500WG Reference Manual 288 053 220-04 May 2005 Issue S E closely follows all technological changes and is continually striving to improve its products for the benefit
IP806GA/GB Wireless ADSL Router
 IP806GA/GB Wireless ADSL Router 802.11g/802.11b Wireless Access Point ADSL Modem NAT Router 4-Port Switching Hub User's Guide DECLARATION OF CON FORMITY This device complies with Part 15 of the FCC Rules.
A Division of Cisco Systems, Inc. 10/100/ Port. VPN Router. User Guide WIRED RV0041. Model No.
 A Division of Cisco Systems, Inc. WIRED 10/100/1000 4-Port VPN Router User Guide Model No. RV0041 Copyright and Trademarks Specifications are subject to change without notice. Linksys is a registered trademark
BIPAC-6500 / 6500W (Wireless) Broadband VPN Firewall Router with 4-port 10/100M Switch Quick Start Guide
 Broadband VPN Firewall Router with 4-port 10/100M Switch Quick Start Guide") BIPAC-6500 / 6500W (Wireless) Broadband VPN Firewall Router with 4-port 10/100M Switch Quick Start Guide Billion BIPAC-6500 / 6500W (Wireless) Broadband VPN Firewall Router For more detailed instructions
BIPAC-6500 / 6500W (Wireless) Broadband VPN Firewall Router with 4-port 10/100M Switch Quick Start Guide Billion BIPAC-6500 / 6500W (Wireless) Broadband VPN Firewall Router For more detailed instructions
Content 1 OVERVIEW HARDWARE DESCRIPTION HARDWARE INSTALLATION PC CONFIGURATION GUIDE... 5 WEB-BASED MANAGEMENT GUIDE...
 Content 1 OVERVIEW...1 1.1FEATURES...1 1.2 PACKETCONTENTS...3 1.3 SYSTEM REQUIREMENTS... 1.4 FACTORY DEFAULTS...4 1.5 WARNINGS AND CAUTIONS...4 2 HARDWARE DESCRIPTION... 6 3 HARDWARE INSTALLATION...8 4
RANGER SERIES. 150Mbps Wireless Green Broadband Router DG-BR4000NG. 150 Mbps V
 RANGER SERIES 150Mbps Wireless Green Broadband Router DG-BR4000NG N 150 Mbps V1.2 2011-12-15 FCC warning: This equipment has been tested and found to comply with the limits for a class B digital device,
SonicWALL TZ 150 Getting Started Guide
 SonicWALL TZ 150 Getting Started Guide SonicWALL TZ 150 Security Appliance Getting Started Guide The SonicWALL TZ 150 is a total security platform delivering true layered security by integrating gateway
300M Wireless-N Broadband Router User Manual
 300M Wireless-N Broadband Router Model No.: ib-wrb314n User Manual Ver.: 1.0.0 Contents...Error! Bookmark not defined. Chapter 1 Product Overview... 3 Package Contents 3 Conventions....4 Panel Overview...
A Division of Cisco Systems, Inc. EtherFast Cable/DSL VPN Router. with 4-Port 10/100 Switch. User Guide WIRED. BEFVP41 v2. Model No.
 A Division of Cisco Systems, Inc. WIRED EtherFast Cable/DSL VPN Router with 4-Port 10/100 Switch User Guide Model No. BEFVP41 v2 Copyright and Trademarks Linksys is a registered trademark or trademark
WIRELESS ROUTER N150. User Manual. F9K1009v1 8820zb01125 Rev.B00
 WIRELESS ROUTER N150 User Manual F9K1009v1 8820zb01125 Rev.B00 TABLE OF CONTENTS Getting Started... 1 What s in the Box...1 Initial Setup...1 How to Set It UP...2 Adding Computers to Your Network...3 Manually
A or G Wireless Router
 A or G Wireless Router 802.11a/802.11g/802.11b Wireless Access Point Broadband Internet Access 4-Port Switching Hub User's Guide DECLARATION OF CONFORMITY Per FCC Part 2 Section 2.1077(a) Responsible Party
A Division of Cisco Systems, Inc. Broadband Router. with QoS. User Guide WIRED RT042. Model No.
 A Division of Cisco Systems, Inc. WIRED Broadband Router with QoS User Guide Model No. RT042 Copyright and Trademarks Linksys is a registered trademark or trademark of Cisco Systems, Inc. and/or its affiliates
Section 3 - Configuration. Enable Auto Channel Scan:
 Enable Auto Channel Scan: Wireless Channel: The Auto Channel Scan setting can be selected to allow the DGL-4500 to choose the channel with the least amount of interference. Indicates the channel setting
Contents Introduction to the Product Configuration CPE built-in Web Server Access CPE Setup on the web page Trouble Shooting Operating Information
 Contents Introduction to the Product Functional Features LED Information Rear Side Information Configuration Network Configuration Package Configuration PC Configuration(Windows XP) How to check your IP
AirCruiser G Wireless Router GN-BR01G
 AirCruiser G Wireless Router GN-BR01G User s Guide i Contents Chapter 1 Introduction... 1 Overview...1 Features...1 Package Contents...2 AirCruiser G Wireless Router Rear Panel...2 AirCruiser G Wireless
NEXT - Technical Specifications
 NEXT - Technical Specifications BACK - Introduction NEXT - Cable Modem - WAN Type Technical Specifications Standards: IEEE 802.3 10BaseT Ethernet IEEE 802.3u 100BaseTX Fast Ethernet IEEE 802.11b WAN Interface:
The GN-BR401 User s Guide Table of Contents. 1. Product Introduction 1-1. About this Product 1-2. Accessories 1-3. Specifications 1-4.
 The GN-BR401 User s Guide Table of Contents 1. Product Introduction 1-1. About this Product 1-2. Accessories 1-3. Specifications 1-4. LED Status 2. System Connection & Installation 2-1. ADSL/Cable Modem
Arion Router and Firewall User s Manual. Rev 1.0 Mar 2004
 Arion 3001-4 Router and Firewall User s Manual Rev 1.0 Mar 2004 Table of Contents 1. INTRODUCTION... 1 1.1. PRODUCT OVERVIEW... 1 2. HARDWARE DESCRIPTION... 2 2.1. FRONT PANEL... 2 Arion 3001-4 Front Panel...
EH-2101W. User Manual. Broadband Wireless Gateway. WiFi Compliant Wireless Access Point. Broadband Internet Access. 4-Port Switching Hub.
 EH-2101W Broadband Wireless Gateway WiFi Compliant Wireless Access Point Broadband Internet Access 4-Port Switching Hub Dial-in RAS Print Server User Manual i TABLE OF CONTENTS CHAPTER 1 INTRODUCTION...
DVG-6008S FXO VoIP Router
 This product can be set up using Internet Explorer or Netscape Navigator, 6.x or above, with Javascript enabled DVG-6008S FXO VoIP Router Before You Begin You must have at least the following: A subscription
TZ 170 Quick Start Guide
 COMPREHENSIVE INTERNET SECURITY S o n i c WALL Internet Security Ap p l i a n c e s TZ 170 Quick Start Guide Quick Start Installation Thank you for purchasing a SonicWALL Internet security appliance. The
Wireless b/g/n 150Mbps AP Router
 Wireless 802.11b/g/n 150Mbps AP Router User Manual V1.2 2009-11-30 Package Contents The following items should be found in your package: One Wireless 802.11b/g/n 150Mbps Broadband Router One DC 9v power
SonicWALL Security Appliances. SonicWALL SSL-VPN 200 Getting Started Guide
 SonicWALL Security Appliances SonicWALL SSL-VPN 200 Getting Started Guide SonicWALL SSL-VPN 200 Appliance Getting Started Guide This Getting Started Guide contains installation procedures and configuration
Wireless a CPE User Manual
 NOTICE Changes or modifications to the equipment, which are not approved by the party responsible for compliance, could affect the user's authority to operate the equipment. Company has an on-going policy
802.11g Wireless High-power Broadband Router with passive PoE. User s Manual
 802.11g Wireless High-power Broadband Router with passive PoE User s Manual Table of Contents CHAPTER 1: INTRODUCTION... 2 WIRELESS ROUTER FEATURES... 2 PACKAGE CONTENTS... 4 PHYSICAL DETAILS... 5 ABOUT
Introduction... 3 Package Contents... 4 VPN100 LEDs... 5 Connecting your VPN Installing USB drivers... 7
 Contents Introduction... 3 Package Contents... 4 VPN100 LEDs... 5 Connecting your VPN100... 6 Installing USB drivers... 7 Configuring the VPN100... 9 Using the Web-based User Interface... 9 Choices when
Connecting the DI-804V Broadband Router to your network
 Before you begin Make sure that any existing Firewall Software/Devices are disabled and/or shutdown before beginning installation of your new D-Link DI-804V Broadband Router. Contents of Package DI-804V
ADSL Router Quick Setup Guide
 ADSL Router Quick Setup Guide RTA300 Important This Guide is intended to get you started quickly. The factory default profile of this Router is customised for New Zealand users. Please follow through the
Security SSID Selection: Broadcast SSID:
 69 Security SSID Selection: Broadcast SSID: WMM: Encryption: Select the SSID that the security settings will apply to. If Disabled, then the device will not be broadcasting the SSID. Therefore it will
N150 WiFi DSL Modem Router Essentials Edition. N300 WiFi DSL Modem Router Essentials Edition
 N150 WiFi DSL Modem Router Essentials Edition Model D500 N300 WiFi DSL Modem Router Essentials Edition Model D1500 User Manual May 2018 202-11390-02 350 East Plumeria Drive San Jose, CA 95134 USA Support
Cable/DSL Gateway Router plus 4-port Switch
 Cable/DSL Gateway Router plus 4-port Switch The revision date for this guide is April 26, 2002 Version 1.0 The information in this guide may change without notice. The manufacturer assumes no responsibility
IP819VGA g ADSL VoIP Gateway
 IP819VGA 802.11g ADSL VoIP Gateway 802.11g/802.11b Access Point ADSL Modem NAT Router VoIP Gateway User's Guide Table of Contents CHAPTER 1 INTRODUCTION... 1 802.11g ADSL VoIP Gateway Features... 1 Package
SMC Barricade Routers
 SMC Barricade Routers User Guide SMC7004BR V1.0 Congratulations on your purchase of the SMC Barricade. The SMC Barricade is a Broadband Router designed to share Internet Access, provide security, and to
Wireless ADSL2+ Modem Router Setup Manual
 Wireless ADSL2+ Modem Router Setup Manual NETGEAR, Inc. 4500 Great America Parkway Santa Clara, CA 95054 USA 208-10087-01 2006-4 2006 by NETGEAR, Inc. All rights reserved. Trademarks NETGEAR is a trademark
WL5041 Router User Manual
 TECOM WL5041 Router User Manual TECOM CO., LTD. March 2003 2003 by TECOM CO., LTD. All rights reserved. Printed in Taiwan Table of contents Package Contents--------------------------------------- 2 Installing