Version /20/2012. User Manual. AP Manager II Lite Business Class Networking
|
|
|
- Ashlie Thompson
- 5 years ago
- Views:
Transcription
1 Version /20/2012 User Manual AP Manager II Lite Business Class Networking
2 Table of Contents Table of Contents Product Overview... 1 Minimum System Requirements... 2 Access Point Requirements... 2 Installation... 3 AP Manager II Lite...11 Control Panel...12 Access Point Report...13 Station Report...15 Model Report...16 Band Report...17 Group View...18 Discovering Devices...19 Advanced Discovery...21 Configuration...23 Set IP...24 Configuration Update...26 Firmware Upgrade...27 Web Management...30 Telnet...31 Change Access Password...32 Enable SNMP...33 Configuration Comparison...35 Sorting...36 View Mode...37 Properties...38 Multi Configuration...39 Create a new template...40 Edit a Template...47 Delete a Template...48 Save Configuration...49 Import Configuration...50 Fault Manager...60 Unread...61 Delete Event...63 Event Settings...64 Event Search...84 Event Export...86 Notice Settings...87 Create Watchlist...88 Tools...91 Topology...91 Site Planning Config Comparison Report Association Security Utilization Channel Rogue AP Syslog Custom i
3 Table of Contents Monitor User Manager Options ii
4 Section 1 - Product Overview Product Overview AP Manager II Lite is a convenient software tool used to manage the configuration of your wireless network from a central computer. With AP Manager II Lite there is no need to configure devices individually. AP Manager II Lite allows you to configure AP settings, update the firmware, and organize and sort your APs into manageable groups. 1
5 Section 1 - Product Overview Minimum System Requirements For best results, the following minimum requirements are recommended on any system used to configure a router: Computer with: 1Ghz processor / 512MB RAM / 200MB available space / CD-ROM drive Windows XP (with Service Pack 2), Windows Vista, Windows 7 Access Point Requirements SNMP must be enabled on access points used with AP Manager II Lite. 2


6 Section 3 - Installation Installation To install the AP Manager II Lite, insert the CD into your CD-ROM drive. Step 1 - When the autorun screen appears, click Install Platform. Note: Windows Firewall presents you with a warning message to unblock the device. Click Unblock to give your computer access to the installation process. Step 2 - The Installation window appears. Click Next to continue. 3


7 Section 3 - Installation Step 3 - Select the installation location. Click Next to continue. Step 4 - Select the Program Folder. Click Next to continue. 4

.")
8 Section 3 - Installation Step 5 - Installation begins. Please be patient while the installation process takes place (a matter of seconds). Step 6 - Click Finish to exit the Wizard. 5

9 Section 3 - Installation Step 7 - An AP Manager II Lite icon will appear automatically on your desktop. Before you click the icon to start the program, install the module. Step 8 - Browse the location where you have the module. Doubleclick the module to install it. 6
10 Section 3 - Installation Step 9 - The module Wizard for the DAP-2690 AP Manager II Lite will begin. Click Next to continue. Step 10 - The wizard will install the module momentarily. Click Cancel if you wish to exit, otherwise wait for the installation process to complete. 7


11 Section 3 - Installation Step 11 - Click Finish to close the wizard. Step 12 - Right-click the icon and click Run as administrator. 8


12 Section 3 - Installation Step 13 - Enter the User Name and Password at the login screen. Click OK to continue. Step 14 - If you have entered the login details incorrectly, the software will warn you and prompt you to enter the correct information. Click OK to continue and enter the correct details. 9


13 Section 3 - Installation Step 15 - Windows Firewall will block the program if you do not provide it access. Click the Allow access button to continue. This completes the installation process for the main software. You are now presented with the AP Manager II Lite main control panel. 10
14 AP Manager II Lite Launch the AP Manager II Lite by clicking: 1. Start Menu 2. Select Programs 3. Select D-Link AP Manager II Lite 4. Select AP Manager II Lite 11
15 Control Panel The Main Control Panel has eight key configuration Windows. General, Group, Multi Config, Fault, Report, User Manager and Option. The General window offers simple data information on the Access Point, a Station Report, a Model Report and a Band Report. 12
16 The Access Point Report shows the discovered AP s. Access points are divided into Managed Access Points and Unmanaged Access Points. The Managed APs are listed in the Station Detail table below the Access Point Report. Access Point Report The Station Detail table lists the MAC Address, Alias, Access Point, IP Address, Band, Authentication type, RSSI, SSID and Power Save Mode of all stations connected to the Managed APs. Remove an access point from the list by right-clicking it and selecting Kick Off. 13

17 Create an Alias by right-clicking the access point and selecting Alias. In the Alias management window, type the new name. Click OK to continue. 14
18 Section 3 - Installation Station Report The Station Report displays a graphical representation of the associated wireless stations. It classifies the stations by bands and shows the station numbers of every band. 15
19 Section 3 - Installation Model Report The Model Report displays a graphical representation of the numerical distribution of models the AP Manager II Lite has discovered and is currently managing. 16
20 Section 3 - Installation Band Report The Band Report displays a graphical representation of the WLAN bands (802.11a, b/802.11g and b/g/n) currently being used by the access point. It shows the number access points on every band. 17
21 Section 3 - Installation Group View The Group View Panel displays the access points the AP Manager II Lite discovers and currently manages. You can group these access points by model or into categories that can make their distribution easier to visualize. The AP Manager II Lite can actively monitor and manage several D-Link Access Points. They are installed as plug-ins under the installation directory. Once access points are detected during the discovery process, they are listed in the main Group View Panel, and you can add or remove supported models freely. 18
22 Discovering Devices Before you can manage and monitor the access point you must discover the device. Click Groups on the main menu bar. Groups has four main icons: Delete, Configure, View and Discover. Delete Configure View Discover 19
23 Click Discover to find the access point. The following dialogue window will appear during the Discovery process. If your AP is connected, it will be detected and shown on the screen. 20
24 The standard discovery can only discover the access points in the same subnetwork. To discover the access points in the other network segments, click the arrow next to the Discover icon and click Advanced Discover from the drop-down list. Advanced Discovery Under Advanced Discover, enter the Start IP and the End IP and click the Start button to search for access points within the specified IP range. Once other access points are discovered their status will be updated by the icons associated to it. New Access Point Managed Access Point The Access Point cannot be pinged but can be modified. The Access Point is offline and/or the SNMP engine is disabled. The Access Point is specified as a Rogue AP 21
25 Section 3 - Installation To delete an access point highlight it in Group View mode, right-click and select Delete. Note: To view a list of supported access points please go to the Frequently Asked Questions page at 22
26 Section 3 - Installation Configuration There are two main ways to configure an access point. First, you can right-click the access point and click Configuration. A list of configurational options will appear in a drop-down menu. The second configuration method is to click the arrow next to the Configure button. The options available from the drop-down menu are: Set IP (Page 24), Update Config (Page 26), Upgrade Firmware (Page 27), Web Management (Page 30), Telnet (Page 31), Change Access Password (Page 32 ), SNMP Enable (Page 33), and Config Comparison (Page 35). 23
27 Section 3 - Installation Set IP You can manually set the IP address of a selected access point. To quickly access IP configuration tools, double-click the access point. Set the IP address, Subnet Mask, and Default Gateway. Click OK to continue. When a new access point is discovered, you can use this function to assign a new IP address, Subnet Mask and Default Gateway to the device. The Action column shows the executing operation, while the Results column shows the progress by percentage. You can set the IP addresses of multiple devices this way. If the operation fails, please check the physical connections and the user name and password settings. (Refer to the Set Password section for details). 24
28 Section 3 - Installation If you enter the wrong IP information, you will be prompted to re-enter the correct IP information. Click OK to try again. 25
29 Section 3 - Installation Configuration Update Right-click the device. Go to Configuration and click Update Config. The device will search for the SNMP status. 26

30 Section 3 - Installation Firmware Upgrade Right-click the device. Go to Configuration and click Update Firmware. The Upgrade Firmware configuration window will open. 27

31 Section 3 - Installation Click the Edit field. A new window will open prompting you to search for the new firmware on your PC. Once you have located your firmware, select it and click Open. 28

32 Section 3 - Installation Upload the firmware to the access point. Click OK to continue. 29


33 Section 3 - Installation Web Management Right-click the device. Go to Configuration and click Web Management. Enter a User name and Password into the fields provided and click OK. Your PC s web browser will open and the access point s IP address will be entered into the address field. You can configure the access point using its built-in web-based manager as you would normally. 30

34 Section 3 - Installation Telnet Right-click the device. Go to Configuration and click Telnet. Next, the Command Prompt will open. This gives you access to the built-in Telnet CLI Manager. Type in the User Name and Password in the console manager. 31
35 Section 3 - Installation Change Access Password Right-click the device. Go to Configuration and click Change Access Password. The Change Username and Password window will ask you to enter the new User Name and Password details. Click OK when complete to continue. 32
36 Section 3 - Installation Enable SNMP Right-click the device. Go to Configuration and click SNMP Enable. Under the SNMP Enable Manager, click the Enable SNMP checkbox. Click the Set check to open module checkbox if you need this application. Enter the Public and Private data in the fields provided and click OK to complete. 33

37 Section 3 - Installation SNMP will restart. The D-Link Manager software will open and you can configure it using this tool. 34

38 Section 3 - Installation Configuration Comparison Right-click the device. Go to Configuration and click Config Comparison. Config Comparison needs two access points to work. Compare each configuration option against the other access point. Click Apply to continue. 35
39 Section 3 - Installation Sorting Right-click the device and click Sort By. You can change the order of the access points by IP Address, Location, Type and Model Name. Once you have selected the sorting option, a gray arrow appear beside it to represent its designation. IP Address: Sorts by IP Address column. Location: Sorts by Location column. Type: Sorts by either Managed, Unmanaged or Rogue Access Point. Model Name: Sorts by access point model name. 36
40 Section 3 - Installation View Mode Right-click the device and click View. You can view the access points based on different parameters, such as: Icon, Small Icon, List, Report, Show Active and Show All. 37

41 Section 3 - Installation Properties Right-click the device and click Properties. The Properties parameter allows you to manage and view the properties of each access point on the network. You can enter a description string in the Location textbox to describe the access point, and then click the Set button to apply the changes. 38
42 Multi Configuration Administrators can manage the configuration of access points from the Multi Configuration section. AP Manager II Lite uses a template to manage this. The same profile can be used for multiple access points. Each profile has unique settings which include System, Wireless, Security and Filter settings. 39
43 Create a new template To create a new template, right-click anywhere on the template view window and select New Item. 40
44 Under Basic Info, type in a name for the new configuration. Creator is pre-set as Admin and the time is already set. Under Content Selection, click the checkbox to configure. There are System, Wireless (2.4GHz/5GHz), Security (2.4GHz/5GHz), Filter (2.4GHz/5GHz), and Multi_SSID (2.4GHz/5GHz) options. Click Next to continue. Under System, click the LAN Settings checkbox and configure the IP (Static or Dynamic), enter Subnet details, and Default Gateway options. Click the Admin checkbox. Enter a User Name and Password. Click the Console Settings checkbox to enable it. Select the Console Protocol and the Timeout period. Click Next to continue. 41
45 Under Wireless 5GHz, you can set the following options: SSID - Enter a name for the SSID. Channel - Select between Auto or a configurable range. SSID Broadcast - Click to enable. Data Rate - Select Auto or the speed option. RTS Length - Enter a range. Beacon Interval - Enter a range. Fragment Length - Enter a value. DTIM - Enter an appropriate value. Radio - Select On or Off. 11n Channel Width - Select the range. If you are unsure of all the settings, there is also the option to Check All. Click Next to continue. Under Wireless 2.4GHz, you can set the following options: SSID - Enter a name for the SSID. Channel - Select between Auto or a configurable range. SSID Broadcast - Click to enable. Data Rate - Select Auto or the speed option. RTS Length - Enter a range. Beacon Interval - Enter a range. Fragment Length - Enter a value. DTIM - Enter an appropriate value. Radio - Select On or Off. 11n Channel Width - Select the range. If you are unsure of all the settings, there is also the option to Check All. Click Next to continue. 42
46 Under Security 5GHz, you can set the following options: Authentication - Select between an Open System, Shared Key, Open System/Shared Key, WPA-Personal, WPA-Enterprise, WPA2-Personal, WPA2-Enterprise, WPA-Auto-Personal, and WPA-Auto-Enterprise. Key Settings - Select to Enable encryption. Then set the Key Type, Key Size, Valid Key and Key Value. WPA - Set the following parameters: Cipher Type, Group Key Update Interval, Pass Phrase, RADIUS Server, Port, and RADIUS Secret. Click Next to continue. Under Security 2.4GHz, you can set the following options: Authentication - Select between an Open System, Shared Key, Open System/Shared Key, WPA-Personal, WPA-Enterprise, WPA2-Personal, WPA2-Enterprise, WPA-Auto-Personal and WPA-Auto-Enterprise. Key Settings - Select to enable the device then Key Type, Key Size, Valid Key and Key Value. WPA - Set the following parameters: Cipher Type, Group Key Update Interval, Pass Phrase, RADIUS Server, Port and RADIUS Secret. Click Next to continue. 43
47 Under the Filter 5GHz IEEE802.11a Wireless MAC ACL Settings, select the Access Control method, enter a MAC Address and click Save. Select an item from the list and click Del if you wish to delete it. Click Next to continue. Under the Filter 2.4GHz IEEE802.11a Wireless MAC ACL Settings, select the Access Control method, enter a MAC Address and click Save. Select an item from the list and click Del if you wish to delete it. Click Next to continue. 44


48 Click the checkbox to enable Multi SSID 5GHz. The Wireless Settings allow you to index Multi SSID by number or name. Enter an SSID name, select the SSID visibility, select to enable/ disable WMM settings, and select a Security method. Key Settings - Select to enable the device, then enter Key Type, Key Size, Valid Key and Key Value. The table below populates with data. Click the Add button to add parameters or the Delete button to delete parameters. Click Next to continue. Click the checkbox to enable Multi SSID 2.4GHz. The Wireless Settings allow you to index Multi SSID by number or name. Enter an SSID name, select the SSID visibility, select to enable/ disable WMM settings, and select a Security method. Key Settings - Select to enable the device, then enter Key Type, Key Size, Valid Key and Key Value. The table below populates with data. Click the Add button to add parameters or the Delete button to delete parameters. Click Next to continue. 45
49 The Template Setup is complete. Read the instructions and click Finish. The new template is now in the Multi Config window. 46

50 Edit a Template To edit a template, double-click the template, or right-click the template, and click Edit Item from the drop-down menu. 47
51 Delete a Template To delete an existing template, double-click the template, or right-click the template, and select the Delete Item from the drop-down menu or click the Delete icon. 48

52 Save Configuration To save the configuration file, click the Save icon above the template window. A pop-up menu will appear with save settings. 49

53 Import Configuration To import a configuration file, click the Import File icon above the template window. A pop-up window will appear, allowing you to browse your computer for configuration files. When you have located your configuration files, click the file the click Open. 50
, and MutiConfig. To enable each one, click the Enable button. 51")
54 When you scroll through the Multi Configuration options, you will notice that it has a Template folder. The Template folder is the folder you created in previous pages. Click Task Scheduler to see the main configuration options - Config Comparison, Upgrade Firmware (FW), and MutiConfig. To enable each one, click the Enable button. 51
55 For the Config Comparison, click the Enable button. Then click New and view the options. Give the task a name. Select the devices and click Next. 52
56 Select a Template from the list provided. Click Next to continue. 53
57 Select a Schedule time frame - Select either Run, Save, Specify Time or Specify Day. Then enter the Date and Times. Click Finish when complete. 54

58 To upgrade the firmware, click Upgrade Firmware. Then click the Enable button to view the devices available. Give the Task a name. Select to upgrade by Group or by IP. Click Next to continue. 55


59 Under Firmware File Settings, click the Browse button next to your device. Select the new firmware, and click Next. 56
60 Under the MultiConfig section in the table, click the Enable button and the click New. Under Device enter a Task Name, select by Group or IP. Click Next to continue. 57
61 Under Template, select a template for this configuration and click Next. 58

62 Under Schedule, select one of the options provided and click Finish. 59
63 Fault Manager The Fault Manager can be accessed from both the side panel and the top panel. Click this icon to access details relating to faults experienced using the access point. 60
64 Unread Click this icon to mark messages as Unread. 61

65 Double-click an event to view its details. The icon next to the event will change to an open book when event details are accessed. 62


66 Delete Event Click this icon to Delete an event. Confirm the delete by clicking Yes. Click No to exit and do nothing. 63
67 Event Settings Click the icon third from the left above the Events window to show Event Settings. 64

68 The main Event Settings panel will open. 65


69 The Events Settings panel consists of four main Event Types. Standard Trap System Event Threshold Event Private 66

70 Standard Trap - The standard trap view window displays the standard trap data received from access points and consists of the following options: ColdStart WarmStart 67

71 LinkDown LinkUp 68
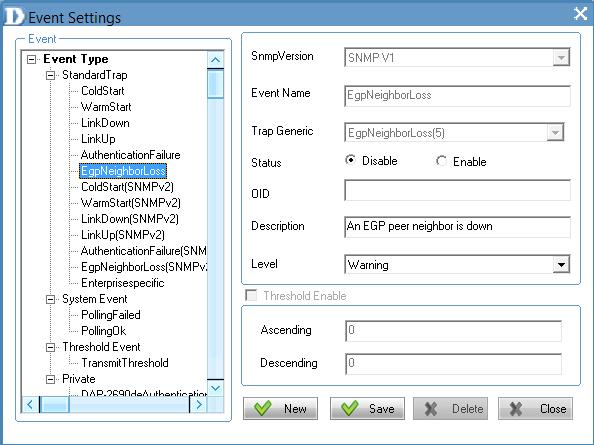
72 AuthenticationFailure EgpNeighborLoss 69
73 ColdStart (SNMPv2) WarmStart (SNMPv2) 70
")
74 LinkDown(SNMPv2) LinkUp(SNMPv2) 71
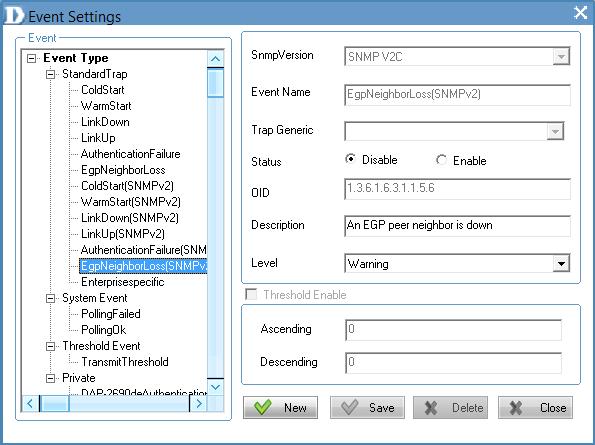
75 AuthenticationFailure(SNMPv2) EgpNeighborLoss(SNMPv2) 72
76 Enterprisespecific 73

77 System Event - To configure the trap condition, click the System Event icon in the tool bar to set the event settings. It consists of the following options: System Event To modify an event setting, select the event from the Event Type list and then change the items. Click Save button to apply the changes. To add a new event, click the New button and configure the settings in the event creation window. PollingFailed 74
78 PollingOK Threshold Event consists of the following options: Threshold Event 75

79 Transmit Threshold Private consists of the following options: Private 76

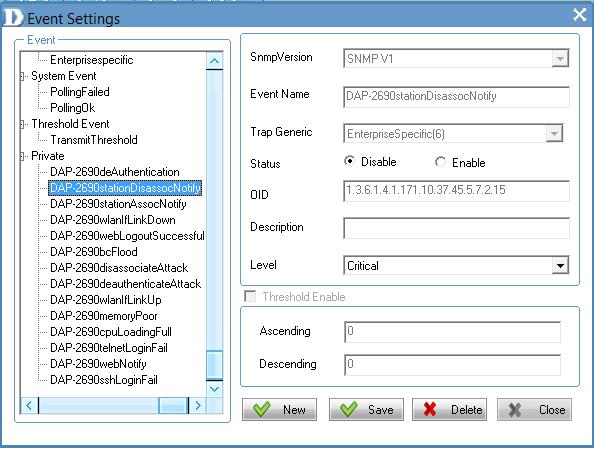
80 DAP-2690deAuthentication DAP-2690stationDisassocNotify 77
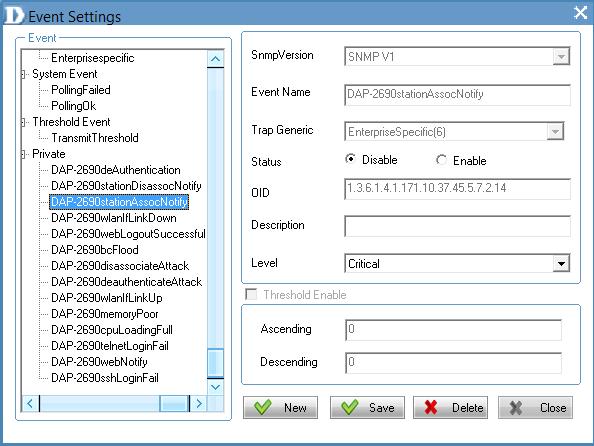
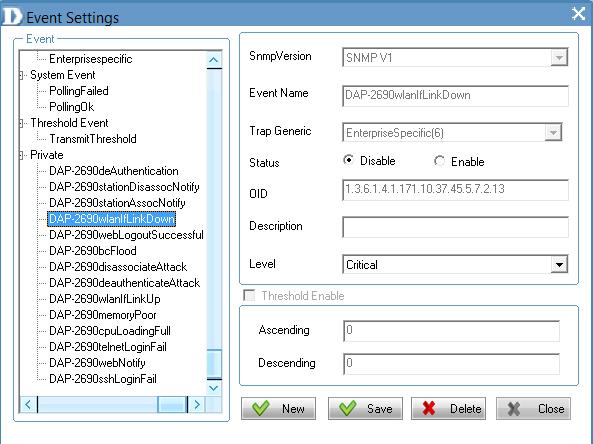
81 DAP-2690stationAssocNotify DAP-2690wlanIfLinkDown 78
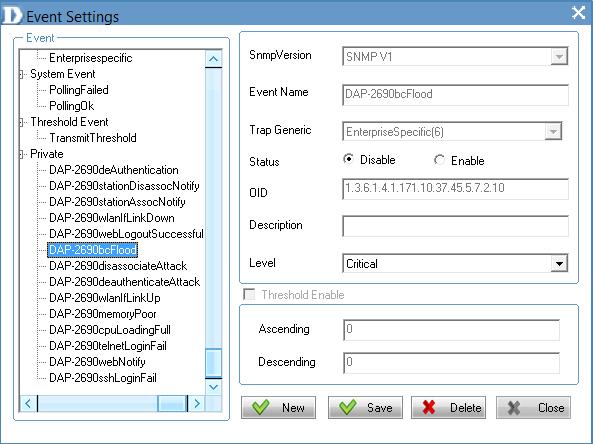
82 DAP-2690webLogoutSuccessful DAP-2690bcFlood 79
83 DAP-2690disassociateAttack DAP-2690deauthenticateAttack 80

84 DAP-2690wlanIfLinkUp DAP-2690memoryPoor 81

85 DAP-2690cpuLoadingFull DAP-2690telnetLoginFail 82
86 DAP-2690webnotify DAP-2690sshLoginFail 83
87 Event Search Click this icon to begin an Event Search. 84

88 The Event Search window will open. Fill in the fields for Event Type, Event Level, Start Time, End Time and Node IP to narrow your search, and click Search to begin. 85
89 Event Export Click this icon to do an Event Export. AP Manager II Lite can export the event results to the files in Text, Excel or PDF format. To save event results, highlight the event record in the Event Window and click the Event Export icon in the tool bar. Next, select the file format you want to save. AP Manager II Lite will save all the records of that type to file. 86
90 Notice Settings Click this icon to view the Notice Settings. AP Manager II Lite can set the corresponding actions when some level of events occurs. To configure the notice setting, click the Notice Settings icon in the tool bar. Play sound: Click Browse to select the sound file. AP Manager II Lite will play the sound file when this level of event occurs. Show Pop Message: AP Manager II Lite will pop-up a message window when this level of event occurs. Send Enter the information for the To/From address, SMTP server, User Name/Password [Optional], Subject and Message in the respective column. AP Manager II Lite will send this when this level of event occurs. 87
91 Create Watchlist AP Manager II Lite allows a user to add custom watch a list(s) which only shows the specified devices and events. To create a Watchlist, please follow the steps below: Click the Create Watchlist icon above the Event Window. 88

92 Enter the Watch List Name in the Create Watchlist form. Click the Add button to insert events into Event List. Select the events that need to be added in Select Event form, click the Select button, then click the OK button 89

93 Click the Add button to insert the devices into Device List. Select the devices that need to be added in the Select Device form. Click the Select button, then click the OK button. The new Watchlist will appear on the left-hand panel. 90

94 Tools Topology You can create a topology map to graphically represent planned or existing networks to aid network design. Also, AP Manager II Lite will periodically poll network devices to monitor their status. You can further customize your diagrams with selected icons and bitmap files used for the background. When a topology map is opened, AP Manager II Lite will discover the devices connected on the network and display their icons on the map. 91
95 To create a new topology view, right-click on the Tool tab, and click Add on the pop-up window. The new workspace will open. 92

96 Right-click on the workspace. To change the background, click Set Background in the pop-up window. Use the Open window to browse your computer files. When you locate a file, click it, then click Open to load. To remove the background, right-click the workspace and select Remove Background. 93

97 To Set Network Map Size, right-click on the workspace and click Set Network Map Size. The Map Size window will appear. Adjust the Width and Height settings and click OK. To Rotate the image, select the image first and click Rotate. Enter a figure in the field provided or use the slider to set the rotation. Click OK when complete. 94


98 To add an access point, right-click in on the workspace and select Add Access Point. Under Selected APs, select the new access point you wish to use and click OK. The new access point will appear on the screen alongside the access point(s) you previously had. 95

99 The new access point(s) will appear on the workspace. To add lines and organize the APs more efficiently, right-click in the workspace and click Add Network Link. 96

100 A drawing icon appears for you to create a line between devices. The topology now appears like a normal network schematic. 97

101 To delete a device, right-click the device and click Delete Network Element. A warning message will appear, prompting you to verify your selection. Click Yes to continue with deleting the device or click No to cancel. 98


102 To find out the properties of each device, double-click the device. The Properties window appears. To define the RF Coverage, select the RF Coverage tab, click the Up/Down arrows to select the RF Coverage. 99

103 To define the channel color settings, click ALL or the device you want to configure. Double-click each channel or the color you want to change. A color palette will pop-up for you to select a new color. Click Apply and OK to finish. 100

104 Site Planning Site Planning is designed to help a user layout the wireless network. Before establishing a wireless network, a user needs to plan and evaluate the wireless network. A user locates access points using his/her notebook to scan for access points. Once the access points are located, it can be imported into the AP Manager II Lite for analysis. The Site Planning Interface shows the Location ID (BSSID), Start Time (Band), Interval Time (average RSSI), Length (Min RSSI), and a description (MaxRSSI). 101
105 To run the scan, go to the directory where the AP Manager II Lite is located. Double-click the ScanAP.exe file. 102

106 To collect the Access Points RF information, click ScanAP. Select the target access point. Enter the Location ID, Description, Interval Time and Wireless Adapter, and then click the Start button. 103


107 ScanAP starts to collect information on the access point. A message will appear when the access point scan is complete. You can also save the location information by clicking the Save button when you are prompted. 104

108 To load the Location Information, click the Load button from the Site Planning window, then click Open. Select the file from the list or expand the file to see the details on each location. 105
109 Config Comparison The Config Comparison tool displays template information side-by-side for analysis. It provides all system data on the access points to view and collate. 106


110 Select the File icon to open the Template. Click the Template you want to compare and click OK. The Template is displayed in the left pane. The second option is to click the icon below to download the file to the comparison table. 107

111 Once you have downloaded both profiles, they will be displayed side-by-side for analysis. 108
112 Report Report is segmented into different categories. Each category is assigned a function to summarize details on its particular area. The Report categories are based on Association, Security, Utilization, Channel, Rogue AP, Syslog, Custom and Monitor. 109

113 Association The Association window shows managed access points and their associated client stations in two ways: By Access Point and By Wireless Station. 110
114 By Access Point - Highlight an access point, and the details of client stations that are associated with the AP list will be shown. The detail information includes Date/Time, MAC Address, Alias, Access Point, SSID, Band, Authentication, RSSI and Power Save Mode. From the Group Type you can specify the summary to show the data according to a specified model or group. To export the access point data to a file, click a file type from the Export Text drop-down menu or click the Export Text button. Then enter a file name in the Export window and click the Save button to save the access point data. 111
115 By Wireless Station - To list the access points according to the specified station and detected date, choose the date range from the From/To drop-down menu, or type the MAC address of the device. Export the access point data to a file. Click a file type from the Export Text drop-down menu or click the Export Text button. Then enter a file name in the Export window and click the Save button to save the access point data. 112

116 Security The Security pane graphically lists the security level of the managed access point(s) from lowest to highest - Open System, Shared Key, WPA-Personal, WPA-Enterprise, WPA2-Personal and WPA2-Enterprise. The Security Details pane shows the SSID, Mode Name, MAC Address, IP Address, Authentication and Band information of the access points. 113

117 Utilization The Utilization window shows the band usage of a specific access point. The AP Manager II Lite can poll the access points to show the usage. To start polling, select the access points that AP Manager II Lite will poll from the Select window by clicking the Change button of Dependency and then click Start button. You can also enable the threshold notice by clicking Enable Threshold Notice and select the type of Threshold Column. 114

118 Channel The Channel window graphically lists the channel usage of the managed access points. From the Group Type, specify the graph data according to a specific model or group. 115

119 Rogue AP The Rogue AP pane shows the access points that are not a part of same subnet. Rogue Access Points are showed by Channel, BSSID, Mode and SSID. To categorize the APs, click the Detect button to scan the APs and then click the category at the right side of window. Next, drag the AP from top window to bottom window. 116

120 Syslog The Syslog window shows the System Log information of the managed access point. 117
121 Custom The Custom log report allows you to configure the read-out from a specific date to a designated date. Click the Search button once you have finalized your time frame. Alternatively, you can create a custom configuration according to the Group Type (Model or Category) and Group. 118

122 Monitor The Monitor window shows the performance of an access point that you create from scratch. 119


123 Create a new Surveillance profile by clicking the Create button under Action. The Profile is automatically generated. Device IP Address - Click the arrow to access it. Option - Click the arrow to access it. Public Community String - Automatically generated. Interval Time - Select from the drop-down list. Total Time - Enter a value in minutes. 120


124 Once all the information is entered into the fields provided, click OK. The access point monitors the profile you just created. 121
125 User Manager The AP Manager II Lite allows you to manage user profiles. To manage users, click the User Manager icon at the top of the toolbar. 122
, Privilege and account Creation Date.")

126 This brings up the User Management pane. This shows the current User(s), Privilege and account Creation Date. To create a new user, enter a Name, Password and Privilege rights from the drop-down menu. Click the Add button. Explanation of privilege levels: Administrator: Owns all the rights of the AP Manager II Lite. Manager: Owns all the rights except user manager. Guest: Can only view the information. 123
127 The new details now populate the User Management table. To delete a user, click the Delete button. 124
128 Options Users can change the software operation environment of the AP Manager II Lite. To configure the system environment, click Options in the main toolbar. 125

129 The Options configuration window has four tabs - General, Module, Database Maintenance and Advanced. The General section consists of Logon Settings, SNMP Settings, Polling Settings and Discover. Logon Settings - Select whether to enter a user name and password or select a specific user to use the system. SNMP Settings - Select the Public/Private Community String, the Port number and the SNMP Response TimeOut. Polling Settings - Select to enable or disable the Polling type and the Interval Period. Discover - Enter a value for the Discovery Retry and TimeOut duration. Click Apply, then OK when you are finished with the configuration. Click Cancel if you wish not to make any changes. 126
130 The Module is divided into two sections: Select firmware file for model and Rogue AP. Model Name - Details automatically provided. Firmware File - Click the Browse button to find the new/ updated firmware. Click Save when complete. Module Information - This displays the current information. Rogue AP - This can be auto-signed. Click the checkbox next to Auto-Sign Rogue AP and enter an IP Range. Click Apply, then OK when you are finished with the configuration. Click Cancel if you wish not to make any changes. 127
131 The Database Maintenance allows users to configure the database according to their needs. Data is available for Fault Data, Wireless Station Data, System Log Data, Utilization Data and SysLog Data. Data is further segmented into Notice by Records and Clear Rule. Under Notice By Record, enter a value in the field provided. Under Clear Rule, there are three main options.: Delete all records - Click to clear records. Delete these top records - Enter a value accordingly. Delete these records before the datetime - Enter the calendar date. Click Clear if you wish to start over. Click Apply, then OK when you are finished with the configuration. Click Cancel if you wish not to make any changes. 128
132 The Advanced tab is divided into two sections; TimeOut Settings and FTP Server Settings. TimeOut Settings Under TimeOut Settings, enter a value in the field provided for the following settings: Set Timeout(s) Reboot Timeout(s) Configuration Flash Update Time(s) F/W Download Time(s) F/W Flash Update Time(s) Time Tolerance Time(s) Under FTP Server, there are two main options.: Enable Local FTP Server - Enable Remote FTP Server - Enter Remote IP Address Username Password Port Click Test to see its functionality. Click Apply, then OK when you are finished with the configuration. Click Cancel if you do not want to make changes. 129
Oct 2007 Version 1.01
 Oct 2007 Version 1.01 Table of Contents Introduction...4 System Requirement...4 Getting Started...4 Installing the Smart WLAN Manager...5 Discovering the Switch and AP...9 Understanding the Screen Layout...12
D-Link Central WiFiManager Configuration Guide
 Table of Contents D-Link Central WiFiManager Configuration Guide Introduction... 3 System Requirements... 3 Access Point Requirement... 3 Latest CWM Modules... 3 Scenario 1 - Basic Setup... 4 1.1. Install
Network Management Software ALLNET Zone Controller
 Network Management Software ALLNET Zone Controller For ALL0558N / ALL02850N / ALL02860ND / ALL02880ND User Manual v1.0 Table of Contents 1. Installation & Un-installation... 4 1.1. Install NMS Suite...
LevelOne. User Manual. WAP Mbps PoE Wireless AP V3.0.0
 LevelOne WAP-0005 108Mbps PoE Wireless AP User Manual V3.0.0 i TABLE OF CONTENTS CHAPTER 1 INTRODUCTION... 1 FIGURE 1: WIRELESS ACCESS POINT... 1 FEATURES OF YOUR WIRELESS ACCESS POINT... 1 Security Features...
User s Guide AIR-USB112NH November, VRTL8191SU
 AIRNET 300Mb 802.11b/g/n High Power USB Adapter User s Guide AIR-USB112NH November, 2010 - VRTL8191SU TABLE OF CONTENTS Installation 3 Uninstall 6 Making a Basic Network Connection 8 Ad-Hoc Mode 9 Infrastructure
Wireless-N USB Adapter User s Manual
 Wireless-N USB Adapter User s Manual Copyright 2007 EUSSO Technologies, Inc. All rights reserved. Table of Contents PREFACE... 3 WIRELESS LAN BASICS... 3 Warning... 3 INSTALLATION OVERVIEW... 4 INTRODUCTION...
PMS 138 C Moto Black spine width spine width 100% 100%
 Series MOTOROLA and the Stylized M Logo are registered in the US Patent & Trademark Office. All other product or service names are the property of their respective owners. 2009 Motorola, Inc. Table of
NetBrain Technologies Inc. NetBrain Consultant Edition. Quick Start Guide
 NetBrain Technologies Inc. NetBrain Consultant Edition Quick Start Guide Content 1. Install NetBrain Workstation CE System... 3 1.1 Install and Activate NetBrain Gateway Server... 5 1.2 Install Workstation...
AWUS036NHR Long-Range Indoor IEEE n USB Adapter User Manual
 AWUS036NHR Long-Range Indoor IEEE 802.11n USB Adapter User Manual Alfa Network, Inc. Page 1 Table of Content Overview... 3 Unpacking information... 3 Introduction to the AWUS036NHR Indoor USB Adapter...
MSC-5100 Promotional Bundle Quickstart
 MSC-5100 Promotional Bundle Quickstart This Quickstart shows you how to install, configure, and use the MSC-5100 Promotional Bundle. For detailed configuration and operating information on the MSC-5100
User Guide. Omada Controller Software
 User Guide Omada Controller Software 1910012506 REV 3.2.0 March 2019 CONTENTS 1 Quick Start... 1 1.1 Determine the Network Topology...2 1.1.1 Management on the local Network... 2 1.1.2 Management via Cloud
NMS USER MANUAL. WAP-EN Series Wireless Access Points. Version 1.2, June 2017
 NMS USER MANUAL WAP-EN Series Wireless Access Points Version 1.2, June 2017 Copyright Copyright 2017 Comtrend Corporation. All rights reserved. The information contained herein is proprietary to Comtrend
KMnet Viewer. User Guide
 KMnet Viewer User Guide Legal Notes Unauthorized reproduction of all or part of this guide is prohibited. The information in this guide is subject to change for improvement without notice. We cannot be
User Guide. EAP Controller Software REV1.0.0
 User Guide EAP Controller Software REV1.0.0 1910011273 Contents CONTENTS Chapter 1 System Setup... 1 1.1 System Requirements... 1 1.2 Network Topology... 1 1.3 Software Installation... 2 1.4 Quick Setup...
User Guide. Pharos Control Software
 User Guide Pharos Control Software 1910012155 REV 2.0.1 April 2017 COPYRIGHT & TRADEMARKS Specifications are subject to change without notice. is a registered trademark of TP-Link Technologies Co., Ltd.
WISNETWORKS. WisOS 11ac V /3/21. Software version WisOS 11ac
 WISNETWORKS User Manual V1.1 2016/3/21 Software version 1.0.0021 Table of contents 1. Setup& WMI... 3 1.1 Hardware Setup... 3 1.2 Web Management Interface... 3 2. Status... 4 2.1 Overview... 4 2.1.1 System...
Configuring the network clients
 3 Configuring the network clients Accessing the wireless router Setting an IP address for wired or wireless clients To access the ASUS Wireless Router, you must have the correct TCP/IP settings on your
Quick Start Guide for Standalone EAP
 Quick Start Guide for Standalone EAP CHAPTERS 1. Determine the Management Method 2. Build the Network Topology 3. Log In to the EAP 4. Edit the SSID 5. Configure and Manage the EAP This guide applies to:
NW611. AC600 WiFi Dual Band USB Adapter with 5dBi Antenna
 NW611 AC600 WiFi Dual Band USB Adapter with 5dBi Antenna Chapter 1: Introduction..3 1.1 Product Features..3 1.2 Package Contents.3 1.3 Indicator Description.3 CHAPTER 2: Quick Installation Guide.4 2.1
NETWORK PRINT MONITOR User Guide
 NETWORK PRINT MONITOR User Guide Legal Notes Unauthorized reproduction of all or part of this guide is prohibited. The information in this guide is subject to change for improvement without notice. We
Wireless-G Router User s Guide
 Wireless-G Router User s Guide 1 Table of Contents Chapter 1: Introduction Installing Your Router System Requirements Installation Instructions Chapter 2: Preparing Your Network Preparing Your Network
WIRELESS 150N USB 2.0 ADAPTER
 WIRELESS 150N USB 2.0 ADAPTER DN-70440-1 Rev.2 DN-7042-1 Rev.3 Manual DN-70440-1 Rev.2 DN-7042-1 Rev.3 1 / 38 Chapter 1: Introduction..3 1.1 Product Features..3 1.2 Package Contents.3 1.3 Indicator Description.3
IEEE g Wireless PC Card. User s Guide
 IEEE 802.11g Wireless PC Card User s Guide FCC Certifications Federal Communication Commission Interference Statement This equipment has been tested and found to comply with the limits for a Class B digital
WL-5420AP. User s Guide
 WL-5420AP User s Guide Table of contents INTRODUCTION... 1 About the Operation Modes...2 LED Indicators...5 Solid...5 Ports on the Rear Panel...7 GETTING CONNECTED... 8 WPA AP -CONFIGURATION VIA WEB...
AIRNET 54Mb b/g High Power USB Adapter. User s Manual
 AIRNET 54Mb 802.11b/g High Power USB Adapter User s Manual FCC Certifications Federal Communication Commission Interference Statement This equipment has been tested and found to comply with the limits
D-Link Wireless Aware Smart Switching System Configuration Guide. Wireless Aware Smart Switching System
 Wireless Aware Smart Switching System 1 Table of Contents Table of Contents... 2 Introduction... 3 System Requirement... 3 Scenario 1 - Basic Setup... 3 1.1 Enable the Wireless Awareness Function... 4
User Guide. Omada Controller Software
 User Guide Omada Controller Software 1910012370 REV 2.6.0 March 2018 CONTENTS 1 Quick Start... 1 1.1 Determine the Network Topology...2 1.1.1 Management in the Same Subnet... 2 1.1.2 Management in Different
NMS300 Network Management System Application
 NMS300 Network Management System Application Quick Start Guide October 2013 202-11288-02 350 East Plumeria Drive San Jose, CA 95134 USA Support Thank you for purchasing this NETGEAR product. After installing
WisCloud Access Controller V /6/9
 WISNETWORKS User Manual WisCloud Access Controller V 2.0 2017/6/9 Software Version 3.05.20 Table of contents WISNETWORKS... 1 Chapter 1 Overview... 3 1.1 Access Point...3 1.2 Online Use... 3 1.3 Interferences...3
Wireless Access Point
 802.11g / 802.11b / WPA Wireless Access Point User Guide TABLE OF CONTENTS CHAPTER 1 INTRODUCTION... 1 Features of your Wireless Access Point... 1 Package Contents... 4 Physical Details... 4 CHAPTER 2
WRE2206. User s Guide. Quick Start Guide. Wireless N300 Range Extender. Default Details. Version 1.00 Edition 1, 01/2015
 WRE2206 Wireless N300 Range Extender Version 1.00 Edition 1, 01/2015 Quick Start Guide User s Guide Default Details Web Address http://zyxelsetup OR http://192.168.1.2 www.zyxel.com User Name admin Password
User Manual PDUTracker
 User Manual PDUTracker Management Software for PDU Table of Contents 1. Overview... 1 1.1. Introduction... 1 1.2. Features... 1 2. Install and Uninstall... 1 2.1. System Requirement... 1 2.2. Software
DWS-4000 Series DWL-3600AP DWL-6600AP
 Unified Wired & Wireless Access System Configuration Guide Product Model: Release 1.0 DWS-4000 Series DWL-8600AP DWL-6600AP DWL-3600AP Page 1 Table of Contents 1. Scenario 1 - Basic L2 Edge Setup: 1 Unified
Wireless Access Point
 802.11g / 802.11b / WPA Wireless Access Point User's Guide TABLE OF CONTENTS CHAPTER 1 INTRODUCTION... 1 Features of your Wireless Access Point... 1 Package Contents... 4 Physical Details... 4 CHAPTER
DCP585CW Windows Network Connection Repair Instructions
 Difficulty printing from your PC can occur for various reasons. The most common reason a networked Brother machine may stop printing, is because the connection between the computer and the Brother machine
Legal Notes. Regarding Trademarks KYOCERA MITA Corporation
 Legal Notes Unauthorized reproduction of all or part of this guide is prohibited. The information in this guide is subject to change without notice. We cannot be held liable for any problems arising from
Network Camera. Application Guide 1.5 Before operating the unit, please read this manual thoroughly and retain it for future reference.
 A-EAK-100-15 (1) Network Camera Application Guide 1.5 Before operating the unit, please read this manual thoroughly and retain it for future reference. 2012 Sony Corporation Table of Contents Overview
Wireless USB 600AC USER MANUAL. Dual Band USB Adapter. HNW600ACU Rev
 Wireless USB 600AC Dual Band USB Adapter USER MANUAL HNW600ACU Rev. 2.0 www.hamletcom.com Table of Contents 1. Introduction... 4 1.1 Product Features... 4 1.2 Package contents... 4 2. Wireless USB Adapter
Outdoor Wireless USB Adapter User Guide
 Outdoor Wireless USB Adapter User Guide FCC STATEMENT This equipment has been tested and found to comply with the limits for a Class B digital device, pursuant to part 15 of the FCC Rules. These limits
User Guide. Illustra Connect Version C0
 User Guide Illustra Connect Version.0 8200-114-01 C0 Notice The information in this manual was current when published. The manufacturer reserves the right to revise and improve its products. All specifications
Wi-Fi 300N USER MANUAL. Nano USB Adapter HNWU300NN.
 Wi-Fi 300N Nano USB Adapter USER MANUAL HNWU300NN www.hamletcom.com Table of Contents 1. Introduction... 4! 1.1 Product Features... 4! 1.2 Package contents... 4! 2. Wireless USB Adapter Installation...
APC-100. IEEE g Wireless USB Adapter. User s Guide v1.0
 APC-100 IEEE 802.11g Wireless USB Adapter User s Guide v1.0 FCC Certifications Federal Communication Commission Interference Statement This equipment has been tested and found to comply with the limits
EW-7438RPn Mini User Manual
 EW-7438RPn Mini User Manual 04-2015 / v1.1 CONTENTS I. Product Information... 1 I-1. Package Contents... 1 I-2. System Requirements... 1 I-3. LED Status... 1 I-4. Hardware Overview... 3 I-5. Safety Information...
Nano USB Wireless Adapter RNX-AC600NUB. User Manual
 RNX-AC600NUB User Manual Table of Contents Chapter 1: Introduction....... 03 1.1 Product Features.... 03 1.2 Package Contents...... 03 1.3 Indicator Description... 03 CHAPTER 2: Quick Installation Guide......
A Division of Cisco Systems, Inc. GHz g. Wireless-G. Access Point. User Guide WIRELESS. WAP54G ver Model No.
 A Division of Cisco Systems, Inc. GHz 2.4 802.11g WIRELESS Wireless-G Access Point User Guide Model No. WAP54G ver. 3.1 Copyright and Trademarks Specifications are subject to change without notice. Linksys
NetBrain OE System Quick Start Guide
 NetBrain Technologies Inc. NetBrain OE System Quick Start Guide For Operator Edition Administrators Table of Contents 1. Install NetBrain OE System... 3 1.1 Install Gateway Server... 4 1.2 Install Network
Manage Your Inventory
 About Inventory About Inventory, on page 1 Inventory and Cisco ISE Authentication, on page 2 Display Information About Your Inventory, on page 2 Types of Devices in the DNA Center Inventory, on page 6
KYOCERA Net Admin User Guide
 KYOCERA Net Admin User Guide Legal Notes Unauthorized reproduction of all or part of this guide is prohibited. The information in this guide is subject to change without notice. We cannot be held liable
A Division of Cisco Systems, Inc. GHz 2, g. Wireless-G. User Guide. Access Point WIRELESS WAP54G (EU/LA/UK) Model No.
 Model No.") A Division of Cisco Systems, Inc. GHz 2,4 802.11g WIRELESS Wireless-G Access Point User Guide Model No. WAP54G (EU/LA/UK) Copyright and Trademarks Specifications are subject to change without notice. Linksys
A Division of Cisco Systems, Inc. GHz 2,4 802.11g WIRELESS Wireless-G Access Point User Guide Model No. WAP54G (EU/LA/UK) Copyright and Trademarks Specifications are subject to change without notice. Linksys
High Gain USB Wireless Adapter RNX-AC600HGUBE. User Manual
 RNX-AC600HGUBE User Manual Table of Contents Chapter 1: Introduction....... 03 1.1 Product Features.... 03 1.2 Package Contents...... 03 1.3 Indicator Description... 03 CHAPTER 2: Quick Installation Guide......
Software Manual Net Configuration Tool POS Printer Rev. 2.03
 Software Manual Net Configuration Tool POS Printer Rev. 2.03 http://www.bixolon.com Table of Contents 1. Manual Information... 3 2. Operating System (OS) Environment... 3 3. Software Installation & Uninstallation...
CounterACT Wireless Plugin
 CounterACT Wireless Plugin Version 1.7.0 Table of Contents About the Wireless Plugin... 4 Wireless Network Access Device Terminology... 5 How It Works... 6 About WLAN Controller/Lightweight Access Points...
Chapter 1 Introduction
 Copyright Statement is the registered trademark of Zonet Technology Inc. All the products and product names mentioned herein are the trademarks or registered trademarks of their respective holders. Copyright
Grandstream Networks, Inc. GWN76xx Wi-Fi Access Points Master/Slave Architecture Guide
 Grandstream Networks, Inc. GWN76xx Wi-Fi Access Points Master/Slave Architecture Guide Table of Contents INTRODUCTION... 4 DISCOVER AND PAIR GWN76XX ACCESS POINTS... 5 Discover GWN76xx... 5 Method 1: Discover
FreeWave Technologies Tool Suite Version 2.6.0
 FreeWave Technologies Tool Suite Version 2.6.0 FreeWave Technologies, Inc. 1880 South Flatiron Court Boulder, CO 80301 (303) 444-3862 (303) 786-9948 Fax www.freewave.com Table of Contents FreeWave Tool
802.11b/g Access Point WL-8000AP
 802.11b/g Access Point WL-8000AP User s Guide - FCC Certifications This equipment has been tested and found to comply with the limits for a Class B digital device, pursuant to Part 15 of the FCC Rules.
WIRELESS 150N USB 2.0 ADAPTER
 WIRELESS 150N USB 2.0 ADAPTER Manual DN-7042-1 Rev.3 Chapter 1. Introduction Thank you for purchasing the wireless 802.11b/g/n USB adapter! This adapter is mini size design and you are able to plug it
Software Manual Net Configuration Tool Rev. 1.01
 Software Manual Net Configuration Tool Rev. 1.01 http://www.bixolon.com Table of Contents 1. Manual Information... 3 2. Operating System (OS) Environment... 3 3. Software Installation & Uninstallation...
Alarms and Events. Using the Alarm Dashboard CHAPTER
 CHAPTER 14 This chapter describes the type of events and alarms reported, how to view alarms and events by product or entity and severity, and how to view IDS signature attacks. It contains these sections:
Version /01/2013. User Manual. DAP-1665 Wireless AC1200 Dual Band Access Point DAP-1665
 Version 1.0 10/01/2013 User Manual DAP-1665 Wireless AC1200 Dual Band Access Point DAP-1665 Table of Contents Product Overview... 4 Package Contents... 4 System Requirements... 5 Introduction... 6 Features...
User Manual. MPPTracker. Management Software for Solar Charge Controller. Version: 1.2
 User Manual MPPTracker Management Software for Solar Charge Controller Version: 1.2 Table of Contents 1. MPPTracker Overview... 1 1.1. Introduction... 1 1.2. Features... 1 2. MPPTracker Install and Uninstall...
WAP9112/9114 Quick Start Guide
 WAP9112/9114 Quick Start Guide Release 7.6 NN47252-308 Issue 02.01 March 2016 Contents Chapter 1: Introduction... 3 Chapter 2: Required Software Components... 4 Chapter 3: Installing or Upgrading Wireless
User Guide. Omada Controller Software
 User Guide Omada Controller Software 1910012394 REV 2.7.0 July 2018 CONTENTS 1 Quick Start... 1 1.1 Determine the Network Topology...2 1.1.1 Management in the Same Subnet... 2 1.1.2 Management in Different
Legal Notes. Regarding Trademarks KYOCERA MITA Corporation
 Legal Notes Unauthorized reproduction of all or part of this guide is prohibited. The information in this guide is subject to change without notice. We cannot be held liable for any problems arising from
WVL2 Wireless Vehicle Link 2 Installation and Setup Manual
 WVL2 Wireless Vehicle Link 2 Installation and Setup Manual Chapter 1: Introducing the Wireless Vehicle Link 2...1 WVL2 Components...2 Component Checklist...3 Product Specifications...4 System Requirements...5
54Mbps Pocket Wireless Access Point (WL-330g)
") 54Mbps Pocket Wireless Access Point (WL-330g) Copyright 2004 ASUSTeK COMPUTER INC. All Rights Reserved. Contents Conventions... 2 Welcome!... 3 Package contents... 3 System requirements... 3 Device installation...
54Mbps Pocket Wireless Access Point (WL-330g) Copyright 2004 ASUSTeK COMPUTER INC. All Rights Reserved. Contents Conventions... 2 Welcome!... 3 Package contents... 3 System requirements... 3 Device installation...
Wireless Bridge User Manual. Version 1.0
 Wireless Bridge 520645 User Manual Version 1.0 FCC Radiation Exposure Statement This equipment complies with FCC radiation exposure limits set forth for an uncontrolled environment. This equipment should
Wireless USB Port Multi-Functional Printer Server. Model # AMPS240W. User s Manual. Ver. 1A
 Wireless USB 2.0 1-Port Multi-Functional Printer Server Model # AMPS240W User s Manual Ver. 1A Table of Contents 1 Introduction...3 1.1 Package Contents... 3 1.2 System Requirements... 3 2 Multi-Functional
KYOCERA Net Viewer User Guide
 KYOCERA Net Viewer User Guide Legal Notes Unauthorized reproduction of all or part of this guide is prohibited. The information in this guide is subject to change without notice. We cannot be held liable
Preface. Manual Revisions. Revision Date Description 1.0 March 3, 2009 DAP-3520 Revision A1 with firmware version Trademarks
 Preface D-Link reserves the right to revise this publication and to make changes in the content hereof without obligation to notify any person or organization of such revisions or changes. Manual Revisions
WiFi Advisor Wireless LAN Analyzer Quick Start Guide. October 2015 Revision OCT-2015 Technical Assistance: GO VIAVI /
 WiFi Advisor Wireless LAN Analyzer Quick Start Guide October 2015 OCT-2015 Technical Assistance: 1.844.GO VIAVI / 1.844.468.4284 1 Contents 1. WiFi Advisor Wireless LAN Analyzer Overview... 4 2. The WFED-300AC
Version 4.1 June Xerox Device Agent (XDA) Lite User Guide
 Lite User Guide") Version 4.1 June 2013 Xerox Device Agent (XDA) Lite User Guide 2008-2013 Xerox Corporation. All rights reserved. Xerox and Xerox and Design are trademarks of Xerox Corporation in the US and/or other countries.
Version 4.1 June 2013 Xerox Device Agent (XDA) Lite User Guide 2008-2013 Xerox Corporation. All rights reserved. Xerox and Xerox and Design are trademarks of Xerox Corporation in the US and/or other countries.
IBM NetBAY Virtual Console Software. Installer and User Guide
 IBM NetBAY Virtual Console Software Installer and User Guide INSTRUCTIONS This symbol is intended to alert the user to the presence of important operating and maintenance (servicing) instructions in the
NETWORK LAB 2 Configuring Switch Desktop
 Configuring Switch 1. Select the switch tab and then add a switch from the list of switches we have to the workspace, we will choose (2950-24) switch. 2. Add a number of PCs next to the switch in order
LevelOne User Manual WNC-0600USB N_One Wireless USB Adapter
 LevelOne User Manual WNC-0600USB N_One Wireless USB Adapter V2.0.0-0712 i Safety FCC WARNING This equipment has been tested and found to comply with the limits for a Class B digital device, pursuant to
User Guide. For TP-Link Auranet Access Points
 User Guide For TP-Link Auranet Access Points EAP110 / EAP115 / EAP225 / EAP245 / EAP320 / EAP330 / EAP115-Wall / EAP110-Outdoor 1910012276 REV 2.0.2 October 2017 CONTENTS About this User Guide... 1 Overview...
IBM NetBAY Virtual Console Software. Installer and User Guide
 IBM NetBAY Virtual Console Software Installer and User Guide INSTRUCTIONS This symbol is intended to alert the user to the presence of important operating and maintenance (servicing) instructions in the
Table of Contents. Table of Contents
 Table of Contents Table of Contents Product Overview...4 Package Contents... 4 System Requirements... 4 Features... 5 Hardware Overview... 6 Connections... 6 LEDs... 7 Wireless Installation Considerations...
User Guide. EAP Controller Software
 User Guide EAP Controller Software 1910012206 REV 2.4.8 July 2017 CONTENTS 1 Quick Start... 1 1.1 Determine the Network Topology...2 1.1.1 Management in the Same Subnet... 2 1.1.2 Management in Different
Chapter 1 Introduction
 Copyright Statement is the registered trademark of Zonet Technology Inc. All the products and product names mentioned herein are the trademarks or registered trademarks of their respective holders. Copyright
Industrial Ethernet Products Management Utility
 Industrial Ethernet Products Management Utility Open-Vision User s Manual Version 1.1 April, 2013 ORing Industrial Networking Corp. 3F.,NO.542-2, Jhong-Jheng Rd.Sindian District, New Taipei City 23148
Document Created by Nick Schuster
 Document Created by Nick Schuster Table of Contents Product Overview... 4 Introduction... 4 Features... 5 Package Contents... 6 System Requirements... 6 Hardware Overview... 7 LEDs... 7 Connections...
ZAC Product Specification
 ZAC-1023-5-13 Part Number: ZN-7200-2AEI-L Product Specification IEEE 802.11 a/n CPE Version: 0.6-1 - 2 Specification 2.1 Hardware Specification Table 2-1 Hardware Specification Features Chipset Standard
IEEE a/b/g/n Wireless LAN Access Point. AT-MWS AP series. Reference Manual
 IEEE 802.11a/b/g/n Wireless LAN Access Point AT-MWS AP series Reference Manual Table of Contents 1 Before You Begin 5 1.1 Considerations for Wireless Installation...6 Computer Settings...6 Hardware Installation...9
3GWIFIMRD. 3.5G plus WLAN Desktop Server Router. Quick Setup Guide. 1 Version 1.0
 3GWIFIMRD 3.5G plus WLAN Desktop Server Router Quick Setup Guide 1 Version 1.0 Declaration of Conformity Marking by the above symbol indicates compliance with the Essential Requirements of the R&TTE Directive
NetBrain Workstation AE Quick Start
 NetBrain Workstation AE Quick Start For Architect Edition Must-See Features Walk-through Ready-to-use Internet Lab for Test Run Link to Download Software and In-Depth Training Look for: Test Run over Intermet
Figure 35: Active Directory Screen 6. Select the Group Policy tab, choose Default Domain Policy then click Edit.
 PC and Server Configuration Figure 35: Active Directory Screen 6. Select the Group Policy tab, choose Default Domain Policy then click Edit. Figure 36: Group Policy Tab 7. Select Computer Configuration
Release Notes for Avaya WLAN 9100 AOS-Lite Operating System WAP9112 Release WAP9114 Release 8.1.0
 WLAN 9100 Release Notes Release Notes for Avaya WLAN 9100 AOS-Lite Operating System WAP9112 Release 8.1.0 WAP9114 Release 8.1.0 Avaya Inc - External Distribution 1. Introduction This document provides
KYOCERA Net Viewer 5.3 User Guide
 KYOCERA Net Viewer. User Guide Legal Notes Unauthorized reproduction of all or part of this guide is prohibited. The information in this guide is subject to change without notice. We cannot be held liable
User Guide. 300Mbps Wireless N Access Point TL-WA801ND REV
 User Guide 300Mbps Wireless N Access Point TL-WA801ND REV5.0.0 1910012077 Contents About This Guide...1 Chapter 1. Get to Know About Your Access Point.................... 2 1. 1. Product Overview............................................................3
System Requirements. Package Contents
 System Requirements A computer or laptop with an available USB 2.0 port Windows 2000 (SP4) or XP (SP2) 300MHz processor and at least 32MB of RAM Properly installed and working USB Controller A draft 802.11n
User Guide. EAP Controller Software REV
 User Guide EAP Controller Software REV 2.0.0 1910011446 Content 1 Quick Start...1 1.1 Determine the Network Topology... 2 Manage EAPs in the LAN...2 Manage EAPs in Different Network Segment...2 1.2 Install
CWA-854HT 54 Mbps Wireless-G High Transmission Access Point User s Guide
 CWA-854HT 54 Mbps Wireless-G High Transmission Access Point User s Guide May 2006 Version 1.00 1 Table of Contents Table of Contents... 2 List of Figures... 4 List of Tables... 6 Chapter 1. Introduction...
Wireless Presentation System User s Manual
 Téléchargé depuis www.lampe-videoprojecteur.info Wireless Presentation System User s Manual Version: 1.0 Date: 2008.1.11 User s Manual 1 Table of Contents 1. Overview... 3 2. First Setup of the Wireless
A Division of Cisco Systems, Inc. GHz g. Wireless-G. User Guide. Exterior Access Point WIRELESS WAP54GPE. Model No.
 A Division of Cisco Systems, Inc. GHz 2.4 802.11g WIRELESS Wireless-G Exterior Access Point User Guide Model No. WAP54GPE Copyright and Trademarks Specifications are subject to change without notice. Linksys
Table of Contents Surveillance Center Overview...3 Log...30 Live Camera Panel...31 Live Camera Panel Explained I...32
 Surveillance Center Overview...3 Introduction...3 System Requirements... 4 Features... 5 Checking the Hardware Requirements... 6 Installing and Accessing the Module... 8 Connecting a Camera to the Network...
USER MANUAL SNMP-RC210 SNMP WEB MANAGEMENT CARD. bxterra.com
 USER MANUAL SNMP-RC210 SNMP WEB MANAGEMENT CARD bxterra.com TABLE OF CONTENTS INTRODUCTION... INSTALLATION... SNMP MANAGER GUI... SNMP MANAGER FUNCTIONS MENU... SETTINGS... ONLINE UPGRADE... SYSTEM MANAGER...
AplombTech Smart Router Manual
 AplombTech Smart Router Manual (Version: 1.0) 1 Version & Purpose Version Manual version V 1.0 Explanation Corresponds to the initial version of device Purpose This manual describes the function features
GHz g. Wireless A+G. User Guide. Notebook Adapter. Dual-Band. Dual-Band WPC55AG a. A Division of Cisco Systems, Inc.
 A Division of Cisco Systems, Inc. Dual-Band 5 GHz 802.11a + GHz 2.4 802.11g WIRELESS Dual-Band Wireless A+G Notebook Adapter User Guide Model No. WPC55AG Copyright and Trademarks Specifications are subject
ForeScout CounterACT. Configuration Guide. Version 1.8
 ForeScout CounterACT Network Module: Wireless Plugin Version 1.8 Table of Contents About the Wireless Plugin... 4 Wireless Network Access Device Terminology... 6 How It Works... 6 About WLAN Controller/Lightweight