3.3. Annotating Graphs on your ipad Opening a Stored Experiment File Accessing the HELP Screen and Menu
|
|
|
- Erin King
- 5 years ago
- Views:
Transcription
1
2 Contents 1. DataHub Hardware Overview What s in the Pack Ports and Controls Built-in Sensors Using the DataHub DataHub display DataHub keys DataHub menu Setup the DataHub for the next logging session DataHub information Configuration of the DataHub Ward s DataHub Analysis Software Software Installation Software Functions Software Popular Icons and their Functions Ward s DataHub for ipad Initial Setup Download the Ward s DataHub Application Install Pairing the Ward s DataHub with the ipad Downloading Ward s DataHub Stored Measurements to the ipad... 19
3 3.3. Annotating Graphs on your ipad Opening a Stored Experiment File Accessing the HELP Screen and Menu Ward s DataHub for Android Initial Setup Meter View Data Collection Download DataHub Stored Measurements to the Tablet Use of Data Analysis (markers, curve fitting) Use of Graph Annotation Use of Map view on a Field Trip Workbook Section Online Help DataHub Ward s DataHub Communication USB Communication Bluetooth Wireless Communication Pairing with a PC running Windows OS Pairing with a Mac OS Pairing with an ipad Pairing with Android OS Experiment Samples... 30


4 1. DataHub Hardware Overview 1.1 What s in the Pack 1 DataHub data logger 2 DataHub AC charger 3 USB cable 4 Quick start guide 5 Warranty page 7 Banana cables 8 Temperature probe 9 Air pressure tube 10 Plastic rod and screw 11 ph electrode 6 Software CD


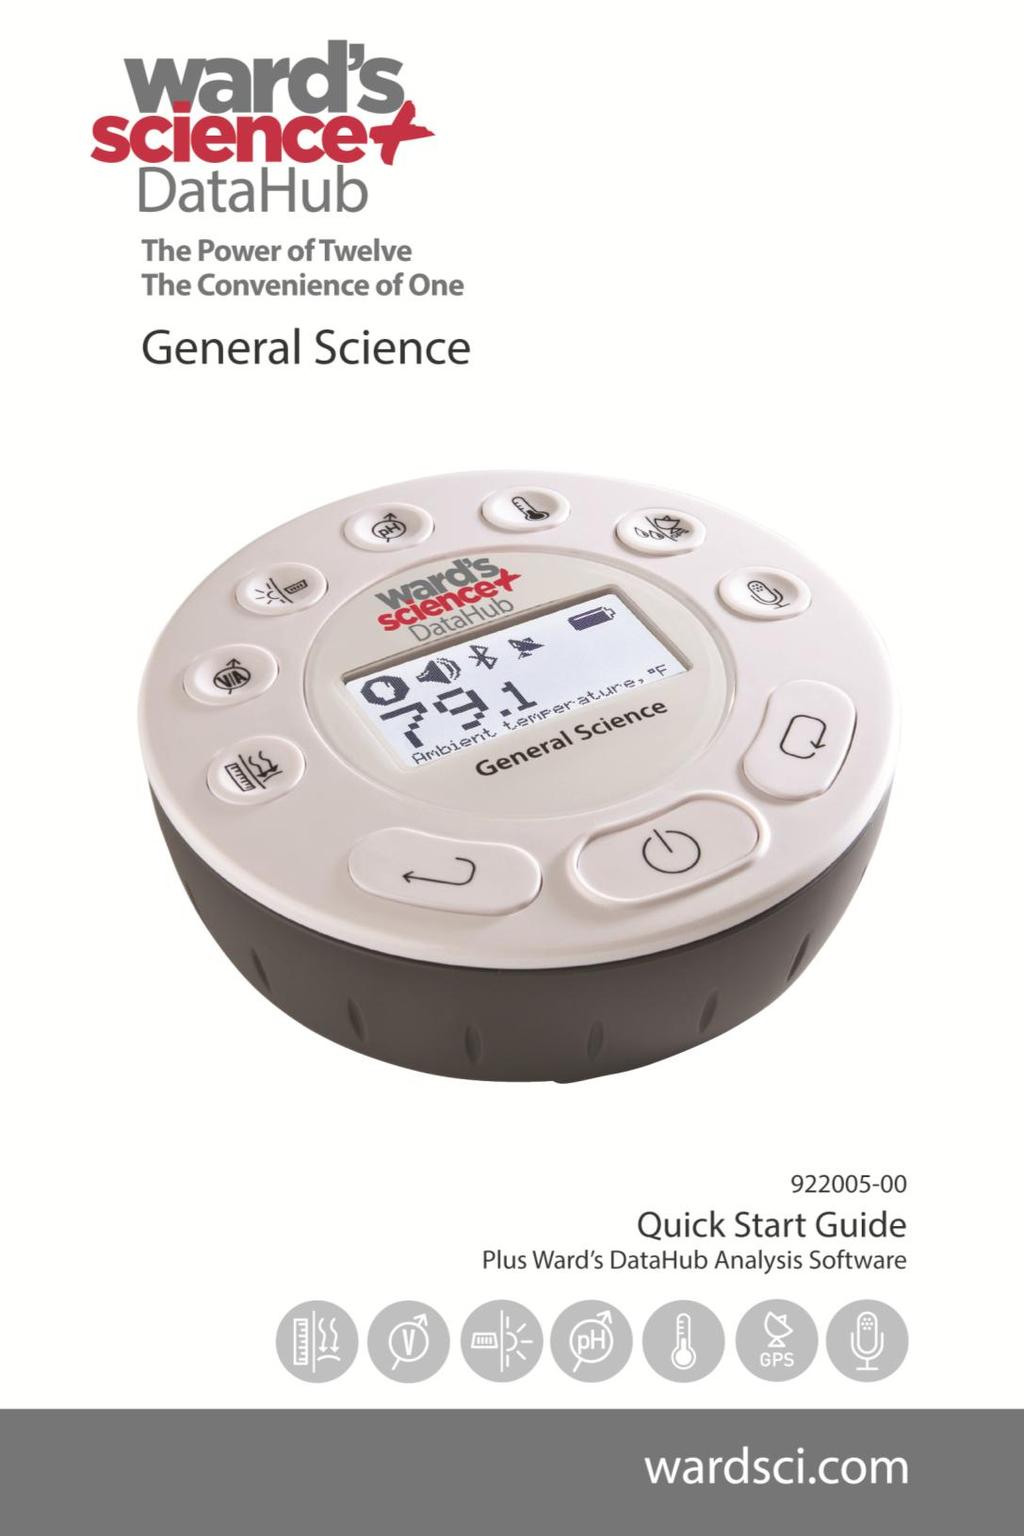
5 1.2 Ports and Controls The picture below reviews the DataHub ports, sensors, keypad and display: 1 On/Off and Escape key 2 Scroll key Select key 4 Graphical display 128 x 64 pixels 5 Sensor selection keys USB port 7 Rotating ring 6 8 Plastic leg 9 M5 screw insert 7 10 Distance sensor 8 11 Microphone, sound level sensors Relative humidity sensor 13 External temperature input ph input 15 Light sensor, universal input Current and voltage sensor 17 Air pressure sensor GPS sensor 2
6 1.3 Built-in Sensors Icon Type Range Description Max. Sample Rate External Accessories (supplied with DataHub) Air pressure 0 to 300 kpa Measuring air pressure 10/s Plastic tube Ambient temp. -10 C to 50 C Measuring ambient temperature 100/s Not required Current -1 to +1 A Measuring electric current 24,000/s Banana cable Distance 0.2 to 10 m Measuring distance 25/s Not required External temp. -25 C to 125 C General purpose stainless steel temperature probe 100/s Temp. probe GPS N/A Measuring 6 different parameters: Longitude, latitude, course, speed, date and time 1/s Not required Light 0 to 55,000 lux Measuring light level 24,000/s Not required 3
 Not required Microphone Sound wave 0 to 5 V Measuring sound waves 24,000/s Not required ph 0 to 14 ph Measuring ph level 10/s")
7 Icon Type Range Description Sound Sound level 56 to 93 db Measuring sound level Max. Sample Rate 10/s sound level External Accessories (supplied with DataHub) Not required Microphone Sound wave 0 to 5 V Measuring sound waves 24,000/s Not required ph 0 to 14 ph Measuring ph level 10/s ph electrode Relative humidity 0 to 100% RH Measuring relative humidity 100/s Not required Universal input 0 to 5 V Connecting Fourier or Vernier analog sensors 24,000/s Universal input adapter cable Voltage -30 to +30 V Measuring electric voltage 24,000/s Banana cable 4

8 1.4 Using the DataHub CHARGE THE DATAHUB BATTERY BEFORE STARTING Before working with the DataHub for the first time, the unit should be charged for six hours with the supplied 6 V charger. The DataHub charging input is located to the left of the On/Off key. Simply rotate the orange ring until the charging input on the DataHub is exposed and then connect the charger plug to the charging input. The DataHub charger will accept any input voltage ranging from 100 to 240 VAC 50/60 Hz, making it functional worldwide. DataHub charging input 5


9 1.4.1 DataHub display The DataHub LCD display allows users to see the different sensor readings and to setup or re-configure the DataHub parameters. 1 Run/Stop icon shows when the DataHub is logging data, or when the DataHub is not logging sensor data. 2 Sound Status shows active sound beep when the key is pressed and when the sound beep is disabled. 3 Communication Status shows when Bluetooth communication is enabled, or DataHub. when the USB cable is connected from the host computer to the 6

10 4 GPS Status shows when the GPS is enabled, when locked to GPS satellites and provides valid positioning parameters. 5 Battery Level shows battery capacity at 3 levels when the DataHub is connected to the external charger., or 6 Sensor Value shows the selected sensor value. 7 Sensor Name and Unit - shows the selected sensor name and unit DataHub keys The DataHub 10 keys are divided into 7 sensor keys and 3 control keys. Using the sensor keys users can select and view different sensor readings. The control keys are used to turn on/off the DataHub, setup the device for the next logging session and configure all its parameters. The 3 control keys are: Select key 7 sensor keys On/Off and ESC key Scroll key 3 control keys 7


11 1.4.3 DataHub menu Press the Scroll key to enter the DataHub menu. Then use the Scroll key to scan menu options, the select key to choose a menu option and the ESC key to go one level up in the menu Setup the DataHub for the next logging session DataHub information 8

12 Configuration of the DataHub 9

13 2. Ward s DataHub Analysis Software 2.1 Software Installation To install the software, users should run the following installers: For PC: Ward s DataHub-en-1.0-setup.exe For Mac: Ward s DataHub-en-1.0-setup Then follow the simple installation instructions. These instructions take the user through the installation of the Ward s DataHub software and the USB driver needed for USB communication with the DataHub. 2.2 Software Functions 10
14 2.3 Software Popular Icons and their Functions Selecting the Open-project icon opens the stored activity *.XML files and displays all its graphs and graphical attributes. Selecting the Workbook icon opens the activities folder, where users can choose from a variety of PDF activities. Clicking the Display-options small triangle icon allows the user to select one of the following six display options: 1. Meter view 2. Table view 3. Graph view 4. Map view 5. Mixed Meter and Graph view 6. Mixed Table and Graph view 11
15 Selecting the Sensor legend: 1. A left click on the sensor name will set it as the active sensor and will change the y-axis to reflect this sensor s units and scale 2. First right click on the sensor name will change the line graphs to symbols 3. Second right click on the sensor name will remove this sensor graph from the display 4. Third right click on the sensor name will return to the default view for this sensor and will show it as a line graph on the display The graphic window includes a graph title. The default title is New Experiment. Changing this title is done with a double left mouse click over the title. A small text dialog box will open where the user can type in the new title. When displaying two or more sensors a right click on the graph x-axis title will open a dialog box for assigning a sensors or time as the x-axis. Selecting the Meter view: A left mouse click on the four bottom blue dot icons will change the number of meters on the screen to: 1, 2, 4 or 6 meters. A left click on any of the meters will open a dialog box for meter type selection and assigning a sensor for this meter. Selecting the Marker icon enters into Marker mode. Left mouse click, near any of the graphs, will place a marker on the graph. Hovering over any of the markers, while pressing and holding the left mouse button and dragging the mouse, will move the marker over the graph. Selecting the Marker icon again, exits the Marker mode. 12
16 Selecting the Annotation icon activates the Annotation mode. Left mouse click opens a dialog box where users can enter text and images. Pressing the Annotation icon again exits the Annotation mode. Pressing the Function-options small triangle icon allows the user to apply the mathematical functions listed below between the graph markers: 1. Selecting the Linear regression icon will display the best linear line that fits the graph between the locations of two markers. Next to the line the software will open a small text box displaying the linear line equation: Y= ax+b. 2. Selecting the Quadric regression icon will display the best parabolic line (2 nd degree) that fits the graph between the locations of two markers. Next to the line the software will open a small text box displaying the parabolic line equation: Y= ax²+bx+c. 3. Selecting the FFT icon will split the graphic display and show the original measurement on a time scale in the top graphic window, and its harmonics, on a frequency scale in the bottom graphic window. Selecting the Run icon launches a new data collection session. Selecting the Stop icon ends the current data collection session. 13
17 Selecting the Selective download icon opens a table listing all stored recordings. Selecting one of the lines on the table and pressing download will download this specific recording to the computer. Setting up the DataHub is done by selecting the Setup icon. The software will open a dialog box, where users can select/remove sensors, set the sampling rate and the amount of samples for the next data recording. Selecting the EXCEL icon saves the file in a *.CSV format, prompts the user for a file name and then automatically opens EXCEL and exports the experiment data into the spreadsheet. Ward s DataHub status bar, is located at the bottom right corner of the software. It includes 3 icons: 1. USB indicator where blue indicates a USB communication between the computer and the DataHub. 2. Bluetooth indicator where blue indicates a Bluetooth wireless communication between the computer and the DataHub. A right mouse click on this icon will open a list of recognized DataHubs, click on one to connect. 1. Memory info shows how many experiments are stored in the DataHub memory, out of a maximum of 127. In the example above there are 7 stored experiments out of 127. A right mouse click on this section will allow users to erase all stored data or just the last recording. 14
18 3. Ward s DataHub for ipad 3.1 Initial Setup Download the Ward s DataHub Application Install This is a one-time action needed to install the DataHub application on your ipad. 1. Tap the ipad App Store Icon. 2. Search for Ward s DataHub. 3. Press the FREE download green key to install the application Pairing the Ward s DataHub with the ipad This is a one-time action needed when you connect your Ward s DataHub to the ipad for the first time. On the Ward s DataHub = Select Key = On/Off & ESC Key = Scroll Key 15
19 1. Press the Scroll key on the Ward s DataHub to launch the Ward s DatHub menu. 2. Press the Scroll key again. 3. Then press the Select key to access the configuration menu. 4. Once in the configuration menu, press the Scroll key twice until the Bluetooth icon is highlighted. X2 5. Then press the Select Key. 6. In the Bluetooth menu, press the Scroll key until BT pairing is highlighted. 16

20 7. Then press the Select key. 8. Once connected to the Bluetooth, the Ward s DataHub will produce a long beep sound, indicating that it is in "pairing" mode and switch to BT Enabled 9. Now, press the Escape key three times. x3 On the ipad 1. Tap the ipad Settings icon. 2. Go to the Bluetooth option and tap it to turn it on. 3. Tap the Bluetooth option to reveal the Devices List. This shows all the devices in range. Bluetooth option Devices list 17


21 4. Locate the serial number on the sticker on the back of the DataHub. Last four digits of serial number should match on both devices On the Devices List on the ipad, a list of active DataHubs will appear. Four numbers will appear next to each listing. Select the device whose numbers match the last four digits of the serial number on your DataHub. 5. The ipad will ask for a PIN code. Enter 1234 and tap Pair. 6. The ipad will show the Ward s DataHub connected for your device s serial number. Last four digits of serial number 18
22 7. Close Settings and tap the Ward s DataHub Analysis Software icon to open this program. Bluetooth icon Note: If the ipad has been successfully paired with the Ward s DataHub, the Bluetooth icon will appear next to the setup icon. Setup icon 3.2. Downloading Ward s DataHub Stored Measurements to the ipad The Ward s DataHub can store up to 127 different experiments. This is useful when conducting multiple experiments and/or collecting measurements over a long period of time. 1. Tap the ipad Download icon. 19

23 2. The ipad will list all Ward s DataHub stored experiments. Each line on this list shows which sensors were recorded, at what sampling rates, and for how many samples, as well as the date and time of each recording. 3. Tap on one of the lines in the list. The Ward s DataHub transfers the data to the ipad. 4. After all the data is transferred, the ipad will show a graph of the collected measurements Annotating Graphs on your ipad 1. When a screen with a graph is showing, touch and hold on the background (in other words, do not touch any data point on the graph) to create an empty annotation box. 2. The edit annotation box opens automatically. You can then use the keyboard and/or touch-screen to: Write or edit an annotation. Add an image using the camera or the image gallery. Remove an annotation. (Additional instructions for annotating a graph are listed on the following page). 20

24 3. To label a data point, touch and hold directly on the data point. Background Data point Edit annotation box appears when background of a graph is touched Opening a Stored Experiment File This instruction uses the Physics Free Fall experiment as an example. The procedure for opening an experiment file and annotating a graph would be similar for all other experiments. 1. Tap the ipad Open icon and select Free Fall. A graph will appear. For this experiment, the graph shows a real-time Ward s DataHub Distance Sensor recording of a ping-pong ball bouncing on a table. 21

25 2. Touch and hold on the graph to add a marker. 3. Touch the marker cross, and drag it with your finger. As the marker follows the graph line, notice the data in the text box changing. 4. Tap the graph twice to view the actual sampling points. 5. Touch and hold on the graph to add a second marker. 6. Place a marker at the beginning and end of a single ball jump. 7. Tap the Curve Fitting icon and select a Quadratic Regression to get the mathematical equation for the ping-pong ball jump. From this equation you can calculate Earth s gravitational force Accessing the HELP Screen and Menu 1. Tap on the? on the bottom right-hand corner of the ipad screen. 2. Open the appropriate view. 3. Tap on the HELP icon to access a list of features and controls. 22
26 4. Ward s DataHub for Android The DataHub software for Android 4 and above is available for download from the Ward s website and from Google Play. The software wirelessly integrates between the DataHub and the Android tablet, allowing full DataHub management (setup of all data logging parameters, online display of current measurements and download of the sample memory), together with graph manipulations (markers, zoom, crop and text annotation) and data analysis (statistics and curve fitting etc.). 4.1 Initial Setup Set wireless communication between the DataHub and the Android tablet Make sure the DataHub is paired to the Android (see section 5.2.4) Turn on the DataHub Launch the application Tap the options icon in the top action bar (rightmost, three vertical dots) Tap and select the name of the DataHub you would like to connect with (e.g. DataHub_6588) The App name (top right) will change to the named DataHub, indicating that the connection is established 4.2 Meter View Tap the Meter view to see the current values of the DataHub probeware Tap one of the meters and scroll the probe wheel to select a different probe type for an existing meter Select a different meter type from the horizontal line of icons 4.3 Data Collection Tap the SETUP icon and enter the SETUP screen. This dialog box allows you to select the probes, sampling rate and amount of samples for the next data recording. Tap the RUN icon to start recording and observe the graph build up on the screen 23
27 You may switch the display to a Bar Graph view by tapping the Bar Graph key You may switch the display to a Table view by tapping the Table key To stop recording tap the STOP icon 4.4 Download DataHub Stored Measurements to the Tablet The DataHub can store up to 127 different experiments. This is very useful when conducting outdoor data collection or long measurements. Tap the Download icon The application will list all DataHub stored experiments. Each line on this list shows what probes were recorded, at what sampling rate and for how many samples. In addition it indicates the date and time of the recording. Click on one of the lines in the list and the DataHub transfers the data to the tablet. After all the data is transferred, the tablet will show a graph of the collected measurement 4.5 Use of Data Analysis (markers, curve fitting) Tap the Open icon and select Free Fall. This graph describes a real recording of a ping-pong ball bouncing on a table, as recorded by the DataHub distance probe. Long touch on the graph to add a marker Touch the marker to cross and drag it with your finger. View the marker text box data changing while the marker follows the graph line. Tap the graph legend and select Dots to view the actual sampling points Long touch the graph to add a second marker Place both the markers at the beginning and end of a single ball jump Tap the Curve Fitting icon and select a Quadric Regression to get the mathematical equation representing the ping-pong ball jump. From this equation we can calculate earth s gravitation. 4.6 Use of Graph Annotation Use a long touch anywhere on the background (not on a graph), create an empty annotation. The edit annotation box opens automatically. From here: o Edit or write an annotation o Remove the annotation 24
28 4.7 Use of Map view on a Field Trip Recording GPS together with other DataHub probes enables the DataHub software to plot these sensors over the Google maps. Make sure the tablet is connected to the Internet Tap the Open icon and select Walk in the Park. In this experiment the different climate in a city park compared to a nearby cross road was measured. Tap the color scale on the left and select Amb. Temperature. Observe the dramatic temperature change while walking from the city cross-road to the park. Tap the colored samples on the map to get a marker with the temperature value Pinch to zoom in/out the map See the experiment data in a table, by tapping the Table View and observe the GPS longitude and latitude values 4.8 Workbook Section Tap the Workbook icon to view DataHub experiment guides Tap on one of the experiments on the list and view a comprehensive PDF guide of that experiment. 4.9 Online Help DataHub analysis software offers a PDF quick start guide. To open the quick start guide, tap on the HELP icon. 25
29 5. DataHub Ward s DataHub Communication 5.1 USB Communication Upon USB cable connection between the computer and the DataHub, the Ward s DataHub software automatically detects the USB connection and begins communicating with the DataHub. 5.2 Bluetooth Wireless Communication Before wireless communication with a DataHub for the first time, the DataHub should be added as a device to the computer in a process called pairing. Pairing need be done only once for each DataHub, after which the computer stores the connection information, including a unique name for each DataHub. When no DataHub is connected via USB, the computer will automatically try to wirelessly connect to the last connected DataHub. To connect to a different or a new DataHub, right click on the Bluetooth icon in the Ward s DataHub status bar, located at the bottom right corner of the screen, then click on the DataHub you want to connect to Pairing with a PC running Windows OS 1. Turn on the DataHub. Make sure the DataHub is not showing the sleep icon. If it does, please press any button to leave the sleep mode. 2. Start the DataHub software. 3. Right click the Bluetooth icon located on the status bar at the bottom right corner of the screen 4. From the new pop-up menu select "Find more DataHubs and sensors". The computer opens the "add a device" dialog box and starts searching for the Bluetooth device. 5. Your DataHub will be displayed as "DataHub-xxxx", where "xxxx" are the last four digits of the DataHub serial number sticker. 6. Select this device and press Next 26
30 7. On the DataHub: Press and hold the SCROLL key to put the DataHub in Pairing mode. The DataHub will produce a long "beep" while its screen shows "BT pairing". 8. On the computer dialog box select the 2nd option: "Enter the device pairing code" and click Next. 9. In the next dialog box enter "1234' as the pairing code, click Next 10. Wait for the computer to finish the process and announce "Your device is ready to use". 11. Right click the Bluetooth icon on the status bar. Choose the DataHub you've just paired and click on it. 12. The computer will connect to the DataHub and turn the Bluetooth icon blue Pairing with a Mac OS 1. Turn on the DataHub. Make sure the DataHub is not showing the sleep icon. If it does, please press any button to leave the sleep mode. 2. Open the Bluetooth menu from the Mac menu and select "Set Up Bluetooth Device..." 3. A dialog box opens. Your DataHub will be displayed as "DataHub-xxxx" where "xxxx" are the last four digits of the DataHub serial number sticker. 4. Select this device and press Continue. 5. Mac will try a quick default attempt to pair. This attempt will not succeed as the DataHub requires a pairing code. 6. Press the "Passcode options..." button and select the option "Use a specific passcode". Enter the passcode "1234", and don't press "OK" yet. 7. On the DataHub: Press and hold the SCROLL key to put the DataHub in Pairing mode. The DataHub will produce a long "beep" while its screen shows "BT pairing". 8. Press the "OK" button in the Mac dialog box. 9. Open the DataHub software. 27
31 10. Right click the Bluetooth icon located at the bottom right corner of the software. 11. Choose the DataHub you ve just paired and click on it. The computer will connect to the DataHub and turn the Bluetooth icon blue Pairing with an ipad 1. Turn on the DataHub. Make sure the DataHub is not showing the sleep icon. If it does, please press any button to leave the sleep mode. 2. Launch the ipad Setting 3. Open Bluetooth. Make sure the ipad Bluetooth is on. 4. From the devices list click the DataHub-xxxx, where the xxxx digits match the last 4 digits of your DataHub S/N sticker on the DataHub back cover. 5. On the DataHub: Press and hold the SCROLL key to put the DataHub in Pairing mode. The DataHub will produce a long "beep" while its screen shows "BT pairing". 6. The ipad will ask for a PIN code. Enter 1234 and click Pair. 7. The ipad will show DataHub-xxxx connected. 8. Start the ios DataHub software application. The application will automatically connect to the DataHub you have paired Pairing with Android OS 1. Turn on the DataHub. Make sure the DataHub is not showing the sleep icon. If it does, please press any button to leave the sleep mode. 2. On the tablet go to setting and select Bluetooth 3. Make sure the Bluetooth radio is ON, then turn on Search for Devices 28
32 4. On the DataHub: Press and hold the SCROLL key to put the DataHub in pairing mode. The DataHub will produce a long "beep" while its screen shows "BT pairing". 5. From the devices list on the tablet tap the DataHub-xxxx, where the xxxx digits match the last 4 digits of your DataHub S/N sticker on the DataHub back cover. 6. The tablet will open the Bluetooth pairing request dialog box and display Type the device s required PIN 7. Enter the pairing code 1234 and tap OK 8. Pairing process is complete and the DataHub will appear on the tablet paired devices list. 9. Open the DataHub software application on the tablet. 10. Tap on the options icon at the top Action Bar (rightmost, 3 vertical dots) 11. Tap on "Connect DataHub", and select the name of the DataHub you d like to connect (e.g. DataHub_1052). 12. The App name will change to show the DataHub you selected (DataHub_xxxx)" to indicate connection. 29


33 6 Experiment Samples The Ward s DataHub software includes experiment samples, for teachers and students to view, analyze, modify or repeat. This section reviews some interesting recorded experiments found in the Ward s DataHub application. To open a recorded experiment, simply press the Open icon in the Ward s DataHub software and select the files below: Day and Night Temperature Changes A long 48-hour recording of temperature and light levels, with the DataHub located on the window shelf: Sensors selected: Light, ambient temperature Sampling rate: 1/min Amount of samples: 1000 Experiment duration: 48 hours Communication: Offline, data downloaded at recording s end Data Analysis: Use the Markers to show min/max. values Walk in the Park Micro climate activity. Comparing temperature and Relative humidity at a city cross-road and park: Sensors selected: External temperature, relative humidity, GPS Sampling rate: 1/sec Amount of samples: 1000 Experiment duration: 15 minutes Communication: Offline, data downloaded at recording s end Data Analysis: Temp./humidity changes in Ward s DataHub map view Free Fall A classic activity for Newton s 2nd Law. Measuring the free fall acceleration of a ping pong ball bouncing on a wooden surface, with the distance sensor located 1.5 m above it: Sensors selected: Distance Sampling rate: 25/sec Amount of samples: 1000 Experiment duration: Seconds Communication: Online, preferably via wireless Bluetooth Data Analysis: Use Markers and Crop functions to focus on the ball bounces. Then use quadric regression on a single bounce, to get the bounce equation and extract the free fall acceleration. 30


34 Sound Beat Sound wave recording of 2 tuning forks, producing slightly different harmonics, of 440 Hz and 435 Hz. Sensors selected: Microphone Sampling rate: 25,000/sec Amount of samples: 10,000 Experiment duration: < 1 second Communication: Offline, data downloaded at recording s end Data Analysis: Use Zoom to see the sound sine wave and Markers to measure amplitude and frequency. Boyle s Gas Law Verifying the ideal gas law: P x V = CONSTANT. Using a 100ml syringe connected to the air pressure sensor. Manually recording air pressure while decreasing the syringe volume by 10ml at a time. Sensors selected: Air pressure Sampling rate: Manual Amount of samples: 10 Communication: Online, preferably via wireless Bluetooth Data Analysis: Use Bar-Graph view to see air pressure values. Use Annotation to add the volume for each bar and Export to Excel to calculate P x V multiplication. ph level of Soft Drinks A fun and interesting activity, comparing the acidity of water, lemon juice and Coca-Cola. Sensors selected: ph Sampling rate: 10/sec Amount of samples: 1000 Experiment duration: 2 minutes approx. Communication: Online, preferably via wireless Bluetooth Data Analysis: Using the Markers to measure the acidity level of the different liquids 31
35 The FCC Wants You to Know: This equipment has been tested and found to comply with the limits for a Class B digital device, pursuant to Part 15 of the FCC rules. These limits are designed to provide reasonable protection against harmful interference in a residential installation. This equipment generates, uses and can radiate radio frequency energy and, if not installed and used in accordance with the instructions, may cause harmful interference to radio communications. However, there is no guarantee that interference will not occur in a particular installation. If this equipment does cause harmful interference to radio or television reception, which can be determined by turning the equipment off and on, the user is encouraged to try to correct the interference by one or more of the following measures: a) Reorient or relocate the receiving antenna. b) Increase the separation between the equipment and receiver. c) Connect the equipment to an outlet on a circuit different from that to which the receiver is connected. d) Consult the dealer or an experienced radio/tv technician. FCC Warning Modifications not expressly approved by the manufacturer could void the user authority to operate the equipment under FCC Rules. NOTE: THE MANUFACTURER IS NOT RESPONSIBLE FOR ANY RADIO OR TV INTERFERENCE CAUSED BY UNAUTHORIZED MODIFICATIONS TO THIS EQUIPMENT. SUCH MODIFICATIONS COULD VOID THE USER S AUTHORITY TO OPERATE THE EQUIPMENT. INSTRUCTIONS CONCERNING HUMAN EXPOSURE TO RADIO FREQUENCY ELECTROMAGNETIC FIELDS A distance of at least 20cm. between the equipment and all persons should be maintained during the operation of the equipment. 32
36 Copyright 2011 WARD S. All rights reserved. WARD S Ltd. logos and product names are registered trademarks of WARD S Ltd. No part of this document may be reproduced by any means, nor translated to any electronic medium without the written consent of WARD S. Information contained in this document is believed to be accurate and reliable, however, WARD S assumes no responsibility for its use. Specifications are subject to change without notice. Made for ipad (3rd generation) ipad 2 ipad ipad is a trademark of Apple Inc., registered in the U.S. and other countries. Made for ipad means that an electronic accessory has been designed to connect specifically to ipod, iphone, or ipad, respectively, and has been certified by the developer to meet Apple performance standards. Apple is not responsible for the operation of this device or its compliance with safety and regulatory standards. Please note that the use of this accessory with ipod, iphone, or ipad may affect wireless performance. 33
3.3. Annotating Graphs on your ipad Opening a Stored Experiment File Accessing the HELP Screen and Menu
 Contents 1. DataHub Hardware Overview... 1 1.1 What s in the Pack... 1 1.2. Ports and Controls... 2 1.3 Built-in Sensors... 3 1.4 Using the DataHub... 5 1.4.1 DataHub display... 6 1.4.2 DataHub keys...
Contents 1. DataHub Hardware Overview What s in the Pack Ports and Controls Built-in Sensors Using the DataHub...
 1 Contents 1. DataHub Hardware Overview... 4 1.1 What s in the Pack... 4 1.2 Ports and Controls... 5 1.3 Built-in Sensors... 6 1.4 Using the DataHub... 9 1.4.1 DataHub display... 10 1.4.2 DataHub keys...
1. Labdisc Hardware Overview What s in the Pack Ports and Controls Built-in Sensors Using the Labdisc...
 Contents 1. Labdisc Hardware Overview...1 1.1 What s in the Pack...1 1.2 Ports and Controls...2 1.3 Built-in Sensors...3 1.4 Using the Labdisc...4 1.4.1 Labdisc display...5 1.4.2 Labdisc keys...6 1.4.3
1. Labdisc Hardware Overview What s in the Pack Ports and Controls Built-in Sensors Using the Labdisc...
 Contents 1. Labdisc Hardware Overview... 1 1.1 What s in the Pack... 1 1.2 Ports and Controls... 1 1.3 Built-in Sensors... 3 1.4 Using the Labdisc... 4 1.4.1 Labdisc display... 5 1.4.2 Labdisc keys...
1. Labdisc Hardware Overview What s in the Pack Ports and Controls Built-in Sensors Using the Labdisc...
 Contents 1. Labdisc Hardware Overview... 1 1.1 What s in the Pack... 1 1.2 Ports and Controls... 2 1.3 Built-in Sensors... 3 1.4 Using the Labdisc... 4 1.4.1 Labdisc Display... 5 1.4.2 Labdisc keys...
1. Labdisc Hardware Overview What s in the Pack Ports and Controls Built-in Sensors Using the Labdisc...
 Contents 1. Labdisc Hardware Overview... 1 1.1 What s in the Pack... 1 1.2 Ports and Controls... 2 1.3 Built-in Sensors... 3 1.4 Using the Labdisc... 5 1.4.1 Labdisc display... 6 1.4.2 Labdisc keys...
1. Labdisc Hardware Overview What s in the Pack Ports and Controls Built-in Sensors Using the Labdisc...
 Contents 1. Labdisc Hardware Overview... 1 1.1 What s in the Pack... 1 1.2 Ports and Controls... 2 1.3 Built-in Sensors... 3 1.4 Using the Labdisc... 5 1.4.1 Labdisc display... 5 1.4.2 Labdisc keys...
1. Labdisc Hardware Overview What s in the Pack Ports and Controls Built-in Sensors Using the Labdisc...
 Contents 1. Labdisc Hardware Overview... 1 1.1 What s in the Pack... 1 1.2 Ports and Controls... 2 1.3 Built-in Sensors... 3 1.4 Using the Labdisc... 4 1.4.1 Labdisc display... 4 1.4.2 Labdisc keys...
Mini Mini GlobiLab Software Quick Start Guide
 Mini Mini GlobiLab Software Quick Start Guide This Guide is intended to help you get your Mini up and running quickly. For more detailed instructions, please see the Getting to Know Your Mini document
DataHub: FAQs/Troubleshooting
 On the Ward s DataHub... = Select key = On/Off and ESC key = Scroll key 1. How do I pair my DataHub with a Windows computer? 2. How do I pair my DataHub with an Apple Macintosh (Mac) computer? 3. How do
Charging Pad / Charging Stand
 Charging Pad / Charging Stand Congratulations on your choice to purchase one of the FUEL ion charge bases! You ve chosen to take your mobile world fully wireless with an effortless secure and charge solution
N331 Wireless Mini Optical Mouse User s Guide
 N331 Wireless Mini Optical Mouse User s Guide Mouse 1. Left mouse button 2. Right mouse button 3. Scroll wheel 4. Charge port 5. Battery cover 6. Receiver storage compartment 7. Battery cover release button
Wireless Smart Pad And Mini Keyboard User s Manual
 Wireless Smart Pad And Mini Keyboard User s Manual Version 1.0 2010/08 ID NO: About This Manual This manual is designed to assist you in installing and using the Wireless Touchpad Keyboard. Information
PILOT QUICK START GUIDE
 PILOT QUICK START GUIDE www.hipstreet.com Getting started Device Layout Camera Touch screen App Menu 01 Back Button Home Button Menu Button History Button Volume -/+ Buttons Power Button Volume Buttons
It s time for something new
 It s time for something new Wireless, compact data logger for every science, with up to 15 built-in sensors. Clear the clutter with a single device. Inquiry-based learning was never so easy! All-in-one,
Smart Pen User Manual
 Smart Pen User Manual Model: XN690 Accessories Receiver Mini USB Cable Smart Pen Ink Refill Refill Extractor User Manual Receiver Overview of Receiver 1 5 2 3 4 1. Reset hole- Reset and shut off the device
mart atch B502 User Manual
 mart watch B502 User Manual Congratulations on your new ownership of a Polaroid smart watch. Please read the manual carefully for full understanding of all operations and functions of your new smart watch.
Contents. Get Started Install SIM Card
 Contents Get Started... 2 Install SIM Card... 2 Insert Micro SD card... 2 Charge Mobile Phone... 3 PC-Phone File Transfer... 4 Keys and Parts... 5 Fingerprint... 7 Lock and Unlock the Screen... 9 Notification
Hardware Installation 1. Install two AA batteries in the mouse. Pairing Process in Vista and Windows XP SP2
 Hardware Installation 1. Install two AA batteries in the mouse. Pairing Process in Vista and Windows XP SP2 1. Open the Windows control panel, then select Bluetooth devices. 2. Click Add.. 3. Select My
Streaming Smart Stick. Quick Start Guide
 Streaming Smart Stick Quick Start Guide GETTING STARTED 1.1 Inside the Box 1 1.2 Equiso Streaming Smart Stick 2 1.3 Equiso Remote 3 1.4 Using Your Equiso Remote 4 1.5 What You Need 5 1.6 Charging the Remote
7 Inch Quad Core Tablet
 7 Inch Quad Core Tablet Cautions This user manual has been specially designed to guide you through the functions and features of your device. ) Please read this manual carefully before using your device
Wireless Entertainment Smart Pad Keyboard User s Manual
 Wireless Entertainment Smart Pad Keyboard User s Manual Version 1.0 2008/12 ID NO: PAKL-231B2001-00 0 About This Manual This manual is designed to assist you in installing and using the Wireless Touchpad
Contents Using the 4SK909 Twister
 Contents About this manual... 1 Notices for use... 1 Know the product... 2 Using the 4SK909 Twister... 3 Charging... 3 Inserting the TF memory card... 4 Powering ON/OFF the Dash Cam... 4 Installing in-vehicle
User Manual. Product Name: 360 Panoramic Camera Brand: VIVITAR Model:DVR978HD, PDV3632. Manufacture:SHUOYING DIGITAL SCIENCE&TECHNOLOGY(CHINA)Co.
Co.") User Manual Product Name: 360 Panoramic Camera Brand: VIVITAR Model:DVR978HD, PDV3632 Manufacture:SHUOYING DIGITAL SCIENCE&TECHNOLOGY(CHINA)Co.,Ltd 0 Overview Thank you for purchasing this product! PANOVIEW
User Manual Product Name: 360 Panoramic Camera Brand: VIVITAR Model:DVR978HD, PDV3632 Manufacture:SHUOYING DIGITAL SCIENCE&TECHNOLOGY(CHINA)Co.,Ltd 0 Overview Thank you for purchasing this product! PANOVIEW
Manual LEICKE Sharon Mobile Bluetooth Keyboard with integrated Touchpad For Samsung Tablets (with limited functions universal for Android too)
") Manual LEICKE Sharon Mobile Bluetooth Keyboard with integrated Touchpad For Samsung Tablets (with limited functions universal for Android too) Product number: SI54196 Thank you for purchasing the Bluetooth
Manual LEICKE Sharon Mobile Bluetooth Keyboard with integrated Touchpad For Samsung Tablets (with limited functions universal for Android too) Product number: SI54196 Thank you for purchasing the Bluetooth
User Guide. Version 2.
 User Guide Version 2 www.rmepad.com RM epad TM User Guide Please read all instructions carefully before using Please retain these instructions for future reference RM epad TM contains replaceable, rechargeable
This user manual has been specially designed to guide you through the functions and features of your device.
 DL102 Cautions This user manual has been specially designed to guide you through the functions and features of your device. 1) Please read this manual carefully before using your device to ensure safe
Q U I C K S T A R T G U I D E
 QUICKSTART GUIDE 2 Top 4 5 6 3 13 14 18 19 16 17 12 1 20 7 8 9 10 15 Left Side Front Right Side Back 11 Bottom 1 Power Button 2 Earphone Connector 3 Front-Facing Camera 4 Speaker 5 Ambient Light Sensor
TABLE OF CONTENTS Folding the Jacket Case into a Stand... 2 FCC Information... 3 Location of Parts and Controls... 4 Charging the Keyboard...
 TABLE OF CONTENTS Folding the Jacket Case into a Stand........................................ 2 FCC Information............................................................ 3 Location of Parts and Controls..............................................
Mini Speaker. CWA BT300 Product Information Guide
 Mini Speaker CWA BT300 Product Information Guide IMPORTANT To get the full capability of your new Cobra Airwave Mini, please read this manual. It's more than just a Bluetooth Speaker! Volume Down Micro-USB
7 inch HD IPS LCD, Resolution: 800*480 OS Android 4.2. Front:0.3MP Rear: 2.0MP(AF)
") Q PAD USER MANUAL Specification Display 7 inch HD IPS LCD, Resolution: 800*480 OS Android 4.2 CPU ARM Cortex A9,Dual core,mtk8312, 1GHz Camera G-sensor Network Audio Format Video Format Image Format Extended
Q PAD USER MANUAL Specification Display 7 inch HD IPS LCD, Resolution: 800*480 OS Android 4.2 CPU ARM Cortex A9,Dual core,mtk8312, 1GHz Camera G-sensor Network Audio Format Video Format Image Format Extended
USER GUIDE. Element Wireless Smart Plug Model: E1C-NB6
 USER GUIDE Element Wireless Smart Plug Model: E1C-NB6 Introduction: Sengled Element Smart Plugs enable automation of your non-smart devices and home appliances. You can control devices remotely and set
+Cam Quick Start Guide
 CAUTION RISK OF ELECTRIC SHOCK DO NOT OPEN CAUTION TO REDUCE THE RISK OF ELECTRIC SHOCK, DO NOT REMOVE COVER (OR BACK). NO USER SERVICEABLE PARTS INSIDE, REFER SERVICING TO QUALIFIED SERVICE PERSONNEL.
Point of View Mobii 10 Tegra Tablet. Notice... 2
 TABLE OF CONTENTS Notice... 2 1.0 Preface... 2 2.0 Getting to know the basics... 4 3.0 How to Start... 7 3.1 Home Shell... 7 3.1.1 Home Shell > Widgets (Search RSS Weather)... 8 3.1.2 Home Shell > Widgets,
Lenovo K6 NOTE. Quick Start Guide. Lenovo K53a48. Read this guide carefully before using your smartphone.
 Lenovo K6 NOTE Quick Start Guide Lenovo K53a48 Read this guide carefully before using your smartphone. Reading before using your smartphone For your safety Before assembling, charging or using your mobile
einstein Tablet+2 Quickstart Guide
 FCC ID: 2AAKDEINSX02 This device complies with Part 15 of the FCC Rules. Operation is subject to the following two conditions: (1) This device may not cause harmful interference and (2) This device must
Dash Jr. User Manual Table of Contents
 (/usermanuals) Dash Jr. User Manual Table of Contents Safety Information Safety Information Call Functions Contacts Messaging Opera Mini Browser Bluetooth & Wi Fi Camera Gallery Music Sound Recorder Alarm
Tablet PC. Android 5.1 User Manual
 Tablet PC Android 5.1 User Manual Tablet of Contents Specifications. What s inside the box Tablet Parts Getting started... How to use TF card How to connect to PC Connection to Internet.. Camera. Trouble
PTT-100-VZ Wireless Speaker Microphone
 Federal Communication Commission Interference Statement This equipment has been tested and found to comply with the limits for a Class B digital device, pursuant to Part 15 of the FCC Rules. These limits
USER MANUAL.
 USER MANUAL www.activeon.com Table Of Contents 1. Name of each part 2. Operation & button description 3. Start the camera 4. LCD screen shot 5. Graphical icon description 6. Video recording 7. Photo shoot
Smartphone Photo Printer
 Smartphone Photo Printer Safety Precautions Safety Precautions Denotes the possibility of serious injury or death Please keep you away at least 20cm distance from printer when printing. Use only recommended
Smartphone Docking Station with Speaker and Bed Shaker
 TM WARRANTY The Silent Call AlarmDock is warranted for (see individual items for length of warranty) from the day of purchase to be free of defects in material and workmanship. This warranty is limited
Please review this guide fully before use. For any questions not answered in this guide, please contact WARNING Battery warning
 Please review this guide fully before use. For any questions not answered in this guide, please contact Support@Komando.com WARNING THIS DEVICE SHOULD NOT BE ADJUSTED BY THE DRIVER WHILE DRIVING. Battery
BTK-A21 Bluetooth Headset User Manual
 BTK-A21 Bluetooth Headset User Manual Thank you for purchasing the Mini Bluetooth Headset BTK-A21, we hope you will be delighted with its operation. Please read this user's guide to get started, and to
Product Key. Installing the SIM Cards. Top
 QUICK START GUIDE Product Key 2 Top 3 4 5 6 1 Power Button 2 Earphone Connector 3 Front-Facing Camera 4 Speaker 5 Ambient Light Sensor 6 LED Indicator 7 Microphone 8 Menu 9 Home 10 Back 11 USB Connector
1. Product Description. 2. Product Overview
 1. Product Description Avantree Pluto Air is a multi-function Bluetooth speaker with high quality music performance and mini compact design. This mini speaker can allow you to stream music from Bluetooth-enabled
WIDTV1. Mobile TV Receiver WIRELESS LIVE LOCAL TV ON THE GO. Quick Start Guide
 WIDTV1 Mobile TV Receiver WIRELESS LIVE LOCAL TV ON THE GO Quick Start Guide To access the English language WIDTV1 Mobile TV Receiver User Manual, please visit www.audiovoxmobiletv.com. To access the Spanish
MXHP-R500. Remote Control
 MXHP-R500 Remote Control MX-HomePro MXHP-R500 Owner s Manual 2016 Universal Remote Control Inc. all rights reserved. The information in this manual is copyright protected. No part of this manual may be
Quick Start Guide. Reolink Argus 2. Technical Support QG2_A. For more troubleshooting, please go to FAQs on our website: https://reolink.
 Reolink Argus 2 Quick Start Guide Technical Support For more troubleshooting, please go to FAQs on our website: https://reolink.com/faqs/ For other technical support, please contact us at support@reolink.com
Technical @Makeblock D1.2.11_
 Technical support: tec-support@makeblock.com www.makeblock.com @Makeblock @Makeblock @Makeblock D1.2.11_7.40.4600 The Modular & Programmable Drone USER MANUAL Table of Contents P02 Downloading the Software
BT-R900. Bluetooth GPS Receiver. User s Manual. Date: April 2006 Version: 2.1. All Rights Reserved
 BT-R900 Bluetooth GPS Receiver User s Manual Date: April 2006 Version: 2.1 All Rights Reserved Page 1 Manual Revision History Revision Date Update Summary Issue 1.0 March 2006 Initial release Issue 2.1
Contents Welcome Know your Device Greeting started Features Accessing the Internet Taking Care of Your Device
 Thank you for purchasing the tablet PC and it is packaged with the following state of the art features and much more: 1 GHz Processor 7 Inch Full touch screen with Pinch Zoom 3G Dongle support via USB
WIDTV1. Mobile TV Receiver WIRELESS LIVE LOCAL TV ON THE GO. Quick Start Guide
 WIDTV1 Mobile TV Receiver WIRELESS LIVE LOCAL TV ON THE GO Quick Start Guide 128-9242a WIDTV1 MobileTV Quick Start Guide 11 25 2013.indd 1 11/25/2013 4:21:11 PM To access the English language WIDTV1 Mobile
ZERO Instruction Manual
 ZERO Instruction Manual Thank you for buying the 8Bitdo ZERO GamePad! It s the best for fighting, shooting action and emulator games. The ZERO GamePad supports many devices and platforms thanks to the
User Guide TABLE OF CONTENTS Rename Copy and Paste Delete Export Extras
 TABLE OF CONTENTS GETTING STARTED 1.1Pairing the inotebook 2 USING THE inotebook TO CAPTURE HANDWRITTEN NOTES 2.1 Storing Pages in the Sensor 3 USING THE inotebook APP 3.1 List and Grid View 3.2 Creating
Model: MiTraveler 1081W
 10.1 Windows Tablet User Manual Model: MiTraveler 1081W Table of Contents 1. What s in the Box.1 2. Tablet Parts.. 1 3. Getting Started 2 4. The Start Screen 3 5. Getting Around.4 6. Apps..5 7. Charm Menu.6
NUBAND APP. Model: NU-G0003.
 NUBAND APP Model: NU-G0003 www.nubandamerica.com FCC Statement This equipment has been tested and found to comply with the limits for a Class B digital device, pursuant to Part 15 of the FCC Rules. These
BBW200 SmartClim Bluetooth Smart Temperature and Humidity Sensor User Manual
 BBW200 SmartClim Bluetooth Smart Temperature and Humidity Sensor User Manual Thank you for purchasing the BBW200 SmartClim sensor from BEEWI. Please read the following instructions to learn how to configure
LevelOne BLH-1000 Bluetooth Headset User s Manual
 LevelOne BLH-1000 Bluetooth Headset User s Manual - 1 - Introduction Introduction to Bluetooth Wireless Technology Bluetooth is a short- range wireless communication technology. It allows wireless connections
USER MANUAL CW14Q1P. CW14Q1P MANUAL-EN 70g 书纸,135x102mm
 CW14Q1P MANUAL-EN 70g 书纸,135x102mm USER MANUAL CW14Q1P Thank you for your choosing the new device This guide serves to enable users to get to know and familiar with our product as soon as possible. Here
Please read this guide before using the printer
 PD-450/450W/480/480W User Guide Please read this guide before using the printer Safety Precautions Safety Precautions Denotes the possibility of serious injury or death Use only recommended power sources.
SMARTPLUG. Quick Start Guide. Model: isp6x. Intelligent Home Solutions. Control your SmartPlug from anywhere with your smartphone WHAT YOU LL NEED
 Model: isp6x Intelligent Home Solutions Quick Start Guide SMARTPLUG Control your SmartPlug from anywhere with your smartphone WHAT YOU LL NEED WiFi network transmitting at 2.4GHz 1 Apple device running
U-Bell. Quick Start Guide. Two-way Audio. 180 Field of View. Motion Activated. 1080p Full HD. Night Vision. Wireless Video Doorbell DB1
 U-Bell Wireless Video Doorbell Quick Start Guide 1080p Full HD Two-way Audio Motion Activated 180 Field of View Night Vision U-Bell includes Lifetime Warranty DB1 Regulatory Information FCC Information
Panda Wireless Version 4.0 ( BLE + EDR) Bluetooth USB Adapter Quick Start Guide Model number: PBU40 FCC ID:2ADUTLGPBU40
 Bluetooth USB Adapter Quick Start Guide Model number: PBU40 FCC ID:2ADUTLGPBU40") Panda Wireless Version 4.0 ( BLE + EDR) Bluetooth USB Adapter Quick Start Guide Model number: PBU40 FCC ID:2ADUTLGPBU40 Panda Wireless is a trademark of Panda Wireless, Inc. All product names are the trademarks
Panda Wireless Version 4.0 ( BLE + EDR) Bluetooth USB Adapter Quick Start Guide Model number: PBU40 FCC ID:2ADUTLGPBU40 Panda Wireless is a trademark of Panda Wireless, Inc. All product names are the trademarks
User Manual. Daffodil. 2.4GHz Wireless Mouse Souris Sans Fil 2.4GHz 2.4GHz Wireless Maus Mouse senza fili da 2.4 GHz Ratón Inalámbrica 2.
 Daffodil User Manual 2.4GHz Wireless Mouse Souris Sans Fil 2.4GHz 2.4GHz Wireless Maus Mouse senza fili da 2.4 GHz Ratón Inalámbrica 2.4GHz Model No. : UT-M3 User Manual Please follow the instructions
1. Product description
 User Manual 1. Product description Phone Finder is a brilliant Bluetooth device which allows you to find your phone in just one click. Once clicked, your phone will ring, vibrate and flash so that you
a. Access the link b. Touch INSTALL to start c. OPEN the APP
 Quick Start Guide for Energy Lights 2.0 Bluetooth 1. Fundmental function of the shoe Charging Port Press Button 1.1 Refer to above picture, turn on the shoe by pressing the button on tongue; 1.2 Change
Radio Mini Wireless Wheel Mouse User s Guide MODEL: RFMSW-15
 Radio Mini Wireless Wheel Mouse User s Guide MODEL: RFMSW-15 Trademark Recognition Windows, Office 97 and MS-IntelliMouse are registered trademarks of Microsoft Corp. RFMSW-15 THIS DEVICE COMPLIES WITH
STEM Solutions. Wireless, compact data logger for every science, with more than 10 built-in sensors. Clear the clutter with a single device.
 STEM Solutions Labdisc All-in-one, complete lab in the palm of your hand Inquiry-based learning was never so easy! Next generation wireless technology Automatic for indoor and outdoor science Ever ready
CWA BT320 Product Information Guide
 TM Printed in China Part No. 480-900-P Version A CWA BT320 Product Information Guide IMPORTANT To get the full capability of your new Cobra Airwave 360, please read this manual. It's more than just a Bluetooth
Dealer Account Request: Needed Information Admin First/Last Name Admin Address If available, list of PROSVR device IMEIs
 PROSVR Dealer Guide How Login to and get URL a PROSVR Dealer Account Dealer account requests will be sent to: mlynch@voxxintl.com Dealer Account Request: Needed Information Admin First/Last Name Admin
USB Hub-Audio Series. January 1999 A
 Series January 1999 A15-0157-110 FCC COMPLIANCE STATEMENT: This device complies with part 15 of the FCC Rules. Operation is subject to the following two conditions: (1) This device may not cause harmful
f150 Wireless Mini Camcorder User Manual
 f150 Wireless Mini Camcorder User Manual Preface About this Manual This manual is designed to demonstrate the features of your HP Wireless Mini Camcorder f150. All information presented is as accurate
Quick Start Guide. For Android Tablet TR10RS1
 Quick Start Guide For Android Tablet TR10RS1 Federal Communication Commission Interference Statement This equipment has been tested and found to comply with the limits for a Class B digital device, pursuant
User Guide for Yeelight Bedside Lamp
 User Guide for Yeelight Bedside Lamp Get started Connect to the power supply Connect the adapter to the power source and plug the other end into the bedside lamp jack. Lamp jack Adapter* Adapter plug *
For your safety and protection of the E-bot, please read and abide by the following important safety precautions.
 2 P age Safety Precautions For your safety and protection of the E-bot, please read and abide by the following important safety precautions. 1) Do not plug the AC adapter into a faulty electrical outlet.
Toucan Surveillance Kit Camera & Smart Socket. User s Manual Model: TSK100KU
 Toucan Surveillance Kit Camera & Smart Socket User s Manual Model: TSK100KU Table of Contents 1. Key Features... 3 2. What Is Included... 6 3. Toucan Camera & Socket Installation... 8 4. Getting The Kuna
K8 smart watch phone quick start guide
 K8 smart watch phone quick start guide K8 smart watches are built-in android 4.4, call, text messages, audio and video, pictures, Internet radio, weather, tape recorder, step, health management, WIFI,
VIRTUAL REALITY ALIEN ATTACK GAME. Item No Owner s Manual
 VIRTUAL REALITY ALIEN ATTACK GAME Item No. 206103 Owner s Manual Thank you for purchasing the Sharper Image Virtual Reality Alien Attack Game. Please read this guide and store it for future reference.
BTH-800. Wireless Ear Muff headset with PTT function
 BTH-800 Wireless Ear Muff headset with PTT function The MobilitySound BTH-800 is a multi function wireless headset designed for MobilitySound s two way radio wireless audio adapter or your smart phone
LaserJet Pro M501 Getting Started Guide
 LaserJet Pro M501 Getting Started Guide 2 English... 1... 4 IMPORTANT: www.hp.com/support/ljm501 www.register.hp.com Follow Steps 1-2 on the printer hardware setup poster, and then continue with Step 3.
ToolSmart Digital Moisture Meter
 ToolSmart Digital Moisture Meter Model: TS06 User s Manual ToolSmart Digital Moisture Meter r Model:TS06 Overview TS06 ToolSmart Digital Moisture Meter measures the moisture content by detecting the electrical
Bluetooth Stereo Headset icombi TM AH20 User s Manual
 Bluetooth Stereo Headset icombi TM AH20 User s Manual icombi AH20 Index 1. Product introduction 2. What is included in icombi AH20 package 3. Headset features 4. Battery charging 5. Headset pairing and
User s Manual NETVUE II Model Number: NI-1300, NI-1301, NI-1302
 User s Manual NETVUE II Model Number: NI-1300, NI-1301, NI-1302 NetView Technologies keeps the right of the document updated with the new service offer or the service change Version:1.2 Basic installation
f200 English User Manual Contents
 f200 English User Manual Contents About this Guide...3 FCC Statement...3 WEEE Notice...3 CE Regulatory Notice...4 Notes on Installation...4 Caution...4 1 Introduction...5 1.1 Features...5 1.2 Package Contents...5
Quick Installation Guide
 Quick Installation Guide Applicable Models: AS3102T/AS3104T/AS3202T/AS3204T Ver.2.5.0128 (2016-1-28) Table of Contents Notices... 3 Safety Precautions... 4 1. Package Contents... 5 2. Optional Accessories...
Quick Installation Guide
 Quick Installation Guide For Network Attached Storage Ver.1.1.0.0320 Table of Contents Notices... 3 Safety Precautions... 4 1. Package Contents... 5 2. Hardware Installation Guide... 6 2.1. Hard Disk Installation...
BlueCheck III (BC3) User Manual
 User Manual") BlueCheck III (BC3) User Manual Version 1.2 Released on 11/08/12 3M COGENT BLUECHECK III, BC3, CSD330 FBI CERTIFIED SAP LEVEL 30 OPTICAL FINGERPRINT SENSOR, EMEBEDDED WITH WINCE 6.0 CORE AND BLUETOOTH
BlueCheck III (BC3) User Manual Version 1.2 Released on 11/08/12 3M COGENT BLUECHECK III, BC3, CSD330 FBI CERTIFIED SAP LEVEL 30 OPTICAL FINGERPRINT SENSOR, EMEBEDDED WITH WINCE 6.0 CORE AND BLUETOOTH
i9 MID User Manual ShenZhen Ramos Digital Technology Co.,Ltd
 i9 MID User Manual ShenZhen Ramos Digital Technology Co.,Ltd 1 Thank you for your choosing and buying the i9 tablet. Please carefully read this operation manual before using the product. Precautions 1.
Color LaserJet Pro M452dw Getting Started Guide
 Color LaserJet Pro M452dw Getting Started Guide English... 1... 4 IMPORTANT: Follow Steps 1-2 on the printer hardware setup poster, and then continue with Step 3. www.hp.com/support/colorljm452 3. Initial
TABLET PC. Quick Start Guide. Model: TVE100 I
 TABLET PC Quick Start Guide Model: TVE100 I Safety Precautions 1. This production is suitable for use in non-tropic areas below 2,000 meters, and the mark in the nameplate indicates the product is suitable
Chicony Standard Bluetooth Keyboard Users Manual. Model No.: KT-1063
 Chicony Standard Bluetooth Keyboard Users Manual Model No.: KT-1063 Issue: Jan. 03, 2011 Scope Getting Start Thank you for choosing this ultrathin keyboard with Bluetooth technology to ensure no hinder
Laser Mouse. Bluetooth USER GUIDE. for Mac. ONE YEAR LIMITED WARRANTY N2953
 AMB08US / 410-1513-001C N2953 www.targus.com/us/formac 2008 Manufactured or imported by Targus Group International, Inc. (for U.S. sales: 1211 North Miller Street, Anaheim, CA 92806 USA, for Australia
BLUETOOTH KEYBOARD & SPEAKER CASE
 BRYDGE BLUETOOTH KEYBOARD & SPEAKER CASE For ipad BR-101/102 BR-200 Please read the instructions carefully before using: The Brydge Bluetooth Keyboard &Speaker Case for ipad has been designed to provide
User's Guide. Video Borescope Inspection Camera. Model BR70
 User's Guide Video Borescope Inspection Camera Model BR70 Introduction Congratulations on your purchase of this Extech BR70 Video Borescope. This instrument was designed for use as a remote inspection
I. Safe Items. Configuration List
 快速指南 :Quick Guide I. Safe Items To avoid being hit or fall by other items; Do not put the product in the environment with too high/ low temperature or too moist; Do not use it in the thunderstorm weather;
This device complies with part 15 of the FCC Rules. Operation is subject to the following two conditions:
 FCC Statement The equipment has been tested and found to comply with the limits for a Class B digital device, pursuant to Part 15 of the FCC Rules. These limits are designed to provide reasonable protection
BTH-900. Wireless Ear Muff headset w/dual Connections
 BTH-900 Wireless Ear Muff headset w/dual Connections The MobilitySound BTH-900 s a wireless microphone/headset designed for using the MobilitySound two way radio audio adapter and smart phone at the same
Copyright 2013 Esselte Leitz GmbH & Co. KG. All rights reserved.
 Copyright 2013 Esselte Leitz GmbH & Co. KG. All rights reserved. Mac, ipad, AirPrint, and OS X are trademarks of Apple Inc., registered in the U.S. and other countries. Google and Google Cloud Print are
Ball Probe Moisture Meter With Bluetooth
 User Manual Ball Probe Moisture Meter With Bluetooth Model MR59 Table of Contents 1. Advisories... 3 1.1 Copyright... 3 1.2 Quality Assurance... 3 1.3 Documentation... 3 1.4 Disposal of Electronic Waste...