DELTACRYPT TECHNOLOGIES INC. USER MANUAL. DUSK-File Encryption (Automatic Pro) DUSK-USB Corporate DUSK-USB Home
|
|
|
- Jemima Cunningham
- 5 years ago
- Views:
Transcription
1 DELTACRYPT TECHNOLOGIES INC. USER MANUAL DUSK-File Encryption (Automatic Pro) DUSK-USB Corporate DUSK-USB Home
2 Introduction... 7 What s New... 7 Operating Systems... 7 O/S change... 7 DUSK-File Encryption (Automatic Pro)... 8 Available features... 8 DUSK-File Encryption (Automatic Pro)... 8 Install... 8 Register... 8 Public Key... 9 Installation... 9 Default Folders DeltaCrypt Icons Registration Internet-Automatic Internet-Manual No Internet-Manual Verification O/S Change Interface Public and Private Keys Creation Sending Keys Receiving Keys Public Keys Double-click Encryption Key Validation Private Keys Double Decryption Access To Learn More Encrypting...24 One-To-One Selecting Files Deleting Original Files Public Key Selection Encrypt & Sign File location Decryption To avoid Re-Encryption To Decrypt As Batch Select Files Delete Original Files Public Key Selection Send an Encryption... 32
3 Encrypt & Sign Naming your file File location Decrypting...33 Functioning Selecting Files File location Original file location Current Folder Specified Location Password Decrypted Original Files s...36 Encrypt Encrypt & Sign Decrypt Sign Signature Verification Signature...41 Sign Forms Functioning Validation Signed Encrypted file Original file & its signature file Tools...47 Express Commands Creation File selection Name Functioning Encryption & Decryption Original Files deletion File location Modification Removal Logon/Logoff Encryption Functioning File Selection Decryption Manual Decryption Selection change Addition Change... 53
4 To Suspend Time-Interval Encryption Functioning Continual Security To Suspend To Stop Selection Change Addition Change Secure File Shredder Functioning File selection Zeroization Options...58 Preferences Default Folders Public Keys Private Keys Encryption Decryption Express Commands Language Selection Keys Default Key Original File Deletion Signature Default Key Selection Password Memorization System Tray Zeroization FIPS Validation DUSK-USB Corporate...65 Installation With DUSK Suite Purchased version Demo version Registration Demo version Active Directory Purchased version Functioning Launch Diagram To Encrypt To Decrypt... 70
5 Double-Click Modification Save Drag & Drop Tools Search Tool Preferences Change Your Settings DUSK-USB Home...72 Installation Registration Functioning Launch Diagram To Encrypt To Decrypt Double-Click Modification Save Drag & Drop Tools Search Tool Preferences Change Your Settings Troubleshooting...77 I Can t Choose to Delete Files Being Encrypted System Tray Difficulties I m Losing my /Text Selection Expired Trial Version My Files and/or Folders Won t Encrypt I m Sure I Use the Right Password But It s not Decrypting Encrypting Bulleted or Numbered Text from Word-Processing Software Why Can t I See My Express Command To Modify It? File Size or Amount of Files Limits for Encryption What are.dti,.dsg,.dpk and.drk Files? What Happens If a User Deletes DUSK-USB Protection Hidden Files? Other questions - FAQ Appendix...80 More on Public Key Encryption Keys Location Public Key Password Key Names Personalization Name Number Extension Known Problems...84 Assistance...84
6 Copyright...84 To Contact Us...84
7 Introduction This User Manual describes installation and configuration procedures and provides usage instructions for the following DeltaCrypt applications: DeltaCrypt DUSK-File Encryption (Automatic Pro) DUSK-USB Corporate DUSK-USB Home What s New Product versions & up of Automatic Pro is compatible with this DeltaCrypt User Manual v15.10 Operating Systems The DeltaCrypt applications are compatible with the following operating systems: O/S change O/S 32-bit 64-bit Windows 7 Windows 8 & 8.1 Windows 10 Server 2003 Server 2008 Server 2008 R2 A DeltaCrypt license is valid for a single operating system version. Once installed, you need to register your license by visiting our registration page. Any changes to your Windows version will terminate your license registration. To continue using DeltaCrypt solutions, you will need to purchase and register a new license.
8 DUSK-File Encryption (Automatic Pro) DUSK-File Encryption (Automatic Pro) solution offers basic encryption functions together with automatic functionalities to encrypt your data. Get the peace of mind that comes from knowing your data is duly protected and therefore that no-one has access to it unless you want them to. Available features Features Description Send your public key to third parties so they can encrypt data that only you will be able to decrypt Select files and folders on-the-fly to encrypt/decrypt individually Select files and folders on-the-fly to decrypt Select files and folders on-the-fly to encrypt as batch Select files and folders on-the-fly to sign Verify the file signature Create a command to automatically encrypt & decrypt a predefined selection of files and folders Select files and folders to automatically encrypt at logoff and to automatically decrypt at logon Safely shred files and folders on your computer so that deleted files cannot be reconstructed Select files and folders to encrypt at a specific time interval To work on an encrypted file, double-click on it, make your modifications, save and close your file. The file will automatically be decrypted when opened and re-encrypted when closed Refer to Section Public and Private Keys > Sending Keys Encrypt > One-to-One Decrypting Encrypt > As Batch Signature > Sign Signature Verification Tools > Express Commands Tools > Logon/Logoff Encryption Tools > Secure File Shredder Tools > Time-Interval Encryption Encrypting > One-To-One > To Decrypt DUSK-File Encryption (Automatic Pro) Install For incompatibilities issues, DUSK-File Encryption (Automatic Pro) cannot be installed on the same computer as DeltaCrypt DUSKWatch Manager. First, install the application. Please refer to the DUSK-File Encryption (Automatic Pro) > Installation section for more details. Register Please refer to the Registration section below for more details.
9 Public Key Create your public key. Type of user Individual Network Administrator Create your Public Key If you are a self user, start by creating your own public key and set it as the default one to encrypt If you are a network administrator, a public key must first be created and distributed to each user for encrypting. A public key can also be created and distributed to a group of users working on shared files. The Administrator must keep track of the keys created and their associated password. Please record this information in a safe place Please refer to the Public and Private Keys > Creation section for more details. Installation To install your new software application, simply double-click on the DeltaCrypt installer: Make your language selection and click Next View the DeltaCrypt Readme file and click Next Read the license agreement, accept it and click Next The application will then install on your computer Click on the Finish button when the installation is complete Accept to restart your computer
10 Default Folders DeltaCrypt automatically creates the following folders at installation: Documents DeltaCrypt Encryption Decryption Express Public Key Private Key Default location for Batch Encryptions Default location for Decryptions Default location for Express Commands & Logoff Encryptions Default location for Public Keys Default location for Private Keys The DeltaCrypt program folder (created in the location you specified at installation; by default it is C:\Programs\DeltaCrypt). DeltaCrypt Icons At installation, the following icons are created: An DUSK-File Encryption (Automatic Pro) shortcut icon is placed onto the desktop An application shortcut in the Start Menu An icon in the System Tray A System Tray icon enables to directly access all the DeltaCrypt application functions without having to launch the application itself. Registration Should you have a time-limited demo and only wish to use it for evaluation purposes, you do not have to register. The application will inform you on the numbers of days left for trial every time the application opens At demo expiry, you will be prevented from accessing the application interface to decrypt your files. Make sure to do so before demo expiration The registration will eliminate the application time restriction. A registered version will permit unlimited use of our product. Internet-Automatic The automatic registration of DeltaCrypt application can be directly performed over the Internet. If no Internet connection is available, simply proceed with a manual registration without Internet connection as described in the following section. The automatic registration of DeltaCrypt application is completely transparent to users. When executing the application in an ulterior session, the registration pop-up will only display if registration was unsuccessful.
11 Firewall : Before starting the automatic registration, it is recommended that you add deltacrypt.com to your firewall filter list. Should the firewall still keep you from automatically registering, simply proceed with a manual registration as described in one the following sections. Windows Start Menu : Make sure not to block any Windows element launched with the Start Menu. As an example, ensure that McAfee System Guard elements are duly started. Internet-Manual When launching DeltaCrypt application for the first time, and as long as its license has not been registered, a pop-up will invite you to proceed with registration. When ready, you may perform one of the following three options. Option 1 In all cases, it is necessary that you run the application as an administrator by right-clicking the shortcut icon on the desktop. Otherwise you will be prevented from registration. Should your operating system be Vista or Seven with the UAC (User Account Control) activated, this function will keep you from registration. Ensure to deactivate the UAC function before starting the registration process. Right-click on the application shortcut icon Select Run as administrator Click on the Test-Drive button Click on the Help menu Select Register An About pop-up will appear, indicating the application version, identification number and FIPS module version number (if applicable). Enter your address Click on the Registration button A serial number will be ed to you immediately. Ensure to indicate the same address as the one used to purchase Copy-paste this serial number in the About pop-up Finalize by clicking on the Registration button.
12 Option 2 Right-click on the application shortcut icon Select Run as administrator. In the initial pop-up, click on the Contact Us button This will directly lead you to the DeltaCrypt home Web page There, hover on the Downloads menu item and select Registration. The following form will appear: Indicate your name and your address twice. The application Identification Number should already be indicated in the form. Should the application Identification Number be absent, you could easily find it by following these next steps and then copy it back in the form. To open the About window, double-click on the application shortcut icon on the desktop Click on the Test-Drive button On the Help menu found in main interface, choose About The identification number should be displayed Copy it back to the registration form Click on the Serial Number to obtain it by to the address you indicated earlier
13 Copy-paste the serial number and your address in the About window Finalize by clicking on Registration Option 3 Right-click on the application shortcut icon Select Run as administrator. Click on the Register button that appears in the pop-up when launching your DeltaCrypt application. An About window will display and indicate the version number, application Identification Number and FIPS module version number (if applicable) Enter your address and click on the Registration button. Your serial number will be sent to the address indicated. Copy-paste it back to your DeltaCrypt pop-up. Finalize by clicking once again on the Registration button. No Internet-Manual If the application to register is installed on a computer without Internet connection, you may obtain your serial number from any connection to the Internet you can find. You must use the DeltaCrypt registration form to request the serial number. That form can be found at: Once the serial number received: Right-click on the application shortcut icon Select Run as administrator. Click on the Register button that appears in the pop-up when launching your DeltaCrypt application. An About window will display and indicate the version number, application Identification Number and FIPS module version number (if applicable) Enter your address Enter the serial number received Finalize by clicking on the Registration button.


14 Verification To check that the registration was successful: Close and re-open your application A pop-up message should no longer appear before displaying the main application interface. Click on the Help menu The Register option will no longer be offered to you. Click the About item, the window indicated below will display with the and the Serial number fields filled out. O/S Change Upgrading your Windows operating systems version will prevent the DeltaCrypt software from functioning. Please refer to section Operating Systems > O/S Change for further details. Interface All main menu buttons can be expanded to display sub-menus. For example, clicking on Public and Private Keys will unveil the Create Keys and Send Keys buttons.


15 If you uncheck the option Show button names in main menu in the Tools menu, the text from beneath each button is removed, making the main menu narrower. Public and Private Keys Creation If it s the first time you run your DeltaCrypt software: Click Yes to create your public and private keys. If not: Click on the Public and Private Keys button and then, on Create Keys.

16 Fill in the necessary details required to create your public and private key pair: Indicate a key name. By default, <UserName>@<domain> is suggested as part of the keys name. Indicate a key password. This password and the private key file are required to decrypt any files that the public key will be encrypted. Do not forget where you stored this file. You also have the possibility to impose a time limitation of your choice for the keys by un-checking No Expiry. Once a key expires, will be prevented from encrypting files. However, you will still be able to decrypt your files Provide information to identify you as the public key owner. All fields are optional


17 To finish creating your keys, click on the Create button If running your DeltaCrypt software application for the first time: Click OK to use this public key as the default one No one, not even DeltaCrypt programmers, can decrypt a file without the private key password and private key file. Make sure to record them safely! Sending Keys In order to exchange data securely, you can send your public key to your correspondents. Then when they have data to securely send to you, they encrypt their selection using your public key. When you get their encrypted files, you decrypt them using the password used to create your public key and the private key associated to your public key used. When working on a group project, it may be more practical to share the same password and private key amongst group members. Click on the Public and Private Keys button from the DeltaCrypt application main menu and then on Send Keys.


18 Select the appropriate public key from the list. If you wish to also send the corresponding private key, click on the last radio button. Click on the Select button. Your default software will be launched, creating a new message with the public key already attached to it. Simply fill in with the details and content of your choice. Receiving Keys When receiving keys by from a correspondent, they come as attachments. Simply double-click separately on each attachment file to automatically save them in the Public or Private Key default folder.

19 Select Open and the key you received will automatically be copied into your DeltaCrypt public keys or private keys default folder.

20 Public Keys Double-click Double-clicking on a public key file triggers one of these actions. When the key is already stored in the DeltaCrypt Public Keys default folder: Automatically launch the One-to-One Encryption Otherwise: Move the key to this default folder, so it can now be selected for encrypting.


21 Encryption Key The name of the public key used to encrypt a given file (with extension.dti) can be determined in two ways: Right-click the file Choose Public Key Name or Select Properties and click on the Public Key tab. This will help you remember the proper password and private key file when you have created several public keys.


22 Validation DeltaCrypt Encryption Solutions always verify the validity of the public key before encrypting a file to ensure that it has not been modified in any way. If you want to validate a given key, rightclick on it and select Validate. It will be indicated if the key is valid together with the name of the owner and data that was entered to identify the key owner (see subsection Identify the Owner of the Key). If it is not valid, a message pop-up will inform the user.
.")
 or The private key file and the password associated to a correspondent s Public Key, if applicable.")
23 Note: Information on the validity of a Public Key is also available from the Owner tab found in the Properties window (You must right-click on the key file and choose the Properties item at the bottom to display that window). Private Keys Double Decryption Access All files and s can be decrypted with either: The private key file and the password associated to the user default public key (at the time of encryption) or The private key file and the password associated to a correspondent s Public Key, if applicable. To Learn More Please refer to the corresponding section of the Appendix if you wish to know more on public encryption mechanisms.
.")
24 Encrypting Do you need to protect a single file? No problem! Simply right-click on the file and choose the Encrypt One-to-One option from the DeltaCrypt item of the contextual menu. DeltaCrypt will encrypt this one file, storing it in the same folder as the original (the one use for encryption). Do you need to protect a single folder content (including all files found in its subfolders)? Just right-click on the folder, choose the Encrypt One-to-One option from the DeltaCrypt item of the contextual menu. All files found in the selected folder and its sub-folders will be encrypted individually and stored in their original location. Do you want to protect more than one folder and/or file at once? Simply choose the option that works for you: the Encrypt One-to-One or Encrypt as Batch button from the DeltaCrypt main. These options display or hide when the Encrypt/Decrypt button is clicked. Create one encrypted output file for each individual original file ( One-to-One Encryption) or merge all of your encrypted files into a single batch. When you have selected from among those helpful options, click on the Encrypt button and you are done. The One-to-One and Batch procedures are explained in the following sections. One-To-One When you select Encrypt One-to-One, every source (original) file selected from the opening window is encrypted individually. You end up with as many encryptions as there were original files selected. Every encryption is stored with the original, in the same folder and has the same name (only the extension differs). This offers the advantage of being able later to decrypt just the one encrypted file you need, while all of the others remain protected.
 A double-click on a public key that is located in the default Public Key folder A click on")
25 There are many ways to Encrypt One-to-One. You can do so with: One of the two buttons of the main interface (Encrypt One-to-One and Enc/Sign Oneto-One) A double-click on a public key that is located in the default Public Key folder A click on the DUSK-File Encryption (Automatic Pro) icon on the Windows notification bar and selecting Encrypt One-to-One from the contextual menu A right-click on the file to encrypt and clicking DeltaCrypt > Encrypt One-to-One. Selecting Files After you click on the Encrypt One-to-One button, a window opens, allowing you to view all of the files on your computer and your network. Click on the sign to access a drive or a folder. To select a single file or a whole folder, click on the square beside its name. When selected, the selection square changes colour. To undo the selection, click a second time. When you select a whole folder or sub-folder for encryption, each of the files within it will be encrypted as separate files, saving you the trouble of selecting each file individually. If you do not select all of the files within a folder, the selection square changes colour half-way.

26 The number of selected files is indicated at the bottom of the file selection box to assist you in confirming your selection. This window may be enlarged if desired, in order to see a larger selection of files and folders. Any kind of files, created by any kind of application, can be encrypted one-to-one (excepted if it has already been encrypted as such). 1. DeltaCrypt will not encrypt the default folders indicated in the Preferences tab of the window opened with Tools > Options, nor will it encrypt anything in the folder into which you installed the DeltaCrypt program (normally in C:\Programs\DeltaCrypt). Therefore, be certain that the default folders you specify for Encryption, Decryption, Public and Master Keys, Private Keys and Express Commands are kept separate and do not contain any folders or files you want to encrypt. 2. Encrypted files will not be re-encrypted One-to-One. However, they may be re-encrypted as Batch.
27 Deleting Original Files When encrypting, DeltaCrypt Encryption Solutions create an encrypted copy of your sources files. It does this intentionally so that, during secure exchanges, you can send your correspondent encrypted versions of your source files without them being deleted from your computer. (Remember that whatever you encrypt with your correspondent s public key cannot be decrypted by anyone except that person unless she/he discloses the password to you). But if you wish that DeltaCrypt deletes the original file, check the Delete original files after encryption option at the middle of the file selection window. When this option is selected, files are destroyed by the DeltaCrypt Encryption Solution, using secure file shredding, and then, deleted permanently. These files will not be transferred to the Windows Recycle Bin. Please note that the Delete original files after encryption option is only enabled when encrypting with a public key from among Your Public Keys (these are listed in the Keys tab from Tools > Options). This helps preventing the situation described above, where you are only left with an encrypted file impossible to decrypt without your correspondent s password, thus recuperating your original file. Public Key Selection Locate the public key you want to use to encrypt the files and/or folders in your selection. Encrypt & Sign If you have chosen the option to Encrypt and Sign One-to-One (Enc/Sign One-to-One), you will be asked to choose a Public Key which identifies you, and to provide a password as a way to identify you as the signatory and the real owner of the Public Key. See the Encrypt / Decrypt > Signature subsection for more information. File location One-to-one encryptions are stored in the same folder that the source files were in at the time of encryption.
28 Decryption You can use this functionality on a file encrypted one-to-one (signed or not) in these ways: By double-clicking on the file By a right-click on the file followed by Execute. The DeltaCrypt software will ask for a password (and the private key file if not in the private key default folder) and will then automatically open the decrypted file using the proper application (i.e. opens it using Word or Excel, depending on the kind of file it was). Then, when you are finished with the file and have closed it, DeltaCrypt will automatically re-encrypt it using its original Public Key. (If unable to find that key, it will ask for a confirmation before encrypting the file with the new public key set as the default one). Finally, DeltaCrypt will delete the non-encrypted version of the file in a way that makes the data unrecoverable. Each deleted file is zeroized using shredding options. Refer to the Tools >Secure File Shredder sub-section for further details). Note: This function: Only operates on files encrypted One-to-One (with or without signature). The same actions on a file encrypted as Batch will simply cause it to decrypt. It will not be automatically be opened by an editing software. Is prevented, as a safety feature, to work on encrypted files that are stored within the default Encryption or Decryption folders as identified in the Preferences tab of Tools > Options. Will not re-encrypt a file created following a Save As action. Will not be activated when choosing to decrypt using main interface, the Tray menu or from a right-click on the file and selecting Decrypt. This is so you have the option to decrypt a file without it being encrypted it automatically later. To avoid Re-Encryption To avoid automatically re-encrypting a particular file that you have opened, simply save it with a different name using the Save As function. If you know ahead of time that you will not want it to be automatically re-encrypted, use a method from the following section. To Decrypt You may want to decrypt a file encrypted One-to-One without opening it. In this case, you could either:


29 Right-click the encrypted file and choose Decrypt Click the Decrypt button from the main interface (from the Encrypt/Decrypt group) Click the DeltaCrypt Tray icon and select Decrypt You may re-encrypt the file manually later if desired.
 offers the items. A right-click on the files and selecting DeltaCrypt > Encrypt & Sign for sending by email).")
30 As Batch There are many ways to Encrypt as Batch. You can do so with: The two buttons of the main interface: Encrypt as Batch and Enc/Sign as Batch. The DeltaCrypt icon menu in the System Tray (also called Notification Area) offers the items. A right-click on the files and selecting DeltaCrypt > Encrypt & Sign for sending by ). You will be asked to specify the name and the location for the resulting encryption. This functionality is especially recommended for encrypting groups of files all at once (for ex. databases, accounting files,.bat files, or source code modules). If you take the third possibility, a batch file will automatically be created for you and attached in a new , using your default program.
31 Select Files After you click on the Encrypt as Batch button, a window opens, allowing you to view all of the files on your computer and on your network. To access a drive or a folder, click on the sign. To select a single file or a whole folder, click on the square beside its name. When selected, the square of a file changes colour. To deselect, click again. When you select a whole folder or subfolder for encryption, all of the files and sub-folders within it will be encrypted. If you do not select all of the files within a folder, the selection square changes colour half-way. All of the selected files will be encrypted together into a single encryption file. To assist you in confirming the number of selected files, it is indicated at the bottom of the file selection box. This window may be enlarged if desired, in order to see a larger selection of files and folders. Any kind of files, created by any kind of application, can be encrypted as batch, even if already encrypted. 1. DeltaCrypt will not encrypt the default folders indicated in the Preferences tab of the window opened with Tools > Options, nor will it encrypt anything in the folder into which you installed the DeltaCrypt program (normally in C:\Programs\DeltaCrypt). Therefore, be certain that the folders you specify for Encryption, Decryption, Public and Master Keys, Private Keys and Express Commands are kept separate and do not contain any folders or files you want to encrypt.
32 2. An already encrypted file can be encrypted again as Batch. It is not the case with One-to- One encryption. Delete Original Files DeltaCrypt Encryption Solutions create an encrypted copy of your sources files. It does this intentionally so that, for secure exchanges, you can send your correspondent encrypted versions of your source files without having deleted them from your computer. (Remember, whatever you encrypt with your correspondent s public key cannot be decrypted by anyone except that person unless he/she discloses the password and the private key to you). If you wish DeltaCrypt to delete the original file, check the Delete original files after encryption option offered at the middle of the file selection window. When this option is selected, files are destroyed by DeltaCrypt Encryption Solution by being filled with null characters, and then are deleted. These files will not be transferred to Windows Recycle Bin. Please note that the Delete original files after encryption option may only be activated when encrypting with a public key selected from among Your Public Keys (these are listed in the Keys tab from Tools > Options). This helps to prevent the situation described above, where you are left with only an encrypted file that you cannot decrypt without your correspondent s password and private key. Public Key Selection Locate the public key you want to use to encrypt the files and/or folders in your selection. Send an Encryption With Batch Encryptions, you have the option of automatically sending an with the encrypted file as an attachment. The application will use the address it finds in the identifying information of the correspondent s public key you are using for encrypting. You will not be asked where to save your encryption (see subsection Naming your Batch Encryption right below), because it will be saved as an attachment. Because this file is being sent to another user, the option to delete after encrypting is deactivated. This function is also available when you are browsing your files in Windows Explorer. Right-click on a selection of files and select DeltaCrypt > Encrypt & Sign for sending by . Encrypt & Sign If you have chosen the option to Encrypt and Sign as Batch (Enc/Sign as Batch), you will be asked to choose a Public Key which identifies you, and to provide a password to validate you as the signatory. See subsection Encrypt / Decrypt > Signature for more information.
33 Naming your file A Save As screen prompts you to indicate a name and the storage location for your new encryption. By default, the storage location will be the encryption default folder (as configured in the Preferences tab of the Tools > Options submenu). Click on the Save button when you are satisfied with the name and location. File location Batch Encryptions are stored in your Encryption folder, as set in the Preferences tab of the Tools > Options submenu, unless you instruct the software otherwise when saving your encryption. The encrypted file is identified by the DeltaCrypt icon and by the.dti extension. Decrypting Do you want to decrypt one or more folders or files at once? All you have to do is open the DeltaCrypt encryption solution main menu (or use the icon in the System Tray) and click on the Decrypt button (or on the contextual menu item). When you have selected from among the various options, click on the Decrypt button at the bottom of the screen. Enter the password (and select the private key file if not in the private key default folder) and you are done. You only need to decrypt a single file? Besides opening the DeltaCrypt application and navigating to the file, there are two other ways to proceed. 1) If you are using DUSK-File Encryption (Automatic Pro), double-click on the file. DeltaCrypt will decrypt it after you enter the correct password. If the file was encrypted One-to-One, it will also open it for you in the application used for editing it, if found on your computer, and will automatically re-encrypt it for you when you close the file. 2) Right-click on the file (encrypted One-to-One or as a Batch) and select Decrypt. (If you choose this option, the file will stay decrypted when you close the application.) In some circumstances, you may want to see what public key was used to encrypt a given file before you actually decrypt it. You can retrieve the name of the public key that was used with a right-click, either by choosing Public Key Name or by selecting Properties and examining the its Public Keys tab. Functioning The Decrypt button in the main menu permits you to select one or multiple encrypted files (both One-to-One files and Batch files) and decrypt them all at once.

34 Selecting Files After you click on the Decrypt button, a window opens, allowing you to view all of the encrypted files on your computer and your network. To access a drive or a folder, click on the sign. To select files or a whole folder, click on the square beside its name. When selected, the selection square changes colour. To undo the selection, click a second time. If you do not select all of the files within a folder, the selection square changes colour half-way. Notice that the default folder for Encryptions is already selected when the window opens, making it easier for you to find your files for decrypting. The number of selected files is indicated at the bottom of the file selection box to assist you in confirming your selection. This window may be enlarged if desired, in order to see a larger selection of files and folders. File location You determine where you wish your decrypted file be located In the original folder(s) In the encrypted file folder location In another specified location This location can be anywhere you specify with the Browse button; by default, if selected, the location will be the default decryption folder.
35 Note: It is best, when decrypting multiple encryptions, to restore them to their original locations, or to restore them to their current location, as ways of reducing the chances of confusion between files of the same name. This should not be chosen, however, when the files originate from another computer with a different file structure. Original file location DeltaCrypt Encryption Solution memorizes the folder structure from which the source files originated, allowing it to reconstruct the structure with your files at decryption. If a folder no longer exists, it will be re-created. This feature also allows you to recreate the original folder structure when decrypting to a different location. Beware, however, of restoring files from another computer to their original location, as this may cause your files to be placed in an unknown folder structure. Current Folder If you choose this option, the decrypted files will be placed into the same folder in which the encrypted file is found. Specified Location DeltaCrypt Encryption Software initially presents the default decryption folder indicated in DeltaCrypt Tools > Options > Preferences. (When it is first installed, this will be Documents\DeltaCrypt\Decryption). You can specify a different folder for saving your decrypted files by using the Browse button. Password Once your decryption selection is made, click on the Decrypt button. You will be asked to provide the password of the ciphering key and the associated password to this key. Select also the private key file if not in the private key default folder. If you have multiple encrypted files that were encrypted with different public keys, this password window will appear only once for each different key.


36 Note: It is possible to configure the DeltaCrypt software to memorize each password that is used in a single user session or for a determined period of time. See Password Memorisation from the Options section of the present manual. Decrypted Original Files DeltaCrypt Encryption Solutions reconstruct the original files exactly as they were to start with: the same name, same date and time, as well as the same size. s One of the features of DeltaCrypt Encryption Software is its ease of use with any or text messaging software. From the DeltaCrypt icon in the System Tray (on the bottom right of your screen), you can quickly encrypt or decrypt your text and then get back to work. Encrypt There are three ways to select the portion of the document you wish encrypted: Document or an entire
.")
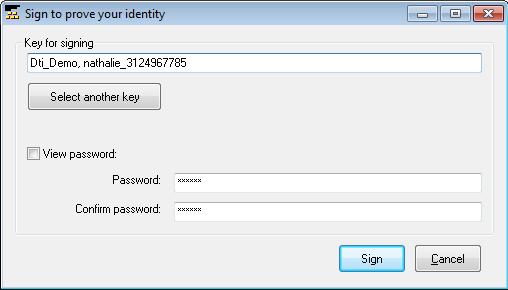
37 Click anywhere within the text or the message window A portion of your text: Select or highlight the portion of text Text size larger than 64 K: A limitation within Windows prevents DeltaCrypt from encrypting more than 64 K at a time (in and text mode). Should your original text be larger than this, you have two options: you can divide your original text into portions and encrypt each one separately, or you can save the data as a file and proceed with file encryption in order to send it as an attachment instead. Then click on the DeltaCrypt icon in the System Tray, and select > Encrypt in the menu. (When selecting this icon, your text may temporarily lose its highlight, giving you the false impression that it has been de-selected. You can ignore the change and simply continue with the encryption.) A new screen will prompt you to identify the public key you want to use for encrypting. Then copy-paste the encrypted text in the to send. The encrypted text will appear in your original document between brackets; the name of the public key used for encryption is indicated at the top of the encrypted text in order to make it easier for the recipient to know which password and private key file to use for decryption. The brackets are part of the encryption, and must not be removed. Encrypt & Sign Select > Encrypt & Sign if you not only wish to protect your document, but also to incorporate a digital signature so that your recipients can be ensured it comes from you by authenticating your identity. You will be asked first to select an encryption key, and then to select a public key for signing. You must then enter the password (and select the private key file if not in the private key default folder) for the signing key as a way of identifying you as the signatory.

38 Decrypt Open the encrypted or document. If the whole or document was encrypted, or if the document has only one encrypted section, click anywhere in it with your mouse. If it includes more than one encrypted section, select the section you wish to decrypt from the beginning bracket to the ending bracket, being sure to include both brackets. Then click on the DeltaCrypt icon on the System Tray and select > Decrypt. To decrypt a text or an , you will need to select the encryption key used and enter its password. Then click on the Decrypt button. The associated private key file will be required should the application not find it in the default folder. Repeat for each section to decrypt. Once the data has been decrypted, a new window will open to display the original information. When you have finished reading the text, you then have the choice of either closing this window by clicking on OK, or to copy the information onto the Clipboard so that you can then paste it somewhere. Simply click on the Clipboard button, open the file into which you would like to save this data in, and click on the location you wish to paste it within the document. Then select Paste (Edit > Paste or right-click on the document and choose Paste). Note: Make sure that Windows has not hidden the DeltaCrypt icon in the System Tray; it should be visible before you try to encrypt or decrypt text or an . (Some versions of Windows reduce the size of this section by hiding from view the icons that have not been used recently). If you have to uncover the DeltaCrypt icon in the System Tray in between selecting your text and clicking on DeltaCrypt icon, Windows can lose track of the text selection you have made, and DeltaCrypt will give you a message saying that no text has been selected. Sign When > Sign is chosen from the contextual menu opened by clicking on the DeltaCrypt icon in the System Tray, simply select the public key with which to sign, and then provide its password and associated private key file (if not in the private key default folder). Do this while the or text in question is opened, and your selection point is active anywhere within the text. The text will be set within square brackets and a signature will be appended. Then, as long as none of its characters is changed (including the digital signature added at the end) and that you have the signing key in your possession, DeltaCrypt will be able to confirm its integrity (i.e. that it is completely unchanged and unaltered) and validate the signature that was appended.

39
 comments from different reviewers.")
40 It is possible to sign sections of text of an or document. For example, you could sign portions of text that all readers could be confident is genuine, and in between them to leave room for (unsigned) comments from different reviewers. Format changes in text or are not tracked. As an example, after signing, applying new style will not be pointed out as a lack of authenticity. For a higher level of validation, we recommend you create a document to sign and send as an attachment. Formatting and layout changes are detected at document signing, not in text or s. Signature Verification Authenticating a sender and verifying the integrity of a document is very easy. You need to have in your possession the signing key. Place your insertion point inside the text in question, and select the option for Signature verification from within the menu item. A message will indicate whether or not you can have confidence in the integrity of the text and in the signature. (The lack of integrity can also come from corruption during transmission or from intentional changes). If there is more than one section of text that has been signed (as indicated by the square bracket beginning with [DTI DATA and ending with the square bracket after the second instance of DTI END]), DeltaCrypt validates only the first one when Signature Verification is selected. To validate other sections, you must select the whole section with the mouse before initiating the Signature Verification process.
41 Signature A digital signature permits the recipient of a file to be certain of two important facts: That the file has not been altered since it was signed (integrity protection) That it originates from a person who knows the password and has the private key to a given public key in your possession (sender s authentication). DeltaCrypt Encryption Software has carefully woven the signature capability into all of its operations in order to increase the confidence of users in the files they are exchanging. The two diagrams below explain how digital signature works when exchanging documents between user A and user B:

42 Sign A file can be digitally signed whether it is encrypted or not. In addition, it is possible to integrate the digital signature into the original file or to separately provide proof of the signature. It is your decision to make. Forms Signatures can either: Be integrated directly into encrypted files Be found in separate files which accompany documents (and these documents may be encrypted or not). This has the advantage, in the case of un-encrypted files, of permitting you to circulate a public document in such a way that your readers can know with a high degree of confidence that it comes from you and that it has not been modified since you signed it. Functioning There is more than one way to sign a document (encrypted or not): By right-clicking on the document and choosing DeltaCrypt > Sign


43 By clicking the Sign button By selecting the Sign item from the contextual menu offered by the DeltaCrypt icon in the Windows Taskbar The result is a separate signature file (with.dsg extension). By clicking the Enc/Sign One-to-One or Enc/Sign as Batch button from the Main Menu The resulting file is encrypted and signed (with.dti extension).

44 Regardless of the chosen option, the DeltaCrypt Encryption Software will ask you to select a public key for signing and to provide its password as a means of determining that you are its owner. This is known as sender authentication. You will also need to locate and select the private key file, if not found in the default private key folder. Any person in possession of both the encryption and the signature files may verify the signature attesting of the integrity of the original (that it has not been changed since signed). If a copy of the signing key is accessible, DeltaCrypt will verify the validity of the signature and display the identifying information from that key owner. At decryption, if your correspondent has a copy of the public signing key, he can be assured of the validity of the signature. Furthermore, he may be shown the owner identifying information.


45 If your correspondent is not in the possession of a copy of the public signing key, signature validation will not be possible In order to notify of that fact, the following pop-up will display: Clicking No will cancel the decryption but by clicking Yes, he will be able to decrypt the file (presuming he has access to the private key associated to the public key that encrypted the document and the password). A copy of the original document will then be created. Note: This implies that the public key of the document sender must also be made available to the recipient in order for the latter to be able to validate the sender s signature. Validation To verify a signature, you must hold a copy of the public key your correspondent used for signing. Signed Encrypted file You can verify the signature of a file that has been signed and encrypted by decrypting it. During the decryption process, the DeltaCrypt software will validate the signature, and offer to display the identifying information which was entered when the key was created.
 that is accompanied by a signature file in several")

46 Original file & its signature file You can verify an original file (encrypted or not) that is accompanied by a signature file in several ways, you may: Double-click on the signature file Right-click on the signature file select Verify Click on button Signature Verification (from the Signature group)
 If either the original file or the signature file has been modified or corrupted in any way, an error message will appear.")

47 Browse the signature file (DSG) Click the DeltaCrypt icon from the Notification Area and choose Signature Verification Browse the signature file (DSG) If either the original file or the signature file has been modified or corrupted in any way, an error message will appear. Otherwise, you will have the option of viewing the signature identification data. Tools Express Commands An Express Command is designed to automate a specific set of encryption and decryption tasks. Express Commands do not require any special programming skills. They allow you, for example,

48 to automatically encrypt one or multiple folders and/or files, with a simple double-click on the icon. In this way, they complement the Logon/Logoff and Time-Interval Encryption processes by automating groups of tasks that occur infrequently. They also allow you to encrypt with public keys other than your default public key. Unlike Logon / Logoff and Time-Interval Encryption, you may have multiple Express Commands. This section will show you how to create them. When an Express Command is created, an icon is placed on your desktop: Creation Create as many Express Commands as you need by clicking on: The Express Command button located on the main menu bar (the Tools button needs to have been previously clicked in order to expand its contents). The DeltaCrypt icon in the Notification Area (Task Bar) and select Express Command. File selection To access a drive or a folder, click on the sign. To select a single file or a whole folder, click on the square beside its name. When selected, the selection square changes colour. To undo the selection, click a second time. When you select any folder for encryption, each of the files within it will be encrypted, as will the files within its sub-folders and sub-sub-folders, etc. If you do not select all of the files within a folder, the selection square changes colour half-way. To help confirm that everything has been properly selected, the number of files selected is indicated at the bottom of the file selection box.

49 1. Any kind of files, created by any kind of application, can be encrypted. No distinction is made between one type of file and another, since all information is handled in a raw binary mode. 2. DeltaCrypt will not encrypt the default folders indicated in the DeltaCrypt Tools > Options > Preferences, nor will it encrypt anything in the folder into which you installed the DeltaCrypt program (normally in C:\Programs\DeltaCrypt). Therefore, be certain that the folders you specify for Encryption, Decryption, Public Keys and Express Commands are kept separate and do not contain any folders or files you want to encrypt. Name Give a name to your Express Command. This name will be used for the Express icon and for the Express encrypted file. Click on the OK button at the bottom of the screen to complete the Express Command creation process. A confirmation message will appear when your Express Command has been created and an icon placed on your desktop. Functioning Once created, simply click on the Express shortcut icon to launch the pre-recorded encryption actions. Encryption & Decryption Clicking on the Express shortcut icon will toggle between encryption and decryption.
.")
50 Your default public key will be used to encrypt the selected folders/files. For decryption, you will be asked to type in your password (and select the private key file if not in the private key default folder). Original Files deletion Express Commands delete your original files securely so that they cannot be accessed in any way. When you choose to decrypt them, they are reconstructed. File location Encryption A single batch encryption file is created and saved in the Express default folder (specified in the Preferences tab of the window opened with Tools > Options). The encryption file will have the same name as your Express Command shortcut name. Decryption Files and folders are always returned to their original location. Modification Click on the Express Commands button found on the main menu of your software application or on the DeltaCrypt icon from the System Tray, then select the Modify button found at the bottom of the screen.
51 Select the Express Command you wish to edit, and perform changes in the files and/or folders selection or in the name. Click on the OK button at the bottom of the screen. When the name of the Express Command is left the same, you will be asked whether the previous may be overwritten. If you do not want to replace the previous version, provide a different name before generating a new Express Command. Removal To delete an Express Command, click on the Delete button of the Express Command window, then select the Command you want to delete. Logon/Logoff Encryption Our goal is to make data security as transparent as possible for you. When you select Logon / Logoff Encryption, you are given the opportunity to identify files and folders to encrypt each and every time you shut down or log off your computer. As with the Express Command, the Logon / Logoff Encryption function creates a Batch Encryption which is stored by default within the Express sub-folder of the DeltaCrypt folder. Functioning There are two ways to create a Logon / Logoff Encryption: By clicking on the Logon / Logoff Encryption button from the main interface. By selecting that item from the DeltaCrypt Tool Tray icon.

52 File Selection In either case, a window opens allowing you to view all of the folders on your computer. To access a drive or a folder, click on the sign. To select files or a whole folder, click on the square beside its name. When selected, the selection square changes colour. To undo the selection, click a second time. If you do not select all of the files within a folder, the selection square changes colour half-way. The number of files selected is indicated at the bottom of the file selection window to assist you in confirming your selection. This window may be enlarged if desired, in order to see a larger selection of files and folders. Once you click on the OK button, whenever you shut down, and when you log off, the files you have indicated will automatically be encrypted into a Batch Encryption and the originals will be deleted in a way that makes the data un-recoverable. Your data will be fully secured without your having to think about it. Files will be encrypted using the default Public Key, as set in the Options window. The name of this key is also shown in the bottom left corner of this window.
53 Decryption When you start up your computer or when you log on to an account, if a Logon/Logoff encryption function has been set as described above, all you have to do is enter the correct password when you are asked (and browse the private key file if not in the private key default folder). The public key that was used to encrypt the file(s) is indicated. This makes it easier for you to identify the password required for decrypting. Once the decryption process has finished, the decrypted files will be returned to their original locations and will be available for use as normal. Manual Decryption If you cancel the logon decryption process, the next time, the password will be requested again to decrypt the Logon/Logoff file selection. You may also manually start the decryption process by clicking on the Decrypt button of the application main menu. Selection change To modify the selection of files to be encrypted, re-open the Logoff/Logoff Encryption window. You will be shown the current selection and be set to make changes. Addition You can add more files and folders to the current selection by clicking on them. Once you click the OK button, all the selected files and folders will be encrypted at the end of each session. Change If you wish to substitute files or folders for the ones you have selected, simply click to select and un-select as necessary. Then click on the OK button. To Suspend You may cancel your Logoff Encryption any time. The files will then be encrypted next time you shut down or logoff. If, on the other hand, you wish to stop the automatic encryption process more permanently, all you have to do is check the tick-box labeled Permanently suspend Logoff Encryption. The files remain selected for when you want to resume securing them, but in the mean time they will no longer be encrypted. You may also un-select all the files and folders that were set and then click on OK.

54 Time-Interval Encryption There are some files which are so sensitive that they should be kept encrypted at all the times. Other files are only opened occasionally and don t need to be decrypted at each logon. Time- Interval Encryption automates the security process by checking designated folders and files at a specified interval, and encrypting them One-to-One in place. The original file is deleted so that the data cannot be read if the file is recovered. Functioning As with all One-to-One Encryptions, when you double-click on any of them, you will be asked for the password (and select the private key file if not in the private key default folder) then the file will be decrypted and opened using the appropriate editing software. When that software is closed, the file will be automatically re-encrypted and the decrypted working file will be automatically deleted.

55 This window may be enlarged if desired, in order to see a larger selection of files and folders. Continual Security When you select the Time-Interval Encryption button in the main menu or from the DeltaCrypt Tool Tray icon, a window opens in which you can select the folders to be watched. All of the folders on your computer and your network are presented. To access a drive or a folder, click on the sign. To select a folder, click on the square beside its name. When selected, the selection square changes color. To undo the selection, click a second time. You can verify the files and folders that are being watched by opening the Time-Interval Encryption window at any time. The files and folders which are selected are the ones that will be monitored to ensure that they are kept encrypted. Set the interval to determine how often DeltaCrypt checks for files that have been added and need encrypting. The default time interval is 1 minutes; this can be modified by clicking on the up or down arrows beside the indicated time. The smaller inside arrows permit changes in units of one minute at a time, and the larger, outside arrows change the setting in ten minute intervals. Files will be encrypted using the default Public Key, as set in the Tools > Options > Public Keys window. The name of this key is presented in the bottom left corner of the Time-Interval Encryption window. When you select a whole folder, all the files within it (and all the files within any folders it contains) will be encrypted at the interval you have set. Whenever the DeltaCrypt software is in the process of checking for files or of encrypting them, DeltaCrypt presents an icon in the Tool Tray to alert you to this background processing. Any file that is open at the time a check is made will be skipped. When you log off or shut down your computer, the Time-Interval Encryption process will be initiated one last time to ensure that no recently-closed files are left un-protected.
56 To Suspend You may suspend your Time-Interval Encryption at any time by checking the tick-box labelled Temporarily Suspend Time-Interval Encryption. You will then be able to work on or decrypt the watched files without them being re-encrypted. When you next log on, the Time-Interval Encryption will start up again as usual. Note that DeltaCrypt will never encrypt a file that is currently open; therefore another way to temporarily prevent one or two files from being reencrypted would be to open them. To Stop You may also permanently stop the Time-Interval Encryption by checking the option to Permanently Suspend Time-Interval Encryption. Your current selection remains in place, but no more files will be encrypted until you uncheck the tick box. As a safety measure, you will be asked to confirm that you really intend to turn off the Time-Interval Encryption. You also have the option of un-selecting all of the files and folders in the selection box.

57 Selection Change To modify the selection of files and folders to be watched and kept encrypted, re-open the Time-Interval Encryption window. You will be shown the current selection. Addition You can add more files and folders to the current selection by clicking on their square to select. To unselect a folder, just click again on your selection. Once you click OK, all the selected files and folders will be watched, and any un-encrypted files will be encrypted at the interval you specify. Change If you wish to substitute files or folders for the ones you have selected, simply click to select and un-select as necessary. Then click on OK. Secure File Shredder Functioning With the Secure File Shredder you can remove files from your computer without fearing they could be recovered.

58 File selection After you click on the File Shredder button from the main menu or that you select that function from the DeltaCrypt Tool Tray icon, a window opens allowing you to view all of the folders on your computer and your network. To access a drive or a folder, click on the sign. To select files or a whole folder, click on the square beside its name. When selected, the selection square changes colour. To undo the selection, click a second time. If you do not select all of the files within a folder, the selection square changes colour half-way. The number of files selected is indicated at the bottom of the file selection window to assist you in confirming your selection. Zeroization The File Shredder option allows you to choose between two deleting method: 1x This method replaces once the original file by zeros. 7x Random (DOD M ECE) This method replaces seven times the original file by random characters. It is inspired by the DoD M sanitization method defined by the US National Industrial Security Program (NISP) in the National Industrial Security Program Operating Manual (NISPOM). Options The configuration options that have been set for the DeltaCrypt Encryption Solutions application can be consulted and modified by selecting Tools > Options from the main menu of the application, or from the DeltaCrypt icon in the System Tray at the bottom right of your screen.

59 Preferences DeltaCrypt Encryption Solutions manage the default storage locations of various items through the information presented in the Preferences tab of the Tools > Options window. You may change these default settings to better suit your needs. Changes take effect immediately. By default, each of the folders indicated can be found in Documents\DeltaCrypt. Default Folders Public Keys Newly-created Public Keys are stored in this default folder Private Keys Newly-created Private Keys are stored here.
60 Encryption When encrypting with batch encryption, you have the option of saving your encrypted files in their original folders or to save them in this default one. Decryption When you decrypt a file, you may choose to place the decrypted files into this folder, to decrypt them into the folder that the encryption is currently in, or to return them to their original location (which would most likely NOT be appropriate if they do not originate from your own computer). Express Commands All Express Commands that you create will be stored here unless you move them to another location. Language Selection You may use DeltaCrypt Encryption Software in English or in French. You may change this setting at any time, and will see the effect immediately on the screen. This has no effect on the functionality of the software. (Should you wish to interact with our software in other languages, please contact DeltaCrypt to explore the customization possibilities.) Keys This tab from the Options window handles two central issues in protecting your files: your default public key and the public keys for which you have the password: The default public key is also a key that you know the password for as well as have the private key. In addition, this key is preselected when encrypting For all public keys that you know the passwords and that you have the private keys, DeltaCrypt will let you delete original files when encrypting

61 Default Key The default public key is the one which is pre-selected for encrypting. It is also used when you encrypt files. It is also used when right-clicking files and/or folders and choosing DeltaCrypt > Encrypt One-to-One, during Logoff and Time-Interval Encryptions, and with Automatic Reencryption when the original public key cannot be found. It is chosen from among the keys in the Your Public Keys list from the window above. Original File Deletion Signature Default Key Selection The above window is provided in order to keep track of and display all of the public keys for which you have the password. This is important when you are encrypting files to send to a correspondent in order to prevent DeltaCrypt from deleting original files that you are not able to decrypt. To add or remove keys, use the buttons at the bottom of the window. The software does not permit you to add a key to this list unless you are able to enter the key password (and select the private key file if not in the private key default folder)
.")
62 This safety feature prevents DeltaCrypt from deleting the original of a file you are encrypting when you do not have the password for decrypting. No key can be added to Your Public Keys unless it has the same prefix as is indicated at the bottom left of the DeltaCrypt main menu. (Dti Demo shows there during the demo period). This provides some measure of protection against employees adding their personal public keys created with personal version of DeltaCrypt to Your Public Keys, and then encrypting and automatically deleting corporate files without realizing that they were making data inaccessible to their organization. Password Memorization In order to allow you to establish the level of security that is most appropriate for your needs, DeltaCrypt provides a Secret Key Server, which memorizes the password you enter for the period of time you specify: either for the whole session (until logoff, restart or shutdown) or for a specified number of minutes This server can remember the passwords for as many public keys as you need to use. The passwords are securely erased from memory at the end of the specified period. This function permits you to decrypt documents with a minimum of interruption to enter passwords, if this appropriate for your computer environment. When you change the time period that you want a password to be remembered, all passwords in memory are erased and the timer will start again the next time you enter the password. You can remove all passwords from memory immediately by pressing the Clear button in this window. This permits you to go for a coffee break, for example, without leaving your files vulnerable.

63 System Tray Since DeltaCrypt takes over Windows shutdown when set to automatically perform encryption at the end of a session or at timed-interval, you will need to indicate how you want DeltaCrypt to end your sessions: Ask you how to end your session each time, or Automatically launch encryption and turn your computer off. Zeroization By using automatic functions (Express Command, Logon / Logoff Encryption and Time-Interval Encryption), original files are deleted after encryption. This option allows you to choose the deleting method: 1x Zeroization This method replaces the original file by zeros. 7x Random Zeroization (DOD M ECE) This method replaces seven times the original file by random characters. It is inspired by the DoD M sanitization method defined by the US National Industrial Security Program (NISP) in the National Industrial Security Program Operating Manual (NISPOM).


64 FIPS Validation DeltaCrypt Encryption Applications are FIPS Validated. According to the NIST specifications, the software must provide an interface to validate the FIPS-mode integrity. You can invoke the FIPS-Mode Self-Test by clicking on the Validate button
65 DUSK-USB Corporate If you travel on a regular basis with information on your USB device or if you are an IT professional working from multiple workstations, DeltaCrypt offers a software application that lets you protect data carried on USB drives or USB hard disc drives. To encrypt, launch DUSK- USB and simply drag n drop files on the USB device. And to decrypt, drag n drop them off. DUSK-USB Corporate solution provides an encryption protection without driver for: USB drives USB hard disc drives Memory cards Installation With DUSK Suite Connect an empty USB device to your computer Double-click on the Install DUSK-USB desktop shortcut Once installed, the application will launch automatically You may need to enter your Windows user password Read the given information on how to properly save your file modifications You may have to browse the Master Key created by your network administrator Enter your address Name your USB device Choose and confirm a user password (minimum 4 characters). Your administrator may choose a higher minimum than this one When connecting the drive to a computer where the DUSK Suite is installed, a DUSK shortcut will appear on the desktop for easy access to the protection. This shortcut will not appear should you use your DUSK-protected device on a workstation not running the DUSK Suite such as an Internet café or at home. Note that allowing DUSK-USB installation to the user is an Active Directory configuration. By default, users are not authorized to install the application themselves.
66 Purchased version Connect a USB device to your computer Copy the installer Dti - setupduskcorporate.exe on your computer desktop Launch the DUSK-USB installation by double-clicking on the installer Select your language and click Next Read the DeltaCrypt Readme file and click Next Read the license agreement and click I Agree You may need to select your USB Drive Letter and click OK Click Next to begin installation The application will install on the USB device Double-click the newly created desktop shortcut icon DUSK-USB Read the given information on how to properly save your file modifications Register the license (refer to the Registration section below for more details. You may need to browse the Master Key created and sent by your network administrator Enter your address Name your USB device Choose and confirm a user password (4 characters minimum) Demo version At demo expiry, you will be prevented from accessing the application interface to decrypt your files. Make sure to do so before demo expiration. The application will inform you on the numbers of days left for trial every time the application opens. Connect a USB device to your computer Copy the installer Dti setupduskcorporate(demo).exe on your computer desktop Launch the DUSK-USB installation by double-clicking on the installer shortcut Select your language and click Next Read the DeltaCrypt Readme file and click Next Read the license agreement, accept it and click I Agree You may need to select your USB Drive Letter and click OK Click Next to begin installation The application will install on the USB device Double-click the newly created desktop shortcut icon DUSK-USB Read the given information on how to properly save your file modifications The number of days until demo expiration will display Browse and select the Master Key initially found in the DUDemoEN folder Enter your address Name your USB device Choose and confirm a user password (4 characters minimum)
 Active Directory This registration method is only possible with the DUSK Suite. Please contact your Service Desk. Purchased version You will need to be connected to the Internet to register.")
67 Registration Demo version Registration is NOT possible if you installed the demo version (its installer is named Dti setupduskcorporate(demo).exe) Active Directory This registration method is only possible with the DUSK Suite. Please contact your Service Desk. Purchased version You will need to be connected to the Internet to register. After the DUSK-USB installation launches a first session, the following About pop-up window should appear: In this window, enter your address and click on the Registration button. If the computer on which you installed DeltaCrypt application does not have Internet access, you can perform registration from another computer by visiting the DeltaCrypt web site at A serial number will be ed to you immediately. The address used to get a serial number must be the same as the one used for your purchase in our records. This address is also used to identify you in future communications with DeltaCrypt. Now back to the About window, enter the serial number returned to you in the DeltaCrypt , and click on the Registration button to complete the process.

68 Functioning Launch If DUSK Suite is installed on your workstation, a DUSK-USB icon is found on your desktop when a DUSK-protected device is connected to your computer. Double-clicking on this icon enables to launch the protection application. Otherwise, open Windows Explorer and double-click on the DUSK-USB executable file found at the protected device drive letter side. Once launched, you have to enter your user password in order to open DUSK application.
69 Diagram To encrypt/decrypt files, drag and drop files or folders as depicted below. To Encrypt Drag & drop files in DUSK-USB application to encrypt them. Simple as can be! When you select files for encryption, every selected source file is encrypted individually. You end up with an encryption file for every original file selected. These encryptions take the name of the original file that they come from. This offers the advantage of being able to decrypt later just the one file you need, while all the others remain protected. The DUSK-USB window is divided into two parts. The left pane allows you to view all of the files on your computer and the right pane displays your secured USB Key. To access a drive or a folder, click on the sign. Select a single file or a whole folder and drag it to the secured USB Key pane located to the right of the DUSK-USB screen. When you select a whole folder or subfolder for encryption, each of the files within will be encrypted as separate files, saving you the trouble of selecting each file individually. Any type of files, created by any kind of application, can be encrypted. No distinction is made between one type of file and another, since all information is handled in a raw binary mode. The encryption is automatically done when files are dropped into the DUSK-USB right pane (USB Key). No other intervention is required. When encrypting, DUSK creates an encrypted copy of your sources files on your protected USB Key. The original files located on your PC will remain intact. DUSK will append a digital signature on every encryption to ensure its integrity. If the encryption is in any way altered, the system will inform you when decrypting.
70 To Decrypt To decrypt files found in DUSK-USB protection, many options are offered to you: you may double-click on each file selection, drag & drop them back in the computer pane or out of the application, or right-click on your files and then choose Decryption. Double-Click When you double-click on a file found in the right pane of your DUSK-USB drive, it will automatically launch its decryption. The file will then open using the editing software if installed on the computer (i.e. with Word or Excel, depending on the file type it is). Once you have finished with the file and have closed it or saved any modifications using the Save button, DUSK- USB will automatically re-encrypt it for you. Modification Save To properly save your DUSK-protected file modification: 1. Save all modifications before closing files 2. Close all files applications (important) 3. Close DUSK application and wait until completely done 4. Securely remove your DUSK-protected USB Device Drag & Drop The DUSK-USB protection window is divided into two panes. The left pane allows you to view all of the files on the computer your drive is connected to and the right pane displays files on your secured USB drive. To decrypt, select a single file or a whole folder found on the device pane, and drag it out to the left window pane. As the original file is dropped into the DUSK-USB left window pane, it is decrypted without any other intervention. You may also drag & drop files from the device right pane directly onto your desktop to decrypt. Tools Search Tool In DUSK-USB main menu, you may click on Search to enter a key word to search files on your protected device. You may also click on Searches found in the file structure section of the application.
71 Preferences Click on Options in the menu. Three tab menus are then displayed: Change Your Settings This tab lets you change: Your password Your address Your device name As soon as a new password is set, it is required the next time you wish to launch DUSK-USB protection.
72 DUSK-USB Home If you travel on a regular basis with personal sensitive information on your USB device, DeltaCrypt offers a software application that lets you protect data carried on USB drives or USB hard disc drives. To encrypt, launch DUSK-USB Home and simply drag & drop files on the USB device. And to decrypt, drag & drop them off. DUSK-USB Home solution provides an encryption protection without driver for: USB drives USB hard disc drives Memory cards Installation Connect an empty USB device to your computer Copy the DUSK-USB installer on your computer desktop Launch the installation Select your language and click Next Read the DeltaCrypt Readme file and click Next Read the license agreement and click I accept You may need to select your USB device and click OK Click Next to install the application on the USB device Double-click on the newly created desktop shortcut icon DUSK-USB Read the given information on how to properly save your file modifications Register the purchased license. Refer to the Registration section that follows Choose and confirm your user password (4 characters minimum) Registration You will need to be connected to the Internet to register. After the DUSK-USB installation, launch DUSK-USB first session. The following About pop-up window should appear:

73 Enter your address and click on the Registration button. If the computer on which you installed DeltaCrypt application does not have any Internet access, you can perform registration from another computer by visiting the DeltaCrypt web site at A serial number will be ed to you immediately. The address used to get a serial number must be the same as the one used for your purchase in our records. This address is also used to identify you in future communications with DeltaCrypt. Now back to the About window, enter the serial number returned to you in the DeltaCrypt , and click on the OK button to complete the registration process.

74 Functioning Launch Open Windows Explorer and double-click on the DUSK-USB executable file found at the protected device drive letter side to launch DUSK-USB. Once launched, you have to enter your user password in order to open DUSK application. Diagram To encrypt/decrypt files, drag and drop files or folders as depicted below. To Encrypt You have to drag & drop files in DUSK-USB application to encrypt them. Simple as can be. When you select files for encryption, every selected source (original) file is encrypted individually. You end up with as much as one encryption for every original file selected. These encryptions keep their original names. This offers the advantage of being able later to decrypt just the one encrypted file you need, while all the others remain protected. The DUSK-USB window is divided into two parts. The left pane allows you to view all of the files on your computer and the right pane displays your secured USB Key. To access a drive or a folder, click on the sign. Select a single file or a whole folder and drag it to the secured USB Key pane located to the right of the DUSK-USB screen. When you select a whole folder or subfolder for encryption, each of the files within will be encrypted as separate files, saving you the trouble of selecting each file individually.
User Manual v
 DUSK-USB Encryption User Manual v. 16.9.5.0 Introduction... 3 What s New... 3 Operating Systems (OS)... 3 OS Change... 3 DeltaCrypt Upgrades... 3 Upward Compatibility... 3 Installation & Registration (if
Apptix Online Backup by Mozy User Guide
 Apptix Online Backup by Mozy User Guide 1.10.1.2 Contents Chapter 1: Overview...5 Chapter 2: Installing Apptix Online Backup by Mozy...7 Downloading the Apptix Online Backup by Mozy Client...7 Installing
Dostek 440A BTR. Software Guide
 Dostek 440A BTR Software Guide Table of Contents Introduction... 1 Installing Dostek DNC... 1.1 Installing Dostek DNC... 1.2 Installing Your Software License Key... 1.2.1 Install Automatically (Recommended)...
Version: 4.1 Date: 02/09/2017
 User manual Version: 4.1 Date: 02/09/2017 Microsoft, Windows, Windows Vista, Outlook and Microsoft.NET are either registered trademarks or trademarks of the Microsoft Corporation in the USA and / or other
Auslogics BOOSTSPEED USER MANUAL. auslogics.
 Auslogics BOOSTSPEED 10 USER MANUAL www..com TABLE OF CONTENTS: Welcome Installation Guide Registering Auslogics BoostSpeed 10 Backing up with the Rescue Center Your First Scan Navigation Panel Navigation
User Guide. BlackBerry Workspaces for Windows. Version 5.5
 User Guide BlackBerry Workspaces for Windows Version 5.5 Published: 2017-03-30 SWD-20170330110027321 Contents Introducing BlackBerry Workspaces for Windows... 6 Getting Started... 7 Setting up and installing
BackupVault Desktop & Laptop Edition. USER MANUAL For Microsoft Windows
 BackupVault Desktop & Laptop Edition USER MANUAL For Microsoft Windows Copyright Notice & Proprietary Information Blueraq Networks Ltd, 2017. All rights reserved. Trademarks - Microsoft, Windows, Microsoft
 Trend Micro Incorporated reserves the right to make changes to this document and to the products described herein without notice. Before installing and using the software, please review the readme files,
Calendar & Buttons Dashboard Menu Features My Profile My Favorites Watch List Adding a New Request...
 remitview User Guide 1 TABLE OF CONTENTS INTRODUCTION... 3 Calendar & Buttons... 3 GETTING STARTED.... 5 Dashboard.... 7 Menu Features... 8 PROFILE.... 10 My Profile... 10 My Favorites... 12 Watch List...
Guide Installation and User Guide - Windows
 Guide Installation and User Guide - Windows With Fujitsu mpollux DigiSign Client, you can use your smart card for secure access to electronic services or organization networks, as well as to digitally
INSTALLATION AND USER S GUIDE OfficeCalendar for Microsoft Outlook
 INSTALLATION AND USER S GUIDE OfficeCalendar for Microsoft Outlook Sharing Microsoft Outlook Calendar and Contacts without Exchange Server Contents What is OfficeCalendar? Sharing Microsoft Outlook Calendars
Help & User Manual. Table of Contents. 1 Introduction of Safe-All. 2 Safe-All Installation. 3 Safe-All Login. 4 Safe-All Functions & Features
 Help & User Manual Table of Contents No. Chapter 1 Introduction of Safe-All 2 Safe-All Installation 3 Safe-All Login 4 Safe-All Functions & Features 4.1 Virtual Drive 4.2 Shredder 4.3 Disk-Wipe 5 Tools
How to install the software of ZNS8022
 How to install the software of ZNS8022 1. Please connect ZNS8022 to your PC after finished assembly. 2. Insert Installation CD to your CD-ROM drive and initiate the auto-run program. The wizard will run
Server Edition USER MANUAL. For Microsoft Windows
 Server Edition USER MANUAL For Microsoft Windows Copyright Notice & Proprietary Information Redstor Limited, 2016. All rights reserved. Trademarks - Microsoft, Windows, Microsoft Windows, Microsoft Windows
PGP NetShare Quick Start Guide Version 10.2
 PGP NetShare Quick Start Guide Version 10.2 What is PGP NetShare? The PGP NetShare product is a software tool that provides multiple ways to protect and share your data. Use PGP NetShare to: Let authorized
RedBeam Inventory Tracking User Manual
 RedBeam Inventory Tracking User Manual Contact us at www.redbeam.com. Page 1 Table of Contents Table of Contents... 2 Overview... 4 RedBeam Inventory Tracking... 4 PC Prerequisites... 4 Mobile Computer
DBT-120 Bluetooth USB Adapter
 DBT-120 Bluetooth USB Adapter Rev.2.1 (09/25/2002) 2 Contents Introduction... 5 Package Contents... 6 Installing Bluetooth Software... 6 Hardware Installation... 8 Introduction to Bluetooth Software...
Secure Single Sign On with FingerTec OFIS
 Secure Single Sign On with FingerTec OFIS User Guide CONTENTS 3 1 INTRODUCTION Welcome to OFIS Gateway 4-11 2 INSTALLATION & SETUP Registering Your OFIS Gateway Installing & Setting Up Your OFIS Gateway
Virtual CD TS 1 Introduction... 3
 Table of Contents Table of Contents Virtual CD TS 1 Introduction... 3 Document Conventions...... 4 What Virtual CD TS Can Do for You...... 5 New Features in Version 10...... 6 Virtual CD TS Licensing......
Computer Basics. Hardware. This class is designed to cover the following basics:
 Computer Basics This class is designed to cover the following basics: computer hardware software computer s operating system different kinds of storage devices you can use to save files using a mouse what
ziplogix Digital Ink User Support Guide
 ziplogix Digital Ink User Support Guide Table of Contents What is ziplogix Digital Ink?... 3 E-Signature Packet Creation Process... 3 Add Forms... 3 Selecting Parties... 7 SMS Two-Factor Authentication...
Storage Security Software (Version )
") For Toshiba CANVIO series Storage Security Software (Version 1.00.6904) User s Manual Version 1.00 This document explains the installation process and basic usage of the Storage Security Software designed
For Toshiba CANVIO series Storage Security Software (Version 1.00.6904) User s Manual Version 1.00 This document explains the installation process and basic usage of the Storage Security Software designed
GiftMaker Pro & EventMaker Pro 8.2
 GiftMaker Pro & EventMaker Pro 8.2 Update Installation Instructions Windows Please be sure you have a working backup copy of your data file before proceeding. To install any of the Pro Series version 8.2
APDM. Accounts Payable InstaDocs
 DSD Business Systems Sage 100 Enhancements APDM Accounts Payable InstaDocs Version 6.00 2 A/P InstaDocs Information in this document is subject to change without notice. Copyright 1993-2018, DSD Business
Convert to PDF 3.0. User Guide. PEERNET Inc.
 User Guide PEERNET Inc. Copyright 2005-2013 Updated: 1/9/2013 Table of Contents Welcome... to Convert to PDF 1 Legal... Notices 2 System... Requirements 3 Activating... Convert to PDF 4 Launching the Activation
Trend Micro Incorporated reserves the right to make changes to this document and to the products described herein without notice.
 Trend Micro Incorporated reserves the right to make changes to this document and to the products described herein without notice. Before installing and using the software, please review the readme file
Chapter. Accessing Files and Folders MICROSOFT EXAM OBJECTIVES COVERED IN THIS CHAPTER
 Chapter 10 Accessing Files and Folders MICROSOFT EXAM OBJECTIVES COVERED IN THIS CHAPTER Monitor, manage, and troubleshoot access to files and folders. Configure, manage, and troubleshoot file compression
Qbox User Manual. Version 7.1
 Qbox User Manual Version 7.1 Index Page 3 Page 6 Page 8 Page 9 Page 10 Page 12 Page 14 Page 15 Introduction Setup instructions: users creating their own account Setup instructions: invited users and team
Protegent Total Security Solution USER GUIDE Unistal Systems Pvt. Ltd. All rights Reserved Page 1
 Protegent Total Security Solution USER GUIDE 2007-2017 Unistal Systems Pvt. Ltd. All rights Reserved Page 1 Table of Contents PROTEGENT TOTAL SECURITY...3 INSTALLATION...4 REGISTERING PROTEGENT TOTAL SECURITY...
Administration. Training Guide. Infinite Visions Enterprise Edition phone toll free fax
 Administration Training Guide Infinite Visions Enterprise Edition 406.252.4357 phone 1.800.247.1161 toll free 406.252.7705 fax www.csavisions.com Copyright 2005 2011 Windsor Management Group, LLC Revised:
Desktop & Laptop Edition
 Desktop & Laptop Edition USER MANUAL For Mac OS X Copyright Notice & Proprietary Information Redstor Limited, 2016. All rights reserved. Trademarks - Mac, Leopard, Snow Leopard, Lion and Mountain Lion
NotifySync 4.7. Notify Technology Corporation
 1 NotifySync 4.7 Notify Technology Corporation Device Requirements 2 BlackBerry OS 4.1 4.7 (5.0 coming soon) 4.5.0 and later Attachments can be downloaded and saved to the file system or SD Card. Any attachment
1. Adjusting Your Work Area
 21 1. Adjusting Your Work Area You can customize the Windows Vista operating system to look and function exactly how you want. In the book Windows Vista for SENIORS you learned for example how to change
Copyright 2016 ForensicSoft Inc. SAFE Block Win10 To Go User s Guide
 Copyright 2016 ForensicSoft Inc. SAFE Block Win10 To Go User s Guide Table of Contents What is SAFE Block Win10 To Go?... 3 Installation... 4 License File... 4 I need to get a license file... 4 I already
Area Access Manager User Guide
 Area Access Manager User Guide Area Access Manager User Guide Table of Contents Chapter 1: Introduction...9 Conventions Used in this Documentation... 9 Getting Started... 10 Licensing Requirements...
Trend Micro Incorporated reserves the right to make changes to this document and to the products described herein without notice.
 Trend Micro Incorporated reserves the right to make changes to this document and to the products described herein without notice. Before installing and using the software, please review the readme file
Area Access Manager User Guide
 Area Access Manager User Guide PERPETUAL INNOVATION Lenel OnGuard 2012 Area Access Manager User Guide, product version 6.5 This guide is part 2 of a 2-document suite, item number DOC-800, revision 2.003,
Outlook 2010 Level 2
 Outlook 2010 Level 2 Table of Contents MS Outlook 2010 Level 2... 1 Personalize Your E-mail... 1 Setting the Default Font for E-mails... 1 Selecting a Default Stationary... 3 Selecting a Default Theme...
WINDOWS HOST GUIDE. Remote Support & Management PC Mac Tablet Smartphone Embedded device. WiseMo Host module on your PC or Server
 WINDOWS HOST GUIDE Remote Support & Management PC Mac Tablet Smartphone Embedded device WiseMo Guest module for example on your Windows PC WiseMo Host module on your PC or Server WiseMo develops software
docalpha Monitoring Station
 ARTSYL DOCALPHA MONITORING STATION MANUAL 1. docalpha Architecture Overview... 3 1.1. Monitoring Station Overview... 4 2. What's New in docalpha Monitoring Station 4.5... 4 3. Working with Monitoring Station...
Schneider Electric License Manager
 Schneider Electric License Manager EIO0000001070 11/2012 Schneider Electric License Manager User Manual 12/2012 EIO0000001070.01 www.schneider-electric.com The information provided in this documentation
User Guide. Rev Dot Origin Ltd.
 User Guide Introduction to the EasyTac File Explorer...1 Using EasyTac to read drivers' cards with a card reader...2 Using EasyTac to read VU files from a download device...3 Using EasyTac to download
PDF Creator Plus 6.0. Version 6.0. User Guide. PEERNET Inc.
 Version 6.0 User Guide PEERNET Inc. Copyright 2004-2012 Updated: 12/12/2012 Table of Contents Welcome... to PDF Creator Plus 1 Legal... Notices 2 System... Requirements 3 Typographic... Conventions 4 Activating...
Password Memory 7 User s Guide
 C O D E : A E R O T E C H N O L O G I E S Password Memory 7 User s Guide 2007-2018 by code:aero technologies Phone: +1 (321) 285.7447 E-mail: info@codeaero.com Table of Contents How secure is Password
Chapter 9. Protecting Attachments
 PROTECTING EMAIL ATTACHMENTS Chapter 9. Protecting Email Attachments This chapter describes the Workshare Protect functionality with regard to identifying content risk in emails and their attachments.
FREEDOM-Pad Installation and Operation
 FREEDOM-Pad Installation and Operation Quick Start Steps for installing FREEDOM-Pad Page 2 Desktop Install Overview Page 2 Mobile Device Installation Overview Page 2 Activating the Battery Page 2 Resetting
Microsoft Outlook 2010 Hands On Guided Tour. Level 1
 Microsoft Outlook 2010 Hands On Guided Tour Level 1 Outlook 2010 Window Anatomy Level 1/Guide A, p.1 Welcome to Outlook 2010 at UMHS. This guide gives you a quick visual tour of the Outlook 2010 window.
DriveWizard Plus Instruction Manual
 DriveWizard Plus Instruction Manual To properly use the product, read this manual thoroughly. MANUAL NO. TOEP C730600 20C Table of Contents Safety Symbols and Markings...4 Manual Overview...5 Related Manuals...5
Identity Finder: Managing Your Results
 Updated 1/30/2012 Identity Finder: Managing Your Results The most important part of running Identity Finder is determining the most effective and secure way of managing the search results. Be sure to carefully
Parallels Toolbox for Windows User's Guide
 Parallels Toolbox for Windows User's Guide Parallels International GmbH Vordergasse 59 8200 Schaffhausen Switzerland Tel: + 41 52 672 20 30 www.parallels.com Copyright 1999-2018 Parallels International
INSTALLATION AND USER S GUIDE OfficeCalendar for Microsoft Outlook
 INSTALLATION AND USER S GUIDE OfficeCalendar for Microsoft Outlook Sharing Microsoft Outlook Calendar and Contacts without Exchange Server Contents What is OfficeCalendar? Sharing Microsoft Outlook Calendars
USB Server User Manual. USB Server Manual (DN-13010)
") USB Server Manual (DN-13010) Copyright Notice Copyright 2010. Al rights reserved. Disclaimer Incorporated shall not be liable for technical or editorial errors or omissions contained herein; nor for incidental
USB Server Manual (DN-13010) Copyright Notice Copyright 2010. Al rights reserved. Disclaimer Incorporated shall not be liable for technical or editorial errors or omissions contained herein; nor for incidental
NZ Online Forms for Research Software Manual
 NZ Online Forms for Research Software Manual Version 1.5 Released May 2016 2 P a g e N Z O n l i n e F o r m s f o r R e s e a r c h 1 INTRODUCTION... 6 2 GETTING STARTED... 6 2.1 Creating an Account...
Bucknell University Digital Collections. LUNA Insight User Guide February 2006
 Bucknell University Digital Collections LUNA Insight User Guide February 2006 User Guide - Table of Contents Topic Page Number Installing Insight. 2-4 Connecting to Insight 5 Opening Collections. 6 Main
PGP NetShare Quick Start Guide version 9.6
 PGP NetShare Quick Start Guide version 9. What is PGP NetShare? The PGP NetShare product is a software tool that provides multiple ways to protect and share your data. You can use PGP NetShare to: Let
SIMATIC. SIMATIC Logon V User management and electronic signatures 1. Hardware and Software Requirements 2. Scope of delivery 3.
 User management and electronic signatures 1 Hardware and Software Requirements 2 SIMATIC Scope of delivery 3 Installation 4 SIMATIC Logon 5 Configuration Manual 12/2015 A5E34528136-AA Legal information
Sage Fixed Assets Single User
 Single User 2018.0 Installation guide October 2017 Last updated October 17, 2017 2017 The Sage Group plc or its licensors. All rights reserved. Sage, Sage logos, and Sage product and service names mentioned
Server Edition. V8 Peregrine User Manual. for Microsoft Windows
 Server Edition V8 Peregrine User Manual for Microsoft Windows Copyright Notice and Proprietary Information All rights reserved. Attix5, 2015 Trademarks - Microsoft, Windows, Microsoft Windows, Microsoft
Easy Windows Working with Disks, Folders, - and Files
 Easy Windows 98-3 - Working with Disks, Folders, - and Files Page 1 of 11 Easy Windows 98-3 - Working with Disks, Folders, - and Files Task 1: Opening Folders Folders contain files, programs, or other
SecureAPlus User Guide. Version 3.4
 SecureAPlus User Guide Version 3.4 September 2015 Copyright Information Information in this document is subject to change without notice. Companies, names and data used in examples herein are fictitious
SharePoint 2010 Tutorial
 SharePoint 2010 Tutorial TABLE OF CONTENTS Introduction... 1 Basic Navigation... 2 Navigation Buttons & Bars... 3 Ribbon... 4 Library Ribbon... 6 Recycle Bin... 7 Permission Levels & Groups... 8 Create
Symantec Enterprise Vault
 Symantec Enterprise Vault Guide for Microsoft Outlook 2010/2013 Users 11.0 Light Outlook Add-In Symantec Enterprise Vault: Guide for Microsoft Outlook 2010/2013 Users The software described in this book
User Guide. Rebit Backup. https://rebitbackup.rebitgo.com
 User Guide Information in this document is subject to change without notice. 2017 Rebit Inc. All rights reserved. Reproduction of this material in any manner whatsoever without the written permission of
Handbook: Carbonite Safe
 1 Welcome to Carbonite! Important Things to Know...4 Carbonite Features...5 Advanced/Add-On Features... 5 Setting Up and Installing...6 Starting a Trial... 7 Installing Carbonite for the First Time...
Schneider Electric Floating License Manager
 Schneider Electric Floating License Manager EIO0000001078 11/2012 Schneider Electric Floating License Manager User Manual 12/2012 EIO0000001078.01 www.schneider-electric.com The information provided in
Getting Started. Microsoft QUICK Source 7
 Microsoft QUICK Windows Source 7 Getting Started The Windows 7 Desktop u v w x u Icon links to a program, file, or folder that is stored on the desktop. v Shortcut Icon links to a program, file, or folder
Manual Download. Please visit SUNIX website by searching keyword isafe or KEY-256UN1 for detail.
 Manual Download Please visit SUNIX website http://www.sunix.com by searching keyword isafe or KEY-256UN1 for detail. 1 User s Manual Copyright Copyright 2014 SUNIX Co., Ltd. All Rights Reserved. No part
Remote Support 19.1 Web Rep Console
 Remote Support 19.1 Web Rep Console 2003-2019 BeyondTrust Corporation. All Rights Reserved. BEYONDTRUST, its logo, and JUMP are trademarks of BeyondTrust Corporation. Other trademarks are the property
MY VOIC ON-LINE
 Learning and Development Department of Human Resources and Employee Relations MY VOICEMAIL ON-LINE (CALL10) Microcomputer Training Centre Microcomputer Training Centre 2007 TABLE OF CONTENTS Welcome to
Windows Installation support
 Windows Installation support Installing Riffmaster Pro to your PC is easy. Just in case you want some help with the process, we have listed all the steps in the process in this document. Download Go to
Microsoft Windows SharePoint Services
 Microsoft Windows SharePoint Services SITE ADMIN USER TRAINING 1 Introduction What is Microsoft Windows SharePoint Services? Windows SharePoint Services (referred to generically as SharePoint) is a tool
DSS User Guide. End User Guide. - i -
 DSS User Guide End User Guide - i - DSS User Guide Table of Contents End User Guide... 1 Table of Contents... 2 Part 1: Getting Started... 1 How to Log in to the Web Portal... 1 How to Manage Account Settings...
Configuring the WebDAV Folder for Adding Multiple Files to the Content Collection and Editing Them
 Configuring the WebDAV Folder for Adding Multiple Files to the Content Collection and Editing Them The Content Collection should be the repository for all of the files used in Blackboard. The Content Collection
Thank you for purchasing itwin. itwin provides simple and secure file sharing between two online computers.
 Starting Notes Thank you for purchasing itwin. itwin provides simple and secure file sharing between two online computers. 1. This guide is for v1.0.0.145 of the itwin software for Microsoft Windows Platform.
Sage Fixed Assets Single User. Installation guide
 Single User Installation guide Last updated January 15, 2019 2019 The Sage Group plc or its licensors. All rights reserved. Sage, Sage logos, and Sage product and service names mentioned herein are the
Trend Micro Incorporated reserves the right to make changes to this document and to the products described herein without notice.
 Trend Micro Incorporated reserves the right to make changes to this document and to the products described herein without notice. Before installing and using the software, please review the readme file
Cisco CTL Client setup
 Cisco CTL Client setup This chapter provides information about Cisco CTL client setup. About Cisco CTL Client setup, page 2 Remove etoken Run Time Environment 3.00 for CTL Client 5.0 plug-in, page 2 Cisco
Installation Manual. Fleet Maintenance Software. Version 6.4
 Fleet Maintenance Software Installation Manual Version 6.4 6 Terri Lane, Suite 700 Burlington, NJ 08016 (609) 747-8800 Fax (609) 747-8801 Dossier@dossiersystemsinc.com www.dossiersystemsinc.com Copyright
Sophos SafeGuard File Encryption for Mac Quick startup guide. Product version: 7
 Sophos SafeGuard File Encryption for Mac Quick startup guide Product version: 7 Document date: December 2014 Contents 1 About Sophos SafeGuard File Encryption for Mac...3 2 First use...4 3 Working with
Clean & Speed Up Windows with AWO
 Clean & Speed Up Windows with AWO C 400 / 1 Manage Windows with this Powerful Collection of System Tools Every version of Windows comes with at least a few programs for managing different aspects of your
Contents. User's Guide
 Contents i User's Guide ii Contents No part of this document may be reproduced or transmitted in any form or by any means, electronic or mechanical, for any purpose, without prior written permission from
DATAVIZ, INC. Documents To Go. User Manual for Android 10/21/2010
 DATAVIZ, INC. Documents To Go User Manual for Android 10/21/2010 View, Edit & Create Microsoft Word, Excel and PowerPoint as well as View Adobe PDF Files & Attachments All in One Complete Package. Contents
INFORMATION TECHNOLOGY COMMITTEE ESCB-PKI PROJECT
 INFORMATION TECHNOLOGY COMMITTEE ESCB-PKI PROJECT SUBSCRIBER S GUIDE VERSION 1.3 ECB-PUBLIC 15-April-2014 ESCB-PKI - Subscriber's Procedures v.1.3.docx Page 2 of 26 TABLE OF CONTENTS GLOSSARY AND ACRONYMS...
Remote Copy Management
 Remote Copy Management From Page:1 Index Cover 1 Index 2 Overview 3 Installation 4 Configuration Subjects 5 E-Mail Lists 6 For List 7 Copy Writers 7 Groupings 8 Create and Send a Message 9 Status Window
SIMATIC Automation License Manager Manual 02/2008 A5E
 s Contents SIMATIC Automation License Manager Product Overview 1 Installation 2 Working with the Automation License Manager 3 Glossar Index Manual 02/2008 A5E02128430-01 Safety Guidelines This manual contains
This document is a visual step-by-step guide to download and activate DET Licensed Software on Student BYOD PCs.
 This document is a visual step-by-step guide to download and activate DET Licensed Software on Student BYOD PCs. The example device we used has Windows 10 Home edition installed, and the procedure will
Remote Support Web Rep Console
 Remote Support Web Rep Console 2017 Bomgar Corporation. All rights reserved worldwide. BOMGAR and the BOMGAR logo are trademarks of Bomgar Corporation; other trademarks shown are the property of their
User Guide. Web Intelligence Rich Client. Business Objects 4.1
 User Guide Web Intelligence Rich Client Business Objects 4.1 2 P a g e Web Intelligence 4.1 User Guide Web Intelligence 4.1 User Guide Contents Getting Started in Web Intelligence 4.1... 5 Log into EDDIE...
Nextiva Drive The Setup Process Mobility & Storage Option
 Nextiva Drive The Setup Process The Setup Process Adding Users 1. Login to your account and click on the Account icon at the top of the page (this is only visible to the administrator). 2. Click Create
IBM Notes Client V9.0.1 Reference Guide
 IBM Notes Client V9.0.1 Reference Guide Revised 05/20/2016 1 Accessing the IBM Notes Client IBM Notes Client V9.0.1 Reference Guide From your desktop, double-click the IBM Notes icon. Logging in to the
Installation Instructions. Your Guide to Installing and Getting Started with WinSteam Version 4.0
 Installation Instructions Your Guide to Installing and Getting Started with WinSteam Version 4.0 Copyright 1992-2012 Techware Engineering Applications, Inc. www.techwareeng.com Toll Free (866) TECHWAR
Unit 8: Working with Actions
 Unit 8: Working with Actions Questions Covered What are actions? How are actions triggered? Where can we access actions to create or edit them? How do we automate the sending of email notifications? How
Introduction to the. Managed XP Service (For Students) Mark Morley Bob Booth December 2004 AP-Win7. University of Sheffield.
 Mark Morley Bob Booth December 2004 AP-Win7. University of Sheffield.") Introduction to the Managed XP Service (For Students) Mark Morley Bob Booth December 2004 AP-Win7 Contents University of Sheffield 1. INTRODUCTION... 4 2. USING A MANAGED SERVICE MACHINE... 5 2.1 LOGGING
Introduction to the Managed XP Service (For Students) Mark Morley Bob Booth December 2004 AP-Win7 Contents University of Sheffield 1. INTRODUCTION... 4 2. USING A MANAGED SERVICE MACHINE... 5 2.1 LOGGING
GUARD1 PLUS Manual Version 2.8
 GUARD1 PLUS Manual Version 2.8 2002 TimeKeeping Systems, Inc. GUARD1 PLUS and THE PIPE are registered trademarks of TimeKeeping Systems, Inc. Table of Contents GUARD1 PLUS... 1 Introduction How to get
ELM Server Exchange Edition ArchiveWeb version 5.5
 ELM Server Exchange Edition ArchiveWeb version 5.5 Copyright 2016 Lexmark. All rights reserved. Lexmark is a trademark of Lexmark International, Inc., registered in the U.S. and/or other countries. All
Handbook: Carbonite Safe
 1 Welcome to Carbonite! Important Things to Know...4 Carbonite Features...5 Setting Up and Installing...6 Starting a Trial... 7 Installing Carbonite for the First Time... 7 Buying a Subscription...9 Subscription
BC6.3 User Guide (Part 1)
") BC6.3 User Guide (Part 1) Document Management and Searching C Sellar 27 May 2015 Version 1 BC-27769333 BC6.3 User Guide (Part 1) Document Management and Searching Executive Summary This is the BC User
BC6.3 User Guide (Part 1) Document Management and Searching C Sellar 27 May 2015 Version 1 BC-27769333 BC6.3 User Guide (Part 1) Document Management and Searching Executive Summary This is the BC User
Microsoft Windows 10. Quick Reference. Watsonia Publishing 47 Greenaway Street Bulleen VIC 3105 Australia
 Watsonia Publishing 47 Greenaway Street Bulleen VIC 3105 Australia www.watsoniapublishing.com info@watsoniapublishing.com Quick Reference Course Code: INF1440 Table of Contents Chapter 1: Starting With
Parish . User Manual
 Parish Email User Manual Table of Contents LOGGING IN TO PARISH EMAIL... 3 GETTING STARTED... 3 GENERAL OVERVIEW OF THE USER INTERFACE... 3 TERMINATE THE SESSION... 4 EMAIL... 4 MESSAGES LIST... 4 Open
Anchor User Guide. Presented by: Last Revised: August 07, 2017
 Anchor User Guide Presented by: Last Revised: August 07, 2017 TABLE OF CONTENTS GETTING STARTED... 1 How to Log In to the Web Portal... 1 How to Manage Account Settings... 2 How to Configure Two-Step Authentication...