HD All-in-one DVR. User manual
|
|
|
- Nicholas Baker
- 6 years ago
- Views:
Transcription


1 HD All-in-one DVR User manual
2
3 Table of Contents 1. Product Introduction Product Summary Parameters Product Outside Structure Introduction The Panel Instruction The Connect Ports Instruction Remote Controller Instruction Video format Operating Instruction Turn on/off DVR Preview and turn on/off LCD panel Basic Menu Operation Instruction Main Menu Introduction Video Playback Manual Recording PTZ Control Menu Log Information Shutdown System Client Operation Instruction The Main Page of the Video Monitoring Bit Stream Selection PTZ Control Advanced Setting Box Talkback Control Configuration Remote Playback
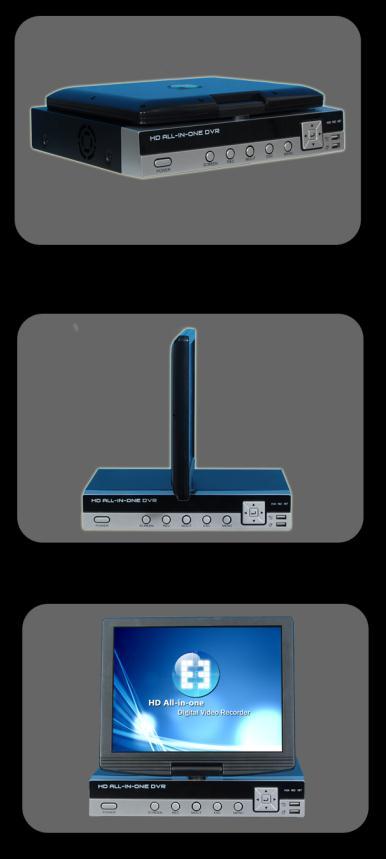
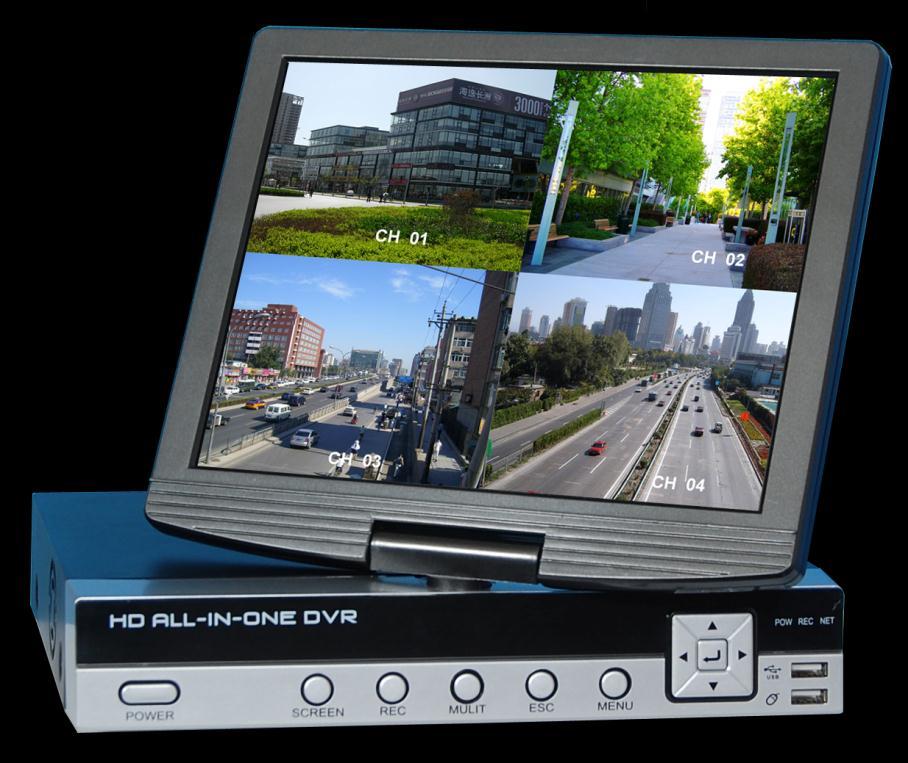
4 1. Product Introduction 1.1 Product Summary This device is a digital monitoring and recording product specially designed for the security field, which integrate a revolvable 10.5 inch digital LCD panel. The device combines with the latest technologies in the IT field, such as standalone processor and standalone Linux operating system, video and audio compression/decompression, large capacity HDD record, TCP/IP network etc.. The code is embedded in the FLASH chip, which makes the system running more steadily. This device has both features of digital video and audio recording (DVR) and digital video and audio server (DVS). It can not only work locally and independently but also compose of a powerful security monitoring net with networking. With the use of professional network video surveillance platform (network) software, it can fully reflect its strong networking and remote monitoring capability. It can be used for the security protection in the fields of banking, telecommunications, electronic power, justice, traffic, residential, factory, warehouse, water conservancy facilities and other areas and departments. 1.2 Parameters Model 4 CHANNEL 8 CHANNEL Operation System Embedded Linux Operation System Operation Interface GUI, support mouse, pane, remote control operation Video Standard PAL, NTSC System Resources Multi-tasking operation, simultaneous multi-channel recording, simultaneous video playback and simultaneous network operation. Video Compression H.264 Audio Compression ADPCM Recording Mode Manual, Timing, Alarm, Motion detection Search Mode By time, event, channel, log Backup Mode Network download, USB backup Video Input 4ch BNC 8ch BNC Video Output Digital LCD panel:10.5 inch (Resolution:1024X768), CVBS, VGA Resolution: 1280X1024. Audio Input 4ch RCA 8ch RCA Audio Output 1ch RCA Voice Talkback 1ch RCA Live Video Resolution PAL:720x576(D1 );NTSC:720x480(D1) Playback Resolution PAL:352x288(CIF);NTSC:352x240(CIF) Image Control 1-6 level are selectable Motion Detection Each channel can set independent detection zones and multilevel sensitivity Video Display 1/4multiple display 1/4/8multiple display 2
5 Recording Frame Rate PAL:25f/s(Adjustable) NTSC:30f/s(Adjustable) Recording Storage Local HDD, Network Local Playback 1--8 channel playback at same time Alarm Input 4ch 4ch Alarm Output 1ch output PTZ Control RS485 HD Interface 1 SATA Ports Network Interface RJ45 10M/100M Adaptable Ethernet Connection Mobile Phone View Support 3G mobile phone with special operating system USB Interface 2 USB2.0 High-speed Port Power Supply 12V 3A 3

6 2. Product Outside Structure Introduction 2.1 The Panel Instruction 1 POWER Power key, use to turn on/turn off the device power. 2 SCREEN LCD panel on/off key. 3 REC Record key 4 MULIT Screen display mode switch key. 5 ESC Escape 6 MENU Menu key 7 Direct and Enter Up, down, left, right and Enter key 8 USB USB Port, connect to USB disk or mouse 9 Led Light POW: Power REC: Record NET: Network 2.2 The Connect Ports Instruction 1 VIN1-VIN8 Channel 1~8 video input 2 VOUT Video output 3 AIN1-AIN8 Channel 1~8 audio input 4 AOUT Audio output 5 LINE Talkback 6 VGA VGA port 7 NET Network RJ45 port 8 ALARM Alarm input/output, RS485 port 9 POWER DC 12V 3A power input 10 SWITCH Power on/off 4

7 2.3 Remote Controller Instruction Key name POWER DEV Function Soft shutdown Device number input 0~9 Number key MODE MENU ESC Direct OK PTZ Record Playback CLEAR MUTE Display mode switch Menu key Escape and cancel Up, down, left, right key OK or save Enter PTZ control mode Manual recording Play, pause, fast forward, fast back, play as one frame, pre and next Clear select area Mute on/off The operation of remote controller is same as front panel. DEV: After pressing the DEV button, press the number button and input the device number which is consistent with the host. Press ENTER and save the setting. Then the control operation on this device comes into effect. SHIFT:This version does not support this key. CLEAR:Clear current selected area when setup the motion detection region. Note: When there are multiple devices in a same place, the remote control should choose a device first according to the device number. Therefore, you should define one unique device number for each device, otherwise, the remote control operation may simultaneously affect the multiple devices which are with the same device number. 5


8 2.4 Video format Setup the video format by video format switch jumper on device main board. PAL format state: NTSC format state: 6
9 3. Operating Instruction 3.1 Turn on/off DVR 1). Please confirm the access AC voltage matches the requirements of the DVR and ensure that the middle earth terminal of the outlet connected to the ground well. After accessing to the power, the device will startup and the POWER led will become red. 2). Press the Shutdown button in the menu, DVR will stop work, but still power on. If want to power off the DVR, there are two ways: a). Please press the Power key 5 Sec, DVR will power off and the POW indicator led in the front panel will off. Press the Power key 5 sec again, DVR will power on and the POW indicator led in the front panel will on again. b).turn on/off the Power switch in the back panel of the DVR. But directly Turn on/off Power switch when DVR working may lead to loss of system data and the result of a damaged disk, so we recommend use the Shutdown button in the menu or the Power key to shutdown DVR system before turn off the Power switch. 3.2 Preview and turn on/off LCD panel Preview The device will enter the preview screen when it starts normally. The date, time and channel name of the system will be indicated on the preview screen. Pressing the code corresponding button on the panel or clicking the left mouse button can start single-screen preview. Pressing the MULTI button on the panel again or clicking the left mouse button can return to the state of multi-screen preview Turn on/off LCD panel After device starts normally, Pressing SCREEN key on the front panel will turn on/off the LCD panel. 3.3 Basic Menu Operation Instruction Enter the Menu Mode Click right button of the mouse or press the MENU button on device panel. Screen will show a User Login dialog,you could enter you User Name and Password to login the DVR, now, you click mouse right button again, it will show a menu which have some option, such as.1 CH,4CH,8CH,9CH,Playback,Record,PTZ,Audio,Menu 7
10 3.3.2 Menu Component Instruction The component units of the menu mainly include the following kinds: (1) Checkbox: Provide two kinds of state options. means valid, while means invalid. Use the ENTER button or, button or click the left mouse button to choose. For example, the Channel and Type select box on the page of the file search menu. (2) Select box: Provide more than 2 options, but only one option can be chosen. Use, button or click left mouse button to turn up and click right mouse button to turn down. For example, the Storage Device select box on the page of the file search menu. (3) List box: Display the search result information in the list. You can choose one item and carry out corresponding operation. For example, press the ENTER button on the list of playback search result or click left mouse button to play this file information. Click right mouse button can select/cancel this video file in order to backup this video file. (4) Edit Box: Input target name through edit box. For example, on the page of the system configuration menu, numbers, English letters and Chinese etc. can be input into the Device Name edit box. a) Single-clicking left mouse button on can switch input type, including number, upper-alpha and lower-alpha, punctuation, Chinese input method. There will be current input method indicated following the activity box. b) After moving the location of the edit box place cursor by, button on the panel or by mouse, pressing the ENTER button or single-clicking left mouse button, the input keyboard will appear. Then select the target characters by direction buttons or single-clicking the left mouse button. c) Delete the character before the cursor by the MENU button or single-clicking the right mouse button. d) After the input is complete, exit the edit status by pressing the ESC button or clicking the right mouse button. (5) Button: Used for the implementation of a specific function or entering the second-level set menu. Press ENTER or click left mouse button to confirm access Exit the Menu Mode Pressing ESC or clicking right mouse button can exit the menu mode and switch to the multi-screen preview mode. Pressing ESC or single-clicking right mouse button will return to the previous menu. 3.4 Main Menu Introduction Press MENU or click right mouse button to popup the main menu. The main menu consists of the following three components: Preview Mode: Choose the corresponding preview screen mode in the menu bar. Shortcut Menu: There are video playback, manual recording and PTZ control shortcut menu in the menu bar, from which you can enter the corresponding menu page directly. Main Menu Bar: After entering the menu bar, there will be the menu page of management tools, system setting, log search, shut down system. 8
11 3.5 Video Playback Single-click the Video Playback in the main menu bar to enter the file search operation interface File Search Select Channel: Select the target channel to be searched and click the checkbox to select. Recording Type : Select the recording type to be searched. means selected; means unselected. Time Bucket Setup: Input the start and stop times of the video to be searched in the edit box. Storage Device: Select the target backup storage device in the select box. File Search Button: When the settings of the above search conditions are complete, clicking this button, the system will start searching the corresponding video information and entering the search result interface. Note: If the quantity of the video files which meet the search conditions is bigger than 4000, the system will only indicate the latest 4000 video files. If you want to search for the updated files, please modify the search conditions. Playback by Time: Start playing back the video according to the set start and stop times(regardless of recording type) For the playback tool control, please refer to Backup: Backup all the videos which are within the set start and stop times to the designated storage device Search Result When the setting of the search conditions is complete, single-clicking the File Search button will enter the search result interface. Video File Playback: In the list box of search result, positioning the target file by the up and down button or moving mouse, click ENTER or left mouse button to play this file. Page Turning: The searched video files are page displayed. Single-click Page Up, Page Down button or input the target page number in the page number box and then press Jump button or scroll the middle button of the mouse to turn the page. Backup: In the list of search result, positioning the target file by the up and down button or by moving mouse and then use the FN button or right mouse button to select the file. In the storage device select box, selecting the target storage device, then clicking the Backup button will backup the selected video file to the target storage device. Cancel Button: Return to the previous menu Playback Tool Control Choosing file playback or playback by time will enter the video playback interface. Playback Toolbar: Playback toolbar will appear at the bottom of the playback interface. Click right mouse button can hide/display the toolbar. When multi-screen playing back simultaneously, clicking right mouse button to hide the toolbar, then the corresponding channel video can be enlarged or diminished by single-click left mouse button. Stop playing: Click, the system will stop playing and return to the playback interface. Pause/Play: Click to pause playback; click to go on playback. 9

12 Single-frame Playback: Under the pause mode, click can start single-frame play; click once will play one frame forwards. Slow Forward: Click to start slow forward; click it again to set the slow forward multiple. Fast Forward: Click to start fast forward; click it again to set the fast forward multiple. Last Section/Next Section: Click or, each click last section or next section, the video will forward or backward 10%. Turn off/on Sound: Click or to turn off or turn on the sound of the playback file. Playback Status Information: The right side of the toolbar will respectively show the play speed, play progress, playing time and total time of the video file. Exit Playing: Clicking ESC or can exit the playback screen at any time; when finishing playing all the video files, it will return to the playback screen automatically. 3.6 Manual Recording Single-click Manual Recording in the main menu bar to enter the setting interface. Press the REC button or click Manual Recording in the main menu bar by mouse can enter the manual recording setting interface. Manual recording operation interface consists of the following parts: Channel Number: Correspond with the video channel of the device. Channel State: Indicates the recording status of the corresponding channel. When the status led is green, it means unopened video; the status led is red " ", it means open video; when there is a coil around the status led, means the corresponding channel opening the network video transmission. When the system is under the status of recording (regardless of recording type), will appear at the bottom left corner of the channel preview screen which means the system is recording. Start All/Stop All: Single-click this button to stop or start the video setting of all the channels. Back Button: Single-click the back button to exit manual recording interface and return back to the main menu bar. Note: If the recording is enabled manually, you can only stop it manually, otherwise, the recording will continue all the time. 10
13 Attention: Manual recording operation requires that the user has the recording operation authority. Before the operation, please confirm with the administrator that the hard disk has been installed in the DVR and it has been formatted correctly. 3.7 PTZ Control Single-click PTZ Control in the main menu bar to enter the setting interface. The main operations of the PTZ control are direction control, horizontal scanning, ZOOM control, focal adjustment, aperture adjustment and PTZ speed. After switching the page, the preset point can be invoked; start up/stop automatic cruise; wiper control; light control; auxiliary device control. Note: The invoked preset points must have be set up well. For the setting methods of the cruise path, please refer to PTZ setting. If the cruise path number is less than 2 digits, you need to add 0 before the corresponding cruise path number to make up for 2 digits. 3.8 Menu Click MENU in the main menu bar to enter the main menu page. The first-level menu includes management tools, system setting, log search, system shutdown Management Tools Management tools include HDD management, user management, default configuration, alarm clear, software update, date and time, system information HDD Management SATA: Displays the current system HDD information; means HDD detected successfully; X means no hard disk detected. HDD Format: In the HDD select box, selecting the target disk can view the information of the corresponding disk; clicking the Format button will show the confirmation page; clicking the OK button will start formatting the HDD; after the HDD formatting is complete, the hard disk can be used normally. Note: All the videos must be stopped before the HDD formatting User Management Create, add and delete user and modify the user information. (No one has the right to set other user authority except the admin.) Create New User Enter the User Management operation interface, click ADD button and enter the add user interface. Note: For the input methods, please refer to 3.3.2(4)edit box. 1) Input New User Name Input a new user name in the user name edit box(such as: user). Note: For the input methods, please refer to 3.3.2(4)edit box. 2) Setup Password of New User Choose the Setup Password button in the Add User interface and input the new password on the password setup page. The password is within 6 digits. 3) Setup the Authority of the New User Setup the operation authority for the new user on the "Add User" interface, and then make selection in the checkbox with corresponding functions. means that the user can use this authority; means that the user cannot use this authority. 11
14 4) Save the Setup Information of the New User Single-clicking the OK button, the setup information of the new user will be saved while clicking the Cancel button, the setup information of the new user will not be saved. Modify User Enter the User Management operation interface, single-click the right mouse button or press ENTER on the panel in the user list to select the target user, then single-click the Modify button, enter the Modify User page to modify the user information. Note: Admin administrator can modify the authority of other users. Delete User Enter the User Management operation interface, single-click the right mouse button or press ENTER on the panel in the user list to select the target user, then click Delete to delete the user Restore Default Restore the system configuration parameters to factory configuration. The system will restart after the restore is complete Alarm Clear Clear all the alarm information manually. When the alarm is cleared successfully, the system will indicate Alarm has been successfully cleared. Confirm and return to the page of management tools Software Update Choose the Software Update on the management tools interface to enter the operation interface. Select the target to be updated in the update select box, then select the update mode in the update method select box: FTP or USB. USB Update: Copy the file to be updated to the USB root catalogue, insert USB and click OK to update the system. FTP Update:Put the file to be updated to the FTP server root catalogue and set the IP address of the server as the designated address, then press OK to update the system. After the update is complete, the system will restart automatically. Note: The update name of the main board should be: mainboard.bin; the update name of the panel should be: panel. bin. When the system is being updated, do not disconnect the power so as to avoid device failure Time Setting Enter the date and time page, input the exact date and time in the "Date, Time edit box, then confirm and save or cancel and exit Version Information Check the relevant information of the device name, item number and the version number System Setup Choose the System Setup to enter the sub-menu interface on the main menu interface, including system parameter, code parameter, image parameter, and alarm input, alarm output, Schedule, motion detection, PTZ configuration and network System Setup Choose the "Setup" and enter its setting interface on the system setting interface. Device ID: When using the remote control to operate the device, the communications with the remote control is realized y the device number. To realize the remote control operation, the remote control must correspond to the device number. For the settings of the remote control device number, please refer to 2.3 remote control instruction. 12
15 Device Name: Device name is normally defined as the area name of the monitoring point. When remote access, you can find the monitoring point to be visited intuitively. The default device name is LCD DVR. For the edit method, please refer to 3.3.2(4)edit box. Overwrite: When all the hard disks inside the device are full, choose "Yes", the system will overwrite the earliest video information to achieve the purpose of cycle recording. Lock Time: There is no operation within the keypad lock time. The system will cancel the current user automatically. To operate, you need to relogin the system. Auto Switch: Switch time means the cycle time indicated on the single-channel preview. Video Standard: The device supports PAL and NTSC video output. The default video output is NTSC. VGA Resolution: Adjust the VGA video output resolution. There are 800*600/60Hz, 1024*768/60Hz and 1280*1024/60Hz options. Menu Transparency: When the user enters the menu operation interface, you can realize the transparency between the screen preview and menu by adjusting the level of the menu transparency. Language: 11 kinds of commonly used languages including Simplified Chinese, English, etc.. According to the user's needs, any menu language type can be setup (language pack is needed) Show Status: Setup if the information icons of the recording mode, state and motion detection will be indicated on the screen preview. When the mark is changed into, it means state displayed; when the sign is changed into, it means state not displayed. The explanations for the lower left corner icons on the channel screen preview. The system is recording(regardless of recording type). Timing recording state. Manual recording state. Motion detection state. When the page setting is complete, single-clicking the OK button, the setting information will be saved and it exits; single-clicking the Cancel button, it will exit without saving the setting information Record Choose Record on the system setting interface to enter its setting interface. Channel: Select the target channel to be set, click select box to select. Bit Stream: Select the bit stream to be set. There are "Main Bit Stream" and "sub-bit stream. Bit Stream Type: Choose the video bit stream type. Video Stream" means that when the system is recording, it only encodes the video; Compound Stream" means that when the system is recording, it encodes both the video and audio. CBR/VBR(Bit rate type): User can set up "Fixed Bit Rate" and "Variable Bit Rate". "Fixed Bit Rate" means that the system will encode the image according to the bit rate and video frame rate which are set by the user; "Variable Bit Rate" means the system encodes according to the image quality and video frame rate which are set by the user, but the bit rate is adjusted automatically by the system according to the video scene. Bit rate: set this channel record bit rate 64Kbps to 2Mbps Video Frame Rate: The user selects the video frame rate to be encoded. The higher frame rate, the better image fluency, but also occupies the more hard disk space. Quality: when VBR is selected in CBR/VBR option, this option will be show. The user selects the bit rate of the code as needed. The higher bit rate, the better image effect, but occupies the more hard disk space. Resolution: this option default value is CIF, if the LCD DVR is 8 channel type, channel 1 and 13
16 channel 2 could set to D1, otherwise, LCD DVR is 4 channel type, only channel 1 could be set. Copy to: Selecting the target channel in the select box on the right side of the Copy to button, single-clicking the Copy to button, the setting information of the current channel will be applied to other target video channels by the system. When the page setting is complete, single-clicking the OK button, the setting information will be saved and it exits; single-clicking the Cancel button, it will exit without saving the setting information Video Choose Video on the system setting interface to enter its setting interface. Select Channel: Select the target channel to be set and click the select box to select. Channel Name: In the edit box, the user is free to edit the channel name. For the edit method, please refer to (4)edit box. Show Name: means show; means not show. Click Position button and enter the setting interface. Setting can be realized by the direction buttons on the panel or by mouse dragging the red channel. When the setting is complete, press the ENTER button or click right mouse button to save and exit. Clicking the ESC button will exit without saving. Show Time: means show; means not show. Click position button and enter the setting interface. Setting can be realized by the direction buttons on the panel or by mouse dragging the red channel. When the setting is complete, press the ENTER button or click right mouse button to save and exit. Clicking the ESC button will exit without saving.. Image Parameter: The brightness, contrast, hue and saturation of the channel image can be configured. Use the button on the panel or mouse dragging the scroll bar to adjust. Blind: Set the "Envelop" option mark to be " " to activate the Zone button and enter the envelop zone setting interface. Area (Blind Zone): On the blind zone setting interface, a small yellow box will appear in the middle of the area namely envelop setting box. Zone Creation: move the yellow box to the start position of the setting area by the direction buttons of the panel; Press FN button(switching between yellow box and red box) to change it into red box(red box is the effective cover area box), then adjust the zone size by direction buttons. The minimum size can be set up is a small box while maximum 4 envelop zones can be set up. Single-click or long press left mouse button and move the mouse can choose zone. After the setting is complete, press the ENTER or click the middle mouse button to exit and save. Clicking the ESC button will exit without saving. Local Clear (Area): Move the yellow box to the start position (up left) of the zone to be cleared. Press FN, it will change into a small black box(local clear box), local is cleared. After the clear is complete, press ENTER button to save and exit. If press ESC, the clear operation will be invalid. Clicking the left mouse button in the red box or long pressing the left mouse button and moving mouse can clear the zone. Click the middle mouse button to exit and save. Clear All (Area): Press MENU to clear all the envelop zones of the channel. Default: The setting image parameter can be restored to the system default value(only the restore of image parameters) by clicking this button. Copy to: Selecting the target channel in the select box on the right side of the Copy to button, single-clicking the Copy to button, the setting information of the current channel will be applied to other target video channels by the system. Note: The channel name cannot be copied. When the page setting is complete, single-clicking the OK button, the setting information will be saved and it exits; single-clicking the Cancel button, it will exit without saving the setting information. 14
17 Alarm Input Choose the Alarm Input on the system setting interface to enter its setting interface. Input Channel: Select the target channel to be set and click select box to select. Alarm Type: High level and low level can be set up. Please choose the appropriate level for the alarm connected to the alarm input channel. Detection: You can set up if the system detect alarm input signal. Choose Yes, the following setting functions will take effect; choose No, nothing is conducted. PTZ:Single-click PTZ button to enter the PTZ link interface. Choose the channel number and conduct related settings of PTZ link: preset point, cruise, track. For the setting methods, please refer to Duration: When the alarm input is complete, set up the Duration time needed for dealing with each point. Buzzer: If buzzer alarm is needed. means enable; means invalid. Rec. CH: You need to trigger the designated recording channel number when you are setting up the alarm input. Alarm Output: You need to trigger the designated alarm output channel number when you are setting up the alarm input. Mail Alarm: If mail alarm is needed. means display; means not display. Copy to: Selecting the target channel in the select box on the right side of the Copy to button, single-clicking the Copy to button, the setting information of the current channel will be applied to other target video channels by the system. When the page setting is complete, single-clicking the OK button, the setting information will be saved and it exits; single-clicking the Cancel button, it will exit without saving the setting information Alarm Output Choose the Alarm Output on the system setting interface to enter its setting interface. Alarm out: Select the target channel to be set up and click the select box to select. Type: Normal Close Type and Normal Open Type. Choose the corresponding type. Input on the right of the alarm mail. When local alarm occurs, it will send a prompt message to the corresponding . Password: password SMTP Server: enter the SMTP server When the page setting is complete, single-clicking the OK button, the setting information will be saved and it exits; single-clicking the Cancel button, it will exit without saving the setting information Schedule Choose Schedule on the system setting interface to enter its setting interface. Channel: Select the target channel to be set up and click the select box to select. Week: Select the date to be set up. You can set up respectively; All means all the dates. Recording Type and Time Bucket: Within the four time buckets, each time bucket can set up different recording types: timing recording(red), motion detection recording(green), alarm recording(yellow). " " means enable; " " means invalid. There is time bucket status indicated at the bottom. It is a whole plan of 0 to 24 hour. Copy to: Selecting the target channel in the select box on the right side of the Copy to button, single-clicking the Copy to button, the setting information of the current channel will be applied to other target video channels by the system. When the page setting is complete, single-clicking the OK button, the setting information will be 15
18 saved and it exits; single-clicking the Cancel button, it will exit without saving the setting information Network Setup Choose Network on the system setting interface to enter its setting interface. There are "Ethernet Configuration, PPPOE Configuration, DDNS configuration". 1) LAN: Choose LAN on the network configuration interface to enter its setting interface. MAC: Indicate the physical address number of the device. DHCP: Choose whether to enable DHCP to obtain IP automatically. IP address:the IP address must be exclusive, which can not be conflict with any other host or workstation during the same network segment. Net Mask: It is used to divide subnet segment. Gateway: Realizes the communications between different network segments. Gateway address needs to be set. DNS: When the device is connected to the network using PPPoE protocol, it will gain a dynamic IP address. Port Number:The default port number is 8670 Http Port: The port number which the IE browser visit. The default port is 80. Mobile Port: The port number which the mobile phone visit. The default port is 101. When the page setting is complete, single-clicking the OK button, the setting information will be saved and it exits; single-clicking the Cancel button, it will exit without saving the setting information. 2) PPPOE: Choose PPPOE Configuration" on the network configuration interface to enter its setting interface. Enable: " " means enable PPPOE protocol and dial-up internet access; " " means do not enable this function. User Name and Password: Input the user name and password provided by ISP in the edit box. For the edit methods, please refer to 3.3.2(4)edit box. When the page setting is complete, single-clicking the OK button, the setting information will be saved and it exits; single-clicking the Cancel button, it will exit without saving the setting information. 3) DDNS: Choose "DDNS Configuration" on the network configuration interface to enter its setting interface. Enable: " " means enabling DDNS dynamic domain name service; " " means do not enable this function. Provider: Choose the corresponding servicer. User Name, Password and Domain Name: Input the user name, password and domain name applied from the internet. For the edit methods, please refer to 3.3.2(4)edit box. When the page setting is complete, single-clicking the OK button, the setting information will be saved and it exits; single-clicking the Cancel button, it will exit without saving the setting information PTZ Setup Choose the PTZ Configuration to enter its setting interface. Channel: Select the target channel to be set up and click the select box to select. Baudrate: Select the Baudrate which matches the connected PTZ. Data Bit: Select the data bit which matches the connected PTZ. Stop Bit: Select the stop bit which matches the connected PTZ. Checksum: Select the check value which matches the connected PTZ. 16
19 Flow Ctrl: The selected items must match the PTZ flow control setting. Protocol Type: The selected items must match the PTZ protocol. Decoder : Input designated decoder address. Preset: Preset point is to preset and memorize the position, focus, aperture and zoom of the camera and use a number to identify these settings at the same time. 1) Add Preset Point: Input a preset point in the preset point edit box, ranging from 1-128, then adjust the camera to the target position. When the adjustment is complete, pressing set, the preset point will be saved. 2) Delete Preset Point: Input a preset point to be deleted in the preset point edit box, click Delete. Cruise: Cruise path is a path on which a camera running at a certain speed. It passes various cruise points with numbers. Each cruise point includes stay preset points and retention time. Thus, the settings of cruise path include the parameters setting for the cruise point, preset point, retention time and cruise speed etc. Corresponding information can be set up on the Setting interface. At present, one device supports the setting of 16 cruise path numbers. Track: Track is a line which is used to record the predefined irregular movement of the camera. Entering Setting can set track. Copy to: Selecting the target channel in the select box on the right side of the Copy to button, single-clicking the Copy to button, the setting information of the current channel will be applied to other target video channels by the system. When the page setting is complete, single-clicking the OK button, the setting information will be saved and it exits; single-clicking the Cancel button, it will exit without saving the setting information Motion Detection Choose the MTD on the system setting interface to enter its setting interface. Channel: Select the target channel to be set up and click the select box to select. Type: Motion detection, video loss and video block can be chosen. Rec. CH: When the detection occurs, the designated recording channel number needs to be triggered. Alarm Output: When the detection occurs, the designated alarm output channel number needs to be triggered. Buzzer: If buzzer alarm is needed. means enable; means invalid. Sensi: Choose triggering motion detection sensitivity. No Detection means the above setting parameters are invalid. Area: Setting up the motion detection area. For the setting methods, please refer to envelop zone setting. Duration: When the signal detection is complete, set up the delay time needed for dealing with each point. Send Mail:Mail Alarm: If mail alarm is needed. means display; means not display. Copy to: Selecting the target channel in the select box on the right side of the Copy to button, single-clicking the Copy to button, the setting information of the current channel will be applied to other target video channels by the system. When the page setting is complete, single-clicking the OK button, the setting information will be saved and it exits; single-clicking the Cancel button, it will exit without saving the setting information. 17
20 3.9 Log Information Choose Log Search on the main menu page to enter its operation interface. Type: Select the target log type in the select box. Time Setting: Input the time bucket of viewing in the edit box. Single-click Log Search, the corresponding log information will appear in the log list at the bottom. You can turn page by inputting target page number in the page number box or by single-clicking OK button Shutdown System Choose Shutdown on the main menu interface to enter its operating system. Choose the corresponding operation contents in the select box. Log out: It is used to cancel the current user. After log out, if you want to continue to use the device, you need to login the system again. Restart: Restart the device. After confirmation, the device will be restarted. Shutdown: Shutdown the device. After confirmation, the device will be shut down. 18


21 4. Client Operation Instruction When you use the client on PC, please conduct the following settings: IE Setting: If it is used for the first time, the activex cannot be loaded, the IE must be set as follows: Tools Internet Options Security-Internet Custom Level Enable all the activexs and plugins. Click OK finally. Login: Open IE and input the IP address of the host network setting in the address bar (the factory IP address is: then enter the login page. Input the user name and login password. If the user name and password match with the ones of the host-side, and the input user information is correct, then the login will be successful. 4.1 The Main Page of the Video Monitoring After login, the main page of the monitoring consists of preview window, PTZ control, preview mode, bit stream selection, channel open, talkback open, configuration and playback. 19
22 Open Preview: Click left mouse button to select the target channel in the preview window (red channel box means selected). Double-clicking the channel number by mouse in the channel open box can open or close the video image of the corresponding preview window. means open, means close. Preview Mode: Click or double-click the preview window screen by mouse in the switch box under preview mode to switch between single-screen or multi-screen preview mode. 4.2 Bit Stream Selection This device supports double bit stream. Choose the bit stream type of video preview in the bit stream select box. 4.3 PTZ Control A. PTZ direction control button. You can control the PTZ operation direction by the up, down, left, right button. B. The aperture button. You can control the PTZ aperture by enlarge and diminish button. C. Focus button. You can control the PTZ focus by the farther adjustment or nearer adjustment. D. Zoom button. You can control the PTZ position by zoom out and zoom in. 4.4 Advanced Setting Box When the preview window opens the video preview, this function will be activated. Click right mouse button to open the advanced setting box. Turn on/off Audio: Turn on or turn off the audio of the previewing by this button channel. Screenshot: Capture the current video image and save it as image format. For the settings of directory storage, please refer to the figure video screenshot directory storage. Recording/Turn off Recording: Turn on/off the remote recording of the video of this channel and save this recording. For the settings of directory storage, please refer to video screenshot directory storage. PTZ Setting: Conduct the settings of PTZ preset point, cruise path, track. For the setting methods, please refer to host-side PTZ setting. OSD Setting: Set up the channel of OSD layer, time display position. Mouse drags the position and saves after confirmation. Motion Detection: Setting the motion detection area: First, displays motion detection area. Choosing Add Area, pressing left mouse button and dragging on the screen, there will be a latticed area with white lines namely motion detection area. Choosing Clear Area, pressing left mouse button on the screen of the latticed area with white lines and mouse dragging the latticed area, the white lines will disappear. The motion detection area is cancelled. Choose the corresponding parameter in the sensitivity and output delay box. Screen Adjustment: Set the brightness, contrast, hue, saturation. Click left mouse button or adjust by dragging. It will save automatically when exit. 4.5 Talkback Control Click to open voice and initiate the talkback actively. 20

23 4.6 Configuration Sever Parameter Configuration On this setting interface, you can set the corresponding parameters of the host-side. The setting parameters match with the host-side. For the setting methods and notes, please refer to the host-side system configuration, system information and network operation instruction Channel Parameter Configuration 21


24 On this setting interface, you can set the corresponding parameters of the host-side. The setting parameters match with the host-side. For the setting methods and notes, please refer to the host-side image setting, recording setting and PTZ setting operation instruction Alarm parameter Configuration On this setting interface, you can set the corresponding parameters of the host-side. The setting parameters match with the host-side. For the setting methods and notes, please refer to the host-side alarm input and alarm output operation instruction. 22


25 4.6.4 User Configuration Information For the user information of the setting device the setting parameters match with the host-side. For the setting methods and notes, please refer to the host-side user management operation instruction Others On this setting interface, you can set the corresponding parameters of the host-side. The setting parameters match with the host-side. For the setting methods and notes, please refer to the host-side manual recording, date and time, HDD management, alarm clear, log search, software update and restore default operation instruction. Recording and screenshot directory storage: Set the storage path of the recording and screenshot. 23
.")
26 4.7 Remote Playback Choosing video playback channel number, recording type, time condition and clicking the search button, a list of search results will appear on the left box. You can turn up and down page or input the page number and jump to view the video files(one page displays 20 file messages and maximum supports 4000 messages). File Playback: Selecting the target file in the search list box, double-clicking the file or clicking the File Playback button, the playback window on the right will play the target file. Playback control matches with the host-side. Time Playback: Clicking the Time Playback button, the Playback window will start playing the video file which has been set the start time. File Download: Selecting the target file in the search list box and clicking the File Download button, the target file will start downloading after setting the storage path. The progress bar at the bottom indicates the file downloading status. 24
Chapter 1: Introduction
 Contents Chapter 1 - Introduction... 2 1.1 General Description... 2 1.2 Technical Parameters... 2 1.3 Checking Before Use & HDD Installation... 2 Chapter 2 Front/Rear Panels and Remote Control... 3 2.1
User Manual for Stand alone DVR 4ch/8ch/16ch
 User Manual for Stand alone DVR 4ch/8ch/16ch Chapter 1 Product Description 1.1 Product Overview The equipment is a security surveillance product which is designed specifically for the security field, which
JVS-D7216 Standalone DVR User Manual
 Menu JVS-D7216 Standalone DVR User Manual JVS-D7216 Standalone DVR Instructions 1. Introduction..4 1.1 Product Description...4 1.2 Features..4 1.3 Specifications...4 2. Product Features....6 2.1 Panel
User s Manual of DVR ULTIMAX. Remote Client Software V wersja 2.40
 User s Manual of DVR ULTIMAX Remote Client Software V 4.0.1 ULTIMAX-304 ULTIMAX-308 ULTIMAX-316 ULTIMAX-504 ULTIMAX-508 ULTIMAX-516 ULTIMAX-704 ULTIMAX-708 ULTIMAX-716 wersja 2.40 Index 1 Software Install,
Chapter 1 Features FEATURES
 Chapter 1 Features Operation Playback, recording and network transmission simultaneously Real time full screen or quad screen display 2X digital zoom and Picture-in-picture display Easy operations by shuttle
Quick Start Guide 4/8/16-CH DVR.
 Quick Start Guide 4/8/16-CH DVR 1. Install Hard Drive &DVD Writer 1.1 Install Hard Drive Notice: 1. Support two SATA hard drives. Please use the hard drive the manufacturers recommend specially for security
SPY-DVR4HYB & SPY-DVR8HYB SPY-DVR4HYB2ND & SPY-DVR8HYB2ND
 SPY-DVR4HYB & SPY-DVR8HYB SPY-DVR4HYB2ND & SPY-DVR8HYB2ND Instructions 1.0 INTRODUCTION 1.1 Main menu 2.0 SPLIT SCREEN 3.0 SYSTEM SETUP 3.1 General Setup 3.2 Time Setup 3.3 HDD Setup 3.4 Screen Setup 3.5
VMS-A1 Client Software. User Manual
 VMS-A1 Client Software User Manual Contents Contents... 2 Chapter1. Overview... 4 1.1 Description... 4 1.2 Features & Functions... 4 Chapter2. Update Info... 6 Chapter3. Starting VMS-A1... 7 3.1 Installing
SURVEILLANCE KIT USER MANUAL. All in One Series
 SURVEILLANCE KIT USER MANUAL All in One Series Contents Part one Basic Operation 1 1. Basic Installation 1 1. Hard Disk Installation 1 2. Mouse Connection 1 2. Starting 1 3. Turn Off 1 4. Login 2 5. Preview
H.264 Network DVR. Quick Start
 H.264 Network DVR Quick Start GUI Display with USB Mouse Control Please read instructions thoroughly before operation and retain it for future reference. For the actual display & operation, please refer
DVR RANGE ENGINEER MANUAL
 INSPIRE DVR RANGE ENGINEER MANUAL Contents Hardware Inspire DVR range Connections Connecting a mouse Connecting keyboard Connecting PTZ cameras Connecting Keyboard/PTZ Alarm connections Using front panel
H.264 Network DVR. Quick Start
 341Z H.264 Network DVR Quick Start GUI Display with USB Mouse Control Please read instructions thoroughly before operation and retain it for future reference. For the actual display & operation, please
NVR User Manual. NVR User Manual For further help, please visit
 NVR User Manual NVR User Manual For further help, please visit www.zmodo.com Introduction This product series is a 4 channel embedded NVR with pentaplex functionality: the product will perform video audio
SDI Digital Video Recorder. Quick Operation Guide
 SDI Digital Video Recorder Quick Operation Guide Thank you for purchasing our product. If there is any question or request, please do not hesitate to contact dealer. This manual is applicable to HDDVRXXXX-SDI
Quick Start Guide 4/8/16/24-Ch DVR
 Quick Start Guide 4/8/16/24-Ch DVR 1.1 Install Hard Drive 4/8/16/24-CH DVR Quick Start Guide Notice: 1.4/3/16-ch DVR supports one SATA hard drive. 24-ch DVR supports three SATA hard drives. Please use
4CH/ 8CH/ 16CH Digital Video Recorder
 4CH/ 8CH/ 16CH Digital Video Recorder DVR204B/ 208B/ 216B INSTRUCTION MANUAL DIRECTORY CHAPTER 1 Hard Disk Installing (Standard shipping products include neither HDD or R/W)...2 CHAPTER 2 Panel Appearance...4
R4, R8, R16 Digital Video Recorders Quick Setup Guide
 R4, R8, R16 Digital Video Recorders Quick Setup Guide This guide provides instructions to initially setup the R16 (16 channel) digital video recorders (DVR). The DVR supports these advanced features: 2
DS-9000 Series Hybrid Net DVR
 DS-9000 Series Hybrid Net DVR Overview DS-9000 series net DVR is the Hybrid DVR of a new generation designed by HIKVISION. The product combines various patents, along with advanced IT technologies such
CAMERAS IP START SERIES
 CAMERAS IP START SERIES Contents 1. Login Interface... 3 2. Preview... 4 2.1 Open/Close Preview... 5 2.2 Full-screen Preview... 5 2.3 Electronic Zoom-in... 5 2.3 PTZ Control... 6 3. File Management...
H.264 Network DVR. Quick Start. GUI Display with USB Mouse Control 336Z
 336Z H.264 Network DVR Quick Start GUI Display with USB Mouse Control Please read instructions thoroughly before operation and retain it for future reference. For the actual display & operation, please
SunEyes V Series IP Camera P2P CMS user manual
 SunEyes V Series IP Camera P2P CMS user manual Version: 2.0 Date: July. 2015 This document is applicable to all series devices in our company. Page 1 ON page 40 foreword The HiP2P client of IP Camera is
NVMS1000. User Manual
 NVMS1000 User Manual Contents 1 Software Introduction... 1 1.1 Summary... 1 1.2 Operation Environment... 1 1.3 Install and Uninstall... 2 1.3.1 Install the Software... 2 1.3.2 Uninstall the Software...
NVR&IPCAM USER MANUAL V1.0 (USER MANUAL) V1.0. Thanks for choosing our products, please read this manual carefully before use!
 V1.0. Thanks for choosing our products, please read this manual carefully before use!") NVR&IPCAM (USER MANUAL) V1.0 Thanks for choosing our products, please read this manual carefully before use! NOTICE Installation condition 1) In order to ensure your rights, please read this manual carefully
NVR&IPCAM (USER MANUAL) V1.0 Thanks for choosing our products, please read this manual carefully before use! NOTICE Installation condition 1) In order to ensure your rights, please read this manual carefully
CCTV42 System2 DVR Quick Start Guide 4/8/16-Ch DVR
 CCTV42 System2 DVR Quick Start Guide 4/8/16-Ch DVR If you have purchased a DVR / Hard drive package from us then we will have already installed the hard drive(s) and configured the basic settings on your
Video Surveillance Management Software NVClient V5 User Manual
 Video Surveillance Management Software NVClient V5 User Manual Version: V5.0 Update Date: 2013-12-12 Welcome Thanks for using the Company's digital video surveillance management software. Please read this
Quick Start Guide 4/8/16-Ch DVR
 Quick Start Guide 4/8/16-Ch DVR 1 1. Install Hard Drive &DVD Writer 1.1Install Hard Drive Notice: 1.This series support one SATA hard drive. Please use the hard drive the manufacturers recommend specially
Quick Start Guide 4/8-CH DVR
 Quick Start Guide 4/8-CH DVR 1 1. Install Hard Drive &DVD Writer 1.1 Install Hard Drive Notice: 1. this series support one SATA hard drives. Please use the hard drive the manufacturers recommend specially
Quick Start Guide 4/8/16-Ch DVR
 Quick Start Guide 4/8/16-Ch DVR 1 1. Install Hard Drive &DVD Writer 1.1Install Hard Drive Notice: 1. Support two SATA hard drives. Please use the hard drive the manufacturers recommend specially for security
Analog High Definition DVR. Stand alone digital video recorder. User Manual H.264 AHD DVR
 Analog High Definition DVR Stand alone digital video recorder User Manual H.264 AHD DVR WARNING To reduce the risk of fire or electric shock, do not expose this appliance to rain or moisture. All the safety
Digital Video Recorder Quick Operation Guide
 Digital Video Recorder Quick Operation Guide UD.6L0202B0063A01 Thank you for purchasing our product. If there is any question or request, please do not hesitate to contact dealer. This manual is applicable
USER MANUAL Mobile DVR
 USER MANUAL Mobile DVR V1.2 Contents 1 Product Introduction... 2 1.1 Product Summary... 2 1.2 Main Functions of the Product... 2 1.3 Technical Parameter... 3 2 Structure Introduction of the Product Appearance...
Network Transmission System
 Network Transmission System Quick Operation Guide Quick Operation Guide of Network Transmission System UD.6L0202B1058A02 Thank you for purchasing our product. If there is any question or request, please
Network Video Recorder
 Network Video Recorder Quick Operation Guide No. Name Function Description POWER Turns green when NVR is powered up. READY The LED is green when the device is running normally. The light is green when
DSC-N114_Network_Video_Recorder
 DSC-N114_Network_Video_Recorder Quick Start Guide 8200-1116-05 Regulatory information FCC information FCC compliance: This equipment has been tested and found to comply with the limits for a digital device,
NVMS User Manual
 NVMS-1000 User Manual Contents 1 Software Introduction...1 1.1 Summary... 1 1.2 Operation Environment... 1 1.3 Install and Uninstall... 2 1.3.1 Install the Software... 2 1.3.2 Uninstall the Software...
USER MANUAL. Mac Version
 USER MANUAL Mac Version Contents 1 Software Introduction... 1 1.1 Summary... 1 1.2 Install and Uninstall... 1 1.2.1 Install the Software... 1 2 Login Software... 3 2.1 Login... 3 2.2 Control Panel Instruction...
Network Video Recorder Quick Operation Guide
 Network Video Recorder Quick Operation Guide UD.6L0202B1057A01 Thank you for purchasing our product. If there is any question or request, please do not hesitate to contact dealer. This manual is applicable
CONTENTS Chapter 1: DVR Features... 4 Chapter 2: Overview... 5 Chapter 3: Starting the DVR... 8
 1 CONTENTS Chapter 1: DVR Features... 4 Chapter 2: Overview... 5 2.1 Front Panel... 5 2.2 Rear Panel... 6 2.3 Remote Control... 7 Chapter 3: Starting the DVR... 8 3.1 Firmware Version... 8 3.2 Detecting
QSD2308L/QSD2316L DVR User s Manual
 QSD2308L/QSD2316L DVR User s Manual NOTE: We use two different front panel designs on these models. They have the same function buttons but they are arranged differently. Please match the front panel on
PAL 4-camera AHD DVR PAL 8-camera AHD DVR PAL 16-camera AHD DVR
 391 115 391 116 391 117 PAL 4-camera AHD DVR PAL 8-camera AHD DVR PAL 16-camera AHD DVR User manual LE08198AA-01FV-15W04 en Contents 1 Product description... 5 1.1 Front view... 5 1.2 Rear view... 6 1.3
SAMSUNG ALL-IN-ONE SECURITY SYSTEM
 Quick Start Guide KIT MODEL SDH-B74041/SDH-B74081 DVR MODEL SDR-B74301 SAMSUNG ALL-IN-ONE SECURITY SYSTEM Thank you for purchasing the Samsung DVR Security System. Follow the simple steps in this guide
HLong Asia Industrial
 SDI DVR Stand alone digital video recorder HLong Asia Industrial Thank you for using the company's products! This manual describes only the host functions basic operation. Product design and specification
Lite H.264 DVR Setup Guide
 Package Content Lite H.264 DVR Setup Guide Inspect the packaging carton. Make sure the Lite H.264 DVR is properly delivered. Remove all items from the box and make sure the box contains the following items.
Error! Bookmark not defined.
 HD-NVR user manual Directory Part one Basic Operation... 3 1. Basic Installation... 3 1.1 Hard Disk Installation... 3 1.2 Mouse Connection... 3 2. Starting... 3 3.Turn Off... 3 4.Login... 4 5.Preview...
SmartWatch Eco/Eco Compact
 SmartWatch Eco/Eco Compact Digital Video Recorders SmartWatch Eco SmartWatch Eco Compact Quick User Guide Index Box Contents...3 Front Panel Controls...4-5 SmartWatch Eco Compact...4 SmartWatch Eco...5
AMDV960H4 User Manual
 s AMDV960H4 User Manual AMDV960H4 User Manual Version 1.3.2 www.amcrest.com 1 TABLE OF CONTENTS 1 PRODUCTION 4 1.1. Product Key Features 4 1.2. Front Panel Controls 5 1.3. USB Mouse 6 1.4. Soft Keyboard
DHE-04 DHE-08 DHE H H.264 DVR 4 / 8 / 16 CH. Quick Setup Guide PACKAGE CONTENTS A. B. C. D. E. F. G. H. Inside the DVR I.
 960H H.264 DVR 4 / 8 / 16 CH. Quick Setup Guide DHE-04 DHE-08 DHE-16 PACKAGE CONTENTS A. One (1) DHE-04 / DHE-08 / DHE-16 DVR B. One (1) Remote Controller C. Two (2) AAA Battery for Remote Controller D.
Hi Performance Embedded Linux Stand Alone DVR. 16 Channel DVR E48016RT-250 Technical Specifications
 Hi Performance Embedded Linux Stand Alone DVR 16 Channel DVR E48016RT-250 Technical Specifications Quality Reliability Performance Parameter Processor 4CH 8CH 16CH High performance industry level embedded
Quick Reference Guide. For IL6000HB Series NetDVR
 Quick Reference Guide For IL6000HB Series NetDVR Directory 1. Features and Specifications.1 2. Physical Interface 2 2.1 Front Panel and Interior of Product 2 2.2 Rear Panel of Product..3 3. Software Main
Pro71600N3 NVR User Manual
 Pro71600N3 NVR User Manual User Information Admin User Name: Admin Password: IP Address: System Name: Table Of Contents 1. Menu Operation...4 1.1 Main Menu...4 2. Start & Shutdown System...5 2.1 Start
NVMS1000. User Manual
 NVMS1000 User Manual Contents 1 Software Introduction... 1 1.1 Summary... 1 1.2 Operation Environment... 1 1.3 Install and Uninstall... 2 1.3.1 Install the Software... 2 1.3.2 Uninstall the Software...
Pro7400H1 Hybrid DVR User Manual
 Pro7400H1 Hybrid DVR User Manual User Information Admin User Name: Admin Password: IP Address: System Name: Table Of Contents 1. Menu Operation... 4 1.1 Main Menu... 4 2. Start Up/Shutdown System... 5
NVMS User Manual
 NVMS-1000 User Manual Contents 1 Software Introduction...1 1.1 Summary... 1 1.2 Operation Environment... 1 1.3 Install and Uninstall... 2 1.3.1 Install the Software... 2 1.3.2 Uninstall the Software...
NVMS User Manual. Version 2.1.0
 NVMS-1000 User Manual Version 2.1.0 Contents 1 Software Introduction... 1 1.1 Summary... 1 1.2 Operation Environment... 1 1.3 Install and Uninstall... 2 1.3.1 Install the Software... 2 1.3.2 Uninstall
Digital Video Recorder User Manual
 Statement Thank you for purchasing our product. If there is any question or request, please do not hesitate to contact dealer. This manual may contain several technical inaccuracies or typographical errors,
DS-7700NI-ST Series NVR. Technical Specification
 DS-7700NI-ST Series NVR Technical Specification Notices The information in this documentation is subject to change without notice and does not represent any commitment on behalf of HIKVISION. HIKVISION
IPC Online Operation Manual
 IPC Online Operation Manual 1 Overview An IP camera (hereinafter referred to as IPC) is a new product integrating network video technologies into a traditional camera. The IPC can realize simpler monitoring
DVR Serie PRO H960 - Analog Ip. Model. Features
 DVR Serie PRO H960 - Model ST620H-AI: ch DVR/NVR, support @960H/2@100P, 2 HD, RS5, Alarm, Audio, HDMI. ST620H-AI: ch DVR/NVR, support @960H/@720P, 2 HD, RS5, Alarm, Audio, HDMI. ST62H-AI: ch DVR/NVR, support
SPY-DVR4KIT1/SPY-DVR4KIT2
 SPY-DVR4KIT1/SPY-DVR4KIT2 SPY-DVR4KIT1 (1) 4 channel DVR with 500GB Hard Drive (2) Plastic mini dome cameras (2) Weather resistant mini bullet cameras (1) 120v to 12v AC/DC power supply (1) 5 way splitter
Pro7804N1 NVR User Manual
 Pro7804N1 NVR User Manual Pro7804N1 User Manual BW R6.indd 1 User Information Admin User Name: Admin Password: IP Address: System Name: Table Of Contents 1. Menu Operation...4 1.1 Main Menu...4 2. Start
Attention. Please handle this product with care and inspect it regularly to ensure it is in good working order.
 Attention Please handle this product with care and inspect it regularly to ensure it is in good working order. If the product, power supply cord or plug shows any signs of damage: stop use, unplug and
H.264 Dual Stream Network DVR 8 Channel & Digital Video Recorder USER MANUAL. Model #: QT528
 H.264 Dual Stream Network DVR 8 Channel CIF@240fps & D1@240fps Digital Video Recorder USER MANUAL Model #: QT528 www.q-see.com Rev 12/6/2010 CAUTION Please read this user manual carefully to ensure that
SK7404-NE & SK7408-NE Series NVR. Technical Specification
 SK7404-NE & SK7408-NE Series NVR Technical Specification Key Features :- Connectable to network cameras with up to 5 Megapixels resolution. Support live view, storage and playback of video at 5Megapixels
ALI-HVR3000H Series 4/8/16-Channel 960H HD-TVI Hybrid+ DVR Quick Setup Guide
 ALI-HVR3000H Series 4/8/16-Channel 960H HD-TVI Hybrid+ DVR Quick Setup Guide This quick setup guide provides instructions to initially setup and use the ALI-HVR3000H series digital video recorder (DVR).
DDNS UPNP
 PL-ADR0608/16-H2 PL-ADR0604-H2 Content 1 Product Introduction... 3 2 Installation... 3 2.1 Open-package Inspection... 3 2.2 Hard Disk Installation... 3 3. Local operation guide... 3 3.1 Boot operation...
Digital Video Recorder User Manual. DVR User Manual. For H channe/ 8-channel/16-channel Digital Video Recorder All rights reserved
 DVR User Manual For H.264-4-channe/ 8-channel/16-channel Digital Video Recorder All rights reserved i CAUTION Please read this user manual carefully to ensure that you can use the device correctly and
errors, or places that do not match the product. If you have any unsolved please contact our technical support department.
 - 0 - Statement: This manual may contain several technical inaccuracies or typographical errors, or places that do not match the product. If you have any unsolved problems in the process of using product
NVR Equipment WEB Operation Guide ISSUE V1.1 DATE
 NVR Equipment WEB Operation Guide ISSUE V1.1 DATE 2018-05-15 About This Document About This Document Purpose This document describes how to use the web management system for NVR and the cameras managed
DS-7200HWI-SH Series DVR. Technical Specification
 DS-7200HWI-SH Series DVR Technical Specification Notices The information in this documentation is subject to change without notice and does not represent any commitment on behalf of HIKVISION. HIKVISION
960H H.264 DVR Setup Guide
 Package Content 960H H.264 DVR Setup Guide Inspect the packaging carton. Make sure the 960H H.264 DVR is properly delivered. Remove all items from the box and make sure the box contains the following items.
IP WEB User Manual V2.0
 IP WEB User Manual V2.0 Please read carefully before installing or contacting your supplier. The information contained at the time of printing is correct, but is subject to change without notice. This
DDR-08 DDR-16 Full D1 Realtime H.264 DVR 8 / 16 CH. Quick Setup Guide
 DDR-08 DDR-16 Full D1 Realtime H.264 DVR 8 / 16 CH. Quick Setup Guide PACKAGE CONTENTS A. One (1) DDR-08 / DDR-16 DVR B. One (1) Remote Controller C. Two (2) AAA Battery for Remote Controller D. One (1)
DVR User s Manual. For H FPS /8-channel digital video recorder All rights reserved. Rev
 QSDT8DP DVR User s Manual For H.264-240 FPS /8-channel digital video recorder All rights reserved Rev 120209 i QSDT8DP User s Manual CAUTION Please read this user manual carefully to ensure that you can
Digital Video Recorder Quick Operation Guide
 Digital Video Recorder Quick Operation Guide UD.6L0202B1345A02 TABLE OF CONTENTS DVR Pre-Installation... 2 DVR Installation... 2 Hard Disk Installation... 2 Front Panels... 4 Rear Panels... 8 Peripheral
HDMI mobile phone monitoring H.264 Central Management Software Delta
 The DA-DVRLEA LC series - Slim line design DVR that supports HDMI and mobile phone monitoring functions. H.264 encoding cost effective DVR suit your needs, DA- DVRLEA LC series DVR brings standard standalone
DVR User Manual. For H.264-4/8/16-channel digital video recorder All rights reserved
 DVR User Manual For H.264-4/8/16-channel digital video recorder All rights reserved CAUTION Please read this user manual carefully to ensure that you can use the device correctly and safely We do not warrant
DS-7204HVI-ST Series DVR. Technical Manual
 DS-7204HVI-ST Series DVR Technical Manual Notices The information in this documentation is subject to change without notice and does not represent any commitment on behalf of HIKVISION. HIKVISION disclaims
HVR LINE INSTALL GUIDE
 HVR LINE INSTALL GUIDE 4.9.07 HVR v2.4.1 455 E. Industrial Drive P.O. Box 94 Hartland, WI 53029 Technical Support: 262.369.8798 Sales & Service: 262.369.8797 efax: 312.602.1356 www.visioncontrols.net Basic
DS-7600NI-SE/N Series NVR. Technical Specification
 DS-7600NI-SE/N Series NVR Notices The information in this documentation is subject to change without notice and does not represent any commitment on behalf of HIKVISION. HIKVISION disclaims any liability
QSC26404 Net DVR User Manual V2.1
 QSC26404 Net DVR User Manual V2.1 Contact Us: Q-See Products 8015 E. Crystal Dr Anaheim, CA 92807 Website: http://www.q-see.com Customer Service: Phone: 877-998-3440 x 538 Email: cs@dpsi-usa.com Tech Support:
H.264 Digital Video Recorder
 H.264 Digital Video Recorder User Manual 1/73 Contents 1. Production Introduction... 4 2. Installation...4 2.1. HDD Installation... 4 3. Fast Operation...5 3.1. Login...5 3.2. Starup Wizard... 6 3.3. Menu
HIGH STORAGE MODELS WITH CD-RW DRIVE
 208 CPD HIGH STORAGE MODELS WITH CD-RW DRIVE CPD505HC_CPD507HC_QUICK_V1.2 1. OVERVIEW 1.1 Product Description With the high storage capacity feature, this MPEG-4 DVR model is designed to accommodate up
HD IPCameras User's Mannual
 Thank you for purchasing our products, if you have any questions or need, please feel free to contact us. This manual applies to IPC-XXX series of network cameras. This manual may contain technical inaccuracies
DS-7604/7608NI-SE Series NVR. Technical Specification
 DS-7604/7608NI-SE Series NVR Technical Specification Notices The information in this documentation is subject to change without notice and does not represent any commitment on behalf of HIKVISION. HIKVISION
DS-7600NI-SE/P Series NVR. Technical Specification
 DS-7600NI-SE/P Series NVR Notices The information in this documentation is subject to change without notice and does not represent any commitment on behalf of HIKVISION. HIKVISION disclaims any liability
QSD42908C8 Net DVR User s Manual
 QSD42908C8 Net DVR User s Manual V2.1 Contact Us: Q-See Products 8015 E. Crystal Dr Anaheim, CA 92807 Website: http://www.q-see.com Customer Service: Phone: 877-998-3440 x 538 Email: cs@dpsi-usa.com Tech
Network Video Recorder Quick Operation Guide
 Network Video Recorder Quick Operation Guide UD.6L0202B1351A01 TABLE OF CONTENTS NVR Pre-Installation... 2 NVR Installation... 2 Hard Disk Installation... 2 Front Panels... 6 DS-9500NI-ST/RT Front Panel...
IMS200 SURVEILLANCE SYSTEM USER MANUAL
 IMS200 SURVEILLANCE SYSTEM USER MANUAL 1 PRECAUTIONS The contents of this manual may change due to product upgrades or other reasons. We have the right to make changes of the contents without notice. This
Hybrid DVR Quick Start Guide
 Hybrid DVR Quick Start Guide Thank you for purchasing our product. If there is any question or request, please do not hesitate to contact dealer. This manual is applicable to most Hybrid DVR models. DVR
Prime Series NVR-User's Manual NVR-PRE8M-P. 2 yr PTZ. 1080p. Control. View From Anywhere. Motion Activated Recording. Resolution.
 Prime Series NVR-User's Manual NVR-PRE8M-P PTZ Control Motion Activated Recording 2 yr Warranty View From Anywhere 1080p Resolution OUR UNITS DO NOT SUPPORT PAL TABLE OF CONTENTS NVR Pre-Installation...
Figure 4-9. Click Finish button, system pops up a dialogue box. Click the OK button, the startup wizard is complete. See Figure 4-10.
 For detailed information, please refer to chapter 4.11.4.1.1. Figure 4-9 Finish button, system pops up a dialogue box. the OK button, the startup wizard is complete. See Figure 4-10. Figure 4-10 4.4 Preview
NVMS-7000 Client Software User Manual Version 1.03
 NVMS-7000 Client Software User Manual Version 1.03 Contents Chapter 1. Overview... 3 1.1 Description... 3 1.2 Running Environment... 3 Chapter 2. Starting NVMS-7000... 4 2.1 User Registration... 4 2.2
USER MANUAL. ST-DVR8708BG 8-Channel Digital Video Recorder. v2.0 11/8/11 1
 USER MANUAL ST-DVR8708BG 8-Channel Digital Video Recorder v2.0 11/8/11 1 TABLE OF CONTENTS PACKAGE CONTENTS...4 PRODUCT DESCRIPTION...4 SPECIFICATIONS...5 INSTALLATION...6 1. UNPACKING and HANDLING...6
Digital Snitch Video Recorder
 Digital Snitch Video Recorder User Manual Models: DTVI-DVR04H DTVI-DVR08H DTVI-DVR16H TABLE OF CONTENTS DVR Pre-Installation... 5 DVR Installation... 5 Hard Disk Installation... 5 Front Panels... 7 Rear
DS-7200HFI-ST Series DVR. Technical Manual
 DS-7200HFI-ST Series DVR Technical Manual Notices The information in this documentation is subject to change without notice and does not represent any commitment on behalf of HIKVISION. HIKVISION disclaims
User Manual. 4 Channel 960H High Performance Standalone DVR with HDMI 1080p Output. Model: D4960H-H-BK
 Model: D4960H-H-BK 4 Channel 960H High Performance Standalone DVR with HDMI 1080p Output User Manual 8805 Jones. Rd Ste C104, Houston Texas 77065 * 1-888-861-7351 * www.zuummedia.com Statement: This manual
Outdoor IPC Web Operation Manual Version1.0
 Outdoor IPC Web Operation Manual Version1.0 1 Table of Contents 1 Network Connection...4 2 Main Interface Introduction...5 2.1 Log in...5 2.2 Monitor Channel Menu Tree...8 2.3 System Menu...10 2.4 Monitor
DS-9600NI-ST Series NVR. Technical Specification
 DS-9600NI-ST Series NVR Technical Specification Notices The information in this documentation is subject to change without notice and does not represent any commitment on behalf of HIKVISION. HIKVISION
DVR DVR VENEZIA series
 DVR DVR VENEZIA series Main features - Real Esaplex (Recording, Live, Play, Control, Backup, Network) - Quick connection by mobile/ PDA phone without using any software - H264 compression - Real time Recording,
NUBIX H.264 DVR Setup Guide
 Package Content NUBIX H.264 DVR Setup Guide Inspect the packaging carton. Make sure the NUBIX H.264 DVR is properly delivered. Remove all items from the box and make sure the box contains the following