User Guide. i-3 System Controller Configuration Software Instruction Manual.
|
|
|
- Alexandrina Wright
- 6 years ago
- Views:
Transcription


1 User Guide i-3 System Controller Configuration Software Instruction Manual
2 i-3 System Controller Configuration Software Instruction Manual Table of Contents Installing the Configuration Software.. 2 o Operating System Requirements o Running the Installation Wizard Program Flow. 4 o Running the Configuration Software o Navigating the Configuration Software Project Details.. 5 o Creating a New Project o Opening an Existing Project o Exporting a Finished Project Initialization. 7 o Choosing Location Preferences o Setting the System Passcode Panel Setup. 8 o Adding Panels to the Project o Configuring a Panel Breaker Naming. 10 o Using a Default Naming Scheme Input Setup. 11 o Specifying Input Types o Changing Input Names Zone Setup. 13 o Creating a Zone o Editing and Deleting a Zone IO Mapping. 14 o Mapping an Input to an Output Input Logic. 15 o Adding Logic to an Input Analog. 16 o Defining the Analog Input Logic o Configuring the Analog Outputs o Using Active Dimming o Using Step Dimming Logic Control. 19 o Adding Logic Control Schedule Setup. 20 o Creating a New Schedule o Adding Events to a Schedule Schedule Logic. 22 o Adding New Schedule Logic Holidays. 23 o Creating a Holiday Global Settings. 24 o Modbus Settings o Web Monitoring Settings o User Passwords o Date and Time Format, Maximum Number of Characters o Integrator Details 1


3 Installing the Configuration Software Operating System Requirements The i-3 System Configuration Software has been tested on the Windows XP and Windows 7 operating systems. The software may work on other versions of Windows, but Siemens has not verified its compatibility at this time. Download the Setup File The setup files are available for download from the Siemens i-3 web portal ( Download the file titled System Controller Offline Config.zip to a temporary folder, and extract its contents using WINZIP. Typically, this may be accomplished by right-clicking on the zip file and selecting WinZip > Extract to For more information on this process, refer to the utility s help site ( Running the Installation Wizard After extracting the zip file to a temporary location, double click on Setup.exe to start the Installation Wizard. The following welcome screen will appear. Click Next to advance through the Installation Wizard. This portion of the Installation Wizard allows the user to choose the directory where the Configuration Software will be installed, as well as to define which other users are allowed to use the Configuration Software. Using the defaults is recommended to avoid installation problems, and this manual assumes that the defaults were chosen. Click Next to advance. This screen is notification that the Installation Wizard has all the information necessary to install the Configuration Software. Click Next to start the installation. 2

4 The Installation Wizard will now perform the installation. Several blue status bars will show in the Installation Wizard window indicating the progress of the installation. After the installation is complete, the Installation Wizard will display a notification. Click Close to exit the Installation Wizard. 3
5 Program Flow Running the Configuration Software Open the Configuration Software through the Start menu by clicking Start > Programs > Siemens > i3ctsystemcontrollerconfigurator_v30 Alternatively, the Configuration Software can be opened by double-clicking on the following desktop shortcut. Note: This shortcut is automatically placed on the desktop during installation. Navigating the Configuration Software The Configuration Software is organized into fourteen tabbed sections: Project Details, Initialization, Panel Setup, Breaker Naming, Input Setup, Zone Setup, IO Mapping, Input Logic, Analog, Logic Control, Schedule Setup, Schedule Logic, Holidays, and Global Settings. Each of these sections can be accessed by clicking on the tab. For new projects, the first three sections (Project Details, Initialization, and Panel Setup) must be completed first, and in order, before the remaining tabs can be accessed. After that, the tabs may be configured in any order, although it is strongly recommended that the user proceed from left to right. At the bottom of every tab, there is a message pane which will display system messages (e.g. save confirmations). The Exit button next to the message pane will close the Configuration Software. 4


6 Project Details The Project Details tab is the first active screen displayed when the program is launched. This section of the Configuration Software is used to create new configuration projects, to open for editing or delete an existing project, or to export a finished project to a USB drive. The pane on the top left displays all of the projects currently stored in the standard project directory. This directory is located by default at C:\Program Files\Siemens Industry, Inc\i3SystemControllerConfigurator\Projects Creating a New Project To create a new project, click the Create or Load a New Project button located underneath the Project(s) pane. A box will appear to the right of the pane as shown in the picture below. Enter the name of the new project in the Project Name textbox. If the project being created is going to be based off of an existing project, check the checkbox underneath the project name. This will open a window that can be used to browse to the location of the existing project. Finally, specify the number of panels in the project, including the System Controller, and click the Continue button. The Configuration Software will save the project details and automatically display the Initialization tab. Opening an Existing Project To open an existing project, highlight the project in the project pane and click the Edit Existing Project button. The Project Details section will display with the Project Name grayed out. Click the Continue button to proceed to the Initialization tab. Project Details cannot be edited for existing projects. To change those settings, use the Create or Load a New Project button and load the existing project. 5
7 Existing projects may be deleted by highlighting it from the project pane and clicking the Delete Project button. Exporting a Finished Project In order to program the i-3 System Controller, the configuration project must be exported to a USB flash drive. To export a project, highlight it in the project pane and click the Export Project button. This will open a Browse for Folder window. Navigate to the desired directory on the USB flash drive, and click OK. Note: All exported files are named i3ctdb.i3v2 to simplify the System Controller programming process, and are placed in a folder with the project name. Be sure to copy the folder to the USB flash drive. 6


8 Initialization The Initialization tab contains basic language, location, and system protection settings options for the System Controller. To choose the language of the System Controller touch screen interface, select one of the four options from the Language drop-down menu. The four available languages are English, German, French, and Spanish. Note: Changing the language from English affects only the System Controller touch screen menus, not the Configuration Software language. The Configuration Software is only available in English. Choosing Location Preferences Use the Location Preferences section to define the physical location of the System Controller after installation. This information is necessary for the astronomical clock internal to the System Controller to accurately predict sunrise and sunset times. First, select the correct time zone from the Time Zone drop-down menu. Check the Daylight Saving box to the right of that menu to update the System Controller s clock based on daylight savings time automatically during the year. Next, select the country and city in which the System Controller will be operating. If the city isn t listed, or a higher degree of accuracy is desired, select Other from the City drop-down menu to specify the geographic coordinates of the System Controller. Un-check the Decimal Coordinates? checkbox to enter the geographic coordinates in degrees, minutes, and seconds. Note: Please ensure that the location and time zone information match. Setting the System Passcode A system passcode is a 4-digit numeric code used to limit access to the System Controller after its installation. Setting and maintaining a system passcode is a good idea, as it will limit access and prevent accidental lighting overrides and configuration changes. To set a system passcode, select the Yes radio button underneath the Location Preferences section. The Password section will appear and prompt the user to enter and confirm a 4-digit numeric password. Once all of the Initialization tab sections have been completed, click the Save button to save the settings and advance to the Panel Setup tab. 7


9 Panel Setup The Panel Setup tab is used to add panels to the project and define the physical configuration of those panels. Adding Panels to the Project The Panel Detection pane displays all of the panels that were enabled for the project in the Project Details tab when the project was created. To add a panel to the project, highlight it in the panel detection pane and click the Add Panel button to the bottom right of the pane. This process of adding panels to the project must be done one at a time and sequentially. After the first panel is added, the Panel Configuration section will appear underneath the Panel Detection section. Also, each time a panel is added, a small window will pop up acknowledging the addition. The purpose of this process is to provide the user with the opportunity to work on just a few panels and add the rest as the system expands. Note that there are four columns in this pane with useful information for each panel. The first is the panel name, which can be changed in the Panel Configuration section (see Configuring a Panel). The next column indicates whether or not that panel has been added to the project yet; when a panel is added, it will be detected. The third column is the physical EIB address of the panel. These are automatically assigned by the Configuration Software, and must be physically set on the EIB I/O Controllers before attempting to program the System Controller. The fourth column indicates which panels have been enabled for the project (which is different from a panel being added/detected). Configuring a Panel To configure a panel, first select the panel to be configured from the Select a Panel drop-down menu. This menu is populated only with panels that have already been added to the project in the Panel Detection section. Next, use the Panel Name textbox to name each panel something more intuitive, like First Floor or Lobby. The panel size, numbering scheme, and feed type are all selected using the radio buttons below the Panel Name textbox. 8

10 Warning: Returning to this section to change the panel size or numbering after other configuration settings have been defined will invalidate those settings. Observe that the picture of the panel on the right side of the tab will change to reflect the current options selected. Finally, the Controller Hardware Type radio buttons allow the user to create i-3 networks with 1 st or 2 nd generation EIB I/O Controllers. However, it is strongly recommended that only 2 nd generation controllers be used. This option is not active for the first panel, since the first panel is the master of the network and must be a 2 nd -Generation System Controller by default. Again, the picture of the communications board to the right of the panel picture will change to reflect the Controller Hardware Type selection. Once all of the settings for the panel have been selected, click Save to save the settings. Be sure to repeat this process for all of the panels listed in the Select a Panel drop-down menu. 9

11 Breaker Naming The Breaker Naming tab allows the user to individually name each circuit in each panel. This can be useful for upcoming configuration tasks, like creating zones of breakers and scheduling when certain breakers turn on and off. It s also helpful for overrides after the panel has been programmed. To name a breaker, select the panel from the Select a Panel drop-down menu and the breaker to be named from the Select a Breaker drop-down menu. After the desired breaker has been selected, the name can be entered into the Breaker Name textbox. Click the Save button to save the new name before proceeding to the next breaker. Note: The special characters caret (^) and comma (,) are reserved and cannot be used to name a breaker. Using a Default Naming Scheme The default naming scheme is recommended for projects with multiple panels that don t have specific circuit names. To use the default naming scheme, select the appropriate panel from the Select a Panel drop-down menu, check the load default name for all breakers for the chosen panel checkbox in the Default Naming section, and click the Load Default Name button. This process should be repeated for every panel without specific circuit names to avoid confusion in future configuration and override tasks. The default naming scheme follows the format [Panel Name] Ckt [Circuit Number]. For example, circuit 3 in Panel A would be named Panel A Ckt 3. Also, the circuit number will depend on the numbering scheme defined in the Panel Setup tab. Refer to the panel picture for a visual reference of which physical breakers correspond to which numbers. If, for any reason, the user needs to change the panel numbering, size, or feed type, be sure to return to the Breaker Naming tab to re-load the default names. 10


12 Input Setup The Input Setup tab is used to specify which type of input will be connected to the controllers in the i-3 network. It s important to specify input types so that the i-3 controllers know how to interpret the signals on their respective inputs. Many of the sections in this tab refer to switches, but digital signals can also come from sensors and other devices. Specifying Input Types The Configuration Software Input Setup process is intended to be used to define all inputs of the same type at the same time for one panel. This allows the user to save time by assigning all of the relevant inputs to a type, rather than assigning the types to the different inputs. To specify an input type, click the Specify Input Types button to display the input parameters sections. Choose the input type in the Switch Type section. There are two types of digital inputs, maintain and momentary. A maintain switch will hold its state after being switched, whereas a momentary switch returns to an initial state after being switched. If the input being connected is a wet contact (24V), check the Powered Input? checkbox. A timed override of an input may be programmed by clicking the Timed Override radio button. The function of a timed override is to return the input to its original state in the software after a specific period of time, even though the switch itself may still be activated. 11

13 Next, use the Switch Function section to define how the input will physically be connected and operate. 2-wire inputs require two connections, one to the digital input and one to digital common. 3-wire inputs require three connections, two to adjoining digital inputs such that the lower-numbered input is odd, and one to digital common. Within the 2-wire category, indicate whether the switch will be used as a toggle switch, a switch that is normally left open, or a switch that is normally left closed. An input may be overridden by a timed override or a scheduled event. To receive a warning of this, click the Blink radio button. This will cause the lights to blink once per minute starting five minutes before the input is overridden. To change the duration of the blinking, navigate to Expert Setup -> Advanced Input Settings -> Blink Parameters on the System Controller touch screen. Finally, use the Assigning Parameters to Input(s) section to select which inputs will be connected to the switch type defined in the previous two sections. If the 3-wire type is being assigned, only the odd-numbered inputs will appear in the list. Be sure to click Save before progressing to defining another input type or the same input type for a different panel. Use the Panel drop-down menu at the top of the tab to select inputs from a different panel. Input types may also be edited retroactively by highlighting the defined input in the pane and clicking the Edit Input Type button. Note: The default input type is Digital 2-wire Maintain Normally Open with no timed override or blink settings. Inputs of this type need not be explicitly defined. Changing Input Names After an input has been defined, it will appear in the list of inputs at the top left of the screen. To change the name of an input, highlight it from the list and click the Change Input Name button. The Input Naming section will appear to the right and allow the user to change the input s name to something more recognizable. 12


14 Zone Setup A zone is a grouping of breakers that will be turned on and off together. The Zone Setup tab is where this task is performed. Creating a Zone To create a zone, first click the Add New Zone button to display the Zone Details section. Within the Zone Details section, name the zone in the Zone Name textbox. Next, use the drop-down menu to select the panel that contains the breakers you would like to add to the new zone. Finally, highlight the breakers from the panel breaker list and click the > button to add them to the zone. If the zone must span several panels, continue to select each panel from the drop-down menu and add the appropriate breakers. Once the zone has been completed, click the Save button. Editing and Deleting a Zone To edit a zone, highlight it from the zone list and click the Edit Zone button. This will re-activate the Zone Details section, allowing the user to add or remove breakers from the zone, or rename the zone. To delete a zone, highlight it from the zone list and click the Delete Zone button. Make sure to check that the zone is not being used by another part of the configuration, as that feature will cease to function. 13

15 IO Mapping The IO Mapping tab is used to define relationships between a single input and a single output. Once defined, these relationships will cause the output to turn on or off whenever the input is turned on or off. At the top of the tab, there is a drop-down menu with all of the panels in the system listed. The digital inputs associated with the selected panel are displayed in the list underneath the Panel drop-down menu. For each input listed, a second column shows which output the input is currently mapped to. If no such relationship exists, N/A will be displayed. Mapping an Input to an Output To create a new mapping between an input and an output, first select the panel that the input is physically located in from the drop-down menu at the top of the tab. Next, highlight the input that will trigger the output from the main list in the tab and click the Create / Edit Mapping button. This will display the Input Output Mapping section underneath the input list. Use the Input Output Mapping section to choose the output which the user would like to be triggered by the highlighted input. Specify the output type using the Zone or Breaker radio buttons. If the Zone radio button is selected, a list of all zones currently defined for the project will display. If the Breaker radio button is selected, use the drop-down menu to select the panel that the breaker is physically located in and then select the breaker from the Breaker list. Complete the process by clicking the Save button to save the IO Mapping. Mappings may be edited using the same process described above. Delete a mapping by highlighting it from the list and clicking the Delete Mapping button. To control an output using a combination of inputs, use the IO Mapping section to map only one of the inputs to the output. The Logical relationship with the other input will be defined later using the Input Logic tab. 14


16 Input Logic Sometimes it may be necessary to control an output breaker or zone using a combination of inputs. The Input Logic tab allows the user to add a second relative input condition to an existing input-output mapping so that the combination of the mapped input and the relative input controls the output. The Input Logic Pane has three columns. The first column lists all of the inputs for the Panel selected in the Panel drop-down menu at the top of the tab. The third column is the relative input that the input in the first column is being compared to. The second column denotes how the two inputs are being compared. Note: Logic may only be defined between two inputs in the same panel. Adding Logic to an Input A logical input combination is made up of two inputs, a mapped input and a relative input. The mapped input must be mapped (in the IO Mapping tab) to the output that will be controlled by the entire logical combination. The relative input must not be mapped to the same output as the mapped input, as this will nullify any logical relationship. Once a mapping has been created for the mapped input, use the Panel drop-down menu to select the panel that the mapped input is physically housed in. Next, highlight the mapped input and click the Create / Edit Logic button to display the Edit Input Logic section In the Edit Input Logic section, select the relative input from the drop-down menu. Finally, click the radio button corresponding to the type of logical comparison (OR, AND, NAND, XOR) that is to be performed between the mapped input and the relative input. The tables below show how the output will behave for each logical combination. Click the Save button to save the logic. AND OR INPUT OUTPUT INPUT OUTPUT A B A AND B A B A OR B OFF OFF OFF OFF OFF OFF OFF ON OFF OFF ON ON ON OFF OFF ON OFF ON ON ON ON ON ON ON XOR NAND INPUT OUTPUT INPUT OUTPUT A B A XOR B A B A NAND B OFF OFF OFF OFF OFF ON OFF ON ON OFF ON ON ON OFF ON ON OFF ON ON ON OFF ON ON OFF 15


17 Analog The Analog tab is used to define how a reading on an analog input will be interpreted by the system to trigger analog and digital outputs. The behavior of the system s analog outputs is also defined in the Analog section. An analog input differs from a digital input. Digital inputs can be one of two values (either high or low), whereas an analog input can be a range of values. This means that you must define how the value that the Controller reads off each analog input will be interpreted to control different outputs. i-3 Controllers have two analog inputs and two analog outputs, each with a range of 0-10V. The Controller converts the voltage reading to a number between 0 and 4095, with 4095 indicating a reading of 10V. An example of an analog input would be the reading from a light sensor that converts the amount of light in an area to a proportional voltage. 50% light saturation would result in a reading of 4095 * 0.50 = Defining the Analog Input Logic Since an analog value itself doesn t usually evaluate to a simple on or off value, the user must define how the input voltage will be evaluated to turn on and off a circuit or zone. This establishment of the analog input logic is performed in the Analog Input Settings section. To begin defining how the analog input will be evaluated, select Compare Logic from the Logic drop-down menu, then select the desired logical operator from the Compare drop-down menu. The table below lists the available logical operators and the corresponding logical expression. Logical Operator How the Analog Input Is Evaluated = On when {Analog Input #} is equal to {Set Value} < On when {Analog Input #} is less than {Set Value} > On when {Analog Input #} is greater than {Set Value} <= On when {Analog Input #} is less than or equal to {Set Value} >= On when {Analog Input #} is greater than or equal to {Set Value} Not Equal On when {Analog Input #} is not equal to {Set Value} Always On when {Analog Input #} is {ON/OFF} 16


18 The value that the input is compared to is defined in the Set Value drop-down menu, which is activated when any of the first seven options (= through Not Equal) is selected. Also available for the first seven options is the Hysteresis drop-down menu. Since analog inputs are generally susceptible to noise which may cause the Actual Value to fluctuate randomly, the Hysteresis value is used to provide a buffer on both sides of the Set Value. The effect is that the analog input value being read must entirely cross this larger boundary before turning the output on or off. For example, in the picture below, Analog Input 1 will turn on when the value being read is less than the Set Value 2048 with a Hysteresis of 100. In effect, this means that Analog Input 1 will turn on when the value being read is less than 1948, and will turn off when the value being read is greater than This cushion prevents the lights from flickering on and off when the analog value is near the boundaries. With = or Not Equal logic, the effect of Hysteresis is to expand the range of values that the analog input can be equal to. However, Hysteresis does nothing to prevent light flicker at the edge of that zone. As a result, when the logical operator desired is = or Not Equal, the Epsilon drop-down menu will become available in addition to the Hysteresis menu. Epsilon provides a buffer at the edge of the Hysteresis range that the analog input value must completely move through before the analog input will turn on or off. In the example below, the range of values for which Analog Input 2 will turn on is 2972 through 3172 (Set Value plus or minus Hysteresis value). However, the effect of Epsilon is that when the value being read is less than 2972, it must exceed 2982 before Analog Input 2 will turn on. Once in the on range, the value must drop below 2962 or exceed 3182 to reach the off range. For most applications, a Hysteresis of 100 and an Epsilon of 10 should be sufficient to achieve the desired results. If light flicker is still occurring, increase the Epsilon value. Finally, the logical operator Always effectively converts the analog input into a digital input. When the Always operator is selected, only the ON/OFF drop-down menu is active. ON corresponds to an input of 10V on the analog input, and OFF corresponds to an input of 0V. Be sure to click the Save button in the bottom right corner of the tab after fully defining the Analog Input Settings. Configuring the Analog Outputs The Analog Output Settings section allows the user to determine which inputs map to the Controller s two analog outputs and how those inputs are interpreted to generate an analog output. The Feed drop-down menu specifies which input controls each analog output. A list of all the Feed options is shown in the table below. For some input feeds, the analog output will be a single specific value. In those cases, the Set Value textbox will be activated, allowing the user to enter an integer value between 0 and
 logic Analog (1 or 2) Actual Output is the actual value currently being read on Analog Input (1 or 2) Analog (1 or 2) Reverse")
 Active Dimming (1 or 2) Output is based on the Active Dimming section Be sure to click the Save button in the bottom right corner of the tab after fully defining the Analog")
19 Feed Description of Output No Feed Analog output is disabled because there is no input mapping Digital Input (01-32) Output is Manual Set value when Digital Input (01-32) is triggered Analog (1 or 2) with Logic Output is Manual Set value based on Analog Input (1 or 2) logic Analog (1 or 2) Actual Output is the actual value currently being read on Analog Input (1 or 2) Analog (1 or 2) Reverse Output is 4095 minus the actual value being read on Analog Input (1 or 2) Manual Set (1 or 2) Output is the always the Set Value Step Dimming (1 or 2) Output is based on the Gain Table as read by Analog Input (1 or 2) Active Dimming (1 or 2) Output is based on the Active Dimming section Be sure to click the Save button in the bottom right corner of the tab after fully defining the Analog Output Settings. Using Active Dimming Active Dimming is a process whereby a specific light level is maintained in an area by dimming the lights when light is available from other sources (i.e. the sun). This is accomplished by using an analog output to provide a voltage to a dimmable light based on feedback from a light sensor connected to an analog input. To set up Active Dimming, first make sure that Analog (1 or 2) Active Dimming has been selected in the Feed Type drop-down menu (Analog Output Settings section) for the analog output connected to the dimmable light. The choice of which Analog Input will depend on which analog input is connected to the light sensor. Next, use the light sensor s datasheet to determine the maximum output voltage of the sensor and the corresponding maximum brightness in foot-candles. Input these values into the Light Sensor Max. Level (V) and Max Brightness of Sensor (FC) boxes under the correct Analog Input column. Finally, enter the desired room light level (in foot-candles) in the Desired Brightness (FC) box and click on the Calculate button. In the picture above, the light sensor is connected to analog input 1. It has a maximum level of 9V and a maximum brightness of 100FC. The desired light level in the room is 45FC, which results in a brightness setting of In the Feed Type menu for Analog Output 1 (Analog Output Settings section), Active Dimming 1 must be selected. Be sure to click the Save button in the bottom right corner of the tab after fully defining the Active Dimming section. Using Step Dimming The other available method of dimming is Step Dimming. In this method, a gain table is used to define what the analog output s voltage level should be given a certain input threshold. Note that only one gain table can be defined, although it can be used for any analog input/analog output combination. The relationship must be defined in the Analog Output Settings section by selecting Step Dimming (1or 2) for the appropriate Analog Output. For example, in the picture below, a gain table has been defined with Thresholds at 0% (0), 25% (1024), 50% (2048), 75% (3072), and 100% (4095) of the maximum sensor brightness. For each Threshold increase, the required amount of light from the i-3 system will be less. As such, the Light Level values decrease as the Threshold values increase. Note: The Step Dimming gain table may have up to ten entries. 18

20 Logic Control The Logic Control tab is used to create logical relationships between an input, a breaker, the brightness measured by a Siemens AP254, and/or the temperature as measured by a Siemens AP254. An AP254 is a dual brightness and temperature sensor that interfaces with the System Controller through the EIB network. This tab is intended for highly specific applications. If you cannot think of a specific task you would like to accomplish with it, skip this section. The top left pane will display all control logic relationships that have been defined for the project. Control logic list items may be edited or deleted using the buttons to the right. Note: The logical condition is defined in the Logic Control tab, while the control function (i.e. which output is triggered) is defined in the Schedule Control tab. Adding Control Logic To add new control logic, click the Add Logic Control button. If a specific name for the control logic is desired, re-name the control logic using the Logic Control Name textbox. The control logic relationship can be any combination of an input, breaker, AP254 brightness value, or AP254 temperature value. These factors are added to the control logic relationship using the checkboxes next to each name, and their respective relationships to one another are defined using the logical operator drop-down menu. As more factors are added, the bar at the bottom of the Control Logic Factor section will display the entire logical statement. Also, when a checkbox is checked, a sub-section will appear in the Logic Control Value section. These sub-sections allow the user to specify how the state of the input, breaker, AP254 brightness sensor, and AP254 temperature sensor will be evaluated to trigger the output. The Input sub-section contains drop-down menus to select both the panel that the input is housed in, and the input itself. The third drop-down menu is used to specify which state of that input will cause that portion of the control logic to be true. Similarly, the Breaker sub-section contains drop-down menus for selecting the panel that the breaker is housed in, and the breaker itself. The third drop-down menu is used to specify which state of that breaker will cause that portion of the control logic to be true. The AP254 is able to simultaneously measure brightness and temperature data, and that data can be used for control logic. Use the two drop-down menus in the Brightness and Temperature sub-sections to define the light level and temperature ranges for which that portion of the logic control will be true. 19

21 Schedule Setup The Schedule Setup tab allows the user to create multiple lighting schedules, each with multiple events that can be used to control breakers, zones, and digital inputs. When the Schedule Setup tab is first accessed, the pane in the top left corner will be empty. As new schedules are created, the pane will be populated with a list of those schedules, and each schedule may be re-opened for editing or deleted if it is no longer required. Creating a New Schedule To create a new schedule, click on the Add New Schedule button to the right of the schedule pane. This will display the Schedule Details section and the Event Details section. Use the Schedule Details section to define when the schedule will run. Only proceed to the Event Details section after the Schedule Details section has been completed. In the Schedule Details section, re-name the schedule using the Schedule Name box. Next, select the type of schedule you would like to create. The four schedule types are Special, Holiday, Monthly, and Weekly. A Special schedule is defined using a specific start and end date, and does not repeat (i.e. April 4, 2012 to April 7, 2012). Schedules of the Holidays type will run on a specific date each year. Initially, the Configuration Software will be programmed with Thanksgiving, Christmas, and New Year s Day. If the desired holiday is not listed, use the Holidays tab to define it and return to the Schedule Setup tab to create a schedule for it. Monthly schedules will run for specific months out of the year, and Weekly schedules will run on specific days of the week. For Monthly or Weekly schedules, check the boxes next to the days and months the schedule will run on. The priority of the schedules is the order in which they re listed (in this manual and in the Configuration Software). In the event of a schedule overlap, the schedule with the higher priority will run instead. For example, a schedule for Thanksgiving will run instead of a schedule for Thursdays. Adding Events to a Schedule After the type of schedule has bee defined in the Schedule Details section, the Event Details section can be used to add events to that schedule. To add an event, click the Add Event button underneath the Events pane. This will cause the Event Details section to fully appear, allowing the user to define the event s output, timing, and action. 20
. Next, select the event s Output Type.")

22 In the Event Details section, first specify a name for the event using the Event Name box. If the event will be enabled using control logic, check the Event has logic? checkbox and select the appropriate control logic from the drop-down menu (control logic is defined in the Logic Control tab). Next, select the event s Output Type. The available output types are Zone, Breaker, and Input. Choosing either of the first two will allow the scheduled event to switch a zone or breaker at the appointed time. Choosing the Input radio button will allow the event to enable or disable a digital input. After selecting the Output Type, specify which zone, breaker, or digital input will be controlled from the pane to the left. Use the Event Time sub-section to choose when the event will occur. Event times may be defined using Fixed Time or Astronomical Time. If the Fixed Time radio button is clicked, the event will occur based on the system clock. If the Astronomical Time radio button is clicked, the event can be programmed to occur a certain number of minutes before or after sunrise or sunset. In order for the astronomical clock to function properly, be sure that the correct time zone and city have been selected in the Initialization tab. Finally, select the event s output action using the Event Action radio buttons. In the case of a zone or breaker output, the available actions are ON and OFF. In the case where an event is outputting to a digital input, the available options are Disabled On, Disabled Off, and Enable. The event itself may also be enabled or disabled using the Enable Event? radio buttons. After an event has been completely defined, click the Save button to add it to the schedule. A dialog box will pop up asking if you would like to continue to add events to the schedule. To add another event, click the Yes button, and then click the Add Event button underneath the event pane to add another event. Clicking the No button will save the schedule and close both the Schedule Details and Event Details sections. It is recommended that a schedule have at least two events- one to turn the lights on, and one to turn the lights off. 21


23 Schedule Logic The Schedule Logic tab is used to control a breaker, zone, or digital input based on a condition defined in the Logic Control tab. If a control logic condition has not been defined, return to the Logic Control tab and create the control logic there first. Attempting to add new schedule logic without existing control logic will result in an error message. The pane at the top of the window displays all of the schedule logic that has been defined for the project. Initially, the pane will be blank. As new schedule logic is created, they will be added as line items to a list within the pane. To edit or delete existing schedule logic, highlight the item in the list and click either the Edit Schedule Logic or Delete Schedule Logic buttons. Adding New Schedule Logic To add new schedule logic, first verify that the requisite control logic has already been defined in the Logic Control tab. Next, click the Add New Schedule Logic button to display the Schedule Logic Details section. Within the schedule logic details section, use the top textbox to name the schedule logic. Underneath that textbox, select the control logic condition from the Logic Control drop-down menu. This drop-down menu is filled with all the control logic defined in the Logic Control tab. Next, select the zone, breaker, or digital input that will be controlled by the schedule logic. Select the general type using the Output Type radio buttons, and then select the specific zone, breaker, or input from the list to the right. In the case of breakers and inputs, be sure that the correct panel is selected from the drop-down menu above the list. After choosing the schedule logic s output, specify the action on that output using the Schedule Logic Action radio buttons near the bottom left of the window. The schedule logic is enabled using the Enable Schedule Logic? radio buttons. It is also possible to create schedule logic that is only enabled for a certain period of time on specific days of the week. To enable schedule logic for a specific time, check the box next to the line reading Has Time Factor? to display the Time Factor sub-section. This sub-section may be used to define the start and end time of the time period for which the schedule logic is enabled, as well as which days of the week it will be enabled. After selecting the driving control logic; choosing the output zone, breaker, or input; specifying the output s action; and defining a time factor, click the Save button at the bottom right to save the schedule logic. 22

24 Holidays The Holidays tab allows the user to create holidays that can then be used in the Schedule Setup tab to program the System Controller to behave differently for those days of the year. Initially, the project will recognize- and list- New Year s Day, Thanksgiving, and Christmas. As more holidays are defined and saved, they will appear as additions to this list. Any item from the list may be edited or deleted by highlighting the item and clicking either the Edit Holiday or Delete Holiday button. Creating a Holiday To add a holiday to the project, first click the Add Holiday button to the right of the defined Holidays pane. This will cause the Holiday Details section to appear. In the Holiday Details section, use the top-most textbox to name the holiday. Below that, specify how the holiday will be defined. Fixed Date holidays occur on the same date each year (i.e. Christmas always occurs on December 25 th ). Variable Date holidays are defined instead by a day, week, and month (i.e. Thanksgiving occurs on the Thursday of the fourth week of November). If the Fixed Date radio button is selected, specify the date of the holiday using the mm/dd/yyyy format. If the Variable Date radio button is selected, specify the holiday s day of the week, week of the month, and month. Finally, if the holiday occurs every year, check the checkbox next to Recur every year. Complete the process by clicking the Save button. 23


25 Global Settings The Global Settings tab contains networking, access, and formatting settings that apply to the system as a whole. Modbus Settings The Modbus Settings section is used to specify the System Controller s address and other Modbus parameters when the Controller will be connected to a building management system. If this is the case, check the checkbox in the top left corner of the Modbus Settings section to display the settings. Be sure that the Web Monitoring Settings checkbox is unchecked. First, select the type of Modbus connection that will be utilized. A simple way to determine this is that a Modbus RTU connection uses an RS-485 cable, while a Modbus TCP connection uses an Ethernet cable. For a Modbus RTU connection, the user may change the Modbus Address, Baud Rate, Parity, and Stop Bits. For a Modbus TCP connection, the user may edit the IP address, subnet mask, and default gateway of the System Controller. In both cases, check the specifications of the building management system and its available addresses to determine the appropriate values for these settings. After all the necessary changes have been made, click the Save button in the bottom right of the Section to save the Modbus settings. Web Monitoring Settings The Web Monitoring Settings section should be used when the System Controller will be monitored, programmed, or controlled using Siemens online software. If this is the case, check the checkbox in the top left corner of the Web Monitoring Settings section to display the web monitoring settings. Be sure that the Modbus Settings checkbox is unchecked. 24


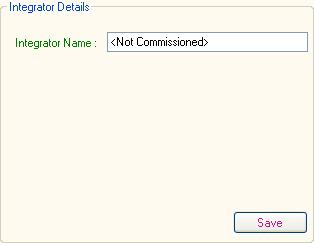
26 After all changes have been made, or if no changes are required, click the Save button. User Passwords Multiple levels of access may be declared for use of the System Controller s touch screen. An Admin has complete access to the system. A Manager may view states and perform system overrides, but may not change the configuration. A User may only view and monitor the system. To change a password, select the user access level from the drop-down menu. Then, enter and confirm a 4-digit numeric password in the boxes provided. Click the Save button before proceeding to another user access level or section. Note: The Admin password can also be set in the Initialization tab. If this task has already been performed, do not set another Admin password. Or, use the same password used in the Initialization tab. Date & Time Format, Maximum Number of Characters Use the radio buttons in this section to change how the date and time will be displayed on all system screens. At the bottom of the section, the numeric textbox can be used to set an upper limit on the number of characters allowed in a name. The absolute maximum is 32 characters. Integrator Details Use this section to record the name of the person or company that created the configuration project. Click the Save button after the name has been added to the textbox. The name typed here will be displayed on the main screen of the System Controller. 25
27 26
28 Siemens Industry, Inc Triangle Parkway Norcross, GA All rights reserved Printed in USA 2012 Siemens Industry, Inc. The information provided in this brochure contains descriptions or characteristics of performance which in case of actual use do not always apply as described or which may change as a result of further development of the products. An obligation to provide the respective characteristics shall only exist if expressly agreed in the terms of contract. Availability and technical specifications are subject to change without prior notice. Any product names mentioned may be trademarks or product designations of Siemens or their suppliers, whose use by third parties for their own purposes may infringe the rights of the trademark owners.
User Guide i-3 I/O Modbus Controller Configuration Software Instruction Manual
 User Guide i-3 I/O Modbus Controller Configuration Software Instruction Manual www.usa.siemens.com/i-3 1 1 i-3 I/O Modbus Controller Configuration Software Instruction Manual Table of Contents Installing
Quantum 3.2 Software. User Manual
 Quantum 3.2 Software User Manual Contents Quantum Vue 1 Main Dashboard 2 How much energy am I saving system-wide? Do I have any system alerts? How can I view/edit scheduled events? Energy 4 How do I view
E3xA, E3xB, E3xC, E3xE
 ZL0140-0C Page 1 of 21 2017 Veris Industries USA 800.354.8556 or +1.503.598.4564 / support@veris.com 0717 Commissioning Guide Power Monitoring E34E E31 * E30E & E31E E34A E30 *The CE mark indicates RoHS2
CREATING PANEL APPLICATIONS
 CREATING PANEL APPLICATIONS 3.1. Setting up the Panel Application... 1 3.1.1. General Settings...2 3.1.2. Custom Settings...5 3.1.3. Activating Multiple Overlapped Buttons by One Touch...7 3.1.4. Specifying
NEXTGEN PROGRAMMING SOFTWARE QUICK START GUIDE Copyright Intermatic 2004
 NEXTGEN PROGRAMMING SOFTWARE QUICK START GUIDE Copyright Intermatic 2004 RECOMMENDED SYSTEM REQUIREMENTS Processor: 500-MHz Intel Pentium-class processor (Minimum: 90- MHz) Memory: 128MB RAM (Minimum:
Power Xpert Meter 2000 Gateway Card Kit
 Quick Start Guide IL02601011E Rev. 2 December 2011 PXM 2250 PXM 2260 IQ 250 IQ 260 Power Xpert Meter 2000 Gateway Card Kit Table of Contents Remove the Meter From Service.... 2 Disconnect Power Connections,
SolarPower Pro. User s Manual. Management Software for Solar Inverter
 SolarPower Pro User s Manual Management Software for Solar Inverter Table of Contents 1. SolarPower Pro Overview... 2 1.1. Introduction... 2 1.2. Structure... 2 1.3. Features... 3 2. SolarPower Pro Install
Note: Act Today provide this KB article as a courtesy however accept no responsibility for content or the recipient performing these steps
 Note: Act Today provide this KB article as a courtesy however accept no responsibility for content or the recipient performing these steps How To Download and Apply Sage ACT! 2011 Premium Service Pack
QUICK START. Installation & Programming Guide
 QUICK START Installation & Programming Guide PRECAUTIONS READ AND FOLLOW ALL SAFETY INSTRUCTIONS. CAUTION - RISK OF ELECTRICAL SHOCK. To prevent electrical shock, turn off power at the circuit breaker
X-618 Public Address and Voice
 X-618 Public Address and Voice Alarm System Commissioning Manual M_XXXXXX_CN_0 Copyright 2012 Honeywell International Inc. All rights reserved. No part of this document may be reproduced in any form without
Power Xpert Meter 2000 Gateway Card Kit
 Quick Start Guide IL02601011E PXM 2250 PXM 2260 IQ 250 IQ 260 Power Xpert Meter 2000 Gateway Card Kit Table of Contents Remove the Meter From Service... 2 Disconnect Power Connections, CTs, and Modbus....
Oracle Connector for Outlook User s Guide
 Oracle Connector for Outlook 2003 User s Guide MIT IS&T Oracle Connector for Outlook Release Team Revised: January 7, 2005 MIT IS&T Oracle Connector for Outlook Release Team MIT-OCFO-2003-UG.doc Revised
VisionTouch 5 Software
 User Manual VisionTouch 5 Software Greengate Contents Contents Description General Information.... 3 Hardware and Software Requirements.... 3 Hardware Requirements.... 3 Software Requirements... 3 VisionTouch
Pow-R-CommandE PC Central. Instruction Manual
 Pow-R-CommandE PC Central Instruction Manual DISCLAIMER OF WARRANTIES AND LIMITATION OF LIABILITY The information, recommendations, descriptions and safety notations in this document are based on Eaton
USER MANUAL. PowerFrame TM Personal. UPS Monitoring Software
 USER MANUAL PowerFrame TM Personal UPS Monitoring Software www.bxterra.com 1 TABLE OF CONTENTS Introduction... Structure... Applications... Features... System Requirements... Supported Operating Systems...
Temperature-Humidity Sensor Configuration Tool Rev. A 1/25/
 Rev. A 1/25/213 172 Contents Contents Temperature-Humidity Sensor Configuration Tool... 3 Read Sensor Screen... 3 Manual Calibration Screen... 4 Register View Screen... 5 Modbus Registers... 6 Reprogram
INSTRUCTION MANUAL. DVR Utility Software VA-SW800
 INSTRUCTION MANUAL DVR Utility Software VA-SW800 CONTENTS DVR UTILITY SOFTWARE FEATURES..... 2 ACCESSORIES........................ 2 NETWORK CONFIGURATION............ 3 SYSTEM REQUIREMENTS...............
IP Device Search and Configuration Tool Operation Manual
 IP Device Search and Configuration Tool Operation Manual Note Copyright Statement This manual may not be reproduced in any form or by any means used to create any derivative such as translation, transformation,
RC-SV Configuration Guide (Rev 4)
") Kramer Electronics, Ltd. RC-SV Configuration Guide (Rev 4) Software Version 2.1.2.69 Intended for Kramer Technical Personnel or external System Integrators. To check that you have the latest version, go
Kramer Electronics, Ltd. RC-SV Configuration Guide (Rev 4) Software Version 2.1.2.69 Intended for Kramer Technical Personnel or external System Integrators. To check that you have the latest version, go
User Manual. MPPTracker. Management Software for Solar Charge Controller. Version: 1.2
 User Manual MPPTracker Management Software for Solar Charge Controller Version: 1.2 Table of Contents 1. MPPTracker Overview... 1 1.1. Introduction... 1 1.2. Features... 1 2. MPPTracker Install and Uninstall...
Power Vision 1.5 (Cod )
") ELECTRICAL NETWORK ANALYSIS SOFTWARE Power Vision 1.5 (Cod. 775 353) USER S MANUAL (Cod. M 981 358 / 02 D) 2002 - CIRCUTOR, S.A. INDEX 1.- POWER VISION SOFTWARE INSTALLATION...4 2.- INTRODUCTION TO POWER
ELECTRICAL NETWORK ANALYSIS SOFTWARE Power Vision 1.5 (Cod. 775 353) USER S MANUAL (Cod. M 981 358 / 02 D) 2002 - CIRCUTOR, S.A. INDEX 1.- POWER VISION SOFTWARE INSTALLATION...4 2.- INTRODUCTION TO POWER
AKCess Pro Server Access Control User Manual
 www.akcp.com AKCess Pro Server Access Control User Manual Help Version updated till version 118 Copyright 2012, AKCess Pro Co., Ltd.. 1) Introduction A) What is the AKCess Pro Server / Access Control?
PV101-C Configuration Software V3.2. Installation and Operations Manual Section 78
 PV101-C Configuration Software V3.2 Installation and Operations Manual 00-02-0797 08-18-11 Section 78 In order to consistently bring you the highest quality, full featured products, we reserve the right
EMS WEB APP Configuration Guide
 EMS WEB APP Configuration Guide V44.1 Last Updated: August 14, 2018 EMS Software emssoftware.com/help 800.440.3994 2018 EMS Software, LLC. All Rights Reserved. Table of Contents CHAPTER 1: EMS Web App
User Manual PDUTracker
 User Manual PDUTracker Management Software for PDU Table of Contents 1. Overview... 1 1.1. Introduction... 1 1.2. Features... 1 2. Install and Uninstall... 1 2.1. System Requirement... 1 2.2. Software
GWCommander V3.x. Administrators Guide
 GWCommander V3.x Administrators Guide OpenNet Software Ltd., January 2006 OpenNet Software Ltd. GWCommander v.3 Admin Guide, Page 1 Table of Contents 1. Introduction...2 1.1 Requirements...3 2. Setting
DocAve for Salesforce 2.1
 DocAve for Salesforce 2.1 This document is intended for anyone wishing to familiarize themselves with the user interface and basic functionality of AvePoint s DocAve for Salesforce tool. System Requirements
Centralized Lighting Control Systems
 Systems CLCS Overview-1 10.30.06 Centralized Lighting Systems A centralized lighting control system provides switching, dimming, energy management, and shade control from a single system. It is used to
TouchKit TouchScreen Controller User Manual for Windows NT4 Version: 3.4.0
 TouchKit TouchScreen Controller User Manual for Windows NT4 Version: 3.4.0 1 CONTENT CHAPTER 1. TOUCH PANEL CONTROLLER 2 1.1 Controller 2 1.2 Specifications and Features 3 CHAPTER 2. INSTALLING TOUCHKIT
Outlook: Web Access. Outlook: Web Access AIS Vienna
 Outlook: Web Access AIS Vienna Table of Contents Introduction to OWA...1 Log On... 1 OWA Workspace... 2 Hiding/Displaying the Reading Pane... 3 Collapsing/Expanding the Outlook Bar... 4 Log Off... 5 Sending
SLS-ENVR2016 Network Video Recorder V2.2.2 Quick Setup Guide
 SLS-ENVR2016 Network Video Recorder V2.2.2 Quick Setup Guide The SLS-ENVR2016 series NVR is an intelligent and compact appliance that provides a network interface to monitor, record and playback video
Managed ACA Reporting and Filing Tool User Guide
 Managed ACA Reporting and Filing Tool User Guide V2.0 December 1, 2015 Table of Contents Managed ACA Reporting and Filing Tool User Guide...1 RAFT Download from www.managedaca.com...2 RAFT Installation
ViewPower. User s Manual. Management Software for Uninterruptible Power Supply Systems
 ViewPower User s Manual Management Software for Uninterruptible Power Supply Systems Table of Contents 1. ViewPower Overview...2 1.1. Introduction...2 1.2. Structure...2 1.3. Applications...2 1.4. Features...3
Central Management Software. Cam Viewer 3 Lite. User Manual
 Central Management Software Cam Viewer 3 Lite User Manual Version 1.0.0 Table of Contents 1. System Requirement...4 2. Software Installation...5 3. Configuration Wizard...9 3.1 Channel...10 3.1.1 Adding
ST-HVR8704 ST-HVR8708 ST-HVR8716. Professional Digital Video Recorders QUICK START GUIDE
 ST-HVR8704 ST-HVR8708 ST-HVR8716 Professional Digital Video Recorders QUICK START GUIDE 1 Thank you for purchasing this SecurityTronix Hybrid Video Recorder! The documentation for this HVR comes in 2 formats;
GAMMA instabus Application Program Description. November CO Touch-Panel
 Use of the application program Product family: Product type: Manufacturer: Name: Order no.: Name: Order no.: Display Display units Siemens UP 588/2 Colour Touch Panel (AC 230 V) 5WG 588-2AB2 UP 588/22
Traffic Logix SafePace Beacon Control Software User Manual
 Traffic Logix SafePace Beacon Control Software User Manual Traffic Logix I 3 Harriet Lane I Spring Valley, New York 10977 T (866) 915-6449 F (866)995-6449 www.trafficlogix.com I info@trafficlogix.com 2011
TouchKit TouchScreen Controller User Guide for Windows NT4 Version: 3.2.1
 TouchKit TouchScreen Controller User Guide for Windows NT4 Version: 3.2.1 TouchKit Guide for WinNT4 v3.2.1 0 CONTENT CHAPTER 1. TOUCH PANEL CONTROLLER... 2 1.1 CONTROLLER... 2 1.2 SPECIFICATIONS AND FEATURES...
Multi-Sponsor Environment. SAS Clinical Trial Data Transparency User Guide
 Multi-Sponsor Environment SAS Clinical Trial Data Transparency User Guide Version 6.0 01 December 2017 Contents Contents 1 Overview...1 2 Setting up Your Account...3 2.1 Completing the Initial Email and
RC-SV Configuration Guide Revision 3
 Kramer Electronics, Ltd. RC-SV Configuration Guide Revision 3 Software Version 2.1.2.32 Intended for Kramer Technical Personnel or external System Integrators. To check that you have the latest version,
BIOMETRIC FINGERPRINT TECHNOLOGY
 BIOMETRIC FINGERPRINT TECHNOLOGY Installation Guide timeqplus Biometric TM Installation Guide Thank you for purchasing the timeqplus Biometric Time and Attendance System. This installation guide will
Welcome to ThinkEssentials
 User s Manual Welcome to ThinkEssentials Figure 1: Sample room and device layout with ten devices ThinkEssentials software includes the following features: Set up and control up to 230 Z-Wave devices Draw
Using the VSOM Operator Pages
 CHAPTER 8 The VSOM Operator Pages provide access to features that video surveillance operators can use to view, record, search, and control video. This chapter describes the Operator Pages in detail. It
1 P age NEXTIVA CALL CENTER. Supervisor User Guide. nextiva.com/support 2015 NEXTIVA, ALL RIGHTS RESERVED
 1 P age NEXTIVA CALL CENTER Supervisor User Guide nextiva.com/support 2015 NEXTIVA, ALL RIGHTS RESERVED 2 P age Creating Employees... 3 Creating an Employee... 3 Assigning Licenses to Employees... 7 Schedules...
PST for Outlook Admin Guide
 PST for Outlook 2013 Admin Guide Document Revision Date: Sept. 25, 2015 PST Admin for Outlook 2013 1 Populating Your Exchange Mailbox/Importing and Exporting.PST Files Use this guide to import data (Emails,
CITO2 Installation & User Instructions
 CITO2 Installation & User Instructions DD 56107 Stoneridge Electronics Ltd 1. Installation...4 1.1. System Requirements...4 1.2. Installing CITO2...4 1.3. Uninstalling CITO2...4 2. Starting and closing
JNIOR. A Network I/O Resource Utilizing the JAVA Platform. JNIOR Support Tool Manual. Release 6.0
 JNIOR A Network I/O Resource Utilizing the JAVA Platform Release 6.0 Supports JNIOR Series 3 and 4 JNIOR OS 3.4 or greater required INTEG Process Group, Inc. 2919 East Hardies Rd, First Floor Gibsonia,
Power Xpert Meter 2000 Gateway Card Kit
 Quick Start Guide IL02601011E PXM 2250 PXM 2260 IQ 250 IQ 260 Power Xpert Meter 2000 Gateway Card Kit Table of Contents Remove the Meter From Service.... 2 Disconnect Power Connections, CTs, and Modbus....
LepideAuditor for File Server. Installation and Configuration Guide
 LepideAuditor for File Server Installation and Configuration Guide Table of Contents 1. Introduction... 4 2. Requirements and Prerequisites... 4 2.1 Basic System Requirements... 4 2.2 Supported Servers
DMS Local. User Manual. For Projector Management V 1.01
 DMS Local User Manual For Projector Management V 1.01 2 Copyright Copyright Copyright 2018 BenQ Corporation. All rights reserved. No part of this publication may be reproduced, transmitted, transcribed,
IBM NetBAY Virtual Console Software. Installer and User Guide
 IBM NetBAY Virtual Console Software Installer and User Guide INSTRUCTIONS This symbol is intended to alert the user to the presence of important operating and maintenance (servicing) instructions in the
DATA ARCHIVING SOFTWARE V.
 Interscan Corporation. ARC-MAX III - DATA ARCHIVING SOFTWARE V. 2.1.0.9 OPERATION MANUAL 1 Contents 1 Opening the program.... 3 2 Login Window... 3 2 Menu & Toolbar... 4 2.1 Current Data Display... 5 2.2
Luxor CRM 2.0. Getting Started Guide
 Luxor CRM 2.0 Getting Started Guide This Guide is Copyright 2009 Luxor Corporation. All Rights Reserved. Luxor CRM 2.0 is a registered trademark of the Luxor Corporation. Microsoft Outlook and Microsoft
Script.byu.edu SharePoint Instructions
 Script.byu.edu SharePoint Instructions Site Actions Menu Go to script.byu.edu, click on Authenticate at the bottom of page, you will be prompted to enter a username and password, use your netid and password
DALI Cockpit. Startup Guide V5. DALI Configuration Tool. Traffic Monitoring. 2017/12/15, Lunatone Industrielle Elektronik GmbH DALI Cockpit
 DALI Cockpit Startup Guide V5 DALI Configuration Tool Commissioning of DALIcomponents and DALI-line Traffic Monitoring 2017/12/15, Lunatone Industrielle Elektronik GmbH DALI Cockpit 2 DALI Cockpit Configuration
CME E-quotes Wireless Application for Android Welcome
 CME E-quotes Wireless Application for Android Welcome This guide will familiarize you with the application, a powerful trading tool developed for your Android. Table of Contents What is this application?
Business Online Banking User Guide
 Business Online Banking User Guide Table of Contents Contents Overview... 2 Logging In... 2 Additional Login Information... 5 Home/Dashboard... 6 Top Line Tool Bar... 6 Bulletins... 7 Dashboard... 8 Accounts...
User Manual WatchPower
 User Manual WatchPower Management Software for SP Efecto / SP Brilliant (Plus) / SP Initial Table of Contents 1. WatchPower Overview...1 1.1. Introduction... 1 1.2. Features... 1 2. WatchPower Install
Access Easy Master Controller
 Access Easy Master Controller Quick Start Guide en Quick Start Guide Ver. 3.0.0 All rights reserved. No part of this manual may be reproduced, stored in a retrieval system, or transmitted in any form or
TouchKit TouchScreen Controller User Guide for Windows 2000 / XP Version: 3.2.4
 TouchKit TouchScreen Controller User Guide for Windows 2000 / XP Version: 3.2.4 TouchKit Guide for Win2000/XP v3.2.4 0 CONTENT CHAPTER 1. TOUCH PANEL CONTROLLER...2 1.1 CONTROLLER...2 1.2 SPECIFICATIONS
Using Devices with Microsoft HealthVault
 Using Devices with Microsoft HealthVault A Microsoft HealthVault Step-by-Step Guide This guide will help you get started using Microsoft HealthVault Connection Center to send information from your health
USER MANUAL. Calendar 365 TABLE OF CONTENTS. Version: 4.0
 USER MANUAL TABLE OF CONTENTS Introduction... 1 Benefits of Calendar 365... 1 Pre-requisites... 2 Installation... 2 Installation Steps... 2 Configuration Steps... 5 Calendar Management... 19 Calendar Activities...
Xerox Versant 3100 Press Stock Library Manager
 Software Version 8.0[0-9][0-9] Help Version 3.0 March 2016 2016 Xerox Corporation. All rights reserved. Xerox and Xerox and Design are trademarks of Xerox Corporation in the United States and/or other
1 Overview. 2 Installation. exacqvision-entrapass Installation Guide.
 1 Overview Purpose ExacqVision recorders now include Kantech Entrapass CE software. The purpose of this document is to guide the technician or installer through the process of installing and registering
Microsoft Outlook: Outlook Web App
 Microsoft Outlook: Outlook Web App Using the Outlook Web App (OWA) you can access your BVU email from any place you have an Internet connection. To open Microsoft Outlook Web App: 1. Open a new browser
1. ECI Hosted Clients Installing Release 6.3 for the First Time (ECI Hosted) Upgrading to Release 6.3SP2 (ECI Hosted)
 Upgrading to Release 6.3SP2 (ECI Hosted)") 1. ECI Hosted Clients........................................................................................... 2 1.1 Installing Release 6.3 for the First Time (ECI Hosted)...........................................................
1. ECI Hosted Clients........................................................................................... 2 1.1 Installing Release 6.3 for the First Time (ECI Hosted)...........................................................
GreenFolders User Manual
 GreenFolders User Manual Welcome! Welcome to GreenFolders the Electronic Records Management Solution. GreenFolders allows you to store and retrieve files with many easy-to-use features for working with
Power Vision 1.7 (Cod )
") ELECTRICAL NETWORK ANALYSIS SOFTWARE Power Vision 1.7 (Cod. 775 353) USER S MANUAL (Cod. M 981 358 / 05B) 2005 - CIRCUTOR, S.A. INDEX 1.- POWER VISION SOFTWARE INSTALLATION...4 2.- INTRODUCTION TO POWER
ELECTRICAL NETWORK ANALYSIS SOFTWARE Power Vision 1.7 (Cod. 775 353) USER S MANUAL (Cod. M 981 358 / 05B) 2005 - CIRCUTOR, S.A. INDEX 1.- POWER VISION SOFTWARE INSTALLATION...4 2.- INTRODUCTION TO POWER
Install & First Time Setup Guide
 cs@cyberonic.com CONTENTS www.cyberonic.com Install & First Time Setup Guide Cyberonic Development Team December 10, 2013 This guide should help you install and set-up the CMS software for use with a pre-configured
Table of Contents.
 Table of Contents http://www.advancedactuators.com 1. Items Included with the ThumbLock PCMU:... 2 2. IMPORTANT NOTE:... 2 3. Supported Operating Systems:... 2 Section 1 Installing the ThumbLock PCMU Software...
TLL5000 Electronic System Design Base Module
 TLL5000 Electronic System Design Base Module The Learning Labs, Inc. Copyright 2007 Manual Revision 2007.12.28 1 Copyright 2007 The Learning Labs, Inc. Copyright Notice The Learning Labs, Inc. ( TLL )
Wireless RAK system setup guide
 Wireless RAK system setup guide 1 What you need to get started 2 Create a new Rasoft Pro Project File 2.1 Project name and House numbers 2.2 Save Locations 2.3 Adding rooms 2.4 Adding channels 2.5 Adding
GAMMA instabus Application Program Description. July CO Colour Touch-Panel
 Use of the application program Product family: Product type: Manufacturer: Name: Order no.: Name: Order no.: Display Display units Siemens UP 588/12 Colour Touch Panel UP 588/13 Colour Touch Panel (AC
Obsolete. BR Series USB Tech Kit. B l u e R i d g e. T e c h n o l o g i e s. User Guide. Page 1. Hardware and Software Instructions
 Hardware and Software Instructions Page 1 Attention Page 2 This section serves as a notice of the immediate or potential dangers involved when working with the equipment described throughout this manual.
SNMP Web Management. User s Manual
 SNMP Web Management User s Manual Suitable Product: SNMP Web Card SNMP Web Box Management Software for Uninterruptible Power Supply Systems Table of Contents 1. Overview... 1 1.1 Introduction... 1 1.2
Morningstar Office Academy Day 3: Client Relationship Management
 Morningstar Office Academy Day 3: Client Relationship Management - - - - - - - - - - - - - - - - - - - - - - - - - - - - - - - - - - - - - - 1 Lesson 1: to Note Manager, Task Manager and Workflow................
LiveNX Upgrade Guide from v5.1.2 to v Windows
 LIVEACTION, INC. LiveNX Upgrade Guide from v5.1.2 to v5.1.3 - Windows UPGRADE LiveAction, Inc. 3500 Copyright WEST BAYSHORE 2016 LiveAction, ROAD Inc. All rights reserved. LiveAction, LiveNX, LiveUX, the
Don t jump ahead, there is more you need to do first in order for this to work properly.
 With the release of our new PD 502 & PD 602 portable terminals, you are required to use CPS v5.06.01.009 programming software. To maintain compatibility between the different DMR model radios, you will
Configuring the LxOEM
 Technical Instruction The LxOEM lighting controller is designed to be configured in several ways. As a programmable controller, it can be fully programmed and configured at the ligthing panel manufacturing
TouchScreen for Display & Panel-PC
 TouchScreen for Display & PanelPC User Manual for Windows 2000 / XP Version: 4.0.2 TouchKit Manual for Win2000/XP v4.0.2 Page 1 CONTENT CHAPTER 1. TOUCH PANEL CONTROLLER... 3 1.1 CONTROLLER... 3 1.2 SPECIFICATIONS
SecureGuard VMS. SecureGuard All-In-One Quick Install Guide V. 2.5
 SecureGuard VMS Quick Install Guide V. 2.5 9/30/2018 2 Table of Contents Purpose... 3 Installation... 3 Setup... 4 Startup & Live View... 26 3 Purpose This is a step-by-step guide to installing the current
Intel Server RAID Controller U2-1 Integration Guide For Microsoft* Windows NT* 4.0
 Intel Server RAID Controller U2-1 Integration Guide For Microsoft* Windows NT* 4.0 Revision 1.0 February 2000 Revision History Revision Revision History Date 1.0 Initial Release 02/10/00 Intel Corporation
Basic Software Maintenance. Ham Station Ultra Software Package
 1 Carl Skip Glover, Jr. K1SPG Custom Software & Hardware Solutions 4 Valley of Industry Boscawen, NH 03303 (603) 369-7015 Email: pctech.skip@gmail.com Email: k1spg@arrl.net Basic Software Maintenance Ham
DSS User Guide. End User Guide. - i -
 DSS User Guide End User Guide - i - DSS User Guide Table of Contents End User Guide... 1 Table of Contents... 2 Part 1: Getting Started... 1 How to Log in to the Web Portal... 1 How to Manage Account Settings...
TouchKit Touch Panel User manual for WindowsNT4 Version: 3.1.4
 TouchKit Touch Panel User manual for WindowsNT4 Version: 3.1.4 TouchKit Touch Panel v3.1.4 0 CONTENT CHAPTER 1. TOUCH PANEL CONTROLLER...2 1.1 CONTROLLER...2 1.2 SPECIFICATIONS AND FEATURES...3 CHAPTER
- 1 - Dominion PX Overview: Dominion PX refers to Raritan s family of intelligent power distribution units.
 - 1 - Release Notes for Dominion PX Software Version 1.3.0 (firmware version will be displayed as 01.03.00 in the GUI after an upgrade) Version: DPX 1.3 Release Notes, Revision 1.3 Date: February 20, 2009
Getting Started with the IntelleView POS Operator Software
 Getting Started with the IntelleView POS Operator Software Operator's Guide for Software Version 1.2 About this Guide This operator's guide explains how to start using your IntelleView POS Operator software.
Outlook Web Access Exchange Server
 Outlook Web Access Exchange Server Version 2.0 Information Technology Services 2008 Table of Contents I. INTRODUCTION... 1 II. GETTING STARTED... 1 A. Logging In and Existing Outlook Web Access... 1 B.
TouchKit Touch Panel User manual for WindowsNT4 Version: 3.1.4
 TouchKit Touch Panel User manual for WindowsNT4 Version: 3.1.4 TouchKit Touch Panel v3.1.4 0 CONTENT CHAPTER 1. TOUCH PANEL CONTROLLER... 2 1.1 CONTROLLER... 2 1.2 SPECIFICATIONS AND FEATURES... 3 CHAPTER
Talon FAST User Guide. Date Version Author Comments. November 15, Jaap van Duijvenbode Final Release
 Talon FAST 2.0.1 User Guide Date Version Author Comments November 15, 2012 2.0.1 Jaap van Duijvenbode Final Release 1 TABLE OF CONTENTS Talon FAST 2.0.1 User Guide... 1 Table of Contents... 2 1. Introduction
Microsoft Office Outlook 2010
 Starting Microsoft Outlook 2010 with XP Click on Start, E-mail Microsoft Outlook or Start, All Programs, Microsoft Office, Microsoft Outlook. Starting Microsoft Outlook 2010 with Windows 7 Click on the
Microsoft Outlook Basics
 Microsoft Outlook 2010 Basics 2 Microsoft Outlook 2010 Microsoft Outlook 2010 3 Table of Contents Getting Started with Microsoft Outlook 2010... 7 Starting Microsoft Outlook... 7 Outlook 2010 Interface...
SLS-ENVR16 Network Video Recorder V2.1.5 Quick Setup Guide
 SLS-ENVR16 Network Video Recorder V2.1.5 Quick Setup Guide The SLS-ENVR16 series NVR is an intelligent and compact appliance that provides a network interface to monitor, record and playback video from
HVR LINE INSTALL GUIDE
 HVR LINE INSTALL GUIDE 4.9.07 HVR v2.4.1 455 E. Industrial Drive P.O. Box 94 Hartland, WI 53029 Technical Support: 262.369.8798 Sales & Service: 262.369.8797 efax: 312.602.1356 www.visioncontrols.net Basic
LiteKeeper 4. Stand Alone Lighting Control Panel Technical Specifications PART 1. GENERAL 1.01 INTRODUCTION 1.02 DESCRIPTION OF WORK
 LiteKeeper 4 Stand Alone Lighting Control Panel Technical Specifications PART 1. GENERAL 1.01 INTRODUCTION The work covered in this section is subject to all of the requirements in the General Conditions
INSIGHT Installation Instructions
 This is the New Icon that will appear on your computer screen after the INSIGHT v8.1 software is installed. IMPORTANT: These instructions pertain to version 8.1.29. INSIGHT v8.1.29 requires Windows 8,
Payment Solutions MyCardRules. MyCardRules Mobile App. User Guide. Release 3.1
 Payment Solutions November 27, 2017 Installing MyCardRules... 2 Registering a Card and Creating an Account on MyCardRules... 2 Logging In to MyCardRules... 2 Registering a Card... 3 Creating an Account...
GUARD1 PLUS Documentation. Version TimeKeeping Systems, Inc. GUARD1 PLUS and THE PIPE are registered trademarks
 GUARD1 PLUS Documentation Version 3.02 2000-2005 TimeKeeping Systems, Inc. GUARD1 PLUS and THE PIPE are registered trademarks i of TimeKeeping Systems, Inc. Table of Contents Welcome to Guard1 Plus...
PigCHAMP Knowledge Software. Enterprise Edition Installation Guide
 PigCHAMP Knowledge Software Enterprise Edition Installation Guide PIGCHAMP, LLC Enterprise Edition Installation Guide JUNE 2016 EDITION PigCHAMP Knowledge Software 1531 Airport Rd Suite 101 Ames, IA 50010
Contents. System Properties...5
 User s Guide Contents Accessing Excel 5000 TM Open View Net Using Web Browser...1 About this Guide... 1 Introduction... 1 Architecture Diagram... 1 Getting Started... 2 Accessing Excel 5000 TM Open View