Programming and user guide
|
|
|
- Abigail Lyons
- 6 years ago
- Views:
Transcription


1 Programming and user guide CareAssist 68100/01 D B
2 Introduction CareAssist is designed to support local carers to deliver high quality, non-intrusive care. It is extremely easy to use, portable device that provides carers working or living onsite with a means to receive instant alerts from Tunstall s range of telecare sensors. As a result, onsite carers can be quickly made aware of any incidents allowing them to provide a high level of care whilst maximising their efficiency. It provides a very cost effective telecare solution whilst avoiding the need for a telephone line or monitoring centre service which is often not required when full time (24 hour) care is being provided. The CareAssist has a radio range in free space of up to 200m and has a battery life of up to 12 hours (depending on usage). Page 2 of 24
3 Contents What s in the box...4 Key features...5 Display symbols...6 How to set up for the first time...7 How to program...8 Entering programming mode...8 Exiting programming mode...8 Adding a trigger...9 Removing a trigger...10 Editing a trigger...11 Viewing Triggers...12 Locations...12 Adding a Location Removing a Location Editing a Location Setting Time and Date...14 Changing Settings...15 Alerts Radio Walk Test Service Menu Alarm History...17 View Locally Send to PC Switch Off...20 How to manage alarms...21 Acknowledging an alarm call Managing multiple alarm calls Battery Information...22 Accessories...22 Notices...23 Declaration of conformity...23 Technical Details...23 Page 3 of 24


 Keypad")

4 What s in the box CareAssist Pager Output Port Antenna Port Charging Socket (USB) Keypad Antenna Belt clip and screw Charger User Guide Page 4 of 24

5 Key features The CareAssist is designed to be extremely easy to use and understand. It includes the following features: Multiple alert modes the unit can alert the carer using audible alerts, on screen message and a vibration mode. The audible alerts and vibration mode can be turned off if necessary. Date and time providing that the time has been set, the current time will be shown on the screen. The set date and time will also be used to log the alarm history in the CareAssist s memory. Keypad lock if the keypad is not pressed for 30 seconds, the keypad will be locked and a key symbol will be displayed on the screen. View and download alarm history the alarm history including the time the alarm was received and the time it was acknowledged (cleared) is held on the unit s memory and can be viewed on the screen or downloaded to a PC. Flexible monitoring period when using a Universal Sensor (only when set to send Door, PES Wander, Bed Absence and PIR Standard radio messages) or PIR movement sensor, the CareAssist provides the ability to only alert the carer to trigger activations during a specified period of time each day. For example, to only receive activation alerts from a bedroom door during the night. The date and time must be set in the unit for this feature to operate. Pager compatible the CareAssist has a pager output port that enables alarm messages to be sent to pagers worn by carers (this requires additional products see accessories on page 22 for more details). Page 5 of 24


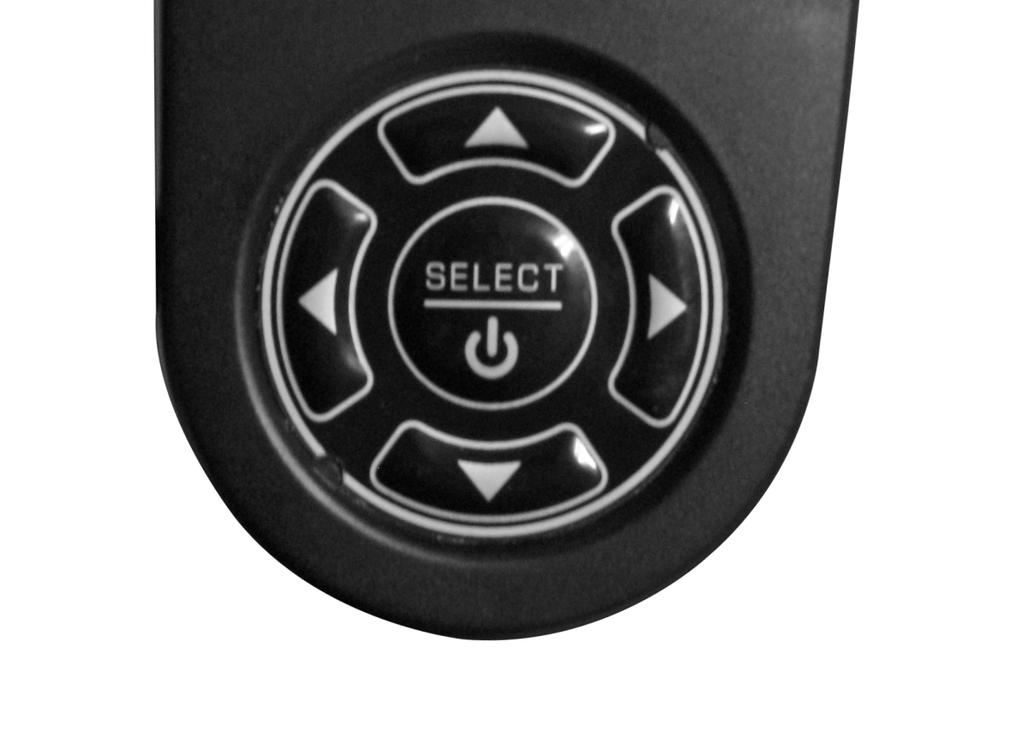
6 Display symbols Symbol Meaning Description 1 bar = 25% charged 2 bars = 50% charged Battery indicator 3 bars = 75% charged 4 bars = 100%charged flashing Low battery Battery should be charged Keypad locked Press and hold select key to unlock keypad Time Silent mode Audible alerts disabled Down arrow Press down key to scroll to next menu item Up arrow Press up key to scroll to next menu item Right arrow Press right key to scroll to next menu item Left Arrow Press left key to scroll to next menu item Page 6 of 24


7 How to set up for the first time To set up the CareAssist follow the below steps: 1. If the CareAssist is to be used as a portable device, attach the belt clip to the back of the CareAssist and then fit the screw to permanently fix it in place. A Back of the CareAssist with the belt clip fixing points B Squeeze the top of the belt clip and fit in to the fixing points C Fit the screw to permanently fix the belt clip D Belt clip is now fixed 2. Connect the CareAssist to the USB charger provided then plug it into a mains power socket and charge for an initial period of 24 hours. 3. It is now advisable to perform a range test around the building in which the CareAssist will be deployed to ensure it provides sufficient coverage (see Radio Walk Test on page 16 for details). 4. The antenna can be screwed into the antenna port to improve the radio range of the unit. The Antenna does not have to be used where the radio coverage is sufficient. You are now ready to program the CareAssist. Page 7 of 24
8 How to program In order to program the CareAssist you first of all need to enter programming mode. Entering programming mode To enter programming mode, ensure the keypad is unlocked then press and hold the select key until the unit beeps. If the keypad is locked ( displayed), press and hold the select key to unlock it, then press and hold the select key again to enter programming mode. The CareAssist will then display the first item (Add Trigger) in the programming menu. NOTE: The word Trigger refers to any 869MHz radio trigger or telecare sensor. Programming mode will automatically time out if the keypad is not pressed for a 60 second period. Exiting programming mode To exit programming mode, press the up/down keys to Exit then press select. The CareAssist will return to its normal mode. NOTE: Unless the unit is in Walk Test mode, programming mode will automatically be exited if an alarm is received. Page 8 of 24


9 Adding a trigger Step 1 - In programming mode, use the up/down keys to display Add Trigger then press the select key. Step 2 - The CareAssist will then display Please Press Trigger. Then activate the trigger/sensor that is required to be added. Step 3 The radio trigger s ID number will then be displayed. Check the radio trigger ID displayed matches the ID on the small label on the trigger/sensor (see below). The Trigger ID is a 6 digit number normally displayed in the top right of product labels. Step 4 If the Trigger ID matches, press select. If the ID doesn t match then more than one trigger may have been received. In this case, use the down key to display the correct ID, then press select. Step 5 You must then assign a location to the trigger. Use the up/down key to scroll to the required location then press select. If Custom Locations have been programmed, they will be displayed before the default locations. Step 5a When adding a Universal Sensor (only when set to send Door, PES Wander, Bed Absence and PIR Standard radio messages) or PIR movement sensor, the CareAssist provides the ability to only alert the carer to trigger activations during a specified period of time each day e.g. at night. In this case, the unit will ask you to set the Monitoring period. You can then select either: 24 Hour - the unit will monitor trigger activations 24 hours a day. Configure the unit will ask you to input a start/end time and will only generate alerts for trigger activations received during this period. The date and time must be set correctly in the unit for this feature. Step 6 A confirmation tone will be emitted after successfully adding the trigger. NOTE: If a location is not assigned the trigger will not be added to the CareAssist. Page 9 of 24
.")
10 Removing a trigger IMPORTANT: Removing triggers may affect the events held in the memory of the CareAssist. Therefore before removing triggers it is advisable to download any history you wish to keep (see Alarm History section). Step 1 - In programming mode, use the up/down keys to display Remove Trigger then press the select key. Step 2 Scroll to or activate the trigger you wish to delete. When the correct trigger ID is displayed, press select. Step 3 Confirm that you wish to remove the trigger and a confirmation beep will be emitted. Step 4 To exit, press the down arrow key until the word Exit is displayed then press select. Page 10 of 24
11 Editing a trigger IMPORTANT: Editing triggers may affect the events held in the memory of the CareAssist. Therefore before editing triggers it is advisable to download any history you wish to keep (see Alarm History section). Editing a trigger enables you to change the location assigned to a trigger. Step 1 - In programming mode, use the up/down keys to display Edit Trigger then press the select key. Step 2 Scroll to or activate the trigger you wish to edit. When the correct trigger ID is displayed, press select. Step 3 Then scroll to a new location and press select to confirm the change. A confirmation beep will be emitted. Step 3a When editing a Universal Sensor (only when set to send Door, PES Wander, Bed Absence and PIR Standard radio messages) or a PIR movement sensor, the CareAssist provides the ability to only alert the carer to trigger activations during a specified period of time each day e.g. at night. In this case, the unit will ask you to set the Monitoring period. You can then select either: 24 Hour - the unit will monitor trigger activations 24 hours a day. Configure the unit will ask you to input a start/end time and will only generate alerts for trigger activations received during this period. The date and time must be set correctly in the unit for this feature. Step 4 To exit, press the down arrow key until the word Exit is displayed then press select. Page 11 of 24
12 Viewing Triggers By selecting View triggers you can easily view all the triggers that are currently programmed to the CareAssist. This includes the Trigger ID and type. By pressing and holding the right key you can also temporarily view the location assigned to the highlighted trigger. To exit, press the down arrow key until the word Exit is displayed then press select. Locations Whilst all triggers and telecare sensors have a list of preprogrammed locations available to choose from you can personalise the CareAssist by adding custom locations. The custom location replaces the location information that is presented during an alarm call. Custom locations can be used to display a resident s name or, where it is important to have a location; both the resident s name and a location could be added. Where both a resident s name and location is required, a custom location for each of the resident s rooms will need to be added. For example. Custom location 1 Deborah s living room Custom location 2 Deborah s bedroom In multiple person complexes it may be more appropriate to just display the person to whom the trigger is associated. For example; Custom location 1 Deborah Custom location 2 Helen Page 12 of 24
13 Adding a Location Step 1 - In programming mode, use the up/down keys to display Add Location then press the select key. Step 2 To edit the location text, press the up/down keys to scroll to the letter/symbol you wish to use then press the left/right keys to move to the next space. Step 3 Press select when you have completed the custom location text and a confirmation beep will be emitted. Removing a Location IMPORTANT: Removing locations may affect the events held in the memory of the CareAssist. Therefore before removing locations it is advisable to download any history you wish to keep. Step 1 - In programming mode, use the up/down keys to display Remove Location then press the select key. Step 2 Scroll to the location you wish to delete. When the correct location is displayed, press select. Step 3 Confirm that you wish to remove the location by highlighting yes and pressing select, a confirmation beep will be emitted. Page 13 of 24
14 Editing a Location Page 14 of 24 IMPORTANT: Editing locations may affect the events held in the memory of the CareAssist. Therefore before editing locations it is advisable to download any history you wish to keep. Step 1 - In programming mode, use the up/down keys to display Edit Location then press the select key. Step 2 Scroll to the location you wish to edit. When the correct location is displayed, press select. Step 3 To edit the location text, press the up/down keys to scroll to the letter/symbol you wish to use then press the left/right keys to move to the next space. Step 4 Confirm that you wish to save the changes by highlighting yes and pressing select, a confirmation beep will be emitted. Setting Time and Date IMPORTANT: The date and time must be set correctly on the CareAssist as the time and date is logged in the unit s history. If the CareAssist battery runs out and is not recharged the Time and Date should be checked to ensure it hasn t reset. Step 1 - In programming mode, use the up/down keys to display Set Time/Date then press the select key. Step 2 Press up/down keys to display either Time or Date then press select. Step 3 To edit the time/date, press the up/down keys to change the number and the left/right keys to move to the hours/minutes/day/month/year. Step 4 Press select when the correct time/date is displayed, a confirmation beep will be emitted. To exit the Time/Date menu, use the up/down keys to display Back then press select.
15 Changing Settings In programming mode, use the up/down keys to display Settings then press the select key. You will now be presented with the settings menu. To exit the settings menu, use the up/down keys to display Back then press select. Alerts The alerts menu item enables you to configure how the unit should alert you when an alarm is received. Use the up/down keys to display Alerts then press select. Then follow the on screen instructions to: Enable/Disable Audible Alerts Set Alert Volume Level High or Low Enable/Disable the Vibration mode Highlight Yes/No then press select to confirm each alert setting. Page 15 of 24
16 Radio Walk Test IMPORTANT: Genuine alarm calls will only display as a range test when the CareAssist is in Walk Test mode and will not be registered in the unit s history. This feature allows you to test the radio range around the building by continually activating triggers and receiving audible alerts to verify the radio transmission has been received. To enter walk test mode, enter programming mode by holding down select then press select when Radio Walk Test is displayed. Then activate the trigger/sensor at different points in the building to assess the radio performance/range within the building. Walk test mode can be exited by pressing the select key at any time alternatively, Walk Test mode will time out after a period of inactivity. In Walk Test mode, Audible alerts will only be emitted if the trigger is already programmed into the CareAssist. Triggers not programmed into the unit will just display their trigger type and ID number on the screen. NOTE: The range of the unit is up to 200m (line of sight) however the overall radio performance in buildings is dependant upon a number of conditions including the building type, wall thicknesses, insulation type etc. Service Menu This menu provides access to Pager settings, Radio Diagnostics, Battery Status, Software Version Info, Restore Defaults and a complete unit Shutdown. It is only accessible by authorised individuals. Page 16 of 24
 is held in the unit s memory. The memory has a capacity to hold the last 256 events.")
17 Alarm History IMPORTANT: The history is altered when triggers/locations are edited and deleted therefore it is advisable to download the unit s history before performing these tasks. The Time/Date must be set correctly to use this feature. The history of alarms received and acknowledged (cleared) is held in the unit s memory. The memory has a capacity to hold the last 256 events. The history can be viewed locally (on the CareAssist screen) or can be downloaded to a PC. View Locally After entering Alarm History, press select when the screen displays View Locally, the CareAssist will then display the history held on its memory in the following format. Memory event number Total events in memory Action (Raised or Cleared) View next event Alarm information (display will scroll between (alarm type, location, date and time, trigger ID) Page 17 of 24


18 Send to PC The unit s history can be downloaded to a PC using HyperTerminal which is a program available on standard Windows based PCs. The program is also available from and free versions are also available from many other websites. Step 1 Connect the CareAssist to your PC using the PC download lead (see accessories) and a USB to RS232 adaptor (if required). Step 2 Go to the Start menu on your PC, and select the following go to the following folder All Programs / Accessories / Communications, then click on HyperTerminal. Step 3 Create a new connection by typing in the name CareAssist and clicking OK. Step 4 on the Connect to screen, change the Connect using drop down box to the correct COM port then click OK. To establish which COM port your PC is using. a. Open your PC s System Properties and select the Hardware tab, then click Device Manager Page 18 of 24

19 b. Scroll down to Ports (COM & LPT) and click on the + symbol, then see which COM port is being used (example COM5 is the port being used for the USB adapter cable). You can then close the device manager. Step 5 Ensure the COM port properties are set correctly (see below) then click OK Bits per second Data bits - 8 Parity - None Stop bits - 1 Flow control - None Step 6 In the HyperTerminal menu select Transfer, then either Capture Text (saves as a text file) or Capture to Printer (prints the history) and select the appropriate file/printer. Step 7 Go to CareAssist programming menu by holding down the select key. Scroll down to Alarm History then press select. Scroll to Send To PC then press select and the history will be transferred into HyperTerminal. Step 8 Exit HyperTerminal and when asked Do you want to save the connection named CareAssist?, click yes. Page 19 of 24

20 Step 9 the next time you open HyperTerminal, you can directly open the previously saved CareAssist setup to avoid needing to carry outs steps 2-5. The CareAssist setting can be opened by going to Start / All Programs / Accessories / Communications / HyperTerminal then click on CareAssist. Switch Off Pressing select when Switch Off is displayed will turn off the CareAssist unit. No alarm calls will be received when the unit is switched off. The unit can be turned on again by pressing and holding the select key. Page 20 of 24

21 How to manage alarms To generate an alarm, activate a trigger that has been programmed to the CareAssist. The unit will enter alarm mode and the display will alternate between the activation type and the location of the trigger. The CareAssist will also beep and vibrate according to the alert settings (see alert settings). Activation type Location Additional information including the time the alarm was received and the trigger ID can also be accessed by pressing the down key. Acknowledging an alarm call When an alarm call is received, it can be acknowledged (cleared) by pressing select. Then press the right arrow key to highlight yes and press select again. The call will then be cleared and the call information stored in the CareAssist s memory (see alarm memory). Managing multiple alarm calls If multiple alarms are received, then it is possible to scroll to other alarms in the queue by using the left/rights keys. NOTE: The CareAssist supports up to 20 concurrent alarm calls. Page 21 of 24
22 Battery Information The unit contains a Lithium ION rechargeable battery. Before using for the first time, the unit should be charged for a full 24 hour period in order to fully charge the battery. During normal usage the battery will last up to 12 hours. Whenever the unit is discharged it is advisable to charge the unit for 2 hours in order to return the battery to full charge. To preserve battery power, the CareAssist screen will go blank after 50 seconds if the keypad is unlocked and after 15 seconds if the keypad is locked. The CareAssist should be disposed of according to current local regulations. The battery can be changed by removing the battery cover Accessories The following accessories are available from Tunstall: Accessory PC download lead (RS232) RS232 to USB converter Replacement battery Belt clip Antenna Micro USB charger Part Number D A S S D A S XD A For connecting to a pager system Pager 9000/69A Pager Transmitter 9000/61A Pager Transmitter Connection D A lead (Connects CareAssist to the Transmitter) Page 22 of 24
23 Notices Please refer to for information regarding the statutory approvals and notices for this product. Declaration of conformity We, Tunstall declare that this telecare equipment is in compliance with the essential requirements and other relevant provisions of the R&TTE Directive 1999/5/EC. Technical Details Size: 128 x 73 x 22mm (L x W x D) Weight: 148g Radio Frequency: MHz Radio Range: Up to 200 metres (line of sight) Battery backup time: Up to 12 hours Battery charge time: Up to 2 hours Programmable sensors: Up to 128 Number of locations/users: 139 locations (inc 64 custom locations) Memory capacity: Last 256 events Warranty: 2 years return to base Page 23 of 24

24 Our policy of continual development means that product specification and appearance may change without notice Tunstall Healthcare Group Ltd. TUNSTALL is a registered trademark Tunstall Healthcare Group Limited, Whitley Lodge, Whitley Bridge, Yorkshire DN14 0HR
Bridgemate Pager. Messaging System for Tournament Directors. Bridgemate II Pager Manual Bridge Systems BV
 Bridgemate Pager Messaging System for Tournament Directors Bridgemate II Pager Manual 2018 Bridge Systems BV Adapted for North American use Bridgemate.US, LLC 2018 Page 2 Bridgemate Pager Manual Contents
ivi Programming and installation Guide the intelligent pendant with auto fall detection Page 1
 ivi the intelligent pendant with auto fall detection Programming and installation Guide Page 1 Contents Introduction... 3 Wearing Options... 4 Alert Types... 4 Getting Started... 5 Default ivi settings...
Bridgemate Pager. Messaging system for tournament directors. Manual Bridge Systems BV
 Bridgemate Pager Messaging system for tournament directors Manual 2017 Bridge Systems BV Bridgemate Pager Manual Page 2 Contents Introduction... 3 Requirements... 3 How the pager system works... 3 Installing
USER GUIDE. for. EkoTek Pager
 USER GUIDE for EkoTek Pager 9261-8275 Issue 5 CONTENTS Introduction 3 Compliance 5 General user information 6 EkoTek system schematic 7 Switching on the pager 8 Status and warning messages 8 Using menus
SCOPE COMMUNICATIONS UK LTD
 User Manual EPOC-S Version 1 1/23 Copyright Scope Communications UK Ltd 2016 2/23 Table of Contents 1 Abbreviations...4 2 Product overview...5 2.1 EPOC-S... 5 2.2 cradle...5 3 keys...7 4 screen...7 4.1
MOVEMENT DETECTOR WITH INBUILT CAMERA USER GUIDE
 Easy to install wireless technology MOVEMENT DETECTOR WITH INBUILT CAMERA USER GUIDE www.my-serenity.ch What s in the Box? 1 x Wireless Movement Detector with inbuilt camera (also called PIRCAM or PIR
Finding your way around the manual. Contents. Chapter 1: Installing a transceiver. Chapter 2: Installing a pager. Chapter 3: Care and maintenance
 DESIGN FOR LIFE Contents Chapter 1: Installing a transceiver 5 Transceiver overview 6 Installing a SIM card 7 Connecting a transceiver to a mobile phone 8 Interpreting alarms on a mobile phone 9 Connecting
Altec Response Portable Alarm Unit. Installation Guide
 Altec Response Portable Alarm Unit Installation Guide Tynetec operates a policy of continual product improvement and reserves the right to modify the specification of its products. If any variation to
CF3000 Dealer Diagnostic Tool Instruction Manual
 CF3000 Dealer Diagnostic Tool Instruction Manual Table of Contents: About the CF3000......3 Important Precautions......4 Components....5 Charging the CF3000......7 Licensing the CF3000.......8 Updating
BT Call Blocking. Pull out and keep
 BT HALO USER GUIDE You need a Caller Display service from your network provider to use Call Blocking and other Caller Display enabled features. Charges may apply. Pull out and keep BT Call Blocking To
Installation and User guide. Safe Socket 36900/55 D C
 Installation and User guide Safe Socket 36900/55 D3607593C Introduction As Tunstall home units provide emergency support they must be able to raise an alarm on the telephone line even when another telephone
User s Manual. PNG125 Bluetooth Speakerphone R2
 User s Manual PNG125 Bluetooth Speakerphone 040712R2 Contents: 1 - Specification. 2 - Getting to know your PNG125. 3 - Overview. 4 - Recommended installation position. 5 - Using the car charger. 6 - Turning
Premium Phone with 100% nuisance call blocking and mobile sync Quick Set-up and User Guide
 Premium Phone with 100% nuisance call blocking and mobile sync Quick Set-up and User Guide Digital Cordless Phone with Answer Machine You ll need a Caller Display service from your network provider to
use. Best of all, the is affordable and will keep you in touch with those important to you.
 Congratulations on your purchase of our Pager. By incorporating some of the most advanced electronic paging technologies, the is reliable and easy to use. Best of all, the is affordable and will keep you
Please review this guide fully before use. For any questions not answered in this guide, please contact WARNING Battery warning
 Please review this guide fully before use. For any questions not answered in this guide, please contact Support@Komando.com WARNING THIS DEVICE SHOULD NOT BE ADJUSTED BY THE DRIVER WHILE DRIVING. Battery
Premises Pager System Glowster Pagers
 Pager and Charger Guide Part Number 321035A5 Premises Pager System Glowster Pagers Chargers Components Introduction Introduction: Congratulations on your purchase of a JTECH Paging System. Please take
Senior Phone BAS User Guide English
 Senior Phone BAS-24100 www.facebook.com/denverelectronics User Guide English ENG-1 Insert the SIM card: The SIM card contains your phone number, PIN code, links to operator services, contacts and SMS messages.
WiFi Data Logging Sensor Quick Start Guide.
 WiFi Data Logging Sensor Quick Start Guide www.filesthrutheair.com 5 easy steps to get started with your FilesThruTheAir sensor 1. Charge your sensor The sensor will arrive partly charged, but for optimum
Aid-Call. Are Pager/s switched on? Insert Battery. Wait 3-5secs then Press & Hold the GREEN button to switch on pager
 Touchsafe Pro Nurse Call J24/J25 Pager NOT paging/vibrating etc on Calls Are Pager/s switched on? Insert Battery Wait 3-5secs then Press & Hold the GREEN button to switch on pager Aid-Call will display
4 Message Paging System
 4 Message Paging System Thank you for choosing Pagertec Thank you for choosing Pagertec as your provider for your wireless paging requirements. We greatly appreciate your confidence in our products. At
smartentry Wireless Video Doorphone User Manual
 smartentry Wireless Video Doorphone User Manual Designed & Engineered Version 1.2 in the United Kingdom Contents Precautions... 3 1. Product Overview... 4 1.1. Product Features... 4 1.2. Contents... 4
TLKR T60/T61 OWNER'S MANUAL
 TLKR T60/T61 OWNER'S MANUAL RF ENERGY EXPOSURE AND PRODUCT SAFETY GUIDE FOR PORTABLE TWO-WAY RADIOS ATTENTION! Before using this product, read the RF Energy Exposure and Product Safety Guide that ships
EATON 5S 850/1200/1600
 www.eaton.com EATON 5S 850/1200/1600 Installation and user manual Packaging EATON 5S 1 2 3 5 Caution! l Before installing the Eaton 5S, read the booklet 3 containing the safety instructions to be respected.
EL-WiFi-TH -
 EL-WiFi-TH - www.pel.eu WiFi Temperature & Humidity Sensor -20 to +60 C (-4 to +140 F) temperature and 0 to 100% humidity measurement range Wirelessly stream and view data on the EasyLog Cloud, App or
User Manual. DE910/DE920/DE920 Ex Alphanumeric POCSAG pager
 User Manual DE910/DE920/DE920 Ex Alphanumeric POCSAG pager Contents Introduction................................................... 3 Switching on and off............................................. 7
B T H A L O U S E R G U I D E
 BT HALO USER GUIDE Welcome to your new BT Halo 2 The phone that keeps you connected. It s a useful bit of kit that lets you take your mobile calls through your home phone using Bluetooth. It blocks nuisance
Alcatel DECT 209 Wireless PBX System
 Alcatel DECT 209 Wireless PBX System USER GUIDE 1 User Guide Index Contents 4 Installation 5 The Base 5 The Handset 6 Charger 6 Battery Cover 7 Handset Keys 7 LCD Icons 8 Standby Mode 8 Receiving a Call
5.8 GHz Expansion Handset E580-2
 ATT-580-2CIB-d2.qxd 1/17/2004 6:06 PM Page 1 User Manual (Part 2) 5.8 GHz Expansion Handset E580-2 For use with AT&T models E5860 E5865 E5900B E5965C ATT-580-2CIB-d2.qxd 1/17/2004 6:06 PM Page 2 You must
Axxis Biometrics LLC. BioAxxis L113 Fingerprint Door Lock Programming Kit
 Axxis Biometrics LLC BioAxxis L113 Fingerprint Door Lock Programming Kit Revision 0.14 Dec 2005 Table of Contents 1. Introduction... 2 Product Overview... 2 Main Features... 2 Packing Lists... 3 2. Operation
USER S GUIDE. USA Mobility. Odyssey. Numeric Pager
 USER S GUIDE USA Mobility Odyssey Numeric Pager USA Mobility Odyssey Numeric Pager We thank you for making the ultimate choice to purchase the USA Mobility Odyssey Pager. Your USA Mobility Odyssey Pager
HE413002B INSTRUCTION MANUAL
 CORDLESS PHONE WITH DECT TECHNOLOGY Model Number: HE413002B INSTRUCTION MANUAL 1 1. Safety Warnings & Cautions - Keep Cordless DECT Phone away from liquid - Keep away from heat sources such as heaters
Limmex Emergency Watch
 Limmex Emergency Watch User manual in partnership with 1 ON02264 Limmex User Manual FP.indd 1 16/10/2014 14:01 Contents Overview Overview Triggering an Ending an Initiating a test p 3 The time is adjusted
Model: ECHO-5 LCD 2-way Upgrade Kit January 21, 2015 Operation & Installation Guide
 Model: ECHO-5 LCD 2-way Upgrade Kit January 21, 2015 Operation & Installation Guide Table Of Contents Installing & Programming The ECHO System...3 Controller Overview...4 The 2-Way Controller...4 System
How to activate your Tunstall Liberty 300 alarm. - self-installation guide
 How to activate your Tunstall Liberty 300 alarm - self-installation guide Contents Your Tunstall Liberty 300 alarm 3 How to self-install your Tunstall Liberty 300 alarm 5 Step 1 Situate your alarm 5 Step
Nokia ar
 2017-12-22 ar : " " " " wwwnokiacom/support 2017 HMD Global Oy 2 2 6 Keys and parts 6 7 10 Lock or unlock the keys 11 12 SIM 12 Explore your phone 12 Change the volume 16 Change your ring or message tone
SensorWATCH Basic RH - Wireless Setup Users Help Guide Part Number: A Revision: 1.1.0
 SensorWATCH Basic RH - Wireless Setup Users Help Guide Part Number: A53-7974-13-001 Revision: 1.1.0 Page 1 SensorWATCH Basic RH - Wireless SetupUsers Help Guide 1.1.0 Table of Contents 1.0 - Quick Setup
USER GUIDE. T52 two-way pager
 USER GUIDE T52 two-way pager TABLE OF CONTENTS Control Buttons...3 Getting Started...4 Turning Device On...5 Replacing Battery...5 Turning Device Off...6 Using the Main Menu...6 Backlight...7 Setting the
ViviCam T026 Digital Camera
 ViviCam T026 Digital Camera User Manual 2010 Sakar International, Inc. All rights reserved. Windows and the Windows logo are registered trademarks of Microsoft Corporation. All other trademarks are the
U S E R M A N UA L Long Range Systems, Inc.
 T9550 LCK Paging System Transmitter U S E R M A N UA L 08.14.08 Long Range Systems 800.437.4996 T9550LCK 1 2 3 4 5 6 7 8 9 10 11 12 0 PGR PROG ENTER Long Range Systems www.pager.net Usage, Installation,
Smart Stack Paging System
 Smart Stack Paging System Thank you for choosing Pagertec Thank you for choosing Pagertec as your provider for your wireless paging requirements. We greatly appreciate your confidence in our products.
USER & INSTALLATION GUIDE
 Reach Plus GSM At Home Alarm Unit Touch Personal Pendant USER & INSTALLATION GUIDE www.tynetec.co.uk SECTION 1 USER INSTRUCTIONS Section Topic Page 1.1 Unpacking the Reach Plus GSM At Home Alarm 3 1.2
USER MANUAL Mobeye CM-Guard CM2000
 USER MANUAL Mobeye CM-Guard CM2000 SW version 3.n Attention! Very important This user manual contains important guidelines for the installation and usage of the Mobeye device as described in this manual.
Quick Start Guide CJB1950ALAAB
 Quick Start Guide 1 CJB1950ALAAB www.sar-tick.com This product meets applicable national SAR limits of 2.0W/kg. The specific maximum SAR values can be found in the section of this user guide. When carrying
jcmtechnologies GSM-CARD/VGSM-CARD user s manual communications card
 jcmtechnologies user s manual GSM-CARD/VGSM-CARD communications card EN Contents Safety instructions 3 Introduction 4 General description 4 Introduction 6 Assembly 6 Configuration 7 Verification 8 LED
CRIBS Installation and User Guide
 CRIBS Installation and User Guide CRIBS Installation and User Guide Multiple Access Communications Ltd Delta House Southampton Science Park Southampton Hants, SO16 7NS UK MAC-UMAN-23-101-02 Page 2 of 12
Portable Data Collector Series Z-9000 ( Version 1.0) User s Manual ZEBEX INDUSTRIES INC.
 User s Manual ZEBEX INDUSTRIES INC.") Portable Data Collector Series Z-9000 ( Version 1.0) User s Manual ZEBEX INDUSTRIES INC. WWW.ZEBEX.COM Revision History Changes to the original manual are listed below: Version Date Description of Version
Portable Data Collector Series Z-9000 ( Version 1.0) User s Manual ZEBEX INDUSTRIES INC. WWW.ZEBEX.COM Revision History Changes to the original manual are listed below: Version Date Description of Version
39E Electronic Combination Lock SETUP INSTRUCTIONS
 The ComboGard Pro Lock has three states of operation: Factory Default, Manual Setup, and Active. ComboGard Pro locks are shipped from LA GARD in Factory Default state without Users or features enabled.
VNS2000 Server Software
 VNS2000 Server Software Automated Messaging Interface OEM & Developer Guide Version 1.02 Visiplex, Inc. 2010 VNS2000 Server Software Automated Messaging Interface Copyright The product described in this
Infrared Digital Scouting Camera. User s Manual
 Infrared Digital Scouting Camera User s Manual Quick Start 1. Load the fully charged AA batteries, 12(recommended), 8 or 4(emergency); or connect 6 V external power supply; 2. Insert the SD card (32GB
i-page User Guide Issue 1
 i-page User Guide 9261-8880 Issue 1 Compliance Information EU Territories - This product complies with the requirements of the EU Radio & Telecommunications Terminal Equipment Directive 99/5/EC. A complete
CONTENTS ... S-62 OVERVIEW POSITIONING GETTING STARTED... 6 HOW TO USE YOUR S OTHER FUNCTIONS TECHNICAL SPECIFICATIONS...
 Quick Start Guide CONTENTS WELCOME...................................... 2 S-62 OVERVIEW POSITIONING..................................................................... 3 4 CHARGING.......................................
SR200 GPS SPORTS WATCH. Keeping you one step ahead. User manual
 SR200 GPS SPORTS WATCH Keeping you one step ahead User manual Congratulations on purchasing your Snooper RUN SR200 Your new Snooper RUN SR200 is packed with loads of great features. It uses the latest
N e s s Radio Keypad RKP RADIO KEYPAD. Ness Radio Keypad Installation and Programming Manual
 N e s s Radio Keypad RKP RADIO KEYPAD Installer MANUAL Ness Radio Keypad Installation and Programming Manual REV 5.1 1 www.nesscorporation.com National Customer Service Centre Ph: 1300 551 991 customerservice@ness.com.au
DT-500W. GB Version 1
 DT-500W Version 1 Control 1 Key lock: The key lock function is used to prevent unintentional operation of the radio. Slide the lock switch to the lock position (left), the symbol will appear on the display.
User Manual Version 1.0
 User Manual Version 1.0 Getting to know your Up (forward) Down (backwards) Power On/Off Page key for scrolling between two mapping screens Please read the following information in this booklet to ensure
I-RK01 Radio Keypad. Installation Guide. 2 abc. 3 def. 4 ghi. 6 mno. 5 jkl. 8 tuv 9 wxyz. 7 pqrs
 Radio Keypad A 1 2 abc 3 def B 4 ghi 5 jkl 6 mno C 7 pqrs 8 tuv 9 wxyz D * 0 # Installation Guide Introduction The I-RK01 Radio Keypad is designed to work with the I-ON16 control unit. This unit allows
Operating Instructions KEYPAD. Compatible WIRELESS ACCESS CONTROL
 Operating Instructions KEYPAD Compatible WIRELESS ACCESS CONTROL Contents Technical specifications page 1 Approvals page 1 Changing the Master code page 2 Adding a User code page 3 Deleting a User code
Danfoss commercial compressors Secop compressors produced for Danfoss Bluetooth Gateway
 MAKING MODERN LIVING POSSIBLE Manual Danfoss commercial compressors Secop compressors produced for Danfoss Bluetooth Gateway www.danfoss.com 2 FRCC.ES.011.A1.02 CONTENTS Introduction... 4 General Description...4
Your PANDAH system is easy to use, simple to tailor, and provides the Owner with;
 Constant Reassurance PANDAH Arevolutionary personal alert system - designed for the personal safety and welfare of the Owner, direct contact with family and other Carers, and reassurance for everyone.
SigNET 200/300 User Guide
 SigNET 200/300 User Guide Warning: While this system is an advanced design integrated security system, it does not offer guaranteed protection against burglary, fire or other emergency. Any alarm system,
BT Freestyle 7110 ~ Issue 02 ~ Edition 01 ~ ~ User Guide BT FREESTYLE 7110
 User Guide BT FREESTYLE 7110 Welcome to your BT Freestyle 7110 digital cordless telephone Directory lets you store up to 50 names and numbers for easy dialling. Send and receive SMS text messages. Caller
HX2.0 Bluetooth Earpiece Kit. User Guide ENGLISH
 HX2.0 Bluetooth Earpiece Kit User Guide ENGLISH 2 HX2.0 Bluetooth Earpiece Kit User Guide Table of Contents PRECAUTIONS...3 End of Life Disposal...3 Quick Start Guide...4 Charging...4 Attaching the Bluetooth
CBTH3. Bluetooth Speakerphone User Guide
 Bluetooth Speakerphone User Guide CBTH3 1. Notice Before Using Thank you for purchasing the Cobra Bluetooth Visor Speakerphone CBTH3. Your Cobra CBTH3 is a Bluetooth wireless technology device that enables
Scanning with Simplicity
 Scanning with Simplicity SAVEO-RV2-Z12D Bluetooth SPP set-up guide * shown with Motorola MOTO G 6th Generation info@saveoscan.com www.saveoscan.com US PH: +1 720 257 7070 UK PH: +44 208 0998071 Contents
PIR Movement Sensor. Instruction Manual. Connect Series. Model No. JSJSLW107. Version 2
 PIR Movement Sensor Model No. JSJSLW107 Instruction Manual Connect Series www.lightwaverf.house Version 2 EC DECLARATION OF CONFORMITY Responsible Authority: LightwaveRF PLC, Innovation Campus Birmingham
SMARTLINE WIRELESS INTERFACE SYSTEM INSTALLATION MANUAL
 SMARTLINE WIRELESS INTERFACE SYSTEM INSTALLATION MANUAL SmartLine (Wireless) Installation Manual v1.9 1.Contents 2. Overview...2 Equipment List...2 Introduction... 2 Monitoring Software Compatibility...2
eurösec CPX Control Panel User Instructions
 eurösec CPX Control Panel User Instructions eurösec CPX User Manual Contents User Information... 2 Introduction... 3 User Code Types... 3 Setting The System... 4 Setting & Unsetting via Keyswitch... 4
SCS100. Single Channel System. User Manual. HM Electronics, Inc Whiptail Loop Carlsbad, CA USA
 SCS100 Single Channel System User Manual HM Electronics, Inc. 2848 Whiptail Loop Carlsbad, CA 92010 USA Phone: 1-800-848-4468 Fax: 858-552-0172 Website: www.hme.com Email: support@hme.com HME# 400G724
Synergy 4500 Issue 5 Edition User Guide BT SYNERGY 4500
 User Guide BT SYNERGY 4500 Welcome to your BT Synergy 4500 Digital Cordless Telephone Answering Machine 11 Minutes digital recording time. 255 Name and number phonebook to store all your contact numbers
Wireless Doorphone Intercom
 Security Made Smarter Wireless Doorphone Intercom EN INSTRUCTION MANUAL DOORBELL OVERVIEW MICROPHONE LEDS CAMERA LENS LIGHT SENSOR Detects ambient light and turns on the LEDS to provide clear color night
Installation and Operation Manual Back-UPS BR900G-RS
 Installation and Operation Manual Back-UPS BR900G-RS Inventory Safety bu001a This unit is intended for indoor use only. Do not operate this unit in direct sunlight, in contact with fluids, or where there
1 How do I download my PrimeTest 350 to PATGuard 2?... 2 How do I upload my PrimeTest 350 from. 4 How do I upload a logo to my tester for printing?...
 Table of Contents Page 1 How do I download my PrimeTest 350 to PATGuard 2?... 2 How do I upload my PrimeTest 350 from PATGuard 2?... 3 How to update the PrimeTest 350 Firmware.... 4 How do I upload a logo
Zartek. CDP-808 Two Button Wireless Intercom Installers Manual
 Zartek CDP-808 Two Button Wireless Intercom Installers Manual ZA-614 Two Button Gate station including power supply, relay board and external antenna ZA-613 Handsets with charger ZA-613-E Handsets with
Please read and retain these instructions for future reference v002: 14/03/17. Cradle, Charger, Instruction manual, Lithium-ion Battery 3.7 V d.c.
 Power Details: AC Charger Input voltage: 100-240V ~ 50/60Hz, 200mA Cradle Input Voltage: DC 5V, 500mA Cradle Output Voltage: DC 5V, 500mA Accessories: Cradle, Charger, Instruction manual, Lithium-ion Battery
HD. ED1, R&T Handset - User s Guide
 1407-3600-HD. ED1, R&T 75 50 26 66 Handset - User s Guide Congratulations on your new DECT handset The handset will provide you with the greatest possible degree of flexibility and mobility due to high
XCAM 2 PIR. Transmits colour video to a VCR as soon as it detects a movement! (Install by your front door to know who came calling)
") XCAM 2 PIR Transmits colour video to a VCR as soon as it detects a movement! (Install by your front door to know who came calling) Color camera with integrated movement detector and 2.4 GHz sender (XC14E,
XCAM 2 PIR Transmits colour video to a VCR as soon as it detects a movement! (Install by your front door to know who came calling) Color camera with integrated movement detector and 2.4 GHz sender (XC14E,
Setup Instructions. LA GARD ComboGard Pro 39E Electronic Lock
 Setup Instructions LA GARD ComboGard Pro 39E Electronic Lock P/N 731.018 Rev I - 05/2018 ComboGard Pro locks can either be configured using the ComboGard Pro Setup software or through a series of keypad
SP-1V SPEAKER USER GUIDE
 SP-1V SPEAKER USER GUIDE VERTU SP-1V BLUETOOTH TRAVEL SPEAKER USER GUIDE VERSION 1.0 English 1 2 English VERTU SP-1V BLUETOOTH TRAVEL SPEAKER Thank you for purchasing the Vertu SP-1V Bluetooth travel speaker.
Instructions for use of the handle. version: Intratone access control
 Instructions for use of the handle version: Intratone access control Presentation of the Intratone handle The Intratone handle is specially designed to fit secondary doors inside buildings: access to cellars,
COMET TRUE WIRELESS EARBUDS
 kitsound.co.uk Warning: To prevent possible hearing damage, do not listen at high volume levels for long periods. For your own safety, please be aware of your surroundings when using these earbuds. Not
Nokia Bluetooth Stereo Headset BH-221
 Nokia Bluetooth Stereo Headset BH-221 Issue 1.1 2 Introduction About your headset With the Nokia Bluetooth Stereo Headset BH-221, you can handle calls hands-free, enjoy your favourite music, and listen
BT Diverse 6250 Issue 2 Edition User Guide BT DIVERSE 6250
 User Guide BT DIVERSE 6250 Welcome to your BT Diverse 6250 digital cordless telephone answering machine Directory lets you store up to 100 names and numbers for easy dialling. Copy the whole directory
NMEA Reader NMR183. User Guide
 NMEA Reader NMR183 User Guide This Guide and the information contained therein is the property of AMI Marine (UK) Ltd. It must not be reproduced or otherwise disclosed without prior consent in writing
Flare. Smart Activity Tracker. Quick Start Guide. delvfire.com PHONE/TABLET REQUIREMENTS QUICK START GUIDE
 PHONE/TABLET REQUIREMENTS ios 7.1 & above Android 4.5 & above Bluetooth 4.0 QUICK START GUIDE Flare Smart Activity Tracker Quick Start Guide ID115U 1. Download the VeryFitPro App To set up your tracker
SMARTLINK COMPANION (Voice Pendant) (14 button) (3 button) USER MANUAL. SmartLink Companion User Manual Version 1.2
 (14 button) (3 button) USER MANUAL. SmartLink Companion User Manual Version 1.2") SMARTLINK COMPANION (Voice Pendant) SLC14 SLC3 (14 button) (3 button) USER MANUAL SmartLink Companion User Manual Version 1.2 Table of Contents 1. The SMARTLINK COMPANION 2 2. KIT CONTENTS 2 3. HOME SET-UP
SMARTLINK COMPANION (Voice Pendant) SLC14 SLC3 (14 button) (3 button) USER MANUAL SmartLink Companion User Manual Version 1.2 Table of Contents 1. The SMARTLINK COMPANION 2 2. KIT CONTENTS 2 3. HOME SET-UP
ATLAS 8 PLUSTM USER GUIDE LED & LCD. Rins 160 Issue 2
 ATLAS 8 PLUSTM USER GUIDE LED & LCD The equipment has been approved to CTR21for pan-european single terminal connection to the Public Switched Telephone Network (PSTN). However, due to differences between
2.4GHz Digital Wireless 7 LCD Surveillance Kit
 2.4GHz Digital Wireless 7 LCD Surveillance Kit User Manual QC-3762 Box Contents: 1 x 7 LCD Monitor 1 x Wireless Camera 2 x Mains Power Adaptors 1 x Camera Antenna 1 x Mounting Hardware Product Diagram:
Introduction. Getting Started. Step 1) Know your watch: GPS 2.0 Watch Instruction Manual. Push button location:
 Know your watch: GPS 2.0 Watch Instruction Manual. Push button location:") GPS 2.0 Watch Instruction Manual Introduction Thank you for purchasing the GPS watch. This GPS watch is packed with personal Training features like speed, trip time, laps, etc. GPS can display your current
GPS 2.0 Watch Instruction Manual Introduction Thank you for purchasing the GPS watch. This GPS watch is packed with personal Training features like speed, trip time, laps, etc. GPS can display your current
Manual Bluetooth Handsfree Speakerphone
 Manual Bluetooth Handsfree Speakerphone 2 To get the most out of your Sudio Vogue, make sure you read this owner s guide. The Sudio Vogue is designed for use with a Bluetooth enabled mobile phone, PDA
BORESCOPE INSTRUCTIONS INSPECTION CAMERA RANGE RBS100 RBS200 RBS300. Retain these instructions for future reference
 BORESCOPE INSPECTION CAMERA RANGE RBS100 RBS200 RBS300 INSTRUCTIONS Retain these instructions for future reference www.ringautomotive.co.uk 1 Instructions for Ring Automotive Borescope Inspection Camera
GuardTrak II. User s Manual. Securing your world PDF created with FinePrint pdffactory trial version
 GuardTrak II User s Manual Securing your world PRECAUTIONS Safety Do not start up any defective devices, but contact your GuardTrak supplier for advice. The PC docking station is intended for operation
Wireless keypad PRF-LCD-WRL
 1471 prf-lcd-wrl_en 02/17 Wireless keypad PRF-LCD-WRL SATEL sp. z o.o. ul. Budowlanych 66 80-298 Gdańsk POLAND tel. +48 58 320 94 00 www.satel.eu Firmware version 1.00 WARNINGS The device should be installed
Operating Instructions
 Operating Instructions Version 1.0 Title Issued by Tetra Messenger Device Rob Horton, Responder Manager Date Issued 25 th August 2014 1 Background 1.1 Tetra Messenger Devices have been selected as the
Emergency Dialer DIAL-ALERT MODEL: AD-433S.
 www.skylinkhome.com Emergency Dialer TM DIAL-ALERT MODEL: AD-433S 101A118 FEB, 2000 SKYLINK TECHNOLOGIES INC., 2213 Dunwin Drive, Mississauga, Ontario L5L 1X1 CANADA Tel : (905) 608-9223 (800) 304-1187
SNYPER-3G Spectrum. Quick Start Guide. Cellular Signal and Network Analyser. Rev 1.5
 SNYPER-3G Spectrum Cellular Signal and Network Analyser Quick Start Guide Rev 1.5 SNYPER-3G Spectrum Overview What s in the Box? As standard, the SNYPER-3G Spectrum comes with the following:* SNYPER-3G
User Manual SOLOgarde
 User Manual SOLOgarde Stand Alone Access Control System To Register your Product, Visit http://www.tdsi-product-registration.co.uk HELP US TO HELP YOU Every effort has been made to provide you with error
Nokia Bluetooth Headset BH-215. Issue 1
 Nokia Bluetooth Headset BH-215 4 5 6 7 3 3 1 2 8 9 10 11 12 Issue 1 13 14 DECLARATION OF CONFORMITY Hereby, NOKIA CORPORATION declares that this HS-129W product is in compliance with the essential requirements
Turn on: Press and hold the MFB for 1 second, The LED flashes blue and you will hear: Welcome to Avantree.
 NOTE: All accessories are also available on avantree.com 2. Connect Turn on: Press and hold the MFB for 1 second, The LED flashes blue and you will hear: Welcome to Avantree. Turn off: Press and hold the
Property of Monitronics Inc
 Enter Program (Locations 034 to 410) 1. Press Program Button on main panel 2. At keypad press 9 + Program Code (9 8 7 6 5) or 1. Power down with black switch on bottom left of panel 2. Power up while holding
Vercise DBS Remote Control 3 Handbook
 Vercise DBS Remote Control 3 Handbook 92104391-01 Content: 92116334 REV C CAUTION: Federal law restricts this device to sale, distribution and use by or on the order of a physician. Product Model Numbers