Retain Wallchart Manual
|
|
|
- Charla Mosley
- 6 years ago
- Views:
Transcription

1 M Retain Wallchart Manual
2 Contents Table of Contents 1 Introduction Introduction About Retain About Retain Manager Retain Wallchart User Interface...10 Sort, Selection & Fields etc Quick Selection...12 Page Navigation...13 Resource/Job Record Tips...14 Bookings Over Non-working Days...15 Field Descriptions...15 Booking Creation & Editing Adjusting Multiple Bookings Exporting Reports...21 Retain Settings Contact Details Scope of this userguide How to use this guide Conventions Where to get support 2 Overview of Retain Overview Resources Jobs Bookings Components Notebooks and data Notebook pages 3 Getting started Installation Initial set-up Starting Retain The Retain interface Switching into edit mode Changing the edit password Exiting Retain 4 Quick start 4.1 Quick wallchart Opening Retain Navigation Locating resources Booking bar tips Switching view Time Series Reports Configuration Toolbars Reports Quick bookings Making bookings Using the clipboard Manipulation Quick resources and jobs Add edit delete Sort
3 Contents Select Quick notebooks Notebooks and pages Saving and closing Opening Format booking bars Quick reports Viewing Printing Quick preferences Toolbars Quick reference Icons Wallchart view Calendar view Report view The wallchart view Wallchart view overview Working with the wallchart Working with wallchart overview Rotating the wallchart Changing the wallchart date scales Navigating around the wallchart Finding a particular resource or job The project view Wallchart display options Wallchart display options overview Gridlines and shading Customising date scale settings Week display Display diary Jargon Report page Preferences Using selection criteria Statutory holidays Booking display options Booking display options overview Booking bar formats Booking bar fields Booking bar tips Row label fields and layout 6 The calendar view The calendar view overview Rotating the calendar Changing the calendar date scales Moving between calendar records Navigating within the current record Calendar display options Making bookings in calendar Resources, jobs and components General principles Resources What are resources? The modify record dialog Adding resources Editing record details Deleting resources Hiding resources from view Jobs
4 Contents What are jobs Adding jobs Editing job details Hiding jobs from view Deleting jobs 7.4 Components What are components Adding components Editing component names Deleting components Job-specific components Sorting and selecting Sorting and selecting overview Changing the sort order Collapsing records Selecting marked records Special selections using date ranges Special selections overview The Special selections dialog Hiding the 'Special selections' dialog Deactivating special selections Clearing special selections Defining selection criteria Selection criteria overview The selection dialog Selection operators and conditions Cross-reference view selections Booking selection filters Removing selection filters Locking selection filters Importing and exporting selections Working with bookings Bookings overview Making a basic booking Make bookings overview Marking an area Entering the booking details Making multiple resource bookings Selecting a booking component Choosing a different booking colour Adding additional booking details Additional booking details overview Amending the start and end of a booking Making proportional bookings Changing the booking charge rate Entering actual times Assigning scenario names Viewing bookings Inspecting bookings Editing bookings Changing booking colours Duplicating bookings Splitting bookings Cutting bookings Using the colour key Deleting bookings Using the clipboard Using scenarios Rolling bookings forward Undo-ing a booking
5 Contents 10 Working with notebooks Notebooks overview Creating a new notebook Opening an existing notebook Saving the notebook Closing the notebook Importing/Exporting pages Notebook windows Working with notebook pages Notebook pages overview Adding a page Inserting a page Copying a page Deleting a page Navigating between pages Switching to wallchart or calendar... view 121 Setting the opening date The Retain Report Writer Report writer overview Creating a report Report fields Special report fields Report date range Report selection criteria Report sort orders and subtotals Report sort overview The report sort dialog Sort titles and outline Viewing the report Viewing report overview Expanding and collapsing report sections Report display options Recalculating the report Refreshing the report Report headers and footers Headers and footers overview Editing the header Editing the footer Hiding and showing the header Hiding and showing the footer Saving and exporting reports Printing 13.1 Printing overview 13.2 General rules for printing 13.3 Printing the current page Previewing the current page Printing wallcharts 13.5 Print configuration options Print configuration overview Print headers Print footers Print setup Customising the desktop 14.1 Retain preferences Retain preferences overview General preferences Bookings preferences
6 Contents Palette preferences Availability preferences General printing settings 14.2 Customising the toolbar Toolbar customising overview Toolbar types Adding and removing toolbar icons Reference Icon reference Hot-key reference Glossary Example reports 16 Support 16.1 Support services Index 161 6

7 Introduction Introduction Introduction Retain Wallchart Manual Retain Planner edition Retain Corporate edition Retain International Limited 7

8 Introduction 1.2 About Retain Retain Resource Planning System is a flexible planning tool for viewing and manipulating staff and job allocations through a user friendly graphical interface. It has been designed to resemble the manual "wallchart" booking system, but it is much more versatile than any manual booking system. 1.3 About Retain Manager Retain Manager is the administration module for Retain. Retain Manager is used for initial set up operations and for the subsequent administration of Retain data files. See the help provided with Retain Manager. Set up operations performed within Retain Manager include: defining display and calculation calendars (e.g. standard working days); defining colour codes and colour descriptions; setting up charge rate periods and charge rates; customising field properties and report field names; 8
9 Introduction defining statutory holidays. Administration functions include packing, purging and reindexing the data files and performing database consistency checks. 1.4 Retain Wallchart Retain Resource Planning System version 4 introduces the following enhancements: Retain Wallchart - New Features User Interface Toolbars Sort, Selection & Fields etc. Quick Selection Page Navigation Resource/Job Record Tips Bookings Over Non-working Days Field Descriptions Booking Creation & Editing Adjusting Multiple Bookings Reports Time Series Reports Exporting Reports Configuration Retain Settings (RDB) 9

10 Introduction User Interface Toolbars The design and colour scheme of user interface has been updated to take advantage of the latest display resolutions. Sort, Selection & Fields etc. The 'Sort, Selection, Fields etc.' setup dialog has been renamed to 'Setup Wallchart' and 'Setup Report' accordingly. It is now organised in a logical order: Select the fields you would like to view in the wallchart page or in a report: 10

11 Introduction Apply sort levels to fields to view your data in a logical order: Apply selections to view specific data or to hide data you do not want to see in the wallchart page or in the report. 11


12 Introduction Fields, sort order and selections can be applied to the resource view and in the job view. The relevant view is now selected from the dropdown box: You can also sort bookings by fields and apply selections to show or hide certain bookings. A separate 'booking' tab now exists for each view: Quick Selection To quickly select specific resources or jobs according to a sort field in a wallchart page, you can use the selection dropdown: 12
13 Introduction The quick selection dropdown allows you to select resource or job records according to the first sort field: Page Navigation Pages in notebooks are accessed from a drop-down list, conserving screen space. To the right of the dropdown are links providing quick access to the four most recently opened pages. 13


14 Introduction Resource/Job Record Tips A record tip appears displaying further information about a resource or job when the mouse pointer hovers on a record. The record tip appears when multiple fields are selected through the 'Sort, Selection & Fields etc.' dialog. 14


15 Introduction Bookings Over Non-working Days Non-working days are more pronounced on the wallchart even when bookings are made across public holidays. Field Descriptions Descriptions for fields can be defined in Retain Security. The corresponding field description will appear in the status bar of the respective dialog in Retain Wallchart. 15
16 Introduction 16


17 Introduction Booking Creation & Editing Adjusting Multiple Bookings Multiple bookings can be edited through the 'Alter bookings' dialog. As an example, if an employee leaves the company, the bookings assigned to that resource can be quickly moved to another resource using the 'Alter bookings' dialog. Select multiple bookings on the wallchart by holding down CTRL and clicking on each booking. Right-click on a highlighted booking and select 'Edit Bookings...'. 17
18 Introduction The 'Alter bookings' dialog will appear. You can select one or more of the following options in 'Alter bookings' to edit the bookings: Move to Resource - reassign the currently selected bookings to another resource: Move to Job - reassign the currently selected bookings to another jobs: 18

19 Introduction Move - move the bookings backwards or forwards by a number of days/weeks: Change length - increase or decrease the duration of the currently selected bookings by a number of days: Change grouped status - group or ungroup the currently selected bookings. 19


20 Introduction Reports Time Series Reports Time series reports can now be generated in Retain Wallchart report writer for comparative analysis of data. In the 'Setup Report' dialog, selecting multiple instances of a calculated field will generate a time series report for a defined date range. 20

21 Introduction Exporting Reports Reports can be exported directly into Microsoft Excel, copied to the clipboard or saved as a text (TXT) file. Export report - This will export the whole report including the header and footer. Export data - This will export data only from the report. Configuration Retain Settings Retain settings are now saved in the database. In previous editions, settings such as the length of your working day, colour codes, field properties were saved in the RDB file. These settings were changed through Retain Manager. This is no longer the case. In version 4, these settings are managed through the Retain Security application. 1.5 Contact Details retaininternational USA: UK: World: (toll free) USA fax: World fax: +44 (0) info@retaininternational.com Support: support@retaininternational.com Address: Retain International 33 Beaufort Court Admirals Way London E14 9XL United Kingdom 21
22 Introduction 1.6 Scope of this userguide Refer to this User Guide if you are using Retain to make bookings or to view staff plans or reports. This User Guide is for the following editions of Retain: Retain Standard Retain DBI Retain for Notes Retain Corporate Retain Enterprise Refer to the separate Retain Manager Guide if you are doing any of the following: installing Retain setting Retain up for the first time performing database administration jobs Retain Corporate and Retain Enterprise editions also have a Retain Security Manager guide and a Defaults Manager guide. How to use this guide This guide is aimed at new users of Retain, who want to take a step-by-step approach of learning to work with the software. Although manuals are often used for reference, it is assumed that people looking for a specific topic will use either the Help file available in the program, or the Index or Contents of this manual to find what they need. This leaves the structure of the manual open to be used as an approach to understanding the software. The manual starts with an overview of the different elements and structure of the program. This chapter is recommended for all users who have not used the program before. It is followed by a Quick Start guide that provides users with a working knowledge of the program's basic functionality. Often users will start using the program from here, returning to the manual when they run into unknown features. The later chapters exhaustively cover all of Retain's functionality, precisely describing all required actions, as would a reference manual. The steps followed in both the Quick Start guide and the rest of the manual is aimed at learning to work with the software directly, so that users become productive as soon as possible. It starts with the basic, often used features and covers all related topics before moving to other areas of the software's functionality. It is assumed that new users start with an existing database, either from their organisation or an example file, already containing resources and jobs. Those starting from scratch are advised to read 'Resources, jobs and components' chapter and create a number of resources and jobs before working through the 'Bookings' chapter. 1.7 Conventions The following conventions are used throughout this user guide: Data file types are referred to as follows: '.RTN' files are referred to as Retain Notebook files - The collection of data files that make up the database: Retain Standard: DBF files are referred to as data files Retain DBI: Linked via ADO to the database platforms Retain for Notes:.NSF files are referred to as data files Retain Corporate: Linked to the database via Retain Server application Retain Enterprise: Linked to the database via Retain Server application Details you must enter from the keyboard are in bold typeface, for example: Type A: as the run command. Menu options, options within dialog boxes and special terms are expressed in single quotes, for 22
23 Introduction example: Select Data Edit from the menus. Keyboard strokes are represented by capitals, for example: ENTER represents the Enter or carriage return key (also referred to as the RETURN key in some computer manuals). ESC represents the Escape key. F1, F2 etc., represent the function keys. SHIFT represents the Shift key. A plus sign between two key presses indicates a combination of key presses, for example: CTRL+S represents the action of holding down the Control key and pressing the S key. 1.8 Where to get support If you have any problems with Retain which you are unable to resolve through this user guide or through your local support contacts, please contact your support service provider. 23
24 Overview of Retain Overview of Retain Overview The Retain concept is all about managing a limited supply of resources in order to perform a defined population of jobs. The exact meaning of the terms 'resources' and 'jobs' varies from organisation to organisation, but the process of allocating resources to jobs in the form of 'bookings' is the same in each. Retain is primarily a resource management (as opposed to a project management) tool. It is therefore not greatly concerned with the individual activities being performed within each job. Nevertheless, bookings against a particular job can be usefully explained to indicate the nature of the specific booking. In Retain these sub-jobs are called 'components'. Retain allows you to maintain resource, job and component information. You are encouraged to record descriptive information about the jobs and resources, to help you in the resource planning process. You will need to balance the benefit to the planning process of recording this information in Retain with the time taken to capture and maintain this information. The resources, jobs and components data files can be updated on a continual basis throughout the resource management process. You can build these details up from scratch if you prefer, but it is usually helpful if the starting position can be established as a one-off exercise, before you start making bookings. You may want to consider transferring data automatically into Retain from other systems as part of this set-up exercise. There are certain issues you need to consider if you choose this route, as explained in the separate Manager Guide. Related topics: Resources Jobs Bookings Components Notebooks and data Notebook pages 2.2 Resources Retain uses the term 'resources' as a general description for the people or entities that can be applied to the process of completing a job. In many organisations the term 'resources' simply refers to staff. However, you can also use Retain to plan other types of resource, such as plant and machinery or training rooms. Indeed any item with a finite capacity that goes into the performance of a Retain 'job' can be considered a resource. 2.3 Jobs Retain uses the term 'job' as a general description for any project, product or assignment being planned using the Retain resource planning approach. What constitutes a job in your organisation depends on the nature of your business and what you consider to be the 'unit' level of your planning in Retain. Some organisations may set up a separate job for each individual project, while others may group together projects under a single 'umbrella' job, since that is the level at which they carry out planning work on Retain. Since every booking in Retain must be made against a job, jobs should also include non-project activities, such as vacation or sick leave or, in a manufacturing context, machine down-time. You can use analysis fields within the job data file to combine jobs for viewing and reporting purposes. For example, if you have several jobs relating to ABC plc then you might enter 'ABC' in one of the job fields against each relevant job. You can then filter on this field to obtain views and reports relating to the ABC plc group of jobs. You can also use components to analyse bookings within a job. Components are usually defined in general 24
25 Overview of Retain terms applicable to most jobs, such as 'planning', 'fieldwork' and 'reporting' (see Components for details). 2.4 Bookings In Retain each booking represents an allocation of an individual resource against a specific job, covering a defined date range and a measurable number of hours. In order to allocate resources to jobs in Retain you will need to make bookings. You can make bookings on either a wallchart page or a calendar page, although it is usually easier to make them on a wallchart page. Retain treats all allocations to the wallchart as 'bookings', regardless of their nature. This means that 'non-jobs', such as vacation and sick leave also need to be entered as bookings. You can use the fields associated with the job to treat bookings against these special types of jobs differently from other types (see Adding jobs). 2.5 Components In Retain components are sub-jobs, providing information regarding the nature of each booking made against a job. Components provide an element of project planning within Retain, since you can select a component for each booking you make and analyse the job into its component parts for reporting purposes. Components take the form of a simple pick-list of descriptive names, available for selection each time you make a booking. They are usually defined in general terms applicable to most jobs, such as 'planning', 'fieldwork' and 'reporting', although you can enter components relating to specific types of job if desired, such as 'stock take', 'branch visit', or 'security review', for example. The level at which you define components should correspond to that at which you make bookings in Retain. For example, if your planning on Retain takes the form of bookings of two or more weeks each, your components should not represent the half-day elements within each booking. 2.6 Notebooks and data Retain uses a database structure to store its data. Resources, jobs, components and bookings are all stored in separate tables that together form a set of data files. The files used by the Retain user program are called Retain Notebook ('.RTN' files). Notebook contain views of your Retain data. They allow you to display and edit your Retain data in various ways and to define report formats used by the Retain Report Writer. Each Notebook points to a particular set of data files. In most organisations, you are likely to have a single set of data files, but you may have several Notebookpointing to that data. In a network environment, your Retain data may be stored on a network drive and shared by many users. Each user may have their own Notebook files, or you may even have Notebook files which are shared by several users. If you intend to share Notebook files, the Notebook file is changed each time someone saves it. You may prefer to make shared Notebook files read only so that they cannot be amended. It is essential, when working with a Retain Notebook, to appreciate that the underlying data is the same across all pages, Notebook files and even users of that data. For example, if you amend a booking in a particular Notebook view the booking itself is amended, not just the view. Conversely, if you amend a view, for example by excluding certain jobs from the display, you affect the current view, but not the records currently hidden from that view. 25
26 Overview of Retain 2.7 Notebook pages A Notebook contains one or more notebook pages, each page representing a different view of your data. The characteristics of each Notebook page can be defined and maintained independently, using the various sort, selection and other display features in Retain. In this way you can create an almost unlimited number of views of your data. (See Working with notebook pages.) Each Notebook is of one of the following 3 types: Wallchart - the traditional wallchart view, with resources or jobs listed down the side of the page and a continuous time bar along the top. Each booking is represented as a coloured rectangular block on the wallchart. Calendar - a calendar view where each screen page represents the bookings for one individual resource or job. Time is represented in a calendar style grid and special navigation features allow you to move between resources or jobs. 26
27 Overview of Retain Report - report formats, which you can easily develop and quickly generate using the powerful Retain Report Writer. Being a view of the data, Notebook pages are dynamic. The best way of working is to create a separate Notebook page for each view of your data that you want to produce on a regular basis and work within these 27
28 Overview of Retain existing Notebook pages, rather than creating a separate page for every unique view. 28
29 Getting started Getting started Installation This guide assumes that the Retain has already been installed on your personal computer or network drive and is available to you. If it is not, either consult your local support contacts or refer to the separate Technical Implementation Guide for instructions on installing Retain. 3.2 Initial set-up After the software has been installed, the following initial set-up tasks should have been carried out prior to Retain going 'live' in your organisation: 1. For network versions, user names and access rights should be defined. 2. The Retain database file should be set up, including: specifying the location of your data files; setting up initial charge rates and charge periods; defining standard working diaries, for both calculation and display purposes; and setting up colours and defining colour conventions and alias names. For Retain Corporate please refer to Retain Manager help file. 3. The Retain Notebook files should be set up, including: amending the standard data file structures, if desired; clearing out any sample or test data; and loading resources and jobs from other applications, if desired. 29

30 Getting started 3.3 Starting Retain Select the Retain icon and double click on it, or press ENTER, to launch the program. After a second you will arrive at the main Retain screen: At this screen you can: create a new Retain Notebook; open an existing Retain Notebook; set up environment preferences; customise the toolbar; access the Retain help files; exit the software. You will usually want to start by creating or opening a Retain Notebook, which gives you access to your planning information. See Working with notebooks for guidance on creating or opening Notebook files. 30

31 Getting started 3.4 The Retain interface Once you have created or opened a Notebook, the Notebook will be displayed on the main screen: The screen is divided into the following areas: 1. The menu bar - Located at the top of the screen, this area provides access to all Retain functions, although you may prefer to use short-cuts where possible. 2. The toolbar - This is usually located immediately below the menu bar and contains several icon buttons. These buttons provide quick access to many of the commonly used features in Retain. 3. The page navigation toolbar - This toolbar consists of a drop-down which allows you to select pages within your existing Notebook. Links to the four most recently opened pages are also displayed to the right of the drop-down. A further drop-down is available which allows you to filter the records displayed on the wallchart according to the first sort criteria. 4. The Notebook area - The main part of the screen, this area contains one or more Retain Notebook files. Think of a Notebook as rather like a document or a spreadsheet; you can open a number of Notebook files in Retain and each will reside in its own window. You can manipulate each Notebook window in the usual way. The left-hand side of the Notebook gives you the list of all or selected resources or jobs and the right-hand side shows the bookings. 5. The status bar - Located at the foot of the screen, this area displays information about the current status, such as the name of the currently selected resource and the date range covered by the selected booking. It changes according to the context. For example, it will give you a hint at a menu or a tool bar item that you are pointing to. 31
32 Getting started 3.5 Switching into edit mode When you first enter Retain you will always be in read-only mode. In read-only mode you can move around your Retain Notebook in the normal way and produce reports, but you cannot change any data. To amend any data you have to be in 'Edit' mode. (In a network environment you will also need edit access rights, which should have been set up by your Retain administrator). To enter 'Edit' mode: 1. Select Edit Edit mode... from the menu. Short-cuts: Edit mode button or press CTRL+E. 2. Enter the edit password at the 'Password' dialog. The default password is 'abc' (case sensitive), but you can change this password (see Changing the edit password). 3. Click on OK or press ENTER to accept the password. On entering the correct password, the 'Toggle edit-mode' button will be depressed and the 'Make booking' button will become enabled. You can now make changes to the Retain data. If the edit icon is greyed out, it means you do not have the appropriate access rights to switch into edit mode. You will remain in 'Edit' mode until you choose to return to read-only mode. You may want to switch back to read-only mode at the end of an editing session, or if you move away from your PC, to make sure you do not make changes accidentally. Click on the 'Toggle edit-mode' button again. 3.6 Changing the edit password An edit password provides a simple access control mechanism for users of Retain who have full access to the system. (Access for network users is also controlled by user access rights, as defined by your Retain administrator). When you enter the correct password and enter 'edit mode' you can amend all the data held within Retain. When Retain is first installed the edit password is set to 'abc'. If you are relying on this password to control access to edit facilities in Retain then you should change this password at regular intervals. To change the edit password: 1. Select 'Edit', 'Change password' from the menus. 2. At the 'Password' dialog enter the current password, then choose 'OK'. 3. Enter your new password, then choose 'OK'. 4. Enter the new password again to confirm the initial entry, then choose 'OK'. Your new password will be saved and will be required whenever you switch into edit mode in the future. Each Retain user with full edit access rights should maintain their own edit password. Note that the password is case sensitive and is held locally. If you forget your password, contact your support provider. 32
33 Getting started 3.7 Exiting Retain To close the current notebook(s) and exit Retain entirely: Select 'File', 'Exit' from the menus. Short-cut: ALT+F4. You do not need to save changes to Retain data before exiting Retain, since changes are saved to disk as you go along. However, you may be prompted to save changes to your notebooks, such as new or modified notebook pages (see Working with notebooks). 33
34 Quick start Quick start Quick wallchart Opening Retain Locate the Retain icon on your workspace or launch from the Start Menu. Double click on it with your left mouse-button. You will see a blank screen from where you must create a new notebook or open an existing one. Notebooks Retain has been set up to resemble a personal notebook consisting of notebook pages that constitute a set of personalised views of one set of Retain data files. Each notebook can contain one or more notebook pages, each of which represent different views of the data (you can add up to forty notebook pages). Altering resource, job or booking information within a notebook will change the information held in the underlying data files directly. Altering selection criteria, sort order or fields displayed only affects the notebook you are currently working with. By saving a notebook you will be saving these settings. The.RDB file Each notebook must point to a particular database, the location and configuration of which is defined via a Retain database (.RDB) file. To create a new notebook, you must open this.rdb file e.g. Retain.rdb. Creating a notebook Click on 'File' -> 'New'. From the Select Data Source dialog box, specify the location of the file e.g. C:\RETAIN36\EXAMPLES\AUDIT\DEMO.RDB and click on 'OK'. A basic notebook is opened which can be set up to your preferences. The first notebook page is set up as a Wallchart view. Wallchart view The wallchart view has resources listed on the left hand side. The time frame is shown at the top of the screen. Bookings are shown in the main part of the screen. Navigation Menu options can be accessed from any part of the screen by right-clicking once with your mouse. The contents of the drop down menus vary depending on which part of the wallchart the mouse cursor is positioned in. There are two ways in which you can navigate around the wallchart: Scroll bars The The The The scroll bars at the right of the wallchart enable you to scroll up and down the staff members. scroll bars at the bottom of the wallchart enable you to move backwards and forwards through time. single arrow moves single days in time (can be more according to the grid units set). double arrows move whole screens in time. Transparent frame The transparent rectangular frame at the bottom of the wallchart can be grabbed and moved, or extended/condensed. The time period displayed on the wallchart corresponds to that contained within the rectangle. Clicking on the 'Go To' button at the bottom left hand side of the screen brings you back to the present date or to any day of your choice. To change the time scale displayed on the wallchart, right-click anywhere on the booking area of the wallchart. Choose the 'Zoom...' option. Click on the date scale by which you want to view the data. Click on 'OK'. Otherwise, you can use the smart icons for years, months, weeks, days and hours on your toolbar. 34

35 Quick start Locating resources Start typing the resource name to locate that staff member on the wallchart view (the same procedure can be used to locate jobs in the Job View). A pick list appears from which you can select the required resource. Double-click on a resource to view resource details. If the wallchart is sorted by a field other than resource name, then the first of these fields, if there is more than one, will also be shown, allowing users to navigate via that attribute. 35
36 Quick start Booking bar tips Booking bar tips are displayed when you hover over a booking with the mouse arrow. These tips can be changed and added to suit the individual user. Switching view Right click anywhere within the wallchart v iew and choose Job View. Job View shows jobs down the left hand side of the screen and the related bookings on the wallchart. Right click anywhere in the wallchart view and choose Resource View to change back to the resource view. 4.2 Quick bookings Making bookings Switching to edit mode You must be in edit mode in order to make any changes to Retain data files. This includes amending resource and job details, bookings and components. From the Edit menu, choose Edit Mode. Key in the password (default 'abc'). You can now make a booking. Marking the wallchart Mark the time period on the wallchart for which you wish to make a booking to book a staff member as follows: On the line next to the resource, left-click on the start date for the booking and drag the mouse until you reach the end date. The booking period should now be highlighted on the wallchart. Right-click anywhere on the wallchart and from the drop-down menu choose 'Make Booking'. Booking dialog Multiple bookings can be made in the Make Booking dialog box by adding staff from to the Resources box. Select a job name from the Job box. Select an assignment (Enterprise only) or a component (components are sub-jobs, providing information regarding the nature of each booking made against a job. Usually defined in general terms applicable to most jobs, such as 'Reporting, 'Fieldwork' etc). Click on the 'Show More' button. Here you can alter the start and end date for the booking, start and end times, enter actual booking time or the percentage of time the booking takes up. Changing the start/end of a booking on wallchart Position the mouse over the start or end of the booking, until the cursor changes to a double-headed arrow. Left-click and drag the end of the booking to the new start/end date. Moving bookings To move bookings on the wallchart, left-click on the booking. Drag the booking to the new location. Release mouse button. Copying a booking Press the <CTRL> key while left-clicking and dragging the booking. 36
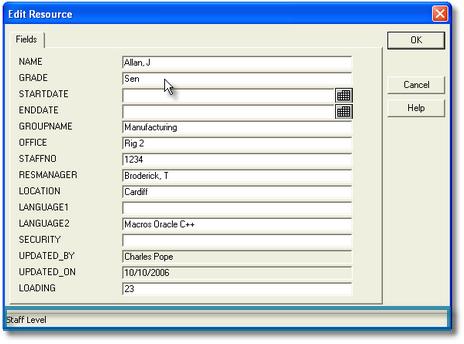
37 Quick start Using the clipboard Clipboard is useful when you want to move/copy bookings beyond the currently displayed area of the wallchart. Located at top left hand side of wallchart view. The clipboard is similar to the normal clipboard facility provided by other Windows applications as you can paste from the clipboard. However: A number of bookings can be stored at any one time; Clipboard only deals with bookings; Each notebook page has its own clipboard - the bookings in one page's clipboard are unavailable in any other pages' clipboard. Cutting bookings Left-click on the booking to select it. Holding down the left mouse button, drag it to the clipboard (at top left hand side of screen). Copying bookings This enables you to copy bookings between resources. To copy a booking to the clipboard, hold down the <CTRL> key while you left-click and drag the booking to the clipboard. In addition to moving/copying bookings to the clipboard, you can move/copy bookings in the same manner from the clipboard. Moving up/down clipboard When the clipboard fills up, arrow keys appear to the right to enable you to scroll up and down the bookings on the clipboard. Manipulation Selecting multiple bookings To select a number of bookings in order to move or copy them to another area on the wallchart or the clipboard, hold down the <CTRL> key while you left-click on the required bookings to select them. Copying or moving bookings To move the selected bookings drag all the highlighted bookings to the new destination. To copy the selected bookings hold down the <CTRL> key while dragging all the highlighted bookings to the new destination. Deleting bookings To delete a booking (not using the clipboard), select the booking by left clicking once on it and click on the 'Delete Booking' smart icon. Choose the 'Delete Booking' option. Click on 'Yes' to confirm the deletion. 4.3 Quick resources and jobs Add edit delete Switching to edit mode Ensure you are in edit mode before attempting to alter record details. You can tell whether you are in edit mode by checking the 'Edit' menu, there should be a tick next to the 'Edit Mode' option. Adding a resource/job Right-click over the resource column at the left hand side of the screen. Choose the 'Modify Resources' option, and click on the 'New' button. Input the staff details in the Add Resource dialogue box. Click on the 'Add' button. Click on the 'Close' button. Editing a resource/job Right-click over the resource column at the left hand side of the screen. Choose the 'Modify Resources' option. 37
38 Quick start Locate the staff member you wish to edit in the pick list provided by type-ahead. Click on the 'Edit' button. Edit the staff member details in the Edit Resource dialogue box. Click on the 'OK' button. Click on the 'Close' button in the 'Modify Resource' box. Deleting a resource/job Right-click over the resource column at the left hand side of the screen. Choose the 'Modify Resources' option. Locate the staff member you wish to delete. Click on the 'Delete' button. When asked if you are sure you wish to delete this resource, click on 'OK', or cancel if you wish to keep the resource. Click on the 'Close' button. Sort Why sort? Suppose you wish to sort your staff members alphabetically by grade or office... Sorting Right-click over the resource column at the left hand side of the screen. Choose the 'Sort...' option. Ensure a radio button is next to 'Resource' if you wish to sort by staff member in the Resource screen. You can choose to sort by a number of different resource fields, as listed in the Database Fields box. Highlight the field(s) by which you wish to sort (by clicking on the field) and click on the 'Add' button to add it to the Sort Criteria box. Sort by grade and name You can choose whether to sort in ascending or descending order by clicking on the appropriate radio button in the 'Direction' box. Click on the 'OK' button. Don't forget to clear the sort when you have finished. Select Why select? Suppose you want to view only resources of Grade 'Manager'...or you want a view consisting only of staff members in the London Group......or you want to see all the jobs for which Alice Jardine is the manager... Use one of the selection options. You can sort and select using any fields in your Retain database. You can sort the resource view by any resource field and the job view by any job field. Resources can be sorted independently from the jobs and each notebook page can be sorted differently. This means that you can create a number of different views of the booking information, simply by setting a different sort order in each page. Selecting Marked records You can decide only to view randomly selected resources or jobs. Holding down the <CTRL> key, click with your left mouse button on the resources you want in your selection (from the resource column on the left hand side of the screen). Right-click over the resource column and choose the 'Select marked records' option. To clear this selection, right-click over the resource column and choose the 'Clear entire selection' option. Selecting Availability To show all resources that are available during a particular time period... Mark the time period anywhere on the wallchart (as if you were going to make a booking). Right-click anywhere on the wallchart. Choose 'Special Selections', 'Add'. From the 'Special Selections' dialogue box, you can edit the start and end date of the preferred time frame. Enter an availability percentage (the default is 80%). Click on the 'OK' button. To clear the availability selection, right-click over the resource column and choose the 'Special Selections', 'Clear' option. 38
39 Quick start Using selection criteria Right-click over the resource column at the left hand side of the screen. You can input many different selection criteria in the Selection Dialogue box. Click on the 'Add' button to add an expression to the Selection Criteria box. The following operators are used to build expressions: AND selects all records which satisfy the expression. This is the basic selection operator to which you can add other expressions. For instance, if you wish to view resources with grades equal to Manager then the expression would be 'AND Resource.Grade = Man'. SUB excludes all records which satisfy the expression (subtract). 'SUB Resource.Grade = Man' will show a view with no members of grade Manager. ADD adds records which satisfy the expression. Multiple selection criteria using the ADD operator will select records which satisfy any of the criteria, as opposed to using the AND operator, which will only return records matching all the criteria. To clear this selection, right-click over the resource region and choose the 'Clear entire selection' option. 4.4 Quick notebooks Notebooks and pages You can add up to forty notebook 'pages' to your notebook, each page containing a different view of your data. You can add a wallchart, calendar or report page to your notebook. The characteristics of each notebook page can be defined and maintained independently using the various display features in Retain. Adding a basic wallchart page To add a new notebook page, left-click on the 'Add Page' smart icon in the tool bar. In the Add Page dialog box, choose what type the new page will be (Wallchart, Calendar or Report) and input a page name in the Page Name box then click on 'OK'. A new page will be added to your notebook. Select the new page from the dropdown box. The new page sort and selection default to all resources sorted by name. Once in your new notebook page, use the appropriate sort and selection criteria to arrange the view. Adding a calendar page The calendar view shows bookings for one individual resource or job. Time is represented in a calendar style grid and special navigation features allow you to move between resources or jobs. To add a calendar page, click on the radio button next to Calendar in the Add Page dialog box and key in the page name then click on 'OK'. Note, you must select which resource you want to view using the selection criteria (Data, Selection). Adding a report page Reports gives you a summary of jobs against resources for a specific selection. To add a report page, click on the radio button next to Report in the Add Page dialog box and key in the page name then click on 'OK'. In the Sort, Selection, Fields etc. dialog box select the fields you want to show in the report and choose a date range in Date tab. Deleting a notebook page To delete a page, select the page from the dropdown box. Click on the 'Delete Page' smart icon. Click on 'OK' to confirm deletion of active page. 39
40 Quick start Saving and closing Saving your notebook From the 'File' menu, choose 'Save as'. In the 'Drives' box, select the drive and then the directory to which you wish to save your notebook. Type in a file name for your notebook (notebookname.rtn). Click on the 'OK' button. Note, by doing so you will preserve the view settings such as the sort order or selection of fields of the data in this notebook. The actual data such as bookings would have been saved into database while you edit it on the wallchart. Closing your notebook From the 'File' menu, choose 'Close'. If you forget to save your notebook, you will be prompted to save when you go to exit the notebook or Retain. Opening Opening a notebook When you open a notebook previously saved, the underlying data displayed is the current data. The views you set up before closing the notebook are saved. To open a notebook, click on the 'Open' smart icon in the tool bar. From the Open dialog box, specify the location of the notebook. Input drive, directory and filename details and click on 'OK'. Format booking bars Bookings are shown as colourful bars on the wallchart. You can customise the following features of booking bars. Booking bar height To change the height of the booking bars on the wallchart, select and right-click over a booking. From the drop-down menu, choose 'Booking Bar', 'Depth'. Choose the bar size you want. You may manually set the size of the booking bars, using the arrows to the left of the text boxes. You can also determine in this dialogue box whether to display constant size booking bars or proportional booking bars by clicking the radio button next to the preferred option. Booking bar layout To change the layout of your booking bars, right-click over a highlighted booking bar and choose 'Booking Bar', 'Layout'. Here you can choose whether to show bookings separate or stacked, the look of the bar (Plain, Embossed or Recessed) and show continuation arrows when the bookings go beyond the edge of the currently visible screen. Booking bar tips fields To change the details displayed on the booking bars, right-click over a highlighted booking bar and choose 'Booking Bar', 'Bar Fields...' From here you can add or delete fields in the booking bar. You can change the font by choosing 'Bar font'. Booking bar tips fields To change the details displayed on the booking bar tips boxes, right-click over a highlighted booking bar and choose 'Booking Bar', 'Tips Fields...' From here you can add or delete fields in the tips box. You can change the font by choosing 'Tip font'. 40
41 Quick start 4.5 Quick reports Report page Report page Add a report page to your notebook following the steps detailed in the 'Adding a New Page' section, with a radio button next to the 'Report' option. Report fields Fields are displayed on each row of the report. In the Fields screen, input the fields you want to display in your report by double-clicking on the fields in the Database Fields list, or clicking and dragging them to the Column fields box. You can select any of the fields from the resource, job and bookings tables, plus a number of special report fields (calculated fields). Report sort criteria Click on the 'Sort...' tab to sort the records listed in your report (see sort). Report selection criteria Click on the 'Selection...' tab and input selection criteria to choose the records for your report. Report date selection You must specify the time period over which you want your report to be generated. Click on the 'Date' tab. Click in the Date Type box and choose the time range you require. If you want to input a manual date range, choose the 'Manual Date Range' option at the top the Date Type pick list and use the calendar buttons to select a start and end date for your report. When you are satisfied with your report specifications, click on the 'OK' button. Viewing Viewing your report page Click on the new report page to v iew your report. If you have entered sort criteria, the report will be grouped under sort headings. To view all records' details, right-click once anywhere within the main report area and choose the 'Open All Detail' option. Report header/footer To edit the report header and footer, right-click once anywhere over the Title area and choose the 'Edit Header...' option. The Header/Footer Configuration dialogue box will open, from where you can edit either the header or the footer. You may edit the following header details: title, sub-title, date of report generation, page number, date range covered by report, surrounding frame, column titles. You can also choose whether or not to show a header at all. You can edit the following footer details: footnote, date of report generation, page number, surrounding frame, fonts for footer elements. Click on the Footer tab to edit footer details. When you have finished, click on the 'OK' button. 41
42 Quick start Printing Print preview It is always a good idea to v iew the screen before printing it. From the 'File' menu, choose 'Print Preview...' When you have finished viewing the page, click on 'Close'. Printing To print the active page, from the 'File' menu, choose 'Print'. A dialogue box is opened from which you can define your margins, header and footer information and the date range you want displayed in your printout. Edit header and footer information by clicking on the relevant tab (similar to header and footer for reports). 4.6 Quick preferences Preferences Retain preferences are the default settings which will be applied in various areas of the wallchart application. You can set preferences in several areas: Setting preferences From the 'File' menu, choose 'Preferences'. Preference options General: These options will apply to all your Retain notebooks. For example, you can choose whether or not to display booking bar tips and whether you can make block bookings. Bookings: These options will apply to bookings. For example, whether to display field names on booking bars and booking tips. Palette: These options will apply to the priority colours palette. For example, the number of colours you want to display on the colour key. Av ailability: These options will apply to availability selections. For example, the default availability percentage. Printing: These options will apply to printing. For example, whether or not the printing should be in colour. Toolbars Like most windows applications, Retain provides a 'toolbar', a panel of icon buttons usually located at the top of the screen. These icons provide quick access to most of the commonly used features in Retain. You may wish to customise the toolbar to include the options you use most frequently. Customising your toolbar From the 'View' menu, choose 'Toolbar options'. To remove an icon from your current toolbar, left-click on the offending icon (in the icon list on the right) and drag to the Available Buttons list on the left. To add an icon to your current toolbar, left-click and drag the icon from the Available Buttons list to the toolbar. To add spaces between smart icons on your toolbar, click on the icon in your toolbar before which you want to insert a space and click on the 'Separator' button. Buttons can be rearranged by left-clicking and dragging buttons to new positions. When you are finished, click on the 'OK' button. 42
43 Quick start 4.7 Quick reference Jargon Retain notebook Notebooks contain views settings of your Retain data. They allow you to display your Retain wallchart in various ways and to define report formats used by the Retain Report writer. Notebook page Notebooks can hold up to forty notebook pages, each containing different views of the underlying data. Wallchart This is the traditional wallchart view, with resources or jobs listed down the side of the page and a continuous time bar along the top. Each booking is represented as a coloured rectangular block on the wallchart. Calendar A calendar view shows bookings for one individual resource or job, where time is represented in a calendar style grid. Project view The project view separates bookings against a resource or job into a separate row for a specified sub-field. Menu Bar Located at the top of the screen, this area provides access to all Retain functions, although you may prefer to use short-cuts where possible. Toolbar Usually located immediately below the menu bar and contains several icon buttons which provide quick access to the commonly used features in Retain. Scroll bars Scroll bars located at the right hand side of the screen enable users to move up and down resources, while those at the bottom of the screen move backwards and forwards through time. Status bar This is located at the foot of the screen and displays information about the current status, for example, name of currently selected resource and the date range covered by the selected booking. Drop-down menus Right-clicking anywhere on the screen will produce a drop-down menu relevant to the area of the screen you happen to be in at the time. Job colour The colour code of a job defines the default colour of bookings made against that job. The colour determines what type of job it is. Analysis The analysis field can be used to pick up default charge rates based on different job types, usually in combination with the resource grade. For example, you might enter 'C' for chargeable jobs, 'N' for non-chargeable jobs and 'U' for unavailable jobs. Recovery Used for calculated fields in reports. When inputting job details, the recovery field is the value the scale cost must be multiplied by to obtain the recovery rate... which is the fee expected rather than the standard rate for the job. Component In Retain components are sub-jobs, providing information regarding the nature of each booking made against a job. Components provide an element of project planning within Retain, since you can select a component for each booking you make and analyse the job into its component parts for reporting purposes. Components are usually defined in general terms applicable to most jobs, such as 'planning', 'fieldwork' and 'reporting'. Scenario Scenarios give users control over tentative bookings. Bookings assigned to a scenario are displayed with 43
44 Quick start a dotted line. Scenario bookings can be deleted or confirmed as a group. Icons Create new notebook Open existing notebook Help! Wallchart view - Edit mode on/off Wallchart view - Switch between resource/job view Wallchart view - Add new notebook page Wallchart view - Delete active notebook page Wallchart view - Change active notebook page name Wallchart view - Make a booking Wallchart view - Edit selected booking Wallchart view - Delete selected booking Wallchart view - Copy selected booking to clipboard Wallchart view - Time scale, years Wallchart view - Time scale, months Wallchart view - Time scale, weeks Wallchart view - Time scale, days Wallchart view - Time scale, hours Wallchart view - Change sort order Wallchart view - Change resource/job selection Wallchart view - Edit page fields Wallchart view - Turn wallchart grid on/off Print preview - Send to printer Print preview - Edit print header Print preview - Edit print footer Reports - Show/don't show report header Reports - Show/don't show report footer Reports - Edit report header Reports - Edit report footer Reports - Show more record detail Reports - Open all record details Reports - Show less record detail Reports - Close all record details Calendar view - Show previous record Calendar view - Show next record 44
45 Quick start Tips on the smart icon options can be obtained by hovering over the smart icon with your mouse. More information is available in the reference chapter on icons and hot-keys. Wallchart view 45
46 Quick start Calendar view 46
47 Quick start Report view 47

48 The wallchart view The wallchart view Wallchart view overview Wallchart pages in Retain look similar to a traditional "wallchart" booking system. They have a date scale along the top and a list of resources down the left-hand side, with a number of coloured bars on the grid representing bookings or commitments to work. Here is an example: Of course, you can do much more with a Retain wallchart than with any manual wallchart. For example, you can: rotate the view to see bookings against jobs instead of resources; sort the resources (or jobs) in different ways and filter out unwanted records from your current view of the wallchart; manipulate the scale of the booking bars and of the wallchart as a whole, and change which information is displayed on each booking bar; select several bookings at the same time and make changes to all the selected bookings at once; examine additional information about the resources and jobs listed on the wallchart; add statutory holidays and have bookings incorporate their effects. Features explained in this section include: 1. Working with the wallchart - common features for regular use in the wallchart, such as navigating and zooming; 2. Row label fields and layout - customising the resource or job information displayed for rows; 3. Wallchart display options - options for setting up the display of the wallchart, such as date scales and diaries; 48
49 The wallchart view Statutory holidays - their use within the wallchart; 5. Booking display options - define format, fields and tips of bookings in the wallchart. Working with the wallchart Working with wallchart overview A number of features relating to the wallchart view are used regularly in the common process of planning resources, as opposed to display options which are likely to be set up once and for all. These features include rotating the wallchart, changing the wallchart date scales, navigating around the wallchart, finding a particular resource or job and using the project view. Rotating the wallchart The wallchart page can be displayed in two basic views: Resource view - lists resources down the left hand side. Bookings represent jobs allocated against the resource. Job view - lists the jobs down the left hand side. Bookings represent resources booked to the displayed job. To switch between these two views: 1. Click on a booking, if desired. This fixes the axis on which the view will be rotated, so that the selected booking will be displayed as part of the rotated view. 2. Select 'View, Rotate view' from the menu. Short-cuts: The Rotate icon or press CTRL+R. Alternatively right-click anywhere over the booking grid and select either 'Job view' or 'Resource view' as appropriate. Within these two basic views, there are numerous further options which allow you to manipulate the wallchart page on screen. See Display options and Row label fields and layout. Changing the wallchart date scales The wallchart can be displayed using a very wide range of date scales. You can work in units as small as fractions of an hour and as large as months or even years. You can amend the date scales at any time. This does not affect any of the underlying data and you can switch between date scales as often as you like. To select one of the standard date scales do one of the following: Select 'View', 'Zoom' from the menus and then choose a view. Click on one of the pre-defined date scale icons. The date scale icons. The standard date scales are displayed approximately as follows: Year Month Week 3 years displayed. Each cell represents 1 month. 3 months displayed. Each cell represents 1 day. 3 weeks displayed. Each cell represents 1 day. 49

50 The wallchart view Day Hour 3 days displayed. Each cell represents 1 hour. 3 hours displayed. Each cell represents 5 minutes. You might use the 'year' or 'month' view to display long-term planning overviews and the 'week' and 'day' views for short-term planning. You are unlikely to need the 'hour' view in most cases. You can customise the settings associated with these standard date ranges. You can also manipulate the date ranges manually by re-sizing the 'custom date scale' bar below the wallchart grid. To do this: 1. Move the mouse pointer over one end of the custom date scale bar, so that the pointer changes to a double-headed arrow ' '. 2. Click the left mouse button, holding the button down. 3. Move the mouse pointer horizontally to a new position in the date panel. 'Stretch' the custom date scale bar to increase the date range covered, or 'shrink' it to reduce the date range covered. 4. Release the left mouse button. Repeat steps 1 to 4 as desired until you obtain the date scale you require. The 'Go To' button located at the bottom left hand corner of the wallchart can be used to navigate straight to a specific date. Navigating around the wallchart There are lots of techniques you can use in order to navigate around the wallchart. These include: The date scale below the wallchart grid. The transparent rectangle in the centre section of this date scale can be 'grabbed' and moved to a new position. The 'Go To' button. This allows you to select a date to display. As the current date is the default value, clicking 'OK' moves you back to today's date (indicated by a coloured line). The single and double arrow buttons either side of the date scale. These move you forwards and backwards in time along the wallchart. The scroll bar on the right hand side of the screen. This allows you to scroll through the list of resource or job records listed in the left hand column of the screen. Cursor keys. Once you have clicked on the wallchart grid you can use the cursor keys to move between the cells on the grid. Changing the date scales. Increasing the date range covered by the wallchart displays more information on the grid. You can then click on the wallchart to move to a different date. 50
 in the wallchart is usually as follows: 1. Type the first letter of the name. The 'Select record' dialog will appear.")
51 The wallchart view Finding a particular resource or job You can scroll up and down the resource (or job) list on the wallchart to find a particular record. However, a quicker way to find a particular resource (or job, in the job view) in the wallchart is usually as follows: 1. Type the first letter of the name. The 'Select record' dialog will appear. Alternative: 'Select record' icon. 2. At the 'Select record' dialog, type or select the name you wish to go to. 3. Click on 'OK' to go to the selected record, or 'Close' to cancel without going to the selected record. Short-cut: Double-click on the name to go to that record. The cursor will jump straight to the selected record on the wallchart. The project view The project view separates bookings into sub-fields. Often the project view is used to display bookings against a resource into a separate row for each job, as in the example. There are many ways of using the project view. Some of the more frequently used views have bookings separated into rows: In resource view, each resource will have a separate row for: each job; each job manager. 51
52 The wallchart view In job view, each job will have a separate row for: each resource booked to the job; each grade of resource booked to the job. The project view can be useful when you have several bookings on the screen and you want to separate them out visibly on screen. To turn the project view on or off: Select 'View', 'Project view' from the menus. Short-cuts: Project view icon or press CTRL+J. Repeat the process to return the view to its previous state. 5.3 Wallchart display options Wallchart display options overview Retain provides various display options to allow you to view wallchart and calendar pages in different ways. Display options include: grid lines - turn the vertical grid lines on or off; date scale settings - change standard date settings, grid lines and shading for a more convenient display; display diary - change the displayed time per day and days per week; week display - change how weeks are displayed in the date bar. The current display options will also be reflected whenever you print out a wallchart or calendar page. All of these display options are specific to one particular page in a notebook and cannot be overridden globally for all pages. If you wish to maintain consistent settings across all pages, then create one page with the desired settings and copy this page to establish the basic settings. To amend the display of bookings see 'Working with bookings', 'Booking display options'. Gridlines and shading Vertical grid lines on the wallchart and calendar pages help to identify the individual cells of the booking area. Thick black grid lines indicate the main dividers within the current screen (e.g. weeks) and grey grid lines indicate the individual cells within each main divider (e.g. days). Broken grey grid lines indicate the lowest level of time division, if in use. For further help in identifying individual cells, shading can be applied to the grid. You may find that grid lines and shading make the booking area look cluttered. You may also want to exclude them when printing out the current view of the wallchart or calendar page. To turn the vertical grid lines and shading on or off: Select 'View', 'Grid' from the menus. Short-cuts: Grid lines icon or press CTRL+G. Alternatively right-click over the wallchart area and select 'Grid' from the menu. Repeat the process to return both the grid lines and the shading to their original state. 52

53 The wallchart view Customising date scale settings Select 'View', 'Display settings...', 'Date scale settings' tab from the menu. Short-cut: 'Display settings' icon, 'Date scale settings' tab. Short-cut: Right-click anywhere over the date scale and select 'Date Settings', 'Date scale settings' tab. For the different date scale buttons available (Year, Month, Week, Day, Hour), this allows you to set up: the scaling; the time information shown in the calendar bars at the top of the resource screen; where the grid lines are displayed; where shading is applied; how booking start and end times should snap to the grid; the scrolling unit. Select the scale by choosing the appropriate scale from the drop-down list. Scale value The 'Scale factor' field represents the scale value. The larger the number, the greater the amount of time shown on screen. It represents the number of seconds for each pixel on screen. As a general rule, you do not need to adjust these numbers. Date bars Choose which scales you wish to appear in the date bar. Grid lines Choose at what time intervals you want the grid lines to appear. Shade Choose which time intervals you wish to shade. Snap to Choose the smallest unit you wish to plan to in this particular scale. 53

54 The wallchart view Unit scroll Choose how much the screen should scroll if you shift the resource screen left or right by one step. You can edit these settings for each different date scale for the current page in the notebook. Week display Weeks can be displayed in the date bar using either dates or week numbers, depending on usage within your organisation. To change display settings: 1. Select 'View', 'Display settings', 'Week display mode' tab from the menus. Short-cut: 'Display settings' icon, 'Week display mode' tab. 2. Select the appropriate week display mode: 'Show Date' to display weeks using the date of its starting day. 'Show Week' to display weeks using week numbers. 'Show Both' to use both dates and week numbers. Display diary The default diary settings show the length of your working day. To use a display diary other than the default as defined in Retain Manager: 1. Select 'View', 'Display settings', 'Display diary' tab from the menus. Short-cut: 'Display settings' icon, 'Display diary' tab. 2. Amend the start and end time for the display diary by typing in the 'Start of day' and 'End of day' fields. Alternatively use the up/down arrows to change the displayed time in 5 minute increments. 3. Check the 'Show weekends' box to display weekends (7 days per week). 54
55 The wallchart view 5.4 Statutory holidays Statutory holidays are added in Retain Manager (see the separate Retain Manager Guide). Statutory holidays are visible in the wallchart as a crossed-out day. Not only are they clearly marked in the wallchart, they are accounted for in booking operations and calculations. In terms of calculations, statutory holidays are similar to weekends: Making a booking overlapping a statutory holiday gives a booking time of one day less than without the statutory holiday (for example, if one day is 7.5 hours, then a five day booking overlapping a statutory holiday has 30 hours). Making a booking starting or ending on a statutory holiday includes the statutory holiday in the booking time (for example, if the five day booking starts or ends on a statutory holiday, it would have a booking time of 37.5 hours). Note that Retain treats consecutive statutory holidays (as with Christmas) not as one holiday. A four day booking starting on the first of two consecutive holidays would have a booking time of 30 hours, including the first but excluding the second holiday. For utilisation and availability calculations, holidays are excluded from standard time. A month that would normally have 22 working days but has two statutory holidays uses 20 working days for its calculations. Booking operations such as moving, copying, using the clipboard, rolling forward, duplicating and splitting bookings all take account of any statutory holidays by adjusting the booking details, depending on its settings: A five-day fixed-loading booking moved to a date range overlapping a statutory holiday would adjust the time to 30 hours to keep its loading at 100%. A five-day fixed-time booking moved to a date range overlapping a statutory holiday would change its loading to 125% to keep booking time at 37.5 hours. Splitting a booking where the 'split' would occur on a statutory holiday will have the resulting bookings end on either side of the holiday. Though these calculations are what will be most often used for Retain's purposes, it is recommended to explicitly book statutory holidays and have overlapping bookings split into one booking ending before and one starting after the holiday, to ensure the bookings behave as is used. 5.5 Booking display options Booking display options overview Retain provides various display options to allow you to view bookings in different ways. Display options include: booking bar formats - change the depth, layout and font of the booking bars. booking bar fields - change the fields displayed on the booking bars and in the booking tips. booking tips - display or hide booking tips when moving the mouse over a booking bar and the font of the booking tips. Like wallchart display options, the current booking display options will also be reflected whenever you print out a wallchart or calendar page. All of these booking display options are specific to one particular page in a notebook and cannot be overridden globally for all pages. If you wish to maintain consistent settings across all pages, then create one page with the desired settings and copy this page to establish the basic settings. 55

56 The wallchart view Booking bar formats The format of the booking bars can be amended for depth, layout and font. You can also change the fields displayed on the booking bars (see Booking bar fields). Booking bar depth The depth of booking bars is their vertical height when displayed in wallchart and calendar pages. You may want to increase the depth of the booking bars to see more information within each booking bar, for example, or you may want the depth of the bookings to reflect their percentage commitment over the booked period. To change the booking bar depth: 1. Select 'Booking bars', 'Depth' from the 'View' menu. Short-cuts: Right-click over a booking and select 'Booking bars', 'Depth' from the menu. There are also icons for individual depth settings as described below. 2. Set the depth settings as desired (see below). 3. Click on 'OK' to accept your changes. The 'Depth' tab on the 'Booking bars' screen allows you to edit the various depth settings: Booking bar depth is set in terms of both: standard depth - the absolute height of the booking bars measured in pixels. relational depth - the depth relative to the commitment ('loading') of the booking. To select a standard depth setting: 1. Make sure you are in the 'Depth' tab of the 'Booking bars' dialog. 2. Click on the desired standard depth setting. Short-cuts: Large booking bars; Medium booking bars; Small booking bars; 56
57 The wallchart view Booking bars to fit fields. The 'Fit fields' option sets the standard depth of booking bars with respect to the fields displayed within each booking bar (see Booking bar fields). This option needs to be re-selected if fields are added to the booking bar. 3. Optionally change the unit measurement associated with each standard depth setting. To select the relational depth setting: 1. Make sure you are in the 'Depth' tab of the 'Booking bars' dialog. 2. Click on the desired relational depth setting. Short-cut: Booking depth proportional to loading. The 'Proportional to loading' option sets the depth of booking bars in relation to the percentage commitment of each booking (see Proportional bookings). For example, a 50% booking will be half the height of a full commitment booking. The 'Constant' option displays all booking bars at the same height. Booking bar layout The layout of the booking bars in Retain comprises: bar stacking - what happens when bookings overlap in time for the same resource or job. Short-cuts: Booking bar stacking icon. 3-D look - plain, embossed or recessed format. continuation arrows - what happens when bookings go beyond the edge of the currently visible screen. To change the booking bar layout: 1. Select 'Booking bars', 'Layout' from the 'View' menu. Short-cuts: Right-click over a booking and select 'Booking bars', 'Layout' from the menu. 2. Set the layout settings as desired (see below). 3. Click on 'OK' to accept your changes. The 'Layout' tab at the 'Booking bars' screen allows you to edit the various layout settings: 57

58 The wallchart view The bar stacking options define how bookings are to be displayed when they overlap against the same resource (in the resource view) or job (in the job view): Separate - the bookings are displayed separately. Where bookings overlap the overall depth of the resource row will be increased. Tip: Remember that the depth of the booking bars can also be set to either 'constant' or 'proportional to loading'. Stacked - the overlapping bookings are stacked like a deck of cards, with only one booking fully displayed. This reduces screen usage when there are many overlapping bookings, as will often be the case in the job view. Short-cuts: Bar stacking icon. The 3D-look options change the look of all the booking bars in the current view as follows: Plain - no 3D effect. Embossed - the booking bars give the appearance of being laid on top of the booking screen. Recessed - the booking bars give the appearance of being inset into the booking screen. The 'Show continuation arrows' option defines how bookings are to be displayed when they start before and/or finish after the currently displayed date range of the booking screen. Set the checkbox - to display continuation arrows. Booking bar font The booking bar font is the font used for the text displayed within the booking bars. To change the booking bar font: 1. Select 'Booking bars', 'Font' from the 'View' menu. Short-cuts: Right-click over a booking and select 'Booking bars', ' Bar Font' from the menu. 2. Set the new font as desired (see below). 3. Click on 'OK' to accept your changes. The 'Font' dialog allows you to edit the various font settings: 58

59 The wallchart view You can edit the type of font, its size and its colour, as well as using effects such as bold, italic and underlining. Bear in mind that the font you select will apply to all booking bars and that it should be legible both on screen and when printed out. Booking bar fields You can specify which fields will be displayed: within the booking bars themselves; and within the tips window which pops up over each booking when booking tips are activated. You can also define the fields separately for the resource and job views. To define booking bar fields: 1. Select 'Booking bars', 'Bar fields' or 'Tips fields' from the 'View' menu. Short-cuts: Right-click over a booking and select 'Booking bars', 'Bar fields' or 'Tips fields' from the menu. 2. At the 'Booking Fields' dialog edit the bar or tips fields as desired (see below). 3. Click on each tab heading and repeat step 2 for each set of fields as desired. 4. Click on 'OK' to accept your changes. The 'Booking Fields' dialog allows you to define the various booking bar and booking tips fields: 59
 - Fields displayed inside each booking bar when in the job view.")
60 The wallchart view Fields can be defined independently under each of the four tab headings: Bars (Res) - Fields displayed inside each booking bar when in the resource view. Bars (Job) - Fields displayed inside each booking bar when in the job view. Tips (Res) - Fields displayed within the pop-up booking bar tips when you move the mouse pointer over a booking in the resource view. Tips (Job) - Fields displayed within the pop-up booking bar tips when you move the mouse pointer over a booking in the job view. At the 'Booking Fields' dialog: 1. Select a field in the left hand list and click on the 'Add' button to add it to the displayed fields for the current tab. Short-cut: Double-click on the selected item. Tip 1: You can include information relating to the booked resource and job in your displayed fields. In the fields list, resource fields are preceded by 'resource' and job fields by 'job'. Note that adding resource and job fields may affect the speed of the software. Tip 2: A useful field only available for booking fields and tips is 'calcpriorityalias' which shows the alias defined for the priority field, instead of just priority numbers. 2. Select a field in the right hand list and click on the 'Remove' button to remove it from the displayed fields for the current tab. Short-cut: Double-click on the selected item. 3. Select a field in the right hand list and click on the 'Up' and 'Down' buttons to reposition it within the displayed fields for the current tab. 4. Click on the tab heading to move between tabs. 5. Click on 'OK' when done. 60
61 The wallchart view Booking bar tips Booking tips are windows which pop up when you move the mouse pointer over each booking, providing additional information about that booking. Booking tips can be very useful when you want to look at bookings in greater detail than is displayed within the booking bars themselves, but you may find that always displaying the tips slows you down when navigating around the booking screen. To turn the booking tips on or off: 1. Select 'File' -> 'Preferences' from the menus. Short-cuts: Right-click over the booking area (not over a booking) and select 'Booking Tips' from the menu. 2. At the 'Preference' screen, select the 'General' tab and then mark or clear the 'Booking bar tips' checkbox as desired. Repeat the process to return the booking tips setting to its original state. See Booking fields if you want to change the fields displayed within the booking tips window. Note: You can hide the fields displayed in the booking bar tips by unchecking 'Show booking field names' in the 'Booking' tab of the above menu. 5.6 Row label fields and layout You can specify which fields will be displayed as the row labels to the left of each page in the Wallchart in both resource and job views. You can also customise the position and width of these fields. This can be used to tailor the wallchart view to the requirements of your organisation, for example displaying resources with their division or jobs with their location. You must specify resource fields for row labels in the resource view and job fields for row labels in the job view. You can also specify a booking field to act as the label for subsidiary rows when displaying the wallchart in the project view (see Project view). Like other display options, fields are specific to each notebook page. To maintain consistent settings throughout your notebook, create one page with the desired settings and copy this page to establish the basic settings. To define the fields to be used as the wallchart row labels: 1. Select 'Data' -> 'Fields' from the menus. Short-cuts: Fields icon. 2. In the 'Fields' tab, add or remove the column fields for both resource and job to change the row label fields (see below). 3. Click on 'OK' to accept your changes. The 'Fields' panel in the 'Setup Wallchart' dialog allows you to define the row labels for both the resource view and the job view: 61

62 The wallchart view Note: 1. The 'Fields' panel contains the current row label definition for the current view. The width of each column in this panel indicates the width of the column as it will be displayed in the row labels. 2. The 'Fields' list contains all the fields that you may include in the row labels. The current value in the 'Sub Project Field' drop down list indicates the label that will be used for subsidiary rows when in the project view. To switch between resource and job view labels: Select either 'resource' or 'job' from the 'View' drop-down list. Resource fields are used as row labels in the resource view and job fields in the job view. To add a field to the row labels: 1. Select the field from the drop-down box. 2. Adjust the width of the column by changing the number under 'Width' or by dragging the line which separates each field in the top box. 3. Adjust the order in which fields are displayed by clicking on the black dot and dragging the line up or down. 4. Repeat steps 1 to 3 for each field as desired. To remove a field from the row labels, click on the X button against the field row or: 1. Move the mouse pointer over a field in the top box. 2. Click the left mouse button, holding the mouse button down. 3. Drag the mouse pointer (the pointer changes to a crossed-arrows sign) anywhere outside of the box. 4. Release the mouse button. 5. Repeat steps 1 to 4 for each field as desired. 62
63 The wallchart view To amend the sequence of a field within the row labels, click on the black dot and drag the line up or down or: 1. Move the mouse pointer over the field in the 'Column Fields' list. 2. Click the left mouse button, holding the mouse button down. 3. Drag the mouse pointer (the pointer changes to a crossed-arrows sign) to the new location in the box. Tip: Fields are positioned to the left of the current position on the list, or at the right hand end of the list if they are dropped beyond the end of the list. 4. Release the mouse button. 5. Repeat steps 1 to 4 to move each field as desired. To change the width of a field within the row labels definition, change the number under 'Width' or: 1. Move the mouse pointer to the right edge of the field in the top box, so that the mouse pointer changes to a " " sign. 2. Click the left mouse button, holding the mouse button down. 3. Move the mouse pointer until the desired width is indicated in the box. 4. Release the mouse button. 5. Repeat steps 1 to 4 to change the width of each field as desired. Short-cut: Resize the label column widths directly within the wallchart view. To select a different sub project view label: 1. Click on the 'Sub Project Field' drop-down list. A list of booking fields is displayed for selection. 2. Select the new field as desired. Tip: Select a job field such as 'Job Name' for the resource view and a resource field such as 'Name' for the job view. See The project view. Graphical View Fonts You can define the following fonts of the wallchart and calendar display separately: expanded records; collapsed records; sub fields; and date bar. To change the display fonts: 1. Select 'Fonts' from the 'View' menu. Short-cut: 'Fonts' icon. 63
64 The wallchart view 2. At the 'Edit Graphical View Fonts' dialog select an item from the list then click on the 'Set font' button. Short-cut: Double-click on the report item. 3. At the 'Font' dialog set the new font as desired, then click on 'OK' to accept your changes. 4. Repeat steps 2 to 3 for each report font as desired. 5. Click on 'OK' to accept your changes. 64
65 The calendar view The calendar view The calendar view overview The calendar view in Retain displays the bookings for an individual resource or job in a format similar to a calendar. Here is an example: You can set up separate calendar pages in your notebook if desired (see Adding a page) or you can switch wallchart pages between wallchart and calendar view. To switch a wallchart page into calendar view: 1. Make sure the wallchart is the active page. 2. Select 'View', 'Calendar' from the menu. Short-cut: Calendar view icon. To switch the page back to wallchart view: 1. Make sure the wallchart is the active page. 2. Select 'View', 'Wallchart' from the menu. Short-cut: Wallchart view icon. Rotating the calendar Changing the calendar date scales Moving between calendar records Navigating within the current record Calendar display options Making bookings in calendar view 65
66 The calendar view 6.2 Rotating the calendar The calendar page can be displayed in two basic views: Resource view - displays one resource per screen. Bookings represent jobs allocated against the resource. Job view - displays one job per screen. Bookings represent resources booked to the displayed job. To switch between these two views: 1. Click on a booking, if desired. This fixes the axis on which the view will be rotated, so that the selected booking will be displayed as part of the rotated view. 2. Select 'View', 'Rotate view' from the menu. Short-cuts: The Rotate icon or press CTRL+R. Alternatively right-click anywhere over the booking grid and select either 'Job view' or 'Resource view' as appropriate. 6.3 Changing the calendar date scales The calendar can be displayed using a very wide range of date scales. You can work in units as small as fractions of an hour and as large as months or even years. You can amend the date scales at any time. This does not affect any of the underlying data and you can switch between date scales as often as you like. To select one of the standard date scales do one of the following: Select 'View', 'Zoom' from the menus and then choose a view. Click on one of the pre-defined date scale icons. The date scale icons. The standard date scales are displayed as follows in the calendar view: Year Month Week Day Hour Year per row. Each cell represents 1 month. Month per row. Each cell represents 1 day. Week per row. Each cell represents 1 day. Day per row. Each cell represents 1 hour. Hour per row. Each cell represents 10 minutes. You might use the 'year' view to display long-term planning overviews and the 'week' and 'day' views for short-term planning. You are unlikely to need the 'hour' view in most cases. You can customise the settings associated with standard date ranges. 66
67 The calendar view 6.4 Moving between calendar records In calendar view only one resource (in resource view) or job (in job view) is displayed on screen at a time. The currently selected resource or job is displayed in the status bar at the bottom of the screen. To move to the next record: Right-click over the booking area and choose 'Next record' from the menu. Short-cut: Next record icon or CTRL+SHIFT+N. To move to the previous record: Right-click over the booking area and choose 'Previous record' from the menu. Short-cut: Previous record icon or CTRL+SHIFT+P. To move to a particular record: 1. Right-click over the booking area and choose 'Select record' from the menu. Short-cut: Select record icon or type the first letter(s) of the name you are seeking and then use the up or down cursor keys to navigate to the correct record. 2. Select the name at the 'Select Record' dialog. 3. Choose 'OK' to move to the selected record. 6.5 Navigating within the current record Use the following features to navigate within the current record in the calendar: Cursor keys. Once you have clicked on the calendar grid you can use the cursor keys to move between the cells on the grid. The date scale to the right of the calendar grid. The transparent rectangle in the centre section of this date scale can be 'grabbed' and moved to a new position. The single and double arrows either side of this date scale. Click on the up arrows to move back in time or the down arrows to move forward in time. Changing the date scales. Increasing the date range covered by the calendar displays more information on the grid. You can then click on the calendar to move to a different date. 6.6 Calendar display options Most of the display options in the calendar view are the same as those for wallchart pages. The only difference is: Project view is not available in the calendar view. See Display options. 67
68 The calendar view 6.7 Making bookings in calendar You can make bookings in calendar view in much the same way as in wallchart view (see Making bookings). However the following restrictions apply when making bookings in calendar view: You can only mark an area for a single resource when in resource view. (You can still, however, select more than one resource in the 'Make Booking' dialog). You cannot move or copy the bookings graphically, and you cannot use the clipboard. For these reasons you may find it easier to make all your bookings through a wallchart page and to use the calendar view only for viewing purposes. 68
69 Resources, jobs and components Resources, jobs and components General principles The Retain concept is all about managing a limited supply of resources in order to perform a defined population of jobs. The exact meaning of the terms 'resources' and 'jobs' varies from organisation to organisation, but the process of allocating resources to jobs in the form of 'bookings' is the same in each. Retain assists the planning process by offering several levels of classifying bookings in terms of jobs, components, resources and. The time taken to capture and maintain this information must be balanced against the benefit to the planning process. Retain is primarily a resource management, (as opposed to a project management), tool. It is therefore not greatly concerned with the individual activities being performed within each job. Retain does however have a useful hierarchy to define bookings against a particular client, job and an individual assignment which can be utilised to indicate the nature of the specific booking. It is best to first determine the level of detail required to maximise planning effectiveness and secondly to establish the initial setup before making bookings. Naturally the data files for each of these categories can be updated on a continuing basis. In order to make a booking at least one resource and one job is required. Note: You may want to consider transferring data automatically into Retain from other systems as part of this set-up exercise. There are certain issues you need to consider if you choose this route, as explained in the separate Security Manager Guide. Resources What are resources? Retain uses the term 'resources' as a general description for the people or entities that can be applied to the process of completing a job. In many organisations the term 'resources' simply refers to staff. However, you can also use Retain to plan other types of resource, such as plant and machinery or training rooms. Indeed any item with a finite capacity that goes into the performance of a Retain 'job' can be considered a resource. Adding resources Editing resource details Changing the name of a resource Deleting resources Hiding resources from view The modify record dialog Operations affecting resources, jobs or components can be accessed through the Modify Records dialog (for example, Modify Resources for resources, Modify Jobs for jobs). To display the Modify Records dialog do one of the following: Select 'Actions' -> 'Modify Record' -> 'Resource...' or 'Job...' or 'Component...'. Right click on the Resource list on the left-hand side of the screen (in Resource View) and select 'Modify Resources' from the context menu. In the Job View, right-click the Job list and select 'Modify Jobs'. Click the 'Modify resources', the required Modify Records dialog. 'Modify jobs' or the 69 'Modify components' icon to bring up the
70 Resources, jobs and components Records can be selected by either clicking in the dialog or typing (part of) their name. The options available at the Modify Records dialog are: Edit - Change details (except job name, resource name or resource first name) of a selected record; New - Add a new resource, job or component; Delete - Delete the selected record; Change name - Change the job name, resource name or resource first name; Close - Return to the Wallchart. Adding resources To add new resources: 1. Make sure that you are in 'Edit' mode. 2. Select 'Actions' -> 'Modify records' -> 'Resource' from the Retain menus. Short-cut: 'Modify resources' icon or right-click over a resource name and select 'Modify Resources'. 3. Click on the 'New' button. 4. At the 'Add Resource' dialog, enter details about the new resource as desired (see below). 5. Click on the 'Add' button to add the resource and return to the 'Modify resources' dialog. 6. To add multiple resources, click 'Add Again' and repeat steps 4 and 5 to add further resources as desired. 7. Click on the 'Close' button when done. The 'Add Resource' dialog prompts you to provide various details about each new resource. This screen may have been customised to the requirements of your organisation. Make sure that you follow any conventions laid down by your organisation. 70

71 Resources, jobs and components Note that the following resource fields have special usage in Retain: Name and Initials - The combination of name and initials uniquely identifies each resource in Retain. Enter a unique name; if you enter a duplicate resource name an error message will tell you that this resource cannot be added. In Retain Standard, the initials are held in a separate file, which is used in combination with the name field, ('Initials' may be called 'First name' in your organisation). Grade - The resource grade is used by Retain to automatically pick up the associated charge rate, often in combination with the job analysis code. Make sure that the grade you enter here corresponds to that defined in the charge rates table (see the Manager Guide for further details). Use other resource fields as instructed by your organisation. Editing record details To edit the details associated with a resource, job or component: 1. Make sure that you are in 'Edit' mode. 2. Select 'Actions' -> 'Modify records' and 'Resource' or 'Job' or 'Component' from the Retain menus. Short-cut: 'Modify resources', 'Modify jobs' and 'Modify components' icons or right-click over a resource or job name and select 'Modify Resources' or 'Modify Jobs' (from now on both are referred to as 'Modify Records'). 3. At the 'Modify Record' dialog, select a record and then click on 'Edit' to edit its details. Short-cut: Double-click on a resource or job to edit its details directly. 4. At the 'Edit Record' dialog, edit the record details as desired. Then click on 'OK' to accept your changes or 'Cancel' to abandon your changes. 5. Repeat steps 3 and 4 to edit further records as desired. 6. Click on the 'Close' button to close the 'Modify Record' dialog. Editing the resource grade, the job priority colour or analysis code, or the component name does not affect the 71
72 Resources, jobs and components grade applied to any existing bookings for this record. Either edit these bookings separately or use the special database administration functions in Retain Manager to update these bookings. See the Manager Guide for help on updating bookings in this way. Updating multiple records with one value You can update one field of all records within a selection with one value. To do this: 1. Select the records you want to update in the resource or job view. (See Making Selections.) Tip: for quick manual selection, select multiple records by holding CTRL and clicking on them, then right-click and select 'Select marked records'. After updating, select 'Clear entire selection' to display all records. 2. Select 'Actions' -> 'Modify selected records' from the menus. 3. Select the field you want to update, and press 'OK'. 4. Enter the desired value. Retain will prompt you with the number of records it will update, which you will need to confirm. Deleting resources You will want to delete resources when they leave your organisation or are no longer part of your Retain database for planning purposes. To delete a resource: 1. Make sure that you are in 'Edit' mode. 2. Select 'Actions' -> 'Modify Record' -> 'Resource' from the Retain menus. Short-cut: 'Modify resources' icon or right-click over a resource name and select 'Modify Resources'. 3. At the 'Modify Resources' dialog, select a resource and then click on 'Delete' to delete the resource. 4. Click on 'OK' to confirm your actions or 'Cancel' to abandon your actions. 5. Repeat steps 3 and 4 to delete further resources as desired. 6. Click on the 'Close' button when you have finished deleting resources. Note: When you delete a resource, any bookings against the resource will also be deleted. Do not delete resources until you are sure that you no longer need to include their bookings on screen or in reports. Generally it is better to give a leaving date and / or to change a resource to a group such as "left" till you are certain there are no bookings remaining for that resource. (Giving a leaving date (end date) means that Retain cross-hatches the time after the leaving date). Hiding resources from view You can filter the wallchart views or reports to include or exclude resources based on any of the fields in the resources data file. See Sorting and selection for further details. Hiding would typically be used to filter out resources that have left. 72
73 Resources, jobs and components 7.3 Jobs What are jobs Retain uses the term 'job' as a general description for any project, product or assignment being planned using the Retain resource planning approach. What constitutes a job in your organisation depends on the nature of your business and what you consider to be the 'unit' level of your planning in Retain. Some organisations may set up a separate job for each individual project, while others may group together projects under a single 'umbrella' job, since that is the level at which they carry out planning work on Retain. Since every booking in Retain must be made against a job, jobs should also include non-project activities, such as staff vacation or sick leave or, in a manufacturing context, machine down-time. You can use analysis fields within the job data file to combine jobs for viewing and reporting purposes. For example, if you have several jobs relating to ABC plc then you might enter 'ABC' in one of the job fields against each relevant job. You can then filter on this field to obtain views and reports relating to the ABC plc group of jobs. You can also use components to analyse bookings within a job. Components are usually defined in general terms applicable to most jobs, such as 'planning', 'fieldwork' and 'reporting' (see What are components?). Adding jobs Editing job details Changing the name of a job Deleting jobs Hiding jobs from view Adding jobs To add new jobs: 1. Make sure that you are in 'Edit' mode. 2. Select 'Actions' -> 'Modify Record' -> 'Job' from the Retain menus. Short-cut: 'Modify Jobs' icon or right-click over a job name and select 'Modify Jobs'. 3. Click on the 'New' button. 4. At the 'Add Job' dialog, enter details about the new job as desired (see below). 5. Click on the 'Add' button to add the new job and return to the 'Modify jobs' dialog. 6. Click 'Add Again' and repeat steps 4 and 5 to add further jobs as desired. 7. Click on the 'Close' button when done. The 'Add Job' dialog prompts you to provide various details about each new job. This screen may have been customised to the requirements of your organisation. Make sure that you follow any conventions laid down by your organisation. 73

74 Resources, jobs and components Note that the following job fields have special usage in Retain: Name - The name uniquely identifies each job in Retain. Enter a unique name; if you enter a duplicate job name an error message will tell you that the job cannot be added. Priority - The priority of a job defines the default colour of bookings made against that job. It saves time if you enter a priority for the job which matches your colour conventions. See Using colours. Analysis - The analysis field can be used to pick up default charge rates based on different job types, usually in combination with the resource grade. For example, you might enter 'C' for chargeable jobs, 'N' for non-chargeable jobs and 'S' for special jobs. If you use job-based charge rates make sure that the code you enter here corresponds to that defined in the charge rates table (see the Manager Guide for further details). Recovery - The recovery rate can be applied to the costs based on charge rates to arrive at an adjusted cost or revenue figure. Enter recovery as a number where 1.10 represents 110% of cost, for example. If you do not apply recovery rates to your costs you can ignore this figure. Use other job fields as instructed by your organisation. Editing job details To edit the details associated with a job: 1. Make sure that you are in 'Edit' mode. 2. Select 'Actions' -> 'Modify record' -> 'Job' from the Retain menus. Short-cut: 'Modify Jobs' icon or right-click over a job name and select 'Modify Jobs'. 3. At the 'Modify Job' dialog, select a job and then click on 'Edit' to edit its details. Short-cut: Double-click on a job to edit its details directly. 4. At the 'Edit Job' dialog, edit the job record details as desired. Then click on 'OK' to accept your changes or 'Cancel' to abandon your changes. 74
75 Resources, jobs and components 5. Repeat steps 3 and 4 to edit further jobs as desired. 6. Click on the 'Close' button to close the 'Modify Job' dialog. Editing the job priority colour or analysis code does not affect existing bookings against this job. Either edit these bookings separately or use the special database administration functions in Retain Manager to update these bookings. See the Manager Guide for help on updating bookings in this way. Updating multiple jobs with one value You can update one field of all jobs within a selection with one value. To do this: 1. Select the jobs you want to update in the job view. (See Making Selections.) 2. Select 'Actions', 'Modify selected records' from the menus. 3. Select the field you want to update, and press 'OK'. 4. Enter the desired value. Retain will prompt you with the number of records it will update, which you will need to confirm. Hiding jobs from view You can filter the wallchart views or reports to include or exclude jobs based on any of the fields in the jobs data file. See Sorting and selection for further details. Deleting jobs You will want to delete jobs from time to time, when they are no longer part of your Retain planning cycle. To delete a job: 1. Make sure that you are in 'Edit' mode. 2. Select 'Actions', 'Modify Record', 'Job' from the Retain menus. Short-cut: 'Modify Jobs' icon or right-click over a job name and select 'Modify Jobs'. 3. At the 'Modify Jobs' dialog, select a job and then click on 'Delete' to delete the job. 4. Click on 'OK' to confirm your actions or 'Cancel' to abandon your actions. 5. Repeat steps 3 and 4 to delete further jobs as desired. 6. Click on the 'Close' button when you have finished deleting jobs. Note: When you delete a job, any bookings against the job will also be deleted. Do not delete jobs until you are sure that you no longer need to include their bookings on screen or in reports, for historical cost purposes, for example. 75


76 Resources, jobs and components 7.4 Components What are components In Retain, components are sub-jobs, providing information regarding the nature of each booking made against a job. Components provide an element of project planning within Retain, since you can select a component for each booking you make and analyse the job into its component parts for reporting purposes. Components take the form of a simple pick-list of descriptive names, available for selection each time you make a booking. They are usually defined in general terms applicable to most jobs, such as 'planning', 'fieldwork' and 'reporting', although you can enter components relating to specific types of job if desired, such as 'stock take', 'branch visit', or 'security review', for example. The level at which you define components should correspond to that at which you make bookings in Retain. For example, if your planning on Retain takes the form of bookings of two or more weeks each, your components should not represent the half-day elements within each booking. Adding components To add new components: 1. Make sure that you are in 'Edit' mode. 2. Select 'Actions' -> 'Modify Record' -> 'Component' from the Retain menus. Short-cut: 'Modify Component' icon. 3. Click on the 'New' button. 4. At the 'Add Component' dialog, enter a unique name for the new component. 76
77 Resources, jobs and components 5. Click on the 'Add' button to add the new component and return to the 'Modify Component' dialog. 6. Click 'Add Again' and repeat steps 4 and 5 to add further components as desired. 7. Click on the 'Close' button when done. Editing component names To edit the name of a component: 1. Make sure that you are in 'Edit' mode. 2. Select 'Actions' -> 'Modify Record' -> 'Component' from the Retain menus. Short-cut: 'Modify Component' icon. 3. At the 'Modify Components' dialog, select a component and then click on 'Edit' to edit its name. 4. At the 'Modify Components' dialog, edit the name as desired. Then click on 'OK' to accept your changes or 'Cancel' to abandon your changes. 5. Repeat steps 3 and 4 to edit further component names as desired. 6. Click on the 'Close' button to close the 'Modify Components' dialog. Amending the name of a component does not update existing bookings with this component name. To update bookings to reflect a changed component name you must edit each booking separately. Deleting components To delete a component: 1. Make sure that you are in 'Edit' mode. 2. Select 'Actions' -> 'Modify Records' -> 'Component' from the Retain menus. Short-cut: 'Modify Component' icon. 3. At the 'Modify Components' dialog, select the existing component and then click on 'Delete' to delete the component. 4. Click on 'OK' to confirm your actions or 'Cancel' to abandon your actions. 5. Repeat steps 3 and 4 to delete further components as desired. 6. Click on the 'Close' button when you have finished deleting components. Deleting components removes them from the components data file, but does not affect existing bookings with this component name. The component will no longer appear in the pick list for components. 77

78 Resources, jobs and components Job-specific components You can set up component lists specific to a job as well as have a general shared list. The component list displayed in the booking dialog will adjust depending on the jobs selected. 1. Ensure the 'Edit Job' dialog is displayed, by selecting 'Actions', 'Modify record', 'Job' from the menus or double clicking on a job in the job list. 2. In the 'COMPONENT LIST' field (maybe aliased differently in your organisation), type the comma separated names you want to use instead of the standard component list when you make a booking in Retain. An example entry would be: [COMPONENT LIST] Review, Plan, Meeting. 3. To add the standard component list to the custom list, add the entry '_default' to your custom component list. An example entry would be: [COMPONENT LIST] Delta Implementation, Strategy, _default. If 'COMPONENT LIST' is left blank the standard component list will be used. 78
79 Sorting and selecting Sorting and selecting Sorting and selecting overview One of the most powerful features of Retain is the ability to sort and select (i.e. filter) each notebook page in any way you choose. Using these features you can obtain many powerful views of your data. You could, for example: Display only resources that are available in a specified time period. Display only those jobs belonging to a particular project manager. Sort your wallchart in descending order by resource grade. Produce reports by group or division, sub-totalled by manager. You can sort and select using any fields in your Retain database. If your organisation has customised the standard data file structures, these customised fields are also available for sort and selection purposes. Sorting Change the sort order to sort the records in each notebook page, report or wallchart, based on any of the fields in its underlying view. Selecting There are a number of ways in which you can select or filter the records you want to display in the current view. You can filter the current view by: collapsing records from the display selecting marked records; using special selections with date ranges; defining selection criteria. 8.2 Changing the sort order You can sort the records in each notebook page based on any of the fields in its underlying view. For example, you can sort the resource view by any resource field and the job view by any job field. You can sort the resources independently from the jobs. Each notebook page can be sorted differently. This means you can create a number of different views of the booking information, simply by setting a different sort order in each page. When booking against multiple resources, sorting can be used to group resources logically before selecting multiple ones. It is also possible to sort on booking fields, in case of concurrent bookings for a single resource or job, but this is not used often. To sort the active notebook page: 1. Select 'Data', 'Sort' from the menus. Short-cuts: Sort order icon. 2. At the 'Sort' dialog specify sort criteria as desired by selecting the sort field from the drop-down list (see below). 3. Choose 'OK' to accept your changes. The 'Sort' panel of the 'Setup Wallchart' dialog allows you to specify the sort order applying to both the resource and job view for the active page: 79
80 Sorting and selecting If there is more than one item in this list, the view will be sorted initially by the first item on the list then, within each item, by the second item and so on. To switch between resource and job view: Select either 'resource' or 'job' from the 'View' drop-down list. You can also sort the order in which bookings are displayed in each view: Click on the 'booking' tab and and select the field to sort by from the drop-down. To add an item to the sort order criteria: 1. Select a field from the drop-down list. 2. Choose 'Ascending' or 'Descending' as the sort order for the selected field. 3. Repeat steps to add further sort items as desired. To remove an item from the current sort criteria, click on the X button. You also need to consider the sequence of items in the sort criteria carefully. For example, sorting by resource grade and then name should produce a meaningful result, but sorting by resource name and then grade may not. To amend the sequence of items in the current sort criteria, click on the black dot and drag the line up or down. Further sort options are available when dealing with report pages. See Report sort orders and subtotals. You can also select records from the drop-down menu in the wallchart page by the first sort field: 80


81 Sorting and selecting 8.3 Collapsing records In wallchart pages, you can collapse one or more rows in the wallchart grid. Collapsing the records greys them out and hides their associated bookings. Collapsed records appear like this: To collapse a resource (or job) record: Click on the blue icon to the left of the record name. The blue icon changes to a '+' sign to indicate that the record has been collapsed. To collapse all the resource (or job) records at once: Choose 'View', 'Close all records' from the menus. Short-cut: Right-click over the records list and choose 'Close all records' from the menus. To expand a resource (or job) record which has been previously collapsed: Click on the blue icon to the left of the record name. 81
82 Sorting and selecting The blue icon changes to a '-' sign to indicate that the record has been expanded. To expand all the resource (or job) records at once: Choose 'View', 'Open all records' from the menus. Short-cut: Right-click over the records list and choose 'Open all records' from the menus. 8.4 Selecting marked records In wallchart pages you can mark one or more resource or job records and then filter the view to show only the marked records. To do this: 1. Select the first record by clicking on the resource or job names displayed to the left of the booking grid. 2. Hold the CTRL key down and click on further records to select or deselect them as desired. 3. Release the CTRL key. 4. Right-click over the records list and select 'Select marked records' from the menu. Short-cut: Select marked records icon. Marked records will be displayed and all other records will be excluded from the display. Clearing the marked records selection To clear the marked records selection: Select 'Data', 'Clear selection' from the menus. Short-cut: the menu. Clear selection icon or right-click over the records list and choose 'Clear entire selection' from All records will again be displayed in the current view. 8.5 Special selections using date ranges Special selections overview A number of frequent planning requirements refer to time periods, for example finding out which resources are available to perform a job during a specified time period. In Retain there are a number of special functions to perform these searches. These selections are independent of other selections using selection criteria. To select resource or job records based on time periods: 1. Make sure that you are in a wallchart page, either in the resource or job view. 2. Mark an area anywhere on the booking grid. Tip: It doesn't matter which resource record the marked area covers, but the start and end dates should match the time period in which you are interested. 3. Select 'Data', 'Special selections', 'Add' from the menus. This will use the default selection criteria. Short-cut: 'Add special selection' icon or right-click over the records list or wallchart and select 'Special selections', 'Add' from the menu. 82

83 Sorting and selecting 4. Amend your special selection using the 'Special Selections' dialog if required and click 'OK'. Records matching the criteria will be displayed and all other records will be excluded from the display. When a special selection is already active, an additional selection line will be applied using the same procedure. Remember this when using the icon - it adds an additional selection line to the dialog when used. To edit the current special selection: Select 'Data', 'Special selections', 'Edit' from the menus, or right-click, 'Special selections', 'Edit'. This allows you to edit the current special selection. If no special selection is active, 'Edit' takes you to an empty 'Special selections' dialog. The Special selections dialog The 'Special selections' dialog allows you to enter special selection criteria, based on parameters such as availability percentage and available days for resources, or adjusted revenue for jobs. All criteria use their own date range to which the criteria is applied. Special selections consist of a (number of) selection criteria. The steps in creating a criteria are: 1. Select the field you want to use, for example 'availability' for resources, that selects based on availability percentage. There are 13 different calculated fields for resources you can use, 5 for jobs. For a full description of all of them see 'Special report fields' in the Reports section. 2. Select the start and end date for the date range of the booking. Note that each line has its own date range. If you marked an area before displaying the dialog, this will automatically populate these values. 3. Select the condition to use for this field, either '=' (equal to), '>=' (greater than or equal to), '<' (less than) and 'Contains' (containts text string). For example '>=' for all fields with a minimum availability. 4. Enter the value to compare the field to, for example 80 for availability, which will select all resources that have at least 80% availability in the selected date range. 5. Press 'OK'. The above example will display all resources that have at least 80% availability in the marked area. (80% is typically used to ensure that a week with one day of client work or one day's holiday can still be booked). To add a selection line: 83
84 Sorting and selecting Click the 'Add Line' button to add a selection line. When using multiple lines, the resources displayed are those for which each line is true, i.e. the lines are combined using an AND operator. To remove a selection line: Click the 'X' to the right of the line to be removed. Further options Hide the dialog window with 'Hide for availability' (resource view only). (De)activate special selections with 'Special Selection Active'. Hiding the 'Special selections' dialog For people primarily using the default availability selection, it is possible to hide the 'Special selection' dialog when using 'Special Selections', 'Add' from the menus or its icon. This is only available for the resource view. When used, this will add a default line to the current selection and will directly apply the selection. When there is no current selection this is equivalent to directly applying the default selection. Criteria can still be edited using 'Edit'. To hide the dialog: 1. Go to the 'Special selection' dialog via the menus or right-click. 2. Check the 'Hide for availability' checkbox to hide or uncheck to display. The default selection can be defined using the Availability preferences dialog, which is also an alternative way to select 'Hide for availability'. Deactivating special selections It is possible to deactivate a special selection, using either the 'Special selections' dialog or the menus: 1. Make sure the 'Special selections' dialog is displayed, using the menus or right-clicking. 2. Uncheck the 'Special Selection Active' checkbox. Alternatively, select 'Data', 'Special selections' from the menus or using right-click and uncheck 'Use'. This will keep the selection criteria in memory (as opposed to clearing the selection) but does not apply the selection to the resources displayed. This allows you to change any other selection criteria independently. To activate the special selection again, check the 'Special Selection Active' checkbox in the 'Special selections' dialog or check 'Use' from the 'Special selections' menu. Clearing special selections To clear the availability selection: Select 'Data', 'Special selections', 'Clear' from the menus. Short-cut: Clear special selection icon or right-click over the booking grid and choose 'Special selections', 'Clear' from the menu. All records will again be displayed in the current view. This will empty the 'Special selection' dialog. To temporarily deactivate the selection and reactivate it later, uncheck 'Special Selection Active' in the dialog. 84

85 Sorting and selecting 8.6 Defining selection criteria Selection criteria overview You can perform quick searches on the current view by either Selecting marked records or Special selections. To perform other types of searches you will need to define selection criteria. To define selection criteria for the active notebook page: 1. Select 'Data', 'Selection' from the menus. Short-cuts: Selection icon. 2. At the 'Selection' dialog specify selection criteria as desired (see below). 3. Choose 'OK' to accept your changes. The selection dialog Selection operators and conditions Cross-referencing resource and job view selections Booking selection filters Removing selection filters Locking selection filters Importing and exporting selections The selection dialog The 'Selection' panel of the 'Setup Wallchart' dialog, available from the menus by selecting 'Data', 'Selection' allows you to specify the selection criteria applying to both the resource and job view for the active page. You can also cross reference your selections between resource and job views and include booking fields in your selection criteria: The current selection criteria is displayed in the 'Selection Criteria' list. To switch between resource and job view: Select either 'resource' or 'job' from the 'View' drop-down list. 85
86 Sorting and selecting You can also apply selections to bookings: Click on the 'booking' tab and and set selection. Switch between the resource, job and bookings options to define selection criteria as follows: Resource - set resource view selection criteria and cross-reference these criteria to the job view if desired. Job - set job view selection criteria and cross-reference these criteria to the resource view if desired. Booking tab - set criteria relating to the bookings. This criteria will be applied to the currently selected view. To add an item to the selection criteria: 1. Choose an 'Operation' setting to apply to this item from the drop-down list. 2. Select a field in the 'Fields' list. 3. Choose a 'Condition' followed by a value in the pop-up box. (For operations, conditions and values, see Selection operators and conditions.) 4. Repeat steps 1 to 3 to add further selection criteria as desired. To remove an item from the current selection criteria, click on the X button against the row. You also need to consider the sequence of items in the selection criteria carefully. The order of items can determine the meaning of the selection. To amend the sequence of items in the current selection criteria, click on the black dot and drag the line up or down. You can also lock selections which allows you to clear selections up to the last locked selection. Tick the box under the 'Lock' icon against the line you would like to lock. Do not show records outside the locked selection Checking this box will allow you to execute selections within the locked selection(s). For example, if you are looking for 'Auditors' in the 'New York' office then locking 'OFFICE = New York' and checking the 'Do not show records outside the locked selection' box will mean the 'GRADE = Auditor' selection is done within all records which match 'OFFICE = New York'. Selection operators and conditions Selection filters in Retain are derived from selection operations and conditions applied to one or more of the underlying database fields. For example, the selection criteria that you would use to display all resources with a grade of 2 comprises the following elements: Operation AND Selection Field resource.grade Condition = Condition Value 2 In most cases your searches will probably be very simple, like the one above. However, Retain allows you to build up complex selection criteria using these elements. For complex criteria it is important to understand the usage of these elements in Retain. Operations Each item in your selection criteria must use one of these three operations: And - Includes records which satisfy the expression. 86
87 Sorting and selecting Subtract - Excludes records which satisfy the expression. Add - Adds records which satisfy the expression (usually to the previous item in the selection criteria). It is similar to an 'OR' operation. Useful examples: Example 1: Display only resources of grade 2 and in the 'Lond' division: Operation AND AND Selection Field Condition resource.grade = resource.division = Condition Value 2 Lond Example 2: Display resources of grade 2, excluding those in the 'Lond' division: Operation AND SUB Selection Field Condition resource.grade = resource.division = Condition Value 2 Lond Example 3: Display resources of grade 2 or grade 3: Operation AND ADD Selection Field resource.grade resource.grade Condition = = Condition Value 2 3 Conditions Each item in your selection criteria must use one of these five conditions: = The value in the database field equals the condition value. >= The value in the database field is greater than or equal to the condition value. Contains The value in the database field contains the condition value (the text string). < The value in the database field is less than the condition value. Is blank The database field is blank. Useful examples Example 1: Display only resources of grade 2 or above: Operation AND Selection Field resource.grade Condition >= Condition Value 2 Example 2: Display only jobs containing the text 'ABC Group': Operation AND Selection Field job.name Condition Contains Condition Value ABC Group Example 3: Display resources with the same security settings as the currently selected resource: Note: For this to work, the user must have the selected resource set up in Security. Operation AND Selection Field resource.security Condition = Condition Value $MY_VAL 87
88 Sorting and selecting Cross-reference view selections Using basic selection criteria you can filter the resource and job views independently. For example, you can filter the resource view to display only resources of grade 1 and the job view to display jobs with manager name 'Smith'. The 'Selection' dialog also allows you to cross-reference your selection filters. In this way you can apply your resource selection criteria to the bookings displayed in the job view and vice-versa. For example, you can display resources of grade 1 in the resource view and the bookings relating to grade 1 resources when you rotate the screen to the job view. Likewise, you can display jobs belonging to manager 'Smith' in the job view and the bookings relating to manager 'Smith' jobs when you rotate the screen to the resource view. To apply resource selection criteria to the job view: 1. Switch to the 'resource' view in the 'Setup Wallchart' dialog. 2. Define your resource selection criteria in the usual way under the 'Selection' tab. 3. Mark the 'Use selection in Job view' checkbox. To apply job selection criteria to the resource view: 1. Switch to the 'Job' view in the 'Setup Wallchart' dialog. 2. Define your job selection criteria in the usual way under the 'Selection' tab. 3. Mark the 'Use selection in Resource view' checkbox. Remember to reset these cross-reference checkboxes when you have finished filtering in this way. If you don't you may continue working from a filtered view without realising it. Booking selection filters You can restrict the bookings that are displayed on the wallchart in two ways: By specifying bookings selection criteria. By setting up cross-references between your resource and/or job selection criteria (see above). Selection criteria in respect of bookings hides the booking bars that do not meet the selection criteria, but does not restrict the rows displayed on the wallchart grid. Booking selection filters therefore operate differently to resource and job selection filters. For example: If you Select resources with grade = 1. Then The resource view only displays rows for grade 1 resources. All bookings are displayed for these resources. As above & cross-refer to the job view. As above, but in the job view only bookings in respect of grade 1 resources are displayed. Select bookings with resgrade = 1. All resources are displayed in the resource view. Only bookings with resgrade 1 are displayed in either resource or job view. Use check boxes which appear for bookings view only: Filter Res / Jobs Takes out Resources (in resource view) or takes out Jobs (in job view) for which there are no bookings. Show All Bookings For the Jobs or Resources on view, displays all the bookings. Furthermore, since in Retain you can set details such as the resource grade or job priority on a booking by booking basis, the information stored in bookings level fields such as 'resgrade' is not necessarily the same as 88
89 Sorting and selecting that in the underlying resources or jobs. In the above example, information in 'resgrade' in the bookings table need not be the same as the current 'grade' of the underlying resource. Using "$MY_VAL" to filter resources Removing selection filters To remove your selection filters: Select 'Data', 'Clear selection' from the menus. Short-cuts: menu. Clear selection icon or right-click over records list and select 'Clear entire selection' from the This will remove all the selections applied to the current view. If selections are locked then it will remove selections up to the last locked level. Remember that resource and job view selections can be set independently. Therefore they must also be removed independently. Locking selection filters You can lock selections at a particular level, so that you always display the intended selection for a group or other categorisation after clearing selections. To do this: 1. Select the selection line within the selection dialog you wish to lock (lines below this line are removed when clearing a selection). 2. Tick the box under the 'Lock' icon. When clearing a selection the locked selection will still be displayed. To unlock a selection: 1. Display the selection dialog, either by right-click, 'Selection...' or 'Data', 'Selection...' from the menus. 2. Uncheck the box under the 'Lock' icon. Importing and exporting selections Any set of selection criteria can be exported to be used as a standard selection, to use for other notebook pages, other users or for use at a later date. Selections are saved as.sel files. Note that report selections are also exported as.sel files, but report and wallchart selections cannot be used interchangeably. To export a selection: 1. Select 'Data', 'Export selection...' from the menus. 2. Select a directory to put the selection file in, if required. 3. Enter a suitable filename or select an existing file to overwrite it, and click 'OK'. Note that this exports the selection criteria as accessible using 'Data', 'Selection...'. It does not include any active special selections or the selection of marked records. To import a selection: 1. Select 'Data', 'Import selection...' from the menus. 2. Select the directory of the required selection file, if necessary. 89
90 Sorting and selecting 3. Select the required file, and click 'OK' or double click in the file window. 90
91 Working with bookings Working with bookings Bookings overview In Retain each booking represents an allocation of an individual resource against a specific job, covering a defined date range and a measurable number of hours. In order to allocate resources to jobs in Retain you will need to make bookings. You can make bookings on either a wallchart page or a calendar page, although it is usually easier to make them on a wallchart page. Retain treats all allocations to the wallchart as 'bookings', regardless of their nature. This means that 'non-jobs', such as vacation and sick leave also need to be entered as bookings. You can use the fields associated with the job to treat bookings against these special types of jobs differently from other types (see Adding jobs). Bookings are often tentative. For greater control over tentative bookings, they can be assigned a scenario number. These bookings will be displayed with dotted lines, and you can modify all bookings of a scenario as a group. Making a booking Adding additional booking details Viewing bookings Inspecting bookings Editing bookings Duplicating bookings Using the colour key Deleting bookings Using the clipboard Using scenarios Rolling bookings forward 9.2 Making a basic booking Make bookings overview In order to make bookings you must first be in edit mode. See Switching to edit mode if you are not sure whether you are in edit mode. In Retain you make bookings graphically on the wallchart (or calendar) page. To make a booking involves: 1. Marking an area on the wallchart. 2. Displaying the 'Make Booking' dialog and entering required information. 3. Entering optional details such as a component, priority colour or other details if desired. 4. Accepting the booking. Marking an area There are two distinct methods of marking an area on the wallchart, in preparation for making a booking: Using the mouse 1. Find the resource (or job) against which you want to make the booking. 2. Move the mouse pointer to the start date of the booking, adjacent to the required resource or job. 3. Click and hold down the left mouse button. 4. Move the mouse pointer to the end date of the booking. 5. Release the mouse button. 91

92 Working with bookings Using the keyboard 1. Find the resource (or job) against which you want to make the booking. 2. Using the cursor keys, move the black rectangle to the start date of the booking adjacent to the required resource or job. 3. Hold down the SHIFT key while using the cursor keys to move to the end date of the booking. 4. Release the SHIFT key. A black bar marks the scope of the booking you are about to make. Make sure that you have selected the correct resource (or job) and that the start and end dates covered by the marked area correspond to the duration of the proposed booking by checking the status bar at the bottom of the screen. Entering the booking details Once you have marked an area on the wallchart you are ready to make a booking. To do this: 1. Select 'Actions', 'Make booking' from the menu. Short-cuts: CTRL+K. The 'Make booking' icon or right-click on the booking grid and select 'Make booking' or press 2. At the 'Make Booking' dialog enter the required details. One job and at least one resource must be selected. If you are in a resource view then the 'Selected Resources' box will already contain the resource(s) selected when you marked the booking area. If you are in a job view then the marked job will be selected in the 'Job' box. 3. Optionally enter further booking details (see Optional booking details). 4. Click on 'OK' to accept the booking. The booking will appear on the wallchart at the position corresponding to the area you originally marked. If you selected more than one resource when making the booking then a separate booking will have been created against each selected resource. If you make a booking against a resource that has either left or not started, a message box will warn you, and ask if you want to continue. 92
93 Working with bookings Making multiple resource bookings You can book several resources to the same job simultaneously (effectively creating several identical bookings at once). There are three ways to select or remove resources which will be allocated in the current booking: Using the 'Make booking' dialog: Add resources to the 'Selected Resources' list by clicking on the resource name and then clicking on the 'Add' button. Remove resources from the 'Selected Resources' list by clicking on the selected resource and clicking on the 'Remove' button. Short-cut: Double-click on the resource name in either list. Marking an area: When marking an area using either mouse or keyboard, you can extend the area to multiple resources. All resources marked will appear in the 'Selected Resources' list. Making block bookings: Make a selection of all resources for which you want to make the booking (See Making Selections), or clear the selection to book for all resources. Select 'Actions', 'Make block booking' from the menus. All currently displayed resources will appear in the 'Selected Resources' list. Selecting a booking component You can select a component to further describe the booking. Components are usually generic 'sub-jobs' which break down a job into its component parts. They might include 'planning', 'fieldwork' and 'reporting' for example. You can also define job-specific components or use a custom booking name. To select a component to describe this booking: Click on the component name in the list. If the component isn't listed at the 'Make Booking' dialog, you can type in a name for the component needed for the booking. If you want to use a component that you would like to be available for all further bookings: 1. Click the 'Add component' button. 2. At the 'Add Component' dialog, enter the new component name. 3. Choose 'Add' to add the new component. The new component will be automatically selected at the 'Make Booking' dialog. Choosing a different booking colour The colour of each booking is determined by its priority code. When you add a new booking, the colour will default to the priority code associated with the booked job. However, you can change the colour on a booking by booking basis if you prefer. To choose a different booking colour at the 'Make Booking' dialog: 1. Select the job you want to book. The drop-down list of priority codes is unavailable until a job has been selected. 2. Click on the drop-down list in the 'Priority Colour' panel. 93
94 Working with bookings 3. Select a new priority code. Tip: Use the up and down cursor keys to scroll through the priority colour list. Each colour will be displayed in the 'Priority Colour' panel. 4. Repeat steps 2 and 3 if you want to choose a different colour. If you choose a booking colour other than the default associated with the corresponding job, a reset button becomes available in the 'Priority Colour' panel, labelled with an 'X'. To return the booking to its default colour: Click on the 'X' button in the 'Priority Colour panel'. When the booking colour is the default colour, this button will be unavailable and will be labelled with a 'D'. 9.3 Adding additional booking details Additional booking details overview You can show or hide the following booking details at the 'Make Booking' dialog: charge rate information; start and end dates and times; loading details (for proportional bookings); booking notes; actual booking times; scenario names; any user-defined additional fields; 94

95 Working with bookings To view or amend these additional booking details: 1. Click on the 'Show More' button in the 'Make Booking' dialog. The dialog is expanded and the 'Show More' button becomes a 'Hide More' button. 2. Amend the details as desired. To hide these additional booking details again: Click on the 'Hide More' button in the 'Make Booking' dialog. The dialog is collapsed and the 'Hide More' button becomes a 'Show More' button. You can determine whether the view is expanded or collapsed by default by marking or clearing the 'Always open maximized' checkbox. Amending the start and end of a booking The easiest way to define the start and end of a booking is to mark the area on the wallchart accurately in the first instance. Thereafter it is usually easier to amend the booking graphically on the wallchart (see Moving and copying bookings), rather than amending the booking dates and times manually. Nevertheless, the start and end dates and times can be edited at the 'Make Booking' dialog if required. The current information is displayed in a panel at the 'Make Booking' dialog such as this: To edit these details manually: 1. At the 'Make Booking' dialog, make sure that the dialog has been expanded (see Showing or hiding additional booking details). 2. Click on the 'Start Date' and 'End Date' boxes and amend the start and end dates as desired. Tip: Click on the calendar button to the right of each date box to select a date from the pop-up calendar. 95
96 Working with bookings 3. Click on the 'Start Time' and 'End Time' boxes and amend the start and end times as desired. Tip: Click on the up and down arrows to the right of each box to increase or decrease the time in 5 minute increments or right click on the entry box to get a pick list of times. When you amend the start and end dates and times, the size of the booking will be adjusted automatically on the wallchart view. Also, unless you have made a proportional booking, the number of hours calculated for this booking will be automatically adjusted. Note: When you make a booking covering only part of a day, the whole of that part is included in the calculated hours (i.e. no account is taken of any defined break in the day). This produces the paradoxical situation that a booking covering less than the full day can amount to a greater number of booked hours. For example, if you have an 8-hour day with a 1-hour lunch break the standard day is calculated as 7 hours. If you make a booking starting 15 minutes after the start of the day and covering the rest of the day, this booking is calculated as lasting 7 hours and 45 minutes. The break in day deduction is ignored. Making proportional bookings When you make a booking Retain initially assumes that the work requires 100% commitment during the booking period. For example, if your organisation has a 35-hour standard week then a booking of 2 week's duration would be assumed to equate to 70 hours for planning purposes. The actual duration of the booking is displayed in the 'Hours' and 'Minutes' panel at the centre of the 'Make Booking' dialog. The 'Time' field is the total number of booked hours for a booking. In case of a 100% commitment, this is equal to the actual duration of the booking. To make proportional bookings: 1. At the 'Make Booking' dialog, make sure that the dialog is expanded (see Showing or hiding additional booking details). 2. Enter the proportional booking using either of the following methods: 96
97 Working with bookings Click on the 'Loading' box and enter a percentage commitment for this booking. The corresponding fixed hours will be calculated automatically. For example, a 50% commitment over a 70-hour period would produce a 35-hour booking. Or Click on the 'Time' box and enter a fixed number of hours for the booking. The corresponding loading percentage will be calculated automatically. For example, 35 hours over a 105-hour booking period would represent a loading percentage of 33%. 3. Click on the 'Fix' radio button next to 'Loading' or 'Time' to store the booking as either a fixed percentage commitment or a fixed number of hours. Changing the duration of a booking (by stretching or shrinking the booking in the wallchart, for example) will keep this field fixed and adjust the other field. Fixed Loading or Time is important for the way bookings are handled on statutory holidays. For more information see 'Statutory Holidays'. In wallchart or calendar pages, if you view bookings with the booking bar depth set to 'proportional to loading' the height of each booking graphically represents the percentage commitment of the booking (see Booking bar display options). Changing the booking charge rate Retain derives the charge rate applied to each booking automatically, based on its 'charge code'. The charge code is arrived at through a combination of: the grade of the resource selected; the analysis code of the job selected; and the date range of the booking. The current charge rate information is displayed in a panel at the 'Make Booking' or 'Edit Bookings' dialog such as this: 97
98 Working with bookings When you select a resource and job for the booking, the corresponding charge rate should already be entered, so you need do no more. However, you can select a different charge code for the booking, or even amend the charge rate itself, so that every booking can have a unique charge rate if desired. To select a different charge code for the current booking: 1. At the 'Make Booking' dialog, make sure that the dialog is expanded (see Showing or hiding additional booking details). 2. If you have selected more than one resource for this booking, click on a resource at the 'Selected Resources' list. 3. Click on the 'Charge Codes' drop-down list to see the available codes. The charge codes are listed as the resource grade and then the job code. 4. Select the desired charge code. The rate corresponding to the selected charge code will be automatically updated in the 'Charge Rate' box. 5. Repeat steps 2 to 4 for each resource as desired. To select a different charge rate for the current booking, without changing the charge code: 1. Click on the 'Charge Rate' box. 2. Enter the desired charge rate. The charge rate should be expressed as a value per hour. You may enter rates with up to 2 decimal places. 3. Repeat steps 1 and 2 for each selected resource as desired. To fix the charge rate, such that it keeps its value when moving bookings to other resources, check the 'Fix' 98
99 Working with bookings checkbox. If you set a customised charge code or charge rate, a reset button becomes available next to the corresponding box, labelled with an 'X'. To return the booking to its default: Click on the 'X' button at the 'Charge Codes' box to restore the charge code to its default value. The charge rate will automatically be adjusted to the corresponding rate. Click on the 'X' button at the 'Charge Rate' box to restore the rate to its default value based on the currently selected charge code. The charge code will not be returned to the default value unless you click on the button at the 'Charge Codes' b ox. When the booking is using its default charge code and rate, these buttons will be unavailable and will be labelled with a 'D'. Note that if you move a booking entered with a manual charge code or rate, it will be updated to the default charge code or rate, unless the 'Fix' box is checked. Other details about the booking remain the same. Note that the relationship between charge rates, resource grades and job codes is defined in the separate Retain Manager application. Contact your Retain administrator or see the separate Manager Guide for more information. Entering actual times You may enter actual hours against each booking in Retain. To enter actual hours against a booking: 1. Create or edit a booking. 2. At the 'Make Booking' dialog, make sure that the dialog is expanded (see Showing or hiding additional booking details). 3. Click on the 'Actual Time' panel and enter the number of hours. Tip: You can use the up and down arrows to the right of this box to adjust the actual hours in 1 hour increments. Retain is not a time recording system and there are obvious limitations to entering actual times against bookings. These include: You can only enter an actual time if a corresponding booking exists. You can only enter one figure for actual time against each booking, so you may not be able to represent differences in timing across the booking. You might consider integrating Retain with your own time recording system. Alternatively a separate time recording module is available, which is closely integrated with Retain. Contact your supplier for more information. Some organisations alias the actual time field so it can be used as any numeric field of information. 99
 as a group. To assign a name: 1.")
100 Working with bookings Assigning scenario names Each Retain booking can be assigned a scenario name for use with scenarios (see Using scenarios). All bookings with the same name can be modified (accepted or deleted) as a group. To assign a name: 1. At the 'Make Booking' dialog, make sure that the dialog is expanded (see Showing or hiding additional booking details). 2. Click on the 'Scenario' drop-down list to see the scenario names currently in use. 3. Either select the desired name or enter a different name for a new scenario. Scenario bookings will be displayed with a dotted line: 100
101 Working with bookings 9.4 Viewing bookings To view a Retain booking: 1. Locate the booking on the wallchart (see Navigating around the wallchart). The booking bar itself displays some information. See Booking bar fields if you want to customise the booking bar fields. 2. Move the mouse pointer over the booking so that the mouse pointer changes to a 'hand' icon. If booking tips are activated a pop-up window will display information about the booking. See Booking tips. 3. Click on the booking to select it. 4. Select 'Actions', 'Booking Info' from the menus to see all the details of the booking. Short-cuts: Double click on the booking or from the menu. 'View booking' icon or right-click and then select 'Booking info' 5. Select 'Actions', 'Resource info' or 'Job info' from the menus to see details relating to the underlying resource or job of the selected booking. Short-cuts: 'Resource info' or 'Job info' icons, or right-click over the selected booking and then select 'Resource info' or 'Job Info' from the menu. You can view the details relating to all the bookings in a specified range of the wallchart by using the 'Inspect' function. Selecting multiple bookings and using any of the 'View booking', 'resource info' or 'job info' icons brings up the 'Inspect' dialog containing the selected bookings. 9.5 Inspecting bookings A special 'Inspect' function allows you to examine all of the bookings contained within a marked area of the wallchart via a simple dialog format. This option can be useful where you have a lot of bookings squeezed into a particular area of the booking grid, or where you have proportional bookings with such a low loading percentage that they are not currently visible on screen. To inspect all of the bookings in a specified range of the wallchart: 1. Mark an area on the wallchart using the mouse. Tip: Ensure Block booking in Retain preferences is enabled if you want to inspect bookings across a range of resources in the resource view. 2. Select 'Actions' 'Inspect bookings' from the menus. Short-cuts: Inspect bookings icon, or press CTRL+I. Alternatively right-click over the marked area and choose 'Inspect' from the menu. 3. At the 'Inspector' dialog, view and edit the booking details as desired (see below). 4. Choose 'Done' when you have finished inspecting bookings. The inspector dialog The 'Inspector' dialog displays all bookings contained within a selected range of the wallchart (including bookings outside the current display diary) when you run the 'Inspect' function: 101

102 Working with bookings Select a booking and then choose one of the following options: 9.6 View - Displays the selected booking details Edit - Displays the 'Edit booking' dialog, allowing you to edit the details of the selected booking Delete - Deletes the selected booking Select - Closes the 'Inspector' dialog and selects the highlighted booking in the wallchart Select all - Closes the 'Inspector' dialog and selects all of the retrieved bookings in the wallchart Configure - configure booking fields shown in the Inspector dialog Editing bookings You can edit bookings either graphically on the wallchart or manually through the booking details screen. Editing bookings using the wallchart Once you have made bookings you will normally find it quicker to amend the bookings graphically through the wallchart. Moving bookings Moving a booking on the wallchart automatically updates booking details such as the resource (or job) name and the start and end dates of the booking, if relevant. Charge code and rate information may also be updated. For example, if you move a booking relating to resource grade '1' to a resource with grade '2' the booking adopts the charge rate associated with grade 2 (unless the charge rate is fixed). Other details about the booking remain the same. To move a booking: 1. Move the mouse pointer over the booking so that the mouse pointer changes to a 'hand' icon. 2. Click with the left mouse button, holding the button down. The mouse pointer will change to a hand with directional arrows, to indicate the move operation. 102

103 Working with bookings 3. Move the outlined booking to the new location. You will see a transparent copy of the booking floating over the wallchart behind your mouse pointer, indicating where the booking would end up if you were to let go of the mouse button at any given moment. (See Booking preferences for different 'snap to' settings.) 4. Release the left mouse button. The booking will be moved to the new location. Repeat the process if the booking isn't exactly where you wanted it. Use the clipboard to move bookings to resources, jobs or time periods outside the current view of the booking information (see Using the clipboard). Copying bookings Copying a booking creates a new booking with identical characteristics to the first, but with new details such as the resource (or job) name and the start and end dates of the booking, if relevant, based on the location of the new booking. Charge code and rate information may also be updated. For example, if you copy a booking relating to resource grade '1' to a resource with grade '2' the new booking adopts the charge rate associated with grade 2. If the booking was originally entered with a manual charge code or rate, it will be updated to the default charge code or rate. Other details about the booking remain the same. To copy a booking: 1. Move the mouse pointer over the booking so that the mouse pointer changes to a 'hand' icon. 2. Hold the CTRL key down and then click with the left mouse button, also holding the button down. The mouse pointer will change to a hand with directional arrows. A '+' sign inside the hand indicates that this is a copy operation. 3. Move the outlined booking to the new location. Tip: Concentrate on placing the bottom left corner of the booking into the cell into which you want to copy the booking. (See Booking preferences for different 'snap to' settings.) 4. Release the left mouse button and then the CTRL key. The booking will be copied to the new location. You can now move the new booking, if it isn't exactly where you wanted it. Use the clipboard to copy bookings to resources, jobs or time periods outside the current view of the booking information (see Using the clipboard). Resizing a booking Resizing a booking on the wallchart automatically updates its start or end date, depending on which end of the 103
104 Working with bookings booking you move. Unless the booking is for a fixed number of hours (see Making proportional bookings) resizing also changes the number of hours allocated to the booking; 'stretching' the booking increases the booked hours and 'shrinking' the booking reduces the booked hours. Other details about the booking remain the same. To resize a booking: 1. Move the mouse pointer over either the left or right end of the booking, so that the mouse pointer changes to a ' ' icon. 2. Click with the left mouse button, holding the button down. 3. Move the mouse pointer to the new location. A marked area will indicate the scale of the amended booking. 4. Release the left mouse button. The booking will be resized to the new location. Repeat the process if the booking isn't exactly where you wanted it. Selecting multiple bookings You can select multiple bookings and then move, copy or delete them in one go. You can only resize one booking at a time. To select multiple bookings: 1. Click on the first booking. 2. Hold the CTRL key down and click on further bookings to select or deselect them as desired. Bookings change colour (inversion) to indicate when they are currently selected. 3. Release the CTRL key. 4. Perform the desired operation on the selected bookings. This facility is particularly useful when there is a relationship between the bookings which you want to preserve. For example, you can use this function when an entire job has been rescheduled, by selecting all bookings against the job and moving them with reference to the new start date. An alternative method of selecting multiple bookings is available through the booking inspector (see Inspecting bookings). Editing a booking through the booking details screen To editing a booking through the booking details screen: 1. Click on the booking in the wallchart. 2. Select 'Actions', 'Edit booking' from the menus. Short-cuts: The 'Edit selected booking' icon or right-click over the booking and choose 'Edit booking' from the menu. 3. At the 'Edit Booking' dialog, amend the booking details as desired. This dialog is similar to the one you see when first making a booking. See Making a booking for help on entering booking details. 104
 are affected by statutory holidays. (See the Wallchart section.) 9.")

105 Working with bookings 4. Click on 'OK' to accept your changes to the current booking. Amendments through this booking details dialog will be automatically reflected in the wallchart. Note that all booking operations (editing, duplicating, splitting and so on) are affected by statutory holidays. (See the Wallchart section.) 9.7 Changing booking colours Users can change the colour of a booking by right-clicking on the booking in the Wallchart view and selecting the new colour from a visual display of all the colours available. 9.8 Duplicating bookings A duplication wizard is available to help create recurring bookings. To repeat a booking across time or resources: 1. Select 'Actions', 'Duplicate bookings' from the menus to start the Duplicate Bookings wizard. 105

106 Working with bookings Short Cut: 'Duplicate bookings' icon or right click on a booking. 2. Select whether to repeat bookings across, time, resources or both by clicking the appropriate checkboxes. 3. If repeating across resources, select the resources desired by highlighting them in the 'Available' list and moving them to the 'Selected' list using the '>' button. You can move a resource from the 'Selected' list using the '<' button, add all resources using '>>' and remove all resources using the '<<' button. 4. Check to see if your settings are correct and click on 'Finish' to duplicate the bookings. Duplicating over time follows a different procedure depending on the duplication period selected. 1. Select 'Actions', 'Duplicate bookings' from the menus to start the Duplicate Bookings wizard. Short Cut: Right click on a booking and select 'Duplicate bookings'. 2. Select whether to repeat bookings across, time, resources or both by clicking the appropriate checkboxes. 3. If repeating across time, select duplication period, either yearly, monthly, weekly, daily or custom. 4. For yearly, monthly or weekly bookings, select the duplication interval (every.. years/months/weeks). 5. Select the dates the duplicating bookings should start, depending on the period: Yearly: Select which day of the year. Monthly: Select which day of the month or 'Last day of the month'. Weekly: Select which day(s) of the week. 106

107 Working with bookings Custom: Select the exact dates. 6. Select when to start duplicating. Default is the first day after the selected booking ends. 7. Select when to stop duplicating. The 'Duplicates' field will show the number of duplications to be made within that period. Default is one duplication. Alternatively, type or use the up/down arrows to change the required number of duplications. Note: Daily and weekly duplication will not copy to weekends, but copies for yearly or monthly duplication might end up in weekends or on statutory holidays. Afterwards, check the duplicates and move them to weekdays if necessary. 8. Check to see if your settings are correct and click on 'Finish' to duplicate the bookings. 9.9 Splitting bookings This function will split a booking in half, rounding each half to the current 'snap to' settings (see Customising date scale settings for the wallchart). This is useful for spreading bookings over resources or out in time while fixing the number of hours. To split a booking: 1. Click on the booking in the wallchart. 2. Select 'Action', 'Split booking' from the menus. Short-cuts: Right-click over the booking and choose 'Split booking' from the menu. A booking smaller than the current 'snap to' settings will split in two halves with minute precision. It is recommended to do the splitting on a smaller date scale in that case (from months to weeks for example) Cutting bookings Users now have the ability to divide one booking into two by visually cutting the booking in the wallchart view at any point along the it's length. The two newly created ends of the bookings will 'snap to' as defined in your preferences. (see Customising date scale settings for the wallchart). Select 'Actions' -> 'Cut booking tool' 107

108 Working with bookings 9.11 Using the colour key A quick way to change the colour of existing bookings is to use the 'Colour Key'. This is a floating window which displays the priority colours and allows you to 'paint' the colours onto the booking grid. To call up the colour key: Select 'View', 'Colour Key' from the menus. To amend booking colours through the colour key: 1. Click on the colour in the colour key. The mouse pointer will change to 'paint-pot' icon. 2. Move the mouse pointer over the desired booking. The mouse pointer will change to 'pouring paint-pot' icon. 3. Click on the booking to accept the new colour. 4. Repeat steps 1 to 3 for each amendment as desired. 5. When you have finished making changes click anywhere on the booking grid, but away from the bookings, to remove the paint pot icon. Note that 'dropping' a new colour onto a booking through the colour key has the effect of changing its priority. You can keep the colour key displayed throughout your current session if you like and use it whenever you need it. To move the colour key: 1. Click on the header bar or the colour key dialog, holding the mouse button down. 2. Move the mouse pointer to the new location. 3. Release the mouse button. To close the colour key: Click on the 'X' icon at the top right corner of the colour key. See Palette preferences for guidance on customising the colour key. 108

109 Working with bookings 9.12 Deleting bookings Deleting one or more bookings removes them permanently from the wallchart and all reports. To delete bookings: 1. Click on the bookings in the wallchart. 2. Select 'Actions', 'Delete booking' from the menus. Short-cuts: The 'Delete selected booking' icon or press DEL. Alternatively right-click over a booking and choose 'Delete booking' from the menu. 3. The 'Delete Booking' dialog will appear. Choose 'Yes' to delete the displayed booking, 'No' not to delete the displayed booking, 'Yes to All' to delete all bookings selected or 'Cancel' not to delete the remaining selected bookings Using the clipboard The rectangular area immediately above the left hand column of resource or job names is called the Retain 'clipboard'. It appears white when containing no bookings. The size of the clipboard area can be changed by dragging the borders to the right and downwards to show more bookings. You can hide and unhide the clipboard from the 'View' menu and selecting 'Booking Clipboard'. The clipboard is particularly useful when you want to move or copy bookings beyond the currently displayed area of the wallchart. The Retain clipboard is similar to a normal Windows clipboard, in that you can cut (move) and copy bookings to the clipboard and paste them back into the wallchart. The Retain clipboard is different from other clipboards, however, in that: A number of bookings can be stored in the clipboard at any one time. The clipboard only deals with bookings. The processes are slightly different from the standard cut, copy and paste features of other Windows applications. Each notebook page has its own clipboard and the bookings in one page's clipboard are not available in any other page's clipboard. To move or copy a booking to the clipboard: 1. To copy a booking to the clipboard, right-click on a booking and select 'Copy to Clipboard' in the context 109
110 Working with bookings menu. Alternatively click on a booking and click on the Short-cut in the tool bar. 2. To move a booking to the clipboard, drag the booking to the clipboard directly and release the booking within the clipboard area. Note, if you do undo now the booking will re-appear on the wallchart but the clipboard will keep a copy. Bookings remain on the clipboard until you move them back to the wallchart. If you have several bookings on the clipboard at the same time scroll bars will appear to allow you to navigate between bookings. To move or copy a booking from the clipboard: There are two options for this action. The more straightforward option is: 1. Move the mouse pointer over the booking in the clipboard. 2. Drag the booking to move the booking in the usual way, or press CTRL and then drag to copy the booking. 3. Release the booking within the desired location of the wallchart. An alternative option locates the booking at the current block position in the wallchart: 1. Use the mouse or keyboard to mark the date you want to place the booking. 2. Select the booking you want in the clipboard with the left mouse button. 3. Right-click and select 'Move to wallchart' to move or 'Copy to wallchart' to copy the booking to the wallchart. Note: the original start time of the booking is maintained, the 'Snap to' settings are ignored. This is useful for different date scales. To remove bookings from the clipboard: 1. Move the mouse pointer over the clipboard area. 2. Right click with the mouse. 3. Choose 'Delete selected' to delete a selected booking. 4. Choose 'Flush clipboard' to remove all bookings from the clipboard Using scenarios Scenarios allow more control over tentative bookings, especially for use with the roll forward functionality. Scenarios allow tentative bookings to be grouped and be modified as such. When rolling forward bookings, you can select or type in a scenario name that will be assigned to all rolled forward bookings. Existing bookings can be assigned to a scenario in the booking details dialog, accessible by right clicking on a booking and choosing 'Edit Booking' or when making a new booking. All scenario bookings are displayed with a dotted line. Scenarios can be used as criteria when selecting bookings. Modifying a scenario In the end a scenario will no longer be tentative, it will either become an actual project or it won't. To modify a scenario, converting scenario bookings into actual bookings or deleting them: 1. Select 'Actions', 'Modify scenario...' from the menus. 2. Select the desired scenario from the drop-down list or by typing its name. 110
; 'Delete scenario' to delete the related bookings; or 'Exit' to abort the")
111 Working with bookings 3. Click one of the following: 'Confirm scenario' to convert the related records into actual bookings (no scenario value); 'Delete scenario' to delete the related bookings; or 'Exit' to abort the operation. Enabling scenarios To enable scenarios, add a character field to RESBOOK called SCENARIO Rolling bookings forward If you are planning resources on recurring jobs, rolling the bookings forward from one period to the next may save time setting them up in second and subsequent periods. To roll forward bookings 1. At a wallchart page, filter the resource and/or job view as desired, so that only those bookings that you want to roll forward are displayed (see Sorting and selecting). For example, if you only want to roll forward bookings for jobs belonging to manager Smith, filter the jobs view by setting selection criteria where Manager = 'Smith'. 2. Select 'Actions', 'Roll forward' from the menus. Short-cut: 'Roll forward' icon. 3. At the 'Roll forward' dialog, specify roll forward dates and criteria (see The roll forward dialog). 4. Choose 'OK' to perform the roll forward. A status bar will be displayed while the bookings are rolled forward. This may take some time. 5. Once the roll forward process is complete, check the new bookings and amend them for the current period as desired. The roll forward dialog When you select 'Actions', 'Roll forward' from the menus, the 'Roll forward' dialog is displayed: At this screen(s): 1. Specify the date range of the bookings to be copied forward. Or this could be done by marking a region on 111
112 Working with bookings the wallchart. All bookings starting within the date range specified (and matching the current selection settings) will be rolled forward. 2. Specify the destination date for the new bookings. The new bookings will start from a date that is either before or after the destination date (by an offset of the original start date and start date of the date range), depending on whether the start date of the original booking is before or after the date range. For example, a booking between 1/5/2005 and 6/5/2005 with an offset of 2 days and destination date on 10/7/2005 will result in a new booking between 12/7/2005 and 17/7/2005. Hint: Use the same day of the week for the destination date to avoid creating weekend bookings. 3. Select one of the following 'Copy bookings to resource' options: Same resources if same grade. A booking will be rolled forward to the same resource only if the current resource grade is the same as the grade for the booking. Otherwise the booking will be rolled forward to a dummy resource of the same grade. Where assignments are allocated primarily based on resource grade, this option helps to isolate bookings which need to be reassigned to different resources, where grades change through staff promotions, for example. Same resource irrespective of grade. All bookings will be rolled forward to the same resource. Use this option where staff continuity is more important than resource grade. Temporary resources with same grade. A dummy resource will be added for each grade covered by the selected bookings and the bookings will be rolled forward to these temporary resources. Temporary resources are given names beginning 'zztemp' so that they are easily identifiable. Use this option on assignments where there is little staff continuity from one period to the next. Move bookings from the temporary resources to real resources as desired. Delete the temporary resources when done. 4. Specify an optional scenario name for the selected bookings. All bookings will be assigned to the same scenario and later displayed with dotted lines. They can be modified as a group. This can be done either by selecting an existing name from the drop-down list or typing a new name in the scenario field. 5. Choose 'OK' to execute the roll forward. Rolling forward bookings is normally only the starting point for your planning on recurring jobs. Move, copy and resize the new bookings in the usual way to take into account differences in timing and duration of the assignments and reallocate bookings to different resources as desired. Rolling forward to weekends or statutory holidays affects this as well. Although it resembles duplicating bookings, rolling bookings forward works with multiple bookings and provides only a single copy. 112

113 Working with bookings 9.16 Undo-ing a booking All editions of Retain now have the facility to undo the last action that was performed on a booking. In the Edit menu, there will be an option to either 'Undo delete booking', 'Undo make booking' or 'Undo move booking' depending on the last change you made. 113
114 Working with notebooks 10 Working with notebooks 10.1 Notebooks overview Notebooks contain views of your Retain data. They allow you to display your Retain wallchart in various ways and to define report formats used by the Retain Report Writer. Each notebook can contain one or more notebook pages, each page representing a different view of your data. Each notebook page may be either a wallchart, calendar or report type page and can be defined independently (see Working with notebook pages). Each notebook points to a particular set of data files. In most organisations, you are likely to have a single set of data files, but you may have several notebooks pointing to that data. In a network environment, your Retain data may be stored on a network drive and shared by many users. Each user may have their own notebooks, or you may even have notebooks which are shared by several users. (Note: If you intend to share notebooks the notebook file is changed each time someone saves it. You may prefer to make shared notebook files read only so that they cannot be amended.) It is essential, when working with Retain notebooks, to appreciate that the underlying data is the same across all pages, notebooks and even users of that data. For example, if you amend a booking in a particular notebook view the booking itself is amended, not just the view. Conversely, if you amend a view, for example by excluding certain tasks from the display, you affect the current view, but not the records currently hidden from that view. Creating a new notebook Opening an existing notebook Saving the notebook Closing the notebook Notebook windows 10.2 Creating a new notebook To create a new notebook: Select 'File' -> 'New' from the menus. Short-cuts: New file icon or press CTRL+N. The new notebook file will be created with a temporary name such as 'ntbk1' and a default 'Resource' page will be provided. You can now work with the notebook as desired. The temporary notebook name given to a new notebook is equivalent to an untitled document in a word processing application or unsaved workbook in a spreadsheet application. Remember to save your new notebook under a meaningful name and to save changes to your notebooks from time to time, such as when you add new notebook pages. See Saving the notebook Opening an existing notebook To open an existing notebook in Retain: 1. Select 'File', 'Open' from the menus. Short-cuts: The Open File icon or press CTRL+O. The four most recently opened notebooks are also listed in the 'File' menu. 2. Select or type the name of the notebook file you want to open. Use the 'Drives' and 'Directories' boxes to navigate to files in different locations. In Retain notebook files usually have an.rtn file extension. 3. Click on 'OK' to open the notebook, or 'Cancel' to cancel without opening the notebook. 114
115 Working with notebooks Generally you should only need to have one notebook open at any one time, since you may be working with several pages within that notebook (see Working with notebook pages). Close one notebook before opening another. You can open more than one notebook simultaneously, but only if all the notebooks point to the same database. You must close notebooks pointing to one data source before attempting to open a notebook pointing to a different data source. See Selecting a different data source Saving the notebook To save the current notebook: Select 'File', 'Save' from the menus. Short-cuts: The Save File icon or press CTRL+S. If the notebook has not previously been named you will then be prompted to enter a name for the new notebook. To save the current notebook under a different name, or to save a notebook which has not previously been named: 1. Select 'File', 'Save As' from the menus. 2. Enter the new name of the notebook file. Retain notebook files should be given an.rtn file extension. If you want to save the file in a different location, enter the full path of the file or use the Drives and Directories boxes to navigate to the desired location. 3. Click on 'OK' to save the notebook under this new name. If you enter an existing filename, Retain will ask if you want to overwrite the existing notebook. Click on 'Yes' to overwrite the existing notebook or 'No' to enter a different filename. When you save a notebook, remember that you are saving your views of the Retain data, including any pages added or deleted and any changes to the formats of existing pages. You are not saving the data itself. Changes to your bookings, jobs, resources and components are saved to the underlying database as you go along, so you do not need to worry about saving these changes separately Closing the notebook To close the current notebook: Select 'File', 'Close' from the menus. Short-cut: Double-click on the control icon at the top left of the notebook window or use CTRL+F4. If you have made changes to your notebook you will be prompted to save these changes before closing the file (see Saving the notebook). When you exit Retain you will automatically close any open notebooks. See Exiting Retain. 115


116 Working with notebooks 10.6 Importing/Exporting pages You can import and export individual notebook pages so that pages can be easily moved between different notebooks. Select 'Notebook' -> 'Export page...' to export and 'Notebook' -> 'Import page...'. For example if two users are each working on a sperate notebook but one user wants to use a report page that the other user has designed, then the first user can select 'Notebook' -> 'Export page...' The second user can then navigate to that file and import it to their own notebook by selecting 'Notebook' -> 'Import page...' 116
117 Working with notebooks 10.7 Notebook windows In Retain you can open several notebooks at once, as long as they point to the same underlying database (see Opening an existing notebook). Each notebook you open in Retain is contained in its own window. Resizing notebook windows You can manipulate each notebook window as follows: To expand the notebook window to its maximum size, click on the maximise button at the top right of the window. To restore a maximised window to its original size, click on the restore button at the top right of the window. To reduce the notebook window to an icon, click on the minimise button at the top right of the window. To manually resize a window, move the mouse pointer to the border of the window you want to size, so that the pointer changes to a double-headed arrow ' '. Then drag the border, until the window is the size you want, and then release the mouse button. To close a notebook window, double-click on the control icon at the top left of the window. Window menu options Any open notebook windows are listed in the 'Window' menu. To switch to a different window either click anywhere on the window area or select the name of the notebook from the 'Window' menu. The following options are also available from the 'Window' menu: Cascade - overlays your open notebook windows one on top of another, each window having the same dimensions. Tile vertically - tiles your open notebook windows side by side, each window being the same width. Tile horizontally - tiles your open notebook windows on top of each other, each window being the same height. Arrange icons - arranges the icons of minimised notebook windows evenly across the foot of the notebook area of the screen. Close all - closes all open notebook windows. 117
118 Working with notebook pages 11 Working with notebook pages 11.1 Notebook pages overview Each notebook can contain one or more notebook pages, each page containing a different view of your data. Up to 40 pages can be created per notebook. If the add/copy icons are greyed out, you already have 40 pages. The characteristics of each notebook page can be defined and maintained independently, using the various sort, selection and other display features in Retain. In this way you can create an almost unlimited number of views of your data. Each notebook page falls under one of the following 3 types: Wallchart - the traditional wallchart view, with resources or jobs listed down the side of the page and a continuous time bar along the top. Each booking is represented as a coloured rectangular block on the wallchart. Calendar - a calendar view where each screen page represents the bookings for one individual resource or job. Time is represented in a calendar style grid and special navigation features allow you to move between resources or jobs. Report - report formats, which you can easily develop and quickly generate using the powerful Retain Report Writer. Create a separate notebook page for each view of your data that you want to produce on a regular basis. When you save the notebook all the page formats are stored, so you can retrieve them quickly at a later date. Remove notebook pages that you no longer need or modify their formats to bring the views up to date. Often you will be able to work within the views of existing notebook pages, rather than creating a separate page for every unique view. If you are setting up a lot of notebook pages, consider setting up separate notebooks to deal with pages of a similar type. For example, you might set up pages relating to monthly reports in a 'monthly' notebook, or pages relating to particular staff groups into 'group' notebooks. Adding a page Inserting a page Copying a page Editing a page name Deleting a page Navigating between pages 118
119 Working with notebook pages Switching to wallchart or calendar view Setting the opening date 11.2 Adding a page To add a new page at the end of the current notebook: 1. Select the 'Add page' option from the 'Notebook' menu. Short-cuts: The 'Add page' icon. 2. Select the page type by clicking on the appropriate radio button. 3. Type in a descriptive name for the new notebook page. 4. Select 'OK' to add the page to your notebook. Note: When adding a report page you will be prompted to define the report format for the new report. See Reports for more details. The new page will be added as the last page in the dropdown box. See Inserting a page if you want to add a page elsewhere in the current notebook. Select the page from the dropdown box to make it the active page. See Navigating between pages. Then modify the page formats and work with the new page as desired. If you already have 40 pages, then the option to add a page will be greyed out, as 40 pages is the maximum. Renaming a page To edit the name of a notebook page: 1. If it isn't already the active page, click on the page you want to modify. 2. Select the 'Rename page' option from the 'Notebook' menu. Short-cuts: The 'Rename page' icon. 3. Type in the new name for the page. 4. Select 'OK' to accept your changes Inserting a page To insert a new page at the current location in the notebook: 1. Click on the page before which you want to insert the new page, if it isn't already the active page. 2. Select the 'Insert page' option from the 'Notebook' menu. Short-cuts: The 'Insert page' icon. 3. Select the page type by clicking on the appropriate radio button. 4. Type in a descriptive name for the new notebook page. 5. Select 'OK' to insert the new page to your notebook. Note: When adding a report page you will be prompted to define the report format for the new report. See Reports for more details. 119
120 Working with notebook pages The new page will be inserted immediately before the currently active page in the notebook. See Adding a page if you want to add a page at the end of the current notebook. Select the page from the dropdown box to make it the active page. See Navigating between pages. Then modify the page formats and work with the new page as desired Copying a page To create a new page by copying the currently active page in the notebook: 1. Click on the page which you want to use as the basis for the new page, if it isn't already the active page. 2. Select the 'Copy page' option from the 'Notebook' menu. Short-cuts: The 'Copy page' icon. 3. Select 'OK' to add the new page to your notebook. The new page will be added as the last page in the current notebook. It will contain all the characteristics of the original page, but can now be amended independently of the original page. Select the page from the dropdown box to make it the active page. See Navigating between pages. Then modify the page name and formats and work with the new page as desired Deleting a page To delete a notebook page: 1. Click on the page you want to delete, if it isn't already the active page. 2. Select the 'Delete page' option from the 'Notebook' menu. Short-cuts: The 'Delete page' icon. 3. Select 'OK' to confirm that you want to delete the current page. 4. Deleting a page does not affect any of the underlying data, such as the resources, jobs or bookings which were displayed in the deleted page. A notebook needs to have at least one page - you will not be able to delete the last page Navigating between pages To switch to a different page there are two options: Using the mouse - Select the page from the dropdown box. Using the keyboard - Use CTRL+PageUp and CTRL+PageDown to move through your pages in the dropdown box. This page will now become the active page and the page name will appear in the dropdown box accordingly. Moving pages You can change the order of notebook pages by moving them up or down. This is useful when your notebook has many pages. To move a page: 120
121 Working with notebook pages 1. Select the page you want to move from the dropdown box, if it isn't already the active page. 2. Select the 'Move page up' or 'Move page down' option from the 'Notebook' menu Switching to wallchart or calendar view For wallchart and calendar pages you can switch the page between wallchart and calendar view. To switch a wallchart page into calendar view: 1. Make sure the wallchart is the active page. 2. Select 'View', 'Calendar' from the menu. Short-cut: Calendar view icon. To switch a calendar page into wallchart view: 1. Make sure the calendar is the active page. 2. Select 'View', 'Wallchart' from the menu. Short-cut: Wallchart view icon. If you are using both views regularly you may find it more convenient to create separate pages for your wallchart and your calendar. Report pages cannot be converted to wallchart or calendar views Setting the opening date Each notebook page can have its own opening date, being the date at which the focus is set when the page is first displayed during the current session. For example, you may want to set the opening date for the page as: today's date. a position relative to today's date. a fixed date. the date at which the page was pointing when the notebook was last closed. To set the opening date for the current notebook page: 1. Select 'View', 'Opening date' from the menus. 2. At the 'Opening Date' dialog, set the opening date for the current page as desired (see below). 3. Choose 'OK' to accept your changes. The Opening Date dialog The 'Opening Date' dialog allows you to set the opening date for the current page. 121

122 Working with notebook pages Set the opening date as follows: Specify a fixed date if you want the notebook page to open always at the same date. You are likely to use this option for historical views of your data, or when you are planning from a fixed point of time in the future, for example. Select Relative with an offset value of zero if you want the notebook to open always at today's date, based on the computer's internal clock. You will probably use this option for most of your current resource planning activities. Specify a position relative to today's date by setting a value other than zero in the offset box. For example, set the offset to '+30' if you want to open the notebook page at a date 30 days after today's date, or '-30' to open the notebook page at a date 30 days earlier than today's date. Tip: Right-click on the entry box to get a pick list of offsets. Select Last closed date if you want the notebook page to reopen always at the point at which the notebook page was last saved. 122
123 The Retain Report Writer 12 The Retain Report Writer 12.1 Report writer overview Retain provides its own versatile report writer, which allows you to develop your own customised Retain reports in a matter of minutes. You can use the Retain report writer to produce both job-based reports, such as job costings and forecast revenues, and resource-based reports, such as resource allocations and utilisation analyses. You can sort, select and aggregate your reports in various ways and set up reports titles and headings. Some example reports can be found in the reference chapter. Creating a report Report fields Special report fields Report date range Report selection criteria Report grouping and subtotals Viewing the report Report headers and footers Exporting reports 12.2 Creating a report To create a new report you need to add a new notebook page with a 'Report' page type: 1. Select the 'Add page' option from the 'Notebook' menu. Short-cuts: The 'Add page' icon. Tip: Use the 'Copy page' function if you want to create a report based on an existing report format. 2. Select the 'Report' page type by clicking on the appropriate radio button. 3. Type in a descriptive name for the new report page. 4. Select 'OK' to add the report page to your notebook. 5. Define the report formats for the new report as desired (see below). 6. Click on 'OK' to accept your report formats. A new notebook page will be created for your report. 7. Select the new page from the dropdown to generate the report. When you create a new report page you will be prompted to define the report formats at the 'Setup Report' dialog: 123
124 The Retain Report Writer Use this dialog to define the following information about the report: Fields - add the resource, job or booking fields that you want to appear in each row of your report. Using multiple instances of the same field allows you to create a report for multiple time periods. There are calculated fields only available in reports. Sort - specify the order in which the report data will be sorted, including any aggregation of your data by way of sub-totals. Selection - enter any criteria by which you want to filter the contents of the report. Date - specify the date range to be covered by the report. As a minimum you should normally enter one or two fields and a date range for your report. You can produce a quick report in less than a minute with just these elements, although in practice you may want to experiment with the different report settings to produce the report in your preferred format Report fields Report fields are displayed on each row of the report. You can select any of the fields from the resource, job and bookings tables, plus a number of special report fields (see Special report fields). You can also customise the position and width of these fields in the report. To define report fields in the active report: 1. Select 'Data', 'Fields' from the menus or click on the 'Fields' tab heading at the 'Setup Report' dialog. Short-cuts: Fields icon. 2. At the 'Fields' dialog edit the report fields as desired (see below). 3. Click on 'OK' to accept your changes. The 'Fields' panel in the 'Setup Report' dialog allows you to define the fields to be included in the current report: 124

125 The Retain Report Writer The fields panel contains the current report fields definition. The width of each column in this panel indicates the width of the column as it will be displayed in the report. To add a field to the report: 1. Select the field from the drop-down box. 2. Adjust the width of the column by changing the number under 'Width' or by dragging the line which separates each field in the top box. 3. Adjust the order in which fields are displayed by clicking on the black dot and dragging the line up or down. 4. Repeat steps 1 to 3 for each field as desired. Tip:You do not need to include fields which you plan to use to sort or aggregate the report here. Fields you add to the sort dialog are already displayed in the report. Only combine report fields if they have a logical relationship. Generally this means producing reports based on either resource fields or job fields or bookings fields, but not on a combination of fields across these tables. For example, the resource grade field and the job priority field do not have a logical relationship. Since the bookings table contains information across both resources and jobs you can often use this table to produce sensible results. For bookings level reports, for example, you can use the 'Name' and 'Job name' fields in the bookings table rather than extracting the name fields separately from the job and resource tables. Specifically, the following bookings table fields will normally contain the same information as held in the corresponding resource and job tables: Booking field: Name RESINIT Job Name PRIORITY RESGRADE CHARGETYPE Equates to: Resource name Resource initials Job name Job priority (colour) Resource grade Job analysis code If using booking level fields rather than the values held in the corresponding resource or job tables, bear in mind that Retain allows you to change the priority colour, resource grade and charge type on a booking by booking basis. You may observe differences between reports using these fields at a booking level to those using the 125
126 The Retain Report Writer fields at the resource/job level. To remove a field from the report, click on the X button against the field row or: 1. Move the mouse pointer over a field in the top box. 2. Click the left mouse button, holding the mouse button down. 3. Drag the mouse pointer (the pointer changes to a crossed-arrows sign) anywhere outside of the box. 4. Release the mouse button. 5. Repeat steps 1 to 4 for each field as desired. To reposition a field within the report definition, click on the black dot and drag the line up or down or: 1. Move the mouse pointer over the field in the 'Column Fields' list. 2. Click the left mouse button, holding the mouse button down. 3. Drag the mouse pointer (the pointer changes to a crossed-arrows sign) to the new location in the box. Tip: Fields are positioned to the left of the current position on the list, or at the right hand end of the list if they are dropped beyond the end of the list. 4. Release the mouse button. 5. Repeat steps 1 to 4 to move each field as desired. To change the width of a field within the report definition, change the number under 'Width' or: 1. Move the mouse pointer to the right edge of the field in the top box, so that the mouse pointer changes to a " " sign. 2. Click the left mouse button, holding the mouse button down. 3. Move the mouse pointer until the desired width is indicated in the box. 4. Release the mouse button. 5. Repeat steps 1 to 4 to change the width of each field as desired. Short-cut: You can resize the report fields widths directly within the report view Special report fields Standard report fields are preceded by 'resource', 'job' or 'booking' to indicate to which table they relate. For example: resource.name - the name field in the resource table; job.name - the name field in the job table; booking.startdate - the booking start date. In addition to these standard table fields, the Retain report writer provides a number of special fields for use in the reports, preceded by 'calculated'. Definitions Utilisation Bookings with non-zero charge rate. 126
127 The Retain Report Writer Utilisable Av ailability Standard time minus availability-excluded time. Time with no bookings. Note that availability is not the same as standard minus utilised. It is important to note that the definition of these fields can be modified in Retain Manager for different priority codes. It can be defined whether a code is included in utilisation calculations, availability calculations and utilisable time calculations, for example for part-time workers. The definitions should be made clear across the organisation. Resource table fields calculated.utilisation Usage Utilisation % by resource based on utilised (or chargeable) hours / total utilisable time. calculated.availability Availability % by resource based on available hours / total standard time. calculated.utilised Utilised hours within period by resource. calculated.available Available hours within period by resource. calculated.utilisabletime Hours available to be utilised within period. calculated.resourcetime Total booking hours assigned to a given resource within period. calculated.maxbooked Maximum % booked in a day within period. calculated.standardtime Number of hours a resource should be working in a given time period. Taken from the calculation diary set up in Retain Manager, excludes holidays. calculated.utiliseddays Utilised days within period by resource. calculated.availabledays Available days within period for a resource. calculated.resourcedays Total amount of days booked to a given resource within period. calculated.standarddays Number of working days in a selected period. Taken from the calculation diary set up in Retain Manager. Added field for the functionality of exporting reports to Excel. calculated.resourcebookingcount Number of bookings within period for a given resource. calculated.blank Blank spacer field. Job table fields calculated.jobrevenue Usage Booked hours (calculated.jobtime) x charge rates for each job. calculated.adjustedrevenue The job recovery rate applied to calculated.jobrevenue. calculated.jobtime Total number of hours within period assigned to a job. calculated.jobdays Total number of days within period assigned to a job. calculated.jobbookingcount Number of bookings within period for a given job. calculated.blank Blank spacer field. Booking table fields booking.time Usage Field for internal calculations, use of booking.calcbookingtime is recommended. booking.calcbookingtime Total hours of entire booking (not related to report date range). booking.plannedtme Field for internal calculations, use of booking.calcbookingtime is 127
128 The Retain Report Writer recommended. booking.calccost Calculated cost per booking, based on booking.calcbookingtime x charge rate. booking.calcactualcost Actual cost per booking, based on booking.actualtime x charge rate. booking.calchoursperweek Hours per week of booking, based on loading and calculation diary. booking.calcbookingdays Total amount of days of entire booking (not related to report date range). booking.calcpriorityalias Alias of work type (i.e. 'Unavailable' instead of '6'), for display purposes. calculated.bookingtime Calculated hours per booking within the selected period and fixed or variable booking hours. calculated.bookingcost Calculated cost per booking within the selected period, based on calculated.bookingtime x booking charge rate. calculated.priority Field for backward compatibility, booking.calcpriorityalias is recommended. calculated.bookingdays Days per booking based on the selected period. calculated.maxbookingconflict Maximum total loading for the resource during the booking, within the selected period, used to produce booking based conflict reports. calculated.bookingbookingcount Number of bookings overlapping in time with the booking, within the selected period. calculated.blank Blank spacer field. Please note the difference between the 'booking.calc...' and 'calculated.booking...' fields: The 'booking.calc...' fields refer to the entire booking. The 'calculated.booking...' fields refer to the part of the booking included in the report date range. Also note that some fields are for internal purposes or backward compatibility Report date range All reports, except mere listings of the resources and jobs tables, will need a date range. The date range of the report determines the cut off points for all calculations in the report, including utilisation percentages, booked hours and job costings. Where bookings span across the specified date range then they will be time apportioned for the purposes on each report. For example, if only 1 week of a 3-week booking is included in the date range of a report, then 33.3% of the booking will be included in the report for the purposes of generating time and cost figures. To define the date range of the active report: 1. Select 'Data', 'Date range' from the menus or click on the 'Date' tab heading at the 'Setup Report' dialog. Short-cuts: Date range icon. 2. At the 'Date' dialog edit the date range as desired (see below). 3. Click on 'OK' to accept your changes. The 'Date' panel in the 'Setup Report' dialog for reports allows you to define the date range of the current report: 128

129 The Retain Report Writer The 'Date Type' drop-down list includes several pre-defined date ranges, covering weekly, monthly, quarterly or annual reports. Select one of these options where possible, because the report will then automatically use the appropriate date range whenever you run the report. To select a pre-defined date range: 1. Click on the 'Date Type' drop down list. 2. Select the desired item from the 'Date Type' drop down list. The pre-defined date ranges are calculated automatically with reference to your computer's internal clock. Make sure your clock is set to the correct date. If your date range needs to be absolute, not relative, select the desired range first to set the dates, then select Manual Date Range to make them absolute. If none of the pre-defined date ranges are suitable for your requirements then you will need to specify a date range manually. To set a manual date range: 1. Select 'Manual Date Range' from the 'Date Type' drop down list. 2. Enter start and end dates manually as desired. Tip: Click on the calendar buttons to the right of each box to select the date from the pop-up calendar. To set a report with no date range: 1. Select 'No Date Range' from the 'Date Type' drop down list. Generally, reports using booking information will require a date range. 129
130 The Retain Report Writer 12.6 Report selection criteria Use report selection criteria to filter the contents of your report in much the same way as you filter the display of a wallchart or calendar view. To define selection criteria for your report: 1. Select 'Data', 'Selection' from the menus or click on the 'Selection' tab heading at the 'Setup Report' dialog. Short-cuts: Selection icon. 2. At the 'Selection' dialog specify criteria as desired (see below). 3. Choose 'OK' to accept your changes. The report selection dialog The 'Selection' panel of the 'Setup Report.' dialog allows you to specify the selection criteria applying to the active report page: The current selection criteria is displayed in the 'Selection Criteria' list. If there is more than one item in this list the criteria is combined using an operator such as 'add' or 'subtract'. To add an item to the report selection criteria: 1. Choose an 'Operation' setting to apply to this item. See Selection operators and conditions. 2. Select a field from the 'Field' drop-down list. 3. Choose a 'Condition' followed by a value in the pop-up box. See Selection operators and conditions. 4. Repeat steps 1 to 3 to add further selection criteria as desired. Your report selection criteria should form a logical relationship with the rest of the report definition. For example, if your report contains resource based fields you should not attempt to filter the report based on job selection criteria. 130

131 The Retain Report Writer To remove an item from the report selection criteria, click on the X button against the row. Alternatively click the 'Clear Selection' button to remove all the items from the selection criteria. You also need to consider the sequence of items in the selection criteria carefully. The order of items can determine the meaning of the selection. To amend the sequence of items in the report selection criteria, click on the black dot and drag the line up or down Report sort orders and subtotals Report sort overview Use the report sort order both to sort the rows displayed in your report and to provide sub-totals in the report, analysing the report in logical groupings as desired. To specify the report sort order and subtotals: 1. Select 'Data', 'Sort' from the menus or click on the 'Sort' tab heading at the 'Setup Report' dialog. Short-cuts: Sort order icon. 2. At the 'Sort' dialog specify sort criteria as desired (see below). 3. Choose 'OK' to accept your changes. The report sort dialog Grouping and expanding The report sort dialog The 'Sort' panel of the 'Setup Report.' dialog allows you to specify both the sort order and, via the 'Group By' setting, the levels at which the report will be aggregated. The current sort order is displayed in the 'Sort Criteria' 131
132 The Retain Report Writer list at the lower left of the screen. If there is more than one item in this list the view will be sorted initially by the first item on the list then, within each item, by the second item and so on. To add an item to the report sort order criteria: 1. Select a field from the drop-down list. 2. Choose 'Ascending' or 'Descending' as the sort order for the selected field. 3. Repeat steps to add further sort items as desired. To remove an item from the report sort criteria, click on the X button. You also need to consider the sequence of items in the sort criteria carefully. For example, sorting by resource grade and then name should produce a meaningful result, but sorting by resource name and then grade may not. To amend the sequence of items in the sort criteria, click on the black dot and drag the line up or down. You can also remove the field headings ('Field =' labels) for sub-totals. This is determined by the 'Field Headers' tick box. Sort titles and outline You can use 'Group By' and 'Expand To' to control how your report looks: Group By - determines which sort fields will be displayed as titles and subtotals in the report for expanding and collapsing. The sort fields you include here need not be defined in the 'Fields' tab, otherwise they will appear twice. Expand To - defines the level of detail at which the report will open when first generated Viewing the report Viewing report overview Select the report page from the dropdown box. If the report has not been generated during your current session then a progress bar will indicate that the report is being generated. If the report has been generated before, and you want to make sure you have the latest report data, you will need to refresh the report. Expanding and collapsing report sections Report display options Recalculating the report Refreshing the report 132

133 The Retain Report Writer Expanding and collapsing report sections If your report has one or more sort titles (see Sort titles and outline) you can expand and collapse the sections of the report as defined by those titles. or icons adjacent to the report sort titles will indicate that they can be expanded or collapsed. Here is an example: Expanded report sections are indicated by a. Collapsed sections are indicated by a. To expand or collapse an individual report section: Double-click on the report section row; or Click on the report section and press the SPACEBAR. To expand all the nodes in the report by one section level: Select 'Actions', 'Show more detail' from the menus. Short-cut: Increment open nodes icon or right-click over the report area and select 'Show more detail' from the menu. To expand all the nodes in the report fully: Select 'Actions', 'Open all details' from the menus. Short-cut: menu. Open all nodes icon or right-click over the report area and select 'Open all details' from the 133
134 The Retain Report Writer To collapse all the nodes in the report by one section level: Select 'Actions', 'Show less detail' from the menus. Short-cut: Decrement open nodes icon or right-click over the report area and select 'Show less detail' from the menu. To collapse all the nodes in the report fully: Select 'Actions', 'Close all details' from the menus. Short-cut: menu. Close all nodes icon or right-click over the report area and select 'Close all details' from the The level of expansion of the report on screen will be used when the report is printed out or exported. Note: It is generally preferable to use these icons to modify the report outline level rather than editing the settings in the 'report sort dialog'. Using the 'report sort dialog' results in a full recalculation of the report. For large complex reports this may take some time. Report display options The following display options are available for report pages: Grid lines - turn the report record grid lines on or off. Fonts - set the fonts for different elements of the report as desired. Indent totals - choose whether to indent report totals or to have them appear directly beneath their corresponding report entries. Report column widths - resize the report columns as desired. Grid lines Grid lines surrounding the records in the report can help to identify the individual fields in the report. However, you may find that grid lines make the report look cluttered. You may also want to exclude the grid lines when printing out the current view of the report page. To turn the report grid lines on or off: Select 'View', 'Grid' from the menus. Short-cuts: Grid lines icon or press CTRL+G. Alternatively right-click over the report area and select 'Grid' from the menu. Repeat the process to return the grid lines to their original state. Fonts You can define different fonts for each of the following elements of the report: report details. report totals. report sort levels (up to 5 levels). 134
135 The Retain Report Writer To change the report fonts: 1. Select 'Fonts' from the 'View' menu. Short-cut: menu. 'Fonts' icon or right-click over the report page header and select 'Format', 'Font' from the 2. At the 'Edit Report Fonts' dialog select an item from the list then click on the 'Set font' button. Short-cut: Double-click on the report item. 3. At the 'Font' dialog set the new font as desired, then click on 'OK' to accept your changes. 4. Repeat steps 2 to 3 for each report font as desired. 5. Click on 'OK' to accept your changes. Indent totals You can indent the sub-totals and totals in the report or have them appear directly underneath their respective columns. Indented totals may look more pleasing to the eye, although they do take up more room; with indented totals you may also need to adjust the width of the report columns. To turn the indent totals on or off: Select 'View', 'Indent Totals' from the menus. Short-cuts: Right-click over the report area and select 'Indent totals' from the menu. Repeat the process to return the indentation to its original state. Report column widths You may need to adjust the widths of the columns in your report in order to accommodate large numbers or indented totals, or perhaps merely for cosmetic purposes. You can also adjust the column widths as a way of temporarily hiding columns in the view. To adjust the report columns widths: 1. Move the mouse pointer over the right side of the title of the column you wish to change, so that the mouse pointer changes to a " " icon. 2. Click the left mouse button, holding the mouse button down. 3. Move the mouse pointer horizontally to the desired new position. 4. Release the left mouse button. 5. Repeat steps 1 to 4 for each column as desired. You can also adjust the report column widths through the fields definition (see Report fields). Hint: If you see ****** in a column, it means that the column is too narrow for the data in that field. Make the column wider. 135
136 The Retain Report Writer Recalculating the report When you first define or view a report in your current Retain session it will be calculated based on the latest available data. However, once you have viewed a report once it will not be calculated again until you require it to be updated, as calculating a report takes some time. To recalculate the report: Select 'Actions', 'Refresh' from the menus. Short-cuts: Refresh icon or press F5. Refreshing the report If you are running Retain in a network environment and other users have made changes to the data you can use the refresh command to ensure all the latest changes are reflected in your report. This command takes longer than recalculating. Press F5 to refresh a report Report headers and footers Headers and footers overview To customise the layout of the report to include page numbers, dates, titles and so on, headers and footers are available. Each has various elements that can be adjusted, and they can be easily toggled using Retain. Editing the header Editing the footer Hiding and showing the header Hiding and showing the footer Editing the header To edit the report header: 1. Select 'View', 'Header...' from the menus. Short-cuts: Header icon or right-click over report header area and choose 'Edit Header' from the menu. 2. At the 'Header configuration' dialog, define the report header details as desired (see below). 3. Click on 'OK' to save your changes. The 'Header configuration' dialog allows you to define various items in the report header: 136

137 The Retain Report Writer Define header details as follows: Show header - show or hide the whole header. Title - show or hide the report title and type a title of the report. Sub-title - show or hide the report sub-title and type a sub-title for the report. Date - show or hide the report date. Page number - show or hide the report page number. Show date range - show or hide the date range covered by the report. Surrounding frame - show or hide the frame surrounding the report header. Column titles - show or hide the column titles. Fonts - set the fonts for the various header elements. Editing the footer To edit the report footer: 1. Select 'View', 'Footer...' from the menus. Short-cuts: Edit footer icon or right-click over report footer area and choose 'Edit footer' from the menu. 2. At the 'Footer configuration' dialog, define the report footer details as desired (see below). 3. Click on 'OK' to save your changes. The 'Footer configuration' dialog allows you to define various items in the report footer: 137

138 The Retain Report Writer Define report footer details as follows: Show footer - show or hide the whole footer. Footnote - show or hide the report footnote and type a footnote for the report. Date - show or hide the report date. Page number - show or hide the report page number. Surrounding frame - show or hide the frame surrounding the report footer. Font - set the fonts for the various footer elements. Hiding and showing the header To show or hide the report header: At the 'Header configuration' dialog click the 'Show header' checkbox. Short-cuts: menu. Toggle header icon or right-click over the report header area and choose 'Header...' from the Hiding and showing the footer To show or hide the report footer: At the 'Footer configuration' dialog click the 'Show footer' checkbox. Short-cuts: menu. Toggle footer icon or right-click over the report footer area and choose 'Footer...' from the 138
139 The Retain Report Writer 12.10Saving and exporting reports Your report definitions are stored along with all your other notebook pages in your Retain notebook. Although you can produce reports very quickly with the Retain report writer, it is worthwhile saving any report formats that you intend to use on a regular basis. See Saving your notebook. Exporting your reports Reports created using the Retain report writer can be exported in spreadsheet format and hence transferred to other applications such as popular spreadsheet packages. You can either: export the report to clipboard, for immediate transfer; or export the report to a file, for later use. The exported report file will contain separate rows and columns for each report record and field respectively and so can be easily manipulated using a spreadsheet application. Exporting to clipboard Exporting a report to clipboard copies the contents of the current report to the Windows clipboard. To export a report to clipboard: 1. Generate the report and customise the view on screen as desired. 2. Select 'Edit', 'Export to clipboard' from the menus. The report will remain on the Windows clipboard until replaced by another cut or copy operation. Switch to another application such as Excel and paste the report contents into the application using the normal Windows 'Paste' functions. Exporting to file Exporting a report to file copies the contents of the current report to a text file. To export a report to file: 1. Generate the report and customise the view on screen as desired. 2. Select 'Edit', 'Export to file' from the menus. 3. Enter a name and path for the report file and save it in the usual way. Open the TXT file in another application, such as Notepad, in the usual way. You may need to specify that tabs delimit the fields if you use Lotus or Excel. 139
140 Printing 13 Printing 13.1 Printing overview Retain enables you to print both reports and wallcharts for use within your company. There are various settings available to enable you to produce the printout you require. However, it is easy to overlook certain settings and it is recommended to take note of the general rules for printing. General rules for printing Previewing the current page Printing the current page Printing Wallcharts Print configuration options Printer setup 13.2 General rules for printing When printing from Retain always bear in mind the following general rules: Retain prints the active notebook page. If you want to print a particular report then first make sure that the report is the active page, or if you want to print your wallchart then make that page the active page. Retain printing is based on the current view of your data. Set your sort and selection criteria as desired and consider recalculating the view before producing the print out. Do a print preview before producing a hard copy to check you have all the correct settings. Retain printing takes the current display options into account. If you are printing a wallchart view then set grid lines, date scales, booking bar formats and so on before printing the wallchart. Likewise, when printing a report, open or close sections of the report, set column widths and so on before printing the report. Graphical printing can take some time. Use a fast printer with a large printer memory if possible. If you are using a shared printer then try to do graphical printing outside peak hours. Do a print preview to check you have the correct settings. Resource planning information usually goes out of date very quickly. Instead of printing things out consider making Retain available on-line to those who need to see it. That way users know they are always looking at up to date information Printing the current page Retain always prints the currently active notebook page. If the page you want to print is not currently displayed then select the page from the dropdown box to make it the active page before printing. To print out the current page: 1. Set sort, selection and other display options as desired. 2. Recalculate/refresh the view if desired. 3. Select 'File', 'Print' from the menus. Short-cut: Print icon or press CTRL+P. 4. At the 'Print Configuration' dialog set configuration options as desired (see Print configuration options). 140

141 Printing 5. Click on 'OK' to begin printing. Previewing the current page It is usually a good idea to preview the current page before printing it out, so you can check that the format of the print out is what you require. Retain always prints the currently active notebook page. If the page you want to preview is not currently displayed then select the page from the dropdown box to make it the active page. To preview the current page: 1. Set sort, selection and other display options as desired. 2. Refresh the view if desired. 3. Select 'File', 'Print preview' from the menus. Short-cut: Print preview icon or press CTRL+V. 4. Use the icons to set configuration options as desired (see Print configuration options). A print preview dialog is displayed, showing how the current notebook page will look when it is printed. Here is an example: The following options are available at the print preview screen: Display the previous print page (if more than one page). Display the next print page (if more than one page). Display one page. Display two pages side by side. Magnify the view (display half page). Short-cut: Click on previewed page. 141

142 Printing Reduce magnification (display full page). Short-cut: Click on previewed page. Print the previewed page(s). Edit the print margins. Edit the print header. Edit the print footer. Edit the print breaks. Edit page numbering Printing wallcharts When printing Wallcharts, the date range is significant. The date range specifies the span of the print. The number of pages affects how much time is printed on each page. In the screen shot above, three months will be on one page. Don't forget that all resources/jobs, not just the ones visible on the screen, will be printed, which could mean many pages. The date range can be set in the 'Print Configuration' dialog Print configuration options Print configuration overview From the Print dialog, clicking on the Page Set-up button will bring up the Page Set-up dialog where you can set the following options: Header - edit the header details. Footer - edit the footer details. Numbering - set horizontal or vertical page numbering when dealing with adjacent pages (reports only). 142
143 Printing Breaks - set page breaks between report section titles (reports only). In the Preferences dialog, the Printing tab contains further general printing settings. Print headers The 'Header' panel of the 'Print Configuration' dialog allows you to define various items in the print header: Short-cut: 'Edit Header' icon in the Print Preview window. Show header - show or hide the whole header. Title - show or hide the print title and type a title for the printout. Sub-title - show or hide the sub-title and type a sub-title for the printout. Date - show or hide the print date. Page number - show or hide the print page number. Show date range - show or hide the date range covered by the printout. Surrounding frame - show or hide the frame surrounding the print header. Column titles - show or hide the column titles (reports only). Fonts - set the fonts for the various header elements. In the case of reports, these details are the same as those available through the report header configuration dialog. 143
144 Printing Print footers The 'Footer' panel of the 'Print Configuration' dialog allows you to define various items in the print footer: Short-cut: 'Edit footer' icon in the Print Preview window. Show footer - show or hide the whole footer. Footnote - show or hide the report footnote and type a footnote for the printout. Date - show or hide the print date. Page number - show or hide the print page number. Surrounding frame - show or hide the frame surrounding the print footer. Font - set the fonts for the various footer elements. In the case of reports, these details are the same as those available through the report footer configuration dialog. Print setup Retain prints to your default printer as defined under Windows. You may need to amend the printer setup to obtain the desired results in your printing. For example, you can adjust the margins and amend the orientation of the printout between portrait and landscape using the printer setup. To amend the printer setup: 1. Select 'File', 'Print setup' from the menus. 2. At the 'Print Setup' dialog, amend your printer setup as desired. 3. Click on 'OK' to accept your changes. 144

145 Printing 145

146 Customising the desktop 14 Customising the desktop 14.1 Retain preferences Retain preferences overview Retain preferences are the default settings which will be applied in various areas of the software. You can set preferences for your use of Retain in several areas as follows: General - Set whether booking bar tips are displayed, what happens when you drag bookings in project view and whether you can make block bookings. Bookings - Set where bookings will 'snap to' when moved graphically and whether to display fields names on booking bars and booking tips. Palette - Set the scope and format of the priority colour palette. Av ailability - Set the default percentage to apply when performing a special selection and whether to display the special selection dialog when adding special selections. Printing - Set the general printing options. Technical note: These settings are personal to each retain user and are stored in each user's local Windows directory as 'retain.cfg'. To set these Retain preferences: 1. Select 'File', 'Preferences' from the menus. 2. At the 'Preferences' dialog amend the default settings as desired. 3. Click on 'OK' to accept your changes. General preferences The 'General' tab of the 'Preferences' dialog allows you to define various settings which will apply to all your Retain notebooks. Booking bar tips - Mark this checkbox if you want booking bar tips to be displayed when you move the mouse pointer over booking bars in wallchart or calendar views. Clear the checkbox if you do not want booking tips displayed. 146

147 Customising the desktop Short-cut: Right-click over booking area (but not a booking) and choose 'Booking tips' from the menu. Dragging booking bars in wallchart - This defines what happens when you drag bookings to a different sub-booking line when in project view. If you mark these checkboxes then: Job project view - when dragging a booking from one job to another, if you move the booking onto a different resource sub-line at the new job then the booking will also be moved to that new resource. Resource project view - when dragging a booking from one resource to another, if you move the booking onto a different job sub-line at the new resource then the booking will also be moved to that new job. Block bookings - Mark this checkbox if you want to be able to make block bookings by marking a rectangular block vertically across adjacent resources. The block bookings facility only applies to the resource view on wallchart pages. If you clear this checkbox you will only be able to mark an area horizontally across one resource. Date range popup - When 'marking an area' on the grid a little window appears showing the date range of the area being marked. If you clear this checkbox, the date range window is no longer visible. Bookings preferences The 'Bookings' tab of the 'Preferences' dialog allows you to define settings relating to bookings: Snap to - Set this option to determine where bookings will 'snap to' when moved graphically in the wallchart. For example, if you set the 'snap to' option to 'Left' then when you move a booking on the wallchart it will be positioned to the cell which contains the left edge of the booking when you release the mouse button. Field names - Mark the 'Bar field names' checkbox if you want to display fields names on booking bars and mark the 'Tip field names' checkbox if you want to display field names on booking tips. Visual - Mark the 'Visually indicate which bookings I can edit' checkbox if you want to have a visual indication on screen of bookings that you have the authority to edit while 'edit mode' is turned on. Confirmations - Mark the 'Confirm dragged bookings' checkbox if you want a dialog to appear which checks 'are you sure?' if you try to move a booking by dragging it on the wallchart. This checkbox is disabled. 147

148 Customising the desktop Palette preferences The 'Palette' tab of the 'Preferences' dialog allows you to define settings relating to the priority colours palette (see Using the colour key): Priority colours in palette - Enter a number between 1 and 36 representing the number of colours you want to display on the colour key. The colours are defined using the separate Retain Manager application. Colours can be defined for priorities with values 0 to 9 and A to Z. Alias names can also be entered against priority colours. Contact your Retain administrator or see the Manager Guide for more information. Columns in colour key - Enter a number between 1 and 36 representing the number of columns in the colour key. For example, if you have 18 colours in your palette and enter 3 as the number of columns then your colour key will consist of a table 6 rows by 3 columns. 148
149 Customising the desktop Availability preferences The 'Availability' tab of the 'Preferences' dialog allows you to define settings relating to availability selections (see Special selections using date ranges): Availability limit - This is the default percentage criteria to apply to the availability searches. For example, if the availability percentage is 80% then records will be displayed if they are at least 80% available during the selected period. Hide availability dialog - Mark this checkbox if you want to hide the availability dialog when making availability selections. Unless you frequently perform searches based on different availability percentages you will probably want to hide the availability dialog. Alternative access: You can hide the availability dialog by marking the relevant checkbox from within the availability dialog itself. 149
150 Customising the desktop General printing settings The 'Printing' panel of the 'Preferences' dialog allows you to set various general printing options: Set or remove colours when printing using the checkbox provided. To print all calendars in one session, tick the relevant box. To use the alternative printing mode, tick the relevant box. Only use colours if printing to a colour printer. The colours of booking bars on your wallchart or calendar view may not be exactly represented in your printouts, depending on the resolution of your colour printer. You may find that with certain printers, use of the alternative printing mode is necessary to achieve the desired results Customising the toolbar Toolbar customising overview Like most Windows applications, Retain provides a 'toolbar'; a panel of icon buttons, usually located at the top of the screen. The icons on the toolbar provide quick access to most of the commonly used features in Retain. See Appendix 1 for a complete list of the Retain icons. Toolbar types Adding and removing toolbar icons Hiding and displaying the toolbar Hiding and displaying toolbar tips Toolbar types There are 4 separate toolbars in Retain: No Windows - The toolbar that is displayed when you do not have any open notebooks. Wallchart - The toolbar that is displayed when the currently active notebook page is a wallchart view. Calendar - The toolbar that is displayed when the currently active notebook page is a calendar view. Reports - The toolbar that is displayed when the currently active notebook page is a report page. 150

151 Customising the desktop Each toolbar should contain only those icons relevant to the current context. For example, the 'No Windows' toolbar contains only the icons to create or open a notebook; the 'Reports' toolbar contains icons that are specific to the preparation of reports. Adding and removing toolbar icons The software is supplied with a default set of icons in each toolbar. You may wish to customise the toolbar to include the options you use most frequently. To customise the toolbar: 1. Select 'View', 'Toolbar Options...' from the menus. Short-cut: Right-click over the toolbar area and choose 'Toolbar Options...' from the menu. 2. At the 'Customise Toolbar' dialog, add and remove toolbar icons as desired (see below). 3. Click on 'OK' to accept your changes. The Customise Toolbar dialog The 'Customise Toolbar' dialog allows you to add and remove icons for each of the toolbars, set the location of the toolbar and show or hide tooltips: The full list of available icons is displayed on the left side of the screen and the icons currently defined for the selected toolbar are displayed on the right side of the screen. To select a different toolbar: 1. Click on the 'Selected Toolbar' drop down list. 2. Select the toolbar. To add an icon to the selected toolbar: 151
152 Customising the desktop 1. Click on the position in the current toolbar above which you wish to add the icon. 2. Select the new icon in the 'Available Buttons' list. 3. Click on the '>' button to add the item to the end of the current toolbar. Short-cuts: Double-click on the selected item or 'drag and drop' the item to the desired location on the current toolbar. 4. Repeat steps 1 to 3 to add further icons to the toolbar as desired. To remove an icon from the selected toolbar: 1. Select the icon in the current toolbar. 2. Click on the '<' button to remove the icon from the toolbar. Short-cut: Double-click on the selected item or 'drag and drop' the item back to the 'Available Buttons' list. 3. Repeat steps 1 and 2 to remove further icons as desired. To add a separator (gap) to the selected toolbar: 1. Click on the position in the current toolbar above which you wish to add the separator. 2. Click on the 'Separator' button to add the separator to the current toolbar. 3. Repeat steps 1 and 2 to add further gaps in the toolbar as desired. Tip: Use the gaps in the toolbar to group icon buttons by type and to distinguish between different types of icon function. To remove a separator (gap) from the selected toolbar: 1. Select the separator in the current toolbar. 2. Click on the '<' button to remove the separator from the toolbar. Short-cut: Double-click on the selected item or 'drag and drop' the item back to the 'Available Buttons' list. 3. Repeat steps 1 and 2 to remove further separators as desired. To move items within the selected toolbar: 1. Select the item in the current toolbar. 2. Click on the 'Up' button to promote the item in the toolbar or 'Down' to demote the item. Short-cut: 'Drag and drop' the selected item to a new position in the toolbar. 3. Repeat steps 1 and 2 to move further items within the selected toolbar as desired. To change the location of the toolbars: 1. Click on the 'Location' button. 2. At the 'Toolbar location' dialog, select the toolbar location as desired. 3. Choose 'OK' to accept your changes. 152
153 Customising the desktop Changing the location of the toolbars affects all the toolbars, not just the currently selected toolbar. 153
154 Reference 15 Reference 15.1 Icon reference Icon Menu Description Hot key File New Creates a new notebook Ctrl + N File Open Opens an existing notebook Ctrl + O File Save Save this document Ctrl + S File Print Print this document Ctrl + P File Print preview Print preview Ctrl + V Edit Edit mode Toggle edit mode Ctrl + E Actions Make booking Make a new booking Ctrl + K Actions Edit booking Edit currently selected booking Actions Delete booking Delete the selected booking(s) Delete Actions Inspect bookings Inspect selected booking(s) Ctrl + I View Zoom Year Set the scale to years Ctrl + Y View Zoom Month Set the scale to months Ctrl + M View Zoom Week Set the scale to weeks Ctrl + W View Zoom Day Set the scale to days Ctrl + D View Zoom Hour Set the scale to hours Ctrl + H View Grid Toggles the grid lines Ctrl + G View Project view Project view Ctrl + J View Rotate view Toggle resource and job view Ctrl + R Actions Recalculate Reload data and recalculate F5 Move to the next record Ctrl + Shift + N Move to the previous record Ctrl + Shift + P Stack bookings above each other Set booking depth proportional Use large bookings bars Use medium-sized booking bars Use small booking bars Match booking bar depth Actions Booking info View current booking Actions Job info View job info for current booking Actions Resource info View resource info for current booking Modify Components Modify Jobs Modify Resources Data Sort Specify the sort order Data Selection Specify the selection criteria 154
155 Reference Data Fields Specify the resource and job fields View Display settings Change the default date scale settings View Fonts Edit the format of the report View Wallchart Wallchart view View Calendar Calendar view Copy the booking to the clipboard Notebook Add page Add a new page to the notebook Notebook Rename page Rename the active page Notebook Insert page Insert a new page into the notebook Notebook Copy page Copy the active page Notebook Delete page Delete the active page View Colour Key Display the colours key Select a new record from the list Select the marked records Data Clear selection Resets the selection to show all records Edit Undo Undo the last booking change Toggle the report header Toggle the report footer View Header Edit the header format View Footer Edit the footer format Actions Show more detail Increase the level of detail shown Actions Show less detail Decrease the level of detail shown Actions Open all details Open all nodes to show maximum detail Actions Close all details Close all nodes to show minimum detail Select available resources (add a special selection) Actions Roll forward Copy bookings forward Actions Duplicate booking Duplicate the currently selected booking Help Help Topics Help table of contents Next page in print preview Previous page in print preview One page in print preview Two pages in print preview Zoom-in in print preview Zoom-out in print preview Print Print current page Edit page numbering 155
156 Reference Page breaks 15.2 Hot-key reference Icon Menu Description Hot Key File New Creates a new notebook Ctrl + N File Open Opens an existing notebook Ctrl + O File Save Save current page Ctrl + S File Print Print current page Ctrl + P File Print preview Print preview Ctrl + V Edit Edit mode Toggle edit mode Ctrl + E Actions Make booking Make a new booking Ctrl + K Actions Delete booking Delete the selected booking(s) Delete Actions Inspect bookings Inspect the selected booking(s) Ctrl + I Edit Undo Undo the last booking change Ctrl + Z Set the scale to years Ctrl + Y Set the scale to months Ctrl + M Set the scale to weeks Ctrl + W Set the scale to days Ctrl + D Set the scale to hours Ctrl + H View Grid Toggles the grid lines Ctrl + G View Project view Toggles project view Ctrl + J View Rotate view Toggle resource and job view Ctrl + R Actions Recalculate Reload data and recalculate F5 Move to the next record Ctrl + Shift + N Move to the previous record Ctrl + Shift + P Move left to next page Ctrl + PgUp Move right to next page Ctrl + PgDown 15.3 Glossary Analysis The analysis field can be used to pick up default charge rates based on different job types, usually in combination with the resource grade. For example, you might enter 'C' for chargeable jobs, 'N' for non-chargeable jobs and 'U' for unavailable jobs. Booking Bookings are allocations of a resource to a job for a specific period, shown as rectangular coloured bars in the wallchart or calendar view. Every 'aspect' of work that takes up a specified amount of time should be booked, including part-time work, vacation, management duties etc. Calendar A calendar view shows bookings for one individual resource or job, where time is represented in a calendar style grid. Charge rate 156
157 Reference Charge rates for bookings combine resource grades with job charge codes to calculate revenues and costing. Component In Retain, components are sub-jobs, providing information regarding the nature of each booking made against a job. Components provide an element of project planning within Retain, since you can select a component for each booking you make and analyse the job into its component parts for reporting purposes. Components are usually defined in general terms applicable to most jobs, such as 'planning', 'fieldwork' and 'reporting'. Drop-down menus Right-clicking anywhere on the screen will produce a drop-down menu relevant to the area of the screen you happen to be in at the time. Job Jobs can refer to clients, projects, tasks or assignments - anything that resources are assigned to. Manager, Retain Retain Manager is the administration module for Retain. Retain Manager is used for initial set up operations and for the subsequent administration of Retain data files. Menu Bar Located at the top of the screen, this area provides access to all Retain functions, although you may often prefer to use short-cuts where possible. Notebook Notebooks contain views of one set of Retain data. They allow you to display your Retain wallchart in various ways and to define report formats used by the Retain Report writer. Notebook page Notebooks can hold up to forty notebook pages, each containing different views of the underlying data. Priority The colour code of a job or priority defines the default colour of bookings made against that job. The colour determines what type of job it is. Project view The project view separates bookings against a resource or job into a separate row for a specified sub-field. Recovery Used for calculated fields in reports. When inputting job details, the recovery field is the value the scale cost must be multiplied by to obtain the recovery rate... which is the fee expected rather than the standard rate for the job. Report A special type of notebook page that displays resource, job or booking data in aggregated form, including calculated fields. Used for presentations and external programs. Resource Retain uses the term 'resources' as a general description for the people or entities that can be applied to the process of completing a job. Retain notebook Notebooks contain views of your Retain data. They allow you to display your Retain wallchart in various ways and to define report formats used by the Retain Report writer. Scenario Scenarios give users control over tentative bookings. Bookings assigned to a scenario are displayed with a dotted line. Scenario bookings can be deleted or confirmed as a group. Scroll bars Scroll bars located at the right hand side of the screen enable users to move up and down resources, while those at the bottom of the screen move backwards and forwards through time. Selecting 157
158 Reference More than just highlighting, selecting in Retain means filtering resources, tasks and bookings based on certain criteria. Selections are used for viewing or collective manipulation. Status bar This is located at the foot of the screen and displays useful information about the current status, for example, the name of the currently selected resource and the date range covered by the selected booking. Toolbar Usually located immediately below the menu bar and contains several icon buttons which provide quick access to the commonly used features in Retain. Wallchart This is the traditional wallchart view, with resources or jobs listed down the side of the page and a continuous time bar along the top. Each booking is represented as a coloured rectangular block on the wallchart Example reports 1. Planned revenue report. 2. Utilisation percentage by Group. 158


159 Reference 3. Staff availability in London report. 159
Retain Wallchart Manual
 M Retain Wallchart Manual www.retaininternational.com Contents Table of Contents 1 Introduction 1.1 1.2 1.3 Introduction About Retain Scope of this userguide... 7... 8... 8 How to use this guide... 9 1.4
Retain Wallchart User Guide
 Retain Wallchart User Guide Retain International 33 Beaufort Court Admirals Way London E14 9XL United Kingdom 1 646 688 4496 (USA) 0845 458 8660 (UK) +44 20 7538 4774 (World) info@retaininternational.com
Retain Manager Manual
 M Retain Manager Manual www.retaininternational.com Contents Table of Contents 1 Introduction 4 1.1 Introduction 1.2 About Retain Manager 1.3 About Retain 1.4 How to use this guide 1.5 Installing Retain
Microsoft How to Series
 Microsoft How to Series Getting Started with EXCEL 2007 A B C D E F Tabs Introduction to the Excel 2007 Interface The Excel 2007 Interface is comprised of several elements, with four main parts: Office
ICDL & OOo BASE. Module Five. Databases
 ICDL & OOo BASE Module Five Databases BASE Module Goals taken from the Module 5 ICDL Syllabus Module 5 Database requires the candidate to understand some of the main concepts of databases and demonstrates
Chapter 2: Clients, charts of accounts, and bank accounts
 Chapter 2: Clients, charts of accounts, and bank accounts Most operations in BankLink Practice are client specific. These include all work on coding transactions, reporting, and maintaining chart of accounts
User Guide. Web Intelligence Rich Client. Business Objects 4.1
 User Guide Web Intelligence Rich Client Business Objects 4.1 2 P a g e Web Intelligence 4.1 User Guide Web Intelligence 4.1 User Guide Contents Getting Started in Web Intelligence 4.1... 5 Log into EDDIE...
Veco User Guides. Grids, Views, and Grid Reports
 Veco User Guides Grids, Views, and Grid Reports Introduction A Grid is defined as being a list of data records presented to the user. A grid is shown generally when an option is selected from the Tree
ECDL Module 6 REFERENCE MANUAL
 ECDL Module 6 REFERENCE MANUAL Presentation Microsoft PowerPoint XP Edition for ECDL Syllabus Four PAGE 2 - ECDL MODULE 6 (USING POWERPOINT XP) - MANUAL 6.1 GETTING STARTED... 4 6.1.1 FIRST STEPS WITH
Layout and display. STILOG IST, all rights reserved
 2 Table of Contents I. Main Window... 1 1. DEFINITION... 1 2. LIST OF WINDOW ELEMENTS... 1 Quick Access Bar... 1 Menu Bar... 1 Windows... 2 Status bar... 2 Pop-up menu... 4 II. Menu Bar... 5 1. DEFINITION...
BusinessObjects Frequently Asked Questions
 BusinessObjects Frequently Asked Questions Contents Is there a quick way of printing together several reports from the same document?... 2 Is there a way of controlling the text wrap of a cell?... 2 How
Simply Personnel Screen Designer
 Simply Personnel Screen Designer -Training Workbook- Screen Designer Page 1 Build 12.8 Introduction to Simply Personnel Screen Designer This document provides step-by-step guide for employee users to give
Expedient User Manual Getting Started
 Volume 1 Expedient User Manual Getting Started Gavin Millman & Associates Pty Ltd 281 Buckley Street Essendon VIC 3040 Phone 03 9331 3944 Web www.expedientsoftware.com.au Table of Contents Logging In...
Microsoft Word 2007 on Windows
 1 Microsoft Word 2007 on Windows Word is a very popular text formatting and editing program. It is the standard for writing papers and other documents. This tutorial and quick start guide will help you
Copyright 2015 Integrated Environmental Solutions Limited. All rights reserved.
 Tabular Room Data User Guide IES Virtual Environment Copyright 2015 Integrated Environmental Solutions Limited. All rights reserved. No part of the manual is to be copied or reproduced in any form without
Introduction to Excel 2007
 Introduction to Excel 2007 These documents are based on and developed from information published in the LTS Online Help Collection (www.uwec.edu/help) developed by the University of Wisconsin Eau Claire
Microsoft Excel 2010 Basic
 Microsoft Excel 2010 Basic Introduction to MS Excel 2010 Microsoft Excel 2010 is a spreadsheet software in the new Microsoft 2010 Office Suite. Excel allows you to store, manipulate and analyze data in
Version Operator Orientation. TIMMS Client. A guide to using the TIMMS System. Training & Navigation Notes
 Version 7.2.4 Operator Orientation TIMMS Client A guide to using the TIMMS System Training & Navigation Notes Disprax Pty Ltd 2015 WHAT IS TIMMS? TIMMS Stands for: Total Industry Management and Marketing
Tabular Building Template Manager (BTM)
") Tabular Building Template Manager (BTM) User Guide IES Vi rtual Environment Copyright 2015 Integrated Environmental Solutions Limited. All rights reserved. No part of the manual is to be copied or reproduced
Tabular Building Template Manager (BTM) User Guide IES Vi rtual Environment Copyright 2015 Integrated Environmental Solutions Limited. All rights reserved. No part of the manual is to be copied or reproduced
Podium Plus Data Analysis Software. User Manual. SWIS10 Version
 SWIS10 Version Issue 1.10 February 2005 Contents 1 Introduction 6 1.1 What is Podium Plus? 6 1.2 About This Manual 6 1.3 Typographical Conventions 7 1.4 Getting Technical Support 7 2 Getting Started 8
Excel Tutorial 1
 IT٢.we Excel 2003 - Tutorial 1 Spreadsheet Basics Screen Layout Title bar Menu bar Standard Toolbar Other Tools Task Pane Adding and Renaming Worksheets Modifying Worksheets Moving Through Cells Adding
CHRIS Introduction Guide
 1 Introduction... 3 1.1 The Login screen... 3 1.2 The itrent Home page... 5 1.2.1 Out of Office... 8 1.2.2 Default User Preferences... 9 1.2.3 Bookmarks... 10 1.3 The itrent Screen... 11 The Control Bar...
Administration. Training Guide. Infinite Visions Enterprise Edition phone toll free fax
 Administration Training Guide Infinite Visions Enterprise Edition 406.252.4357 phone 1.800.247.1161 toll free 406.252.7705 fax www.csavisions.com Copyright 2005 2011 Windsor Management Group, LLC Revised:
MICROSOFT PROJECT Level 2
 MICROSOFT PROJECT 2010 Level 2 Contents LESSON 1 - ORGANISING PROJECT DATA... 3 FILTERING DATA... 4 USING THE AUTOFILTER FEATURE... 4 SORTING A VIEW... 6 CREATING A CUSTOM SORT... 6 GROUPING DATA... 7
Microsoft Excel 2010
 www.jadehorizon.com Microsoft Excel 2010 Sorting and Filtering Sorting and Filtering Microsoft Excel 2010 Table of Contents Table of Contents INTRODUCTION... 3 CONVENTIONS... 3 TABLE DESIGN RULES... 5
Accessibility Aids in Microsoft Word 2010
 Accessibility Aids in Microsoft Word 2010 This document explains how to use many of Microsoft Word's accessibility features in order to improve productivity. It is assumed all users have a working knowledge
Microsoft Word: Steps To Success (The Bare Essentials)
") Microsoft Word: Steps To Success (The Bare Essentials) Workbook by Joyce Kirst 2005 Microsoft Word: Step to Success (The Bare Essentials) Page Contents 1 Starting Word 2 Save 3 Exit 5 Toolbars, Alignment,
Microsoft Word: Steps To Success (The Bare Essentials) Workbook by Joyce Kirst 2005 Microsoft Word: Step to Success (The Bare Essentials) Page Contents 1 Starting Word 2 Save 3 Exit 5 Toolbars, Alignment,
Quick Start Guide - Contents. Opening Word Locating Big Lottery Fund Templates The Word 2013 Screen... 3
 Quick Start Guide - Contents Opening Word... 1 Locating Big Lottery Fund Templates... 2 The Word 2013 Screen... 3 Things You Might Be Looking For... 4 What s New On The Ribbon... 5 The Quick Access Toolbar...
Open. Select the database and click. Print. Set printing options using the dropdown menus, then click the
 The Original Quick Reference Guides Microsoft Access 2010 Access is a tool for creating and managing databases collections of related records structured in an easily accessible format such as a table,
Excel 2016 Basics for Windows
 Excel 2016 Basics for Windows Excel 2016 Basics for Windows Training Objective To learn the tools and features to get started using Excel 2016 more efficiently and effectively. What you can expect to learn
Troubleshooting in Microsoft Excel 2002
 Page 1 of 8 Troubleshooting in Microsoft Excel 2002 Result: To understand how to work with the Excel software to enter data, navigate the page, and print materials. Tabs Look at the tabs at the bottom
THE EXCEL ENVIRONMENT... 1 EDITING...
 Excel Essentials TABLE OF CONTENTS THE EXCEL ENVIRONMENT... 1 EDITING... 1 INSERTING A COLUMN... 1 DELETING A COLUMN... 1 INSERTING A ROW... DELETING A ROW... MOUSE POINTER SHAPES... USING AUTO-FILL...
IP4 - Running reports
 To assist with tracking and monitoring HRIS recruitment and personnel, reports can be run from Discoverer Plus. This guide covers the following process steps: Logging in... 2 What s changed? Changed reference
Microsoft Outlook 2010 Hands On Guided Tour. Level 1
 Microsoft Outlook 2010 Hands On Guided Tour Level 1 Outlook 2010 Window Anatomy Level 1/Guide A, p.1 Welcome to Outlook 2010 at UMHS. This guide gives you a quick visual tour of the Outlook 2010 window.
BASIC MICROSOFT POWERPOINT
 BASIC MICROSOFT POWERPOINT PART ONE PHONE: 504-838-1144 IT Training Team Jefferson Parish Library EMAIL: jpltrain@jplibrary.net In this class you will learn to: Launch, close, and interact with Microsoft
Rooms Management Manual
 Fidelio Suite 7 Rooms Management Manual Front Office Version 7.13 Creation Date: March 2002 Delphi is a trademark of Borland. MSDOS, Windows 95, Windows-NT and Microsoft Word are trademarks of Microsoft
Objective 1: Familiarize yourself with basic database terms and definitions. Objective 2: Familiarize yourself with the Access environment.
 Beginning Access 2007 Objective 1: Familiarize yourself with basic database terms and definitions. What is a Database? A Database is simply defined as a collection of related groups of information. Things
E-Report. User Manual
 E-Report User Manual 2011 All rights reserved. No parts of this work may be reproduced in any form or by any means graphic, electronic, or mechanical, including photocopying, recording, taping, or information
Skills Funding Agency
 Provider Data Self-Assessment Toolkit (PDSAT) v17 User Guide Contents Introduction... 2 Compatibility and prerequisites... 2 1. Installing PDSAT... 3 2. Opening PDSAT... 6 2.1 Opening Screen... 6 2.2 Updates...
Excel 2016 Basics for Mac
 Excel 2016 Basics for Mac Excel 2016 Basics for Mac Training Objective To learn the tools and features to get started using Excel 2016 more efficiently and effectively. What you can expect to learn from
Using Open Workbench Version 1.1
 Version 1.1 Second Edition Title and Publication Number Title: Edition: Second Edition Printed: May 4, 2005 Copyright Copyright 1998-2005 Niku Corporation and third parties. All rights reserved. Trademarks
INTRODUCTION... 1 UNDERSTANDING CELLS... 2 CELL CONTENT... 4
 Introduction to Microsoft Excel 2016 INTRODUCTION... 1 The Excel 2016 Environment... 1 Worksheet Views... 2 UNDERSTANDING CELLS... 2 Select a Cell Range... 3 CELL CONTENT... 4 Enter and Edit Data... 4
Introduction to Word 2010
 Introduction to Word 2010 Screen Elements 4 1 2 3 5 10 6 7 8 9 1. File Tab: The File tab will bring you into the Backstage View. The Backstage View is where you manage your files and the data about them
What can Word 2013 do?
 Mary Ann Wallner What can Word 2013 do? Provide the right tool for: Every aspect of document creation Desktop publishing Web publishing 2 Windows 7: Click Start Choose Microsoft Office > Microsoft Word
button Double-click any tab on the Ribbon to minimize it. To expand, click the Expand the Ribbon button
 PROCEDURES LESSON 1: CREATING WD DOCUMENTS WITH HEADERS AND FOOTERS Starting Word 1 Click the Start button 2 Click All Programs 3 Click the Microsoft Office folder icon 4 Click Microsoft Word 2010 1 Click
Service Minder Plus Features/Helpful Hints
 Service Minder Plus Features/Helpful Hints This manual covers helpful hints and use of features. Note: These items will be addressed during the training sessions. This document is meant to be used as an
Staff Microsoft VISIO Training. IT ESSENTIALS Creating Organisation Charts Using Visio 2013 (ST560) August 2015
 August 2015") Staff Microsoft VISIO Training IT ESSENTIALS Creating Organisation Charts Using Visio 0 (ST0) August 0 Book online at: Royalholloway.ac.uk/it/training Self-Study packs also available 9 th August 0 Table
Staff Microsoft VISIO Training IT ESSENTIALS Creating Organisation Charts Using Visio 0 (ST0) August 0 Book online at: Royalholloway.ac.uk/it/training Self-Study packs also available 9 th August 0 Table
Caterease User Training Guide
 Caterease User Training Guide Copyright: 2016 Table of Contents Unit 1: Introducing Event Manager 15 Entering General Event Information 17 Searching for Events 19 Using the Event Finder 20 Reviewing and
eschoolplus+ Cognos Query Studio Training Guide Version 2.4
 + Training Guide Version 2.4 May 2015 Arkansas Public School Computer Network This page was intentionally left blank Page 2 of 68 Table of Contents... 5 Accessing... 5 Working in Query Studio... 8 Query
D3000.Lite User s Guide
 D3000.Lite User s Guide 2011 Datawatch Systems, Inc. Datawatch Systems is a registered trademark of Datawatch Systems, Inc. For Datawatch D3000.Lite Version 1.2 Manual release date: March 1, 2010 Datawatch
Excel 2010 Level 1: The Excel Environment
 Excel 2010 Level 1: The Excel Environment Table of Contents The Excel 2010 Environment... 1 The Excel Window... 1 File Tab... 1 The Quick Access Toolbar... 4 Access the Customize the Quick Access Toolbar
New User Orientation PARTICIPANT WORKBOOK
 New User Orientation PARTICIPANT WORKBOOK INTEGRATED SOFTWARE SERIES New User Orientation PARTICIPANT WORKBOOK Version 2.0 Copyright 2005 2009. Interactive Financial Solutions, Inc. All Rights Reserved.
MS Excel Henrico County Public Library. I. Tour of the Excel Window
 MS Excel 2013 I. Tour of the Excel Window Start Excel by double-clicking on the Excel icon on the desktop. Excel may also be opened by clicking on the Start button>all Programs>Microsoft Office>Excel.
Astra Schedule User Guide Scheduler
 Astra Schedule User Guide 7.5.12 Scheduler 1 P a g e ASTRA SCHEDULE USER GUIDE 7.5.12... 1 LOGGING INTO ASTRA SCHEDULE... 3 LOGIN CREDENTIALS... 3 WORKING WITH CALENDARS... 4 CHOOSING A CALENDAR AND FILTER...
MICROSOFT OFFICE. Courseware: Exam: Sample Only EXCEL 2016 CORE. Certification Guide
 MICROSOFT OFFICE Courseware: 3263 2 Exam: 77 727 EXCEL 2016 CORE Certification Guide Microsoft Office Specialist 2016 Series Microsoft Excel 2016 Core Certification Guide Lesson 1: Introducing Excel Lesson
Project Advanced. Microsoft Application Series. Best STL
 Microsoft Application Series Project Advanced Best STL Courses never cancelled: guaranteed Last minute rescheduling 24 months access to Microsoft trainers 12+ months schedule UK wide delivery www.microsofttraining.net
Learning Guide for User Interface 4.3
 Learning Guide for User Interface 4.3 This guide will help you learn how to use Datatel User Interface 4.3. It includes instructions for accomplishing various tasks, such as accessing a screen or mnemonic,
SYLLABUS PLUS: PRINTING & REPORTING
 SYLLABUS PLUS: PRINTING & REPORTING Syllabus Plus Printing & Reporting This Syllabus Plus training guide covers printing and reporting data from Syllabus Plus (referred to as S+ throughout the manual).
MICROSOFT WORD 2010 Quick Reference Guide
 MICROSOFT WORD 2010 Quick Reference Guide Word Processing What is Word Processing? How is Word 2010 different from previous versions? Using a computer program, such as Microsoft Word, to create and edit
Ms excel. The Microsoft Office Button. The Quick Access Toolbar
 Ms excel MS Excel is electronic spreadsheet software. In This software we can do any type of Calculation & inserting any table, data and making chart and graphs etc. the File of excel is called workbook.
EXCEL BASICS: MICROSOFT OFFICE 2007
 EXCEL BASICS: MICROSOFT OFFICE 2007 GETTING STARTED PAGE 02 Prerequisites What You Will Learn USING MICROSOFT EXCEL PAGE 03 Opening Microsoft Excel Microsoft Excel Features Keyboard Review Pointer Shapes
Guide to User Interface 4.3
 Datatel Colleague Guide to User Interface 4.3 Release 18 June 24, 2011 For corrections and clarifications to this manual, see AnswerNet page 1926.37. Guide to User Interface 4.3 All Rights Reserved The
Creating Reports in Access 2007 Table of Contents GUIDE TO DESIGNING REPORTS... 3 DECIDE HOW TO LAY OUT YOUR REPORT... 3 MAKE A SKETCH OF YOUR
 Creating Reports in Access 2007 Table of Contents GUIDE TO DESIGNING REPORTS... 3 DECIDE HOW TO LAY OUT YOUR REPORT... 3 MAKE A SKETCH OF YOUR REPORT... 3 DECIDE WHICH DATA TO PUT IN EACH REPORT SECTION...
PM4 + Partners Knowledge Articles
 PM4 + Partners Knowledge Articles Customizing your PM4+ user experience r 1 November 30, 2108 PM4+ Partners Workspace - customize your experience Page 2 Contents Customizing Your Workspace... 1 Customizing
Excel Level 1
 Excel 2016 - Level 1 Tell Me Assistant The Tell Me Assistant, which is new to all Office 2016 applications, allows users to search words, or phrases, about what they want to do in Excel. The Tell Me Assistant
1. Understanding efinanceplus Basics
 1. Understanding efinanceplus Basics To understand the procedures described later in this guide, you will first need some background on the efinanceplus environment. Whether adding, searching for, viewing,
TABLE OF CONTENTS CHAPTER
 TABLE OF CONTENTS CHAPTER 1...1 A QUICK OVERVIEW OF THE MICROSOFT EXCHANGE CLIENT...1 BASIC CONCEPTS AND FEATURES...1 STARTING THE MICROSOFT EXCHANGE CLIENT...1 SETTING OPTIONS FOR YOUR MESSAGES...3 LOOKING
Creating a Spreadsheet by Using Excel
 The Excel window...40 Viewing worksheets...41 Entering data...41 Change the cell data format...42 Select cells...42 Move or copy cells...43 Delete or clear cells...43 Enter a series...44 Find or replace
Computer Training Centre University College Cork. Excel 2016 Level 1
 Computer Training Centre University College Cork Excel 2016 Level 1 Table of Contents Introduction... 1 Opening Excel... 1 Using Windows 8... 1 Using Windows 10... 1 Getting Started with Excel 2016...
Day : Date : Objects : Open MS Excel program * Open Excel application. Select : start. Choose: programs. Choose : Microsoft Office.
 Day : Date : Objects : Open MS Excel program * Open Excel application. Select : start Choose: programs Choose : Microsoft Office Select: Excel *The interface of Excel program - Menu bar. - Standard bar.
MS Excel Henrico County Public Library. I. Tour of the Excel Window
 MS Excel 2013 I. Tour of the Excel Window Start Excel by double-clicking on the Excel icon on the desktop. Excel may also be opened by clicking on the Start button>all Programs>Microsoft Office>Excel.
2.1 Logging on to FieldManager Software
 2 Getting Started The main window displays all statewide contracts. Please note that you have access to ALL contracts and functionality is based on permission level. These contracts are imported into FieldManager
Copyright 2018 MakeUseOf. All Rights Reserved.
 The Beginner s Guide to Microsoft Excel Written by Sandy Stachowiak Published April 2018. Read the original article here: https://www.makeuseof.com/tag/beginners-guide-microsoftexcel/ This ebook is the
USER GUIDE Time and Attendance User Administration Human Capital Management Suite
 USER GUIDE Time and Attendance User Administration Human Capital Management Suite Ormed Information Systems Ltd. Version 1.2 (January 2015) What s Inside What s Inside...1 Introduction...2 Procedures...3
Word 2016 Tips. Rylander Consulting
 Word 2016 Tips Rylander Consulting www.rylanderconsulting.com sandy@rylanderconsulting.com 425.445.0064 Word 2016 i Table of Contents Screen Display Tips... 1 Create a Shortcut to a Recently Opened Document
Microsoft Excel 2010 Part 2: Intermediate Excel
 CALIFORNIA STATE UNIVERSITY, LOS ANGELES INFORMATION TECHNOLOGY SERVICES Microsoft Excel 2010 Part 2: Intermediate Excel Spring 2014, Version 1.0 Table of Contents Introduction...3 Working with Rows and
Business Insight Authoring
 Business Insight Authoring Getting Started Guide ImageNow Version: 6.7.x Written by: Product Documentation, R&D Date: August 2016 2014 Perceptive Software. All rights reserved CaptureNow, ImageNow, Interact,
Using Excel to Troubleshoot EMIS Data
 Using Excel to Troubleshoot EMIS Data Overview Basic Excel techniques can be used to analyze EMIS data from Student Information Systems (SISs), from the Data Collector, and on ODE EMIS reports This session
Outlook - an Introduction to Version 2003 Table of Contents
 Outlook - an Introduction to E-mail Version 2003 Table of Contents What is Outlook Starting Outlook The Navigation Pane Getting Help Creating and Sending a Message Using the College Exchange Directory
Please note that this process must be repeated if a new PC is used.
 Appendix 2 - Using Smart Client This section of the user guide is relevant to first-time users of Agresso. There are some areas of the Agresso package that initially need to be configured by the individual
Sage Getting Started Guide. September 2017
 Sage 100 2018 Getting Started Guide September 2017 2017 The Sage Group plc or its licensors. All rights reserved. Sage, Sage logos, and Sage product and service names mentioned herein are the trademarks
12 BASICS OF MS-EXCEL
 12 BASICS OF MS-EXCEL 12.1 INTRODUCTION MS-Excel 2000 is a Windows based application package. It is quite useful in entering, editing, analysis and storing of data. Arithmetic operations with numerical
KEYBOARD SHORTCUTS AND HOT KEYS
 KEYBOARD SHORTCUTS AND HOT KEYS Page 1 This document is devoted to using the keyboard instead of the mouse to perform tasks within applications. This list is by no means the "be all and end all". There
Kenora Public Library. Computer Training. Introduction to Excel
 Kenora Public Library Computer Training Introduction to Excel Page 2 Introduction: Spreadsheet programs allow users to develop a number of documents that can be used to store data, perform calculations,
DCN Synoptic Microphone Control. Software User Manual en LBB 3571
 DCN en LBB 3571 GENERAL CONTENTS Chapter 1-1.1 About 1.2 What is a synoptic layout? 1.3 Controlling microphones Chapter 2 - Getting Started 2.1 Starting 2.2 Using Help Chapter 3 - Preparing for a Conference
MODULE 5 DATABASES. Content
 MODULE 5 DATABASES Module Goals Module 5 - Databases, requires candidates to understand some of the basic concepts of databases demonstrate the ability to use a database on a personal computer. Candidates
SMART Meeting Pro 4.2 personal license USER S GUIDE
 smarttech.com/docfeedback/170973 SMART Meeting Pro 4.2 personal license USER S GUIDE Product registration If you register your SMART product, we ll notify you of new features and software upgrades. Register
Query Studio Training Guide Cognos 8 February 2010 DRAFT. Arkansas Public School Computer Network 101 East Capitol, Suite 101 Little Rock, AR 72201
 Query Studio Training Guide Cognos 8 February 2010 DRAFT Arkansas Public School Computer Network 101 East Capitol, Suite 101 Little Rock, AR 72201 2 Table of Contents Accessing Cognos Query Studio... 5
Introduction to Excel
 Office Button, Tabs and Ribbons Office Button The File menu selection located in the upper left corner in previous versions of Excel has been replaced with the Office Button in Excel 2007. Clicking on
Contents. Creating Forms
 Access 2007 Forms Contents Creating Forms... 3 Creating a new form 3 Design view and Form view 5 Creating a user-defined form 5 Changing the look of your form... 6 Layout View 6 Design View 6 Moving and
Table of Contents Lesson 1: Introduction to the New Interface... 2 Lesson 2: Prepare to Work with Office
 Table of Contents Lesson 1: Introduction to the New Interface... 2 Exercise 1: The New Elements... 3 Exercise 2: Use the Office Button and Quick Access Toolbar... 4 The Office Button... 4 The Quick Access
Introduction to Microsoft Office PowerPoint 2010
 Introduction to Microsoft Office PowerPoint 2010 TABLE OF CONTENTS Open PowerPoint 2010... 1 About the Editing Screen... 1 Create a Title Slide... 6 Save Your Presentation... 6 Create a New Slide... 7
Using Microsoft Word. Working With Objects
 Using Microsoft Word Many Word documents will require elements that were created in programs other than Word, such as the picture to the right. Nontext elements in a document are referred to as Objects
Frequency tables Create a new Frequency Table
 Frequency tables Create a new Frequency Table Contents FREQUENCY TABLES CREATE A NEW FREQUENCY TABLE... 1 Results Table... 2 Calculate Descriptive Statistics for Frequency Tables... 6 Transfer Results
Microsoft Project 2007 Level 2. MICROSOFT PROJECT 2007 Level 2
 Contents MICROSOFT PROJECT 2007 Level 2 Contents CONTENTS LESSON 1 - ORGANISING PROJECT DATA... 4 Using the AutoFilter Feature... 5 Filtering Data... 5 Sorting a View... 6 Creating a Custom Sort... 6 Grouping
Excel 2007 New Features Table of Contents
 Table of Contents Excel 2007 New Interface... 1 Quick Access Toolbar... 1 Minimizing the Ribbon... 1 The Office Button... 2 Format as Table Filters and Sorting... 2 Table Tools... 4 Filtering Data... 4
BASIC NAVIGATION & VIEWS...
 Content Overview VISUAL TOUR... 5 NEW FEATURES IN OUTLOOK 2010... 6 BASIC NAVIGATION & VIEWS... 7 SETTING PREFERENCES... 7 Creating an Outlook Shortcut... 7 Choosing a Startup View... 7 CUSTOMIZING INBOX
GAZIANTEP UNIVERSITY INFORMATICS SECTION SEMETER
 GAZIANTEP UNIVERSITY INFORMATICS SECTION 2010-2011-2 SEMETER Microsoft Excel is located in the Microsoft Office paket. in brief Excel is spreadsheet, accounting and graphics program. WHAT CAN WE DO WITH
Skills Exam Objective Objective Number
 Overview 1 LESSON SKILL MATRIX Skills Exam Objective Objective Number Starting Excel Create a workbook. 1.1.1 Working in the Excel Window Customize the Quick Access Toolbar. 1.4.3 Changing Workbook and
ABBYY FineReader 14. User s Guide ABBYY Production LLC. All rights reserved.
 ABBYY FineReader 14 User s Guide 2017 ABBYY Production LLC All rights reserved Information in this document is subject to change without notice and does not bear any commitment on the part of ABBYY The