Contents 1. General 2. Definition terms Selecting the marking device Base plates and segments 5. Editing projects
|
|
|
- Alannah Jennings
- 6 years ago
- Views:
Transcription


1 Manual smartmarking
2 Contents 1. General System requirements Software installation Support hotline 4 2. Definition of terms 5 3. Selecting the marking device Type selection Output device plotter (DIN A3 or DIN A4) Output devices Interfaces Calibration Firmware update Creating a new project Use of universal marking elements Manual selection of marking tags Output device TT printer (roll) Selecting the marking materials for the TT printer and plotter Creating the grid pattern for WAGO ddddddimarker strip 7.5 and 11 mm Base plates and segments Segments Base plates Copying base plates Adding base plates Base plate removal Using base plates Base plate renaming Editing projects Opening existing marking projects Closing existing marking projects Saving marking projects 18
3 6. Marking The plotter marking wizard Possible settings One tag / several tags/ tag series Data import Series marking The TT printer marking wizard Possible settings Data import Marker strips plotter/ TT printer Print output Plotter TT printer Printout of the marker strip Printout of WMB Inline markers Plotter calibration Engraving General Output device Output of the engraved marking Menu item Extra - Element designer Designer for one tag size New data base entry Tag parameter default values Calibration of the marking material Accessing the new marking materials Designer for different tag sizes Menu item Extra Grid correction 39
4 1. General 1.1. System requirements Pentium II PC of at least 300MHz or higher 128 MByte RAM CD ROM drive, VGA graphics adapter and monitor (16 bit High Color, resolution 1024x768) Operating system Microsoft Windows 98/NT, ME, 2000, X Internet Explorer 5.01 or later 1.2. Software installation The smart MARKING program is automatically installed in the course of full installation of the WAGO ProServe software Support hotline WAGO Kontakttechnik GmbH & Co. KG Hansastraße 27 D Minden Germany Tel / Fax / support.proserve@wago.com Internet: http//


5 2. Definition of Terms Segment Base plate Segment 1 Segment 2 Segment 3 Segment 4 Marking sequence

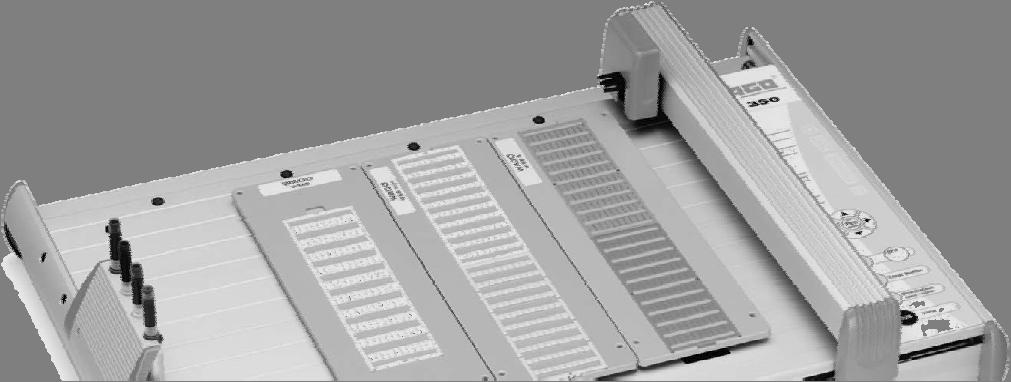
6 3. Selecting the marking device 3. Selecting the marking device 3.1. Type selection Before a new marking project can be created, it is necessary to select the appropriate output device. Selecting the menu item "File > New" or clicking on the button "New project" opens a dialog box, which allows to select the plotter IP 350, the engraving machine or the thermal transfer printer Output device plotter (DIN A3 or DIN A4) After selecting the plotter and then clicking on "Accept" the output device dialog opens. Diverse options are available.


7 3. Selecting the marking device Output devices Interfaces You now have to specify if you will use a plotter with or without carrier plate recognition. Explanation: The WAGO IP350 plotter has automatic recognition of carrier plates The interface selection defines the connection port of the plotter. The smartmarking default setting is "USB". Only smartmarking software version 4.1 or higher supports the USB interface.

8 3. Selecting the marking device Calibration The plotter can be calibrated manually via the "Calibration" tab. A modification of the values will change all entries in the database. If the printout of numbers, for example, is not correctly centered on the tag, please consult responsible support staff, so that the database can be checked.

9 3. Selecting the marking device Firmware update The plotter firmware can be updated via the "Firmware update" tab. For more information about available updates, please contact us under:

10 3. Selecting the marking device Creating a new project Double click displays the database After selecting the plotter shown under point 3, you first see a message asking whether to use automatic element recognition. After clicking on "Yes", the software checks which elements are presently used on the plotter and selects the corresponding elements from the database.
.")
11 3. Selecting the marking device Use of universal marking elements If the plotter has been loaded with a universal tag (e.g. WAGO WMB Series 793), the space is made free during automatic recognition. By double clicking on the missing segment, the database entries appropriate to the universal tag are displayed (see picture 2 under point 6.2).

12 3. Selecting the marking device Manual selection of marking tags By clicking on "No", the entries from the database appear and you can select the appropriate tags. You select the tag by double clicking on the appropriate entry in the right hand window.
. Clicking on the \"Accept\" button opens the dialog for the thermal transfer printer selection.")
13 3. Selecting the marking device 3.3. Output device TT printer (roll) Thermal transfer printers can be used to print on diverse marker strips (e.g. for the Series 2000 TOPJOB S or 870). Clicking on the "Accept" button opens the dialog for the thermal transfer printer selection.


14 3. Selecting the marking device After selecting the device, you also have to select the appropriate driver. To do so, click on the tab "Printers". All printer drivers that are installed under Windows are displayed. Please click on "Accept" and then on "Close" in order to close the dialog Selecting the marking material for the TT printer or the plotter After selecting the printer driver or the output device, a dialog box opens which displays all marking materials that are available for the thermal transfer printer or the plotter. The WAGO marker strip 11 mm is appropriate for marking the new TOPJOB S series of rail-mounted terminal blocks. The WAGO marker strip 7.5mm is appropriate for the Series 870, 270, 869 as well as for the motor connection terminal blocks to WMB Inline markers can be used for marking any WAGO rail-mounted terminal block with cross sections from 2.5mm² to 35mm². Screen view of the database marker carriers thermal transfer


 and the number of")
15 3. Selecting the marking device Creating the grid pattern for WAGO marker strip 7.5 and 11 mm Click right mouse button on the strip and select menu item "Partition strip" to open the following dialog box: Here you can enter the width (e.g. 5.2 mm for a Series 2002 TOPJOB S rail-mounted terminal block) and the number of terminal blocks. The residual length is calculated automatically, so that a strip with a maximum length of 1 m and different grid patterns can be created.


16 4. Base plates and segments 4.1. Segments If identical segments are used for marking, e.g. 4 x , you have the option to copy and paste the first segment without having to select the particular segment from the database. To do so, click right mouse button on the segment to be copied and select the menu item "Copy segment" from the context menu Now click with the mouse on the position where you want to insert the segment (the empty space now must have a green border). After clicking the right mouse button you can select menu item "Paste segment". It is reasonable to copy segments when a grid pattern for a marker strip has already been created which is now also needed for the other segments.
17 4. Base plates and segments 4.2. Base plates Copying base plates If the number of required markings exceeds the number of available tags (e.g. 4 x = 4 cards with 100 tags each= 400 tags), you have the option to place further base plates in the marking project. First select the segments you want to print. Now click with the right mouse button on a segment and select the menu item "Copy base plate" from the context menu. Then click with the right mouse button on a segment and select the menu item "Paste base plate". If there are too few segments / base plates available during data import, the missing segements are automatically generated from the database and distributed among other base plates. If you copy a base plate that has already been labeled, it will be pasted with the entire inscription Adding base plates In order to realize big marking projects, it is possible to paste empty base plates and to assemble them individually. To do so, click with the right mouse button on a segment and select the menu item "Add base plate" from the context menu. You will be asked whether you want to use automatic carrier plate recognition. If you answer this question with "No", you can directly access the database and select the required base plates manually Base plate removal In order to remove a base plate which is no longer requied, click with the right mouse button on a segment and select the menu item "Remove base plate" Using base plates By simply clicking on the individual base plates you can change back and forth between the marking projects Base plate renaming You may assign a project-specific name after double-clicking on the base plate.
18 5. Editing projects 5.1. Opening existing marking projects You can select existing projects for plotting or editing by means of "File > Open" or by clicking on the "Open project" button (file extension.vsp) Closing existing marking projects You can close existing projects by means of "File > Close" or by clicking on the "Close project" button. If the projects have not been saved, the software asks, before closing them, if you want to save them Saving marking objects You can save existing projects by means of "File > save" or by clicking on the "Save project" button. Saving a new marking project based on the saved marking project causes the old data to be overwritten. To save it as a new separate project, use "File -> Save as".

19 6. Markings 6.1. The plotter marking wizard Possible settings Text length check Angle orientation on the tag. Alignment left, centered, right Lines 1 5 lines are available depending on the size of the tag. Font 9 different fonts are available. Block Light; DIN1451; DIN1451eng; Era_Opt; Frutiger_; Futura_Pen; HP_2; ISO_3098; Universal_ (the DIN1451 font is recommended for the plotter) Text length check too long text is shown "flashing red". Font width for reducing or enlarging the character spacing, you can use percentage values from 50 % to 100 %. Font size Line spacing when several lines are used Pen pens with different line widths can be used in the project per segment or marking tag. Pen speed different pen speeds can be used in the project per segement or marking tag.


20 6. Markings One tag / several tags/ tag series In the single tag marking section, you can mark a single tag with one or more lines. By activating the "Repeat" box, the content of the first tag is copied to the other tags. Activating the "Series" checkbox and then clicking on the "Series numbers" button causes the "Series labelling" dialog to open. Prefix letters or numbers can be inserted in front of a consecutive number sequence. Suffix letters or numbers can be inserted after a consecutive number sequence. Preset value start of a number sequence (e.g to or a... to ) Final value end of a number sequence (... to 10 or... to Z) Steps e.g. value 2=2,4,6 or value 3=1, 4, 7 Total display of created markings Repeat value 2=1,1,2,2,3,3, etc.) Leading zeros Counter decimal, alphabetical, hexadecimal, octal Repeat on the tab One tag/several tags/tag series of the marking dialog are e.g. "repeats" number sequences (entry of 1 10 is required, and this job is only required z 5 times, for example)
 to be able to select the file.")
21 6. Markings Data import The following data formats can be imported: XLS TXT MDB Text files (ASCII) can also be imported if they do not have the extension TXT. For example, the file format CSV is used by the CAE system EPLAN for the output of WAGO terminal markings. The data type *.* must be set (show all files) to be able to select the file. After selecting the file to be imported, the wizard for import from text files appears.


22 6. Markings If the file has a structure with several columns, the field separator must first be defined (a comma in the example). The text sections to be copied are selected with the mouse. If you want to import all texts, you can mark the entire text by clicking on the square between rows and columns. Clicking on the "Copy marked range" button copies the marked text to the right hand window. Overwrite preview if there are text sections already present in the right hand window, these can be overwritten by activating this checkbox. Ignore empty fields empty fields are not copied. Left > right Data transfer is done line by line. Smaller amounts of data (20 to 30 lines) can also be copied and inserted from other programs via the clipboard. If the range is larger, it is better to perform an import as it is more easily managed that way.
.")
23 6. Markings Series marking The individual marking tags of a series are assigned to the tags by means of a comma. This can be used for individual marking of single tags (different quantities can be marked depending on the type of tag; with the WAGO WMB , 10 tags are available in one series). It is easier to generate individual markings in the data import section, since the preview window allows direct access. Individual tags are separated by "Return".

24 6. Markings 6.2. The TT printer marking wizard Possible settings Text length check Angle orientation on the tag. Alignment left, centered, right Lines 1 5 lines are available depending on the size of the tag. Font All fonts that are installed under Windows are available. Arial Bold is an ideal font to be used with the TT printer. Text length check too long text is shown "flashing red". Font width for reducing or enlarging the character spacing, you can use percentage values from 50 % to 100 %. Font size Line spacing when several lines are used Margin width It is only possible to use symbols with the thermal transfer printer when using the font WAGO Symbol font After selecting this font, the toolbar is activated.
 to be able to select the file.")
25 6. Markings Data import The following data formats can be imported: XLS DOC TXT MDB Textfiles (ASCII) can also be imported if they do not have the extension TXT. For example, the file format CSV is used by the CAE system EPLAN for the output of WAGO terminal markings. The data type h *.* must be set (show all files) to be able to select the file. After selecting the file to be imported, the wizard for import from text files appears (see also point 6.1.3).

26 6. Markings 6.3. Marker strips plotter/ TT printer Marking of the marker strips 7.5 mm and 11 mm can be done in two different ways. After creating the individual grid patterns (see point 3.3.2), highlight the first tag and click on the "Marking" button. A marking wizard opens which you can use to mark the tags having the same grid pattern. Tags with a different grid pattern can only be generated after the previous marking sequence has been completed. The second marking option allows to mark tags with different grid patterns. Highlight the first tag and click right mouse button. Now select menu item "Mark entire strip" from the context menu. The familiar wizard opens. Now you can mark tags with different grid patterns, for example a Series from 1 to n.

27 7. Print output 7.1. Plotter A click on the button opens the dialog "Plotting". The following settings can be made: Automatic pen preparation Before marking the first tag, the pen is prepared using an exchangeable tag which guarantees high-quality marking right from the start. Pen line width One line width can be used for the entire project. Different line widths that were defined in the project are ignored. Pen lowering unit If there is already a pen in this unit, no other pen will be picked up from the pen station. Plotting speed One plotting speed can be used for the entire project. Different plotting speeds that were defined in the project are ignored. Only highlighted segments Only the highlighted segment in the project is plotted. Only highlighted tags Only the highlighted tags are plotted.


28 7. Print output Before you can access the print menu, it will be checked once again if the correct marking tags have been chosen. Wrong or missing marking tags are displayed in red after confirming the warning message. After the required changes are made, you can immediately start the plotting process, since a check will take place automatically after clicking on "OK". If there are still wrong marking tags, the above message will be displayed again. Clicking the button cancels the plotting process.
 Number of printouts Number of strips / tags to be printed Only highlighted tags Only the")
29 7. Print output 7.2. TT printer Printout of the marker strip Clicking the button opens the dialog "Print". The following settings can be made: Left edge Distance of the left edge to the printer wall (inside) Number of printouts Number of strips / tags to be printed Only highlighted tags Only the highlighted tags are printed. Print separator lines You can specify whether to print the lines of the grid pattern or only one separator line for cutting. Line width of the grid pattern Values from 1 to 5 are available. Separator line width - Values from 1 to 5 are available. Grid pattern alignment During the manufacture of the complete rail assemblies manufacturing tolerances may occur (closer together / farther apart), which can be compensated by entering a certain coefficient.
30 7. Print output Printout of WMB Inline markers The possible settings for marker strips mentioned under are disabled for WMB Inline markers.

31 8. Plotter calibration Click on the button to open the dialog for calibration. The plotter is supplied as standard with the optimal values for plotting. You should only perform calibration if the printout is not correctly centered on the tag. Changes to the calibration must be confirmed with the "Calibrate" button. The plotter does not approach a certain position during calibration. X-axis or Y-axis deviation can be seen from a plotted tag, for example. Deviations are controlled via the arrow keys.

32 9. Engraving 9.1. General For the new version 4.1 an engraving head for the plotter IP350 is available. All existing IP350 plotters can be retrofitted with this engraving head. The item number for the engraving head is Included in the delivery of the engraving machine are the engraving head, the controller EC450 and the vacuum cleaner VC450. For more information please contact your WAGO sales partner Output device Just like with plotting, you have to select the adequate output device. Again, a DIN A3 and a DIN A4 device are available (indicates the potential working area). The marking settings for engraving can be made in the same way as the marking settings for plotting (see also point 6 ). You can also use automatic recognition when selecting the material. Only the materials that are suitable for engraving will then be available.


33 l 9. Engraving The only difference consists in the setting of the output options for the engraving machine. The following settings can be made:

34 9. Engraving 9.3 Output of the engraved marking

35 10. Menu item Extra - Element designer Another new feature of the version 4.1 is the designer for marking elements. For example, this tool offers you the possibility to create any available DIN A4 label as a master and to store it in the user database. The element designer can be found under the following menu item: Extras Marking elements Designer for one tag size New data base entry After clicking the button "New", it is important to determine whether the material is supposed to be used for plotting only or also for engraving at a later date. If you only select the point "Plotter", the material will not be available in the database if you select the engraving machine as output device. The data base entry should have a name that will allow to easily assign it to the material in the database.

36 10. Menu item Extra - Element designer Tag parameter default values When setting tag parameters, it is essential to enter the number of tags in the x-axis and y-axis direction. The other data may be specified if it is known, for example from a drawing. However, it is not required since all positions that are essential for marking are approached by the plotter and can be calculated by smart MARKING Calibration of the marking material
37 10. Menu item Extra - Element designer Click on the button "Approach" under "First tag Top left corner. The plotter arm is now moved to a defined position in the upper left corner. By means of the arrow keys and the point "Increment" the plotter arm can be moved precisely to the top left corner of the upper left tag (for a more precise approach you should insert a pen into the pen unit of the plotter arm). Repeat this procedure using the button "Approach" under "First tag Bottom right corner. At last, you click on "Approach" under "Last tag Top left corner" (only the upper left corner of the last tag is calibrated). Now click on "Accept" and close the dialog. The template with tag parameters opens (see also ). Click on "Accept" and then on "Close".

38 , 10. Menu item Extra - Element designer Accessing the new marking materials If you want to use the new tag, proceed in the same way as if creating a new marking project (see point 3.2.5). However, you will now find a new entry under the "Manufacturer" section. Click on the entry "User-defined" in order to display all individual marking templates Designer for different tag sizes If you want to use the designer for different tag sizes, proceed in the same way as if creating tags of one size. However, you have the option to create marking fields of different sizes on one label, e.g. type plates, that have different spacings.

39 10. Menu item Extra - Element designer Menu item Extra Grid correction The grid correction function can be used to compensate for deviations in the material tolerances, for example. If the marking, which was accurately centered on the first tags, starts to "drift" in the further course, it is possible to prevent this by calibration. First, highlight the first tag on the top left. Now select menu item "Extras Grid correction". The plotter arm will automatically move to the last tag of the matrix (bottom right). The top left corner of the last tag can now be approached via the arrow keys. The correction data (coordinates of the last tag) is then transferred into the user data base.

40 WAGO Kontakttechnik GmbH & Co. KG P.O. Box D Minden Hansastraße 27 D Minden Phone / Fax / Support Hotline ProServe: Phone Fax / support.proserve@wago.com / Manual smartmarking 1.E 07/06 Printed in Germany, JA Subject to design changes
wiemarc 5.2 Manual Labeling Software wiemarc 5.2
 wiemarc 5.2 Manual Labeling Software wiemarc 5.2 Page 1 of 67 Release: February 16, 2016 Manual labeling software 5.2 Table of contents 1. System requirements 2. Software installation 3. Output devices
WAGO ProServe. Designing, Assembling and Marking
 WAGO ProServe Designing, Assembling and Marking Benefits: Quick design Quick ordering User-friendly Extensive and user-specific documentation Network compatibility Different software products on a single
WAGO MARKING. Samples and Overview
 WAGO MARKING Samples and Overview THE INDUSTRY S FASTEST AND MOST COST-EFFECTIVE MARKING SYSTEM Marking materials, printers and software from WAGO are perfectly synchronized for seamless marking: Inline
WAGO Marking Samples and Overview
 WAGO Marking Samples and Overview THE FASTEST MARKING SYSTEM WAGO s marking materials, printers and software are perfectly synchronized for seamless marking: Inline marker slots on DIN-rail-mount terminal
TOPJOB S Sensor/Actuator Terminal Blocks with Push-in CAGE CLAMP Reliability
 TOPJOB S Sensor/Actuator Terminal Blocks with Push-in CAGE CLAMP Reliability TOPJOB S SEND THE RIGHT SIGNALS. TOPJOB S Sensor/Actuator Terminal Blocks with Push-in CAGE CLAMP Reliability TWO IN ONE. WITH
P6 Professional Reporting Guide Version 18
 P6 Professional Reporting Guide Version 18 August 2018 Contents About the P6 Professional Reporting Guide... 7 Producing Reports and Graphics... 9 Report Basics... 9 Reporting features... 9 Report Wizard...
KEEP YOUR COSTS IN LINE. The Fastest Marking System
 KEEP YOUR COSTS IN LINE The Fastest Marking System CLEARLY MARK CONTROL CABINETS Terminal Block Marking Multi-line marking strips for clear, detailed control cabinet labels WMB Inline markers on a reel
TIDY LABELS. User Guide
 TIDY LABELS User Guide TIDY LABELS User Guide Contents 1. Overview...3 2. Installation...3 3. Navigating through the application...3 4. Databases...4 4.1 Creating a new database manually...5 4.2 Importing
CPM-200 User Guide For Lighthouse for MAX
 CPM-200 User Guide For Lighthouse for MAX Contents Page Number Opening the software 2 Altering the page size & Orientation 3-4 Inserting Text 5 Editing Text 6 Inserting Graphics 7-8 Changing the Colour
WAGO Thermal Transfer Printer smartprinter Hardware Installation Instructions
 WAGO Thermal Transfer Printer smartprinter Hardware Installation Instructions Thank you for choosing the WAGO smartprinter thermal transfer printer. You can use this printer to print marking strips, marker
Getting Started. Custom Reports Software
 Getting Started Custom Reports Software Custom Reports software Custom reporting The Custom Reports software lets you transfer quantitative results from Data Analysis into the Custom Reports spreadsheet
TOPJOB S Sensor/Actuator Terminal Blocks with Push-in CAGE CLAMP Reliability
 TOPJOB S Sensor/Actuator Terminal Blocks with Push-in CAGE CLAMP Reliability TOPJOB S SEND THE RIGHT SIGNALS. TOPJOB S Sensor/Actuator Terminal Blocks with Push-in CAGE CLAMP Reliability TWO IN ONE. WITH
MULTIPROG QUICK START GUIDE
 MULTIPROG QUICK START GUIDE Manual issue date: April 2002 Windows is a trademark of Microsoft Corporation. Copyright 2002 by KW-Software GmbH All rights reserved. KW-Software GmbH Lagesche Straße 32 32657
Ms excel. The Microsoft Office Button. The Quick Access Toolbar
 Ms excel MS Excel is electronic spreadsheet software. In This software we can do any type of Calculation & inserting any table, data and making chart and graphs etc. the File of excel is called workbook.
1) Merge the cells that contain the title and center the title
 Merge the cells that contain the title and center the title") Supplies: You will need a storage location to save your spreadsheet for use in Session 2. You will need the 2 handouts pertaining to Session 1 Instructions: Follow the directions below to create a budget
Supplies: You will need a storage location to save your spreadsheet for use in Session 2. You will need the 2 handouts pertaining to Session 1 Instructions: Follow the directions below to create a budget
TOPJOB S Rail-Mounted Terminal Blocks with the Reliability of Push in CAGE CLAMP
 TOPJOB S PUSH YOUR PERFORMANCE TO THE TOP. TOPJOB S Rail-Mounted Terminal Blocks with the Reliability of Push in CAGE CLAMP For all conductor types Range of multifunctional jumpers The fastest marking
TOPJOB S Sensor/Actuator Terminal Blocks Pluggable Signal Level with Push-in CAGE CLAMP Reliability
 TOPJOB S Sensor/Actuator Terminal Blocks Pluggable Signal Level with Push-in CAGE CLAMP Reliability TOPJOB S SEND THE RIGHT SIGNALS For the very first time, sensor/actuator wiring is pluggable between
JASCO CANVAS PROGRAM OPERATION MANUAL
 JASCO CANVAS PROGRAM OPERATION MANUAL P/N: 0302-1840A April 1999 Contents 1. What is JASCO Canvas?...1 1.1 Features...1 1.2 About this Manual...1 2. Installation...1 3. Operating Procedure - Tutorial...2
Conductor and Cable Marking Description and Handling
 Conductor and Cable Marking Description and Handling 566 Wire marking The following markers are available: Markers for plotter marking. Markers on roll for thermal transfer printing. Remove the printed
Excel Select a template category in the Office.com Templates section. 5. Click the Download button.
 Microsoft QUICK Excel 2010 Source Getting Started The Excel Window u v w z Creating a New Blank Workbook 2. Select New in the left pane. 3. Select the Blank workbook template in the Available Templates
NiceForm User Guide. English Edition. Rev Euro Plus d.o.o. & Niceware International LLC All rights reserved.
 www.nicelabel.com, info@nicelabel.com English Edition Rev-0910 2009 Euro Plus d.o.o. & Niceware International LLC All rights reserved. www.nicelabel.com Head Office Euro Plus d.o.o. Ulica Lojzeta Hrovata
testo EasyClimate Software Instruction manual
 testo EasyClimate Software Instruction manual 1 Contents 1 Contents 1 Contents... 3 1.1. About this document... 5 2 Specifications... 5 2.1. Use... 5 2.2. System requirements... 6 3 First steps... 6 3.1.
Excel 2003 Tutorial II
 This tutorial was adapted from a tutorial by see its complete version at http://www.fgcu.edu/support/office2000/excel/index.html Excel 2003 Tutorial II Charts Chart Wizard Chart toolbar Resizing a chart
Graphing Interface Overview
 Graphing Interface Overview Note: This document is a reference for using JFree Charts. JFree Charts is m-power s legacy graphing solution, and has been deprecated. JFree Charts have been replace with Fusion
LinkMotion and CorelDraw 9, 10, 11, 12, X3, X4, X5, X6, X7 and X8:
 LinkMotion and CorelDraw 9, 10, 11, 12, X3, X4, X5, X6, X7 and X8: After you install LinkMotion software and set up all settings launch CorelDraw software. Important notes: Solustan s LinkMotion driver
LABEL MATRIX TEKLYNX V E R S I O N 8 Q U I C K S T A R T G U I D E
 TEKLYNX LABEL MATRIX V E R S I O N 8 Q U I C K S T A R T G U I D E Note Quick Start Guide The information in this manual is not binding and may be modified without prior notice. Supply of the software
Getting Started With Excel
 Chapter 1 Getting Started With Excel This chapter will familiarize you with various basic features of Excel. Specific features which you need to solve a problem will be introduced as the need arises. When
HOUR 12. Adding a Chart
 HOUR 12 Adding a Chart The highlights of this hour are as follows: Reasons for using a chart The chart elements The chart types How to create charts with the Chart Wizard How to work with charts How to
Microsoft Office Word. Help. Opening a Document. Converting from Older Versions
 Microsoft Office 2007 - Word Help Click on the Microsoft Office Word Help button in the top right corner. Type the desired word in the search box and then press the Enter key. Choose the desired topic
Dr.Engrave USER'S MANUAL
 Dr.Engrave USER'S MANUAL This document is the operation manual for Dr. Engrave for Windows, a program for plate engraving. Contents Introduction... 4 Operating environment... 5 Overview of Dr.Engrave...
EXCEL 2013 FDLRS SUNRISE
 EXCEL 2013 FDLRS SUNRISE Goal: Participants will create a spreadsheet and graph to document student progress. Objectives: Participants will create a spreadsheet which includes basic formulas. Participants
Software User's Guide
 Software User's Guide The contents of this guide and the specifications of this product are subject to change without notice. Brother reserves the right to make changes without notice in the specifications
Information on Print Material
 Information on Print Material Note: Individual information on handling print material are representative of other print materials with identical handling. The graphics in these notes only represent the
Quick Start Guide. ARIS Architect. Version 9.8 Service Release 2
 ARIS Architect Version 9.8 Service Release 2 October 2015 This document applies to ARIS Version 9.8 and to all subsequent releases. Specifications contained herein are subject to change and these changes
Excel Basics. TJ McKeon
 Excel Basics TJ McKeon What is Excel? Electronic Spreadsheet in a rows and columns layout Can contain alphabetical and numerical data (text, dates, times, numbers) Allows for easy calculations and mathematical
MANUAL NO. OPS647-UM-151 USER S MANUAL
 MANUAL NO. OPS647-UM-151 USER S MANUAL Software Usage Agreement Graphtec Corporation ( Graphtec ) hereby grants the purchaser and authorized User (the User ) the right to use the software (the Software
TYPE EDIT V12. Tutorial 03. Multicopy to create a set of medals COPYRIGHT 2014 GRAVOTECH MARKING SAS ALL RIGHTS RESERVED
 TYPE EDIT V12 Multicopy to create a set of medals COPYRIGHT 2014 GRAVOTECH MARKING SAS ALL RIGHTS RESERVED Multicopy to create a set of medals Creation Time : 45 minutes Level : Intermediate Module : TypeEdit
Corel Ventura 8 Introduction
 Corel Ventura 8 Introduction Training Manual A! ANZAI 1998 Anzai! Inc. Corel Ventura 8 Introduction Table of Contents Section 1, Introduction...1 What Is Corel Ventura?...2 Course Objectives...3 How to
Contents. Launching Word
 Using Microsoft Office 2007 Introduction to Word Handout INFORMATION TECHNOLOGY SERVICES California State University, Los Angeles Version 1.0 Winter 2009 Contents Launching Word 2007... 3 Working with
COMPUTER TECHNOLOGY SPREADSHEETS BASIC TERMINOLOGY. A workbook is the file Excel creates to store your data.
 SPREADSHEETS BASIC TERMINOLOGY A Spreadsheet is a grid of rows and columns containing numbers, text, and formulas. A workbook is the file Excel creates to store your data. A worksheet is an individual
Section 3 Formatting
 Section 3 Formatting ECDL 5.0 Section 3 Formatting By the end of this Section you should be able to: Apply Formatting, Text Effects and Bullets Use Undo and Redo Change Alignment and Spacing Use Cut, Copy
TOPJOB S Rail-Mounted Terminal Blocks with the Reliability of Push-in CAGE CLAMP
 TOPJOB S Rail-Mounted Terminal Blocks with the Reliability of Push-in CAGE CLAMP TOPJOB S PUSH PERFORMANCE TO THE TOP. 2 TOPJOB S RAIL-MOUNTED TERMINAL BLOCKS In various industrial applications and modern
Microsoft Excel 2007
 Microsoft Excel 2007 1 Excel is Microsoft s Spreadsheet program. Spreadsheets are often used as a method of displaying and manipulating groups of data in an effective manner. It was originally created
ARIS Architect QUICK START GUIDE. Version Service Release 7
 ARIS Architect QUICK START GUIDE Version 9.8 - Service Release 7 December 2016 This document applies to ARIS Version 9.8 and to all subsequent releases. Specifications contained herein are subject to change
Information on Print Material
 Information on Print Material Note: Individual information on handling print material are representative of other print materials with identical handling. The graphics in these notes only represent the
User s Manual CAP 531*1.5 Configuration and Programming tool
 User s Manual CAP 531*1.5 Configuration and Programming tool This manual belongs to: Contents Chapter Page About this manual 1 Introduction 3 Technical descriptions 81 References 177 Customer feedback
MIMAKI ENGINEERING CO., LTD.
 For Windows XP/Windows 2000 Cutting Application Software SimpleCut Operation Manual MIMAKI ENGINEERING CO., LTD. D201463 Contents Introduction 1 About this Manual 2 Chapter 1 Installation Procedure 3
Lesson Skill Matrix Skill Exam Objective Objective Number
 Lesson 6 Page 1 Creating Tables Lesson Skill Matrix Skill Exam Objective Objective Number Creating a Table Create a table by specifying rows and columns. 3.1.3 Formatting a Table Apply table styles. 3.1.4
Microsoft Word 2003 for Windows, Part 2
 Microsoft Word 2003 for Windows, Part 2 In this workshop, the following Word 2003 features will be covered: Creating and using Tables Formatting text using Styles Using MailMerge Arranging text in Columns
Faculty Development Seminar Series Constructing Posters in PowerPoint 2003 Using a Template
 2008-2009 Faculty Development Seminar Series Constructing Posters in PowerPoint 2003 Using a Template Office of Medical Education Research and Development Michigan State University College of Human Medicine
Software User's Guide
 Software User's Guide Brother QL-series The contents of this guide and the specifications of this product are subject to change without notice. Brother reserves the right to make changes without notice
Labels and Envelopes in Word 2013
 Labels and Envelopes in Word 2013 Labels... 2 Labels - A Blank Page... 2 Selecting the Label Type... 2 Creating the Label Document... 2 Labels - A Page of the Same... 3 Printing to a Specific Label on
Software User's Guide
 Software User's Guide The contents of this guide and the specifications of this product are subject to change without notice. Brother reserves the right to make changes without notice in the specifications
User Manual JofraCal for JOFRA Temperature, Pressure and Signal Calibrators. Copyright 2004 AMETEK DENMARK A/S
 User Manual JofraCal for JOFRA Temperature, Pressure and Signal Calibrators Copyright 2004 AMETEK DENMARK A/S 2 124918 01 LIST OF CONTENTS Page 1. INTRODUCTION... 11 1.1 General information... 12 1.2 Hardware
Excel Tutorial 1
 IT٢.we Excel 2003 - Tutorial 1 Spreadsheet Basics Screen Layout Title bar Menu bar Standard Toolbar Other Tools Task Pane Adding and Renaming Worksheets Modifying Worksheets Moving Through Cells Adding
User Manual. Programming & SCN-Coding of Emission Related Control Units with Pass-Thru Programming System SAEJ2534. Version 0.7.
 User Manual Programming & SCN-Coding of Emission Related Control Units with Pass-Thru Programming System SAEJ2534 Version 0.7. 1/28 Table of Content 1. General Introduction on Pass Thru SAEj2534 Compliant
Chapter 2: Creating a Spreadsheet
 Chapter 2: Creating a Spreadsheet 1.Planning and designing a spreadsheet...ca-30 2.Entering data into Calc...CA-31 2.1.Inputing data...ca-31 2.2.Moving between cells...ca-31 3.Working with cells, columns
Dreamweaver Handout. University of Connecticut Prof. Kent Golden
 Dreamweaver Handout University of Connecticut Prof. Kent Golden Kent@GoldenMultimedia.com www.goldenmultimedia.com Main goal of this handout: To give you the steps needed to create a basic personal website
Anleitungen für Word 2016 als Word-Dokument zum Ausdrucken und fürs Intranet
 Anleitungen für Word 2016 als Word-Dokument zum Ausdrucken und fürs Intranet 19 Text and Tabs Tabs (tab stops) help you to write a list, for example, for an order or invoice. Larger spaces should not be
HYDROcom. User s Manual. Data acquisition and evaluation software package. HYDROcom User s Manual
 HYDROcom HYDROcom Data acquisition and evaluation software package Rev. 1.3 EN 2008-03-11 Software Version 5.0 TKZ L8874-14-01.60E Hydrotechnik GmbH All rights reserved Page 1 of 52 1 Contents 1 Contents...
4.0 - ENGRAVING TEXT AND A BARCODE ON ALUMILAZ
 4.0 - ENGRAVING TEXT AND A BARCODE ON ALUMILAZ Material Required: 2 ¼ x 3 ⅞ Alumilaz Difficulty Level: Intermediate In this engraving job, we will produce a small nameplate on a small piece of Alumilaz.
Basic Microsoft Excel Skills
 Basic Microsoft Excel Skills Note : This tutorial is based upon Microsoft Excel 2000. If you are using MSExcel 1997 or 2002, there may be some operations which look slightly different (e.g. graphs), but
Skill Exam Objective Objective Number
 Creating Tables 6 LESSON SKILL MATRIX Skill Exam Objective Objective Number Creating a Table Create a table by specifying rows and columns. 3.1.3 Formatting a Table Apply table styles. 3.1.4 Managing Tables
Océ Engineering Exec. Electronic Job Ticket
 Océ Engineering Exec Electronic Job Ticket Océ-Technologies B.V. Copyright 2004, Océ-Technologies B.V. Venlo, The Netherlands All rights reserved. No part of this work may be reproduced, copied, adapted,
WinCC V4. Manual Part 2/3 C79000-G8276-C107-01
 WinCC V4 Manual Part 2/3 Edition August 1997 WinCC, SIMATIC, SINEC, STEP are Siemens registered trademarks. All other product and system names in this manual are (registered) trademarks of their respective
Microsoft Excel 2002 M O D U L E 2
 THE COMPLETE Excel 2002 M O D U L E 2 CompleteVISUAL TM Step-by-step Series Computer Training Manual www.computertrainingmanual.com Copyright Notice Copyright 2002 EBook Publishing. All rights reserved.
You can also search online templates which can be picked based on background themes or based on content needs. Page eleven will explain more.
 Microsoft PowerPoint 2016 Part 1: The Basics Opening PowerPoint Double click on the PowerPoint icon on the desktop. When you first open PowerPoint you will see a list of new presentation themes. You can
13/02/2008. Users guide RoofCon Viewer
 Users guide RoofCon Viewer Table of contents Users guide RoofCon Viewer... 1 Table of contents... 2 Installation... 3 Select object... 3 Zoom... 3 Measure distance... 3 Toolbar and Drawing preferences...
Tutorials. Lesson 3 Work with Text
 In this lesson you will learn how to: Add a border and shadow to the title. Add a block of freeform text. Customize freeform text. Tutorials Display dates with symbols. Annotate a symbol using symbol text.
Setup Contacts Add Compose Letter Compose Letter
 17 WORD-RITE Now that we have explored the Contacts and Campaigns sections of the program, it is time to work with WordRite, the integrated, full-function Rich Text word processor that is included with
WAGO ProServe. Designing, Assembling and Marking
 WAGO ProServe Designing, Assembling and Marking ProServe Planning at a New Level WAGO ProServe means finding instead of searching, drawing instead of sketching. ProServe readily navigates through the WAGO
CHAPTER 1 GETTING STARTED
 CHAPTER 1 GETTING STARTED Configuration Requirements This design of experiment software package is written for the Windows 2000, XP and Vista environment. The following system requirements are necessary
Microsoft Excel Level 1
 Microsoft Excel 2010 Level 1 Copyright 2010 KSU Department of Information Technology Services This document may be downloaded, printed, or copied for educational use without further permission of the Information
Microsoft Access XP (2002) Reports
 Reports") Microsoft Access XP (2002) Reports AutoReports Report Wizards Manually Design a Report Table Relations Multitable Reports Mailing Labels Mail Merge with MS Word Table of Contents INTRODUCTION TO REPORTS...
Microsoft Access XP (2002) Reports AutoReports Report Wizards Manually Design a Report Table Relations Multitable Reports Mailing Labels Mail Merge with MS Word Table of Contents INTRODUCTION TO REPORTS...
3) The contains a computer's main hardware components. 3) A) master case B) motherboard C) system unit D) CPU
 The contains a computer's main hardware components. 3) A) master case B) motherboard C) system unit D) CPU") FALL 07-08 COMP100 MIDTERM-2 EXAM /FACULTY OF ECON. AND ADMINISTRATIVE SCIENCES OF EUL Student Registration No: Instructor: Prof.Dr.Hüseyin Oğuz Student Name-Surname: Dept. of Computer Information Systems
FALL 07-08 COMP100 MIDTERM-2 EXAM /FACULTY OF ECON. AND ADMINISTRATIVE SCIENCES OF EUL Student Registration No: Instructor: Prof.Dr.Hüseyin Oğuz Student Name-Surname: Dept. of Computer Information Systems
VANGUARD LOAD TAP CHANGER ANALYZER (LTCA) VERSION 2.xx SOFTWARE MANUAL. LTCA-10, LTCA-40, WRM-10P, WRM-40, TRM-20, TRM-40, TRM-203, and TRM-403
 VERSION 2.xx SOFTWARE MANUAL. LTCA-10, LTCA-40, WRM-10P, WRM-40, TRM-20, TRM-40, TRM-203, and TRM-403") VANGUARD LOAD TAP CHANGER ANALYZER (LTCA) VERSION 2.xx SOFTWARE MANUAL For Use with Vanguard s LTCA-10, LTCA-40, WRM-10P, WRM-40, TRM-20, TRM-40, TRM-203, and TRM-403 Load Tap Changer Analyzers and Winding
VANGUARD LOAD TAP CHANGER ANALYZER (LTCA) VERSION 2.xx SOFTWARE MANUAL For Use with Vanguard s LTCA-10, LTCA-40, WRM-10P, WRM-40, TRM-20, TRM-40, TRM-203, and TRM-403 Load Tap Changer Analyzers and Winding
Week 5 Creating a Calendar. About Tables. Making a Calendar From a Table Template. Week 5 Word 2010
 Week 5 Creating a Calendar About Tables Tables are a good way to organize information. They can consist of only a few cells, or many cells that cover several pages. You can arrange boxes or cells vertically
Study Guide. PCIC 3 B2 GS3- Key Applications-Excel. Copyright 2010 Teknimedia Corporation
 Study Guide PCIC 3 B2 GS3- Key Applications-Excel Copyright 2010 Teknimedia Corporation Teknimedia grants permission to any licensed owner of PCIC 3 B GS3 Key Applications-Excel to duplicate the contents
Application Note. a HART Tool-routing with Emerson AMS HART over TH LINK PROFIBUS for Asset Management 1.0.0
 Application Note a116110 HART over TH LINK PROFIBUS for Asset Management 2 Application Note a116110 2016 by WAGO Kontakttechnik GmbH & Co. KG All rights reserved. WAGO Kontakttechnik GmbH & Co. KG Hansastraße
New York City College of Technology. Microsoft Word Contact Information:
 New York City College of Technology Microsoft Word 2016 Contact Information: 718-254-8565 ITEC@citytech.cuny.edu Opening Word 2016 Begin by clicking on the bottom left corner icon on the desktop. From
TPEditor User Manual
 Table of Contents TPEditor User Manual Chapter 1 TPEditor Operation... 1-1 1-1 Recommended System Requirements... 1-1 1-2 TPEditor Software Installation... 1-1 1-3 Basic Introduction... 1-6 1-4 Skills
Tutorial Engraving Badges
 Getting Started With Tutorial Engraving Badges VCarve Pro Disclaimer All CNC machines (routing, engraving, and milling) are potentially dangerous and because Vectric Ltd has no control over how the software
PC Software R&S FS300-K1
 Copyright 0 Copyright Copyright Licence Agreement Rohde & Schwarz grants you the right to install the R&S FS300-K1 software package on one or more PCs of your choice. The licence included in the software
A dialog box will appear informing you that you will need to restart Enterprise to see the Calendar changes. Click Ok and then restart Enterprise.
 The tax Calendar in Premium Pro Enterprise includes due dates for annual, estimate, and monthly premium tax returns, due dates for various additional insurance related filings, and due dates for local
NiceLabel Designer Standard User Guide
 NiceLabel Designer Standard User Guide English Edition Rev-1112 2012 Euro Plus d.o.o. All rights reserved. Euro Plus d.o.o. Poslovna cona A 2 SI-4208 Šenčur, Slovenia tel.: +386 4 280 50 00 fax: +386 4
The Menu and Toolbar in Excel (see below) look much like the Word tools and most of the tools behave as you would expect.
 look much like the Word tools and most of the tools behave as you would expect.") Launch the Microsoft Excel Program Click on the program icon in Launcher or the Microsoft Office Shortcut Bar. A worksheet is a grid, made up of columns, which are lettered and rows, and are numbered.
Launch the Microsoft Excel Program Click on the program icon in Launcher or the Microsoft Office Shortcut Bar. A worksheet is a grid, made up of columns, which are lettered and rows, and are numbered.
Stress-Free Success Using Microsoft WORD 2004
 Stress-Free Success Using Microsoft WORD 2004 Lynn D. Brown Table of Contents Chapter 1 Getting Started 1.1 Symbols 5 1.2 Consistent Steps 6 1.3 Toolbars 7 1.4 Custom Toolbars 8 Chapter 2 Document Set-up
Working with Charts Stratum.Viewer 6
 Working with Charts Stratum.Viewer 6 Getting Started Tasks Additional Information Access to Charts Introduction to Charts Overview of Chart Types Quick Start - Adding a Chart to a View Create a Chart with
Using the WagoAppEtherNetIP_Adapter library with a CompactLogix Controller A500930
 Application Note Building Automation Using the WagoAppEtherNetIP_Adapter library with a CompactLogix Controller A500930 2 Application Note A500930 2016 by WAGO Kontakttechnik GmbH & Co. KG All rights reserved.
Poster-making 101 for 1 PowerPoint slide
 Poster-making 101 for 1 PowerPoint slide Essential information for preparing a poster for the poster printer 1. Poster size: You will be creating a single large slide in PowerPoint. 2. Before adding any
ROBO Master OPS656. USER'S MANUAL MANUAL NO. OPS656m-UM Introduction 1.1 Features System Requirements... 3
 USER'S MANUAL MANUAL NO. m-um-152 Software Usage Agreement... 2 Registered Trademarks... 2 Notes on this Manual... 2 Disclaimer... 2 1 Introduction 1.1 Features... 3 1.2 System Requirements... 3 2 Installing
IP67 IP20. Controllers Open Flexible Compact SPEEDWAY. Programmable. Fieldbus Couplers. Programmable. Fieldbus Controllers
 WAGO Controllers Controllers Open Flexible Compact WAGO s IEC 61131-3 programmable controllers perform a variety of automation tasks, while providing all the benefits of standard PLC technology (e.g.,
Information on Print Material
 Information on Print Material Note: Individual information on handling print material are representative of other print materials with identical handling. The graphics in these notes only represent the
UW Department of Chemistry Lab Lectures Online
 Introduction to Excel and Computer Manipulation of Data Review Appendix A: Introduction to Statistical Analysis. Focus on the meanings and implications of the calculated values and not on the calculations.
SPRECON-E Display Editor
 SPRECON-E Display Editor Version 2.0b USERS MANUAL 94.2.912.60en 09/2004 ISSUE A page 2 / 61 Business Sector Enery Station Automation (ENA) [Power systems automation] Sprecher Automation GmbH Franckstrasse
Microsoft Word Part I Reference Manual
 Microsoft Word 2002 Part I Reference Manual Instructor: Angela Sanderson Computer Training Coordinator Updated by: Angela Sanderson January 11, 2003 Prepared by: Vi Johnson November 20, 2002 THE WORD SCREEN
USER S MANUAL Software Usage Agreement Registered Trademarks Notes on this Manual Disclaimer
 USER S MANUAL Software Usage Agreement Registered Trademarks Notes on this Manual Disclaimer 1 1.1 1.2 2 3 Introduction 2.1 2.2 Features System Requirements Installing Xyron Wishblade Software 3.1 3.2
SciGraphica. Tutorial Manual - Tutorials 1and 2 Version 0.8.0
 SciGraphica Tutorial Manual - Tutorials 1and 2 Version 0.8.0 Copyright (c) 2001 the SciGraphica documentation group Permission is granted to copy, distribute and/or modify this document under the terms
FlowAccess TM GETTING STARTED. Windows software for Skalar SAN plus systems. Version and up
 FlowAccess TM V3 Windows software for Skalar SAN plus systems Version 3.1.0.4 and up GETTING STARTED FlowAccess TM V3 Windows software for Skalar SAN plus systems Version 3.1.0.4 and up Getting started
Using Open Workbench Version 1.1
 Version 1.1 Second Edition Title and Publication Number Title: Edition: Second Edition Printed: May 4, 2005 Copyright Copyright 1998-2005 Niku Corporation and third parties. All rights reserved. Trademarks