Encoder / Modulators
|
|
|
- Philomena Perkins
- 6 years ago
- Views:
Transcription
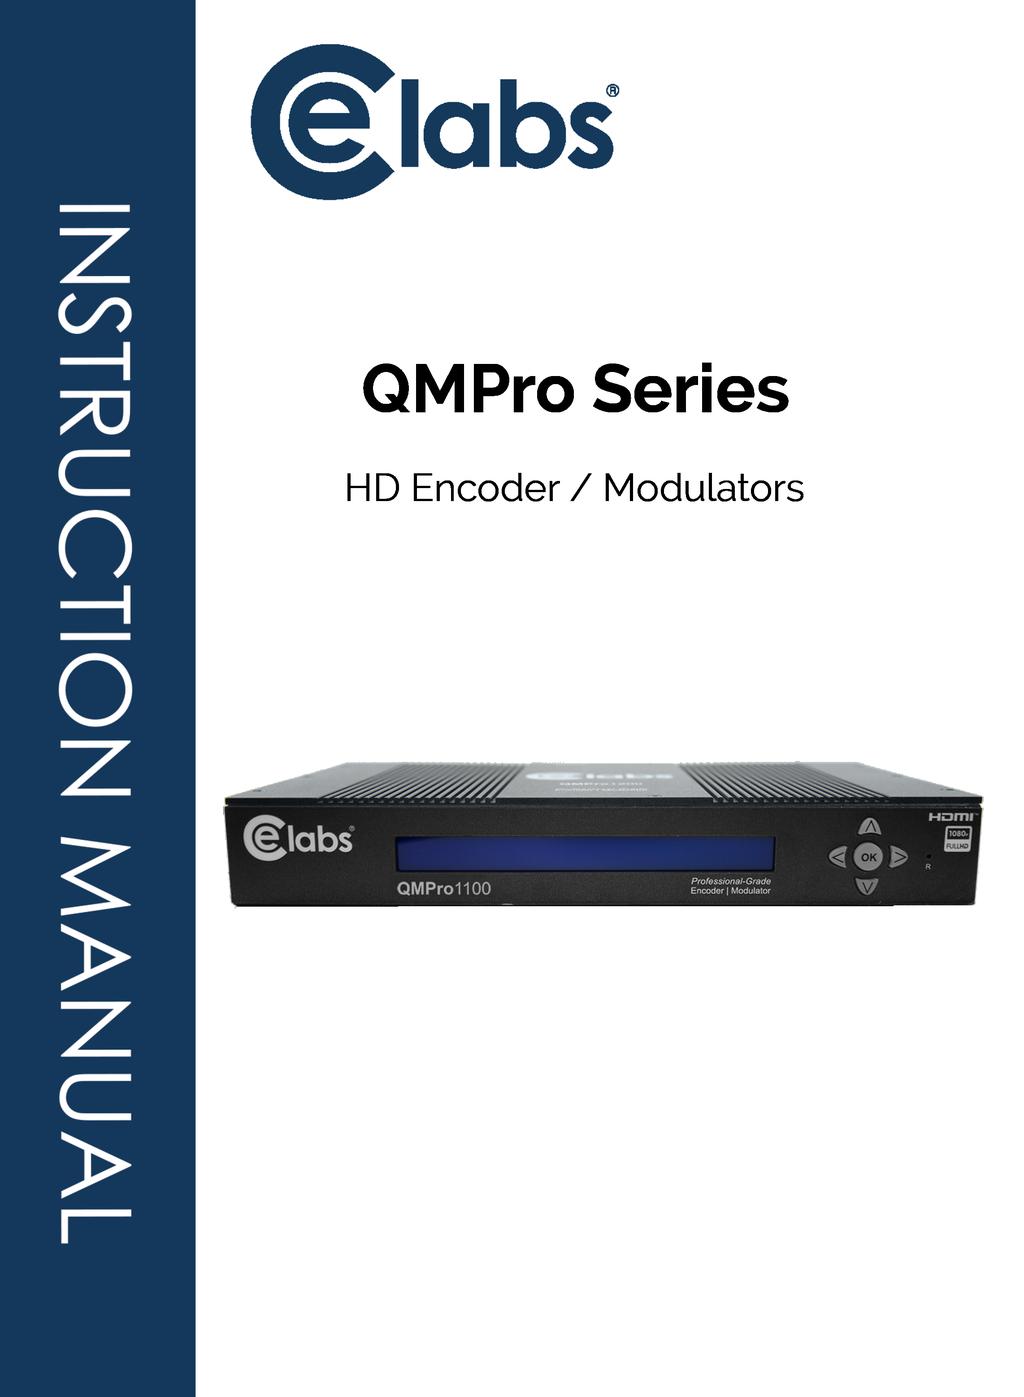


1 Encoder / Modulators
2 Contents 03 Package Contents 04 Features 05 Introduction 06 Installation 07 Specifications 09 Visual Identification Illustrations 10 Encoder Programming and Setup via GUI Interface 16 Virtual Channel Number 18 Streaming Setup 19 Output Setup 21 Management IP Setup 24 Initial Setup & Configuration 25 Front Panel LCD Menu Tree 26 Encoder Setup: QMPro1100/I 26 Encoder Setup: QMPro1200/I 30 Encoder Setup 37 Administration 38 Network Setup 41 Output Setup 44 Streaming Setup 47 Warranty 01
3 The presence of this symbol is to alert the installer and user to the presence of uninsulated dangerous voltages within the product s enclosure that may be of sufficient magnitude to produce a risk of electric shock. TO REDUCE THE RISK OF FIRE OR ELECTRIC SHOCK, DO NOT EXPOSE THIS DEVICE TO RAIN OR MOISTURE. DO NOT OPEN THE UNIT. REFER SERVICING TO QUALIFIED PERSONNEL ONLY. DO NOT apply power to the unit until all connections have been made, all components have been installed and all wiring has been properly terminated. DO NOT terminate, change or uninstall any wiring without first disconnecting the unit s power adapter from the device. This device is supplied with the appropriately rated power supply. The use of any other power supply could cause damage and invalidate the manufacturer s warranty. DO NOT connect the power cord to the device if the power cord is damaged. DO NOT cut the power cord. DO NOT plug the power cord into an AC outlet until all cables and connections to the device have been properly connected. The device should be installed in an environment consistent with its operating temperature specifications. Placement next to heating devices and ducts is to be avoided as doing so may cause damage. The device should not be placed in areas of high humidity. DO NOT cover any of the device s ventilation openings. DO NOT cover or obstruct the device s fan or fan openings. If the device has been in a cold environment allow it to warm to room temperature for at least 2 hours before connecting to an AC outlet. 02
 -")

4 Package Contents This package contains one of the following: - QMPro1100/1100i or QMPro1200/1200i Encoder / Modulator - DIN cable(s) - One installation / configuration manual Inspect the package before starting installation to ensure there is no damage and all supplied contents are present. 03
5 Features HD RF Distribution allows unlimited displays over any distance HD Video/Audio Distribution over Coax 1080p/i, 720p, 480p/i Output (1080p h.264 only) Mini DIN cabling connection for DirectTV interface Front-panel Controls, LCD Display for easy setup Web-based Management Software Auto Input Detection Audio Output with tunable Delay to match video RF Gain Control, +25 to +45 db mv Output Clear, clean picture on high motion media (Movie, Sports) MPEG2, MPEG4 (AVC Only) Video Encoding QAM 256 for bandwidth efficiency Audio Codecs MPEG2 Layer II/AAC/AC-3 Pass-through Supports Dolby Digital Pass-through 42dB signal to noise ratio Emergency Alert System & Closed Captioning compatible VCN (Auto Major & Minor), Manual (Major & Minor), Manual (One Part) Easy integration with CE labs Media Players: MP800T, MP700T 04
6 Introduction The QMPro1100/i (Single) and QMPro1200/i (Dual) is CE labs technology series of encoders/modulators that convert Digital Video Broadcasting (DVB) Standard or High definition video and audio signals to a QAM RF output. This RF signal may be routed throughout a building using traditional CATV coax and distribution network. This allows the HD RF signal to be used on as many TVs as desired. The QMPro1100/i and QMPro1200/i are perfect for multi-video distribution solutions in the commercial and institutional market (hotels, motels, sports bars, restaurants, hospitals, casinos, business and university campuses, etc.), as well as home entertainment systems. The QMPro i-series (1100i or 1200i) adds the additional functionality of AV streaming IP packets over an Ethernet network. 05
7 Installation System Installer must adhere to Article of the NEC that provides guidelines for proper grounding and specifies that the cable ground shall be connected to the grounding system of the building, as close to the point of cable entry as possible. Each unit is shipped factory tested. Ensure all items are removed from the container prior to discarding any packing material. Thoroughly inspect the unit for shipping damage with particular attention to connectors and controls. If there is any sign of damage to the unit or damaged or loose connectors contact your distributor immediately. Do not put the equipment into service if there is any indication of defect or damage. It is highly recommended that quality cables and connectors be used for all video and audio source connections. 1. The unit can be rack mounted in a standard EIA19 rack using the provided rack ears kit. Connect the right and left rack mount ears (if rack-mounting). 2. The unit comes with HDMI and Component/Composite (via DIN) inputs. Connect the required cables to the back of the unit using a HDMI or DIN cables. If your source is High Definition, it is possible that the HDMI signal could be encrypted with HDCP. In this case, you may need to use the DIN cable to connect to the source Component video output. When using the DIN cable, the Right and Left audio should also be connected if the display requires audio. 3. Repeat this step for each video source connection. 4. Be sure the connections for each source are consistent with the unit s inputs (IN1 IN2). 5. Use a quality 75Ω coaxial cable with F connectors from the unit s RF Output. 6. IP output: connect the Ethernet cable to the IP output RJ45 connector to your IGMP capable switch. 7. Connect the included power cord to the unit s POWER plug. 8. Connect the power cord to an appropriately rated AC power outlet. DEVICE Programming and Setup: Connecting to the Web GUI Interface: Factory Default IP: Connect an Ethernet cable to the Remote Setup Port of the QMPro and to your PC/Laptop. 2. Modify your PC/Laptop s IP address to and the sub-net to Enter into your web browser. 4. Make all required parameter changes. 5. Save all changes. 06
8 Specifications VIDEO/AUDIO INPUTS HDMI 1.4v DIN Component & Composite VIDEO FORMATS Resolution 1080p (H.264 Only), 1080i, 720p, 576p, 576i, 480p, 480i Video Codes MPEG-2 Video Codecs H.264 (HD) Video Codecs H.264 (SD) Audio Codecs MPEG-2 VIDEO / AUDIO COMPRESSION MP@HL > 1080p30, HP@Level 4.2 / 1080p30, HP@ Level 4 >720p30, HP@Level 3.2 / 720p30, HP@ Level 3.1 Frame Rate > 30, MP@Level 3.1 / 30, Level 3 MPEG-1 Layer II / AAC / AC-3 pass through VIDEO Bitrate SD: 1 to 8Mbps / HD: 10 to 15.7Mbps H.264 SD: 1 to 4Mbps / HD: 4 to 8Mbps RF Output Channel Plan CH Output Level Output Impedance Level Adjustment Modulation Modes QAM Type VCN Mode 25 dbmv 75 ohm 0~ -20dB 256 QAM / 64 QAM DVB-C Annex B 2-Part Auto, 2-Part Manual, 1-Part Manual MER 43dB Typical 07
9 Streaming Protocols Stream Types Stream Control Connector Local Monitoring GUI Management GUI Supported Password Protected Fan Cooled Power Supply Consumption Dimension IP (QMPro 1100i/1200i) UDP/RTP Unicast, Multicast General Single Program TS Enable / Disable 1 GbE IP stream Enhanced LCD system indicator 1 RJ-45 10/100 Management Microsoft Edge, Firefox, Chrome, Safari GUI: Changeable Internal 12VDC 3 Amp 1.6amp 11.8 x 7.0 x 1.75, (1RU 19 EIA w/rack mountable kit) * Specifications subject to change without notification 08

10 Visual Identification Illustrations 09


11 Encoder Programming and Setup via GUI Interface: After connecting the device to the Remote Setup port located on the rear of the device and connecting to a PC / Laptop. Step 1: Enter Device's IP address in web browser. (QMPro1200i shown) Command Processing: Please not that upon system initialization, the hardware will boot in a few minutes and then populate system parameters. There may be a small delay in the menu page updates that are performed after the hardware changes are complete. 10
 Step 2: Enter User Name/Password Select Encoder Setup After selecting the Encoder Setup Tab the user will be prompted to enter the user name and password for device.")
12 Step 1: Enter Device's IP address in web browser. (QMPro1200i shown) Step 2: Enter User Name/Password Select Encoder Setup After selecting the Encoder Setup Tab the user will be prompted to enter the user name and password for device. GUI Login Password: Default User Name: admin Default Password: Admin123 Note: To change the Password for the GUI go to the Administration Tab. 11
13 Step 3: Encoder Setup This page allows the user to configure the parameters of each encoder. After changes are made, use the Save and Confirm button. The modulator(s) will apply the new settings. 12
14 Encoder Setup page allows the integrator to select and set the parameters needed for each stream. 1. Select the Edit Icons for the Encoders. (Both Encoders can be managed at the same time) 2. Select and set the specific parameters settings as required. 13
15 3. After setting all the required parameters- Select the edit icon again. (Note: All changed parameters will be shown in red) 14
16 4. Select Active/Inactive to activate for remaining parameter(s) as required. 5. Select Save and Confirm to save all changed parameters. 6. Select Apply in the pop-up window. 7. Repeat process for each encoder or if additional changes are required. 15
17 Virtual Channel Number Virtual Channel Number is a method of allowing installers to manipulate and add a channel to a new or existing cable system. Whether the installer is installing a new channel into a system that uses Major and Minor channel numbering (2.1, 3.1) or into a system that uses Single Channel enumeration (Ch. 101, 199). Note: Some HDTV s may represent the Virtual Channel using a dash: 12-1, VCN allows channels to be added regardless of what RF freq. (MHz) the modulator is actually occupying. VCN Modes Examples for the QMPro Series: The QMPro Series of HD Modulators offers 3 VCN (Virtual Channel Number) Modes. 1. VCN (Auto two-part)-vcn Auto 2-part- will force the VCN channels to be based on the CH/freq. selected on the Output Setup page of the device. Examples: CH/freq QMPro 1100/1100i QMPro1200/1200i 7 (177MHz) , (423MHz) , (657MHz) , (855MHz) , Note: QMPRO 1200/1200I will restrict selecting CH# 135 as the VCN auto mode will occupy Setting the Output Channel of the QMPro1200/1200i to CH 134 will force the unit in VCN Auto to set and Both channels of the QMPro 1200 and 1200i will occupy QAM channel 134 (855MHz) in a 6MHz bandwidth. (2 Programs within 1 QAM Channel) Note: QMPro 1100/1100i will allow CH 135(861MHz) to be selected. 16
18 2. VCN (Manual two-part)- VCN Manual 2-part- will allow the installer to control VCN channels regardless of the CH/freq. selected on the Output Setup page of the device. Examples: CH/freq QMPro 1100/1100i QMPro1200/1200i 7 (177MHz) , (423MHz) , (657MHz) , (855MHz) , As shown in the above examples, the installer can easily set and select any Virtual channel regardless of the Output Channel occupied by the modulator. 3. VCN (Manual one-part)-vcn Manual 1-part- will allow the installer to control VCN channels regardless of the CH/freq. selected on the Output Setup page of the device. Examples: CH/freq QMPro 1100/1100i QMPro 1200/1200i 7 (177MHz) 2 2, (423MHz) 59 59, (657MHz) , (855MHz) ,

19 Streaming Setup 1. Enable the Stream by selecting the check box (All streams can be enabled at the same time by using the master checkbox) 3. Enter the stream Destination IP [example: udp:// :1234]. 4. Set the TTL value. 5. Select Save and Confirm once all the streams are setup. Disabling IP Stream(s): To disable an IP Stream uncheck the checkbox in front of the appropriate IP Stream_ID Disabling IP Stream(s): To disable an IP Stream uncheck the checkbox in front of the appropriate IP Stream_ID 18
 Channel Type: STD, HRC, IRC (Factory Default is STD) CH/Freq.")
20 Output Setup Use the Output Setup page to set the RF output type, RF Output CH/ frequency, Attenuation, QAM, and Interleaver. 1. Enable the RF by checking the checkbox. (Factory Default is enabled) 2. Select and set the required parameters for your installation RF: Normal, C.W., Inverted (Factory Default is Normal) Channel Type: STD, HRC, IRC (Factory Default is STD) CH/Freq.: Factory Default is 101. Attenuation: 0 ~ -20 (Factory Default is 0) Constellation (QAM Type): 256 QAM, 64 QAM (Factory Default is 256) Interleaver: Factory Default is I=128, J= 1. Delayed Audio Output Use the Delayed Audio Output Parameters to Delay the audio output of the Encoder in order to better match the video at the TV. This allows external audio amplifiers to achieve lip sync with RF Displays. 1. Set the Delay Buffer (ms) as required. 2. Select the Program (Program 1 or Program 2) audio to be outputted via the L/R Audio outputs on the rear of the device. Save and Confirm all changes settings on Output Setup page. 19
21 Application Note: When installing more than 1 device into a system, each device must have a unique RF TS_ID. We highly recommend you save your encoder configuration files. See Administration tab for how to backup device settings. 20

22 Management IP Setup: Use the Network Setup to configure the device s Management Port s IP address (GUI address) of the device, Subnet Mask, Gateway, Enable/Disable DHCP, and set Host Name. Save and Confirm: Once all parameters are set remember to Save and Confirm all changes. Note: Above example shows current GUI IP as Factory Default GUI IP is Streaming IP SETUP: Use the Streaming IP tab to modify the Streaming IP port of the device as required. 21
23 Section 7 Administration: Reboot: Use the Reboot command button to reboot the device. Note: Any unsaved changes will be lost. Reset to Default: Use the Reset to Default button to reset all parameters to original factory settings. Saving your configuration files We highly recommend you save your configuration files. Simply click the Backup button and the config files will be saved to your computer. Backup: We highly recommend saving your device s setting. 1. Select Administration tab. 2. Select backup from the menu. 3. Locate and name file for future use. 22

24 Restore/Upload saved file configurations: 1. Select Administration tab. 2. Select Choose file menu. 3. Locate the required file to be imported. 4. Select Upload to import the selected file into the device. 5. Remember to save and backup any and all changes. Change Password: Use the Change Password section to change or modify the device s password as desired. 23
25 Initial Setup & Configuration Front Panel Information: Encoder Setup Channel.# HD Bitrate: Short Name: Video Output: Audio Output: IN Mbps DTV-101 MPEG2 MP2 IN Mbps DTV-102 MPEG2 MP2 Output Setup RF #: Output CH#: Constellation Interleaver RF-1 101( MHz) QAM256 I128,J1 Streaming Setup 1st Destination IP: st Destination Port: nd Destination IP: nd Destination Port:
26 Front Panel LCD Menu Tree Modulator Configuration: Turn on the QAM modulator. Once the modulator is powered up, it will go through an internal booting process. First will be display: the rev of unit for 8 seconds, then "Booting" activity for 47 seconds, then "CE labs HD Series" for 15 seconds, and then the unit will be displaying Bit rate information on the LCD Display. The unit is ready for programming or operation. Password Press the OK button to select a 4-digit password. Use the Up/Down button to search and select individual numbers for the password. The default password is Press the OK button to set the password. Main Menu To access the Main Menu first enter the password by pressing the OK button. Once the correct password is entered press the OK button and the LCD Screen will display The following configuration options available (Use the Up/Down button to search and left and right button to select navigate it): MANUAL Modulator Configuration: Password: 0000 Password?: The password is Note: The LCD password cannot be changed. Press OK again after the display shows Options on the Modulator configuration menu: Main Menu: Exit: Administration: Network Setup: Output Setup: Streaming Setup: 25
27 Encoder Setup: QM- Pro1100/I Encoder Setup: QM- Pro1200/I Select Encoder: 1 Select Encoder: 2 Back to Main Menu Back to Main Menu Closed caption: Enable (Enable, Disable) 2 Close caption: Enable Program Num: 1 (1 to 65534) 2 Program Num: 2 TS ID (IP ONLY): 1000 (1 to 65535) 2 TS ID (IP ONLY): 1001 Hue : 128 (1-255) 2 Hue : 128 Saturation: 128 (1-255) 2 Saturation: 128 Contrast: 128 (1-255) 2 Contrast: 128 Brightness: 128 (1-255) 2 Brightness: 128 Audio Output : MP2 (MP2,AAC) 2 Audio Output : MP2 Audio Input: Auto (Auto, Analog L/R) 2 Audio Input: Auto SD Bitrate: 8000 ( ) 2 SD Bitrate: 8000 HD Bitrate: 14,800 (10,000-15,700) 2 HD Bitrate: 14,800 Aspect Ratio: 16:9, (16:9, 4:3) 2 Aspect Ratio: 16:9 Video Output: H.264 CBR Video Input : Auto (MPEG2 CBR, H.264 CBR) 2 Video Output: H.264 CBR (YPbPr, CVBS, HDMI, Auto) 2 Video Input : Auto Source ID:101 (1 to 65535) 2 Source ID:102 VCN Mode: Manual (onepart) VCN (Minor Channel Number) 1 (1-999) VCN (Major Channel Number) 102 (1-999) 2 VCN Mode: Manual (two-part) (Manual (twopart), Manual (One-part), Auto (two-part) 2 VCN (Minor Channel Number): 1 2 VCN (Major Channel Number): 102 VCN (One Part) 101( ) 2 VCN (One Part): 101 Long CH Name: ATS-Digital-TV1 Short Name: My-DTV101 RF Number RF1 EXIT: ATS-Digital-TV1 My-DTV101 2 Long CH Name: ATS-Digital-TV2 2 Short Name: My- DTV102 2 RF Number RF1 26
28 Administration: Reset to Default: No (No.Yes) Reset unit Back to Main: Network Setup: Management IP: Host Name: QM-000 (Selecting this option unit will be rebooting) To Network setup Gateway: Subnet Mask: IP Address: DHCP: Disable (Enable, Disable) Back to Main: Streaming IP: DHCP: Disable (Enable, Disable) To Network setup Gateway: Subnet Mask: IP Address:
29 Subnet Mask: IP Address: Output Setup: RF Output Setup: Enable RF: Enable (Enable, Disable) To Output Setup Interleaver: I:128 J:1 ( I:8 J:16, I:16 J:8, I:32 J:4, I:64 J:2, I:128 J:8, I:128 J:7, I:128 J:6, I:128 J:5, I:128 J:4, I:128 J:3, I:128 J:2, I:128 J:1) Constellation: QAM 256 (QAM 64, QAM 256) Attenuation: 0. (0-20) Output Channel: 102 (7-135) Channel Type: STD (STD, HRC, IRC) RF Output: Normal (Normal, Inverted, C.W.) Regional Name: USA RF TS ID : 1 ( ) Back to Main: Delayed Audio Delay Buffer: 0 ( ) To Output Setup Audio Source: Program1( Program1 Program2) 28
30 Streaming Setup: Select IP Output: 1 Select IP Output: 2 Back to Main Back to Main TTL: 4 (1-255) TTL: 4 Destination Port: 7000 ( ) Destination Port: 7000 Destination IP: Destination IP: Streaming Method: RTP (Multicast) Enable Streaming: Enable ( Ene,Disable) Streaming Method: RTP (MLT (RTP (Multicast), UDP (Multicast), RTP (Unicast), UDP (Unicast)) Enable Streaming: Enable 29
31 Encoder Setup Select Encoder- Use the OK button to enter the Select Encoder Menu. Using the Scroll Up/Down buttons select the encoder you wish to program. Use the OK button to set the Encoder. Select Encoder 1 or 2. Once selected the display will indicate which Encoder you are programming while in the setup function. - Back to Main Menu- Select Back to Main to escape the Encoder Setup Menu. Closed Caption- Use the Scroll Up/Down button to select the Closed Caption Menu. Press the OK button to enter the Closed Caption menu. Enable / Disable Closed Caption control. Factory default: Enabled. Note: A Closed Caption input source is required. Program Num - Use the Scroll Up/Down button to set 1 Program Num(Number). Press the OK button to enter the Program Num menu. Use the Scroll Up/Down to select the Program Num ranging from 1 to then press OK to set. Factory default: Encoder 1: 1 Encoder 2: 2 TS_ID (IP Only) Use the Scroll Up/Down button to select TS ID. Press the OK button to enter the TS ID menu. Use the Scroll Up/ Down button to select the desired Stream ID ranging from 1 to then press the OK button to set. Factory default: Encoder 1: 1000 Encoder 2: 1001 Hue Use the Scroll Up/Down button to select Hue. Press the OK button to enter the Hue menu. Use the Scroll Up/Down button to select the desired Hue value (0 to 255) and press the OK button to set. 30
32 Factory default: 128. Saturation Use the Scroll Up/Down button to select Saturation. Press the OK button to enter the Saturation menu. Use the Scroll Up/ Down button to select the desired Saturation value (0 to 255) and press the OK button to set. Factory default: 128. Contrast Use the Scroll Up/Down button to select Contrast. Press the OK button to enter the Contrast menu. Use the Scroll Up/Down button to select the desired Contrast value (0 to 255) and press the OK button to set. Factory default: 128. Brightness Use the Scroll Up/Down button to select Brightness. Press the OK button to enter the Brightness menu. Use the Scroll Up/ Down button to select the desired Brightness value (0 to 255) and press the OK button to set. Factory default: 128. Audio Output Use the Scroll Up/Down button to select Audio Output. Press the OK button to enter the Audio Output menu. Use the Scroll Up/Down button to select the Audio Output option: MP2 (MPEG2 Layer I Audio) or AAC. Press the OK button to set. Factory default: MP2. Audio Input Use the Scroll Up/Down button to select. Press the OK button to enter the Audio Input menu. Use the Scroll Up/Down button to select the Audio Input options: Auto or Analog. Factory default: Auto. SD Bitrate: Use the Scroll Up/Down button to select SD Bitrate. Press the OK button to enter the SD Bitrate menu. Use the Scroll Up/Down button to set the SD Bitrate SD Bitrate Range MPEG2: 4000 (4Mbps) to 8000 (8Mbps). Factory default: 8000 (8 Mbps). SD Bitrate Range H.264: 1000 (1Mbps) to 4000 (4Mbps). Factory de- 31
33 fault: 4000 (4 Mbps). HD Bitrate: Use the Scroll Up/Down button to select HD Bitrate. Press the OK button to enter the HD Bitrate menu. Use the Scroll Up/ Down button to set the HD Bitrate. HD Bitrate Range MPEG2: (10Mbps) to (15.7Mbps). Factory default: (14.8 Mbps). HD Bitrate Range H.264: 4000 (4Mbps) to 8000 (8Mbps). Factory default: 8000 (8 Mbps). Aspect Ratio Use the Scroll Up/Down button to select Aspect Ratio. Press the OK button to enter the Aspect Ratio menu. Use the Scroll Up/Down button to select the desired Aspect Ratio option of 4:3 or 16:9 then press the OK button to set. Factory default: 16:9. Video Output The user may select to output video in either MPEG2 or H.264. Use the Scroll Up/Down button to select Video Output. Press the OK button to enter the Video Output menu. Use the Scroll Up/Down button to select the Video Output option: MPEG2 or H.264. Press the OK button to set. Factory default: MPEG2. Video Input Use the Scroll Up/Down button to select Video Input. Press the OK button to enter the Video Input menu. Use the Scroll Up/Down button to select the Video Input option: Auto, HDMI, Component, or Composite. Factory default: Auto. Press the OK button to set. Source ID - Use the Scroll Up/Down button to set Source ID. Press the OK button to enter the Source ID menu. Use the Scroll Up/Down to set the Source ID. Range: 1 to Press OK to set. Factory default: 101 VCN: Virtual Channel Number is a method of allowing installers to manipulate and add a channel to a new or existing cable system. Whether the installer is installing a new channel into a system that 32
34 uses Major and Minor channel numbering (2.1, 3.1) or into a system that uses Single Channel enumeration (Ch. 101, 199). Note: Some HDTV s may represent the Virtual Channel using a dash: 12-1, VCN allows channels to be added regardless of what RF freq. (MHz) the modulator is actually occupying. VCN Modes Examples for the QMPro Series: The QMPro Series of HD Modulators offers 3 VCN (Virtual Channel Number) Modes. VCN (Auto two-part)-vcn Auto 2-part- will force the VCN channels to be based on the CH/freq. selected on the Output Setup page of the device. Examples: CH/freq QMPro 1100/1100i QMPro1200/1200i.1, (177MHz) , (423MHz) , (657MHz) , (855MHz) Note: QMPRO 1200/1200I will restrict selecting CH# 135 as the VCN auto mode will occupy Setting the Output Channel of the QMPro1200/1200i to CH 134 will force the unit in VCN Auto to set and Both channels of the QMPro 1200 and 1200i will occupy QAM channel 134 (855MHz) in a 6MHz bandwidth. (2 Programs within 1 QAM Channel) Note: QMPro 1100/1100i will allow CH 135(861MHz) to be selected. VCN (Manual two-part)- VCN Manual 2-part- will allow the installer to control VCN channels regardless of the CH/freq. selected on the Output Setup page of the device. 33
35 Examples: CH/freq QMPro 1100/1100i QMPro1200/1200i 2.1, (177MHz) , (423MHz) , (657MHz) , (855MHz) As shown in the above examples, the installer can easily set and select any Virtual channel regardless of the Output Channel occupied by the modulator. VCN (Manual one-part)-vcn Manual 1-part- will allow the installer to control VCN channels regardless of the CH/freq. selected on the Output Setup page of the device. Examples: CH/freq QMPro 1100/1100i QMPro 1200/1200i 2, 15 7 (177MHz) 2 59, (423MHz) , (657MHz) , (855MHz) 130 VCN Mode Press OK to enter the VCN menu. Select the VCN Mode required. Factory default: VCN Mode: Manual (one-part) VCN Modes Available: VCN Mode: Manual (two-part) Use VCN(Major Ch No.) Menu to set Major VCN channel and VCN (Minor Ch. No.) menu to set Minor channel. VCN Mode: Manual (one-part) - Use VCN (one part) Menu to set VCN channel. Example: VCN can be set to a range
36 VCN Mode: Auto (two-part)- VCN will be set based on the Channel output selected in Output Menu: Output Channel. Example: Output Channel set to 101. VCN for device will be set at and VCN (Minor Ch. No.)-Use the Scroll Up/Down button to enter VCN (Minor CH No.) menu. Press the OK button to enter the menu. Use the Scroll Up/Down to set the VCN (Minor CH No.) channel #. Range: 1 to 999. Press OK to set *Use only when VCN Mode: Manual (two-part) is selected in VCN Mode menu. VCN (Major Ch. No.)-Use the Scroll Up/Down button to enter VCN (Major CH No.) menu. Press the OK button to enter the menu. Use the Scroll Up/Down to set the VCN (Major CH No.) channel #. Range: 1 to 999. Press OK to set *Use only when VCN Mode: Manual (two-part) is selected in VCN Mode menu. VCN (one part): - Use the Scroll Up/Down button to enter VCN (One Part) menu. Press the OK button to enter the menu. IUse the Scroll Up/Down to set the VCN(One Part) channel #. Range: 1 to Press OK to set Note: Use only when VCN Mode is set to VCN(One Part) in VCN Mode menu. Long Channel Name Use the Scroll Up/Down button to select Long Channel Name. Press the OK button to enter the Long Channel Name menu. Use the Scroll Up/Down menu to select the first character of the desired Long Channel Name then press the OK button to set. Repeat the process until the Long Channel Name is completed. Long Channel Name can be 16 characters. Factory Default: ATSC-digi-TV-101 or ATSC-digi-TV-102. Short Channel Name Use the Scroll Up/Down button to select Short Channel Name. Press the OK button to enter the Short Channel Name menu. Use the Scroll Up/Down menu to select the first character of the desired Short Channel Name then press the OK button to 35
37 set. Repeat the process until the Short Channel Name is completed. Press the OK button to set and exit. Short Name can be 7 characters. Factory Default: DTV-101 and DTV-102 RF Number- Press the OK button to enter the RF Number menu. Use the Scroll Up/Down button to Select the RF section of the Encoder. Select Off or RF 1. Use the OK button to set. Factory Default: RF1. Note: Selecting Off will disable any RF video out of the device. Exit- Select Exit to exit the Setup menus. 36
38 Administration Reset to Default- Use the Scroll Up/Down button to select reset to Default Menu. Press the OK button to enter the Reset to Default menu. Use the Scroll Up/Down button to select no/yes. Press the OK button to select no/yes. Unit will reboot if yes is selected. Note: Not all Administration functions are available via the LCD menu. Use the GUI to utilize all the Admin functions available. Back to Main- Select Back to Main to escape Administration. 37
39 Network Setup Management IP (Sub Menu of Network Setup Menu) Hostname: Use the Scroll Up/Down button to select Hostname. Press the OK button to enter the Hostname menu. Use the Left/Right buttons to modify the Hostname as requiredpress the OK button to set. Factory Default: QM-000. Note: Once a change is made to the Hostname the unit will reboot to set the new settings. To Network Setup- Select To Network Setup to return to the Network Setup Menu. Gateway Use the Scroll Up/Down button to select Gateway. Press the OK button to enter the Gateway Address menu. Use the Scroll Up/Down button to enter the Gateway Address. Use the Scroll Up/ Down menu to select the first number of the desired Gateway Address then press the OK button to set. Repeat the process until the Gateway Address is completed. Press the OK button to set. Factory Default: Subnet Mask Use the Scroll Up/Down button to select Subnet Mask. Press the OK button to enter the Subnet Mask menu. Use the Scroll Up/Down button to enter the Subnet Mask. Use the Scroll Up/ Down menu to select the first number of the desired Subnet Mask then press the OK button to set. Repeat the process until the Subnet Mask is completed. Press the OK button to set. Factory Default: IP Address Use the Scroll Up/Down button to select IP Address. Press the OK button to enter the IP Address menu. Use the Scroll Up/ Down button to enter the IP address. Use the Scroll Up/Down menu to select the first number of the desired IP Address then press the OK button to set. Repeat the process until the IP Address is completed. Press the OK button to set. Note: If DHCP is enabled you will not be able to set an IP address. Select DHCP disabled if Static IP Address required. Default Management IP:
40 Note: IP Address Range(s): ~ ~ ~ DHCP Use the Scroll Up/Down button to select DHCP. Press the OK button to enter the DHCP menu. Use the Scroll Up/Down button to Enable/Disable. Press the OK button to set. Factory Default: Disable Once a change is made the unit will reboot to set the new settings. Back to Main- Select Back to Main to escape Network Sub Menu. Streaming IP The Streaming IP address is the Streaming Port for the IP streams. DHCP Use the Scroll Up/Down button to select DHCP. Press the OK button to enter the DHCP menu. Use the Scroll Up/Down button to Enable/Disable. Press the OK button to set. Factory Default: Disable Once a change is made the unit will reboot to set the new settings. To Network Setup- Select To Network Setup to return to the Network Setup Menu. Gateway Use the Scroll Up/Down button to select Gateway. Press the OK button to enter the Gateway Address menu. Use the Scroll Up/Down button to enter the Gateway Address... Use the Scroll Up/ Down menu to select the first number of the desired Gateway Address then press the OK button to set. Repeat the process until the Gateway Address is completed. Press the OK button to set. Factory Default: Subnet Mask Use the Scroll Up/Down button to select Subnet Mask. Press the OK button to enter the Subnet Mask menu. Use the Scroll Up/Down button to enter the Subnet Mask. Use the Scroll Up/ Down menu to select the first number of the desired Subnet Mask 39
41 then press the OK button to set. Repeat the process until the Subnet Mask is completed. Press the OK button to set. Factory Default: IP Address Use the Scroll Up/Down button to select IP Address. Press the OK button to enter the IP Address menu. Use the Scroll Up/ Down button to enter the IP address. Use the Scroll Up/Down menu to select the first number of the desired IP Address then press the OK button to set. Repeat the process until the IP Address is completed. Press the OK button to set. Note: If DHCP is enabled you will not be able to set an IP address. Select DHCP disabled if Static IP Address required. Default Streaming IP Port Address:
42 Output Setup RF Output Setup Enable RF-Use the Scroll Up/Down button to select Enable RF. Press the OK button to enter the Enable RF menu. Use the Scroll Up/Down button to select Enable / Disable. Then press the OK button to set. Factory Default: Enable To Output Setup Select To Output Setup to return to the RF Output Setup Menu Interleaver- Use the Scroll Up/Down button to select the appropriate Interleaver selection. Press the OK button to enter the Interleaver menu. Use the Scroll Up/Down button to select the desired Interleaver value and press the OK button to set. Factory default: I=128, J=1 ( I:8 J:16, I:16 J:8, I:32 J:4, I:64 J:2, I:128 J:8,I:128 J:7, I:128 J:6, I:128 J:5, I:128 J:4, I:128 J:3, I:128 J:2, I:128 J:1) Constellation Use the Scroll Up/Down button to select Constellation. Press the OK button to enter the Constellation menu. Select QAM256 or QAM64. Select the desired Constellation then press the OK button to set. Factor Default: QAM256. Attenuation: Use the Scroll Up/Down button to change the Attenuation. Use the Scroll Up/Down buttons to select the desired setting. Press the OK button to set the Attenuation. Range: 0 ~ -20. Factory Default: 0 Output Channel Use the Scroll Up/Down button to change the output channel. Use the Scroll Up/Down buttons to select the desired Output Channel. Once the desired output channel is selected press the OK button to set the channel. Factory Default: 101 ( MHz) 41
43 The LCD Display will show both the channel # and the frequency # of the output channel (example: MHz). Note: When setting VCN Auto(two-part)- output channel will reflect output channel selected here. Examples: VCN Mode: Auto(two-part) found in Encoder Setup will reflect channel of selected output channel. Output channel selected: 101- then VCN Auto(two-part) will be and (for QMPro 1200/1200i). Channel Type Use the Scroll Up/Down button to select Channel Type. Press the OK button to enter the Channel Type menu. Menu options are: STD, HRC and IRC. Use the Scroll Up/Down button to select the desired Channel Type and press the OK button to set. Factory default: STD. RF Output Use the Scroll Up/Down button to select RF Output. Press the OK button to enter the RF Output menu. Options are Normal, Inverted, or C.W.. Use the Scroll Up/Down button to select the desired RF Output and press the OK button to set. Factory default: Normal Regional Name - Note: Do not Change. Skip this function. Factory Default: USA. RF TS ID Use the Scroll Up/Down button to select TS ID. Press the OK button to enter the TS ID menu. Use the Scroll Up/Down button to select the desired Stream ID ranging from 0 to then press the OK button to set. RF TS ID for RF Output1: Default =1. RF TS ID for RF Output2: Default =2. Back to Main- Select Back to Main to escape RF Output setup Menu. Delayed Audio Menu 42
44 Delay Buffer-Press the OK button to enter the Delay Buffer menu. Use the Scroll Up/Down button to select the appropriate Audio Buffer. Press the OK to set. Range: 0 ~ Factory default: 0 To Output Setup- Select To Output Setup to return to the Output Setup Menu. Audio Source- Press the OK button to enter the Audio Source menu. Use the Scroll Up/Down button to select the appropriate Program. Press the OK to set. Factory default: Program 1. 43
45 Streaming Setup Select IP Out- Use the OK button to select Select IP Out Menu. Using the Scroll Up/Down buttons select the IP Stream to program. Use the OK button to select Select IP Out 1 or 2. Factory default: Select IP Output: 1 FOR QMPRO 1100 AND 1100i Select IP Output: 2 FOR QMPRO 1200 AND 1200i Once Selected the display will indicate which Streaming Setup (1 or 2) you are programming while in the setup function. Back to Main- Select Back to Main to escape the Streaming - IP Streaming Sub Menu. Time To Live Use the Scroll Up/Down button to select Time To Live menu. Press the OK button to enter the Time To Live menu. Use the Scroll Up/Down button to select TTL. Press the OK button to set. TTL Range: 1~ 255. Default Settings: Unicast: 63. Multicast: 4. Destination Port Number Use the Scroll Up/Down button to select Destination Port Number. Press the OK button to enter the Destination Port Number menu. Use the Scroll Up/Down button to set the Port. Press the OK button to set. Range: 1024~ Factory default: 7000 Destination IP Use the Scroll Up/Down button to select Destination IP (Address). Press the OK button to enter the Destination IP Address menu. Use the Scroll Up/Down button to set the Destination IP Address. Note: By selecting Unicast in the Streaming Method Menu the default address begins at Use the Scroll Up/Down button to set the Destination IP Address. Press the OK button to set. 44
46 Destination IP Address Range(s): Unicast: ~ Multicast: ~ Factory Default: Stream1: RTP Multicast default: Stream2: RTP Multicast default: Streaming Method Use the Scroll Up/Down button to select Streaming Method. Press the OK button to enter the Streaming Method menu. Use the Scroll Up/Down button to select the Streaming Method required. Select: RTP (UNICAST), UDP (UNICAST), UDP (MUL- TICAST), or RTP (MULTICAST). Press the OK button to set. Default: Factory Default: RTP (MULTICAST) Enable Streaming: Use the Scroll Up/Down button to select Enable Streaming. Press the OK button to enter the Streaming Method menu. Select Enable or Disable. Factory default: Enabled. To exit the Advanced Menu, use the Up/Down button to select Exit then press the OK button. Exit Menu will appear on the LCD screen. Press the OK button twice to exit. 45
47 46


48 CE Labs support many areas of your audio and video distribution needs. We manufacture: Digital Signage software and Media Players HD Matrix Switchers RF amplifiers HDMI and Component HD distribution amplifiers CAT 5 Signal Extenders VGA Extenders and Splitters and cables of all types See our product line at WARRANTY Cable Electronics, Inc. warrants this product to be free from defects in material and workmanship, under normal use and service, for a period of one year from the purchase by the original purchaser. If this product is defective or malfunctions, Cable Electronics will replace or repair this unit (at their option) within a reasonable time. No expressed or implied warranty is made for any defects caused by immersion or exposure to liquids, abuse, neglect, improper operation of unit, excess wear and tear and defects resulting from unauthorized disassembly and or modification Wood Drive Garland, TX Phone: (469) Toll free: (800) Fax: (469)
DVQ INSTALLATION & CONFIGURATION MANUAL DVQAM-1 / DVQAM-2. Single and Dual Input QAM Encoders / Modulators
 INSTALLATION & CONFIGURATION MANUAL DVQAM-1 / DVQAM-2 Single and Dual Input QAM Encoders / Modulators TABLE OF CONTENTS SAFETY PRECAUTIONS... 3 PACKAGE CONTENTS... 4 PRODUCT DESCRIPTION... 4 SPECIFICATIONS...
RL-DM Input DVB-T Encoder / Modulator User Guide and Install Manual
 ZyCastR Radio Frequency Range digi-mod RL-DM4000+ www.digi-modbyzycast.com RL-DM4000+ 4 Input DVB-T Encoder / Modulator User Guide and Install Manual Table of Contents Safety Precautions 2 Package Contents
User Guide and Installation Manual
 User Guide and Installation Manual HDME102 / HDME202 / HDME402 Single / Dual / Quad Input QAM Encoder / Modulator 1 HDME102/202/402 Manual V1.0 Table of Contents Safety Precautions...3 Package Contents...3
HD-4002DM Quad Input DVB-T HD Encoder / Modulator User Guide and Install Manual
 ZyCastR Radio Frequency Range digi-mod HD-4002DM www.digi-modbyzycast.com HD-4002DM Quad Input DVB-T HD Encoder / Modulator User Guide and Install Manual Table of Contents Safety Precautions... 2 Package
INSTALLATION & CONFIGURATION MANUAL. CSD-1000B, CSD-2000B, CSD-4000B Single, Dual, Quad Input QAM Modulators
 INSTALLATION & CONFIGURATION MANUAL CSD-1000B, CSD-2000B, CSD-4000B Single, Dual, Quad Input QAM Modulators ZyCast Technology Inc. No. 33, Lane 181 Chung Hwa Road Section 4, Hsin Chu, Taiwan 30060 Tel:
INSTALLATION & CONFIGURATION MANUAL
 INSTALLATION & CONFIGURATION MANUAL FDM-8000i 8-port SD Digital Modulator with IP FDM-8000i Manual V1.0 TABLE OF CONTENTS SAFETY PRECAUTIONS... 3 PACKAGE CONTENTS... 4 PRODUCT DESCRIPTION... 4 SPECIFICATIONS...
User Guide and Install Manual
 digi-mod HD-1605 www.digi-modbyzycast.com HD-1605 Single Input DVB-T HD Digital Modulator with Delayed Audio Output User Guide and Install Manual TABLE OF CONTENTS SAFETY PRECAUTIONS...2 PACKAGE CONTENTS...2
User Guide and Install Manual
 digi-mod HD-4797 www.digi-modbyzycast.com HD-4797 4-Input HD Digital Modulator with HDMI Loop Through and IR User Guide and Install Manual TABLE OF CONTENTS SAFETY PRECAUTIONS...2 PACKAGE CONTENTS...2
INSTALLATION & CONFIGURATION MANUAL. HD-1000DM / HD-2000DM / HD-4000 (DVB-T HD Series) Single / Dual / Quad Input Encoders / Modulators
 Single / Dual / Quad Input Encoders / Modulators") INSTALLATION & CONFIGURATION MANUAL HD-1000DM / HD-2000DM / HD-4000 (DVB-T HD Series) Single / Dual / Quad Input Encoders / Modulators TABLE OF CONTENTS SAFETY PRECAUTIONS... 3 PACKAGE CONTENTS... 4 PRODUCT
INSTALLATION & CONFIGURATION MANUAL HD-1000DM / HD-2000DM / HD-4000 (DVB-T HD Series) Single / Dual / Quad Input Encoders / Modulators TABLE OF CONTENTS SAFETY PRECAUTIONS... 3 PACKAGE CONTENTS... 4 PRODUCT
INSTALLATION & CONFIGURATION MANUAL. resi-linx RL-IP1000 HD IP Streaming Server
 INSTALLATION & CONFIGURATION MANUAL resi-linx RL-IP1000 HD IP Streaming Server TABLE OF CONTENTS SAFETY PRECAUTIONS...2 PACKAGE CONTENTS...2 PRODUCT DESCRIPTION...3 SPECIFICATIONS...4 INSTALLATION, UNPACKING
User Manual. Terrestrial DVB-T/T2 to IPTV Converter CT2IP-8032
 User Manual Terrestrial DVB-T/T2 to IPTV Converter CT2IP-8032 ZyCast Technology Inc. No. 33, Lane 181, Chung Hwa Road Section 4, Hsin Chu, Taiwan 30060 Tel: +886-3-5400-949 Fax: +886-3-5400-413 E-mail:
USER GUIDE AND MANUAL. Dual Input HD Digital Encoder-Modulator with ASI. MODEL: DT-IPTV-QAM-ASI-2H Version 1.0 Last Update:
 USER GUIDE AND MANUAL Dual Input HD Digital Encoder-Modulator with ASI MODEL: DT-IPTV-QAM-ASI-2H Version 1.0 Last Update: 01-15-2019 DT-IPTV-QAM-ASI-2H Manual V1.0 01152019 NACE Brands is the leading brand
SD ENCODER AND MODULATOR YPbPr & CVBS TO DVB-T DIGITAL RF SD4250 USER MANUAL
 SD ENCODER AND MODULATOR YPbPr & CVBS TO DVB-T DIGITAL RF SD4250 USER MANUAL All-in-one encoder and modulator for dual SD source. Allows 4 sets of Audio/Video source to be extended throughout a traditional
HSC-42. HDMI 4k2k Video Up/Down Scaler
 INSTRUCTION MANUAL HSC-42 HDMI 4k2k Video Up/Down Scaler SAFETY AND NOTICE 1. Read these instructions. 2. Keep these instructions. 3. Heed all warnings. 4. Follow all instructions. 5. Do not use this apparatus
HDTV SWITCH with Analog and Digital Audio SW204HD
 Component Video/Audio INSTRUCTION MANUAL 4 x 2 Matrix HDTV SWITCH with Analog and Digital Audio Model: SW204HD * Allows you to connect 4 HD sources to either of the two outputs without having to swap cables.
EN-264 DVB MPEG-4 HDTV ENCODER & TRANSCODER - 0 MI1720 -
 EN-264 DVB MPEG-4 HDTV ENCODER & TRANSCODER - 0 MI1720 - SAFETY NOTES Read the user s manual before using the equipment, mainly " SAFETY RULES " paragraph. The symbol on the equipment means "SEE INSTRUCTION
HD ENCODER AND MODULATOR HDMI TO DVB-T DIGITAL RF (MPEG-4) 14MM-DM05 USER MANUAL 3-14
 14MM-DM05 USER MANUAL 3-14") HD ENCODER AND MODULATOR HDMI TO DVB-T DIGITAL RF (MPEG-4) 14MM-DM05 USER MANUAL 3-14 PRODUCT INTRODUCTION Indicator LCD Window Control Buttons RF out RF mix in USB Port for Upgrade HDMI in DC 12V Grounding
HD ENCODER AND MODULATOR HDMI TO DVB-T DIGITAL RF (MPEG-4) 14MM-DM05 USER MANUAL 3-14 PRODUCT INTRODUCTION Indicator LCD Window Control Buttons RF out RF mix in USB Port for Upgrade HDMI in DC 12V Grounding
NDS3524 DVB-T SD&HD Encoder & Modulator with USB. --- Home Use. User Manual
 NDS3524 DVB-T SD&HD Encoder & Modulator with USB --- Home Use User Manual Thank you for buying this encoder modulator. Please read this manual carefully to install, use and maintain the encoder modulator
HDM-500T. DVB-T HD Encoder & Modulator
 HDM-500T DVB-T HD Encoder & User Manual Thank you for buying this encoder modulator. Please read this manual carefully to install, use and maintain the encoder modulator in the best conditions of performance.
1 HDMI & YPbPr, CVBS Digital RF Encoder Modulator. User Manual B-QAM-HDMI-1CH
 1 HDMI & YPbPr, CVBS Digital RF Encoder Modulator User Manual B-QAM-HDMI-1CH Thank you for buying this encoder modulator. Please read this manual carefully to install, use and maintain the encoder modulator
Inserting HD/SD Local Content with the COM2000 System
 Inserting HD/SD Local Content with the COM2000 System The Technicolor COM2000 system has the ability to accept and insert Local Content into the COM2000 system using the HD IP Streamer and the Technicolor
UC-450E+ MPEG-4 HD/SD Encoder. User Manual. Version:
 UC-450E+ MPEG-4 HD/SD Encoder User Manual Version: 07302012-01 CONTENTS UC-450E+ MPEG-4 HD Encoder... 0 Chapter 1 Product Outline... 1 1.1Outline... 1 1.3 Specifications... 2 1.4 Block Diagram... 3 Chapter
SRD x DVB- S/S2 SD/HD Decoder
 SRD 8000 4x DVB- S/S2 SD/HD Decoder TABLE OF CONTENTS 1. SAFETY INSTRUCTION... 4 2. Overview... 5 3. Technical Specification... 6 3.1. Input Port... 7 3.2. Output Port... 7 4. Equipment composition...
The VeCOAX PRO2 HD IP is the #1 Best HD Quality & Best Price Video Encoder on the market, perfect
 The VeCOAX PRO2 HD IP is the #1 Best HD Quality & Best Price Video Encoder on the market, perfect solution to distribute HD video signals over wifi, lan, wan, internet, to an unlimited number of network
HDMI 1x2 Splitter B-230-HDSPLTR-1x2 INSTALLATION MANUAL HDMI OUT 2 HDMI OUT 1 B-230-HDSPLTR-1X2 POWER HDMI IN
 HDMI OUT 2 HDMI 1x2 Splitter B-230-HDSPLTR-1x2 INSTALLATION MANUAL B-230-HDSPLTR-1X2 HDMI OUT 1 POWER HDMI IN IMPORTANT SAFETY INSTRUCTIONS 1. Read and follow all instructions and warnings in this manual.
NetworkAV over IP Sender & Receiver w / Central Control & PoE
 NetworkAV over IP Sender & eceiver w / Central Control & PoE EXT-NETAVTX EXT-NETAVX All ights eserved EXT-NETAVX_V1.0 EXT-NETAVX_V1.0 Statement ead this user manual carefully before using the product.
INSTALLATION MANUAL. HDMI 1x4 Splitter B-230-HDSPLTR-1x4. B-230-HDSPLTR-1x4 HDMI OUT 4 HDMI OUT 3 HDMI OUT 2 HDMI OUT 1 HDMI OUT 4 HDMI IN
 HDMI 1x4 Splitter B-230-HDSPLTR-1x4 INSTALLATION MANUAL HDMI OUT 4 HDMI OUT 3 HDMI OUT 2 HDMI OUT 1 HDMI OUT 1 B-230-HDSPLTR-1x4 HDMI OUT 2 HDMI OUT 3 HDMI OUT 4 HDMI IN HDMI IN 2 IMPORTANT SAFETY INSTRUCTIONS
INSTALLATION MANUAL. HDMI 1x8 Splitter B-230-HDSPLTR-1x8 B-230-HDSPLTR-1X8
 HDMI 1x8 Splitter B-230-HDSPLTR-1x8 INSTALLATION MANUAL HDMI OUT 8 HDMI OUT 7 HDMI OUT 6 HDMI OUT 5 HDMI OUT 4 HDMI OUT 3 HDMI OUT 2 HDMI OUT 1 B-230-HDSPLTR-1X8 HDMI OUT 1 HDMI OUT 2 +5 VDC HDMI OUT 3
MP75. HD Media Player
 INSTRUCTION MANUAL MP75 HD Media Player TABLE OF CONTENTS 1. Caution 2 2. Features and Specifications 3 3. Unit and Accessories 4 4. Functions of Buttons on the Remote Control 4 5. Media Player s Connections
Operating Instructions
 Model No.: SX-MX08 Operating Instructions Thanks for purchasing our product. Please be sure to read this instruction manual Carefully before using our product. Introduction Foxun s SX-MX08 is a HDMI2.0
HDMI MATRIX SWITCHER B-120-HDMATRIX-4x4/8x8 CONFIGURATION UTILITY MANUAL
 HDMI MATRIX SWITCHER B-120-HDMATRIX-4x4/8x8 CONFIGURATION UTILITY MANUAL IMPORTANT SAFETY INSTRUCTIONS To reduce the risk of fire or electric shock, read and follow all instructions and warnings in this
INSTRUCTION MANUAL SW404HD SW808HD. High Definition Matrix Switch
 CE labs can support many areas of your audio and video distribution needs. We manufacture: Digital Signage software and Media Players HD Matrix Switchers RF amplifiers HDMI and Component HD distribution
HDMI/HD-SDI HEVC/H.264 IPTV
 1/4/16 chs HDMI/HD-SDI HEVC/H.264 IPTV Encoder Model: MagicBox HD401S MagicBox HD404S MagicBox HD416S single channel version 1 4 channels version 16 channels version Product Profile Magicbox HD4S series
MINI 150 Encoder. User s Manual V1.0
 MINI 150 Encoder User s Manual V1.0 Preface About This Manual This manual provides introductions to users about how to operate the device correctly. The content includes an introduction to product installation,
Web interface user guide MHD-202 REF Dual HDMI input modulator DVB-T and IP output
 Web interface user guide MHD-202 REF. 3855 Dual HDMI input modulator DVB-T and IP output Index 4 Introduction 4 About this Manual 4 Product Description 5 Web interface connection 5 Ethernet configuration
Website: Toll Free: [US] USER MANUAL
![Website: Toll Free: [US] USER MANUAL](/thumbs/89/98815032.jpg "Website: Toll Free: [US] USER MANUAL") Website: www.jtechdigital.com Toll Free: 1-888-610-2818[US] Email:Support@jtechdigital.com USER MANUAL J-Tech Digital ProAV HDMI2.0 8X8 matrix with IP RS232 Coaxial RoHS JTD-ID:279 1 Thank you for purchasing
Website: www.jtechdigital.com Toll Free: 1-888-610-2818[US] Email:Support@jtechdigital.com USER MANUAL J-Tech Digital ProAV HDMI2.0 8X8 matrix with IP RS232 Coaxial RoHS JTD-ID:279 1 Thank you for purchasing
USERS GUIDE ASP-18H-4K. HDMI 4K2K 1x8 Splitter with EDID Management. Manual Number:
 USERS GUIDE ASP-18H-4K HDMI 4K2K 1x8 Splitter with EDID Management i Manual Number: 141110 SAFETY INSTRUCTIONS Please review the following safety precautions. If this is the first time using this model,
8x8 HDMI2.0 Matrix Support YUV4:4:4, 18Gbps, HDR. Operating Instruction
 8x8 HDMI2.0 Matrix Support 4K@60hz YUV4:4:4, 18Gbps, HDR Operating Instruction 1 Thank you for purchasing this product. For optimum performance and safety, please read these instructions carefully before
This manual describes the installation, setup and operation of this equipment in details.
 About This Manual This manual describes the installation, setup and operation of this equipment in details. Please read it carefully to make sure you can operate the multiplexer correctly. Important Avoid
TCD channel H.264 Video Encoder Hardware User s Manual (DC 12V) Ver. 2010/10/29
 Ver. 2010/10/29") TCD-2100 1-channel H.264 Video Encoder Hardware User s Manual (DC 12V) Ver. 2010/10/29 Table of Contents 0. Precautions 3 1. Introduction 4 Package Contents... 4 Features and Benefits... 5 Safety Instructions...
TCD-2100 1-channel H.264 Video Encoder Hardware User s Manual (DC 12V) Ver. 2010/10/29 Table of Contents 0. Precautions 3 1. Introduction 4 Package Contents... 4 Features and Benefits... 5 Safety Instructions...
Website: Toll Free: [US] USER MANUAL. J-Tech Digital IPTV H264 Encoder.
![Website: Toll Free: [US] USER MANUAL. J-Tech Digital IPTV H264 Encoder.](/thumbs/79/79503151.jpg "Website: Toll Free: [US] USER MANUAL. J-Tech Digital IPTV H264 Encoder.") Website: www.jtechdigital.com Toll Free: 1-888-610-2818[US] Email: Support@jtechdigital.com USER MANUAL J-Tech Digital IPTV H264 Encoder RoHS JTD-ID:220 Table of Contents 1. Features... 3 2. Package Contents...
Website: www.jtechdigital.com Toll Free: 1-888-610-2818[US] Email: Support@jtechdigital.com USER MANUAL J-Tech Digital IPTV H264 Encoder RoHS JTD-ID:220 Table of Contents 1. Features... 3 2. Package Contents...
Website: Toll Free: [US] USER MANUAL
![Website: Toll Free: [US] USER MANUAL](/thumbs/79/79314971.jpg "Website: Toll Free: [US] USER MANUAL") Website: www.jtechdigital.com Toll Free: 1-888-610-2818[US] Email:Support@jtechdigital.com USER MANUAL J-Tech Digital ProAV HDMI2.0 8X8 matrix with IP RS232 Coaxial RoHS JTD-ID:279 1 Thank you for purchasing
Website: www.jtechdigital.com Toll Free: 1-888-610-2818[US] Email:Support@jtechdigital.com USER MANUAL J-Tech Digital ProAV HDMI2.0 8X8 matrix with IP RS232 Coaxial RoHS JTD-ID:279 1 Thank you for purchasing
Marshall Lynx LCD Universal Monitors
 Marshall Lynx LCD Universal Monitors User Manual Marshall Industrial Video/Security Div. For more information, contact Marshall Electronics, Industrial Video & Security (800) 800-6608 www.mars-cam.com
MEDIA OVER IP SYSTEM B-900-MOIP-4K-CTRL B-900-MOIP-4K-TX B-900-MOIP-4K-RX INSTALLATION & SETUP GUIDE
 MEDIA OVER IP SYSTEM B-900-MOIP-4K-CTRL B-900-MOIP-4K-TX B-900-MOIP-4K-RX INSTALLATION & SETUP GUIDE 2 IMPORTANT SAFETY INSTRUCTIONS To reduce the risk of fire or electric shock, read and follow all instructions
4x4 HDMI2.0 Matrix Support YUV4:4:4, 18Gbps, HDR. Operating Instruction
 4x4 HDMI2.0 Matrix Support 4K@60hz YUV4:4:4, 18Gbps, HDR Operating Instruction 1 Thank you for purchasing this product. For optimum performance and safety, please read these instructions carefully before
PS8 - II. Professional Power Sequencer. User s Manual
 PS8 - II Professional Power Sequencer User s Manual IMPORTANT SAFETY INSTRUCTIONS READ FIRST This symbol, whenever it appears, alerts you to the presence of uninsulated dangerous voltage inside the enclosure.
4Ch SDI to IP+ASI MEPG-2 H.264 Encoder. User Manual B-SDI-ASI-IP-4CH
 4Ch SDI to IP+ASI MEPG-2 H.264 Encoder User Manual B-SDI-ASI-IP-4CH Intended Audience About This Manual This user manual has been written to help people who have to use, to integrate and to install the
HDMI/HD-SDI/VGA H.264/H.256 HEVC
 1/16 chs HDMI/HD-SDI/VGA H.264/H.256 HEVC r Model: MagicBox HD4N Series HDMI input HD-SDI input VGA input 16 channels HD-SDI input 1 16 channels HDMI input Product Profile MagicBox HD4 N series The HD
POWER. allows users to interface a third party control system with the devices on a VN Matrix network.
 The Extron VNM Enterprise Controller 00 is a dedicated control device for managing large VN-Matrix systems. The controller allows users to view, manage, and dynamically control multiple VN-Matrix systems
TVA2.1 2-Channel Digital Amplifier Installation Manual
 TVA2.1 2-Channel Digital Amplifier Installation Manual SAFETY INSTRUCTIONS WARNING: TO REDUCE THE RISK OF FIRE OR ELECTRIC SHOCK, DO NOT EXPOSE THIS APPLIANCE TO RAIN OR MOISTURE. CAUTION: TO REDUCE THE
SURGE PROTECTION DEVICE RECOMMENDED
 4x4 HDMI2.0 Matrix Support 4K@60hz YUV4:4:4, 18Gbps, HDR Operating Instruction 1 Thank you for purchasing this product. For optimum performance and safety, please read these instructions carefully before
H.264 HD HDMI Encoder for IP TV. Operation Instructions
 H.264 HD HDMI Encoder for IP TV Operation Instructions Table of Contents 1. Features...3 2. Package Contents... 3 3. Hardware Description... 4 4. Typical Application... 4 5. Environment Configuration...
E12. 3MP Cube with Basic WDR, Fixed lens Hardware User s Manual. (PoE) Ver. 2012/10/22
 Ver. 2012/10/22") E12 3MP Cube with Basic WDR, Fixed lens Hardware User s Manual (PoE) Ver. 2012/10/22 Table of Contents 0. Precautions 3 1. Introduction 4 Package Contents... 4 Features and Benefits... 5 Safety Instructions...
E12 3MP Cube with Basic WDR, Fixed lens Hardware User s Manual (PoE) Ver. 2012/10/22 Table of Contents 0. Precautions 3 1. Introduction 4 Package Contents... 4 Features and Benefits... 5 Safety Instructions...
CM 4HD-IP. HD digital modulator-ip streamer 4 HDMI-IP. User s Manual
 CM 4HD-IP 082008 HD digital modulator-ip streamer 4 HDMI-IP User s Manual 2 1 CM 4HD-IP USER S MANUAL 1.1 General Description 2 1 3 Number Description 1 HDMI Inputs. Connection to the audio/video power
VeCOAX. Micromod MS REFERENCE GUIDE
 VeCOAX Micromod MS Advanced Wall Mount HD Video Modulator REFERENCE GUIDE 2014 Advanced model with also USB Recording and PLAY Capabilities, 1080P input over both mpeg2 and mpeg4 modes, low latency encoding
NB100U Portable Encoder. User s Manual V1.00-N
 NB100U Portable Encoder User s Manual V1.00-N Preface About This Manual This manual provides introductions to users about how to operate the device correctly. The content includes introduction to product
Operating Instructions
 Model No.: SP0108-U01 Operating Instructions Thanks for purchasing our product. Please be sure to read this instruction manual Carefully before using our product. Introduction Vision HD s SP0108-U01 is
TCM H.264 Megapixel IP PoE Cube Camera Hardware User s Manual. (PoE) Ver. 2011/11/30
 Ver. 2011/11/30") TCM-4511 H.264 Megapixel IP PoE Cube Camera Hardware User s Manual (PoE) Ver. 2011/11/30 Table of Contents 0. Precautions 3 1. Introduction 4 Package Contents... 4 Features and Benefits... 5 Safety Instructions...
TCM-4511 H.264 Megapixel IP PoE Cube Camera Hardware User s Manual (PoE) Ver. 2011/11/30 Table of Contents 0. Precautions 3 1. Introduction 4 Package Contents... 4 Features and Benefits... 5 Safety Instructions...
Full HD HEVC(H.265)/H.264 Hardware IPTV Encoder Model: MagicBox HD4 series MagicBox HD401: Single channel HDMI/AV, HDMI/VGA/YPbPr/AV, HDSDI input
/H.264 Hardware IPTV Encoder Model: MagicBox HD4 series MagicBox HD401: Single channel HDMI/AV, HDMI/VGA/YPbPr/AV, HDSDI input") Full HD HEVC(H.265)/H.264 Hardware IPTV Encoder Model: MagicBox HD4 series MagicBox HD401: Single channel HDMI/AV, HDMI/VGA/YPbPr/AV, HDSDI input 1 MagicBox HD404: 4 channels HDMI/AV, HDMI/VGA/YPbPr/AV,
Full HD HEVC(H.265)/H.264 Hardware IPTV Encoder Model: MagicBox HD4 series MagicBox HD401: Single channel HDMI/AV, HDMI/VGA/YPbPr/AV, HDSDI input 1 MagicBox HD404: 4 channels HDMI/AV, HDMI/VGA/YPbPr/AV,
H.264 Compressed Video over IP Encoder
 DATA SHEET H.264 Compressed Video over IP Encoder NMX-ENC-N3121 (FGN3121-SA), Stand Alone NMX-ENC-N3121-C (FGN3121-CD), Card Overview The N3000 Video over IP Series extends the reach of SVSI's Networked
Cantata m100 Amplifier
 Cantata m100 Amplifier Getting Started Guide www.resolutionaudio.com +1.415.553.4100 Safety Information CAUTION RISK OF ELECTRICAL SHOCK DO NOT OPEN CAUTION: TO REDUCE THE RISK OF ELECTRICAL SHOCK, DO
E92. Hardware User s Manual. 3MP Indoor Mini Dome with Basic WDR, Fixed lens. (PoE) Ver. 2013/02/04
 Ver. 2013/02/04") E92 3MP Indoor Mini Dome with Basic WDR, Fixed lens Hardware User s Manual (PoE) Ver. 2013/02/04 Table of Contents 0. Precautions 3 1. Introduction 4 Package Contents... 4 Features and Benefits... 5 Safety
E92 3MP Indoor Mini Dome with Basic WDR, Fixed lens Hardware User s Manual (PoE) Ver. 2013/02/04 Table of Contents 0. Precautions 3 1. Introduction 4 Package Contents... 4 Features and Benefits... 5 Safety
User Manual. Stoltzen SHSP14 HDMI Splitter 1x4. 4K HDMI Splitter 1x4. All Rights Reserved. Version: SHSP14_2016V2
 User Manual 4K HDMI Splitter 1x4 All Rights Reserved Version: SHSP14_2016V2 SAFETY PRECAUTIONS To insure the best from the product, please read all instructions carefully before using the device. Save
Operating Instructions
 Model No.: VH0101 Operating Instructions Thanks for purchasing our product. Please be sure to read this instruction manual carefully before using our product. Introduction VH0101 is a VGA video converter.
Network Digital Menu Board Hardware User Manual
 Network Digital Menu Board Hardware User Manual Manual Version DMA1 Safety Instructions Please keep the display away from any heat sources. Place the display in a stable and well-ventilated place. Please
Ultra High Brightness Professional Monitor User Manual
 Manual Version UHBA1.0 Safety Instructions Please keep the display away from any heat sources. Place the display in a stable and well-ventilated place. Please handle with care as product contains glass.
Signal-433 Network Encoder User Manual
 Signal-433 Network Encoder User Manual SW Version: 1.0 HW version: 1.0 Web NMS version: 1.0 About This Manual Intended Audience This user manual has been written to help people who have to use, to integrate
HDMI Extender (By single CAT-5E/6E cable)
") HDMI Extender (By single CAT-5E/6E cable) Model No.EX0101-U57/U58 Operating Instructions(P/N of this Instructions is INSEX0101-U57/U58) FEATURES One pair as a full functional module, no need for setting.
HDMI Extender (By single CAT-5E/6E cable) Model No.EX0101-U57/U58 Operating Instructions(P/N of this Instructions is INSEX0101-U57/U58) FEATURES One pair as a full functional module, no need for setting.
Icecrypt HDM100 HDMI to DVB-T Modulator User Manual
 Icecrypt HDM100 HDMI to DVB-T Modulator User Manual Technical Support 08712 003 191 www.icecrypt.com 1 Contents Page 1. Rear Panel 3 2. Installation Guide Diagram 4 3. Front Panel 5 4. Operating Instructions
SDI Digital Video Recorder. Quick Operation Guide
 SDI Digital Video Recorder Quick Operation Guide Thank you for purchasing our product. If there is any question or request, please do not hesitate to contact dealer. This manual is applicable to HDDVRXXXX-SDI
USER MANUAL DUX-MTX-WP 100-METER WALL-PLATE HDBT TRANSMITTER
 USER MANUAL DUX-MTX-WP 100-METER WALL-PLATE HDBT TRANSMITTER TABLE OF CONTENT IMPORTANT SAFETY INSTRUCTIONS...03 INTRODUCTION...04 PACKING LIST...05 SPECIFICATIONS...06 CABLE SPECIFICATIONS...07 PANEL
Videon Product Manual. Shavano Encoder
 Videon Product Manual Shavano Encoder Copyright 2018 Videon Central, Inc. All rights reserved. No part of this publication may be reproduced, distributed, or transmitted in any form or by any means, including
User Manual rev: Made in Taiwan
 SP-5002P3 HDMI 1.4 1x2 HDMI Splitter User Manual rev: 130130 Made in Taiwan The SP-5002P3 HDMI 1.4 1x2 HDMI Splitter has been tested for conformance to safety regulations and requirements, and has been
INT-HD52 Quick Install Guide
 INT-HD52 Quick Install Guide This guide is for quick installation only. For complete owners manual go to www.libav.com or use a QR reader to access the manual via QR code below. Scan QR Code with your
POS Android Digital Advertising Display (Network) Hardware User Manual
 Hardware User Manual") POS Android Digital Advertising Display (Network) Hardware User Manual Manual Version POSW3.0 Safety Instructions Please keep the display away from any heat sources. Place the display in a stable and well-ventilated
POS Android Digital Advertising Display (Network) Hardware User Manual Manual Version POSW3.0 Safety Instructions Please keep the display away from any heat sources. Place the display in a stable and well-ventilated
User Instructions Multi-Channel H.264 HD Multimedia System
 User Instructions Multi-Channel H.264 HD Multimedia System High Definition Video Processor Module DM8107 Rapid Prototyping System Model Name: Z3-MVPR-02 DOC-USR-0006-01 Manual Version 1.0.3 Software Version
User Manual TP412RA-4K. Ultra-thin HDBaseT Receiver. 131ft/40m 4K UHD, support audio de-embedding. All Rights Reserved. Version: TP412RA-4K_2017V1.
 User Manual TP412RA-4K 131ft/40m 4K UHD, support audio de-embedding All Rights Reserved Version: TP412RA-4K_2017V1.0 Statement Read this user manual carefully before using the product. Pictures shown in
OWNER S MANUAL >> BINARY HD MATRIX SWITCHER B-100-HDMATRIX-4X4 / B-100-HDMATRIX-8X8
 OWNER S MANUAL >> BINARY HD MATRIX SWITCHER B-100-HDMATRIX-4X4 / B-100-HDMATRIX-8X8 IMPORTANT SAFETY INSTRUCTIONS WARNING: To reduce the risk of fire or electric shock, do not expose this apparatus in
HKI HKI HKI HKI IPTV Encoders. Operation instructions
 HKI 41-34 HKI 41-35 HKI 81-34 HKI 81-35 IPTV Encoders Operation instructions Operation instructions HKI 41-34 HKI 41-35 HKI 81-34 HKI 81-35 Table of contents 1. Product description... 4 1.1. General...
USER GUIDE STAND-ALONE. 4 channel MPEG-4 Triplex DVR V Stand-Alone DVR User Guide
 USER GUIDE STAND-ALONE 4 channel MPEG-4 Triplex DVR V. 1.4 This document contains preliminary information and subject to change without notice. SAFETY PRECAUTIONS EXPLANATION OF SYMBOLS This symbol is
USER MANUAL. KDS-EN3 HD Video Encoder/Streamer. KDS-DEC3 HD Video Decoder MODELS: P/N: Rev 3
 KRAMER ELECTRONICS LTD. USER MANUAL MODELS: KDS-EN3 HD Video Encoder/Streamer KDS-DEC3 HD Video Decoder P/N: 2900-300375 Rev 3 Contents 1 Introduction 1 2 Getting Started 2 2.1 Achieving the Best Performance
JPEG p Low Latency Video over IP Encoder with KVM, PoE, SFP, HDMI NMX-ENC-N2135 (FGN2135-SA), Stand Alone NMX-ENC-N2135-C (FGN2135-CD), Card
, Stand Alone NMX-ENC-N2135-C (FGN2135-CD), Card") DATA SHEET JPEG 2000 1080p Low Latency Video over IP Encoder with KVM, PoE, SFP, HDMI NMX-ENC-N2135 (FGN2135-SA), Stand Alone NMX-ENC-N2135-C (FGN2135-CD), Card Overview The SVSI JPEG2000 NMX-ENC-N2135
DATA SHEET JPEG 2000 1080p Low Latency Video over IP Encoder with KVM, PoE, SFP, HDMI NMX-ENC-N2135 (FGN2135-SA), Stand Alone NMX-ENC-N2135-C (FGN2135-CD), Card Overview The SVSI JPEG2000 NMX-ENC-N2135
User Manual SP2-4K. 4K HDMI Splitter 1x2. All Rights Reserved. Version: SP2-4K_2016V1.0
 User Manual SP2-4K 4K HDMI Splitter 1x2 All Rights Reserved Version: SP2-4K_2016V1.0 SAFETY PRECAUTIONS To insure the best from the product, please read all instructions carefully before using the device.
H.264 Compressed Video over IP Encoder, PoE, SFP, HDMI, USB for Record
 DATA SHEET H.264 Compressed Video over IP Encoder, PoE, SFP, HDMI, USB for Record NMX-ENC-N3132 (FGN3132-SA), Stand Alone NMX-ENC-N3132-C (FGN3132-CD), Card Overview The N3000 Video over IP Series extends
OWNER S MANUAL CD-2 V 1.3
 OWNER S MANUAL CD-2 V 1.3 2 TABLE OF CONTENTS WARNINGS... 3 ACCESSORIES... 4 REMOTE CONTROL... 5 FRONT PANEL... 6 REAR PANEL... 7 MENU SYSTEM... 8 NOTES OF IMPORTANCE... 10 CONNECTORS... 11 TECHNICAL SPECIFICATIONS...
SMART Hi-Fi AUDIO *MFL * SJ8 SIMPLE MANUAL. Wireless Multi-room Sound Bar
 ENGLISH SIMPLE MANUAL SJ8 SMART Hi-Fi AUDIO Wireless Multi-room Sound Bar Please read this manual carefully before operating your set and retain it for future reference. To view the instructions of advanced
DM-TXRX-100-STR HD Streaming Transmitter/Receiver. Supplemental Guide Crestron Electronics, Inc.
 DM-TXRX-100-STR HD Streaming Transmitter/Receiver Supplemental Guide Crestron Electronics, Inc. The product warranty can be found at www.crestron.com/warranty. The specific patents that cover Crestron
Cisco D9054 HDTV Advanced Compression Encoder
 Cisco D9054 HDTV Advanced Compression Encoder Product Overview The MPEG-4 part 10 (H.264/AVC) D9054 Encoder is the right choice for any operator who wants to compress high-definition video using MPEG-4
NB100 Portable Encoder. User s Manual V2.02-N
 NB100 Portable Encoder User s Manual V2.02-N Preface About This Manual This manual provides introductions to users about how to operate the device correctly. The content includes introduction to product
User Manual SP-5028E. 2x8 HDMI Splitter 7.1 CH AUDIO. rev: Made in Taiwan
 User Manual SP-5028E 2x8 HDMI Splitter To avoid EMI issue, complete STP Cat6 cable is strongly recommended! 7.1 CH AUDIO rev: 110225 Made in Taiwan Safety and Notice The SP-5028E 2x8 HDMI Splitter has
291-MB309-02N6F. PI331 pico
 291-MB309-02N6F PI331 pico ZOTAC ZBOX pico User s Manual No part of this manual, including the products and software described in it, may be reproduced, transmitted, transcribed, stored in a retrieval
User Manual. CV-401 / 801 / U Rackmount PS/2 KVM Switch
 User Manual CV-401 / 801 / 1601 1U Rackmount PS/2 KVM Switch 1. Table Of Content 1. Table of Content P.1 2. Introduction P.2 3. Features P.2 4. Package Content P.3 5. Optional Accessories P.4 6. Peripheral
DIGITAL MODULATOR DMHD01R HD ENCODER DVB-T MODULATOR USER MANUAL
 DIGITAL MODULATOR DMHD01R HD ENCODER DVB-T MODULATOR USER MANUAL Congratulations on your purchase of the DMHD01R This state of the art product is an HD encoder. Audio and video is taken from the HDMI input
IPS11& IPS12_2016V1.1
 User Manual IPS11& IPS12 HDMI Streaming Transmitter& Receiver All Rights Reserved Version: IPS11& IPS12_2016V1.1 HDMI Streaming Transmitter& Receiver Statement Read this user manual carefully before using
HDTV Supply, Inc. Operating Instructions
 HDTV Supply, Inc. Operating Instructions Thanks for purchasing our product. Please be sure to read this instruction manual Carefully before using our product. User Manual Table of Contents Quick Start
Splitter for HDMI 1.3 with Digital Audio
 Splitter for HDMI 1.3 with Digital Audio Audio 3GSDI Embedder EXT-HDMI1.3-142D User Manual Release B4 1:2 Splitter for HDMI 1.3 with Digital Audio Important Safety Instructions 1. Read these instructions.
OWNER S MANUAL SINGLE CAT5E/6 3D EXTENDER B-320-1CAT-HDIR
 OWNER S MANUAL SINGLE CAT5E/6 3D EXTENDER B-320-1CAT-HDIR IMPORTANT SAFETY INSTRUCTIONS WARNING: To reduce the risk of fire or electric shock, do not expose this apparatus to rain or moisture. 1. Read
TX G1
 TX G1 www.zerhex.com Zerhex Broadcaster allows you to stream live audio directly from any analog audio source in real time in the format (MP3, OGG PCM, G.711,G.722) and a bit rate of up to 320kbps. This
MAJORITY TOWERS. DVD Player. Instructions Guide TOW-DVD-BLK
 MAJORITY TOWERS DVD Player TOW-DVD-BLK Instructions Guide Contents Controls And Functions... 1 What s In The Box?... 4 Instructions Guide...5 Getting Started 5 Operations 6 Setup Options 7 General Setup
HDBaseT EXTENDER B-520-TX-230-IR B-520-TX-330-IR INSTALLATION MANUAL
 HDBaseT EXTENDER B-50-TX-30-IR B-50-TX-330-IR INSTALLATI MANUAL IMPORTANT SAFETY INSTRUCTIS To reduce the risk of fire or electric shock, read and follow all instructions and warnings in this manual. Keep