6 in 1 Universal Remote with LCD KAUNIRMLCDA. User Manual
|
|
|
- Monica Wilkins
- 6 years ago
- Views:
Transcription

1 6 in 1 Universal Remote with LCD KAUNIRMLCDA User Manual Table of Contents Keys and corresponding functions...2 Usage Notes...3 Battery Installation...3 Operational Interfaces...3 Sub-menus...4 Remote Control Settings...4 Method A: code entry...4 Method B: manual code search...5 Method C: Automated Search...6 Learning Function...7 Cancelling the learning function...8 Other Functions...9 Time/Clock Function and Factory Settings...9 Set/Cancel Alarm Clock Function...9 Key Sounds ON/OFF...10 Sound Sharing Function...10 Macro Instructions...11 Macro Settings...12 Start/Cancel Macro Instruction Settings...13 Set/Cancel Key Transfer...14 Low Power Reminder...16 Kogan TV Linking Codes
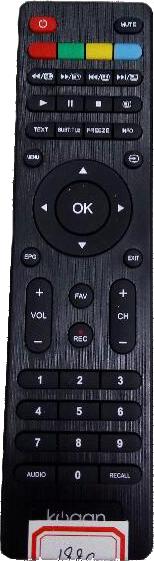
2 Thank you for purchasing our universal remote. This manual will explain how to set up and use your remote control. Please keep a copy of this manual handy for future reference. This remote control features an LCD screen, learning functionality plus a powerful builtin code base. Through simple settings, it can control many infra-red controlled household appliances such as televisions, DVD players, blu-ray players, satellite/cable/pvr boxes, air conditioners etc.. Keys and corresponding functions 2


3 Usage Notes When using the record button in a VCR or DVD player, the record button will need to be pressed and held for approximately 2 seconds. Once you turn on the learning function on the remote control, the built-in clock will stop working. You will have to reset the clock after each time you use the learn function. For this reason, we recommend you teach the remote controller signals for as many devices as you can at one time. When you are connected to an A/C, the keys can be used for learning. For all other appliances, all of the function keys are usable. In regards to the Learn code and the Key Transfer code, be sure to put the key in the same storage area when using the one home appliance, so that the codes will cover each other. When using a single home appliance, the same key cannot store both the Learn code and the Key Transfer code concurrently. While using the menu, if you do not press any keys within 2~3 minutes, the system will back out from the menu. If you do not press any keys within 5~6 minutes, the LCD screen will power off. Battery Installation Open the battery compartment cover as shown below, then install 3 new AAA batteries, making sure the + and polarities match the markings inside the compartment. Precautions: Do not use old and new batteries, or different brand batteries at the same time. 2. In the event of any liquid leaking from a battery, be sure to remove the battery and to clean the battery compartment before replacing with a new battery. 3. Be sure to remove the batteries from the remote if you will not be using the remote controller for a long period of time. Operational Interfaces There are six different interfaces for this remote controller, each suited to different household equipment: TV, VCR, SAT, DVD, CD and A/C (air conditioner). It is possible to simply press the equipment key to select. 3
. You can select whichever method suits you best.")


4 Sub-menus Press the 'SET' key for about 5 seconds to enter the sub-menu settings. There are 10 sub-menus in total, and you can press to shift between them. Remote Control Settings The remote controller can be set by three different methods (A, B or C). You can select whichever method suits you best. Code Ranges TV: VCR: SAT: DVD: CD: A/C: Method A: code entry Find the brand of your home appliance on the code list. Set for this brand from the first code, until you can then locate the code for the specific home appliance from there. If by setting the codes via this method you are not able to use the remote control as expected (or if the brand of the home appliance is not in the list), then go on to use Method B or Method C. Manually turn the appliance you want to use on. Then locate the first code for your home appliance from the code list. For this example, if the DVD player is SONY branded, then the first code will be

5 2. Press the DVD key to switch to DVD interface. 3. Hold the SET button for 5 seconds to enter the submenu CODE state. 4. Press OK to enter the setup menu. 5. Enter the four figure code The remote will return to the CODE sub-menu when the input is correct, and a tone will be heard. Press EXIT to exit and save your settings. Check that all of the keys as expected (with the exception of the equipment key and the SET key) are all valid and operating. If so, then the settings are complete. If not, repeat steps 4-5. (A quickly repeating beep-beepbeep tone will sound if the code input is wrong. If this occurs, enter it again.) Method B: manual code search Manually turn the appliance you want to use on. Aim the remote control at the appliance that has been turned on. For this example, we will connect the remote to a TV. 2. Press the TV key once to switch to the TV interface. 3. Hold the SET key for 5 seconds to enter the sub-menu CODE. Then press the key to show SEARCH, then press the OK key. MANUAL will flash. 4. Press the OK key once and CODE will flash. 5
 showing Turned On, all other home appliances will show VOLUME. Therefore, when doing settings make sure you turn the A/C on, leaving it in standby.")

6 5. Aim the remote control at the TV, then click the key until the screen shows VOLUME. Press OK to return to the MANUAL state. Note: except for A/C (air-conditioner) showing Turned On, all other home appliances will show VOLUME. Therefore, when doing settings make sure you turn the A/C on, leaving it in standby. Other appliances can remain on their normal operative states. 6. Check whether other keys are valid (, EXIT, SET, equipment Key and the confirm key excepted). If yes, press EXIT once to return to the SEARCH menu, then press EXIT to exit. Settings are complete. If not, then please repeat steps 4-6. Method C: Automated Search Manually turn the appliance you want to use on. Aim the remote control at the appliance that has been turned on. For this example, we will connect the remote to a TV. 2. Press the TV key to switch to the TV interface. 3. Hold down the SET key for 5 seconds to enter the CODE sub-menu, then press to set the menu screen to SEARCH, then press OK. At this point MANUAL will flash. 4. Press once and the screen will show AUTO. 6

7 5. Press OK and the system will enter the Automatic Search mode. Press to move to the previous code. Press to move to the next code. 6. When the home appliance that you want the remote control to connect to turns off, press the OK button to save the code to the particular appliance. (Note: TV's and Satellite boxes will turn off. Air-conditioners will turn on. VCR, DVD and CD players will play.) 7. Check to see that the other buttons are valid (, EXIT, SET, equipment key and OK button will not function). If the remote appears to be usable, press EXIT to return to the SEARCH mode, then press EXIT again to exit. The settings should now be complete. Learning Function This remote control is able to learn the functions of other household appliances that are controlled via infrared interfaces. When an interface is being set, all keys on the remote control (with the exception of the equipment keys and SET) will have learning function abilities. Aim the appliances remote controller towards the signal window of the learning remote at a distance of approximately 3 ~ 5cm. 2. Hold the SET key for about 5 seconds, then enter the sub-menu CODE, then press the key to set the menu to LEARN. 7
8 3. Press OK, and will blink. will blink. Press OK again to enter learning mode, and 4. Press the equipment key to switch to the appliance mode of the household appliance to be learnt. (For example, if you are learning from your TV remote, press the TV key). 5. Press and hold a certain function on the target remote controller to send out it's code until the icon stops flashing, then release the key. This means the code from the original remote has been learned. 6. Press the corresponding key to be learned on the learning remote, at which point will blink again. Now, other keys from the remote controller can be learned. Learn each key as required until all keys have been learned. Press the SET key once to exit from learning mode. Press the EXIT key to return to the TV interface. Cancelling the learning function Press SET to shift to the TV interface hold the SET key for about 5 seconds to go into Settings mode press the key to go to LEARN mode press the OK button press to shift to the mode. Press OK to go into mode press the key for the function that has been learned, at which point the in will blink once, meaning the key has been cancelled. Repeat these steps to cancel all information you want removed press SET to withdraw and return to the LEARN mode, then press EXIT to return to the TV interface. 8


9 Other Functions Time/Clock Function and Factory Settings On the TV, VCR, DVD, CD, SAT and A/C pages, you can do the following: Press and hold the SET key for 5 seconds to enter settings. 2. Press on the menu, then select CLOCK on the LCD. 2. Press on the menu, then select RESET on the LCD. 3. Press OK once, then press the time on the clock. 3. Press OK and you will hear a beep. The remote controller will regain factory settings. Press EXIT to go back and return to the menu. to set 4. Press on the menu to set the hour and minute. 5. Press OK once to complete the settings. 6. Press EXIT to return to normal mode. Set/Cancel Alarm Clock Function Press Press Press Press Press SET for 5 seconds to enter SETTINGS mode. on the menu to select ALARM mode. OK once, then press to set the alarm clock. on the menu to set the hour and minute. OK, then press once. 6. TURN ALARM ON: press OK once to turn the alarm on, then press EXIT. The screen will display. 6. TURN ALARM OFF: press OK to cancel the alarm, then press EXIT. The screen will no longer display. 9
10 Key Sounds ON/OFF Hold the SET key for 5 seconds to enter SETTINGS mode. 2. Press to select SOUND. 3. Press OK, then press. 4. SOUND ON: press OK once to turn sound on, then press EXIT. 4. SOUND OFF: press OK once to turn sound off, then press EXIT. Sound Sharing Function After setting this function, you can take control of the sound volume on four different home appliances (VCR, SAT, DVD and CD) by using the volume keys on the TV. Note: This function has no effect on air-conditioners. This example is using the DVD player. Press the DVD button to switch to the DVD interface. 2. Hold the SET button for 5 seconds to go into settings mode. 3. Press on the menu or select the mode on the LCD. 4. Press the OK button once, then press the 5. Press OK to turn Sound Sharing on, then press EXIT to return to the previous menu. button on the menu. 5. Press OK to turn Sound Sharing off, then press EXIT to return to the previous menu. Note: after turning on the sound sharing function, the sound keys on the Settings interface (VOL+, VOL- and mute) can all be controlled by the volume keys. When you replace the batteries, you will need to redo the settings. 10
11 Macro Instructions This remote controller has four multi-function keys: M1, M2, M3 and M4. Each multifunction key can store 15 key codes. This function allows you to integrate many continuous or routine key control motions into one. After finishing the settings, if you press your pre-set multi-function key, this remote controller will emit your pre-set control codes in their set order. Notes The macro instruction keys are not affiliated with any particular home appliances. Therefore, when you press the macro instruction keys, no matter which interface the remote is running under, the same instruction codes will be sent out. When a macro is triggered, the top right corner of the LCD screen will display M. If the timing function for the macro instruction has been turned on, the screen will display TM. To view which macro instructions have been equipped with timing functions, you can enter the Mx ADD menu. If any of the macros have timing functions, the screen will display ON next to it. When adding a macro instruction, the added instruction is displayed under the current code of the current home appliance. Once successfully added however, the current home appliance will have no bearing on the instructions being sent. 11
12 Macro Settings Example 1: Operating steps: switch on the power to the TV set shift between TV/VCR switch on the power to the VCR start playing, using multi-function button M1 to take control. Press the TV button once to switch to the TV interface. 2. Press the SET button for 5 seconds to enter the sub-menu, then press to set the menu to MACRO, then press OK. 3. Press the or button. 4. Press OK again. The LCD will display [M1 00]. (If the display does not show M1:00, press the equipment button to adjust) 5. Press ON/OFF until the LCD displays [M1 25], then release the button. The LCD will now display [M1 01]. 6. Press the TV/AV button until the LCD displays [M1 25], then release the button. The LCD will now display [M1 02]. 7. Press SET once, and the LCD will display [M1 TM]. 8. Press EXIT twice to return to the TV interface. Press VCR once to go into the VCR interface. 9. Press SET for 5 seconds to go into settings mode. 10. Press to set the menu to MACRO. 1 Press OK, then press and the LCD will display [M1 ADD]. 12. Press OK again, and the LCD will display [M1 02]. 13. Press ON/OFF until the LCD displays [M1 25], then release the button. The LCD will display [M1 03]. 14. Press until the LCD displays [M1 25], then release the button. The LCD will display [M1 04]. 15. Press SET once. The LCD will display [M1 TM]. 16. Press EXIT twice, returning you to the VCR interface. You can now use the M1 multi-function button to switch on the TV, shift from TV to VCR, switch on the VCR and start playing whatever is in it. 12
13 Start/Cancel Macro Instruction Settings Press the SET button for 5 seconds to go into settings mode. 2. Press on the menu to select the MACRO mode. 3. Press OK, then press. START MACRO INSTRUCTION CANCEL MACRO INSTRUCTION 4. Press OK to start the multifunction button function. At this time, only the M1, M2, M3 and M4 buttons will serve as multifunction buttons. The home appliance specific buttons will be non-functional. 4. Press OK to cancel the multifunction button function. At this time, the M1, M2, M3 and M4 buttons will not function as multi-function buttons. The home appliance specific buttons will be functional. 5. Press EXIT to store settings and withdraw from the settings state. The LCD will display M which means the multi-function button settings have started. 5. Press EXIT to store settings and withdraw from the settings state. The M on the LCD will disappear, meaning the multi-function button settings have been cancelled. Example 2: Automatically turn the TV on and play the show on Channel 10 at 7:30pm. Press the TV button once to switch to the TV interface. 2. Press the SET button for 5 seconds to enter the sub-menu state, then press or to set the menu to MACRO, then press the OK button. 3. Click the button on the menu. 13
14 4. Press the OK button again, and the LCD will display [M1 00]. (If the display is not showing M1-00, press the equipment key to adjust). 5. Press the ON/OFF button until the LCD displays [M1 25], then release the button. The LCD will display [M1 01]. 6. Press the button until the LCD displays [M1 25], then release the button. The LCD will display [M1 02]. 7. Press the 1 button until the LCD displays [M1 25], then release the button. The LCD will display [M1 03]. 8. Press the 0 button until the LCD displays [M1 25], then release the button. The LCD will display [M1 04]. 9. Press the SET button until the LCD displays [M1 TM]. 10. Press 1 Press on the menu to set the time clock: on the menu to set the hour and minute: 12. Press OK to complete the settings. 13. Press the EXIT button to return to the TV page. 14. Aim the transmitting end of the remote controller at the TV. When the remote controller clock reaches 19:30, the remote controller will turn the TV on and play the program on Channel 10. Set/Cancel Key Transfer Transferring the function button of a home appliance to the function button of another appliance. Notes: The button transfer code and learning code are both X999. After starting the button transfer function, you may have to set a code before using the button transfer function. The TV code is pre-set to be 0999, the VCR code is pre-set to be 1999, the SAT code is pre-set to be 2999, the DVD code is pre-set to be 3999 and the CD code is pre-set to be When doing the button transfer, be sure to use a code that is NOT X When doing the button transfer, the user will be reminded to choose a home appliance. Remember that the code to be transferred will be the currently set code for the home appliance in question. If the current code is X999, then you cannot perform the button transfer. 4. No button transfer functionality is available for the air-conditioner. 14
15 Example: Transferring the information from the 6 button of the SAT to the 7 button of the VCR, then cancelling the transfer. Press VCR once to switch to the VCR interface. 2. Press the SET button for 5 seconds to enter the CODE sub-menu, then press the OK button. 3. Enter a four digit code If the code entered is correct, you will hear a beep sound and the system will return to the CODE sub-menu. 4. Press on the menu to select the KEYMOV mode. 5. Press OK, then press the button. SET BUTTON TRANSFER CANCEL BUTTON TRANSFER 6. Press the OK button once and the LCD screen will display: 6. Press the OK button once and the LCD screen will display 7. Press the button whose information was transferred. The LCD will display: 7. Press the button on the menu, and the LCD will display SAT. Repeat this step to cancel the transferred button information. 8. Press the OK button. The LCD will display FR KEY. Press the function button 6 and the LCD will display TO KEY, then press the function button 7. Repeat this step to transfer the target button. 8. Press the SET button and the LCD will display KEYMOV. 9. Press the SET button. The LCD will display KEYMOV. Then press EXIT to return to the VCR page. 9. Press the EXIT button to return to the normal operational state. 15


16 Low Power Reminder When the battery is running low on power, the screen will show a icon, notifying you that the battery power is low and you should consider changing it over for a fresh battery when you next have the opportunity. Kogan TV Linking Codes If you are using this remote to link to your Kogan.com TV, please compare the remote control to the table below and overleaf to find the correct remote. The code is shown below the remote control image


17 If you have any further questions or concerns regarding the use of this product, please contact the Kogan.com customer support team. 17
Integrated Remote Commander
 3-267-590-11(1) Integrated Remote Commander Operating Instructions RM-AV2500 2004 Sony Corporation WARNING To prevent fire or shock hazard, do not expose the unit to rain or moisture. To avoid electrical
Integrated Remote Commander
 3-048-656-12 (1) Integrated Remote Commander Operating Instructions RM-VL900 2000 Sony Corporation For the customers in the U.S.A. WARNING This equipment has been tested and found to comply with the limits
Integrated Remote Commander
 3-048-646-14(1) Integrated Remote Commander Operating Instructions RM-AV2100/AV2100B 2000 Sony Corporation WARNING To prevent fire or shock hazard, do not expose the unit to rain or moisture. To avoid
Intuitive Remote. Installing the Batteries. The Intuitive remote requires two new AA alkaline batteries.
 Intuitive Remote The Intuitive remote is designed to operate all of the features of your advanced analog or digital cable box: your TV's power, volume control, and mute, and your VCR's power and playback
equipment, etc.) by the learning process or selecting them on a code list. EGi DOMOS2 Universal
 by the learning process or selecting them on a code list. EGi DOMOS2 Universal") User s Manual English 005180 Avda. Almozara, 79 50003 ZARAGOZA - Spain Phone +34 976 40 53 56 Fax +34 976 40 53 54 http//: e-mail: info@egiaudio.com 40100 Remote control Thank you for choosing the EGi
User s Manual English 005180 Avda. Almozara, 79 50003 ZARAGOZA - Spain Phone +34 976 40 53 56 Fax +34 976 40 53 54 http//: e-mail: info@egiaudio.com 40100 Remote control Thank you for choosing the EGi
Using the universal RCU650 remote control
 Using the universal RCU650 remote control RCU650 is 5 in 1 universal remote control is suitable for TV sets, A/V receivers, tuners, BD/DVD players, CD players, DVR players, various STBs (satellite, cable,
Univ-FB_MD80383_AUS.fm Seite 2 Dienstag, 24. Januar : Overview Safety instructions Scope of application...
 Univ-FB_MD80383_AUS.fm Seite 2 Dienstag, 24. Januar 2006 8:57 08 Contents Overview....................................... 4 Safety instructions............................... 7 Scope of application..............................
Flymote C2. Introduction. IR Learning, Air Mouse, QWERTY Keyboard Combo. User Manual
 IR Learning, Air Mouse, QWERTY Keyboard Combo Flymote C2 User Manual Introduction The Flymote is a combo multimedia remote controller. It integrates the key functions of a keyboard, Mouse Function and
Integrated Remote Commander
 4-117-851-11 (1) Integrated Remote Commander Operating Instructions RM-VL610 2008 Sony Corporation For the customers in the U.S.A. WARNING This equipment has been tested and found to comply with the limits
RC UNIVERS47 MANUAL. all languages. 16 in 1 LCD touch screen remote control.
 RC UNIVERS47 16 in 1 LCD touch screen remote control MANUAL all languages www.hqproducts.com The RC UNIVERS47 digital touch screen universal remote controls can work almost all brands of Televisions (TV),
ProntoPro Intelligent Remote Control. User Guide
 ProntoPro Intelligent Remote Control User Guide Table of Content Taking a First Look... 3 Intelligent Remote Control... 3 Before You Start... 5 Getting Started... 7 Activating the Remote Control... 7 Defining
Table of Contents. Taking a First Look 2 Intelligent Remote Control 2 Before You Start 4
 Table of Contents Taking a First Look 2 Intelligent Remote Control 2 Before You Start 4 Getting Started 6 Activating the Remote Control 6 Defining the Brands of Your Devices 7 Working with the Home Panel
Contents. Helpline No. UK/ North Ireland Rep. Ireland Web Support Model Number: 83388
 Contents Safety instructions... 3 General information... 3 Battery instructions... 3 Cleaning... 3 Product Description... 4 Operation... 4 Inserting batteries... 4 Settings after battery replacement...
Universal Krell Touch Screen Remote
 THE LEADER IN AUDIO ENGINEERING Universal Krell Touch Screen Remote QUICK START GUIDE Getting Started Unpacking THERE ARE NO USER- SERVICEABLE PARTS INSIDE ANY KRELL PRODUCT. Notes Placement IMPORTANT
BB40 Owner s Manual Downloaded from manuals search engine
 BB40 Owner s Manual Table of Contents Introduction Introduction...2 Button Functions...4 Setup...6 Battery Installation...6 Battery Saver...6 Code Saver...6 Power-On default...6 Code Entry...7 Direct Code
What s So Great About RF Technology?
 RCU1010RF_US_QS_revA 9/12/03 16:01 Page 1 Congratulations on your purchase of the RCU1010RF Universal Learning Remote with Touchscreen and Built-in Transmitter with additional Remote Sender Cone. Your
Using the remote controller
 Using the remote controller Overview When you use a remote controller, typically you press one of the MODE that corresponds to the device you wish to control, then press the operation. For example, if
Integrated Remote Commander
 Integrated Remote Commander Operating Instructions Getting Started Operating Hardware Settings Setting by On-Remote Setup Additional Information Appendix RM-AX5000 2008 Sony Corporation WARNING To reduce
Learning System Remote Handset
 Learning System Remote Handset TABLE OF CONTENT 1. Quick Launch Page 1 2. Before you start Page 2 3. Connecting to a PC for the first time Page 3-5 4. Registering the RMX111 for the first time Page 3-5
6-Device. User Guide BWB17AV002. v1.6 (2017)
") 6-Device BWB17AV002 User Guide v1.6 (2017) TABLE OF CONTENTS GETTING STARTED (BATTERIES) 02 GETTING STARTED (BUTTONS) 03 PROGRAMMING YOUR REMOTE (DIRECT CODE ENTRY) 05 PROGRAMMING YOUR REMOTE (AUTO CODE
6-Device BWB17AV002 User Guide v1.6 (2017) TABLE OF CONTENTS GETTING STARTED (BATTERIES) 02 GETTING STARTED (BUTTONS) 03 PROGRAMMING YOUR REMOTE (DIRECT CODE ENTRY) 05 PROGRAMMING YOUR REMOTE (AUTO CODE
FUNCTIONS 2 GENERAL INFORMATION 3 BATTERIES 3 SETTING UP BY CODE ENTRY 4 SETTING UP BY MANUAL SEARCH 5 SETTING UP BY AUTOSEARCH 6
 CONTENTS FUNCTIONS 2 GENERAL INFORMATION 3 BATTERIES 3 SETTING UP BY CODE ENTRY 4 SETTING UP BY MANUAL SEARCH 5 SETTING UP BY AUTOSEARCH 6 CODE SEARCHING BY BRAND NAME 7 CODE IDENTIFICATION 7 ALL OFF-FUNCTION
Manual URC 4689 UK Apr05.fm Seite 1 Montag, 11. April :00 12
 Manual URC 4689 UK Apr05.fm Seite 1 Montag, 11. April 2005 12:00 12 Table of Contents Safety Instructions............................................... 1 Scope of application..............................................
Operating Your System
 Operating Your System With the MX-810 COMPLETE CONTROL Universal Remote Control This remote control was Custom Programmed for you by: For questions about your Custom Programming call: Custom Programming
GUIDE TO SIMPLE HOME THEATER OPERATION WITH YOUR B & K SR10.1 SYSTEM REMOTE
 GUIDE TO SIMPLE HOME THEATER OPERATION WITH YOUR B & K SR10.1 SYSTEM REMOTE Thank you for purchasing the B & K SR 10.1 System Remote Control! Please use this manual as a guide to operating your home theater
Integrated Remote Commander
 -8-97- () Integrated Remote Commander Operating Instructions RM-VL600T 007 Sony Corporation Disposal of Old Electrical & Electronic Equipment (Applicable in the European Union and other European countries
Table of Contents. Introduction 2 1. Intelligent Remote Control 2 2. Charging the Remote Control 3
 Table of Contents Introduction 2 1. Intelligent Remote Control 2 2. Charging the Remote Control 3 Getting Started 6 1. Activating the Remote Control 6 2. Selecting a Device 7 3. Operating a Device 8 4.
Aton C6. Bedienungsanleitung. User Manual Mode d emploi Istruzioni per l uso
 Aton C6 Bedienungsanleitung User Manual Mode d emploi Istruzioni per l uso CONTENT Getting started.....................................................................3 Safety Precautions................................................................3
Remote button description. Before you use your remote 48 US. Operations Using the Remote RM-PG411 and RM-PP411. Inserting batteries into the remote
 You can use the remote RM-PG411 (STR- DE985 only) or RM-PP411 (STR-DE885 only) to operate the components in your system. Before you use your remote Remote button description RM-PG411 TV?/1 AV?/1 USE MODE
I N S T A L L A T I O N & O P E R A T I O N G U I D E HAND-HELD LEARNING REMOTE CONTROL R-6L R-8L
 I N S T A L L A T I O N & O P E R A T I O N G U I D E HAND-HELD LEARNING REMOTE CONTROL R-6L R-8L CONGRATULATIONS! Thank you for purchasing the Niles R-6L or R-8L Hand-Held Learning Remote Control. With
8 REMOTE CONTROL UNIT
 8 REMOTE CONTROL UNIT The included remote control unit (RC-97) can be used to operate not only the AVR-80 but other remote control compatible DENON components as well. In addition, the memory contains
RM Universal Remote Instruction Manual
 RM24977 Universal Remote Instruction Manual Table of Contents Setup... 3 Battery Installation... 3 Battery Saver... 3 Code Saver... 3 Code Setup... 3 Button Functions... 4 DVD Functions... 6 SAT Functions...
Universal Remote Instruction Manual DVD SAT
 24922 Universal Remote Instruction Manual DVD SAT TV AUX INPUT ENTER Table of Contents Setup... 3 Battery Installation... 3 Battery Saver... 3 Code Saver... 3 Code Setup... 3 Button Functions... 4 DVD
DIGITAL ENHANCED CORDLESS TELEPHONE with Caller ID Function CL-3350 INF USER' S MANUAL
 DIGITAL ENHANCED CORDLESS TELEPHONE with Caller ID Function CL-3350 INF USER' S MANUAL Congratulations on purchasing our high quality product. Please read the manual carefully to find out all features
OFA SKY Q REPLACEMENT REMOTE
 OFA SKY Q REPLACEMENT REMOTE UNIVERSAL REPLACEMENT REMOTE URC 1635 SIMPLE SET UP GUIDE WELCOME... 2 INSERT BATTERIES...2 KEY TABLE...3 LED COLOUR...4 HOW TO SET UP YOUR REMOTE...4 A - SIMPLESET...5 B -
Chapter 3. Using the System CHANGING CHANNELS USING THE MENUS OPENING THE MENUS CLOSING THE MENUS MENU OPTIONS
 CHANGING CHANNELS There are three basic ways to change channels while watching a program: Press the remote control UP or DOWN ARROW button to get to the desired channel. Use the remote control number pad
Unpacking... 3 Getting Started... 3 Tour of the Remote... 4 Hard keys...4 Interactive LCD screen...5
 UNO Owners Manual Contents Unpacking... 3 Getting Started... 3 Tour of the Remote... 4 Hard keys...4 Interactive LCD screen...5 Home Screen... 6 Devices... 6 What is Quick Power?...6 Activities... 7 Setting
Universal Remote Instruction Manual
 RM24965 Universal Remote Instruction Manual TV DVD AUX VCR SAT CBL OK MENU EXIT LAST SLEEP ENTER SCAN- INFO GUIDE TITLE 2 3 4 5 6 7 8 9 0 PLAY TV/VCR INPUT SCAN+ RECORD STOP PAUSE Table of Contents Setup...
DVR 508NHD Digital Camcorder
 DVR 508NHD Digital Camcorder User Manual 2009-2012 Sakar International, Inc. All rights reserved. Windows and the Windows logo are registered trademarks of Microsoft Corporation. All other trademarks are
Remote button description. Before you use your remote 38 GB. Operations Using the Remote RM-PP506. Inserting batteries into the remote
 For STR-DE585 area code CA only You can use the remote RM-PP506 to operate the components in your system. Before you use your remote Inserting batteries into the remote Insert R6 (size-aa) batteries with
Always there to help you. Register your product and get support at SRP5016. Question? Contact Philips.
 Always there to help you Register your product and get support at www.philips.com/support Question? Contact Philips SRP5016 User manual Contents 1 Your universal remote 2 Introduction 2 Overview of the
II. Features. A. Battery Door B. Battery Lock C. Chain Slot D. Sounder E. LCD display screen F. Read Key G. Right Key H. Left Key I.
 Contents I. Pager Layout...1 II. Features... 2 III. Guide to Operation...5 1. Power On/Off...5 1.1 Power On...5 1.2 Power Off...5 2. Private Messages......6 2.1 Read Private Messages...6 2.2 Protect Private
 Programming the Polaroid Universal Remote Control Following are two sets of instructions for programming your Polaroid Universal Remote Control to work with other devices in addition to your Polaroid TV.
DVR 548HD Digital Video Recorder
 DVR 548HD Digital Video Recorder User Manual 2009-2011 Sakar International, Inc. All rights reserved. Windows and the Windows logo are registered trademarks of Microsoft Corporation. All other trademarks
Indoor Air Quality Meter/Datalogger
 User Manual Indoor Air Quality Meter/Datalogger Model EA80 CC Additional User Manual Translations available at www.extech.com Introduction Congratulations on your purchase of the Extech EA80 Indoor Air
Universal Remote Control Owner s Manual. Manual del Propietario (parte posterior) Component keys (TV, SAT CBL, DVD VCR, DVR AUX)
 Component keys (TV, SAT CBL, DVD VCR, DVR AUX)") RCR4258 / RCR4358 Universal Remote Control Owner s Manual Manual del Propietario (parte posterior) Transport keys for DVD/DVR control INFO key displays information for the component you re controlling
RCR4258 / RCR4358 Universal Remote Control Owner s Manual Manual del Propietario (parte posterior) Transport keys for DVD/DVR control INFO key displays information for the component you re controlling
RM Universal Remote Instruction Manual
 RM24930 Universal Remote Instruction Manual Table of Contents Setup Introduction... 3 Setup... 3 Battery Installation... 3 Battery Saver... 3 Code Saver... 3 Code Setup... 3 Button Functions... 4 Menu
UNIVERSAL REMOTE CONTROL
 3BC UNIVERSAL REMOTE CONTROL KH2150 UNIVERSAL REMOTE CONTROL Operating instructions KOMPERNASS GMBH BURGSTRASSE 21 D-44867 BOCHUM www.kompernass.com ID-Nr.: KH2150-07/08-V1 KH 2150 1 2 3 4 19 5 6 7 18
Using remote controller
 Using remote controller Overview The remote controller is a useful tool to help you operate the components of your home theater. To do so, first press the Mode button that corresponds to the device you
Alphanumeric Pager User Manual
 Alphanumeric Pager User Manual CONTENTS 1 Key Definition 2 Description of the Functions 3 Notes of the Icons 4 Pager On 5 Function Setting 6 Setting Alert 7 Turn Off The Pager 8 Setting Time 9 Setting
Pronto. User Guide. User Guide
 Pronto EN 1 Pronto Copyright 2005 Royal Philips Electronics, Interleuvenlaan 72-74, 3000 Leuven (Belgium) Remark: All rights are reserved. Reproduction in whole or in part is prohibited without prior consent
DVR 505 Digital Camcorder
 DVR 505 Digital Camcorder User Manual 2016 Sakar International, Inc. All rights reserved. Windows and the Windows logo are registered trademarks of Microsoft Corporation. All other trademarks are the property
RCR311W. Universal Remote Control Owner s Manual. Three-Component Universal Remote. Manual del Propietario (parte posterior)
") RCR311W Universal Remote Control Owner s Manual Manual del Propietario (parte posterior) Illuminated on/off key Serves as an indicator light to provide feedback. Component keys. (tv, vcr DVD, SAT CBL)
RCR311W Universal Remote Control Owner s Manual Manual del Propietario (parte posterior) Illuminated on/off key Serves as an indicator light to provide feedback. Component keys. (tv, vcr DVD, SAT CBL)
S! Appli Using S! Applications Additional Functions Troubleshooting S! Applications 11-1
 S! Appli... -2 Using...-2 Additional Functions... -3 Troubleshooting... -5-1 S! Appli Using Try out the preloaded or download and use 931SH-compatible, including games. Refer to the 's help menu or the
invoca Deluxe The world's Most Advanced Remote Control Tell Your TV What To Do Without Lifting a Finger!
 invoca Deluxe The world's Most Advanced Remote Control Macros Explained One of the powerful features of invoca is its ability to utilize "macros." A macro is simply a sequence of commands triggered by
USER GUIDE. 3 Channel DC Current Datalogger Model SD900
 USER GUIDE 3 Channel DC Current Datalogger Model SD900 Table of Contents 1. INTRODUCTION 3 2. DESCRIPTIONS 4 3. OPERATION 5 Power 5 Connecting Current Cables 5 Datalogging 5 Time/Date/Sample Rate Check
(1) Remote Commander. Operating Instructions RM-TP by Sony Corporation
 Remote Commander. Operating Instructions RM-TP by Sony Corporation") 3-864-784-11(1) Remote Commander Operating Instructions RM-TP501 1998 by Sony Corporation Precautions About This Manual CAUTION (Lithium battery) Danger of explosion if battery is incorrectly replaced.
3-864-784-11(1) Remote Commander Operating Instructions RM-TP501 1998 by Sony Corporation Precautions About This Manual CAUTION (Lithium battery) Danger of explosion if battery is incorrectly replaced.
Quick Start. What s in the Box. a - AirBand wireless Bluetooth stereo headset b - USB charging cable c - AC power adapter
 INSTRUCTION MANUAL Thank you for purchasing the GOgroove AirBand wireless Bluetooth stereo headset. The wireless Bluetooth capability enables you to listen to music anytime without getting tangled up in
Universal learning remote
 GUIDE Universal learning remote with LCD touchscreen and integrated atomic clock LIGHT ON/OFF SETUP/SHIFT VOL + MUTE CH - BACK INFO OK MENU CLEAR Model ARR1540 User s Guide Table of Contents Chapter 1:
User Guide. Indoor Air Quality Meter/Datalogger. Model EA80
 User Guide Indoor Air Quality Meter/Datalogger Model EA80 Introduction Congratulations on your purchase of the Extech EA80 Indoor Air Quality Meter. This meter measures Carbon Dioxide (CO 2, ppm) levels,
Jumbo Universal Remote Control #1526 USER S GUIDE
 Jumbo Universal Remote Control #1526 USER S GUIDE This universal remote allows user to easily see and push buttons to control TV, VCR, DVD, PVR, CABLE and SATELLITE RECEIVERS. It also will control the
NOTE CONTENTS NOTE-CONTENTS
 NOTE 1.The outline figure on cover is for reference only, which may differ from what you purchased. 2. Make sure to read chapter PRECAUTIONS before you operate the air conditioner. 3. This manual is available
Operating Your System
 Operating Your System With The Genesis MX-900 COMPLETE CONTROL Universal Remote Control This remote control was Custom Programmed for you by: For questions about your Custom Programming call: Custom Programming
Congratulations on your Pronto purchase! We hope you ll love it as much as we do.
 User Guide Congratulations on your Pronto purchase! We hope you ll love it as much as we do. 1. PRONTO AND PEEL AT A GLANCE... 4 2. GET STARTED WITH YOUR SMARTPHONE/ TABLET... 6 3. GET STARTED WITH APPLE
INTRODUCTION SAFETY INSTRUCTION FEATURES
 INTRODUCTION Thank you for your purchasing our newest Caller ID phone with phonebook function. This manual is designed to familiarize you with this phone. To get the maximum use from your new phone, we
Home Theater Master LCD Screen Preprogrammed and Learning Remote Control. MX-500ª Operating Manual
 R Home Theater Master LCD Screen Preprogrammed and Learning Remote Control MX-00ª Operating Manual Table of Contents Table of Contents 1. Introduction 2. Batteries A. Battery Installation B. Battery Life.
28056 Digital Camera
 28056 Digital Camera User Manual HASBRO and its logo and NERF are trademarks of Hasbro and are used with permission. 2012 Hasbro. All rights reserved. Windows and the Windows logo are registered trademarks
RCR461 Universal Remote Control Owner s Manual
 RCR461 Universal Remote Control Owner s Manual Manual del Propietario (parte posterior) 4-Component Universal Remote Congratulations on your purchase of this four-component universal remote. This universal
2017 All Rights Reserved. Windows and the Windows logo are registered trademarks of Microsoft Corporation. All other trademarks are the property of
 2017 All Rights Reserved. Windows and the Windows logo are registered trademarks of Microsoft Corporation. All other trademarks are the property of their respective companies. 1 2 Thank you for purchasing
A quick look at the BoB2 TM handset. Table of Contents. BoB2 TM Handset Display screen. Getting Started...2
 Handset Manual Table of Contents A quick look at the BoB2 TM handset BoB2 TM Handset... 1 Getting Started...2 1. Display screen 2. Display keys Setting Up Your Handset... 3 3. End call key, On/Off key
Integrated Remote Commander RM-AX4000. Operating Instructions. Getting Started. Operating the Remote Commander. Unit Settings
 Operating Instructions Getting Started Operating the Remote Commander Unit Settings Setting by On-Remote Setup Additional Information Appendix RM-AX4000 Integrated Remote Commander To go to the section
Wireless Digital Video Doorbell CL-3684 USER S MANUAL
 Wireless Digital Video Doorbell CL-3684 USER S MANUAL Prior To Use Congratulations...on purchasing our high quality product. Please read the manual carefully before installing your system and follow all
DVR 808HD Digital Camcorder
 DVR 808HD Digital Camcorder User Manual 2009-2016 Sakar International, Inc. All rights reserved. Windows and the Windows logo are registered trademarks of Microsoft Corporation. All other trademarks are
You are now the owner of the world s most high performance audio system.
 Welcome to Devialet! You are now the owner of the world s most high performance audio system. Protected by 68 patents, it integrates hybrid analogue digital ADH amplification and SAM signal processing
RM24964 RM Universal Remote Instruction Manual
 RM24964 RM84964 Universal Remote Instruction Manual Table of Contents Setup... 3 Battery Installation... 3 Battery Saver... 3 Code Setup... 3 Button Functions... 4 Code Entry... 6 Direct Code Entry...
3 Channel Datalogging Thermometer
 USER MANUAL 3 Channel Datalogging Thermometer Model SD200 Introduction Congratulations on your purchase of the Extech SD200 3-Channel Temperature Datalogger. This meter displays and stores temperature
IS-ZW-RC-1 Remote Control Installation Sheet
 GE Security IS-ZW-RC-1 Remote Control Installation Sheet Description Z-Wave technology is designed to automate lighting/home control and provides easy remote operation of all your Z-Wave enabled devices.
Contents. I. Introduction... II. Description. 1. Pager layout.. 3. Functions. III. Operation.
 Contents I. Introduction... II. Description. 1. Pager layout.. 2. LCD 3. Functions III. Operation. 1. Power On/ Off. 1.1 Pager On. 1.2 Pager Off 2. Messages 2.1 Receiving Messages. 2.2 Reading Messages
Automating Your Home Theater With The Marantz RC5000i
 RC5000i Automating Your Home Theater With The Marantz RC5000i Automating Your Home Theater With The Marantz RC5000i RC5000i Remote Control The information in this manual is copyright-protected. No part
(1) Remote Commander. Operating Instructions RM-LJ by Sony Corporation
 Remote Commander. Operating Instructions RM-LJ by Sony Corporation") 4-227-952-13(1) Remote Commander Operating Instructions RM-LJ304 2000 by Sony Corporation Precautions On safety Should any solid object or liquid fall into the cabinet, unplug the receiver and have it
4-227-952-13(1) Remote Commander Operating Instructions RM-LJ304 2000 by Sony Corporation Precautions On safety Should any solid object or liquid fall into the cabinet, unplug the receiver and have it
*GA e9e* MODEL : AP-824 /AP-924
 Alpha-Numeric Display Pager *GA0102158e9e* MODEL : AP-824 /AP-924 CONTENTS CONTENTS Control Buttons...... 1 Features and Functions... 2-3 LCD Display... 4 Function Operation... 5-20 Reading a Message...
1-Line Alpha/Numeric Pager
 1-Line Alpha/Numeric Pager Operating Guide UPZZ01659ZZ FCC Information Your pager might cause TV or radio interference even when it is operating properly. To determine whether your pager is causing the
Always there to help you. Register your product and get support at SRP3014. Question? Contact Philips.
 Always there to help you Register your product and get support at www.philips.com/support Question? Contact Philips SRP3014 User manual Contents 1 Your universal remote 2 Introduction 2 Overview of the
Automatic Phone-Out Home Monitoring System
 Automatic Phone-Out Home Monitoring System Freeze Alarm Model Number: THP217 Product Description This product is intended to monitor homes, cabins, and other premises for low temperature conditions. It
DVR 426HDv3. Digital Camcorder
 DVR 426HDv3 Digital Camcorder User Manual 2009-2012 Sakar International, Inc. All rights reserved. Windows and the Windows logo are registered trademarks of Microsoft Corporation. All other trademarks
2 IDS LCD Keypad User Manual C Issued March 2009
 2 3 4 Contents 1. Introduction to the IDS LCD Digital Keypad...8 2. Arming the Control Panel...8 2.1 Away Arming...8 2.1.1 How to Away Arm...8 2.1.2 Quick Away Arm Shortcut Key...8 2.2 Stay Arming...9
Owner s Manual RBC-AX32U(W)-E RBC-AX32U(WS)-E AIR CONDITIONER (SPLIT TYPE) Wireless remote controller kit. Model name: English.
-E RBC-AX32U(WS)-E AIR CONDITIONER (SPLIT TYPE) Wireless remote controller kit. Model name: English.") AIR CDITIER (SPLIT TYPE) Owner s Manual Wireless remote controller kit Model name: RBC-AX3U(W)-E RBC-AX3U(WS)-E Generic model name RBC-AX3U(W)-E Wireless remote controller model name WH-LSE Signal receiving
AIR CDITIER (SPLIT TYPE) Owner s Manual Wireless remote controller kit Model name: RBC-AX3U(W)-E RBC-AX3U(WS)-E Generic model name RBC-AX3U(W)-E Wireless remote controller model name WH-LSE Signal receiving
Wireless Video/Audio Intercoms
 Wireless Video/Audio Intercoms User Set-Up Guide and Instructions BEC Integrated Solutions Williamsville, New York 716-689-0871 1 Table of Contents: B-WSP1.Page 3 B-WSP2 Page 8 B-WC2..Page 13 B-WI2 Page
TABLE OF CONTENTS. Introduction... 3 Features And Functions... 4 Key Charts... 5 Device Table... 6
 WALRB4P manual booklet 5/2/06 3:16 PM Page 2 TABLE OF CONTENTS Introduction....................................................... 3 Features And Functions..............................................
Media Player & S! Applications
 Media Player... -2 Media Basics... -2 Music...-4 Playing Music... -4 Video...-5 Playing Video... -5 Playlists... -6 Using Playlists...-6 S! Appli... -7 Using S! Applications...-7 Additional Functions...
GSM AD05 Slave GSM Auto Dialer- Instruction Manual
 GSM AD05 Slave GSM Auto Dialer- Instruction Manual Please read these instructions before you start the installation Features LCD display Programmable 9 x 32 digit phone numbers for each trigger. 10 second
DVR 528 Digital Video Camera
 DVR 528 Digital Video Camera User Manual 2010 Sakar International, Inc. All rights reserved. Windows and the Windows logo are registered trademarks of Microsoft Corporation. All other trademarks are the
INSTALLATION INSTRUCTIONS
 Controllers INSTALLATION INSTRUCTIONS PROGRAMMABLE REMOTE CONTROLLER INTRODUCTION The is a highly sophisticated learning remote, capable of storing single or macro IR commands on each of 8 banks (or layers)
Use the Extron control panel on the top of the podium to: 1. Turn the projector on and off. The projector takes some time to warm up after powering
 Use the Extron control panel on the top of the podium to: 1. Turn the projector on and off. The projector takes some time to warm up after powering on, and to cool down after powering off. To show or hide
(1) Remote Commander. Operating Instructions RM-TP by Sony Corporation
 Remote Commander. Operating Instructions RM-TP by Sony Corporation") 4-227-951-14(1) Remote Commander Operating Instructions RM-TP504 2000 by Sony Corporation WARNING To prevent fire or shock hazard, do not expose the unit to rain or moisture. For the customers in United
4-227-951-14(1) Remote Commander Operating Instructions RM-TP504 2000 by Sony Corporation WARNING To prevent fire or shock hazard, do not expose the unit to rain or moisture. For the customers in United
Datalogging Hygro-Thermometer
 USER MANUAL Datalogging Hygro-Thermometer Model SD500 Introduction Congratulations on your purchase of the Extech SD500 Temperature/Humidity Datalogger. This meter measures, displays, and stores temperature
Personal MiniDisc System
 3-866-600-11(1) Personal MiniDisc System Operating Instructions Owner's Record The model number and the serial number are located on the right side. Record the serial number in the space provided below.
Universal Remote Instruction Manual
 24993 Universal Remote Instruction Manual Table of Contents Setup... 3 Battery Installation... 3 Battery Saver... 3 Code Saver... 3 Code Setup... 3 Button Functions... 4 DVD Functions... 6 SAT Functions...
DIGITAL VOICE RECORDER VN-180
 DIGITAL VOICE RECORDER VN-80 Instruction VN-90 Always do a test recording to avoid recording problems. CONTENTS BEFORE YOUR FIRST RECORDING... 3 Parts Identification... 3 Liquid Crystal Display (LCD)...
Contents Getting Started Messages Function Menu
 User Manual 1 Contents Introduction 1 Getting Started Pager Features 3 Battery Information 6 Battery Installation and Removal 7 Button Definition 8 Pager On 9 Pager Off 9 Backlight 9 Main Menu Screen 10
Knox KN-DC20MP Instruction Manual
 Knox KN-DC20MP Instruction Manual Camera Interface, Inputs, and Outputs 1) Shutter - Press this button to take photographs or to start /stop recording a video clip, or to confirm changes in menu mode 2)