BUCKVIEW Advanced. User Guide
|
|
|
- Kevin Washington
- 6 years ago
- Views:
Transcription


1 BUCKVIEW Advanced User Guide
2 Inside This Manual I. Inside This Manual... 2 II. Viewing and Managing Your Images... 3 Manage Image Folders...5 Manage Sites...6 Manage Locations...10 Erase Memory Card...14 Check Free Space...15 Load New Images...15 View Images...19 Favorites...24 Search Images...25 Tag Images and Manage Image Data...29 Create Video...31 Hit List...32 RECONYX News...32 III. Warranty and Safety Information Satisfaction Guarantee...33 Limited Warranty...33 IV. Troubleshooting and Technical Support Troubleshooting Your BuckView Software...34 V. Copyright and Trademark Information Disclaimer While every effort has been made to ensure that the information contained in this User Guide is accurate and complete, no liability can be accepted for any errors or omissions. RECONYX reserves the right to change the specifications of the software described herein at any time without prior notice. RECONYX makes no warranties for damages resulting from corrupted or lost data due to a mistake in operation or malfunction of the camera, the software, the memory cards, personal computers, or peripheral devices.
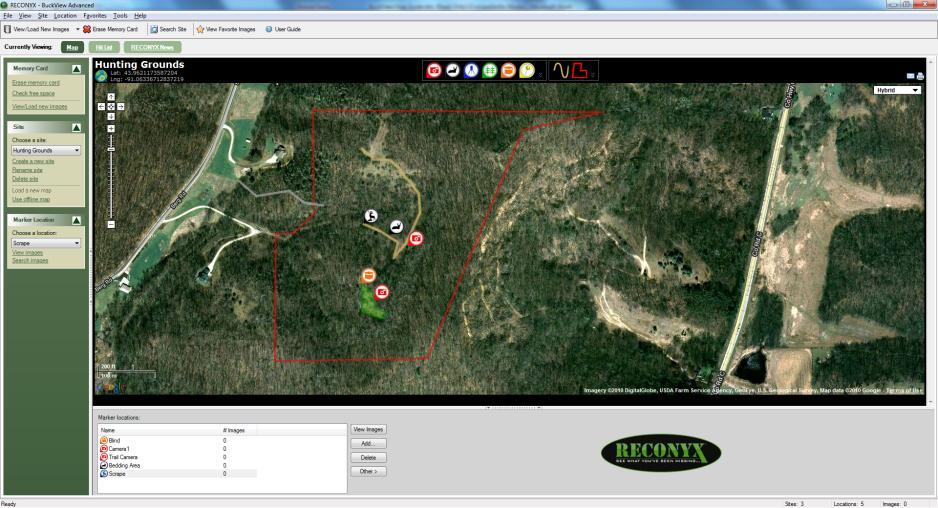
3 Viewing and Managing Your Images BuckView TM Advanced is a complete image-handling system for pictures you take with your RapidFire TM or HyperFire TM Digital Infrared Game Cameras from RECONYX; it can also handle images taken with many other cameras. You can map your camera locations and land markers, organize images (by site and location), view, and search any or all of your images. You can also erase your memory card (see Erase Memory Card). To view and manage your images, move your mouse cursor over the RECONYX BuckView icon desktop and double-click your left mouse button. Or from the Microsoft Windows Start menu, select All Programs > RECONYX > BuckView. BuckView opens. on your BuckView has 3 primary views: 1. Map is your main workspace for managing your land, cameras and images. 2. Hit List gives a quick view of your favorite bucks. 3. RECONYX News keeps you up-to-date with the latest announcements from RECONYX. The BuckView Map workspace is divided into three sections, one of which (the left) is hidden by default. T he left section includes Memory Card, Site, and Marker Location Task Pane menus. T he top middle section displays the site map. The bottom section shows marker locations for the current site. Standard drop-down menus appear across the top, along with toolbar buttons to quickly perform common tasks like viewing/loading new images, erasing your memory card, finding images, viewing favorite images, and displaying this user guide., placing markers on site maps, loading a new map, and viewing images at the current location. The left and bottom sections of BuckView can be hidden or displayed (hiding sections provides more room to view site maps; see Manage Sites). T o hide a section, click the section hide button in the middle of the dividing line between sections. To display a section, click the section display button 3
4 in the middle of the line along the edge of BuckView. You can also display and hide the right section of the Load New Images Wizard (see Load New Images), and the left sections of Location Viewer (see View Images) and Site/Location Search (see Search Images). Note: When a section is hidden, the section display button replaces the section hide button, and vice versa. Buttons shown in the preceding examples are for the bottom section. The left section (Task Pane) is hidden and displayed using a similar, vertical button in the middle of the dividing line between sections (the vertical button is bounded by arrows pointing left or right, depending on whether the section can be hidden or displayed, respectively). Tip: The Task Pane can also be hidden by un-checking Task Pane on the View drop-down menu; the Task Pane can be displayed by checking Task Pane on the View drop-down menu. Task Pane menus can be expanded or contracted. T o contract a menu, click the contract button to the right of the menu name. To expand a menu, click the expand button. Note: When a Task Pane menu is contracted, the expand button replaces the contract button, and vice versa. The size of the left and bottom sections of BuckView can be adjusted. Move your mouse cursor over the dividing line between the sections, and when you see the cursor change to a doubleheaded arrow, click and hold your left mouse button. Then move the dividing line and release your mouse button when the sections are the sizes you want them. You can also adjust sizes of the right section of the Load New Images Wizard (see Load New Images), and the left sections of Location Viewer (see View Images) and Site/Location Search (see Search Images). Select the task that you want to perform: Manage Image Folders Change the location where imported images are stored. T his can be done by selecting T ools from the top menu and then Image Folder Settings. Manage Sites Select a site (property or area where you set up your camera in one or more locations) to work with, rename and delete sites, search images in a site, add a site map, place or remove camera markers, and add new sites. Manage Locations Select a location (specific spot within a site where you set up your camera) to work with, rename and delete locations, view images stored in a location, load new images into a location, create new locations, and place or remove camera markers representing locations on a site map. Erase Memory Card Format new memory cards to prepare them for use, and erase used cards to quickly delete old images. Check Free Space Check your memory card for free space. Load New Images Load (copy) any or all images from your memory card to your computer. You can also load images from one folder on your computer into any of your sites and locations. An image viewer for previewing images before you load them is included in the Load New Images Wizard. View Images View images that you ve loaded onto your computer. You can also copy images to your favorites, save images to another folder, move or copy images from one location to another, and delete images using the Viewer. Favorites Add your favorite images to a folder for easy reference across sites and locations. Search Images Search Image Data of all images in a site (including all locations in the site), or search the Image Data of all images in a location. 4 RECONYX, Inc.


5 Tag Images and Manage Image Data Setup a Hit List of your favorite bucks. T ag images that have captured a photo of your Hit List bucks. Count bucks, does or other animals captured in your photos. Add or edit narrative Image Data, and view all Image Data stored with an image. Create Video Use any of the images you ve stored in a location to create a video clip. Manage Image Folders By default, BuckView stores all imported images into the folder RECONYX Images inside of your My Pictures folder. Inside that RECONYX folder, each site you ve created has its own folder with sub-folders for each camera location within that site. T he images are stored in these camera location folders. BuckView gives you the option of changing the location of that highest level folder so you can store your images anywhere you choose, including on a shared network drive. T his can be done by selecting T ools from the top menu and then Image Folder Settings. On the new window that pops up, click Add. You can type in the new folder location, or press the button on the right to select a folder. Then click Save. 5

6 The new folder will appear in the list. To changes the Current Folder, select one in the list and click OK. T he folder list is saved, making it easy to change between folders in the future. Images are not modified or removed when you change image folders. If you change folders, your sites, maps, camera markers, and images will not be available within BuckView that is, until you switch back to the original folder location. If you change back to the original folder, everything will be there as you saw it before. Manage Sites Use the Site drop-down menu at the top of BuckView to select the current site, rename a site, delete a site, find images for a site, load a site map, place a marker, and create a new site. You can also use the Site Task Pane menu in the left (hidden by default) section of BuckView to perform many of these tasks (these and other alternate instructions, where available, are also included in this user guide). 1. To create a new site, from the Site drop-down menu, select Add Site. Or, in the Site Task Pane menu, click Create a new site. 6 RECONYX, Inc.

 For more details see Mapping Tools.")
7 Enter the Name of your new site. If you have an internet connection and want to make the most of your BuckView mapping tools, choose Online site. If you do not have internet access or wish to manage your maps while you are in the field then choose Offline site. Note: A Site may have both an Online and Offline map. Your location folders and all images are accessible and shared by both the Online and Offline maps. What are not shared are the drawing tools (camera markers and other icons, trails maps, property boundaries, etc.) For more details see Mapping Tools. Click OK to create your new site and close Create a New Site. Click Cancel to close Create a New Site without creating a new site. 2. To select an existing site to work with (the current site), from the Site drop-down menu, select Current Site, and then choose the site you want to work with from the list that appears. Or, in the Site Task Pane menu, Choose a site from the drop-down list. 3. To rename the current site, from the Site drop-down menu, select Rename Current. Or, in the Site Task Pane menu, click Rename site. Enter the new Name for your site. Click OK to change the name of your site and close Rename Site. Click Cancel to close Rename Site without changing the name of your site. 4. To delete the current site, from the Site drop-down menu, select Delete Current. Or, in the Site Task Pane menu, click Delete site. 7
. 5.")
8 Important! When you delete a site, all images in all camera locations for that site are deleted. You will be asked to confirm that you want to delete the current site. Click Yes to delete the site. Click No to keep the site and cancel the deletion process. Note: You must have at least one site in BuckView (if you have only one site, you cannot delete that site). 5. To search the images in the current site, from the Site drop-down menu, select Find Images. Or, click the Find Images toolbar button. Site Search opens (where Site is the name of your current site). Searches that you perform in this search window will search all images in the current site. See Search Images for detailed instructions on searching your images. 6. To add a site map to the current site for display in the top right section of BuckView, follow the steps below for Offline or Online sites. 8 RECONYX, Inc.

9 For Offline sites: From the Site drop-down menu, select Load Map. Or, in the Site T ask Pane menu, click Load a new map. Tip: You can also click the Load a new map toolbar button. Important! When you load a map, all camera markers for that site will be deleted, although no images will be lost. You will be asked to confirm that you want to load a new map for the current site. Click Continue to load a new map, and proceed to browse to the map or aerial photograph you want to display for the current site. Click Cancel to keep the current map and cancel the deletion process. Tip: When you re asked to confirm that you want to load a new map for the current site, you can also access information to help you obtain maps from Microsoft TerraServer website. Click Help me find a map of my land to view instructions for downloading public domain aerial photos and topographical maps from TerraServer. Once you ve selected a site map, you can Place Camera Markers on the map to represent locations in the site (see Manage Locations). For Online sites: Online sites use Google Maps mapping service and RECONYX mapping technology to provide you with an interactive camera and image management experience. Online sites start with a default view of North America. Use the navigation tools on the map to zoom in/out and scroll/pan to locate your land. Tip: You can click on the Globe icon and Search for a location: in the upper left of the map to open the map search control Once you ve located your site, you can place a variety of markers on the map to represent locations in the site (see Manage Locations). You can also use drawing tools to map your land. 9
.")
10 Manage Locations Note: Locations displayed in the Location drop-down menu, the Camera Location T ask Pane menu, and Camera locations in the bottom section of BuckView are for the current site (see Manage Sites). Use the Location drop-down menu at the top of BuckView to select the current location, rename a location, delete a location, find images in a location, view images for a location, load new images from your camera s memory card or another directory into a location, and add a new location. You can also use the Camera Location T ask Pane menu in the left section of BuckView (hidden by default) to perform some of these tasks (these and other alternate instructions, where available, are also included in this user guide). If the current site includes a map (see Manage Sites), you can place and remove camera markers to represent your camera locations on the map. 1. To select a different location to work with (the current location): from the Location drop-down menu, select Current Location and then choose the location you want to work with from the list that appears. Or, in the Marker Locations Task Pane menu, Choose a location from the list. Tip: You can also click the location you want to work with from the Marker locations displayed in the bottom section of BuckView to make it the current location. Or, if the location you want to work with is associated with a map marker, you can click the marker of the location that you want to select. 2. To rename the current location, from the Location drop-down menu, select Rename Current. Tip: You can also click the Other button in the Marker locations (bottom) section of BuckView and from the menu that appears, select Rename Location. Change the Name of the location. Click OK to save your changes and close Rename Location. Click Cancel to close Rename Location without saving your changes. 3. To delete the current location, from the Location drop-down menu, select Delete Current. Tip: You can also click the Delete button in the Marker locations (bottom) section of BuckView. Important! When you delete a location, all images in that location are deleted. You will be asked to confirm that you want to delete the current location. Click Yes to delete the location. Click No to keep the location and cancel the deletion process. 4. To search the images in the current location, from the Location drop-down menu, select Find Images. Or, in the Marker Location Task Pane menu, click Search images. Tip: You can also click the Other button in the bottom right corner of BuckView, and from the menu that appears, select Search Location. Location Search opens (where Location is the name of your current location); this will search all images in the current location. See Search Images for detailed instructions. 10 RECONYX, Inc.

11 5. To view images for the current location, from the Location drop-down menu, select View Images. Or, in the Marker Location Task Pane menu, click View Images. See View Images for detailed instructions. 6. To place a camera marker: For Offline sites: From the Site drop-down menu, check Place Camera Marker. Or, click the site s Place Camera Marker toolbar button. Note: When your mouse cursor looks like a green map pin, Place Camera Marker appears any time you click on the site map. Your mouse cursor will automatically switch back to standard after you place your marker, or cancel the marker-placing process. Tip: Once you place a marker on a map, it appears as a green map pin with a red center. You can change locations by clicking the marker of the location you want to select. T he selected marker has a blue background. Select whether you want to Create a new camera location (and enter the Name of the new location), or Associate with an existing camera location (and select the location from the list of Camera Locations that are not yet marked on the site map). Click OK to place the camera marker for this location and close Place Camera Marker. Click Cancel to close Place Camera Marker without adding a camera marker. 11
. Hold your cursor over any marker to see a description of the marker.")
, or link the marker to an Existing Location (and select the location from the list of locations that")
12 For Online sites: Click on the Marker T ype of your choice from the toolbox above the map. Tip: T o see more markers, click on the grey down arrows on the right side of the markers toolbox (noted by the green arrow below). Hold your cursor over any marker to see a description of the marker. Your cursor will change to match the marker you have selected. Move the marker over the map and click to drop it at your selected position. Select whether you want to Create a new camera location (and enter the Name of the new location), or link the marker to an Existing Location (and select the location from the list of locations that are not yet marked on the site map). Tip: Online sites let you choose many types of markers and link images to them. You may choose to store your images under any marker folder or only use camera markers as image storage folders. Click OK to place the camera marker for this location and close New Camera. Click Cancel to close New Camera without adding a camera marker. \ 12 RECONYX, Inc.

13 7. To load new images into the current location, from the Location drop-down menu, select Load New Images, and then select where you re loading images from (From Memory Card or From Another Folder). See Load New Images for detailed instructions. Tip: The Load New Images Wizard includes an image viewer; you will be able to examine your images before deciding which if any you want to load on to your computer. 8. To remove the current site s camera marker from the map For Offline sites: Move your mouse cursor over the marker, click your right mouse button, and from the menu that appears, select Remove Camera Marker. Or, click the Other button in the in the bottom right corner of BuckView, and from the menu that appears, select Remove Camera Marker. Tip: If you want to move the current location s camera marker from one position on the map to another, you must first remove the existing camera marker for the current site (use Remove Camera Marker) and then place a new camera marker and associate it with the site (use Place Camera Marker). For Online sites: Click on the marker and from the popup window, choose Delete. Or, click the Other button in the in the bottom right corner of BuckView, and from the menu that appears, select Remove Camera Marker. Tip: If you want to move the current location s marker from one position on the map to another, can just click and drag the marker to the new position. 9. To create a new location, from the Location drop-down menu, select Add Location. Tip: You can also click the Add button in the bottom right corner of BuckView. Enter the Name of the location you re adding. Click OK to create your new location and close Add Location. Click Cancel to close Add Location without creating a new location. 13
14 Erase Memory Card Your memory card must be formatted FAT or FAT 32 for use with your RapidFire TM or HyperFire TM camera and BuckView TM software. If you are uncertain of the formatting of your memory card, use BuckView to erase the card; erasing the card also properly formats it for use with your camera. Note: You must have permissions set on your computer to allow you to format removable media. If you can not format memory cards using BuckView, check with computer technical support personnel to be sure you have permissions set properly. Troubleshooting and Technical Support also includes instructions for how to set up formatting privileges. Tip: If you are using a laptop computer, consider a PCMCIA adapter card for accessing memory cards as they are more convenient than USB card readers. Erasing a used card after you ve loaded the images you want to save onto your computer is a much quicker method of clearing the card than deleting the images. Options for erasing your memory card are available in the Load New Images Wizard (see Load New Images). To erase your memory card: 1. Insert the card in your computer s memory card reader and from the Tools drop-down menu, select Memory Card, and then select Erase (Format). Or, in the Memory Card T ask Pane menu, click Erase Memory card. Tip: You can also click the Erase Memory card toolbar button. Note: Erasing a Memory card will delete all images and other information on the card. You will be asked to confirm that you want to erase the card. Click Yes to erase the card. Click No to cancel the process. 2. Erasing is completed automatically. 14 RECONYX, Inc.

15 Check Free Space You can check your memory card for free and used space. To check the free space available on your memory card: 1. Insert the card into your computer s memory card reader and from the Tools drop-down menu, select Memory Card, and then select Check Free Space. Or, in the Memory Card T ask Pane menu (hidden by default), click Check free space. 2. Memory Card Status opens. The memory card is displayed as a lettered drive with available free space displayed as a percent. Load New Images The process of loading new images is automated by the Load New Images Wizard. T he way that you start the Load New Images Wizard depends on if you know where you want to load the images, or if you want to choose the site and location where you want to load the images after you select the specific images you want to load. Note: The Load New Images Wizard includes an image viewer; you will be able to examine your images before deciding which if any you want to load on to your computer. If you want to load new images into the current site and location, click the arrow at the right of the View/Load New Images toolbar button (located above the T ask Pane menus) and from the menu that appears, select the location you re loading images from: From Memory Card or From Another Folder. Tip: If you re loading images from your memory card and you want to load new images to the current site and location, you can also click the View/Load New Images toolbar button itself (not the arrow). Or, from the Tools drop-down menu, select Memory Card, and then select Load New Images. If you want to load new images into a different location within the current site, select the location you want in Marker locations (in the bottom section of BuckView) and then click the Other button in the bottom right corner of BuckView Then, from the menu that appears, select Load New Images, and then select From Memory Card or From Another Folder. 15
16 Note: You can also move your mouse cursor over the location in Marker locations and click your right mouse button. From the menu that appears, select Load New Images, and then select From Memory Card or From Another Folder. If you want to decide the site and location you want to load new images into after you select the specific images you re going to load, from the Location drop-down menu, select Load New Images, and then select the location you re loading images from: From Memory Card or From Another Folder. Note: If you re loading images from your memory card and you want to decide the site and location you want to load images into after you select the images you re going to load, in the Memory Card Task Pane menu, select View/Load new images. On screens within the wizard: Click Erase Memory Card to remove all images from the card (see Erase Memory Card). Note: This button is not available when you re loading new images from another folder. Click Back to return to the previous screen in the wizard. Click Next to advance to the next screen in the wizard. Click Cancel to close the wizard without loading any images. Click Finish to close the wizard after image loading is complete. 1. If you re loading new images from a memory card, the Load New Images Wizard displays the Choose Source Folder(s) screen. Select the folder or folders on your memory card that you want to load images from. As you make your selection(s), a preview of the first image in the selected folder appears at the right. Click Next to continue. To select an individual folder for loading, click the checkbox to the left of the folder s name (so that a checkmark appears in the box). To un-select a folder, click the checkbox to the left of the folder s name (so that no checkmark appears in the box). To quickly check all folders for loading, click Check All. To quickly un-check all folders (so that no folders are selected for loading), click Un-Check All. If you re loading new images from another folder on your computer, the Load New Images Wizard displays Browse for Folder. Select the folder you re loading images from and click OK. 2. The Load New Images Wizard displays the Choose Images screen. Images within the available source folder(s) are displayed. 16 RECONYX, Inc.
, the Checked/Total in the center of the screen above the image viewer updates the number of images you ve checked, and")
17 Select the image or images that you want to load. As you make your selection(s), the Checked/Total in the center of the screen above the image viewer updates the number of images you ve checked, and also displays the total number of images available for loading. Click Next to continue. 17
18 The image viewer is divided into two sections: thumbnail images on the left, and an enlarged view of the current thumbnail on the right. The right section can be hidden or displayed. Note: You can adjust the size of the right section of the image viewer, and hide or display this section as well (see Viewing and Managing Your Images). At any time when the image viewer is open (with the enlarged image section displayed or hidden): To select an individual image for loading, click the checkbox to the left of the image (so that a checkmark appears in the box). To un-select an image, click the checkbox to the left of the image (so that no checkmark appears in the box). To mark all images in a sequence, click the first image you want to load (not the image s checkbox). Press and hold the Shift key on your keyboard, click the last image in the sequence you want to select, and then release the Shift key. All of the image names from the first image you clicked to the last image you clicked are highlighted. Click the checkbox of any highlighted image to select all of the highlighted images for loading (or click Check Selected Images). You can un-check a sequence of selected images in the same way. To quickly select all images for loading, click Check All. To quickly un-select all images (so that no images are marked for loading), click Un-Check All. When the image viewer s enlarged image section is displayed: To select the current image for loading, check the Checked checkbox under the enlarged image. To un-select the current image for loading, un-check the Checked checkbox under the enlarged image. To view the previous image, click the Previous Image button. To view the next image, click the Next Image button. To view the images in a slideshow (automatically advancing display), click the Start Slide Show button. You can adjust the speed of the display by clicking Slow, Med(ium), or Fast, as desired. Click Stop Slide Show at any time after the slideshow begins to stop it. Tip: Clicking the displayed image will also stop the slideshow. Note: When the slideshow is playing, the Stop Slide Show button replaces the Start Slide Show button, and vice versa. You can also change the interval of images in the slideshow. Every image is shown by default (Show every 1 image.); increasing this value will display fewer images in the slideshow, allowing you to view the sequence more quickly. To view image data for the current image, click view image data button (above the upper right corner of the enlarged image). Note: You can view image data when you re using the image viewer in the Load New Images Wizard, but you cannot edit it. See Tag Images and Manage Image Data to add, edit, or delete image data. 3. If you started the Load New Images Wizard using the View/Load New Images toolbar button or the Tools drop-down menu option for loading images, the Load New Images Wizard displays the Choose Camera Location screen. Select the Site and Location where you want to load the images you selected. If you want to load the images you selected into a new location, select the Site where you want the new location and click Add a new location. 18 RECONYX, Inc.

19 Add Location opens. Enter the Name of the location you re adding. Click OK to create your new location and close Add Location. Click Cancel to close Add Location without creating a new location. Click Next to continue. If you started the Load New Images Wizard using another method, skip to step The Load New Images Wizard displays the Summary screen. T he total number of images you ve selected to load and the folders from and to which you re loading those images are displayed for your review. Click Next to continue. Tip: If you re loading new images from a memory card and want to erase the card after the images you selected are loaded onto your computer, check Erase card after saving images. This option is not available if you re loading new images from another folder. 5. The Load New Images Wizard displays the Copying Images screen. The progress of copying the images you selected is displayed and you will be notified when the process is complete. Click Finish to exit the wizard. Note: Errors, if any, are listed after the process is complete. See Troubleshooting and Technical Support. View Images You can view images that you haven t loaded from your memory card onto your computer using the image viewer that s included in the Load New Images Wizard (see Load New Images). You can also view images that you ve already loaded onto your computer. T he Viewer behaves similarly to the image viewer that s included in the Load New Images Wizard, but includes many additional features, such as the ability to print images and create videos from images, search images, zoom in and out on images, and copy images as favorites (see Favorites). Note: When you view images, images are displayed from the current site and location. Before beginning the viewing process, select the site (see Manage Sites) and location (see Manage Locations) you want to view images for. To open the Viewer: To view images in the current site and location, from the Location drop-down menu, select View Images. Or, in the Camera Location T ask Pane menu, click View images. Or, in the Location toolbar, click the View Images at Location button (where Location is the name of the current location). Tip: You can also view images from any Camera location by moving your mouse cursor over that location in the list at the bottom of BuckView and double-clicking your left mouse button, or by selecting the Camera location and clicking the Other button (select View Images from the menu that appears). And, if the location is marked on the site map, you can move your standard mouse cursor over the camera marker, click your right mouse button, and from the menu that appears, select View Images. The viewer window opens. 19
 on the left, and an enlarged view of the current list on the right.")
20 The title of the viewer is Location Viewer (where Location is the name of the current location), and images in this viewer are for this location only. The viewer is divided into two sections: available images (thumbnail or detail view styles) on the left, and an enlarged view of the current list on the right. T he left section can be hidden or displayed (hiding this section displays the enlarged image only). Images can be listed in thumbnail view (by image name, with a reduced-size version of the image also displayed) or detail view (by image name): To list your images in detail view, select Detail for the View Style at the top of the left section of the viewer, or from the View drop-down viewer menu, select Detail. To list your images in thumbnail view, select Thumbnail for the View Style, or from the View drop-down menu, select Thumbnail. Note: You can adjust the size of the left section of the viewer, and hide or display this section as well (see Viewing and Managing Your Images). To move through the images in this location, use the navigation buttons underneath the enlarged image display. 1. To view any image in the right section of the viewer in enlarged view, click the image you want in the list. T his image is the current image. 2. To display the image before the current image, click the Previous Image button. Tip: You can also use the left arrow key on your keyboard to switch to the previous image. 3. To display the image after the current image, click the Next Image button. 20 RECONYX, Inc.
21 Tip: You can also use the right arrow key on your keyboard to switch to the next image. 4. To view the images in a slideshow (automatically advancing display), click the Start Slide Show button. You can adjust the speed of the automatic display by clicking Slow, Med(ium), or Fast, as desired. Click Stop Slide Show at any time after the slideshow begins to stop it. Tip: Clicking the displayed image will also stop the slideshow. Note: When the slideshow is playing, the Stop Slide Show button replaces the Start Slide Show button, and vice versa. You can also change the interval of images in the slideshow. Every image is shown by default (Show every 1 image.); increasing this value will display fewer images in the slideshow, allowing you to view the sequence more quickly. 5. To print the current image, from the File drop-down menu, select Print. Tip: You can also click the Print toolbar button. 6. To create a video from a series of images, select the images you want to include in the video and from the File drop-down menu, select Create Video. See Create Video for more information. Tip: You can also click the Create Video toolbar button. 7. To view, add to, or edit the current image s Image Data, from the Image drop-down menu, select Image Data. Add/Edit Image Data opens. See Tag Images and Manage Image Data for more information. Tip: You can also click the Image Data toolbar button. 8. To search the images, click the Search Location toolbar button. Location Search opens (where Location is the name of the current location). Searches that you perform in this search window will search all images in the current location. See Search Images for more information. 9. To zoom in on the current image, you can choose from 3 options : 1. Auto Fit: this will automatically size the image for best fit within the viewing area. 2. Full Size: this will show the image in its full original size. T he image will likely be larger than the viewing area so you may need to scroll up/down or left/right to see portions of the image. 3. Custom: this will allow you to zoom the image in or out from 25% to 500% of the original image size. You can adjust the zoom level by setting the zoom percentage in the number field that is shown next to the Zoom type: You can also use your mouse wheel to zoom in and zoom out. As you move to the next image, the zoom level is maintained. 21
22 The Viewer also includes options for copying images to your favorites, saving images to another folder on your computer, exporting image data, moving or copying images to another location, and deleting images. All of these tasks can be performed on an individual image (the current image) or on multiple images. To select multiple images that are all adjacent to one another in the list of available images, move your mouse cursor over the first image you want to select and click your left mouse button. T hen, press and hold the Shift key on your keyboard. While holding the Shift key, move your mouse cursor over the last image you want to select and click your left mouse button. All images listed between the first image you clicked and the last image you clicked are selected. To select multiple images that are not adjacent to one another in the list of available images, move your mouse cursor over any one of the images you want to select and click your left mouse button. Then, press and hold the Ctrl key on your keyboard. While holding the Ctrl key, move your mouse cursor over another image that you want to select and click your left mouse button, repeating until all the images you want are selected. 1. To copy the selected image(s) to your favorites, from the File drop-down menu, select Copy Image(s) to Favorites. The image is copied into your Favorites folder. Tip: You can also click the Copy to Favorites toolbar button. Note: To view your favorite images, see Favorites. 2. To save the selected image(s) into another folder on your computer, from the File drop-down menu, select Save Image(s) to and browse to the folder you want to save the image(s) in. 3. To remove the selected image(s) from this location and put it in another location, from the Image drop-down menu, select Move to Another Camera Location. Move to location opens. Select the Site and Location where you want to move the selected image(s). Click OK to move the image(s) and close Move to location. Click Cancel to close Move to location without moving the image(s). 4. To copy the selected image(s) and put the copy(ies) in another location, from the Image drop-down menu, select Copy to Another Location. 22 RECONYX, Inc.
. 5. To delete the selected image(s), from the Image drop-down menu, select Delete.")
23 Copy to location opens. Select the Site and Location where you want to copy the selected image(s). Click OK to copy the image(s) and close Copy to location. Click Cancel to close Copy to location without copying the image(s). 5. To delete the selected image(s), from the Image drop-down menu, select Delete. You will be asked to confirm that you want to delete the image. Click Yes to delete the image(s). Click No to keep the image(s) and cancel the deletion process. Tip: Several of the menu options in the File and Image drop-down menus in the Viewer are also available when you move your mouse cursor over a thumbnail or detail image name in the list of images on the left side of the viewer window and click your right mouse button: Image Data, Print, Create Video, Copy Image(s) to Favorites, Save Image(s) To, and Delete. A MultiViewer is also available to display two, three, or four images at the same time. To select two, three, or four images that are all adjacent to one another in the list of available images, move your mouse cursor over the first image you want to select and click your left mouse button. Then, press and hold the Shift key on your keyboard. While holding the Shift key, move your mouse cursor over the last image you want to select and click your left mouse button. To select two, three, or four images that are not adjacent to one another in the list of available images, move your mouse cursor over any one of the images you want to select and click your left mouse button. T hen, press and hold the Ctrl key on your keyboard. While holding the Ctrl key, move your mouse cursor over another image that you want to select and clic k your left mouse button, repeating until all the images you want to view are selected. From the View drop-down menu, select Side By Side. T he MultiViewer opens with the selected images displayed. Note: You can have multiple MultiViewers open at the same time. 23

24 Favorites You can add your favorite images (images that you want be able to reference quickly, across locations and even across sites) so that you can open the My Favorite RECONYX Images Viewer and view all your favorite images together. You can also access the folder that contains your favorites and use Microsoft Windows options to order prints online and copy images to a CD. Note: You can add images to your Favorites folder from any Viewer that you re looking at the images in (see View Images). 1. To view your favorites, from the Favorites drop-down menu, select View Favorite Images. Or, click the View Favorite Images toolbar button. The My Favorite RECONYX Images Viewer opens. T his viewer operates the same as any other, but instead of displaying images by site or location, it displays only your favorites. 2. To open your Favorites folder, from the Favorites drop-down menu, select Open Favorites Folder. The My Favorite RECONYX Images folder opens, including a Pictures Tasks task panel menu on the left side. Select the images you want to work with and the tasks you want to perform. 24 RECONYX, Inc.
 does not appear in File and Folder Tasks until you select an image or images.")
25 Note: Certain tasks do not appear in the list of task panel menus until you select one or more images. For example, this file (or the selected items if you ve selected multiple images) does not appear in File and Folder Tasks until you select an image or images. Search Images You can search Image Data of all images in a site (including all locations in the site), or search the Image Data of all images in a location. T he Search is the same in both cases. Note: When you search images, images in your search results are displayed from the current site or current location. Before beginning the search process, select the site (see Manage Sites) or location (see Manage Locations) you want to search. The way that you start the Search from within BuckView depends on whether you want to search an entire site or a specific location within a site. To search all images in the current site, click the Search Site toolbar button. Or, from the Site drop-down menu, select Search Site. To search all images in the current location, from the Location drop-down menu, select Search Location. Or, in the Camera Location T ask Pane menu (hidden by default), click Search Location. Tip: You can also click the Other button in the bottom right corner of BuckView, and from the menu that appears, select Search Location. You can also start a search from within the Viewer (see View Images). The title of the search window is Site Search (where Site is the name of the current site) if you re searching images in all locations in the current site, and Location Search (where Location is the name of the current location) if you re 25
26 searching images from the current location. Images that you find in searches in this window are from the current site or current location only, as noted in the title of the window. Note: In site searches, you can choose to limit your search to locations within the site using the Location Filter. In location searches, you can only search the location you selected. Note: You can adjust the size of the left section of the search, and hide or display this section as well (see Viewing and Managing Your Images). There are 2 ways to search a Site or Location: Basic Search or Advanced Search. Basic Search 1. Choose whether to limit the search to a certain Date Range. If so, check the box by the Start Date and/or End Date to limit your search to images within that time frame. 2. To search any of the Notes you may have added to your images, enter the text into the Notes Contain field. 3. If you want to limit the search to only images containing bucks on your Hit List, choose Hit List in the Tagging dropdown box and then check each Hit List buck that you wish to include. Alternatively, you can search only the images where you have entered Count data. Choose Counts from the Tagging dropdown and the check each species you would like to search. T he results will only include images where you have marked that 1 or more of these species show in the image. 4. If you re searching a site and want to limit your search to a location within the site to search, select that location from the list in Location Filter. If you re searching a location, the Location Filter is not available. 5. Click Search to perform your search. T he total number of images found that match your search is displayed above the search results area, and a full-size version of the first image found is displayed to the right of the search section. 26 RECONYX, Inc.

27 Advanced Search 1. Choose the Advanced Search radio button. 2. Click on Define Advanced Search to open the Advanced Search dialog. 3. Choose any Image Data field or T agging field on the left. 4. Click one of the double-arrow buttons to move the selected search field into one of the 3 search groups: INCLUDE images meeting ALL of these conditions (the image must satisfy every condition in this list) INCLUDE images meeting ANY of these conditions (the image must satisfy only 1 condition in this list) EXLUDE images meeting ANY of these conditions (the image must not have ANY of the conditions in this list) 5. Click OK to close the Advanced Search window and execute the Search. 6. If you re searching a site and want to limit your search to a location within the site to search, select that location from the list in Location Filter and click Search to re-run the last search. If you re searching a location, the Location Filter is not available. 27
28 Search Results Images can be listed in thumbnail view (by image name, with a reduced-size version of the image also displayed) or detail view (by image name): To list your images in detail view, select Detail for the View Style at the top of the list of search results, or from the View drop-down viewer menu, select Detail. To list your images in thumbnail view, select Thumbnail for the View Style, or from the View dropdown menu, select Thumbnail. Note: You can adjust the size of the left section of the search, and hide or display this section as well (see Viewing and Managing Your Images). Tip: If you re searching a site with multiple locations, list your images by detail view so that the location of each image found in the search is also displayed (as shown in the preceding example). Tip: To clear the results of your most recent search, click Clear. Note: When you re viewing images in your search results, you can view any image as full size on the right side of the search window, move through images in the list using the navigation buttons underneath the full size image display, display images as a slideshow, zoom in and out on images, copy images to your favorites, save images to another folder on your computer, export image data, move or copy images to another location, and delete images. All of these tasks are the same as those described in View Images. 28 RECONYX, Inc.


29 Tag Images and Manage Image Data Click the Image Data button to open the Image T oolbox. The Image Toolbox has three sections: 1. Toolbox Controls/Setup: The button is used to close the Image Toolbox. The link is used to control whether the Image Toolbox is docked/anchored within the Image Viewer or is allowed to float and be moved/positioned independently of the Image Viewer. The link opens the Tagging setup window to allow you to customize your Hit List and Counts: 29

30 2. Hit List and Counts: The buttons are used to collapse or expand each section. The checkboxes are used to T ag an image to mark that it contains the selected Hit List buck. The Hit List page in the BuckView main window will display all of your Hit List bucks with a thumbnail image of each and counts showing how many images have been tagged with that buck at all of your sites and locations with links to quickly view just those images. Tip: The first 9 Hit List bucks have keyboard shortcuts of Ctrl+# that allow you to check/uncheck the buck without using your mouse. The Counts section can be used to gather census about your property. You can T ag each image that contains the selected species and enter a count of how many animals are in the image. Tip: The predefined values of Bucks, Does and Fawns include keyboard shortcuts (such as Ctrl+B) that you can used to select the checkbox and increment the count. So pressing Ctrl+B 3 times would check the Bucks checkbox and set the count to 3. (Note: Ctrl+Shift+B will decrease the count) 3. Notes / Metadata Notes are any text you wish to add to your images. Metadata is data about the image that was captured by your RECONYX camera. 30 RECONYX, Inc.
31 Create Video Select a group of images and create a video clip using any of the images you ve stored in a location in BuckView. The video you create is saved as an.avi (Audio Video Interleave) video and can be viewed using a number of widely available media players, including RealPlayer and Microsoft Windows Media Player. Within the Viewer, select the images you want to include in the video clip (the process of selecting multiple images is described in View Images). Once you have selected the images you want to use to create your video, from the Image drop-down menu, select Create Video, browse to the folder you want to save the video in, enter the file name you want to give the video, and click Save. T he progress of creating your video is displayed. Tip: You can also click the Create Video toolbar button. To view your video, browse to the folder where you saved it and double-click the file. The video will play in your default video player. Tip: The default location where videos are stored is your My Favorite RECONYX Images folder; if you save your videos in this folder, you can access them quickly from BuckView by opening your Favorites folder (see Favorites). The video clip file can be attached to an for sharing images with friends and colleagues and/or inserted into presentation tools such as Microsoft PowerPoint. Note: Video files can become quite large depending upon the number of images included in the video. As a guide, 10 images from the RapidFire camera will result in a video file of about 500KB, and 20 images will create a video file around 1MB in size. 31
, use the Image Toolbox to setup the names of the bucks you track closely.")
32 Hit List Hit List is a simple way to find / view the images of your favorite bucks. In any image viewer (Viewer, Search, Import), use the Image Toolbox to setup the names of the bucks you track closely. When you are reviewing your images, be sure to T ag the images that contain one or more of your Hit List bucks. From the BuckView main window, click on the button to go to the Hit List control. T he Hit List control lists all of your Hit List bucks with a sample thumbnail photo of each: RECONYX News The RECONYX News page will keep you up-to-date with the latest happenings at RECONYX, such as camera sales, new product announcements, photo submission contests and more. 32 RECONYX, Inc.
Working with PDF s. To open a recent file on the Start screen, double click on the file name.
 Working with PDF s Acrobat DC Start Screen (Home Tab) When Acrobat opens, the Acrobat Start screen (Home Tab) populates displaying a list of recently opened files. The search feature on the top of the
GOM Cam User Guide. Please visit our website (cam.gomlab.com) regularly to check out our. latest update.
 regularly to check out our. latest update.") GOM Cam User Guide Please visit our website (cam.gomlab.com) regularly to check out our latest update. From screen recording to webcam video and gameplay recording GOM Cam allows you to record anything
GOM Cam User Guide Please visit our website (cam.gomlab.com) regularly to check out our latest update. From screen recording to webcam video and gameplay recording GOM Cam allows you to record anything
End User Guide. 2.1 Getting Started Toolbar Right-click Contextual Menu Navigation Panels... 2
 TABLE OF CONTENTS 1 OVERVIEW...1 2 WEB VIEWER DEMO ON DESKTOP...1 2.1 Getting Started... 1 2.1.1 Toolbar... 1 2.1.2 Right-click Contextual Menu... 2 2.1.3 Navigation Panels... 2 2.1.4 Floating Toolbar...
Gwenview User Manual. Aurélien Gâteau Christopher Martin Henry de Valence
 Aurélien Gâteau Christopher Martin Henry de Valence 2 Contents 1 Introduction 5 1.1 What is Gwenview..................................... 5 2 The Interface 6 2.1 Start Page..........................................
PowerPoint 2016 Building a Presentation
 PowerPoint 2016 Building a Presentation What is PowerPoint? PowerPoint is presentation software that helps users quickly and efficiently create dynamic, professional-looking presentations through the use
Introduction. Getting Started. Selecting a Template. 1 of 1
 1 of 1 Introduction Visual materials are one of the most effective means of communicating a message. They can give a presentation a professional quality. Visuals help a speaker to be well prepared, organized,
SeeSnake HQ User Guide
 SeeSnake HQ User Guide SeeSnake HQ Version 1.53.85.1426 23 May 2010 About SeeSnake HQ 3 Digital Technology 3 Installation and Updates 5 Windows XP 5 Windows Vista 5 Windows 7 5 The Home Window 6 Home Toolbar
PowerPoint 2 (Office 2007)
") Reference Services Division Presents PowerPoint 2 (Office 2007) In this class, we will continue to work with PowerPoint and explore more advanced features through a class exercise. This handout covers
Reference Services Division Presents PowerPoint 2 (Office 2007) In this class, we will continue to work with PowerPoint and explore more advanced features through a class exercise. This handout covers
Quick Access Toolbar. You click on it to see these options: New, Open, Save, Save As, Print, Prepare, Send, Publish and Close.
 Opening Microsoft Word 2007 in the practical room UNIT-III 1 KNREDDY 1. Nyelvi beállítások az Office 2007-hez (Language settings for Office 2007 (not 2003)) English. 2. Double click on the Word 2007 icon
PowerPoint X. 1. The Project Gallery window with the PowerPoint presentation icon already selected. 2. Click on OK.
 PowerPoint X Launching PowerPointX 1. Start PowerPointX by clicking on the PowerPoint icon in the dock or finding it in the hard drive in the Applications folder under Microsoft PowerPoint. PowerPoint
Central Management Software. Cam Viewer 3 Lite. User Manual
 Central Management Software Cam Viewer 3 Lite User Manual Version 1.0.0 Table of Contents 1. System Requirement...4 2. Software Installation...5 3. Configuration Wizard...9 3.1 Channel...10 3.1.1 Adding
Microsoft PowerPoint 2013 Beginning
 Microsoft PowerPoint 2013 Beginning PowerPoint Presentations on the Web... 2 Starting PowerPoint... 2 Opening a Presentation... 2 File Tab... 3 Quick Access Toolbar... 3 The Ribbon... 4 Keyboard Shortcuts...
User s Guide. Valvova Oy
 User s Guide Valvova Oy June 21, 2017 CONTENTS Contents 1 Timeline 2 1.1 Program startup......................................... 3 1.2 Calendar............................................. 3 1.3 Go to
DDX-R Quick Start Guide
 DDX-R Quick Start Guide Imaging Support 1-855-726-9995 www.scilvet.com Contents USING DDX-R... 2 Opening a Patient File... 2 Opening a New Patient File... 3 Screen Layout... 3 ACQUIRING IMAGES ON A PATIENT...
Version 2.0. Campus 2.0 Student s Guide
 Campus 2.0 Student s Guide Version 2.0 Campus 2.0 Student s Guide Error! No text of specified style in document. i Important Notice Copyright 2008 Tegrity, Inc. Disclaimer 2008 Tegrity, Inc. all rights
PowerPoint Launching PowerPointX
 PowerPoint 2004 Launching PowerPointX 1. Start PowerPoint by clicking on the PowerPoint icon in the dock or finding it in the hard drive in the Applications folder under Microsoft Office 2004. PowerPoint
Work Smart: Windows 7 New Features
 About Windows 7 New Features The Windows 7 operating system offers several new features to help you work faster and more efficiently, and enable you to access the files, folders, programs, and applications
AVS4YOU Programs Help
 AVS4YOU Help - AVS Document Converter AVS4YOU Programs Help AVS Document Converter www.avs4you.com Online Media Technologies, Ltd., UK. 2004-2012 All rights reserved AVS4YOU Programs Help Page 2 of 39
Table of Contents. Chapter 2. Looking at the Work Area
 Table of Contents... 1 Opening a PDF file in the work area... 2 Working with Acrobat tools and toolbars... 4 Working with Acrobat task buttons... 13 Working with the navigation pane... 14 Review... 18
Jabber Messenger Online Help
 Jabber Messenger 3.2.1 Online Help Table Of Contents Welcome... 1 Welcome... 1 What's New in this Release?... 2 Getting Started... 3 Logging In... 3 Creating a New Account... 6 Using Jabber Messenger...
Operating Instructions
 Providing presentation solutions V iewer Software Program Operating Instructions NIPPON AVIONICS CO., LTD. 1 This manual describes the functions and operations for conducting presentations using ip Viewer.
PowerPoint for Art History Presentations
 PowerPoint for Art History Presentations For PC computers running Microsoft Office 2007+ Adapted by The University of California, Berkeley from the Institute of Fine Arts document by Elizabeth S. Funk
User Guide 701P Wide Format Solution Wide Format Scan Service
 User Guide 701P44865 6204 Wide Format Solution Wide Format Scan Service Xerox Corporation Global Knowledge & Language Services 800 Phillips Road Bldg. 845-17S Webster, NY 14580 Copyright 2006 Xerox Corporation.
Computer learning Center at Ewing. Course Notes - Using Picasa
 1st January 2014 Computer learning Center at Ewing Course Notes - Using Picasa These course notes describe the content of the Using Picasa course. The course notes are based on Picasa 3. This course material
2 Work with Slides. Adding and Deleting Slides
 2 Work with Slides In this chapter, you will learn how to Add and delete slides. Add slides with ready-made content. Divide presentations into sections. Rearrange slides and sections. For each slide to
5.2. Click these tabs to jump to the Table of Contents, Index or start of each chapter.
 5.2 Click these tabs to jump to the, or start of each chapter. Click this button to advance to the next page. Click this button to return to the previous page. (Since this is the starting page, the [Back]
Empty the Recycle Bin Right Click the Recycle Bin Select Empty Recycle Bin
 Taskbar Windows taskbar is that horizontal strip at the bottom of your desktop where your open files and programs appear. It s where the Start button lives. Below are improvements to the taskbar that will
Copyright Notice. Trademarks
 Copyright Notice All rights reserved. No part of this publication may be reproduced, stored in a retrieval system, or transmitted in any form or by any means, electronic, mechanical, photocopying, recording,
Windows Movie Maker / Microsoft Photo Story Digital Video
 Windows Movie Maker / Microsoft Photo Story Digital Video http://intranet/technology/index.html TRC HELP DESK X5092 April 2006 Photo Story and Movie Maker Microsoft Photo Story 3 allows you to create fantastic
BASIC MICROSOFT POWERPOINT
 BASIC MICROSOFT POWERPOINT PART ONE PHONE: 504-838-1144 IT Training Team Jefferson Parish Library EMAIL: jpltrain@jplibrary.net In this class you will learn to: Launch, close, and interact with Microsoft
Impress Guide. Chapter 1 Introducing Impress
 Impress Guide Chapter 1 Introducing Impress Copyright This document is Copyright 2005 2009 by its contributors as listed in the section titled Authors. You may distribute it and/or modify it under the
DATA PROJECTOR XJ-H1650/XJ-H1750 XJ-ST145/XJ-ST155
 DATA PROJECTOR XJ-H1650/XJ-H1750 XJ-ST145/XJ-ST155 E Data Projector USB Function Guide Be sure to read the precautions in the separate Setup Guide. Be sure to keep all user documentation handy for future
Libraries. Multi-Touch. Aero Peek. Sema Foundation 10 Classes 2 nd Exam Review ICT Department 5/22/ Lesson - 15
 10 Classes 2 nd Exam Review Lesson - 15 Introduction Windows 7, previous version of the latest version (Windows 8.1) of Microsoft Windows, was produced for use on personal computers, including home and
Getting Started. Microsoft QUICK Source 7
 Microsoft QUICK Windows Source 7 Getting Started The Windows 7 Desktop u v w x u Icon links to a program, file, or folder that is stored on the desktop. v Shortcut Icon links to a program, file, or folder
Creating Interactive PDF Forms
 Creating Interactive PDF Forms Using Adobe Acrobat X Pro for the Mac University Information Technology Services Training, Outreach, Learning Technologies and Video Production Copyright 2012 KSU Department
PUB. DIE A. Canon XF Utility. Instruction Manual. Macintosh. Version 1.2
 PUB. DIE-0408-000A 1 C Y P O Canon XF Utility Instruction Manual Macintosh Version 1.2 Table of Contents 02 03 Introduction 03 About Canon XF Utility 03 Conventions in the Manual 04 Running XF Utility
Bombardier Business Aircraft Customer Services. Technical Publications. SmartPubs Viewer 3.0 User Guide. Updated January 2013 [2013]
![Bombardier Business Aircraft Customer Services. Technical Publications. SmartPubs Viewer 3.0 User Guide. Updated January 2013 [2013]](/thumbs/90/103657167.jpg "Bombardier Business Aircraft Customer Services. Technical Publications. SmartPubs Viewer 3.0 User Guide. Updated January 2013 [2013]") Bombardier Business Aircraft Customer Services Technical Publications SmartPubs Viewer 3.0 User Guide Updated January 2013 [2013] Table of Contents Application Views... 5 Collection View... 5 Manual View...
Bombardier Business Aircraft Customer Services Technical Publications SmartPubs Viewer 3.0 User Guide Updated January 2013 [2013] Table of Contents Application Views... 5 Collection View... 5 Manual View...
Creating a Presentation
 Creating a Presentation 1.1 Double Click the PowerPoint icon on the desktop Or Click on the start menu Type PowerPoint into the search box Click on the PowerPoint icon 1.2 Click Blank Presentation 1 How
Introduction to Microsoft PowerPoint 2000
 Introduction to Microsoft PowerPoint 2000 TABLE OF CONTENTS Accessing PowerPoint 2000... 3 Starting a Presentation... 3 About the Editing Screen in Normal Screen View... 4 About Menu Displays in PowerPoint
7 For Seniors For Dummies
 Windows 7 For Seniors For Dummies Chapter 16: Making Windows 7 Easier to Use ISBN: 978-0-470-50946-3 Copyright of Wiley Publishing, Inc. Indianapolis, Indiana Posted with Permission Making Windows 7 Easier
Section 2. Slides. By the end of this Section you should be able to:
 Section 2 Slides By the end of this Section you should be able to: Understand and Use Different Views Understand Slide Show Basics Save, Close and Open Presentations Exit PowerPoint 26 CIA Training Ltd
Creating a Recording Using Panopto
 Creating a Recording Using Panopto Table of Contents Accessing Panopto... 2 Panopto Recording Screen... 3 Recording a PowerPoint Presentation... 3 Recording Your Desktop... 4 Manage Recordings... 5 Viewing/Managing
Chapter 9 Slide Shows
 Impress Guide Chapter 9 Slide Shows Transitions, animations, and more OpenOffice.org Copyright This document is Copyright 2007 by its contributors as listed in the section titled Authors. You can distribute
Railroad Crossing Pilot Study Video System User s Guide. Provided by:
 Railroad Crossing Pilot Study Video System User s Guide Provided by: 1 Table of Contents Installation and Login... 4 Minimum System Requirements... 4 Installation... 4 Logging in with the Ocularis Client...
Palm Reader Handbook
 Palm Reader Handbook Copyright 2000-2002 Palm, Inc. All rights reserved. Graffiti, HotSync, the Palm logo, and Palm OS are registered trademarks of Palm, Inc. The HotSync logo and Palm are trademarks of
Discovering Computers & Microsoft Office Office 2010 and Windows 7: Essential Concepts and Skills
 Discovering Computers & Microsoft Office 2010 Office 2010 and Windows 7: Essential Concepts and Skills Objectives Perform basic mouse operations Start Windows and log on to the computer Identify the objects
Learn more about Pages, Keynote & Numbers
 Learn more about Pages, Keynote & Numbers HCPS Instructional Technology May 2012 Adapted from Apple Help Guides CHAPTER ONE: PAGES Part 1: Get to Know Pages Opening and Creating Documents Opening a Pages
MICROSOFT POWERPOINT 2016 Quick Reference Guide
 MICROSOFT POWERPOINT 2016 Quick Reference Guide PowerPoint What is it? What s new in PowerPoint 2016? PowerPoint is a computer program that allows you to create, edit and produce slide show presentations.
Tutorial 01 Quick Start Tutorial
 Tutorial 01 Quick Start Tutorial Homogeneous single material slope No water pressure (dry) Circular slip surface search (Grid Search) Intro to multi scenario modeling Introduction Model This quick start
[Not for Circulation] This document provides a variety of shortcuts for working in PowerPoint 2007.
![[Not for Circulation] This document provides a variety of shortcuts for working in PowerPoint 2007.](/thumbs/72/67772637.jpg "[Not for Circulation] This document provides a variety of shortcuts for working in PowerPoint 2007.") PowerPoint Shortcuts This document provides a variety of shortcuts for working in PowerPoint 2007. Using Slides from Other Presentations To add a slide from an existing presentation to the current presentation,
PowerPoint Shortcuts This document provides a variety of shortcuts for working in PowerPoint 2007. Using Slides from Other Presentations To add a slide from an existing presentation to the current presentation,
Chapter 3 Operating instructions
 Chapter 3 Operating instructions Summary This chapter describes the how to control and navigate through the TVR 30 s menus and options. Content Control interfaces 10 Controlling the TVR 30 10 Front panel
Application of Skills: Microsoft PowerPoint 2013 Tutorial
 Application of Skills: Microsoft PowerPoint 2013 Tutorial Throughout this tutorial, you will progress through a series of steps to create a presentation about yourself. You will continue to add to this
Creating a Presentation
 Creating a Presentation You will need to create a basic presentation before you can work with the advanced features of PowerPoint. 1 Exercise #1 Creating the Basic Presentation (1) Open Microsoft PowerPoint
Apple is rightfully proud of the user interface design incorporated into
 Customizing OS X Apple is rightfully proud of the user interface design incorporated into the Macintosh OS X family of operating systems. The interface is easy to use, and it s also easy to customize so
Podium Plus Data Analysis Software. User Manual. SWIS10 Version
 SWIS10 Version Issue 1.10 February 2005 Contents 1 Introduction 6 1.1 What is Podium Plus? 6 1.2 About This Manual 6 1.3 Typographical Conventions 7 1.4 Getting Technical Support 7 2 Getting Started 8
Bucknell University Digital Collections. LUNA Insight User Guide February 2006
 Bucknell University Digital Collections LUNA Insight User Guide February 2006 User Guide - Table of Contents Topic Page Number Installing Insight. 2-4 Connecting to Insight 5 Opening Collections. 6 Main
1 ZoomBrowser EX Software User Guide 5.0
 1 ZoomBrowser EX Software User Guide 5.0 Table of Contents (1/2) Chapter 1 Chapter 2 Chapter 3 What is ZoomBrowser EX? What Can ZoomBrowser EX Do?... 4 Guide to the ZoomBrowser EX Windows... 5 Task Buttons
Chapter 1 : Getting Started with Integrity... Chapter 2 : Interface Layout... Chapter 3 : Navigation... Chapter 4 : Printing...
 .0 User s Manual Table of Contents Chapter : Getting Started with Integrity... Chapter : Interface Layout... Chapter : Navigation... Chapter : Printing... Chapter : Quick Search and Results Pane... Results
Chapter 9 Slide Shows
 Impress Guide Chapter 9 Slide Shows Transitions, animations, and more Copyright This document is Copyright 2007 2011 by its contributors as listed below. You may distribute it and/or modify it under the
STORYTELLING-PowerPoint-Windows Movie Maker 2
 Judy Honaker Storytelling Using PowerPoint & Movie Maker 2 1 STORYTELLING-PowerPoint-Windows Movie Maker 2 By: Judy Honaker-Instructional Technology Resource Teacher Introduction This tutorial is designed
Introduction to Microsoft Office PowerPoint 2010
 Introduction to Microsoft Office PowerPoint 2010 TABLE OF CONTENTS Open PowerPoint 2010... 1 About the Editing Screen... 1 Create a Title Slide... 6 Save Your Presentation... 6 Create a New Slide... 7
Premiere Pro Desktop Layout (NeaseTV 2015 Layout)
") Premiere Pro 2015 1. Contextually Sensitive Windows - Must be on the correct window in order to do some tasks 2. Contextually Sensitive Menus 3. 1 zillion ways to do something. No 2 people will do everything
Premiere Pro 2015 1. Contextually Sensitive Windows - Must be on the correct window in order to do some tasks 2. Contextually Sensitive Menus 3. 1 zillion ways to do something. No 2 people will do everything
Easy Windows Working with Disks, Folders, - and Files
 Easy Windows 98-3 - Working with Disks, Folders, - and Files Page 1 of 11 Easy Windows 98-3 - Working with Disks, Folders, - and Files Task 1: Opening Folders Folders contain files, programs, or other
OnPoint s Guide to MimioStudio 9
 1 OnPoint s Guide to MimioStudio 9 Getting started with MimioStudio 9 Mimio Studio 9 Notebook Overview.... 2 MimioStudio 9 Notebook...... 3 MimioStudio 9 ActivityWizard.. 4 MimioStudio 9 Tools Overview......
Intermediate/Advanced. Faculty Development Workshop FSE Faculty retreat April 18, 2012
 Intermediate/Advanced Faculty Development Workshop FSE Faculty retreat April 18, 2012 Remote Desktop Sharing Quick Reference Guide for Moderators The Moderator or a Participant may request control of another
Impress Guide Chapter 1 Introducing Impress
 Impress Guide Chapter 1 Introducing Impress This PDF is designed to be read onscreen, two pages at a time. If you want to print a copy, your PDF viewer should have an option for printing two pages on one
IT Essentials v6.0 Windows 10 Software Labs
 IT Essentials v6.0 Windows 10 Software Labs 5.2.1.7 Install Windows 10... 1 5.2.1.10 Check for Updates in Windows 10... 10 5.2.4.7 Create a Partition in Windows 10... 16 6.1.1.5 Task Manager in Windows
User Guide. FTR Reporter For more information, visit
 FTR Reporter 5.7.1 For more information, visit www.fortherecord.com TABLE OF CONTENTS INTRODUCTION... 5 Overview... 5 About This Document... 5 GETTING STARTED... 6 Installation... 6 Starting Reporter...
Percussion Documentation Table of Contents
 Percussion Documentation Table of Contents Intro to the Percussion Interface... 2 Logging In to Percussion... 2 The Dashboard... 2 Managing Dashboard Gadgets... 3 The Menu... 4 The Finder... 4 Editor view...
Chapter 9 Slide Shows
 Impress Guide Chapter 9 Slide Shows Transitions, animations, and more Copyright This document is Copyright 2007 2012 by its contributors as listed below. You may distribute it and/or modify it under the
Unit III: Working with Windows and Applications. Chapters 5, 7, & 8
 Unit III: Working with Windows and Applications Chapters 5, 7, & 8 Learning Objectives In this unit, you will: Launch programs and navigate the Windows task bar. Perform common windows functions. Customize
Tabbing Between Fields and Control Elements
 Note: This discussion is based on MacOS, 10.12.6 (Sierra). Some illustrations may differ when using other versions of macos or OS X. The capability and features of the Mac have grown considerably over
Appleworks 6.0 Word Processing
 Appleworks 6.0 Word Processing AppleWorks 6.0 Starting Points What s New in AppleWorks 6.0 AppleWorks 6.0 is a versatile and powerful program that integrates the best of everything you need - word processing,
FLIR Tools+ and Report Studio
 Creating and Processing Word Templates http://www.infraredtraining.com 09-20-2017 2017, Infrared Training Center. 1 FLIR Report Studio Overview Report Studio is a Microsoft Word Reporting module that is
Vizit Essential for SharePoint 2013 Version 6.x User Manual
 Vizit Essential for SharePoint 2013 Version 6.x User Manual 1 Vizit Essential... 3 Deployment Options... 3 SharePoint 2013 Document Libraries... 3 SharePoint 2013 Search Results... 4 Vizit Essential Pop-Up
Quick Start Guide. ARIS Architect. Version 9.8 Service Release 2
 ARIS Architect Version 9.8 Service Release 2 October 2015 This document applies to ARIS Version 9.8 and to all subsequent releases. Specifications contained herein are subject to change and these changes
Collaborate Ultra: Sharing Content
 Collaborate Ultra: Sharing Content The Share Content pane on the Collaborate Panel provides five links, three of which are actually for sharing content: Whiteboard, Applications, and Files. There is also
Using Windows 7 Explorer By Len Nasman, Bristol Village Computer Club
 By Len Nasman, Bristol Village Computer Club Understanding Windows 7 Explorer is key to taking control of your computer. If you have ever created a file and later had a hard time finding it, or if you
XnView Image Viewer. a ZOOMERS guide
 XnView Image Viewer a ZOOMERS guide Introduction...2 Browser Mode... 5 Image View Mode...14 Printing... 22 Image Editing...26 Configuration... 34 Note that this guide is for XnView version 1.8. The current
Excel Select a template category in the Office.com Templates section. 5. Click the Download button.
 Microsoft QUICK Excel 2010 Source Getting Started The Excel Window u v w z Creating a New Blank Workbook 2. Select New in the left pane. 3. Select the Blank workbook template in the Available Templates
Work Smart: Microsoft Office 2010 User Interface
 About the Office 2010 User Interface You can use this guide to learn how to use the new features of the Microsoft Office Ribbon. Topics in this guide include: What s New in the Office 2010 User Interface
Inserting Information into PowerPoint
 LESSON 6 6.1 Inserting Information into PowerPoint After completing this lesson, you will be able to: Change the layout of a slide. Insert a clip art image. Scale an image. Insert and format a table. Insert
Prezi Creating a Prezi
 Prezi Creating a Prezi Log in to your account and click on the New Prezi button. Enter a title and (optional) description, and then click on the Create New Prezi button. Selecting a Template Select a template.
SMART Meeting Pro PE 4.1 software
 Help us make this document better smarttech.com/feedback/170973 SMART Meeting Pro PE 4.1 software USER S GUIDE Product registration If you register your SMART product, we ll notify you of new features
Microsoft PowerPoint 2007 Beginning
 Microsoft PowerPoint 2007 Beginning Educational Technology Center PowerPoint Presentations on the Web... 2 Starting PowerPoint... 2 Opening a Presentation... 2 Microsoft Office Button... 3 Quick Access
Getting Started with. PowerPoint 2010
 Getting Started with 13 PowerPoint 2010 You can use PowerPoint to create presentations for almost any occasion, such as a business meeting, government forum, school project or lecture, church function,
SMART Meeting Pro 4.2 personal license USER S GUIDE
 smarttech.com/docfeedback/170973 SMART Meeting Pro 4.2 personal license USER S GUIDE Product registration If you register your SMART product, we ll notify you of new features and software upgrades. Register
Windows Me Navigating
 LAB PROCEDURE 11 Windows Me Navigating OBJECTIVES 1. Explore the Start menu. 2. Start an application. 3. Multi-task between applications. 4. Moving folders and files around. 5. Use Control Panel settings.
POWERPOINT BASICS: MICROSOFT OFFICE 2010
 POWERPOINT BASICS: MICROSOFT OFFICE 2010 GETTING STARTED PAGE 02 Prerequisites What You Will Learn USING MICROSOFT POWERPOINT PAGE 03 Microsoft PowerPoint Components SIMPLE TASKS IN MICROSOFT POWERPOINT
Introduction to Microsoft Word 2010
 Introduction to Microsoft Word 2010 Microsoft Word is a word processing program you can use to write letters, resumes, reports, and more. Anything you can create with a typewriter, you can create with
Cropping an Image for the Web
 Cropping an Image for the Web This guide covers how to use the Paint software included with Microsoft Windows to crop images for use on a web page. Opening Microsoft Paint (In Windows Accessories) On your
PowerPoint Spring 2002
 PowerPoint 2000 Spring 2002 Table of Contents I. INTRODUCTION... 1 II. GETTING STARTED... 1 A. Opening PowerPoint... 1 B. The Mouse Pointer... 1 C. Working with Text... 2 1. Windows Control Buttons...
Avigilon Control Center Player User Guide. Version 5.10
 Avigilon Control Center Player User Guide Version 5.10 2006-2016, Avigilon Corporation. All rights reserved. AVIGILON, the AVIGILON logo, AVIGILON CONTROL CENTER, ACC and HDSM, are trademarks of Avigilon
FaxFinder Fax Servers
 FaxFinder Fax Servers Models: FF130 FF230 FF430 FF830 Client User Guide FaxFinder Client User Guide Fax Client Software for FaxFinder Series PN S000460B, Version B Copyright This publication may not be
Apple is rightfully proud of the user interface design incorporated into
 Customizing OS X Apple is rightfully proud of the user interface design incorporated into the Macintosh OS X family of operating systems. The interface is easy to use, and it s also easy to customize so
Slides & Presentations
 Section 2 Slides & Presentations ECDL Section 2 Slides & Presentations By the end of this section you should be able to: Understand and Use Different Views Understand Slide Show Basics Save, Close and
SASKTEL INTEGRATED BUSINESS COMMUNICATIONS (IBC)
") SASKTEL INTEGRATED BUSINESS COMMUNICATIONS (IBC) DESKTOP CLIENT USER GUIDE Version 4 January 2018 TABLE OF CONTENTS About the SaskTel IBC Desktop Client...3 Requirements...3 How to download and install
SASKTEL INTEGRATED BUSINESS COMMUNICATIONS (IBC) DESKTOP CLIENT USER GUIDE Version 4 January 2018 TABLE OF CONTENTS About the SaskTel IBC Desktop Client...3 Requirements...3 How to download and install
Adobe Acrobat Pro DC for Windows
 Adobe Acrobat Pro DC for Windows Creating Interactive PDF Forms University Information Technology Services Learning Technologies, Training & Audiovisual Outreach Copyright 2017 KSU Division of University
User manual. SmartPSS. Manual includes
 User manual software is used for viewing, playing back and exporting video footage from IP video surveillance systems. Manual includes Logging In Starting Live View Adding a Custom View Using Digital Zoom
PowerPoint Basics (Office 2000 PC Version)
") PowerPoint Basics (Office 2000 PC Version) Microsoft PowerPoint is software that allows you to create custom presentations incorporating text, color, graphics, and animation. PowerPoint (PP) is available
PowerPoint Basics (Office 2000 PC Version) Microsoft PowerPoint is software that allows you to create custom presentations incorporating text, color, graphics, and animation. PowerPoint (PP) is available