Intermediate/Advanced. Faculty Development Workshop FSE Faculty retreat April 18, 2012
|
|
|
- Maud Stokes
- 5 years ago
- Views:
Transcription

1 Intermediate/Advanced Faculty Development Workshop FSE Faculty retreat April 18, 2012

 on the participant s name and select Request Desktop Control from the context menu. 3.")


2 Remote Desktop Sharing Quick Reference Guide for Moderators The Moderator or a Participant may request control of another participant s desktop at anytime during a session. Both the person requesting control and the person being requested must have application sharing permission. To Request Control of a Participant s Desktop 1. In the Participants window, select the participant from whom you wish to request desktop control. 2. Right-click (Control-click for Mac users) on the participant s name and select Request Desktop Control from the context menu. 3. The Participant will receive a message indicating someone has requested control. The participant can: a. Accept by clicking Yes b. Refuse by clicking No c. Select Allow all other requests until I quit and then click Yes d. Add a Password and then click Yes 4. You will now have control of the Participant s desktop. Confirmation that you are remotely controlling the Application Sharing session is the presence of a magenta border in the Application Sharing window. This border is displayed to you (the remote controller) only and the red arrow will display on top of the Application Sharing privilege..


3 Return Control of a Participant s Desktop The participant can take control back by selecting the Ctrl key plus the Space bar or by click the button located in the tool bar. The participant controlling the application can give control back by clicking the button. Request Control of Shared Applications If you give control of the shared application back to the participant and later wish to gain control again: 1. Select the participant in the Participants window. 2. Right-click and select Request Control of Shared Applications Terminate Remote Desktop Sharing There are two ways to stop Remote Desktop Sharing: 1. Select the Participant s name, right-click and select Terminate Remote Desktop Sharing. 2. The Participant may also choose to stop the application sharing session by clicking the button. Tips A Participant can always refuse to give control over their desktop. The Moderator will receive a message saying Remote Start Refused. Simulated keystrokes can be sent using by select the button. The simulated keystrokes will be sent to the host machine and interpreted appropriately. For example, sending Ctrl+Escape to a Windows platform will result in the Start menu popping up. The host machine will accept these keystrokes as long as they are not in the Filtered Keystrokes list. If a Participant requests control of a shared application while someone else is controlling the application, they will receive the Remote Control Failed message. Remember you must have the Application Sharing permission ( ) to be able to request control and to give control. In the Preferences dialog box, you are able to define your preferred prompt for Remote Desktop Sharing to ensure the level of security you wish. There are three options available from Tools > Preferences (or Elluminate Live! > Preferences on a Mac).

4 o You can always be prompted to allow someone to take control of your desktop o You can set a password so that the user requesting control has to enter a password before control is given o You can allow users to take control automatically Ideas for using Remote Desktop Sharing Help Desk staff are able to use Remote Desktop Sharing to take over a caller s desktop. In this way the help desk can immediately diagnose the problem and fix it for the caller. Conduct real-time virtual lab sessions. Virtual lab applications make it possible to view and fully-interact with all of the applications on one computer from any other computer. Conduct hands-on training session just as you would in a physical lab. Sometimes in an instructional setting it is easier for the teacher to take control of a student s computer and to fix the problem for the student rather than describing how to fix the problem. Use Remote Desktop Sharing in this type of situation Elluminate Inc. All Rights Reserved. For more information visit


5 Whiteboard Tools Quick Reference Guide Elluminate Live! provides powerful and versatile whiteboard tools that allow all users to draw or write on the whiteboard. Multiple users can interact on the whiteboard simultaneously. Moreover, the whiteboard is object oriented meaning that all objects placed on the whiteboard can be edited. The moderator controls access to the whiteboard. Available Whiteboard Tools The whiteboard tools are located on the left-hand side of the whiteboard. Attributes Panel The attributes panel is displayed along the bottom of the Whiteboard window and is available when you select a whiteboard tool. Some attributes are common to all objects, and some are dependent upon which tool has been selected. These attributes allow you to edit your object. Examples are color, line thickness, font, bold/italics, etc. Pen Tool To use the Pen tool, click on the pen ( ) and select the color and line thickness from the attributes panel. Press and hold down your mouse button and drag the cursor to where you want to end your line. Highlighter Tool To use the highlighter click on the Highlighter ( ) and select the color and line thickness from the attributes panel. Press and hold down the mouse button and drag the cursor to where you want to end the highlighter stroke.
6 Line Tool To draw a straight line, click the Line tool ( ) and select the color and line thickness from the attributes panel. Press and hold down the mouse button and drag the cursor to where you want to end the line. You can draw a horizontal, vertical or 45 degree angle by holding down your Shift key while drawing the line. Text Tool To enter text, click the Text tool ( ) and select the color, size, bold and/or italics from the attributes panel. Click the whiteboard to place an insertion point, and then type your text. Press the <Enter> key when you are done typing each line of text. Text Editor To enter multiple lines of editable text, click the Text tool ( ) and select the color, size, bold and/or italics from the attributes panel. Click the whiteboard to place an insertion point, and then type your text. Press the <Enter> key when you are done typing each line of text. Ellipse or Rectangle Tools To draw either an ellipse or rectangle click on either of the tools (,,, ) and select the color and if applicable the line thickness from the attributes panel. Press and hold down the mouse button and drag your cursor until the shape is the desired size. You can draw a perfect circle or rectangle by holding down the Shift key while drawing either an ellipse or rectangle. Laser Pointer To use the laser pointer, click the Laser Pointer ( ) and select an image from the attributes panel to use as your pointer. As you hold down your mouse and move the pointer on the whiteboard, or single click anywhere on the whiteboard, the participants will see the movement or image. Eraser Tool To erase foreground objects, click on the Eraser tool ( ). You will be presented with a Confirm Erase dialogue box where you have three options: My Objects -- only erase foreground objects you created All Objects -- erase all foreground objects Cancel -- cancel the erase The eraser tool is only available when there are objects in the foreground. Loading Images To load an Image on the whiteboard click the Load Image tool ( ). You can load any JPEG, GIF, Animated GIF or PNG file. Loading Clip Art To load clip art to the whiteboard, click the Clip Art tool ( ) and choose from the available clip art collections. Loading a Screen Capture Use the Screen Capture tool ( ), to capture your desktop or selected area of your desktop to a JPEG or PNG file and load this file on the whiteboard. Selection Tool To select an object on the screen, click the Selection tool ( ) and then click on the object. The selected object will appear with a border around it. You can select more than one object by using your Shift key while clicking on each object. To de-select the object, click on a blank space on the whiteboard, or click on the selection tool again. Manipulating Objects Grouping Objects Click the selection tool ( ) and hold down the Shift key while you select the objects you would like to group. Then click the Group button ( ). To ungroup objects, use the selection tool ( ) to select the grouped objects and then click the ungroup ( ) button. Moving Objects to the Background/Foreground Only the moderator can move objects into the background or foreground. Objects placed in the background cannot be deleted by
7 participants. Click the selection tool ( ) and select the object you wish to send to the background. Click ( ) to move the selected objects to the background. To move objects in the background to the foreground, click the move all objects button ( ). This button is only available if there are objects in the background. Cut/Copy/Paste/Delete Objects Click on the selection tool ( ) and select the object(s) you wish to manipulate. Then right mouse click anywhere on the whiteboard (for Mac users, hold down your Control or Command key and click on your mouse). You will have the following abilities: Cut Object(s) - cut object on the whiteboard and place on clipboard Copy Object(s) - copy object from the whiteboard on to clipboard Paste Object(s) - paste a previously cut or copied object onto the whiteboard Delete Object(s) - delete object from the whiteboard 2010 Elluminate Inc. All Rights Reserved. For more information visit


8 Using Live Video Quick Reference Guide The Video feature of Elluminate Live! enables you to transmit video broadcasts to others in a session. This is video you send live via a video camera (e.g., web cam) not to be confused with a pre-recorded video (movie) that you can play using the Multimedia feature. The Video window has the following components: Steps for Using Live Video 1. Click on the Enable Video button in the Toolbar. 2. Click on the Show Video Window button in the Toolbar. To open the Video window. 3. Click on the Preview button to start your camera and display in your image. No one but you will see this video transmission. 4. Select the Image Quality you want to transmit. The options are Coarse Grays, Coarse Color, Medium Grays, Medium Color, Fine Grays and Fine Color. 5. Click on the Transmit button to send the video to others in the session. Expanding The Video window can be expanded to reveal the Video Control panel. To do so, click on the Show Video Control Panel button. When you are done setting the controls, you can hide the panel by clicking on the Hide Video Control Panel button. Resizing The Video pane has three different sizes: small (160 x 120 pixels), medium (320 x 240 pixels) and large (640 x 480 pixels). Toggle between the sizes Stopping Video Transmission To stop transmitting video: 1. But keep the Video window open; release the Transmit button by clicking on it. No images will be transmitted.


9 2. To close the video window; Click the Hide Video Window button in the toolbar. Viewing Video with Multiple Simultaneous Cameras By default, only one session attendee at a time can transmit video in an Elluminate Live! room. Moderators, however, can override the default and configure Video to allow up to six cameras simultaneously. To configure the number of simultaneous cameras, do the following: 1. From the Tools menu, select Video > Maximum Simultaneous Cameras. The Maximum Simultaneous Cameras dialog will open. 2. Select the number of simultaneous cameras you would like to permit in the room and click on OK. (The default is 1 simultaneous camera, unless otherwise configured by the session creator in the session scheduling server.) 3. Once the video transmission has been started, participants can click Transmit to activate their video. A thumbnail will appear for each participant (up to five) at the bottom of the video window. Recording and Playback If a session with multiple simultaneous cameras is recorded, the video from all cameras is saved and, when playing the recording, you can choose who to show in your main view pane. If Moderators used Follow me during the recording, their camera changes will also occur in the recording Elluminate Inc. All Rights Reserved. For more information visit

 Edit the invitation text as desired. 3.")

10 In-Session Invitation Quick Reference Guide for Moderators The In-Session Invitation feature of Elluminate Live! enables Moderators, from within a live session, to invite people into the session by sending them or instant messenger invitations. The invitations contain a link to join the session. Sending an In-Session Invitation To send an invitation to a participant: 1. Open the Invite New Participants window by clicking the button in the Moderator Toolbar. 2. (Optional) Edit the invitation text as desired. 3. Click on the Compose button. A new message composition window for your default mail application will open. It will be populated with the information from the Invite New Participants dialog. 4. Enter the address of all those to whom you wish to sent the invitation and click on Send. The invitation will be ed to guests immediately.
11 Copying the Session Link to an Application To copy the session link so you can paste it into another application (such as an instant messaging application), follow the steps below: 1. Open the Invite New Participants window by clicking on the In-Session Invite button. 2. Click on Copy Link button. 3. Open the other application such as Instant Messenger and paste the link. The recipient will be able to join your session. No username or password is required. Tips If the Compose button does not open your application, you may not have a mail application set as your default. If required, consult your system administrator for help setting a default application. If your default mail application opens but the text is copied into the new message incorrectly, you have two courses of action: 1. Try changing your Encoding Invitation Option under Preferences. 2. Select Keep this dialog open in the Invite New Participants window, manually open your application and copy and paste the text from the Invite New Participants dialog into a new message composition window in your application Elluminate Inc. All Rights Reserved. For more information visit


12 Presentation Mode Quick Reference Guide for Moderators As a Moderator, you can change the view of the Whiteboard or an Application Sharing window so it fills the entire Elluminate Live! window. This is called Presentation Mode. When you use Presentation Mode, everyone in the session automatically will have the same full-window view until either they opt out or you end Presentation Mode and return the content to a normal view. Displaying Whiteboard Content in Presentation Mode 1. Open the Present Content dialog box by clicking the Present Content button. 2. Select Whiteboard. If you wish your own view of the Whiteboard to be in Presentation Mode, select Present to Self. 3. Click on the Present button. 4. To stop Presentation Mode, click the terminate button. Presentation Mode View To return to the default view or to activate your audio without exiting the Presentation Mode view, click the Controller Tab, which will appear in the upper right hand portion of the window. It will expand to display two buttons. Click the button to exit Presentation Mode and to Return to nonpresented layout. The Participant can return to Presentation Mode by clicking the return button. Click the button to activate your microphone.


13 Moderator View If the Moderator does not select Present to Self and has their windows locked, the Whiteboard window will be surrounded by a yellow border containing text to indicate that it has been placed in Presentation Mode. There will also be an indicator in the bottom right-hand side of the Moderator s screen to confirm the Whiteboard is being show to Participants in Presentation Mode. The Moderator can switch to the presentation view at anytime by clicking the button. Displaying Application Sharing in Presentation Mode You can put your Application Sharing window into Presentation Mode either through the Present Content dialog box or through the Host Applications dialog box. Application Sharing will appear in the Present Content dialog box only if an Application Sharing session has already been started. Using the Present Content Dialog 1. Share your application through the Application Sharing dialog box. 2. Open the Present Content dialog box by clicking the Presentation Mode button. 3. Select Application Sharing. 4. Click on the Present button. Using the Application Sharing Dialog 1. Open the Application Sharing dialog box. 2. Select the application or region you wish to share. 3. Select the Show in Presentation mode option.


 control of the application sharing session, a magenta halo will appear around")
14 4. Click on the OK button. 5. To stop Presentation Mode but to continue Application Sharing click the button. To stop Application Sharing click the button. Displaying Application Sharing Session in Presentation Mode Viewers of an application sharing session in Presentation Mode will see the controller in the top right corner of the Presentation Mode window. To show the controller, click on the slider. The controller has buttons to let the viewer Talk, opt out of Presentation Mode, request remote control of the shared application and scale the window. If you requested (and were granted) control of the application sharing session, a magenta halo will appear around the application. Mini-Controller Participants can be moved in and out of Presentation Mode from the Mini- Controller by click the Presentation Mode button Elluminate Inc. All Rights Reserved. For more information visit
 and *.tif to the Whiteboard. Protected Whiteboard files (*.wbp) and Whiteboard files (*.wbd) can also be loaded to the Whiteboard.")

15 Loading Presentations Quick Reference Guide for Moderators Moderators can import PowerPoint presentations (*.ppt, *pptx), and OpenOffice presentations as well as the following image file formats *.bmp, *.gif, *.jpg, *.jpeg, *.png, *.pict (Mac only) and *.tif to the Whiteboard. Protected Whiteboard files (*.wbp) and Whiteboard files (*.wbd) can also be loaded to the Whiteboard. Once imported, the presentation is available for all participants to see, and can be marked up using the Whiteboard drawing tools. Loading a File To load your presentation, you must have Moderator status. 1. Click on the Load Presentation tool in the Whiteboard window. 2. In the Select Screens dialog box, determine where you want to insert the file in relation to the Current Screen or Selected Screens. The file can also replace a screen or become a subtopic of a screen. 3. Click OK. The Load File dialog box appears. 4. Navigate to the folder containing the file you want to load. 5. Select the file type you wish to load by scrolling through the Files of type drop-down menu. The options are a. PowerPoint File (*.ppt, *.pptx) b. Image Files c. Protected Whiteboard Files (*.wbp) d. Whiteboard Files (*.wbd)


16 6. Locate the file or image you want to import, and select it. The file name will appear in the File name: text box. Click Open. 7. Choose the Import Options Faster Import, Better Quality, or Best Quality. In most cases Better Quality is recommended. 8. Select Include Notes from the Accessibility Options to copy the PowerPoint Notes to the Elluminate Live! Notes window. 9. Select the import screen size from the Specify Import Screen Size window. The default is 1024 x 768. Click OK. 10. Each slide in the presentation is loaded onto a separate whiteboard screen as an image. Activity Indicators When you load a presentation, you may see red and orange activity indicators next to your name or a participant s name. These colored indicator lights represent if participants have received all of the content Red: A red light next to a participant s name indicates that he or she has not received the content on their current screen. This light disappears once the participant has received the screen content from the server. Orange: An orange light next to a participant s name indicates that he or she is still receiving the whiteboard screens from the server. This light disappears once the participant has received all of the whiteboard screens. The whiteboard activity indicators are dynamic and are updated and visible to all moderators throughout the session. Best Practices When you are loading PowerPoint you have three Import Options to select from: Faster Import, Better Quality, and Best Quality. Best Quality is recommended since each PowerPoint slide is being converted into an image file. When loading a presentation, each slide is converted to a static image and loaded onto the whiteboard. If you would like to include any transitions or animations, use Application Sharing. In PowerPoint, go to Slide Show > Set Up Slide Show > Browsed by an individual (window)

17 Many users create content using other presentation software such as Keynote or Photoshop. Although you cannot import these presentations directly onto the Elluminate Live! whiteboard, you can save the slides in the presentation as individual images and then load the images onto the Elluminate Live! whiteboard. When you load a presentation during your session, keep an eye on the indicator lights next to each participant s name so that you know if any are delayed in receiving whiteboard content. In particular, note the red indicator light as this means the user does not see the current slide. These indicator lights allow you to adjust the pace of your session accordingly Elluminate Inc. All Rights Reserved. For more information visit
18
Elluminate Introduction & Handbook
 CSU Stanislaus Office of Information Technology Elluminate Introduction & Handbook What is Elluminate? Elluminate is the university s online meeting and conferencing service. Users can create virtual rooms
Novice. Faculty Development Workshop FSE Faculty retreat April 18, 2012
 Novice Faculty Development Workshop FSE Faculty retreat April 18, 2012 1 Creating an Elluminate Session within your Blackboard Course Under the Collaboration Tools Menu - Click on Elluminate Live Click
Feature Moderators Participants
 Elluminate Live! version 9.5 Chapter 10 The Whiteboard The Whiteboard is the main presentation window in Elluminate Live! You can use this region to present slides or use it as a work area where you and
Elluminate, Inc. All Rights Reserved.
 2001-2004 Elluminate, Inc. All Rights Reserved. Contents Chapter 1 Chapter 2 Getting Started...4 Minimum System Requirements...4 Download and Install Java Web Start...5 Joining an Elluminate Live! Session...6
Blackboard Collaborate Classroom in D2L Brightspace Daylight Experience
 Blackboard Collaborate Classroom in D2L Brightspace Daylight Experience Moderators Guide University Information Technology Services Learning Technology, Training, Audiovisual, and Outreach Copyright 2018
Blackboard Collaborate Basics
 Blackboard Collaborate Basics 2017 Table of Contents Blackboard Collaborate Overview... 4 Terms and Technical Requirements... 4 Technical Requirements... 4 Create a Session... 5 Blackboard Collaborate
Collaborate Ultra: Sharing Content
 Collaborate Ultra: Sharing Content The Share Content pane on the Collaborate Panel provides five links, three of which are actually for sharing content: Whiteboard, Applications, and Files. There is also
Table of Contents. Blackboard Collaborate Overview... 4 Bb Collaborate Terms and Technical Requirements... 4
 Table of Contents Blackboard Collaborate Overview... 4 Terms and Technical Requirements... 4 Technical Requirements... 4 Create a Session... 5 Create Session Options... 7 Getting Started... 12 Student
Microsoft Lync 2013 Quick-Start Guide. ThinkTel Communications Professional Services Last Updated: June 18, 2013
 Microsoft Lync 2013 Quick-Start Guide ThinkTel Communications Professional Services Last Updated: June 18, 2013 Instant Messaging & Presence Accept an IM request Click anywhere on the picture display area
Using SFB Web App for Windows
 Using SFB Web App for Windows Table of Contents What Is It?... 3 Required Plug ins... 3 Information for Online Meetings and Conference Calls... 4 Join a Meeting... 5 Access Meeting Audio... 7 View Information
Blackboard Collaborate for Faculty
 New York City College of Technology Instructional Technology & Technology Enhancement Center -- itec Blackboard Collaborate for Faculty Contact Information: 718-254-8565 ITEC@citytech.cuny.edu System Requirements:
About This Guide 1. Terminology Used in this Guide 1 System Requirements 1. Getting Started 2. Downloading and Installing Meeting Software 2
 RP1Cloud User Guide Contents About This Guide 1 Terminology Used in this Guide 1 System Requirements 1 Getting Started 2 Downloading and Installing Meeting Software 2 Install the Plug-in 2 Install the
SMART Meeting Pro 4.2 personal license USER S GUIDE
 smarttech.com/docfeedback/170973 SMART Meeting Pro 4.2 personal license USER S GUIDE Product registration If you register your SMART product, we ll notify you of new features and software upgrades. Register
SMART Meeting Pro PE 4.1 software
 Help us make this document better smarttech.com/feedback/170973 SMART Meeting Pro PE 4.1 software USER S GUIDE Product registration If you register your SMART product, we ll notify you of new features
University Academic Computing Technologies. Web-site:
 University Academic Computing Technologies E-mail: bbcollab@aucegypt.edu Web-site: www.aucegypt.edu/it/uact/bbcollab Last Revised: May 2012 The American University in Cairo University Academic Computing
Elluminate, Inc. All Rights Reserved.
 2001-2004 Elluminate, Inc. All Rights Reserved. Contents Chapter 1 Chapter 2 Getting Started...1 About This Manual...1 Getting Help...2 Minimum System Requirements...2 Download and Install Java Web Start...3
Adobe Connect: Overview
 Adobe Connect: Overview Table of Contents Table of Contents... 1 Overview of Adobe Connect... 2 Recommended Use... 2 Roles and Privileges... 2 Menu Bar... 3 Prepare Room and Upload Content... 4 Create
A Reference guide to Using the Collaborate tool in your LMS (Mac Users)
") A Reference guide to Using the Collaborate tool in your LMS (Mac Users) Your LMS includes a synchronous (real-time) tool for online communication within your subject or community. The Collaborate tool
A Reference guide to Using the Collaborate tool in your LMS (Mac Users) Your LMS includes a synchronous (real-time) tool for online communication within your subject or community. The Collaborate tool
PowerPoint 2016 Building a Presentation
 PowerPoint 2016 Building a Presentation What is PowerPoint? PowerPoint is presentation software that helps users quickly and efficiently create dynamic, professional-looking presentations through the use
Cisco WebEx. User Guide. University Information Technology Services. Learning Technologies, Training, Audiovisual and Outreach
 Cisco WebEx User Guide University Information Technology Services Learning Technologies, Training, Audiovisual and Outreach Copyright 2017 KSU Division of University Information Technology Services This
Blackboard Collaborate for Students
 Blackboard Collaborate for Students Participants Guide University Information Technology Services Training, Outreach, Learning Technologies and Video Production Copyright 2014 KSU Department of University
Microsoft PowerPoint 2007 Beginning
 Microsoft PowerPoint 2007 Beginning Educational Technology Center PowerPoint Presentations on the Web... 2 Starting PowerPoint... 2 Opening a Presentation... 2 Microsoft Office Button... 3 Quick Access
USER MANUAL. Infoshare Web Conferencing
 USER MANUAL Infoshare Web Conferencing Table of Contents Contents Table of Contents... 1 What is Infoshare?... 3 Infoshare Control Panel and Key Functions... 3 1. Launching Infoshare... 4 2. Meeting Types...
Reservation Line: (866)
") WebEx Meeting Center Users Guide Prov vided by Ameriprise & ConferencePlus Reservation Line: (866) 402-2673 1 WebEx Users Guide This guide provides tips and techniques that you can use to conduct effective
WebEx Meeting Center Users Guide Prov vided by Ameriprise & ConferencePlus Reservation Line: (866) 402-2673 1 WebEx Users Guide This guide provides tips and techniques that you can use to conduct effective
Microsoft PowerPoint 2013 Beginning
 Microsoft PowerPoint 2013 Beginning PowerPoint Presentations on the Web... 2 Starting PowerPoint... 2 Opening a Presentation... 2 File Tab... 3 Quick Access Toolbar... 3 The Ribbon... 4 Keyboard Shortcuts...
OnPoint s Guide to MimioStudio 9
 1 OnPoint s Guide to MimioStudio 9 Getting started with MimioStudio 9 Mimio Studio 9 Notebook Overview.... 2 MimioStudio 9 Notebook...... 3 MimioStudio 9 ActivityWizard.. 4 MimioStudio 9 Tools Overview......
Bb Collaborate. Virtual Classroom and Web Conferencing
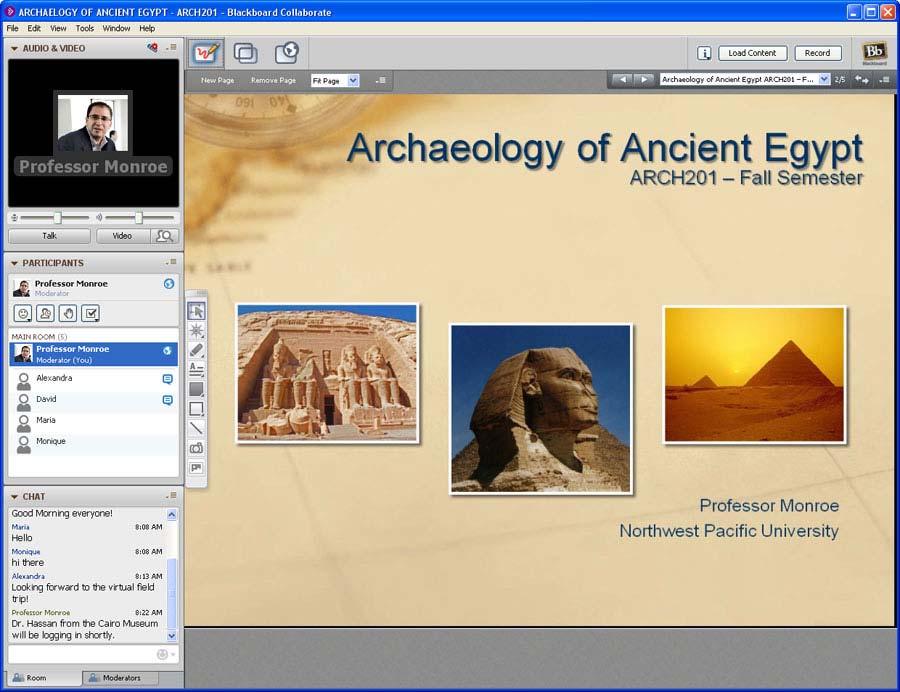
 Bb Collaborate Virtual Classroom and Web Conferencing Bb Collaborate Participant Interface and Basic Moderator Controls The Blackboard Collaborate participant interface has 4 main areas. 1. Audio & Video
Useful Google Apps for Teaching and Learning
 Useful Google Apps for Teaching and Learning Centre for Development of Teaching and Learning (CDTL) National University of Singapore email: edtech@groups.nus.edu.sg Table of Contents About the Workshop...
Skype for Business 2016 Windows Meeting Environment
 Skype for Business 2016 Windows Meeting Environment Contents Preview....1 Information for Skype for Business Meetings and Conference Calls.... 1 Participant List.4 Change Meeting Audio Settings..5 Transfer
MimioClassroom User Guide
 MimioClassroom User Guide for Windows gkpglobalsolutions.com Mimio LLC. All rights reserved. Revised 10/21/2010. No part of this document or the software may be reproduced or transmitted in any form or
TrainingCenter Getting Started Guide
 TrainingCenter Getting Started Guide This guide introduces you to TrainingCenter and provides basic information about using its many features. For more information about using these features, refer to
2. Select Share Desktop or a specific application from the list. Only open applications that are not minimized will appear on the list.
 APPLICATION SHARING Application Sharing allows a Moderator or Participant to share any application or the entire desktop with other attendees. The host of the application share can grant remote control
11.1 Create Speaker Notes Print a Presentation Package a Presentation PowerPoint Tips... 44
 Contents 1 Getting Started... 1 1.1 Presentations... 1 1.2 Microsoft Office Button... 1 1.3 Ribbon... 2 1.4 Mini Toolbar... 2 1.5 Navigation... 3 1.6 Slide Views... 4 2 Customize PowerPoint... 5 2.1 Popular...
SASKTEL INTEGRATED BUSINESS COMMUNICATIONS (IBC)
") SASKTEL INTEGRATED BUSINESS COMMUNICATIONS (IBC) DESKTOP CLIENT USER GUIDE Version 4 January 2018 TABLE OF CONTENTS About the SaskTel IBC Desktop Client...3 Requirements...3 How to download and install
SASKTEL INTEGRATED BUSINESS COMMUNICATIONS (IBC) DESKTOP CLIENT USER GUIDE Version 4 January 2018 TABLE OF CONTENTS About the SaskTel IBC Desktop Client...3 Requirements...3 How to download and install
Contents A. COLLABORATE INTRODUCTION... 1 B. SYSTEM REQUIREMENTS... 1 C. CANVAS COLLABORATE... 2 D. SETTING OF AUDIO (COMPULSORY)...
...") Contents A. COLLABORATE INTRODUCTION... B. SYSTEM REQUIREMENTS... I. OPERATING SYSTEM... II. BROWSER... III. JAVA APPLICATION... C. CANVAS COLLABORATE... I. CREATING COLLABORATE SESSION... II. JOINING
Contents A. COLLABORATE INTRODUCTION... B. SYSTEM REQUIREMENTS... I. OPERATING SYSTEM... II. BROWSER... III. JAVA APPLICATION... C. CANVAS COLLABORATE... I. CREATING COLLABORATE SESSION... II. JOINING
SmileTiger emeeting Server 2008 Client Guide
 SmileTiger emeeting Server 2008 Client Guide SmileTiger Software Corporation 11615 Sir Francis Drake Drive Charlotte, NC 28277 USA Phone: + 1 704 321 9068 Email: info@smiletiger.com http://www.smiletiger.com
Microsoft Lync FAQ s 6/25/2012
 Microsoft Lync FAQ s 6/25/2012 1. What is Microsoft Lync? Microsoft Lync is an enterprise-ready, unified communications platform. With Lync, users can keep track of their contacts availability; send an
What s Inside. 1 Introducing Creating Visually Compelling Lectue Slides Access to Slide Creation Software Step- by- Step Examples...
 Creating Visually Compelling Lecture Slides User Guide What s Inside Updated: 2013 Aug 9 by Teaching & Learning Services Contact: cetl@unb.ca 1 Introducing Creating Visually Compelling Lectue Slides...
Prezi: Moving beyond Slides
 [ Prezi: Moving beyond Slides ] by: Charina Ong Centre for Development of Teaching and Learning National University of Singapore Table of Contents About the Workshop... i Workshop Objectives... i Session
Elluminate, Inc. All Rights Reserved.
 2001-2004 Elluminate, Inc. All Rights Reserved. Contents Chapter 1 Chapter 2 Getting Started...1 About This Manual...1 Getting Help...2 Minimum System Requirements...2 Download and Install Java Web Start...3
Microsoft PowerPoint 2010 Beginning
 Microsoft PowerPoint 2010 Beginning PowerPoint Presentations on the Web... 2 Starting PowerPoint... 2 Opening a Presentation... 2 File Tab... 3 Quick Access Toolbar... 3 The Ribbon... 4 Keyboard Shortcuts...
OmniJoin Overview Guide. A quick start reference tool for new OmniJoin users
 OmniJoin Overview Guide A quick start reference tool for new OmniJoin users ...Starting a Meeting...Hosts...Collaboration...Whiteboard...Chat...Mobile Devices Starting a meeting Your meeting room, audio
Part 1: Basics. Page Sorter:
 Part 1: Basics Page Sorter: The Page Sorter displays all the pages in an open file as thumbnails and automatically updates as you add content. The page sorter can do the following. Display Pages Create
Bridgit Conferencing Software User s Guide. Version 3.0
 Bridgit Conferencing Software User s Guide Version 3.0 ii Table Of Contents Introducing Bridgit Conferencing Software... 1 System Requirements... 1 Getting Bridgit Conferencing Software... 2 The Bridgit
Virtual Classroom 7/9/2014
 7/9/2014 Virtual Classroom The Virtual Classroom tool allows you to access and participate in any online class meetings or sessions scheduled by your instructor. 1. Click on Communication (1) and select
Beginning PowerPoint XP for Windows
 Beginning PowerPoint XP for Windows Tutorial Description This course introduces you to the PowerPoint program basics for creating a simple on-screen presentation. Intended Audience Individuals interested
Presenting a Live Meeting Session
 Presenting a Live Meeting Session LIVE MEETING CONSOLE COMPONENTS The Live Meeting console is made up of multiple components: Presentation area in the middle of the console. Control panels (panes) accessible
For Organizers (Hosts) at OSU
 at OSU") Adobe Connect Pro 8.2 Overview For Organizers (Hosts) at OSU Getting Started 1. Access Adobe Connect Pro Central via this URL: http://oregonstate.adobeconnect.com 2. Login using your email address and
Adobe Connect Pro 8.2 Overview For Organizers (Hosts) at OSU Getting Started 1. Access Adobe Connect Pro Central via this URL: http://oregonstate.adobeconnect.com 2. Login using your email address and
Orientation to Collaborate 11 Farnoush Zadeh, Instructional Designer
 Orientation to Collaborate 11 Farnoush Zadeh, Instructional Designer Continuing & Distance Education St. Francis Xavier University ! Provide a brief introduction to the Collaborate platform How to get
SMART Board Interactive Whiteboard Basics
 SMART Board Interactive Whiteboard Basics This Quick Reference Guide provides an overview of the information you need to begin using a SMART Board interactive whiteboard. Before you begin, make sure the
For Windows Microsoft Corporation. All rights reserved.
 For Windows 1 About Skype for Business... 4 Skype for Business Window... 5 Audio... 6 Set up your audio device... 6 Make a call... 6 Answer a call... 7 Use audio call controls... 7 Check voicemail... 8
Microsoft PowerPoint 2007 Tutorial
 Microsoft PowerPoint 2007 Tutorial Prepared By:- Mohammad Murtaza Khan I. T. Expert Sindh Judicial Academy Contents Getting Started... 5 Presentations... 5 Microsoft Office Button... 5 Ribbon... 6 Quick
PowerPoint Spring 2002
 PowerPoint 2000 Spring 2002 Table of Contents I. INTRODUCTION... 1 II. GETTING STARTED... 1 A. Opening PowerPoint... 1 B. The Mouse Pointer... 1 C. Working with Text... 2 1. Windows Control Buttons...
GLOBALMEET USER GUIDE
 GLOBALMEET USER GUIDE Release 3.8.1 July 2016 TABLE OF CONTENTS GlobalMeet Overview 4 Get the GlobalMeet Desktop Tools 5 Download and Install GlobalMeet 5 System Requirements 5 Getting Started 6 Sign in
Lync 2013 Getting Started
 Lync 2013 Getting Started Information Technology September 1, 2014 1 P a g e The Lync Window Personal Information Navigation Buttons Options Button Add Contact Button Personal Information access your personal
ScreenBeam Touch90 Interactive Whiteboard
 ScreenBeam Touch90 Interactive Whiteboard Software User Guide xxxx-xxxx-000 rev. 1 Table of Contents Installing the Software 2 Software Installation 2 Using the Software 5 Pages 6 Pens 7 Figures 10 Erasers
A Host and Presenter s Guide to the Cure4kids Web Conferencing System
 A Host and Presenter s Guide to the Cure4kids Web Conferencing System An online collaboration tool used in Cure4Kids An online medical education initiative of the International Outreach Program St. Jude
Frequently Asked Questions
 Frequently Asked Questions Frequently Asked Questions for Cisco Unified Personal Communicator 8.6 and Voice and Video Firmware 8.6 for Cisco Virtualization Experience Client 6215 FAQs 2 Basics 3 Setup
Contacts, presence, and IM
 Want to shut your virtual office door? Presence is automatically set based on your Outlook calendar but you can change it temporarily if you want to. Presence status is a quick way for other people see
Blackboard Collaborate Ultra 2018 UT DALLAS USER MANUAL
 Blackboard Collaborate Ultra 208 UT DALLAS USER MANUAL UT Dallas elearning ELEARNING@UTDALLAS.EDU SPRING 208 Table of Contents Introduction... 3 Browser Support... 3 Blackboard Collaborate Ultra inside
CyberLink. U Webinar. User's Guide
 CyberLink U Webinar User's Guide Copyright and Disclaimer All rights reserved. To the extent allowed by law, U Webinar IS PROVIDED AS IS, WITHOUT WARRANTY OF ANY KIND, EITHER EXPRESS OR IMPLIED, INCLUDING
Share Content. Share Content
 , page 1 Quick reference tasks: share content, page 2 Share a file, page 4 Share an application, page 11 About sharing a remote computer, page 14 Take a Poll, page 17 Transfer and Download Files During
Welcome. Microsoft PowerPoint 2010 Fundamentals Workshop. Faculty and Staff Development Program
 Faculty and Staff Development Program Welcome Microsoft PowerPoint 2010 Fundamentals Workshop Computing Services and Systems Development Phone: 412-624-HELP (4357) Last Updated: 04/19/13 Technology Help
ECDL Module 6 REFERENCE MANUAL
 ECDL Module 6 REFERENCE MANUAL Presentation Microsoft PowerPoint XP Edition for ECDL Syllabus Four PAGE 2 - ECDL MODULE 6 (USING POWERPOINT XP) - MANUAL 6.1 GETTING STARTED... 4 6.1.1 FIRST STEPS WITH
Creating a Website with Publisher 2016
 Creating a Website with Publisher 2016 Getting Started University Information Technology Services Learning Technologies, Training & Audiovisual Outreach Copyright 2017 KSU Division of University Information
PowerPoint Basics (Office 2000 PC Version)
") PowerPoint Basics (Office 2000 PC Version) Microsoft PowerPoint is software that allows you to create custom presentations incorporating text, color, graphics, and animation. PowerPoint (PP) is available
PowerPoint Basics (Office 2000 PC Version) Microsoft PowerPoint is software that allows you to create custom presentations incorporating text, color, graphics, and animation. PowerPoint (PP) is available
Reference guide: Zoom webinar tool
 Reference guide: Zoom webinar tool Introduction Zoom is the webinar tool that will be used for the webinars that have been scheduled for your online graduate subject. This guide includes information and
Publishing Electronic Portfolios using Adobe Acrobat 5.0
 Step-by-Step Publishing Electronic Portfolios using Adobe Acrobat 5.0 2002, Helen C. Barrett Here is the process we will use to publish a digital portfolio using Adobe Acrobat. The portfolio will include
FACULTY AND STAFF COMPUTER FOOTHILL-DE ANZA. Office Graphics
 FACULTY AND STAFF COMPUTER TRAINING @ FOOTHILL-DE ANZA Office 2001 Graphics Microsoft Clip Art Introduction Office 2001 wants to be the application that does everything, including Windows! When it comes
Section 2. Slides. By the end of this Section you should be able to:
 Section 2 Slides By the end of this Section you should be able to: Understand and Use Different Views Understand Slide Show Basics Save, Close and Open Presentations Exit PowerPoint 26 CIA Training Ltd
The Video Broadcast. Blackboard Support Team V 2.0
 The Video Broadcast By Blackboard Support Team V 2.0 1111111 Content Video Broadcast... 3 Activity and Permission Indicators... 4 Status Indicators... 5 Previewing Video... 6 Transmitting Video... 6 Stopping
Signing in. Signing in. Which Skype should I use? Quick Start Guide. Sign in using your Massey address and password.
 Quick Start Guide Signing in Signing in Sign in using your Massey email address and password. Which Skype should I use? Skype for Business is for connecting with a co-worker or business associate. Skype
Skype for Business: Get Started Set-up Audio Set-up Video Conversation Window Shut Your Virtual Office Door...
 Desktop/Laptop Contents : Get Started... 3 Set-up Audio... 3 Set-up Video... 3 Conversation Window... 4 Shut Your Virtual Office Door... 4 Personalise... 5 Customise What s Happening Today... 5 Profile
Slides & Presentations
 Section 2 Slides & Presentations ECDL Section 2 Slides & Presentations By the end of this section you should be able to: Understand and Use Different Views Understand Slide Show Basics Save, Close and
Creating a Text Frame. Create a Table and Type Text. Pointer Tool Text Tool Table Tool Word Art Tool
 Pointer Tool Text Tool Table Tool Word Art Tool Picture Tool Clipart Tool Creating a Text Frame Select the Text Tool with the Pointer Tool. Position the mouse pointer where you want one corner of the text
User Guide. DrawAnywhere.com: User Guide
 DrawAnywhere.com: User Guide DrawAnywhere.com is an online diagramming & flow charting application with the look & feel of a desktop application! User Guide http://www.drawanywhere.com August, 2007 Table
Welcome & Introduction
 Welcome & Introduction Welcome to ebeam Interactive Suite 3. Overview ebeam Interactive Suite 3 allows you to create lessons with provided resources and enhances curriculum delivery with dynamic annotation
JMWeb Online Help
 Table Of Contents Contents Welcome to Jabber Messenger for the Web... 3 What do you want to do?... 3 Adding Contacts... 4 Chatting with Contacts... 5 What is Presence?... 7 Presence types... 7 Your presence...
PowerPoint Intermediate 2010
 PowerPoint Intermediate 2010 I. Creating a Slide Master A. Using the design feature of PowerPoint essentially sets up similar formatting for all of your slides within a presentation. However, there are
Premiere Pro CC 2018 Essential Skills
 Premiere Pro CC 2018 Essential Skills Adobe Premiere Pro Creative Cloud 2018 University Information Technology Services Learning Technologies, Training, Audiovisual, and Outreach Copyright 2018 KSU Division
This guide will show you how to create a basic multi-media PowerPoint presentation containing text, graphics, charts, and audio/video elements.
 This guide will show you how to create a basic multi-media PowerPoint presentation containing text, graphics, charts, and audio/video elements. Before starting the steps outlined in this guide, it is recommended
Using Graphics. Digital Camera. Auto Shapes
 AutoShape Using Graphics Internet The following graphic elements are available to enhance your presentation Clip Art AutoShapes Fill effects Shadow effects 3D effects Digital Camera WordArt Digital Camera
PowerPoint for Art History Presentations
 PowerPoint for Art History Presentations For PC computers running Microsoft Office 2007+ Adapted by The University of California, Berkeley from the Institute of Fine Arts document by Elizabeth S. Funk
YOUR GUIDE TO. Skype for Business
 YOUR GUIDE TO Skype for Business Welcome to Skype for Business This is the Skype for Business app Your profile picture, status & location (you can change these) Your options Your contacts and groups (you
What is Adobe Connect Pro? Setting up a Meeting. Using Adobe Connect Pro
 What is Adobe Connect Pro? Adobe Acrobat Connect Pro is a Flash based application that allows you to have real-time, multi-point meetings and class sessions that participants can access through a web browser.
PowerPoint 2010 Level 1 Computer Training Solutions Student Guide Version Revision Date Course Length
 Level 1 Computer Training Solutions Version 1.2 Revision Date Course Length 2012-Feb-16 6 hours Table of Contents Quick Reference... 3 Frequently Used Commands... 3 Manitoba ehealth Learning Management
OnBase - EDM Services (Electronic Document Management Services)
") OnBase - EDM Services (Electronic Document Management Services) Overview EDM Services contains the following features: EDM Briefcase Prerequisites The EDM Briefcase allows you to: Document Templates Image
OnBase - EDM Services (Electronic Document Management Services) Overview EDM Services contains the following features: EDM Briefcase Prerequisites The EDM Briefcase allows you to: Document Templates Image
PowerPoint 2010: Basic Skills
 PowerPoint 2010: Basic Skills Application Support and Training Office of Information Technology, West Virginia University OIT Help Desk (304) 293-4444, oithelp@mail.wvu.edu oit.wvu.edu/training/classmat/ppt/
Kidspiration 3 Basics Website:
 Website: http://etc.usf.edu/te/ Kidspiration is the visual learning tool for K-5 learners from the makers of Inspiration. With Kidspiration, students can build graphic organizers such as webs, concept
Technology Training Center. WebEx Meeting Center User Guide
 Technology Training Center WebEx Meeting Center User Guide Updated 9/26/2017 Table of Contents ACCESSING WEBEX AS A PARTICIPANT... 1 Joining a WebEx as a Participant... 1 Audio and Video Connection...
MeetingCenter Getting Started Guide
 MeetingCenter Getting Started Guide For more information: 800.374.2441 www.intercall.com info@intercall.com This guide introduces MeetingCenter TM, powered by WebEx TM,and provides basic information about
Voyant Connect User Guide
 Voyant Connect User Guide WELCOME TO VOYANT CONNECT 3 INSTALLING VOYANT CONNECT 3 MAC INSTALLATION 3 WINDOWS INSTALLATION 4 LOGGING IN 4 WINDOWS FIRST LOGIN 6 MAKING YOUR CLIENT USEFUL 6 ADDING CONTACTS
WebEx Meeting Center TM Pro 6.2
 BT Web Conferencing Powered by WebEx TM WebEx Meeting Center TM Pro 6.2 For collaborative meetings with 2 to 500 participants USER GUIDE Version 1.0. Last revised January 7, 2005 With BT Web Conferencing
HOW TO. In this section, you will find. miscellaneous handouts that explain. HOW TO do various things.
 In this section, you will find miscellaneous handouts that explain do various things. 140 SAVING Introduction Every time you do something, you should save it on the DESKTOP. Click Save and then click on
Getting Started with Microsoft PowerPoint 2003
 Getting Started with Microsoft PowerPoint 2003 Overview: This handout provides basic introductory information about Microsoft PowerPoint and its application in the classroom. Audience: All instructional
Avigilon Control Center Standard Web Client User Guide. Version 5.6
 Avigilon Control Center Standard Web Client User Guide Version 5.6 2006-2015, Avigilon Corporation. All rights reserved. Unless expressly granted in writing, no license is granted with respect to any copyright,
[Not for Circulation]
![[Not for Circulation]](/thumbs/72/67739940.jpg "[Not for Circulation]") Advanced PowerPoint This document provides instructions for using some of the more advanced features in PowerPoint, including slide masters, techniques for running presentations, animation, and incorporating
Advanced PowerPoint This document provides instructions for using some of the more advanced features in PowerPoint, including slide masters, techniques for running presentations, animation, and incorporating
PowerPoint 2016 Basics for Mac
 1 PowerPoint 2016 Basics for Mac PowerPoint 2016 Basics for Mac Training Objective To learn the tools and features to get started using PowerPoint more efficiently and effectively. What you can expect
INSERVICE DAY - 11/11/11 TECHNOLOGY
 INSERVICE DAY - 11/11/11 TECHNOLOGY Converting PowerPoints into Movies (examples using imovie& Windows MovieMaker) (More detailed tutorials with pictures can be found at http://www.whsd.net/olc/teacher.aspx?s=1452).
Windows Movie Maker / Microsoft Photo Story Digital Video
 Windows Movie Maker / Microsoft Photo Story Digital Video http://intranet/technology/index.html TRC HELP DESK X5092 April 2006 Photo Story and Movie Maker Microsoft Photo Story 3 allows you to create fantastic