X1 RGB. Mechanical Keyboard User Guide
|
|
|
- Melinda Mabel Dawson
- 5 years ago
- Views:
Transcription

1 X1 RGB Mechanical Keyboard User Guide 01
2 Table of Contents PAGE 05 Keyboard Features Overview PAGE 16 Software Installation PAGE 19 Functions Available on the Home Page PAGE 21 Key Configurations Default Functions Single-Key Operations Macros Multimedia Features Hot Keys Program Execution Game Profiles Key Deactivation PAGE 39 Functions Available on the Macro Page 02 User Guide
3 Table of Contents PAGE 41 How to Record Macros Recording a Macro Recording a Character Set PAGE 49 Functions Available on the Lighting Effects Page PAGE 51 Lighting Effects Overview Static Pulse Wave Spiral Rainbow Spectrum Cycling Reactive Flow Ripple Raindrop Snake Marquee Sound Control System Temperature PAGE 88 Functions Available on the Settings Page 03 User Guide
4 Table of Contents PAGE 90 App Features Overview Downloading the App Connecting the App with Software Lighting Features Macros Virtual Controller Voice Control Virtual Keyboard Voice Control Table User Guide
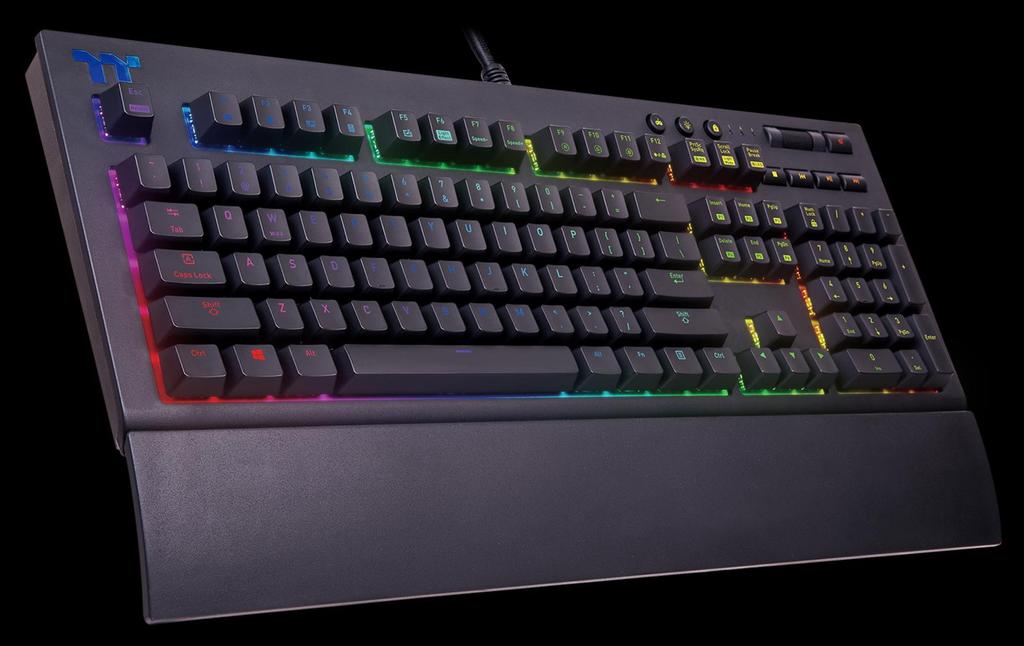
5 Chapter 1: Keyboard Features Overview 05 User Guide

6 Keyboard Features Features Overview Restore Factory Settings + Press and hold for five seconds to restore factory settings (including all lighting effects and macros). After the settings are restored, a startup animation will run once to indicate that all settings have been restored. + Open the default box. Web Browser + Open the default web browser/return to the home page. 06
7 Keyboard Features Features Overview My Computer + Open My Computer. Calculator + Open the system's built-in calculator. Multimedia Player + Open the system's built-in multimedia player. 07
, F10 (green), and F11 (blue) to change the color of the lighting effect (F12 will display the blended color). Pulse: (1).")
8 Keyboard Features Features Overview Switching Lighting Effects + Static: (1). You can use Fn + F9 (red), F10 (green), and F11 (blue) to change the color of the lighting effect (F12 will display the blended color). Pulse: (1). You can use Fn + F7 (slower) and F8 (faster) to adjust the speed of the lighting effect. (2). You can use Fn + F12 to switch between monochrome and random color modes. (3). Under monochrome mode, Fn + F9 (red), F10 (green), and F11 (blue) can be used to adjust the color of the lighting effect (F12 will display the blended color). Wave: (1). You can use Fn + F7 (slower) and F8 (faster) to adjust the speed of the lighting effect. (2). You can use Fn +,,, or to change the direction of running lights. (3). You can use Fn + F9 (red), F10 (green), and F11 (blue) to change the color of the lighting effect. Spiral Rainbow: (1). You can use Fn + F7 (slower) and F8 (faster) to adjust the speed of the lighting effect. (2). You can use Fn + (counterclockwise) or (clockwise) to switch the direction of running lights. (3). You can use Fn + F9 (red), F10 (green), and F11 (blue) to change the color of the lighting effect. Spectrum Cycling: (1). You can use Fn + F7 (slower) and F8 (faster) to adjust the speed of the lighting effect. Reactive: (1). You can use Fn + F7 (slower) and F8 (faster) to adjust the speed of the lighting effect. (2). You can use Fn + F12 to switch between monochrome and random color modes. (3). Under monochrome mode, Fn + F9 (red), F10 (green), and F11 (blue) can be used to adjust the color of the lighting effect (F12 will display the blended color). Flow: (1). You can use Fn + F7 (slower) and F8 (faster) to adjust the speed of the lighting effect. (2). You can use Fn + F12 to switch between monochrome and random color modes. (3). Under monochrome mode, Fn + F9 (red), F10 (green), and F11 (blue) can be used to adjust the color of the lighting effect (F12 will display the blended color). Ripple: (1). You can use Fn + F7 (slower) and F8 (faster) to adjust the speed of the lighting effect. (2). You can use Fn + F12 to switch between monochrome and random color modes. (3). Under monochrome mode, Fn + F9 (red), F10 (green), and F11 (blue) can be used to adjust the color of the lighting effect (F12 will display the blended color). Raindrop: (1). You can use Fn + F7 (slower) and F8 (faster) to adjust the speed of the lighting effect. (2). You can use Fn + F12 to switch between monochrome and random color modes. (3). Under monochrome mode, Fn + F9 (red), F10 (green), and F11 (blue) can be used to adjust the color of the lighting effect (F12 will display the blended color). Snake Marquee: (1). You can use Fn + F7 (slower) and F8 (faster) to adjust the speed of the lighting effect. (3). You can use Fn + or to change the direction of running lights. (4). You can use Fn + F12 to switch between monochrome and random color modes. (5). Under monochrome mode, Fn + F9 (red), F10 (green), and F11 (blue) can be used to adjust the color of the lighting effect (F12 will display the blended color). 08
9 Keyboard Features Features Overview Decreasing the Speed of Lighting Effects + Five different lighting effect speeds (the is set to the slowest setting). indicator lights will flash when the speed Increasing the Speed of Lighting Effects + Five different lighting effect speeds (the set to the fastest setting). indicator lights will flash when the speed is Adjust the brightness of the red light Ten brightness level settings for the red light (the indicator lights will flash when the speed is set to the fastest setting). + Press and hold for three seconds to clear the red value (once cleared, the indicator lights will flash at the same time). 09
10 Keyboard Features Features Overview Adjust the brightness of the green light Ten brightness level settings for the green light (the indicator lights will flash when the speed is set to the fastest setting). + Press and hold for three seconds to clear the green value (once cleared, the indicator lights will flash at the same time). Adjust the brightness of the blue light Ten brightness level settings for the blue light (the indicator lights will flash when the speed is set to the fastest setting). + Press and hold for three seconds to clear the blue value (once cleared, the indicator lights will flash at the same time). Switching Color Modes + Can be used to switch between monochrome and random color modes for a specific lighting effect. Under monochrome mode, this key serves as the mixed-color indicator. 10
11 Keyboard Features Features Overview Changing the Direction of Lighting Effects + You can switch the running direction of a specific lighting effect. Switching Profiles Up to six profiles can be saved. The current active profile is shown by the color displayed on the. + P1: Red, P2: Green, P3: Blue, P4: Yellow, P5: Purple, P6: Aquamarine. The color statuses described above are only visible under Game Mode. 11
. (2).")
12 Keyboard Features Features Overview On-the-Fly Macro Recording Macro Recording (only available under Game Mode): (1). Press Fn + PrtSc to enter recording mode (the entire keyboard will light up and the Record button will begin to flash). (2). Press Fn + any key (excluding the Recording key) to specify a key to save the macro under (a red light will appear after a slight delay; if you press Fn + the same key, a blue light will appear without a delay). Once the key selection is completed, all lights on the keyboard will go out, and the Recording key will change from flashing to constantly lit. (3).Enter the sequence to be recorded (keys recorded will flash in aquamarine). (4).After the sequence is entered, press Fn + PrtSc to exit recording mode (the light for the Recording key will go off). This feature is only available under Game Mode. When a key has been designated for macro assignment, before any keystrokes are recorded, the key assignment can be changed by pressing Fn + another key. + While in recording mode, if the key's backlight is solid white, that means there is currently no macro assigned to this key. If the key is solid green, that means a macro has been assigned to this key (as shown in the following figure: the "A" key has a macro assigned to it). Press and hold a key which has been assigned a macro for more than 3 seconds to erase the saved macro. 12
: (1).Press Fn + ScLk to enter Area Backlight mode. (2).")
13 Keyboard Features Features Overview Area Backlight + Supports up to five presets: FPS1 FPS2 MMO MOBA RTS All five presets listed above can be recorded and modified separately. Recording Area Backlight + Recording procedure (recording can only be activated while in Area Backlight Mode): (1).Press Fn + ScLk to enter Area Backlight mode. (2).Press Fn + Pause to enter Backlight Recording mode (the recording button will flash). (3).Press Fn + F9 (red), F10 (green), and F11 (blue) to produce a desired color by mixing the three colors together (F12 will display the blended color). (4).Press the key in each display area in order (if you wish to change to another color, please return to the previous step). (5).Once completed, press Fn + Pause to exit Recording mode (the recording button will stop flashing). When a key's backlight color is identical to the blended color shown by the F12 key, pressing it will cancel the backlight color. If it is a different color, the color will be overwritten. Press and hold for five seconds to restore the area's preset light position and color value ( indicator lights will flash at the same time to indicate that the settings have been restored). 13
14 Keyboard Features Features Overview Switching WASD and the Direction Keys + Switches the functions of WASD keys with the arrow keys. Full Keyboard Lock + Lock the entire keyboard (once activated, to indicate the current status). indicator lights will flash at the same time Game Mode When this key is lit up in white, this means it is in non-game Mode. Once Game Mode is activated, the indicator color will light up in the color specified in the setup profile. While not operating under Game Mode, all keys will function according to their preset values. 14

15 Keyboard Features Features Overview Full Keyboard Brightness Adjustment A total of five brightness levels are available for adjusting the brightness of the keyboard's lighting effects. The first level completely disables the backlight for all keys. Locking the Windows Key The Windows key can be replaced with the function of the Ctrl key. Before the key is locked, a white-colored light will turn on. After the key is locked, an aquamarine-colored light will turn on. Software Requirements: Compatible with Windows 7/Windows 8/Windows 10. An Internet connection is required. And at least 200MB of free hard disk space. Please plug the keyboard into a USB port that is directly connected to the computer's motherboard. Avoid using a USB hub, which may not supply sufficient power for the keyboard to function properly. After the software program is started up, all keyboard functions will be controlled by the program (only the functions of Fn + F1 ~ F5 will be kept; other switching functions and lighting effects will become temporarily unavailable). 15
16 Chapter 2: Software Installation 16 User Guide

 file and click Next.")
17 Software Installation Setup Instructions Step 1: Step 2: Launch the setup executable file (.EXE) file and click Next. Click Install to begin the setup process. 17


18 Software Installation Setup Instructions Step 3: Once setup is complete, you will also need to install the Microsoft Visual C Redistributable Package. Without installing the Redistributable Package, the software will fail to launch. Step 4: Click Finish to complete the installation. 18
19 Chapter 3: Functions Available on the Home Page 19 User Guide

20 Keyboard Page Key Assignment Setting Switching the Home Page You can switch the main keyboard configurations page with the macro recording page. Switching Profiles The X1 RGB can support up to 6 profiles, which can be switched as required. Restore Factory Settings / Customer Service Center / Product Info / Close Window / Other Settings Restore Factory Settings: All settings saved under Profiles 1 to 6 will be restored to factory default values. Customer Service Center: Opens the Global Customer Service Center page. Close Window: Close the display and minimize the program to the lower right corner. Other Settings: Software version, firmware version, and switching the language used for the user interface. Switching Configuration Pages Switches between the configuration pages r singlekey operation and lighting effects. Functions for Managing Profiles Up to 15 profiles can be added for use. The functions of each button from left to right are: Add: Create a new profile. Delete: Delete an existing profile. Copy: Copy a profile. Import: Import a profile. Export: Export a profile. Correcting the Name of a Profile The name of a new profile can be modified directly. Assigning Key Functions Eight different functions can be assigned. Restore Keyboard Settings for All Keys / Apply Restore Keyboard Settings for All Keys: All key functions saved under the current profile will be restored to factory default values. Apply: Save and apply all settings to the selected key. 20
21 Chapter 4: Key Configurations 21 User Guide
22 Default Function Default Key Setting Step 1: Step 2: Select a key, then select a "preset" function from the drop-down list. Click Apply to change and save the new function. 22
23 Single Key Function Single Key Setting Step 1: Step 2: Select a key, then select "Single Key" from the drop-down list. Enter a new key value into the lower-right box. 23
24 Single Key Function Single Key Setting Step 3: Click Apply to change and save the new function. Step 4: Based on the information and color displayed on the screen, you will be able to see if the new key setting is applied properly. 24
25 Macro Function Macro Key Setting Step 1: Step 2: First, you must designate a key, then select "Macro" in the drop-down list. Select a macro from the upper-right. 25
26 Macro Function Macro Key Setting Step 3: Step 4: Select a macro playback mode from the drop-down list located in the Click Apply to save the new function. Verify if the new key function is applied lower-right corner. properly by looking at the color displayed on the screen. 26
27 Media Function Media Key Setting Step 1: Step 2: Select a key, then select "Multimedia" from the drop-down list. Select a multimedia function in the right drop-down list. 27
28 Media Function Media Key Setting Step 3: Click Apply to change and save the new function. Step 4: Based on the information and color displayed on the screen, you will be able to see if the new key setting is applied properly. 28
29 Hot Key Function Hot Key Setting Step 1: Step 2: Select a key, then select "Multifunction Key" from the drop-down list. Select a type of hotkey function in the upper-right drop-down list. 29

30 Hot Key Function Hot Key Setting Step 3: Select a hotkey function in the lower-right drop-down list. Step 4: Click Apply to save the new function. Verify if the new key function is applied properly by looking at the color displayed on the screen. 30
31 Launch Application Function Application Setting Step 1: Step 2: Select a key, then select "Launch Application" from the drop-down list. Select "Application" in the upper-right drop-down list. 31

 to open.")
32 Launch Application Function Application Setting Step 3: Step 4: Click on the Open File button located on the bottom-right. Select the executable file (.EXE) to open. 32
33 Launch Application Function Application Setting Step 5: Click Apply to change and save the new function. Step 6: Based on the information and color displayed on the screen, you will be able to see if the new key setting is applied properly. 33
34 Launch Application Function Website Setting Step 1: Step 2: Select a key, then select "Launch Application" from the drop-down list. Select "Web" in the upper-right drop-down list. 34
35 Launch Application Function Website Setting Step 3: Enter the URL into the textbox located on the bottom-right and press Enter. Step 4: Click Apply to save the new function. Verify if the new key function is applied properly by looking at the color displayed on the screen. 35

36 Gaming Profile Function Gaming Key Setting Step 1: Step 2: Select a key, then select "Gaming Profile" from the drop-down list. Select a game title in the upper-right drop-down list. 36

37 Gaming Profile Function Gaming Key Setting Step 3: In the lower-right drop-down list, select an in-game action. Step 4: Click Apply to save the new function. Verify if the new key function is applied properly by looking at the color displayed on the screen. 37
38 Disable Function Disable Key Setting Step 1: Select a key, then select "Disable" from the drop-down list. Step 2: Click Apply to save the new function. Verify if the new key function is applied properly by looking at the color displayed on the screen. 38
39 Chapter 5: Functions Available on the Macro Page 39 User Guide

40 Macro Page Macro Recording Setting New Macro / Delete / Copy / New Character Set / Import / Export New macro: Create a blank macro. Delete: Delete a macro or character set. Copy: Copy a macro or character set. New Character Set: Create a blank character set. Import: Import a macro or character set. Export: Export a macro or character set. Record / Delete / Insert / Pause / Edit Record: Begin macro recording. Delete: Delete the assigned value of a specific key. Insert: Insert an additional value above or below the existing value of a specific key. Stop: End macro recording. Edit: Edit the delay time of a specific key. Modifying the Name of a Macro You can change the name of a new macro or character set directly. Macro Recording Settings Record Delay Times: Record a macro based on the time interval between each keystroke. Fixed Delay: Record a macro based on the specified time interval. No Delay: Record a macro without recording the time interval between each keystroke. Macro Recording Area You can verify the sequence recorded by the macro and the key assignment. 40
41 Chapter 6: How to Record Macros 41 User Guide
42 Macro Recording Function Recording Setting Step 1: Step 2: Add a new macro and modify its name. Select the delay method used to record the macro by using the checkboxes below. 42
43 Macro Recording Function Recording Setting Step 3: Press the Record button. Step 4: Enter the sequence to be recorded from the keyboard, then press the Stop button to complete the recording. 43
44 Macro Recording Function Insert Setting Step 1: Step 2: Select a macro by clicking on the key it is assigned to. Click the Insert button. 44
45 Macro Recording Function Insert Setting Step 3: Step 4: Select the position where new content is to be inserted. Press the Record button. 45
46 Macro Recording Function Insert Setting Step 5: Step 6: Enter the sequence to be recorded from the keyboard. Click the Stop button to complete the insertion process. 46

47 Text Recording Function Recording Setting Step 1: Step 2: Add a new character set and modify its name. Enter the values for the "Start Key" and "End Key" in the upper right corner. 47
48 Text Recording Function Recording Setting Step 3: Click on the input box located at the bottom-right corner and enter the characters to be recorded from the keyboard. Step 4: Click the Save button to complete the recording of the character set. 48
49 Chapter 7: Functions Available on the Lighting Effects Page 49 User Guide

50 Lighting Page Lighting Function Setting Switching Lighting Effects A total of 12 lighting effects are supported: Static, Pulse, Wave, Spiral Rainbow, Spectrum Cycling, Reactive, Flow, Ripple, Raindrop, Snake Marquee, Sound Control, and System Temperature. Lighting Effects Configurations Can be used to adjust the color, direction, speed, and brightness level of the lighting effect within an area; can also be used to switch to random colors. TT RGB Synchronized Lighting Effect Once activated, it supports a synchronized lighting effect with the TT liquid cooling kit. Apply / Restore Lighting Effect Settings Apply: Apply the new lighting effect settings to all keys on the keyboard. Restore Lighting Effect Settings: All lighting effect settings saved under the current profile will be restored to factory default values. 50 Color Pattern Settings Add Pattern: Add a new pattern with red to black gradient. Delete Pattern: Delete the currently selected color pattern. Insert Color Point: Add a red color point to the color pattern. Delete Color Point: Delete the selected color point from the color pattern. Color Wheel Settings You can select a color from the color wheel directly or enter RGB color values to adjust the color of the lighting effect.
51 Chapter 8: Lighting Effects Overview 51 User Guide
52 Static Mode Color Setting Step 1: Select "Static" in the Lighting Effect drop-down list. Step 2: Click on a color inside the color wheel or enter the RGB color values to change the color. 52
53 Static Mode Color Setting Step 3: Step 4: Adjust the brightness level of the keyboard's backlight. Click Apply to save the new settings. 53
54 Static Mode Customized Setting Step 1: Step 2: Switch the area to "Customized." Click on a color inside the color wheel or enter the RGB color values to set the color. 54
55 Static Mode Customized Setting Step 3: Click on the keyboard image directly with the left mouse button to change the key color. Right click to cancel the color. Step 4: Click Apply to save the new settings. 55

56 Pulse Mode Color Setting Step 1: Select "Pulse" in the Lighting Effect drop-down list. Step 2: Click on a color inside the color wheel or enter the RGB color values to change the color. 56
57 Pulse Mode Color Setting Step 3: Step 4: Adjust the backlight speed. Click Apply to save the new settings. 57
58 Pulse Mode Customized Setting Step 1: Step 2: Switch the area to "Customized." Click on a color inside the color wheel or enter the RGB color values to set the color. 58
59 Pulse Mode Customized Setting Step 3: Click on the keyboard image directly with the left mouse button to change the key color. Right click to cancel the color. Step 4: Click Apply to save the new settings. 59
60 Wave Mode Pattern Setting Step 1: Step 2: Select "Wave" in the Lighting Effect drop-down list. Select a set of color patterns on the upper-right. 60
61 Wave Mode Pattern Setting Step 3: Step 4: Set the direction, speed, and brightness level of the lighting effect. Click Apply to save the new settings. 61
62 Wave Mode Customized Pattern Setting Step 1: Step 2: Add a new set of color patterns. Add a new color-insertion point and drag it to the desired position. 62
63 Wave Mode Customized Pattern Setting Step 3: Step 4: Click on each color-insertion point to modify its color. Click Apply to save the new settings. 63
64 Spiral Rainbow Mode Pattern Setting Step 1: Step 2: Select "Spiral Rainbow" in the Lighting Effect drop-down list. Select a set of color patterns on the upper-right. 64
65 Spiral Rainbow Mode Pattern Setting Step 3: Step 4: Set the direction, speed, and brightness level of the lighting effect. Click Apply to save the new settings. 65
66 Spiral Rainbow Mode Customized Pattern Setting Step 1: Step 2: Add a new set of color patterns. Add a new color-insertion point and drag it to the desired position. 66
67 Spiral Rainbow Mode Customized Pattern Setting Step 3: Step 4: Click on each color-insertion point to modify its color. Click Apply to save the new settings. 67
68 Spectrum Cycling Mode Function Setting Step 1: Select "Spectrum Cycling" in the Lighting Effect drop-down list. Step 2: Set the speed and brightness level of the backlight and click on Apply to save the new settings. 68
69 Reactive Mode Color Setting Step 1: Select "Reactive" in the Lighting Effect drop-down list. Step 2: Click on a color inside the color wheel or enter the RGB color values to change the color. 69
70 Reactive Mode Color Setting Step 3: Step 4: Adjust the backlight speed. Click Apply to save the new settings. 70
71 Reactive Mode Customized Setting Step 1: Step 2: Switch the area to "Customized." Click on a color inside the color wheel or enter the RGB color values to set the color. 71
72 Reactive Mode Customized Setting Step 3: Click on the keyboard image directly with the left mouse button to change the key color. Right click to cancel the color. Step 4: Click Apply to save the new settings. 72
73 Flow Mode Color Setting Step 1: Select "Flow" in the Lighting Effect drop-down list. Step 2: Click on a color inside the color wheel or enter the RGB color values to change the color. 73
74 Flow Mode Color Setting Step 3: Step 4: Set the speed and brightness level of the backlight. Click Apply to save the new settings. 74
75 Flow Mode Customized Setting Step 1: Step 2: Set the area to "Customized", then add a new set of color patterns. Add a new color-insertion point and drag it to the desired position. 75
76 Flow Mode Customized Setting Step 3: Step 4: Click on each color-insertion point to modify its color. Click Apply to save the new settings. 76
77 Ripple Mode Color Setting Step 1: Select "Ripple" in the Lighting Effect drop-down list. Step 2: Click on a color inside the color wheel or enter the RGB color values to change the color. 77
78 Ripple Mode Color Setting Step 3: Step 4: Set the speed and brightness level of the backlight. Click Apply to save the new settings. 78
79 Ripple Mode Customized Setting Step 1: Step 2: Set the area to "Customized", then add a new set of color patterns. Add a new color-insertion point and drag it to the desired position. 79
80 Ripple Mode Customized Setting Step 3: Step 4: Click on each color-insertion point to modify its color. Click Apply to save the new settings. 80
81 Raindrop Mode Color Setting Step 1: Select "Raindrop" in the Lighting Effect drop-down list. Step 2: Click on a color inside the color wheel or enter the RGB color values to change the color. 81
82 Raindrop Mode Color Setting Step 3: Step 4: Set the speed and brightness level of the backlight. Click Apply to save the new settings. 82
83 Snake Marquee Mode Color Setting Step 1: Select Snake Marquee" in the Lighting Effect drop-down list. Step 2: Click on a color inside the color wheel or enter the RGB color values to change the color. 83
84 Snake Marquee Mode Color Setting Step 3: Step 4: Set the direction, speed, and brightness level of the lighting effect. Click Apply to save the new settings. 84
85 Sound Control Mode Color Setting Step 1: Select "Sound Control" in the Lighting Effect drop-down list. Step 2: Click on a color inside the color wheel or enter the RGB color values to change the color of each row. 85
86 Sound Control Mode Color Setting Step 3: Step 4: Set the desired mode of lighting effects. Click Apply to save the new settings. 86
87 System Temperature Mode Function Setting Step 1: Step 2: Select "System Temperature" in the Lighting Effect drop-down list. Click Apply to save the new settings. 87
88 Chapter 9: Functions Available on the Settings Page 88 User Guide
89 Settings Page Else Function Language Settings Sets the language of the program's user interface. Official Website / Social Media Official Website: Visit the X1 RGB Keyboard official website. Social Media: Visit Thermaltake on Facebook. Software Version / Firmware Version Software Version: Displays the version number of the installed program. Firmware Version: Displays the version number of the keyboard's driver. X1 APP Password Setting Enter four number or English alphabet. Empty is disable function. 89

90 Chapter 10: App Features Overview 90 User Guide


91 APP Download Download Step Step 2 Enter "X1 RGB" into the search bar. Step 1 Open the App Store. Step 3 Tap to download. 91
92 APP Connecting Connecting Step Step 1 Launch the X1 RGB app. Step 2 Open X1 RGB Software and setting X1 App password. 92

93 APP Connecting Connecting Step Step 3 Click to scan for devices. Step 5 Enter X1 App password. Step 4 In order to establish a connection, click on the IP address of the computer you wish to connect to. If the IP address is not found, please try again to scan for your device. In addition, please verify that the keyboard software is activated. If your device still cannot be found, please use the manual connection method (described on the next page). 93

94 APP Connecting Input IP Connecting Step 1 Enter the computer's IP address. Connection Guide Before attempting to establish a connection, please read these instructions carefully to prevent problems when searching for your device. Step 2 Click on the "Connect" button. 94
. Step 2 Set the desired speed to complete the settings.")

95 Lighting Function Setting Step Pulse Wave Step 1 Select the color you wish to adjust or switch to random color mode (once activated, color selection is no longer available). Step 2 Set the desired speed to complete the settings. Step 1 Select from a list of preconfigured color patterns available in the program (the number indicates the order). Step 2 Select the direction of running lights. Switching Lighting Effects Slide left or right to switch between different lighting effects. Step 3 Set the desired speed and brightness level to complete the settings. 95
96 Macro Function Import Macro Setting Step Step 1 Click to select the menu in the upper-left corner. Step 3 Select the key position for adding a new macro. Step 2 Select "Macro. 96

97 Macro Function Import Macro Setting Step Step 4 Select a previously recorded macro from the program. Step 7 Tap on the button to activate the macro. Step 5 Select the type of game the macro will be used for. Step 6 Tap OK to complete the settings. 97

98 Macro Function Delete Macro Setting Step Step 1 Tap the icon located in the upper-right corner to enter editing mode. Step 2 Tap the trash can icon to delete the macro. Step 3 Tap the confirmation icon located in the upper-right corner to exit editing mode. 98
99 Virtual Controller Function Setting Step Step 1 Click to select the menu in the upperleft corner. Default Settings L" and R" keys on the keyboard. Gaming Profile A maximum of 10 profiles Can be saved. Default Settings "A", "B", X", and Y" keys on the keyboard. Step 2 Select "Virtual Controller. Default Settings Up, Down, Left, and Right keys on the keyboard. Default Settings Enter" key on the keyboard. 99

100 Virtual Controller Function Setting Step Step 3 Tap the icon located in the upper-right corner to enter editing mode. Step 4 Tap the icon located in the lower-right corner to add new keys. 100

101 Virtual Controller Function Setting Step Step 5 Select the design of the new key. Step 6 Once it's added, move the key to the desired position, and modify its value and size. (Resizable by using pinch-to-zoom). 101


102 Virtual Controller Function Setting Step Step 7 Select the key settings you want to edit. Step 8 Once editing is complete, tap the confirmation icon in the upper-right corner to confirm your settings and exit editing mode. 102

103 Voice Control Function Setting Step Step 1 Click to select the menu in the upper-left corner. Step 2 Select "Voice Control. Step 3 After tapping on the microphone icon, the app will begin to listen for voice commands. Please refer to the next page for a list of voice commands. 103

104 Keyboard Control Function Setting Step Step 1 Click to select the menu in the upper-left corner. Step 2 Select "Virtual Keyboard. Step 3 Once the keyboard pops up, press the keys in order to perform remote control. 104
105 Voice Control Table Command Table Note Command (Chinese) Command (English) Description Color mode Light mode 紅色 Red Color Change all LED color Red 橙色 Orange Color Change all LED color Orange 黃色 Yellow Color Change all LED color Yellow 綠色 Green Color Change all LED color Green 藍色 Blue Color Change all LED color Blue 靛色 Indigo Color Change all LED color Indigo" 紫色 Purple Color Change all LED color Purple 白色 White Color Change all LED color White 彩色 Rainbow Default color 全亮 Static Full Lighted mode 呼吸 Pulse Pulse mode 波浪 Wave Wave mode 旋轉 Spiral Spiral Rainbow Wave mode 極光 Flow Flow mode, could not change color 光譜循環 Spectrum Cycling 漣漪 Ripple Ripple mode RGB Spectrum mode, could not change color 雨滴 Raindrops Raindrops mode 跑馬燈 Snake Marquee Snake Marquee mode 反應 Reactive Reactive mode 105
106 Voice Control Table Command Table Note Command (Chinese) Command (English) Description 速度極快 Extreme Light speed Extreme 速度快 Fast Light speed Fast Light Speed 速度慢 Normal Light speed Normal 速度極慢 Slow Light speed Slow 快一點 Quickly Change the light speed quickly 慢一點 Slowly Change the light speed slowly 關燈 Turn Off Turn off all LED light Switch 開燈 Turn On Turn on all LED light 結束 End Leave voice input 燈光最亮 Glaring Brightness 100% Brightness 燈光亮 bright Brightness 75% 燈光暗 dim Brightness 50% 106
RGBBLUE SPEED RGB SILVER CHERRY MX CHERRY MX. Mechanical SWITCH NAME. Mechanical SWITCH TYPE SWITCH TYPE CHERRY MX SPEED RGB SILVER MECHANICAL
 CHERRY MX RGB SWITCHES CHERRY MX SPEED RGB SILVER ULTRA FAST 1.2MM ACTUATION POINT CHERRY MX RGBBLUE FAST, RESPONSIVE AUDIBLE CLICK SWITCH TYPE Mechanical SWITCH TYPE Mechanical SWITCH NAME CHERRY MX SPEED
RIPJAWS KM780 RGB User Manual
 RIPJAWS KM780 RGB User Manual Table of Contents 4 Introduction Layout Overview 6 Profiles & Modes Introducing Profiles & Modes Link Program to a Profile Save Profile to Device 8 Profiles Create a Profile
RIPJAWS KM780 RGB User Manual
 RIPJAWS KM780 RGB User Manual Table of Contents 4 Introduction Layout Overview 6 Profiles & Modes Introducing Profiles & Modes Link Program to a Profile Save Profile to Device Memory 8 Profiles Create
RIPJAWS KM570 RGB User Manual
 RIPJAWS KM570 RGB User Manual Table of Contents 4 Introduction Layout Overview 6 Profiles Introducing Profiles Link Program to a Profile Save Profile to Device Memory Create a Profile Select a Profile
Cerberus Mechanical RGB Keyboard. Software Guide
 Cerberus Mechanical RGB Keyboard Software Guide E12775 / First Edition / April 2017 Operating System The software supports the following operating systems: Windows 7 (32-bit/64-bit) Windows 8.1 (32-bit/64-bit)
5 DEDICATED MACRO KEYS INTRODUCTION REMOVABLE MAGNETIC LED PALM REST
 LIGHT CONTROL KEYS 5 LIGHTING PROFILE KEYS MULTIMEDIA KEYS VOLUME/MUTE WHEEL USB/AUDIO PASS THROUGH PORT AIRCRAFT GRADE ALUMINUM CHASSIS 108 PROGRAMMABLE MACRO KEYS 109 KEY ROLLOVER ANTI-GHOSTING FULL
STRIKE BATTLE spectra.
 USER MANUAL STRIKE BATTLE spectra. SOLID, PORTABLE and now RGB. Strike Battle Spectra offers the best selection of cherry mx keyswitches, a short-body and an ergonomic design to ensure a comfortable use.
5 DEDICATED MACRO KEYS INTRODUCTION REMOVABLE MAGNETIC LED PALM REST
 LIGHT CONTROL KEYS 5 LIGHTING PROFILE KEYS MULTIMEDIA KEYS VOLUME/MUTE WHEEL USB/AUDIO PASS THROUGH PORT AIRCRAFT GRADE ALUMINUM CHASSIS 108 PROGRAMMABLE MACRO KEYS 109 KEY ROLLOVER ANTI-GHOSTING FULL
Table of Contents SKILLER PRO+ 2
 Handbuch Manual Table of Contents 1. Keyboard Features 3 2. Software Features 3 3. Keyboard Specifications 3 4. Package Contents 4 5. The Skiller PRO+ at a Glance 4 5.1 Lighting Color Change 5 5.2 Profile
User Manual K85 MECHANICAL GAMING KEYBOARD
 K85 MECHANICAL GAMING KEYBOARD INTRODUCTION Thank your purchasing the NEON K85 RGB series mechanical gaming keyboard Low profile design imbued with mechanical technology to meet your needs. Featuring durable
Mechanical Gaming Keyboard Owner s Manual V1.0
 Mechanical Gaming Keyboard Owner s Manual V1.0 2014 All Rights Reserved. EpicGear, EG and DeziMator are trademarks of Golden Emperor International Limited CONTENTS P2 P3 P4 P5 P6 P8 P11 P14 P16 - Introduction
Trident Z Royal. Royal Lighting Control Software Guide
 Trident Z Royal Royal Lighting Control Software Guide Introduction 1 2 3 About This Guide This guide will help you understand and navigate the Royal Lighting Control software, which is designed to control
SmartSet App User Manual Version 1.1 Introduction
 SmartSet App User Manual Version 1.1 Introduction The SmartSet App is a convenient graphical programming application for your Freestyle Edge programmable keyboard that lets you design custom layouts, build
STRIKE PRO Spectra MECHANICAL GAMING KEYBOARD
 USER MANUAL STRIKE PRO Spectra MECHANICAL GAMING KEYBOARD Strong, fast, accurate, configurable, reliable, intuitive and comfortable are just a few of the epithets that define of the new Ozone Strike Pro
Mouse Driver Installation Manual
 Mouse Driver Installation Manual System Requirements Windows 10, Windows 8, Windows 7, Windows XP, Windows Vista Available USB 1.1 / 2.0 Port 30 MB of free disk space Installation 1. Plug the mouse to
Challenge Is The Game LEVEL 10M ADVANCED GAMING SOFTWARE USER GUIDE. Tt esports LEVEL 10M ADVANCED Gaming Software User Guide
 Challenge Is The Game LEVEL 10M ADVANCED GAMING SOFTWARE USER GUIDE 01 CONTENTS Challenge Is The Game PAGE 04 Main Interface PAGE 05 PAGE 13 PAGE 14 PAGE 20 PAGE 22 PAGE 23 Key Assignment Macro Interface
GOM Cam User Guide. Please visit our website (cam.gomlab.com) regularly to check out our. latest update.
 regularly to check out our. latest update.") GOM Cam User Guide Please visit our website (cam.gomlab.com) regularly to check out our latest update. From screen recording to webcam video and gameplay recording GOM Cam allows you to record anything
GOM Cam User Guide Please visit our website (cam.gomlab.com) regularly to check out our latest update. From screen recording to webcam video and gameplay recording GOM Cam allows you to record anything
USER MANUAL. Mac Version
 USER MANUAL Mac Version Contents 1 Software Introduction... 1 1.1 Summary... 1 1.2 Install and Uninstall... 1 1.2.1 Install the Software... 1 2 Login Software... 3 2.1 Login... 3 2.2 Control Panel Instruction...
PACKAGAGE CONTENTS Viper V760 gaming keyboard Detachable magnetic palm rest Keycap remover Quick start guide Viper sticker
 INTRODUCTION Thank you for purchasing the Viper V760 gaming keyboard. This keyboard uses super quiet mechanical Kailh Brown switches for an undisruptive experience and each key can be individually customized
The Fundamentals. Document Basics
 3 The Fundamentals Opening a Program... 3 Similarities in All Programs... 3 It's On Now What?...4 Making things easier to see.. 4 Adjusting Text Size.....4 My Computer. 4 Control Panel... 5 Accessibility
Lenovo Yoga S730-13IWL
 Lenovo Yoga S730-13IWL User Guide Read the safety notices and important tips in the included manuals before using your computer. Notes Before using the product, be sure to read Lenovo Safety and General
SL-6397 DECUS GAMING MOUSE
 Profile selection and configuration, lighting effects You can switch between 5 different profiles at the top of the left-hand column. A default profile is configured when the driver is installed for the
NVMS User Manual. Version 2.1.0
 NVMS-1000 User Manual Version 2.1.0 Contents 1 Software Introduction... 1 1.1 Summary... 1 1.2 Operation Environment... 1 1.3 Install and Uninstall... 2 1.3.1 Install the Software... 2 1.3.2 Uninstall
Contents Contents. Chapter 1. Program Installation. Chapter 2. For the start of CMS. Chapter 3. Monitoring. Chapter 4. E-Map Mode
 CMS User's Manual Contents 0 Contents Chapter 1. Program Installation 1.1 PC specifications 1.2 Program Installation Chapter 2. For the start of CMS 2.1 Site Registration Setup (Network Camera Registration)
Apple is rightfully proud of the user interface design incorporated into
 Customizing OS X Apple is rightfully proud of the user interface design incorporated into the Macintosh OS X family of operating systems. The interface is easy to use, and it s also easy to customize so
EASI MP-X Series. User Manual EASI MPR. Workstation. MPR Workstation user manual, , rev003
 EASI MP-X Series User Manual EASI MPR Workstation MPR Workstation user manual, 59300234, rev003 Contents MPR Workstation Introduction...1 General...1 Software version...1 Structure of the Network...1 Workstation
User s Guide. Attainment s. GTN v4.11
 Attainment s User s Guide A printable PDF of this user guide is available from the Attainment Company website: https://www.attainmentcompany.com/gotalk-now Contents 1 Getting Started with GoTalk NOW 1
Lenovo ideapad 710S-13ISK
 Lenovo ideapad 710S-13ISK User Guide Read Read the the safety safety notices notices and and important important tips tips in in the the included manuals before using your computer. included manuals before
Game Mode...29 Settings Mode...30 Using the AVI Converter Software...36 Troubleshooting...40
 Contents Important Notice...3 Safety Instructions...4 Product feature...5 Front view...7 Minimum System Requirements...8 Connect USB...8 Get Started...9 Power ON / Power OFF...9 Set Key Lock...9 Music
RICOH TAMAGO Presenter V1.2.0 Quick Guide. Ricoh Co., Ltd.
 RICOH TAMAGO Presenter V1.2.0 Quick Guide Ricoh Co., Ltd. 1 1. Introduction RICOH TAMAGO Presenter (TAMAGO Presenter) is a paper-less presentation software that allows sharing / synchronization of the
1. Specifications General Key Properties Software Properties Package Contents Installation 5. 3.
 MANUAL Table of Contents 1. Specifications 3 1.1 General 3 1.2 Key Properties 3 1.3 Cable and Connectors............................ 4 1.4 Software Properties 4 1.5 Package Contents 4 2. Installation 5
LOREX CLIENT 3.0 SOFTWARE MANUAL IRMS Integrated Remote Management Software
 LOREX CLIENT 3.0 SOFTWARE MANUAL IRMS Integrated Remote Management Software Instruction Manual English Version 2.0 Copyright 2007 Lorex Technology Inc. www.lorexcctv.com Table of Contents Overview... -
Lorex Client 7.0 & Lorex Message Master
 Lorex Client 7.0 & Lorex Message Master Software Manual English Version 1.0 MODELS: L19WD Series www.lorexcctv.com Includes L19WD800 & L19WD1600 Copyright 2008 Lorex Technology Inc. Table of Contents Table
Avigilon Control Center Web Client User Guide
 Avigilon Control Center Web Client User Guide Version: 4.12 Standard PDF-WEBCLIENT-S-E-Rev2 Copyright 2013 Avigilon. All rights reserved. The information presented is subject to change without notice.
Using the VSOM Operator Pages
 CHAPTER 8 The VSOM Operator Pages provide access to features that video surveillance operators can use to view, record, search, and control video. This chapter describes the Operator Pages in detail. It
NVMS User Manual
 NVMS-1000 User Manual Contents 1 Software Introduction...1 1.1 Summary... 1 1.2 Operation Environment... 1 1.3 Install and Uninstall... 2 1.3.1 Install the Software... 2 1.3.2 Uninstall the Software...
apple Service Source ipod Testing Procedures ipod (Click Wheel) 16 May Apple Computer, Inc. All rights reserved.
 16 May Apple Computer, Inc. All rights reserved.") apple Service Source ipod Testing Procedures 16 May 2005 2004 Apple Computer, Inc. All rights reserved. Testing Procedures Purpose These procedures are a tool to help identify an ipod hardware failure
apple Service Source ipod Testing Procedures 16 May 2005 2004 Apple Computer, Inc. All rights reserved. Testing Procedures Purpose These procedures are a tool to help identify an ipod hardware failure
NMS Spectrum Analyzer Application
 NMS Spectrum Analyzer Application Spectrum View Window... 3 Context Sensitive Menus for Spectrum View Window... 3 Add Horizontal Line... 4 Add Vertical Line... 4 Show Lines... 4 Hide Lines... 4 Delete
User Manual Portable Laptop Console Crash Cart Adapter
 User Manual Portable Laptop Console Crash Cart Adapter GUC211V PART NO. M1458 www.iogear.com 2017 IOGEAR. All Rights Reserved. Part No. M1458. IOGEAR, the IOGEAR logo is trademarks of IOGEAR. Microsoft
User Manual Games Addendum
 User Manual Games Addendum 1 Games Addendum Effective as of 11/30/18 DaVinci Pro has been updated with a new Games feature. This represents a substantial change to the organization of the DaVinci Pro Menu.
Please read this manual carefully before you use the unit and save it for future reference.
 ANDROID STEREO RECEIVER Please read this manual carefully before you use the unit and save it for future reference. Installation Precaution: 1. This unit is designed for using a 12V negative ground system
Network Video Recorder Quick Operation Guide
 Network Video Recorder Quick Operation Guide UD.6L0202B1351A01 TABLE OF CONTENTS NVR Pre-Installation... 2 NVR Installation... 2 Hard Disk Installation... 2 Front Panels... 6 DS-9500NI-ST/RT Front Panel...
SolarPower Pro. User s Manual. Management Software for Solar Inverter
 SolarPower Pro User s Manual Management Software for Solar Inverter Table of Contents 1. SolarPower Pro Overview... 2 1.1. Introduction... 2 1.2. Structure... 2 1.3. Features... 3 2. SolarPower Pro Install
User Guide. Read the safety notices and important tips in the included manuals before using your computer.
 User Guide Read the safety notices and important tips in the included manuals before using your computer. Notes Before using the product, be sure to read Lenovo Safety and General Information Guide first.
NEO 4.5. User Manual
 1 NEO 4.5 User Manual Table of Contents Safety Information... 3 Appearance and Key Function... 4 Introduction... 5 Call Functions... 6 Contacts... 7 Messaging... 8 Internet Browser... 9 Bluetooth & Wi-Fi...
NVMS User Manual
 NVMS-1000 User Manual Contents 1 Software Introduction...1 1.1 Summary... 1 1.2 Operation Environment... 1 1.3 Install and Uninstall... 2 1.3.1 Install the Software... 2 1.3.2 Uninstall the Software...
PIVOT CMS CLIENT SOFTWARE USER MANUAL
 PIVOT CMS CLIENT SOFTWARE USER MANUAL 1 CMS USER GUIDE 1.1 PC REQUIREMENT Recommended PC Requirement OS CPU VGA RAM HDD Graphics Card OS CPU VGA RAM HDD Windows Vista, 7 or higher Intel Core2Quad Q9400
DRAGON CENTER User Guide
 DRAGON CENTER User Guide 1 Contents About DRAGON CENTER... 4 Get Started... 5 System Requirements... 5 Supported Hardware... 5 Installing DRAGON CENTER... 5 Launching DRAGON CENTER... 5 DRAGON CENTER Basics...
VSPlayer Software User Manual
 VSPlayer Software User Manual UD.6L0202D1505A01 Thank you for purchasing our product. This manual applies to VSPlayer software, please read it carefully for the better use of this software. This manual
Lenovo YOGA 920. User Guide. Read the safety notices and important tips in the included manuals before using your computer.
 Lenovo YOGA 920 YOGA 920-13IKB YOGA 920-13IKB Glass User Guide Read the safety notices and important tips in the included manuals before using your computer. Notes Before using the product, be sure to
Apple is rightfully proud of the user interface design incorporated into
 Customizing OS X Apple is rightfully proud of the user interface design incorporated into the Macintosh OS X family of operating systems. The interface is easy to use, and it s also easy to customize so
IWH3216 Touch/Touch II
 IWH3216 Touch/Touch II 16CH Embedded Hybrid DVR Quick User Guide COPYRIGHT 2012 AVer Information Inc. All rights reserved. No part of this document may be reproduced or transmitted in any form, or by any
IMS200 SURVEILLANCE SYSTEM USER MANUAL
 IMS200 SURVEILLANCE SYSTEM USER MANUAL 1 PRECAUTIONS The contents of this manual may change due to product upgrades or other reasons. We have the right to make changes of the contents without notice. This
PowerPoint 2016 Advanced for Windows
 1 PowerPoint 2016 Advanced for Windows PowerPoint 2016 Advanced for Windows Training Objective To learn advanced features of PowerPoint 2016 in order to create more elaborate presentations. What you can
VMS-A1 Client Software. User Manual
 VMS-A1 Client Software User Manual Contents Contents... 2 Chapter1. Overview... 4 1.1 Description... 4 1.2 Features & Functions... 4 Chapter2. Update Info... 6 Chapter3. Starting VMS-A1... 7 3.1 Installing
Table of Contents SHARK ZONE MK80 2
 Table of Contents 1. Keyboard Properties 03 2. Software Properties 03 3. Keyboard Specifications 03 3.1 General 03 3.2 Key Properties 04 3.3 Cable and Connectors 04 3.4 Software Properties 04 4. Package
Figure 4-9. Click Finish button, system pops up a dialogue box. Click the OK button, the startup wizard is complete. See Figure 4-10.
 For detailed information, please refer to chapter 4.11.4.1.1. Figure 4-9 Finish button, system pops up a dialogue box. the OK button, the startup wizard is complete. See Figure 4-10. Figure 4-10 4.4 Preview
Chapter 3 Operating instructions
 Chapter 3 Operating instructions Summary This chapter describes the how to control and navigate through the TVR 30 s menus and options. Content Control interfaces 10 Controlling the TVR 30 10 Front panel
Secure+ Password Manager ver 1.1.1
 Secure+ Password Manager ver 1.1.1 Table of Contents 1. First setup & Auto lock functionality 1. Setup 2. Auto Lock 2. Add new item & edit 1. Icons 2. Edit Fields (Title, Category, ID, Password, URL) 3.
STUDIO 7.0 USER MANUAL
 STUDIO 7.0 USER MANUAL 1 Table of Contents Safety Information... 3 Appearance and Key Functions... 4 Introduction... 5 Call Functions... 6 Notifications Bar... 7 Contacts... 8 Messaging... 9 Internet Browser...
HIP2P Network Video Camera Client Terminal User Manual
 HIP2P Network Video Camera Client Terminal User Manual Document version:5.1 Page 1 of 34 } Preface Thank you for using our company's products. The network video camera client terminal is used to implement
Quick Guide for Photoshop CC Basics April 2016 Training:
 Photoshop CC Basics Creating a New File 1. Click File > New 2. Keep Default Photoshop Size selected in the Preset drop-down list. 3. Click OK. Showing Rulers 1. On the Menu bar, click View. 2. Click Rulers.
Quick Start Guide. Menu Structure. Startup and Shutdown. Using the Setup Wizard. DS-8100-S Series DVR (V2.0.1)
") Quick Start Guide DS-8100-S Series DVR (V2.0.1) Menu Structure The menu structure of the DS-8100-S Series DVR is as followed: 1. Enter the Shutdown menu by clicking on Menu > Shut down. 2. Select the Shutdown
Quick Start Guide DS-8100-S Series DVR (V2.0.1) Menu Structure The menu structure of the DS-8100-S Series DVR is as followed: 1. Enter the Shutdown menu by clicking on Menu > Shut down. 2. Select the Shutdown
Quick Start Guide (V1.03) UD.6L0201B1064A01
 UD.6L0201B1064A01") ivms-4200 PCNVR Quick Start Guide (V1.03) UD.6L0201B1064A01 Thank you for purchasing our product. If there is any question or request, please do not hesitate to contact the dealer. This manual applies
ivms-4200 PCNVR Quick Start Guide (V1.03) UD.6L0201B1064A01 Thank you for purchasing our product. If there is any question or request, please do not hesitate to contact the dealer. This manual applies
ReLANproo Language LAB Teach. B sev. ANpro. ReLA. ven TEAC. o LAB
 ReLANproo Language LAB Teach her Manuall ReLA ANpro o LAB B sev ven TEAC CHER MANU M UAL 2 Maro Multimediaal Introduction of ReLANpro Language LAB The ReLANpro Language LAB is a learning tool for class
Lenovo Legion Y530. User Guide. Legion Y530-15ICH. Read the safety notices and important tips in the included manuals before using your computer.
 Lenovo Legion Y530 Legion Y530-15ICH User Guide Read the safety notices and important tips in the included manuals before using your computer. Notes Before using the product, be sure to read Lenovo Safety
Lenovo N22. User Guide. included manuals before using your computer. included manuals before using your computer.
 Lenovo N22 User Guide Read Read the the safety safety notices notices and and important important tips tips in in the the included manuals before using your computer. included manuals before using your
Unisight DVR System. Unisight DVR Manual. Ver rev1.3.4
 Unisight DVR Manual Ver2.7.1027 rev1.3.4 1 Table of Contents System Requirements.8 Unisight DVR Server.. 8 Server Hardware Requirements...8 Server Software Requirements 8 Client Hardware Requirements...
Control Keyboard Operating Manual
 Control Keyboard Operating Manual 1 Contents Welcome...4 Important Safeguarding and Warnings...5 1 Feature and Specification...6 1.1 Feature...6 1.2 Specification...6 2 Keyboard Function...7 2.1 Keyboard
DVR 514 Digital Video Recorder
 DVR 514 Digital Video Recorder User Manual 2010 Sakar International, Inc. All rights reserved. Windows and the Windows logo are registered trademarks of Microsoft Corporation. All other trademarks are
Lenovo YOGA 310. User Guide YOGA IAP. Read the safety notices and important tips in the included manuals before using your computer.
 Lenovo YOGA 310 YOGA 310-11IAP User Guide Read the safety notices and important tips in the included manuals before using your computer. Notes Before using the product, be sure to read Lenovo Safety and
DVR 710HDv2 Digital Video Recorder
 DVR 710HDv2 Digital Video Recorder User Manual 2009-2011 Sakar International, Inc. All rights reserved. Windows and the Windows logo are registered trademarks of Microsoft Corporation. All other trademarks
Main Interface. Main Profiles Link to Program Normal Mode / Battle Mode Key Assignment. Macro Setting
 A CONTENTS PAGE 01 PAGE 17 PAGE 23 PAGE 27 PAGE 28 Main Interface Main Profiles Link to Program Normal Mode / Battle Mode Key Assignment Macro Setting Macro Setting Interface Macro Manager Macro Record
IdeaTab A1000L-F. User Guide V1.0. Please read the Important safety and handling information in the supplied manuals before use.
 IdeaTab A1000L - UserGuide IdeaTab A1000L-F User Guide V1.0 Please read the Important safety and handling information in the supplied manuals before use. file:///c /Users/xieqy1/Desktop/EN UG/index.html[2013/8/14
FIREPOWER M04 RGB MMO LASER MOUSE INSTRUCTION MANUAL ADXLM0418
 FIREPOWER M04 RGB MMO LASER MOUSE INSTRUCTION MANUAL ADXLM0418 Contents Safety Warnings... 4 Unpacking... 5 Product Overview... 6 Adjusting the Weight... 7 System Requirements... 8 Software Installation...
Hi-Res Audio Recorder
 Stereo Turntable System Application Hi-Res Audio Recorder About Hi-Res Audio Recorder What Is Hi-Res Audio Recorder? [1] Supported Stereo Turntable System [2] Audio File Formats Supported for Recording
Ecamm Live for Facebook User Guide
 Ecamm Live for Facebook User Guide Ecamm Live is a Facebook Live streaming app for Mac. Use the app to broadcast camera video, pre-recorded video, Skype video calls, or your Mac s screen, along with an
Using BOSS TONE STUDIO for SY-300
 This document explains operation of BOSS TONE STUDIO for SY-300 (subsequently referred to as TONE STUDIO ). Getting Ready to Use TONE STUDIO Important terms in TONE STUDIO Library This is a storage area
Lenovo TAB A User Guide V1.0. Please read the safety precautions and important notes in the supplied manual before use.
 Lenovo TAB A10-70 User Guide V1.0 Please read the safety precautions and important notes in the supplied manual before use. Chapter 01 Lenovo TAB A10-70 Overview 1-1 Appearance 1-2 Buttons 1-3 Turning
Mac Edition For KillerKeys Pro software version 1.4 and later
 KillerKeys Pro User Guide Mac Edition For KillerKeys Pro software version 1.4 and later 1 Introduction... 3 1.1 System Requirements... 3 1.2 Installation... 3 1.3 Launching the KillerKeys Program... 3
NVMS1000. User Manual
 NVMS1000 User Manual Contents 1 Software Introduction... 1 1.1 Summary... 1 1.2 Operation Environment... 1 1.3 Install and Uninstall... 2 1.3.1 Install the Software... 2 1.3.2 Uninstall the Software...
Panoramic Talking Camera
 Panoramic Talking Camera IPC2201 home8alarm.com 1-844-800-6482 support@home8alarm.com 1 Table of Contents Chapter 1. Introduction... 1 1.1 System Requirement... 1 Chapter 2. Hardware Overview... 2 Chapter
Android Mobile Client. User Guide
 Android Mobile Client. User Guide 1. General information about the Android mobile client..................... 3 2. Connecting to the Axxon Next server and working with servers in the Android client. 3
Using the Microsoft Remote Desktop on non-windows devices
 Using the Microsoft Remote Desktop on non-windows devices You can use the free Microsoft Remote Desktop Client to connect to the DGLPM Server from virtually any Apple Mac, iphone, ipad, or Android device
DVR 505 Digital Camcorder
 DVR 505 Digital Camcorder User Manual 2016 Sakar International, Inc. All rights reserved. Windows and the Windows logo are registered trademarks of Microsoft Corporation. All other trademarks are the property
User s Manual of DVR ULTIMAX. Remote Client Software V wersja 2.40
 User s Manual of DVR ULTIMAX Remote Client Software V 4.0.1 ULTIMAX-304 ULTIMAX-308 ULTIMAX-316 ULTIMAX-504 ULTIMAX-508 ULTIMAX-516 ULTIMAX-704 ULTIMAX-708 ULTIMAX-716 wersja 2.40 Index 1 Software Install,
ideapad 100S-14IBR User Guide
 ideapad 100S-14IBR User Guide Read the safety notices and important tips in the included manuals before using your computer. Notes Before using the product, be sure to read Lenovo Safety and General Information
Microsoft Windows 10. Quick Reference. Watsonia Publishing 47 Greenaway Street Bulleen VIC 3105 Australia
 Watsonia Publishing 47 Greenaway Street Bulleen VIC 3105 Australia www.watsoniapublishing.com info@watsoniapublishing.com Quick Reference Course Code: INF1440 Table of Contents Chapter 1: Starting With
Emote 1.0 Users Manual
 Emote 1.0 Users Manual Part No: 141318 Rev A 2018 Eventide Inc., One Alsan Way, Little Ferry, NJ, 07643 USA 1 Table of Contents Introduction... 3 Downloading the Installer... 3 Making Sure Your H9000 Hardware
User s and installation guide
 INTELLIO MOBILE CLIENT 4 User s and installation guide 1 Intellio Mobil Client 4 Table of contents 1 Intellio Mobile Client 4 (IMC4) introduction... 3 2 Installation... 3 2.1 Intellio Video Gateway...
User s Guide. Valvova Oy
 User s Guide Valvova Oy June 21, 2017 CONTENTS Contents 1 Timeline 2 1.1 Program startup......................................... 3 1.2 Calendar............................................. 3 1.3 Go to
CONTENTS. Working With Feeds Viewing Your Feeds Working With Snippets Deleting Snippets Rev AA
 CONTENTS Getting Started.............................................. 4 Setting Up Livescribe+...................................................... 4 Connecting Your Smartpen and Device........................................
Copyright 2017 Xi'an NovaStar Tech Co., Ltd. All Rights Reserved. No part of this document may be copied, reproduced, extracted or transmitted in any
 Product Version: Document Number: SmartLCT Screen Configuration Software V3.2.0 NS110100363 Copyright 2017 Xi'an NovaStar Tech Co., Ltd. All Rights Reserved. No part of this document may be copied, reproduced,
Help. About Hi-Res Audio Recorder. Getting Ready to Use Your Computer. Operation Flow from Recording to Editing to Saving
 This Help describes the features of and provides the instructions on using it. In this Help, screens that appear on a Windows computer connected with the turntable are used as examples. About What Is?
Using GIGABYTE Notebook for the First Time
 Aero 14 V1.1 Congratulations on your purchase of the GIGABYTE Notebook. This manual will help you to get started with setting up your notebook. The final product configuration depends on the model at the
E N G L I S H V E R S I O N 1
 ENGLISH VERSION 1 CONTENT Your new LK200 RGB Gaming Keyboard Page 02 Keyboard description Page 04 Software Page 10 LED Settings Page 14 Important note about this manual Key input is shown in red and quotation
User Manual PDUTracker
 User Manual PDUTracker Management Software for PDU Table of Contents 1. Overview... 1 1.1. Introduction... 1 1.2. Features... 1 2. Install and Uninstall... 1 2.1. System Requirement... 1 2.2. Software
Using GIGABYTE Notebook for the First Time
 Congratulations on your purchase of the GIGABYTE Notebook P7! This Manual will help you to get started with setting up your notebook. For more detailed information, please visit our website at http://www.gigabyte.com.
1. Introduction P Package Contents 1.
 1 Contents 1. Introduction ------------------------------------------------------------------------------- P. 3-5 1.1 Package Contents 1.2 Tablet Overview 2. Using the Tablet for the first time ---------------------------------------------------
ECB Digital - Click 3 (4th Grade)
") ECB Digital - Click 3 (4th Grade) There are several ways to navigate around the Whiteboard Digital Books: 1 Go to a chosen unit or feature by clicking on a button on the main menu. 2 Go to a specific page
ECB Digital - Click 3 (4th Grade) There are several ways to navigate around the Whiteboard Digital Books: 1 Go to a chosen unit or feature by clicking on a button on the main menu. 2 Go to a specific page