RAK831 Pilot Gateway User Manual V1.0
|
|
|
- Sophia Cameron
- 5 years ago
- Views:
Transcription
1 RAK831 Pilot Gateway User Manual V1.0 Shenzhen Rakwireless Technology Co., Ltd Rakwireless all rights reserved. in this document, the actual company and product names, trademarks are their respective owners. After update the new version, this document without prior notice. 1
2 Contents 1. Build your own RAK831 Pilot gateway Preparations Create resin.io account Create a new application Set Fleet Configuration Add device Write image to SD card Add software to your application Boot the gateway hardware Add the gateway to the TTN console Configure your device Contact information Change Note


3 1. Build your own RAK831 Pilot gateway This documents are from a workshop held during the Things Network Conference 2018, in this workshop, many developers build a gateway based on RAK831 and a Raspberry Pi model 3. We can use this tutorial as the reference to understand how to connect RAK831 Pilot gateway to TTN. NOTE: Never power on the gateway without the antenna connected as shown in the picture 3
4 2. Preparations The workshop requires some tools to be available on your system. Check the list below and follow the link to the installation instructions if you do not have the tool installed. GIT command line client. windows, OSX, for Linux use the tools from your distribution to install. For Windows and OSX: Etcher, SD card writing software. windows, OSX You will also need a SSH public/private key pair, generate a key pair if you do not have it. 4
5 3. Create resin.io account If you already have a resin.io account, please go to the website and log in. And if you do not have it, now is the time to create it. Go to signup to create it. (If you have an account skip to the next step) On the first screen enter your address and a (secure) password. Next you provide your first and last name, company if applicable and choose whether you will be using resin.io for a personal or professional project. 5


6 Now we need to add our public SSH key. Resin.io uses this key when we upload code to run on our devices. In the upper right of the page click on the down arrow next to your name and select Preferences from the menu. Now select the tab SSH keys and click on Enter SSH key manually In the next window you need to paste the public part of your SSH key. This is store in id_rsa.pub in the folder.ssh in your home folder (Windows: c:\users<your username>.ssh\id_rsa.pub, OSX /Users/.ssh/id_rsa.pub, Linux: /home/.ssh/id_rsa.pub) Use your favorite editor to open the file and copy the contents to the form. 6

7 Save with Add SSH key. Go back to the main page by click in the resin.io logo in the top left of the page. 7

8 4. Create a new application On the resin.io main screen you are able to create a new application. The device type conveniently defaults to Raspberry Pi 3, which we will be using. Enter lorawangw for the application name and proceed with CREATE NEW APPLICATION. 8
9 5. Set Fleet Configuration The Raspberry Pi model 3 requires some settings to correct the timing and switch serial ports (not used in this setup, but would be required to access a GPS if it had been mounted). In your browser go to FLEET, as shown below: Add the information as shown below: Name Value RESIN_HOST_CONFIG_core_freq 250 RESIN_HOST_CONFIG_dtoverlay pi3-miniuart-bt Application config variables: 9
 Once the download is finished, extract the contents of the zip file to disk (keep in mind the extracted file will be almost 2GB in size). In the next step we will write this file to SD card.")
10 6. Add device In the application select Add device. Leave all settings set to the default and click Download resinos. Save the download to disk. (Remember where you save it!) Once the download is finished, extract the contents of the zip file to disk (keep in mind the extracted file will be almost 2GB in size). In the next step we will write this file to SD card. 10


11 7. Write image to SD card Get the micro SD card from the Raspberry Pi. Insert it into the SD card writer (use a full size SD card adapter if required). Windows & OSX: Open Etcher, click Select image and browse to the ISO file extracted in the previous step, verify the correct SD card is chosen. Once the right file and device have been click Flash!. (On Windows this will show the UAC dialog, click Yes ) Proceed to the next step while Etcher is writing the image. Linux: Use dmesg to check which device is used for you SD card. Check with mount if any partitions of it are mounted and unmounts if this is the case. Write the image to SD card with dd. sudo dd if=/tmp/resin-lorawangw-<revision>.img of=/dev/sdx bs=4m conv=sync 11
12 NOTE: Take care to select the right device, dd will quite happily overwrite any disk, including your Linux installation! Proceed to the next step while dd is writing to the SD card. 12
13 8. Add software to your application Earlier we have created the resin.io application. Now we need to add the application code that should be run on the Raspberry Pi. For this we will use a prepared LoRaWAN gateway application available on Github. A. Open (OSX/Linux) Terminal or (Windows) Git Bash B. Create a new directory to store the code on you local system go to it mkdir lorawan-software cd lorawan-software C. Get the code from github git clone D. The output should resemble: Cloning into 'ttn-resin-gateway-rpi'... remote: Counting objects: 27, done. remote: Compressing objects: 100% (20/20), done. remote: Total 27 (delta 4), reused 27 (delta 4), pack-reused 0 Unpacking objects: 100% (27/27), done. E. Go to the newly created directory cd ttn-resin-gateway-rpi F. Now we need to couple this reposity to resin.io so we are able to send the code there. For this we need to execute the git command listed on our application page. (Top right) G. Copy the text marked in the picture (for your application page) and paste it on the command line of your terminal/git bash. git remote add resin <your resin.io account>@git.resin.io:<your resin.io account>/lorawangw.git If the command runs successfully no output will be shown H. Now we will push the code to resin.io, run 13
14 git push resin The first time you run this command you will be see a message like The authenticity of host 'git.resin.io ( )' can't be established. ECDSA key fingerprint is SHA256:NfwmqnKId5cx1RWpebbEuuM87bCJbdyhzRnqFES9Nnw. Are you sure you want to continue connecting (yes/no)? Reply yes to the question. Next you will be prompted for the passphrase for your SSH key: Enter passphrase for key '/c/users/kersing/.ssh/id_rsa': Enter the passphrase. The upload starts and resin starts to build the image: Counting objects: 27, done. Delta compression using up to 4 threads. Compressing objects: 100% (24/24), done. Writing objects: 100% (27/27), 2.30 MiB 3.71 MiB/s, done. Total 27 (delta 4), reused 0 (delta 0) [Info] Starting build for workshop/lorawangw, user workshop [Info] Dashboard link: [Info] Building on arm02 [Info] Fetching base images [==================================================>] 100% [Info] Building Dockerfile.template project This will take a few minutes. When the build is finished a unicorn will be shown. Proceed with the next step while the build is running. 14
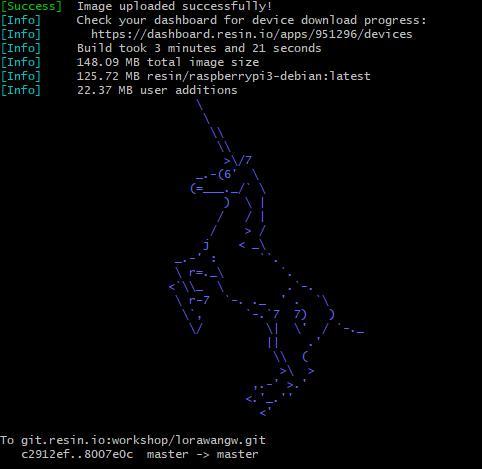
15 15
16 9. Boot the gateway hardware Eject the micro SD card from your write and insert it into the Raspberry Pi SD card slot. (Metal contacts at PCB side) Make sure the antenna is connected to the RAK831 card (see picture at the top), connect Ethernet cable and power adaptor to the Raspberry Pi. Now plug the power adaptor into power socket. The red LED on the Raspberry Pi should light and (after a few seconds) a green LED should start flashing. Switch to your browser, select DEVICES on the left. After 1-2 minutes a device should appear in on the application page. If the build we started in the previous step is finished the node will start downloading, if not it will stay idle. Click on the device name to open the device details. The top window on the right shows the output from the device. In this case it shows an error because the software attempted to start but is missing configuration parameters. 16
17 10. Add the gateway to the TTN console To configure our gateway, we need to add it in the TTN console. A. Use your TTN credentials to log in to B. In the main screen click on gateways C. Click on register gateway (or Get started by registering one ) D. In the form enter the following values: For Gateway ID, choose a unique name for the gateway, allowed A-Z, a-z, 0-9 and -. Do not check legacy packet forwarder. For Description, enter a human read-able description. For Frequency Plan, choose the one appropriate for your location, for Amsterdam use Europe 868MHz. For Router, choose the one closest to you. Routers prefixed with ttn- are public ones operated by The Things Network. switch-router is based in Switzerland and meshed-router is Australian. For Location, choose your location on the map. 17

18 For Antenna Placement, choose Indoor/Outdoor as appropriate. Click Register Gateway to proceed. The result should look like: 18
19 Keep this window open, you need it to copy-and-paste information. 19
20 11. Configure your device Switch to your resin.io page. If you do not have the device summary page open, open it now. Click on ENVIRONMENT VARIABLES. You need to add three variables: A. Name the first one GW_ID (no quotes) and copy the value listed for the Gateway ID in the TTN console. B. Name the second one GW_KEY (no quotes), on the TTN console click on the little eye icon to the right of Gateway Key, this will display the value. Now use the icon at the end of the line to copy the value (and display copied ) C. Paste this value and add. D. Enter GW_RESET_PIN (no quotes) and value


21 Once set (and the software download has finished) the software will start. If the software starts correctly you will see concentrator started in the output in the resin.io Logs. In the TTN console the Last seen status should change to something between 0 and 60 seconds. 21
22 In the TTN console switch to Traffic. If there are any nodes nearby sending data (should be the case during the conference), packets will show. Congratulations, the gateway is now operational! 22
23 12. Contact information Shenzhen Business Address: Room 506, Bldg. 3, Minqi Technology Park, No.65 Taoyuan Road, Xili Block, Nanshan District, Shenzhen Shenzhen Technical Tel : Address: Room 506, Bldg. 3, Minqi Technology Park, No.65 Taoyuan Road, Xili Block, Nanshan District, Shenzhen 23
24 13. Change Note Version Date Modify content Arthur V Create the document Farce 24
Getting started with the RAK 831 Lora Gateway and RPi3 V1.0 Shenzhen Rakwireless Technology Co., Ltd Rak
 Getting started with the RAK 831 Lora Gateway and RPi3 V1.0 Shenzhen Rakwireless Technology Co., Ltd www.rakwireless.com info@rakwireless.com 2016 Rakwireless all rights reserved. Mentioned in this document,
Adafruit's Raspberry Pi Lesson 1. Preparing an SD Card for your Raspberry Pi
 Adafruit's Raspberry Pi Lesson 1. Preparing an SD Card for your Raspberry Pi Created by Simon Monk Last updated on 2016-12-03 03:20:15 AM UTC Guide Contents Guide Contents Overview You Will Need Downloading
Raspberry Pi Setup Tutorial
 Raspberry Pi Setup Tutorial The Raspberry Pi is basically a miniature linux- based computer. It has an ARM processor on it, specifically the ARM1176JZF- S 700 MHz processor. This is the main reason why
Upgrading to the Raspberry Pi 3B or Pi 3B+ 1
 Upgrading to the Raspberry Pi 3B or Pi 3B+ 1 By Sandy McCauley April 30, 2018 Part 1: Before you commit to doing this NOTE: This is NOT a KNK USA-published procedure. Any questions should be directed to
Lab: Setting up PL-App with a Raspberry Pi
 Lab Topology Objectives Set up a Raspberry Pi board as a PL-App device Use PL-App Launcher to provision and discover PL-App devices Background Cisco Prototyping Lab is a set of hardware and software components
Overo Conduit Setup Guide. Bring-up guide for Gumstix R Overo LoRaWAN gateway board withthethingsnetwork.org
 Overo Conduit Setup Guide Bring-up guide for Gumstix R Overo LoRaWAN gateway board withthethingsnetwork.org Revised October 2, 2017 Overo Conduit Setup Guide Gumstix, Inc. 2017 October 2, 2017 Contents
Part # Quick-Start Guide. SpeedStream 4200 Modem PPPoE Modem Router
 Part # 007-0-00 Quick-Start Guide SpeedStream 00 Modem PPPoE Modem Router Before you begin, Verify that the following items came with your DSL kit: Step > Install Line Filters 7 SpeedStream Device Documentation
NovTech User Guide Chameleon96
 NovTech User Guide Chameleon96 Document Name: User Guide Document Number: 001-127-04-05-01 Rev. 1.1 10/2017 Property of NovTech, Inc. 2017. All Rights Reserved Contact Information: Home Page: Company:
Raspberry Pi Kernel Install. By: Daniel Rizko
 Raspberry Pi Kernel Install By: Daniel Rizko Introduction In this presentation I will be demonstrating three things. 1. Building a cross compiler from scratch using crosstool-ng for Raspberry Pi hardware.
WisLTE With Hologram.io V1.0
 WisLTE With Hologram.io V1.0 Shenzhen Rakwireless Technology Co., Ltd www.rakwireless.com info@rakwireless.com 2018 Rakwireless all rights reserved. Mentioned in this document, the actual company and product
XLink Kai Raspberry Pi Beginners Tutorial
 XLink-Kai-Raspberry-Pi-Beginners-Tutorial.md XLink Kai Raspberry Pi Beginners Tutorial Hi! This tutorial will guide you through setting up XLink Kai on a Raspberry Pi to play multiplayer system link Xbox
Operation Manual for OutboxSMS-Lite
 Operation Manual for OutboxSMS-Lite Copyright 2006-2016 Felltech Limited. All rights reserved The use and copying of this product is subject to a license agreement. Any other use is prohibited. No part
RETROPIE INSTALLATION GUIDE
 RETROPIE INSTALLATION GUIDE CONTENTS THE FOLLOWING GUIDE WILL COVER THE INSTALLATION, SETUP AND CONFIGURATION OF THE RASPBERRY PI, RASPBIAN OS AND RETROPIE Author: http://rpiarcadebuild.wordpress.com/
Installing + Configuring
 Installing + Configuring Install and Recover with TFTP Introduction This document is designed to help you install the Commotion software if the Install on a Ubiquiti Device instructions did not work, or
LotOS Framework. Getting Started Guide for Banana Pi. Copyright (C) 2015 ilbers GmbH Revision 1.1,
 2015 ilbers GmbH Revision 1.1,") LotOS Framework Getting Started Guide for Banana Pi Copyright (C) 2015 ilbers GmbH Revision 1.1, 2015-10-20 Mango hypervisor and LotOS framework are copyright (C) 2014 2015 ilbers GmbH. All rights reserved.
LotOS Framework Getting Started Guide for Banana Pi Copyright (C) 2015 ilbers GmbH Revision 1.1, 2015-10-20 Mango hypervisor and LotOS framework are copyright (C) 2014 2015 ilbers GmbH. All rights reserved.
Link Gateway ISO Installation Manual
 Link Gateway ISO Installation Manual Copyright 2016 NetLinkz. All Rights Reserved. No part of this publication may be reproduced, transmitted, transcribed, stored in a retrieval system, or translated into
READ ME FIRST Windows 95/98/Me/2000
 READ ME FIRST Windows 95/98/Me/2000 *DSL Equipment Installation Guide: Efficient Networks 5260 *Digital Subscriber Line Part Number: 52609x02 Version 1.2-A Table of Contents Follow Steps 1 through 8 to
NetQoS Multi-Port Collector Setup Guide
 NetQoS Multi-Port Collector Setup Guide The NetQoS Multi-Port Collector is a powerful appliance that captures and processes data at an extremely high rate, making more data available for faster reporting
Exporting a VM to a USB Mass Storage Device
 Exporting a VM to a USB Mass Storage Device Version 5.1.0 March 26, 2014 Table of Contents About this Guide...3 Export a Virtual Machine using XenClient Enterprise Synchronizer...3 About VM Image Assignment...
READ ME FIRST Windows 98/ME/2000
 READ ME FIRST Windows 98/ME/2000 *DSL Equipment Installation Guide: Alcatel Speed Touch PC *Digital Subscriber Line Part Number: AlcatelPC9x02A Version 1.2-A Table of Contents Follow Steps 1 through 7
HySecure Quick Start Guide. HySecure 5.0
 HySecure Quick Start Guide HySecure 5.0 Last Updated: 25 May 2017 2012-2017 Propalms Technologies Private Limited. All rights reserved. The information contained in this document represents the current
SCCM Plug-in User Guide. Version 3.0
 SCCM Plug-in User Guide Version 3.0 JAMF Software, LLC 2012 JAMF Software, LLC. All rights reserved. JAMF Software has made all efforts to ensure that this guide is accurate. JAMF Software 301 4th Ave
BeagleBone Black: Installing Operating Systems
 BeagleBone Black: Installing Operating Systems Created by Justin Cooper Last updated on 2017-12-05 07:31:58 PM UTC Guide Contents Guide Contents Overview Choosing an Operating System Angstrom Download
VIRTUALIZATION MANAGER SINGLE SERVER EDITION GETTING STARTED GUIDE
 VIRTUALIZATION MANAGER SINGLE SERVER EDITION GETTING STARTED GUIDE This manual provides a quick introduction to Virtual Iron software, and explains how to install and use Virtual Iron Single Server Edition
Configuring CloudN using ESXi 5.0 or later (EST mode)
") Configuring CloudN using ESXi 5.0 or later (EST mode) This document describes the step-by-step procedures to configure CloudN and Ubuntu server that will connect to external devices in access mode. CloudN
Configuring CloudN using ESXi 5.0 or later (EST mode) This document describes the step-by-step procedures to configure CloudN and Ubuntu server that will connect to external devices in access mode. CloudN
BeagleBone Black: Installing Operating Systems
 BeagleBone Black: Installing Operating Systems Created by Justin Cooper Last updated on 2014-01-17 11:30:27 AM EST Guide Contents Guide Contents Overview Choosing an Operating System Angstrom Download
CA NetQoS Multi-Port Collector Setup Guide
 CA NetQoS Multi-Port Collector Setup Guide The CA NetQoS Multi-Port Collector is a powerful appliance that captures and processes data at an extremely high rate, making more data available for faster reporting
OpenROV. Update Software Image From SD Card
 OpenROV Update Software Image From SD Card This guide will walk you through the steps for update your software to the latest image. The steps are for computers running Microsoft Windows or Apple OSx. Written
O ptima S aver P i. User Guide. January 2017 Version 1.0
 O ptima S aver P i User Guide January 2017 Version 1.0 T able O f C ontents Page 1. What is OptimaSaverPi -------------------------- 2 2. Why OptimaSaverPi -------------------------- 2 3. Requirement --------------------------
Experiments 1 How to set up Raspberry Pi B+ The little computer you can cook into DIY tech projects
 Experiments 1 How to set up Raspberry Pi B+ The little computer you can cook into DIY tech projects The Raspberry Pi is a computer about the size of a credit card. The darling of the do-it-yourself electronics
How do I setup a Raspberry Pi?
 If you would like to setup a Raspberry Pi to run QRUQSP code, the following steps will walk you through downloading an SD image and configuring your Raspberry Pi. Step 1 of 17 - Equipment Required In order
Ansible Tower Quick Setup Guide
 Ansible Tower Quick Setup Guide Release Ansible Tower 2.4.5 Red Hat, Inc. Jun 06, 2017 CONTENTS 1 Quick Start 2 2 Login as a Superuser 3 3 Import a License 4 4 Examine the Tower Dashboard 6 5 The Setup
Lab 0: Intro to running Jupyter Notebook on a Raspberry Pi
 Lab 0: Intro to running Jupyter Notebook on a Raspberry Pi Nick Antipa, Li-Hao Yeh, based on labs by Jon Tamir and Frank Ong January 24, 2018 This lab will walk you through setting up your Raspberry Pi
Preparing SD card for Pi
 Preparing SD card for Pi Sarwan Singh Assistant Director(S) NIELIT Chandigarh Education is the kindling of a flame, not the filling of a vessel. - Socrates 1 sarwan@nielit Using NOOBS- New Out Of Box Software
GIT. A free and open source distributed version control system. User Guide. January, Department of Computer Science and Engineering
 GIT A free and open source distributed version control system User Guide January, 2018 Department of Computer Science and Engineering Indian Institute of Technology, Kharagpur Table of Contents What is
OpenStack Havana All-in-One lab on VMware Workstation
 OpenStack Havana All-in-One lab on VMware Workstation With all of the popularity of OpenStack in general, and specifically with my other posts on deploying the Rackspace Private Cloud lab on VMware Workstation,
Raspberry Pi 3 Model B+ and JMRI with WiFi Access Point for Pi- SPROG One and Pi-SPROG Nano raspian-stretch build
 Raspberry Pi 3 Model B+ and JMRI with WiFi Access Point for Pi- SPROG One and Pi-SPROG Nano 2018-03-13-raspian-stretch build May 2018 SPROG DCC These instructions describe the process of setting up a Raspberry
Code and data management with Git
 Code and data management with Git Git and remote repositories Jonathan K. Vis Department of Human Genetics Remote repositories Table of contents Remote repositories Transferring commits between repositories
IoTivity Development on ARTIK 530s
 Getting Started Guide Sungdong Kim SAMSUNG IoTivity Development on ARTIK 530s G E T T I N G S T A R T E D G U I D E Version 1.0, October 24, 2018 Table of Contents Summary... 3 OCF and IoTivity... 3 The
User Guide NAS 3.0 Adapter (NAS30U2)
") T E C H N O L O G I E S User Guide NAS 3.0 Adapter (NAS30U2) www.addonics.com v5.1.11 Technical Support If you need any assistance to get your unit functioning properly, please have your product information
T E C H N O L O G I E S User Guide NAS 3.0 Adapter (NAS30U2) www.addonics.com v5.1.11 Technical Support If you need any assistance to get your unit functioning properly, please have your product information
Installation of Cisco Business Edition 6000H/M
 Installation Overview, page 1 Installation Task Flow of Cisco Business Edition 6000H/M, page 2 Installation Overview This chapter describes the tasks that you must perform to install software on your Business
Cloud Frame User's Manual
 Cloud Frame User's Manual For ongoing product improvement, this manual is subject to modification without prior notice. MODEL: CPF716 Before Operation Product Introduction 2 Safety Precautions 3 Instructions
NANO-SPOT Personal Digital Hotspot
 NANO-SPOT Personal Digital Hotspot User's Manual REVISION 1.01 Micro-Node International, Inc. - Henderson, Nevada Table of Contents 1.0 NANO-SPOT DESCRIPTION... 3 2.0 INCLUDED ACCESSORIES... 3 3.0 GETTING
OS Installer. Installation Instructions
 OS Installer These instructions are only relative to Digital X Bus X.200 owners needing to completely clean out their internal hard drive and re-install the entire operating system and the latest Digital
Getting started with Raspberry Pi (and WebIoPi framework)
") Getting started with Raspberry Pi (and WebIoPi framework) 1. Installing the OS on the Raspberry Pi Download the image file from the Raspberry Pi website. It ll be a zip file as shown below: Unzip the file
Getting started with Raspberry Pi (and WebIoPi framework) 1. Installing the OS on the Raspberry Pi Download the image file from the Raspberry Pi website. It ll be a zip file as shown below: Unzip the file
Hands-On Lab. Windows Azure Virtual Machine Roles. Lab version: Last updated: 12/14/2010. Page 1
 Hands-On Lab Windows Azure Virtual Machine Roles Lab version: 2.0.0 Last updated: 12/14/2010 Page 1 CONTENTS OVERVIEW... 3 EXERCISE 1: CREATING AND DEPLOYING A VIRTUAL MACHINE ROLE IN WINDOWS AZURE...
READ ME FIRST. Windows NT. *DSL Equipment Installation Guide: Efficient Networks 5260
 READ ME FIRST Windows NT *DSL Equipment Installation Guide: Efficient Networks 5260 *Digital Subscriber Line Part Number: 5260NT02A Version 1.2-A. Table of Contents Follow Steps 1 through 8 to complete
Parallels Management Console
 Parallels Management Console Getting Started Guide Copyright 1999-2010 Parallels Holdings, Ltd. and its affiliates. All rights reserved. Parallels Holdings, Ltd. c/o Parallels International GMbH. Parallels
Deploying Cisco UCS Central
 This chapter includes the following sections: Obtaining the Cisco UCS Central Software from Cisco, page 1 Using the Cisco UCS Central OVA File, page 2 Using the Cisco UCS Central ISO File, page 4 Logging
Clearswift SECURE Gateway Installation & Getting Started Guide. Version 4.3 Document Revision 1.0
 Clearswift SECURE Email Gateway Installation & Getting Started Guide Version 4.3 Document Revision 1.0 Copyright Revision 1.1, March, 2016 Published by Clearswift Ltd. 1995 2016 Clearswift Ltd. All rights
mce100+ getting started guide Install mce100+ The disc will run and display the below screen: Choose Install mce to continue
 content between two the phonebook records of a content from a 1. Insert the mce CD. 2. Choose the Run mce Setup button. The disc will run and display the below screen: Choose mce to continue 5. Ready to
Online Backup Client User Manual
 Online Backup Client User Manual Software version 3.21 For Linux distributions October 2010 Version 2.0 Disclaimer This document is compiled with the greatest possible care. However, errors might have
School of Computing Science Gitlab Platform - User Notes
 School of Computing Science Gitlab Platform - User Notes Contents Using Git & Gitlab... 1 Introduction... 1 Access Methods... 2 Web Access... 2 Repository Access... 2 Creating a key pair... 2 Adding a
Installing the Operating System or Hypervisor
 If you purchased E-Series Server or NCE Option 1 (E-Series Server or NCE without a preinstalled operating system or hypervisor), you must install an operating system or hypervisor. This chapter includes
Pengwyn Documentation
 Pengwyn Documentation Release 1.0 Silica October 03, 2016 Contents 1 Introduction 3 1.1 Platforms................................................. 3 1.2 Hardware requirements.........................................
Getting Started with ESX Server 3i Installable Update 2 and later for ESX Server 3i version 3.5 Installable and VirtualCenter 2.5
 Getting Started with ESX Server 3i Installable Update 2 and later for ESX Server 3i version 3.5 Installable and VirtualCenter 2.5 Getting Started with ESX Server 3i Installable Revision: 20090313 Item:
Plexxi HCN Plexxi Connect Installation, Upgrade and Administration Guide Release 3.0.0
 Plexxi HCN Plexxi Connect Installation, Upgrade and Administration Guide Release 3.0.0 May 3, 2018 100 Innovative Way - Suite 3322 Nashua, NH 03062 Tel. +1.888.630.PLEX (7539) www.plexxi.com Legal Notices
READ ME FIRST Windows 95/98/Me/2000
 READ ME FIRST Windows 95/98/Me/2000 *DSL Equipment Installation Guide: Efficient Networks 5260 *Digital Subscriber Line Part Number: 52609X02 Version 1.2 Table of Contents Follow Steps 1 through 8 to complete
Installing Eclipse (C++/Java)
") Installing Eclipse (C++/Java) The 2017 suite of text-based languages, Java and C++, utilize the current version of Eclipse as a development environment. The FRC specific tools for the chosen language are
Installing Eclipse (C++/Java) The 2017 suite of text-based languages, Java and C++, utilize the current version of Eclipse as a development environment. The FRC specific tools for the chosen language are
Parallels Server 5 Bare Metal
 Parallels Server 5 Bare Metal Installation Guide Copyright 1999-2011 Parallels Holdings, Ltd. and its affiliates. All rights reserved. Parallels Holdings, Ltd. c/o Parallels International GMbH. Parallels
Guide. Cloudistics Ignite: Setup and Configuration Guide
 Guide Cloudistics Ignite: Setup and Configuration Guide Contents Introduction... 3 Step 1: Configure Ignite Uplink Network... 4 1.1 Console into each Ignite SDN Router... 4 1.2 Configure the IP address(es)
Dell Lifecycle Controller Integration Version 2.2 For Microsoft System Center Configuration Manager User's Guide
 Dell Lifecycle Controller Integration Version 2.2 For Microsoft System Center Configuration Manager User's Guide Notes, Cautions, and Warnings NOTE: A NOTE indicates important information that helps you
Using a Virtual Machine for Cisco IPICS on a Cisco UCS C-Series Server
 CHAPTER7 Using a Virtual Machine for Cisco IPICS on a Cisco UCS C-Series Server This chapter describes how to configure a virtual machine (VM) on a Cisco UCS C-Series server. You can install and operate
Topics. What is a RaspberryPi? Why should I want one? What is Raspbian? What is SSH? What is FTP? What is LAMP? Making a LAMP Stack!
 Topics What is a RaspberryPi? Why should I want one? What is Raspbian? What is SSH? What is FTP? What is LAMP? Making a LAMP Stack! What is a Raspberry Pi? The Raspberry Pi is a Credit Card sized computer.
SeeMeCNC Guides. RAMBo Control Firmware. This guide will show you how to install the firmware on your SeeMeCNC 3D printer.
 SeeMeCNC Guides RAMBo Control Firmware This guide will show you how to install the firmware on your SeeMeCNC 3D printer. Written By: geneb 2018 seemecnc.dozuki.com/ Page 1 of 10 Step 1 Download and Install
Getting Started with ESX Server 3i Embedded ESX Server 3i version 3.5 Embedded and VirtualCenter 2.5
 Getting Started with ESX Server 3i Embedded ESX Server 3i version 3.5 Embedded and VirtualCenter 2.5 Title: Getting Started with ESX Server 3i Embedded Revision: 20071022 Item: VMW-ENG-Q407-430 You can
How to Dual-Boot OS X and Ubuntu
 How to Dual-Boot OS X and Ubuntu Nailen Matschke - nailen@caltech.edu 10/3/2015 What you need: 1. A USB drive with at least 2 GB of space, that you don t mind wiping 2. A copy of Ubuntu (available here),
ConnectCore 6 Android/Yocto. Getting Started Guide
 ConnectCore 6 Android/Yocto Getting Started Guide Revision history 90001397 Revision Date Description A May, 2014 Initial release B May, 2017 Updated branding and made editorial enhancements. Trademarks
LCS Guide September 2018
 LCS Guide September 2018 Kite LCS Guide ATS Service Desk: 785.864.3537 Contents Chapter 1: Welcome to LCS... 1.1 Introduction to Local Caching Servers... 1.2 Semi-Offline Mode... 1.3 Structure of LCS Manual...
Lab: Install a NIC in Windows XP
 11.4.1 Lab: Install a NIC in Windows XP Introduction Print and complete this lab. In this lab, you will install a NIC, verify NIC operation, and manually configure an IP address. Recommended Equipment
Clearswift SECURE Exchange Gateway Installation & Setup Guide. Version 1.0
 Clearswift SECURE Exchange Gateway Installation & Setup Guide Version 1.0 Copyright Revision 1.0, December, 2013 Published by Clearswift Ltd. 1995 2013 Clearswift Ltd. All rights reserved. The materials
Build your own NAS with OpenMediaVault
 Build your own NAS with OpenMediaVault Installation Minimum Requirements i486 or amd64 platform 1 GiB RAM 2 GiB HDD/DOM/CF/USB Thumb Drive used as OpenMediaVault system drive. Flash Drives without static
Quick Start Guide V NLX-miniUCS APPLIANCE Unified Communications Server
 Quick Start Guide V0210 NLX-miniUCS APPLIANCE Unified Communications Server Introduction The Elastix NLX-miniUCS appliance puts at your fingertips all the tools you need to handle your communications requirements:
Veritas System Recovery 18 Management Solution Administrator's Guide
 Veritas System Recovery 18 Management Solution Administrator's Guide Documentation version: 18 Legal Notice Copyright 2018 Veritas Technologies LLC. All rights reserved. Veritas and the Veritas Logo are
Dell Lifecycle Controller Integration Version 3.0 For Microsoft System Center Configuration Manager User's Guide
 Dell Lifecycle Controller Integration Version 3.0 For Microsoft System Center Configuration Manager User's Guide Notes, Cautions, and Warnings NOTE: A NOTE indicates important information that helps you
Media Writer. Installation Guide LX-DOC-MW5.1.9-IN-EN-REVB. Version 5.1.9
 Media Writer Installation Guide Version 5.1.9 Regulations and Compliance Tel: 1-844-535-1404 Email: TS_PACSGEAR@hyland.com 2018 Hyland. Hyland and the Hyland logo are trademarks of Hyland LLC, registered
Cloud Frame User's Manual
 Cloud Frame User's Manual For ongoing product improvement, this manual is subject to modification without prior notice. MODEL: CPF1510+ Before Operation Product Introduction Safety Precautions Package
Atlas iot. Installation guide V 1.0
 Atlas iot Installation guide V 1.0 Necessary items Before we begin have the following items readily available: SanDisk ultra micro SDHC, 16 gb card USB micro SD card reader Raspberry Pi 7 touchscreen Raspberry
Log & Event Manager UPGRADE GUIDE. Version Last Updated: Thursday, May 25, 2017
 UPGRADE GUIDE Log & Event Manager Version 6.3.1 Last Updated: Thursday, May 25, 2017 Retrieve the latest version from: https://support.solarwinds.com/success_center/log_event_manager_(lem)/lem_documentation
Accessioning Born-Digital Content with BitCurator
 Electronic Records Modules Electronic Records Committee Congressional Papers Section Society of American Archivists Accessioning Born-Digital Content with BitCurator John Caldwell University of Delaware
Quick Start Guide Sentrius RG1xx. Version 2.1
 A Version 2.1 REVISION HISTORY Version Date Notes Approver 1.0 20 July 2017 Initial Release Jonathan Kaye 1.1 28 July 2017 Minor fixes Dave Drogowski 1.2 3 Aug 2017 Clarified web interface URL in section
2 Initialize a git repository on your machine, add a README file, commit and push
 BioHPC Git Training Demo Script First, ensure that git is installed on your machine, and you have configured an ssh key. See the main slides for instructions. To follow this demo script open a terminal
Configuring GNS3 for CCNA Security Exam (for Windows) Software Requirements to Run GNS3
 Software Requirements to Run GNS3") Configuring GNS3 for CCNA Security Exam (for Windows) Software Requirements to Run GNS3 From Cisco s website, here are the minimum requirements for CCP 2.7 and CCP 2.8: The following info comes from many
Configuring GNS3 for CCNA Security Exam (for Windows) Software Requirements to Run GNS3 From Cisco s website, here are the minimum requirements for CCP 2.7 and CCP 2.8: The following info comes from many
Version 11. NOVASTOR CORPORATION NovaBACKUP
 NOVASTOR CORPORATION NovaBACKUP Version 11 2009 NovaStor, all rights reserved. All trademarks are the property of their respective owners. Features and specifications are subject to change without notice.
Link Gateway Initial Configuration Manual
 Link Gateway Initial Configuration Manual Copyright 2016 NetLinkz. All Rights Reserved. No part of this publication may be reproduced, transmitted, transcribed, stored in a retrieval system, or translated
Lab2 - Bootloader. Conventions. Department of Computer Science and Information Engineering National Taiwan University
 Lab2 - Bootloader 1 / 20 Cross-compile U-Boot. Connect to Raspberry Pi via an USB-TTL cable. Boot Raspberry Pi via U-Boot. 2 / 20 Host Machine OS: Windows Target Machine Raspberry Pi (2 or 3) Build Machine
IT Essentials v6.0 Windows 10 Software Labs
 IT Essentials v6.0 Windows 10 Software Labs 5.2.1.7 Install Windows 10... 1 5.2.1.10 Check for Updates in Windows 10... 10 5.2.4.7 Create a Partition in Windows 10... 16 6.1.1.5 Task Manager in Windows
Adafruit's Raspberry Pi Lesson 1. Preparing an SD Card for your Raspberry Pi
 Adafruit's Raspberry Pi Lesson 1. Preparing an SD Card for your Raspberry Pi Created by Simon Monk Last updated on 2013-07-08 12:15:38 PM EDT Guide Contents Guide Contents Overview You Will Need Downloading
Dell EMC ME4 Series vsphere Client Plug-in
 Dell EMC ME4 Series vsphere Client Plug-in User's Guide Regulatory Model: E09J, E10J, E11J Regulatory Type: E09J001, E10J001, E11J001 Notes, cautions, and warnings NOTE: A NOTE indicates important information
NETWRIX WINDOWS SERVER CHANGE REPORTER
 NETWRIX WINDOWS SERVER CHANGE REPORTER ADMINISTRATOR S GUIDE Product Version: 4.0 June 2013. Legal Notice The information in this publication is furnished for information use only, and does not constitute
Amazon Elastic Compute Cloud
 Amazon Elastic Compute Cloud Getting Started Guide AWS Management Console Table of Contents What s New...1 Introduction...2 Setting Up...3 Setting up an AWS Account...3 Signing up for Amazon EC2...3 Signing
Manually Mount Usb Flash Drive Ubuntu Server 12.04
 Manually Mount Usb Flash Drive Ubuntu Server 12.04 USB storage devices have the enormous advantage that for the most part they By default, disk drives do not auto-mount in Ubuntu Server Edition. Sometimes,
PGP NetShare Quick Start Guide Version 10.2
 PGP NetShare Quick Start Guide Version 10.2 What is PGP NetShare? The PGP NetShare product is a software tool that provides multiple ways to protect and share your data. Use PGP NetShare to: Let authorized
Quick Start Guide V NLX-microUCS APPLIANCE Unified Communications Server
 Quick Start Guide V.02.10 NLX-microUCS APPLIANCE Unified Communications Server Introduction The Elastix NLX-microUCS appliance puts at your fingertips all the tools you need to handle your communications
Deep Security 9 vcenter Operations Manager Integration
 Trend Micro Incorporated reserves the right to make changes to this document and to the products described herein without notice. Before installing and using the software, please review the readme files,
BASpi Quick Start Guide
 Instruction Sheet BASpi BASpi Quick Start Guide Thank you for choosing the Sedona-powered and BACnet networked BASpi I/O board from Contemporary Controls. You are ready to control without restrictions!
Raspberry Pi 2b PART 1. Table of Contents. Step by step guide. 1. Hardware (0:05) RS Online (ex-tax prices)... 3 MSY ebay...
 RS Online (ex-tax prices)... 3 MSY ebay...") Step by step guide PART 1 Table of Contents 1. Hardware (0:05)... 3 RS Online (ex-tax prices)... 3 MSY... 4 ebay... 4 Centercom Computers... 4 2. Installing the operating system (0:21)... 5 Preparing the
Step by step guide PART 1 Table of Contents 1. Hardware (0:05)... 3 RS Online (ex-tax prices)... 3 MSY... 4 ebay... 4 Centercom Computers... 4 2. Installing the operating system (0:21)... 5 Preparing the
Veritas System Recovery 18 Linux Edition README
 Veritas System Recovery 18 Linux Edition README ===================================================================== ====== Veritas(TM) System Recovery 18 Linux Edition README =====================================================================
Embedded Linux. A Tour inside ARM's Kernel
 Embedded Linux A Tour inside ARM's Kernel Contents 1. Shell basics 2. Introduction to Embedded Linux 3. Kernel Programming for Module / Driver Installation 4. Module / Device Driver in RPi 5. Cross Compiling
Anvil: HCC's Cloud. June Workshop Series - June 26th
 Anvil: HCC's Cloud June Workshop Series - June 26th Anvil: HCC's Cloud OpenStack Cloud Resource offering customizable virtual machines For projects not well served by a traditional Linux environment: Software