H.264 Video Compression
|
|
|
- Aldous Boone
- 5 years ago
- Views:
Transcription
1 USER MANUAL H.264 Video Compression Digital Video Recorder HDR-4008AE1.0, HDR-4016AE1.0

2 Safety Precautions Explanation of Graphical Symbols This symbol indicates the presence of important operating and maintenance (servicing) instructions in the literature accompanying the product. This symbol indicates the presence of uninsulated dangerous voltage within the product s enclosure that may be of sufficient magnitude to constitute a risk of electric shock to persons. WARNING To reduce a risk of fire or electric shock, do not expose this product to rain or moisture. CAUTION Changes or modifications not expressly approved by the manufacturer may void the user s authority to operate this equipment. CAUTION Danger of explosion if battery is incorrectly replaced. Replace only with the same or equivalent type recommended by the manufacturer. Discard used batteries according to the manufacturer s instructions. 2
3 These precautions must be followed for safety reasons. Warning Do not use if the unit emits smoke, strange sounds are heard or odor is emitted. - Continued use may cause electrocution and/or fire. Immediately remove the power plug from the outlet. Once the unit stops emitting smoke, consult the dealership where this unit was purchased or factory shop for repairs. - Do not attempt repairs on your own. Make sure the power cable is not damaged. - Always use the power cable supplied with the unit. - Do not place heavy objects on the power cable or place the power cable near heating equipment. Also, do not bend the power cable forcefully, work upon or staple it. A damaged power cable may result in fire and/or electrocution. - Should the power cable become damaged it must be replaced by the dealership where this unit was purchased or factory shop. Make sure there is no dust accumulation on the power plug or the outlet. - Dust accumulation may result in a short-circuit and heat generation and cause fire. - Be especially careful when using an outlet situated in a room exposed to high humidity, condensation and/or dust, or in a kitchen. - Periodically remove the power plug from the outlet and clean any dust and dirt between the plug and the outlet. Caution when connecting the power cable - Connect the power plug directly with the outlet. Faulty connection may result in heat generation and cause fire. - Do not use the power cable while it is tied in a bundle. This may result in heat generation and cause fire. - When using the extension cord supplied, make sure the power consumption of the connected unit does not exceed the electrical rating of the extension cord. Higher power consumption may result in heat generation and cause fire. Disassembly prohibited - Do not place your hand inside this unit as this may cause fire and/or electrocution. - Consult the dealership where this unit was purchased or factory shop for diagnostics, adjustments, and repairs. Do not place any foreign objects inside the unit. - Do not insert or push in any metal or combustible object through openings such as air ducts. This may cause fire and/or electrocution. - In the event that a foreign object is inside the unit, turn off and unplug the unit. Consult the dealership where this unit was purchased or factory shop. Continued use may result in fire 3

4 and/or electrocution. Do not place a container holding water or other liquids above the unit when it is connected to power. - In the event that water gets inside the unit, turn off and unplug the unit. Consult the dealership where this unit was purchased or factory shop. Continued use may result in a fire or electrocution. Do not allow the unit to get wet. - This unit is not waterproof. Do not expose the unit to water. This may cause fire and/or electrocution. Do not use in a bath or shower room. - In the event that the internal components have been exposed to water, turn the power off and remove the power plug from the outlet. Consult the dealership where this unit was purchased or factory shop. Continued use may cause electrocution and/or fire. Do not use during thunder/thunder storms. - Do not use during thunder/thunder storms. Never touch the connection cable during thunder/thunder storms. This may cause electrocution. Do not place in an unstable position. - Doing so may cause accidents and/or breakdowns through falling or toppling. - In the event that the unit has been dropped or the casing has been damaged, turn the power off and remove the power plug from the outlet. Consult the dealership where this unit was purchased or factory shop. Continued use may cause electrocution and fire. Do not expose to shock or vibration. - Stored data may be damaged or lost through hard-disk breakdowns caused by shock/vibration. Do not use this unit in areas where it is exposed to the possibility of explosion. - Do not use this unit in areas where explosive and/or flammable gases are present. This may cause fire and/or explosion. For pluggable equipment, the socket-outlet shell be installed near the equipment and shall be easily accessible. Caution Do not pull on the power cable when removing the power plug from the outlet. - Hold the power plug when disconnecting the power cable from the outlet. Pulling on the power cable from the outlet. Pulling on the power cable may damage the cord. This may cause fire and/or electrocution. Do not touch the power plug with wet hands. - Doing so may result in electrocution. Do not sit on. - Doing so may cause the unit to fall, be damaged and/or result in injury. Make sure the cables are connected properly. 4
5 - Connect and install the power cable and connection cable very carefully. Tripping over the cable may result in the unit capsizing or falling and cause injury. Do not place heavy objects on connected units. - Doing so may affect the stability of the unit and cause it to fall which may result in injury. Doing so may also damage the unit depending on the weight of the object. Shipment and portability - Never move this unit while the power is turned on. - When shipping, remove the power plug from the outlet, confirm that the connection cable has been removed, and store in original packaging. Ship using a method that causes the least amount of shock and/or damage to this unit. Also, do not drop this unit. Maintenance when the unit is going to remain unused for long periods of time - Remove the power plug from the outlet when the unit is going to remain unused for long periods of time. Cleaning the internal components - Consult the dealership where this unit was purchased or factory shop for cleaning internal components. Leaving the unit unused for long periods of time may attract duct to the internal components, which in turn may cause fire and/or breakdowns. Do not block the cooling fans or air ducts. - This unit it equipped with air ducts and cooling fans in order to assist the ventilation of hot air produced by the hard disk drive. Placing covers, placing in a case, or placing inside bookcases may cause heat build up, and may result in fire and/or electrocution. - When the unit is set up in a rack, leave open space on all sides.. Leave 5 cm or more of space above and below.. Leave 10 cm or more of space on both sides and on the rear. Do not expose to extreme temperatures or humidity changes. - Do not place in areas where the unit will be exposed to extreme temperatures (±10 degrees C per hour) or humidity changes. Points on unit positioning - This unit is constructed using precision electronic parts. Avoid placing it in areas described below as this may cause faulty operation and/or breakdowns.. In direct sunlight. In places exposed to water. In the vicinity of cooling and heating units or humidifiers. Near the air conditioner where the unit is exposed to cool air. Dusty areas. Areas that contain fire hazards. In the vicinity of volatile substances. Areas where the unit will be exposed to constant vibration (in trains, cars, etc.) Cautionary points on condensation - Droplets may form on the outside when very cold water is poured into a cup. In the same way, droplets may form around the internal components of his unit. This is called condensation. 5
6 - Do not use this unit if condensation has formed. Using this unit while condensation is formed may cause breakdowns. In the event of sudden sharp temperature changes, turn off the power and do not use this unit until the temperature of the room where it is positioned stabilizes (about 2 hours). Condensation will not occur while the power is turned on. - When condensation is likely to occur Use the unit after turning the power off and leaving it for 1~2 hours. Back up battery - This unit has got a built-in lithium battery used to back up the clock function. The battery continues to operate the clock even when there is a power disruption. - The life expectancy of the battery is approximately 2 years. If the battery runs out or leaks, the clock resets when the power is turned off. - Battery fluid leaks. In the event that the battery fluid has leaked rinse hands/clothes thoroughly with water.. Loss of eyesight may result if battery fluid enters the eyes. Do not rub the eyes. Immediately rinse with clean water and consult a physician. - When disposing of this unit. Consult the dealership where this unit was purchased for information concerning the disposal of the lithium battery. Warning Installation and servicing should be performed only by qualified and experienced personnel. Turn off the power of the DVR when connecting cameras, audio or sensor cables. The manufacturer is not responsible for any damage caused by improper use of the product or failure to follow instructions for the product. The manufacturer is not responsible for any problems caused by or resulting from the user physically opening the DVR for examination or attempting to fix the unit. The manufacturer may not be held liable for any issues with the unit if the warranty seal is removed. Warranty for Critical Parts HDD, Battery and ATX Power: 2 years (25 environment) Cooling Fan: 3 years (25 environment) 6

 Power Cable (110V or 220V) Items HDD SATA Data")
7 Product Components The package contains the main unit and its components as specified below. When you purchase the unit, Please check to ensure the components specified below are included. DVR Set Client Software CD, User Guide Remote Control, Battery1.5V, Mouse / / / HDD SATA data cable HDD mounting bracket & Screw HDD bracket fixing screw Rack Mount (2EA) Power Cable (110V or 220V) Items HDD SATA Data Cable HDD Mounting Bracket HDD Mounting Bracket Screw Rack Mount Bracket Quantity 4 EA 2 EA 16 EA 2 EA Basic function of the MOUSE 1 : Left button: SELECT function 2 : Wheel: MOVEMENT function on a drop-down menu 7


 and the supplied S-ATA")
8 Mounting the HARD DISK 1. Remove the unit s cover. 2. Fix the supplied rubber pads to the supplied HDD mounting bracket. Then fix the hard disk to the mounting bracket using the supplied screws (A). 3. Connect the unit s power cable (B) and the supplied S-ATA cable (C) to the hard disk. Then fix the hard disk to the unit using the supplied HDD fixing screws (D). 8
9 Compatible HDD Models Seagate ST AS (Barracuda LP) 2 TB 5900 RPM 32 MB Seagate ST SV (Surveillance) 1 TB 7200 RPM 32 MB Seagate ST AS (Barracuda) 1 TB 7200 RPM 32 MB Seagate ST SCE 500 GB 7200 RPM 8 MB Seagate ST AS (Barracuda) 500 GB 7200 RPM 16 MB Seagate ST AS (Barracuda) 500 GB 7200 RPM 16 MB Seagate ST AS (Barracuda) 250 GB 7200 RPM 16 MB Seagate ST SV (Surveillance) 250 GB 7200 RPM 8 MB Seagate ST AS (Barracuda) 250 GB 7200 RPM 8 MB Seagate ST AS (Barracuda) 160 GB 7200 RPM 8 MB HITACHI HDS722020ALA330 2 TB 7200 RPM 32 MB HITACHI HDS721010KLA330 1 TB 7200 RPM 32 MB HITACHI HDT721010SLA360 1 TB 7200 RPM 16 MB HITACHI HDS721010CLA332 1 TB 7200 RPM 32 MB HITACHI HDS721050CLA GB 7200 RPM 16 MB HITACHI HDP725050GLA GB 7200 RPM 16 MB HITACHI HDS721032CLA GB 7200 RPM 16 MB HITACHI HDS721025CLA GB 7200 RPM 8 MB HITACHI HDT721025SLA GB 7200 RPM 8 MB HITACHI HDP725025GLA GB 7200 RPM 8 MB Western Digital WD20EADS 2 TB 7200 RPM 32 MB Western Digital WD10EACS 1 TB 7200 RPM 16 MB Western Digital WD5000AACS 500 GB 7200 RPM 16 MB Western Digital WD2500AAKS 250 GB 7200 RPM 16 MB NOTICE The brands and models of all HDD should be the same. If the brands and models of the HDD are different, the DVR may not recognize HDD or malfunction. Storage Estimation HDD Super High Standard Economy Capacity Hour(s) Hour(s) Hour(s) Hour(s) 250GB 23 Hours 1 Days 5 Hours 2 Days 10 Hours 4 Days 20 Hours 500GB 2 Days 2 Days 13 Hours 5 Days 1 Hours 10 Days 2 Hours 1TB 4 Days 3 Hours 5 Days 4 Hours 10Days 8 Hours 20 Days 16 Hours 2TB 8 Days 9 Hours 10 Days 11 Hours 20 Days 21 Hours 41 Days 19 Hours Recording Condition: 4CH * 1280X720* 30fps * Continuous 9


10 Booting the DVR and Basic Time Setting 1. During the first start up, the following message will be displayed. 2. Setting Daylight Saving Time If the DVR is to be set Day Light Saving Time and be synchronized NTP (Network Time Protocol), Take next steps. 1. Enter the SETUP mode. The default Password is Go to SETUP>SYSTEM>SET DATE & TIME 10
11 3. Select DAYLIGHT SAVING. 11
12 Setting NTP (Network Time Protocol) 1. When the DVR is connected with internet and the DVR need to be syncronized with NTP (Network Time Protocol), set SETUP>SYSTEM>NTP ON. 2. Select proper TIME ZONE time. NOTE: If you want the unit to automatically synchronize the local time, the Time Zone must be properly set according to your local Time Zone. 12
13 Technical Specifications ITEM HDR-4008AM1.0 HDR-4016AM1.0 Video Input Channel, 4/8/16CH HD-SDI (1080p25/30, 1080i50/60, 720p25/30/50/60 Input Level Auto Detection) Output HDMI 1 HDMI (Max 1920x1080p60 and Various Resolution) VGA 1 VGA (Max 1920x1080p60 and Various Resolution) Input 4/8/16CH RCA Audio Output 1 RCA, 1 HDMI Audio Codec G.711 Alarm Sensor Input 4/8/16ch (NC/NO Selectable) Alarm Output 1/2/4ch Alarm out by Sensor, Motion and Video Loss Compression H.264 Multi-operation QUADPLEX (Playback/Record/Network/Backup) 1080p 40fps 80fps Resolution 720p 96fps 192fps Record NTSC/PAL 640x fps 240fps Recording quality grade LEVEL 1 (Low), 2, 3, 4, 5 (High) Recording Mode Continuous / Schedule / Motion/ Sensor/ Manual Pre & Post Recording Yes Display Frame Rate ( /Sec) NTSC: 30fps/ch, 60 fields / PAL: 25fps/ch, 50 fields Multi-Decoding 1, 4, 8 1, 4, 8, 16 Single Playback Playback channel x 1/4, 1/2, 1, 2, 4, 8, 16, 32, 64 Speed Multichannels Up to x16 Up to x8 HDD Capacity of 1 2TB HDD Internal HDD 1 (2: w/o DVDRW) 2 (4: w/o DVDRW) No. Storage E-SATA Port & USB Port 1 & 2 2 & 2 (Front 1, Rear 1) (Front 1, Rear 1) USB Flash drive Video & Still Image Huge Backup Yes (up to 24 hours) Backup Build-in DVD- Video & Still Image RW Network Video & Still Image 13
14 User I/F Input Method Front button, Remote control, Mouse, Keyboard controller Console 1 RS-232C Serial port PTZ & Keyboard control 1 RS RS-485 Termination Yes Dynamic DNS Yes (Free DDNS) Network Dual Encoding for Network 640x360 60fps (HD TBD) Web viewer (1:1) Network Live, Search, Backup, PTZF Cam Control, Remote Setup, UMS Single (1:1) Access Remote Upgrade UMS Multi (1:n) Useful Features DLS & NTP & S.M.A.R.T & Digital Zoom Features Internal Beep By Alarm, Motion, Video Loss, HDD error Multi-Language Yes (more than 20 languages) 3G Mobile Yes (Exclusive Viewer) Power Power Supply Voltage DC 12V 5A 280W SMPS Allowable operation temperature During operation 5 C - 40 C, During storage: -10 C C Weight Unit Weight (Gross weight) 4.1Kgs (6.2Kgs) 6.8Kgs (9.0Kgs) Dimension Unit Dimension (W x H x D) 432mm x 340mm x 98mm Specifications are subject to change without notice 14
15 Table of Contents 1. Name, Function and Connection Front Panel Rear Panel Remote control Setting up the DVR Setup Main Screen Setup Display Mode Setup Recording Mode Recording Schedules Setup Device Mode ALARM-OUT Controller & PTZ Setup Motion Zone Setup Setup Storage Mode Setup System Mode Setup SECURITY Mode Setup Network Mode Port and Web Port Network Types DHCP STATIC DDNS NETWORK STREAM Setup - CONFIG Mode Quick Setup Saving Setup Live, Search, and Playback Live Viewing Screen SEARCH Screen TIME-LINE Search Event Search Go To First Time Go To Last Time Go To Specific Time Archive Search Log Search Play mode PTZ Control
16 6. Back up Still Image backup onto USB flash memory Video backup onto USB flash memory Transferring still images or video from the ARCHIVE list Playback of Backup Video Upgrading Firmware Network access using the Exclusive network viewer, UMS single PC requirements Installing the network viewer Live monitoring mode and functions Bi directional audio Remote search mode and functions PC System configuration Network access using the Exclusive network viewer, UMS multi Overview Minimum PC requirements Installing the program Live Window Main user interface Control buttons Search and Playback Window Main user interface Main control panel Setup of UMS Multi Client General Event Record OSD Language About Remote Setup Operation Addition, Delete, and modify of DVR sites Connect and Disconnect Still-image capture during Live Recording video on local PC during Live Local Playback and Remote Playback AVI Backup during playback Network By an web-browser viewer APPENDIX: How to connect network A. How to set IP address of the DVR and open TCP port of the router?
17 B. How to access DVR from Remote PC? C. How to access DVR with iphone? D. How to access DVR with Android?
18 1. Name, Function and Connection 1-1. Front Panel The following information will help you to operate the front panel controls. Figure Front panel Indication Lights Name POWER HDD ALARM NETWORK CH 1, 2, 3, 4 Description Indication light is on when power is applied to the system. Green Power On, Orange Power Off Indicates that the system is accessing the hard disk. Indicates that sensor(s) is/are triggered or motion is detected. Indication light is on when client is connected to the system through the network. Indication light is on when the channel is recording. Front Panel Buttons NO Name Description 1 Channel Keys (1 to 4) 2 Press to rewind the footage in playback mode. 3 Jump/Step backward. In playback mode, the playback position moves 60 seconds backward. 4 Press to fast forward the footage in playback mode. 5 Jump/Step forward. In playback mode, the playback position moves 60 seconds forward. 18
19 6 Set the alarm output mode. (On or Off) 7 Press to go to SEARCH menu in live display mode. 8 Press to play/pause the footage in playback mode. 9 Press to enter SETUP menu. 10 Enable/disable the automatic sequence of display of channels in full screen, quad, 9-split display mode. 11 Press to control Pan/Tilt/Zoom operations. 12 Press to capture video in jpeg format in live or playback mode. 13 (LEFT) Press to move left or to change the values in Setup mode. It is also used as the number 4 when entering password. 14 (UP) Press to move up the menu in Setup mode. It is also used as the number 1 when entering password. 15 (RIGHT) Press to move right or to change the values in Setup mode. It is also used as the number 2 when entering password. 16 (DOWN) Press to move down the menu in Setup mode. It is also used as the number 3 when entering password. 17 Press to select desired menu item or to store the setup value. 18 Press for temporary storage of the changed value or to return to the previous menu screen. 19 Press to start or stop manual recording. 20 Display Key for split the channel screen from single to all. 21 USB Port To archive still-image or video into a USB memory or upgrade firmware with USB memory stick, connect a USB memory to the USB terminal. 19

20 1-2. Rear Panel Figure Rear Panel Table Rear panel connections NO Connection Purpose 1 VIDEO IN HD-SDI connectors for video input. 2 AUDIO IN 4/8/16 connectors for audio input. In case of 16ch, an audio cable is needed from ch 5 to ch 16. AUDIO OUT 1 connector for audio output. 3 HDMI OUT HDMI connectors for main video output. 4 VGA Connector for VGA monitor. 5 RS-232C For engineering use only, the function be used by a gender through the VGA output 6 E-SATA External SATA terminal 7 ETHERNET RJ-45 connector for network function 8 USB Port Connector for Mouse or Backup 9 SENSOR IN 4/8/16 Connectors for Sensor device connection 10 RS-485 RS-485 control terminal (D+, D-) 11 ALARM OUT 1/2/4 connectors for alarm device. Provide simple on/off switching by using relay (A, B) 12 POWER DV12V for 4/8ch. 280W SMPS for 16ch 13 HD Out HD SDI Out for HD SDI Monitor 20
 or to enter DVR ID number. 4 -- (F/REW): During playback - To move the playback position 60 seconds backward.")
21 1-3. Remote control 1 ID: When a remote control ID number is set in DVR, press it before number. 2 REC: To start and stop manual recording. 3 Number: To select channel (1, 2, 3, & 4) or to enter DVR ID number (F/REW): During playback - To move the playback position 60 seconds backward. During pause - To move the playback position 1 frame backward (F/ADV): During playback - To move the playback position 60 seconds forward. During pause - To move the playback position moves 1 frame forward. 6 (REW): To rewind the footage at 1x, 2x, 4x, and more speed during playback. 7 /II (PLAY/PAUSE): To play or to pause the footage in playback mode. 8 (FF): To fast forward the footage at 1x, 2x, 4x, and more speeds during playback. 9 Control button: Press to move the menu items or select channel. 10 SETUP: To launch SETUP menu. 11 SEARCH: To go to the search menu. 12 ESC: During setting - To return to previous menu screen. During playback - To exit from playback System Lock to lock a system when pressing ESC button for 5 seconds. System Unlock to unlock a system when pressing ESC button (Toggle) 2. Setting up the DVR for 5 seconds. 13 BACKUP: To start operations of backup in live or playback mode. (The same function button as CAPTURE on the front panel of DVR in case of New Entry and Mighty series) The following sections detail the initial setup of a DVR. 14 SEQ: To start auto sequencing of the screen in full screen mode Setup Main Screen To enter the setup menu, select MENU and SETUP on the screen using the mouse or press the SETUP 21

.")
22 button on the front panel. Then select a user type. User can select one of user types (ADMIN, USER1, USER2, USER3) using the control button ( ) on the front panel and press SEL button. Input the password by front key panel, mouse or remote controller. Use the Virtual Keyboard when you use front key and mouse. The factory default password is It is highly recommended to assign a new password to protect the system. User can assign a new password in SECURITY setup menu. HD VIDEO INPUT: Display a channel, total time, elapsed time, error count, active pixels, total pixels, active lines, total lines and frame rate of HD channel (9~10). CONTROL BAR AUTO HIDE: Set to hide automatically or display continuously a control bar on the bottom side in a Live mode. CHANNEL INFORMATION: Display a channel number, channel name, resolution, frame rate, quality and recording type of each channel. 22
23 SYSTEM INFORMATION: Display a software version, storage size, network type, IP address, MAC address, DDNS status, DVR ID and remote controller ID of the system. SYSTEM LOCK: To lock the system, user input a password. To unlock the system, please press ESC button for 5 seconds on a front panel or a remote control. You can also unlock the system when pressing LOCK icon on the screen using a mouse control. Then, the system will ask a password. Table Setup menu tree DISPLAY OSD OSD CONTRAST SEQUENCE SEQUENCE-DWELL TIME CHANNEL - NAME - COVERT VIDEO OPTION (HDMI/VGA) RECORD CHANNEL - RESOLUTION - FRAME RATE - QUALITY - RECORDING - SENSOR RECORDING - PRE RECORD - POST EVENT RECORD - AUDIO - SCHEDULE DEVICE ALARM OUT CONTROLLER & PTZ CHANNEL - MOTION ZONE - MOTION SENSITIVITY KEY TONE REMOTE CONTROL ID SENSOR - TYPE STORAGE OVERWRITE DISK FORMAT DISK INFO 23
24 RECORDING LIMIT - RECORDING LIMIT DAYS S.M.A.R.T SYSTEM DVR-ID DESCRIPTION LANGUAGE DATE FORMAT SET DATE & TIME CLIENT ACCESS NTP SEND SECURITY USER AUTHENTICATION USER PASSOWRD AUTHORITY OF PLAYBACK NETWORK PORT WEB PORT NETWORK TYPE (DHCP, STATIC) DDNS NETWORK STREAM CONFIG SAVE SETUP TO A USB LOAD SETUP FROM A USB LOAD DEFAULT LOAD FACTORY DEFAULT QUICK SETUP USE QUICK SETUP CUSTOMER SETTINGS DUAL STREAM 24
25 2-2. Setup Display Mode Press the SETUP button and enter the password. The setup menu is displayed as picture below. Select DISPLAY icon and press SEL button to enter the setup menu item. Navigate through the menu items using the control button ( ) and change the value of the menu item using the control button ( ). To return to setup menu screen, press the ESC button. Figure Display mode setup screen Table Menu items in DISPLAY mode setup Item Description OSD Enable/disable on-screen-display. Select ON: show it on the screen, Select OFF: Disappear on the screen. OSD Set the visibility level of the On Screen Display (OSD).(50-100) CONTRAST SEQUENCE Enable/disable sequential display of video in full screen mode. SEQ-DWELL Set the dwell time of each, single channel display in sequential display mode TIME (3~60seconds) CHANNEL Select a channel for applying the following settings using the control button ( ). Press SEL button to change the channel. NAME Set the channel name. Press SEL button and set the channel name and select OK using the control button ( ). COVERT Enable/disable display of the video channel in live display mode. VIDEO Select a video output type for HDMI/VGA. (720p 50Hz, 720p 60Hz, 1080i 50Hz, 1080i 25
26 OUTPUT (HDMI/VGA) 60Hz, 1080p 50Hz, 1080p 60Hz). Default value is 720p 60Hz. If the monitor doesn t support some output type, it would be returned to the previous value Setup Recording Mode Press the SETUP button and enter the password. The setup menu is displayed as picture below. Select RECORD icon and press SEL button to enter the setup menu item. Navigate through the menu items using the control button ( ) and change the value of the menu item using the control button ( ). To return to setup menu screen, press the ESC button. Figure Recording mode setup screen Menu item CHANNEL Table Menu items in Recording mode setup Description Select a channel for applying the following settings using the control button ( ). Press SEL button to change the setting value of all channels at once. Once you select an item, then press SEL to set value for all channels. Use virtual keyboard for all setting on one screen as you want as bellow picture. 26

27 RESOLUTIO Set the resolution for the specified channel: 1920x1080, 1920x540, 1280x720 and N 640x360. You can see the 1920x1080 and 1920x540 menu when 2M HD-SDI camera is connected. FRAME Set the frame rate for the specified channel. The sum of the frame rate values from each RATE channel cannot exceed the maximum frame rates for a specific recording resolution. Typical values of the maximum frame rate for video are Total 1080p@60fps or 720p@120fps. * It is possible to use 1080p camera and 720p camera at the same time. Please note that the system has to be booted after connecting all cameras on the system. QUALITY Select the recording quality for the specified channel. Options are: Level 1 (Low), 2, 3, 4 and 5 (High) RECORDING Assign the recording mode for each channel. Options are: Continuous, By Motion, By Sensor, By Schedule or Disable. SENSOR Enable setting up to 4 sensors for the specified channel using the control button ( RECORDING ). PRE Enable/disable pre-event recording. Pre-event recording time is 15 seconds to 20 RECORD minutes(selectable) POST EVENT Set the post event recording time duration for the specified channel. (10-30 seconds) RECORD AUDIO Enable/disable audio recording for the specified channel. SCHEDULE Set the recording schedule. Press SEL to go to schedule setup screen. 27
.")
 and set the recording mode using the SEL")
28 Recording Schedules To setup a recording schedule, select SCHEDULE in the RECORD menu. Navigate through the items using the control button ( ). Once the channel 1 is selected, SCHEDULE-CH1 screen is displayed. Select ALL or each day using the control button ( ) and set the recording mode using the SEL button repeatedly Figure Schedule recording setup screen 28
29 C: CONTINUOUS recording, when you select the color will change to Blue Color M: MOTION recording, when you select the color will change to Yellow Color S: SENSOR recording, when you select the color will change to Red Color -: Does not record [ALL]: Move the cursor to ALL and select a recording mode C,M or S using the SEL button to set the same setting for every day. [SUN to SAT]: Move the cursor to SUN to SAT and select a recording mode C,M or S using the SEL button to set the same setting for the whole day. [Vertical Bar ]: Move the cursor to ALL and move the cursor to the specific time using the control button ( ). And select a recording mode C,M or S using the SEL button to set the same setting. [SEL]: The recording mode can be selected by pressing repeatedly the SEL button. [COPY FROM] [COPY TO]: Set the channel 1 schedule and select COPY TO using the control button ( ), select CH2 using the control button ( ) and press the SEL button. Then the CH1 schedule is copied to CH2. To return to setup menu screen, press the ESC button. The setting of the schedule recording is determined by the admin only Setup Device Mode Press the SETUP button and enter the password. The setup menu is displayed as picture below. Select DEVICE icon and press SEL button to enter the setup menu item. Navigate through the menu items using the control button ( ) and change the value of the menu item using the control button ( ).To return to setup menu screen, press the ESC button. Figure Device mode setup screen 29
30 Table Menu items in Device Setup screen Item Description ALARM OUT Set the sensor, motion, and video loss for each alarm. CONTROLLER & PTZ Set the Controller and PTZ camera speed, number, type and ID. CHANNEL Select specified channel for motion zone setup. MOTION ZONE Select either Full Zone or Partial Zone for motion sensing. MOTION SENSITIVITY Set the motion sensitivity for the specified channel. Control the motion sensitivity from 1 to 9. KEY TONE Enable/disable key tone. REMOTE CONTROL ID Select an ID of remote control. 1. Select ID. 2. Press the same number as ID set in DVR on a remote control. 3. Then icon will be displayed on Live screen of DVR that respond to the remote control. The options are from 00 to 99 SENSOR Select sensor NO from 1 to 4 TYPE Set the type of sensor for the specified channel. Options are: OFF, N/O (normal open), and N/C (normal closed) ALARM-OUT Figure ALARM-OUT setup screen 30

31 Table Menu item in ALARM-OUT Setup screen Item Description ALARM OUT Select an alarm out number. Available NO: 4ch (1) SENSOR IN Enable Alarm Out by Sensor up to 4 Inputs. MOTION ON Enable Alarm Out by Camera Motion up to 4 cameras. VIDEO LOSS ON Enable Alarm Out by Video Loss up to 4 cameras. ALARM DURATION Set the alarm dwell time from 5 to 60 seconds. ERROR ALARM Set the error type for the alarm activation. The options are OFF, ALL, HDD ERROR and VIDEO LOSS Controller & PTZ Setup To control the controller and PTZ functions of the camera, connect a controller to the RS-485 port. 1 Connect the RS-485 cables of Controller and PTZ camera to the RS-485 port on the rear panel. 2 Press SEL button or double click to enter the menu. Then Controller and PTZ menu screen is displayed. Figure Controller and PTZ Control Setup Screen Note: For speed dome cameras that support RS-485, connect them directly to the RS-485 port. If the camera is controlled with RS-232C, use an RS-485 to RS-232C signal converter. On the Controller and PTZ control setup screen, you can select or set the protocol type of the camera that is the same as the one installed on the site. If the camera has a specific camera ID, select the camera ID using the control button ( ). The following options are available on the Controller and PTZ setup screen. CHANNEL (channel number that the Controller and PTZ is connected to) NAME (protocol type) SPEED (19200, 14400, 9600, 4800, 2400) ID (0-63) Keyboard Controller Mapping Table 31
32 KBD-2 32


33 Motion Zone Setup Select MOTION ZONE using the control button ( ) and select either PARTIAL ZONE or FULL ZONE using the control button ( ). And press the SEL button. If FULL ZONE is selected, the motion setting screen is not displayed. Only set the level of sensitivity for MOTION SENSITIVITY. FULL ZONE: The motion sensor is active on the whole screen. PARTIAL ZONE: The motion sensor is active in the set detection frame. Select the sensor detection position using the control button ( ) and press the SEL button. Then the color of the position which is selected will be changed. Press ESC button to return to the DEVICE setup menu. Figure Motion Zone selection screen 2-5. Setup Storage Mode Press the SETUP button and enter the password. The setup menu is displayed as picture below. Select STORAGE icon and press SEL button to enter the setup menu item. Navigate through the menu items using the control button ( ) and change the value of the menu item using the control button ( ). To return to setup menu screen, press the ESC button. 33

34 Figure STORAGE setup screen Item OVERWRITE DISK FORMAT Table Menu items in STORAGE Setup screen Description When enabled, the DVR will continue recording and overwrite the oldest existing recorded data once the hard drive is full. When disabled, recording will stop once the hard drive is full. You will have an option YES or NO for the hard drive format. Caution: We recommend that you archive any data that you may need in the future before you format the hard drive. 34
 The data will remove by the hour.")
35 DISK INFO Hard drive information RECORDING LIMIT RECORDING LIMIT DAYS S.M.A.R.T. Enable/disable recording limit. Set the recording limit days.(1-90 days) The data will remove by the hour. Set the alarm and buzzer by setting HDD temperature limit. 35
36 2-6. Setup System Mode Press the SETUP button and enter the password. The setup menu is displayed as picture below. Select SYSTEM icon and press SEL button to enter the menu item. Navigate through the menu items using the control button ( ) and change the value of the menu item using the control button ( ). To return to setup menu screen, press the ESC button. Figure SYSTEM Setup Screen Item DVR ID DESCRIPTIO N Table Menu items in SYSTEM Setup screen Description Press the SEL button and select DVR ID using the control button ( ), and press SEL button. Press OK to apply the selected DVR ID. SPACE / Caps Lock(Select either Capital or Lower letter) BS(Back space: Erase previous character) / Clear(Erase all characters) Press SEL button to view system information. (Software version, Storage size, IP address and MAC address.) 36
.")
37 LANGUAGE DATE FORMAT SET DATE&TIME Select the display language using the control button ( ). Once a language is selected, the display language changes. Select the date display format using the control button ( ). Options are: YYYY/MM/DD, MM/DD/YYYY, DD/MM/YYYY, YYYY-MM-DD, MM-DD-YYYY, DD-MM- YYYY Select the display date and time using the mouse or the control button ( ) on the remote control and press OK button to set the present date and time. DAY LIGHT SAVING Select DAYLIGHT SAVING using the mouse and the control button ( ) on the remote control and select the appropriate daylight saving time zone. If choosing EU or OTHERS, set the applicable conditions. The options are: OFF USA EU OTHERS 1. OFF: Daylight saving is not set. 2. USA: Applies the USA daylight saving time. 3. EU: Applies the EU daylight saving time. - Select the GMT AREA using the control button ( ). - Set the time difference with the standard time using the control button ( ). 4. OTHERS: If the time zone is neither USA nor E, set the start and end date of the daylight saving period. 37
, select the setting value using the control button ( ) and press the ESC button to return to SET DATE & TIME setup menu.")
38 CLIENT ACCESS NTP - Select BEGIN or END using the control button ( ) and press the SEL button. - Select the item using the control button ( ), select the setting value using the control button ( ) and press the ESC button to return to SET DATE & TIME setup menu. CAUTION: - Do not set the start time to 23:00 for DLS. - DLS can t be applied if the date of BEGIN and END is the same. Enable/Disable remote access through network client software. NTP is an abbreviation for Network Time Protocol, which is for synchronizing the clocks of computer systems over variable-latency data networks. SEND PRIMARY SNTP SERVER: Input the address of the primary NTP time server. SECONDARY SNTP SERVER: Input the address of the secondary NTP time server. TIME ZONE: Greenwich Mean Time(GMT) is a term originally referring to mean solar time at the Royal Observatory, Greenwich in London. Because NTP synchronizes with Greenwich Mean Time(GMT) regardless of geography, users must set their own time difference. (Ex.KOREA GMT+09:00) CONNECTON MODE: Select NTP time server connection mode. INTERVAL: Synchronize the clock by hours which is set on the connection period menu. TIME: Synchronize the clock at the time daily which is set on the connection period menu. CONNECTION PERIOD: 1~24 Enable/disable the send function.(on/off) 38

39 TRANSMISSION MODE: Sending an image only of the channel that triggered the alarm when an alarm event is triggered. IP NOTIFICATION: Enable/disable sending when the IP address of your DVR is changed. EVENT ALARM: Enable/disable sending reports on the channel that triggered the alarm when an alarm event is triggered. MAIL TO: Enter the appropriate address to enable sending reports using a virtual keyboard. MAIL SERVER: Enter the appropriate mail server information to enable sending daily e- mail reports using a virtual keyboard. ID: To set the connection user ID for the mail server using a virtual keyboard. (ex.id@yahoo.com) PASSWORD: To set the connection password for the mail server using a virtual keyboard. MAIL FROM: To set the mail address sent to the destination host using a virtual keyboard. 39
 and change the value of the menu item using the control button ( ). To return to setup menu screen, press the ESC button Figure 2.7.1.")
40 2-7. Setup SECURITY Mode Press the SETUP button and enter the password. The setup menu is displayed as picture below. Select SECURITY icon and press SEL button to enter the setup menu item. Navigate through the menu items using the control button ( ) and change the value of the menu item using the control button ( ). To return to setup menu screen, press the ESC button Figure SECURITY setup screen USER Item AUTHENTICATION Table Menu Items in SECURITY Setup Screen Description PASSWORD CHECK: Check either V or blank for the functions such as Setup, Playback(PB), PTZ, Record OFF(R/OFF), and Network. V: Ask for a password when the given function is selected for all users. Blank: Does not ask for a password when the given function is selected for all users. USER PASSWORD ADMIN, NETWORK, USER1, USER2, USER3: Options are ADMIN, USER1, USER2 and USER3. Select USER PASSWORD using control button ( ) and press SEL button. Select user type using the control button ( ) and SEL button. Enter the current password and select OK. Enter the new password and select OK. Enter the same password again to 40

41 confirm and select OK. Then the message PASSWORD CHANGED is displayed. The factory default password is AUTHORITY OF PLAYBACK Enable/disable a covert function in playback mode. V: No covert. Blank: Covert 2-8. Setup Network Mode Press the SETUP button and enter the password. The setup menu is displayed as picture below. Select NETWORK icon and press SEL button to enter the setup menu item. Navigate through the menu items using the control button ( ) and change the value of the menu item using the control button ( ). To return to setup menu screen, press the ESC button 41
42 Figure NETWORK setup screen Table Menu items in Network Setup screen Item Description PORT Port number (Default: 5445) WEB PORT Web Sever Port number (Default: 80) NETWORK TYPE Select a type of network connection. Options are: DHCP and STATIC Note. Other parts of the network setup screen change depending on what network type you select. DHCP DVR automatically get IP varying from time to time from network and does not therefore need to be set. STATIC Assigned to an Internet service provider (ISP) to be its permanent address on the Internet. DNS (PRIMARY) The address for the primary DNS server DNS (SECONDARY) The address for the secondary DNS server DDNS Enable/disable using domain name address through DDNS server. ON mode, DDNS server name appears for domain registration. DDNS SERVER NAME: The DDNS sever name is bestddns.com. CAUTION: Do not change this sever name. If this is changed, the DDNS service cannot be available. DDNS INTERVAL: Set the connection interval (5-60minutes) NETWORK STREAM Set the value for network streaming. 42
43 Port and Web Port When you connect one or more DVRs to a network through an IP sharing device, each device must have a unique TCP port number for access to each unit from outside the LAN. Also, the IP sharing device must be configured for port forwarding so when each port is accessed on the IP sharing device, it will forward to the appropriate DVR. Note: This port number is listed next to the Port menu option in the Network Setup screen. If you plan to access the DVR units only from within the same LAN, the TCP port does not have to be changed. Network access beyond a router In order to access the DVR remotely beyond a router (firewall), the user must open TCP port for command level, live/storage channels. User need to open port number If the DVR supports remote setup and upgrade function over the network, user need to open additional port number 80. Web viewer Network access beyond Router In order to access beyond Router (Firewall), user must open 1 TCP port that is set on NETWORK > WEB PORT. If this port is not open properly, user can not access DVR using direct Web viewer (Example: When NETWORK > WEB PORT is set as 80, 80 TCP port of IP address of DVR must be open.) Network Types DHCP An IP address is automatically assigned by the DHCP server, which automatically assigns IP address and other parameters to new devices. When ADSL or other network being used adopts variable IP method, not fixed IP. This option is used as a way to automatically get IP address STATIC 1. For the use of fixed IP. (See your network administrator if you do not have this information.) 2. When DVR is installed in IP sharer that is connected with ADSL, a user can assign fixed IP to DVR from IP sharer itself using DMZ function out of such sharer. Input IP set in DMZ on IP field and Gateway of ADSL modem on Gateway field. Similarly, for Subnet Mask, DNS address, input relevant values in IP sharer. 43
44 Item IP SUBNET MASK GATEWAY DNS (PRIMARY) DNS (SECONDARY) Table LAN Description The fixed IP address of the DVR unit. The subnet mask for the LAN The IP address of the Gateway The address for the DNS server The address for the DNS server DDNS User can use the function to connect to a network with a domain name. When it selects a Sever 1, user can select one type among three DDNS Servers which be supporting for free. (okddns.com for Korea, ddnscenter.com for USA and bestddns.com for other area including EU) The DDNS interval can be set from 5 to 60 minutes. To connect to a network with a domain name, user also has to register a MAC address and create a unique domain name to or Please refer to page 90 for the detail of the registration. Figure Network setup screen DDNS Server 1 Figure Network setup screen DDNS Server 2 If user wants to use other general-purpose DDNS Server, select a Sever 2. Then, user has to input the server name, ID and password using a virtual keyboard. 44

45 NETWORK STREAM User can set the Resolution, the frame rate and the quality for a network stream classified by channel. It is recommended that user should adjust each item to proper level to get the network service smoothly. Figure Network setup screen Network Stream 2-9. Setup - CONFIG Mode Press the SETUP button and enter the password. The setup menu is displayed as picture below. Select CONFIG icon and press SEL button to enter the setup menu item. Navigate through the menu items using the control button ( ) and change the value of the menu item using the control button ( ). To return to setup menu screen, press the ESC button Figure Config setup screen 45
46 Item SAVE SETUP TO A USB LOAD SETUP FROM A USB LOAD DEFAULT LOAD FACTORY DEFAULT Table Config setup Description User can save the current configuration (Setting values) of DVR to the USB memory stick. Put the USB stick on the front panel and press SEL to start the saving process. User can upload the configuration of DVR to another DVR using the USB Memory stick. Put the USB stick on the front panel and press SEL to start the loading process. Select ON to reset the system to the default settings. (The follow settings such as Language, DVR ID, Security User Authentication, Security User P/W, Date format, DLS settings, Network settings, HDD serial number, and HDD ERROR time will not be included.) Select ON to reset the system to the factory default settings Quick Setup In the MENU, select the QUICK SETUP tab. Then, the QUICK SETUP menu is displayed as pictured below. Navigate through the menu items using the mouse or the control button ( ) on the remote control and change the value of the menu item. The QUICK SETUP has high priority than other setting values on RECORDING and NETWORK menu. The QUICK SETUP also cannot set to classified according to channel. Figure Quick Setup Screen 46
47 Table Quick Setup Item USE QUICK SETUP CUSTOMER SETTINGS DUAL STREAM Description Select the Checkbox to use the Quick Setup. When user inputs the DESIRED DAYS to record, the system displays a recommended resolution, frame rate, quality and recording type after calculating the capacity of the installed HDD. At that time, the priority is followed by the order of the items; resolution, frame rate, quality and recording type. User can change the setting value such as resolution, frame rate, quality and recording type. By the setting value, the DAYS TO RECORD will change. User can set the DUAL STREAM. The DUAL STREAM setting takes precedence over the network stream setting of Network menu. 3. Saving Setup To preserve the setup values that you have changed, select YES. 4. Live, Search, and Playback 4-1. Live Viewing Screen In the Live screen, video inputs from the cameras are displayed as they are configured in the Display Setup screen. Various on-screen display (OSD) symbols, which indicate the status of the DVR, are described in Table Figure Live Viewing Screen Table Status Indicator Icons in Live Viewing Screen 47
48 Icon Description Click the power icon when you want to shut it off by mouse Click the LOCK icon when you want to lock and unlock the DVR by a mouse Click the SETUP icon on the screen using the mouse to see menu items. Select menu item (SETUP, SEARCH, BACKUP, RECORD, PTZ, SEQUENCE, AUDIO or ALARM-OUT) using the mouse to enable/disable its functions Click the AUDIO icon when you want to activate the audio using a mouse Click this SEARCH icon when you want to play back and search from the recorded data using a mouse Click this PTZ icon when you want to control the PTZ cams using a mouse Click this SEQUENCE icon when you want to activate the sequential screen Click this MANUAL RECORD icon when you want to manually record Click this ALARM OUT icon when you want to activate alarm out Click the split screen icon to change the current split screen mode using the mouse or SEL button. Displays the current date and time Remote control ID display. If no remote ID is set the message ALL is displayed. Displays the amount of recording on the hard disk from 0-100%. 48
49 Indicates that HDD is recycled. Continuous recording in progress. Manual recording in progress. To set the Manual recording mode, press the Record button on the front panel. Motion alarm recording in progress. Sensor recording in progress. Indicates that lock activated, this icon will be back to black color when unlock. Audio mute. To set audio mute, press the Audio button on the front panel. Single audio display. To set audio single for highlighted channel only, press the Audio button on the front panel. Indicates that alarm is set. To set the alarm function, press the Alarm button on the front panel. Indicates that alarm output is activated. Event indicator. When there is an event (motion recording, video loss, HDD fail, S.M.A.R.T), this icon will be highlighted bright. Indicates that a network client is connected to the DVR. Indicates that sequencing mode is enabled. Button Table Button functions in Live Viewing Screen Description Select channel to be displayed in full screen mode. Switch between full screen and quad display mode. SEQ RECORD SEARCH ARCH SETUP ESC Press to start auto sequencing of the screen in full screen mode. (Toggle) Press to start and stop manual recording. Press to go to the search menu. Event search /Time line search /Log /Archive search Press to capture a still image. The still image will be stored into hard drive. It can be transferred to the USB device. Press to launch SETUP menu. Press for temporal storage of the changed value or to return to the previous menu screen. 49
50 4-2. SEARCH Screen To enter the search screen, select SEARCH menu on the screen using the mouse or press SEARCH icon on live screen. Figure Search Screen There are 7 ways of search menu such as TIMELINE, EVENT, GO TO FIRST TIME, GO TO LAST TIME, GO TO SPECIFIC TIME, ARCHIVE and LOG on the screen TIME-LINE Search The TIME-LINE search window is used to find the stored video by using the time line bar. 50


51 When it clicks a Timeline menu, user can see a calendar which has recording data. Select a specific date and time. Use a drag-and-drop function of the mouse control. User can select a specific minutes using a button in the above red box. Press a PLAY button after setting a specific time. Press the PREV to return to the SEARCH window Event Search The Event Search window is used to find stored video. Figure Event Search screen When it clicks an Event menu, user can see a calendar which has recording data. Select a specific date and then user can see all data. Press a PLAY button to playback the data or a SAVE button to save the data at once after selecting a specific data. User can find a data of the specific channel and event using a button in the above red box. Press the PREV to return to the SEARCH window. 51

52 Go To First Time You can access from the oldest recorded data on the DVR hard drive by selecting GO TO FIRST TIME on the SEARCH window. Press the PREV to return to the SEARCH window Go To Last Time You can access from the last minute recorded data on the DVR hard drive by selecting GO TO LAST TME on the SEARCH window. Press the PREV to return to the SEARCH window Go To Specific Time Figure Go To Specific Time User can search for video data from a specific instance by setting the date and time in the Go To Specific Time menu. Use the mouse or the control button ( ) on the remote control to change the date and time value and press the PLAY button after setting. If there are no the video data in the set date and time, the DVR will play the latest video data. 52

53 Archive Search The ARCHIVE Search window is used to find previously stored video or images. Figure Archive Search Screen When it clicks an Archive menu, user can see a calendar which has recording data. Select a specific date and then user can see all data. When it presses a Display button, the still image or the first frame of the selected video is opened and user can save the data Log Search You can access the LOG list search screen by selecting LOG on the SEARCH window. Figure Log Search Screen When it clicks a Log menu, user can see a calendar which has recording data. Select a specific date and press NEXT button. Then user can see all log data. Press SAVE button to save the data and then the data is saved to text file format. 53


54 4-3. Play mode During playback of a recorded event, the mode changes from SEARCH to PLAY. While in PLAY mode, you may return to the SEARCH screen by pressing the X button on the status bar or the ESC button of a remote control. Figure PLAY Mode Screen The following status bar hides automatically and appears again when putting a mouse pointer to the bar. Button Description Return to the previous menu screen, search window, or exit from the Menu Press to rewind the footage at 1x, 2x and 4x speeds. Reverse playback speed is shown as -1x(normal), -2x (2 times normal) and -4x (4 times normal) at the bottom right of the screen. Jump/Step backward. The playback position moves 60 seconds backward. Press to play or pause recorded video. Jump/Step forward. Playback position moves 60 seconds forward. Press to fast forward the footage at 1x, 2x and 4x speeds. Playback speed is indicated as +1x, +2x and +4x for normal, twice and 4 times of the regular speed at the bottom right of the screen. 54
 on the remote control. Please refer to the table 5.1. for the control. Figure 5.1. PTZ Control Screen Item Table 5.")
55 Press to backup the video. Table Button functions in PLAY Mode 5. PTZ Control To control the PTZ functions of the camera, select PTZ menu on the screen using the mouse. Select the item you wish to control the PTZ camera and control them using the mouse or the control button ( ) on the remote control. Please refer to the table 5.1. for the control. Figure 5.1. PTZ Control Screen Item Table 5.1. Button Functions in PTZ Control Description INITIALIZE Initialize the PTZ settings of the selected camera. PAN / TILT Select PAN/TILT using the mouse or the control button ( ) and press SEL button on the remote control. Adjust the tilt(up/down) / pan(left/right) position using the mouse or the control button ( ) on the remote control. ZOOM / Select ZOOM/FOCUS using the mouse or the control FOCUS button ( ) and press SEL button on the remote control. Adjust the zoom(mouse Wheel Down or Up/Down button of the remote control)/focus(mouse Wheel Up or Left/Right button of the remote control)position. OSD Select the OSD to enter the menu. Control keys are Right, Left, UP, Down, Select, Far (REW KEY), and Near (FF KEY). Press the ESC button to return to the main menu. Press the PTZ button to escape from the OSD menu. AUTOSCAN Press the right key ( ) on the control button to start auto scan Press the left key ( ) on the control button to stop auto scan. PRESET Select the PRESET and press the left key ( ) on the control button. Then, number input window will appear. Set the number (3 digits) using the number key and press the SEL to set the preset number for the current position. 55
56 Press the right key ( ) on the control button and set the number (3 digits) to go to the preset number. TOUR NUMBER Select the TOUR and press the right key ( ) on the control button. Then, number input window will appear. Set the number (1 digit) using the number key and press SEL to make the group number work. Press the left key ( ) on the control button to stop tour. User can set the preset number in the tour group of the OSD menu. Avail ble only on the TOUR and PRESET menu. Press the ESC button to return to the main menu. Preset/ Tour/ OSD/ Autoscan function are available on the specific model AP8777 and PMA-200. (Select it in the NAME of PTZ setup menu) 56

57 6. Back up 6-1. Still Image backup onto USB flash memory Still images can be captured and archived onto the USB stick or hard drive in live mode or while playing back recorded video. In live mode, press the BACKUP button to launch the archive function or select BACK UP menu on the screen using the mouse. 1. Select a specific channel which wants to backup on live screen. 2. When you press BACKUP button, the archiving screen will display as Figure Once you press Backup button, the system will start to archive the data to the selected media. Figure Still Image Archiving and Backup Screen NOTICE For a backup using a USB stick, a format of the USB stick has to be set to FAT Video backup onto USB flash memory Video can be captured and archived onto the USB stick or hard drive while playing back recorded video. In playback mode, press the BACKUP button to launch the archiving function. 1. When you press BACKUP button, the DVR will ask whether to archive a Still Image or Video clip. 2. If the user selects VIDEO, the DVR will ask for the media. To use the huge backup, the external USB HDD has to be mounted. 3. After selecting the media, the DVR will ask for the channel and the setting of the archiving duration. If the huge Backup is selected, the duration is from 1 hour to 24 hours. 4. After selecting the channel and setting of the duration, the system will start to archive the data to the selected media. 57

58 Figure Video Archiving and Backup Screen The DVR will convert the corresponding portion of the video into an AVI file Transferring still images or video from the ARCHIVE list The stored data onto hard drive will be found in the ARCHIVE list in SEARCH window. User can back up still images or video into the storage device from the ARCHIVE list. 1. Select the date to begin searching and navigate through the days using the mouse or the control button ( ) on the remote control. 2. Once you have selected the date, press NEXT button to open the list of stored data. 3. Use the mouse or the control button ( ) on the remote control to scroll through the on-screen listings. 4. Select a list of stored events that happened previous to or after the current selection. 5. Once the desired event has been selected, press NEXT button to view the still image or the first frame of the selected video. 6. Press the BACKUP button to launch the archiving function in playback mode. 7. Press CLOSE button to return to the SEARCH window. 58
 that the DVR copies on")


59 Figure Archive Search Screen 6-4. Playback of Backup Video H.264 format: H.264 format video can be played back by the player (the HD player) that the DVR copies on USB thumb drive with video. Three files are copied on USB thumb drive - H.264 file: H.264 format video file. - INDEX file: Title file of date and time. - HD PLAYER: Exclusive video viewer. AVI conversion: User can convert the H.264 format video to AVI format video which can be played back by Window Media Player or other media player that is compatible with AVI format video. 59

60 7. Upgrading Firmware In order to upgrade, the firmware upgrade file must first be downloaded and copied into the USB memory stick. Create a new folder in the USB memory stick and name it upgrade. Copy the firmware upgrade file xxxxxx.bin into the upgrade folder. Then, boot a system after inserting the USB memory stick on the system. The system will be upgrade automatically. NOTICE The folder on the USB memory stick must be named upgrade. After the firmware upgrade file is copied into the USB memory stick, connect the USB memory stick to the USB port on the front panel and do the followings: 1. Go to Config menu of Setup. 2. You can see the following message when pressing the software upgrade menu after putting the USB memory stick on the system. 3. You can see the following message when pressing the scan button. Please check the current firmware version and the firmware version which you want to upgrade. 60

61 4. You can see the following progressive message when pressing the upgrade button. 5. You can see the following message when finishing the upgrade. After upgrading, the system should be restarted. At that time, the USB memory stick has to be pulled out. 6. You could see the following warning message if you don t pull out the USB memory stick. 61


62 Remote Firmware Upgrade User can upgrade the firmware via Network as follows. 1. Go to the Remote Setup menu on the UMS Multi or Web Viewer. 2. Press the password for admin. Just admin is possible to connect to the remote setup menu. 62

63 3. Go to the Remote Upgrade menu. Then, you can see the current F/W version as follows. To upgrade a new F/W, insert the F/W in your PC and press the UPGRADE button. 4. Then, you can see the following progress bar and it would be taken around 150 seconds to upgrade. 5. When finishing the upgrade, the network streaming would be connected again automatically and you can see the following screen. Please check the current F/W version if the upgrade is succeeded. 63
64 8. Network access using the Exclusive network viewer, UMS single The DVR provides a live remote monitoring feature. Remote monitoring requires installation of the network viewer on your PC. NOTICE In a high bandwidth network, a maximum of four users can access one DVR simultaneously. In a low bandwidth network it is recommended that only one user access the DVR at a time PC requirements CPU: Intel Pentium Ⅳ 1.4Ghz or higher Memory: 512MB (1GB or higher is recommended.) VGA memory: 16MB (64MB or higher is recommended.) Resolution: 1024x768 O/S: Windows 2000, XP Professional, XP home Direct X: DirectX 8.1 or higher 64
.exe 2.")

65 8-2. Installing the network viewer 1. Insert the provided CD in the CD drive and double-click UMSClient(XXXX).exe 2. Select a destination folder and click Next. 3. Select the type and click Next. 4. Select the program folder and click Next. 5. The setup status screen is displayed. After the installation is completed, UMS Client icon is displayed on the desktop Live monitoring mode and functions. 65


66 Button Function Description DATE & TIME Displays the current date and time. CONNECT/DISCONNECT Connect/disconnect network connection. SEARCH Switches the live mode to search mode. DISPLAY MODE Select a channel and screen display mode. PAN/TILT/ZOOM/ FOCUS Control the PAN/TILT/ZOOM/FOCUS features on the remote camera. CAPTURE Capture a still image from live screen. PLAY/PAUSE Play/pause live video. ALARM SETUP HDD USAGE NETWORK BANDWIDTH AUDIO LOG WINDOW The ON/OFF button of the alarm output of the DVR. When an alarm of the DVR is output, this button becomes Red. Display the setup screen of the network viewer. DVR HDD storage Indicator. Shows the transferred frames and network bandwidth. Adjust the volume. The audio can be turned on or off by clicking the audio icon. Operations of the display mode of the main screen Single channel display - Click the one of channel button or double-click the channel screen. 66


67 QUAD/-screen display - Click the QUAD button to switch to quad-screen display Full screen display - Click the maximize button to display only screen and hidden the operation panel. Image capture of live screen Still-image of live screen can be captured and saved as BMP or JPEG file. 1. Click the channel to be captured. Then the channel screen is surrounded with a red line. 2. Click the CAPTURE button. Then the IMAGE CAPTURE dialog is displayed. 3. Set the conditions and click OK button. Then still-image is saved Bi directional audio The UMS Client allows for bi directional audio between the client and a dvr unit. On the PC, to use bi directional audio, you will need a sound card of handling a microphone and speakers. On the dvr side, you will need to connect a microphone to the audio in connection, and a pair of amplified speakers to the audio out connection. 67

68 8-5. Remote search mode and functions Button Function Description DATE & TIME Displays the recording time of the data selected on the time bar at the bottom of the main user interface. DISCONNECT Disconnect network connection.. LIVE Switches the search mode to live mode. CAPTURE Capture a still image from live screen. MARK IN Set the start time for video backup. MARK OUT Set the ending time for video backup. BACKUP SEARCH CALENDAR Backup the selected recorded video as AVI format. The calendar shows dates with recorded video in a light blue and the selected date in dark blue. TIMELINE BAR The timeline shows recorded data in dark blue on the bar. 68

69 PLAYBACK BUTTON DISPLAY MODE The playback buttons. Select a channel and screen display mode. Searching and playing video in the remote DVR Video recorded in the remote DVR or Video recorded on the PC can be searched and played back. 1. Connect the network to the remote DVR and press SEARCH button. Then the mode is changed from the live mode to the search mode. Searching the video recorded in the remote DVR: Connect the network to the DVR.. Searching the video recorded in the PC: Do not connect the network to the DVR. 2. Select the date to search the video. 3. Drag the slid on the time scale and drop it between 0 to Press the PLAY button. Then the video recorded in the remote DVR is played back. Backup of video in the remote DVR Video recorded in the remote DVR cab be backed up on the PC HDD as AVI format. 69

70 1. Connect the network to the remote DVR and play the video recorded in the remote DVR. 2. Drag the slid on the time scale and drop to the start time for video backup and press the MARK IN button. 3. Drag the slid on the time scale and drop to the end time for video backup and press the MARK OUT button. Then the marked time is displayed in dark green. 4. AVI Backup dialog is displayed. Click the OK button. Then the marked video is backed up. Start time / Stop time: Backup time can be changed. File path: Shows the folder that the backup file is recorded. Channel: Shows backup channel PC System configuration Click the SETUP button. Then the Setup dialog is displayed. Setting General Set the Security Option, Save Path, and Miscellaneous. 70

71 Security Option: Set a password for security options. When you access any of the selected functions, you will need to enter the password. Save Path: Specify the location to record for backup and still image capture. Automatic reconnection: If a user selects this function, the client S/W will automatically try to connect to the previously connected IP address if the network connection is lost. Display network statistics: If a user selects this function, the client S/W will display network status, Bit rate and Frame rate. Time Format: Change the mode the Client software displays the time. Setting Site The remote DVRs can be added, modified, and removed. Setting Event Set the record path and the size of local disk space for the log files. 71


72 LOG Select to save event log into log file. ICON Select to display the event on live video. EVENT LIST Select to show the event in the Event List window of live mode. Search and check the recorded log data. Setting Record Set the recording conditions and select channels to record. 72

73 Select the local disk to use and the amount of disk space you want to allow the program to use for recording. 9. Network access using the Exclusive network viewer, UMS multi 9-1. Overview The UMS Multi-Client is a multiple site monitoring client software with; video, audio, and alarm signals from the DVRs over networks. The UMS Multi-Client does not limit the number of DVR units to register. The program displays to up 256 live videos on one display and even playback videos window on the same or another display monitor. On the program, user may control PTZF cameras on the DVRs. By attaching a microphone and speaker system to devices on site, user may make bi-directional audio communication over the network Minimum PC requirements CPU Intel PentiumⅣ 2Ghz Memory 512MB or Higher is recommended. VGA 128MB or Higher is recommended. Resolution 1024x768 Disk space 1GB OS Windows 2000, XP Professional, XP Home, Vista (Some versions of Vista has problem in installation. Please contact your vendor for more information.) Network 10/100Base T Others Direct X 8.1 or Higher Before installing the program, check the PC specifications. The DVR remote software may not perform correctly if the PC does not meet the minimum requirements. 73
.exe 2.")

74 9-3. Installing the program 1. Insert the provided CD in the CD drive and double-click UMSMultiClient (XXXX).exe 2. Select a destination folder and click Next. 3. Select the program folder and click Next. 4. The setup status screen is displayed. 5. After the installation is completed, UMS Multi Client icon displays on the desktop screen. 74
75 9-4. Live Window When installation is completed, double click the UMS Multi Client icon on your desktop to start the program Main user interface Control buttons Button LOCAL PLAYBACK REMOTE PLAYBACK SITE MANAGEMENT CONNECT DISCONNECT SETUP Description Click this icon to run a playback window to search and play videos that are recorded in local PC. Click this icon to run a playback window to search and play videos that are recorded in remote DVR. THUMBNAIL REFRESH: Click this icon to refresh and renew thumbnail image of every connected site. SITE ADDITION: Click this icon to open Site Addition window. SITE DELETE: Click this icon to delete site from the index window, after disconnect a site. NET FINDER: Select the site from the index window and click this icon to modify the information of specific site. Click this icon to connect the selected site/sites. Click this icon to disconnect the selected site/sites. Click this icon to setup configuration of UMS MULTI CLIENT. 75

76 CAPTURE Click this icon to capture a still image EVENT LIST PAUSE Click this icon to play/pause live video. ALARM ON RECORD ON Enable or disable recording of live video to local disk which has set in setup menu. AUDIO MIC Use the volume control bar to set the audio level. Use the micro phone volume control bar to set the micro phone level. User can control PAN/TILT & ZOON/FOCUS. PAN left /right TILT up/down ZOOM in/out FOCUS in/out CHANNEL SPLIT DVR SITE SPLIT To select the numbers of display channel/channels (Single, quad, 9 channels, and 16 channels) of highlighted site. To select the numbers of DVR/DVRs (1 DVR, 4 DVRs, 9 DVRs, 16 DVRs) on main display screen. 76

77 9-5. Search and Playback Window Main user interface You can access to search window by clicking the search icon (Local Playback / Remote Playback) on the upper left of Live Window Main control panel Button LOCAL PLAYBACK REMOTE PLAYBACK Description Click this icon to run a playback window to search and play videos that are recorded in local PC. Click this icon to run a playback window to search and play videos that are recorded in remote DVR. 77


78 Directory window shows site/sites that are pre-registered. CONNECT DISCONNECT SETUP CAPTURE Click this icon to connect the selected site/sites. Click this icon to disconnect the selected site/sites. Click this icon to setup configuration of UMS MULTI CLIENT. Click this icon to capture a still image. EVENT LIST MARK IN MARK OUT BACKUP Click this icon to set the beginning time for backup of the recorded video in AVI format. Click this icon to set the ending time for backup of the recorded video in AVI format. Click this icon to backup the recorded video in AVI format. AUDIO Use the volume control bar to set the audio level. DVR SITE SPLIT CHANNEL SPLIT To select the numbers of DVR/DVRs (1 DVR, 4 DVRs, 9 DVRs, 16 DVRs) on main display screen. To select the numbers of display channel/channels (Single, quad, 9 channels, and 16 channels) of highlighted site. To select the channel to playback. 78

79 The calendar shows dates with recorded video in color. To display the recorded data of selected channel or all channels on a time line scale. To change a time line scale from 24 hours to 60 minutes or vise versa. The timeline shows recorded data in color on the bar. You can adjust the time line scale and move it to the time you wish to playback. Then click the play icon to display the recorded video. Playback buttons Setup of UMS Multi Client Click the setup icon displays. to setup the configuration of UMS Multi Client software. The Setup window 79
80 General Security Option: Set a password for security options. Select security options and set a password. Then when you access any of selected functions, you need to enter the password. You can also set the save path for capturing and backup Save Path: Specify the location to save captured still image for Capture and Backup data Miscellaneous Automatic reconnection: If a user selects this function, client S/W will automatically try to connect the finally connected IP address, after the network is disconnected. Always On Top: If a user selects this function, client S/W will display continuously at the very front than other software on the PC. Time Format: Change the way the Client software displays the time. 80
81 Event Event log can be archived and searched Archiving Event Log: Specify the location to save event logs and select event to archive Archiving Event Log: Event log can be searched from selected time. 81
82 Record Record setup: You can set the recording conditions for Always, Event, or Auto record. And you can also select target DVR/DVRs and channel/channels. When you set the recording condition to event, you can set event for motion or alarm with duration Record local storage setup: You can select the local disk to use and the amount of disk space you want to allow the program to use for recording. You can also select the option to overwrite data or stop recording when the maximum amount of disk space is full. 82
83 OSD You can select the OSD to be display Language You can select a language to be display. 83

84 About About provides network client version information Remote Setup The menu settings for the DVR unit can be set from a PC, via network. Put the cursor of the mouse on the channel which is connected to the site and press the right. Then the following window is displayed. Select the Remote Setup. Then the setup window is displayed as follows to check the password for admin. Just admin is possible to connect to the remote setup menu. The specified menu screen is displayed on the upper side of the screen. Setting is basically the same as with the DVR menu setting. 84

85 Display User can set the value on this remote setup page. After setting the value, please press the APPLY button. Then the value would be applied to the system without the system rebooting. RELOAD button is used when user want to bring the value in the system. 85


86 RECORD DEVICE 86
87 STORAGE 87


88 SYSTEM NETWORK 88

89 UPGRADE Please refer to page 54 for the Remote Upgrade Operation Addition, Delete, and modify of DVR sites Addition of sites 1. Click SITE ADDITION button. And then the following window displays. o Model: User has to select surely a suitable type. SDVR series, H series DVR N series DVR, HD DVR IP Camera 89
 or Domain name that is registered at www.okddns.com (for Korea), www.ddnscenter.com (for USA) or www.bestddns.com (for other area including EU) o Port No.")

90 o Site Name: Input a name that properly describes a site. o IP Address: Input IP address (Public IP address of a router that DVR is connected.) or Domain name that is registered at (for Korea), (for USA) or (for other area including EU) o Port No.: Input port number of DVR. o ID: Input ID of DVR. o Password: Input network password of DVR. 2. Click OK button. And then the registered site is added on the directory window Delete of sites 1. Select the site/sites to delete from the directory window. 2. Click SITE DELETE button. And then the selected site/sites is/are deleted. 90

91 Modify of sites 1. Select the site/sites to modify from the directory window. 2. Click NET FINDER button. And then the following window displays. 3. Click MODIFY button. And then the modified information is applied. 91

92 Connect and Disconnect Connect 1. Select site/sites to connect from the directory window. 2. Click CONNECT button, and then site/sites displays/display as connected Disconnect 1. Select site/sites to disconnect from the directory window. 92


93 2. Click DISCONNECT button, and then selected site/sites disconnected Still-image capture during Live 1. Double-click a channel to capture from the display screen. (Otherwise all channels will be captured.). 2. Click CAPTURE button. And then a Capture window displays. 3. Set Save path, File Name, and File Format. And then click OK button. 4. Still image is saved as set in Capture window. 93

94 Recording video on local PC during Live 1. Click SETUP button. And then a setup window display. 2. Select Record and set the values. 3. Select Disk and set the values. 94


95 4. Click RECORD ON button. And the color of button is changed. 5. Live video data is recorded as set in Record and Disk setup. These video data can be searched and play-backed with Local Playback Local Playback and Remote Playback Playback of recorded video on local PC 1. Click LOCAL PLAYBACK button. And then Playback Window display over Live Window. 2. Select site/sites to connect from the directory window. 3. Click CONNECT button. And then Green bar displays on Search calendar and slide window. 4. Move scroll bar on where there is video data and Play button. 95

96 5. Video data that is recorded on local PC will be play-backed Playback of recorded video on remote DVR 1. Click REMOTE PLAYBACK button. And then Playback Window display over Live Window. 2. Select site to connect from the directory window. 3. Click CONNECT button. And then Green bar displays on Search calendar and slide window. 4. Move scroll bar on where there is video data and Play button. 96

97 5. Video data that is recorded on a remote DVR is play-backed AVI Backup during playback You can back up the recorded videos in AVI format during playback. 1. Double-click the target channel to backup. 2. Select the beginning time by using the search calendar and slide bar. 3. Click MARK IN button, when the scale of the timeline is located on the target time as the beginning time of backup. 4. Set the ending time on the blue timeline by dragging the scale on the target time as the ending time of backup and clicking and ending time will be changed into dark Green. MARK OUT button. Then, color of the timeline between the beginning time 97


98 5. Click BACKUP. And then the window appears as below. 6. You can also set the beginning time and ending time on this window. After selecting a channel for backup, click the OK button. The backup will begin. 8. AVI video data is recorded as set in AVI Backup window. AVI format video can be played back by Window Media Player or other media player that is compatible with AVI format video. Notice When it does a backup with NSF format, user can do a playback using the DVR player. The DVR player is installed with the S/W in user s PC. 98

99 10. Network By an web-browser viewer The DVR provides a live remote monitoring feature by web-browser viewer. 1. Check the IP address of the DVR from SETUP>SYSTEM>DESCRIPTION>IP ADDRESS. 2. Input the IP address or Domain name address that you pre-registered on on the address field and press Go. Please pre-register on in Korea and on in USA. 3. Click this bar. Then the dialog box is displayed. 4. Click Install to download ActiveX control. 99


100 5. Web Browser Viewer is displayed as bellow. 6. Click CONNECT button on the Left upper corner of web-viewer. Then Connect dialog is displayed. Enter IP address (or Domain name address that you pre-registered on or Port number and Password and click Connect Server address: Input IP address of the DVR from SETUP>SYSTEM>DESCRIPTION>IP ADDRESS or Domain name address that you pre-registered on or 100

101 Port: Input Port number (The number is set on SETUP>NETWORK>PORT.) ID: Input ID of DVR. Password: Input network password of DVR. (The number is set on SETUP>SYSTEM>NETWORK PASSWORD.) 7. Then the cameras connected to the DVR are displayed on the screen. 8. SETUP: The menu settings for the DVR unit can be set from a PC, via network. Refer to the detail of Remote Setup description of UMS Multi Client. Please check the detail to the page 77, Remote Setup. 101


102 APPENDIX: How to connect network A. How to set IP address of the DVR and open TCP port of the router? The port forwarding is dependent on the brand and model of the router. The port forwarding is required to allow access to the DVR beyond a router. Connect network cable between DVR and Router or ADSL modem. 1. Default network setting on DVR are - Port: WEB Port : 80 - Network : DHCP 2. From PC connected in the same Router, find IP address, Gateway, and Subnet mask by IPCONFIG command in command prompt. 3. But if IP is something else like x.xxx., you should change IP address, Subnet, Gateway on the DVR. Go to SETUP>NETWORK>LAN of the DVR and change the IP settings to be like IP: XXX.XXX and Gateway: XXX.XXX. (Refer to the user s manual of Router.) 102
, click GO. 4.")
 ii.")
 iv. Protocol: Select Both. v.")
103 Open your web browser. Enter the router IP address in the address bar (The router IP address are different with the brand and model.), click GO. 4. Enter the user name and password (admin is default) and press the OK button. 5. Select the Port Range Forwarding tab. 6. Enter the each field. i. Application: Enter a description of the DVR (Example: store1) ii. Start: Enter the first number of the port you need to port forward (Example: 5445) iii. End: Enter the last number of the port you need to port forward (Example: 5445) iv. Protocol: Select Both. v. IP address: Enter the IP address of the DVR on SETUP>NETWORK>LAN>IP ADDRESS. vi. Enable: Check the enable box. 7. Select the Save settings button located on the bottom of the window. Then Port forwarding is finished. 103
104 Network access beyond a router In order to access the DVR remotely beyond a router (firewall), the user must open TCP port for command level, live channels and storage channels. User need to open 2ports numbers on the router; the DVR port number 5445 and the WEB port number 80. If this port is not opened properly, user can not access DVR beyond a router. You can learn how to port forward many kinds of Routers from the bellow site
105 B. How to access DVR from Remote PC? LAN Connection Using a switching hub Connect to the system, using a hub (Switching hub) and an Ethernet cable (10BASE-T/100BASE-TX CAT 5 LAN cable) 1. Run the pre-install the network client software on the supplied CD. (Refer to Chapter 6. Network access using the Exclusive network viewer) 2. Check the IP address from SETUP>SYSTEM>DESCRIPTION of DVR. 3. Run network client software and click button. 4. Input Site Name, Site Address(IP address), Port No., and Password on the connect window. And click OK. Then, press button after checking the left check box. Internet (ADSL) Connection using DDNS Connect to the system, using an Router or ADSL modem and an Ethernet cable (10BASE-T/100BASE-TX CAT 5 LAN cable) 105
 3.")
106 1. Go to SETUP>NETWORK. Set NETWORK TYPE as DHCP and DDNS SERVER as ON. And select one type among bestddns.com, okddns.com and ddnscenter.com after setting to DDNS1. 2. Go to Setup menu of Router and open TCP port 5445 and 80 using Port Forwarding. (Refer to A. How to set IP address of the DVR and open TCP port of the router?) 3. Confirm the Mac address and Serial No. from the label of the rear panel of the DVR. 4. Open the web browser and log on Please log on in Korea and in USA. MAC Address: Input the Mac address (EX XXXXX) without any space. Serial Number: Input the Serial No. (EX. HD0410SA1100XXX.) without any space. 5. Domain Name: Input Domain Name for your DVR system 6. Click the DUPLICATION CHECK button to see if the domain name is available. 7. If you see the screen You can use the Domain name you entered then click RETURN and click REGISTER button to complete the registration. 8. Run the pre-install the network client software on the supplied CD. (Refer to Chapter 8. Network access using the Exclusive network viewer) 9. Click button and add the DVR as necessary. 106
107 Model: Select one type surely among SDVR series, H DVR series DVR / N series DVR, HD DVR / IP Camera. Site Name: Input the name of the DVR. Site Address: Input the Domain Name that is registered on Please log on in Korea and in USA. (EX. XXXXX.bestddns.com) Port Number: Input the DVR port number. Password: Input the network password. 10. Press button after checking the left check box of the site that you will access. 107


108 C. How to access DVR with iphone? 1. Run App Store. 2. Search iums 3. Touch iums icon. 4. Install iums 5. Run iums icon. 6. Touch + icon. 7. Input the information. 8. Touch Save icon. 9. Touch the added site. 10. Select Channels and Connect 11. 4CH splitted Image 12 Single Channel 108
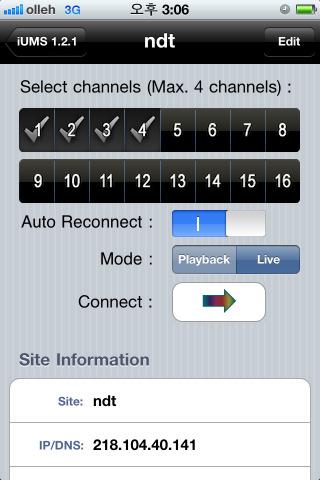


109 109


110 D. How to access DVR with Android? 1.Run Android Market. 2. Search iums 3.Search iums. 4.Install iums. 5. Run iums 6. Register user. 7. Touch Live View. 8. Add the Site or Device. 9. Select Channels. 110
H.264 Video Compression
 INSTRUCTION MANUAL (Compact HD_Ver. 1.2_20120314) H.264 Video Compression Digital Video Recorder 4/8ch 16ch About this user guide Before installing and using this unit, please read this user guide carefully.
H.264 Video Compression
 INSTRUCTION MANUAL (HDEX Ver 1.1(2011-12-13) H.264 Video Compression Digital Video Recorder About this user guide Before installing and using this unit, please read this user guide carefully. Be sure to
H.264 4/8/10/16-Channel High-Definition DVR Quick Start Guide
 H.264 4/8/10/16-Channel High-Definition DVR Quick Start Guide Products: BLK-HD4D, BLK-HD4E, BLK-HD8D, BLK-HD10D, BLK-HD16D BLK-HD4E (upper) BLK-HD4D and BLK-HD8D (middle) BLK-HD10D and BLK-HD16D (lower)
H.264 Video Compression
 INSTRUCTION MANUAL (N:M_Ver. 2.1_110125) H.264 Video Compression Digital Video Recorder About this user guide Before installing and using this unit, please read this user guide carefully. Be sure to keep
USER GUIDE STAND-ALONE. 4 channel MPEG-4 Triplex DVR V Stand-Alone DVR User Guide
 USER GUIDE STAND-ALONE 4 channel MPEG-4 Triplex DVR V. 1.4 This document contains preliminary information and subject to change without notice. SAFETY PRECAUTIONS EXPLANATION OF SYMBOLS This symbol is
H.264 Video Compression
 INSTRUCTION MANUAL (N:L_Ver. 1.0_101126) H.264 Video Compression Digital Video Recorder About this user guide Before installing and using this unit, please read this user guide carefully. Be sure to keep
HD SDI DVR & Analog (960H) DVR User s Guide (Ver. 3.2)
 DVR User s Guide (Ver. 3.2)") HD SDI DVR & Analog (960H) DVR User s Guide (Ver. 3.2) HD-SDI DVR Models: HDH4, HDH8, HDH16, HDR4, HDR8, HDR16 Analog (960H) DVR Models: HR4, HR8, HR16 About This User s Guide Before operating the unit,
HD SDI DVR & Analog (960H) DVR User s Guide (Ver. 3.2) HD-SDI DVR Models: HDH4, HDH8, HDH16, HDR4, HDR8, HDR16 Analog (960H) DVR Models: HR4, HR8, HR16 About This User s Guide Before operating the unit,
(Ver. 3.0) HDcctv NVRT. / Analog NVRT. it for future. Before operating. reference.
 HDcctv NVRT. / Analog NVRT. it for future. Before operating. reference.") HDcctv NVRT / Analog NVRT User ss Guide ( (Ver. 3.0) HDcctv NVRT Models: HD204, HD408, HD8016 Analog NVRT Models: H4, H4D, H8, H8D, H16, H16D About This User s Guide Before operating the unit, please read
HDcctv NVRT / Analog NVRT User ss Guide ( (Ver. 3.0) HDcctv NVRT Models: HD204, HD408, HD8016 Analog NVRT Models: H4, H4D, H8, H8D, H16, H16D About This User s Guide Before operating the unit, please read
follow BLK-D20xx00D RQ 2011 DIGIOP, Inc.
 H.264 4/8/16 Channel DVR Quick Start Guide Products: BLK-DH2004 400D, BLK-DH200800D, BLK-DH201600D PLEASE READ THIS GUIDE BEFORE USING YOUR RECORDER, and always the instructions for safety and proper use.
H.264 Video Compression
 INSTRUCTION MANUAL (E_Ver. 1.1_090609_N) H.264 Video Compression Digital Video Recorder Elite Series H.264 DVR HDVR-0412E HDVR-0812E HDVR-1612E About this user guide Before installing and using this unit,
H.264 Video Compression
 INSTRUCTION MANUAL (New MDR-x500_Ver. 1.0_130401) H.264 Video Compression Digital Video Recorder About this user guide Before installing and using this unit, please read this user guide carefully. Be sure
USER GUIDE VCT-STDDVR9-1 = /16 channel MPEG-4 Triplex DVR V. 1.0
 USER GUIDE VCT-STDDVR9-1 = 16-1 9/16 channel MPEG-4 Triplex DVR V. 1.0 This document contains preliminary information and subject to change without notice. 2 SAFETY PRECAUTIONS EXPLANATION OF SYMBOLS This
User s Guide. Combo DVR. Thank you for purchasing our product. Please read this User s Manual before using the product. Change without Notice
 Thank you for purchasing our product. Please read this User s Manual before using the product. Change without Notice Combo DVR User s Guide User please operate according to the DVR model that you purchased
H.264 Video Compression
 INSTRUCTION MANUAL (SP-DR_Ver. 1.1_120404) H.264 Video Compression Digital Video Recorder About this user guide Before installing and using this unit, please read this user guide carefully. Be sure to
User Guide. H.264 Video Compression. INSTRUCTION MANUAL (X-Plus Series _Ver. 1.0_131114) 960H Digital Video Recorder
 960H Digital Video Recorder") INSTRUCTION MANUAL (X-Plus Series _Ver. 1.0_131114) H.264 Video Compression 960H Digital Video Recorder User Guide About this user guide Before installing and using this unit, please read this user guide
INSTRUCTION MANUAL (X-Plus Series _Ver. 1.0_131114) H.264 Video Compression 960H Digital Video Recorder User Guide About this user guide Before installing and using this unit, please read this user guide
User Manual. HDSDI Digital Video Recorder Series RDVR-HQ08, RDVR-HQ16
 HDSDI Digital Video Recorder Series RDVR-HQ08, RDVR-HQ16 User Manual About this user guide Before installing and using this unit, please read this user guide carefully. Be sure to keep it handy for later
USER GUIDE. EST9120/EST /16 channel MPEG-4 Triplex DVR V. 1.5
 EST9120/EST16120 User Guide USER GUIDE EST9120/EST16120 9/16 channel MPEG-4 Triplex DVR V. 1.5 This document contains preliminary information and subject to change without notice. EST9120/EST16120 User
Chapter 1 Features FEATURES
 Chapter 1 Features Operation Playback, recording and network transmission simultaneously Real time full screen or quad screen display 2X digital zoom and Picture-in-picture display Easy operations by shuttle
User Manual. HDSDI Digital Video Recorder Series RDVR-HQ04
 HDSDI Digital Video Recorder Series RDVR-HQ04 User Manual About this user guide Before installing and using this unit, please read this user guide carefully. Be sure to keep it handy for later reference.
User Manual. INSTRUCTION MANUAL (HDI-DVR 2.0(R) Series_Ver. 1.1) HDI Digital Video Recorder
 Series_Ver. 1.1) HDI Digital Video Recorder") INSTRUCTION MANUAL (HDI-DVR 2.0(R) Series_Ver. 1.1) HDI Digital Video Recorder User Manual About this user guide Before installing and using this unit, please read this user guide carefully. Be sure to
INSTRUCTION MANUAL (HDI-DVR 2.0(R) Series_Ver. 1.1) HDI Digital Video Recorder User Manual About this user guide Before installing and using this unit, please read this user guide carefully. Be sure to
NVR&IPCAM USER MANUAL V1.0 (USER MANUAL) V1.0. Thanks for choosing our products, please read this manual carefully before use!
 V1.0. Thanks for choosing our products, please read this manual carefully before use!") NVR&IPCAM (USER MANUAL) V1.0 Thanks for choosing our products, please read this manual carefully before use! NOTICE Installation condition 1) In order to ensure your rights, please read this manual carefully
NVR&IPCAM (USER MANUAL) V1.0 Thanks for choosing our products, please read this manual carefully before use! NOTICE Installation condition 1) In order to ensure your rights, please read this manual carefully
HRDE4X4. Digital Video Recorder. User Guide. Document /06 Rev 2.00
 HRDE4X4 Digital Video Recorder User Guide Document 900.0399 Rev 2.00 Revisions Issue Date Revisions 1.00 09/05 New document. 2.00 Updated Remote Access Software sections with screenshots and function changes.
HD NVR User Manual. High-Definition Network Video Recorder. Model : HD NVR 1 st Edition : 13 Nov nd Edition : 28 Dec Thank You!
 High-Definition Network Video Recorder HD NVR User Manual The picture & functions & supplied items might differ according to the specification and model. Contents of this user manual are protected under
R4, R8, R16 Digital Video Recorders Quick Setup Guide
 R4, R8, R16 Digital Video Recorders Quick Setup Guide This guide provides instructions to initially setup the R16 (16 channel) digital video recorders (DVR). The DVR supports these advanced features: 2
HLong Asia Industrial
 SDI DVR Stand alone digital video recorder HLong Asia Industrial Thank you for using the company's products! This manual describes only the host functions basic operation. Product design and specification
4CH Real Time DVR. User Guide INFORMATION MAY CHANGE WITHOUT NOTICE. Digital Video Recorder
 User Guide INFORMATION MAY CHANGE WITHOUT NOTICE. Table of Contents Caution... 4 Package Contents... 4 Introduction... 5 1. Product Overview...5 2. Front Panel...5 3. Rear Panel...6 4. IR Remote Controller
User Manual. H.264 Video Compression. INSTRUCTION MANUAL (MDR-AHxxxx Series _Ver. 1.0) Analog HD Digital Video Recorder
 Analog HD Digital Video Recorder") INSTRUCTION MANUAL (MDR-AHxxxx Series _Ver. 1.0) H.264 Video Compression Analog HD Digital Video Recorder User Manual About this user guide Before installing and using this unit, please read this user
INSTRUCTION MANUAL (MDR-AHxxxx Series _Ver. 1.0) H.264 Video Compression Analog HD Digital Video Recorder User Manual About this user guide Before installing and using this unit, please read this user
DDR-08 DDR-16 Full D1 Realtime H.264 DVR 8 / 16 CH. Quick Setup Guide
 DDR-08 DDR-16 Full D1 Realtime H.264 DVR 8 / 16 CH. Quick Setup Guide PACKAGE CONTENTS A. One (1) DDR-08 / DDR-16 DVR B. One (1) Remote Controller C. Two (2) AAA Battery for Remote Controller D. One (1)
Analog High Definition DVR. Stand alone digital video recorder. User Manual H.264 AHD DVR
 Analog High Definition DVR Stand alone digital video recorder User Manual H.264 AHD DVR WARNING To reduce the risk of fire or electric shock, do not expose this appliance to rain or moisture. All the safety
DVR RANGE ENGINEER MANUAL
 INSPIRE DVR RANGE ENGINEER MANUAL Contents Hardware Inspire DVR range Connections Connecting a mouse Connecting keyboard Connecting PTZ cameras Connecting Keyboard/PTZ Alarm connections Using front panel
Digital Video Surveillance System Engineering Service Manual
 Digital Video Surveillance System Engineering Service Manual The picture might differ according to the specification and model. Contents of this manual are protected under copyrights and computer program
Trouble Free DDNS Setup
 H.264 Compression Technology, Up to 120fps 1080P for 4CH Real Time 4CH HD-SDI H.264 Stand Alone Video Recorder CMS (Central Management So ware) supports Mul ple DVR for free Mobile Surveillance: iphone,
9/16CH Triplex MPEG-4 DVR
 DVR 9CH User Guide 9/16CH Triplex MPEG-4 DVR Release Version : 1.4 This document contains preliminary information and subject to change without notice. 目录. THE LIST OF CONTENTS DVR SET CLIENT SOFTWARE
4CH H.264 Multiplex DVR
 4CH H.264 Multiplex DVR User Manual VER.:1.0, P/N: R040199A This symbol is intended to alert the user to the presence of unprotected Dangerous voltage" within the product's enclosure that may be strong
User s Guide (Ver. 1.0)
") User s Guide (Ver. 1.0) HD-SDI DVR: VC-SYS-HD0400A, VC-SYS-HD0800A, VC-SYS-HD1600A High Definition H.264 Digital Video Recorder [VC-SYS-HD0400A, VC-SYS-HD0800A] [VC-SYS-HD1600A] About This User s Guide
User s Guide (Ver. 1.0) HD-SDI DVR: VC-SYS-HD0400A, VC-SYS-HD0800A, VC-SYS-HD1600A High Definition H.264 Digital Video Recorder [VC-SYS-HD0400A, VC-SYS-HD0800A] [VC-SYS-HD1600A] About This User s Guide
CCTV42 System2 DVR Quick Start Guide 4/8/16-Ch DVR
 CCTV42 System2 DVR Quick Start Guide 4/8/16-Ch DVR If you have purchased a DVR / Hard drive package from us then we will have already installed the hard drive(s) and configured the basic settings on your
Brand. E42 / E82 DVR System User Manual
 Brand E42 / E82 DVR System User Manual 1 Safety precautions Before using the product, please ensure that you read the safety precautions described below. Always ensure that the product is used correctly.
QSD2308L/QSD2316L DVR User s Manual
 QSD2308L/QSD2316L DVR User s Manual NOTE: We use two different front panel designs on these models. They have the same function buttons but they are arranged differently. Please match the front panel on
Lorex Client 7.0 & Lorex Message Master
 Lorex Client 7.0 & Lorex Message Master Software Manual English Version 1.0 MODELS: L19WD Series www.lorexcctv.com Includes L19WD800 & L19WD1600 Copyright 2008 Lorex Technology Inc. Table of Contents Table
HD Analog Recorder. Quick Start Guide CJ-HDR104. Model No. CJ-HDR108. Version 1.0.2
 HD Analog Recorder Quick Start Guide Model No. CJ-HDR104 CJ-HDR108 Version 1.0.2 Table of Contents 1 Hardware Installation and Connection... 1 1.1 Check Unpacked DVR... 1 1.2 About Front Panel and Rear
DVR DVR VENEZIA series
 DVR DVR VENEZIA series Main features - Real Esaplex (Recording, Live, Play, Control, Backup, Network) - Quick connection by mobile/ PDA phone without using any software - H264 compression - Real time Recording,
Appendix A. esync DVR Manual Appendix A. FCC Compliance Statement WARNING. Revision A esync Manual esync
 Appendix A Appendix A FCC Compliance Statement Model Name: esync Series (SSA-1648e, SSA-0824e, SSA-0424e). This device complies with Part 15 of the FCC Rules. Operation is Subject to the following two
4Ch Real time / Triplex / Mux Stand Alone DVR
 4Ch Real time / Triplex / Mux Stand Alone DVR User s Manual VER 1.2 VSD-31 4 Channel Stand Alone DVR USB Backup available The most stable and reliable real stand alone Digital Video Multiplex Recorder
CONTENTS Chapter 1: DVR Features... 4 Chapter 2: Overview... 5 Chapter 3: Starting the DVR... 8
 1 CONTENTS Chapter 1: DVR Features... 4 Chapter 2: Overview... 5 2.1 Front Panel... 5 2.2 Rear Panel... 6 2.3 Remote Control... 7 Chapter 3: Starting the DVR... 8 3.1 Firmware Version... 8 3.2 Detecting
Quick Start Guide 4/8/16-Ch DVR
 Quick Start Guide 4/8/16-Ch DVR 1 1. Install Hard Drive &DVD Writer 1.1Install Hard Drive Notice: 1. Support two SATA hard drives. Please use the hard drive the manufacturers recommend specially for security
Network Video Recorder Quick Operation Guide
 Network Video Recorder Quick Operation Guide UD.6L0202B1351A01 TABLE OF CONTENTS NVR Pre-Installation... 2 NVR Installation... 2 Hard Disk Installation... 2 Front Panels... 6 DS-9500NI-ST/RT Front Panel...
4CH/ 8CH/ 16CH Digital Video Recorder
 4CH/ 8CH/ 16CH Digital Video Recorder DVR204B/ 208B/ 216B INSTRUCTION MANUAL DIRECTORY CHAPTER 1 Hard Disk Installing (Standard shipping products include neither HDD or R/W)...2 CHAPTER 2 Panel Appearance...4
User s Guide. H.264 Digital Video Recorder. About This User s Guide
 Generic Version 1.1 User s Guide H.264 Digital Video Recorder About This User s Guide Before operating the unit, please read this user s guide thoroughly and retain it for future reference. Warning Cautions
Downloaded from manuals search engine
 INDEX 1. DVR Features...1 2. Layout 2.1 Front Panel...1 2.2 Rear Panel...2 2.3 Remote Control...2 3. Installation 3.1 Installing the Hard Drive...3 3.2 Connecting Camera and Monitor...3 3.3 Connecting
Digital Video Recorder DVR-400. User s manual
 Digital Video Recorder DVR-400 User s manual 1 Copyright Copyright (C) 2005 PLANET Technology Corp. All rights reserved. The products and programs described in this User s Manual are licensed products
TruVision DVR 30 Quick Start Guide
 TruVision DVR 30 Quick Start Guide Content Contact information 1 Package contents 1 Installation environment 1 Setting up the TVR 30 1 Connecting the devices 2 Turning on the TVR 30 2 Operating the TVR
Quick Guide. ENC-H Video Encoder XX
 Quick Guide ENC-H264-16 Video Encoder XX298-20-00 Vicon Industries Inc. does not warrant that the functions contained in this equipment will meet your requirements or that the operation will be entirely
EX-SDI(Ver.2) Hybrid DVR
 Hybrid DVR") EX-SDI(Ver.) Hybrid DVR XD-L Series XD-0405L (4CH DVR) XD-0813L (8CH DVR) XD-M Series XD-163M (16CH DVR) XD-S Series XD-163S (16CH DVR) XD-0405L 4 50/60fps XD-0813L 8 (190x1080 100/10fps XD- 163M 16 00/40fps
EX-SDI(Ver.) Hybrid DVR XD-L Series XD-0405L (4CH DVR) XD-0813L (8CH DVR) XD-M Series XD-163M (16CH DVR) XD-S Series XD-163S (16CH DVR) XD-0405L 4 50/60fps XD-0813L 8 (190x1080 100/10fps XD- 163M 16 00/40fps
H.264 Network DVR. Quick Start. GUI Display with USB Mouse Control 336Z
 336Z H.264 Network DVR Quick Start GUI Display with USB Mouse Control Please read instructions thoroughly before operation and retain it for future reference. For the actual display & operation, please
Quick Start Guide 4/8/16-Ch DVR
 Quick Start Guide 4/8/16-Ch DVR 1 1. Install Hard Drive &DVD Writer 1.1Install Hard Drive Notice: 1.This series support one SATA hard drive. Please use the hard drive the manufacturers recommend specially
Quick Start Guide 4/8/16-CH DVR.
 Quick Start Guide 4/8/16-CH DVR 1. Install Hard Drive &DVD Writer 1.1 Install Hard Drive Notice: 1. Support two SATA hard drives. Please use the hard drive the manufacturers recommend specially for security
Quick Start Guide 4/8-CH DVR
 Quick Start Guide 4/8-CH DVR 1 1. Install Hard Drive &DVD Writer 1.1 Install Hard Drive Notice: 1. this series support one SATA hard drives. Please use the hard drive the manufacturers recommend specially
DHE-04 DHE-08 DHE H H.264 DVR 4 / 8 / 16 CH. Quick Setup Guide PACKAGE CONTENTS A. B. C. D. E. F. G. H. Inside the DVR I.
 960H H.264 DVR 4 / 8 / 16 CH. Quick Setup Guide DHE-04 DHE-08 DHE-16 PACKAGE CONTENTS A. One (1) DHE-04 / DHE-08 / DHE-16 DVR B. One (1) Remote Controller C. Two (2) AAA Battery for Remote Controller D.
H.264 Network DVR. Quick Start
 H.264 Network DVR Quick Start GUI Display with USB Mouse Control Please read instructions thoroughly before operation and retain it for future reference. For the actual display & operation, please refer
H.264 Network DVR. Quick Start
 341Z H.264 Network DVR Quick Start GUI Display with USB Mouse Control Please read instructions thoroughly before operation and retain it for future reference. For the actual display & operation, please
Video Web Server. User s s Manual MPEG-4 VIDEO WEB SERVER. Please read instructions thoroughly before operation and retain it for future reference.
 13 Video Web Server MPEG-4 VIDEO WEB SERVER User s s Manual Please read instructions thoroughly before operation and retain it for future reference. 733_V0.95 Thank-You Note Before You Get Start First
BlackHawk for MAC Software User Guide
 BlackHawk for MAC Software User Guide Products: BLK-DH2 Series and BLK-HD Series DVRs Please read this manual before using your software, and always follow the instructions for safety and proper use. Save
User s Manual. Combo DVR. Thank you for purchasing our product. Please read this User s Manual before using the product. Change without Notice
 Thank you for purchasing our product. Please read this User s Manual before using the product. Change without Notice Combo DVR User s Manual User please operate according to the DVR model that you purchased
QSTD2404/QSTD2408/QSTD2416 Digital Video Recorders User s Manual
 QSTD2400 Series DVR User s Manual QSTD2404/QSTD2408/QSTD2416 Digital Video Recorders User s Manual For H.264-4-channel/ 8-channel/16-channel Digital Video Recorders All rights reserved Rev 091708 i QSTD2400
Hybrid DVR Quick Start Guide
 Hybrid DVR Quick Start Guide Thank you for purchasing our product. If there is any question or request, please do not hesitate to contact dealer. This manual is applicable to most Hybrid DVR models. DVR
SDI Digital Video Recorder. Quick Operation Guide
 SDI Digital Video Recorder Quick Operation Guide Thank you for purchasing our product. If there is any question or request, please do not hesitate to contact dealer. This manual is applicable to HDDVRXXXX-SDI
truvision DVR 31 Quick Start Guide
 truvision DVR 31 Quick Start Guide Content Contact information 1 Package contents 1 Installation environment 1 Setting up the DVR 31 1 Connecting the devices 2 Turning on the DVR 31 2 Operating the DVR
User Manual QT SERIES. Conventional and SDI DVRs
 User Manual QT SERIES Conventional and SDI DVRs 1 About this Manual Thank You for Choosing a Q-See Product! All of our products are backed by a conditional service warranty covering all hardware for 12
VXHAHDM Channel Analogue High Definition Recorder. Features
 The Concept Pro VXHAHDM-16 is a sixteen channel professional DVR that can record up to 1080p resolution video footage on all channels. Compatible with all AHD, HD-TVI and traditional analogue cameras,
261Z. DR040_Quick_V1.0 PLAY RE C
 261Z MPEG4 4CH DVR Quick Guide REC PLAY PA USE ST OP REW FF HDD HD D Fu ll ALAR M TIMER PLAY RE C MENU ENTER LIST SLOW ZOOM SEQ Please read instructions thoroughly before operation and retain it for future
ROHS AND WEEE COMPLIANCE
 210Z ROHS AND WEEE COMPLIANCE All lead-free products offered by the company comply with the requirements of the European law on the Restriction of Hazardous Substances (RoHS) directive, which means our
ALI-HVR3000H Series 4/8/16-Channel 960H HD-TVI Hybrid+ DVR Quick Setup Guide
 ALI-HVR3000H Series 4/8/16-Channel 960H HD-TVI Hybrid+ DVR Quick Setup Guide This quick setup guide provides instructions to initially setup and use the ALI-HVR3000H series digital video recorder (DVR).
DVR User s Manual. For H FPS /8-channel digital video recorder All rights reserved. Rev
 QSDT8DP DVR User s Manual For H.264-240 FPS /8-channel digital video recorder All rights reserved Rev 120209 i QSDT8DP User s Manual CAUTION Please read this user manual carefully to ensure that you can
Digital Video Recorder User Manual. DVR User Manual. For H channe/ 8-channel/16-channel Digital Video Recorder All rights reserved
 DVR User Manual For H.264-4-channe/ 8-channel/16-channel Digital Video Recorder All rights reserved i CAUTION Please read this user manual carefully to ensure that you can use the device correctly and
Quick Start Guide 4/8/16/24-Ch DVR
 Quick Start Guide 4/8/16/24-Ch DVR 1.1 Install Hard Drive 4/8/16/24-CH DVR Quick Start Guide Notice: 1.4/3/16-ch DVR supports one SATA hard drive. 24-ch DVR supports three SATA hard drives. Please use
Digital Video Recorder User Manual. DVR User Manual. For H channel/ 8-channel/16-channel Digital Video Recorder All rights reserved
 DVR User Manual For H.264-4-channel/ 8-channel/16-channel Digital Video Recorder All rights reserved i CAUTION ii Please read this user manual carefully to ensure that you can use the device correctly
Digital Video Surveillance System
 Digital Video Surveillance System Engineering Manual The picture might differ according to the specification and model. Contents of this user manual are protected under copyrights and computer program
4CH CAR D.V.R. USER'S MANUAL - Eng
 4CH CAR D.V.R USER'S MANUAL - Eng WARNIG AND CAUTIONS CAUTION : TO REDUCE THE RISK OF FIRE OR ELECTRONISC SHOCK, DO NOT EXPOSE THIS PRODUCT TO RAIN OR MOIS-TURE. DO NET INSERT ANY METALLIC OBJECT THROUGH
Network Transmission System
 Network Transmission System Quick Operation Guide Quick Operation Guide of Network Transmission System UD.6L0202B1058A02 Thank you for purchasing our product. If there is any question or request, please
NUBIX H.264 DVR Setup Guide
 Package Content NUBIX H.264 DVR Setup Guide Inspect the packaging carton. Make sure the NUBIX H.264 DVR is properly delivered. Remove all items from the box and make sure the box contains the following
SmartWatch Eco/Eco Compact
 SmartWatch Eco/Eco Compact Digital Video Recorders SmartWatch Eco SmartWatch Eco Compact Quick User Guide Index Box Contents...3 Front Panel Controls...4-5 SmartWatch Eco Compact...4 SmartWatch Eco...5
USER S MANUAL GV-DVR1042. Real Time DVR System. Stand Alone 4 Channel.
 USER S MANUAL GV-DVR1042 Stand Alone 4 Channel Real Time DVR System www.gviss.com 1 B E F O R E I N S T A L L A T I O N - - - - - - - - - - - - - - - - - - - - - - - - - - - - - - - - - - - - - - - - -
VIDEO WEB SERVER. User s Manual. Please read instructions thoroughly before operation and retain it for future reference. PATENT 732 V1.
 VIDEO WEB SERVER PATENT User s Manual Please read instructions thoroughly before operation and retain it for future reference. 732 V1.0 WARNING The apparatus shall not be exposed to dripping or splashing
USER MENU Chapter 1: Features...4 Chapter 2: Layout...5 Chapter 3: DVR Installation...7 Chapter 4: DVR Boot up...8 Chapter 5 DVR Menu...
 + USER MENU 0 CONTENTS 1 USER MENU Chapter 1: Features...4 DVR Features...4 Chapter 2: Layout...5 2.1 Front Panel (Details please refer to the real product)...5 2.2 Rear Panel (Details please refer to
GV-IP Decoder Box Plus User s Manual
 GV-IP Decoder Box Plus User s Manual Before attempting to connect or operate this product, please read these instructions carefully and save this manual for future use. DBPV10-UM-A 2015 GeoVision, Inc.
Triplex MPEG-4 DVR. OSD Setup Guide
 Triplex MPEG-4 DVR OSD Setup Guide 00940A01 Version 1.1 00940A01 Table of Content Menu System Overview...5 ...5 Key Usage in OSD Menu...5 Key Usage in Virtual Keyboard...6 System Setup...8 ...8
User s Manual. 4 Channel Digital Video Recorder
 Thank you for purchasing our product. Please read this User s Manual before using the product. Change without Notice 4 Channel Digital Video Recorder User s Manual 1 Safety Precautions CAUTION RISK OF
DVR User Manual. For H.264-4/8/16-channel digital video recorder All rights reserved
 DVR User Manual For H.264-4/8/16-channel digital video recorder All rights reserved CAUTION Please read this user manual carefully to ensure that you can use the device correctly and safely We do not warrant
HIGH DEFINITION PEACE OF MIND
 HIGH DEFINITION PEACE OF MIND 1080p HD VIEWING AND RECORDING POWERFUL DIGITAL ZOOM SMART SEARCH & PLAYBACK REMOTE CONNECTIVITY ON ANY DEVICE 4(or)8 HD-SDI CHANNELS 2TB STORAGE EASY CONNECT WIZARD EVIDENCE
Installation Manual of DS-9600NI-H8 DS-9600NI-H8. Installation Manual UD.7L0202A1730B01
 DS-9600NI-H8 Installation Manual UD.7L0202A1730B01 1 Thank you for purchasing our product. If there is any question or request, please do not hesitate to contact dealer. Before you start, read the following
Network Video Recorder Quick Operation Guide
 Network Video Recorder Quick Operation Guide UD.6L0202B1057A01 Thank you for purchasing our product. If there is any question or request, please do not hesitate to contact dealer. This manual is applicable
Quick Start. H.264 Network DVR 303Z
 303Z H.264 Network DVR Quick Start Please read instructions thoroughly before operation and retain it for future reference. The image shown above may differ from the actual product appearance. 792_Quick_V0.9
Taurus Super-S3 LCM. Dual-Bay RAID Storage Enclosure for two 3.5-inch Serial ATA Hard Drives. User Manual March 31, 2014 v1.2
 Dual-Bay RAID Storage Enclosure for two 3.5-inch Serial ATA Hard Drives User Manual March 31, 2014 v1.2 www.inxtron.com EN Table of Contents Table of Contents 1 Introduction... 1 1.1 Technical Specifications...
Lite H.264 DVR Setup Guide
 Package Content Lite H.264 DVR Setup Guide Inspect the packaging carton. Make sure the Lite H.264 DVR is properly delivered. Remove all items from the box and make sure the box contains the following items.
AVerMedia. AverDiGi EH5116 PRO. Quick Installation Guide
 AVerMedia AverDiGi EH5116 PRO Quick Installation Guide i SPECIFICATIONS ARE SUBJECT TO CHANGE WITHOUT PRIOR NOTICE THE INFORMATION CONTAINED HEREIN IS TO BE CONSIDERED FOR REFERENCE ONLY WARNING TO REDUCE
SC1720 (720P Black Box)
") SC1720 (720P Black Box) - HD Stealth Camcorder - User Manual Ver. 1.0.0 F40708000 04.11.2013 Table of Contents Quick Start Guide...- 3 - Diagram...- 4 - LED Indicator Status...- 5 - How to Charge The Battery...-
SC1720 (720P Black Box) - HD Stealth Camcorder - User Manual Ver. 1.0.0 F40708000 04.11.2013 Table of Contents Quick Start Guide...- 3 - Diagram...- 4 - LED Indicator Status...- 5 - How to Charge The Battery...-
AMDV960H4 User Manual
 s AMDV960H4 User Manual AMDV960H4 User Manual Version 1.3.2 www.amcrest.com 1 TABLE OF CONTENTS 1 PRODUCTION 4 1.1. Product Key Features 4 1.2. Front Panel Controls 5 1.3. USB Mouse 6 1.4. Soft Keyboard
Control Device
 1 Import Safety Notification ----------------------------------------------------- 5 Before Installation ---------------------------------------------------------- 6 Main Features -------------------------------------------------------------
User s Manual V 0.96
 User s Manual V 0.96 1 Regulatory Information FCC compliance: This equipment has been tested and found to comply with the limits for a digital device, pursuant to part 15 of the FCC Rules. These limits
Digital Video Recorder Quick Operation Guide
 Digital Video Recorder Quick Operation Guide UD.6L0202B0063A01 Thank you for purchasing our product. If there is any question or request, please do not hesitate to contact dealer. This manual is applicable