VirtualDJ 8 Rane TTM57 MKII 1
|
|
|
- Alberta Rosalyn Harrington
- 6 years ago
- Views:
Transcription


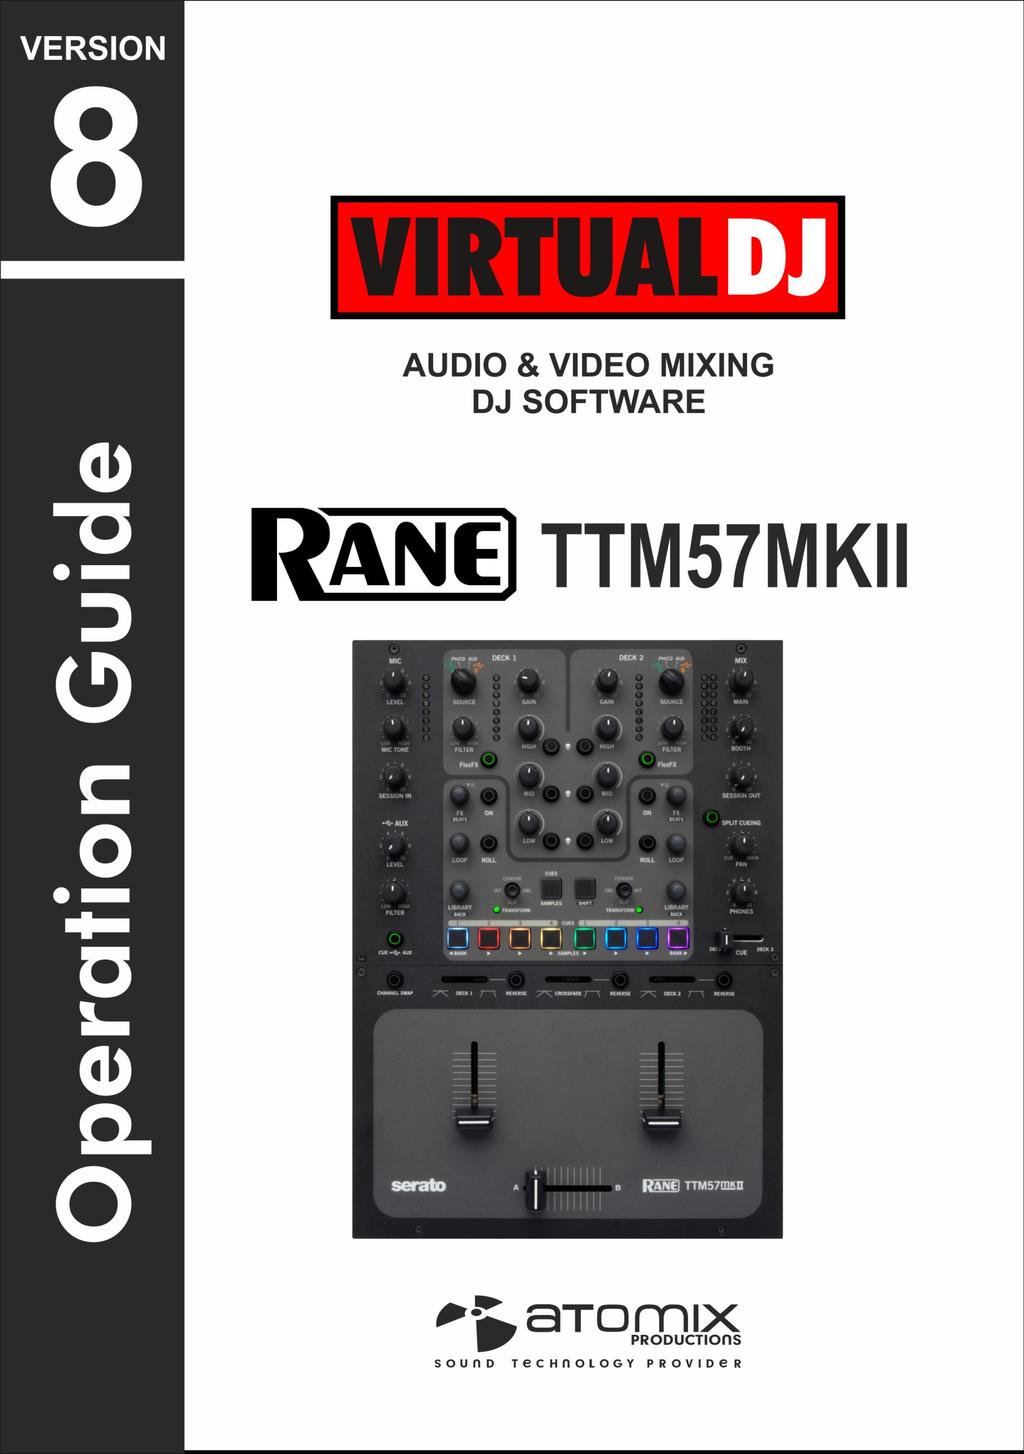
1 VirtualDJ 8 Rane TTM57 MKII 1
2 Table of Contents Installation... 3 Connections... 3 Drivers... 4 VirtualDJ 8 Setup... 4 Advanced Setup... 5 VirtualDJ & Hardware Functionality... 6 A. Volume Mixer... 7 B. Equalizer & Source Selector... 7 C. Inputs... 9 D. Outputs... 9 E. Software Controls F. Front panel G. Rear Panel Advanced Audio Setups Timecode (DVS) Sampler Output Back to back Recording VirtualDJ 8 Rane TTM57 MKII 2
 with the switch above the input jacks. Secure the ground wire to a Phono Ground terminal.")
3 Installation Connections Connect your computer to USB A (or B) port at the rear panel of Rane TTM57 MKII. Connect your Left deck s RCA cables to ANALOG INPUT DECK1. If it s a CD player, select CD with the switch above the input jacks. If it s a turntable, select PH (Phono) with the switch above the input jacks. Secure the ground wire to a Phono Ground terminal. Connect your Right deck s RCA cables to ANALOG INPUT DECK2. If it s a CD player, select CD with the switch above the input jacks. If it s a turntable, select PH (Phono) with the switch above the input jacks. Secure the ground wire to a Phono Ground terminal Set the SOURCE selector for DECK 1 to USB-A (or B if the USB B port is used). Set the SOURCE selector for DECK 2 to USB-A (or B if the USB B port is used). Connect the Rane TTM57 MKII with AC power using the provided cable and power on the unit VirtualDJ 8 Rane TTM57 MKII 3
 Mac OSX: Download and install the necessary CoreAudio drivers from http://dj.rane.")
 Once VirtualDJ 8 is launched, a Login Window will appear. Login with your virtualdj.com account credentials.")
4 Drivers Windows: Download and install the necessary ASIO drivers from (Downloads tab Control Panel for Windows) Mac OSX: Download and install the necessary CoreAudio drivers from (Downloads tab Control Panel for Mac OS).. VirtualDJ 8 Setup Download and install VirtualDJ 8 from (in case you have not done already) Once VirtualDJ 8 is launched, a Login Window will appear. Login with your virtualdj.com account credentials. A Pro Infinity, a PLUS* or a Pro Subscription License is required to use the Rane TM57 MKII. Without any of the above Licenses, the controller will operate for 10 minutes each time you restart VirtualDJ. *For DVS Support an additional Timecode Plus license is required if the Rane TTM57MKII Plus license is purchased. A window will appear next, to verify the proper detection. Click on the Use Soundcard button and VirtualDJ will automatically create and apply the pre-defined audio configuration using the built-in audio interface of the Rane TTM57 MKII. Click to OK. The unit is now ready to operate with VirtualDJ. VirtualDJ 8 Rane TTM57 MKII 4

* configuration is preconfigured (see DVS Support for more details). *requires Pro Infinity or Timecode License http://www.virtualdj.com/buy/index.")
5 Advanced Setup MIDI Operation The unit should be visible* in the CONTROLLERS tab of Config and the factory default available/selected from the Mappings drop-down list. The factory default Mapping offers the functions described in this Manual, however those can be adjusted to your needs via VDJ Script actions. Find more details at AUDIO Setup The unit has a pre-defined Audio setup and a special button in the AUDIO tab of Config to provide that. Alternative setups can be applied in the same window. Timecode (DVS)* configuration is preconfigured (see DVS Support for more details). *requires Pro Infinity or Timecode License For further software settings please refer to the User Guides of VirtualDJ 8. VirtualDJ 8 Rane TTM57 MKII 5

6 VirtualDJ & Hardware Functionality S. SHIFT. Press and hold this button down to access secondary software or hardware functions of other controls on the Rane TTM57 MKII M. CUE/SAMPLER MODE. Use this button to select a different mode for the 8 colored pads (HotCues and Samples) of the Rane TTM57MKII VirtualDJ 8 Rane TTM57 MKII 6
 4. REVERSE CF. Crossfader flip switch for normal and reverse behavior.")
7 A. Volume Mixer 1. CROSSFADER. Blends audio between the left and right channels/decks. 2. VOLUME. Use these faders to adjust the Output Volume of each mixer channel. 3. CROSSFADE CURVE. Adjust the slope of the crossfader curve (cut to smooth behavior) 4. REVERSE CF. Crossfader flip switch for normal and reverse behavior. When enabled Deck 1 will be assigned to the right side of the crossfader and Deck 2 to the left side. 5. FADER CURVE. Adjust the slope of the fader curve (cut to smooth behavior) for the left and right decks. 6. REVERSE FADER. Flip switches for the Left and Right Faders for normal and reverse behavior. 7. CHANNEL SWAP. Use this button to swap the Left and Right Channels. When enabled, the left Volume fader will control the output level of the right deck and vice versa. Note The Crossfader and Volume faders will move the relative faders of the VirtualDJ GUI, but not vice versa (Fake mixer mode) B. Equalizer & Source Selector 8. LOW. Full-cut isolator to adjust the low (bass) frequencies of each mixer channel. 9. MID. Full-cut isolator to adjust the middle (mid) frequencies of each mixer channel 10. HIGH. Full-cut isolator to adjust the high (treble) frequencies of each mixer channel. 11. GAIN. Adjusts the input audio level (trim) up to +15db of the left and right mixer channel. No boost or cut is at 12 o clock position. 12. KILL LOW. Temporary (as long as its pressed) full cut of the low (bass) frequencies of each mixer channel. VirtualDJ 8 Rane TTM57 MKII 7
 full cut of the high (treble) frequencies of each mixer channel. 15. FLEXFX.")
8 13. KILL MID. Temporary (as long as its pressed) full cut of the middle (mid) frequencies of each mixer channel. 14. KILL HIGH. Temporary (as long as its pressed) full cut of the high (treble) frequencies of each mixer channel. 15. FLEXFX. Use this button to route the Output to external Hardware FX unit (connections at the rear side). If no Send-Return FX unit is connected to the rear side, the sound from the software will be muted. 16. FILTER. Applies a High-Pass / Low-Pass Filter on each mixer channel. 17. SOURCE SEL. Set this selector to the appropriate position to define which Channel Input will be routed to the 2 Mixer Channel Outputs (DECK 1 and DECK 2). On USB A or USB B position, the audio signal from the computer connected to the USB A or USB B port (rear panel) will be routed to the Output of this Mixer Channel and assign the MIDI controls for the Left or Right channels to the same computer. On INPUTS PH/CD, AUX the audio signal from the relative Inputs will be routed directly to the Output of this Mixer Channel. In this case the sound from the computer s decks will be muted. Use these positions to route external analogue media sources or the PH/CD. VirtualDJ 8 Rane TTM57 MKII 8
 21. AUX LEVEL.")
9 C. Inputs 18. MIC LEVEL. Use this knob to adjust the output level of the microphone input. Turn the knob to the far left position to mute (turn off) the Microphone input. 19. MIC TONE. Use this knob to adjust the tone of the microphone input channel. 20. SESSION IN. Use this knob to adjust the level of the SESSION Input (connection at the rear panel) 21. AUX LEVEL. Use this knob to adjust the Output level of the AUX Input. In VirtualDJ, the AUX Input has been assigned to the Sampler. Use this knob to adjust the Output level of the VirtualDJ Sampler to the Master Output. 22. AUX FILTER. Apply a High/Low pass Filter to the AUX Input channel. In VirtualDJ, use this knob to apply a Filter to the Sampler. 23. CUE-AUX. Use this button to send the AUX Input to the Headphones channel for previewing. D. Outputs 24. MAIN MIX. Use this knob to control the Output level of the Master Output. 25. BOOTH. Use this knob to control the Output level of the Booth Output.(connection at the rear panel) 26. SESSION OUT. Use this knob to control the Output level of the Session Output (connection at the rear panel) SESSION IN and OUT are typically used to chain mixers together, through any line-level device may be connected to the Session Input and mixed here. VirtualDJ 8 Rane TTM57 MKII 9
 will be heard.")

10 27. SPLIT CUE. When enabled the PAN knob (28) will pan between Mono Cue in the left ear and mono Main Mix in the right ear. 28. PHONES PAN. Use this knob to mix between CUE and Program MIX in the Headphone channel. When all the way to the left, only channels routed to Headphones (via the CUE buttons) will be heard. When all the way to the right, only the Program mix will be heard. 29. PHONES LEVEL. Use this knob to adjust the volume of the Headphones Channel 30. CUE FADER. Use this fader to select the channel you wish to prelisten with Headphones. When the fader is at the far left position, the Left Deck will be routed to the Headphones channel. If the fader is at the far right position, the right deck will be routed to the Headphones channel. In all other positions, the sound from both decks will blend and routed to the Headphones. E. Software Controls 31. JOYSTICK. Push the Joystick to select the Mute mode (TRANSFORM LED will be turned on). In this mode, use the joystick to any direction to temporary mute the corresponding channel. Push again to return to the Default mode. In Default mode (TRANSFORM LED off): Move the Joystick towards down to enable/disable Slip mode. When Slip mode is enabled (TRANSFORM LED will blink), several functions (such as scratching, HotCues VirtualDJ 8 Rane TTM57 MKII 10
11 and Loops) will act temporary and the track will resume to the position it would have been if this action was never triggered. Move the Joystick to the DBL position (towards right for the Left deck and towards left for the Right deck), to clone the other deck to this deck. (Instant Doubles) Move the Joystick to the INT position to enable/disable Timecode control on the corresponding deck. Move the Joystick towards up to play the track reversed. Once the Joystick is released, the track will continue playing forward from the position it would have been as if the reverse was never triggered (Censor). 32. LIBRARY KNOB. Use this encoder to scroll through files or folders in the selected Browser Window. Push the encoder to enter the Songs list (if the focus is on the Folders list) or load the selected track to the left or right deck (if focus is on any other Browser window) If the focus is on the Songs list, hold SHIFT down and then push the encoder to set focus to the Folders list. If the focus is on the Folders list, hold SHIFT down and then push the encoder to expand/collapse subfolders. 33. LOOP ENC. Use this encoder to select the length of the applied loop in beats. Turn clockwise to double the size and anti-clockwise to half the size. Push the encoder to trigger the selected loop. 34. ROLL. Press and keep this button down to apply a temporary Loop Roll. Once the button is released, the track will return to the position it would have been if the Loop has never been triggered. While the ROLL button is pressed, use the LOOP encoder to adjust the length of the applied Loop Roll. 35. FX BEATS. Push the encoder to toggle between the Select (LED of the will flash) and the Parameter (LED off) control modes. In Select mode, use this encoder to select a VirtualDJ Effect for the left and right decks. In Parameter mode, use this encoder to adjust the 1 st Parameter of the selected Effect, or have SHIFT pressed to control the 2 nd Parameter of the selected effect. 36. FX ON. Use this button to enable/disable the selected Effect of the left and right deck. 37. HOTCUES/ SAMPLES Each one of the 8 Pads offers a different functionality, depending on the selected mode (M) VirtualDJ 8 Rane TTM57 MKII 11
 or returns the track to that Hot Cue Point if assigned. When a Hot Cue Button is unlit, you can assign a Hot Cue Point by pressing it at the desired point in your track.")
12 HotCues 1-4 mode Press the CUES/SAMPLER mode button to select the HotCues mode (LED will become red) In this mode each one of the 4 buttons per side (1-4) assigns a Hot Cue Point (1 to 4) to the left or right deck (if unassigned) or returns the track to that Hot Cue Point if assigned. When a Hot Cue Button is unlit, you can assign a Hot Cue Point by pressing it at the desired point in your track. Once it is assigned, the Hot Cue Button will light up blue (for Left deck) or red (for Right deck). Hold SHIFT down and then press any of these buttons to delete its assigned Hot Cue Point. HotCues 5-8 mode While the HotCue 1-4 mode is selected, hold SHIFT down and then press the CUES/SAMPLER mode button to select the HotCues 5-8 mode (LED will become yellow) In this mode each one of the 4 buttons per side (1-4) assigns a Hot Cue Point (5 to 8) to the left or right deck (if unassigned) or returns the track to that Hot Cue Point if assigned. When a Hot Cue Button is unlit, you can assign a Hot Cue Point by pressing it at the desired point in your track. Once it is assigned, the Hot Cue Button will light up blue (for Left deck) or red (for Right deck). Hold SHIFT down and then press any of these buttons to delete its assigned Hot Cue Point. Sampler mode Press the CUES/SAMPLER mode button to select the Sampler mode (LED will become green) In this mode each one of the 6 buttons (marked as >) triggers a sample (1 to 6) from the selected Sampler Bank of VirtualDJ. The leds of those buttons will be turned off if the corresponding slot is unloaded, and will get the color of the assigned sample (if loaded) VirtualDJ 8 Rane TTM57 MKII 12


13 Hold SHIFT down and then press any of these Sampler buttons to stop the playing Sample (useful if the Stutter or Unmute Trigger mode is selected) Use the <BANK button to select and load the previous available Sampler Bank Use the >BANK button to select and load the next available Sampler Bank Sampler Output Channel: By default VirtualDJ will send Sampler to the USB AUX Channel. Use the AUX LEVEL knob to control the Output Volume and the AUX Filter knob to apply a Low-High Pass Filter to the playing samples. See more Sampler Output options in Sampler Output. F. Front panel 38. HEADPHONES SOCKET. Connect your ¼ or 1/8 headphones to these outputs for cueing and mix monitoring. 39. FOOTSWITCH. ¼ TRS footswitch connection. Footswitch controls are not mapped to any function, but can be learned/assigned from Settings->Controllers tab of VirtualDJ. G. Rear Panel 40. POWER. Connect the supplied universal AC cord. Power on the unit after all the necessary connections are done. 41. USB A/B. These USB connections send and receive audio and control information from the connected computers. See more details in Back to Back. VirtualDJ 8 Rane TTM57 MKII 13
14 42. MAIN OUT. Connect your amplifier using a pair of balanced XLR jacks. The level of this output is controlled by the MAIN knob at the top panel 43. BOOTH OUT Use a pair of balanced ¼ TRS jacks to connect the unit with your secondary output (e.g. for monitor). The level of this output is controlled by the BOOTH knob at the top panel 44. SESSION IN/OUT. Use standard RCA cables for the connections. The level of both Input and Output are controlled by the SESSION IN and OUT knobs at the top panel. 45. ANALOG INPUTS. Two Phono/CD inputs are provided by RCA jacks for each mixer channel (DECK 1 / DECK 2). These may be set for PH or CD using the rear panel slide switches. PH/CD inputs may be selected as Timecode Inputs or for recording on USB stereo pair 5-6. See Timecode (DVS). Connect your turntable ground wires to the PHONO GOUND posts on the rear when using PH inputs. 46. FLEXFX LOOP Use standard RCA cables for the SEND and RETURN Inputs. The FlexFX output is normally used to connect outboard effects. 47. MIC INPUT Connect your microphone using a XLR 3-pin plug, a balanced ¼ TRS plug or unbalanced TS plug. This input may be set as Microphone or Line Input using the MIC-LINE switch on the rear panel. Set this to Line when connecting a wireless receiver. Note: The Main, Booth and Session outputs arrive from the same Main Mix signal. Each one of them has its own LEVEL control at the top panel. Because all signals are identical, users may use any of these outputs as the Main output if a different cable type is required for system connection. Advanced Audio Setups As mentioned, the Rane TTM57MKII is offering a pre-defined audio configuration for Timecode (DVS) and Sampler routing to the AUX USB Channel. Further details and alternative setups are described below. Timecode (DVS) VirtualDJ is offering DVS (Digital Vinyl System) support for the Rane TTM57MKII. A timecode Plus or Pro Infinity license is required. 2 Timecode Inputs are available to control any software decks via Timecode CDs or Vinyls. Both Mixer Decks can accept LINE (Timecode CDs) and PHONO Sources (Timecode Vinyls) depending on the LN/PH switchers at the rear panel of the unit. VirtualDJ 8 Rane TTM57 MKII 14


15 Connect your Timecode devices at the rear panel of the Rane TTM57MKII to the PH/CD Inputs Click on the ON buttons from the TIMECODE panels of the Default Skin to enable the Timecode control to the left and/or right deck. Press PLAY on your timecode CD or Vinyl device and VirtualDJ will automatically detect your Timecode type and make the appropriate adjustments for best performance. Open the TIMECODE tab of the VirtualDJ Settings and choose the CALIBRATE button if for any reason the signal is not detected (possibly due to reversed phase connections). Timecode Detection Timecode On/Off buttons - 2 Decks default skin If no Timecode Inputs need to be used, it is suggested to delete the Timecode lines from the predefined audio configuration and save your custom audio settings as an alternative profile. Sampler Output VirtualDJ routes the Sampler Output to the USB AUX channel (Outputs 5 and 6) providing the ability to control its Volume, apply Filter and Effects from the USB AUX section of the Rane 62. See Auxiliary/Sampler You may specifically route the Sampler output to deck 1, deck 2, both decks and active deck. In that case, you will need to delete the Sampler line from the Audio configuration and choose the desired Output via the Sampler Options. VirtualDJ 8 Rane TTM57 MKII 15


16 Back to back The Rane TTM57MKII has two USB ports, allowing simultaneous connection of two computers. Each port is completely independent. It is possible to run VirtualDJ on one computer and any other 3 rd -party DJ-software on the other, Mac or PC. How to: - Connect the 2 nd computer to the unused USB port on the TTM57MKII. - Switch the DECK SOURCE selector at the top panel on the non-playing mixer channel to the USB source of the 2 nd computer. - Play a track on this deck and mix it when ready you ll now have audio from both computers during the mix. - Fade out the audio playing from the 1 st computer to the audio playing from the 2 nd one. - When only audio from the 2 nd computer is left in the mix, remove the first computer. - Assign the DECK SOURCE for the remaining free mixer channel to the 2 nd computer and keep mixing. Recording The Rane TTM57MKII has a dedicated USB Input to record your Main Mix (default setting) and the Microphone. VirtualDJ has pre-configured this input for recording, thus no special setting is required in order to record your mix (including analogue sources and Microphone). Simply make sure the Main Mix is selected as in the Rane Audio Driver control panel for the USB 6 Record Input and use the REC or BSCAST buttons from the MASTER center panel of the VirtualDJ GUI. Record Selection Rane Control Panel Record section MASTER GUI panel VirtualDJ 8 Rane TTM57 MKII 16
17 Useful links VirtualDJ web-page: VirtualDJ Support Center: VirtualDJ 8 Operation Guides: Rane web-page: Rane Support Center: Rane Sixty-Two product page: Rane Sixty-Two manual: Hardware Integration Department ATOMIX PRODUCTIONS Reproduction of this manual in full or in part without written permission from Atomix Productions is prohibited. VirtualDJ 8 Rane TTM57 MKII 17
VirtualDJ 8 Rane Sixty-Two 1
 VirtualDJ 8 Rane Sixty-Two 1 Table of Contents Installation... 3 Connections... 3 Drivers... 4 VirtualDJ 8 Setup... 4 Advanced Setup... 5 VirtualDJ & Hardware Functionality... 6 A. Volume Mixer... 7 B.
VirtualDJ 8 Rane Sixty-Four 1
 VirtualDJ 8 Rane Sixty-Four 1 Table of Contents Installation... 3 Connections... 3 Drivers... 4 VirtualDJ 8 Setup... 4 Advanced Setup... 5 A. Deck Controls... 7 HotCues (Layer 1)... 8 Sampler (Layer 2)...
VirtualDJ 8 Hercules Universal DJ 1
 VirtualDJ 8 Hercules Universal DJ 1 Table of Contents A. Installation... 3 Drivers... 3 VirtualDJ 8 Setup... 3 Advanced Setup... 4 B. Controls... 5 C. Pads... 8 HotCues... 8 Effects... 8 Sampler... 9 Loops...
VirtualDJ 8 American Audio 10MXR 1
 VirtualDJ 8 American Audio 10MXR 1 Table of Contents A. INSTALLATION... 3 Firmware & Drivers & Mode... 3 VirtualDJ 8 Setup... 3 Advanced Setup... 4 B. CONTROLS... 5 C. RECORD & TIMECODES... 10 Recording
VirtualDJ 8 American Audio VMS4 1
 VirtualDJ 8 American Audio VMS4 1 Table of Contents INSTALLATION... 3 Firmware & Drivers & Setup... 3 VirtualDJ 8 Setup... 3 ADVANCED SETUP... 4 Midi Operation... 4 Audio Setup... 4 CONTROLS... 5 A.Mixer...
VirtualDJ 8 American Audio 19MXR 1
 VirtualDJ 8 American Audio 19MXR 1 Table of Contents A. INSTALLATION... 3 Firmware & Drivers & Mode... 3 VirtualDJ 8 Setup... 3 Mixer mode... 4 Controller mode... 5 B. CONTROLS... 6 C. RECORD & TIMECODES...
VirtualDJ 8 Pioneer DDJ-SB2 1
 VirtualDJ 8 Pioneer DDJ-SB2 1 Table of Contents A. INSTALLATION... 3 Firmware & Drivers... 3 VirtualDJ 8 Setup... 3 Advanced Setup... 4 B. MIXER... 5 C. DECKS... 7 D. PADS... 9 HotCues mode... 9 HotCues
VirtualDJ 8 MD1311 1
 VirtualDJ 8 MD1311 1 Table of Contents INSTALLATION... 3 Drivers... 3 VirtualDJ 8 installation... 3 VirtualDJ 8 Setup... 3 Advanced Setup... 4 LAYOUT... 6 A. MIXER... 7 B. BROWSER... 8 C. DECKS... 8 D.
VirtualDJ 8 MD1310 1
 VirtualDJ 8 MD1310 1 Table of Contents INSTALLATION... 3 Drivers... 3 VirtualDJ 8 installation... 3 VirtualDJ 8 Setup... 3 Advanced Setup... 4 LAYOUT... 6 A. MIXER... 7 B. BROWSER... 8 C. DECKS... 8 D.
VirtualDJ 8 Numark Mixtrack II 1
 VirtualDJ 8 Numark Mixtrack II 1 Table of Contents INSTALLATION... 3 Firmware & Drivers... 3 VirtualDJ 8 Setup... 3 Advanced Setup... 4 A. MIXER... 5 B. DECKS... 6 C. EFFECTS & UPPER PADS... 7 Effects
VirtualDJ 8 Pioneer DDJ-SB 1
 VirtualDJ 8 Pioneer DDJ-SB 1 Table of Contents A. INSTALLATION... 3 Firmware & Drivers... 3 VirtualDJ 8 Setup... 3 Advanced Setup... 4 B. MIXER... 5 C. DECKS... 7 D. PADS... 9 HotCues mode... 9 HotCues
VirtualDJ 8 Pioneer DDJ-SR 1
 VirtualDJ 8 Pioneer DDJ-SR 1 Table of Contents A. INSTALLATION... 3 Firmware & Drivers... 3 VirtualDJ 8 Setup... 3 Advanced Setup... 4 PAD PLUS mode... 4 B. MIXER... 5 C. DECKS... 7 D. EFFECTS... 9 E.
VirtualDJ 8 Hercules DJControlWave 1
 VirtualDJ 8 Hercules DJControlWave 1 Table of Contents A. Installation... 3 Drivers... 3 VirtualDJ 8 Setup... 3 Advanced Setup... 4 B. Basic Controls... 5 C. Advanced Controls... 6 HotCues... 6 Sampler...
QUICKSTART GUIDE ENGLISH ( 3 9 ) MANUAL DE INICIO RÁPIDO ESPAÑOL ( ) GUIDE D UTILISATION RAPIDE FRANÇAIS ( )
 MANUAL DE INICIO RÁPIDO ESPAÑOL ( ) GUIDE D UTILISATION RAPIDE FRANÇAIS ( )") QUICKSTART GUIDE ENGLISH ( 3 ) MANUAL DE INICIO RÁPIDO ESPAÑOL ( 11 17 ) GUIDE D UTILISATION RAPIDE FRANÇAIS ( 1 25 ) MANUALE RAPIDO DI UTILIZZAZIONE ITALIANO ( 27 33 ) KURZANLEITUNG DEUTSCH ( 35 41 )
QUICKSTART GUIDE ENGLISH ( 3 ) MANUAL DE INICIO RÁPIDO ESPAÑOL ( 11 17 ) GUIDE D UTILISATION RAPIDE FRANÇAIS ( 1 25 ) MANUALE RAPIDO DI UTILIZZAZIONE ITALIANO ( 27 33 ) KURZANLEITUNG DEUTSCH ( 35 41 )
QUICK-START GUIDE ROLAND DJ-808
 QUICK-START GUIDE ROLAND DJ-808 Installation and Setup The Roland DJ-808 requires drivers for both Windows and MacOS operating systems. IMPORTANT NOTE: Please ensure you have the latest available drivers
QUICK-START GUIDE DENON DJ MC4000
 QUICK-START GUIDE DENON DJ MC4000 Installation and Setup The Denon DJ MC4000 is a class compliant USB plug and play device for Mac and Windows. 1. Download and install the latest version of Serato DJ Intro
Table of Contents. Introduction... 4 Box Contents... 4 Support Setup Features... 6 Top Panel... 6 Front Panel Rear Panel...
 User Guide Table of Contents Introduction... 4 Box Contents... 4 Support... 4 Setup... 5 Features... 6 Top Panel... 6 Front Panel... 12 Rear Panel... 12 Using Serato DJ... 14 Mixing with Serato DJ... 14
Table of Contents. Introduction Box Contents Support Setup Single-DJ Performance Transitioning Between DJs...
 User Guide English Table of Contents Introduction... 4 Box Contents... 4 Support... 4 Setup... 5 Single-DJ Performance... 5 Transitioning Between DJs... 6 Features... 7 Top Panel... 7 Front Panel... 12
ALLEN&HEATH Publication AP11255
 QUICK START GUIDE Thank you for purchasing the Allen & Heath XONE:96, 6+2 Analogue DJ mixer, featuring: Dual 24 channel, 32Bit/96kHz, Hi-Speed USB internal soundcards with MIDI Control & X:Link connectivity
DDJ-SX3. DJ Controller. Operating Instructions
 DJ Controller DDJ-SX3 pioneerdj.com/support/ http://serato.com/ For FAQs and other support information for this product, visit the above site. Operating Instructions Contents How to read this manual Thank
QUICK-START GUIDE RELOOP MIXON4
 QUICK-START GUIDE RELOOP MIXON4 Installation and Setup The Reloop MIXON4 is a class compliant USB plug and play device for Mac, however requires drivers for Windows. You will find these on Reloop s website.
QUICKSTART MANUAL ENGLISH ( 3 10 ) MANUALE DE INICIO RÁPIDO ESPAÑOL ( ) GUIDE D'UTILISATION SIMPLIFIÉ FRANÇAIS ( )
 MANUALE DE INICIO RÁPIDO ESPAÑOL ( ) GUIDE D'UTILISATION SIMPLIFIÉ FRANÇAIS ( )") QUICKSTART MANUAL ENGLISH ( 3 10 ) MANUALE DE INICIO RÁPIDO ESPAÑOL ( 11 18 ) GUIDE D'UTILISATION SIMPLIFIÉ FRANÇAIS ( 19 26 ) GUIDA RAPIDA ITALIANO ( 27 34 ) KURZANLEITUNG DEUTSCH ( 35 42 ) :: Omni Control
QUICKSTART MANUAL ENGLISH ( 3 10 ) MANUALE DE INICIO RÁPIDO ESPAÑOL ( 11 18 ) GUIDE D'UTILISATION SIMPLIFIÉ FRANÇAIS ( 19 26 ) GUIDA RAPIDA ITALIANO ( 27 34 ) KURZANLEITUNG DEUTSCH ( 35 42 ) :: Omni Control
GUIDE D UTILISATION RAPIDE FRANÇAIS ( )
") QUICKSTART GUIDE ENGLISH ( 11 ) GUÍA DE INICIO RÁPIDO ESPAÑOL ( 1 1 ) GUIDE D UTILISATION RAPIDE FRANÇAIS ( 1 ) GUIDA RAPIDA ITALIANO ( 41 ) KURZANLEITUNG DEUTSCH ( 4 1 ) BOX CONTENTS MIXDECK EXPRESS Power
QUICKSTART GUIDE ENGLISH ( 11 ) GUÍA DE INICIO RÁPIDO ESPAÑOL ( 1 1 ) GUIDE D UTILISATION RAPIDE FRANÇAIS ( 1 ) GUIDA RAPIDA ITALIANO ( 41 ) KURZANLEITUNG DEUTSCH ( 4 1 ) BOX CONTENTS MIXDECK EXPRESS Power
DJ Controller DDJ-1000
 DJ Controller DDJ-1000 pioneerdj.com/support/ rekordbox.com For FAQs and other support information for this product, visit the above site. Operating Instructions Contents How to read this manual! Thank
DJ SYSTEM XDJ-AERO. TRAKTOR PRO2 Connection Guide
 DJ SYSTEM XDJ-AERO TRAKTOR PRO Connection Guide Introduction The XDJ-AERO is equipped with a computer control mode, allowing commercially available DJ software to be controlled when the XDJ-AERO is connected
Ref. No " DUAL CD PLAYER, MIXER AND CASE USER MANUAL
 Ref. No. 170.408 19" DUAL CD PLAYER, MIXER AND CASE USER MANUAL 1 CAUTION RISK OF ELECTRIC SHOCK DO NOT OPEN To prevent electric shock, do not remove top or bottom covers. No user serviceable parts inside.
MC6000 MKII Guide to PCDJ DEX3. Top panel view. Front panel view
 MC6000 MKII Guide to PCDJ DEX3 Top panel view Front panel view Effects Deck 1 PARAM 1 PARAM 2 PARAM 3 PREViOUS ON/OFF NEXT Nothing Effects Deck 2 PARAM 1 PARAM 2 PARAM 3 PREViOUS ON/OFF NEXT Nothing Microphones
INSTALLATION 1/18. When using Hercules DJControl Jogvision for the first time: - Insert the CD-ROM in your computer s drive.
 INSTALLATION When using Hercules DJControl Jogvision for the first time: - Insert the CD-ROM in your computer s drive. 1. Launch the installer program to install the Hercules DJControl Jogvision drivers
Owner s Manual. Copyright 2017 ROLAND CORPORATION 01
 Owner s Manual Before using this unit, carefully read USING THE UNIT SAFELY and IMPORTANT NOTES (leaflet USING THE UNIT SAFELY and Startup Guide). After reading, keep the document(s) where it will be available
VirtualDJ Remote - User Guide 1
 VirtualDJ Remote - User Guide 1 Table of Contents VIRTUALDJ REMOTE APPLICATION... 3 SETUP... 4 TABLET VIEW... 5 RHYTHM WAVE & DECK INFO DISPLAY... 6 BASIC DECK CONTROLS... 6 ADVANCED DECK CONTROLS... 7
OPERATION MANUAL FEATURES BEFORE USE JB SYSTEMS 1/10 DJ-KONTROL 4
 OPERATION MANUAL Thank you for buying this JB Systems product. To take full advantage of all possibilities, please read these operating instructions very carefully. FEATURES Professional 4 channel MIDI
QUICKSTART GUIDE ENGLISH ( 3 12 ) INICIO RÁPIDO ESPAÑOL ( ) UTILISATION SIMPLIFIÉ FRANÇAIS ( ) KURZANLEITUNG DEUTSCH ( )
 INICIO RÁPIDO ESPAÑOL ( ) UTILISATION SIMPLIFIÉ FRANÇAIS ( ) KURZANLEITUNG DEUTSCH ( )") QUICKSTART GUIDE ENGLISH ( 3 12 ) INICIO RÁPIDO ESPAÑOL ( 13 22 ) UTILISATION SIMPLIFIÉ FRANÇAIS ( 23 22 ) KURZANLEITUNG DEUTSCH ( 33 42 ) GUIDA RAPIDA ITALIANO ( 43 52 ) BOX CONTENTS Please make sure
QUICKSTART GUIDE ENGLISH ( 3 12 ) INICIO RÁPIDO ESPAÑOL ( 13 22 ) UTILISATION SIMPLIFIÉ FRANÇAIS ( 23 22 ) KURZANLEITUNG DEUTSCH ( 33 42 ) GUIDA RAPIDA ITALIANO ( 43 52 ) BOX CONTENTS Please make sure
MANUAL DE INICIO RÁPIDO ESPAÑOL ( ) GUIDE D UTILISATION RAPIDE FRANÇAIS ( ) MANUALE RAPIDO DI UTILIZZAZIONE ITALIANO ( )
 GUIDE D UTILISATION RAPIDE FRANÇAIS ( ) MANUALE RAPIDO DI UTILIZZAZIONE ITALIANO ( )") QUICKSTART GUIDE ENGLISH ( 3 11 ) MANUAL DE INICIO RÁPIDO ESPAÑOL ( 12 20 ) GUIDE D UTILISATION RAPIDE FRANÇAIS ( 21 29 ) MANUALE RAPIDO DI UTILIZZAZIONE ITALIANO ( 30 38 ) KURZANLEITUNG DEUTSCH ( 39 47
QUICKSTART GUIDE ENGLISH ( 3 11 ) MANUAL DE INICIO RÁPIDO ESPAÑOL ( 12 20 ) GUIDE D UTILISATION RAPIDE FRANÇAIS ( 21 29 ) MANUALE RAPIDO DI UTILIZZAZIONE ITALIANO ( 30 38 ) KURZANLEITUNG DEUTSCH ( 39 47
Owner s Manual. Copyright 2017 ROLAND CORPORATION
 Owner s Manual Before using this unit, carefully read USING THE UNIT SAFELY and IMPORTANT NOTES (Startup Guide). After reading, keep the document(s) where it will be available for immediate reference.
TTM 57SL MIXER. Contents. OPERATOR S MANUAL Scratch LIVE Version 1.6. Manual-
 TTM 57SL MIXER Contents TTM 57SL: The Hardware... 3 Connecting the Mixer... 3 PGM Inputs 1-4 and Aux Input... 3 Mic Input... 3 Outputs... 3 Power Supply... 3 Program Controls... 4 INPUT... 4 GAIN... 4
Quick Guide. You must read the Usage and Safety Precautions before use.
 Quick Guide You must read the Usage and Safety Precautions before use. The Operation Manual can be downloaded from the ZOOM website (https://www.zoom.jp/docs/l-0). 018 ZOOM CORPORATION Copying or reprinting
1. Disclaimer Welcome to TRAKTOR KONTROL S Document Conventions Documentation Resources In this Document...
 Table of Contents 1. Disclaimer... 4 2. Welcome to TRAKTOR KONTROL S4... 5 2.1. Document Conventions... 5 2.2. Documentation Resources... 6 2.3. In this Document... 6 3. Concepts... 7 3.1. S4 and TRAKTOR
NOW EVEN BETTER THE BEST DJ CONTROLLER EVER BUILT 2015 NEW PRODUCTS FOUR-DECK SERATO DJ CONTROLLER WITH MULTI-SCREEN DISPLAY NUMARK.
 2015 NEW PRODUCTS THE BEST DJ CONTROLLER EVER BUILT NOW EVEN BETTER INCLUD ES FOUR-DECK SERATO DJ CONTROLLER WITH MULTI-SCREEN DISPLAY Integrated color displays provide real-time visual feedback of Serato
1. Disclaimer Welcome to TRAKTOR KONTROL S Document Conventions Documentation Resources In this Document...
 Table of Contents 1. Disclaimer... 1 2. Welcome to TRAKTOR KONTROL S4... 2 2.1. Document Conventions... 2 2.2. Documentation Resources... 3 2.3. In this Document... 3 3. Concepts... 4 3.1. S4 and TRAKTOR
PROFESSIONAL EIGHT-CHANNEL AUDIO MIXER WITH USB INTERFACE, BLUETOOTH, AND DSP SOUND EFFECTS AMX7323. eight
 PROFESSIONAL EIGHT-CHANNEL AUDIO MIXER WITH USB INTERFACE, BLUETOOTH, AND DSP SOUND EFFECTS AMX733 eight CONTENTS Warning...- Precautions.........3 Package Contents........ 4 Features...... 4 Functions
Quick Start Owner s Manual. Manual de inicio rápido del
 Professional CD Mixing Console Quick Start Owner s Manual BOX CONTENTS CDMIX3 CD MIXING STATION POWER ADAPTER Manual de inicio rápido del usuario(español) CONTENIDO DE LA CAJA ESTACIÓN DE MEZCLAS DE CD
Simply Silky-Smooth. Rane DJ Products - 2
 MP New! Simply Silky-Smooth The MP represents the perfect marriage of a high-quality rotary control-surface, with state-of-the-art digital signal processing and dual -channel USB sound cards. An essential
VirtualDJ 8 - User s Guide 1
 VirtualDJ 8 - User s Guide 1 Table of Contents A. BASIC FEATURES... 4 Top Section... 6 Application Controls & Info... 6 Waveform Display... 7 Deck Controls... 10 Track Info Display... 10 Basic Deck Controls...
MixVibes product line
 ULTRA-ACCURATE TIMECODED VINYLS AND CDS SPARE Control Vinyl Record MixVibes is based on a revolutionary and innovative technology to ensure that you experience the genuine vinyl feeling when mixing digital
Operation Manual. You must read the Usage and Safety Precautions before use ZOOM CORPORATION
 Operation Manual You must read the Usage and Safety Precautions before use. 2018 ZOOM CORPORATION Copying or reprinting this manual in part or in whole without permission is prohibited. Product names,
TRUE VINYL TURNTABLE TWELVE. Motorized Control. The ultimate in legacy vinyl control for digital DJs and turntablists.
 TWELVE TWELVE The ultimate in legacy vinyl control for digital DJs and turntablists. 12 acrylic, motorized platter 8 Hot Cue selector / Search strip Solid steel chassis With no tonearm or damaged/skipping
1. Disclaimer Welcome to TRAKTOR KONTROL S Document Conventions Documentation Resources In this Document...
 Table of Contents 1. Disclaimer... 1 2. Welcome to TRAKTOR KONTROL S2... 2 2.1. Document Conventions... 2 2.2. Documentation Resources... 3 2.3. In this Document... 3 3. Concepts... 4 3.1. Automatic Track
Startup Guide. Copyright 2016 ROLAND CORPORATION
 Startup Guide Before using this unit, carefully read USING THE UNIT SAFELY and IMPORTANT NOTES (leaflet USING THE UNIT SAFELY and Startup Guide (p. )). After reading, keep the document(s) where it will
OPERATIONS MANUAL PS-767 STEREO PREAMP MIXER
 OPERATIONS MANUAL PS-767 STEREO PREAMP MIXER Page 1 Page 2 INTRODUCTION Congratulations on purchasing a Gemini Platinum Series model PS-767 mixer. This state of the art mixer includes the latest features
DDJ-RZX. DJ controller. Operating Instructions.
 DJ controller DDJ-RZX http://pioneerdj.com/support/ http://rekordbox.com/ For FAQs and other support information for this product, visit the above site. Operating Instructions Contents How to read this
PXR 1506 / WATT MIXER AMPLIFIER
 PXR 1506 / 1508 150-WATT MIXER AMPLIFIER Operating Manual www.peavey.com ENGLISH PXR 1506 / 1508 150-Watt, 8-Channel Mixer Amplifier Designed with the latest Peavey technology, the PXR 1506 / 1508 powered
TWO COMPUTERS, TWO USB PORTS, FOUR DECKS AND A RANGE OF EFFECTS RANE SIXTY-EIGHT MIXER FOR SERATO SCRATCH LIVE OPERATOR S MANUAL 2.4.
 TWO COMPUTERS, TWO USB PORTS, FOUR DECKS AND A RANGE OF EFFECTS RANE SIXTY-EIGHT MIXER FOR SERATO SCRATCH LIVE OPERATOR S MANUAL.. Important Safety Instructions. Read these instructions.. Keep these instructions..
2. Box contents. - Hercules DJControl Instinct P8 - USB cable (type A male/type B male), length: 4.9 feet / 1.5 meters - Quick start guide
, length: 4.9 feet / 1.5 meters - Quick start guide") User manual 1. Overview 2. Box contents - Hercules DJControl Instinct P8 - USB cable (type A male/type B male), length: 4.9 feet / 1.5 meters - Quick start guide 3. Product specifications 3.1. Mechanical
User manual 1. Overview 2. Box contents - Hercules DJControl Instinct P8 - USB cable (type A male/type B male), length: 4.9 feet / 1.5 meters - Quick start guide 3. Product specifications 3.1. Mechanical
USO RESTRITO. Yamaha 01V96/Nuendo Setup and Control
 Yamaha 01V96/Nuendo Setup and Control The information in this document is subject to change without notice and does not represent a commitment on the part of Steinberg Media Technologies GmbH. The software
DDJ-WEGO4. DJ Controller. Operating Instructions.
 DJ Controller DDJ-WEGO4 http://pioneerdj.com/support/ http://rekordbox.com/ For FAQs and other support information for this product, visit the above site. Operating Instructions Contents How to read this
1xxxx SCRATCHLIVE TTM 57SL OPERATORS MANUAL 1.8.0
 1xxxx SCRATCHLIVE TTM 57SL OPERATORS MANUAL 1.8.0 Important Safety Instructions 1. Read these instructions. 2. Keep these instructions. 3. Heed all warnings. 4. Follow all instructions. 5. Do not use this
1. Disclaimer Welcome to TRAKTOR KONTROL S Document Conventions Documentation Resources In this Document...
 Table of Contents 1. Disclaimer... 4 2. Welcome to TRAKTOR KONTROL S2... 5 2.1. Document Conventions... 5 2.2. Documentation Resources... 6 2.3. In this Document... 6 3. Concepts... 7 3.1. About Automatic
DJ MIXER DJM-750MK2. Operating Instructions. pioneerdj.com/support/ rekordbox.com
 DJ MIXER DJM-750MK2 pioneerdj.com/support/ rekordbox.com For FAQs and other support information for this product, visit the above site. Operating Instructions Contents How to read this manual Thank you
TPM4200FX MKII V2 24- BIT EFFECTS PROCESSOR MAIN MID LOW FOOT SW FX RETURN FX SEND OUT. 12KHz. 2.5KHz USB PLAYER CH4 OFF COMP./LIM.
 .5KHz TPM400FX MKII V KHz MID LOW 80Hz CH4 OFF COMP./LIM. 88 FOOT SW PHANTOM FX RETURN FX SEND MAIN 4- BIT EFFECTS PROCESSOR MAIN OUT MONITOR OUT 9 . INTRODUCTION...4. FEATURES...4. USEFULL DATA...4 4.CONTROL
TRAKTOR DJ Studio 2 Quick Reference. Welcome... The TRAKTOR Panels
 Welcome... TRAKTOR DJ Studio 2 Quick Reference...to TRAKTOR DJ Studio 2, the latest and most advanced version of the software that changed the way DJs think about computers. We ve introduced a number of
] GUIDE D UTILISATION (FRANÇAIS) ::::: ] MANUALE DI RIFERIMENTO (ITALIANO) ::::: ] BEDIENUNGSANLEITUNG (DEUTSCH) :::::
![] GUIDE D UTILISATION (FRANÇAIS) ::::: ] MANUALE DI RIFERIMENTO (ITALIANO) ::::: ] BEDIENUNGSANLEITUNG (DEUTSCH) :::::](/thumbs/90/101370781.jpg "] GUIDE D UTILISATION (FRANÇAIS) ::::: ] MANUALE DI RIFERIMENTO (ITALIANO) ::::: ] BEDIENUNGSANLEITUNG (DEUTSCH) :::::") ] REFERENCE MANUAL (ENGLISH) ::::: 2 42 ] MANUAL DE REFERENCIA (ESPAÑOL) ::::: 43 85 ] GUIDE D UTILISATION (FRANÇAIS) ::::: 86 136 ] MANUALE DI RIFERIMENTO (ITALIANO) ::::: 137 179 ] BEDIENUNGSANLEITUNG
] REFERENCE MANUAL (ENGLISH) ::::: 2 42 ] MANUAL DE REFERENCIA (ESPAÑOL) ::::: 43 85 ] GUIDE D UTILISATION (FRANÇAIS) ::::: 86 136 ] MANUALE DI RIFERIMENTO (ITALIANO) ::::: 137 179 ] BEDIENUNGSANLEITUNG
Fast Track C600 User Guide
 Fast Track C600 User Guide Legal Notices This guide is copyrighted 2011 by Avid Technology, Inc., with all rights reserved. Under copyright laws, this guide may not be duplicated in whole or in part without
PIONEER STRIKES GOLD WITH LIMITED EDITION DIGITAL DJ-SX GOLD MODEL
 For Immediate Release Publicist PR Consultants T: 6220 4082 / 9835 1082 PIONEER STRIKES GOLD WITH LIMITED EDITION DIGITAL DJ-SX GOLD MODEL SINGAPORE 1 st November 2013 Pioneer DJ's flagship Serato controller
DJ controller DDJ-RX. Operating Instructions
 DJ controller DDJ-RX http://pioneerdj.com/support/ The Pioneer DJ site shown above offers FAQs, information on software and various other types of information and services to allow you to use your product
TTM 57SL -- OPERATOR S MANUAL
 TTM 57SL -- OPERATOR S MANUAL 1.8.1 1.8.2 1 2 TTM 57SL - OPERATOR S MANUAL 1.8.2 Important Safety Instructions 1. Read these instructions. 2. Keep these instructions. 3. Heed all warnings. 4. Follow all
DA-3700 Digital Karaoke Mixing Amplifier with Key Control
 DA-3700 MIC 1 MIC 2 ECHO ST MONO VOL LOW HIGH REPEAT DELAY -15 +15 0 10-15 +15 0 10 0 10 Digital Karaoke Mixing Amplifier with Key Control OWNER S MANUAL ST MONO VOL LOW HIGH 0 10-15 +15-15 +15 REPEAT
2010 NEW PRODUCT GUIDE
 2010 NEW PRODUCT GUIDE NS7FX MOTORIZED DJ-SOFTWARE PERFORMANCE CONTROLLER WITH FX + SERATO ITCH High-resolution digital DJ controller with effects, built for Serato ITCH and compatible with Scratch LIVE
PCDJ Red Mobile M a n u a l
 PCDJ Red Mobile M a n u a l PCDJ Red Mobile Version: 1.0 #7134 Latest Update to this document: September 10, 2009 Website: http://www.pcdj.com 1 1 - Contents 1 - Contents... 2 2 - Introduction... 3 3 -
Contents. Introduction. Pioneer DJM-900nexus. TRAKTOR SCRATCH 2 Connection Guide
 Pioneer DJM-900nexus TRAKTOR SCRATCH 2 Connection Guide Contents Introduction............................................................ 1 Using the scratch control function with analog players...........................
and close the various Traktor Panels. Setup: click on the setup icon to open the setup dialog. Close: clicking this icon will close TRAKTOR DJ Studio.
 Welcome... TRAKTOR DJ Studio 2 Quick Reference...to TRAKTOR DJ Studio 2, the latest and most advanced version of the software that changed the way DJs think about computers. We ve introduced a number of
CB Electronics TMC1-Penta Monitor Remote. Use with the TMC-1Guide Version 4.0
 CB Electronics TMC1-Penta Monitor Remote Use with the TMC-1Guide Version 4.0 2016 CB Electronics 1 Version 4.0 Contents TMC1-Penta Monitor Controller Contents... 2 NTP Penta/DAD AX32... 5 TMC-1-Penta User
RANE TTM 57SL MIXER FOR SERATO SCRATCH LIVE OPERATOR S MANUAL 2.5.0
 RANE TTM 57SL MIXER FOR SERATO SCRATCH LIVE OPERATOR S MANUAL 2.5.0 Important Safety Instructions 1. Read these instructions. 2. Keep these instructions. 3. Heed all warnings. 4. Follow all instructions.
KARMIX PROFESSIONAL MIXER FOR LAPTOP KARAOKE. Overview
 Overview Karmix is an Audio mixer designed for Karaoke systems run on Computer. Karmix is powered by USB and controlled by Software, with Hands on volume faders for Vocal Mix, Reverb Effect, Music, and
TOA ELECTRIC CO., LTD.
 Operating Instruction Manual TOA MIXING CONSOLE Model RX-31C TOA ELECTRIC CO., LTD. KOBE, JAPAN Contents General Description...2 Features...2 Front Panel...3 Rear Panel...4 Rack Mounting Instructions...5
201-USB Play mixer. user manual
 201-USB Play mixer user manual Musikhaus Thomann Thomann GmbH Hans-Thomann-Straße 1 96138 Burgebrach Germany Telephone: +49 (0) 9546 9223-0 E-mail: info@thomann.de Internet: www.thomann.de 19.09.2018,
CONTENTS 1. INTRODUCTION MINIMUM SYSTEM REQUIREMENTS INSTALLATION First installation Connecting and disconnecting
 CONTENTS 1. INTRODUCTION... 2 2. MINIMUM SYSTEM REQUIREMENTS... 3 3. INSTALLATION... 3 3.1. First installation... 3 3.2. Connecting and disconnecting your DJ Console Rmx... 5 3.3. Power consumption...
DJ-dedicated MIDI controller to play and mix files
 DJ-dedicated MIDI controller to play and mix files USER GUIDE 9822 - Version 1 / 10-2010 English VIRTUALITY-Skill - DJ-dedicated MIDI controller Page 2 VIRTUALITY-Skill - DJ-dedicated MIDI controller English
GETTING STARTED WITH DJCONTROL COMPACT AND DJUCED 18
 GETTING STARTED WITH DJCONTROL COMPACT AND DJUCED 18 INSTALLATION Connect the DJControl Compact to your computer Install the DJUCED 18 software Launch the DJUCED 18 software More information (forums, tutorials,
Quick Start Owner s Manual. Manual de inicio rápido para el usuario (ESPAÑOL) Kurzbedienungsanleitung (DEUTSCH)
 Kurzbedienungsanleitung (DEUTSCH)") Quick Start Owner s Manual BOX CONTENTS POWER SUPPLY (2) ipod DOCKING ADAPTERS Manual de inicio rápido para el usuario (ESPAÑOL) CONTENIDO DE LA CAJA FUENTE DE ALIMENTACIÓN (2) ADAPTADOERS DE ACOPLAMIENTO
Quick Start Owner s Manual BOX CONTENTS POWER SUPPLY (2) ipod DOCKING ADAPTERS Manual de inicio rápido para el usuario (ESPAÑOL) CONTENIDO DE LA CAJA FUENTE DE ALIMENTACIÓN (2) ADAPTADOERS DE ACOPLAMIENTO
rekordbox TM rekordbox dvs Setup Guide
 rekordbox TM rekordbox dvs Setup Guide Table of Contents 1 Before Start... 1 1.1 Prior to use... 1 1.2 Overview of rekordbox dvs... 1 1.3 Required equipment... 2 1.4 System requirements... 3 2 Preparing
KeyStudio 49i. English. User Guide
 KeyStudio 49i English User Guide KeyStudio Table of 49i Contents User Guide 1 Introduction. 3 About this User Guide. 3 KeyStudio 49i Features. 4 Minimum System Requirements. 5 Standalone. 5 Bus-Powered.
Yamaha DM1000/Nuendo Setup and Control
 Yamaha DM1000/Nuendo Setup and Control The information in this document is subject to change without notice and does not represent a commitment on the part of Steinberg Media Technologies GmbH. The software
1 - TM-D1000 Operations Manual
 1 - TM-D1000 Operations Manual Congratulations on your purchase of the TM-D1000. This high-quality digital mixing console allows you to produce crystal-clear multitrack recordings and to mix them to a
Apogee Quartet. QuickStart Guide
 Apogee Quartet QuickStart Guide V1, September, 2012 Contents Overview! 3 Introduction! 3 Package contents! 4 Quartet panel tour! 5 Display and touchpad tour! 7 Connecting to your Mac! 8 Adjusting Input
Waves GTR3 ToolRack Manual
 Waves GTR3 ToolRack Manual Waves GTR ToolRack Manual 1 TABLE OF CONTENTS CHAPTER 1 INTRODUCTION...3 1.1 WELCOME...3 1.2 PRODUCT OVERVIEW...3 1.3 COMPONENTS...4 1.4 AUTOMATION...4 MIDI Automation...4 CHAPTER
CalArts Film/Video Sound Quick Start for Sound Devices 744T Time Code Hard Drive Field Recorder:
 CalArts Film/Video Sound Quick Start for Sound Devices 744T Time Code Hard Drive Field Recorder: Front Panel Descriptions 1) Digital Input LEDs! Indicates the presence of digital signal on the respective
Introduction. Introduction
 DJ Rig User Manual Introduction Introduction Thank you for purchasing DJ Rig. This manual covers all the product features in detail. Please read it carefully to get maximum results. You can also take a
Check the contents of the package
 Read this first! UA-4FX Owner s Manual Copyright 2005 ROLAND CORPORATION All rights reserved. No part of this publication may be reproduced in any form without the written permission of ROLAND CORPORATION.
Sono 61. English User Guide
 Sono 61 English User Guide 1 Introduction.............................................................. 3 ProKeys Sono 61 Features............................................... 4 What s in the Box?.......................................................
BOX CONTENTS REGISTRATION QUICK SETUP CONNECTION DIAGRAM POWER HOUSE AMP MIXER
 QUICKSTART GUIDE BOX CONTENTS MP10USB Power cable Stereo RCA cable Quickstart Guide Safety & Warranty Information Booklet REGISTRATION Please go to http://www.numark.com to register your MP10USB. Registering
DJM-450 DJ MIXER. Operating Instructions.
 DJ MIXER DJM-450 http://pioneerdj.com/support/ http://rekordbox.com/ The Pioneer DJ site shown above offers FAQs, information on software, and various other types of information and services to allow you
Connecting the SI-24 to the VS-2400CD for Expanded Operation
 Connecting the SI-24 to the VS-2400CD for Expanded Operation When the SI-24 is used in tandem with the VS-2400CD, it becomes a powerful expander with 8 additional analog preamps and faders, switches &
Setting Up the US-428 to Work with MOTU Digital Performer
 Setting Up the US-428 to Work with MOTU Digital Performer The US-428 is supported in Digital Performer v2.7 and later. Before setting up the US-428 to work with Digital Performer, please install the US-428
Versa Mix. User Guide and Reference Manual Charter Street Los Angeles Ca /07
 Versa Mix User Guide and Reference Manual 2/07 4295 Charter Street Los Angeles Ca. 90058 www.americanaudio.us Introduction Congratulations and thank you for purchasing the American Audio Versa Mix. Versa
Rear Panel RockOnRoller
 Getting Connected The Karaoke RockOnRoller is an all-in-one karaoke solution, there were no additional connections required to use the system. The additional connections that can be made are the AV Output
PCMX265B PORTABLE SOUND SYSTEM FOR USB AND SD CARD.
 PCMX265B PORTABLE SOUND SYSTEM FOR USB AND SD CARD USER'S MANUAL www.pyleaudio.com 110-T750mAL 250V 100-120V-60Hz 20W 230-T315mAL 250V 220-240V-50Hz 20W QUICK SETUP GUIDE 1. Make sure all items listed
Professional 24-bit USB Audio Interface. User s Guide
 Professional 24-bit USB Audio Interface User s Guide - Copyright 2016-2017 Revision 2, May 2017 www.esi-audio.com INDEX 1. Introduction... 4 1.1 Features... 4 2. Installation... 7 2.1 System Recommendation...
USER GUIDE. Publication AP7820. Allen & Heath User Guide for XONE:DX with Serato ITCH 1.6 1
 USER GUIDE Publication AP7820 Allen & Heath User Guide for XONE:DX with Serato ITCH 1.6 1 Limited One Year Warranty This product is warranted to be free from defects in materials or workmanship for period
DDJ-XP1. DJ Controller. Operating Instructions. pioneerdj.com/support/
 DJ Controller DDJ-XP1 pioneerdj.com/support/ rekordbox.com The Pioneer DJ site shown above offers FAQs, information on software, and various other types of information and services to allow you to use
The Engineers. Quick Start Guide
 The Engineers Quick Start Guide Powered by 16 XLR Outputs, individually assignable to any mix bus or direct output 32 MIDAS Designed Programmable Mic Preamps with individually selectable phantom power