FUSION MS-RA55 ENGLISH
|
|
|
- Jonah McKinney
- 5 years ago
- Views:
Transcription

1 FUSION MS-RA55 MARINE ENTERTAINMENT SYSTEM OWNER S MANUAL ENGLISH FUSIONENTERTAINMENT.COM
2 2016 Garmin Ltd. or its subsidiaries All rights reserved. Under the copyright laws, this manual may not be copied, in whole or in part, without the written consent of Garmin. Garmin reserves the right to change or improve its products and to make changes in the content of this manual without obligation to notify any person or organization of such changes or improvements. Go to for current updates and supplemental information concerning the use of this product. Garmin, the Garmin logo, FUSION, and the Fusion logo are trademarks of Garmin Ltd. or its subsidiaries, registered in the USA and other countries. These trademarks may not be used without the express permission of Garmin. Bluetooth word mark and logos are owned by the Bluetooth SIG, Inc. and any use of such marks by Garmin is under license. Other trademarks and trade names are those of their respective owners.


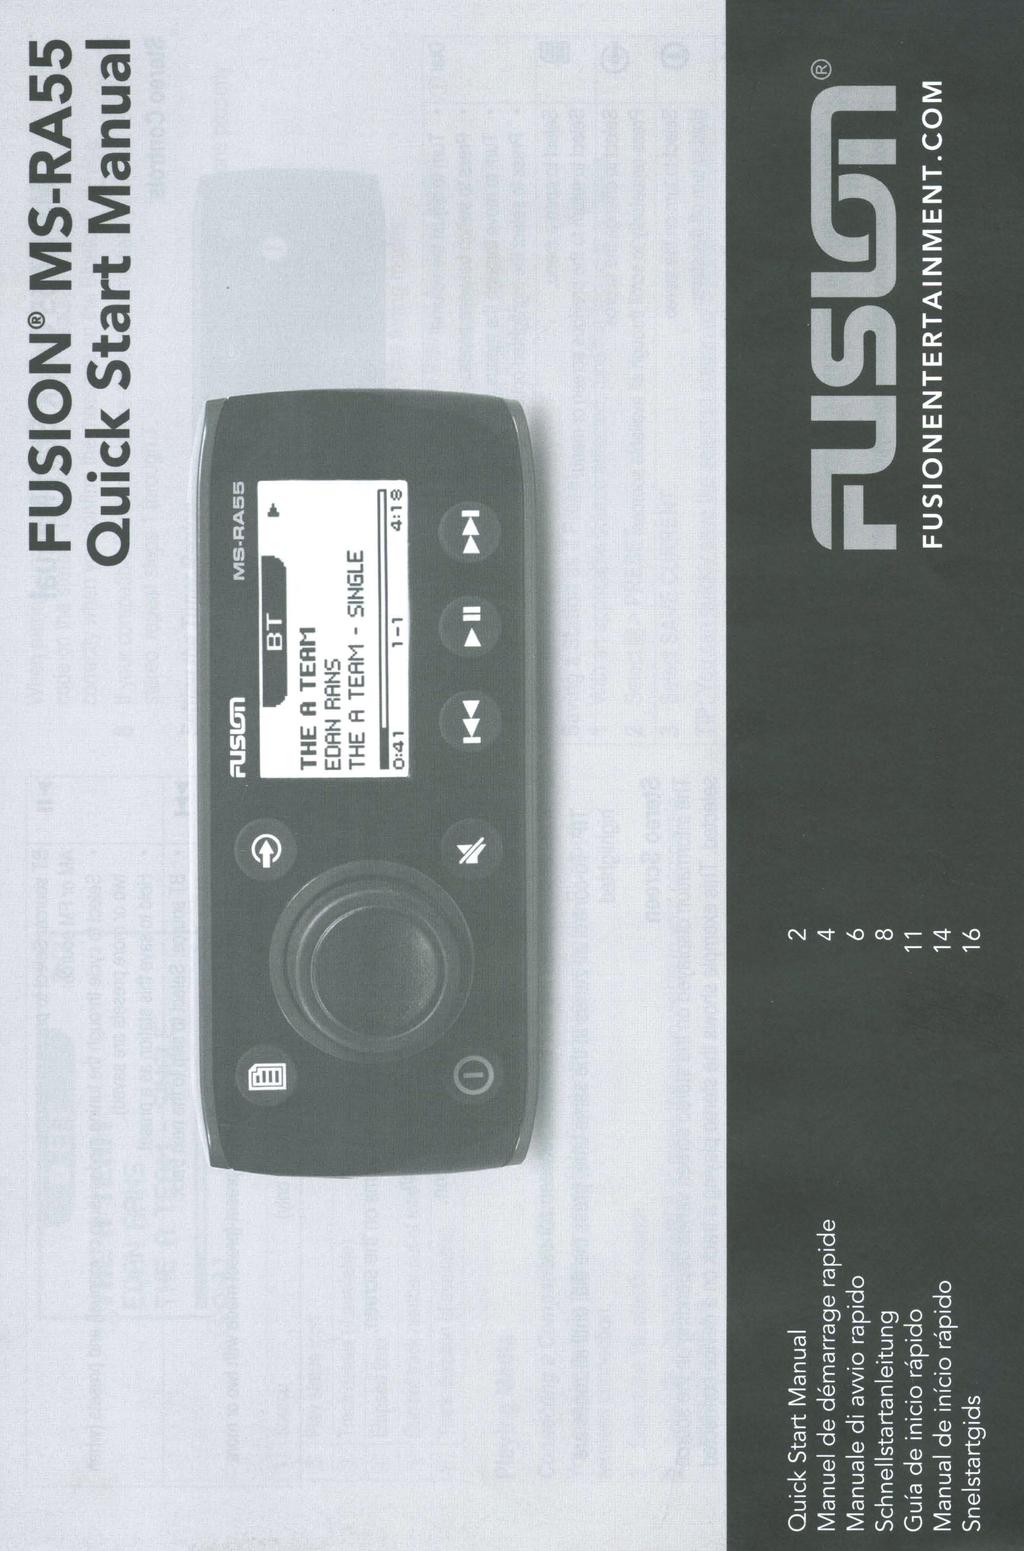
3 Getting Started WARNING See the Important Safety and Product Information guide in the product box for product warnings and other important information. Stereo Controls Dial À Turn to adjust the volume. Press to switch between zones to control the volume. Turn to move through the menus or adjust a setting. Press to select the highlighted option. Select to open a menu. Select to return to the previous screen or menu. Select to change the source (AM, FM, BT, or AUX). Press repeatedly to scroll through the available sources. Select to turn on the stereo. Press and hold to turn off the stereo. Select to mute and un-mute the stereo. BT source: Select to skip to the previous track. AM or FM source: Select to tune to the previous station or preset (preset mode with two or more presets saved). Press and hold for faster tuning (manual mode only). BT source: Select to pause or resume. AM or FM source: Select to cycle through the tuning modes (auto or manual) and presets (when two or more presets are saved). Press and hold to save this station as a preset. BT source: Select to skip to the next track. AM or FM source: Select to tune to the next station or preset (preset mode with two or more presets saved). Press and hold for faster tuning (manual mode only). Using the Dial to Select Items You can use the dial to highlight and select items on the screen. Turn the dial to highlight an item on the screen. Press the dial to select the highlighted option. Adjusting the Volume 1 Use the dial to adjust the volume. 2 If necessary, press the dial to switch between zones. TIP: To control all zones at the same time, press the dial until all zones are highlighted. Entering Text You can enter text to change some settings values on this device, such as changing the name of the device. 1 Use the dial to choose a letter, and press the dial to select it. 2 If necessary, select to erase a character. 3 Add additional letters to finish entering the text. 4 Select to save the new text. Adjusting the Backlight Brightness and Contrast 1 Select > SETTINGS > LCD. 2 Press the dial to select brightness or contrast. 3 Adjust the brightness or contrast. Getting Started 4 Select to exit the menu. Stereo Screen The information displayed on the stereo screen varies depending on the source selected. This example shows the stereo playing a track on a device connected using Bluetooth wireless technology. À Á Â Ã Ä Å Source Play status icon Track details (if available) Elapsed time Current track number out of total number of tracks in the playlist (if available) Track duration (if available) Connecting an Auxiliary Device You can connect various auxiliary devices to the stereo, such as TVs, DVD players, game consoles, and media players. These devices have either RCA connectors, a line output, or a headphone output jack. 1 Locate the auxiliary connectors on the wiring harness. 2 If necessary, connect an RCA-to-3.5 mm adapter cable to the auxiliary device. 3 Connect the auxiliary device to the RCA connectors on the wiring harness. Bluetooth Device Playback You can control the playback using the stereo, but you cannot browse the music collection. You should select a song or playlist on the media device. The availability of song information, such as song title, artist name, and track duration, depends on the capability of the media player and music application. The shuffle and repeat status icons are not supported over Bluetooth wireless technology. Connecting a Compatible Bluetooth Device You can play media from a compatible Bluetooth device using the Bluetooth wireless connection. 1 Select the Bluetooth source. 2 Select > DISCOVERABLE to make the stereo visible to your compatible Bluetooth device. 3 Enable Bluetooth on your compatible Bluetooth device. 4 Bring the compatible Bluetooth device within 10 m (33 ft.) of the stereo. 5 On your compatible Bluetooth device, search for Bluetooth devices. 6 On your compatible Bluetooth device, select the RA55 stereo from the list of detected devices. 7 On your compatible Bluetooth device, follow the on-screen instructions to pair and connect to the discovered stereo. When pairing, your compatible Bluetooth device may ask you to confirm a code on the stereo. The stereo does not display a code, but it does connect correctly when you confirm the message on the Bluetooth device. 1
4 8 If your compatible Bluetooth device does not immediately connect to the stereo, repeat steps 1 through 7. Bluetooth Range Information The stereo and Bluetooth wireless devices have a range of 10 m (33 ft.). For optimal performance, the Bluetooth wireless device should also have a clear line of sight to the stereo. Bluetooth Source Settings With the BLUETOOTH source selected, select. DISCOVERABLE: Allows the stereo to be visible to Bluetooth devices. This setting turns off automatically after two minutes to prevent possible interruption to audio after pairing a Bluetooth device to the stereo. Radio To listen to AM or FM radio, you must have a suitable marine AM/FM antenna properly connected to the stereo and be within range of a broadcasting station. For instructions on connecting an AM/FM antenna, see the stereo installation instructions. Setting the Tuner Region You must select the region you are in to receive AM and FM stations properly. 1 Select > SETTINGS > TUNER REGION. 2 Select the region you are in. Changing the Radio Station 1 Select an applicable source, such as FM. 2 Select repeatedly to move through the tuning modes: Select AUTO to scan and stop on the next available station. Select MANUAL to select a station manually. Select PRESETS to select a saved station preset. 3 Select or to tune to the station. Presets You can save your favorite AM stations and FM stations as presets for easy access. Saving a Station as a Preset 1 With an applicable source selected, tune the stereo to a station. 2 Select > PRESETS. 3 Select SAVE CURRENT. TIP: You can quickly save the selected station as a preset by holding. Selecting a Preset from a List Before you can select a preset from a list, you must save at least one station as a preset. 1 Select the applicable source. 2 Select > PRESETS. 3 Select a preset from the list. Removing Presets 1 With an applicable source selected, select > PRESETS > REMOVE PRESET. 2 Select an option: To remove one preset, select the preset. To remote all presets, select REMOVE ALL PRESETS. General Settings Select > SETTINGS. NOTE: When an option button is filled, the option is on. When the option button is clear, the option is off. ZONE: Enables you to set the balance, volume limit, and names of the speaker zones. ZONE > TONE: Adjusts the bass and treble tones. LCD: Adjusts the backlight brightness and contrast settings (Adjusting the Backlight Brightness and Contrast, page 1). LANGUAGE: Sets the language on the device. POWER SAVE: Disables the LCD backlight after one minute of inactivity to save battery power. TUNER REGION: Sets the region used by FM and AM. SET DEVICE NAME: Sets the name for this stereo (Entering Text, page 1). ABOUT: Shows the software version for the stereo. Appendix Registering Your FUSION MS-RA55 Help us better support you by completing our online registration today. Go to Keep the original sales receipt, or a photocopy, in a safe place. Cleaning the Device 1 Dampen a soft, clean, lint-free cloth with fresh water. 2 Gently wipe the device. Troubleshooting The stereo does not respond to key presses Turn off power to the stereo for two minutes to reset the stereo. My Bluetooth audio is interrupted by short breaks Ensure the media player is not covered or obstructed. Bluetooth technology performs best with line-of-sight operation. Bring the media player within 10 m (33 ft.) of the stereo. Turn off the DISCOVERABLE setting after pairing a Bluetooth device to the stereo. The stereo does not display all song information from my Bluetooth source The availability of song information, such as song title, artist name, and track duration, depends on the capability of the media player and music application. Album cover artwork and shuffle and repeat status icons are not supported by this stereo on Bluetooth technology. Reducing Unexpected Noise If the stereo is subject to strong electrical interference, this interference might be heard through the speakers. You should take appropriate action to suppress or reduce the noise. Add clip-on ferrite beads to the cables connected directly to the product. Add clip-on ferrite beads to the device in the vessel that is causing the interference. Disconnect the AUX input cable from the RCA connector when it is not used. 2 Radio
5 For additional information, go to and contact Tech Support. Specifications General Weight Water resistance Operating temperature range Storage temperature range Input voltage Fuse Current (max.) Current (muted) Current (standby) Compass-safe distance On-board, Class AB Amplifier Output music power per channel Total output music power 556 g (19.6 oz.) IEC IPX5 From 0 to 50 C (from 32 to 122 F) From -20 to 70 C (from -4 to 158 F) From 10.8 to 16 Vdc 15 A 15 A Less than 350 ma Less than 5 ma 15 cm (5.9 in.) 45 W max. x 4 channels at 4 Ohms per channel 180 W max. À 32 mm (1.25 in.) Á 52 mm (2 in.) Â 50 mm (2 in.) Top Dimensions À 130 mm (5.1 in.) Á 32 mm (1.25 in.) Â 20 mm (0.8 in.) Tuner FM radio frequency range FM frequency step AM radio frequency range AM frequency step Europe and Australasia From 87.5 to 108 MHz USA From 87.5 to MHz Japan From 76 to 95 MHz 50 khz 200 khz 50 khz From 522 to 1620 khz From 530 to 1710 khz 9 khz 10 khz 9 khz From 522 to 1620 khz Stereo Dimension Drawings Front Dimensions À Á 160 mm (6.3 in.) 71.5 mm (2.8 in.) Side Dimensions Appendix 3
6 FUSION SUPPORT New Zealand Australia Europe +44 (0) USA Pacific FUSIONENTERTAINMENT.COM November 2016 Printed in Thailand _0A
7
8
9
10
11
12
13 MS-RA55 Installation Instructions Important Safety Information WARNING Failure to follow these warnings and cautions could result in personal injury, damage to the vessel, or poor product performance. See the Important Safety and Product Information guide in the product box for product warnings and other important information. This device must be installed according to these instructions. Disconnect the vessel's power supply before beginning to install this product. Before applying power to this product, make sure it has been correctly grounded, following the instructions in the guide. CAUTION Always wear safety goggles, ear protection, and a dust mask when drilling, cutting, or sanding. NOTICE When drilling or cutting, always check what is on the opposite side of the surface. You must read all installation instructions before beginning the installation. If you experience difficulty during the installation, contact FUSION Product Support. What's In the Box Mounting gasket Four 6-gauge, self-tapping screws Power and speaker wiring harness Two screw covers Tools Needed Phillips screwdriver Electric drill Drill bit (size varies based on surface material and screws used) Rotary cutting tool or jigsaw Marine sealant (optional) Mounting Considerations The stereo must be mounted on a flat surface. The stereo must be mounted in a location that allows open airflow around the rear of the stereo for heat ventilation. If you are installing the stereo in a location that may be exposed to water, it must be mounted within 45 degrees of the horizontal plane. If you are installing the stereo in a location that may be exposed to water, the cable should have a drip loop to allow water to drip down off the cable and avoid damage to the stereo. If you need to mount the stereo outside a boat, it must be mounted in a location far above the waterline, where it is not submerged. If you need to mount the stereo outside a boat, it should be mounted in a location where it cannot be damaged by docks, pilings, or other pieces of equipment. To avoid interference with a magnetic compass, the stereo should be installed at least 15 cm (5.9 in.) away from a compass. Mounting the Stereo NOTICE Be careful when cutting the hole to mount the stereo. There is only a small amount of clearance between the case and the mounting holes, and cutting the hole too large could compromise the stability of the stereo after it is mounted. Be careful when installing the stereo in an aluminum boat or a boat with a conductive hull, if you require the electrical system to be isolated from the boat hull. Before you can mount the stereo in a new location on the mounting surface, you must select a location in accordance with the mounting considerations. 1 Trim the template and make sure it fits at the mounting location. 2 Adhere the template to the mounting surface. 3 Using a drill bit appropriate for the mounting surface, drill a hole inside the corner of the dashed line on the template to prepare the mounting surface for cutting. 4 Using a rotary-cutting tool, cut the mounting surface along the inside of the dashed line on the template. 5 Place the stereo in the cutout to test the fit. 6 If necessary, use a file and sandpaper to refine the size of the cutout. 7 After the stereo fits correctly in the cutout, ensure the mounting holes on the stereo line up with the pilot holes on the template. 8 If the mounting holes on the stereo do not line up, mark the new pilot-hole locations. 9 Using an appropriately sized drill bit for the mounting surface and screw type, drill the pilot holes. 10Remove the template from the mounting surface. 11Make the necessary wiring connections (Connections, page 2). 12Place the mounting gasket on the back of the stereo À. 13Place the stereo in the cutout. 14Secure the stereo to the mounting surface using the included screws Á. 15Snap the screw covers in place Â. November 2016 Printed in Thailand _0A
14 Connections The stereo must be connected to power, to speakers, and to media input sources to function correctly. You should carefully plan the layout of the stereo, speakers, and your input sources before making any connections. Wiring Harness Wire and Connector Identification Wire Function Speaker zone 2 left (+) Speaker zone 2 left (-) Speaker zone 2 right (+) Speaker zone 2 right (-) Wire Color/ Number Green Green/black Purple Purple/black Notes Fuse à Contains the 15 A fuse. Connecting to Power When connecting the stereo to power, you should connect it through the ignition or another manual switch. If it is necessary to extend the power and ground wires, use 14 AWG (2.08 mm 2 ) wire. For extensions longer than 1 m (3 ft.), use 12 AWG (3.31 mm 2 ) wire. 1 Route the power wire À to the ignition or another manual switch Á, and route the black ground wire  to the battery. Wire Function Wire Color/ Number Notes Antenna À Connects the stereo to a typical AM/FM antenna using an RF coaxial connector. If you are installing the stereo on a boat with a metal hull, you must use a ground-dependent antenna, and if you are installing the stereo on a boat with a non-metal hull, you must use a ground-independent antenna. See the installation instructions provided with your antenna for more information. Á Auxiliary in left Auxiliary in right Zone 1 line out (left) Zone 1 line out (right) Power (+)  Red (yellow on some wire harnesses) Provides a red and white RCA stereo line input for audio sources, such as a CD or MP3 player. Provides a full-range output to an external amplifier, and is associated with the volume and tone for zone 1. Connects to the positive terminal of a 12 Vdc power source capable of supplying 15 A. Ground (-) Black Connects to the negative terminal of a 12 Vdc power source. This wire should be connected before connecting the yellow wire. All accessories connected to the stereo must share a common ground location. Amplifier on Blue Connects to an optional external amplifier to turn it on when the stereo turns on. Dim Orange Connects to the boat's illumination wire to dim the stereo screen when the lights are on. The gauge of the illumination wire must be suitable for the fuse supplying the circuit it is connected to. Speaker zone 1 left (+) Speaker zone 1 left (-) Speaker zone 1 right (+) Speaker zone 1 right (-) White White/black Gray Gray/black 2 If necessary, route a wire à between the switch and the battery. 3 Route the wiring-harness plug to the stereo. Do not connect the wiring harness to the stereo until after all of the bare wire connections have been made. 4 Connect the black wire to the negative (-) battery terminal. 5 Connect the power wire to the ignition or another manual switch, and connect the switch to the positive (+) battery terminal if necessary. 6 Connect the wiring harness plug to the stereo. Single-Zone System Wiring Diagram À Á Speakers Water-tight connection 2 FUSION MS-RA55 Installation Instructions
15 Complete System Wiring Stereo Dimension Drawings Front Dimensions À Á 160 mm (6.3 in.) 71.5 mm (2.8 in.) Side Dimensions Item À Á Â Ã Ä Å Æ Ç Description Zone 2 speakers Water-tight connection Zone 1 speakers Amplifier-on signal wire Powered amplifier Zone 1 line out Line in cable Auxiliary line in device Stereo Information Specifications General Weight Water resistance Operating temperature range Storage temperature range Input voltage Fuse Current (max.) Current (muted) Current (standby) Compass-safe distance On-board, Class AB Amplifier Output music power per channel Total output music power Tuner FM radio frequency range FM frequency step AM radio frequency range AM frequency step Europe and Australasia From 87.5 to 108 MHz 556 g (19.6 oz.) IEC IPX5 From 0 to 50 C (from 32 to 122 F) From -20 to 70 C (from -4 to 158 F) From 10.8 to 16 Vdc 15 A 15 A Less than 350 ma Less than 5 ma 15 cm (5.9 in.) 45 W max. x 4 channels at 4 Ohms per channel 180 W max. USA From 87.5 to MHz Japan From 76 to 95 MHz 50 khz 200 khz 50 khz From 522 to 1620 khz From 530 to 1710 khz 9 khz 10 khz 9 khz From 522 to 1620 khz À Á Â 32 mm (1.25 in.) 52 mm (2 in.) 50 mm (2 in.) Top Dimensions À Á Â 130 mm (5.1 in.) 32 mm (1.25 in.) 20 mm (0.8 in.) Reducing Unexpected Noise If the stereo is subject to strong electrical interference, this interference might be heard through the speakers. You should take appropriate action to suppress or reduce the noise. Add clip-on ferrite beads to the cables connected directly to the product. Add clip-on ferrite beads to the device in the vessel that is causing the interference. Disconnect the AUX input cable from the RCA connector when it is not used. For additional information, go to and contact Tech Support. Cleaning the Device 1 Dampen a soft, clean, lint-free cloth with fresh water. 2 Gently wipe the device. Registering Your FUSION MS-RA55 Help us better support you by completing our online registration today. Go to FUSION MS-RA55 Installation Instructions 3
16 Keep the original sales receipt, or a photocopy, in a safe place Garmin Ltd. or its subsidiaries Garmin, the Garmin logo, FUSION, and the Fusion logo are trademarks of Garmin Ltd. or its subsidiaries, registered in the USA and other countries. These trademarks may not be used without the express permission of Garmin. Bluetooth word mark and logos are owned by the Bluetooth SIG, Inc. and any use of such marks by Garmin is under license. Other trademarks and trade names are those of their respective owners Garmin Ltd. or its subsidiaries
17
18
19
20
21
FUSION MS-RA70/MS-RA70N Installation Instructions
 FUSION MS-RA70/MS-RA70N Installation Instructions Important Safety Information WARNING Failure to follow these warnings and cautions could result in personal injury, damage to the vessel, or poor product
FUSION MS-BB100 B L A C K B O X E N T E R T A I N M E N T S Y S T E M O W N E R S M A N U A L ENGLISH
 FUSION MS-BB100 B L A C K B O X E N T E R T A I N M E N T S Y S T E M O W N E R S M A N U A L ENGLISH FUSIONENTERTAINMENT.COM 2015 2016 Garmin Ltd. or its subsidiaries All rights reserved. Under the copyright
FUSION Apollo SRX400 O W N E R S M A N U A L ENGLISH
 FUSION Apollo SRX400 O W N E R S M A N U A L ENGLISH FUSIONENTERTAINMENT.COM 2018 Garmin Ltd. or its subsidiaries All rights reserved. Under the copyright laws, this manual may not be copied, in whole
FUSION MS-RA70/MS-RA70N
 FUSION MS-RA70/MS-RA70N M A R I N E E N T E R T A I N M E N T S Y S T E M O W N E R S M A N U A L ENGLISH FUSIONENTERTAINMENT.COM 2015 2016 Garmin Ltd. or its subsidiaries All rights reserved. Under the
FUSION MS-UD/AV650/755 Installation Instructions
 FUSION MS-UD/AV650/755 Installation Instructions Important Safety Information WARNING Failure to follow these warnings and cautions could result in personal injury, damage to the vessel, or poor product
FUSION MS-UD/AV650/755 Installation Instructions
 FUSION MS-UD/AV650/755 Installation Instructions Important Safety Information WARNING Failure to follow these warnings and cautions could result in personal injury, damage to the vessel, or poor product
FUSION MS-NRX300 ENGLISH
 FUSION MS-NRX300 MARINE WIRED REMOTE OWNER S MANUAL ENGLISH FUSIONENTERTAINMENT.COM 2016 2017 Garmin Ltd. or its subsidiaries All rights reserved. Under the copyright laws, this manual may not be copied,
FUSION Apollo MS-SRX400
 FUSION Apollo MS-SRX400 O W N E R S M A N U A L ENGLISH FUSIONENTERTAINMENT.COM 2018 Garmin Ltd. or its subsidiaries All rights reserved. Under the copyright laws, this manual may not be copied, in whole
Apollo RA770 Installation Instructions
 Apollo RA770 Installation Instructions Important Safety Information WARNING Failure to follow these warnings and cautions could result in personal injury, damage to the vessel, or poor product performance.
FUSION MS-RA70NSX O W N E R S M A N U A L ENGLISH
 FUSION MS-RA70NSX O W N E R S M A N U A L ENGLISH FUSIONENTERTAINMENT.COM 2018 Garmin Ltd. or its subsidiaries All rights reserved. Under the copyright laws, this manual may not be copied, in whole or
MARINE HEADUNIT MS-RA50
 MARINE HEADUNIT MS-RA50 USER INTERFACE AND CONTROLS LICENSING CONTROL PANEL LAYOUT Apple, the Apple logo, ipod and itunes are trademarks of Apple Computer, Inc., registered in the US and other countries.
All rights reserved. Under the copyright laws, this manual may not be copied, in whole or in part, without the written consent of Garmin.
 All rights reserved. Under the copyright laws, this manual may not be copied, in whole or in part, without the written consent of Garmin. Garmin reserves the right to change or improve its products and
FUSION Panel-Stereo O W N E R S M A N U A L ENGLISH
 FUSION Panel-Stereo O W N E R S M A N U A L ENGLISH FUSIONENTERTAINMENT.COM 2018 Garmin Ltd. or its subsidiaries All rights reserved. Under the copyright laws, this manual may not be copied, in whole or
FUSION Apollo RA770 O W N E R S M A N U A L ENGLISH
 FUSION Apollo RA770 O W N E R S M A N U A L ENGLISH FUSIONENTERTAINMENT.COM 2018 Garmin Ltd. or its subsidiaries All rights reserved. Under the copyright laws, this manual may not be copied, in whole or
MS30. Owner s Manual + FOLDER VOL+ VOL- >ll MUTE. >>l. l<< MS30 MODE FOLDER
 Owner s Manual MS30 VOL- + FOLDER VOL+ lll MUTE >>l l FOLDER CONTENTS Introduction... 1 Features... 1 Box Contents... 1 Compliance... 1 Safety Information... 2 Installation... 3 Mounting the
JWM1A MOBILE AUDIO SYSTEM
 MOBILE AUDIO SYSTEM Owner s Manual CONTENTS Introduction... 1 Installation... 2 Wiring... 3 Basic Operation... 4 Tuner Operation... 5 Bluetooth Operation... 6 APP Operation... 7 Specifications... 7 ii
Gauge Mount Radio PRIMARY FEATURES. Marine & Powersports Bluetooth Source Units
 R MUSIC.DEFINED. Gauge Mount Radio Marine & Powersports Bluetooth Source Units Thank you for choosing the MB Quart Nautic GMR Marine & Powersports Source Units. With proper installation, you are on the
OPERATION MANUAL MM1C25 DIGITAL AUDIO PLAYER AM/FM STEREO USB BLUETOOTH CAPABLE HEADPHONE OUTPUT
 OPERATION MANUAL MM1C25 DIGITAL AUDIO PLAYER AM/FM STEREO USB BLUETOOTH CAPABLE HEADPHONE OUTPUT CONTENTS CONTENTS. 1 CONTROL PANEL ILLUSTRATION 2 WIRE DIAGRAM 3 INSTALLATION.. 4 BASIC OPERATION... 5 RADIO
AWM914 Owner s Manual
 Owner s Manual Table of Contents Installation... 2 Wiring... 3 Basic Operation... 4 Tuner Operation... 6 Bluetooth Operation... 7 Specifications... 9 ii Thank You! Thank you for choosing a Jensen product.
OVERHEAD AUDIO UNIT Model A10049
 R R R OVERHEAD AUDIO UNIT Model 2879459 21A10049 R NOTES APPENDICES TROUBLESHOOTING Resetting the unit Should the overhead unit become unresponsive: Remove power for 5minutes and then reconnect. CONTENTS
Owner s Manual AWM910 JENSEN AWM910 COMPACT DISC PLAYER RADIO CD COMPACT MUSIC SYSTEM MUTE AUX BAND AUX IN PUSH PUSH PWR VOL ALARM T/F AUD SPK A SPK B
 AWM910 Owner s Manual COMPACT DISC PLAYER PUSH 1 2 3 4 5 6 RPT SCAN RDM H M PUSH PWR VOL ALARM SET ON/OFF EQ T/F AUD RADIO CD COMPACT MUSIC SYSTEM MUTE AUX BAND CD AUX IN A B A+B JENSEN AWM910 Thank You!
GSMR30 OWNER S MANUAL
 GSMR30 OWNER S MANUAL Version 1.0 MP4/MP3/Photo Playback Gauge Series Marine Radio FEATURES 4 Channel Full Range, Class A/B 45W x 4 @ 4Ω IPX5 Water proof INPUTS AND OUTPUTS Bluetooth Audio Streaming Easy
OVERHEAD AUDIO UNIT Model A10117
 R R R OVERHEAD AUDIO UNIT Model 2879703 21A10117 R NOTES APPENDICES TROUBLESHOOTING Resetting the unit Should the overhead unit become unresponsive: Remove power for 5minutes and then reconnect. CONTENTS
ipod + MP3 INSTRUCTION MANUAL ipod touch 8G, 16G ipod classic 80G, 160G AQ-DM-2B Keep Dry
 R ipod + MP3 INSTRUCTION MANUAL ipod nano 3G 4G, 8G ipod touch 8G, 16G ipod classic 80G, 160G ipod 5G 30G, 60G, 80G AQ-DM-2B Model AQ-DM-2B Water/Dust Proof MP3/iPod Digital Media Locker With Floating
JWM10A MOBILE AUDIO SYSTEM. Owner's Manual
 MOBILE AUDIO SYSTEM Owner's Manual H M CONTENTS Introduction... 3 Installation... 4 Wiring... 5 Basic Operation... 6 Tuner Operation... 7 Bluetooth Operation... 8 APP Operation... 9 Specifications...
WATER AND DUST PROOF ipod DOCK AND DIGITAL MEDIA LOCKER with FLOATING 2-WAY WIRELESS REMOTE CONTROL
 CM ipod DOCK, INSTALLATION AND OPERATING INSTRUCTIONS WATER AND DUST PROOF ipod DOCK AND DIGITAL MEDIA LOCKER with FLOATING 2-WAY WIRELESS REMOTE CONTROL The ipod Dock is water proof, intended for installation
INSTRUCTION 1 MANUAL
 MA1801 WATERTIGHT MARINE AM/FM RADIO BLUETOOTH MULTIMEDIA SYSTEM SPECIFICATIONS GENERAL - USB Input (Rear) - 2ch Aux Inputs (Rear) - LCD Display - Clock - IP66 Watertight - Water & Salt Protection PCB
GSMR20 OWNER S MANUAL
 GSMR20 OWNER S MANUAL Version 1.0 FEATURES AM/FM/Radio/Preset 180 Watts Max Power Pre-Amplifier Outputs Splash Proof LCD Display Bluetooth Audio Streaming (Bluetooth 3.0) A2DP Audio Streaming USB/AUX Input
ipod Digital Media Center AM / FM Radio
 INSTRUCTION MANUAL MULTI- ENVIRONMENT PLAYER AQ-IP-3B- AQ-IP-3B-X ipod Digital Media Center AM / FM Radio INFO TOP 1. MOUNTING PRECAUTIONS The AQ-IP-3B-X is designed for a multi environment application.
MARINE AUDIO SYSTEM. Installation and Operation Manual
 MARINE AUDIO SYSTEM Installation and Operation Manual CONTENTS Warning and Compliance...1 Introduction...2 Installation......3 Wiring Diagram...4 Basic Operation...5 Tuner Operation...7 Bluetooth Operation...8
MS3A. Owner s Manual
 Owner s Manual CONTENTS Introduction... 1 Features... 1 Box Content... 1 Compliance... 1 Safety Information... 2 Installation... 3 Mounting the Radio... 3 Auxiliary Input... 4 Line Output... 4 Wiring Diagram...
PRECAUTIONS. Lithium Battery Cell Warnings. Take Precaution. Cell leakage may cause damage to the remote control. Do not throw cells into
 PRECAUTIONS Lithium Battery Cell Warnings Cell leakage may cause damage to the remote control. Do not throw cells into as this may cause an explosion. Keep battery cells out of reach of children. Take
Precautions... 1 Lithium Battery Cell Warnings... 1 Take Precaution...1 Installation Installation Procedures... 2 Installation Opening...
 CONTENTS Precautions... 1 Lithium Battery Cell Warnings... 1 Take Precaution...1 Installation...2-3 Installation Procedures... 2 Installation Opening... 2 Wiring Connections... 3 Remove of the Main Unit...
CONTENTS. Next/Previous Track... 4 Fast Forward/Backward... 4 Set the Clock (CLK)... 4 Insert SD Card... 4
... 4 Insert SD Card... 4") CONTENTS Precautions... 1 Lithium Battery Cell Warnings... 1 Take Precaution...1 Installation...2-3 Installation Procedures... 2 Installation Opening... 2 Wiring Connections... 3 Remove of the Main Unit...3
CONTENTS Precautions... 1 Lithium Battery Cell Warnings... 1 Take Precaution...1 Installation...2-3 Installation Procedures... 2 Installation Opening... 2 Wiring Connections... 3 Remove of the Main Unit...3
G BT 2.4 TFT DISPLAY DAB/DAB+ RADIO CAR ADAPTER WITH FM TRANSMITTER & BLUETOOTH MUSIC STREAMING
 G4-234BT 2.4 TFT DISPLAY DAB/DAB+ RADIO CAR ADAPTER WITH FM TRANSMITTER & BLUETOOTH MUSIC STREAMING G4-2 3 4BT IMPORTANT: Please read the manual carefully before using the product and keep it for future
Installation Manual. Balboa Bluetooth Audio bba 2
 Installation Manual Balboa Bluetooth Audio bba 2 WARNING There are no user serviceable parts inside the system pack. All connections must be made by a qualified electrician in accordance with the country
700 Series Manual MARINE ENTERTAINMENT SYSTEM. MS-IP700i True Marine Entertainment System for ipod. MS-AV700i True Marine DVD Entertainment System
 700 Series Manual MARINE ENTERTAINMENT SYSTEM MS-IP700i True Marine Entertainment System for ipod MS-AV700i True Marine DVD Entertainment System WARNINGS AND CAUTIONS Do not attempt to open the unit s
MARINE. Operation Manual. Model No.: MBB-3. Effective from 31 / May / x210mm
 MARINE Operation Manual Model No.: MBB-3 Effective from 31 / May / 07 145x210mm Mounting the Black Box 1. Precautions Choose the mounting location carefully so that the unit will not interfere with the
PLMRMBT5B / PLMRMBT5S 600 Watt 2 Channel Bluetooth Enabled Marine Grade Amplifier
 PLMRMBT5B / PLMRMBT5S 600 Watt 2 Channel Bluetooth Enabled Marine Grade Amplifier PLMRMBT7B / PLMRMBT7S 1200 Watt 4 Channel Bluetooth Enabled Marine Grade Amplifier It s compact, waterproof design allows
Installation Manual. Balboa Bluetooth Audio (bba 2)
") Installation Manual Balboa Bluetooth Audio (bba 2) WARNING There are no user serviceable parts inside the system pack. All connections must be made by a qualified electrician in accordance with the country
Installation Manual Balboa Bluetooth Audio (bba 2) WARNING There are no user serviceable parts inside the system pack. All connections must be made by a qualified electrician in accordance with the country
PRECAUTIONS. How to Handle Discs. Lithium Battery Cell Warnings
 CONTENTS Precautions... 1 How to Handle Discs... 1 Lithium Battery Cell Warnings... 1 Installation... 2 Prepare Radio... 2 Mount Radio... 2 Wiring Connections... 3 Uninstall the Main Unit... 4 Control
USER'S MANUAL 610UA MP3-COMPATIBLE DIGITAL MEDIA AM/FM RECEIVER BO S AUDIO SYSTEMS
 USER'S MANUAL 610UA MP3-COMPATIBLE DIGITAL MEDIA AM/FM RECEIVER BOS AUDIO SYSTEMS CONTENTS Precautions... 1 Lithium Battery Cell Warnings... 1 Take Precaution...1 Installation...2 3 Installation Procedures...
PO Box 409 Hanover, MD TEL (410)
") ME-50 Expansion Amplifier 1 ME-50 Expansion Amplifier Introduction: The ME-50 is a 2 channel audio amplifier capable of delivering up to 25W RMS per channel. It s compact, waterproof design allows for
ME-50 Expansion Amplifier 1 ME-50 Expansion Amplifier Introduction: The ME-50 is a 2 channel audio amplifier capable of delivering up to 25W RMS per channel. It s compact, waterproof design allows for
CONTENTS. Store/Recall Preset Stations (1-6)... 5 Next/Previous Track...
... 5 Next/Previous Track...") CONTENTS Precautions... 1 Lithium Battery Cell Warnings... 1 Use Cautions...1 Installation... 2 Installation Procedures... 2 Installation Opening... 2 Wiring Connections... 3 Uninstall the Main Unit...4
CONTENTS Precautions... 1 Lithium Battery Cell Warnings... 1 Use Cautions...1 Installation... 2 Installation Procedures... 2 Installation Opening... 2 Wiring Connections... 3 Uninstall the Main Unit...4
GBT 10 Installation and Configuration Instructions
 GBT 10 Installation and Configuration Instructions Use the Garmin GBT 10 Bennett Trim Tab Adapter to adapt analog information provided by a Bennett Trim Tab Position Indicator (Bennett TPI), or by the
Quick Start Guide C-515BT / C-313. What s in the Box? Follow the steps below to use your Compact Hi-Fi Component System. Remote control unit operation
 BAND TUNER SLEEP USB/SD CD BACKLIGHT DISPLAY CONTRAST Bluetooth D.AUDIO/iPod AUX SOUND STOP STEREO/MONO ABC DEF RANDOM P.MODE GHI JKL MNO PQRS TUV WXYZ PTY CLEAR FILE SEARCH REMOTE CONTROL UNIT X-BASS
CONTENTS. Store/Recall Preset Stations (1-6) Next/Previous Track...
 Next/Previous Track...") CONTENTS Precautions... 1 Lithium Battery Cell Warnings... 1 Use Cautions...1 Installation... 2 Installation Precedures... 2 Installation Opening... 2 Wiring Connections... 3 Remove of the Main Unit...4
CONTENTS Precautions... 1 Lithium Battery Cell Warnings... 1 Use Cautions...1 Installation... 2 Installation Precedures... 2 Installation Opening... 2 Wiring Connections... 3 Remove of the Main Unit...4
Disconnect the battery to ensure there will be no shorted wires during the installation procedure.
 The round-style headunit receiver radio features Bluetooth technology allowing music to wirelessly stream from your compatible Bluetooth-enabled device. Control the audio from a distance -- all from your
MA300 MARINE AUDIO SYSTEM
 MARINE AUDIO SYSTEM Installation and Operation Manual CONTENTS Warnings and Compliance... 1 Introduction... 2 Installation... 3 Wiring... 4 Basic Operation... 5 Tuner Operation... 7 Weather Band Operation...
PRECAUTIONS. Lithium Battery Cell Warnings. Use cautions
 PRECAUTIONS Lithium Battery Cell Warnings Cell leakage may cause damage to the remote control. Do not throw cells into as this may cause an explosion. Keep battery cells out of reach of children. Use cautions
AX1300BT SPECIFICATIONS: MECHLESS AM/FM MULTIMEDIA PLAYER RECEIVER BLUETOOTH w BUILT-IN SPEAKERS DESIGNED FOR AUSTRALASIAN CONDITIONS
 MECHLESS AM/FM MULTIMEDIA PLAYER RECEIVER BLUETOOTH w BUILT-IN SPEAKERS SPECIFICATIONS: GENERAL: Mechless Fixed Face Panel Ultra Memory Power Backup Built-In Speakers ISO DIN Mounting ISO Wiring harness
PRECAUTIONS. How to Handle Discs. Lithium Battery Cell Warnings
 CONTENTS Precautions... 1 How to Handle Discs... 1 Lithium Battery Cell Warnings... 1 Installation... 2 Prepare Radio... 2 Mount Radio... 2-3 Wiring Connections... 3 Removal of the Main Unit... 4 Control
MA500 MARINE AUDIO SYSTEM
 MARINE AUDIO SYSTEM Installation and Operation Manual CONTENTS Warnings and Compliance... 1 Introduction... 2 Installation... 3 Wiring... 5 Basic Operation... 6 Tuner Operation... 8 Weather Band Operation...
Thank You! Specifictions
 Thank You! Thank you for choosing an rockford fosqate product. We hope you will find the instructions in this owner's manual clear and easy to follow. If you take a few minutes to look thr-ough it, you'll
PRECAUTIONS. Lithium Battery Cell Warnings. Use cautions. Cell leakage may cause damage to the remote control. Do not throw cells into
 CONTENTS Precautions... 1 Lithium Battery Cell Warnings... 1 Use Cautions...1 Installation... 2 Installation Precedures... 2 Installation Opening... 2 Wiring Connections... 3 Uninstall the Main Unit...
CONTENTS. Store/Recall Preset Stations (1-6) Next/Previous Track...
 Next/Previous Track...") CONTENTS Precautions... 1 Lithium Battery Cell Warnings... 1 Use Cautions...1 Installation...2 Installation Procedures...2 Installation Opening... 2 Wiring Connections... 3 Remove of the Main Unit... 3
CONTENTS Precautions... 1 Lithium Battery Cell Warnings... 1 Use Cautions...1 Installation...2 Installation Procedures...2 Installation Opening... 2 Wiring Connections... 3 Remove of the Main Unit... 3
6 Track/Folder Navigation... 6 Mute... 6
 CONTENTS Precautions... 1 Lithium Battery Cell Warnings... 1 Use Cautions...1 Installation... 2 Installation Procedures... 2 Installation Opening... 2 Wiring Connections... 3 Uninstall the Main Unit...
FUSION MS-RA205 Quick Start Manual & Installation Instructions
 FUSION MS-RA205 Quick Start Manual & Installation Instructions FUSIONENTERTAINMENT.COM PRECAUTIONS Do not attempt to open the unit. There are no user serviceable parts or adjustment s inside. No responsibility
poly-planar Marine Audio System
 ME-52 Expansion Amplifier 1 ME-52 Expansion Amplifier Introduction: The ME-52 is a 2 channel audio amplifier capable of delivering up to 25W RMS per channel. It s compact, water resistant design allows
User`s Guide SBAR-51. Sound Bar and Docking Station
 User`s Guide SBAR-51 Sound Bar and Docking Station Please read the following instructions carefully before connecting, operating or adjusting this product. Please keep this manual in a convenient place
MR100 INSTALLATION/OWNER'S MANUAL Digital Media Marine Receiver
 MR100 INSTALLATION/OWNER'S MANUAL Digital Media Marine Receiver Preparation MR100 INSTALLATION Please read entire manual before installation. Before You Start Disconnect negative battery terminal. Consult
D E S I G N E D T O M O V E. Owner s Manual
 D E S I G N E D T O M O V E [ Y O U] Owner s Manual WX CONTENTS Introduction...2 Features...2 Box Content...2 Compliance...2 Safety Information...3 Installation...4 Mounting the Radio...4 Auxiliary Input...4
MS-BB300. User/Installation Manual BLACK BOX ENTERTAINMENT SYSTEM FUSIONENTERTAINMENT.COM
 MS-BB300 BLACK BOX ENTERTAINMENT SYSTEM User/Installation Manual FUSIONENTERTAINMENT.COM PRECAUTIONS Do not attempt to open the unit. There are no user serviceable parts or adjustment s inside. No responsibility
INSTRUCTION MANUAL CD MP3 WMA USB AUX-IN
 NA99i Car Audio System Player INSTRUCTION MANUAL CD MP3 WMA USB AUX-IN ipod/iphone Safety WARNING Stop the car before operating the unit. Important to know... To prevent a short circuit, never put or leave
GM3x-HF Installation Guide for GM Class II Radios with XM Tuner
 Courtesy of:discountcarstereo.com Driving without distraction is a necessity for a safer driving experience GM3x-HF Installation Guide for GM Class II Radios with XM Tuner Created July 19, 2016 Revised:
products with with a a watertight reputation AQ-DM-4 AQ-DM-4B OWNERS MANUAL OWNERS MANUAL
 products with with a a watertight reputation WATER/DUST DIGITAL PROOF MEDIA DIGITAL LOCKER MEDIA LOCKER AQ-DM-4 OWNERS MANUAL OWNERS MANUAL AQ-DM-4 DIGITAL MEDIA LOCKER WATER/DUST PROOF ipod/mp3 DIGITAL
PRECAUTIONS. How to Handle Discs. Lithium Battery Cell Warnings
 PRECAUTIONS How to Handle Discs Handle a disc by its edges. Do not touch the playing side. Before inserting a disc, wipe the disc outward from the disc center with a clean, soft, dry and lint-free cloth.
Interface Module for radio Auxiliary Input. Installation & Operation
 Interface Module for radio Auxiliary Input Installation & Operation Serial Number: Date of Purchase: Contents Introduction and Precautions... 2 Supported ipod Models... 3 Installation...3-4 Operation...
OPTIUTA10B 4 Channel Waterproof 4 UTV/ATV/ OWNER S MANUAL.
 OPTIUTA10B 4 Channel Waterproof 4 UTV/ATV/ OWNER S MANUAL www.lanzar.com y e OPTIUTVA10B 4 Channel Waterproof 4 UTV/ATV/Snowmobile/Marine Amplified Speaker System with Bluetooth Audio Interface Two Pair
IF ADDITIONAL INSTALLATION COMPONENTS ARE NECESSARY, CONTACT YOUR REI SALES REP FOR:
 50W X 4 R-9 05 Thank you for purchasing this AM/FM/CD/MP3 Weather Band Receiver from REI. This product is designed and tested to withstand temperature and vibration extremes. Please read the owner's manual
RD-44 Audio Network Control Panel
 RD-44 Audio Network Control Panel Introduction: The RD-44 is designed to control the audio functions and sources of the MRD-70 marine radio and the MZ-100 DSP Zone Amplifier. With versatile mounting options,
VM SERIES Rackmount 100V mixer-amplifiers
 VM SERIES Rackmount 100V mixer-amplifiers VM60, VM120, VM240Z Caution: Please read this manual carefully before operating Damage caused by misuse is not covered by the warranty Introduction Thank you for
WALLMOUNT Entertainment System
 Wiring Diagram AV IN AV OUT SUBWOOFER OUT HDMI JACK R R R L L L IR REMOTE JACK AUDIO IN ANTENNA WIRING CONNECTING SOCKET Specification GENERAL Supply Voltage Current Consumption Power Output Number of
Precautions... 1 Take Precaution...1 Installation Installation Procedures... 2 Installation Opening...
 CONTENTS Precautions... 1 Take Precaution...1 Installation... 2-3 Installation Procedures... 2 Installation Opening... 2 Wiring Connections... 3 Remove of the Main Unit...3 Control Panel Button Locations...
OWNER S MANUAL. Marine Audio System SEA9526 AM/FM/MPX WITH SINGLE CD PLAYER RCA LINE OUT. HIGH POWER 4 X 35 Watts Max.
 SEA9526, OWNER S MANUAL Marine Audio System PWR VOL- VOL+ MUT OPEN DIRECT-IN PLAY POWER LOADING TOP/REPEAT/RANDOM/ 3-BEAMLASER TRACKING SYSTEM DUAL 1-BIT D/A CONVERTERS 24AM/FMPRESETSTATIONS SEEK UP/DOWN
PLMRMP2A FEATURES: ACCESSORIES:
 Enjoy convenient music streaming from a universal mount audio system with the Pyle Compact Marine Amplifier Kit. It s compact, waterproof design allows for flexible mounting possibilities, and makes it
Easy Setup Guide. 1 Preparation. English. AV Receiver. Accessories. Cables required for connections
 UA 1 Preparation AV Receiver Accessories Check that the following accessories are supplied with the product. Remote control Batteries (AAA, R0, UM-4) (x2) Easy Setup Guide English Insert the batteries
OWNER S MANUAL Hertz Marine Audio
 OWNER S MANUAL Hertz Marine Audio PLL True Marine Radio Automatic Memory Storing Full Weather Band SIRIUSXM Satellite Radio Ready Bluetooth Full A2DP Function USB Interface AUX IN Transom Remote Options
CD DAB+ RADIO WITH BLUETOOTH MUSIC SYSTEM BT-9000
 CD DAB+ RADIO WITH BLUETOOTH MUSIC SYSTEM BT-9000 Instruction Manual For information and support www.lenco.eu Important Safety Instructions When used in the directed manner, this unit has been designed
ism1060bt INSTRUCTION MANUAL The Singing Machine is a registered trademark of The Singing Machine Co., Inc.
 ism1060bt INSTRUCTION MANUAL www.singingmachine.com The Singing Machine is a registered trademark of The Singing Machine Co., Inc. Included Please make sure the following items are included. ism1060bt
Specifications. General and Radio Controls
 General and Radio Controls 2 7 6 4 AUX IN BAND LOUDNESS Specifications Supply voltage : 12V DC(11V-15V) Current consumption : Less than 10A Audio Signal Output : 2ch line out Characteristics : (1) Frequency
DM25, DM40. Compact 100V mixer-amplifiers with Bluetooth. Item ref: UK, UK User Manual
 DM25, DM40 Compact 100V mixer-amplifiers with Bluetooth Item ref: 953.108UK, 953.109UK User Manual Caution: Please read this manual carefully before operating Damage caused by misuse is not covered by
Easy Setup Guide. 1 Preparation. English. AV Receiver. Accessories. Cables required for connections
 UA Preparation Accessories AV Receiver Check that the following accessories are supplied with the product. Remote control Batteries (AAA, R0, UM-4) (x) Easy Setup Guide English YPAO microphone AM antenna
PXR 1506 / WATT MIXER AMPLIFIER
 PXR 1506 / 1508 150-WATT MIXER AMPLIFIER Operating Manual www.peavey.com ENGLISH PXR 1506 / 1508 150-Watt, 8-Channel Mixer Amplifier Designed with the latest Peavey technology, the PXR 1506 / 1508 powered
CONTENTS. Fast Forward/Backward... Change Bands (BAND) Automatic Music Search (AMS)... 6 Track Search... Mute... 6
 Automatic Music Search (AMS)... 6 Track Search... Mute... 6") CONTENTS Precautions... 1 Lithium Battery Cell Warnings... 1 Use Cautions...1 Installation... 2 Installation Procedures... 2 Installation Opening... 2 Wiring Connections... 3 Uninstall the Main Unit...
CONTENTS Precautions... 1 Lithium Battery Cell Warnings... 1 Use Cautions...1 Installation... 2 Installation Procedures... 2 Installation Opening... 2 Wiring Connections... 3 Uninstall the Main Unit...
Quickstart Guide (English)
") Quickstart Guide (English) Introduction 1. Make sure all items listed in the Box Contents are included in the box. Look in the box under the foam sheet for the speaker stand rubber feet, speaker stand
Quickstart Guide (English) Introduction 1. Make sure all items listed in the Box Contents are included in the box. Look in the box under the foam sheet for the speaker stand rubber feet, speaker stand
IMPORTANT! USER MANUAL. LPU192CD Hi-Fi Turntable Stereo System WARRANTY INFORMATION INSIDE. PLEASE READ.
 LPU192CD Hi-Fi Turntable Stereo System USER MANUAL IMPORTANT! WARRANTY INFORMATION INSIDE. PLEASE READ Trademark of TEAC Corporation JAPAN www.teac.com.au 1 1 Read these Instructions. 2 Keep these Instructions.
Register your product and get support at CEM2000. Quick Start Guide
 Register your product and get support at CEM2000 EN Quick Start Guide 1 a b c d e f g 2 3 4 5 B a b c d a a a b c d b b A e f c c g h d d 6 5mm 5mm Overview of parts 1 These are the supplied parts needed
Operation and Installation Manual
 Operation and Installation Manual Reset Models: MD-150 MD-250 MD-350 Deluxe Entertainment Center with Docking Station Introduction Please take the time to read all of the information in this manual. Familiarity
Model No.: MIL-MR70BT
 Model No.: MIL-MR70BT This product is sold and serviced exclusively by Prospec Electronic Inc. and must be returned to Prospec for in and out of warranty repairs. It can not be serviced under warranty
WATERPROOF MEDIA PLAYER
 AQ-MP-5BT - WATERPROOF MEDIA PLAYER for Bluetooth & MP3 devices OWNER MANUAL WATERPROOF MEDIA PLAYER USB charging PLEASE READ THIS INSTRUCTION MANUAL BEFORE INSTALLATION AND OPERATION Table of Contents
AQ-DM-5BT - DIGITAL MEDIA LOCKER OWNERS MANUAL. for Bluetooth & MP3 devices PLEASE READ THIS INSTRUCTION MANUAL BEFORE INSTALLATION AND OPERATION
 products with a watertight reputation AQ-DM-5BT - DIGITAL MEDIA LOCKER for Bluetooth & MP3 devices OWNERS MANUAL PLEASE READ THIS INSTRUCTION MANUAL BEFORE INSTALLATION AND OPERATION Table of Contents
Owner's Manual. Stereo Sound Bar System with Bluetooth Wireless Technology. Model: CHT921 PLEASE READ BEFORE OPERATING THIS EQUIPMENT.
 Size: 148.5(W) x 210(H)mm (A5) Stereo Sound Bar System with Bluetooth Wireless Technology Owner's Manual PLEASE READ BEFORE OPERATING THIS EQUIPMENT. Model: CHT921 FCC Warnings WARNING:Changes or modifications
Quickstart Guide English ( 2 6 ) Appendix English ( 7 )
 Appendix English ( 7 )") Quickstart Guide English ( 2 6 ) Appendix English ( 7 ) Quickstart Guide (English) Introduction Box Contents Solar Rocker Microphone with Cable 1/8 (3.5 mm) Stereo Aux Cable Power Cable Quickstart Guide
Quickstart Guide English ( 2 6 ) Appendix English ( 7 ) Quickstart Guide (English) Introduction Box Contents Solar Rocker Microphone with Cable 1/8 (3.5 mm) Stereo Aux Cable Power Cable Quickstart Guide
2014 Cadillac Escalade Rear Seat Entertainment M
 2014 Cadillac Escalade Rear Seat Entertainment M Infotainment System...... 3 Rear Seat Infotainment.... 3 Rear Seat Entertainment (RSE) System....................... 3 Index..................... i-1 Rear
MA200 MARINE AUDIO SYSTEM
 MARINE AUDIO SYSTEM Installation and Operation Manual CONTENTS Important Safety Instructions... 1 Introduction... 2 Installation... 4 Wiring... 5 Basic Operation... 6 Tuner Operation... 8 MP3/USB Operation...
Table of Contents. Table of Contents
 MARINE Operation Manual Model No.: MBB-2020 This product is sold and serviced exclusively by Prospec Electronics Inc. and must be returned to Prospec for in and out of warranty repairs. It can not be serviced
*000IPODIG* ipod Installation Guide. Tools Needed: (depending upon vehicle) 000IPODIG IMPORTANT
 000IPODIG IMPORTANT") Revision 3/15/05 ipod Installation Guide IMPORTANT Before starting, compare items on your invoice with items received. Carefully check through packaging material. If any item is missing, please call: Crutchfield
Revision 3/15/05 ipod Installation Guide IMPORTANT Before starting, compare items on your invoice with items received. Carefully check through packaging material. If any item is missing, please call: Crutchfield
Parrot MKi9100. User guide
 Parrot MKi9100 User guide Contents Contents... 2 Installation... 4 Before you begin... 4 Checking the car configuration... 4 Caution... 4 Removing the car stereo... 4 Installing the kit... 5 Car stereo
poly-planar Marine Audio Systems
 ME60BT Bluetooth Amplifier 1 Introduction: The ME60BT is a four channel, 120 Watts RMS Bluetooth wireless audio amplifier, capable of delivering up to 30W RMS per channel. It has a compact, water resistant