HOLUX GPSport 260. GPSport 260. User s Guide
|
|
|
- Blaze Wade
- 5 years ago
- Views:
Transcription
1 GPSport 260 User s Guide 1
2 Safety Precautions HOLUX GPSport 260 Use the power adapter included with the package, using power adapters other than the one provided will result in malfunction and could prove dangerous. Battery replacement should not be performed by consumers, only professionally trained maintenance personnel should do the removal of the cover and the internal components. Note: It may cause explosion if the battery is not properly replaced with the same or equivalent model. Please contact the original professional service personnel to replace the battery. Do not use the power adapter in a wet environment. When hands and feet are wet, do not touch the power adapter. While using the power adaptor ensure that the area is well ventilated. Do not let paper or other material cover the power adaptor, as this will interfere with cooling. Do not use the power adaptor whilst it is in a bag. Do not attempt to repair the device. If device is damaged or is in a wet environment, replace the device immediately. This device is waterproof (meets IPX 7 standard) but not protected against water immersion. Warranty Information The GPSport 260 is warranted to be free from defects in material and functions for a period of one year from the date of purchase. If there is a product failure of 2
3 within this period (under normal conditions), a replacement will be provided at no charge to the customer. Copyright Information No part of this manual, including the products and software described in it, may be reproduced, transmitted, transcribed, stored in a retrieval system, or translated into any language in any form or by any mean, without the express written permission of Holux Technology, Inc. Copyright, All Rights Reserved. Federal Communications Commission (FCC) Statement This equipment has been tested and found to comply with the limits for a Class B digital device, pursuant to Part 15 of the FCC Rules. These limits are designed to provide reasonable protection against harmful interference in a residential installation. This equipment generates, uses and can radiate radio frequency energy and, if not installed and used in accordance with the instructions, may cause harmful interference to radio communications. However, there is no guarantee that interference will not occur in a particular installation. If this equipment does cause harmful interference to radio or television reception, which can be determined by turning the equipment off and on, the user is encouraged to try to correct the interference by one or more of the following measures: Reorient or relocate the receiving antenna. 3
4 Increase the separation between the equipment and receiver. Connect the equipment into an outlet on a circuit different from that to which the receiver is connected. Consult the dealer or an experienced radio/tv technician for help. 4
5 CAUTION Any changes or modifications not expressly approved by the grantee of this device could void the user's authority to operate this equipment. This device complies with Part 15 of the FCC Rules. Operation is subject to the following two conditions: (1) This device may not cause harmful interference, and (2) this device must accept any interference received, including interference that may cause undesired operation. For product available in the USA/Canada market, only channel 1~11 can be operated. Selection of other channels is not possible. RF Exposure Warning This equipment must be installed and operated in accordance with provided instructions and the antenna(s) used for this transmitter must be installed to End-users and installers must be provided with antenna installation instructions and transmitter operating conditions for satisfying RF exposure compliance. 5
6 Table of Contents HOLUX GPSport 260 Introduction...1 FEATURES...2 PARTS AND FUNCTIONS...3 ACCESSORIES...6 CHARGING THE BATTERY...8 Using the AC Charger...8 INSTALLING BIKE MOUNT...9 DOWNLOADING TRACK LOGS...11 Installing eztour Plus...11 Starting eztour Plus...15 Starting eztour Planner...16 Connecting to a PC...17 Introduction of 8 Function Modes...18 MAIN MENU...18 SPORT MODE...19 PLOT MODE...22 FOLLOW COURSE MODE...24 PEDOMETER MODE...27 MULTI FINDER MODE...29 COMPASS MODE...31 SETTING MODE...32 HISTORY MODE...41 Getting Started...43 TURNING ON GPSPORT
7 TURNING OFF GPSPORT INITIAL SETUP...43 TURNING ON/OFF BACKLIGHT...44 STARTING/STOPPING LOGGING...45 Auto-Start Logging...45 BASIC OPERATION/ SPORT MODE...46 Speed information...46 Barometer information...47 CO 2 Reduction/ Tree-Saved Information...47 Distance/Time Information...47 Calories Consumed Information...47 Save POI...48 Creating QR Code...48 User-Defined Sport Page...49 STATUS ICONS...50 Setting Up GPSport QUICK SETUP...53 Sport Mode...53 Weight...53 Odometer...54 ALERT...55 To Set Alerts...55 To Set Time Alert...56 To Set Speed Alert...56 To Set Distance Alert...57 To Set Altitude Alert
8 Reset Alert...58 CALIBRATION...59 Barometer Calibration...59 Compass Calibration...62 GENERAL SETTING...64 Speed Meter...64 Set Backlight...64 Set Auto Flip Page...66 Set Memory Mode...66 Auto Power Off...67 LOG...68 Interval...68 Auto-Start (Logging)...68 Pause (Logging)...68 GPS...69 Signal...69 Cold Start...69 SYSTEM SETTING...71 Delete all log...71 Time Format...71 Time Zone...71 Unit...72 LCD Contrast...73 Odometer...73 Reset Device...74 About eztour Plus and eztour Planner
9 FUNCTIONS OF EZTOUR PLUS...75 FUNCTIONS OF EZPLANNER...75 FEATURES OF EZTOUR PLUS...75 Normal Care and Maintenance...77 Specifications
10 Introduction Thank you for purchasing the GPSport 260. The GPSport 260 is a compact and light-weighed device designed for sport use. It is not only a GPS data logger with internal memory, the GPSport 260 also serves the purpose of a speed meter that shows immediate sport information including speed, distance, time, and pace while users are exercising. Plus, the built-in 3D compass and barometer sensors make it a perfect gadget for outdoor lovers to find their direction and altitude. One of its simplest functions is to work as a pedometer for everyday exercise measurer and motivator. The GPSport 260 comes with a powerful software called eztour Plus and eztour Planner. The former helps users with their health fitness management, while the latter enables users to plan their course prior to their outdoor adventure. The device plays the role of outdoor best companion and in the meantime reminds users how they can contribute to the environment by calculating and showing the amount of CO 2 emissions reduced and the amount of calories consumed when users are walking/hiking/cycling instead of driving. 1
11 Features GPS positioning Automatic page flipping Auto power off after a specified interval with no signal Multi Finder can record up to 10 locations and supports return-to -starting-point TripStart automatically records the first GPS fixed location when power on Can simulate an analog speedometer and use a large-font display 3 sport modes for calorie calculations Track Log function can start recording after satellite fix Generate QR code for current coordination Supports metric, imperial, and nautical measurements Supports 12-hour or 24-hour and time zone Pedometer 2
12 Parts and Functions Front View 1.8 LCD screen Backlight Menu Exit Power/ Stop/Pause OK/Up/ Down/ Right/ Left button 3
13 Rear View Mini USB Port Button Name Icon Function Power button Press to pause/resume log when the device is turned on. Press for 3 seconds to power on/off the unit. Menu Exit Exit to main menu Press for 3 seconds to turn on/off the backlight. 5-Direction Use Left, Up, Right, and Down to select an option. 4
14 OK Press the OK button in the middle to confirm input. 5
15 Accessories Please make sure the following accessories are included in the box. Please contact your supplier immediately if there are any missing items. GPSport 260 USB cable Quick Guide AC Adapter Warranty Card CD-ROM (including eztour Plus, eztour Planner*[optional], and documents for user manuals.) 6
16 Bicycle Mounting Kit 7
17 Charging the Battery Using the AC Charger 1. Plug the mini USB plug of the AC charger into the mini USB port on the top of the handset. 2. Plug the AC charger into a wall outlet. When charging, the Power indicator shows. After charging is completed, the Power indicator shows. If the power indicator shows while charging, it means the charging is automatically disabled because of circuit protection at high temperature. Note: Do not charge the device at high temperature otherwise the charging may not be performed or the lithium battery can not be fully charged. 8

18 Installing Bike Mount You can install the bike mount and the GPS on the left or right side of the handlebar or on the stem. 1. Attach the bracket to the bracket holder. 2. Thread the two cable ties through the slots of the bracket holder. 9


19 3. Place the rubber pad under the bike mount and attach the bike mount securely to the bike stem using the two cable ties. 4. Slide in the GPS on top of the bike mount until it snaps into place. Push here to release Cable ties are reusable 10

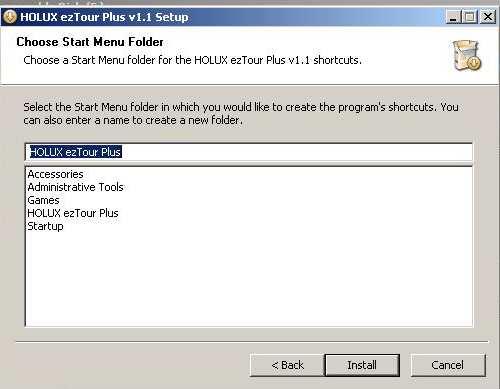
20 Downloading Track Logs HOLUX GPSport 260 To download the recorded track log and view it on your computer, firstly you will need to install the bundled eztour Plus. Installing eztour Plus 1. Insert the provided installation CD into the computer s CD drive. The introductory screen appears automatically. If the screen does not appear, open the Autorun.exe file on the CD. 2. Click Next to begin the installation. The License Agreement screen opens. 3. Read the agreement, click I accept the terms of the license agreement, then click Next. 4. Follow the on-screen instruction to proceed. The installation wizard will guide you through the steps. 11


21 12

22 13


23 Click Finish to exit the wizard. 14

24 Starting eztour Plus Once the eztour Plus is well installed in your computer, the eztour Plus icon will appear on your desktop as a shortcut. Double-click the icon to start eztour Plus. The following opening screen appears and you are ready to use the software. For details, please refer to the included eztour Plus user manual. 15

25 Starting eztour Planner The eztour Planner will be automatically installed when the eztour Plus is installed and the program icon will appear on the tool bar. Double-click the icon and the software to start planning your courses. 16
26 Connecting to a PC After the eztour Plus is installed, you can now connect your GPSport 260 to your computer to download the recorded track log. Use the included mini USB cable to connect the GPSport 260 with your computer as described below. 1. Connect the mini USB plug (smaller) of the USB cable to the mini USB port on the top of the system. 2. Connect the USB plug (larger) or the USB cable to a USB port on your computer. 17

27 Introduction of 8 Function Modes Main Menu The main menu appears when the device is turned on by pressing the power button. 8 operation modes are displayed in the main menu including Sport, Plot, Multi Finder, Pedometer, Compass, Follow Course, History and Setting modes. Use the 5 direction button to move among the modes and press OK button to select mode. To escape from mode and return to main menu, press This chapter describes respective functions of each mode. 18


28 Sport Mode In Sport mode, user can turn on/off the log recording. This mode displays sport information including analog speed meter, speed, time and distance, barometer altitude, calories consumed, and CO2 reduced. Press the 4-way button left and right to switch among different pages for different sport information. Note: This is the ONLY mode where users can turn on / off the log recording. Dashboard/ Analog speed meter Displays the speedometer in analog fashion. Information shown in this page can be customized by users to display different types of information by selecting the Top & Bottom values. Setting->General->Speed meter->user Define-> Top or Bottom. Save to save coordinates in 1. POI (waypoint) 2. Save the track 3. Show current coordination in QR code Display current location in a QR code for mobile 19


29 devices. Speed: Displays maximum speed and current speed. Distance and Time: Displays distance and time travelled since log started. Altitude: Displays barometer altitude and the variation since the log started. Calories: Displays calories consumed since the log started and total calories consumed today. 20

30 Carbon Saving: Displays amount of carbon dioxide emissions avoided or number of trees planted by not driving for one journey. 21


31 Plot Mode Plot mode shows track log in graph and in real time display without interruption. The real time transectional plot shows four units of sport information including: Altitude + Time Altitude + Distance Speed + Time Speed + Distance View Plot Displays the graph for altitude and time. Use the down and up buttons to zoom in and zoom out. Use the right button to move the x- and along the graph. The following x- and y-axis combinations are available: Altitude + Time Altitude + Distance Speed + Time Speed + Distance 22
32 Real Time Track Log The real-time track log which allows users to Pan to eight directions Zoom in / zoom out Seeing nearby waypoints previously marked 23


33 Follow Course Mode Enter this mode to follow a well-recorded track. To follow course, tracks can be acquired from one of the following methods. 1. Plan your routes with eztour Planner and then send it from the PC to GPSport 260. Please refer to the eztour Planner user manual for details. 2. Get course directly from History log recorded in this device. List Displays the tracks currently stored on the GPSport


34 Track details: Distance, time, maximum speed, average speed, calories, altitude, carbon reduction, trees planted, and the number of check points in the track. Check Points Preview all checkpoints and the details of check points in one track. View Track Course Loaded track can be displayed in four modes, i.e. Speed Meter, Plot Mode, View Mode and Pan/Zoom Mode. 25


35 Show track on Plot Mode. Shows Check Points on track; Zoom in / out for the loaded track. Shows distance & ascend to next check point and distance to the destination. 26


36 Pedometer Mode Pedometer mode enables users to count and record the number of steps taken, and accordingly the calories burned. Main screen: The device will start counting the walking steps, time, distance, and calorie burned. The icon will appear to indicate the pedometer is starting. Press the OK button to Reset Counter or to set the Stride Length. Please note: 1. Unless Reset Counter is selected and confirmed, Pedometer will not be reset and number of steps will be stored when the device is turned off. 2. Log recording continues when Pedometer is working. 27
37 Enter this mode, input your stride length and press OK. 28


38 Multi Finder Mode The Multiple Finder Mode shows the direction to the start of the track and lead you back to the starting point; alternatively, enter the coordinates for the destination to be guided by direction and distance. TripStart auto memorized your first GPS fixing location Store up to 10 user defined Finder points Upload Finder points directly from eztour planner with their own language Allow users to edit coordinate on device Allow users to mark a new Finder point on device Allow users to switch coordinate between WSG84 and Geocache 29


39 format Finder Board Displays destination name as well as direction and distance to destination. List Points User may store up to 10 records Set Points Save current coordinates to a Finder point on the List. Show Displays the coordinates of current location and the destination. 30


40 Compass Mode Works as a regular magnetic compass Shows direction mark with degree Shows current coordinates A warning icon and message appears when calibration is needed 31


41 Setting Mode Various setting information Setting Menu Quick Setup Item 1 set Sport mode Bicycle Mode: Calculate the calories consumed while cycling Running mode: Calculate the calories consumed while running Walking mode: Calculate the calories consumed while walking 32


42 Vehicle mode: Calories are not counted in Vehicle mode Quick Setup Item 2 set user weight Quick Setup Item 3 total distance Set Alert for Time, Speed, Distance, Altitude. You can also reset all to remove all settings for alert. Different types of alert can be set. 33


43 Use the cursor buttons to set the values. Tick the Enable option below to activate the alarm. Sensor calibration for barometer and compass. Calibrate barometer Use GPS to calculate the correct altitude. 34


44 Manually enter the correct altitude. Calibrate compass Step 1: Place GPSport 260 on a level surface Step 2: Horizontally rotate the GPSport 260 Step 3: Vertically rotate the GPSport


45 The compass will be displayed if calibration was successful. Other Settings General Settings includes Speed Meter, Backlight setting, Auto Flip Page, Memory mode, and Auto Power Off. Set Speed Meter Set the information for the Speed Meter to display 36


46 Set Backlight Set how long the backlight should be on for Auto Flip Page Set number of seconds between auto page flips Memory Mode Overwrite: Automatically write over old memory when track log is full Full Stop: Stop recording when track log is full Auto Power Off Set how long after GPS signal is lost before automatically powering off. Log Settings 37


47 GPS Settings The Signal page shows the name and strength of satellite signals currently being picked up. System Settings System settings include Time Format, Time Zone, Unit, Language, LCD Contrast, Odometer, Delete all log and Reset Device. Set Time Format Select time format to display. 38


48 Set Time Zone Select your time zone. Set Unit Select unit of measurement to display. Set LCD Contrast Select LCD contrast Set Odometer Select total distance to set Odometer Reset sets odometer back to zero. The total distance can also be edited using the Up, Down, Left and Right buttons. Tick the Enable option to continue 39
49 adding total distance traveled. Reset Device Reset device to factory default HOLUX GPSport


50 History Mode History shows track details Displays total number of tracks. Tracks can also be set as Favorite. Track List displays all history track logs with track time and distance. Favorite: Collect your favorite tracks in one place. 41

51 Statistics: shows activity statistic for all tracks or favorites. Track statistics. Use the left and right buttons to switch between different intervals (1 day, 2 days etc.) 42

52 Getting Started Turning on GPSport 260 Press the Power button until the startup screen appears on the LCD. Turning off GPSport 260 Press the Power button for 3 seconds and you will be prompted a message to confirm the message. Press the OK button again. Initial Setup Please perform the initial setup for the very first time use of GPSport 260. If the GPSport 260 is reset, the Initial Setup will automatically start when users turn on the device. 43


53 Turning on/off Backlight Press the button for 3 seconds to turn on/off backlight. Backlight can be set to Always on, or you can set it to be automatically turned off after 10, 30, 60, or 120 seconds as displayed below. Go to Main Menu Setting General Set Backlight 44


54 Starting/Stopping logging Auto-Start Logging The GPSport 260 is set to automatically log your track once it is turned on. To stop/pause logging during activity, just press the Power button and the play icon will be replaced by pause icon as shown below. Please note that the stop/pause is only functional in Sport Mode. If you are in the Follow Course mode, the stop/pause function is disabled. For more details on data log recording, please refer to the later section titled Log. 45


55 Basic Operation/ Sport Mode Once your device is turned on, you will be prompted the main menu, select Sport Mode and the default first page for Sport Mode appears Speed Meter. You are now on the Sport Page and are ready to use the basic function of this device.. Main Menu Sport Mode Sport Page Press the 5-way button left or right to switch among pages with different sport information as shown in the following. Speed information 46


56 Barometer information CO 2 Reduction/ Tree-Saved Information Distance/Time Information Calories Consumed Information 47


57 Save POI Your current coordinates can be saved as a POI (Point of Interest) by GPSport 260 by pressing the OK. your location saved in QR code and convert and show it on Google map via internet connection. Creating QR Code Your current coordinates can be saved as QR code by GPSport 260. QR code is a two-dimensional bar code which has been widely used in Japan. If your mobile phone with built-in digital camera can read QR code, then you can decode your location saved in QR code and convert and show it on Google map via internet connection. 48


58 User-Defined Sport Page The first Sport Page is Speed Meter by default. The Sport Page can be defined by users if they want to have other information as described above on the Sport Page rather than Speed Meter. Go to Main Menu Select Setting Enter the Setting Menu Select Setting Select General Select Speed Meter Select Define Select User Define Move to select Top/Bottom. A list of sport information will be displayed for selection. Move to select Top/Button information. 49


59 Status Icons The status icons indicates Sport mode, Auto Turn Page, POI, Backlight, Satellite Status, Memory Mode and Battery. Sport mode offers calorie calculation or indicates that logging is currently active. When the Sport mode icon disappears, it means the logging function is stopped or paused. 50

60 Sport mode icons: Bicycle mode Running mode Walking mode Vehicle mode Track Log icons: Track currently being logged Track currently not being logged Compass icons: The black arrow points north The compass needs calibrating Backlight icon: Backlight is on Satellite mode icons: 51


61 Satellite fix acquired Device currently attempted to acquire satellite fix Memory mode icons: Overwrite: Memory now in Overwrite mode Full Stop: Show % of remaining memory Battery status icons: Battery is being charged Battery is fully charged Low battery warning 52


62 Setting Up GPSport 260 Quick Setup User-friendly Quick setup function allows you to quickly setup most common settings. Press the Menu button to enter Main Menu and choose Quick Setup to begin setup. Q1. Sport Mode setup appears when you begin. Sport Mode Use the Up/Down button to move to the desired mode. 1. Press the OK button to confirm and save. 2. Q2. Weight setup appears. Weight 1. Use the Left/Right button to move the cursor to the digit you want to edit. 2. Press the Up button to increase value or the Down button to decrease value. 3. Press the OK button to confirm and save. 53

63 4. Q3. Odometer setup appears. Odometer Press or to move to the odometer you choose. 1. Press the OK button to confirm and save. 2. Quick setup is now completed. Press OK to start. 54

64 Alert The Alert function can be set for time, speed, distance and altitude. Time Alert - appears only when the pre-determined time is due. Distance Alert - appears only when the pre-determined distance is due. Speed Alert - appears only when the pre-determined speed is due. Altitude Alert - appears only when the pre-determined altitude is due. You can press any key to disable the message. To Set Alerts 1. Press the Menu button to enter Main Menu. 2. Use the Up/Down button to move to Alert. 3. Press the OK button to enter Alert submenu. 4. Select Time, Speed, Distance or Altitude to open submenu. 55


65 To Set Time Alert i. Press the Left/Right button to move to left/right. ii. Press the Up/Down button to adjust the value. iii. Press the Up/Down button to check Enable or leave it blank. The following indicators will appear on the message bar: To Set Speed Alert i. Press the Left/Right button to move to left/right. ii. Press the Up/Down button to adjust the value. iii. Press the Up/Down button to check Enable or leave it blank. 56

66 To Set Distance Alert i. Press the Left/Right button to move to left/right. ii. Press the Up/Down button to adjust the value. iii. Press the Up/Down button to check Enable or leave it blank. To Set Altitude Alert i. Press the Left/Right button to move to left/right. ii. Press the Up/Down button to adjust the value for the warning altitude. iii. Press the Up/Down button to adjust the value for warning when ascending a certain value of altitude. Press the OK button to confirm and continue. iv. Press the Up/Down button to check Enable or 57

67 leave it blank. Press the OK button to confirm and exit. Reset Alert You may also reset alert by selecting Reset Alert from the Alert submenu: 1. Select Reset Alert. 2. Press the OK button to confirm. 58
68 Calibration GPSport 260 comes with built-in 3D electronic compass and barometer sensors. Calibration for both 3D compass and barometer is necessary at the start of each activity s recording. The 3D compass calibration is required to separate the earth's magnetic field from stray magnetic fields emitted by something metallic/electronic like a car for which may affect the operation of the compass. Without calibration, the 3D compass may have inaccurate readings. As for barometer calibration, the GPSport 260 provides two methods for users to calibrate, i.e. GPS calibration and Manual calibration. GPS calibration uses GPS elevation to periodically adjust the built-in barometer to allow for real-time barometric pressure changes. The shortcoming of GPS calibration is that when GPS accuracy wasn't great and the GPS elevation might not have been accurate, either. Manual calibration is recommended when the user knows his true elevation there, for Manual calibration uses the calibrated altitude as truth and assumes all changes in the pressure sensor are associated with the barometric pressure, Manual calibration therefore will be more accurate Barometer Calibration A barometer is an instrument for determining the pressure generated by the weight of the atmosphere. Users can use 59


69 GPSport 260 for determining their immediate altitude and altitude gained. Barometer calibration is set to automatically perform by default. However, users can set the device to be manually calibrated. Note: If the device is set to Auto Calibration, the barometer altitude gained is the average of the first ten barometer altitudes acquired when the device s position is fixed. The auto calibration is performed every time when the device is turned on. Auto Calibration: Main Menu Setting Calibration Barometer Auto 60


70 Manual Calibration: Main Menu Setting Calibration Barometer Manual Enter the current height by pressing the Up/Down button to adjust the value. Press the OK button to confirm and exit. 61


71 Compass Calibration Main Menu Setting Calibration Compass Step 1. Hold the compass level with the horizon. Make sure that you are not near any metallic or magnetic objects. Step 2. Rotate the compass twice slowly (two complete rotations), make sure that the compass remains level to the horizon. Step 3. Press the OK button. Once calibration is finished, the following screen appears. 62

72 Note: Users should always calibrate the compass at the start of their outdoor activities for more accurate log information. 63

73 General Setting Speed Meter Users can determine to display Speed Meter as their Sport Page. Or they can define their Sport Page by setting General Speed Meter User Define Top/Bottom as shown below. Set Backlight Backlight can be set to Always on if needed. To save power, backlight can be set to automatically off after it has been activated for 10,30,60 or 120 seconds. 64

74 65

75 Set Auto Flip Page Users can enable the Auto Flip Page to rotate all sport information pages regularly by 5, 10, 30 or 60 seconds. Or they can choose to manually flip the Sport Page. Set Memory Mode As a data logger, the GPSport 260 is designed to automatically collect information upon activation, and can be left unattended for the duration of the monitoring period, the internal memory will be used up by recorded information. Overwrite Users can then determine if new data logs received should overwrite old data logs data logger by selecting Overwrite. Press the Up/Down button to select. Full Stop If users want the logger automatically stop recording when the internal memory is used up and no room for recording new data logs, select Full Stop. Press the Up/Down button to select. 66
76 Auto Power Off The GPSport 260 can be set to be automatically powered off when there s no GPS signal being detected for 15 minutes, 30 minutes, 1 hour, or 2 hours. Users can ignore the function and set to No which will keep the GPSport powered on even when there s no GPS signal detected. To enable the Auto Power Off, please go to General Auto Power Off 67

 User can enable/disable the auto logging by entering Setting Log Auto Start Yes/No Pause (Logging) Users can")
77 LOG HOLUX GPSport 260 Interval The GPSport 260 is set to automatically log your track once it is turned on. The factory setting of automatic logging is set to log at interval of time/distance 10 m/5 sec. For example, when the distance is below 10 meters in 5 seconds, the log will pause. Auto-Start (Logging) User can enable/disable the auto logging by entering Setting Log Auto Start Yes/No Pause (Logging) Users can set the log to stop/pause recording when the speed is below a determined number among 1km to 5 km. 68


78 Press the up and down button to check the Enable box. HOLUX GPSport 260 GPS Enter GPS to view the signal strength or you can activate to Cold Start. Signal Setting GPS Signal Cold Start Setting GPS Cold Start 69
79 Users are recommended to perform Cold Start when they travel for a long distance within a short period of time, say flying from Asia to Europe, for the GPS receiver may have problem to receive information about the current time, the orbits of the satellites or its own current position with previous GPS acquired. The searching time will be long for it proceeds to listen for satellites at random until it has acquired one or more. Cold Start will initialize the positioning of GPS and etc. 70


80 System Setting Delete all log Select Delete all log will empty the internal memory and all recorded log data will be removed. Time Format System Time Format Select format 24 hours and 12 hours. Time Zone System Time Zone 71


81 Press the up and down button to select. Unit Unit Conversion converts units of Speed/Distance, Weight and Temperature. Speed/Distance System Unit Speed/Distance Select Distance/Speed to choose metric as km/m/kmh, imperial as mi/ft/mph or nautical as kt/nm. Weight System Unit Weight Select weight to choose metric as Kilogram/kg, or imperial as Pound/lb. 72
82 LCD Contrast LCD contrast can be adjusted in the LCD Contrast. Press the Up/Down button to select. Odometer You can save trip information in Odometer A or Odometer B. The default is Odometer A. The value of both odometers can be reset or modified. Press the left and right button to move among the number. Press up and down button to change the value. When finished, press OK button to continue. Press the up and down button to check the Enable box. 73


83 Reset Device Press Reset Device to restore all settings to factory setting. Please note that all existing values and settings will be cleared except for Track logs in history, history name, finder point & name, odometer data, & POI data. Once the device is reset to factory setting, users will be prompted with the initial setup screen when they first turn on the device. 74
84 About eztour Plus and eztour Planner Functions of eztour Plus HOLUX GPSport 260 Posses the original eztour function and more! Statistic view shows you accumulated activity statistics based on the date rage the users selected! Functions of ezplanner Plan route at home with an easy to use tool Edit the route directly on the Google map! Able to plan the route between two points or follow the road User define Placemark to plan the rest point at home Automatically show earth elevation as soon as the route is completed! Able to synchronize the route to GPSport 260 Import/Export.gpx.kml files for other usages Access multiple projects in the same project window. Features of eztour Plus Display statistic data in month, week, or day view. Support both chart view and table view. Analyze sport data in terms of time, distance, speed, and elevation. Allow users keep notes of every activity. Replay the activity on map and detailed information of 75
85 every point. Analyze detailed information for user defined segment of activity. (marker1 marker2 support.) Export statistic data to Excel report. Plan routes before trip or activity. Automatically find route by start and end points setting. User defined point of interest. Support check-points and itinerary for trip/activity. Share routes with friends by exporting/importing kml, gpx files. Support various exercises or sports. 76
86 Normal Care and Maintenance To ensure the unit s normal operation and extended life span, please note the following while using and storing: Do not drop the unit If violently impacted or shocked, serious damage may be caused. Avoid sudden temperature changes Condensation may occur when entering a warm room on a cold day. To prevent condensation from damaging the unit, please place into an airtight plastic bag before sudden temperature changes. Keep away from strong magnetic fields When using or storing, please keep away from strong electromagnetic/radioactive or magnetic field equipment. Operating temperature The products operating temperature is between 0 C ~ 40 C; please do not operate under extreme temperatures. Avoid exposure to sunlight Please avoid long periods of sunlight or high temperature exposure. Using the stylus The LCD screen is easily scratched; please use only the stylus for 77
87 operation. Do not use any other sharp objects on the screen to avoid damaging the LCD screen. Cleaning the screen Using a soft clean cloth to wipe the screen is recommended; do not use ordinary tissue to wipe the screen. Do not disassemble Please do not disassemble the product, this may void the warranty and damage the unit. Storage When the product is not being used for a long period, store the device in a cool and dry place. For long-term storage, keeping the unit in a dry box is recommended. Please do not keep the product in the following environments: 1. Unventilated and humid locations. 2. In a car window that is exposed to excessive amounts of sunlight. 3. In an environment where humidity is over 90%. 78
88 Specifications Chipset: MTK 3329 GPS Chip Dimensions Weight Battery Power Button Antenna IO Interface Display Environmental Temperature Water proof * Cold Start: 36 sec Warm Start: 33 sec Hot Start: 1 sec Refresh Rate: < 1 second continuously 81.7x 54x 22 mm <72g Rechargeable 1050 mah lithium battery DC5V/1A 2 buttons + 1 keypad: Menu / Power / 5 Direction keys Built-in patch antenna Mini USB High-contrast electro-luminescent backlit display, 4-level grayscale LCD. Dimensions: mm, 1.8" Resolution: 128 x 128 pixels Operating Temperature: -10 C to 60 C Storage Temperature: -20 C to 70 C Battery Recharging Temperature: 0 C ~40 C IPX7 79
GPSport 245. User s Guide
 GPSport 245 User s Guide Safety Precautions Use the power adapter included with the package, using power adapters other than the one provided will result in malfunction and could prove dangerous. Do not
GPSport 260 User s Guide
 GPSport 260 User s Guide Safety Precautions Use the power adapter included with the package, using power adapters other than the one provided will result in malfunction and could prove dangerous. Battery
GPSport 245+ User Manual
 GPSport 245+ User Manual Safety Precautions Use the power adapter included with the package, using power adapters other than the one provided will result in malfunction and could prove dangerous. About
mart atch B502 User Manual
 mart watch B502 User Manual Congratulations on your new ownership of a Polaroid smart watch. Please read the manual carefully for full understanding of all operations and functions of your new smart watch.
Introduction. Do not store your GPS watch to prolonged exposure to extreme temperatures as this may result to permanent damage to your unit.
 Please visit www.outboundsports.com for additional information. WARNING: Before starting any exercise program. We strongly suggest you visit your doctor for a complete physical and to discuss your exercise
Deluxe In/Out Remote Thermometer with Trend Chart
 Deluxe In/Out Remote Thermometer with Trend Chart MODEL: JTR-168LR USER'S MANUAL INTRODUCTION Congratulations on your purchase of the JTR-168LR Deluxe In/ Out Remote Thermometer. The basic package comes
BTK-A21 Bluetooth Headset User Manual
 BTK-A21 Bluetooth Headset User Manual Thank you for purchasing the Mini Bluetooth Headset BTK-A21, we hope you will be delighted with its operation. Please read this user's guide to get started, and to
BT-R900. Bluetooth GPS Receiver. User s Manual. Date: April 2006 Version: 2.1. All Rights Reserved
 BT-R900 Bluetooth GPS Receiver User s Manual Date: April 2006 Version: 2.1 All Rights Reserved Page 1 Manual Revision History Revision Date Update Summary Issue 1.0 March 2006 Initial release Issue 2.1
HOLUX. Wireless GPS Logger. M-241 Plus. User Manual. No.1-1, Innovation Road1, Science-based Industrial Park, Hsinchu 300, Taiwan
 HOLUX Wireless GPS Logger M-241 Plus User Manual Technology, Inc. No.1-1, Innovation Road1, Science-based Industrial Park, Hsinchu 300, Taiwan TEL: 886-3-6687000 FAX: 886-3-6687111 Website: www.holux.com
Welcome 1. Precaution
 0 Table of Contents 1. Precautions. 2 2. Preparation.. 2 Standard Accessories.. 5 Parts Names.. 6 Charging the Battery Pack..... 7 3. Recording Mode 9 Loading SD card 9 Connect External Camera.. 9 Powering
SLIMLINE DASH CAM Audio & Video Recorder
 SLIMLINE DASH CAM Audio & Video Recorder 1 EK142CAM INSTRUCTION MANUAL PLEASE READ ALL INSTRUCTIONS CAREFULLY AND RETAIN FOR FUTURE USE Getting Started Remove the Car Digital Video Recorder from the box.
TABLET PC. Quick Start Guide. Model: TVE100 I
 TABLET PC Quick Start Guide Model: TVE100 I Safety Precautions 1. This production is suitable for use in non-tropic areas below 2,000 meters, and the mark in the nameplate indicates the product is suitable
User s Manual BeamPod User Manual
 User s Manual BeamPod General Safety Information 1. Keep the device and packaging materials out of reach of infants and children. 2. Keep the power adapter and other contacts from water, Dry your hands
OPERATING INSTRUCTIONS POWERSMART 10 10,000 MAH PORTABLE POWER PLEASE READ BEFORE OPERATING THIS EQUIPMENT
 POWERSMART 10 10,000 MAH PORTABLE POWER OPERATING INSTRUCTIONS PLEASE READ BEFORE OPERATING THIS EQUIPMENT HALO POWERSMART 10 Thank you for choosing HALO. Innovative and easy to use, the HALO POWERSMART
f200 English User Manual Contents
 f200 English User Manual Contents About this Guide...3 FCC Statement...3 WEEE Notice...3 CE Regulatory Notice...4 Notes on Installation...4 Caution...4 1 Introduction...5 1.1 Features...5 1.2 Package Contents...5
Contents Using the 4SK909 Twister
 Contents About this manual... 1 Notices for use... 1 Know the product... 2 Using the 4SK909 Twister... 3 Charging... 3 Inserting the TF memory card... 4 Powering ON/OFF the Dash Cam... 4 Installing in-vehicle
Model: MiTraveler 1081W
 10.1 Windows Tablet User Manual Model: MiTraveler 1081W Table of Contents 1. What s in the Box.1 2. Tablet Parts.. 1 3. Getting Started 2 4. The Start Screen 3 5. Getting Around.4 6. Apps..5 7. Charm Menu.6
BW50 SportBuds. User Guide. Control Buttons & Operations. On / Off. Play / Pause / Answer. Volume / Track Selection. Models: GDI-EXBW50...
 BW50 SportBuds Models: GDI-EXBW50...59 User Guide Control Buttons & Operations On / Off PRESS & HOLD the Multi-Function Button for 5 seconds to turn it on for the first time or to connect to a new device.
*520886* IntelliTouch Pool & Spa Control System MobileTouch Wireless Controller. User s and Installation Guide. P/N Rev A
 pool/spa control system IntelliTouch Pool & Spa Control System MobileTouch Wireless Controller User s and Installation Guide P/N 520886 - Rev A *520886* i MobileTouch Wireless Controller kit contents The
Wireless Smart Pad And Mini Keyboard User s Manual
 Wireless Smart Pad And Mini Keyboard User s Manual Version 1.0 2010/08 ID NO: About This Manual This manual is designed to assist you in installing and using the Wireless Touchpad Keyboard. Information
K8 smart watch phone quick start guide
 K8 smart watch phone quick start guide K8 smart watches are built-in android 4.4, call, text messages, audio and video, pictures, Internet radio, weather, tape recorder, step, health management, WIFI,
Digital Photo Album Operation Manual
 Digital Photo Album Operation Manual English Instruction Manual... E-1 French Instruction Manual.. F-1 Spanish Instruction Manual. S-1 German Instruction Manual..G-1 Introduction... E-2 Product Overview...
Bluetooth Hands-free Car Kit S-61. Quick Start Guide
 Bluetooth Hands-free Car Kit S-61 Quick Start Guide CONTENTS WELCOME...................................... 2 S-61 OVERVIEW POSITIONING.....................................................................
USER MANUAL CW14Q1P. CW14Q1P MANUAL-EN 70g 书纸,135x102mm
 CW14Q1P MANUAL-EN 70g 书纸,135x102mm USER MANUAL CW14Q1P Thank you for your choosing the new device This guide serves to enable users to get to know and familiar with our product as soon as possible. Here
Table of Contents. 2 Changing Focus Modes (e) Freeze Image (f) Mirror View... 18
 Freeze Image (f) Mirror View... 18") Table of Contents 1. What is LifeStyle CANDY GRIP?... 4 2. Safety Precautions... 5 3. What s in the Box?... 6 4. Physical Description... 7 5. Getting Started... 9 (a) Charging the Battery... 9 (b) Removing
Table of Contents 1. What is LifeStyle CANDY GRIP?... 4 2. Safety Precautions... 5 3. What s in the Box?... 6 4. Physical Description... 7 5. Getting Started... 9 (a) Charging the Battery... 9 (b) Removing
SHUTTERBOSS VERSION II USER MANUAL
 SHUTTERBOSS VERSION II USER MANUAL 1 INTRODUCTION Thank you for choosing the Vello ShutterBoss. This device is more than just a remote shutter release. It features many timer functions: self-timer, interval
WIRELESS THIN-PROFILE KEYBOARD AND MOUSE USER S MANUAL.
 WIRELESS THIN-PROFILE KEYBOARD AND MOUSE USER S MANUAL www.jascoproducts.com TABLE OF CONTENTS 1. INTRODUCTION...3 2. PACKAGE CONTENTS...3 3. SYSTEM REQUIREMENT...3 4. INSTALLATION INSTRUCTIONS...3 5.
Table of Contents. 2 Changing Focus Modes (e) Freeze Image... 17
 Freeze Image... 17") Table of Contents 1. What is LifeStyle CANDY?... 4 2. Safety Precautions... 5 3. What s in the Box?... 6 4. Physical Description... 6 5. Getting Started... 10 (a) Charging the Battery... 10 (b) Removing
Table of Contents 1. What is LifeStyle CANDY?... 4 2. Safety Precautions... 5 3. What s in the Box?... 6 4. Physical Description... 6 5. Getting Started... 10 (a) Charging the Battery... 10 (b) Removing
P OWERBUDS. The perfect accessory for anyone who wants to be truly wireless PLEASE READ BEFORE OPERATING THIS EQUIPMENT
 P OWERBUDS The perfect accessory for anyone who wants to be truly wireless PLEASE READ BEFORE OPERATING THIS EQUIPMENT HALO POWERBUDS Thank you for choosing HALO. The HALO POWERBUDS are the perfect accessory
USB Laptop Camera. Installation And Quick Start Guide
 USB Laptop Camera Installation And Quick Start Guide VideoLabs, Inc. 5960 Golden Hills Drive Golden Valley, MN 55416-1040 Toll Free U.S.: 800-467-7157 Phone: 612-542-0061 Fax: 612-542-0069 www.videolabs.com
OWNER'S GUIDE BT 390
 OWNER'S GUIDE BT 390 WIRELESS HEADPHONES Thank you for purchasing PHIATON BT 390. - Please follow the directions, and read the guidelines carefully before use. Please keep the owner s guide for future
Smart Stack Paging System
 Smart Stack Paging System Thank you for choosing Pagertec Thank you for choosing Pagertec as your provider for your wireless paging requirements. We greatly appreciate your confidence in our products.
WiFi Inspection Camera Instruction Manual
 WiFi Inspection Camera Instruction Manual FERRET WiFi CFWF50A Version 1.1 2018 Patent Pending The Cable Ferret Company Limited The Cable Ferret Company Pty Ltd Cable Ferret, Inc. www.cableferret.com Designed
Manual. Bluetooth Headphone X9. Please read this manual before operating your headset, and keep it for future reference.
 Manual Bluetooth Headphone X9 Please read this manual before operating your headset, and keep it for future reference. Switching On and Off To switch the X9 on or off, hold down the MFB for about 4 seconds
QUICK SETUP GUIDE PROFESSIONAL REMOTE MONITORING WEATHER STATION. Model No. V22-WRTH DC:
 QUICK SETUP GUIDE PROFESSIONAL REMOTE MONITORING WEATHER STATION Model No. V22-WRTH DC: 101017 INTRODUCING Connecting You to Your Home Anytime, Anywhere. TAKE YOUR STATION TO THE NEXT LEVEL! ON-THE-GO
cenomax F350 User Manual 使用手冊 3.5 Digital Photo Frame Revision 1.0a
 cenomax F350 3.5 Digital Photo Frame User Manual 使用手冊 Revision 1.0a FCC compliance statement Note: This equipment has been tested and found to comply with the limits for a Class B digital device, pursuant
Charging Pad / Charging Stand
 Charging Pad / Charging Stand Congratulations on your choice to purchase one of the FUEL ion charge bases! You ve chosen to take your mobile world fully wireless with an effortless secure and charge solution
CONTENTS. Safety Information Cleaning and Maintenance Function Information Messaging
 CONTENTS Safety Information... - 3 - Cleaning and Maintenance... - 3 - Function Information... - 5 - Messaging... - 7 - Email... - 8 - Camera... - 9 - Music... - 10 - FM Radio... - 12 - Sound Recorder...
Dash Jr. User Manual Table of Contents
 (/usermanuals) Dash Jr. User Manual Table of Contents Safety Information Safety Information Call Functions Contacts Messaging Opera Mini Browser Bluetooth & Wi Fi Camera Gallery Music Sound Recorder Alarm
P OCKET POWER 9000 T. Powerful Universal Portable Charger PLEASE READ BEFORE OPERATING THIS EQUIPMENT
 P OCKET POWER 9000 T M Powerful Universal Portable Charger PLEASE READ BEFORE OPERATING THIS EQUIPMENT HALO POCKET POWER 9000 Thank you for choosing HALO. Innovative, fashionable and easy to use, the HALO
Safety and Maintenance You can use your Tablet PC under a wide range of environmental conditions. However, to ensure long use and continued high
 EVG7 DL46 Getting Started Congratulations on your purchase of a Tablet PC. The Tablet PC is a fully functional PC with built-in LAN, and wireless connectivity. With your Tablet PC you will be able to organize
HomePlug Ethernet Bridge
 HomePlug Ethernet Bridge User Manual English LINDY No. 25120 www.lindy.com LINDY ELECTRONICS LIMITED & LINDY-ELEKTRONIK GMBH - SECOND EDITION (Feb 2004) Introduction Thank you for purchasing a LINDY HomePlug
Labtec Wireless Optical Desktop. Getting Started Guide
 Labtec Wireless Optical Desktop Getting Started Guide Important Ergonomic Information Long periods of repetitive motions using an improperly set-up workspace, incorrect body position, and poor work habits
MERCURY 100 User Manual
 MERCURY 100 User Manual Disclaimer...2 Warning...3 About GPS...4 Thank You for Choosing the MERCURY 100...5 Conditions for Use:...5 1. Introduction...6 1.1 Package Contents:...6 1.2 Maintenance:...6 1.3
Getting Started What s included Setting up Fitbit Ultra on a computer Mac & PC Requirements... 2
 User Manual Table of Contents Getting Started... 1 What s included... 1 Setting up Fitbit Ultra on a computer... 2 Mac & PC Requirements... 2 Installing Fitbit software on your computer... 2 Installing
montana 600 series quick start manual for use with models 600, 650, 650t Montana 600 Series Quick Start Manual 1
 montana 600 series quick start manual for use with models 600, 650, 650t Montana 600 Series Quick Start Manual 1 Getting Started warning See the Important Safety and Product Information guide in the product
ZTE WIRELESS HOME PHONE BASE QUICK START GUIDE
 ZTE WIRELESS HOME PHONE BASE QUICK START GUIDE Thank you for choosing Consumer Cellular! We know you re excited to use your new ZTE Wireless Home Phone Base, and this short guide will help you get familiar
Z-Wave Ceiling-mount Smoke Detector HZS-200E/HZS-200A
 Z-Wave Ceiling-mount Smoke Detector Copyright Z-Wave Ceiling-mount Smoke Detector Copyright 2015 by PLANET Technology Corp. All rights reserved. No part of this publication may be reproduced, transmitted,
P OCKET POWER 6000 T. Powerful Universal Portable Charger PLEASE READ BEFORE OPERATING THIS EQUIPMENT
 P OCKET POWER 6000 T M Powerful Universal Portable Charger PLEASE READ BEFORE OPERATING THIS EQUIPMENT HALO POCKET POWER 6000 Thank you for choosing HALO. Innovative, fashionable and easy to use, the HALO
Tabel of Content. What s in the Box 01. Feature Introduction 02. Setting Up the Camera and Monitor 03. Replacing the Camera lens 11.
 Tabel of Content What s in the Box 01 Feature Introduction 02 Setting Up the Camera and Monitor 03 Replacing the Camera lens 11 Safety 12 Customer service 15 What s in the Box Feature Introduction Monitor
PRO REMOTE. Universal Dual Sided Remote with Keyboard and Air Mouse All power in your hands. User Manual
 Universal Dual Sided Remote with Keyboard and Air Mouse All power in your hands User Manual 180413 TABLE OF CONTENTS 1. Overview 2. Cautions 3. Layout and Key Funtions 4. Pairing 5. Sleep 6. Air mouse
User manual BT3900. Register your product and get support at
 User manual BT3900 Register your product and get support at www.philips.com/support Contents 1 Important 1 Safety 1 Notice 1 2 Your Bluetooth speaker 3 Introduction 3 What's in the box 3 Overview of the
Pad. ( )
") Pad www.gkpglobalsolutions.com (1-855-653-7724) Copyright Mimio LLC all rights reserved. No part of this document or the software may be reproduced or transmitted in any form or by any means or translated
Pad www.gkpglobalsolutions.com (1-855-653-7724) Copyright Mimio LLC all rights reserved. No part of this document or the software may be reproduced or transmitted in any form or by any means or translated
Z-Wave 4-in-1 Multi Sensor HZS-300E/HZS-300A
 Copyright Z-Wave 4-in-1 Multi Sensor Copyright 2015 by PLANET Technology Corp. All rights reserved. No part of this publication may be reproduced, transmitted, transcribed, stored in a retrieval system,
GUIDELINES LAID DOWN BY FCC RULES FOR USE OF THE UNIT IN THE U.S.A. (not applicable to other areas). NOTICE
. NOTICE") GUIDELINES LAID DOWN BY FCC RULES FOR USE OF THE UNIT IN THE U.S.A. (not applicable to other areas). NOTICE This equipment has been tested and found to comply with the limits for a Class B digital device,
GUIDELINES LAID DOWN BY FCC RULES FOR USE OF THE UNIT IN THE U.S.A. (not applicable to other areas). NOTICE This equipment has been tested and found to comply with the limits for a Class B digital device,
DG-500 GPS Data Logger & GPS Receiver Quick Start Guide
 DG-500 GPS Data Logger & GPS Receiver Quick Start Guide GlobalSat WorldCom Corporation 16F., No. 186, Jian 1 st Rd, Zhonghe Dist., New Taipei City 23553, Taiwan Tel: 886.2.8226.3799/ Fax: 886.2.8226.3899
User Manual Infinity:One
 User Manual Infinity:One For the latest updates and information, please visit: support.one-education.org Notice The information in this user s manual is protected by copyright laws, all parts of this manual,
J-Style Wireless Wristband Track Activity + Sleep Model: JP-1304
 J-Style Wireless Wristband Track Activity + Sleep Model: JP-1304 1. Getting Started What s included Your J-STYLE Wireless Wristband Activity + Sleep Tracker includes: J-STYLE tracker USB charging cradle
1101 Universal Transmitter
 INSTALLATION SHEET 1101 Universal Description The 1101 is a two input transmitter that is typically used for door/window applications. The 1101 provides two internal magnetic reed switches and an on-board
Ball Probe Moisture Meter With Bluetooth
 User Manual Ball Probe Moisture Meter With Bluetooth Model MR59 Table of Contents 1. Advisories... 3 1.1 Copyright... 3 1.2 Quality Assurance... 3 1.3 Documentation... 3 1.4 Disposal of Electronic Waste...
USER GUIDE. R30 CAR DVR Capture your journey
 USER GUIDE R30 CAR DVR Capture your journey Languages 4 Community /kaiserbaas Register this product for 12 month warranty: www.kaiserbaas.com/register Get product updates: www.kaiserbaas.com/updates Tech
User Guide. Version 2.
 User Guide Version 2 www.rmepad.com RM epad TM User Guide Please read all instructions carefully before using Please retain these instructions for future reference RM epad TM contains replaceable, rechargeable
Contents FCC COMPLIANCE STATEMENT PRECAUTIONS GETTING READY
 USER MANUAL Contents FCC COMPLIANCE STATEMENT PRECAUTIONS GETTING READY Package Contents Knowing the device BASIC OPERATIONS OF THE PROJECTOR Turning On/Off the Projector Adjusting Focus Resizing the Projection
SPK User Manual. 900MHz Wireless Stereo Headphones INTRODUCTION FEATURES IMPORTANT SAFETY INFORMATION
 INTRODUCTION Thank you for purchasing our 900Mhz compact cordless stereo headphone system that takes advantage of the very latest advances in wireless transmission technology so you SPK-9100 900MHz Wireless
Table of Contents Confirming the camera location
 Table of Contents 1. What is the SenseView PORTABLE...1 2. Safety precaution...2 3. Package...3 4. Configuration...4 5. After purchasing...6 (1)... Charging...6 (2)Remove LCD protective film...6 6. How
PLEASE READ BEFORE OPERATING THIS EQUIPMENT.
 PLEASE READ BEFORE OPERATING THIS EQUIPMENT. HALO BOLT ACDC WIRELESS Thank you for choosing HALO! Powerful, compact and easy to use, the HALO BOLT ACDC WIRELESS can safely jump start your car or charge
ADVANCED REMOTE CONTROL
 ADVANCED REMOTE CONTROL (SUITS IP28) INSTALLATION & OPERATING INSTRUCTIONS 918-962 12/07/10 The Advanced Remote Control is tested safe when installed in accordance with this installation manual. It is
BiPAC 2073 R2. BiPAC 2074 R2
 BiPAC 2073 R2 HomePlug AV 200 Ethernet Adapter BiPAC 2074 R2 HomePlug AV 200 Ethernet Bridge with AC Pass-Through Quick Start Guide Quick Start Guide FCC Certifications Billion BiPAC 2073 R2/2074 R2 HomePlug
ACTIVE FIT+HR. Fitness Tracker Activity Band USERS GUIDE
 ACTIVE FIT+HR Fitness Tracker Activity Band USERS GUIDE Getting Started Thank you for choosing the Jarv Active Fit +HR Fitness Tracker Activity Band. Please take the time to read this manual carefully,
Prime bolt User Manual
 GSM Tracker Prime bolt User Manual Revision: 1.00 Document Title Prime bolt User manual Version 1.00 Finale Date 2015-5-20 Status Released Document Control ID TRACKER Prime bolt 1 Contents 1 Introduction...3
Thanks for shopping with Improvements! Orbit Bluetooth Tracker Card Item #569169
 Thanks for shopping with Improvements! Orbit Bluetooth Tracker Card Item #569169 To order, call 1-800-642-2112 West Chester, OH 45069 Made in China 1217 If you have questions regarding this product, call
MXHP-R500. Remote Control
 MXHP-R500 Remote Control MX-HomePro MXHP-R500 Owner s Manual 2016 Universal Remote Control Inc. all rights reserved. The information in this manual is copyright protected. No part of this manual may be
N331 Wireless Mini Optical Mouse User s Guide
 N331 Wireless Mini Optical Mouse User s Guide Mouse 1. Left mouse button 2. Right mouse button 3. Scroll wheel 4. Charge port 5. Battery cover 6. Receiver storage compartment 7. Battery cover release button
4 Message Paging System
 4 Message Paging System Thank you for choosing Pagertec Thank you for choosing Pagertec as your provider for your wireless paging requirements. We greatly appreciate your confidence in our products. At
Available in 2.0MP, 4.0MP, 6.0MP and 8.0MP, with 2.8mm and 3.6mm lenses.
 Camera Quick Install Guide VDMINIIRCB Series Available in 2.0MP, 4.0MP, 6.0MP and 8.0MP, with 2.8mm and 3.6mm lenses. Thank you for purchasing a VDMINIIRCB Series CCTV Surveillance Camera. This Quick Install
User Manual. eufy Security SpaceView Baby Monitor
 User Manual Anker Innovations Limited. All rights reserved. Eufy and the Eufy logo are trademarks of Anker Innovations Limited, registered in the United States and other countries. All other trademarks
Manufacture:Shenzhen Roverstar Technology Co.,Ltd Dash camera/dvr D28RS
 1 USER MANUAL Introduction Dear Customer! Thank you for purchasing this NAVITEL product. NAVITEL R1000 is a multifunctional high-definition DVR with many functions and features that are described in this
GPS mini Watch User Manual Introduction. Getting Started. Caution: Step 1) Know your Watch:
 Know your Watch:") Watch User Manual Introduction Thank you for purchasing the GPS Watch. This GPS Watch is packed with personal Training features like speed, trip time, laps, etc. Watch features include but not limited
Watch User Manual Introduction Thank you for purchasing the GPS Watch. This GPS Watch is packed with personal Training features like speed, trip time, laps, etc. Watch features include but not limited
Smart Watch. User Manual PULSE 2. Please refer to this manual before using the product V1.0
 Smart Watch User Manual PULSE 2 Please refer to this manual before using the product V1.0 Please read this manual carefully for correct using the product. If you feel confused about any operating descriptions
User's Guide. Video Borescope Inspection Camera. Model BR70
 User's Guide Video Borescope Inspection Camera Model BR70 Introduction Congratulations on your purchase of this Extech BR70 Video Borescope. This instrument was designed for use as a remote inspection
User manual Model: VIU-800 Brand:
 User manual Model: VIU-800 Brand: - 1 - This manual s main purpose is to introduce the correct way of using the Voter Identification Unit / Electronic Voting Machine (hereinafter referred to as "the device").
W10 PRO QUICK START GUIDE
 W10 PRO QUICK START GUIDE GETTING STARTED Thank you for purchasing a Hipstreet product and we hope you enjoy using it. Please visit our website at www.hipstreet.com IMPORTANT SAFETY PRECAUTIONS Always
Contents Attentions... 2 Preparation... 4 Technical Specification... 7
 Contents Attentions... 2 SAFETY GUIDE... 2 SAFETY PRECAUTIONS... 2 SERVICING... 2 INSPECTION OF ALL ATTACHMENTS... 3 Preparation... 4 FRONT PANEL... 4 REAR PANEL... 4 REMOTE CONTROLLER... 5 USAGE TIPS...
Thank you for choose this Blue Tooth smart watch for sport & health. You will understand the use of the watch, and enjoy its perfect functionality
 U8 USER GUIDE 1 2 Thank you for choose this Blue Tooth smart watch for sport & health. You will understand the use of the watch, and enjoy its perfect functionality and simple method of operation. This
Dear users, the configuration for this camera is professional, so please read the user manual carefully before using the camera V5.
 Dear users, the configuration for this camera is professional, so please read the user manual carefully before using the camera. IP Camera (629W) User manual 2014-03 V5.1 Statement If the user manual can
79 Backup and Reset DRAFT FOR INTERNAL USE ONLY. Factory Data Reset
 Backup and Reset Back up your data to Google servers. You can also reset your device to its factory defaults. Backup and Restore Samsung Account Enable backup of your information to Samsung servers. 2.
podz wireless rechargeable speakers
 podz wireless rechargeable speakers with auto-tuning FPO working name podz wireless rechargeable speakers with auto-tuning BETTER BY BROOKSTONE We believe that exacting standards are the core of our success.
SHUTTER WORLD. PerfectTilt RF Motorized Shutter. User Manual
 SHUTTER WORLD PerfectTilt RF Motorized Shutter User Manual INTRODUCTION The PerfectTilt RF motorization system features a remote control that utilizes the latest in radio frequency technology. This user
Operating Instructions
 9000 Operating Instructions Contents Introduction 1 Operating Instructions 2-5 Demonstrations 6-8 Storing/Handling/Cleaning 9 Safety Precautions 9-10 Specifications 10 FCC Compliance Statement 11-12 Limited
PTSGOB8W. Quick Start Guide
 PTSGOB8W Quick Start Guide Introduction Thank you for your choosing the new Tablet PC. This guide serves to enable users to get to know and familiar with our product as soon as possible. Here we have made
1. Product description
 User Manual 1. Product description Phone Finder is a brilliant Bluetooth device which allows you to find your phone in just one click. Once clicked, your phone will ring, vibrate and flash so that you
Wireless Entertainment Smart Pad Keyboard User s Manual
 Wireless Entertainment Smart Pad Keyboard User s Manual Version 1.0 2008/12 ID NO: PAKL-231B2001-00 0 About This Manual This manual is designed to assist you in installing and using the Wireless Touchpad
TW-100. Wearable Watch Tracker User Manual. Ver 1.0
 TW-100 Wearable Watch Tracker User Manual Ver 1.0 Table of Contents Introduction...- 1 - Features...- 1 - Specifications...- 2 - Getting Started...- 3 - TW-100 Device Configuration...- 6 - Operation Mode...-
Activity Tracker. User s Manual
 Activity Tracker User s Manual Table of Contents Important Precautions.... 1 Questions?... 2 What s In The Box... 2 Getting Started..................................................................................................
IOS 7.1 & above Android 4.3 & above Support Bluetooth 4.0art Guide
 Model: APH120HR Bluetooth 4.0 device application OS IOS 7.1 & above Android 4.3 & above Support Bluetooth 4.0art Guide Quick Start Guide 1. Download Veryfit for heart rate APP The smart band needs to pair
Model WT1 Wireless Tablet Interface
 Model WT1 Wireless Tablet Interface User Manual Model WT1 Wireless Tablet Interface Thank you for purchasing the Califone Model WT1 Wireless Tablet Interface. We encourage you to visit our website www.
PTT-100-VZ Wireless Speaker Microphone
 Federal Communication Commission Interference Statement This equipment has been tested and found to comply with the limits for a Class B digital device, pursuant to Part 15 of the FCC Rules. These limits
Contents. About this Guide FCC Statement WEEE Notice CE Regulatory Notice Notes on Installation Caution...
 Contents About this Guide... 4 FCC Statement... 4 WEEE Notice... 4 CE Regulatory Notice... 5 Notes on Installation... 5 Caution... 5 1 Introduction...... 6 1.1 Features... 6 1.2 Package Contents... 6 1.3
USER MANUAL. idream3 HEAD MASSAGER
 idream3 HEAD MASSAGER USER MANUAL OBM Distribution / Breo-USA 5678 East Concours Avenue Ontario, California 91764 http://www.breo-usa.com info@breo-usa.com Thank you for purchasing BREO idream Please read
TR-206 User Manual. Version 1.0
 TR-206 User Manual Version 1.0 TR-206 page 2 CONTENT 1 Safety... 4 2 TR-206 Introduction... 6 Brief Introduction...6 Features...6 3 Specifications... 8 Hardware Specifications...8 4 Getting Started...