SETU VGFX Quick Start
|
|
|
- Jayson Carson
- 6 years ago
- Views:
Transcription

1 SETU VGFX Quick Start
2

3 SETU VGFX VoIP-GSM-FXS-FXO Gateway Quick Start


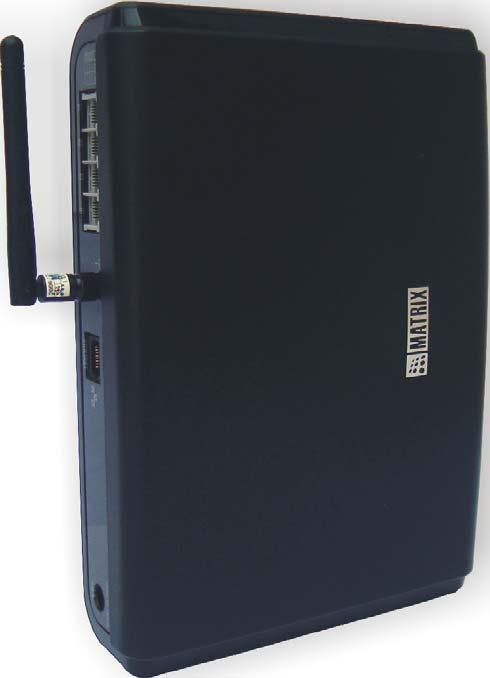
4 Introduction Thank you for choosing Matrix SETU VGFX! Please read the instruction in this quick start to install this feature reached system. This Quick Start is meant to help you to install the basic features and parameters of VGFX. For detailed information on installing and configuring SETU VGFX, please refer 'SETU VGFX V1 System Manual' provided to you on the CD-ROM. Know your SETU VGFX SETU VGFX has 1 WAN Port, 2 FXO Ports, 2 FXS Ports, 4 Mobile Ports, 9 SIP Trunks, Antenna Connecter, a Power Socket and 10 LEDs. SETU VGFX is available in three different configurations: 1. SETU VGFX8422: supports 4 Mobile Ports, 2 FXO Ports and 2 FXS Ports. This is the default configuration of SETU VGFX. 2. SETU VGFX8404: supports 4 Mobile Ports and 4 FXS Ports. 3. SETU VGFX8440: supports 4 Mobile Ports and 4 FXO Ports. This Quick Start is written with reference to the default configuration. The term SETU VGFX refers to SETU VGFX8422, unless otherwise specified. LEDs: There are total 10 LEDs in VGFX. These LEDs are labeled as M1, M2, M3, M4, P1, P2, P3, P4, STS and PWR as shown in the figure below. These LEDs indicate the status of ports, various events occurring on the ports and also the error conditions.
 and Status (STS) LEDs are non-programmable whereas all port LEDs are programmable. By default, LEDs labeled as M1, M2, M3 and M4 show status of Mobile Ports.")
5 M1 M2 M3 M4 Power P1 P2 P3 P4 Status All LEDs are of dual colour (Red/Green) except Power LED which is of single colour (Red). Power (PWR) and Status (STS) LEDs are non-programmable whereas all port LEDs are programmable. By default, LEDs labeled as M1, M2, M3 and M4 show status of Mobile Ports. LEDs labeled as P1 and P2 show status of FXO Ports and P3 and P4 show status of FXS Ports. Port LEDs can be programmed for showing the status of SIP Trunks also. You can program LEDs for showing status of maximum 8 SIP Trunks simultaneously. (Refer "Step 10" for more details) Before You Start Verify Package Contents SETU VGFX with Antenna (Rubber ducky SMA) Adaptor 12VDC, 2A (Country Specific) Quick Start and User Card CD containing System Manual, Quick Start and User Card Ethernet Cable (RJ45) Two Screws M 7/30 with Grips External Antenna SMA with cable A Mounting Template A Warranty Card Set Make sure that all the above mentioned components are present when you open the Sales Kit of SETU VGFX. In case any of the part is missing or damaged, contact the source from where you have purchased your VGFX.
6 Get your Internet Connection ready: To install VGFX, you must have: 1. Broadband Internet connection from an ISP to make and receive calls through public internet. If you want to make calls within your network, you do not need an internet connection. 2. Connection from an Internet Telephony Service Provider (ITSP) to activate your SIP Trunks. You do not need an ITSP connection for making Peer to Peer calls. Get your Network Information ready: Ask your LAN Administrator/ISP for: 1. IP Address 2. Subnet Mask 3. Gateway Address 4. DNS Address 5. DNS Domain Name Ask your ITSP for: 1. SIP ID/User ID 2. Authentication User ID (in most cases it is same as SIP ID) 3. Authentication Password 4. Registrar Server Address 5. Registrar Server Port 6. Outbound Proxy Server Address 7. Outbound Proxy Server Port To install VGFX, you should also have: 1. An active SIM card/s from GSM service provider. 2. Analog trunk line from Public Switched Telephone Network (PSTN). Installing SETU VGFX Take proper precautions while installing VGFX to reduce the risk of fire, electric shock and injury to the system as well as the person using it. (Refer Installation Precautions and Safety Instructions under 'Protecting SETU VGFX' topic in the System Manual) Mounting SETU VGFX on wall: SETU VGFX should be installed at the airy, dust free and moisture free place. Select a suitable place on the wall for mounting SETU VGFX. Put the mounting template on the wall and mark the nail hole on the wall. Drill a hole of appropriate size. Insert the screw and tighten it leaving the screw head a few millimeters protruded of the wall. Check the strength of the nail. Hang VGFX on the wall.
7 Connecting SETU VGFX Connect SETU VGFX as shown below: Ethernet Switch Adaptor PC Router RJ11 RJ11 Antenna Place SETU VGFX at a suitable place where it can be provided with proper power supply. Connect Ethernet (WAN) Port of SETU VGFX to the LAN Switch/Network of the Enterprise. Connect PSTN line to the FXO Port of SETU VGFX or connect FXO Ports of SETU VGFX to the FXS Ports of the PBX. Connect telephone instruments to the FXS Ports of SETU VGFX or connect FXS Ports of SETU VGFX to the FXO Ports of the PBX. Connect Antenna to SETU VGFX. Insert SIM Card into the Mobile Port of SETU VGFX for the mobile network. If SIM protection is enabled in the SIM Card, ensure that SIM PIN of the SIM Card and VGFX is same. By default, SIM PIN of all the Mobile Ports of the VGFX is To change SIM PIN of the SIM Card, SE is recommended to take following steps: Switch Off VGFX. Remove SIM Card and insert the same in the mobile instrument. Enable 'SIM PIN at Power ON' parameter in the SIM Card. (This step is not required if SIM protection is already ON) Change the SIM PIN of the SIM Card to 1234 i.e. the default SIM PIN of VGFX. Remove SIM Card from the mobile instrument and insert it in VGFX. Change the SIM PIN after VGFX attains normal working position. Connect Power Socket of SETU VGFX to the power supply using 12V DC, 2A power adaptor.
8 Switching ON SETU VGFX After connecting SETU VGFX as shown above, switch ON the power supply. At Power ON, Power LED will turn ON (Continuous Red). Initialization process will start and LED sequence of all other LEDs during initialization process is shown in the table given below: System Status STS P1 P2 P3 P4 M1 M2 M3 M4 Time in MS Power ON - UBOOT OFF ON OFF OFF OFF OFF OFF OFF OFF Kernel UP & LED Driver Loaded OFF ON ON OFF OFF OFF OFF OFF OFF Application Load OFF ON ON ON OFF OFF OFF OFF OFF 200ms VOPP Program Download Success OFF ON ON ON ON OFF OFF OFF OFF 200ms All Init Done, System goes Live ON ON ON ON ON ON ON ON ON 1000 ms ON ON ON ON ON ON ON ON ON 1000 ms OFF OFF OFF OFF OFF OFF OFF OFF OFF 1000 ms ON OFF OFF OFF OFF OFF OFF OFF OFF 1000 ms OFF OFF OFF OFF OFF OFF OFF OFF OFF 1000 ms (Continuous Last 2 steps) Red color text (Bold) indicates that led will glow red and Green color text (Bold+Italic) indicates that led will glow green. Mobile Port LEDs (M1, M2, M3 and M4) will display following error/event/status during initialization: Event/State/ Status Color Cadence (in ms) (1 cadence is of 4000ms) GSM Initialization Red 500ms On- 500ms Off 500ms On-500ms Off- 500msOn-500ms Off- 500ms On- 500ms Off (4 Blinks) PUK required Red 500ms On- 500ms Off 500ms On-500ms Off- 500msOn-1500ms Off (3 Blinks) SIM PIN faulty Red 500ms On- 500ms Off 500ms On-2500ms Off (2 Blinks) SIM Absent Red 500ms On- 3500ms Off (1 Blinks) GSM network absent Red 1sec On 1sec Off
9 System LED (STS) will display the following error/events/status: System Status LED Status Comment VoPP Program Down Load Fail. Red On Continuously VoPP Program download fail Gateway started successfully and NW_Up_SIP_Up_CDR _OK GREEN Blink 1sec On-1sec Off Gateway Started Successfully. Network link is Up. SIP stack is Up CDR buffer is not full NW_Down_SIP_ down_cdr_ok NW_Up_SIP_down_C DR_OK NW_Down_SIP_ down_cdr_full NW_Up_SIP_down_C DR_Full NW_Up_SIP_Up_CDR _Full Green Blink 500 ms on-500ms off-500 ms on-500ms off-500 ms on-500ms off- 500 ms on- 500ms off Green Blink 500 ms on-500ms off-500 ms on-500ms off- 500 ms on-1500ms off Red Blink 500 ms on-500ms off-500 ms on-500ms off-500 ms on-500ms off- 500 ms on- 500ms off Red Blink 1sec On-1sec Off Red Blink 500 ms on-500ms off-500 ms on-500ms off- 500 ms on-1500ms off Network link is down. SIP stack is down CDR buffer is not full Network link is Up. SIP stack is down CDR buffer is not full Network link is down. SIP stack is down CDR buffer is full Network link is up. SIP stack is up CDR buffer is full Network link is up. SIP stack is up CDR buffer is full FXS/FXO/Mobile Port LED status during normal functioning is as shown below: Event/State/Status Color Cadence (1 cadence is of 4000ms) ON OFF ON OFF Port Idle/Disable - OFF Incoming Ring Event Red Off-Hook Event Red Continuous Speech Green Continuous LED of FXS Port, that is used to enter the programming mode, will glow continuous GREEN while the system is in programming mode. Once the command to exit programming mode is issued, the LED will turn continuous
10 RED i.e. will display the Off-Hook Event. You can also program Port LEDs for showing the status of SIP Trunks. For example, if you are using only two mobile ports and other two mobile ports are disabled then you can program these LEDs for showing the status of SIP Trunks. (Refer Step 13: 'Checking the Status' for more details) If LED is programmed for SIP Trunk, it will display following error/event/status: Event/State/Status Color Cadence (1 cadence is of 5000msec) ON OFF ON OFF SIP Disable - OFF SIP Registered Green Continuous SIP Registration Failed Red Continuous SIP Authentication Failed Red When all LEDs are programmed for SIP Trunks then no LED indication would be displayed for FXS/FXO and Mobile Port. Accessing Web Jeeves: Programming of SETU VGFX can be done using Web JEEVES only. It does not support programming of VGFX using telephone instrument except few Network Port Parameters. To access Web JEEVES, Network Port Parameters should be programmed first using conventional phone. Follow the steps shown below: Accessing web jeeves is a very important step in programming VGFX. To access web jeeves, Network Port Parameters should be programmed first using conventional phone. 1. Pick up handset of analog phone connected to SETU VGFX. 2. Dial the programming access code #19 followed by default password You will get programming tone. 3. To access Web JEEVES using computer/computers in LAN to which VGFX is connected, change IP address and Subnet Mask of SETU VGFX to bring VGFX and computer/computers in LAN in the same subnet. Ensure that their IP Addresses are different. 4. To program Network Port IP address, use command: 11-IP Address-#* Where, IP address is of 12 digits in XXX.XXX.XXX.XXX format. Each octet is of three digits ranging from 001 to 255. For example, to program IP address , enter the command #*. By default, IP Address of VGFX is
11 5. To program Network port Subnet Mask, use command: 12-Subnet Mask-#* Where, Subnet Mask is of 12 digits in XXX.XXX.XXX.XXX format. Each octet is of three digits. Valid range is 0, 128, 192, 224, 240, 248, 252, 254 and 255. For example, to program Subnet Mask , enter the command #*. By default, Subnet Mask of VGFX is To exit programming mode, use command: 00#*. VGFX restarts as soon as IP Address or Subnet Mask is changed. 7. After changing IP Address and Subnet Mask as shown above, open web browser of the computer connected to VGFX and enter IP Address of VGFX in the URL of the web browser. Login page of VGFX Web JEEVES will appear on the screen. 8. Enter default password 1234 in the login page and reach the home page. Program all the necessary parameters of SETU VGFX one by one by clicking the links given on the left side of the web page. Programming SETU VGFX Once VGFX is switched ON, the SE is advised to program it in the following sequence: 1. SIM PIN 2. Date and Time Settings 3. Call Progress Tones 4. Ring Type 5. Mobile Network Selection 6. SIP Trunk Parameters 7. Routing Groups 8. Routing Mechanism 9. Network Port Parameters After programming VGFX in above mentioned sequence, you will be able to make and receive calls. Open Web browser of the computer connected to VGFX. Enter IP Address of SETU VGFX in the URL field and press 'Enter' key. Login Page of SETU VGFX will appear on the screen.
12 Enter default SE password (1234) in the 'Password' field and click on 'Login' button. Home page of Web JEEVES will open up.
13 Step 1: SIM PIN SIM PIN is a security feature used by the GSM network. This feature is used to protect the SIM card inserted in the system from mis-use. If this feature is enabled, the network will ask the user to enter SIM PIN at every Power On. If the user enters wrong SIM PIN for three times then the network suspects the user and asks for the Personal Unlock Keyword (PUK). If wrong PUK number is entered for ten times then the SIM Card will become useless. Follow the steps given below to enable SIM protection or change SIM PIN in VGFX: Switch Off VGFX. Remove SIM card and insert the same in the mobile instrument. Enable 'SIM PIN at Power ON' parameter in the SIM card. (This step is not required if SIM protection is already ON) Change the SIM PIN of the SIM card to (default) Remove SIM card from the mobile instrument and insert it in VGFX. Switch on the system and change the SIM PIN after it attains normal working position. SE should take above steps to change the SIM PIN of the SIM Card in case SIM protection of SIM Card is enabled and SIM PIN of SIM Card and VGFX is different else VGFX will not initialize. (Refer 'Port Parameters-Mobile' feature in System Manual for more details) Step 2: Date and Time Click on 'Date and Time Settings' link and program following parameters:

14 Current Date: Enter current date in DD-MM-YYYY format. Valid range for date = 01 to 31 Valid range for month = January to December Valid range for year = 2008 to 2099 Current Time: Enter current time in HH-MM-SS format. Valid range for hour = 00 to 23 Valid range for minutes = 00 to 59 Valid range for seconds = 00 to 59 Current Day: Depending on the current date entered by SE, System automatically sets current day in this field. NTP Address: In this field, select one of following Time Servers: 1. Ntp1.cs.wisc.edu 2. Time.windows.com 3. Time.nist.gov Default = Ntp1.cs.wisc.edu OR Enter IP address of NTP server address manually. Maximum Length = 40 characters All ASCII characters allowed

15 Time Zone: Select the time zone from the given combo box depending on the country of installation of SETU VGFX. After programming Date and Time settings, click on submit button at the bottom of the page to save the settings. Step 3: Call Progress Tones Click on 'Call Progress Tones' link and program following parameters: Select either Countrywise or Customized option. By default, Countrywise option is selected. If 'Countrywise option' is selected then the combo box for selecting the country becomes editable. Select the country in which SETU VGFX is installed. By default, INDIA is selected. If 'Customized option' is selected then countrywise combo box becomes uneditable and CPTG table will become editable. Program frequency and cadence for each tone. By default, values for all tones are displayed as per the last country selected. Frequency1: Program frequency1 for each tone. Range of frequency 1 is Hz for all tones.
16 Frequency2: Program frequency2 for each tone. Range of frequency 2 is Hz for all tones. Operator parameter has three options: 1. No: If 'No' is programmed then Frequency 2 is not applicable. 2. * (Modulation): If '*' (Modulation) is programmed then Frequency 1 and Frequency 2 is used as modulation i.e. F1* F (Addition): If Addition (+) is programmed then Frequency 1 and Frequency 2 is used as addition i.e. F1 + F2. Cadence: Program Cadence ON time and OFF time. 1. ON time (msec): Range of Cadence ON Time is from 0000 to 9999 msec for all tones. 2. OFF time (msec): Range of Cadence OFF Time is from 0000 to 9999 msec for all tones. Default Cadence for all the tones for INDIA is shown below: Tone Type Cadence (msec) Freq. 1 Freq. 2 Operator ON OFF ON OFF ON OFF (Hz) (Hz) Time1 Time1 Time2 Time2 Time3 Time3 Dial Tone 400 * Ring Back Tone 400 * Error Tone No Error Tone No Busy Tone 400 No Confirmation Tone 400 No Feature Tone/ Programming Tone 400 No Prompt Tone 400 No Routing Tone 400 No Intrusion Tone 400 No Call Progress Tones and the country selected will not be defaulted when you default the VGFX. (Refer 'Call Progress Tones' feature in System Manual for details) Step4: Ring Type Click on 'Ring Type' link and program the following parameters:

 Step5: Mobile Network Selection Click on 'Mobile Network Selection'")
17 In 'Ring Type' field, select the country in which SETU VGFX is installed. Ring cadence value will change in Ring Cadence table automatically as per the country programmed in Ring Type field. Ring Cadence table is un-editable. (Refer 'Ring Type' feature in System Manual for details) Step5: Mobile Network Selection Click on 'Mobile Network Selection' link and program the following parameters: Network Selection Mode: Select one of the following two network selection modes: 1 Automatic 2 Manual Default = Automatic

18 Network Operator Code: If mode programmed for network selection is 'Manual' then program network operator code and set the priority for network operators with which the SIM can get registered. Maximum Length = 8 digits Default = Blank. In Manual mode for network selection, SIM Card will be registered only with the network that is supported by the network operator of the SIM Card used in the system. (Refer Mobile Network Selection in System Manual for more details). Step6: SIP Trunk Parameters Click on 'SIP Trunk Parameters 1' link and program the following parameters.


19 Port Enable?: Enable the status of the SIP Trunk. You will be able to receive incoming calls and make outgoing calls only if the SIP Trunk is enabled. Valid options: Yes/No Default = No SIP ID: Enter the SIP ID provided by the ITSP in this field. Maximum Length = 40 characters All ASCII characters allowed Default = * In case of Peer to Peer calls, the first SIP Trunk with SIP ID programmed as '*' will always be used for routing the incoming call.
20 Registrar Servers' Address: Enter SIP registrar server address provided by ITSP in this field. It can be an IP address or domain. Maximum Length = 40 characters All ASCII characters allowed Default = Blank Registrar Servers' Port: Enter registrar server listening port provided by ITSP in this field. Valid range = 1024 to Default = 5060 Authentication User ID: Enter User Id provided by ITSP for registering the SIP Trunk with the SIP server. Maximum Length = 40 characters All ASCII characters allowed Default = Blank Authentication Password: Enter the authentication password provided by ITSP. Maximum Length = 24 characters Default = Blank Outbound Proxy Server: Enable outbound proxy, if your ITSP have a SIP outbound server to handle voice calls. Valid options: Yes/No Default = No Outbound Proxy Server's Address: Enter the outbound proxy server address provided by ITSP if outbound proxy is enabled. It can be IP address or domain. Maximum Length = 40 character All ASCII characters allowed Default = Blank Outbound Proxy Server's Port: Enter the outbound proxy server's listening port provided by ITSP. Valid range = 1024 to Default = 5060 Source Port IP Address: Select one of the following options as Source Port IP Address. 1. Use Network Port IP Address 2. Use IP Address fetched using STUN 3. Use Router's Public IP Address By default, Source Port IP Address is 'Use Network Port IP Address'.

21 Use Symmetric RTP?: This parameter is applicable only for peer to peer calls. Select 'Yes' if SETU VGFX is located on public IP and calls are made and received from the SIP client located behind the NAT router. Valid options: Yes/No Default = No (Refer Port Parameter-SIP in System Manual for more details). Step7: Routing Groups Create Routing Groups for all the port types. To program Routing Groups for Mobile Ports, click on 'Mobile Port Groups' link and program the following parameters: Member Selection Method: In this field, select the method for selecting member from a group for placing the call on Mobile Port. Valid options: First Free/Rotation Default = Rotation Members: Program desired Mobile Port number in each of the member field. VGFX shall place the call on any of these members as per member selection method programmed for the group. Similarly create Routing Groups for FXS Ports, FXO Ports and SIP Trunks also. (Refer 'Routing Group' feature in System Manual for more details)
22 Step8: Destination Number Determination Method: Routing mechanism in VGFX involves two things: Destination Number Determination Method and Destination Port Determination Method. VGFX supports following method for Destination Number Determination Method: 1. Number Not Required In this method, destination number would be blank. Call will not be answered till the destination port is answered. This method is applicable for FXO Ports, Mobile Ports and SIP Trunks. Generally this option is used when incoming call is to be routed on FXS Port. 2. Fixed Destination Number In this method, call is routed to a fix destination number programmed. To use this method, program destination number in 'Fixed Destination Number' field of the respective port. Call will not be answered till the destination port is answered. This method is applicable for FXO Ports, Mobile Ports and SIP Trunks. 3. Based on Calling Number In this method, call is routed to a specific number depending upon the calling party's number. To use this method, 'Destination Number Determination: Calling Number Based' table should be programmed. Call will not be answered till the destination port is answered. This method is applicable for FXO Ports, Mobile Ports and SIP Trunks. 4. Based on Called Number In this method, call is routed to a number received on the SIP Trunk. Call will not be answered till the destination port is answered. This method is applicable for SIP Trunks only. 5. Manual Dial In this method, incoming call will be answered and VGFX will feed dial tone to the caller. Call is routed to the number dialed manually by the caller. This method is applicable for all port types. For SIP Trunks, only four calls can be answered simultaneously.
23 Programming Destination Number Determination Method: Click on 'Mobile Port Parameters2' link and select Destination Number Determination Method. Similarly, open 'FXS Port Parameters 2', 'FXO Port Parameters 2' and 'SIP Trunk Parameters 2' and select Destination Number Determination Method for FXS Ports, FXO Ports and SIP Trunks respectively. Step9: Destination Port Determination Method: Routing mechanism in VGFX involves two things: Destination Number Determination Method and Destination Port Determination Method. VGFX supports following method for Destination Port Determination Method: 1. Fixed In this method, call is routed using 'Routing Groups' programmed for the respective port. This method is applicable for all port types. 2. Destination Number Based In this method, calls originated on the source port are routed through a port group based on the destination number dialed by the caller. To use this method, program 'Port Routing: Destination Number Based' table. This method is applicable for all port types. 3. Calling Number Based In this method, calls received on the source port are routed through a port group based on the calling party's number. To use this method, program 'Port Routing: Calling Number Based' table. This method is applicable for FXO Ports, Mobile Ports and SIP Trunks.

24 Programming Destination Port Determination Method: Click on 'Mobile Port Parameters2' link and select Destination Port Determination Method. Similarly, open 'FXS Port Parameters 2', 'FXO Port Parameters 2' and 'SIP Trunk Parameters 2' and program Destination Port Determination Method for FXS Ports, FXO Ports and SIP Trunks respectively. Step10: Network Port Parameters Click on 'Network Port Parameters' and program following parameters:
25 Connection Type: Select the type of connection provided by service provider in this field. Valid options: Static/DHCP/PPPoE Default = Static When DHCP is selected as the connection type then PPPoE parameters, IP parameters and DNS Settings parameters would become uneditable. PPPoE Parameters: Program following parameters when connection type selected is PPPoE. User ID: Enter PPPoE user id given by service provider manually in this field. Maximum Length: 16 characters All ASCII characters allowed Default = Blank Password: Enter password of PPPoE user id provided by service provider manually in this field. Maximum Length = 16 characters All ASCII characters allowed Default = Blank
26 Static IP Parameters: Program IP address, Subnet Mask and Gateway Address manually in the following fields if connection type selected is Static. IP Address: Enter IP Address in this field. Maximum Length = 15 characters Valid Range = 000 to 255 for first three octets and 000 to 254 for last octet Default = Subnet Mask: Enter Subnet Mask Address in this field. Maximum Length = 15 characters Valid range of octets = 000, 128, 192, 224, 240, 248, 252, 254 and 255 Default = Gateway: Enter Gateway Address in this field. Maximum Length = 15 characters Valid range of octets = 000 to 255 Default = Blank. DNS Setting: Select either Static DNS or Automatic DNS. By default, Static DNS is selected. Automatic DNS: If Automatic DNS is selected then DNS Address and DNS Domain Name shall be assigned automatically by the server. Static DNS: If Static DNS is selected then program the following parameters manually: DNS Address: Program DNS address provided by the service provided manually in this field. 1. Maximum Length = 15 characters 2. Valid range of octets = 000 to 255. DNS Domain Name: Program DNS Domain Name in this field. 1. Maximum Length = 40 characters 2. All ASCII characters allowed Router's Public IP Address: Program public IP address of the router in this field if 'Source Port IP Address' is set to 'Use Router's Public IP Address' in SIP parameters. Maximum Length = 15 characters Valid range = 000 to 255 Default = Blank. (Refer 'Port Parameters-SIP' in system manual for more details)
27 STUN: Program STUN parameters if SETU VGFX is located behind the NAT router. Server Address: Enter STUN server address in this field. Maximum Length = 40 characters All ASCII characters allowed Default = Blank Server Port: Enter STUN Server's listening port in this field. Valid range = From 1024 to Default = 3478 Use SIP Port fetched using STUN? This parameter is applicable only when 'Source Port IP Address' is set to 'Use IP Address fetched using STUN'. Valid options = Yes/No Default = No Listening Port SIP Listening Port: SIP Listening port defines the port on which SETU VGFX listens for SIP messages. Valid range = From 1024 to Default = 5060 RTP Listening Port: RTP Listening port defines the port on which SETU VGFX listens for RTP packets. Valid range = From 1024 to Default = 8000 SETU VGFX will reboot as soon as you submit the page after changing any of the Network Port parameters and you will logout of the Web JEEVES. If SETU VGFX is connected directly to the Computer for configuring the system then remove the Ethernet Cable from the Computer and connect it to the Broadband Modem switch. To know IP Address of your SETU VGFX, follow the steps given below: Enter programming mode by dialing # (Default SE Password) through FXS Port. Dial 21-#* and go On-Hook during confirmation tone. VGFX will display its IP Address as CLI on FXS Port. Note down the IP Address and exit programming mode. Access Web JEEVES using the displayed IP Address through one of the Computers connected to the LAN Switch or through Internet ready access Computer (if IP Address of VGFX is Public IP).


28 Step 11: Reinstate the Default Settings SETU VGFX enables the user to default VGFX and assign default values to all programmable parameters by using 'System Default' feature. This feature will set all parameters to factory set values except the following features: 1. Call Detail Records 2. Date and Time 3. Call Progress Tones 4. Ring Type 5. SIM PIN (in Mobile Port Parameters) Click on 'Default SETU VGFX' link. An alert message window will appear stating: This option shall assign default values to all the programmable parameters of the SETU VGFX and will restart. Do you want to continue?" OK/Cancel. Click on 'OK' button. All the programmable parameters shall be defaulted except those mentioned above, followed by system restart. Step12: Restore SE Password To program VGFX, you must login in the Jeeves or enter programming command using SE password. However, if you forget SE Password it is possible to reset the same by changing the jumper position. To default SE password, follow the steps given below: Switch Off VGFX. Locate a mini jumper J8 on the card. In normal condition, it is in BC position. J8 BC Position AB Position Change the jumper position from BC to AB. Switch On the system and wait till it gets initialize. Switch Off VGFX and restore the jumper in its original position. Switch On the system again. SE password gets default to 1234.

29 Step13: Checking the Status SIP Trunk Status: You can check SIP Trunk Status in two ways: 1. Through LED Indication 2. Through Web JEEVES Through LED Indication: Port LEDs can be programmed for showing the status of SIP Trunks also. You can program LEDs for showing status of maximum 8 SIP Trunks simultaneously. Programming of LEDs is done using Web JEEVES as shown below: Open Web JEEVES of SETU VGFX. (Refer 'Accessing Web JEEVES' topic) Click on 'System Port LED' link. Program LEDs as per your requirement. Once the LEDs are programmed for showing status of the SIP Trunks, it will display the status of SIP Trunks. If LED is programmed for SIP Trunk, it will display following error/event/ status: Event/State/Status Color Cadence (1 cadence is of 5000msec) ON OFF ON OFF SIP Disable - OFF SIP Registered Green Continuous SIP Registration Failed Red Continuous SIP Authentication Failed Red When all LEDs are programmed for showing status of SIP Trunks then status of FXS, FXO and Mobile Port will not be displayed.

30 Through Web JEEVES: Open Web JEEVES of SETU VGFX and click on the 'SIP Trunk Status' link to check status of SIP Trunks. Following page will be displayed: Following is a brief description of the parameters displayed on the 'SIP Trunk Status' page. 1. SIP Trunk Number: This field displays the SIP Trunk number. 2. Status: This field displays the status of SIP Trunk. Different status option which can appear in this field is explained below: Status Description Disable Shows that SIP Trunk is disable Registering Shows that SIP Trunk is enable and waiting for response from the SIP server Registered Shows that SIP Trunk is registered with the SIP server. Failed Shows that some error has occurred in the SIP Trunk and no calls can be made using it (applicable only in case of Proxy Account). Peer to Peer Shows that SIP Trunk is configured for Peer to Peer calling 3. Registration Time: This field displays the time left to re-register the SIP Trunk after it gets registered successfully. This time is provided by
31 the registrar server. When the registration period gets over, SIP Trunk is to be registered again. 4. Registration Retry Count: This field displays the total number of register message which is sent to the registrar server for registering SIP Trunk. 5. Failed Reason: This field displays the reason for registration failure, if registration of SIP Trunk fails with the registrar server. Registration failure occurs because of various reasons such as: Message send fail, Failed to create register client, Failed to send request, Error response-4xx to 6xx etc. Network Status: You can check Network Status through Web JEEVES only. Open Web JEEVES of SETU VGFX and click on the 'Network Status' link. Following page will be displayed: Brief description of the parameters displayed on the 'Network Status' page is as follows: 1. IP Address: This field displays IP address currently assigned to VGFX. 2. Subnet Mask: This field displays Subnet Mask currently assigned to VGFX. 3. Gateway Address: This field displays Gateway Address assigned to VGFX.
32 4. MAC Address: This field displays MAC Address assigned to VGFX. 5. DNS Address: This field displays the DNS address of VGFX. 6. NAT Type: This field displays NAT Type, if STUN is enabled in VGFX. The NAT Types Supported by VGFX are: Unknown Open Conenat Restrictednat Portrestrictednat Symmetricnat Symmetricfirewall Blocked 7. Router's Public IP Address: This field displays Router's Public IP address programmed in the Network Port Parameters. 8. IP Address fetched using STUN: This field displays the IP address fetched using STUN if STUN server address is programmed. 9. SIP Port fetched using STUN: This field displays the SIP port fetched using STUN if STUN server address is programmed. 10. Stack Status: In this field, strings such as Idle, DHCP Response wait, PPPoE response wait, NAT checking response wait, construct and error is displayed. Test Call Now you can make and receive calls either from a cell phone or from analog phone connected to VGFX follow the steps given below to make a test call: Making a Call Pick up the handset of telephone instrument connected to SETU VGFX. You will get dial tone. Dial the desired number. Talk after the called party replies the call. Dial 'Call Disconnect' access code or replace the handset to disconnect the call. Receiving a Call Ring on telephone instrument connected to SETU VGFX. Lift the handset to talk. You will be in speech with the calling party. Replace the handset to disconnect the call.
33 Appendices Features at Glance Feature Description Feature Code To Enter Programming Mode #19-User Password (Default Password = 1234) To Exit Programming Mode 00#* To Set Hotline #151-1 To Cancel Hotline #151-0 To Enable Call Waiting #16-1 To Disable Call Waiting #16-0 To Set DND #18-1 To Cancel DND #18-0 To Set Call Forward Unconditional #131-1 To Cancel Call Forward Unconditional #131-0 To Set Call Forward Busy #132-1 To Cancel Call Forward Busy #132-0 To Set Call Forward No Reply #133-1 To Cancel Call Forward No Reply #133-0 To Program Hotline Number #152-Destination Number-End-of- To Program Hotline Timer #153-X (X is the timer value) To Program Call Forward Unconditional Number #135-Destination number-end-of- To Program Call Forward Busy Number #136-Destination Number-End-of- To Program Call Forward No Reply Number #137-Destination Number-End-of- To Program No-Reply Timer #139-XX (XX is time in seconds) For Call Hold Flash To Retrieve Held Call Flash For Call Toggle (Call Split) #2 To Reject the Waiting Call and Speech with #31 Current Call To Ignore the Waiting Call and Speech with #32 Current Call To Accept the Waiting Call and Hold Current #33 Call To Accept the Waiting Call and Release #34 Current Call For Blind Transfer #6 For Conference #8 For Using Supplementary Services of #4 Service Provider For Attended Transfer ^ (On-Hook) For Making a New Call #91 To Disconnect Call #92
34 @ Dial # as end of dialing if end of dialing digit is programmed or wait till expiry of inter digit wait timer. System Commands Description To Program Network IP Address To Program Network Subnet Mask To Program the Connection Type To Enable/Disable VLAN tag To Display the Connection Type To Display the Network IP Address To Display the Network Subnet Mask To Display the Network Gateway Address To Display the DNS Address To Display the Signal Strength of the GSM Network To Display the Status of SIP Accounts System Commands 11-IP Address-#* 12-Subnet Mask-#* 10-Code-#* 31-Code-#* 20-#*-Go On-Hook 21-#*-Go On-Hook 22-#*-Go On-Hook 23-#*-Go On-Hook 24-#*-Go On-Hook 26-Mobile Port-#* 27-SIP Accounts-#*
35
36 MATRIX TELECOM PVT. LTD. Corporate Office: 394-GIDC, Makarpura, Vadodara , India. Tel.: , Fax: Info@MatrixTeleSol.com Factory: 39-GIDC, Waghodia , Dist. Vadodara, India. Tel.: /57 Technical Support: Tel.: /73, Fax: Support@MatrixTeleSol.com Version 1, August 2009
SETU VFXTH System Manual
 SETU VFXTH System Manual SETU VFXTH MULTI-PORT VoIP-FXO-FXS GATEWAY System Manual Documentation Disclaimer Matrix Comsec reserves the right to make changes in the design or components of the product as
SIMADO GFX11/GFX11E Quick Start
 SIMADO GFX11/GFX11E Quick Start SIMADO GFX11 GSM/3G Fixed Cellular Terminal for Voice Applications SIMADO GFX11E GSM/3G Fixed Cellular Terminal for Emergency Applications Quick Start Documentation Disclaimer
ANSEL FXS / 1 PSTN. VoIP Telephone Adaptor. User Manual V1.10
 ANSEL 5518 1 FXS / 1 PSTN VoIP Telephone Adaptor User Manual V1.10 Quick Guide Step 1: Broadband (ADSL/Cable Modem) Connections for ANSEL 5518 A. Connect ANSEL 5518 WAN port to ADSL NAT Router as the following
SETU ATA211G Quick Start.
 SETU ATA211G Quick Start Disclaimer Matrix Comsec reserves the right to change, at any time, without prior notice, the product design, specifications, components, as engineering and manufacturing may warrant.
Welltech WellGate User Manual
 Welltech WellGate 2626 An Easy to Use PBX Gateway User Manual Copyright 2009 Welltech Computer Co., Ltd. All right reserved Table of Contents Introduction...2 WellGate 2626 - An Easy to Use PBX Gateway...2
FAQs on ETERNITY NE. Ans. ETERNITY NE is an all Integrated IP-PBX with seamless mobility that caters to the communication
 FAQs on ETERNITY NE Q1. What is ETERNITY NE? Ans. ETERNITY NE is an all Integrated IP-PBX with seamless mobility that caters to the communication requirements of small business. ETERNITY NE offers connectivity
CHAPTER 3 CONFIGURING THE SIP-PHONE THROUGH WEB PAGES STEP 1. BROWSE THE IP ADDRESS PREDEFINED VIA KEYPAD... 36
 WellPhone-305 SIP CHAPTER 1 OVERVIEW OF THE SIP-PHONE... 3 1. HARDWARE OVERVIEW... 4 1.Front View and Keypad function... 4 2.Back View...11 3.Specification of connector...11 2. SOFTWARE FEATURES AND SPECIFICATION...
FTA-102L. Free Roaming Gateway. User Manual
 FTA102L Free Roaming Gateway User Manual FTA102L PORTech Communications Inc. Content 1. Introduction... 1 2. System Topology... 2 3. Function Description... 2 4. Parts list... 3 5. Dimension: 14*9*3 cm...
TT11 VoIP Router 1FXS/1FXO TA User Guide
 TT11 VoIP Router 1FXS/1FXO TA User Guide Page 1 Table of Contents: 1.0 Introduction... 3 2.0 Package Contents... 3 3.0 Summary of LED & Connector Descriptions... 4 3.1 The Front LEDs... 4 3.2 The Rear
EP502/EP504 IP PBX 1.1 Overview
 1.1 Overview The EP502/EP504 is an embedded Voice over IP (VoIP) Server with Session Initiation Protocol (SIP) to provide IP extension phone connection for global virtual office of small-to-medium business
RP-FSO522 2-Line FXO, 2-Line FXS SIP IP Gateway. Feature
 RP-FSO522 2-Line FXO, 2-Line FXS SIP IP Gateway RP-FSO522 is an 2-Line FXO plus 2-Line FXS gateway with SIP protocol IP device which allows to connect 2 Lines of analog PSTN telephone line and connect
Matrix SETU ATA. VoIP Adaptors with FXO, FXS, GSM Ports and Multiple SIP Accounts
 Warm Welcome Matrix SETU ATA VoIP Adaptors with FXO, FXS, GSM Ports and Multiple SIP Accounts SETU ATA Presentation Outline Introduction Variants Target Customers Applications Key Features Technical Specifications
2757 VoIP Phone Users Guide
 2757 VoIP Phone Users Guide Rev. 1.0 Table of Contents 1 Introduction... 5 1.1 Package Contents... 5 1.2 Features... 5 1.3 Basic Setup... 6 2 Network Setup... 8 2.1 Static IP Address... 8 2-2 PPPoE...11
WellGate 2504 ( 4-FXS ) and WellGate 2540 (4-FXO gateway) in Peer to Peer mode with Hotline by port to port application.
 and WellGate 2540 (4-FXO gateway) in Peer to Peer mode with Hotline by port to port application.") WellGate 2504 ( 4-FXS ) and WellGate 2540 (4-FXO gateway) in Peer to Peer mode with Hotline by port to port application. Note : Please use Windows XP IE 6.0 web browser or above version to configure both
WellGate 2504 ( 4-FXS ) and WellGate 2540 (4-FXO gateway) in Peer to Peer mode with Hotline by port to port application. Note : Please use Windows XP IE 6.0 web browser or above version to configure both
Please follow the steps that are listed here to get started with your Berkshire 10K ippbx telephone system.
 Please follow the steps that are listed here to get started with your Berkshire 10K ippbx telephone system. Step 1 Power-up and log into your PC. Unplug any existing ethernet cable from your PC. Step 2
4 Port IP-PBX + SIP Gateway System
 4 Port IP-PBX + SIP Gateway System The IPG-40XG is an embedded Voice over IP (VoIP) PBX Server with Session Initiation Protocol (SIP) to provide IP extension phone connections for global virtual office
VS Port FXS SIP. VoIP Telephone Adaptor. User Manual. V2.1h
 VS200 2-Port FXS SIP VoIP Telephone Adaptor User Manual V2.1h Quick Guide Step 1: Broadband (ADSL/Cable Modem) Connections for VS200 A. Connect VS200 LAN port to ADSL NAT Router as the following connection.
VG422R. User s Manual. Rev , 5
 VG422R User s Manual Rev 1.0 2003, 5 CONGRATULATIONS ON YOUR PURCHASE OF VG422R... 1 THIS PACKAGE CONTAINS... 1 CONFIRM THAT YOU MEET INSTALLATION REQUIREMENTS... 1 1. INSTALLATION GUIDE... 2 1.1. HARDWARE
KT101 Broadband IP Phone User Manual
 KT101 Broadband IP Phone User Manual Content 1 Product Overview... 4 1.1 Introduction to IP Telephony... 4 1.2 Features... 4 1.3 Intended Users and Situations... 5 1.4 Top View and Button Description...
SETU VGFX Multi-port SIP based VoIP to GSM, FXO and FXS Gateway
 Multi-port SIP based VoIP to GSM, FXO and FXS Gateway Today, with expanding business horizons, communication has emerged as a life-line for business sustenance. Communication that is seamless, faster and
KTA1010 INSTALL GUIDE
 KTA1010 INSTALL GUIDE Table of Contents 1 Check for Required Items... 2 2 Installation... 2 2.1 Installation View... 2 2.2 Connection Chart to determine cable types... 3 3 Ready to use... 3 3.1 Network
TA Series Analog VoIP Gateway Installation Guide
 TA Series Analog VoIP Gateway Installation Guide Version 1.5 Date: November 17, 2016 Yeastar Information Technology Co. Ltd. Contents About TA Series Analog VoIP Gateway... 3 1. Preparation before Installation...
VoIP ATA series (ATA171plus, ATA172plus, ATA-171, ATA-172, ATA-171M, ATA-171P)
") ATA Web User Guide VoIP ATA series (ATA171plus, ATA172plus, ATA-171, ATA-172, ATA-171M, ATA-171P) User Guide Released Date : January-2015 Firmware Version : V.303 1. Introduction... 4 2. Hardware Overview...
ATA Web User Guide VoIP ATA series (ATA171plus, ATA172plus, ATA-171, ATA-172, ATA-171M, ATA-171P) User Guide Released Date : January-2015 Firmware Version : V.303 1. Introduction... 4 2. Hardware Overview...
Quick Start Guide. Cisco SPA232D Mobility Enhanced ATA
 Quick Start Guide Cisco SPA232D Mobility Enhanced ATA Package Contents Analog Telephone Adapter Ethernet Cable Phone Cable Power Adapter Quick Start Guide Product CD-ROM Welcome Thank you for choosing
SAPEX. The All in One Embedded IP PBX Server
 Warm Welcome SAPEX The All in One Embedded IP PBX Server Introduction Pure IP-PBX Embedded Server Platform Registrar, Proxy, Presence and Voice Mail Servers : All-Integrated Open-Standard SIP Protocol
VoiceLine Calling Features
 VoiceLine Calling Features For a complete list of features and codes, refer to the VoiceLine User s Guide. VOICELINE CALLING FEATURES Feature Call Waiting Caller ID 3-Way Calling Description Once you hear
DVG-6008S FXO VoIP Router
 This product can be set up using Internet Explorer or Netscape Navigator, 6.x or above, with Javascript enabled DVG-6008S FXO VoIP Router Before You Begin You must have at least the following: A subscription
Voice Communication for Free High Performance Embedded VoIP Gateway
 Voice Communication for Free High Performance Embedded VoIP Gateway 07I12CM.ENC Copyright Notice Copyright (c) 2007 DSG Technology Inc. All rights reserved. This guide, the software and the hardware described
Version: epbxum_
 epbx-100a-128 User s Manual Version: epbxum_128.300 CH1. Overview 5 1.1 Specifications 5 1.2 Hardware Overview 7 1.2.1 Front Panel and LED Indication...7 1.2.2 Back Panel...8 CH2. Start to configure epbx-100a-128
IPS-2101h. Quick Installation Guide V1.0
 IPS-2101h Quick Installation Guide V1.0 ArtDio IPS-2101h VoIP Gateway Package content: One IPS-2101h VoIP Gateway One Power Adaptor One RJ 45 Ethernet Cable One RJ-11 Telephone Cable Quick Installation
TG400/TG800 Series. VOIP Voice Gateway. Version: 2.0.1
 TG400/TG800 Series VOIP Voice Gateway USER MANUAL Version: 2.0.1 Default Login Details WAN IP Address: DHCP LAN IP Address: http://222.222.222.1 User Name: admin Password: admin Preface... 5 0.1 About
Internet Telephony Gateway VGW-402 / VGW-400FS / VGW-400FO. Quick Installation Guide
 Internet Telephony Gateway VGW-402 / VGW-400FS / VGW-400FO Quick Installation Guide Table of Contents 1. Package Contents... 3 2. Hardware Installation... 4 2.1 Safety Instructions... 4 2.2 Physical Introduction...
EIP 7012 Essence VoIP Phone Administration Guide Version 1.0B
 Essence Technology EIP 7012 Essence VoIP Phone Administration Guide Version 1.0B Table of Contents 1 Introduction... 1 1.1 Hardware Overview... 1 1.2 Software Overview... 1 2 Keypad interface for IP Phone
Table of Contents. CRA-200 Analog Telephone Adapter 2 x Ethernet Port + 2 x VoIP Line. Quick Installation Guide. CRA-200 Quick Installation Guide
 CRA-200 Analog Telephone Adapter 2 x Ethernet Port + 2 x VoIP Line Quick Installation Guide Table of Contents VoIP ATA Package Contents... 2 Checklist... 2 IMPORTANT SAFETY INSTRUCTIONS... 3 Connecting
All Rights Reserved. February 2005 Version 1.1
 All Rights Reserved The use, disclosure, modification, transfer or transmittal of this work for any purpose, in any form, or by any means, without the written permission from Net2Phone is strictly forbidden.
Configuring the Grandstream UCM6202 for use with TopView Voice Notification Updated August 2018
 Configuring the Grandstream UCM6202 for use with TopView Voice Notification Updated August 2018 Contents Introduction... 2 Voice Notification in TopView... 2 Options for using VOIP in TopView... 2 How
Quick Installation Guide of Acer WLAN 11b Broadband Router
 Preparation 1 At lease one PC with IEEE802.11b WLAN client installed. 2 One straight-through Category 5 Ethernet cable, used to link WAN interface to xdsl or CM for Internet connection. 3 Acer WLAN 11b
Phone Adapter with Router
 Voice User Guide Model No. SPA2102 Copyright and Trademarks Specifications are subject to change without notice. Linksys is a registered trademark or trademark of Cisco Systems, Inc. and/or its affiliates
Ultra-elegant Gigabit IP Phone
 Ultra-elegant Gigabit IP Phone SIP-T42G Quick Start Guide(V73.40) www.yealink.com Applies to firmware version 29.73.0.40 or later. EHS36 Packaging Contents The following items are included in your package.
VoiceLine Getting Started Guide InnoMedia MTA R
 VoiceLine Getting Started Guide InnoMedia MTA 3328-2R June 2005 IMPORTANT NOTICE CONCERNING EMERGENCY 911 SERVICES Your service provider, not the manufacturer of the equipment, is responsible for the provision
User Guide. V110, V210P, V211, V220 VoIP ATA
 User Guide V110, V210P, V211, V220 VoIP ATA Welcome to the Wonderful World of VoIP Congratulations on your purchase of a NetComm VoIP ATA. Whether this is your first VoIP device or you are upgrading from
Contents. 2 V85 Desktop VoIP Phone User Guide YML772 Rev1
 Contents Chaper 1: Introduction... 4 About VoIP... 4 Chapter 2: Getting to know your V85... 6 Before you begin...... 6 Package Contents... 7 Rear of the V85... 8 Chapter 3: Getting your V85 Up and Running...
Grandstream Networks, Inc. HT802 Analog Telephone Adaptor User Guide
 Grandstream Networks, Inc. HT802 Analog Telephone Adaptor User Guide COPYRIGHT 2016 Grandstream Networks, Inc. http://www.grandstream.com All rights reserved. Information in this document is subject to
Table of Contents. Save Changes Restart System Troubleshooting Warranty Contacting Technical Support Registration...
 Table of Contents Product Overview...3 Introduction...3 Features...4 Hardware Overview...5 Front Panel - LEDs...5 Rear Panel - Connections...6 Installation...7 Requirements...7 Connection...8 Configuration...9
SIP Proxy Server. Administrator Installation and Configuration Guide. 08SIPXM.SY2.20a.EN2
 SIP Proxy Server Administrator Installation and Configuration Guide 08SIPXM.SY2.20a.EN2 DSG, DSG logo, InterPBX, InterServer, Blaze Series, Savanna, VG5000, VG6000, VG7000, IP590, IP580, IP500, IP510,
Enterprise IP Phone SIP-T19 E2 & T19P E2
 Enterprise IP Phone SIP-T19 E2 & T19P E2 Quick Start Guide(V80.10) www.yealink.com Applies to firmware version 53.80.0.10 or later. Packaging Contents The following items are included in your package.
Version: V1.0. Yeastar Technology Co., Ltd. Date: 25 th, July, 2012
 MyPBX U500 Installation Guide Version: V1.0 Yeastar Technology Co., Ltd Date: 25 th, July, 2012 http://www.yeastar.com 1/13 Contents MyPBX U500 Installation Guide 1. PREPARATION BEFORE INSTALLATION...
GIGABIT COLOR IP PHONE
 GIGABIT COLOR IP PHONE USER GUIDE UC842 Version:1.0.3.59 Nanjing Hanlong Technology Co., Ltd 86-25-84608050 support@hanlongtek.com Notices Information Notices Information Copyright Copyright 2005-2013
VOI-9300 SIP IP PBX. User Manual
 VOI-9300 SIP IP PBX User Manual September 2008 GENERAL PUBLIC LICENSE This product incorporates open source code into the software and therefore falls under the guidelines governed by the General Public
SIP Proxy Server. Administrator Installation and Configuration Guide. 06SIPXM.SY1.00a.EN1
 SIP Proxy Server Administrator Installation and Configuration Guide 06SIPXM.SY1.00a.EN1 DSG, DSG logo, InterPBX, InterServer, Blaze Series, Savanna Series, VG5000, IP580, IP500, InterClient, NAT Proxy,
VG-422R. User s Guide
 VG-422R User s Guide Trademarks Contents are subject to revise without prior notice. All trademarks belong to their respective owners. FCC Warning This equipment has been tested and found to comply with
for VoIP Gateway Series
 Smart Web Manager for VoIP Gateway Series www.addpac.com AddPac Technology 2010, Sales and Marketing Contents Web Connection Main Page Layout System Configuration Language, WAN Setup, LAN Setup, NAT, NTP,
IS-381 / IS-382 IP Audio gateway. User Manual
 IS-381 / IS-382 IP Audio gateway User Manual IS-381 IS-382 PORTech Communications Inc. Content 1. Introduction... 1 2. Functions... 1 3. Parts list... 2 4.Main body size... 2 5.Panel description... 3 6.Link
AC1200M/MS. User Manual
 AC1200M/MS User Manual Table of Contents User Manual... 1 1 Preface... 1 2 LED Indicators and Connectors... 1 2.1 LED Indicators... 1 2.2 Hardware Installation... 2 3 Voice Prompt (AC1200MS)... 2 4 User
Broadvox Fusion SIP Trunks Configuration Guide PBX Platform: KX-TDA50
 Broadvox Fusion SIP Trunks Configuration Guide PBX Platform: KX-TDA50 3/20/2013 1 Overview This document describes the configuration procedures required for the KX-TDA50 to make full use of the capabilities
SPA400 Internet Telephony Gateway with 4 FXO Ports
 SPA400 Internet Telephony Gateway with 4 FXO Ports Administration and Configuration Guide v1.0 Using the SPA400 The SPA400 features the ability to connect up to four (4) standard analog telephones lines
Sipura SPA 3000 How To. (c) Bicom Systems
 Bicom Systems") Sipura SPA 3000 How To Sipura SPA 3000 How To All rights reserved. No parts of this work may be reproduced in any form or by any means - graphic, electronic, or mechanical, including photocopying, recording,
Sipura SPA 3000 How To Sipura SPA 3000 How To All rights reserved. No parts of this work may be reproduced in any form or by any means - graphic, electronic, or mechanical, including photocopying, recording,
Yeastar S300 VoIP PBX. Installation Guide
 Yeastar S300 VoIP PBX Installation Guide Version 1.0 Jun. 2016 Content Content...2 Welcome.3 Before You Start...4 Package Contents..4 Expansion Board 4 Yeastar S300 Overview.5 LED Indicators and Ports..6
Contents. 2 SmartVoice Gateway(s) User Guide YML832 Rev1
 User Guide YML832 Rev1") Contents 1. Introduction...4 Product Overview...4 Items that you will need and things you will need to know...5 NetComm SmartVoice Gateway Features...6 SmartVoice Gateway Hardware Description...9 Front
Contents 1. Introduction...4 Product Overview...4 Items that you will need and things you will need to know...5 NetComm SmartVoice Gateway Features...6 SmartVoice Gateway Hardware Description...9 Front
Ultra-elegant Gigabit IP Phone
 Ultra-elegant Gigabit IP Phone SIP-T48G Quick Start Guide (V8060) wwwyealinkcom Applies to firmware version 3580060 or later Packaging Contents The following items are included in your package If you find
BiPAC 7404V Series. VoIP/ (802.11g) ADSL2+ (VPN) Firewall Router. Quick Start Guide
 ADSL2+ (VPN) Firewall Router. Quick Start Guide") BiPAC 7404V Series VoIP/ (802.11g) ADSL2+ (VPN) Firewall Router Quick Start Guide Billion BiPAC 7404V Series ADSL2+ Router PLEASE READ THE QUICK START GUIDE AND FOLLOW THE STEPS CAREFULLY. THIS QUICK
BiPAC 7404V Series VoIP/ (802.11g) ADSL2+ (VPN) Firewall Router Quick Start Guide Billion BiPAC 7404V Series ADSL2+ Router PLEASE READ THE QUICK START GUIDE AND FOLLOW THE STEPS CAREFULLY. THIS QUICK
What you need today is Essence IPBX for tomorrow s productivity
 What you need today is Essence IPBX for tomorrow s productivity Energize your business with effective Essence IPBX system which comes with easy setup and administrator-friendly designs. Essence IPBX system
TG Series GSM/3G VoIP Gateway User Guide
 TG Series GSM/3G VoIP Gateway User Guide Sales Tel: +86-592-5503309 E-mail: sales@yeastar.com Support Tel: +86-592-5503301 E-mail: support@yeastar.com Web: http://www.yeastar.com Version: 91.1.0.7 Revised:
Steady green On hook. Slow flashing green Off hook. Off Port not ready. Off No link. Fast flashing green Upgrading firmware.
 Product Features Product Features Top Panel Feature Description Steady green On hook. Phone Phone 2 Slow flashing green Off hook. Off Port not ready. Flashing green Transmitting or receiving data through
Yeastar S412 VoIP PBX
 Yeastar S412 VoIP PBX Installation Guide Version: 1.3 Date: 2017.10.10 Content CONTENT... 2 WELCOME... 3 BEFORE YOU START... 4 Package Contents... 4 Hardware Overview... 4 LED Indicators and Ports... 5
NEOS3000A GSM Least Cost Wireless Router
 NEOS3000A GSM Least Cost Wireless Router For model GW-NEOS-TC35A5-Q1 or later Operating Manual. Model GW-NEOS-TC35A5-Q1 or later Operating manual Ver. 1.2 November 2005 page 1 Introduction Thank you for
Contents. 2 V400 Series VoIP Gateway User Guide YML832 Rev1
 Contents 1. Introduction...4 Product Overview...4 Items that you will need and things you will need to know...5 NetComm V400 Series VoIP Gateway Features...6 Package Contents...9 Hardware Description...10
Grandstream Networks, Inc. HT814 Analog Telephone Adaptors User Guide
 Grandstream Networks, Inc. HT814 Analog Telephone Adaptors User Guide COPYRIGHT 2016 Grandstream Networks, Inc. http://www.grandstream.com All rights reserved. Information in this document is subject to
Grandstream Networks, Inc. HT818 Analog Telephone Adaptor User Guide
 Grandstream Networks, Inc. HT818 Analog Telephone Adaptor User Guide COPYRIGHT 2018 Grandstream Networks, Inc. http://www.grandstream.com All rights reserved. Information in this document is subject to
BiPAC 6404VP/VGP. VoIP/(802.11g) Broadband Firewall Router. Quick Start Guide
 Broadband Firewall Router. Quick Start Guide") BiPAC 6404VP/VGP VoIP/(802.11g) Broadband Firewall Router Quick Start Guide VoIP/(802.11g) Broadband Firewall Router For more detailed instructions on configuring and using the VoIP/(802.11g) Broadband
BiPAC 6404VP/VGP VoIP/(802.11g) Broadband Firewall Router Quick Start Guide VoIP/(802.11g) Broadband Firewall Router For more detailed instructions on configuring and using the VoIP/(802.11g) Broadband
Grandstream Networks, Inc. HT801/HT802 Analog Telephone Adaptors User Guide
 Grandstream Networks, Inc. HT801/HT802 Analog Telephone Adaptors User Guide COPYRIGHT 2017 Grandstream Networks, Inc. http://www.grandstream.com All rights reserved. Information in this document is subject
GoIP Series SIM Card for GSM Voice Gateway User Manual
 GoIP Series SIM Card for GSM Voice Gateway User Manual V3.0 Shenzhen HYBERTONE Technology Co., Ltd Http://www.hybertone.com Marketing@ hybertone.com Support@ hybertone.com Content Content...1 1 Overview...3
Analog Telephone Adapter Setup for Q-SYS Softphone
 Analog Telephone Adapter Setup for Q-SYS Softphone This document applies to this Cisco device: SPA232D Introduction This document covers the use of the SPA232D in the role of analog telephone adapter (ATA)
Aristel Networks Pty Ltd NEOS Port GSM / 3G* Fixed Wireless Terminal
 NEOS 4000 For models: 4 Port GSM / 3G* Fixed Wireless Terminal NEOS 4000-01 (GSM900/1800) NEOS 4000-02 (GSM 850/900/1800/1900) *NEOS 4000-3G (Next G & 3G) Operating Manual NEOS4000 SERIES Operating MANUAL
D-Link DVG-1402S. Manual. 2Voice + 4SW VoIP Router. Version B.1. Building Networks for People
 D-Link DVG-1402S 2Voice + 4SW VoIP Router Manual Building Networks for People Version B.1 Contents Package Contents... 3 Introduction... 4 Rear Panel Connections... 5 Front Panel LEDs... 6 Features...
Quick Installation Guide DVG-N5412SP VoIP Wireless Router
 Quick Installation Guide DVG-N5412SP VoIP Wireless Router Check Your Package Contents DVG-N5412SP VoIP Router Phone Cord X 2 Ether Cable (CAT5 UTP) 12VDC, 2A Power Adapter Using a power adapter with a
Ultra-elegant Gigabit IP Phone
 Ultra-elegant Gigabit IP Phone SIP-T48G Quick Start Guide(V80.95) www.usaphone.com 856.761.1000 Applies to firmware version 35.80.0.80 or later. Packaging Contents The following items are included in your
The VWRT510&WRT500 High Speed Router User s Guide
 The VWRT510&WRT500 High Speed Router User s Guide The page 1 of 53 Table of Contents 1 Preface... 4 2 LED Indicators and Connectors... 5 2.1 LED Indicators... 6 2.2 Hardware Installation... 7 3 Voice Prompt...
Internet Telephony PBX System. (30/100/500 SIP Users Registrations) IPX-330 / IPX-2100 / IPX Quick Installation Guide
 IPX-330 / IPX-2100 / IPX Quick Installation Guide") Internet Telephony PBX System (30/100/500 SIP Users Registrations) IPX-330 / IPX-2100 / IPX-2500 Quick Installation Guide Table of Contents 1. IPX-330... 3 1.1. Package Contents... 3 1.2. Hardware Installation...
Internet Telephony PBX System (30/100/500 SIP Users Registrations) IPX-330 / IPX-2100 / IPX-2500 Quick Installation Guide Table of Contents 1. IPX-330... 3 1.1. Package Contents... 3 1.2. Hardware Installation...
SPARSH VP The High-definition Edge to Your IP Communication
 SPARSH VP The High-definition Edge to Your IP Communication Telecommunication has undergone many technological phases starting from analog to digital, wired to wireless and gradually evolved to VoIP technology
InterPBX Quick Installation Guide
 InterPBX Quick Installation Guide Prepare Your Telephone Numbering Plan InterPBX Communication System supports flexible numbering plan with maximum 5 digits of extension number. You need to prepare the
Aristel Networks Pty Ltd. All Round Cabling Solutions NEOS3003-3G01. Operating Manual * NEOS G01
 Aristel Networks Pty Ltd All Round Cabling Solutions NEOS3003-3G01 Operating Manual * NEOS 3003-3G01 Supports 3G/UMTS 800/850/900/1900/2100 MHz bands Telstra-Vodafone-Optus supported in all areas. * Model:
Version:V1.1. Yeastar Technology Co., Ltd. Date: 9 th, Aug, 2013
 MyPBX U300 Installation Guide Version:V1.1 Yeastar Technology Co., Ltd Date: 9 th, Aug, 2013 http://www.yeastar.com1/15 Contents 1. PREPARATION BEFORE INSTALLATION... 3 2. HARDWARE SPECIFICATIONS... 4
Hotel Phone - H3 & H5 Quick Installation Guide
 Hotel Phone - H3 & H5 Quick Installation Guide Connection methods Please connect power adapter, network, PC, and handset to the corresponding ports as described in below picture. 2 / 6 1 Introduction to
DMR Conventional Radio. SIP Phone Application Notes
 DMR Conventional Radio SIP Phone Application Notes Copyright Information Hytera is the trademark or registered trademark of Hytera Communications Corporation Limited (the Company) in PRC and/or other countries
Quick Start Guide. NB9WMAXX ADSL2+ VoIP Modem Router
 Quick Start Guide NB9WMAXX ADSL2+ VoIP Modem Router Please note that documentation and features of this product are subject to change, please visit the support downloads section of the NetComm website
VoIP Analog Telephone Adapter VIP-158 User s manual Version 1.00
 VoIP Analog Telephone Adapter VIP-158 User s manual Version 1.00-1 - Copyright Copyright (C) 2007 PLANET Technology Corp. All rights reserved. The products and programs described in this User s Manual
Enterprise IP Phone SIP-T26P. Applies to firmware version or later.
 Enterprise IP Phone SIP-T26P Quick Start Guide (V7340) wwwyealinkcom Applies to firmware version 673040 later Packaging Contents The following items are included in your package If you find anything missing,
Basic FXO Gateway Configuration
 Mediatrix units with FXO ports Revision 308 2015-06-25 Table of Contents Table of Contents Configuring the Mediatrix Unit 3 Getting Started 3 Logging On to the Mediatrix Unit Web Interface 3 Configuring
Enterprise IP Phone SIP-T23P & SIP-T23G. Quick Start Guide (V80.60) Applies to firmware version or later.
 Applies to firmware version or later.") Enterprise IP Phone SIP-T23P & SIP-T23G Quick Start Guide (V8060) wwwyealinkcom Applies to firmware version 4480060 later Packaging Contents The following items are included in your package If you find
Enterprise IP Phone SIP-T23P & SIP-T23G Quick Start Guide (V8060) wwwyealinkcom Applies to firmware version 4480060 later Packaging Contents The following items are included in your package If you find
SMG1004B SMG1008B SMG1016B4 SMG1032B4
 Synway SMG-B Series Analog Gateway SMG1004B SMG1008B SMG1016B4 SMG1032B4 Analog Gateway Version 1.1.0 Synway Information Engineering Co., Ltd www.synway.net Content Content...i Copyright Declaration...iii
Sales and Marketing.
 3G SMS Gateway Solution AddPac Technology Sales and Marketing www.addpac.com Contents SMS Gateway Service Diagram SMS Gateway Series AP-GS3500(36ch) AP-GS2500(16ch) 4-Port 3G Module (AP-N1-3G4) Smart Web
SVG300S+ 2 FXS SIP/IAX ATA USER MANUAL
 SVG300S+ 2 FXS SIP/IAX ATA USER MANUAL STEPHEN TECHNOLOGIES CO.,LIMITED ALL RIGHTS RESERVED Contents Preface... 3 About this Manual... 3 Audience... 3 Related Documentation... 3 Document Conventions...
TG200 User Manual. Version Yeastar Technology Co., Ltd
 TG200 User Manual Version 5.11.0.05 Yeastar Technology Co., Ltd Table of Contents 1. INTRODUCTION... 4 1.1 Features... 4 1.2 Hardware Specification... 4 1.2.1 Exterior Appearance... 4 2. SYSTEM SET UP...
Yeastar S100 VoIP PBX
 Yeastar S100 VoIP PBX Installation Guide Version: 1.1 Date: 2016/7/6 Content Welcome...3 Before You Start..4 Package Contents.4 Expansion Board 4 Yeastar S100 Overview...5 LED Indicators and Ports..6 Installation...8
AddPac Technology. 2012, Sales and Marketing.
 SOHO GSM Gateway Solution AddPac Technology 2012, Sales and Marketing www.addpac.com Contents SOHO GSM Gateway Service Diagram SOHO GSM Gateway Series AP-GS501(1ch) AP-GS701(1ch) AP-GS702(2ch) AP-GS802(2ch)
PLEASE READ. This user manual is from the manufacturer Jive Communications may not support some features discussed in this document.
 PLEASE READ This user manual is from the manufacturer Jive Communications may not support some features discussed in this document. Please see our online documentation or contact us for a complete list
SoLink-Lite IP-PBX. Administrator Guide. (Version 1.0)
") SoLink-Lite IP-PBX Administrator Guide (Version 1.0) TABLE OF CONTENT 1.0 Introduction... 1 2.0 Setting Up the IP-PBX... 2 3.0 Logging On... 3 4.0 Configuring Network... 4 5.0 Configuring Hardware... 5
SoLink-Lite IP-PBX Administrator Guide (Version 1.0) TABLE OF CONTENT 1.0 Introduction... 1 2.0 Setting Up the IP-PBX... 2 3.0 Logging On... 3 4.0 Configuring Network... 4 5.0 Configuring Hardware... 5
Version: SIPPBXUM.100
 SIPPBX 6200A User s Manual Version: SIPPBXUM.100 CH1. Overview... - 5-1.1 Specifications... - 5-1.2 Hardware Overview... - 8-1.2.1 The Front Panel... - 8-1.2.2 The Back Panel... - 8 - CH2. Start to configure
XBLUE QB Setup Guide QB1 QB2
 XBLUE QB Setup Guide QB1 QB2 20180406001 Content About This Guide... 3 Defaults (what is set at the factory):... 3 Before You Start... 4 Package Contents... 4 Online aids... 4 Hardware Overview... 5 LED