HIPAA Compliance Module. Using the HIPAA Module without Inspector Instructions. User Guide RapidFire Tools, Inc. All rights reserved.
|
|
|
- Violet Hodges
- 6 years ago
- Views:
Transcription
1 HIPAA Compliance Module Using the HIPAA Module without Inspector Instructions User Guide 2017 RapidFire Tools, Inc. All rights reserved. V
2 Contents Purpose of this Guide... 4 About Network Detective HIPAA Compliance Module... 4 Overview... 5 HIPAA Assessment Project Initial Set-up... 6 Creating a Site... 6 Starting a HIPAA Assessment... 7 HIPAA Risk Assessment... 8 HIPAA Risk Profile... 8 Using the Checklist Feature for Assessment Process Guidance Planning the On-site Data Collection Scans Performed During the HIPAA Assessment Process Optional Internal Network Vulnerability Scan and Local Scanning of Unreachable Computers PHASE A INITIAL DATA COLLECTION Phase A - Step 1: Complete the HIPAA On-site Survey Assessment Status and Checklist Updates and Progress Tracking Phase A - Step 2: Initiate External Vulnerability Scan Phase A - Step 3: Initiate the HIPAA Network Scan Using the HIPAA Data Collector and Import Scan Results Running the HIPAA Data Collector - Network Scan Importing the HIPAA Network Scan Data Phase A - Step 4: Use Push Deploy Tool to Initiate Push of HIPAA Local Scans on Selected Systems and Import Scan Results Run the HIPAA Local Computer Scan using the Push Deploy Tool based scanner Importing the HIPAA Local Computer Scan Data into the HIPAA Assessment PHASE B GET SECONDARY DATA Phase B - Step 1: Run HIPAA Data Collector selecting Local Scan on the Computers that were Unreachable during Push Deploy Tool Scanning (OPTIONAL) Phase B - Step 2: Complete the Inactive Computer Identification Worksheet Phase B - Step 3: Complete the User Identification Worksheet Phase B - Step 4: Complete the Computer Identification Worksheet Phase B - Step 5: Complete the Network Share Identification Worksheet PHASE C DOCUMENT EXCEPTIONS Complete the Security Exception Worksheet (Optional)
3 GENERATING REPORTS Customizing Your Reports Using the Reports Risk Assessment and Management Plans HIPAA Policy and Procedure Document HIPAA Risk Analysis HIPAA Risk Profile HIPAA Management Plan Evidence of HIPAA Compliance HIPAA On-site Survey Disk Encryption Report Documented Surveys and Worksheets User Identification Worksheet Computer Identification Worksheet Network Share Identification Worksheet Security Exception Worksheet Login History by Computer Report Share Permission Report External Vulnerability Scan Detail Report Appendix I Group Policy Reference Forward and Introduction Policies for Windows Firewall Policies for Windows Services rd party Firewalls and Group Policy Considerations Appendix II Site Assessment Reports and Supporting Documents Locations Appendix III HIPAA Risk Profile Use for Ongoing HIPAA compliance assessments Appendix IV Adding an Inspector to a Site Adding an Inspector to a Site Appendix V Key Terminology Appendix VI Run the HIPAA Local Computer Data Collector on Unreachable Computers Appendix VII Time Saving Features to Reduce Survey and Worksheet Completion Time Completing Worksheet and Surveys
4 Entering Assessment Responses into Surveys and Worksheets Survey and Worksheet Question Response Types Time Savings Tip to Reduce Survey and Worksheet Data Input Time Saving Time Inputting Reponses in Worksheets Through the Use of the Bulk Entry Feature Worksheet Completion Time Saving Techniques when Using the Classic User Interface Saving Time Inputting Reponses in Worksheets Through the Use of Shift+Select Saving Time Inputting Reponses in Worksheets Through the Use of Select All Rows option Appendix VIII Initiate Internal Vulnerability Scan on the Inspector Appliance and Download Results (OPTIONAL) 99 Viewing the Status of an Inspector Scan Downloading Inspector Scans
5 Purpose of this Guide The purpose of this document is to provide users of Network Detective HIPAA Compliance module instruction on how to perform a HIPAA Risk Assessment. It will guide you through the initial use of the software as well as the more advanced features. To become familiar with some of the definitions of the terms used throughout this guidebook, please refer to Appendix V Key Terminology. About Network Detective HIPAA Compliance Module HIPAA is a risk-based compliance framework, with a Risk Assessment being the first requirement in the HIPAA Security Rule. The Risk Assessment must identify the vulnerabilities to the security of electronic Protect Health Information (ephi) threats that can act on the vulnerabilities, including the likelihood and the impact if that occurs. Network Detective s is the first professional tool to combine and integrate automated data collection, with a structured framework for collecting supplemental assessment information not available through automated tools. It is the first solution to allow for the automatic generation of the key documents that are necessary to demonstrate compliance with the Security Rule. It includes comprehensive checklists that cover the Administrative, Physical, and Technical safeguards defined in the HIPAA Security Rule. More than just documents to satisfy a compliance requirement, Network Detective provides factual evidence, expert advice, and direction to minimize or eliminate the risk of a data breach. You can compare Network Detective s to getting a medical exam. Network Detective automates the lab tests for the technology environment. It includes interview surveys to gather information manually. In addition, it provides a recommended treatment plan. 4
 Initial Data Collection, Phase B) Get Secondary Data, and Phase C) Document Exceptions in the form of compensating")
6 Overview Network Detective HIPAA Compliance Module is composed of the HIPAA Data Collector, Network Detective Application, Surveys, Worksheets, and the Push Deploy Tool. The process to create a HIPAA assessment involves three major steps: Phase A) Initial Data Collection, Phase B) Get Secondary Data, and Phase C) Document Exceptions in the form of compensating controls. Phases of a HIPAA Assessment Using the HIPAA Module There are two types of HIPAA assessments that can be performed using the HIPAA Module: 1) HIPAA Risk Assessment 2) HIPAA Risk Profile The Risk Assessment is a complete assessment that includes all worksheets and surveys. You should plan on a day to complete a full assessment on a typical 15-user network. The Risk Profile requires selecting a prior Risk Assessment and reduces the time to complete the assessment by using worksheets and surveys from the Risk Assessment. 5


7 HIPAA Assessment Project Initial Set-up Creating a Site The first step in the assessment is creating a Site using Network Detective. All Network Detective assessments are organized into Sites. A Site can be a physical location or a logical grouping, such as a customer account name. Before making a selection you must decide on your assessment strategy. See the Network Detective User Guide for information on sites. a. For a single location you will create one site. b. For organizations with multiple locations, you must decide if you want one set of reports, or separate reports for each location. Select New Site Enter the site name. For sites with multiple locations, enter a more detailed description. 6

8 Starting a HIPAA Assessment Important: Throughout the HIPAA assessment process, there are a number of steps where surveys, automated scans, and data collection worksheets are completed in a specific order. By default, all of the worksheets that are used to collect and document assessment data are not immediately visible in the HIPAA module s Assessment Window. These worksheets are created as a result of automated scan data collection and data collected in both surveys and worksheets that are presented and used throughout the process. In the case that you are attempting to perform a HIPAA assessment remotely, you will need to coordinate with on-site personnel in order to complete the surveys and questionnaires that dynamically appear throughout the HIPAA assessment process. To start a HIPAA Risk Assessment, from the Home screen, select and open the Site you wish to use for your Assessment. Click on the Start button. 7

9 Select either a HIPAA Risk Assessment for an Annual or Quarterly assessment or a HIPAA Risk Profile for a monthly update. A completed HIPAA Risk Assessment is required prior to running a monthly assessment using the HIPAA Risk Profile. For more details, refer to Appendix III found on page 81. HIPAA Risk Assessment HIPAA Risk Profile Required at least Annually Recommended Quarterly as part of a Quarterly Compliance Review Requires that all manual WORKSHEETS be completed Example 15-user network in 4 6 hours Monthly Review Does NOT require WORKSHEETS Requires selecting a prior RISK ASSESSMENT (will use existing worksheets) MUCH faster with little manual input Example- 15-user network in less than one hour 8

10 Enter a Label to identify the assessment. Enter a Comment to help further identify the assessment. Select the Next button to proceed to create/start the new assessment. Once the assessment is started, the HIPAA Assessment Checklist will be presented. 9
11 Using the Checklist Feature for Assessment Process Guidance The Checklist will guide you through the assessment process and ensure you have gathered enough data to produce the best assessment possible. As you import scans, complete questionnaires, and fill out worksheets, the Checklist will automatically be revised adding additional suggestions and indicating where additional information may help produce richer results. As you progress through the assessment process additional work items will be added to the Checklist. The assessment s Checklist is always available within the Assessment Window. The Checklist will be updated continuously with the need to perform and Import Scans and to fill out Questionnaires and Worksheets as you work through your HIPAA Compliance Assessment. Throughout the assessment process, the Checklist will update the list of Open Items and Completed Items to present to you a list of assessment actions that have been completed and a list of outstanding actions. At any time, you can Refresh the Checklist or Print a Checklist. As you perform your assessment, Completed Items will be noted by a particular Checklist item having a Checkmark placed in the center of the Checklist item graphic as illustrated below. 10

12 During the assessment process, Required and Optional actions will be referenced throughout the Checklist. This Checklist will have new Open Items (i.e. assessment tasks) added to the Checklist based on the phase and/or steps that have been performed by the user within the assessment process. These Checklist items created and updated within the list are related to the performance and importing of scans, the answering of questionnaires, or the completion of worksheets that are dynamically created throughout the assessment process. 11
13 Planning the On-site Data Collection There are various ways to collect data for a HIPAA Compliance Risk Assessment. These methods can vary based on time, cost, client expectation, level of detail needed to identify remediation needs, etc. Initial Assessment Types of collections: HIPAA Risk Assessment Quick Audit Full Audit + External Scan + Network Scan + Computer Scan on 1-3 computers + All worksheets + External Scan + Network Scan + Computer Scan on all computers + All worksheets HIPAA Risk Profile Quick Audit + External Scan + Network Scan + Computer Scan on 1-3 computers + NO worksheets Full Audit + External Scan + Network Scan + Computer Scan on all computers + NO worksheets 12
14 Scans Performed During the HIPAA Assessment Process The Initial Data Collection phase of the HIPAA compliance assessment consists of the following required and optional scans: External Vulnerability Scan HIPAA Network Scan Using the HIPAA Data Collector HIPAA Scans on Local Computers (using the Push Deploy Tool) Optional Local Computer Scans (using the HIPAA Data Collector for unreachable computers) Optional Internal Vulnerability Scan (requires the Network Detective Inspector) The Inspector network and local computer scans and the HIPAA Data Collector scans make use of multiple technologies/approaches for collecting information on the client network, including: Network Scan Active Directory WMI Remote Registry ICMP File System Scanning Windows Registry Windows Shares and Permissions Security Center 13
15 Optional Internal Network Vulnerability Scan and Local Scanning of Unreachable Computers Throughout the assessment process, Optional scans may need to be undertaken based on the availability of servers and workstations during automated and network scans, based on a need to sample scan machines outside of the network that you are assessing, or based on the need to more thoroughly scan for internal network vulnerabilities. These scans would include: Optional Scan Type Run HIPAA Local Data Collector scan on the Computers that were unreachable (Refer to Appendix VI for instructions on how to run this scan) Internal Vulnerability Scan (requires Inspector) (Refer to Appendix VIII for instructions on how to run this scan) Description Run the "Local Scan any computers that cannot be scanned remotely (i.e. blocked by a firewall, not connected to the domain, or otherwise inaccessible). Run the Local Scan directly the computer itself. An Inspector initiated scan that checks for Open Ports and Protocol Vulnerabilities that could be exploited ONCE a hacker is in your network or by employees. Essentially INSIDE attacking INSIDE. This scan complements the external vulnerability scan performed with the HIPAA module, which finds weaknesses at the network edge that could be exploited by external sources. 14
16 PHASE A INITIAL DATA COLLECTION Phase A - Step 1: Complete the HIPAA On-site Survey Completing the HIPAA On-Site Survey is the first step in the HIPAA compliance assessment process. To access the HIPAA On-Site Survey, From the Site s Dashboard, select the selector control on the left side of the InForm Bar located at the bottom of the Assessment Window. To open the HIPAA On-Site Survey, click on the name label for the HIPAA On-Site Survey entry in the InForm Questionnaire/Worksheet list located below the InForm Bar at the bottom of the Assessment Window: Survey and Worksheet Question Response Types Throughout the HIPAA Risk Assessment process, the Network Detective s InForm-based Surveys and Worksheets used throughout the HIPAA Module must be completed. Responses to the questions posed in surveys and worksheets are from the available Response Types below: Response Type Description Example Use Text Response Free-form text response Describe the condition of the data center. Multiple Choice Multiple fixed responses Does the firewall have IPS? - Yes - No Checklist Item An item that is marked off if done Check the security of the door locks When stepping throughout the Survey and Worksheet completion process throughout your assessment, you are required to provide answers to the Topics presented. In each row within the Survey or Worksheet, there are Instructions presented. 15

17 To complete a Survey or Worksheet, review the Topics and Instructions listed in a Survey or Worksheet and document the answers accordingly. TIME SAVINGS TIP: To learn more about how to save time completing Surveys and Worksheets, please see Appendix VII Time Saving Features to Reduce Survey and Worksheet Completion Time found on page 92. Completing the HIPAA On-site Survey Upon editing (opening) the HIPAA On-site Survey, the following window is presented: To document the responses to the Instructions/Questions presented in this survey: 1. Review the Topic Question. 2. Review the Instructions. Instructions provide guidance and are not included in the reports. 3. Enter the Response in the Response field. A Response must be given for each entry to complete the all of the surveys within the HIPAA assessment process with the exclusion of the Exception Management process that 16
18 is performed from within the Security Exceptions Worksheet found later in the HIPAA Module s assessment process. 4. Select the Notes icon to enter any Notes relevant to the topic question s response in the Notes Field 5. Select the Respondent icon to enter the name of individual that responded or provided information to respond to the topic s question or requirement in the Respondent field. 6. Save your answers periodically and Save when you are done. 7. Select Close to close the survey worksheet when you are done. You can return to the HIPAA On-site Survey by selecting the worksheet s name label listed under the InForm Bar in the Assessment Window. Assessment Status and Checklist Updates and Progress Tracking As surveys, scans, and worksheets are completed throughout the HIPAA Module s Data Collection process, the assessment s Status and Checklist information presented within the Network Detective Assessment Window updates throughout the assessment process. For example, once the HIPAA On-Site Survey is completed, the Status and Checklist tracking data for the Assessment will be updated to show the number of Active Completed and Open Checklist items. You can view the Completed items and the Open items that are additional steps to be completed within the Checklist. Refer to the figure below. 17


19 After each step in the data collection and assessment process, it is recommended that the Checklist information be reviewed at regular intervals in order to plan and execute the next steps that are to be performed within the assessment. Initiated and Completed Scans Impact on Checklist Items Status Information Checklist items and their status that reference the collection of data collection through automated scans will not be updated to the Completed status until the scan is imported or downloaded into the Active Assessment. As scan data files are imported into the Assessment, the scan data files are listed under the Scans Bar within the Scans section located towards the bottom of the Assessment Window. Status information on other scans such as the HIPAA Network Scan, the Push Deploy Tool Local Computer for HIPPA Scan, HIPAA Data Collector Local Computer Scan are tracked and maintained in the Checklist and the Scans section of the Network Detective Assessment Window. 18

20 The status and Checklist information for these scans will be updated as completed when each scans data files are imported into the assessment itself and listed in the Scans section of the Assessment Window. Status Information Associated with Questionnaires and Worksheets Added to the Assessment Process As new questionnaires and worksheets are added to the list of forms under the InForm Bar located within the InForm section of the Assessment Window or as questionnaires and worksheets are completed, their status will be updated with an In Progress or Completed status label. The Inform list window below presents questionnaire and worksheet status information. 19

21 Phase A - Step 2: Initiate External Vulnerability Scan To configure and start the External Vulnerability Scan, select the selector control on the left side of the Scans Bar, which is located at the bottom of the Assessment Window. Select Initiate External Scan button to start the scan s setup process. Enter the range of IP addresses you would like to scan. You may enter up to 16 external addresses. 20


22 Select Add to add a range of external IP addresses to the scan. If you do not know the external range, you can use websites such as whatismyip.com to determine the external IP address of a customer. Enter the IP range for the scan. For just one address, enter the same value for the Starting and Ending IP Address. You can initiate the External Vulnerability Scan before visiting the client s site to perform the data collection. This way, the External Scan data should be available when you are ready to generate the client s reports. 21

23 In the Initiate External Vulnerability Scan window, enter an address to be notified when the scan is completed. Click Next to send the request to the servers that will perform the scan. Scans can take several hours to complete. You will receive an when the scan is complete. Note that the Assessment Window will be updated to reflect the External Vulnerability Scan has been initiated. Refer to the list under Scans Bar located within the Assessment Window as detailed in the figure below. The scan s status of 0 of 1 complete will be updated to complete once the scan is completed and you will receive the scan is complete message. Note the External Vulnerability Scan s complete status below. Upon viewing the Checklist for the assessment, the Checklist now details the status indicating that the External Vulnerability Scan is complete as displayed below. 22

24 The next step in the HIPAA assessment process is to use HIPAA Data Collector to run the HIPAA Network Scan. 23
25 Phase A - Step 3: Initiate the HIPAA Network Scan Using the HIPAA Data Collector and Import Scan Results Running the HIPAA Data Collector - Network Scan NOTE: THE FOLLOWING NETWORK SCANNING PROCESS IS ONLY USED WHEN INSPECTOR IS NOT USED WITH THE HIPAA MODULE. The HIPAA Data Collector is a self-extracting zip file that executes an.exe. This collector is completely non-invasive. This collector is not installed on the domain controller or on any other machine on the client s network and does not make any changes to the system. The HIPAA Data Collector makes use of multiple technologies/approaches for collecting information on the client network, including: Network Scan Active Directory WMI Remote Registry ICMP File System Scanning Windows Registry Windows Shares and Permissions Security Center Step 1 - Launch the HIPAA Data Collector To perform a HIPAA Network scan, visit the RapidFire Tools software download website and download and run the HIPAA Data Collector. The HIPAA Data Collector s self-extracting.zip file that does not install on the client computer. Use the unzip option to unzip the files into a temporary location and start the collector. Step 2 Configure the HIPAA Data Collector Network Scan Starting the HIPAA Data Collector application will present the following screen. 24

26 If you are running on a computer in the network, such as the domain controller, to run a network scan, select the HIPAA Network Data Collector option. Select the Next button and the Credentials window will be presented. Step 3 Configure the HIPAA Data Collector Network Scan The Credentials window will be displayed to enable you to configure the type of network you are scanning (either an Active Directory domain or Workgroup). Then you can assign the required administrative credentials necessary to access the network environment during the scanning process. 25

27 Enter the Credentials by performing these steps: 1. Enter the type of network you are scanning (Active Directory Domain or Workgroup). 2. Enter a username and password with administrative rights to connect to the local Domain Controller and Active Directory. If in a domain, clicking the Next button will test a connection to the local Domain Controller and Active Directory to verify your credentials. If you are scanning a Workgroup environment, enter credentials, which can access the individual workstations as a local administrator. 3. Select the Next button. At this point in the process, the Local Domains window will be presented. Note: If you select to scan a Workgroup, then the Local Domains select step in this process will be skipped. 26

28 Step 4 Configure the Local Domains Select the Domains to gather information from by performing these steps: 1. Select to gather information from ALL domains detected or from Domains and OUs you select. 2. Select the Next button. You will then be requested to confirm the Domain and OU when the Domain and OU Confirmation window is presented as seen below. 27


29 Select the OK button to confirm the Domain and OUs you have selected. At this point in the process, the External Domains screen will be presented. Step 5 Configure the External Domains Enter the name(s) of the organization s External Domains. 28
 you want to scan in the fields that are highlighted in blue.")
30 A Whois query and MX (mail) record detection will be performed upon selecting the Next button. The IP Ranges screen will be presented. Step 6 Configure the Network IP Address Range to be Scanned Enter the Starting and Ending IP Addresses for the range(s) you want to scan in the fields that are highlighted in blue. Scans may affect network performance. Select Perform minimal impact scan if this is an issue. Then select the Next button. The SNMP Information screen will be presented. 29
 screen will be presented.")
31 Step 7 Configure the SNMP Community String Information Enter any additional SNMP community strings used on the network. Then click on the Next button. The Microsoft Base Security Analyzer (MBSA) screen will be presented. 30

32 Step 8 Configure the Scan to Run MBSA and the Patch Analysis Microsoft Baseline Security Analyzer (MBSA) window enables you to select to run the MBSA and Patch Analysis during the Network Scan. If MBSA is needed, please follow instructions to install the MBSA software as directed in the MBSA window. After installation, select the Refresh button to include MBSA in the data collection scan. Select the MBSA and Patch Analysis. Then select the Next button. MBSA is in the process of being deprecated. Follow the steps in this guide and use the Push Deploy Tool as instructed instead. This will collect information such as Patch Analysis for all Windows operating systems. 31

33 Step 9 Verify and Run the Scan Select the folder that you want to store the scan data file in after the scan is completed. You may change the scan s Output Assessment File Folder location and Basename for the scan data. Enter any Comments and then select Start. The Collection Progress window will then be displayed as presented below. 32
34 Step 10 Monitor the Network Scan s Collection Progress The Network Scan s status is detailed in the Collection Progress window. The Collection Progress window presents the progress status of a number of scanning processes that are undertaken. MBSA is an external program provided by Microsoft. It can take 1-5 minutes per node to run. More than one node is checked at a time. Usually 256 nodes take about 30 minutes. Patch analysis can take more than 8 minutes per computer. At any time, you can Cancel Data Collection, which will not save any data. By selecting Wrap It Up, you can terminate the scan and generate reports using the incomplete data collected. Upon the completion of the scan, the Finish window will be displayed. 33
35 Step 11 Complete the HIPAA Data Collector Network Scan Process The Finish window indicates that the scan is complete and enables you to review the scan output file s location and the scan s Results Summary. Click on Done button to close the HIPAA Data Collector window. Note the location where the scan s output file is stored. 34
36 Importing the HIPAA Network Scan Data The final step in this process is to import the data collected during the HIPAA Network Scan into the Active HIPAA assessment. Click on the Import Scan File button in the Network Detective Assessment window: The Select the Scan Results window will be displayed thereby allowing you to import the.hdf file produced by the HIPAA Network Data Scan into the Assessment. Browse and select the HIPAA Network Scan data file from the folder you selected during the Network Scan process. Then click the Next button to import the scan data. 35
37 The Network Detective Merge window will be displayed. The success of the scan s import will be confirmed by the Scan Archive Created window being displayed as presented below. 36

38 Select the Finish button to complete the scan file import process. After the.hdf file import, the Assessment Window will be updated to reflect the addition of the HIPAA Network Scan data under the Import Scans section of the Assessment Window. In addition, the Status and Check List information indicators will be updated to present the assessment s current status. Refer to the figure below. After the network scan file is imported, the Scans section of the Assessment window will be updated to list the files imported into the assessment as seen below. 37

39 38
40 Phase A - Step 4: Use Push Deploy Tool to Initiate Push of HIPAA Local Scans on Selected Systems and Import Scan Results Run the HIPAA Local Computer Scan using the Push Deploy Tool based scanner NOTE: THE FOLLOWING LOCAL COMPUTER SCANNING PROCESS IS ONLY USED WHEN INSPECTOR IS NOT USED WITH THE HIPAA MODULE. Steps to Run the HIPAA Local Computer Scan Using the Push Deploy Tool The Push Deploy Tool pushes the local data collector to machines in a specified range and saves the scan files to a specified directory (which can also be a network share). The benefit of the tool is that a local scan can be run simultaneously on each computer from a centralized location to reduce or eliminate the need to spend time at each computer within the network to run a local scan. The output files (.ZIP files) from the local scans can either be: 1. stored on a USB drive and taken off site to be imported into the active assessment within Network Detective. 2. automatically uploaded to the RapidFire Tools secure cloud storage area using the Client Connector Network Detective add-on and later downloaded from the secure cloud storage area directly to the Network Detective application for use in report generation. Step 1 Install and Run the Push Deploy Tool Visit to download the Push Deploy Tool. To perform a local computer scan extract the contents of the NetworkDetectivePushDeployTool.ZIP file either to a USB drive, or, directly to any machine on the target network. Then right click and Run as Administrator the NetworkDetectivePushDeployTool.exe contained within the folder named NetworkDetectivePushDeployTool that was created by the.zip file extraction. 39

41 Step 2 Configure the Push Deploy Tool to Perform Local Computer Scan and Add Credentials Starting the Push Deploy Tool will present the following window. Next, select the HIPAA Deep Scan option. Set the Storage Folder location and select the HIPAA Deep Scan option. Note: This Storage Folder location can be located on a network share drive to centralize scan file storage. 40
42 If the entry of credentials is required or credentials are not present in the Credentials list, then type in the administrator level Username and Password Credentials necessary to access the local computers on the network. Next, then select the Add option. Note: For the Push Deploy Tool to push the local scans to computers throughout the network to perform local computer scans, you need to ensure that the Windows Management Instrumentation (WMI) service is running and able to be managed remotely on the computers that you wish to scan. Sometimes Windows Firewall blocks Remote Management of WMI, so this service may need to be allowed to operate through the Firewall. Push/Deploy also relies on using the Admin$ share to copy and run the data collector locally. Admin$ must be present on the computers you wish to scan, and be accessible with the login credentials you provide for the scan. For Workgroup based networks, the Administrator credentials for all workstations and servers that are to be scanned are recommended to be the same. In cases where a Workgroup-based network does not have a one set of Administrator credentials for all machines to be scanned, use the Add option to add all of the Administrator credentials for the Workgroup. Multiple sets of Administrator credentials will be listed in the Credentials. Next, select the Next button. Step 3 Add the Computers to Scan The Computers and Status window allows you to: Add a Single Computer to be scanned Add (computers) from File that are to be scanned Add (computers) from IP Range that are to be scanned Or. to Save Computers to File in order to export a list of computers to be scanned again in future assessments 41


43 Process to Configure Computers to be Scanned Method As previously referenced, there are three methods to creating/adding a list of computers to be scanned by the Push Deploy tool. Method 1 - Add a Single Computer to be Scanned To use the Add Single Computer method to select computers to be scanned, then type in the computer s IP address as shown below, then click on the Add Single Computer link to the right of the IP address entry field. Method 2 - Add (computers) from File that are to be Scanned 42

44 Click on the Add from File link and select the text file that contains the computer IP addresses that are to be included within the scanning process. Select the file that contains the IP addresses to be scanned, and then click on the Open button. The file that contains the IP addresses can be created using the Push Deploy Tools Save Computers to File feature, or created manually with a text editor using the required text formatting structure so that the IP addresses are recognized by the Push Deploy Tool. Upon the file s selection and opening the IP address and computer information will be imported into the Push Deploy Tool and presented in the Computers and Status window for verification prior to starting the scan. Method 3 - Add (computers) from IP Range that are to be Scanned Click on the Add from IP Range and to define the Starting and Ending computer IP addresses range that are to be included within the scanning process. 43

45 When you have input the IP address range into the IP Range window, select the OK button. After one or more of the abovementioned methods have been used to define the computer IP addresses to be scanned, the computer names and IP addresses will be listed in the Computer and Collection Status window. 44

46 Step 4 Initiating the Scan After creating/adding a list of one or more computers to scan, start the scan either by selecting the unpause button in the Computer and Status window, or, by selecting the Next button in the Computer and Status Window and the scan will be initiated. The status of each computer s scan activity will be highlighted within the Computers and Status window as presented below. Upon the completion of all of the scheduled scans, the scan data collected is stored within the Storage Location folder presented in the Collected Data Files window of the Push Deploy Tool. Step 5 Verify that the Quick Local Computer Scan Data has been Collected To verify the inclusion of the scan data produced by the Push Deploy Tool within your assessment, select the Next button and the Collected Data Files window will be displayed. 45

47 Step 6 Verify that HIPAA Local Computer Scan Files are Available from Scan Process To review or access the files produced by the Push Deploy Tool s scans, select the On Finish: Open Storage Folder option in the Collected Data Files window and then select the Finish button. After all of the HIPAA Local Computer Scans are complete for the computers that were selected to undergo this scan, the next phase in the process is to import the scan data files produced by the Local Scan into the current HIPAA Assessment. 46

48 Importing the HIPAA Local Computer Scan Data into the HIPAA Assessment The final phase in this process is to import the data collected during the HIPAA Computer Scan performed by the Push Deploy Tool s local computer scanner into the HIPAA Risk Assessment. Click on the Import Scan File button in the Network Detective Assessment window: The following Select Scan Results window will be displayed. This window enables you to Browse, select, and import the HIPAA Local Computer Scan s.zip file(s) for all of the computers scanned into the Assessment. Click on the Browse button in the Network Detective Wizard s Select the Scan Results window to select a single scan data file or a group of scan data files to import. The Open Network Assessment Data File window will then be displayed. 47

49 Select a single file or multi-select multiple files that you would like to import. Then select the Open button. This action will display the Select the Scan Results window in the Wizard noting the file name of the file selected for import. 48

50 Select the Next button to start the import (data Merge) process. The Network Detective Merger window will be displayed. Select the Merge Now button. The Scan Archive Created window below will be displayed indicating that the Merge (import) process is complete. 49

51 Next, select the Finish button in the Scan Archive Created window. Upon reviewing the Imported Scans list within the Assessment Window, the.cdf,.sdf, and.wdf files have been added the Computer Scan, Security Scan, and WiFi Scan data collected by the Push Deploy Tool scanning process to the HIPAA Assessment. 50
52 PHASE B GET SECONDARY DATA Phase B - Step 1: Run HIPAA Data Collector selecting Local Scan on the Computers that were Unreachable during Push Deploy Tool Scanning (OPTIONAL) Using the HIPAA Data Collector, run the local scan any computers that cannot be scanned remotely (i.e. blocked by a firewall, not connected to the domain, or otherwise inaccessible). Use the HIPAA Data Collector to run the HIPAA Local Scan on selected computer systems manually. To use the HIPAA Data Collector to run the Local Scan please refer to Appendix - VI found on page

53 Phase B - Step 2: Complete the Inactive Computer Identification Worksheet The Inactive Computer Identification Worksheet contains a list of computers that have not been logged into for a long period of time. This list of computers was identified during the network scan phase of the automated data collection. In this worksheet, you document the usage status of (for example: Verified Active, Possibly Active, or Verified Inactive). To open and complete the Inactive Computer Identification Worksheet, click on the name label for the Inactive Computer Identification Worksheet entry in the InForm Questionnaire/Worksheet list located below the InForm Bar at the bottom of the Assessment window. The Inactive Computer Identification Worksheet window will be displayed. 52


54 To document the responses to the Instructions/Questions presented in this survey: 1. Review the Topic Question. 2. Review the Instructions. Instructions provide guidance and are not included in the reports. 3. Enter the Response in the Response field. A Response must be given for each entry to complete the worksheet. To save time you may select from a list of responses contained within the list provided in the Response field to pre-populate each computer s usage status record. For each computer you can select the Response field and change the default response to the response required. 53

55 Complete the worksheet for all of the inactive computers listed. TIME SAVINGS TIP: To learn more about how to save time completing Surveys and Worksheets, please see Appendix VII Time Saving Features to Reduce Survey and Worksheet Completion Time found on page Select the Notes icon to enter any Notes relevant to the topic question s response in the Notes Field 5. Select the Respondent icon to enter the name of individual that responded or provided information to respond to the topic s question or requirement in the Respondent field. 6. Select the Save option to save your answers periodically and Save when you are done. 7. Select the Close option to close the survey worksheet when you are done. You can return to the Inactive Computer Identification Worksheet by clicking on the name label for the Inactive Computer Identification Worksheet located under the InForm Bar at the bottom of the Assessment Window. After completing the Inactive Computer Identification Worksheet, the word Completed will be displayed next to this questionnaire s label in the InForm section of the Assessment Window. 54
.")
56 Phase B - Step 3: Complete the User Identification Worksheet The User Identification Worksheet enables you to identify each user and document if they are authorized to access electronic Protected Health Information (ephi). The User Identification Worksheet contains a list of users that have been identified as having ephi access rights during the network scan phase of the automated data collection. In this worksheet, you document the type of user account (for example: Employee ephi Authorization, Employee - no ephi Authorization, Vendor ephi Authorization, Vendor no ephi Authorization, Former Employee, Former Vendor, Service Account, etc.). To open and complete the User Identification Worksheet, click on the name label for the User Identification Worksheet entry in the InForm Questionnaire/Worksheet list located below the InForm Bar at the bottom of the Assessment window. From the Assessment Window, edit the User Identification Worksheet. 55


57 To document the responses to the Instructions/Questions presented in this worksheet: 1. Review the Topic Question. 2. Review the Instructions. Instructions provide guidance and are not included in the reports. 3. Enter the Response in the Response field. A Response must be given for each entry to complete the worksheet. To save time you may select from a list of responses contained within the list provided in the Response field to pre-populate each user record. 56

58 For each user you can select the Response field and change the default response to the response required. Complete the worksheet for all of the users listed. TIME SAVINGS TIP: To learn more about how to save time completing Surveys and Worksheets, please see Appendix VII Time Saving Features to Reduce Survey and Worksheet Completion Time found on page Select the Notes icon to enter any Notes relevant to the topic question s response in the Notes Field 5. Select the Respondent icon to enter the name of individual that responded or provided information to respond to the topic s question or requirement in the Respondent field. 6. Select the Save option to save your answers periodically and Save when you are done. 7. Select the Close option to close the survey worksheet when you are done. You can return to the User Identification Worksheet by clicking on the name label for the User Identification Worksheet located under the InForm Bar at the bottom of the Assessment Window. After completing the User Identification Worksheet, the word Completed will be displayed next so this questionnaire s label in the InForm section of the Assessment Window. 57

59 Phase B - Step 4: Complete the Computer Identification Worksheet The Computer Identification Worksheet contains a list of the computers that have been identified during the network scan phase of the automated data collection. The computers identified are operating within a particular domain or workgroup as well as include non-domain devices. In this worksheet, you identify each computer that stores ephi, does not store ephi, or accesses ephi. To open and complete the Computer Identification Worksheet, click on the name label for the Computer Identification Worksheet entry in the InForm Questionnaire/Worksheet list located below the InForm Bar at the bottom of the Assessment window. Upon editing the Computer Identification Worksheet, the following window is presented: 58

60 Within this worksheet, there is a list of computers that have been identified during the network scanning process. These computers are either in a Domain, Workgroup, and/or are Nondomain devices. For each device, either the machine name or IP address of the device is displayed in the Topic column. There additional details about the devices listed in the worksheet that are documented in the Notes field, including OS version, IP address, Description data, Last Login, and possibly a CPU version. To document the responses to the Instructions/Questions presented in this worksheet: 1. Review the Topic Question. 2. Review the Instructions. Instructions provide guidance and are not included in the reports. 3. Enter the Response in the Response field. A Response must be given for each entry to complete the worksheet. To save time you may select from a list of responses contained within the list provided in the Response field to pre-populate each user record. For each computer you can select the Response field and change the default response to the response required. Complete the worksheet for all of the computers listed. TIME SAVINGS TIP: To learn more about how to save time completing Surveys and Worksheets, please see Appendix VII Time Saving Features to Reduce Survey and Worksheet Completion Time found on page Select the Notes icon to enter any Notes relevant to the topic question s response in the Notes Field 59

61 5. Select the Respondent icon to enter the name of individual that responded or provided information to respond to the topic s question or requirement in the Respondent field. 6. Select the Save option to save your answers periodically and Save when you are done. 7. Select the Close option to close the survey worksheet when you are done. You can return to the Computer Identification Worksheet by clicking on the name label for the Computer Identification Worksheet located under the InForm Bar at the bottom of the Assessment Window. After completing the Computer Identification Worksheet, the word Completed will be displayed next so this questionnaire s label in the InForm section of the Assessment Window. 60

62 Phase B - Step 5: Complete the Network Share Identification Worksheet The Network Share Identification Worksheet is used to identify and document each network share servers and workstations operating within the environment scanned by the HIPAA Module that contains ephi, does not contain ephi, or document that you do not know if the share contains ephi or not. To open and complete the Network Share Identification Worksheet, click on the name label for the Network Share Identification Worksheet entry in the InForm Questionnaire/Worksheet list located below the InForm Bar at the bottom of the Assessment window. Upon editing the Network Share Identification Worksheet, the following window is presented: 61

63 The Network Share Identification Worksheet presents a list of network share locations with the network. These network share locations are listed in the worksheet to enable you to document an examination of the features contained within the applications. The final Network Share Identification assessment will be a result of responses to a series of questions used to document whether ephi is stored in the share location, ephi is not stored in the share location, or if you do not know if the share location contains ephi or not. To document the responses to the Instructions/Questions presented in this worksheet: 1. Review the Topic Question. 2. Review the Instructions. Instructions provide guidance and are not included in the reports. 3. Enter the Response in the Response field. A Response must be given for each entry to complete the worksheet. To save time you may select from a list of responses contained within the list provided in the Response field to pre-populate each user record. For each network share you can select the Response field and change the default response to the response required. Complete the worksheet for all of the share locations listed. TIME SAVINGS TIP: To learn more about how to save time completing Surveys and Worksheets, please see Appendix VII Time Saving Features to Reduce Survey and Worksheet Completion Time found on page Select the Notes icon to enter any Notes relevant to the topic question s response in the Notes Field 5. Select the Respondent icon to enter the name of individual that responded or provided information to respond to the topic s question or requirement in the Respondent field. 62

64 6. Select the Save option to save your answers periodically and Save when you are done. 7. Select the Close option to close the survey worksheet when you are done. You can return to the Network Share Identification Worksheet by clicking on the name label for the Network Share Identification Worksheet located under the InForm Bar at the bottom of the Assessment Window. After completing the Network Share Identification Worksheet, the word Completed will be displayed next so this questionnaire s label in the InForm section of the Assessment Window. 63
65 PHASE C DOCUMENT EXCEPTIONS Complete the Security Exception Worksheet (Optional) The Security Exception Worksheet is an optional worksheet that compiles the issues discovered by the Push Deploy Tool Scans, HIPAA Data Collector, Surveys and Assessment Worksheets used throughout the HIPAA assessment process to enable security exceptions to be specified along with compensating controls to manage the exceptions. To open and complete the Security Exception Worksheet, click on the name label for the Security Exception Worksheet entry in the InForm Questionnaire/Worksheet list located below the InForm Bar at the bottom of the Assessment window. Upon editing the Security Exception Worksheet, the following window is presented: 64

66 Exceptions are grouped by a number of exception types that may include: Audit Controls, Group Policy Exceptions, Former Employee/Vendor Enabled Accounts, Remote Access Cloud Services, Firewall, Office Environment, Wireless, Endpoint Protection, and External Vulnerability Scan categories. 1. Review the Topic Question. 2. Review the Instructions. Instructions provide guidance and are not included in the reports. 3. Enter the Response in the Response field. A Response must be given for each entry to complete the worksheet. TIME SAVINGS TIP: To learn more about how to save time completing Surveys and Worksheets, please see Appendix VII Time Saving Features to Reduce Survey and Worksheet Completion Time found on page Select the Notes icon to enter any Notes relevant to a particular Exception explanation topic s response. Please note that the Security Exception Worksheet is the only worksheet that does not require a response for each and every topic. Enter your Response if applicable, otherwise, leave the entry blank. 65

67 5. Select the Respondent icon to enter the person providing the information concerning the Exception explanation in the Respondent field. 6. Select the Save option to save your answers periodically and Save when you are done. 7. Select the Close option to close the survey worksheet when you are done. You can return to the Security Exception Worksheet by clicking on the name label for the Network Share Identification Worksheet located under the InForm Bar at the bottom of the Assessment Window. After completing the Security Exception Worksheet, the word Completed will be displayed next so this questionnaire s label in the InForm section of the Assessment Window. 66


68 GENERATING REPORTS To generate reports, open an assessment and select the Reports link at the top of the Assessment Window. The Create Reports window will be displayed. The reports that are displayed in black text (versus the gray text) can be selected and generated. To generate reports, select the HIPAA Assessment reports you want to generated and then click on the Create Reports button. The Generating Reports window will be displayed. 67
69 After the reports are generated, the following window is displayed presenting the HIPAA folder on the computer used for the assessment that contains the report document files: 68

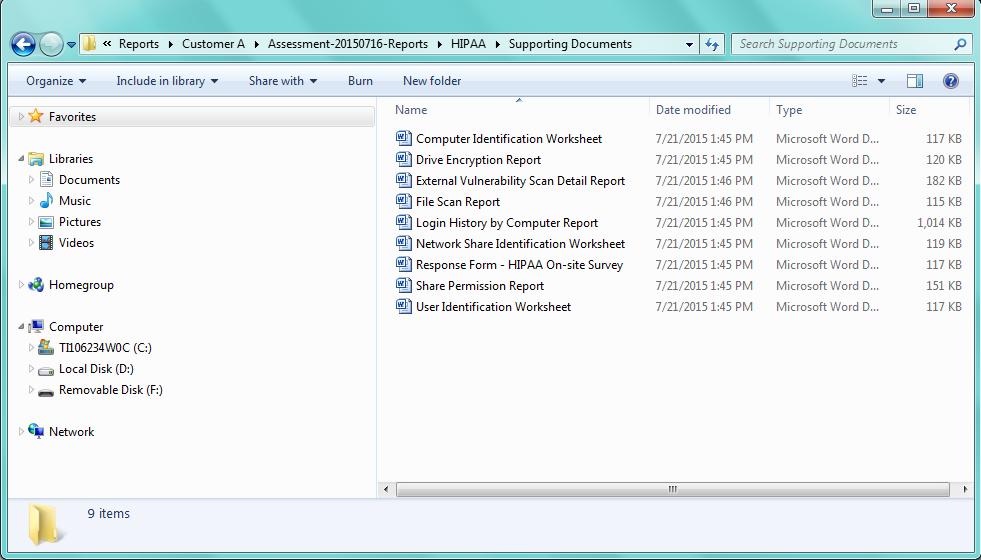
70 To view a list of the report files, the supporting worksheets, and surveys double click on the HIPAA folder: The Supporting Documents folder contains copies of all of the completed worksheets and surveys that you completed through the HIPAA assessment process. Customizing Your Reports Reports can be customized including logos, design themes, and cover images. Enter your information, upload your logo, choose a theme, and select or upload cover images. 69
71 For more information about how to set the Report Preferences, please refer to the Network Detective User Guide. 70
72 Using the Reports There are a number of reports that are produced as a result of an assessment using the HIPAA Module. In general, these reports fall into three document categories: Risk assessment and management plans Evidence of HIPAA Compliance (including an evidence cross-reference to the specific HIPAA Regulations). Supporting documents consisting of the completed surveys and worksheets used during the assessment process Risk Assessment and Management Plans The following are the risk assessment and management plan reports. HIPAA Policy and Procedure Document The Network Detective HIPAA Security Rule Policy and Procedures guide includes suggested HIPAA policies and procedures required for compliance. Policies are rules that an organization adopts stating that they will do something. The guide includes both suggested policies and references the specific HIPAA requirements. Also provided are suggestions for procedures to implement to comply with the policies. Policies, procedures, and end-user training are effective tools to protect against data breaches. They are required for compliance but are important lines of defense against data breaches. HIPAA Risk Analysis HIPAA is a risk-based security framework and the Risk Analysis is the first requirement of the HIPAA Security Rule. A Risk Analysis is the foundation for the entire security program. It identifies the locations of electronic Protected Health Information (ephi,) vulnerabilities to the security of the data, threats that might act on the vulnerabilities, and estimates both the likelihood and the impact of a threat acting on a vulnerability. 71
73 The Risk Analysis helps HIPAA Covered Entities and Business Associates identify the locations of their protected data, how the data moves within, and in and out of, the organization. It identifies what protections are in place and where there is a need for more. The Risk Analysis results in a list of items that must be remediated to ensure the security and confidentiality of ephi. The value of a Risk Analysis cannot be overstated. Every major data breach enforcement of HIPAA, some with penalties over $ 1 million, has cited the absence of, or an ineffective, Risk Analysis as the underlying cause of the data breach. The Risk Analysis should be reviewed or updated at least annually, more often if anything significant changes that could affect ephi. HIPAA Risk Profile A Risk Analysis is a snapshot in time, while compliance is an ongoing effort. The Network Detective HIPAA Risk Profile updates a Risk Analysis to show progress in avoiding and mitigating risks. Whether performed monthly or quarterly, the Risk Profile updates the Risk Analysis and documents progress in addressing previously identified risks, and finds new ones that may have otherwise been missed and resulted in a data breach. HIPAA Management Plan Based on the findings in the Risk Analysis, the organization must create a Risk Management plan with tasks required to minimize, avoid, or respond to risks. Beyond gathering information, Network Detective provides a risk-scoring matrix that an organization can use to prioritize risks and appropriately allocate money and resources. The Risk Management plan defines the strategies and tactics the organization will use to address its risks. Evidence of HIPAA Compliance Just performing HIPAA-compliant tasks is not enough. Audits and investigations require evidence that compliant tasks have been followed, and kept for six years after an event or incident occurs. Documentation can be in different forms and stored in various systems. The keys to proper documentation are to be able to access it, and that it contains enough details to satisfy an auditor or investigator. HIPAA On-site Survey The On-site Survey contains questions that cannot be answered by collecting data from the network. Information is gathered about the organization s Security Officer, and about security of the wireless network. 72
74 The On-site Survey worksheet includes an extensive list of questions about physical and technical security that cannot be gathered automatically. The survey includes questions ranging from how facility doors are locked, firewall information, how faxes are managed, and whether servers are on-site, in a data center, or in the Cloud. Disk Encryption Report Encryption is such an effective tool used to protect data that if an encrypted device is lost then it does not have to be reported as a data breach. The Disk Encryption Report identifies each drive and volume across the network, whether it is fixed or removable, and if Encryption is active. 73
75 Documented Surveys and Worksheets User Identification Worksheet The User Identification Worksheet takes the list of users gathered by the Push Deploy Tool and/or Data Collector and lets you identify whether they are an employee or vendor. Users who should have been terminated and should have had their access terminated can also be identified. This is an effective tool to determine if unauthorized users have access to protected information. It also is a good indicator of the efforts the organization goes to so terminated employees and vendors have their access quickly disabled. Another benefit is that you can review the user list to identify generic logons, such as Nurse, Billing Office, etc., which are not allowed by HIPAA since each user is required to be uniquely identified. To save time the system allows you to enter default settings for all users and just change some as needed. Computer Identification Worksheet The Computer Identification Worksheet takes the list of computers gathered by the Data Collector and lets you identify those that store or access ephi. This is an effective tool in developing data management strategies including secure storage and encryption. To save time the system allows you to enter default settings for all computers and just change some as needed. Network Share Identification Worksheet The Network Share Identification Worksheet takes the list of network shares gathered by the Data Collector and lets you identify those that store or access ephi. This is an effective tool in developing data management strategies including secure storage and encryption. To save time the system allows you to enter default settings for all network shares and just change some as needed. 74
76 Security Exception Worksheet The report is used present the details associated with security exceptions and how Security Exceptions will be managed or have been implemented to enable HIPAA compliance. This worksheet allows the HIPAA Compliance readiness specialist to document explanations on suspect items. The readiness specialist is enabled to document and explain why various discovered items are not true issues and possible false positives. These exceptions can be documented on an item-by-item level (For example: at the granularity at users, ports, applications, etc.) The Security Exception Worksheet compiles the issues discovered by the HIPAA Compliance Data Collection including the completion of the surveys and worksheets. The benefit of this feature is that it adds back in the human element into the assessment and allows for explanation of special circumstances and specific environment requirements. The Security Exception Worksheet does not alleviate the need for safe guards but allows for description of alternative means of mitigating the identified security risk. The process is consistent with industry standard HIPAA assessment and risk management processes Login History by Computer Report The Login History by Computer Report shows login audit history. The report is used crossreferenced with the ephi worksheets to look for unauthorized logins. Share Permission Report The Share Permission Report shows all network shares and both the associated network share permissions and file system permissions. External Vulnerability Scan Detail Report The External Vulnerability Scan Detail Report shows the result of a vulnerability scan performed against the external (Internet facing) IP addresses. 75
77 Appendix I Group Policy Reference Forward and Introduction Some networks are more restrictive than others are, and in some cases, the Network Detective Data Collector may query a device and have the request blocked or return less information than is required. To obtain more information, Group Policies can be modified, or a Local Data Collection to fill-in-the-blanks can be performed. This document is a reference for modifying Group Policies, and will indicate which Group Policies are needed to ensure a full data collection. This document is for reference only; RapidFire Tools is in no way responsible for, or able to assist with, any modifications to Group Policies made via this document. If you choose to make changes, perform a backup first, only make changes once you have assessed the overall impact, and of course, exercise caution. Policies for Windows Firewall Computer Configuration > Administrative Templates > Network > Network Connections > Windows Firewall > Domain Profile Windows Firewall: Allow ICMP exceptions Enabled Allow inbound echo request Windows Firewall: Allow file and printer sharing exception Enabled Allow unsolicited incoming messages from local subnet Windows Firewall: Allow remote administration exception Enabled Allow unsolicited incoming messages from local subnet Windows Firewall: Allow local port exceptions Enabled Windows Firewall: Define inbound port exceptions TCP: 135, 139, 445 UDP: 137, 138 Windows Firewall: Allow Remote Desktop exception Enabled Allow unsolicited incoming messages from local subnet Policies for Windows Services Computer Configuration > Windows Settings > Security Settings > System Services Windows Management Instrumentation (WMI) Startup Type: Automatic Remote Registry 76
78 Startup Type: Automatic Remote Procedure Call (RPC) Startup Type: Automatic 3 rd party Firewalls and Group Policy Considerations 3rd party firewalls should be disabled or configured similar to Windows Firewall Machines automatically refresh policies every minutes, but rebooting a machine or manually performing a gpupdate /force will update policies quicker 77
79 Appendix II Site Assessment Reports and Supporting Documents Locations The reports document files produced by the HIPAA Module are stored in a folder located on the hard disk of the computer operating the HIPAA Module. For example, the figure below illustrates the location of the Assessment Report folder a HIPAA assessment for a site named Customer A. In the folder path referenced in the Windows Explorer folder window displayed below, the reference to Customer A is a reference to the HIPAA assessment s Site Name associated with the actual assessment. To access the reports, you would double click on the assessment reports folder w. In this example the assessment reports folder is named: Assessment Reports. Windows Explorer will then display folder named HIPPA as shown below. 78

80 The HIPAA folder is the location where the HIPAA assessment s report documents, HIPAA Evidence of Compliance, and supporting survey and worksheet documents are stored. Upon doubling clicking the HIPAA folder in Windows Explorer, the reports and supporting documents for the assessment are available for viewing and editing. Opening the Supporting Documents folder will enable access to all of the supporting documents as seen below. 79
81 80
82 Appendix III HIPAA Risk Profile Use for Ongoing HIPAA compliance assessments A HIPAA Risk Analysis should be done no less than once a year. However, the Network Detective includes an abbreviated version of the HIPAA Risk Analysis assessment and reporting process within the Network Detective HIPAA Module. This process is called the HIPAA Risk Profile. The HIPAA Risk Profile designed to provide interim reporting in a streamlined and almost completely automated manner. Whether performed monthly or quarterly, the Risk Profile updates the Risk Analysis and documents progress in addressing previously identified risks, and finds new ones that may have otherwise been missed and resulted in a data breach. An important aspect of this abbreviated process is the need that the HIPAA Module has been already used to perform a HIPAA Risk Assessment of your customer s Network on a previous occasion. 81


83 Appendix IV Adding an Inspector to a Site Please follow the steps below to Associate Inspector with your assessment s Site: Before using the Inspector Software Appliance, the Inspector must be associated with a Site in the Network Detective Application. Adding an Inspector to a Site After starting a new assessment, or within an existing assessment, in order to Associate an Inspector Software Appliance with the Assessment Project, you must first select the V symbol to expand the assessment properties view. This action will expand the Assessment s properties for you to view and to add a Software Appliance to the Assessment. To add an Appliance to an Assessment, from the Assessment Window select the Appliance button, then the Appliances Add button as noted above. 82

84 Select the Appliance ID of the Appliance from the drop down menu. Note: When users have purchased a Network Detective Hardware Appliance, the Appliance ID can be found on a printed label on the Hardware Appliance itself. After successfully adding an Appliance, it will appear under the Appliance bar in the Assessment Window. To view a list of all Appliances and their associated Sites, navigate to the Appliance tab from the top bar of the Network Detective Home screen. This will show a summary of all Appliances, their activity status, and other useful information. To return to the Site that you are using to perform your assessment, click on Home above and select the Site that you are using to perform your assessment. 83
85 Appendix V Key Terminology ephi Electronic Patient Health Information. 84
86 Appendix VI Run the HIPAA Local Computer Data Collector on Unreachable Computers A full HIPAA assessment requires running the Local Computer Data Collector on all computers in the network. When computers are unreachable during the Push Local Scan process undertaken using Push Deploy Tool, the HIPAA Data Collector should be used to perform the scan on each of these computers. NOTE: THIS LOCAL COMPUTER SCANNING PROCESS USING THE HIPAA DATA COLLECTOR RUNNING ON THE LOCAL MACHINE IS ONLY USED WHEN THE PUSH DEPLOY TOOL IS USED WITH THE HIPAA MODULE AND ON UNREACHABLE COMPUTERS Step 1- Launch the HIPAA Data Collector To perform a HIPAA Network scan, visit the RapidFire Tools software download website and download and run the HIPAA Data Collector. The HIPAA Data Collector s self-extracting.zip file that does not install on the client computer. Use the unzip option to unzip the files into a temporary location and start the collector. Then the Data Collector is started, the Scan Type window will be displayed. The Computer Scan will augment data collection when remote protocols are not available from a computer. 85

87 As referenced previously, a full HIPAA assessment requires running the Local Computer Data Collector on all computers that were to be included in the assessment that were missed when the Local Push Scan was performed using Push Deploy Tool. Step 2 Select the Local Computer Scan Select HIPAA Local Computer Data Collector option. Click on the Next button. The Verify and Run window will then be displayed. Step 3 Verify and Run the Scan The Verify and Run window enables you to change the output location for the scan data, change the name of the file, and add comments. After setting the Output Assessment File s folder location, the Basename of the scan s output file, and adding a Comment, select Start to initiate the scan. Step 4 Monitor Collection Progress The Collection Progress window will be displayed during the scan process. 86


88 Track the scan s progress through the Collection Progress window. At any time, you may Cancel Data Collection without saving any data. You may select Wrap It Up to stop a scan and use the incomplete data that was collected. Upon the completion of the scan, the Finish window will be displayed. Note the scan output file s location and click on the Done button to complete the process. 87
89 Step 5 Importing the HIPAA Computer Scan Data from Local Computer Scan The final step in this process is to import the data collected during the HIPAA Local Computer Scan. Click on the Import Scan File button in the Network Detective Assessment window: The following Select Scan Results window will be displayed. Select the Browse button to select the scan file to import. The following Open Network Data Assessment File window will be displayed. 88

90 The Import File process enables you to import the HIPAA scan file (.HDF file) produced by the HIPAA Computer Data Scan into the Risk Assessment being performed. Select the file name of the scan file to be imported into the assessment. During the import of the scan file, there will be a need to merge the HIPAA Local Computer Scan data with the HIPAA Network Scan data that was previously produced and imported into the HIPAA assessment. Select the Open button in the Open Network Assessment Data File window. This action will display the following Select the Scan Results window indicating that the file has been selected for import. 89

91 Select the Next button in the Select the Scan Results window. This action will display the following Network Detective Merger window: 90
92 To perform the import/merge, select the Merge Now button to initiate the import and data merge process. The Scan Archive Created window below will then be displayed indicating that the Merge (import) process is complete. Next, select the Finish button in the Scan Archive Created window. The next step is to proceed with completing the Inactive Computer Identification Worksheet as instructed in Phase B - Step 2: Complete the Inactive Computer Identification Worksheet found on page
93 Appendix VII Time Saving Features to Reduce Survey and Worksheet Completion Time Completing Worksheet and Surveys Throughout the assessment process, HIPAA assessment data is gathered though the use of automated scans and by documenting information in a series of surveys and worksheets. These surveys and worksheets are dynamically generated when the assessment is initially started and when data is collected throughout the assessment process. Assessment response data is collected through: use of automated scans importing responses from Word documents typing the information directly into surveys and worksheets forms Entering Assessment Responses into Surveys and Worksheets Throughout the assessment process a number of Surveys and Worksheets will be generated and require completion. In a survey or worksheet form, there are three fields that can be filled with information. These fields are the Response field, the Notes field, and the Responded By field. Survey and Worksheet Question Response Types Throughout the HIPAA Risk Assessment process the Network Detective s InForm-based Surveys and Worksheets used throughout the HIPAA Module must be completed and typically support three types of responses: Response Type Description Example Use Text Response Free-form text response Describe the condition of the data center. Multiple Choice Multiple fixed responses Does the firewall have IPS? - Yes - No Checklist Item An item that is marked off if done Check the security of the door locks 92


94 Entering Responses Use the response column to enter your answers for the various topics. Notes are used to augment or supplement the information in the responses. Files and SWOT are used to attach pictures and other files, as well as specify strength, weakness, opportunities, and threat entries. Time Savings Tip to Reduce Survey and Worksheet Data Input Time Saving Time Inputting Reponses in Worksheets Through the Use of the Bulk Entry Feature You can save time inputting multiple Responses to answer questions presented in a worksheet using the Bulk Response feature. For example, in the Inactive Computer ID Worksheet, the same response needs to be applied to a number of Topics and Questions. Follow these steps to use the Bulk Response feature: After opening the worksheet, select the Bulk Entry Option.Then follow the steps below to setup the Bulk Entry within the Worksheet you are updating: A. Select the worksheet s Category page that should be updated using the Bulk Entry feature. B. Select all of the suspected Inactive Computers that you want to assign a common Response. C. Select the list of available responses that you want to use for your Response entry. D. Select the specific Response from the list that you want to enter for the selected Inactive Computers.. E. Enter in a Note that you would like to include with your Response to be assigned to the selected Inactive Computers. F. Enter the name of the name of the Respondent that provided the selected Response information. 93

95 G. Select the Apply to Selected button to assign your selected Response to the selected Inactive Computers. The Response, Note, and Respondent you defined will be applied to the selected Inactive Computers listed in the Worksheet. H. View the assigned responses to verify the bulk entries are correct. After you have verified that all of the responses you assigned are correct, select the Save button to save the updated worksheet. Then select the Close button to close the Worksheet. 94

96 Worksheet Completion Time Saving Techniques when Using the Classic User Interface Saving Time Inputting Reponses in Worksheets Through the Use of Shift+Select You can save time inputting multiple Responses to answers instruction questions using the Inform Shift+Select multi-response field select feature. For example, in the User ID Worksheet below, the same response needs to be applied to a number of Instruction questions. First, select the Response field at the top-most question you want to answer. Next, select press the Shift Key down. 95
97 Then select the bottom-most field in the column range that you wish to respond. Then select the Response from the list. Release the Shift Key. At this point in the process, all of the Response fields selected will be filled with the response you selected as illustrated below in the following window. 96

98 Upon completion of the worksheet, select Save to store the responses. 97


99 Saving Time Inputting Reponses in Worksheets Through the Use of Select All Rows option. You can save time inputting multiple Responses to answers instruction questions using the Inform Select All Rows multi-response field select feature. For example, in the Computer Identification Worksheet, the same response needs to be applied to a number of Instruction questions. 1. First, select the Response field at the top-most question you want to answer. 2. Next, right-click on the Response field to display the Select All Rows menu option. 3. Then select the Select All Rows option. All rows in the worksheet will now be selected. 4. Next, select the Response field on the top row and select the Response of your choice. At this point in the process, all of the Response fields selected within the worksheet will be filled with the response you selected as illustrated below. 5. Next, click a field in the Topic column to Deselect all rows. 6. Upon completion of the worksheet, Select Save to store the responses. 98

100 Appendix VIII Initiate Internal Vulnerability Scan on the Inspector Appliance and Download Results (OPTIONAL) The addition of the internal vulnerability assessment to your HIPAA compliance assessment will enhance the risk assessment and reporting practices being performed upon the network. Initiating the Internal Vulnerability Scan on the Inspector Appliance The Internal Vulnerability Scan will enhance the risk assessment and risk reports by performing an internal scan looking for common vulnerabilities. The scan can be initiated from the Network Detective Application. Please note that the scan make take several hours to complete. Click on the Initiate Appliance Scan button to initiate the scheduling of an Internal Vulnerability scan. The Create Task window will be displayed in order to configure the Internal Vulnerability Scan configuration parameters. 99

101 Select the IT Assessments tab, next select the Internal Vulnerability Scan option, and then select Next. The Ports to Scan window will be displayed. The Ports to Scan setup option allows you to select one of two available scanning options. One option, referenced as the Standard Scan, is used to scan Standard TCP ports and Top 1000 UDP ports. The second option, referenced as the Comprehensive Scan, is used to execute a comprehensive scan of all TCP ports and Top 1000 UDP ports. To proceed, select the appropriate number of ports to scan for your assessment s purposes. Then select the Next button. The IP Ranges screen will be displayed. At this point the Network Detective HIPAA Module will connect with the Inspector appliance and Auto-Detect an IP address range that can be scanned. Alternatively, you can manually set the IP address range that you would like to scan during the scheduled internal vulnerability scan. IMPORTANT: THE AUTO-DETECT FEATURE WILL IDENTIFY THE IP RANGE OF THE INTERNAL SUBNET THAT IS FROM THE INSPECTOR. THIS COULD RESULT IN A SUBSTANTIALLY LARGER NUMBER OF IP ADDRESSES THAT WILL BE SCANNED VERSES THE ACTUAL NUMBER OF WORKSTATIONS, SERVERS, AND OTHER IP-BASED NETWORK COMPONENTS WHICH COULD BE A FAR SMALLER NUMBER. 100


102 IF THIS INTERNAL VULNERABILTIY SCAN IS CONFIGUED TO INTERROGATE A LARGE NUMBER OF IP ADDRESSES THAT ARE NOT USED BY ANY DEVICE, THE VULNERABILITY SCAN MAY RESULT IN TAKING AN EXPONENTIALLY LONGER TIME THAN NECESSARY. Define the IP Range that you would like to scan and select Next button. The Create Task - Verify and Schedule window will be displayed. To have an Notification sent to you when the scan task completes, select the Send notification when schedule completes option, and type in the address where the notification should be sent. 101

 option and")
103 Click on the Finish button to complete the scheduling of the internal vulnerability scan task, which will display the Appliance Tasks and Queue window. The scheduled internal vulnerability scan can be confirmed in the Appliance Tasks and Queue window is that displayed in the Task Library list referenced below. Upon viewing the scan task, you can select the run now option link under the Queue column to initiate the scan, which will place the scan into the Queued Tasks list. Alternatively, you can click on schedule link to execute the scan sometime in the future by selecting the interval (daily, weekly, monthly, annually, or just once) option and the time that the scan should be scheduled to run. 102
104 When you click the schedule link, The CRON Builder scheduler window is displayed and is used to set the schedule action s execution time. Note the Pending task present in the Queued Task list after the Run Now option has been selected for the Vulnerability Scan in the window below. Time Savings Tip: Once you have placed the internal vulnerability scan task into the Queued Tasks list, you can continue on to use Inspector to perform other scan tasks. 103

105 Checking Internal Vulnerability Scan Execution Status and Downloading Scans Viewing the Status of an Inspector Scan To check on the status of the scheduled internal vulnerability scan you must first select the selector symbol to expand the assessment Site s properties view. This action will expand the assessment Site s properties to enable you to view the status associated with any scan tasks, or to add an Appliance to the Site. If an Inspector has been Associated with the Site, you may view any Running Tasks as presented in the window below. Viewing Scheduled or Queued Inspector Tasks To view any scheduled or Queued Tasks that have been configured in the Inspector, you must use the Manage option to view these Tasks. To access the Queued Tasks list within the Inspector for viewing, you must first select the selector symbol to expand the assessment properties view. This action will expand the Assessment s properties for you to view an Appliance that is Associated with a Site being used to perform to the Assessment. 104


106 You can view the queued Inspector tasks by selecting the Manage appliance option to access Manage Appliance Window containing the Queued Tasks list in order to check the status of a scheduled scan. The status of the scan may be set to Pending or Running along with a percentage of the task s performance completion as illustrated in the window below. To view the Settings for the Scan Task itself, double click on the name of the Scan listed in the Task Type column. 105

107 When the internal vulnerability scan task is completed, the task will be removed from the Queued Tasks list. Downloading Inspector Scans Go to the Active Assessment of the Site associated with the Appliance. From the Assessment Window, select Download Scans from the Scans bar. Selecting Download Scans will present the Download Files window. This window presents a list of files that can be downloaded and imported into the HIPAA assessment. To complete the scan results file s downloading and importing process, select the check box next to the scan file you wish to download then select the Download Selected button. 106

108 The file will then be downloaded and imported into the assessment. The success of this process will be confirmed by an updating of the Scans section of the Assessment Window. After being successfully downloaded, the Scan will immediately be displayed under the Scans Bar and available for data exploration or report generation. 107
PCI Compliance Assessment Module
 User Guide PCI Compliance Assessment Module Instructions to Perform a PCI Compliance Assessment V20180316 Network Detective PCI Compliance Module without Inspector User Guide Contents About the Network
Datto BDR Needs Assessment Module
 Datto BDR Needs Assessment Module Instructions to Perform the Full BDR Needs Assessment User Guide 2016 RapidFire Tools, Inc. All rights reserved. V20161205 Ver 4K Contents Overview... 2 Performing the
HIPAA Compliance Assessment Module
 Quick Start Guide HIPAA Compliance Assessment Module Instructions to Perform a HIPAA Compliance Assessment Performing a HIPAA Compliance Assessment 2 HIPAA Compliance Assessment Overview 2 What You Will
PCI Compliance Assessment Module with Inspector
 Quick Start Guide PCI Compliance Assessment Module with Inspector Instructions to Perform a PCI Compliance Assessment Performing a PCI Compliance Assessment (with Inspector) 2 PCI Compliance Assessment
Inspector Software Appliance User Guide
 User Guide 2017 RapidFire Tools, Inc. All rights reserved 20170804 Ver 3V Contents Overview... 3 Components of the... 3... 3 Inspector Diagnostic Tool... 3 Network Detective Application... 3 Features...
Remote Data Collector Installation and User Guide
 Remote Data Collector Installation and User Guide 2017 RapidFire Tools, Inc. All rights reserved. V20170207 Ver 1F Contents Purpose of this Guide... 2 System Requirements... 2 Remote Data Collector installation
Reporter User Guide RapidFire Tools, Inc. All rights reserved Ver 4T
 Reporter User Guide 2017 RapidFire Tools, Inc. All rights reserved 20171102 Ver 4T Contents Overview... 3 Components of the Reporter... 3 Reporter Appliance... 3 Network Detective Application... 3 Diagnostic
Comodo One Software Version 3.26
 rat Comodo One Software Version 3.26 Network Assessment Tool Administrator Guide Guide Version 1.3.113018 Comodo Security Solutions 1255 Broad Street Clifton, NJ 07013 Table of Contents 1 Introduction
HIPAA Assessment. Prepared For: ABC Medical Center Prepared By: Compliance Department
 HIPAA Assessment Prepared For: ABC Medical Center Prepared By: Compliance Department Agenda Environment Assessment Overview Risk and Issue Score Next Steps Environment NETWORK ASSESSMENT (changes) Domain
INSTALLATION GUIDE. Virtual Appliance for Inspector and Reporter 9/20/2018 1:32 PM
 INSTALLATION GUIDE Virtual Appliance for Inspector and Reporter 9/20/2018 1:32 PM Network Detective Virtual Appliance for Inspector and Reporter Installation Guide Contents Purpose of this Guide 4 RapidFire
ForeScout Extended Module for Tenable Vulnerability Management
 ForeScout Extended Module for Tenable Vulnerability Management Version 2.7.1 Table of Contents About Tenable Vulnerability Management Module... 4 Compatible Tenable Vulnerability Products... 4 About Support
QUICK START GUIDE. SQL Server Assessment Module. Instructions to Perform a SQL Server Assessment 8/22/2018 4:45 PM
 QUICK START GUIDE SQL Server Assessment Module Instructions to Perform a SQL Server Assessment 8/22/2018 4:45 PM Network Detective SQL Server Assessment Module Quick Start Guide Contents Performing a SQL
rat ITarian Software Version 3.26 Network Assessment Tool Quick Start Guide Guide Version Broad Street Clifton, NJ 07013
 rat ITarian Software Version 3.26 Network Assessment Tool Quick Start Guide Guide Version 1.4.110618 1255 Broad Street Clifton, NJ 07013 Network Assessment Tool - Quick Start Guide This tutorial explains
Detector Service Delivery System (SDS) Version 3.0
 Version 3.0") Detector Service Delivery System (SDS) Version 3.0 Detecting and Responding to IT Security Policy Violations Quick Start Guide 2018 RapidFire Tools, Inc. All rights reserved. V20180112 Contents Overview
Detector Service Delivery System (SDS) Version 3.0 Detecting and Responding to IT Security Policy Violations Quick Start Guide 2018 RapidFire Tools, Inc. All rights reserved. V20180112 Contents Overview
NORTH AMERICAN SECURITIES ADMINISTRATORS ASSOCIATION Cybersecurity Checklist for Investment Advisers
 Identify Protect Detect Respond Recover Identify: Risk Assessments & Management 1. Risk assessments are conducted frequently (e.g. annually, quarterly). 2. Cybersecurity is included in the risk assessment.
Nessus v6 SCAP Assessments. November 18, 2014 (Revision 1)
") Nessus v6 SCAP Assessments November 18, 2014 (Revision 1) Table of Contents Overview... 3 Standards and Conventions... 3 Abbreviations... 3 Simple Assessment Procedure... 3 XCCDF Certified vs. Lower-Tier
Nessus v6 SCAP Assessments November 18, 2014 (Revision 1) Table of Contents Overview... 3 Standards and Conventions... 3 Abbreviations... 3 Simple Assessment Procedure... 3 XCCDF Certified vs. Lower-Tier
Tenable.io User Guide. Last Revised: November 03, 2017
 Tenable.io User Guide Last Revised: November 03, 2017 Table of Contents Tenable.io User Guide 1 Getting Started with Tenable.io 10 Tenable.io Workflow 12 System Requirements 15 Scanners and Agents 16 Link
This guide details the deployment and initial configuration necessary to maximize the value of JetAdvantage Insights.
 HP JetAdvantage Insights Deployment Guide This guide details the deployment and initial configuration necessary to maximize the value of JetAdvantage Insights. 1. Overview HP JetAdvantage Insights provides
enicq 6 Installation Guide
 Vermont Oxford Network enicq 6 Documentation enicq 6 Installation Guide Release 1.4 Published January 2018 2018 Vermont Oxford Network. All Rights Reserved. enicq 6 Installation Guide Introduction Welcome
Chapter 5: Vulnerability Analysis
 Chapter 5: Vulnerability Analysis Technology Brief Vulnerability analysis is a part of the scanning phase. In the Hacking cycle, vulnerability analysis is a major and important part. In this chapter, we
HIPAA RISK ADVISOR SAMPLE REPORT
 HIPAA RISK ADVISOR SAMPLE REPORT HIPAA Security Analysis Report The most tangible part of any annual security risk assessment is the final report of findings and recommendations. It s important to have
ManageEngine EventLog Analyzer Quick Start Guide
 ManageEngine EventLog Analyzer Quick Start Guide Contents Installing and starting EventLog Analyzer Connecting to the EventLog Analyzer server Adding devices for monitoring Adding Windows devices Adding
Comodo One Software Version 3.3
 rat Comodo One Software Version 3.3 Network Assessment Tool Quick Start Guide Guide Version 1.3.032817 Comodo Security Solutions 1255 Broad Street Clifton, NJ 07013 Comodo One - Network Assessment Tool
KeyData Web System Administrator Manual Version 1: 8 December 2010
 Version 1: 8 December 2010 KeyData Web is an application software package used for gathering prehospital run report information and uploading it to the State of Illinois. The application is available free
Table Of Contents INTRODUCTION... 6 USER GUIDE Software Installation Installing MSI-based Applications for Users...9
 Table Of Contents INTRODUCTION... 6 USER GUIDE... 8 Software Installation... 8 Installing MSI-based Applications for Users...9 Installing EXE-based Applications for Users...10 Installing MSI-based Applications
IBM emessage Version 9 Release 1 February 13, User's Guide
 IBM emessage Version 9 Release 1 February 13, 2015 User's Guide Note Before using this information and the product it supports, read the information in Notices on page 471. This edition applies to version
Malwarebytes Endpoint Security Quick Start Guide Version October 2014
 Malwarebytes Endpoint Security Quick Start Guide Version 1.0 15 October 2014 Notices Malwarebytes products and related documentation are provided under a license agreement containing restrictions on use
UNICORN Administration and Technical Manual
 UNICORN 7.0.2 Administration and Technical Manual Table of Contents Table of Contents 1 Introduction... 1.1 Administrator functions overview... 1.2 Network terms and concepts... 1.3 Network environment...
WhatsUp Gold. Evaluation Guide
 WhatsUp Gold Evaluation Guide Table of Contents This guide provides and overview of WhatsUp Gold. Refer to our Online Help for more details. Section Step 1: Getting Started Description Installation requirements
How do you track devices that have been approved for use? Are you automatically alerted if an unapproved device connects to the network?
 Cybersecurity Due Diligence Checklist Control # Control Name Risks Questions for IT 1 Make an Benign Case: Employees Inventory of using unapproved Authorized devices without Devices appropriate security
ForeScout Extended Module for Qualys VM
 ForeScout Extended Module for Qualys VM Version 1.2.1 Table of Contents About the Qualys VM Integration... 3 Additional Qualys VM Documentation... 3 About This Module... 3 Components... 4 Considerations...
Ekran System v Program Overview
 Ekran System v. 5.1 Program Overview Contents About the Program Ekran Server & Management Tool Database Management Licensing Client Installation Monitoring Parameters Client Protection Advanced User Authentication
Carbon Black PCI Compliance Mapping Checklist
 Carbon Black PCI Compliance Mapping Checklist The following table identifies selected PCI 3.0 requirements, the test definition per the PCI validation plan and how Carbon Black Enterprise Protection and
DSS User Guide. End User Guide. - i -
 DSS User Guide End User Guide - i - DSS User Guide Table of Contents End User Guide... 1 Table of Contents... 2 Part 1: Getting Started... 1 How to Log in to the Web Portal... 1 How to Manage Account Settings...
ISO COMPLIANCE GUIDE. How Rapid7 Can Help You Achieve Compliance with ISO 27002
 ISO 27002 COMPLIANCE GUIDE How Rapid7 Can Help You Achieve Compliance with ISO 27002 A CONTENTS Introduction 2 Detailed Controls Mapping 3 About Rapid7 8 rapid7.com ISO 27002 Compliance Guide 1 INTRODUCTION
End User Manual. December 2014 V1.0
 End User Manual December 2014 V1.0 Contents Getting Started... 4 How to Log into the Web Portal... 5 How to Manage Account Settings... 6 The Web Portal... 8 How to Upload Files in the Web Portal... 9 How
ForeScout Extended Module for VMware AirWatch MDM
 ForeScout Extended Module for VMware AirWatch MDM Version 1.7.2 Table of Contents About the AirWatch MDM Integration... 4 Additional AirWatch Documentation... 4 About this Module... 4 How it Works... 5
INSTALLATION GUIDE. RapidFire Tools Server for Cyber Hawk 9/20/2018 2:28 PM
 INSTALLATION GUIDE RapidFire Tools Server for Cyber Hawk 9/20/2018 2:28 PM Cyber Hawk RapidFire Tools Server for Cyber Hawk Installation Guide Contents Purpose of this Guide 3 RapidFire Tools Server vs.
Forescout. eyeextend for Palo Alto Networks Wildfire. Configuration Guide. Version 2.2
 Forescout Version 2.2 Contact Information Forescout Technologies, Inc. 190 West Tasman Drive San Jose, CA 95134 USA https://www.forescout.com/support/ Toll-Free (US): 1.866.377.8771 Tel (Intl): 1.408.213.3191
PCI DSS v3.2 Mapping 1.4. Kaspersky Endpoint Security. Kaspersky Enterprise Cybersecurity
 Kaspersky Enterprise Cybersecurity Kaspersky Endpoint Security v3.2 Mapping 3.2 regulates many technical security requirements and settings for systems operating with credit card data. Sub-points 1.4,
Ekran System v Program Overview
 Ekran System v. 6.2 Program Overview Contents About the Program Login Ekran Server & Management Tool Notifying Users about Being Database Management Monitored Licensing User Blocking Client Installation
Download installation package and documentation Installation procedure. Network installation Installing updates
 -Manual d-basics I Manual d-basics Table of Contents Chapter I Introduction 1 Chapter II Installation 3 1... Download installation package and documentation 4 2... Installation procedure 4 3... Registration
Pass4suresVCE. Pass4sures exam vce dumps for guaranteed success with high scores
 Pass4suresVCE http://www.pass4suresvce.com Pass4sures exam vce dumps for guaranteed success with high scores Exam : CS0-001 Title : CompTIA Cybersecurity Analyst (CySA+) Exam Vendor : CompTIA Version :
penelope case management software AUTHENTICATION GUIDE v4.4 and higher
 penelope case management software AUTHENTICATION GUIDE v4.4 and higher Last modified: August 9, 2016 TABLE OF CONTENTS Authentication: The basics... 4 About authentication... 4 SSO authentication... 4
INCIDENT RESPONDER'S FIELD GUIDE INCIDENT RESPONDER'S INCIDENT RESPONSE PLAN FIELD GUIDE LESSONS FROM A FORTUNE 100 INCIDENT RESPONSE LEADER
 INCIDENT RESPONDER'S FIELD GUIDE INCIDENT RESPONDER'S INCIDENT RESPONSE PLAN FIELD GUIDE LESSONS FROM A FORTUNE 100 INCIDENT RESPONSE LEADER 1 INCIDENT RESPONDER'S FIELD GUIDE TABLE OF CONTENTS 03 Introduction
MET/TEAM 2.2 AND MET/CAL 9.1 UPDATE
 MET/TEAM 2.2 AND MET/CAL 9.1 UPDATE The MET/TEAM version 2.2 and MET/CAL version 9.1 release is a major update to the previous MET/TEAM and MET/CAL system. This update includes over 130 bug fixes for an
Total Security Management PCI DSS Compliance Guide
 Total Security Management PCI DSS Guide The Payment Card Industry Data Security Standard (PCI DSS) is a set of regulations to help protect the security of credit card holders. These regulations apply to
OPC UA Configuration Manager PTC Inc. All Rights Reserved.
 2017 PTC Inc. All Rights Reserved. 2 Table of Contents 1 Table of Contents 2 4 Overview 4 5 Project Properties - OPC UA 5 Server Endpoints 7 Trusted Clients 9 Discovery Servers 10 Trusted Servers 11 Instance
Getting Started & How to Complete a DoD Insider Threat Assessment v
 Getting Started & How to Complete a DoD Insider Threat Assessment v.1.0 2016 eprmhelp@alionscience.com Table of Contents Page: 3. Introduction from OUSD(I) 4. Getting Started 6. Creating a New Assessment
OPC UA Configuration Manager Help 2010 Kepware Technologies
 OPC UA Configuration Manager Help 2010 Kepware Technologies 1 OPC UA Configuration Manager Help Table of Contents 1 Getting Started... 2 Help Contents... 2 Overview... 2 Server Settings... 2 2 OPC UA Configuration...
CS 356 Operating System Security. Fall 2013
 CS 356 Operating System Security Fall 2013 Review Chapter 1: Basic Concepts and Terminology Chapter 2: Basic Cryptographic Tools Chapter 3 User Authentication Chapter 4 Access Control Lists Chapter 5 Database
Keys to a more secure data environment
 Keys to a more secure data environment A holistic approach to data infrastructure security The current fraud and regulatory landscape makes it clear that every firm needs a comprehensive strategy for protecting
Comodo Unknown File Hunter Software Version 5.0
 rat Comodo Unknown File Hunter Software Version 5.0 Administrator Guide Guide Version 5.0.073118 Comodo Security Solutions 1255 Broad Street Clifton, NJ 07013 Table of Contents 1 Introduction to Comodo
CounterACT VMware vsphere Plugin
 CounterACT VMware vsphere Plugin Configuration Guide Version 2.0.0 Table of Contents About VMware vsphere Integration... 4 Use Cases... 4 Additional VMware Documentation... 4 About this Plugin... 5 What
Endpoint Security. powered by HEAT Software. Patch and Remediation Best Practice Guide. Version 8.5 Update 2
 Endpoint Security powered by HEAT Software Patch and Remediation Best Practice Guide Version 8.5 Update 2 Contents Introduction 3 Prepare Patch Infrastructure 5 Discover Assets 7 Install Agents 10 Create
CYBERSECURITY RISK LOWERING CHECKLIST
 CYBERSECURITY RISK LOWERING CHECKLIST The risks from cybersecurity attacks, whether external or internal, continue to grow. Leaders must make thoughtful and informed decisions as to the level of risk they
Kenna Platform Security. A technical overview of the comprehensive security measures Kenna uses to protect your data
 Kenna Platform Security A technical overview of the comprehensive security measures Kenna uses to protect your data V3.0, MAY 2017 Multiple Layers of Protection Overview Password Salted-Hash Thank you
Support for the HIPAA Security Rule
 white paper Support for the HIPAA Security Rule PowerScribe 360 Reporting v1.1 healthcare 2 Summary This white paper is intended to assist Nuance customers who are evaluating the security aspects of PowerScribe
Installation Guide. EventTracker Enterprise. Install Guide Centre Park Drive Publication Date: Aug 03, U.S. Toll Free:
 EventTracker Enterprise Install Guide 8815 Centre Park Drive Publication Date: Aug 03, 2010 Columbia MD 21045 U.S. Toll Free: 877.333.1433 Abstract The purpose of this document is to help users install
HPE Intelligent Management Center
 HPE Intelligent Management Center EAD Security Policy Administrator Guide Abstract This guide contains comprehensive information for network administrators, engineers, and operators working with the TAM
QUICK START GUIDE. Exchange Assessment Module. Instructions to Perform an Exchange Assessment 8/22/2018 4:37 PM
 QUICK START GUIDE Assessment Module Instructions to Perform an Assessment 8/22/2018 4:37 PM Network Detective Assessment Module Quick Start Guide Contents Performing an Assessment 3 Assessment Overview
Comodo Endpoint Security Manager Professional Edition Software Version 3.3
 Comodo Endpoint Security Manager Professional Edition Software Version 3.3 Quick Start Guide Guide Version 3.2.022615 Comodo Security Solutions 1255 Broad Street Clifton, NJ 07013 Comodo Endpoint Security
ForeScout Extended Module for Advanced Compliance
 ForeScout Extended Module for Advanced Compliance Version 1.2 Table of Contents About Advanced Compliance Integration... 4 Use Cases... 4 Additional Documentation... 6 About This Module... 6 About Support
Freshservice Discovery Probe User Guide
 Freshservice Discovery Probe User Guide 1. What is Freshservice Discovery Probe? 1.1 What details does Probe fetch? 1.2 How does Probe fetch the information? 2. What are the minimum system requirements
IBM BigFix Compliance PCI Add-on Version 9.5. Payment Card Industry Data Security Standard (PCI DSS) User's Guide IBM
 User's Guide IBM") IBM BigFix Compliance PCI Add-on Version 9.5 Payment Card Industry Data Security Standard (PCI DSS) User's Guide IBM IBM BigFix Compliance PCI Add-on Version 9.5 Payment Card Industry Data Security Standard
IBM BigFix Compliance PCI Add-on Version 9.5 Payment Card Industry Data Security Standard (PCI DSS) User's Guide IBM IBM BigFix Compliance PCI Add-on Version 9.5 Payment Card Industry Data Security Standard
ROCHE/GENENTECH PRACTICAL WORKING GUIDE FOR REQUESTORS
 ROCHE/GENENTECH PRACTICAL WORKING GUIDE FOR REQUESTORS Contents I. INTRODUCTION... 3 II. HOW TO REGISTER AND LOG-IN... 3 III. HOW TO SUBMIT AN APPLICATION... 7 IV. HOW TO PROVIDE ADDITIONAL STUDY INFORMATION...
Sophos Enterprise Console advanced startup guide
 Sophos Enterprise Console advanced startup guide For distributed installations Product version: 5.3 Document date: April 2015 Contents 1 About this guide...4 2 Planning installation...5 2.1 Planning the
Sync User Guide. Powered by Axient Anchor
 Sync Powered by Axient Anchor TABLE OF CONTENTS End... Error! Bookmark not defined. Last Revised: Wednesday, October 10, 2018... Error! Bookmark not defined. Table of Contents... 2 Getting Started... 7
Comodo SecureBox Management Console Software Version 1.9
 6. Comodo SecureBox Management Console Software Version 1.9 Quick Start Guide Guide Version 1.9.041918 Comodo Security Solutions 1255 Broad Street Clifton, NJ 07013 Comodo SecureBox Management Console
RBS OpenEMR Multisite Setup Improper Access Restriction Remote Code Execution of 5
 RBS-2017-001 OpenEMR Multisite Setup Improper Access Restriction Remote Code Execution 2018-03-22 1 of 5 Vendor / Product Information OpenEMR is a Free and Open Source electronic health records and medical
CoreMax Consulting s Cyber Security Roadmap
 CoreMax Consulting s Cyber Security Roadmap What is a Cyber Security Roadmap? The CoreMax consulting cyber security unit has created a simple process to access the unique needs of each client and allows
"Charting the Course... MOC A: Administering System Center Configuration Manager. Course Summary
 MOC 20703-1A: Administering System Center Configuration Manager Course Summary Description This five-day course describes how to use Configuration Manager and its associated site systems to efficiently
EXAMGOOD QUESTION & ANSWER. Accurate study guides High passing rate! Exam Good provides update free of charge in one year!
 EXAMGOOD QUESTION & ANSWER Exam Good provides update free of charge in one year! Accurate study guides High passing rate! http://www.examgood.com Exam : 70-298 Title : Designing Security for a MS Windows
ForeScout CounterACT. Security Policy Templates. Configuration Guide. Version
 ForeScout CounterACT Security Policy Templates Version 18.0.1 Table of Contents About Security Policy Templates... 3 Tracking Vulnerable and Infected Endpoints... 3 Requirements... 3 Installation... 4
Customer Compliance Portal. User Guide V2.0
 Customer Compliance Portal User Guide V2.0 0 Copyright 2016 Merchant Preservation Services, LLC. All rights reserved. CampusGuard, the Merchant Preservation Services logo, and the CampusGuard logo are
ForeScout CounterACT. Plugin. Configuration Guide. Version 2.1
 ForeScout CounterACT Hybrid Cloud Module: VMware vsphere Plugin Version 2.1 Table of Contents About VMware vsphere Integration... 4 Use Cases... 4 Additional VMware Documentation... 4 About this Plugin...
ROCK-POND REPORTING 2.1
 ROCK-POND REPORTING 2.1 Installation and Setup Guide Revised on 09/25/2014 TABLE OF CONTENTS ROCK-POND REPORTING 2.1... 1 SUPPORT FROM ROCK-POND SOLUTIONS... 2 ROCK-POND REPORTING OVERVIEW... 2 INFRASTRUCTURE
Best Practices in Securing a Multicloud World
 Best Practices in Securing a Multicloud World Actions to take now to protect data, applications, and workloads We live in a multicloud world. A world where a multitude of offerings from Cloud Service Providers
A company built on security
 Security How we handle security at Flywheel Flywheel was founded in 2012 on a mission to create an exceptional platform to help creatives do their best work. As the leading WordPress hosting provider for
GRS Enterprise Synchronization Tool
 GRS Enterprise Synchronization Tool Last Revised: Thursday, April 05, 2018 Page i TABLE OF CONTENTS Anchor End User Guide... Error! Bookmark not defined. Last Revised: Monday, March 12, 2018... 1 Table
Practical Network Defense Labs
 Practical Network Defense Labs ABOUT This document showcases my practical hands-on engagements in the elearnsecurity HERA labs environment for the Network Defense Professional certification course. I utilized
Sophos Enterprise Console Help. Product version: 5.3
 Sophos Enterprise Console Help Product version: 5.3 Document date: September 2015 Contents 1 About Sophos Enterprise Console 5.3...6 2 Guide to the Enterprise Console interface...7 2.1 User interface layout...7
Expert PR Taxes User s Manual Payroll November p f P.O. Box San Juan PR
 Expert PR Taxes 2015 User s Manual Payroll November 2016 P.O. Box 70198 San Juan PR 00936-8198 p. 787.287.2777 f. 787.287.7948 support@cegsoft.com www.cegsoft.com Table of Contents I. Introduction... 3
Security Configuration Assessment (SCA)
") Security Configuration Assessment (SCA) Getting Started Guide Security Configuration Assessment (SCA) is a lightweight cloud service which can quickly perform the configuration assessment of the IT assets,
Security Configuration Assessment (SCA) Getting Started Guide Security Configuration Assessment (SCA) is a lightweight cloud service which can quickly perform the configuration assessment of the IT assets,
INSTALLATION GUIDE. Trimble PipeDesigner 3D Software
 INSTALLATION GUIDE Trimble PipeDesigner 3D Software Revision A May 2015 F Englewood Office Trimble Navigation Limited 116 Inverness Drive East, Suite 210 Englewood, Colorado 80112 (800) 234-3758 Copyright
Managing Microsoft 365 Identity and Access
 Course MS-500T01-A: Managing Microsoft 365 Identity and Access Page 1 of 3 Managing Microsoft 365 Identity and Access Course MS-500T01-A: 1 day; Instructor-Led Introduction Help protect against credential
ForeScout Extended Module for Carbon Black
 ForeScout Extended Module for Carbon Black Version 1.0 Table of Contents About the Carbon Black Integration... 4 Advanced Threat Detection with the IOC Scanner Plugin... 4 Use Cases... 5 Carbon Black Agent
Azure for On-Premises Administrators Practice Exercises
 Azure for On-Premises Administrators Practice Exercises Overview This course includes optional practical exercises where you can try out the techniques demonstrated in the course for yourself. This guide
Tenable.io Evaluation Workflow. Last Revised: August 22, 2018
 Tenable.io Evaluation Workflow Last Revised: August 22, 2018 Table of Contents Welcome 3 Part One 4 Create User(s) and Group(s) 5 Create Target Group(s) 6 Create Exclusion Lists 7 Create an External Scan
Sample Security Risk Analysis ASP Meaningful Use Core Set Measure 15
 Sample Security Risk Analysis ASP Meaningful Use Core Set Measure 15 Risk Analysis with EHR Questions Example Answers/Help: Status What new electronic health information has been introduced into my practice
VMware Mirage Web Manager Guide
 Mirage 5.3 This document supports the version of each product listed and supports all subsequent versions until the document is replaced by a new edition. To check for more recent editions of this document,
EntraPass Installation Guide Kantech-OnBoard systems
 EntraPass Installation Guide Overview Purpose ExacqVision recorders now include Kantech EntraPass Corporate Edition software. The purpose of this document is to guide the technician or installer through
Endpoint Security Manager
 Comodo Endpoint Security Manager Software Version 1.6 CIS Configuration Editor Version 1.6.010511 Comodo Security Solutions 1255 Broad Street STE 100 Clifton, NJ 07013 Table of Contents 1.Introduction
IBM Endpoint Manager. OS Deployment V3.5 User's Guide
 IBM Endpoint Manager OS Deployment V3.5 User's Guide IBM Endpoint Manager OS Deployment V3.5 User's Guide Note Before using this information and the product it supports, read the information in Notices
Workflow Templates in Compliance 360 Version 2018
 Workflow Templates in Compliance 360 Version 2018 Workflow Templates 5 Workflow Elements 6 Workflow Teams 6 Workflow Template Changes 6 Create or Edit a Workflow Template 8 Import and Export Workflow Templates
Quick Start Guide. Kaseya 2009
 Agent Configuration and Deployment Quick Start Guide Kaseya 2009 February 13, 2010 About Kaseya Kaseya is a global provider of IT automation software for IT Solution Providers and Public and Private Sector
InventoryControl Quick Start Guide
 InventoryControl Quick Start Guide Copyright 2013 Wasp Barcode Technologies 1400 10 th St. Plano, TX 75074 All Rights Reserved STATEMENTS IN THIS DOCUMENT REGARDING THIRD PARTY PRODUCTS OR SERVICES ARE
AUTHORITY FOR ELECTRICITY REGULATION
 SULTANATE OF OMAN AUTHORITY FOR ELECTRICITY REGULATION SCADA AND DCS CYBER SECURITY STANDARD FIRST EDITION AUGUST 2015 i Contents 1. Introduction... 1 2. Definitions... 1 3. Baseline Mandatory Requirements...
Criminal Justice Information Security (CJIS) Guide for ShareBase in the Hyland Cloud
 Guide for ShareBase in the Hyland Cloud") Criminal Justice Information Security (CJIS) Guide for ShareBase in the Hyland Cloud Introduction The Criminal Justice Information Security (CJIS) Policy is a publically accessible document that contains
Criminal Justice Information Security (CJIS) Guide for ShareBase in the Hyland Cloud Introduction The Criminal Justice Information Security (CJIS) Policy is a publically accessible document that contains
IBM Security SiteProtector System User Guide for Security Analysts
 IBM Security IBM Security SiteProtector System User Guide for Security Analysts Version 2.9 Note Before using this information and the product it supports, read the information in Notices on page 83. This