Building MPI so we can run code on multiple nodes
|
|
|
- Domenic Pitts
- 6 years ago
- Views:
Transcription
1 1 of :16 Return to h p:// View video at: h p:// Steps to make Raspberry Pi Supercomputer Prof Simon Cox Computa onal Engineering and Design Research Group Faculty of Engineering and the Environment University of Southampton, SO17 1BJ, UK. V0.2: 8 th September 2012 V0.3: 30 th November 2012 [Updated with less direct linking to MPICH2 downloads] V0.4: 9 th January 2013 [Updated step 33] First steps to get machine up 1. Get image from h p:// I originally used: wheezy raspbian.zip Updated 30/11/12: wheezy raspbian.zip My advice is to to check the downloads page on raspberrypi.org and use the latest version. 2. Use win32 disk imager to put image onto an SD Card (or on a Mac e.g. Disk U lity/ dd) You will use the Write op on to put the image from the disk to your card 3. Boot on Pi 4. Expand image to fill card using the op on on screen when you first boot. If you don t do this on first boot, then you need to use $ sudo raspi config h p://elinux.org/rpi_raspi config 5. Log in and change the password h p:// $ passwd 6. Log out and check that you typed it all OK (!) $ exit 7. Log back in again with your new password Building MPI so we can run code on multiple nodes 8. Refresh your list of packages in your cache $ sudo apt get update 9. Just doing this out of habit, but note not doing any more than just ge ng the list (upgrade is via sudo apt get upgrade ). 10. Get Fortran a er all what is scien fic programming without Fortran being a possibility? $ sudo apt get install gfortran 11. Read about MPI on the Pi. This is an excellent post to read just to show you are going to make it by the end, but don t type or get anything just yet we are going to build everything ourselves: h p://westcoastlabs.blogspot.co.uk/2012/06/parallel processing on pi bramble.html Note there are a few things to note here a) Since we put Fortran in we are good to go without excluding anything b) The packages here are for armel and we need armhf in this case so we are going to build MPI ourselves 12. Read a bit more before you begin: h p:// on/files/mpich installguide.pdf Note: As the version of MPICH2 updates, you are be er to go to: h p:// on/guides/
2 2 of :16 and get the latest installer s Guide. We are going to follow the steps from 2.2 (from the Quick Start Sec on) in the guide. 13. Make a directory to put the sources in $ mkdir /home/pi/mpich2 $ cd ~/mpich2 14. Get MPI sources from Argonne. $ wget h p:// p1.tar.gz [Note that as the MPI source updates, you can navigate to: h p:// to get the latest stable release version for MPICH2] 15. Unpack them. $ tar xfz mpich p1.tar.gz [Note: You will need to update this as the version of MPICH2 increments] 16. Make yourself a place to put the compiled stuff this will also make it easier to figure out what you have put in new on your system. Also you may end up building this a few mes $ sudo mkdir /home/rpimpi/ $ sudo mkdir /home/rpimpi/mpich2 install [I just chose the rpimpi to replace the you in the Argonne guide and I did the directory crea on in two steps] 17. Make a build directory (so we keep the source directory clean of build things) mkdir /home/pi/mpich_build 18. Change to the BUILD directory $ cd /home/pi/mpich_build 19. Now we are going to configure the build $ sudo /home/pi/mpich2/mpich p1/configure prefix=/home/rpimpi/mpich2 install [Note: You will need to update this as the version of MPICH2 increments] Make a cup of tea 20. Make the files $ sudo make Make another cup of tea 21. Install the files $ sudo make install Make another cup of tea it will finish 22. Add the place that you put the install to your path $ export PATH=$PATH:/home/rpimpi/mpich2 install/bin Note to permanently put this on the path you will need to edit.profile $nano ~/.profile and add at the bo om these two lines: # Add MPI to path PATH="$PATH:/home/rpimpi/mpich2 install/bin" 23. Check whether things did install or not $ which mpicc $ which mpiexec 24. Change directory back to home and create somewhere to do your tests $ cd ~ $ mkdir mpi_tes ng $ cd mpi_tes ng 25. Now we can test whether MPI works for you on a single node mpiexec f machinefile n <number> hostname where machinefile contains a list of IP addresses (in this case just one) for the machines a) Get your IP address $ ifconfig b) Put this into a single file called machinefile 26. $ nano machinefile Add this line: [or whatever your IP address was] 27. If you use $ mpiexec f machinefile n 1 hostname Output is: raspberrypi
3 3 of : Now to run a li le C code. In the examples subdirectory of where you built MPI is the famous CPI example. You will now use MPI on your Pi to calculate Pi: $ cd /home/pi/mpi_tes ng $ mpiexec f machinefile n 2 ~/mpich_build/examples/cpi Output is Process 0 of 2 is on raspberrypi Process 1 of 2 is on raspberrypi pi is approximately , Error is Celebrate if you get this far. Flash me once 29. We now have a master copy of the main node of the machine with all of the installed files for MPI in a single place. We now want to clone this card. 30. Shutdown your Pi very carefully $ sudo poweroff Remove the SD Card and pop it back into your SD Card writer on your PC/ other device. Use Win32 disk imager (or on a Mac e.g. Disk U lity/ dd) to put the image FROM your SD Card back TO your PC: You will use the Read op on to put the image from the disk to your card Let us call the image wheezy raspbian_backup_mpi_master.img 31. Eject the card and put a fresh card into your PC/other device. Use win32 disk imager to put image onto an SD Card (or on a Mac e.g. Disk U lity/ dd) You will use the Write op on to put the image from the disk to your card and choose the wheezy raspbian_backup_mpi_master.img image you just created. [Note that there are probably more efficient ways of doing this in par cular maybe avoid expanding the filesystem in step 4 of the first sec on.] 32. Put the card into your second Pi and boot this. You should now have two Raspberry Pis on. Unless otherwise stated, all the commands below are typed from the Master Pi that you built first. Using SSH instead of password login between the Pis 33. Sort out RSA to allow quick log in. This is the best thing to read: h p://steve.dynedge.co.uk/2012/05/30/logging into a rasberry pi using publicprivate keys/ In summary (working on the MASTER Pi node) $ cd ~ $ ssh keygen t rsa C raspberrypi@raspberrypi This set a default loca on of /home/pi/.ssh/id_rsa to store the key Enter a passphrase e.g. myfirstpicluster. If you leave this blank (not such good security) then no further typing of passphrases is needed. $ cat ~/.ssh/id_rsa.pub ssh pi@ " "mkdir.ssh;cat >>.ssh/authorized_keys" 34. If you now log into your other Pi and do $ ls al ~/.ssh You should see a file called authorized_keys this is your cket to no login heaven on the nodes 35. Now let us add the new Pi to the machinefile. (Log into it and get its IP address, as above) Working on the Master Raspberry Pi (the first one you built): $ nano machinefile Make it read [or whatever the two IP addresses you have for the machines are] 36. Now to run a li le C code again. In the examples subdirectory of where you built MPI is the famous CPI example. First me you will need to enter the passphrase for the key you generated above (unless you le it blank) and also the password for the second Pi. $ cd /home/pi/mpi_tes ng $ mpiexec f machinefile n 2 ~/mpich_build/examples/cpi Output is Process 0 of 2 is on raspberrypi Process 1 of 2 is on raspberrypi pi is approximately , Error is If you repeat this a second me you won t need to type any passwords in. Hurray.
4 4 of :16 Note that we have NOT changed the hostnames yet (so yes, the above IS running on the two machines, but they both have the same hostname at the moment). 37. If you change the hostname on your second machine (see Appendix 1 Hostname Script ) and run: $ mpiexec f machinefile n 2 ~/mpich_build/examples/cpi Output: Process 0 of 2 is on raspberrypi Process 1 of 2 is on iridispi002 Now you can see each process running on the separate nodes. CONGRATULATIONS YOU HAVE NOW FINISHED BUILDING 2 NODE SUPERCOMPUTER IF YOU FOLLOW THE STEPS BELOW, YOU CAN EXPAND THIS TO 64 (or more) nodes Acknowledgements Thanks to all of the authors of the posts linked to in this guide and Nico Maas. Thanks to the team in the lab: Richard Boardman, Steven Johnston, Gereon Kaiping, Neil O Brien, and Mark Sco. Also to Oz Parchment and Andy Evere (isolu ons). Thanks to Pavi ar Bassi in Finance, who made all the orders for equipment happen so efficiently. And, of course, Professor Cox s son James who provided specialist support on Lego and system tes ng. Appendix 1 Scripts and other things to do Flash me one more time (rinse and repeat for each additional node) 1. Power off the worker Pi and eject the card $ sudo poweroff We now have a copy of the WORKER nodes of the machine with all of the installed files for MPI in a single place. We now want to clone this card as it has the ssh key on it in the right place. Shutdown your Pi very carefully $ sudo poweroff 2. Remove the SD Card and pop it back into your SD Card writer on your PC/ other device. Use Win32 disk imager (or on a Mac e.g. Disk U lity/ dd) to put the image FROM your SD Card back to your PC: You will use the Read op on to put the image from the disk to your card Let us call the image wheezy raspbian_backup_mpi_worker.img 3. Eject the card and put a fresh card into the machine. Use win32 disk imager to put image onto an SD Card (or on a Mac e.g. Disk U lity/ dd) You will use the Write op on to put the image from the disk to your card and choose the wheezy raspbian_backup_mpi_master.img image you just created. [Note that there are probably more efficient ways of doing this in par cular maybe avoid expanding the filesystem in step 4 of the first sec on.] Hostname Script If you want to rename each machine, you can do it from the Master node using: ssh pi@ 'sudo echo "iridispi002" sudo tee /etc/hostname' ssh pi@ 'sudo echo "iridispi003" sudo tee /etc/hostname' ssh pi@ 'sudo echo "iridispi004" sudo tee /etc/hostname' etc. You should then reboot each worker node If you re run step (36) above again, you will get: $ mpiexec f machinefile n 2 ~/mpich_build/examples/cpi Output: Process 0 of 2 is on raspberrypi Process 1 of 2 is on iridispi002
5 5 of :16 pi is approximately , Error is This shows the master node s ll called raspberrypi and the first worker called iridispi002 Using Python There are various Python bindings for MPI. This guide just aims to show how to get ONE of them working. 1. Let us use mpi4py. More info at h p://mpi4py.scipy.org/ h p://mpi4py.scipy.org/docs/usrman/index.html $ sudo apt get install python mpi4py 2. We also want to run the demo so let us get the source too $ cd ~ $ mkdir mpi4py $ cd mpi4py $ wget h p://mpi4py.googlecode.com/files/mpi4py 1.3.tar.gz $ tar xfz mpi4py 1.3.tar.gz $ cd mpi4py 1.3/demo 3. Repeat steps 1 and 2 on each of your other nodes (we did not bake this into the system image) 4. Run an example (on your master node) $ mpirun.openmpi np 2 machinefile /home/pi/mpi_tes ng/machinefile python helloworld.py Output is: Hello, World! I am process 0 of 2 on raspberrypi. Hello, World! I am process 1 of 2 on iridispi $ mpiexec.openmpi n 4 machinefile /home/pi/mpi_tes ng/machinefile python helloworld.py Output is: Hello, World! I am process 2 of 4 on raspberrypi. Hello, World! I am process 3 of 4 on iridispi002. Hello, World! I am process 1 of 4 on iridispi002. Hello, World! I am process 0 of 4 on raspberrypi. 6. These are handy to remove things if your a empts to get mpi4py don t quite pan out $ sudo apt get install python mpi4py $ sudo apt get autoremove Keygen script commands cat ~/.ssh/id_rsa.pub ssh pi@ "cat >>.ssh/authorized_keys" cat ~/.ssh/id_rsa.pub ssh pi@ "cat >>.ssh/authorized_keys" cat ~/.ssh/id_rsa.pub ssh pi@ "cat >>.ssh/authorized_keys" etc. for sending out the key exchanges if you want to do this again having generated a new key Getting Pip for Raspberry Pi 1. We can install Pip, which gives us a nice way to set up Python packages (and uninstall them too). More info is at h p:// installer.org/en/latest/index.html h p:// installer.org/en/latest/installing.html $ cd ~ $ mkdir pip_tes ng $ cd pip_tes ng 2. A prerequisite for pip is distribute so let s get that first and then install pip. The sudo is because the installa on of these has to run as root. $ curl h p://python distribute.org/distribute_setup.py sudo python
6 6 of :16 $ curl h ps://raw.github.com/pypa/pip/master/contrib/get pip.py sudo python Notes on making MPI Shared Libraries for Raspberry Pi MPI libraries can also be built shared so that they can be dynamically loaded. This gives a library file that ends in.so etc. not.a and we can do that by building those MPI libraries again. This is a repeat of steps above, but wri en out again using the suffix _shared on the directory names. 1. Make a directory to put the sources in $ mkdir /home/pi/mpich2_shared $ cd ~/mpich2_shared 2. Get MPI sources from Argonne. $ wget h p:// p1.tar.gz [Note that as the MPI source updates, you can navigate to: h p:// to get the latest stable release version] 3. Unpack them. $ tar xfz mpich p1.tar.gz [Note: You will need to update this as the version of MPICH2 increments] 4. Make yourself a place to put the compiled stuff this will also make it easier to figure out what you have put in new on your system. $ sudo mkdir /home/rpimpi_shared/ $ sudo mkdir /home/rpimpi_shared/mpich2 install_shared [I just chose the rpimpi_shared to replace the you in the Argonne guide and I made the directory crea on in two steps] 5. Make a build directory (so we keep the source directory clean of build things) $ mkdir /home/pi/mpich_build_shared 6. Change to the BUILD directory $ cd /home/pi/mpich_build_shared 7. Now we are going to configure the build $ sudo /home/pi/mpich2_shared/mpich p1/configure prefix=/home/rpimpi_shared/mpich2 install_shared enable shared [Note: You will need to update this as the version of MPICH2 increments] 8. Make the files $ sudo make 9. Install the files $ sudo make install 10. Finally add the place that you put the install to your path $ export PATH=$PATH:/home/rpimpi_shared/mpich2 install_shared/bin Note to permanently put this on the path you will need to edit.profile $ nano ~/.profile and add at the bo om these two lines: # Add MPI Shared to path PATH="$PATH:/home/rpimpi_shared/mpich2 install_shared/bin"


7 7 of :16 A couple of pictures when it was finished (Picture Credits below: Glenn Harris 2012)


")

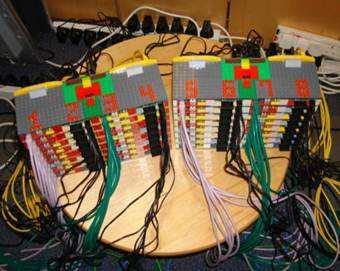
8 8 of :16 Pictures making it (Picture Credits below: Simon J Cox 2012) (Picture Credits: Simon J Cox 2012) Return to h p://
Wallet Installation Guide for Staking on Raspberry PI
 Wallet Installation Guide for Staking on Raspberry PI V2.1 November 2018 CONTENTS 01. Version History... 13 02. Introduction... 3 03. Prerequisites... 13 04. Installation Steps... 6 05. Add an address
Adafruit's Raspberry Pi Lesson 6. Using SSH
 Adafruit's Raspberry Pi Lesson 6. Using SSH Created by Simon Monk Last updated on 2017-08-16 01:12:07 AM UTC Guide Contents Guide Contents Overview Enabling SSH Using a blank boot file Using Raspi-Config
Setting up a Chaincoin Masternode
 Setting up a Chaincoin Masternode Introduction So you want to set up your own Chaincoin Masternode? You ve come to the right place! These instructions are correct as of April, 2017, and relate to version
Lab 0: Intro to running Jupyter Notebook on a Raspberry Pi
 Lab 0: Intro to running Jupyter Notebook on a Raspberry Pi Nick Antipa, Li-Hao Yeh, based on labs by Jon Tamir and Frank Ong January 24, 2018 This lab will walk you through setting up your Raspberry Pi
If you had a freshly generated image from an LCI instructor, make sure to set the hostnames again:
 Storage Node Setup A storage node (or system as your scale) is a very important unit for an HPC cluster. The computation is often about the data it produces and keeping that data safe is important. Safe
Assignment 1: Build Environment
 Read the entire assignment before beginning! Submit deliverables to CourSys: https://courses.cs.sfu.ca/ Late penalty is 10% per calendar day (each 0 to 24 hour period past due, max 2 days). This assignment
RETROPIE INSTALLATION GUIDE
 RETROPIE INSTALLATION GUIDE CONTENTS THE FOLLOWING GUIDE WILL COVER THE INSTALLATION, SETUP AND CONFIGURATION OF THE RASPBERRY PI, RASPBIAN OS AND RETROPIE Author: http://rpiarcadebuild.wordpress.com/
John the Ripper on a Ubuntu MPI Cluster
 John the Ripper on a Ubuntu 10.04 MPI Cluster Pétur Ingi Egilsson petur [at] petur [.] eu 1 Table of Contents Foreword...3 History...3 Requirements...3 Configuring the Server...3 Requirements...3 Required
Raspberry Pi Setup Tutorial
 Raspberry Pi Setup Tutorial The Raspberry Pi is basically a miniature linux- based computer. It has an ARM processor on it, specifically the ARM1176JZF- S 700 MHz processor. This is the main reason why
More Raspian. An editor Configuration files Shell scripts Shell variables System admin
 More Raspian An editor Configuration files Shell scripts Shell variables System admin Nano, a simple editor Nano does not require the mouse. You must use your keyboard to move around the file and make
Contents. Note: pay attention to where you are. Note: Plaintext version. Note: pay attention to where you are... 1 Note: Plaintext version...
 Contents Note: pay attention to where you are........................................... 1 Note: Plaintext version................................................... 1 Hello World of the Bash shell 2 Accessing
Manual to install experimental firmware on a TYTERA MD380
 By Erik, PA0ESH. Monday 28 November 2016 I've been a while in the possession of a MD380/390 Tytera to experiment with DMR. This Chinese MD380/390 is a delight in use and with the support of Arjan Hogt,
Aliases are set manually or in a login script. Aliases that were set manually will be gone the next time you login.
 Page 1 and 2: question without commands. Page 3 7 : questions with answers. Aliases are set manually or in a login script. Aliases that were set manually will be gone the next time you login. 1. List your
XLink Kai Raspberry Pi Beginners Tutorial
 XLink-Kai-Raspberry-Pi-Beginners-Tutorial.md XLink Kai Raspberry Pi Beginners Tutorial Hi! This tutorial will guide you through setting up XLink Kai on a Raspberry Pi to play multiplayer system link Xbox
Supercomputing environment TMA4280 Introduction to Supercomputing
 Supercomputing environment TMA4280 Introduction to Supercomputing NTNU, IMF February 21. 2018 1 Supercomputing environment Supercomputers use UNIX-type operating systems. Predominantly Linux. Using a shell
Experiments 1 How to set up Raspberry Pi B+ The little computer you can cook into DIY tech projects
 Experiments 1 How to set up Raspberry Pi B+ The little computer you can cook into DIY tech projects The Raspberry Pi is a computer about the size of a credit card. The darling of the do-it-yourself electronics
Installing Hadoop / Yarn, Hive 2.1.0, Scala , and Spark 2.0 on Raspberry Pi Cluster of 3 Nodes. By: Nicholas Propes 2016
 Installing Hadoop 2.7.3 / Yarn, Hive 2.1.0, Scala 2.11.8, and Spark 2.0 on Raspberry Pi Cluster of 3 Nodes By: Nicholas Propes 2016 1 NOTES Please follow instructions PARTS in order because the results
Washington WASHINGTON UNIVERSITY IN ST LOUIS
 NetBSD Installation Procedure NetBSD Installation for the Washington University Gigabit Switch Kits Program Presented by: jdd@arl.wustl.edu http://www.arl.wustl.edu/~jdd http://www.arl.wustl.edu/arl Applied
Configuration the Raspberry Pi for the SmartPI. There are two ways to install the necessary software to use the SmartPi with your Raspberry Pi!
 Configuration the Raspberry Pi for the SmartPI There are two ways to install the necessary software to use the SmartPi with your Raspberry Pi! I. You install the pre-configured image on your Raspberry
Adafruit's Raspberry Pi Lesson 1. Preparing an SD Card for your Raspberry Pi
 Adafruit's Raspberry Pi Lesson 1. Preparing an SD Card for your Raspberry Pi Created by Simon Monk Last updated on 2016-12-03 03:20:15 AM UTC Guide Contents Guide Contents Overview You Will Need Downloading
Getting started with Raspberry Pi (and WebIoPi framework)
") Getting started with Raspberry Pi (and WebIoPi framework) 1. Installing the OS on the Raspberry Pi Download the image file from the Raspberry Pi website. It ll be a zip file as shown below: Unzip the file
Getting started with Raspberry Pi (and WebIoPi framework) 1. Installing the OS on the Raspberry Pi Download the image file from the Raspberry Pi website. It ll be a zip file as shown below: Unzip the file
Configure HOSTNAME by adding the hostname to the file /etc/sysconfig/network. Do the same to all the all nodes.
 Network setup As the root user execute the command "ifconfig" on each host. Take a note of ipaddress's of all machines I have a home LAN so my addresses are class C which might be in the format 192.168.192.x.
GIT. A free and open source distributed version control system. User Guide. January, Department of Computer Science and Engineering
 GIT A free and open source distributed version control system User Guide January, 2018 Department of Computer Science and Engineering Indian Institute of Technology, Kharagpur Table of Contents What is
Zephyr Kernel Installation & Setup Manual
 Zephyr Kernel Installation & Setup Manual Zephyr kernel is a small footprint Single address space OS, i.e, it combines application specific code with a custom kernel to create a monolithic image that gets
Compile and run RAPID on the Microsoft Azure Cloud
 Compile and run RAPID on the Microsoft Azure Cloud By Cédric H. David (cedric.david@jpl.nasa.gov), 09 Jul 2014, updated 05 Aug 2014, 08 Sep 2014, 04 Nov 2014, 21 Jan 2015 Introduction Foreword This tutorial
Digital Free Library. Created by Kirby Griese. Last updated on :35:15 PM UTC
 Digital Free Library Created by Kirby Griese Last updated on 2018-01-04 04:35:15 PM UTC Guide Contents Guide Contents Overview Parts Needed Preparation Prepare Micro SD Card Install Apache Configure Access
Davide Cavaliere 18 th February 2017
 Davide Cavaliere www.monocilindro.com dadez87@gmail.com 18 th February 2017 This guide explains how to set in read mode your Raspberry Pi 3, running the latest Raspbian Jessie (January 2017). This feature
PASSWORD SHIELD. User Manual
 PASSWORD SHIELD User Manual Table of Contents Welcome...3 Compa bility...3 Installa on Guide and Database Crea on...4 Registra on...7 Workspace...8 Control Bu ons...9 File...12 Edit...13 View...14 Tools...15
CSE 101 Introduction to Computers Development / Tutorial / Lab Environment Setup
 CSE 101 Introduction to Computers Development / Tutorial / Lab Environment Setup Purpose: The purpose of this lab is to setup software that you will be using throughout the term for learning about Python
Introduction to the ITA computer system
 Introduction to the ITA computer system Tiago M. D. Pereira Slides: https://folk.uio.no/tiago/teaching/unix2017 Institute of Theoretical Astrophysics Today s lecture in a nutshell 1. Network and users,
IT 341 Introduction to System Administration Project I Installing Ubuntu Server on a Virtual Machine
 IT 341 Introduction to System Administration Project I Installing Ubuntu Server on a Virtual Machine Here we create a new virtual machine and install Ubuntu 16.04 LTS Server on it. In this instance, we
PROJECT INFRASTRUCTURE AND BASH INTRODUCTION MARKUS PILMAN<
 PROJECT INFRASTRUCTURE AND BASH INTRODUCTION MARKUS PILMAN< MPILMAN@INF.ETHZ.CH> ORGANIZATION Tutorials on Tuesdays - Sometimes, will be announced In General: no exercise sessions (unless you get an email
Running MESA on Amazon EC2 Instances: A Guide
 Page! 1 of! 12 Running MESA on Amazon EC2 Instances: A Guide by Andrew Mizener (amizener@macalester.edu) Page! 2 of! 12 Introduction Welcome! In this guide, I ll be demonstrating how to set up MESA on
Setting up a Raspberry Pi 1
 Setting up a Raspberry Pi 1 by Kerry Veenstra December 4, 2012 1.0 Introduction! 2 2.0 Materials! 2 3.0 Procedure! 3 3.1 Load GNU/Linux on the SD Memory Card! 3 3.2 Basic Configuration! 5 3.3 Basic Network
Configure router. 26. Start AirPort Utility (located in the Utilities folder). The AirPort Utility window show a component diagram:
. The AirPort Utility window show a component diagram:") Configure router The Raspberry Pi 3 (RPi) should be assigned a fixed IP address in the router. After installing osmc for the first time, you should configure the router. 26. Start AirPort Utility (located
Configure router The Raspberry Pi 3 (RPi) should be assigned a fixed IP address in the router. After installing osmc for the first time, you should configure the router. 26. Start AirPort Utility (located
Raspberry PI 'How-To' Series
 Raspberry PI 'How-To' Series AOSONG AM2315 Temperature Sensor Implementation Guide Update Written by: Sopwith Revision 3.0 February 1, 2019 sopwith@ismellsmoke.net 1 Introduction Here we are in February
Node-RED Dashboard: Pi Control
 : Pi Control Will English June 26, 2017 will.english@vivaldi.net 1 Summary I am using a Raspberry Pi as a headless computer through VNC. A particular interest is learning Node-RED flow programming and
SwanSim - A Guide to Git / SourceTree / GitLab for Windows
 SwanSim - A Guide to Git / SourceTree / GitLab for Windows Dr Jason W. Jones College of Engineering, Swansea University September 2017 Contents 1 Introduction... 2 2 Obtaining the Software... 3 2.1 Software
Computing with the Moore Cluster
 Computing with the Moore Cluster Edward Walter An overview of data management and job processing in the Moore compute cluster. Overview Getting access to the cluster Data management Submitting jobs (MPI
Install Eclipse Mosquitto MQTT on a Raspberry Pi 3B Running Raspbian Stretch
 Install Eclipse Mosquitto MQTT on a Raspberry Pi 3B Running Raspbian Stretch October 7, 2017 David Dickinson, eveningstarnm@gmail.com Eclipse Mosquitto (http://wiki.eclipse.org/mosquitto) is a popular
Embedded Linux Systems. Bin Li Assistant Professor Dept. of Electrical, Computer and Biomedical Engineering University of Rhode Island
 Embedded Linux Systems Bin Li Assistant Professor Dept. of Electrical, Computer and Biomedical Engineering University of Rhode Island Generic Embedded Systems Structure User Sensors ADC microcontroller
Installing and Using Docker Toolbox for Mac OSX and Windows
 Installing and Using Docker Toolbox for Mac OSX and Windows One of the most compelling reasons to run Docker on your local machine is the speed at which you can deploy and build lab environments. As a
The TinyHPC Cluster. Mukarram Ahmad. Abstract
 The TinyHPC Cluster Mukarram Ahmad Abstract TinyHPC is a beowulf class high performance computing cluster with a minor physical footprint yet significant computational capacity. The system is of the shared
Raspberry Pi Class Ed 299. Mike Davis Truman College 5/26/2015
 Raspberry Pi Class Ed 299 Mike Davis Truman College 5/26/2015 Goals for Today Discuss Raspberry Camera Projects Fruit Rotting Air Powered Car Photo booth Use a Python Program to control the camera Copy,
Configure HOSTNAME by adding the hostname to the file /etc/sysconfig/network. Do the same to all the other 3(4) nodes.
 nodes.") Network setup As the root user execute the command "ifconfig" on each host. Take a note of ipaddress's of all machines I have a home LAN so my addresses are class C which might be in the format 192.168.192.x.
Network setup As the root user execute the command "ifconfig" on each host. Take a note of ipaddress's of all machines I have a home LAN so my addresses are class C which might be in the format 192.168.192.x.
DC/OS on Google Compute Engine
 DC/OS on Google Compute Engine You can configure a DC/OS cluster on Google Compute Engine (GCE) by using these scripts. Configure bootstrap node Install the DC/OS GCE scripts Configure parameters Important:
Sigma Tile Workshop Guide. This guide describes the initial configuration steps to get started with the Sigma Tile.
 Sigma Tile Workshop Guide This guide describes the initial configuration steps to get started with the Sigma Tile. 1 Contents Contents... 2 Chapter 1: System Requirements... 3 Chapter 2: Configure Your
Adafruit WebIDE. Created by Tyler Cooper. Last updated on :29:47 PM UTC
 Adafruit WebIDE Created by Tyler Cooper Last updated on 2018-03-12 08:29:47 PM UTC Guide Contents Guide Contents Overview Installation Easy installation: Manual Installation: Uninstallation: Getting Started
Die Brummbeere Documentation
 Die Brummbeere Documentation Release 0.0.1 Peter Bouda February 21, 2016 Contents 1 owncloud Music Player 1 2 Contents 3 2.1 Compile for desktop........................................... 3 2.2 Embedded
CRM CUSTOMER RELATIONSHIP MANAGEMENT
 CRM CUSTOMER RELATIONSHIP MANAGEMENT Customer Relationship Management is identifying, developing and retaining profitable customers to build lasting relationships and long-term financial success. The agrē
AMS 200: Working on Linux/Unix Machines
 AMS 200, Oct 20, 2014 AMS 200: Working on Linux/Unix Machines Profs. Nic Brummell (brummell@soe.ucsc.edu) & Dongwook Lee (dlee79@ucsc.edu) Department of Applied Mathematics and Statistics University of
BR*Tools Studio 7.10 for Oracle Multi-instance Server Standalone Part 2: Server, Database Instances and their Users
 BR*Tools Studio 7.10 for Oracle Multi-instance Server Standalone Part 2: Server, Database Instances and their Users Applies to: SAP BR*Tools Studio 7.10(2) for Oracle DBA on Unix/Linux with examples on
Preparing SD card for Pi
 Preparing SD card for Pi Sarwan Singh Assistant Director(S) NIELIT Chandigarh Education is the kindling of a flame, not the filling of a vessel. - Socrates 1 sarwan@nielit Using NOOBS- New Out Of Box Software
Introduction to Unix - Lab Exercise 0
 Introduction to Unix - Lab Exercise 0 Along with this document you should also receive a printout entitled First Year Survival Guide which is a (very) basic introduction to Unix and your life in the CSE
Building Tizen Development Environment
 Building Tizen Development Environment Minsoo Ryu Real-Time Computing and Communications Lab. Hanyang University msryu@hanyang.ac.kr Tizen 2.3 Development Environment Target hardware device Tizen Reference
TangeloHub Documentation
 TangeloHub Documentation Release None Kitware, Inc. September 21, 2015 Contents 1 User s Guide 3 1.1 Managing Data.............................................. 3 1.2 Running an Analysis...........................................
CS197U: A Hands on Introduction to Unix
 CS197U: A Hands on Introduction to Unix Lecture 3: UNIX Operating System Organization Tian Guo CICS, Umass Amherst 1 Reminders Assignment 2 is due THURSDAY 09/24 at 3:45 pm Directions are on the website
Precursor Steps & Storage Node
 Precursor Steps & Storage Node In a basic HPC cluster, the head node is the orchestration unit and possibly the login portal for your end users. It s one of the most essential pieces to get working appropriately.
GeoDict Download, installation, and licensing. Andreas Wiegmann Jürgen Becker Erik Glatt. Text and editing: Barbara Planas
 GeoDict 2015 Andreas Wiegmann Jürgen Becker Erik Glatt Text and editing: Barbara Planas Download, installation, and licensing 15 December 2016 GEODICT2015 DOWNLOAD, INSTALLATION, AND LICENSING 1 SYSTEM
CSCI 350 Virtual Machine Setup Guide
 CSCI 350 Virtual Machine Setup Guide This guide will take you through the steps needed to set up the virtual machine to do the PintOS project. Both Macintosh and Windows will run just fine. We have yet
Microprocessor-Based Systems (E155)
") Microprocessor-Based Systems (E155) D. Harris and M. Spencer Fall 2017 Lab 4: Life of Pi Requirement 1) Set up your Raspberry Pi 2) Write an assembly-language program to sort an array of 12 signed bytes
Microprocessor-Based Systems (E155) D. Harris and M. Spencer Fall 2017 Lab 4: Life of Pi Requirement 1) Set up your Raspberry Pi 2) Write an assembly-language program to sort an array of 12 signed bytes
Intro to Linux. this will open up a new terminal window for you is super convenient on the computers in the lab
 Basic Terminal Intro to Linux ssh short for s ecure sh ell usage: ssh [host]@[computer].[otheripstuff] for lab computers: ssh [CSID]@[comp].cs.utexas.edu can get a list of active computers from the UTCS
SmartCash SmartNode Setup Guide v1.2. Windows 10. Date: 13/01/2018. By (Jazz) yoyomonkey
 yoyomonkey") SmartCash SmartNode Setup Guide v1.2 Date: Introduction Welcome to this step by step guide that will take you through the process of creating your own SmartCash SmartNode. This guide is aimed at the casual
SmartCash SmartNode Setup Guide v1.2 Date: Introduction Welcome to this step by step guide that will take you through the process of creating your own SmartCash SmartNode. This guide is aimed at the casual
Stop all processes and then reboot - same as above startx. Log in as superuser from current login exit
 Starting & Stopping shutdown -h now Shutdown the system now and do not reboot shutdown -r 5 Shutdown the system in 5 minutes and reboot shutdown -r now Shutdown the system now and reboot reboot Stop all
SmartCash SmartNode Setup Guide V1.2 Windows 10 13/01/2018 By (Jazz) yoyomonkey Page 1
 yoyomonkey Page 1") SmartCash SmartNode Setup Guide v1.2 Date: Introduction Welcome to this step by step guide that will take you through the process of creating your own SmartCash SmartNode. This guide is aimed at the casual
SmartCash SmartNode Setup Guide v1.2 Date: Introduction Welcome to this step by step guide that will take you through the process of creating your own SmartCash SmartNode. This guide is aimed at the casual
L.I.S.A Linux Client Documentation
 L.I.S.A Linux Client Documentation Release 0.1 Julien Syx October 19, 2015 Contents 1 About 3 2 Install 5 2.1 LISA Client............................................... 5 2.2 Speech Dispatcher............................................
Running OpenSees Parallel Applications under Windows/Mac OS X
 Running OpenSees Parallel Applications under Windows/Mac OS X Frank McKenna UC Berkeley OpenSees Parallel Workshop Berkeley, CA Windows Requirements Multi-core Windows Machine or Cluster of windows machines.
IT 341 Introduction to System Administration Project I Installing Ubuntu Server on an Virtual Machine
 IT 341 Introduction to System Administration Project I Installing Ubuntu Server on an Virtual Machine Here we create a new virtual machine and install Ubuntu 16.04 LTS Server on it. In this instance, we
Raspberry Pi NTP Clock Setup Guide
 Raspberry Pi NTP Clock Setup Guide Several steps are involved in getting your Raspberry Pi to operate as a NTP Clock. To begin with, you must obtain a LCD Plate (www.adafruit.com) and build it. You must
IT341 Introduction to System Administration. Project 4 - Backup Strategies with rsync and crontab
 IT341 Introduction to System Administration Project 4 - Backup Strategies with rsync and crontab Backup is one of the most important things a system administrator does. It is important to decide what data
Gitlab Setup/Usage by Yifeng Zhu modified by Vince Weaver 30 January 2019
 ECE271: Microcomputer Architecture and Applications University of Maine Gitlab Setup/Usage by Yifeng Zhu modified by Vince Weaver 30 January 2019 Background We will submit our labs in ECE271 via git to
Using a Linux System 6
 Canaan User Guide Connecting to the Cluster 1 SSH (Secure Shell) 1 Starting an ssh session from a Mac or Linux system 1 Starting an ssh session from a Windows PC 1 Once you're connected... 1 Ending an
Raspberry Pi 2b PART 1. Table of Contents. Step by step guide. 1. Hardware (0:05) RS Online (ex-tax prices)... 3 MSY ebay...
 RS Online (ex-tax prices)... 3 MSY ebay...") Step by step guide PART 1 Table of Contents 1. Hardware (0:05)... 3 RS Online (ex-tax prices)... 3 MSY... 4 ebay... 4 Centercom Computers... 4 2. Installing the operating system (0:21)... 5 Preparing the
Step by step guide PART 1 Table of Contents 1. Hardware (0:05)... 3 RS Online (ex-tax prices)... 3 MSY... 4 ebay... 4 Centercom Computers... 4 2. Installing the operating system (0:21)... 5 Preparing the
Programmable Analog Input Node (PAIN) Master Semester Thesis, Nicolo D Anna.
 Master Semester Thesis, Nicolo D Anna.") Programmable Analog Input Node (PAIN) Master Semester Thesis, Nicolo D Anna. ETH Zu rich June 19, 017 Figure 1: Image of the wire connections between the Pi and Evaluation board. Contents 1 Introduction
Programmable Analog Input Node (PAIN) Master Semester Thesis, Nicolo D Anna. ETH Zu rich June 19, 017 Figure 1: Image of the wire connections between the Pi and Evaluation board. Contents 1 Introduction
Contents. Crave Masternode Setup Guides. Single / Multiple Local Masternode(s) Single Masternode using a VPS. Multiple Masternodes using a VPS
 Single Masternode using a VPS. Multiple Masternodes using a VPS") Contents Crave Masternode Setup Guides Single / Multiple Local Masternode(s) 1 Requirements...1 2 Preparing Masternodes...1 3 Preparing Controller Wallet...2 4 Masternode Configuration...3 5 Starting Masternodes...3
Contents Crave Masternode Setup Guides Single / Multiple Local Masternode(s) 1 Requirements...1 2 Preparing Masternodes...1 3 Preparing Controller Wallet...2 4 Masternode Configuration...3 5 Starting Masternodes...3
When you first log in, you will be placed in your home directory. To see what this directory is named, type:
 Chem 7520 Unix Crash Course Throughout this page, the command prompt will be signified by > at the beginning of a line (you do not type this symbol, just everything after it). Navigation When you first
For Ryerson EE Network
 10/25/2015 MPI Instructions For Ryerson EE Network Muhammad Ismail Sheikh DR. NAGI MEKHIEL Mpich-3.1.4 software is already installed on Ryerson EE network and anyone using the following instructions can
RaspiDigiHamClock. Raspberry Pi Amateur Radio Digital Clock. v WA4EFH R.Grokett
 RaspiDigiHamClock Raspberry Pi Amateur Radio Digital Clock v2018-07-08 WA4EFH R.Grokett Overview Amateur Radio Operators (aka HAM Radio) use 24 hour UTC (Universal Coordinated Time) for much of their operation.
Installing CEA on an Intel Mac
 Installing CEA on an Intel Mac Jonah Zimmerman April 20, 2012 1 Introduction Chemical Equilibrium with Applications (CEA) is a computer program published by NASA Glenn with the purpose of calculating chemical
Installation guide. Step1. Install the OS for Raspberry Pi 3. Go to to download Raspbian to the PC.
 Installation guide Step1. Install the OS for Raspberry Pi 3 Go to https://www.raspberrypi.org/downloads/ to download Raspbian to the PC. Unzip 2017-01-11-raspbian-jessie.zip and you will get a disc image
ELE409 SPRING2018 LAB0
 ELE409 SPRING2018 LAB0 Getting familiar with the LXDE system Objectives: Pre-Lab: 1. Burn the linux system onto a micro-sd card 2. Get familiar with basic linux commands 3. Be able to communicate with
How to Make a Raspberry Pi Web Server
 2 Ways to Make a Raspberry Pi Web Server - wikihow http://www.wikihow.com/make-a-raspberry-pi-web-server of 5 08/5/203 :3 AM How to Make a Raspberry Pi Web Server If you are looking for a way to make a
Introduction to the shell Part II
 Introduction to the shell Part II Graham Markall http://www.doc.ic.ac.uk/~grm08 grm08@doc.ic.ac.uk Civil Engineering Tech Talks 16 th November, 1pm Last week Covered applications and Windows compatibility
Docker task in HPC Pack
 Docker task in HPC Pack We introduced docker task in HPC Pack 2016 Update1. To use this feature, set the environment variable CCP_DOCKER_IMAGE of a task so that it could be run in a docker container on
GPU Cluster Usage Tutorial
 GPU Cluster Usage Tutorial How to make caffe and enjoy tensorflow on Torque 2016 11 12 Yunfeng Wang 1 PBS and Torque PBS: Portable Batch System, computer software that performs job scheduling versions
SmartCash SmartNode SCRIPT Setup Guide v2.2. Windows 10. Date: 20/02/2018. By (Jazz) yoyomonkey
 yoyomonkey") SmartCash SmartNode SCRIPT Setup Guide v2.2 Date: Introduction Welcome to this step by step guide that will take you through the process of creating your own SmartCash SmartNode. This guide is aimed at
SmartCash SmartNode SCRIPT Setup Guide v2.2 Date: Introduction Welcome to this step by step guide that will take you through the process of creating your own SmartCash SmartNode. This guide is aimed at
Raspberry Pi Kernel-o-Matic
 Raspberry Pi Kernel-o-Matic Created by Todd Treece Last updated on 2016-09-25 04:20:07 AM UTC Guide Contents Guide Contents Overview Installing Dependencies Starting the VM Build the Kernel Custom PiTFT
Lab E2: bypassing authentication and resetting passwords
 Lab E2: bypassing authentication and resetting passwords TTM4175 September 7, 2015 The purpose of this lab is to learn about techniques for bypassing the authentication and access control of Windows and
Raspberry Pi (RPi) Setup Documentation Instrumentation Development Lab Department of Physics and Astronomy University of Hawaii at Manoa
 Setup Documentation Instrumentation Development Lab Department of Physics and Astronomy University of Hawaii at Manoa") Raspberry Pi (RPi) Setup Documentation Instrumentation Development Lab Department of Physics and Astronomy University of Hawaii at Manoa AUTHOR: Bronson Edralin DATE: 9/11/14 1 Table of Contents 1. INTRODUCTION
Raspberry Pi (RPi) Setup Documentation Instrumentation Development Lab Department of Physics and Astronomy University of Hawaii at Manoa AUTHOR: Bronson Edralin DATE: 9/11/14 1 Table of Contents 1. INTRODUCTION
CS451 - Assignment 8 Faster Naive Bayes? Say it ain t so...
 CS451 - Assignment 8 Faster Naive Bayes? Say it ain t so... Part 1 due: Friday, Nov. 8 before class Part 2 due: Monday, Nov. 11 before class Part 3 due: Sunday, Nov. 17 by 11:50pm http://www.hadoopwizard.com/what-is-hadoop-a-light-hearted-view/
Overview of the UNIX File System
 Overview of the UNIX File System Navigating and Viewing Directories Adapted from Practical Unix and Programming Hunter College Copyright 2006 Stewart Weiss The UNIX file system The most distinguishing
manifold Documentation
 manifold Documentation Release 0.0.1 Open Source Robotics Foundation Mar 04, 2017 Contents 1 What is Manifold? 3 2 Installation 5 2.1 Ubuntu Linux............................................... 5 2.2
a. puppet should point to master (i.e., append puppet to line with master in it. Use a text editor like Vim.
 Head Node Make sure that you have completed the section on Precursor Steps and Storage. Key parts of that are necessary for you to continue on this. If you have issues, please let an instructor know to
Adafruit NFC/RFID on Raspberry Pi
 Adafruit NFC/RFID on Raspberry Pi Created by Kevin Townsend Last updated on 2016-11-03 06:36:54 AM UTC Guide Contents Guide Contents Overview Freeing UART on the Pi Step One: Run raspi-conf Step Two: Disable
A Step by Step Guide to Installing VPN on Raspberry Pi. Whitepaper
 A Step by Step Guide to Installing VPN on Raspberry Pi Whitepaper Introduction For security conscious IT experts who would like to provide secure access to their network on a budget, this whitepaper provides
Building a standalone access point using a Raspberry Pi Zero W
 Building a standalone access point using a Raspberry Pi Zero W by Barry Robinson The Raspberry Pi Zero W is a small, single board computer (SBC) that has WiFi and Bluetooth connectivity built-in. It is
Singularity: container formats
 Singularity Easy to install and configure Easy to run/use: no daemons no root works with scheduling systems User outside container == user inside container Access to host resources Mount (parts of) filesystems
Exercise sheet 1 To be corrected in tutorials in the week from 23/10/2017 to 27/10/2017
 Einführung in die Programmierung für Physiker WS 207/208 Marc Wagner Francesca Cuteri: cuteri@th.physik.uni-frankfurt.de Alessandro Sciarra: sciarra@th.physik.uni-frankfurt.de Exercise sheet To be corrected
Solution of Exercise Sheet 2
 Solution of Exercise Sheet 2 Exercise 1 (Cluster Computing) 1. Give a short definition of Cluster Computing. Clustering is parallel computing on systems with distributed memory. 2. What is a Cluster of
Tutorial on MPI: part I
 Workshop on High Performance Computing (HPC08) School of Physics, IPM February 16-21, 2008 Tutorial on MPI: part I Stefano Cozzini CNR/INFM Democritos and SISSA/eLab Agenda first part WRAP UP of the yesterday's