End User Guide. 2.1 Getting Started Toolbar Right-click Contextual Menu Navigation Panels... 2
|
|
|
- Oswald Mathews
- 5 years ago
- Views:
Transcription
1
2 TABLE OF CONTENTS 1 OVERVIEW WEB VIEWER DEMO ON DESKTOP Getting Started Toolbar Right-click Contextual Menu Navigation Panels Floating Toolbar Open PDFs Save PDFs View PDFs Page through a Document View File Properties Search Text Adjust Page View Full Screen Mode Organize Rotate Pages Move a Page Add a Blank Page Delete Pages Edit Select and Copy Text Edit text Add New Text Object Add an Image Comment Text Markup Tools... 15
3 2.5.2 Sticky Notes Typewriter Tools Drawing Tools Measure Tools Stamp Change the Appearance of Comments Managing Comments Protect Redaction Ink Signature Password Protection Print WEB VIEWER DEMO ON MOBILE Getting Started Toolbar Contextual Menu Navigation Panels Open PDFs Save PDFs View PDFs Page through a Document View File Properties Search Text Adjust Page View Full Screen Mode Page Organize Rotate Pages Move a Page... 42
4 3.3.3 Add a Blank Page Delete Pages Edit Select and Copy Text Edit text Add New Text Object Add an Image Comment Text Markup Tools Drawing Tools Typewriter Tools Sticky Notes Measure Tools Stamp Change the Appearance of Comments Managing Comments Protect Redaction Ink Signature Password Protection Print CONTACT US... 63
5 1 OVERVIEW Web Viewer Demo is a simple website built on the Foxit PDF SDK for Web. This guide will introduce how to use the functions of Web Viewer Demo on desktop and mobile. It supports the following browsers: Internet Explorer 10, 11 and Edge Chrome Firefox Safari Opera 2 WEB VIEWER DEMO ON DESKTOP After installing Foxit PDF SDK for Web, you can access the Web Viewer Demo in your browser at If you have used the default settings. The default demo file will be loaded. 2.1 Getting Started The Web Viewer Demo is provided for developers to learn how to call the SDK, and to show what the Foxit PDF SDK for Web can do. A good way to get up to speed in using Web Viewer demo is by familiarizing yourself with its workspace. This section will mainly introduce the following contents: The workspace basics for Web Viewer Demo including toolbar, right-click contextual menu, navigation panels, and floating toolbar. Open PDFs. Save PDFs Toolbar The toolbar displays the File, Home, Organize, Edit, Comment, and Protect tabs with different commands. You can easily and quickly find the desired feature in the toolbar. 1


6 Toolbar under the Home Tab To show or hide all toolbars, please do the following: To hide the toolbar, click the arrow located on the lower-right corner of the ribbon. To show the toolbar, choose a tab and click the pushpin icon located on the lower-right corner of the ribbon Right-click Contextual Menu Web Viewer demo provides a list of feature options in the right-click contextual menu (See the following figures). Operation On the view On selected text On annotation Description Change the zoom level, navigate to the previous/next page, rotate page, print document, or find a keyword in the PDF document. Copy, Highlight, underline, strikeout, squiggle, replace and insert text. Delete, reply to or set properties (color) of the selected annotation. Right-click Contextual Menu Navigation Panels The buttons on the left side of the navigation pane provides easy access to various panels as follows: 2
7 Panel Name Description Bookmark Thumbnail Comments Search View document bookmarks. View page thumbnails. View document comments. Expand all comments individually or collapse all comments in the panel. You can also edit the text of a pop-up note (highlight/underline/strikeout/squiggle/pencil/note/line/arrow/rectangle/oval/stamp), reply or delete a comment from the list. Search text in the current document, and all instances will be listed after the search is finished. To open/close a navigation panel, click its button on the left side of the navigation pane. You can change the view area for the navigation pane, just drag its right border to adjust the width Floating Toolbar Click Hand tool under the Home tab, in this mode, move the cursor to the bottom of your browser, then you will see the floating toolbar as follows: The floating toolbar displays the common features, such as page turning, zooming, rotating, and page layout changing. Floating Toolbar To show the floating toolbar, click Hand tool under the Home tab, in this mode, move the cursor to the bottom of your browser, then you will see it. If you move the cursor away, the floating toolbar will disappear. 3


8 2.1.5 Open PDFs You can open an online PDF file or open a PDF file from your local system by clicking Open button under the Home tab, or you can click File > Open File, and then choose a local PDF document or enter a URL Save PDFs After modifying your PDF, you can save the changes to the original PDF by clicking File > Download which will download the modified PDF to your local host. 2.2 View PDFs Web Viewer Demo provides a bunch of features for your journey of PDF reading. This section will mainly introduce the following contents: Page through a document 4
9 View file properties Search text Adjust page view Full screen mode Page through a Document Using the Mouse Middle Mouse Wheel Point your cursor in the document. Scroll your middle mouse wheel up and down to page through. Right Mouse Button Right click on your mouse button and select options on the pop-up context menu. Using the Scroll Bar Drag the vertical scrollbar on the right side to page through the document. If part of the document is out of visibility, you can use the vertical and horizontal scrollbars to move the document. Using Hand Tool Click Hand tool under the Home tab, hold the middle mouse button/wheel mouse button, and then move the mouse to scroll the pages. Using Keyboard Press Up and Down arrow on your keyboard to page through the document. Using Bookmark The Bookmark pane is located on the left Navigation Pane. Click on the bookmark icon to show the Bookmark panel. Click on the plus (+) or minus (-) signs to expand or collapse the bookmarks contents. Click on a bookmark to jump directly to a chapter or section in the document. Click on left arrow to hide bookmark panel. Drag the right border of the pane to resize the bookmark panel. 5


10 1 Bookmark icon: click it to show bookmark panel. 2 Left arrow: click it to hide bookmark panel. Using Page Thumbnails The Page Thumbnails panel can be accessed on the left Navigation Pane. Click on the thumbnail icon to show the thumbnails panel. Drag the vertical scrollbar or press down Up/Down arrow key to quickly browse page miniatures. Click on the left arrow to hide the thumbnails panel. 1 Thumbnails icon: click it to show page thumbnails panel. 2 Left arrow: click it to hide thumbnails panel View File Properties To view PDF file properties, click File > Properties on the top toolbar. The following properties image is an example of the default PDF file that Web Viewer Demo uses. 6

11 2.2.3 Search Text You can search a word, a phrase or sentence. To quickly find text you are looking for one by one, do the following: Click anywhere on the document pane, and then press Ctrl+F to show the quick search box. Tap to open the search panel. In the search box, input the key word or phrase. Set the search criteria. a) Whole words only -- limits the search to match only whole words. For example, if you search for the word Read, the word Reader will not be found. b) Case-Sensitive -- makes the search case-sensitive. For example, if you search for the word text, the words Text and TEXT will not be found. Press Enter to jump to the first instance of the search term, which appears highlighted. You can continuous to press Enter to find the next result. If you want to find all the search results at once, you can do as follows: Move your cursor to the left Navigation pane, choose Search icon to open the Search panel. In the Search box, input the key word or phrase. Set the search criteria. Press Enter button, and then all occurrences will be listed in a tree view with highlight. This will allow you to quickly preview the context and jump to specific locations. 7


12 1 Search icon: click to show the Search panel. 2 Start search: input text, and press Enter button. 3 Set search criteria: set the search criteria as desired. 4 Search result list: List all search instances with page number at the heading of each occurrence. Drag the scroll bar to browse the instances list, click on the specific instance to jump to the destination Adjust Page View When viewing a PDF file, you will need to adjust the view of your PDF documents, such as the page magnification and the display of pages. Zoom in/out the Page View Viewing a PDF file smaller than 200MB in file size, you can adjust zoom range from 50% %. Files greater than 200MB in size, the maximum adjust zoom is limited to 200% considering the server storage and rendering speed. To zoom in/out the page view, you can do one of the following. Using Zoom button on the toolbar Click the Zoom button icon under the Home tab, choose a zoom value you wish to use. You can also click on the zoom in/out icon to decrease/increase the view. 8

13 Using Right-click contextual menu Right-click on the Document Pane (any location on a page of your PDF document) to show the right-click contextual menu, choose the Zoom In or Zoom Out options to decrease/increase the view. Using Floating toolbar Click Hand tool under the Home tab, in this mode, move the cursor to the bottom of your browser, then you will see the floating toolbar as follows: Point your cursor to the Zoom Box, choose a zoom value you wish to use. You can also click on the zoom in/out icon to decrease/increase the view. Note: Scroll down the drop down list, there are more values like Fit Width or Fit Page you can choose. Resizing a Page to Fit the Window There are three types for you to choose: Fit Page: Resize the page to fit entirely in the document pane. Fit Width: Resize the page to fit the width of the window. Part of the page may be out of view. Actual Size: Resize the page to its actual size. You can right-click the Document Pane, and choose the options as desired. Adjust the Page Display Changing Page Orientation To change page orientation, you can do one of the following: 9

14 Right-click on the Document Pane to show the right-click contextual menu, choose Rotate Right option to rotate the pages. Click Hand tool under the Home tab, in this mode, move the cursor to the bottom of your browser to show the floating toolbar, and then choose rotate left icon and rotate right icon to rotate the pages. Changing Page Layout To change page layout, Web Viewer Demo provides the single page and continuous page layouts. Single Page: Displays one page in the document pane at a time. Continuous: Arranges the pages in the document pane in a continuous vertical column. Click Hand tool under the Home tab, in this mode, move the cursor to the bottom of your browser to show the floating toolbar, and then choose Single Page icon and Continuous icon to set the page layout Full Screen Mode In Full Screen mode, the Document Pane fills the entire screen, with Menu Bar, Toolbar, and Navigation Pane hidden behide. Click Hand tool under the Home tab, in this mode, move the cursor to the bottom of your browser to show the floating toolbar, and then choose the icon to start full screen mode. Press Esc to escape the full screen mode. 10

15 2.3 Organize You can organize your pages through Web Viewer Demo, which includes rotating, moving, adding, and deleting pages. Click Origanize tab, you can see the supported features as follows: This section will mainly introduce the following contents: Rotate pages Move a page Add a blank page Delete pages Rotate Pages You can rotate all or selected pages in a document. To rotate one page, do the following: Select the page that you want to rotate. Choose or to rotate the selected page. To rotate multiple pages, do the following: Click Select Pages icon. In the pop-up Select Pages dialog box, select the pages that you want to rotate and click OK. Choose or to rotate the selected page. 11
16 2.3.2 Move a Page Web Viewer Demo allows you to move a page within a PDF document. To move one page, select the page that you want to move, drag and drop the page to the new location Add a Blank Page To add a blank page, you only need to click the Blank Page icon added to the end of the document., and then a new blank page will be Delete Pages You can delete all or selected pages in a document. To delete one page, do the following: Select the page that you want to delete. Click on the page or Click under the Organize tab to delete the seleted page. In the pop-up Delete Pages dialog box, click DELETE PAGES. To delete multiple pages, do the following: Click Select Pages icon. In the pop-up Select Pages dialog box, select the pages that you want to delete and click OK. Click under the Organize tab to delete the seleted page. In the pop-up Delete Pages dialog box, click DELETE PAGES. 2.4 Edit Web Viewer Demo provides the editing features to edit text, add text object, and add images. Click Edit tab, you can see the features as follows: 12


17 This section will mainly introduce the following contents: Select and Copy Text Edit text Add new text object Add an image Select and Copy Text With Web Viewer Demo, you can select text and copy it to other applications. To select and copy text, choose the Select Text icon following: under the Edit or Home tab, and do the 1. Position your cursor to a desired place, click and drag your mouse to select what you want. 2. Right click on the selection, and choose Copy in the pop-up contextual menu. 3. If your current browser doesn t allow to copy directly, you will see a pop-up to let you continue the copy. Select the text in the pop-up window, press down Ctrl + C, or right click on the highlight and choose Copy. Then click CLOSE to exit the pop-up without copying. 13


18 2.4.2 Edit text You can edit texts in a paragraph like Microsoft Office Word as well as changing their font, font size and color. To edit texts in a paragraph, do the following: Select the Edit Text icon. Click on the desired paragraph and double-click to start editing. You can set the font, font size, and font style (including bold, italic, underline and color) Add New Text Object You can add or insert new text object into a PDF document. To add text object, do the following: Select the Add Text icon. Click on the location that you want to input the text, and type new text in the position where the cursor is blinking. You can also paste or delete the text you input. You can choose the text font format, such as the font, font size, and font style (including bold, italic, underline and color) Add an Image You can add an image into a PDF document. To add an image, do the following: Locate the page where you want to insert the image in your document. 14
19 Select the Image icon. Choose the target image file in the Open dialog box and click Open. Click on the page to add the image, you can drag the handles of the four corners to resize the image, as well as drag and drop it to a new location. 2.5 Comment Web Viewer demo provides rich annotating features with different functions for you to choose: Text Markup Tools, Pin tools, Typewriter Tools, Drawing Tools, Measure Tools and Stamp Tools. You can add different comments by selecting the annotation tools from the Comment tab. Most of annotations have an adhesive popup window, some are shown up initially, and some are not. You can double click on an annotation to show or hide it. Click Comment tab, you can see the features as follows: This section will mainly introduce the following contents: Text markup tools Sticky notes Typewriter tools Drawing tools Measure tools Stamp Change the appearance of the comments Managing comments Text Markup Tools You can use Text Markup tools to indicate where text should be edited or noticed. Text Markups do not change the actual text in the PDF. Instead, they indicate which text should be deleted, inserted, 15
 marker.")
20 highlighted or underlined. Text Markup tools include Highlight, Squiggly, Underline, Strikeout, Replace, and Insert. Button Tool Name Description Highlight Text To mark important passages of text with a fluorescent (usually) marker. Strikeout Text To draw a line to cross out text, making others know the text is deleted. Underline Text Squiggly Text Replace Text Insert Text To draw a line under to indicate emphasis. To draw a squiggly line under. To draw a line to cross out text and provide a substitute for it. A proofreading symbol (^) used to indicate where something is to be inserted in a line. To add a text markup comment, do the following: Choose the Highlight, Strikeout, Squiggly, Underline, Insert tools as desired. Click and drag from the beginning of the text you want to mark up. Type your comments in the connecting pop-up box. If the pop-up note is not initially shown, double click on the markup to open it. Press Esc to escape the current mode Sticky Notes The Sticky Note pins a note icon on where your mouse clicks on the document and place an adhesive small popup on one side so you can add comments. To add a note comment, do the following: Select the Sticky Note icon on the toolbar under the Comment tab. 16


21 Click on the page where you would like to add a note. Once clicked, a yellow note icon appears and a popup window comes out on one side of your page. Double click on the connecting pop window to write notes Typewriter Tools The Typewriter tools includes Typerwriter, Callout, and Textbox. Typewriter To add comments with typewriter, do the following: Choose Typewriter icon on the toolbar under Comment tab. Click on a page where you would wish to add text. Type your comments. Press Esc to escape the current mode. Callout To add comments with callout, do the following: Choose Callout icon on the toolbar under Comment tab. Click on a page where you would wish to add text. Type your comments. Press Esc to escape the current mode. 17

22 Textbox To add comments with textbox, do the following: Choose Textbox icon on the toolbar under Comment tab. Click on a page where you would wish to add text. Type your comments. Press Esc to escape the current mode Drawing Tools Web Viewer Demo offers you tools to create types of shapes like Rectangle, Oval, Polygon, Polyline, Line, Arrow, Cloud and Pencil. With one of the tools selected, you can click to draw a desired shape, and make comments on the adhesive popup. Button Tool Name Description Rectangle To draw a four-sided plane figure with four right angles. Press Shift key to draw a square. Oval Polygon Polyline Arrow To draw an oval shape or a circle with pressing Shift key. To draw a closed plane figure bounded by three or more line segments. To draw an open plane figure with three or more line segments. To draw something, such as a directional symbol, that is similar to an arrow in form or function. 18

23 Line Cloudy Pencil Highlight Area To mark with a line. To draw cloudy shapes. To draw free-form shapes. To mark important area as a means of memory retention or for later reference. To add a drawing markup comment, do the following: Choose the shape annotation icon on the toolbar under the Comment tab. Click and drag to make a shape you want to mark up. Type your comments in the connecting popup. If the popup is not initially shown, double click on the shape to open it. Press Esc to escape the current mode Measure Tools Web Viewer Demo supports distance tool to measure object height and length. To measure the distance between two points, do the following: Select the Distance tool icon on the toolbar. Once selected, the horizontal and vertical ruler comes out, and the Distance Measurement window appears on the right lower side of the page, where you can change Scale and distance information. 19


24 Click to draw the distance line. Click the first point, move the pointer to the second point, and click again. The measurements will appear on the page. Note: During measuring a distance, you can click to finish or press Esc to cancel, or right click and choose Complete Measurement or Cancel Measurement Stamp With Stamp features, you can apply standard, dynamic stamps to your document. Stamping PDF files is a very useful feature especially when you need to give reviewers some advices about the document's status or sensitivity. To add a standard or dynamic stamp, do the following: Click the stamp tool icon on the toolbar under the Comment tab, and choose a stamp from the menu. Click on the position where you want to place the stamp. Press Esc to escape the current mode Change the Appearance of Comments You can change the color and appearances of comments or markups after you create them by rightclicking the comment and choosing Properties. Also, you can set the new look as the default appearance for that tool. To change the appearance of the comments, do the following: Select Hand tool or the intended annotation tool. 20

25 Right click on an annotation you would like to change properties, and choose Properties. Make the changes you want. Enable the option "Set current properties as default" will apply your current annotation style to all the afterward created annotations. Click on Close to finish Managing Comments Comments Panel All the annotations and comments you created on the document are listed in the Comments Panel. During navigating comments, you can use the Expand or Collapse icon to unfold or pack up all comments on each page. You can also reply or delete a comment. 1. Expand: Unfold all annotations on each page. 2. Collapse: pack up all annotations on each page. 3. Comments: List number of created comments. 4. Left Arrow: Click to hide the annotation pane. 5. Reply: Click to enter your comments. 6. Delete: Click to delete the current comment, or cancel replying. Show/Hide all Comments To show or hide all comments on the document, choose the Comment icon on the toolbar under the Comment tab, choose Show all comments or Hide all comments options to show or hide all of the comments on the document. Note: The comments displayed on the Comments panel will be synchronously shown or hidden with the settings. 21

26 Reply to Comments or Delete Comments To reply to comments or delete comments, you can do one of the following: 1. Select the annotation that you want to reply or delete, right-click it and choose Reply to input the texts in the Reply fields, or choose Delete to delete it. 2. Open the Comments Panel, click on a listed annotation you want to reply or delete, click Reply to input the texts in the Reply fields, or Click Delete to delete it. Import/Export Comments Data When working with a form, you can choose to import/export form data from/as FDF or XFDF. To import form data, click the Import icon, choose Import FDF or Import XFDF, navigate to where the desired file is, and press Open. To export comments data, click the Export icon, choose Export FDF or Export XFDF, navigate to where you want to save the FDF or XFDF file (e.g., your Document folder). 2.6 Protect The security feature of PDF gives you an exceptional control over your PDF files. To provide adequate protection for PDF s contents, you can encrypt and secure PDF files to prevent unauthorized access, restrict sensitive operations, etc. Click Protect tab, you can see the features as follows: This section will mainly introduce the following contents: Redaction Ink Signature Password Protection Redaction The redaction feature allows you to remove sensitive information from your document prior to making it available to others. You are able to mark the text or graphics for Redaction first, and then apply the redaction. 22
27 Mark for Redaction To mark the text or graphics for redaction, do the following: Select the Mark for Redaction icon on the toolbar under Protect tab, and click OK on the pop-up dialog box. Then the Hand command changes into a Cross automatically. Hold the pointer over the text or image you want to redact and drag a rectangle around it. The selected area will be in a red rectangle, and the rectangle will be filled with black color once moving the pointer to the selected area. Set Redaction Properties You can set redaction properties, such as the Fill color, overlay text, font, font size, and so forth. Only before you apply the redaction can you set the properties. To set redaction properties, do the following: Right-click the marked area and choose Properties and the Redaction Properties dialog box pops up. Make the changes you want. Enable the option "Set current properties as default" will apply your current settings to all the afterward redaction. 23
28 Apply Redactions You need to apply the redactions after marking the text or graphics you want to redact. To apply the redaction, do the following: Select the Apply Redactions on the toolbar under the Protect tab. You can also do this by rightclicking the marked content and choosing Apply or Apply All to redact either the selected content or all of the marked content in the document. A dialog box pops up to give a warning message and asks if you are sure to apply the redaction or not. Select OK after you have marked all content that you want to redact Ink Signature The ink signature feature allows you to draw your own style signature and place it on your document. You can create a list of signatures for different use cases. To create an ink signature, do the following: Select the Ink Signature on the toolbar under the Protect tab. Then you can see the drawing board pop up on your screen. Select a type of color dot and line weight dot, drag your mouse to draw a free signature. To re-draw, choose Eraser. 24

29 Once completing, click on OK to add your calligraphy to the Signature List panel which is in the right side of the document pane. Click the created signature in the Signature List panel, drag it to the location where you want to place the signature. Click to add the ink signature to your document. To delete an ink signature, do the following: 25

30 Click on the signature thumbnail that you do not want in the Signature list, and choose Delete button Password Protection You can add a password to a PDF to limit access and restrict certain features, such as printing, copying and editing. There are two kinds of passwords that could be applied to a PDF file: a Document Open password and a Permissions password. When you set a Document Open password, anyone who tries to open the PDF must type in the password that you specified. When you set a Permissions password, anyone who wants to change the restrictions must type the Permissions password. Please note that if a PDF is secured with both types of passwords, it can be opened with either password, but only the Permissions password allows you to change the restrictions. Tip: There s no way out to recover password from the PDF if you forgot it. To keep a backup copy of the PDF that is not password-protected is a good choice. Click the Password Protect icon on the toolbar under the Protect tab. You can see the Password Protection dialog box pop up on your screen. 26
31 To add document open password, type a password in the following textbox: To add document restriction settings, check Add Document Restriction box, click OK on the pop-up warning dialog box, type a password in the textbox as below. Permission Specification Click the button, the Permission settings dialog box will pop up as follows. In the Permission settings dialog box, check Restrict printing and editing of the document and its security settings and then select the options as needed. Print Allowed specifies the level of printing which users are allowed for the PDF. A. Low resolution (150dpi) allows users to print at no higher than 150-dpi resolution. B. High resolution allows users to print with any resolution. 27
32 Changes Allowed specifies the level of printing which users are allowed for the PDF. A. Inserting, deleting, and rotating pages allows users to insert, delete, and rotate PDF pages. B. Filling in forms and signing existing signature fields allows users to fill in forms and sign documents in existing signatures fields. C. Commenting, filling form and signing existing signature fields allows users to add comments, fill in forms and sign documents in existing signatures fields. D. Any except extracting pages allows users to do any operation but extract pages. Enable copying of text, images, and other content allows users to copy content in PDFs. Enable text access for screen reader devices for the visually impaired allows the visually impaired users to access text with screen reader devices. Encrypt Settings Encryption Algorithm defines data transformations that cannot be easily reversed by unauthorized users. Web Viewer supports 128-bit AES, 256-bit AES and 128-bit ARC-FOUR. Don t encrypt metadata encrypts the contents of a PDF but still allow search engines access to the document metadata. After setting the permissions as desired, click OK on the Password Protection dialog box and save the document to make setting take effect. 28
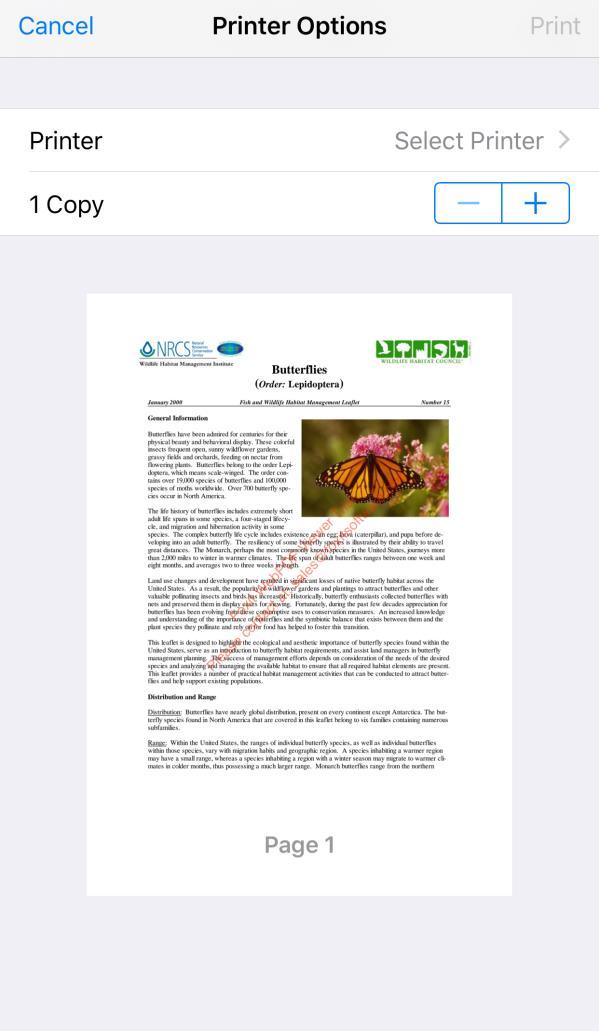
33 2.7 Print You can print all pages of the current loaded PDF file or a range of pages with or without comments. The maximum allowed number of one print task are 100 pages. To print the current active file, do the following: Click File > Print, and the Print Settings window appears where you can specify page ranges for the print task. By default the Current Page is checked. If the current document exceeds 100 pages, the first 100 pages will be printed. To print the left, do the print again. Check Print Comments if you want comments to be included in the output file. Click Next to proceed. You can see a progress message appears as follows. The time length depends on the output page numbers you specified and file size. You can click Cancel to abort the print. Once the progress bar completes, the Print dialog box pops up by which you can set up available print settings. 29

34 Click Print to start. 30

35 3 WEB VIEWER DEMO ON MOBILE When using Web Viewer Demo on a mobile device, you can access the Web Demo in your mobile browser at If you have used the default settings. The default demo file will be loaded. 3.1 Getting Started The features of Web Viewer Demo in Mobile are similar to the desktop version. This section will mainly introduce the following contents: The workspace basics for Web Viewer Demo including toolbar, right-click contextual menu and navigation panels. Open PDFs. Save PDFs Toolbar The following picture shows the toolbars of Web Viewer Demo, in which the bottom toolbar is similar to the floating toolbar in desktop version. 31


36 3.1.2 Contextual Menu Web Viewer demo provides a list of feature options in the Contextual Menu (See the following figures). Operation On the view On selected text On annotation Description Change the zoom level, navigate to the previous/next page, rotate page, print document, or find a keyword in the PDF document. Copy, Highlight, underline, strikeout, squiggle, replace and insert text. Delete, reply to or set properties (color) of the selected annotation. Contextual Menu Navigation Panels Tap on the top toolbar to show the navigation pane which provides easy acces to various panels. Panel Name Description Bookmark Thumbnail Comments Search View document bookmarks. View page thumbnails. View document comments. Expand all comments individually or collapse all comments in the panel. You can also edit the text of a pop-up note (highlight/underline/strikeout/squiggle/pencil/note/line/arrow/rectangle/oval/stamp), reply or delete a comment from the list. Search text in the current document, and all instances will be listed after the search is finished. 32

37 3.1.4 Open PDFs You can open an online PDF file or open a PDF file from your device. Tap on the top toolbar, select Open > Open PDF files from your device/open Online PDF File to choose a local PDF document or enter a URL. 33

38 3.1.5 Save PDFs After modifying your PDF, you can save the changes to the original PDF. Tap choose Download to download the modified PDF to your device. on the top toolbar, 34
39 3.2 View PDFs Web Viewer Demo provides a bunch of features for your journey of PDF reading. This section will mainly introduce the following contents: Page through a document View file properties Search text Adjust page view Full screen mode Page through a Document Using your Finger Under Hand mode, switch pages by swiping up or down with your finger on the screen. Using Bookmark Tap on the top toolbar to show the navigation pane. Tap the bookmark icon to show the Bookmark panel. Tap the plus (+) or minus (-) signs to expand or collapse the bookmarks contents. Tap a bookmark to jump directly to a chapter or section in the document. Tap the left arrow to hide bookmark panel. 1 Bookmark icon: Tap it to show bookmark panel. 2 Left arrow: Tap it to hide bookmark panel. 35

40 Using Page Thumbnails Tap on the top toolbar to show the navigation pane. Tap the thumbnail icon to show the thumbnails panel. Swipe up or down to quickly browse page miniatures. Tap the left arrow to hide the thumbnails panel. 1 Thumbnails icon: Tap it to show Page thumbnails panel. 2 Left arrow: Tap it to hide thumbnails panel View File Properties To view PDF file properties, tap on the top toolbar, select Properties. The following properties image is an example of the default PDF file that Web Viewer Demo uses. 36
41 3.2.3 Search Text To quickly find text you are looking for one by one, tap on the top toolbar, input the text, and tap return or go depending on your device, then it will jump to the first instance of the search term, which appears highlighted as follows: Continue to tap return or go to find the next result. 37
 Whole words only -- limits the search to match only whole words.")
42 If you want to find all the search results at once, you can do as follows: Tap on the top toolbar to show the navigation pane. Tap to open the search panel. In the search box, input the key word or phrase. Set the search criteria. a) Whole words only -- limits the search to match only whole words. For example, if you search for the word Read, the word Reader will not be found. b) Case-Sensitive -- makes the search case-sensitive. For example, if you search for the word text, the words Text and TEXT will not be found. Tap next to the search box, and then all occurrences will be listed in a tree view with highlight. This will allow you to quickly preview the context and jump to specific locations Adjust Page View When viewing a PDF file, you will need to adjust the view of your PDF documents, such as the page magnification and the display of pages. Zoom in/out the Page View 38

43 Viewing a PDF file smaller than 200MB in file size, you can adjust zoom range from 50% %. Files greater than 200MB in size, the maximum adjust zoom is limited to 200% considering the server storage and rendering speed. To zoom in/out the page view, you can do one of the following. Using two-finger Use two-finger pinch and stretch gesture or double tapping on the screen to zoom in or out a document. Using contextual menu Click Hand tool under the Home tab, in this mode, tap and hold anywhere on the PDF document to show the contextual menu, and then choose the Zoom In or Zoom Out options to decrease/increase the view. Resizing a Page to Fit the Window There are three types for you to choose: Fit Page: Resize the page to fit entirely in the document pane. Fit Width: Resize the page to fit the width of the window. Part of the page may be out of view. Actual Size: Resize the page to its actual size. You can tap and hold anywhere on the PDF document to show the contextual menu, and choose the options as desired. Adjust the Page Display Changing Page Orientation 39

44 To change page orientation, you can do one of the following: Tap and hold anywhere on the PDF document to show the contextual menu, and choose Rotate Right option to rotate the pages. Tap or on the bottom toolbar to rotate the pages. Changing Page Layout To change page layout, We Viewer Demo provides the single page and continuous page layouts. Single Page: Displays one page in the document pane at a time. Continuous: Arranges the pages in the document pane in a continuous vertical column. Tap or on the bottom toolbar to set the page layout Full Screen Mode In Full Screen mode, the Document Pane fills the entire screen, with Menu Bar, Toolbar, and Navigation Pane hidden behide. Tap on the bottom toolbar to start full screen mode. Press Esc to escape the full screen mode. 40

45 3.3 Page Organize You can organize your pages through Web Viewer Demo, which includes rotating, moving, adding, and deleting pages. Tap on the top toolbar, and tap page organize icon, then you can see the supported features as follows: This section will mainly introduce the following contents: Rotate pages Move a page Add a blank page Delete pages Rotate Pages You can rotate all or selected pages in a document. To rotate one page, do the following: Tap the page that you want to rotate. Choose or to rotate the selected page. To rotate multiple pages, do the following: Tap Select Pages icon. In the pop-up Select Pages dialog box, select the pages that you want to rotate and click OK. 41
46 Choose or to rotate the selected page Move a Page Web Viewer Demo allows you to move a page within a PDF document. To move one page, tap the page that you want to move, drag and drop the page to the new location Add a Blank Page To add a blank page, you only need to tap the Blank Page icon added to the end of the document., and then a new blank page will be Delete Pages You can delete all or selected pages in a document. To delete one page, do the following: Tap the page that you want to delete. Tap on the page or tap on the bottom of the page to delete the seleted page. In the pop-up Delete Pages dialog box, click DELETE PAGES. To delete multiple pages, do the following: Click Select Pages icon. In the pop-up Select Pages dialog box, select the pages that you want to delete and click OK. Tap on the bottom of the page to delete the seleted page. In the pop-up Delete Pages dialog box, click DELETE PAGES. 42
47 3.4 Edit Web Viewer Demo provides the editing features to edit text, add text object, and add images. Tap on the top toolbar, and tap Edit icon, then you can see the features as follows: This section will mainly introduce the following contents: Select and Copy Text Edit text Add new text object Add an image Select and Copy Text With Web Viewer Demo, you can select text and copy it to other applications. To select and copy text, do the following: 1. Tap and drag your finger to select what you want. 2. After dragging, choose Copy in the pop-up contextual menu. 43


48 3. If your current browser doesn t allow to copy directly, you will see a pop-up to let you continue the copy. Select the text in the pop-up window, and tap Copy. Tap ClOSE to exit the pop-up without copying Edit text You can edit texts in a paragraph like Microsoft Office Word as well as changing their font, font size and color. To edit texts in a paragraph, do the following: Tap the Edit Text icon. Tap on the desired paragraph and double-tap to start editing. You can set the font, font size, and font style (including bold, italic, underline and color). 44


49 3.4.3 Add New Text Object You can add or insert new text object into a PDF document. To add text object, do the following: Tap the Add Text icon. Tap on the locaiton that you want to input text, and type new text in the position. You can also paste or delete the text you input. You can choose the text font format, such as the font, font size, and font style (including bold, italic, underline and color) Add an Image You can add an image into a PDF document. To add an image, do the following: Locate the page where you want to insert the image in your document. Tap to show more features about editing. Tap the Image icon. Choose an image file from Cemera or Photo Library or icloud Drive (for ios device). Tap on the page to add the image, you can drag the handles of the four corners to resize the image, as well as drag and drop it to a new location. 45


50 3.5 Comment Web Viewer demo provides rich annotating features with different functions for you to choose: Text Markup Tools, Pin tools, Typewriter Tools, Drawing Tools, Measure Tools and Stamp Tools. You can add different comments by selecting the annotation tools. Tap on the top toolbar, and tap Comment icon, then you can see the features as follows: This section will mainly introduce the following contents: Text markup tools Sticky notes Typewriter tools Drawing tools Measure tools Stamp Change the appearance of the comments Managing comments 46

51 3.5.1 Text Markup Tools You can use Text Markup tools to indicate where text should be edited or noticed. Text Markups do not change the actual text in the PDF. Instead, they indicate which text should be deleted, inserted, highlighted or underlined. Text Markup tools include Highlight, Squiggly, Underline, Strikeout, Replace, and Insert. Button Tool Name Description Highlight Text To mark important passages of text with a fluorescent (usually) marker. Strikeout Text To draw a line to cross out text, making others know the text is deleted. Underline Text Squiggly Text Replace Text Insert Text To draw a line under to indicate emphasis. To draw a squiggly line under. To draw a line to cross out text and provide a substitute for it. A proofreading symbol (^) used to indicate where something is to be inserted in a line. To add a text markup comment, do the following: Tap on the bottom toolbar, choose the Highlight, Strikeout, Squiggly, Underline, Insert tools as desired. Tap and drag from the beginning of the text you want to mark up Drawing Tools Web Viewer Demo offers you tools to create types of shapes like Rectangle, Oval, Polygon, Polyline, Line, Arrow, Cloud and Pencil. With one of the tools selected, you can draw a desired shape. 47
52 Button Tool Name Description Rectangle To draw a four-sided plane figure with four right angles. Press Shift key to draw a square. Oval Polygon Polyline Arrow Line Cloudy Pencil Highlight Area To draw an oval shape or a circle with pressing Shift key. To draw a closed plane figure bounded by three or more line segments. To draw an open plane figure with three or more line segments. To draw something, such as a directional symbol, that is similar to an arrow in form or function. To mark with a line. To draw cloudy shapes. To draw free-form shapes. To mark important area as a means of memory retention or for later reference. To add a drawing markup comment, do the following: Tap on the bottom toolbar, choose the shape annotation icon as desired. Tap and drag to make a shape you want to mark up Typewriter Tools The Typewriter tools includes Typerwriter, Callout, and Textbox. Typewriter To add comments with typewriter, do the following: Tap on the bottom toolbar, choose. Tap on a page where you would wish to add text. 48


53 Type your comments. Callout To add comments with callout, do the following: Tap on the bottom toolbar, choose. Tap on a page where you would wish to add text. Type your comments. Textbox To add comments with textbox, do the following: Tap on the bottom toolbar, choose. Tap on a page where you would wish to add text. Type your comments Sticky Notes The Sticky Note pins a note icon on where you tap on the document and you can add comments. 49


54 To add a note comment, do the following: Tap the Sticky Notes icon on the bottom toolbar. Tap on the page where you would like to add a note. Once taped, a yellow note icon appears and a popup window comes out, write notes in the window, and tap OK Measure Tools Web Viewer Demo supports distance tool to measure object height and length. To measure the distance between two points, do the following: Tap the Distance tool icon on the bottom toolbar. Once selected, the horizontal and vertical ruler comes out, and the Distance Measurement window appears on the right lower side of the page, where you can change Scale and distance information. Draw a distance line. Tap and drag to draw a line, and then the measurements will appear on the page. 50

55 3.5.6 Stamp With Stamp features, you can apply standard, dynamic stamps to your document. Stamping PDF files is a very useful feature especially when you need to give reviewers some advices about the document's status or sensitivity. To add a standard or dynamic stamp, do the following: Tap the Stamp tool icon on the bottom toolbar, and choose a stamp from the menu. Tap on the position where you want to place the stamp Change the Appearance of Comments You can change the color and appearances of comments or markups after you create them. Tap and hold the comments and choose Properties. Also, you can set the new look as the default appearance for that tool. To change the appearance of the comments, do the following: Tap the Hand tool icon, in this mode, tap on an annotation you would like to change properties, and choose Properties. Make the changes you want. Check the option "Set current properties as default" will apply your current annotation style to all the afterward created annotations. Tap on Close to finish Managing Comments Comments Panel All the annotations and comments you created on the document are listed in the Comments Panel. During navigating comments, you can use the Expand or Collapse icon to unfold or pack up all comments on each page. You can also reply or delete a comment. 51

56 1. Expand: Unfold all annotations on each page. 2. Collapse: pack up all annotations on each page. 3. Comments: List number of created comments. 4. Left Arrow: Tap it to hide the annotation pane. 5. Reply: Tap it to enter your comments. 6. Delete: Tap it to delete the current comment, or cancel replying. Show/Hide all Comments To show or hide all comments on the document, tap on the bottom toolbar, choose Show all comments or Hide all comments options to show or hide all of the comments on the document. Note: The comments displayed on the Comments panel will be synchronously shown or hidden with the settings. Reply to Comments or Delete Comments To reply to comments or delete comments, you can do one of the following: 1. Tap and hold the annotation that you want to reply or delete, choose Reply to input the texts in the Reply fields, or choose Delete to delete it. 2. Tap on the top toolbar, and tap Comment icon to show the Comments Panel. Tap on a listed annotation you want to reply or delete, choose Reply to input the texts in the Reply fields, or choose Delete to delete it. Import/Export Comments Data 52
57 When working with a form, you can choose to import/export form data from/as FDF or XFDF. To import form data, tap and choose Import FDF or Import XFDF, and then select a FDF or XFDF file from your device. To export comments data, tap and choose Export FDF or Export XFDF, and then a FDF or XFDF file will be generated, you can open it with other applications. 3.6 Protect The security feature of PDF gives you an exceptional control over your PDF files. To provide adequate protection for PDF s contents, you can encrypt and secure PDF files to prevent unauthorized access, restrict sensitive operations, etc. Tap on the top toolbar, and tap Protect icon, then you can see the features as follows: This section will mainly introduce the following contents: Redaction Ink Signature Password Protection 53
58 3.6.1 Redaction The redaction feature allows you to remove sensitive information from your document prior to making it available to others. You are able to mark the text or graphics for Redaction first, and then apply the redaction. Mark for Redaction To mark the text or graphics for redaction, do the following: Tap the Mark for Redaction icon on the bottom toolbar, and tap OK on the pop-up dialog box. Tap and drag over the text or image you want to redact and drag a rectangle around it. The selected area will be in a red rectangle. Set Redaction Properties You can set redaction properties, such as the Fill color, overlay text, font, font size, and so forth. Only before you apply the redaction can you set the properties. To set redaction properties, do the following: Tap and hold the marked area, choose Properties. Then the Redaction Properties dialog box pops up. Make the changes you want. Check the option "Set current properties as default" will apply your current settings to all the afterward redaction. 54

59 Apply Redactions You need to apply the redactions after marking the text or graphics you want to redact. To apply the redaction, do the following: Tap the Apply Redactions icon on the bottom toolbar. You can also do this by tapping and holding the marked content and choosing Apply or Apply All to redact either the selected content or all of the marked content in the document. A dialog box pops up to give a warning message and asks if you are sure to apply the redaction or not. Select OK after you have marked all content that you want to redact Ink Signature The ink signature feature allows you to draw your own style signature and place it on your document. You can create a list of signatures for different use cases. To create an ink signature, do the following: Tap the Ink Signature icon on the bottom toolbar. Then you can see the drawing board pop up on your screen. Select a type of color dot and line weight dot, draw a free signature. To re-draw, choose Eraser. 55


60 Once completing, tap on OK to add your calligraphy to the Signature List panel which is next to the bottom toolbar. Tap the created signature in the Signature List panel, tap on the location where you want to place the signature. Tap to add the ink signature to your document. To delete an ink signature, do the following: Tap on the signature thumbnail that you do not want in the Signature list. 56
61 3.6.3 Password Protection You can add a password to a PDF to limit access and restrict certain features, such as printing, copying and editing. There are two kinds of passwords that could be applied to a PDF file: a Document Open password and a Permissions password. When you set a Document Open password, anyone who tries to open the PDF must type in the password that you specified. When you set a Permissions password, anyone who wants to change the restrictions must type the Permissions password. Please note that if a PDF is secured with both types of passwords, it can be opened with either password, but only the Permissions password allows you to change the restrictions. Tip: There s no way out to recover password from the PDF if you forgot it. To keep a backup copy of the PDF that is not password-protected is a good choice. Tap the Password Protect icon box pop up on your screen. on the bottom toolbar. You can see the Password Protection dialog 57
62 To add document open password, type a password in the following textbox: To add document restriction settings, check Add Document Restriction box, tap OK on the pop-up warning dialog box, type a password in the textbox as below. Permission Specification Check the "Restrict printing and editing of the document and its security settings" option, and then select the options as needed. Print Allowed specifies the level of printing which users are allowed for the PDF. A. Low resolution (150dpi) allows users to print at no higher than 150-dpi resolution. B. High resolution allows users to print with any resolution. Changes Allowed specifies the level of printing which users are allowed for the PDF. A. Inserting, deleting, and rotating pages allows users to insert, delete, and rotate PDF pages. B. Filling in forms and signing existing signature fields allows users to fill in forms and sign documents in existing signatures fields. C. Commenting, filling form and signing existing signature fields allows users to add comments, fill in forms and sign documents in existing signatures fields. D. Any except extracting pages allows users to do any operation but extract pages. Enable copying of text, images, and other content allows users to copy content in PDFs. 58

63 Enable text access for screen reader devices for the visually impaired allows the visually impaired users to access text with screen reader devices. Encrypt Settings Encryption Algorithm defines data transformations that cannot be easily reversed by unauthorized users. Web Viewer supports 128-bit AES, 256-bit AES and 128-bit ARC-FOUR. Don t encrypt metadata encrypts the contents of a PDF but still allow search engines access to the document metadata. After setting the permissions as desired, click OK on the Password Protection dialog box and save the document to make setting take effect. 3.7 Print You can print all pages of the current loaded PDF file or a range of pages with or without comments. The maximum allowed number of one print task are 100 pages. To print the current active file, do the following: Tap on the top toolbar, select Print, and the Print Settings window appears where you can specify page ranges for the print task. By default the Current Page is checked. If the current document exceeds 100 pages, the first 100 pages will be printed. To print the left, do the print again. 59
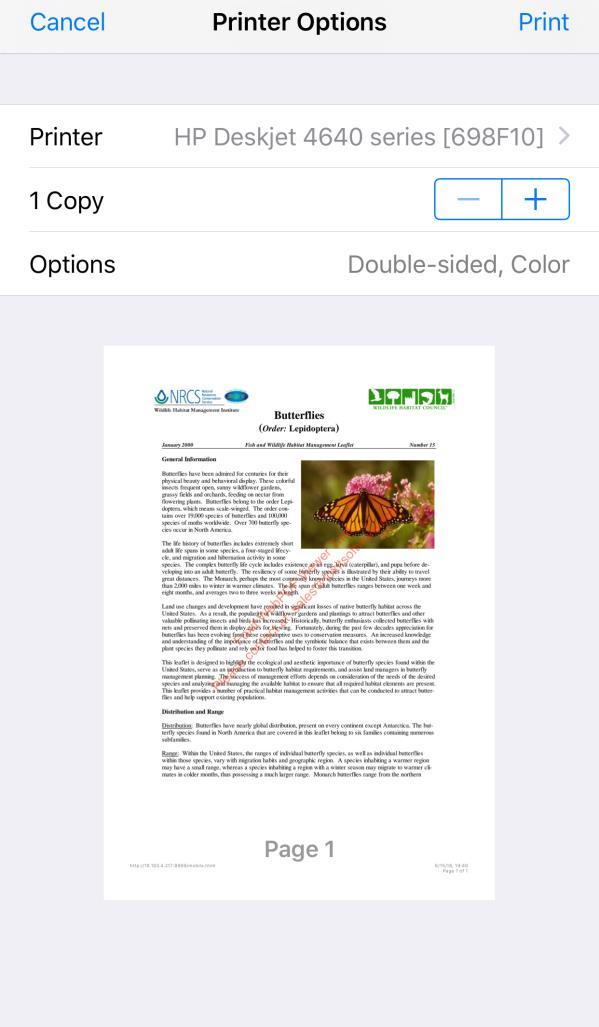
64 Check Print Comments if you want comments to be included in the output file. Tap Next to proceed. You can see a progress message appears as follows. The time length depends on the output page numbers you specified and file size. You can tap Cancel to abort the print. Once the progress bar completes, the Print dialog box pops up. Select a printer, set print copies, and tap Print to start. 60
65 61
66 62
End User Guide. 2.1 View PDF documents on desktop Choose a file View PDF documents View PDF documents on mobile...
 TABLE OF CONTENTS 1 Overview... 1 2 How to use... 1 2.1 View PDF documents on desktop... 1 2.1.1 Choose a file... 1 2.1.2 View PDF documents... 1 2.2 View PDF documents on mobile... 6 2.2.1 Choose a file...
 TABLE OF CONTENTS 1 Overview... 1 2 How to use... 1 2.1 View PDF documents on desktop... 1 2.1.1 Demo panels... 1 2.1.1.1 Choose a file... 2 2.1.1.2 Add Watermark... 2 2.1.2 View PDF documents... 3 2.2
What will I learn today?
 What will I learn today? What s New My Old Adobe did it this way Navigation Pane Tools Pane Comments Pane Share Pane Using Action Wizard Comparing PDF Documents Insert Pages Delete Pages Replace Pages
Press the Plus + key to zoom in. Press the Minus - key to zoom out. Scroll the mouse wheel away from you to zoom in; towards you to zoom out.
 Navigate Around the Map Interactive maps provide many choices for displaying information, searching for more details, and moving around the map. Most navigation uses the mouse, but at times you may also
Foxit Reader Quick Guide
 I Contents Foxit Reader Contents... II Chapter 1 Get Started... 1 Foxit Reader Overview... 1 System Requirements... 1 Install Foxit Reader... 2 Uninstall Foxit Reader... 2 Update Foxit Reader... 2 Workspace...
Foxit MobilePDF Quick Guide
 I Contents Contents... II Chapter 1 Get Started... 1 Expand and Collapse the Tool Switcher... 1 Find a PDF File... 1 Show the Toolbar... 2 Chapter 2 View and Work with PDF Files... 3 Open a PDF File...
MICROSOFT WORD 2010 BASICS
 MICROSOFT WORD 2010 BASICS Word 2010 is a word processing program that allows you to create various types of documents such as letters, papers, flyers, and faxes. The Ribbon contains all of the commands
Introduction to Microsoft Office PowerPoint 2010
 Introduction to Microsoft Office PowerPoint 2010 TABLE OF CONTENTS Open PowerPoint 2010... 1 About the Editing Screen... 1 Create a Title Slide... 6 Save Your Presentation... 6 Create a New Slide... 7
Working with PDF s. To open a recent file on the Start screen, double click on the file name.
 Working with PDF s Acrobat DC Start Screen (Home Tab) When Acrobat opens, the Acrobat Start screen (Home Tab) populates displaying a list of recently opened files. The search feature on the top of the
How to use the Acrobat interface and basic navigation
 How to use the Acrobat interface and basic navigation The work area (Figure 1) includes a document pane that displays Adobe PDF documents and a navigation pane (on the left) that helps you browse through
Microsoft PowerPoint 2013 Beginning
 Microsoft PowerPoint 2013 Beginning PowerPoint Presentations on the Web... 2 Starting PowerPoint... 2 Opening a Presentation... 2 File Tab... 3 Quick Access Toolbar... 3 The Ribbon... 4 Keyboard Shortcuts...
Microsoft PowerPoint 2007 Beginning
 Microsoft PowerPoint 2007 Beginning Educational Technology Center PowerPoint Presentations on the Web... 2 Starting PowerPoint... 2 Opening a Presentation... 2 Microsoft Office Button... 3 Quick Access
Using Help Contents Index Back 1
 Using Online Help Using Help Contents Index Back 1 Using Online Help About the built-in help features Adobe Reader 6.0 offers many built-in features to assist you while you work, including the Help window
Vizit Pro User Manual
 Vizit Pro User Manual 1 Table of Contents Vizit Pro User Manual... 1 Using Vizit Pro... 3 The Vizit Pro User Interface... 3 Toolbars... 4 File Tab Toolbar... 4 Edit Tab Toolbar... 5 Annotations Tab Toolbar...
ClaroPDF is an App for reading and commenting on PDF files and documents. ClaroPDF speaks back accessible text PDF files and documents with highqualit
 ClaroPDF User Guide ClaroPDF is an App for reading and commenting on PDF files and documents. ClaroPDF speaks back accessible text PDF files and documents with highquality speech and highlighting so you
Using Online Help. About the built-in help features Using Help Using the How To window Using other assistance features
 Using Online Help About the built-in help features Using Help Using the How To window Using other assistance features About the built-in help features Adobe Reader 6.0 offers many built-in features to
Vizit Essential for SharePoint 2013 Version 6.x User Manual
 Vizit Essential for SharePoint 2013 Version 6.x User Manual 1 Vizit Essential... 3 Deployment Options... 3 SharePoint 2013 Document Libraries... 3 SharePoint 2013 Search Results... 4 Vizit Essential Pop-Up
BDM s Annotation User Guide
 ETS :Foothill De Anza CC District April 17, 2014 1 BDM s Annotation User Guide Users with Read/Write access can annotate (markup) documents if they retrieve the document using Microsoft s Internet Explorer
South Dakota Department of Transportation January 10, 2014
 South Dakota Department of Transportation January 10, 2014 USER GUIDE FOR ELECTRONIC PLANS REVIEW AND PDF DOCUMENT REQUIREMENTS FOR CONSULTANTS Contents Page(s) What Is A Shared Electronic Plan Review
Creating Interactive PDF Forms
 Creating Interactive PDF Forms Using Adobe Acrobat X Pro for the Mac University Information Technology Services Training, Outreach, Learning Technologies and Video Production Copyright 2012 KSU Department
PDF Expert for ipad User guide
 PDF Expert for ipad User guide 2011 Readdle Inc. 2 Contents Introduction Chapter 1: Copying documents to PDF Expert USB file transfer using itunes File Sharing Saving attachments from Mail and other ipad
Lesson 4 - Creating a Text Document Using WordPad
 Lesson 4 - Creating a Text Document Using WordPad OBJECTIVES: To learn the basics of word processing programs and to create a document in WordPad from Microsoft Windows. A word processing program is the
Word 2013 Quick Start Guide
 Getting Started File Tab: Click to access actions like Print, Save As, and Word Options. Ribbon: Logically organize actions onto Tabs, Groups, and Buttons to facilitate finding commands. Active Document
Mouse Navigation. Middle Button (wheel) Pan. Click + Drag. Re-Center View. Double-Click. Context Menu. Tool Operation. Click. Click. Multi-Select.
 Pan. Click + Drag. Re-Center View. Double-Click. Context Menu. Tool Operation. Click. Click. Multi-Select.") BLUEBEAM REVU KEYBOARD SHORTCUTS Mouse Navigation Middle Button (wheel) Pan Re-Center View Click + Drag Double-Click Left Button Right Button Tool Operation Click Context Menu Click Pan Click + Spacebar
BLUEBEAM REVU KEYBOARD SHORTCUTS Mouse Navigation Middle Button (wheel) Pan Re-Center View Click + Drag Double-Click Left Button Right Button Tool Operation Click Context Menu Click Pan Click + Spacebar
The HOME PAGE opens with a screen split into two parts, Left panel and Right panel.
 How to Use the Goodreader Application Goodreader version 4.0.1 OPEN Goodreader from the ipad HOME SCREEN. The HOME PAGE opens with a screen split into two parts, Left panel and Right panel. The Left Panel
Publishing Electronic Portfolios using Adobe Acrobat 5.0
 Step-by-Step Publishing Electronic Portfolios using Adobe Acrobat 5.0 2002, Helen C. Barrett Here is the process we will use to publish a digital portfolio using Adobe Acrobat. The portfolio will include
MICROSOFT POWERPOINT 2016 Quick Reference Guide
 MICROSOFT POWERPOINT 2016 Quick Reference Guide PowerPoint What is it? What s new in PowerPoint 2016? PowerPoint is a computer program that allows you to create, edit and produce slide show presentations.
Microsoft Publisher 2010 Tecumseh District Library
 1 Microsoft Publisher 2010 Tecumseh District Library by Anne Keller, Teen Services Librarian 2 Microsoft Publisher 2010 Microsoft Publisher is a powerful desktop publishing program that can create posters,
The Portable Document Format (PDF) Converting word or Excel or PowerPoint to PDF PDF. PDF Save as Type. 5. When Finished Click at Save
 Converting word or Excel or PowerPoint to PDF PDF. PDF Save as Type. 5. When Finished Click at Save") The Portable Document Format () The Portable Document Format () is a file format used to present documents in a manner independent of application software, hardware, and operating systems. [3] Each file
The Portable Document Format () The Portable Document Format () is a file format used to present documents in a manner independent of application software, hardware, and operating systems. [3] Each file
Welcome to Foxit MobilePDF Business
 Welcome to Instructions: Main Interface... 2 File Management Tools... 4 Public Cloud Services... 5 Viewing and Tools... 8 Annotation Tools... 10 Form Tools... 12 Signature... 13 Text Selection... 14 Gestures...
Microsoft PowerPoint 2010 Beginning
 Microsoft PowerPoint 2010 Beginning PowerPoint Presentations on the Web... 2 Starting PowerPoint... 2 Opening a Presentation... 2 File Tab... 3 Quick Access Toolbar... 3 The Ribbon... 4 Keyboard Shortcuts...
Adobe Acrobat DC for Legal Professionals - Quick Reference Guide
 Adobe Acrobat DC for Legal Professionals - Quick Reference Guide Adobe Acrobat is an important tool in the legal field giving you the ability to create, view, and edit PDF (portable document format) documents.
Learn more about Pages, Keynote & Numbers
 Learn more about Pages, Keynote & Numbers HCPS Instructional Technology May 2012 Adapted from Apple Help Guides CHAPTER ONE: PAGES Part 1: Get to Know Pages Opening and Creating Documents Opening a Pages
MICROSOFT WORD 2010 Quick Reference Guide
 MICROSOFT WORD 2010 Quick Reference Guide Word Processing What is Word Processing? How is Word 2010 different from previous versions? Using a computer program, such as Microsoft Word, to create and edit
PowerPoint 2016 Building a Presentation
 PowerPoint 2016 Building a Presentation What is PowerPoint? PowerPoint is presentation software that helps users quickly and efficiently create dynamic, professional-looking presentations through the use
Acrobat X Professional
 Acrobat X Professional Toolbar Well Page Navigations/Page Indicator Buttons for paging through document Scroll Bar/box page indicator appears when using the scroll button to navigate. When you release
K e y b o a r d s h o rt c ut s
 Keyboard shortcuts Mouse navigation Middle button (wheel) Click + drag = pan Double-click = re-center view Left button Click = tool operation Click + spacebar = pan Shift + click + drag = multi-select
Digital Content e-reader Features Overview
 Digital Content e-reader Features Overview Announcing the launch of our new digital content e-reader. This brief overview will demonstrate some of the most important features of our new e-reader. Once
Quick Start Guide - Contents. Opening Word Locating Big Lottery Fund Templates The Word 2013 Screen... 3
 Quick Start Guide - Contents Opening Word... 1 Locating Big Lottery Fund Templates... 2 The Word 2013 Screen... 3 Things You Might Be Looking For... 4 What s New On The Ribbon... 5 The Quick Access Toolbar...
Using Microsoft Word. Text Editing
 Using Microsoft Word A word processor is all about working with large amounts of text, so learning the basics of text editing is essential to being able to make the most of the program. The first thing
Microsoft Word Basic Editing. Lesson , John Wiley & Sons, Inc. Microsoft Official Academic Course, Microsoft Word
 Microsoft Word 2013 Lesson 2 Basic Editing 2014, John Wiley & Sons, Inc. Microsoft Official Academic Course, Microsoft Word 2013 1 Objectives 2014, John Wiley & Sons, Inc. Microsoft Official Academic Course,
Vision Pointer Tools
 Vision Pointer Tools Pointer Tools - Uses Pointer Tools can be used in a variety of ways: during a Vision Demo to annotate on the master station s screen during a Remote Control session to annotate on
Center for Faculty Development and Support Creating Powerful and Accessible Presentation
 Creating Powerful and Accessible Presentation PowerPoint 2007 Windows Tutorial Contents Create a New Document... 3 Navigate in the Normal View (default view)... 3 Input and Manipulate Text in a Slide...
Microsoft Office Publisher
 Microsoft Office 2007- Publisher Opening Microsoft Publisher Using the Start Menu, click on All Programs and navigate to the Microsoft Office folder. Click on Microsoft Office Publisher 2007. Choosing
Adobe Acrobat Pro: Tips, Tricks and Timesavers
 Learner Outcomes: How to apply reviewing features to a PDF Learn how to manage and secure your documents Explore how to build forms in Acrobat Find out how to add and edit form fields including text fields,
PowerPoint Tutorial 2: Adding and Modifying Text and Graphic Objects 2013
 PowerPoint Tutorial 2: Adding and Modifying Text and Graphic Objects Microsoft Office 2013 2013 Objectives Insert a graphic from a file Insert, resize, and reposition clip art Modify the color and shape
Word 2013 Beginning. Technology Integration Center
 Word 2013 Beginning Getting Started... 2 Quick Access Toolbar... 3 The Ribbon... 3 Help... 4 Compatibility Mode... 4 Document Views... 4 Navigating the Document... 5 Moving Around in the Document... 5
DOING MORE WITH WORD: MICROSOFT OFFICE 2007
 DOING MORE WITH WORD: MICROSOFT OFFICE 2007 GETTING STARTED PAGE 02 Prerequisites What You Will Learn USING MICROSOFT WORD PAGE 03 Viewing Toolbars Adding and Removing Buttons MORE TASKS IN MICROSOFT WORD
Introduction to Microsoft Office 2016: Word
 Introduction to Microsoft Office 2016: Word Last Updated: September 2018 Cost: $2.00 Microsoft Word is a word processing software. You can use it to type letters, reports, and other documents. This class
Quick Access Toolbar. You click on it to see these options: New, Open, Save, Save As, Print, Prepare, Send, Publish and Close.
 Opening Microsoft Word 2007 in the practical room UNIT-III 1 KNREDDY 1. Nyelvi beállítások az Office 2007-hez (Language settings for Office 2007 (not 2003)) English. 2. Double click on the Word 2007 icon
Adobe Acrobat DC Guide
 Adobe Acrobat DC Guide A Complete Overview for Connect Users Chapter 1: Interface Fundamentals...7 Chapter 2: Home View...7 Chapter 3: Tools...8 Find Tools... 10 Accessing All Tools... 10 Modify Favorite
Adobe Acrobat 5.0. Overview. Internet & Technology Training Services Miami Dade County Public Schools
 Adobe Acrobat 5.0 Overview Internet & Technology Training Services Miami Dade County Public Schools Preparing Microsoft Office Documents in.pdf Format Converting Documents to.pdf Format Using the Tool
PAGE TITLE KEYBOARD SHORTCUTS
 PAGE TITLE KEYBOARD SHORTCUTS DEFAULT KEYBOARD SHORTCUTS MARKUP Align Bottom Ctrl + Alt + B Align Center Ctrl + Alt + E Align Left Ctrl + Alt + L Align Middle Ctrl + Alt + M Align Right Ctrl + Alt + R
Word 3 Microsoft Word 2013
 Word 3 Microsoft Word 2013 Mercer County Library System Brian M. Hughes, County Executive Action Technique 1. Insert a Text Box 1. Click the Insert tab on the Ribbon. 2. Then click on Text Box in the Text
PDF Expert. User Guide Readdle Inc.
 PDF Expert User Guide 2017 Readdle Inc. Contents Chapter 1. Overview 6 Chapter 2. Main menu 9 Chapter 3. Getting files from 12 Mac or PC via itunes 12 Mail app 13 Dropbox 14 Other web storages 16 Other
Adobe Acrobat Reader 4.05
 Adobe Acrobat Reader 4.05 1. Installing Adobe Acrobat Reader 4.05 If you already have Adobe Acrobat Reader installed on your computer, please ensure that it is version 4.05 and that it is Adobe Acrobat
AcroPlot Matrix AcroPlot Matrix
 AcroPlot Matrix AcroPlot Matrix software enables you to easily view, comment, modify and print an extensive list of file types like PDF, DWF, TIFF, PLT, and more, that are associated with the architecture,
Display Systems International Software Demo Instructions
 Display Systems International Software Demo Instructions This demo guide has been re-written to better reflect the common features that people learning to use the DSI software are concerned with. This
Microsoft Word 2010 Basics
 1 Starting Word 2010 with XP Click the Start Button, All Programs, Microsoft Office, Microsoft Word 2010 Starting Word 2010 with 07 Click the Microsoft Office Button with the Windows flag logo Start Button,
SMART Meeting Pro 4.2 personal license USER S GUIDE
 smarttech.com/docfeedback/170973 SMART Meeting Pro 4.2 personal license USER S GUIDE Product registration If you register your SMART product, we ll notify you of new features and software upgrades. Register
PowerPoint 2010 Level 1 Computer Training Solutions Student Guide Version Revision Date Course Length
 Level 1 Computer Training Solutions Version 1.2 Revision Date Course Length 2012-Feb-16 6 hours Table of Contents Quick Reference... 3 Frequently Used Commands... 3 Manitoba ehealth Learning Management
PDFelement 6 Solutions Comparison
 duct Data Sheet Solutions Comparison Our latest release comes stacked with all the productivity-enhancing functionality you ve come to know and love. Compatibility DC Compatible with Microsoft Windows
Keynote 08 Basics Website:
 Website: http://etc.usf.edu/te/ Keynote is Apple's presentation application. Keynote is installed as part of the iwork suite, which also includes the word processing program Pages and the spreadsheet program
The American University in Cairo. Academic Computing Services. Word prepared by. Soumaia Ahmed Al Ayyat
 The American University in Cairo Academic Computing Services Word 2000 prepared by Soumaia Ahmed Al Ayyat Spring 2001 Table of Contents: Opening the Word Program Creating, Opening, and Saving Documents
HBS Training - IT Solutions. PlanWeb. Intermediate
 HBS Training - IT Solutions PlanWeb Intermediate CONTENTS Logging on to the system...3 The PlanWeb Window...5 The Tool Bar...6 The Status Bar...6 The Map Window...6 The Information Window...7 Changing
Welcome! Table of contents:
 Table of contents: Welcome!... 1 User interface... 2 Working with menus... 2 Working with toolbars... 4 Navigating between slides... 4 Entering text... 5 Selecting text and objects... 6 Spell checking...
DOING MORE WITH WORD: MICROSOFT OFFICE 2010
 DOING MORE WITH WORD: MICROSOFT OFFICE 2010 GETTING STARTED PAGE 02 Prerequisites What You Will Learn USING MICROSOFT WORD PAGE 03 Viewing Toolbars Adding and Removing Buttons MORE TASKS IN MICROSOFT WORD
RAPIDMAP Geocortex HTML5 Viewer Manual
 RAPIDMAP Geocortex HTML5 Viewer Manual This site was developed using the evolving HTML5 web standard and should work in most modern browsers including IE, Safari, Chrome and Firefox. Even though it was
button Double-click any tab on the Ribbon to minimize it. To expand, click the Expand the Ribbon button
 PROCEDURES LESSON 1: CREATING WD DOCUMENTS WITH HEADERS AND FOOTERS Starting Word 1 Click the Start button 2 Click All Programs 3 Click the Microsoft Office folder icon 4 Click Microsoft Word 2010 1 Click
Acquiring Amazing Adobe Acrobat Skills using Acrobat Professional XI
 Acquiring Amazing Adobe Acrobat Skills using Acrobat Professional XI Information Technology Services West Virginia University ITS Service Desk: itshelp@mail.wvu.edu, (304) 293-4444 http://it.wvu.edu/support/howto/archives/adobe/acrobat
Microsoft Word 2010 Tutorial
 1 Microsoft Word 2010 Tutorial Microsoft Word 2010 is a word-processing program, designed to help you create professional-quality documents. With the finest documentformatting tools, Word helps you organize
ekaizen Lessons Table of Contents 1. ebook Basics 1 2. Create a new ebook Make Changes to the ebook Populate the ebook 41
 Table of Contents 1. ebook Basics 1 2. Create a new ebook 20 3. Make Changes to the ebook 31 4. Populate the ebook 41 5. Share the ebook 63 ekaizen 1 2 1 1 3 4 2 2 5 The ebook is a tabbed electronic book
VHSE - COMPUTERISED OFFICE MANAGEMENT MODULE III - Communication and Publishing Art - PageMaker
 INTRODUCTION : It is one Adobe PageMaker 7.0 software is the ideal page layout program for business, education, and small- and home-office professionals who want to create high-quality publications such
Microsoft Word: Steps To Success (The Bare Essentials)
") Microsoft Word: Steps To Success (The Bare Essentials) Workbook by Joyce Kirst 2005 Microsoft Word: Step to Success (The Bare Essentials) Page Contents 1 Starting Word 2 Save 3 Exit 5 Toolbars, Alignment,
Microsoft Word: Steps To Success (The Bare Essentials) Workbook by Joyce Kirst 2005 Microsoft Word: Step to Success (The Bare Essentials) Page Contents 1 Starting Word 2 Save 3 Exit 5 Toolbars, Alignment,
If you don t have Adobe Reader on your computer already, download and install it from
 9 To read a PDF on your computer you usually use. is a free program and you can get versions for Windows, Mac or Linux computers. If you don t have on your computer already, download and install it from
Using Inspiration 7 I. How Inspiration Looks SYMBOL PALETTE
 Using Inspiration 7 Inspiration is a graphic organizer application for grades 6 through adult providing visual thinking tools used to brainstorm, plan, organize, outline, diagram, and write. I. How Inspiration
Introduction. Getting Started. Selecting a Template. 1 of 1
 1 of 1 Introduction Visual materials are one of the most effective means of communicating a message. They can give a presentation a professional quality. Visuals help a speaker to be well prepared, organized,
Microsoft Word 2010 Part 1: Introduction to Word
 CALIFORNIA STATE UNIVERSITY, LOS ANGELES INFORMATION TECHNOLOGY SERVICES Microsoft Word 2010 Part 1: Introduction to Word Summer 2011, Version 1.0 Table of Contents Introduction...3 Starting the Program...3
The Fundamentals. Document Basics
 3 The Fundamentals Opening a Program... 3 Similarities in All Programs... 3 It's On Now What?...4 Making things easier to see.. 4 Adjusting Text Size.....4 My Computer. 4 Control Panel... 5 Accessibility
Consider Communicating via PDF
 Consider Communicating via PDF Within the Law School, documents are often collaboratively drafted and comments and suggestions are requested from reviewers on various drafts. In the past, these documents
SMART Meeting Pro PE 4.1 software
 Help us make this document better smarttech.com/feedback/170973 SMART Meeting Pro PE 4.1 software USER S GUIDE Product registration If you register your SMART product, we ll notify you of new features
Introduction to Word 2010
 Introduction to Word 2010 Screen Elements 4 1 2 3 5 10 6 7 8 9 1. File Tab: The File tab will bring you into the Backstage View. The Backstage View is where you manage your files and the data about them
11.1 Create Speaker Notes Print a Presentation Package a Presentation PowerPoint Tips... 44
 Contents 1 Getting Started... 1 1.1 Presentations... 1 1.2 Microsoft Office Button... 1 1.3 Ribbon... 2 1.4 Mini Toolbar... 2 1.5 Navigation... 3 1.6 Slide Views... 4 2 Customize PowerPoint... 5 2.1 Popular...
DaDaDocs for Dynamics 365. A Guidebook for the DaDaDocs Integration for Dynamics 365
 DaDaDocs for Dynamics 365 A Guidebook for the DaDaDocs Integration for Dynamics 365 DaDaDocs for Dynamics 365 2 Table of Contents Getting Started Mini Toolbar Hyperlink Tool Text Checkmarks Signing Documents
Table of Contents. Chapter 2. Looking at the Work Area
 Table of Contents... 1 Opening a PDF file in the work area... 2 Working with Acrobat tools and toolbars... 4 Working with Acrobat task buttons... 13 Working with the navigation pane... 14 Review... 18
For many students, creating proper bookmarks can be one of the more confounding areas of formatting the ETD.
 Step 6: Bookmarks This PDF explains Step 6 of the step-by-step instructions that will help you correctly format your ETD to meet UCF formatting requirements. UCF requires that all major and chapter headings
User Guide. BlackBerry Workspaces for Windows. Version 5.5
 User Guide BlackBerry Workspaces for Windows Version 5.5 Published: 2017-03-30 SWD-20170330110027321 Contents Introducing BlackBerry Workspaces for Windows... 6 Getting Started... 7 Setting up and installing
Session 7 MS Word. Graphics. Inserting Clipart, and Graphics Modify graphics Position graphics
 Session 7 MS Word Graphics Inserting Clipart, and Graphics Modify graphics Position graphics Table of Contents Session 7 Working with Graphics... 1 The Toolbar... 1 Drawing Toolbar... 1 Picture Toolbar...
Contents. Launching Word
 Using Microsoft Office 2007 Introduction to Word Handout INFORMATION TECHNOLOGY SERVICES California State University, Los Angeles Version 1.0 Winter 2009 Contents Launching Word 2007... 3 Working with
Acrobat 6.0 Standard - Basic Tasks
 Converting Office Documents to PDF 1. Create and edit document in Office application (Word, Excel, PowerPoint) 2. Click the Convert to PDF button on the Acrobat toolbar If the buttons are not visible,
Designer Reference 1
 Designer Reference 1 Table of Contents USE OF THE DESIGNER...4 KEYBOARD SHORTCUTS...5 Shortcuts...5 Keyboard Hints...5 MENUS...7 File Menu...7 Edit Menu...8 Favorites Menu...9 Document Menu...10 Item Menu...12
InDesign CS Basics. To learn the tools and features of InDesign CS to create publications efficiently and effectively.
 InDesign CS Basics InDesign Basics Training Objective To learn the tools and features of InDesign CS to create publications efficiently and effectively. What you can expect to learn from this class: How
Microsoft Office Word. Help. Opening a Document. Converting from Older Versions
 Microsoft Office 2007 - Word Help Click on the Microsoft Office Word Help button in the top right corner. Type the desired word in the search box and then press the Enter key. Choose the desired topic
IT Services Financial Services. IT Services Financial Services.
 eledgers IT Services Financial Services IT Services Financial Services http://finserv.uchicago.edu Table of Contents Logging into eledgers... 3 17BThe eledgers Workspace... 4 Basic Search using Custom
PowerPoint 2010: Basic Skills
 PowerPoint 2010: Basic Skills Application Support and Training Office of Information Technology, West Virginia University OIT Help Desk (304) 293-4444, oithelp@mail.wvu.edu oit.wvu.edu/training/classmat/ppt/
SERVICE MANU SER VICE MANU
 SERVICE MANUAL H ow t o U s e Table of Contents 1. 2. 3. 4. 5. 6. Launching the Service Manual Setting up the Service Manual icon Shutting down the Service Manual Basic controls Basic controls of Acrobat
1. The PowerPoint Window
 1. The PowerPoint Window PowerPoint is a presentation software package. With PowerPoint, you can easily create slide shows. Trainers and other presenters use slide shows to illustrate their presentations.
Microsoft Office Word 2010
 Microsoft Office Word 2010 Content Microsoft Office... 0 A. Word Basics... 4 1.Getting Started with Word... 4 Introduction... 4 Getting to know Word 2010... 4 The Ribbon... 4 Backstage view... 7 The Quick
HYPERSTUDIO TOOLS. THE GRAPHIC TOOL Use this tool to select graphics to edit. SPRAY PAINT CAN Scatter lots of tiny dots with this tool.
 THE BROWSE TOOL Us it to go through the stack and click on buttons THE BUTTON TOOL Use this tool to select buttons to edit.. RECTANGLE TOOL This tool lets you capture a rectangular area to copy, cut, move,
Center for Faculty Development and Support Making Documents Accessible
 Center for Faculty Development and Support Making Documents Accessible in Word 2007 Tutorial CONTENTS Create a New Document and Set Up a Document Map... 3 Apply Styles... 4 Modify Styles... 5 Use Table