CMSnipcart Documentation
|
|
|
- Alaina Powers
- 5 years ago
- Views:
Transcription
1 CMSnipcart Documentation Release CMExtension January 07, 2016
2
3 Contents 1 Overview Technical Requirements Features Installation Installation Update Configuration Mode & Credentials General Shopping Cart & Checkout Currency Notification Persmissions CMSnipcart system plugin 19 5 Menu Items Products Menu Item Hidden Menu Product Menu Item Thank You Menu Item Categories Create New Category Change Status Delete Categories Sort Categories Product Attributes 33 8 Products Create New Product Parent and Child Products Change Status Delete Products Sort Products Copy Product i
4 9 Shopping Cart Module Products Module Profile Module Orders Customers Order Custom Fields Discounts Localization Translation Installation Preparation Translate ii
5 CMSnipcart is a Joomla! component for building an ecommerce website powered by Snipcart and Joomla! CMS. This documentation gives your instruction for how to install and setup CMSnipcart on your Joomla! website. Contents: Contents 1
6 2 Contents
7 CHAPTER 1 Overview CMSnipcart is a Joomla! component for building an ecommerce website powered by Snipcart and Joomla! CMS. Snipcart is a lean, powerful HTML/JavaScript shopping cart which can be used on any website. You just need to include some lines of code and start selling, Snipcart takes care of your payments, order history, your customers... so you can have a shopping site running quickly. There is no setup fee or monthly fee, Snipcart takes a small 2% fee of your sale or only $10 fee if your monthly sales are under $500. You can find more info about Snipcart at Because Snipcart is an HTML/JavaScript shopping cart, you can find it difficult to setup your site if you are not a web developer or if you are not familiar with HTML, CSS and JavaScript. CMSnipcart helps you do all of the technical tasks to have a Joomla! website with Snipcart integrated. CMSnipcart includes: CMSnipcart component: the main component for managing your store. CMSnipcart system plugin: inserting Snipcart code into Joomla! pages. Profile module: showing login, logout buttons and Snipcart order history. Shopping cart module: showing items in Snipcart shopping cart. Products module: showing list of products horizontally or vertically. 1.1 Technical Requirements CMSnipcart is compatible with Joomla! 3.x.x. The latest version of Joomla! is recommended. CMSnipcart is NOT compatible with Joomla! 1.x.x and 2.5.x. Please check Joomla! s Technical Requirements for more information of Joomla! s requirements. 1.2 Features Front-end Show list of all products or products in a specific category. Select product attributes (like size, color...) and quantity before adding to shopping cart. Control product s stock. Like/share buttons for Facebook, Twitter, Pinterest and Google+. 3
8 Zoom product s image. Change product s image based on selected attributes. Shopping cart module. Products module to show a list of products horizontally or vertically. Module for Snipcart profile Back-end Manage products, categories, product attributes, discounts, order custom fields, orders and customers. Customize Snipcart s texts (localization). 4 Chapter 1. Overview


9 CHAPTER 2 Installation 2.1 Installation In your Joomla! back-end, you navigate to Extensions -> Manage In Upload Package File tab, you click Browse button and select the installation package of CMSnipcart on your computer, click Upload & Install button to upload the package to your server and install it. If the package is installed successfully, you receive the message Installion of the package package was successful. 5
10 You can see CMSnipcart in Components menu item. 2.2 Update In order to updating CMSnipcart to a greater version, you just need to install the new package, there is no extra steps required. 6 Chapter 2. Installation


11 CHAPTER 3 Configuration In your Joomla! s back-end, you go to Components -> CM Snipcart to access CMSnipcart component. The default page is the dashboard. You click the Options button on the toolbar to configure CMSnipcart. You can find 6 configuration tabs: Mode & Credentials, General, Shopping Cart & Checkout, Currency, Notification and Permissions. 7

12 3.1 Mode & Credentials In Mode & Credentials tab we have the folling options: Mode: Your Snipcart shop s mode. Live Public API Key: The public API key for your shop when it is in Live mode. Test Public API Key: The public API key for your shop when it is in Test mode. Live Secret API Key: The secrect API key for your shop when it is in Live mode. Test Secret API Key: The secrect API key for your shop when it is in Test mode. Webhook secret key: A secret key which is appended to webhook URL to protect it from public access. This webhook is used to receive notifications for your orders from Snipcart. Webhook must be enabled in order to control your product stocks (inventory). Your webhook URL looks like this: Get API Keys To get your API keys, log into Snipcart, open the right menu. 8 Chapter 3. Configuration

13 Click API KEYS menu item Mode & Credentials 9

14 On the top of the page, you can switch between Live and Test mode. In each mode you have different public API key and secret API Key. Copy your public API key to public API key field in your CMSnipcart s configuration. At the bottom of the page, create your secrect API key and copy it to secret API key field in CMSnipcart s configuration. Be careful to paste the keys into the correct mode field (if you are in Test mode, paste to the fields of Test mode) Configure Domain In your Snipcart dashboard, open the right menu, click DOMAINS & URLS menu item. 10 Chapter 3. Configuration
15 Select the protocol your website uses in PROTOCOL option (HTTP or HTTPS), enter your domain in DOMAIN field. This is the domain of your shopping site Configure Webhooks In your Snipcart dashboard, open the right menu, click WEBHOOKS menu item Mode & Credentials 11
16 Enter your webhook URL into WEBHOOKS URL field. Your webhook URL looks like this: Replace with the URL of your website and WEBHOOK_SECRECT_KEY with the webhook secret key which you configure in CMSnipcart s configuration. IMPORTANT: Webhook must be enabled in order to control your product stocks. 12 Chapter 3. Configuration
17 3.2 General In General tab we have the folling options: Load Joomla! s jquery: Load the jquery version which is shipped with Joomla!. CMSnipcart requires jquery to work. Set this option to No if jquery is already loaded by another extension. Bootstrap: The Bootstrap version available in front-end. Bootstrap is often loaded by your template. Default Max Quantity Allowed To Buy: You can set the max quantity which customer can buy for a product in every checkout, if that value is 0, this default value is used instead. Front-end s Pagination Limit: The number of items is displayed in front-end product list. Default is 20 items. Back-end s Pagination Limit: The number of items is displayed in back-end list. Default is 20 items. Load FontAwesome: CMSnipcart uses FontAwesome, load FontAwesome from CMSnipcart if FontAwesome is not loaded by other extensions. Load override CSS file: Load override CSS file to override Snipcart default styles. You need to create components/com_cmsnipcart/assets/css/snipcart.css file and add your override CSS styles General 13
18 Social Network buttons: Show social network buttons. Change Product Thumbnail With Selected Child Product s Thumbnail: Update product s thumbnail image in deal detail page with the image of the selected child product. Zoom Thumbnail On Hover: Zoom product s thumbnail on mouse hover. Snipcart s Language: Use another language for Snipcart instead of English. 3.3 Shopping Cart & Checkout In Shopping Cart & Checkout tab we have the folling options: Add To Cart Mode: The way we add product to shopping cart. Show Shopping Cart Popup When Adding An Item: Automatically show shopping cart popup when adding an item to the cart. Show Continue Shopping Button: Show Continue Shopping button in shopping cart. Allowed Credit Cards: Credit cards you want available during checkout. Allowed Shipping Methods: Enter shipping method s IDs, seperated by a comma. For example: fedex-2- day,fedex-express-saver. You can create shipping methods in Snipcart dashboard. If no shipping methods is set, all shipping methods are allowed. 14 Chapter 3. Configuration
19 Autocheck Use this address for shipping : Check Use this address for shipping checkbox automatically. 3.4 Currency In Currency tab we have the folling options: Currency symbol: Currency symbol which is used for original price, discounted price and discounted value. Currency symbol s position: Where currency symbol is displayed, before or after amount. Currency decimals: The number of decimals in currency. Decimal point: The character which is used as decimal point. Thousands separator: The character which is used as thousands separator Currency 15

 The number of seconds a notification is visible after disappears. 3.")
20 3.5 Notification Notification tab contains the options for AJAX notifications in back-end, these notifications notify you if a task is done successfully or if there is any errors. Notification position Where notification is displayed on the page. Notification s timeout (seconds) The number of seconds a notification is visible after disappears. 3.6 Persmissions Permissions tab allows you to configue what users in specific user groups can do. 16 Chapter 3. Configuration
21 If you are the only one can access Joomla! back-end or if all the users who can access Joomla! back-end have the same rights, you can leave these options with default settings. However if you allow other users to access Joomla! back-end and want to limit their rights in CMSnipcart component, you can adjust these settings to suit your needs Persmissions 17
22 18 Chapter 3. Configuration

23 CHAPTER 4 CMSnipcart system plugin After enter your public API key in CMSnipcart component s configuration, you need to check if Snipcart can connect to your site. In your back-end, you go to Extensions -> Plugins, search for System - CMSnipcart plugin and enable this plugin. In your Snipcart dashboard, click VALIDATE THE JAVASCRIPT FILE button next to Have you included Snipcart javascript file on your website? Click on the button next to this message to validate it. message in your notification section. 19
24 Enter your site s URL in the next step. 20 Chapter 4. CMSnipcart system plugin
25 If the validation is successful, you see the message We have confirmed that Snipcart javascript file is included correctly on your website with your API Key. 21
26 The notification Have you included Snipcart javascript file on your website? Click on the button next to this message to validate it. now disappears. 22 Chapter 4. CMSnipcart system plugin
27 23
28 24 Chapter 4. CMSnipcart system plugin

29 CHAPTER 5 Menu Items CMSnipcart has 3 menu items which are required to run CMSnipcart properly: Products: Used to show a list of products. You can show all products or only the products in a specific category. Product: Used to provide friendly URL for product detail page and help you control the Joomla! module which are displayed in product detail page. Thank You: After completing an order, customer is taken to this page. This page shows information of completed order. 5.1 Products Menu Item In your Joomla! back-end, you access the menu where you want to create menu item for product list, click New button on the toolbar to create a new menu item. In Menu Item Type option, click Select button and select Products from CMSnipcart. If you want to show all products, you select - All Categories - in Category option, otherwise you select a specific category to show only the products in that category. Switch to Options tab, you can use Columns option to configure the column quantity in product list. 25


30 5.2 Hidden Menu Product menu item and Thank You menu item can t be accessed directly. Product menu item needs product information to know what product it needs to show, Thank You menu item only shows information of the latest paid order. In order to hide Product and Thank You menu item, we need to put these menu items in a menu which is not assigned to any menu module (hidden menu), then the menu and its menu items are not displayed in front-end. If you don t have any menu like this yet, you can create one by access Menus -> Manage in your back-end s top menu. Click New button on the toolbar to create a new menu. Give your new menu a title and a menu type. 5.3 Product Menu Item Create a new menu item for Product, ensure you select your hidden menu in Menu Location option. 26 Chapter 5. Menu Items


31 5.4 Thank You Menu Item Similar to Product menu item, you create a new menu item for Thank You, put it in your hidden menu Thank You Menu Item 27
32 28 Chapter 5. Menu Items

33 CHAPTER 6 Categories 6.1 Create New Category Go to CMSnipcart in your Joomla! back-end by navigating to Components -> CM Snipcart. Click Categories in the left menu. To create a new category, you click New button. 29

34 We have the following fields in the form: Name: Category s name. Alias: Category s alias for friendly URL. This alias is not used yet, you can leave this field empty or keep the auto-generated value. Status: This info is currently not used. You can keep the default Published value. Meta Description: Meta description for search engine optimization. Meta Keywords: Meta keywords for search engine optimization. Keywords are separated by comma. 6.2 Change Status In category list, you can click on category name to edit a specific category and change its status. You can change status directly in category list by clicking the green or red circle in Status column. You can do the same to products and order custom fields. 30 Chapter 6. Categories


35 6.3 Delete Categories To delete categories, you select them in category list and click Delete buton. A confirmation popup appears, you click Yes to confirm and delete the selected categories. Similar popups appear when you delete products and order custom fields. 6.4 Sort Categories By sorting categories, you decide the ordering of the categories. This feature is currently not used yet in front-end, it will be used in future when more features are added to CMSnipcart. To sort categories, you click Ordering column header in category list, then you click drag and drop the icons in Ordering column to sort the categories Delete Categories 31
36 You can also sort products, order custom fields and product attributes. 32 Chapter 6. Categories

37 CHAPTER 7 Product Attributes If your product has many characteristics which require customers to choose before purchase, product attribute helps you create these characteristics. In your Joomla! back-end, navigate to Components -> CM Snipcart. Click Product Attributes in the left menu. Click New button to create a new product attribute. 33

38 You give your product attribute a name, click New Option to add options for this attributes. You can select these options when you create/edit products, customers select these options before purchase. To delete an option, you click the red X button on the right side of option s name. To delete product attributes, you select them and click Delete button. 34 Chapter 7. Product Attributes

39 To sort product attributes you drag and drop the icons in Ordering column. 35
40 36 Chapter 7. Product Attributes

41 CHAPTER 8 Products 8.1 Create New Product Navigate to Components -> CM Snipcart -> Products in your Joomla! back-end to access product list. Click New button to create a new product. 37
42 38 Chapter 8. Products

43 We have the following fields in Product tab: Name: Product s name. Alias: Product s alias for friendly URL. Unique ID: An unique ID to indentify this product (for example SKU). You need to use this unique ID to apply discounts to this product in Snipcart dashboard. Category: The category which the product is in. Image: Product s image which is shown in product list and product detail page. Cart Image: Product s image which is shown in Snipcart s shopping cart popup. If there is no image provided, the main image will be used. Description: Product s description which is shown in product detail page. Cart Description: A short description of product, it is shown in Snipcart s shopping cart popup. Stock: Product s inventory. Max Quantity Allowed To Buy For Every Checkout: The max quantity customers are allowed to buy for every checkout. This value is used to generate quantity dropdown list (if you show it). If the value is 0, the default value in the component s configuration is used. Status: This info is currently not used. You can keep the default Published value. Meta Description: Meta description for search engine optimization. Meta Keywords: Meta keywords for search engine optimization. Keywords are separated by comma. In Attributes tab, you can select the attributes of your product. If there is no attributes needed, you can leave the fields blank. If product has attributes, you need to create a parent product and some child products which have their own specfic attributes. Please see the next section Parent and Child Products for more info Create New Product 39

44 In Price & Custom Fields tab, you can set the sale price or the old price of your product. If your product needs custom fields which cutomers can select at checkout, you click New Custom Field button to create new custom field. 40 Chapter 8. Products

45 You need to give your custom field a name, select its type. There are 4 supported types: Textbox: Could be used to ask customers to enter short text. Textarea: Could be used to ask customers to enter long text, like notes. Checkbox: Could be used for a true-false or yes-no question. Radio: Could be used to ask customers to select 1 in many options. If custom field is required (customers must enter something or select an option), you check Required checkbox. If your product has custom fields, it is recommended that you select Split into many items for If This Product Has Custom Fields, When It Is Added To Shopping Cart Many Times, so that customers can select/enter many options fo every item in shopping cart Create New Product 41

46 If your product is shippable, in Shipping & Tax tab you set Shippable option to Yes and enter your product s weight in Weight field (in gram). To include your product in checkout s tax calculation, you set Include This Product In Taxes Calculation to Yes and enter the IDs of the taxes you want to apply to this product in Applied Taxes field, tax IDs are separated by a comma, for example TPS,TVQ. The tax ID must be the exact same name that is defined in the dashboard or you can use the unique ID that is generated, you can find this ID in the URL when editing an existing tax. Note that the unique IDs will not be the same in Live and Test modes. 8.2 Parent and Child Products If your product has many attributes, you must create a parent product and child products which have specific attributes. The parent product is shown in product list. When viewing product detail, the attributes of the child products are shown for customers to select. The product which customer add to cart is the child product, not the parent. Example: You sell t-shirt which has many sizes and colors, first you need to create a parent product for this t-shirt, depending on how many variants you have for your t-shirt, you need to create many child products for it. For example if your t-shirt has 2 colors green and blue, every color has 2 sizes small and large, then you need to create the following child products: a child product for green t-shirt in small size a child product for green t-shirt in large size a child product for blue t-shirt in small size 42 Chapter 8. Products
47 a child product for blue t-shirt in large size In this way, every child product has its own image, description, price, stock and unique ID (which can be used as SKU) Change Status In product list, you can click on the green or red circle in Status column to change product status to Published or Unpublished state. You can do the same to products and order custom fields Change Status 43
48 8.4 Delete Products To delete products, you select them in product list and click Delete buton and click Yes in confirmation popup. 8.5 Sort Products To sort products, you click Ordering column header in product list, then you click drag and drop the icons in Ordering column to sort the products. 8.6 Copy Product If you need to to create many products which have similar info, it is faster if you create 1 product and copy it to many products. You can select a product in product list, click Copy button, you are taken to product form which has the info of the selected product filled automatically in the form, now you can just edit what needs to be changed. This function is helpful when you create child products which are often have the same or similar info with their parent product. 44 Chapter 8. Products
49 CHAPTER 9 Shopping Cart Module Shopping cart module helps you show the current items in customer s shopping cart, this is done by using Snipcart s JavaScript API. Go to Modules section in your Joomla! back-end by navigating to Extensions -> Modules. You can use the module CM Snipcart - Shopping Cart module in the list of your modules, it is installed and created automatically when you install CMSnipcart s package. In case you don t see shopping cart module in your module list, you can click New button on the toolbar to create one. Just like any other Joomla! modules, in the module setting you can assign the module to a specific position in Position option and decide what pages the module is shown in in Menu Assignment tab. 45
50 You can show the shopping cart module in 3 ways: Simple: Only display shopping cart icon and item quantity. Dropdown: Display list of items in a button dropdown. Full: Display list of items vertically and cart s total amount. You can see the sample results in the screenshot below: 46 Chapter 9. Shopping Cart Module
51 47
52 48 Chapter 9. Shopping Cart Module
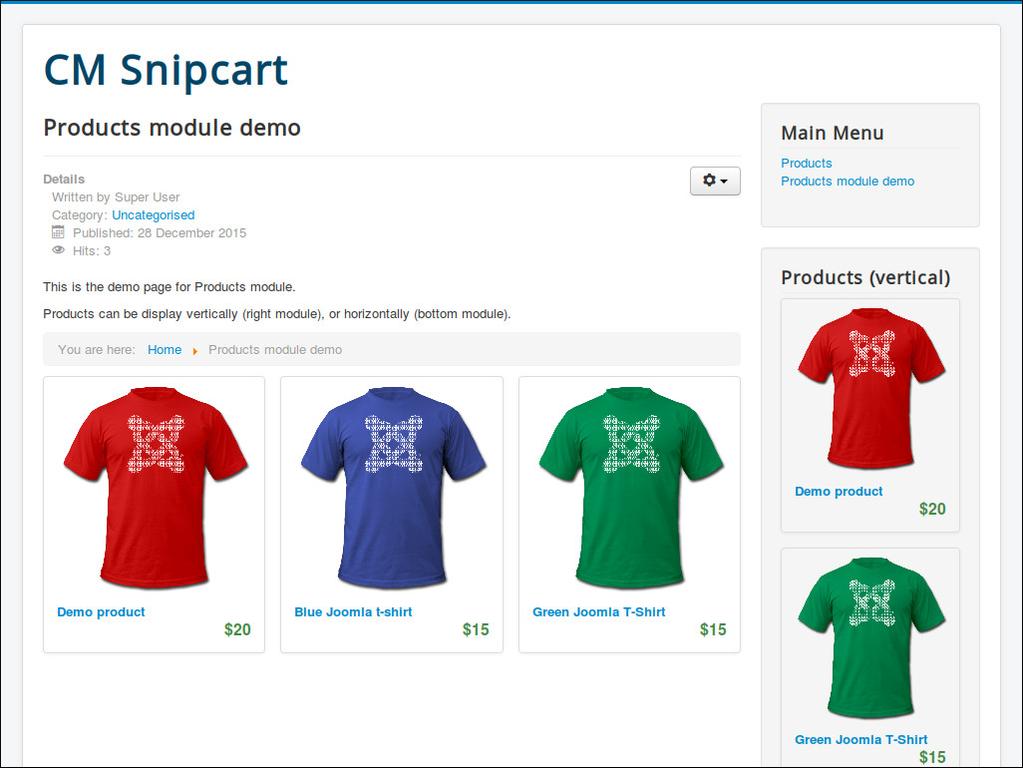
53 CHAPTER 10 Products Module Products module show your products, there are many options helping you configure what products to show. In Modules section in your Joomla! back-end you find the module CM Snipcart - Products module or click New button on the toolbar to create one. 49

54 If you select 1 for Products Per Row option, your products are shown in 1 column (vertically). You can limit the quantity of products to show with Max Products To Show option. With Category option, you can configure to get products from all categories or only get from the selected category. In Select Products option you can configure to get products randomly, get products by their ordering, or get the products which have less purchases first. 50 Chapter 10. Products Module
55 51
56 52 Chapter 10. Products Module

57 CHAPTER 11 Profile Module Profile module helps you show a link to open Snipcart s login in order to view order history. In Modules section in your Joomla! back-end you find the module CM Snipcart - Profile module or click New button on the toolbar to create one. 53

58 There are 3 options for this module: Type: The link is text or a button. Label: The label of the link (or the button). For example, Your profile or Login. FontAwesome s icon: You can show a FontAwesome icon on the left side of the label. For example you can use fa-user icon. You can get the icon s class name here. If you use FontAwesome icon, FontAwesome must be loaded in CMSnipcart component s configuration or loaded by other extensions like plugins or your current template. When you are not logged-in, the icon and the label are shown as the login link: When you click on the link, Snipcart s login popup appears, you can login or register a new account: 54 Chapter 11. Profile Module


59 If you are logged-in, you can see your order history: If you are logged-in and the Snipcart s popup is closed, you can see your displayed in the module. Click on the link again to open Snipcart s order history. 55
60 56 Chapter 11. Profile Module

61 CHAPTER 12 Orders To check your orders, in you back-end you browse to Components -> CM Snipcart -> Orders. To view order s detail, you click on the invoice. 57
62 In order detail page, you change change the status of the order or refund the order. 58 Chapter 12. Orders

63 CHAPTER 13 Customers To view your customers, in you back-end you browse to Components -> CM Snipcart -> Customers. To view customer s detail, you click on the address. 59
64 In customer detail, you can click on order s invoce to view order detail. 60 Chapter 13. Customers

65 CHAPTER 14 Order Custom Fields Order custom fields are displayed in ORDER INFOS tab which is inserted before BILLING ADDRESS tab during the checkout process. You can use order custom fields to ask customers for various information, for example if they agree with your terms of service, if they need to leave notes for delivery, etc... In your Joomla! back-end, navigate to Components -> CM Snipcart -> Order Custom Fields. Click New button to create a new custom field. 61
66 You can create custom field as a textbox for customers to enter text, as a checkbox for true/false or yes/no question, or radio buttons if you want customers to choose 1 in many options. When your custom field is radio type, you need to create some options for customers to choose. To delete options, you click the red X button on the right side of option s name. If you check Required checkbox, customers must enter something (for textbox type), or check the checkbox (for 62 Chapter 14. Order Custom Fields


67 checkbox type), or select an option (for radio type). In custom field list, you can change the fields s statuses by clicking the icons in Status column; you can sort the fields by drag and drop the icons in Ordering column; you can select the fields you want to delete and click Delete button. Here is a sample result: 63
68 64 Chapter 14. Order Custom Fields
69 CHAPTER 15 Discounts You can create discounts in your Snipcart dashboard. However with Snipcart API, CMSnipcart helps you create and manage discounts right in your Joomla! back-end. In CMSnipcart, you click Discounts in the left menu to access discount list. Click New button to create a new discount. 65
70 You provide a name for your discount, select an expire date if you need one, set maximum number of usages if you want to limit how many times this discount is used. In Choose what the discount will do section, there are various options depending what discount type you select: A prefixed amount will be deducted from the order: You need to provide the amount you want to deduct from order total. A percentage rebate on the total of the order: You need to provide the percentage amount you want to deduct from order total. A discount price provided by an alternate price list: This discount type is currently not supported in CM- Snipcart. A discount on the shipping: You need to provide your shipping s description, amount and guaranteed days to delivery A prefixed amount will be deducted on specified products: You need to enter discount amount and product unique IDs which you want to apply discount to. A rate will be deducted on specified products: You need to enter discount rate and product unique IDs which you want to apply discount to. Offer free products when a customer buys a specified quantity of a product: You need to enter the required quantity in order to have this discount and the quantity of free items. In Choose when the discount should be applied section, there are various options depending what condition you select: Manually enter a discount code: You need to enter a discount code. 66 Chapter 15. Discounts
71 When a specific product is added: You need to enter the unique ID of the required product. When an order reach a specific amount: You need to enter the minimum amount. When a product is added a number of times: You need to enter the quantity (or minimum and maximum quantity if you check Specify an interval checkbox), and the unique IDs of the products if you check Triggered only when the quantity is reached on a product in particular.. When cart only contains some specified products: You need to enter the unique IDs of the required products. 67
72 68 Chapter 15. Discounts

73 CHAPTER 16 Localization Snipcart allows us to override the default texts of Snipcart via JavaScript. You can do this easily in CMSnipcart without touching any JavaScript code. Click Localization menu item on the left menu of CMSnipcart, you can enter your custom text for every Snipcart language text. Only the text which has override version is used, so you can leave the fields of the texts you don t want to override empty. 69
74 70 Chapter 16. Localization
. You can see the list of installed languages on your site.")

75 CHAPTER 17 Translation CMSnipcart only comes with English by default however you can always translate CMSnipcart to other languages Installation Before translating CMSnipcart to another language, you need to know install that new language. In your Joomla! back-end, you go to Extensions -> Language(s). You can see the list of installed languages on your site. Click Install Language button on the toolbar to install a new language. Search for the language you want to install, select it in the list and click Install button. After installing new language, go back to the installed language list, you can see your new language in the list. 71

76 You need to remember the language tag of your new language. In the above screenshot, French language package is installed, and fr-fr is the language tag of French Preparation You can use your favorite FTP software or file managers available in your hosting control panel to navigate to <Joomla! root folder>/components/com_cmsnipcart/language/ folder. In this folder you can see the folder en-gb, this is where the language files of English are stored. In this language folder, you create a new folder for your new language, the name of the folder is the language tag. Follow the above example, you create a new folder fr-fr. Go to en-gb folder, copy en-gb.com_cmsnipcart.ini file in this folder to the new language folder that you just create ( fr-fr as in the example). In the new language folder folder, rename en-gb.com_cmsnipcart.ini to xx-yy.com_cmsnipcart.ini, xx-yy is the language tag of your new language, eg fr-fr Translate Open xx-yy.com_cmsnipcart.ini with a text editor and translate the English strings in this file to your new language. Important note: Joomla! language INI files must be saved as UTF-8 without the Byte Order Mark (BOM). For more information on Byte Order Mark see The above instruction is for translating the front-end of CMSnipcart component. To translate the back-end and other extensions, you need to repeat the above steps for the following folders: CMSnipcart component s back-end: <Joomla! root folder>/administrator/components/com_cmsnipcart/language/ CMSnipcart system plugin: <Joomla! root folder>/plugins/system/cmsnipcart/language/ Products module: <Joomla! root folder>/modules/mod_cmsnipcart_products/language/ Profile module: <Joomla! root folder>/modules/mod_cmsnipcart_profile/language/ Shopping cart module: <Joomla! root folder>/modules/mod_cmsnipcart_cart/language/ 72 Chapter 17. Translation
CM Live Deal Documentation
 CM Live Deal Documentation Release 1.3.0-beta CMExtension January 27, 2015 Contents 1 Overview 3 1.1 Technical Requirements......................................... 3 1.2 Features..................................................
CM Deal Aggregator Documentation
 CM Deal Aggregator Documentation Release 1.3.0 CMExtension July 28, 2015 Contents 1 Overview 3 1.1 Technical Requirements......................................... 3 1.2 Features..................................................
CM Live Deal Documentation
 CM Live Deal Documentation Release 1.8.0-beta CMExtension August 14, 2015 Contents 1 Overview 3 1.1 Technical Requirements......................................... 3 1.2 Features..................................................
CM Live Deal Documentation
 CM Live Deal Documentation Release 1.5.0-beta CMExtension April 12, 2015 Contents 1 Overview 3 1.1 Technical Requirements......................................... 3 1.2 Features..................................................
CM Live Deal Documentation
 CM Live Deal Documentation Release 1.9.0-stable CMExtension November 16, 2015 Contents 1 Overview 3 1.1 Technical Requirements......................................... 3 1.2 Features..................................................
CM Coupon Listing Documentation
 CM Coupon Listing Documentation Release 2.1.0 CMExtension March 03, 2015 Contents 1 Overview 3 1.1 License.................................................. 3 1.2 Technical Requirements.........................................
All About Catalog. Contents. West Virginia University Information Technology Services. ecommerce End User Advanced Guide
 Contents All About Catalog Browse...2 Add a Product...5 Basic Info...5 Display Options...6 Taxes & Shipping...6 Inventory Control...7 Descriptions...8 Left Side Menu...9 Product Details...9 Images and
CM Mega Menu Documentation
 CM Mega Menu Documentation Release 1.0.0 CMExtension May 26, 2016 Contents 1 Overview 3 1.1 Technical Requirements......................................... 3 2 Installation 5 2.1 Upgrading................................................
How to Add Product In Your Store
 How to Add Product In Your Store Adding a simple product Adding a Simple product is similar to writing a post in WordPress. 1. Go to WooCommerce > Products > Add Product. You then have a familiar interface
WooCommerce User Manual By Design N Buy
 By Design N Buy Introduction The world's favorite ecommerce solution that gives you completes control to sell anything. WooCommerce is built to integrate seamlessly with WordPress, which is the world's
PHPBasket 4 Administrator Documentation
 PHPBasket 4 Please ensure you have the latest version of this document from http://www.phpbasket.com Contents CONTENTS 2 REQUIREMENTS 3 INSTALLATION 4 PREPARATION 4 UPLOAD 4 INSTALLATION 4 ADMINISTRATOR
Product Sales Report Pro v2.1 User's Manual
 Product Sales Report Pro v2.1 User's Manual Thank you for purchasing the Product Sales Report plugin. This manual will guide you through installing and using the plugin. Installation 1. Login to your WordPress
Updated PDF Support Manual:
 Version 2.7.0 Table of Contents Installing DT Register... 4 Component Installation... 4 Install the Upcoming Events Module...4 Joom!Fish Integration...5 Configuring DT Register...6 General... 6 Display...7
Getting Started Guide. Prepared by-fatbit Technologies
 Getting Started Guide Prepared by-fatbit Technologies 1 Contents 1. Manage Settings... 3 1.1. General... 4 1.2. Local... 6 1.3. SEO... 7 1.4. Option... 8 1.5. Live Chat... 19 1.6. Third Part API s... 20
Your Cart User Manual v3.6
 Your Cart User Manual v3.6 2 Your Cart User Manual v3.6 Table of Contents Foreword 0 7 Part I Getting Started Overview 11 Part II Categories & Products 1 Manage Categories... Overview 11 Add a New... Category
AceShop Quick Guide. AceShop is the integration of two of the most popular open source projects in the world: OpenCart and Joomla!
 AceShop Quick Guide 1.1 What is AceShop? AceShop is a full-featured e-commerce component for Joomla with an easy to use, search engine friendly, visually appealing interface. AceShop is the integration
CMS Online Store Quick Start Guide. with Joomla, j2store
 CMS Online Store Quick Start Guide with Joomla, j2store Configuring Joomla P a g e 1 Table of Contents Introduction... 2 Installing Software... 2 Configuring Joomla... 2 Administrator login... 2 Installing
SitelokTM. Stripe Plugin V1.5
 SitelokTM Stripe Plugin V1.5 Sitelok Stripe Plugin Manual Copyright 2015-2018 Vibralogix. All rights reserved. This document is provided by Vibralogix for informational purposes only to licensed users
Blue Form Builder extension for Magento 2
 Blue Form Builder extension for Magento 2 User Guide Version 1.0 Table of Contents I) Introduction......5 II) General Configurations....6 1) General Settings.....7 2) ReCaptcha... 8 III) Manage Forms......
Getting Started: Setting up Your ecommerce Site
 West Virginia University Information Technology Services ecommerce Getting Started Getting Started: Setting up Your ecommerce Site Table of Contents Introduction... 3 Access Your Site... 4 Logging In...
Pinnacle Cart User Manual v3.6.3
 Pinnacle Cart User Manual v3.6.3 2 Pinnacle Cart User Manual v3.6.3 Table of Contents Foreword 0 Part I Getting Started Overview 7 Part II Categories & Products 11 1 Manage... Categories Overview 11 Add
1. OpenCart 1.5 Home Browsing the store front Admin interface Catalog Categories
 1 1. OpenCart 1.5 Home............................................ 5 1.5.1 Browsing the store front.................................. 5 1.5.2 Admin interface......................................... 14
Cart32 Store Builder User Manual
 Cart32 Store Builder User Manual 1 Contents 1. Client and Sales Summaries... 3 2. Main Categories... 3 3. Store Builder Sub-Categories... 3 Categories... 4 Add a Category/Subcategory... 5 Edit a Category/Subcategory...
Dynamic Product Options extension for Magento2. User Guide
 Dynamic Product Options extension for Magento2 User Guide version 2.0 Website: http://www.itoris.com Page 1 Contents 1. Introduction... 4 2. Installation... 5 2.1. System Requirements... 5 2.2. Installation...
MAGENTO 2 GIFT CARD. (Version 1.0.4) USER GUIDE
 USER GUIDE") MAGENTO 2 GIFT CARD (Version 1.0.4) USER GUIDE Confidential Information Notice Copyright 2017. All Rights Reserved. Any unauthorized reproduction of this document is prohibited. This document and the information
MAGENTO 2 GIFT CARD (Version 1.0.4) USER GUIDE Confidential Information Notice Copyright 2017. All Rights Reserved. Any unauthorized reproduction of this document is prohibited. This document and the information
User Manual. Administrator s guide for mass managing VirtueMart products. using. VM Mass Update 1.0
 User Manual Administrator s guide for mass managing VirtueMart products using VM Mass Update 1.0 The ultimate product management solution for VirtueMart! Contents Product Overview... 3 Feature List...
Newsletter Popup v3.x Configuration for Magento 2
 Newsletter Popup v3.x Configuration for Magento 2 From Plumrocket Documentation Contents 1. Configuring Newsletter Popup 3.x Extension for Magento 2 2. Managing Newsletter Popups 3. Managing Newsletter
ReCPro TM User Manual Version 1.15
 Contents Web Module (recpro.net)... 2 Login... 2 Site Content... 3 Create a New Content Block... 4 Add / Edit Content Item... 5 Navigation Toolbar... 6 Other Site Tools... 7 Menu... 7 Media... 8 Documents...
General Settings General Settings Settings
 Contents General Settings... 3 Payment Methods... 31 Currency Management... 35 Sales Tax... 37 Commission Settings... 40 Affiliate Commission Settings... 43 Email Templates Management... 46 Subscription
Navigation Menu Pro Extension
 Navigation Menu Pro Extension User Guide https://www.magebees.com/magento-navigation-menu-proresponsive-mega-menu-accordion-menu-smart-expand-menu.html Navigation Menu Pro Extension By Support Ticket:
ONEFUSION INSTRUCTION MANUAL HELPING YOU MANAGE YOUR OWN SITE
 11/6/2013 ONEFUSION INSTRUCTION MANUAL HELPING YOU MANAGE YOUR OWN SITE Wordpress 2013 One Fusion Table of Contents Welcome and Login... 1 Dashboard... 2 Dashboard Menu... 4 Toolbar... 6 Pages... 7 Add
Learn how to login to Sitefinity and what possible errors you can get if you do not have proper permissions.
 USER GUIDE This guide is intended for users of all levels of expertise. The guide describes in detail Sitefinity user interface - from logging to completing a project. Use it to learn how to create pages
InstantSearch+ Documentation for WooCommerce
 InstantSearch+ Documentation for WooCommerce Contents Overview... 1 Top Menu... 2 Home...2 Pricing...2 Help & Support...2 Stores...2 Account...4 Dashboard Tabs... 5 Analytics...5 AutoComplete...9 Search
Frooition Implementation guide
 Frooition Implementation guide Version: 2.0 Updated: 14/12/2016 Contents Account Setup: 1. Software Checklist 2. Accessing the Frooition Software 3. Completing your Account Profile 4. Updating your Frooition
FedEx Office Print Online Corporate
 Quick Reference Guide DocStore Catalog Log in to FedEx Office Print Online Corporate 1. Open your browser and navigate to: https://printonline.fedex.com/nextgen/wu 2. Input User ID and Password and click
Table of Contents. Introduction Technical Support Getting Started Data Synchronization General Website Settings...
 E-Commerce Table of Contents Introduction... 1 Technical Support... 1 Introduction... 1 Getting Started... 2 Data Synchronization... 2 General Website Settings... 3 Customer Groups Settings... 4 New Accounts
To configure the extension please go to System Configuration Order Attributes in the admin panel.
 For more details see the Order Attributes extension page. Order Attributes Order Attributes extension allows you to collect additional order related information that may be important for shopping experience
Dynamic Product Options extension for Magento2. User Guide
 Dynamic Product Options extension for Magento2 User Guide version 1.0 Website: http://www.itoris.com Page 1 Contents 1. Introduction... 3 2. Installation... 3 2.1. System Requirements... 3 2.2. Installation...
2013, Active Commerce 1
 2013, Active Commerce 1 2013, Active Commerce 2 Active Commerce User Guide Terminology / Interface Login Adding Media to the Media Library Uploading an Item to the Media Library Editing the Media Meta
STORE CREDIT USER GUIDE
 support@magestore.com sales@magestore.com Phone: 084.4.8585.4587 STORE CREDIT USER GUIDE Version 1.0.0 Magento Compatibility: CE 2.0 Table of Contents 1. INTRODUCTION... 3 2. HOW TO USE (Frontend)... 5
MotoPress Restaurant Menu Plugin Documentation
 MotoPress Restaurant Menu Plugin Documentation Updated on January 11, 2017 Overview Addons Quick start guide Installation Create a menu item Create a menu category Add a menu tag Add ingredients Apply
Blue Form Builder extension for Magento2
 Blue Form Builder extension for Magento2 User Guide Version 1.0 Table of Contents I) Introduction.. 4 II) Installation 5 III) General Configurations...6 IV) Manage Forms.. 7 1) List of Forms 7 2) Add New
System powered by FATbit Technologies
 Manual for GROUPON Script: bitfat Deals USER MANUAL FOR GROUPON: bitfatdeals SYSTEM System powered by FATbit Technologies Table of contents 1. Introduction. 3 of 98 2. Front End System Interface. 4 of
FedEx Office Print Online Corporate
 FedEx Office Print Online Corporate Quick Reference Guide Upload and Print Log in to FedEx Office Print Online Corporate 1. FedEx Office Print Online Corporate is accessible to University Faculty and Staff
Setting up your TouchNet Marketplace ustore
 Setting up your TouchNet Marketplace ustore Topics Covered: Logging into TouchNet Accessing your store Email Messages Single Store Settings Store Template Settings Users Categories Products including Options
Design Gallery User Guide
 Design Gallery User Guide Table of Contents Placing an Order... 3 For Stock and Print on Demand Items... 4 For Customizable Items... 5 Advanced Location Search in Shopping... 7 Your Shopping Cart... 8
SAHARA KIDS1 RESPONSIVE MAGENTO THEME
 SAHARA KIDS1 RESPONSIVE MAGENTO THEME This document is organized as follows: Chater I. Install ma_sahara_kids1 template Chapter II. Features and elements of the template Chapter III. List of extensions
SAHARA GIFT1 RESPONSIVE MAGENTO THEME
 SAHARA GIFT1 RESPONSIVE MAGENTO THEME This document is organized as follows: Chater I. Install ma_sahara_gift1 template Chapter II. Features and elements of the template Chapter III. List of extensions
Users Manual. Payment Registration Software v User Manual. Revision Date: 5/20/2014 1
 Payment Registration Software v. 5.00 User Manual Revision Date: 5/20/2014 1 Table of Contents I. Introduction... 4 II. Smith Payment Registration Pro Module... 4 III. Prerequisites... 4 IV. Installing
FedEx Office Print Online Corporate
 Log in to FedEx Office Print Online Corporate 1. Open your browser and navigate to: https://printonline.fedex.com/nextgen/sprint_wl 2. Input User ID and Password and click Log in. 3. Click the From DocStore
Shop Manager Manual ConfigBox 2.5
 Shop Manager Manual ConfigBox 2.5 Table of Content 1 Introduction... 5 2 Installation... 6 2.1 How to check if ioncube Loader is installed... 6 2.1.1 What to do if ioncube Loader is not installed... 6
CMShortURL Documentation
 CMShortURL Documentation Release 1.0.0 CMExtension August 08, 2015 Contents 1 Overview 3 1.1 Technical Requirements......................................... 3 1.2 Features..................................................
Printed Documentation
 Printed Documentation Table of Contents Getting Started... 1 Technical Support... 1 Introduction... 1 Getting Started... 3 Payment Option:... 3 Data Synchronization... 4 General Website settings... 5
VALO Commerce. Beam Suntory User Guide
 VALO Commerce Beam Suntory User Guide Beam Suntory User Guide Access Your VALO Commerce Site through CONNECT Navigate to https://intlconnect.beamsuntory.com and click on the InnerWorkings tile to access
Episerver Commerce. User Guide
 Episerver Commerce User Guide Episerver Commerce User Guide update 16-1 Table of Contents 1 Table of contents Table of contents 1 Introduction 13 Features, licenses and releases 13 Copyright notice 14
ecommerce Documentation Powered by
 ecommerce Documentation Powered by Last Updated November 24 th 2015 Contents Introduction... 3 Products... 4 Add/Edit Products... 4 Product Details... 4 Product Categories... 5 Product Tags (optional)...
eshop Installation and Data Setup Guide for Microsoft Dynamics 365 Business Central
 eshop Installation and Data Setup Guide for Microsoft Dynamics 365 Business Central Table of Contents Installation Guide... 3 eshop Account Registration in Dynamics 365 Business Central:... 3 eshop Setup
InPost UK Limited OpenCart Integration Guide Version 1.0
 InPost UK Limited OpenCart Integration Guide Version 1.0 CONTENTS Purpose of Document... 4 Target Audience... 4 How to access... 4 Other Software Required... 4 Files to Be Uploaded... 5 vqmod... 5 Module...
Multi Vendor DropShipping - Configuration. Configuration. Back to User Guides (//creativeminds.helpscoutdocs.com/category/1092- dropship-m1)
") / Multi Vendor DropShipping - Configuration Configuration Back to User Guides (//creativeminds.helpscoutdocs.com/category/1092- dropship-m1) At the Admin Panel you can access the main configuration screen
/ Multi Vendor DropShipping - Configuration Configuration Back to User Guides (//creativeminds.helpscoutdocs.com/category/1092- dropship-m1) At the Admin Panel you can access the main configuration screen
Fyndiq Magento Extension
 Fyndiq Magento Extension User guide. Version 3.0 Introduction 2 Fyndiq Merchant Support 2 Prerequisites 2 Seller account 3 Create the account 3 Your company 4 Contact information 4 Your webshop on Fyndiq
Global Access. User Guide. March Copyright 2015 UPS
 Global Access User Guide March 2015 Copyright 2015 UPS Table of Contents Introduction... 4 1.1 Purpose of this User Guide... 4 1.2 Global Access Platform... 4 1.3 Account Management Dashboard... 5 1.4
SAHARA BIKE1 RESPONSIVE MAGENTO THEME
 SAHARA BIKE1 RESPONSIVE MAGENTO THEME This document is organized as follows: Chater I. Install ma_sahara_bike1 template Chapter II. Features and elements of the template Chapter III. List of extensions
Administrative Training Mura CMS Version 5.6
 Administrative Training Mura CMS Version 5.6 Published: March 9, 2012 Table of Contents Mura CMS Overview! 6 Dashboard!... 6 Site Manager!... 6 Drafts!... 6 Components!... 6 Categories!... 6 Content Collections:
User manual. Release Notes DYNAMICWEB 7.1. Internal version number: Version: English
 User manual Release Notes DYNAMICWEB 7.1 Internal version number: 19.1.0.0 Version: 1.0 2010.05.17 English LEGAL INFORMATION Copyright 2010 Dynamicweb Software A/S (Ltd). All rights reserved. Alteration
Overview NOTE: Listing Overview. User Profile. Language Selection. Asset(s) View. Asset(s) Details. Editing Mode
 View. Asset(s) Details. Editing Mode") Overview Listing Overview User Profile Language Selection Asset(s) View Asset(s) Details Editing Mode NOTE: Some functions may not be available to all users depending on permissions granted. Some of the
Overview Listing Overview User Profile Language Selection Asset(s) View Asset(s) Details Editing Mode NOTE: Some functions may not be available to all users depending on permissions granted. Some of the
Sliding PayPal Shopping Cart 2 DMXzone
 Table of contents Table of contents... 1 About Sliding PayPal Shopping Cart 2... 2 Features in Detail... 3 The Basics: Use Sliding PayPal Shopping Cart 2 on your Page... 21 Advanced: Different Options
VolunteerMatters Wordpress Web Platform estore Admin Guide. Version 1.1
 VolunteerMatters Wordpress Web Platform estore Admin Guide Version 1.1 VolunteerMatters Wordpress Web: estore Admin Guide This VolunteerMatters Wordpress Web Platform administrative guide is broken up
Vantiv ecommerce for Magento 1 User Guide. Version 1.0.7
 Vantiv ecommerce for Magento 1 User Guide Version 1.0.7 Vantiv ecommerce for Magento 1... 1 User Guide... 1 1. Project... 3 2. Onboarding... 3 3. Installation... 3 4. Configuration... 5 5. Nuances for
v. 4.3.x Simbirsk Technologies Ltd.
 v. 4.3.x Reference Guide I CS-Cart Reference Guide Table of Contents 1. Administration Panel...1 Environment 2. Dashboard...7 3. Orders...9 3.1. View... orders 9 3.2. Sales... reports 12 3.3. Shipments...
Magento Enterprise Edition. User Guide. Part IV: Customers Sales & Orders Payments Shipping Taxes. Version
 Magento Enterprise Edition User Guide Part IV: Customers Sales & Orders Payments Shipping Taxes Version 1.14.2 Contents Customers 1 Chapter 1: Customer Accounts 3 Customer Account Configuration 4 Customer
Store Pickup Magento2 USER MANUAL MAGEDELIGHT.COM E:
 Store Pickup Magento2 USER MANUAL MAGEDELIGHT.COM E: SUPPORT@MAGEDELIGHT.COM License Key After successfully installing the Store Pickup extension on your Magento store, First of all you required to configure
Version 14 Supplemental Manual
 Version 14 Supplemental Manual This is a reference to the features that will be released from July 1, 2013 through July 1, 2014. Click the name of the feature to jump to that section. New Features: Version
Important Notice. Important Notice
 Important Notice Varien reserves the right to make corrections, modifications, enhancements, improvements, and other changes to its products and services at any time and to discontinue any product or service
A Guide to Using WordPress + RAVEN5. v 1.4 Updated May 25, 2018
 + v 1.4 Updated May 25, 2018 Table of Contents 1. Introduction...................................................................................3 2. Logging In.....................................................................................4
VALO ecommerce User Guide. VALO Commerce
 VALO ecommerce User Guide VALO Commerce Table of Contents Introduction to VALO Commerce... 1 Using VALO Commerce... 1 Access Your Commerce Site... 2 Browse the Catalog... 4 Customize an Item... 6 Place
Shopping Basket and Order Requirements
 Page 1 of 41 Page 2 of 41 1. The user can browse the site and select the product items to be added to the Shopping basket. Use the Catalog link to search and add products to the shopping basket or click
BeetleEye Application User Documentation
 BeetleEye Application User Documentation BeetleEye User Documentation 1 Table of Contents Welcome to the BeetleEye Application... 6 Overview... 6 Navigation... 6 Access BeetleEye... 6 Update account information...
JSN Dona Portfolio User's Guide
 JSN Dona Portfolio User's Guide Getting Started Template Package Installation 1. Download the template installation package Log in JoomlaShine Customer Area to download the template package that you have
Business Edition Basic License User Guide
 Business Edition Basic License User Guide Table of Contents 1. Dashboard-----------------------------------------------------------------------------------------3 2. Catalog Search-----------------------------------------------------------------------------------4
SEO-Cart Documentation
 SEO-Cart Documentation Last Modified October 8th, 2013 Introduction SEO-Cart is a complete e-commerce internet solution for your business. Not only does SEO-Cart focus on the latest search engine optimization
User Guide. Product Design. Version 2.2.2
 User Guide Product Design Version 2.2.2 Table of Contents Bridge User Guide - Table of Contents 1 TABLE OF CONTENTS... 1 INTRODUCTION... 4 Guide... 4 PRODUCTS... 5 Creating a New Product... 5 Viewing and
Rakuten.com Merchant Manual
 Rakuten.com Merchant Manual 1 Table of Contents Signing into your Account..3-4 Manage Shipping Settings 5 Adding Header & Footer.6-9 List/Create a Product..10-17 o Create listing.11 o Create New Product...12
Requisitioner Training Manual
 Requisitioner Training Manual Larry McWilliams Procurement Department lmcwilli@kent.edu Revised December 2018 0 Introduction The purpose of this training guide is to familiarize the user with FlashCart,
Product Page PDF Magento 2 Extension
 Product Page PDF Magento 2 Extension User Manual This is the user manual of Magento 2 Product Page PDF v100.0.0 and was last updated on 26-11- 2017. To see what this extension can do, go to the Magento
USER MANUAL LANGUAGE TRANSLATOR TABLE OF CONTENTS. Version: 1.1.6
 USER MANUAL TABLE OF CONTENTS Introduction... 1 Benefits of Language Translator... 1 Installation... 2 Installation Steps... 2 Extension Activation... 3 Configuration... 4 FAQ... 16 General FAQs... 16
JSN UniForm User Manual. Introduction. A simple contact form created by JSN UniForm. JSN UniForm is a Joomla form extension which helps you create
 JSN UniForm User Manual Introduction A simple contact form created by JSN UniForm JSN UniForm is a Joomla form extension which helps you create forms quickly and easily - from normal forms to complex forms.
User Guide Product Design Version 1.7
 User Guide Product Design Version 1.7 1 INTRODUCTION 3 Guide 3 USING THE SYSTEM 4 Accessing the System 5 Logging In Using an Access Email 5 Normal Login 6 Resetting a Password 6 Logging Off 6 Home Page
About the Tutorial. Audience. Prerequisites. Copyright & Disclaimer. Magento
 About the Tutorial Magento is an open source E-commerce software, created by Varien Inc., which is useful for online business. It has a flexible modular architecture and is scalable with many control options
Getting Started with. InSpiredByYou.com COPYRIGHT STUDIOPLUS SOFTWARE, LLC ALL RIGHTS RESERVED
 Getting Started with InSpiredByYou.com COPYRIGHT 1998-2013 STUDIOPLUS SOFTWARE, LLC ALL RIGHTS RESERVED i Getting Started with InSpiredByYou Table of Contents Setting Up InSpiredByYou... 3 Set Up an InSpiredByYou
ONE STEP CHECKOUT. USER GUIDE for Magento 2.0. Version
 support@magestore.com sales@magestore.com +1-415-954-7137 ONE STEP CHECKOUT USER GUIDE for Magento 2.0 Version 1.0 One step checkout v1.0 User Guide for Magento 2.0 1 Table of Contents 1. INTRODUCTION
NOTE. Important Notice
 NOTE This document is subject to change without notice. Magento recommends that you check the Magento Go website to access the latest version, rather than printing this document. Important Notice Magento
6000+ products. customer orders. We convert raw nutritional data into HTML tables for faster loading and higher quality!
 NutriLoader Your Complete Ecommerce Solution YOUR WEBSITE 6000+ products customer orders to fullfilment NutriLoader Datafeed Product and order automation managed by you! 6000+ products loaded nightly into
Introduction. Logging In. https://portal.format.co.nz/login/trt
 Introduction Welcome to the Tidd Ross Todd On-line Ordering System. This site has been created with the intention to assist users with the following: placing orders viewing work in progress searching for
WEBSITE INSTRUCTIONS. Table of Contents
 WEBSITE INSTRUCTIONS Table of Contents 1. How to edit your website 2. Kigo Plugin 2.1. Initial Setup 2.2. Data sync 2.3. General 2.4. Property & Search Settings 2.5. Slideshow 2.6. Take me live 2.7. Advanced
Importing and Updating Product Data using Import Wizard
 Overview This document is an excerpt from the ProductCart User Guide. You can download the latest version of the ProductCart User Guide here. ProductCart allows you to quickly populate your product catalog
All-In-One-Designer SEO Handbook
 All-In-One-Designer SEO Handbook Introduction To increase the visibility of the e-store to potential buyers, there are some techniques that a website admin can implement through the admin panel to enhance
Quick Online Shop Documentation
 Quick Online Shop Documentation In the following tutorial, you will get a complete step by step guide of using Quick Online Shop WordPress theme for building an amazon affiliate store site. All steps have
Coupa Supplier Portal Admin and User Guide
 Coupa Supplier Portal Admin and User Guide Document Status: CSP Release v7.2. Valid until September 30, 2018. Copyright 2018 Coupa Software, Inc. All rights reserved. Coupa reserves the right to make changes
Walmart Marketplace Integration with Magento Version: 1.0
 User Guide for Walmart Marketplace Integration with Magento Version: 1.0 OVERVIEW Walmart Integration, helps to integrate your Magento store with Walmart by establishing a synchronization of products,
Improved Layered Navigation for Magento 2
 Last update: magento_2:improved_layered_navigation https://amasty.com/docs/doku.php?id=magento_2:improved_layered_navigation 2018/01/23 09:14 For more details see the Improved Layered Navigation extension