User Guide. Version
|
|
|
- Hope King
- 5 years ago
- Views:
Transcription

1 User Guide Version StormPro Max User Guide Page 1 of 69 5/10/2008
2 Table of Contents 1. Overview Definition of StormPro Max Terms Accessing StormPro Max Navigating StormPro Max Overview History Trail Expanding/Collapsing Window Panes Mouse-over Quick Links Lists Help Icons Export List to Excel Main Menu Sites Overview List Sites Search Sites: Add Sites View and Modify Site Detail Permits Overview List Permits Search Permits: Add Permits View and Modify Permit Detail Inspections Overview List Inspections Search Inspections Add Inspections View and Modify Inspection Details View and Modify Map View and Modify Inspection Items Advanced Sharing Tools Inspection Profiles Manage Lists Template Documents Contacts Authorizations Vendors User Type Customers Accounts My Account StormPro Max User Guide Page 2 of 69 5/10/2008
3 10.2 Users Contact StormPro Max Reports Overview Report Corrective Actions Report Uncorrected Items Report Missing Pictures Report StormPro Max User Guide Page 3 of 69 5/10/2008
4 1. Overview StormPro Max is storm water management software designed to provide Development, Construction, and Design Professionals an easy and cost-effective method for tracking National Pollutant Discharge Elimination System (NPDES) permits and their requirements. StormPro Max is a web-based software application that requires an active internet connection to access. There is no additional software to install or download on your personal computer for this web-based version to work. There is also a field version of StormPro Max available that works in conjunction with the web-based. The field version requires software installation directly on your personal computer. The field version provides the same functionality as the web-based version without the need for an internet connection. Although the user is not accessing the primary database in real-time, it provides the user the ability to synch-up the offline work with the online StormPro Max database as soon as an internet connection is available. 1.1 Definition of StormPro Max Terms Customer Land developer that owns or maintains the land being tracked as a Site in StormPro Max. Client Primary StormPro Max account holder responsible for creating the Sites in the system. The client could be the Customer or a third party hired by the Customer such as a professional Inspection company. User Any authorized user on the StormPro Max user account. Each account will have at least one Account Administrator User. The Administrator can add or remove additional users to the account. Users can be given various roles and responsibilities to permit or prohibit specific screen and functionality access. Site Physical piece of land owned or maintained by a Customer. Permit Any government permit issued for a Site. There can be multiple Permits for one Site. Inspection An inspection record for a Permit associated with a Site. There can be multiple Inspections for one Permit. Inspections are typically entered by an Inspection company hired by the Customer. Inspector Performs the physical inspection of the site and enters the inspection details into StormPro Max. Responsible Authority The user authorized by the Customer to approve inspections and any corrective action associated with the inspection. Corrective Action Physical work assigned or authorized in order to fix a failed inspection item on a Site. Agency Permit issuing agency. Vendor Third-party company hired to perform corrective actions. StormPro Max User Guide Page 4 of 69 5/10/2008

5 2. Accessing StormPro Max Your StormPro Max online account is protected by enterprise security software. Once your StormPro Max account is established you will receive an with the User Name and Password for your primary account administrator. The account administrator will be responsible for setting up the additional users on your account. The login screen can be accessed via the following URL: Max.com/Login.aspx. StormPro Max User Guide Page 5 of 69 5/10/2008

6 3. Navigating StormPro Max 3.1 Overview StormPro Max utilizes the latest in programming technology to provide the user with the smoothest screen transition and quickest refresh rates possible for web-based program. There are several ways to navigate through the system. You can drill down from a Site to Permit to Inspection by using the hyperlinks on the various screens. You can also navigate around the system by using the main toolbar links at the very top of the screen. Once you choose a site, permit or inspection, the system recalls your choice so you can navigate back and forth. As you navigate into the hierarchy from sites down to inspections, tabs will appear at the top of the screen which enables you to go back up or down the hierarchy. 3.2 History Trail StormPro Max displays the Site/Permit/Inspection hierarchy on the right side of the screen as the user navigates from the Site down to the Inspection level. StormPro Max also provides a set of mouse-over quick-links for each level. Quick-links available from the history trail: Site: Site Details List of Permits List of Inspections Add Permit Site List Permit: Permit Details List of Inspections Add Inspection Permit List Inspection: Inspection Detail Item List Inspection List StormPro Max User Guide Page 6 of 69 5/10/2008


7 3.3 Expanding/Collapsing Window Panes Any screens that contain sections separated by solid red headers can be collapsed or expanded by clicking on the header bars. Expanded: Collapsed: 3.4 Mouse-over Quick Links StormPro Max offers a series of quick link menus which are accessed by rolling your mouse over any record in a list. You will get a slightly different set of links in your menu depending on which list you are viewing. In the example below, from the Site List you are able to quick link to view the site details, the list of permits for this site, the list of inspections for this site, or add a new permit to this site. StormPro Max User Guide Page 7 of 69 5/10/2008

.")
8 3.5 Lists The grid that displays the list is used throughout the StormPro Max system. For large lists the user can click the numbered links at the bottom right to move to the additional list pages. StormPro Max allows the user to format and customize lists to their preference by simple clicking or drag-and-drop functionality. To select a record from the list, click anywhere on the row. As you move the mouse around, the cursor will change into a hand icon over any part of the page that you can click on Sorting StormPro Max allows the user to sort any list by clicking on any of the column headers. Clicking the header once sorts the list in ascending order (ie. A-Z or 1-10). Clicking the header again will sort the list in descending order (ie. Z-A or 10-1). The sorted column will display an UP or DOWN arrow next to the column header name (see example below). StormPro Max User Guide Page 8 of 69 5/10/2008


9 3.5.2 Grouping StormPro Max allows the user to group any list by any of the column headers. In the example below the User wants to group the list by Address, so he drags the Address header to the area where it says Drag a column header here to group by that column. This can be undone by dragging column header back to the position it came from. Ungrouped List: Grouped List: StormPro Max User Guide Page 9 of 69 5/10/2008

10 3.6 Help Icons Throughout the application there are small help icons that can be clicked to open a small dialogue box with a short description and/or explanation of the associated parameter. StormPro Max User Guide Page 10 of 69 5/10/2008


11 3.7 Export List to Excel StormPro Max provides the user the ability to export and save any list to Microsoft Excel format by clicking the Excel icon in the upper right hand corner. Sample of the Excel output: StormPro Max User Guide Page 11 of 69 5/10/2008

12 4. Main Menu The StormPro Max main menu is the first screen displayed when the user logs into the account. It displays the User Name and a link to the login screen in case you are accidentally logged in as the wrong user. It also acts a dashboard for the user that is logged into the account. The dashboard contains expandable/collapsible lists of the New Inspections, Inspections Due, New Corrective Actions, Corrective Actions Due, and Open Authorizations that are associated with the user logged into the account. The user can expand and view any of the lists. The user can also click any of the list items to view the associated details. StormPro Max User Guide Page 12 of 69 5/10/2008

13 5. Sites 5.1 Overview A Site is any physical location that the user would like to track one or more permits for. The user has the ability to view a list of sites associated to the user account, perform a detailed search for sites, or add new sites to the account. 5.2 List Sites The site list screen shows every site that the user is assigned to. The site list will be limited to 25 records. To view additional records the user can click the page numbers at the bottom right of the list. Basic Search: To perform a basic search for Sites, you can enter all or part of the Site Name you are looking for into the text box and click the Basic Search button next to it. (ie. to find the Bay Harbour site in the example above, you could search by bay, harbour, ba, har, etc.). Off-page links: Add New Site Takes the user to the Add Site page to enter the new site details. Refine Search - Takes the user to the Advanced Site Search page where additional search criteria are provided to narrow the search results. StormPro Max User Guide Page 13 of 69 5/10/2008
14 5.3 Search Sites: Sites can be searched by entering any combination of the following fields listed on the screen below. When the User selects a State from the dropdown menu, the County field is automatically populated with a list of counties to choose from in that State. The Archived Sites checkbox allows the User to also retrieve any archived records in the query results. Off-page links: List All Sites Takes the user back to the Site List page with all Sites displayed. StormPro Max User Guide Page 14 of 69 5/10/2008

")
15 5.4 Add Sites To add a new site the user must complete the form in the following screen and click the Save button. When the User selects a State from the dropdown menu, the County field is automatically populated with a list of counties to choose from in that State. The Latitude and Longitude fields will change to accept any of the four formats (Deg/Min/Sec, Decimal Degrees, GPS Coordinates, Radians) depending on which radio button is selected. The Anticipated Start and End dates can be selected from the pop-up calendar. StormPro Max User Guide Page 15 of 69 5/10/2008


16 5.5 View and Modify Site Detail To view and modify the site details the user can access the Site Detail screen by clicking on any site in the list, or mouse-over any site in the list and click Site Details. StormPro Max User Guide Page 16 of 69 5/10/2008


17 Site Detail cont d: General section: The user can modify the Site Name and Site Area. Location section: The user can modify any of the site Address information including Latitude and Longitude. Project section: The user can modify the Anticipated Start and End dates by selecting from the pop-up calendar. StormPro Max User Guide Page 17 of 69 5/10/2008
18 Attachments section: The user can Add attachments by clicking the 'Add' button. A pop-up screen will appear so the user can enter the Title, Description, and browse to find the document to be uploaded. Once the document is uploaded, the file name will appear in the large text box to the left. To view any existing attachment, the user can click on the attachment name and either View, Edit, or Delete the attached file. Notes section: The user can Add notes by clicking the 'Add Note' button. A pop-up screen will appear so the user can enter the Subject and Note details. To view any existing Note, the user can click on the Note record and either View, Edit, or Delete the note record. When a note is added or modified the User Name and Date recorded with the record. User Access section: The site administrator user can grant access to other users on the account by selecting the User name and clicking the right arrow. This moves the user name from the 'User' box into the 'Access Granted' box. To deny access to a user, simply click the name in the 'Access Granted' box and click the left arrow. Users in the Access Granted box will have access to this Site based on their User Type. This section is visible only to Administrators. [Note: Multiple names can be selected by holding down the 'Ctrl' button while clicking the mouse.] StormPro Max User Guide Page 18 of 69 5/10/2008
19 Stormwater Stella, Online Certifications section: This allows the user to purchase online Storm Water Pollution Prevention training for their personnel. In the 'Site Certifications' sub-section the user can choose to include the site information in the certifications system and enter an optional Alternate Site name and Alternate Builder name. In the 'Invite Personnel for training' sub-section the user can purchase the training for someone by following the 'Direct Link' hyperlink to the 'Dynamic Digital Training' site where they will enter the trainee s address and other information, and purchase the training. StormWaterStella will send them an with instructions to access the training. If you want StormPro Max to automatically send invitation s for you, fill out the address and message fields and click 'Send'. Current Certifications Section: This sections display a list of all user who are currently certified for this site. To view this in report format click the 'Summary Report'. To view the certification detail, click the record or mouse-over and click 'View Certification'. StormPro Max User Guide Page 19 of 69 5/10/2008

20 6. Permits 6.1 Overview One or more permits can be associated to any existing site. The user has the ability to view a list of permits associated with a user account, perform a detailed search for permits, or add new permits to an existing site. 6.2 List Permits The permit list screen shows every permit that the user is assigned to, or every permit associated with the site the user was accessing previously. The permit list will be limited to 25 records. To view additional records the user can click the page numbers at the bottom right of the list. Basic Search: To perform a basic search for Permits, you can enter all or part of the Permit Name you are looking for into the text box and click the Basic Search button next to it. Off-page links: Add New Permit Takes the user to the Add Permit page to enter the new permit details. Refine Search - Takes the user to the Advanced Permit Search page where additional search criteria are provided to narrow the search results. StormPro Max User Guide Page 20 of 69 5/10/2008

21 6.3 Search Permits: Permits can be searched by entering any combination of the following fields listed on the screen below. When the User selects a State from the dropdown menu, the County field is automatically populated with a list of counties to choose from in that State. The Archived Permits checkbox allows the User to also retrieve any archived records in the query results. Off-page links: List All Permits Takes the user back to the Permit List page with all Permits displayed. StormPro Max User Guide Page 21 of 69 5/10/2008

22 6.4 Add Permits Permits can only be added to an existing Site. Therefore, the User must access the 'Add Permit' screen from an existing Site record, or the user will be provided the following quick-links to add a new site or select an existing site record: Main Menu, Site Search, Site List, Add New Site. To add a new permit the user must complete the form in the following screen and click the Save button. When the User selects a State from the dropdown menu, the County field is automatically populated with a list of counties to choose from in that State. The Filed Date and Expiration Date can be selected from the pop-up calendar. The Latitude and Longitude fields will change to accept any of the four formats (Deg/Min/Sec, Decimal Degrees, GPS Coordinates, Radians) depending on which radio button is selected. StormPro Max User Guide Page 22 of 69 5/10/2008

23 Off-page links: Copy Site Information Auto-populates the following fields with the data from the associated Site record: Description, Filed Date, Expiration Date, Area Disturbed, Latitude, and Longitude. 6.5 View and Modify Permit Detail To view and modify the permit details the user can access the Permit Detail screen by clicking on any permit in the list, or mouse-over any permit in the list and click Permit Details. StormPro Max User Guide Page 23 of 69 5/10/2008


24 Permit Detail cont d: StormPro Max User Guide Page 24 of 69 5/10/2008


25 Permit Detail (cont d): General Section: This section contains the basic information associated with the permit filed. The user can modify any of the permit details in this section. Location Section: This section identifies the geographical location of the site where this permit is associated. It has a text box for general driving directions, and a place to enter Longitude and Latitude coordinates in various formats. Attach Map File Section: This section allows the user to upload a map of the permit location. The user must use the Browse button to search for the file on their local computer, and then click the Upload button. The file must be in.jpg format. StormPro Max User Guide Page 25 of 69 5/10/2008
 in the site for which the permit is associated.")
26 Auto Purge Section: This section allows the user to set the number of days that attachment documents will be retained before they are deleted from the system. Lots Section: This section allows the user to identify the lots (or subsections) in the site for which the permit is associated. Lots can be used when entering inspections and corrective actions to communicate where problems are located. To add a new lot the user must enter the lot name, lot number, or any area label for this permit and click the Add button. To remove a lot from the list the user can click on the lot name and click Delete. Attachments Section: The user can Add attachments by clicking the 'Add' button. A pop-up screen will appear so the user can enter the Title, Description, and browse to find the document to be uploaded. Once the document is uploaded, the file name will appear in the large text box to the left. To view any existing attachment, the user can click on the attachment name and either View, Edit, or Delete the attached file. Contact Section: This section allows the user to associate contact names to the permit. To add a contact the can click the Add New button to bring up a pop-up screen where the user can select the contact person s name from the dropdown menu or click the Add New Contact to add the contact person (see Add New Contact section). The user can also select whether the contact is on the Distribution list, a Closed Contact, or a Responsible Authority for this permit. StormPro Max User Guide Page 26 of 69 5/10/2008
27 Notes Section: The user can Add notes by clicking the 'Add Note' button. A pop-up screen will appear so the user can enter the Subject and Note details. To view any existing Note, the user can click on the Note record and either View, Edit, or Delete the note record. When a note is added or modified the User Name and Date recorded with the record. Profile Assignment Section: This section allows the user to choose the Inspection profiles that can be used for this permit. The user can select the inspection profile from the dropdown menu and click Assign. (Inspection profiles are added by going to Tools Inspection Profiles Add New Profile.) Once the profile is assigned it will appear in the profile list. To view the profile details the user can mouse-over the record and click View Details. To remove a profile the user can mouse-over the record and click Remove Profile. Vendor Assignment Section: This section allows the user to choose approved Vendors for this permit. The user can select the vendor from the dropdown menu and click Assign. (Vendors are added by going to Tools Authorizations Add New Vendor.) Once the vendor is assigned it will appear in the vendor list. To view the vendor details the user can mouse-over the record and click View Service. To remove a vendor the user can mouse-over the record and click Remove Service. User Access Section: The user can grant access to this permit to other users by selecting the User name from the list on the left and clicking the right arrow. This moves the user name from the 'User' box into the 'Access Granted' box. To deny access to a user, simply click the name in the 'Access Granted' box and click the left arrow. Users in the Access Granted box will have access to this Site based on their User Type. This section is visible only to Administrators. [Note: Multiple names can be selected by holding down the 'Ctrl' button while clicking the mouse.] StormPro Max User Guide Page 27 of 69 5/10/2008

28 Notification Section: This section allows the user to select which items they wish to receive notifications for on this permit. For items with due dates, the user can select the number of days to delay the notification after the due date. 7. Inspections 7.1 Overview One or more inspections can be associated to any existing permit. The user has the ability to view a list of inspections associated with a user account, perform a detailed search for inspections, or add new inspections to an existing permit. 7.2 List Inspections The inspection list screen shows every inspection that the user is assigned to, or every inspection associated with the site and/or permit the user was accessing previously. The inspection list will be limited to 25 records. To view additional records the user can click the page numbers at the bottom right of the list. Inspection statuses are denoted by the basic color coding scheme seen below: Red inspection has at least one item that requires immediate corrective action. Yellow inspection has at least one item that requires corrective action. Blue inspection has at least one item with corrective action in progress. Green inspection has completed corrective actions. White inspection has all items in Passed status. Basic Search: To perform a basic search for Inspections, you can enter all or part of the Inspection Name you are looking for into the text box and click the Basic Search button next to it. StormPro Max User Guide Page 28 of 69 5/10/2008


29 Off-page links: Refine Search - Takes the user to the Advanced Inspection Search page where additional search criteria are provided to narrow the search results. 7.3 Search Inspections Inspections can be searched by entering any combination of the following fields listed on the screen below. When the User selects a State from the dropdown menu, the County field is automatically populated with a list of counties to choose from in that State. The Inspector name can be selected from the dropdown menu, or the user can type in all or part of the Inspector s name. The Date Completed range start date and end dates can be selected from the pop-up calendar. The Notes Contains field allows the user to search for any Inspection by searching for certain words in the notes section of the inspection. Off-page links: List All Inspections Takes the user back to the Inspection List page with all Inspections displayed. StormPro Max User Guide Page 29 of 69 5/10/2008

30 7.4 Add Inspections Inspections can only be added to an existing Permit. Therefore, the User must access the 'Add Inspection' screen from an existing Permit record, or the user will be provided the following quick-links to add a new permit or select an existing permit record: Main Menu, Permit Search, Permit List, Add New Permit. To add a new inspection the user must complete the form in the following screen and click the Save button. The Date Completed can be selected from the pop-up calendar. StormPro Max User Guide Page 30 of 69 5/10/2008

31 7.5 View and Modify Inspection Details To view the details for an inspection the user can mouse-over the record and select Inspection Details from the menu. General Information Section: This section shows the general information associated with the inspection. The user can modify any of the data on this screen, then click Save. The user can click Cancel to reverse any changes made in the current session. To delete the Inspection record the user can click Delete. StormPro Max User Guide Page 31 of 69 5/10/2008
32 Inspector Signature Section: This section allows the Inspector to electronically sign the inspection by clicking the Sign button. In order for this functionality to work properly, the user must have followed the electronic signature registration process with StormPro Max. Once the inspection has been signed, the signature will be displayed in this section along with the printed name, sign date, and inspector qualification. Responsible Authority Signature Section: This section allows the Responsible Authority to electronically sign the inspection by clicking the Sign button. In order for this functionality to work properly, the user must have followed the electronic signature registration process with StormPro Max. Once the inspection has been signed, the signature will be displayed in this section along with the printed name and sign date. Attachments Section: The user can Add attachments by clicking the 'Add' button. A pop-up screen will appear so the user can enter the Title, Description, and browse to find the document to be uploaded. Once the document is uploaded, the file name will appear in the large text box to the left. To view any existing attachment, the user can click on the attachment name and either View, Edit, or Delete the attached file. StormPro Max User Guide Page 32 of 69 5/10/2008

33 Notes Section: The user can Add notes by clicking the 'Add Note' button. A pop-up screen will appear so the user can enter the Subject and Note details. To view any existing Note, the user can click on the Note record and either View, Edit, or Delete the note record. When a note is added or modified the User Name and Date recorded with the record. 7.6 View and Modify Map To view the map associated with this permit, click 'View Map' to launch the StormProMax Map Application. This is a flash application that provides a convenient visual reference. The Map Application allows inspectors to show the location of various items on a detailed site map. Inspectors can also link items on the map to inspection details to show the location of any problems, or mark the map items as permanent so they will automatically show up on future inspections. StormPro Max User Guide Page 33 of 69 5/10/2008

34 7.6.1 Add Icon to Map The user can add any of the icons available in the Tool menu by simply dragging and dropping the icon on the section of the map desired. Once the icon is dropped on the map the following pop-up screen will appear to add the details for the icon. All of the date fields can be populated by using the pop-up calendar. The Link To field allows the user to link this icon to any item on the inspection. StormPro Max User Guide Page 34 of 69 5/10/2008

35 7.7 View and Modify Inspection Items To view the items for an inspection the user can either click on the record in the list or mouse-over the record and select Inspection Items from the menu. This screen shows all of the items associated with this inspection type, the items status, and notes associated with each item. StormPro Max User Guide Page 35 of 69 5/10/2008

36 7.7.1 Item Details To view the details for any of the inspection items in the list the user can click on the record or mouse-over the record and select Item Details from the menu. StormPro Max User Guide Page 36 of 69 5/10/2008
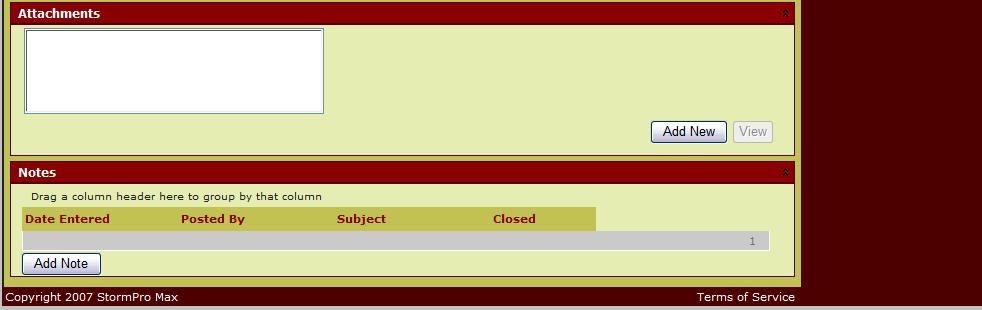
37 Item Details (cont d): Item Information Section: This section allows the user to set the status for this inspection item by clicking the radio button next to any of the statuses. The user can also add any notes associated with the status update. After selecting a status the user can either save and move to the next unanswered item in the inspection item list, save and continue to edit the current item, or cancel any actions taken place on the current item. This action is typically taken by the Inspector during or after an inspection of the associated site and permit. Attachments Section: The user can Add attachments by clicking the 'Add' button. A pop-up screen will appear so the user can enter the Title, Description, and browse to find the document to be uploaded. Once the document is uploaded, the file name will appear in the large text box to the left. To view any existing attachment, the user can click on the attachment name and either View, Edit, or Delete the attached file. StormPro Max User Guide Page 37 of 69 5/10/2008
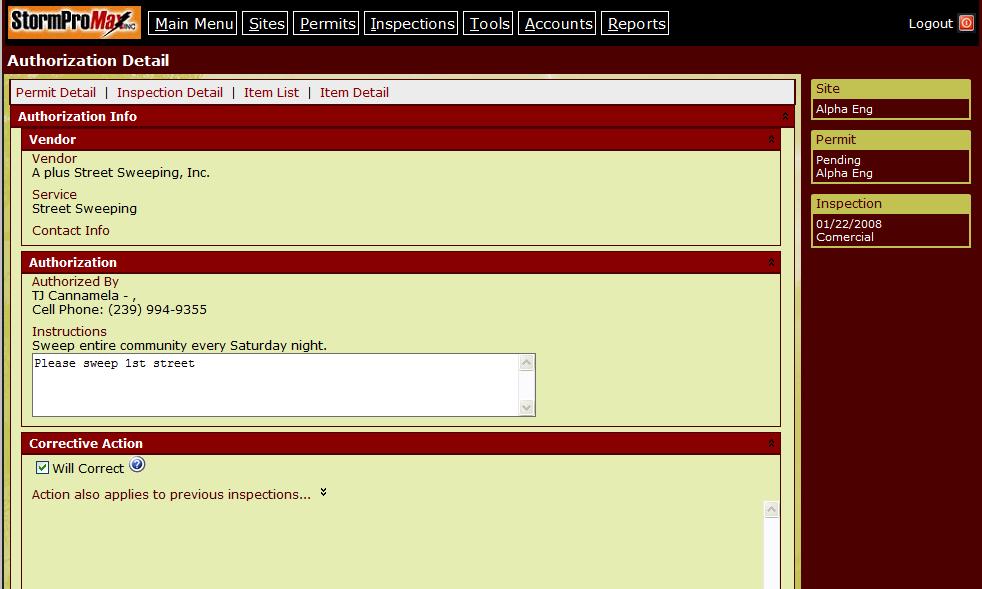
38 Notes Section: The user can Add notes by clicking the 'Add Note' button. A pop-up screen will appear so the user can enter the Subject and Note details. To view any existing Note, the user can click on the Note record and either View, Edit, or Delete the note record. When a note is added or modified the User Name and Date recorded with the record. Corrective Actions Section: This section allows the user to add an Action or Authorization for corrective action on an inspection item. Corrective actions are typically entered by the Customer in response to an inspection item requiring corrective action (typically the owner or developer of the Site). Actions are typically used when the Customer performs the corrective action themselves. Authorizations are typically issued when a third party company or Best Management Practice company (BMP) is being hired to perform the corrective action. When a user enters an authorization they can have an with a purchase order automatically sent to the third party company. StormPro Max User Guide Page 38 of 69 5/10/2008
39 Add or Edit Action: The user can select the date and time the corrective action was requested. They can also enter a description of the action taken. Once the action is corrected the user can check the Corrected box. If this action applies to any previous inspections the user can select all the inspection dates that apply. The user can also select all of the lots that are impacted by this corrective action. StormPro Max User Guide Page 39 of 69 5/10/2008


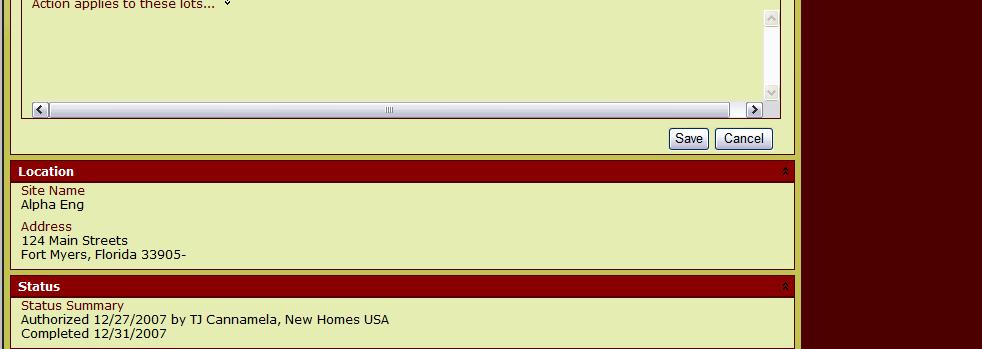
40 Authorize Work: To authorize work for the corrective action the user needs to select a Vendor from the dropdown list and provide instructions in the text box. When the Vendor is selected from the list, the Vendor Contact information will be displayed below the instructions. If this authorization will correct the inspection item, they can check the Will Correct box. If the user wants to include the attachments from the inspection item, they can check the Include Attachments box. If this corrective action applies to any previous inspections the user can select all the inspection dates that apply. The user can also select all of the lots that are impacted by this corrective action. History Section: This section shows the history of all the modifications made to this inspection item. It logs the Date, Inspector s Name, Item Status, and any Notes added. For each record there can be icons displayed in the far right column that tell the user if there are any Actions or Attachments associated with the item at that point in time. Lots Affected Section: This section allows the user to select which Lots are impacted by this inspection item. The user can select one or many records in the Lots box and click the right arrow to move them to the Affected box. [Note: Multiple records can be selected by holding down the 'Ctrl' button while clicking the mouse.] StormPro Max User Guide Page 40 of 69 5/10/2008

41 8. Advanced Sharing The Advance Sharing section appears on the Site, Permit, Profile, and Vendor Detail screens. The Advanced Sharing functionality allows your Account Administrator to provide existing StormPro Max users with access to the selected record. To grant someone access the administrator needs to enter the person's registered StormPro Max address into the ' Address' box. The user can also type an optional message to the invitee if they choose. To assign the invitee s level of access the admin user must select a role from the 'Access Level' drop-down. This dropdown list corresponds to the existing User Types in the account. The admin can also assign individual permissions by clicking the 'Advanced, choose individual permissions' link. This provides a list of individual permissions that can be selected by checking the box next to the item. The invitee will get an from StormPro Max, and if they accept invitation they will then have access. StormPro Max User Guide Page 41 of 69 5/10/2008
42 9. Tools The StormPro Max Tools module allows the user to maintain the underlying metadata that is specific to only their account. The software is template driven which allows the user to customize things such as dropdown lists and inspection forms. Any changes made in this module are made available throughout the entire user account. It is recommended that this module only be accessed and maintained by an appointed account administrator. 9.1 Inspection Profiles Inspections forms or Profiles can vary by region, company, or application, therefore StormPro Max provides the user the ability to create custom inspection profiles to be used as default profiles within their own user account. An inspection profile is made up of a list of items which can be anything the user wishes to track status on. The screen below lists all active inspection profiles. If the user checks the Archived Profiles box, then the list will also include any inactive profiles that have been archived. Off-page links: Add New Profile Takes the user to the Add Profile screen Add New Inspection Profile The user has the ability to add a new inspection profile by clicking the Add New Profile button from the profile list. To add a new profile the user must enter a unique Profile Name on the following screen and click the Save button. Once the user saves the new profile, they will then be able to access the new profile from the profile list and add items to the profile. StormPro Max User Guide Page 42 of 69 5/10/2008


43 Off-page links: Profile List Takes the user back to the Profile List screen View and Modify Inspection Profile Detail The user has the ability to view and modify inspection profiles by clicking on the profile from the list and accessing the Profile Detail screen. From the Profile Detail screen, the user has the ability to modify the Profile Name and the Default Profile status. The user can Delete the entire profile, or archive the entire profile so that it does not appear in the active lists. The user also has the ability to Add, Modify or Inactivate items. If the user checks the Show Inactive box, then all active and inactive items will appear in the list. Off-page links: Profile List Takes the user back to the Profile List screen. Add New Profile Takes the user to the Add Profile screen. StormPro Max User Guide Page 43 of 69 5/10/2008

44 9.1.3 Add Inspection Profile Item The user can add new profile items by clicking the Add Item button and accessing the following screen. The user can enter whatever text they wish to track status on into the Item Text box. The user would then select the appropriate Status options from the dropdown. The user can also check the Require Pictures box if they wish to require the user to upload a digital picture for this inspection item every time Modify Inspection Profile Item To modify an existing inspection profile item, the user can simply click on one of the items in the item list, or mouse-over the item and select Edit Item from the menu. From this mouse-over menu the user can also move the item up or down in the list, or inactivate the item, so that it does not appear in the active list. Inspection profile items cannot be deleted, only inactivated. 9.2 Manage Lists StormPro Max allows the user to customize the data that is displayed in the dropdown lists used throughout the application for their account. The user can maintain the Agency, Inspection Types, and Project Types lists Agency Lists The following screen allows the user to view all of the active Agencies within the user account. From this screen the user can Add, Modify or Delete Agencies. StormPro Max User Guide Page 44 of 69 5/10/2008


45 Add New Agency To add a new agency record the user must click on the Add New Agency link from the list screen, and then enter the Agency Name into the Add Agency screen and click Save. Modify Agency Name To modify an existing Agency Name, the user can simply click on one of the names in the list, or mouse-over the item and select Edit from the menu. From this mouse-over menu the user can also Delete an Agency Name from the list Inspection Types List The following screen allows the user to view all of the active Inspection Types within the user account. From this screen the user can Add, Modify or Delete Inspection Types. StormPro Max User Guide Page 45 of 69 5/10/2008

46 Add New Inspection Type To add a new Inspection type record the user must click on the Add New Inspection Type link from the list screen, and then enter the Inspection Type into the Add Inspection Type screen and click Save. Modify Inspection Type Name To modify an existing Inspection Type, the user can simply click on one of the names in the list, or mouse-over the item and select Edit from the menu. From this mouse-over menu the user can also Delete an Inspection Type from the list Project Types List The following screen allows the user to view all of the active Project Types within the user account. From this screen the user can Add, Modify or Delete Project Types. StormPro Max User Guide Page 46 of 69 5/10/2008

47 Add New Project Type To add a new project type record the user must click on the Add New Project Type link from the list screen, and then enter the Project Type into the Add Project Type screen and click Save. Modify Project Type Name To modify an existing Project Type, the user can simply click on one of the names in the list, or mouse-over the item and select Edit from the menu. From this mouse-over menu the user can also Delete a Project Type from the list. 9.3 Template Documents StormPro Max allows the user to upload template documents in downloadable formats such as WORD, EXCEL, and PDF. Add Template Document To add a new template document the user must click on the Add Template Doc link from the list screen. The user is required to enter the Title and Description of the new template, and then browse to the location of the document to be uploaded, select the document, then click Save. StormPro Max User Guide Page 47 of 69 5/10/2008


48 View Template Document If the user wish to view the document attached to the Template Document record, then can simply click on the list item, or mouse-over the list item and select View from the menu. This will allow the user to open or save the document. Modify Template Document To modify an existing template document the user must click on the Add Template Doc link from the list screen. The user is required to enter the Title and Description of the new template, and then browse to the location of the document to be uploaded, select the document, then click Save. StormPro Max User Guide Page 48 of 69 5/10/2008

49 Delete Template Document To delete an existing template document the user can mouse-over the list item and select Delete from the menu. 9.4 Contacts The user has the ability to maintain a list of contacts that can be accessed in various dropdown menus throughout the user s StormPro Max account. The user can store the method of contact with the appropriate contact information List Contacts The Contact List screen displays a list of all contacts associated with the user s account. The user can view the contact details by clicking on the list item or mouse-over the item and select Contact Details from the menu. Off-page links: List All Contacts Refreshes the list to display all records available. Add New Contact Takes the user to the Add Contact screen Search Contacts The user can perform a basic search by typing all or part of the Contact Name into the text box and clicking the Basic Search button next to it. The user can also perform a detailed search from the following screen by clicking the Refine Search or New Advanced Search links. StormPro Max User Guide Page 49 of 69 5/10/2008


50 Off-page links: List All Contacts Takes the user back to the Contact List screen Add New Contacts To add a new contact record the user must click on the Add New Contact link from the list screen. In the Add Contact screen the user must enter the First Name, Last Name, Title and Organization, select the Address Book type from the dropdown list, and click Save. Once the user saves the new contact, they will then be able to access the new contact from the contact list and modify the record to add the method of contact and contact information. Off-page links: Contacts List Takes the user back to the Contact List screen StormPro Max User Guide Page 50 of 69 5/10/2008

51 9.4.4 Modify Contact To modify a contact, the user can simply click on one of the names in the list, or mouseover the item and select Edit from the menu. From the Contact Detail screen the user can Modify or Delete the contact record. The user can modify any of the data in the General Information section (First Name, Last Name, Title, and Organization). The user can also add, modify or delete contact methods and contact information. Add Contact Method: To add a new contact method the user must select a contact method type from the dropdown list, then enter the appropriate contact information (i.e phone number, instant messenger name, address) and click Save. Modify Contact Method: To modify a contact method the user can click on the method from the list or mouse-over the item and select Edit from the menu. Delete Contact Method: To delete a contact method the user must mouse-over the item and select Delete from the menu. Closed: This prevents anyone outside your account to view the contact information. Off-page links: Contact List Takes the user back to the Contact List screen. Add New Contact Takes the user to the Add Contact screen. StormPro Max User Guide Page 51 of 69 5/10/2008
52 9.5 Authorizations An authorization is issued for any approved work, typically for corrective action on a failed inspection item. StormPro Max allows the user to view all authorizations issued for the entire user account. The user can view a list of all authorizations or perform a detailed search for a specific authorization Search Authorizations The user can perform a basic search by typing all or part of the authorization detail into the text box on the list screen and clicking the Basic Search button next to it. The user can also perform a detailed search from the following screen by clicking the Refine Search or New Advanced Search links. The user has the ability to see any combination of Authorized, Scheduled, and Completed authorizations. The user can filter each of those categories by selecting date ranges for any or all of the 3 categories. The user can also filter the results by selecting a specific Service type from the dropdown list. StormPro Max User Guide Page 52 of 69 5/10/2008

53 9.5.2 List Authorizations The Authorization List screen displays a list of all authorizations associated with the user s account. The user can view the authorization details by clicking on the list item or mouse-over the item and select Authorization Details from the menu. StormPro Max User Guide Page 53 of 69 5/10/2008
54 Authorization Detail: StormPro Max User Guide Page 54 of 69 5/10/2008

55 9.6 Vendors A Vendor is any third party contractor or BMP employed by the Customer to perform authorized corrective actions. Once the Vendor is added to the user s account they can be selected from the dropdown list in the corrective action Authorization screen List Vendors The Vendor List screen displays a list of all vendors associated with the user s account. The user can view the vendor details by clicking on the list item or mouse-over the item and select Vendor Details from the menu. StormPro Max User Guide Page 55 of 69 5/10/2008
56 9.6.2 Add New Vendor To add a new vendor record the user must click on the Add New Vendor link from the list screen. In the Add Vendor screen the user must enter the Vendor Name, Service Name, Addresses, Label, Contact Information, and click Save. 9.7 User Type The account administrator user has the ability to add, modify, and delete User Types for their StormPro Max account. A User Type is assigned to each user on the account and it determines which functionality and screens can be accessed by the user. StormPro Max User Guide Page 56 of 69 5/10/2008


57 9.7.1 Add User Type To add a new user type record the user must click on the Add New User Type link from the list screen. In the Add User Type screen the user must enter the User Type Name and click Save. Once the user saves the new user type, they will then be able to access the new user type record from the search list and modify the record to add the screen access permissions Modify User Type From the User Type Detail screen the user can view the screen permissions allowed for each user type. The user can also modify the User Type Name, and add or remove screen permissions by checking or unchecking the box in front of each screen name. Only the screen names that are checked can be accessed by this user type. StormPro Max User Guide Page 57 of 69 5/10/2008

58 9.8 Customers A 'Customer' refers to the customer of a StormPro Max 'Client'. A 'Client' is the term used to refer to a customer of StormPro Max (or primary account holder). The primary account holder adds the Sites and Permits for the account, and then provides the customer with access to the permits List Customers The Customer List screen displays a list of all customers associated with the user s account. The user can view the customer details by clicking on the list item or mouseover the item and select Customer Details from the menu View and Modify Customer Detail To modify a customer record, the user can simply click on one of the records in the list, or mouse-over the item and select Customer Details from the menu. From the Customer Detail screen the user can Modify or Delete the contact record. StormPro Max User Guide Page 58 of 69 5/10/2008


59 9.8.3 Search Customers The user can perform a basic search by typing all or part of the Customer Name into the text box and clicking the Basic Search button next to it. The user can also perform a detailed search from the following screen by clicking the Refine Search or New Advanced Search links Add Customers To add a new customer record the user must click on the Add New Customer link from the list screen. In the Add Customer screen the user must enter the Customer Name, Main Contact name, Phone number, Address, City, Zip, and select the State from the dropdown list, and click Save'. StormPro Max User Guide Page 59 of 69 5/10/2008


60 10. Accounts The accounts module allows the logged-in user to maintain his/her own account information, add/modify/delete users to the account, and send messages to the StormPro Max technical team My Account The My Account screen displays all of the account settings for the user that is logged into the system. The user can also modify their account settings from this screen. StormPro Max User Guide Page 60 of 69 5/10/2008

61 Account Detail screen (cont d): General Information: The user can modify their name and login information. Signature Information: The user can retrieve a Signature Authorization form to send into StormPro Max. Once the signature has been uploaded to the system, it will appear in this section. Security Question: The user can select a security question, and type the Security Answer. This allows StormPro Max to verify the user s identity in case the user forgets their password. Application Preferences: The section allows the user to modify appearance items such at color schemes, report output types, etc. Notifications: This section allows the user to select which items they wish to receive notifications. For items with due dates, the user can select the number of days to delay the notification after the due date. Contact Info: This section allows the user to add/modify/delete their own contact information. StormPro Max User Guide Page 61 of 69 5/10/2008
. 10.2.")
62 10.2 Users The account administrator has the ability to add, modify, and delete users in their StormPro Max account. Each user on the account will have its own login and password information. The account administrator also has the ability to limit which functionality and screens each user can access by assigning each user a specific User Type (see User Type section) List Users The User List screen will display all of the users within the user s account. StormPro Max User Guide Page 62 of 69 5/10/2008
63 Search Users The user can perform a basic search by typing all or part of the User Name into the text box on the list screen and clicking the Basic Search button next to it. The user can also perform a detailed search from the following screen by clicking the Refine Search or New Advanced Search links. The user has the ability to search by any combination of the fields on the search screen. The user can also filter the results by selecting a specific User Type from the dropdown list. If the user checks the 'Archived Users' box, then all active and inactive users will be returned. StormPro Max User Guide Page 63 of 69 5/10/2008

64 Add New User To add a new User record the user must enter the information for the new User then click Save. This will trigger the StormPro Max system to send a welcome to the user at the address you entered with a temporary password and instructions for logging in. The new user will inherit all of the screen access permissions associated with the User Type selected from the dropdown list. StormPro Max User Guide Page 64 of 69 5/10/2008

65 Modify User Detail From the User Detail screen the user can view all of the associated parameters for each user in the user account. The user can also modify the user detail by changing any of the parameters and clicking Save. From this screen, the user can also add individual user permissions for each user. StormPro Max User Guide Page 65 of 69 5/10/2008

66 User Detail screen (cont d): Permissions section: Shows a list of the current Sites and Permits the user has permission to view. The user can remove any of these records if they mouse-over the item and click Remove. Add/Remove Permissions section: To add Sites and Permits to the list of permissions, the user can mouse-over any of the items and click Add. Copy Permissions section: If a new user is to take on the same permissions as an existing user, then the existing user can be selected from the dropdown list. Permissions by County section: The user can also be granted permissions to see only sites and permits in a certain county by selecting the state/county from the dropdown list. Contact Info section: Allows the user to add, modify, and delete the user s contact methods and information. StormPro Max User Guide Page 66 of 69 5/10/2008

67 11. Contact StormPro Max The Contact StormPro Max screen allows the user to send a message to the technical team at StormPro Max. The user needs to select a Question Type from the dropdown list to help direct the question to the appropriate department. After entering the question into the text box, the user can click the checkbox if they wish to have their StormPro Max account representative contact them for further assistance. 12. Reports The reports module provides the user with access to four different reports that can be customized by date range, and some also by User name. The reports are displayed in whichever format the user selected in the My Account screen (i.e PDF, Standard HTML) Overview Report The Overview report shows items that required corrective actions and any actions that have been taken for inspections falling in the date range. The user need only select Start and End Date by selecting the dates from the pop-up calendar, and then clicking Open Report. StormPro Max User Guide Page 67 of 69 5/10/2008

68 12.2 Corrective Actions Report The Corrective Actions report shows corrective actions entered in the date range. The user need only select Start and End Date by selecting the dates from the pop-up calendar, and then clicking Open Report. The user can also filter the report by selecting a user from the dropdown list which limits the search results for a single user Uncorrected Items Report The Uncorrected Items report shows items that still require corrective actions, and any inprogress actions that have been taken, for inspections falling in the date range. The user need only select Start and End Date by selecting the dates from the pop-up calendar, and then clicking Open Report. StormPro Max User Guide Page 68 of 69 5/10/2008


69 12.4 Missing Pictures Report The Missing Pictures report shows inspection items that should have a picture attached for inspections falling within the date range. The user need only select Start and End Date by selecting the dates from the pop-up calendar, and then clicking Open Report. The user can also filter the report by selecting a user from the dropdown list which limits the search results for a single user. Sample HTML Report Output: StormPro Max User Guide Page 69 of 69 5/10/2008
Secure Transfer Site (STS) User Manual
 User Manual") Secure Transfer Site (STS) User Manual (Revised 3/1/12) Table of Contents Basic System Display Information... 3 Command Buttons with Text... 3 Data Entry Boxes Required / Enabled... 3 Connecting to the
Secure Transfer Site (STS) User Manual (Revised 3/1/12) Table of Contents Basic System Display Information... 3 Command Buttons with Text... 3 Data Entry Boxes Required / Enabled... 3 Connecting to the
Administrator Manual
 Administrator Manual CURA Technical Support Email: cura_support@mindscope.com Phone: 1.888.322.2362 x 55 Administrator Manual Page 1 Table of Contents The Setup Module... 3 Skills... 3 Adding or Modifying
User Manual: Manager
 Learning Management System ( LMS ) User Manual: Manager V NLFMG-03092017-1 Disclaimer and Warranty Information Limits of Liability / Disclaimer of Warranty The information contained within this manual
Administrator Quick Guide
 1 Administrator Quick Guide Login Screen The first page employees will see when visiting their training site is the login screen. This is where employees must enter their username and password to access
Filing Forms Electronically COGCC Denver, CO
 Filing Forms Electronically COGCC Denver, CO 303-894-2100 First Time Users: Set-up and Create Users First-time users will need to install Silverlight. Go to https://cogcc.state.co.us/eform/, the site will
Security: Account Maintenance User Guide v
 Security: Account Maintenance User Guide v. 5.7.0 Copyright 2002-2018 eschooldata, LLC All rights reserved. TABLE OF CONTENTS Overview... 3 Staff Type... 3 New Staff Type...3 New Certification Type...4
How to Use: Outlook Web Access (OWA)
") How to Use: Outlook Web Access (OWA) All About Me Day April 19. 2012 What is Outlook Web App 2010? The Outlook Web App allows you to access your College e-mail and calendar from any computer that has Internet
How to Use: Outlook Web Access (OWA) All About Me Day April 19. 2012 What is Outlook Web App 2010? The Outlook Web App allows you to access your College e-mail and calendar from any computer that has Internet
Sourcing. Supplier Maintenance and Company Administration Buyer User Guide
 Sourcing Supplier Maintenance and Company Administration Buyer User Guide Version 6.1 Ion Wave Technologies, Inc. 2002-2008 Table of Contents Table of Contents...2 Welcome to Supplier Maintenance and Company
Web Client User Guide
 ImageTag, Inc. 2016 Contents Introduction... 2 Logging Into Your KwikTag Client... 3 KwikTag Tabs and Your Landing Page... 4 Drawers Tab Features and Functions... 7 My Lists... 7 The KwikTag Library...
TRAINING GUIDE. Web App End User Training
 TRAINING GUIDE Web App End User Training Web Application End-User Training In this booklet, we will introduce you to the Lucity Web application. The Web system allows you to utilize customized views, forms,
Outlook Webb App quick guide
 What is Outlook Web App 2010? Outlook Webb App quick guide Updated 7/17/2012 The Outlook Web App allows you to access your County e-mail and calendar from any computer that has Internet access via a Web
ORACLE RDC ONSITE RESEARCH COORDINATOR TRAINING
 ORACLE RDC ONSITE RESEARCH COORDINATOR TRAINING TRAINING REQUIREMENTS RDC system training is designed and conducted for access to OnSite. Additional RDC training will be provided on a per study basis by
User Documentation. Administrator Manual.
 User Documentation Administrator Manual Proposal Software 1140 US Highway 287, Suite 400-102 Broomfield, CO 80020 USA Tel: 203.604.6597 www.proposalsoftware.com Table of Contents Open the WebPro Viewer...
New Finance Officer & Staff Training
 New Finance Officer & Staff Training Overview MUNIS includes many programs and tools to allow for the management of the District financials. As newer finance officers and staff, you are charged with understanding,
ORACLE RDC ONSITE RESEARCH COORDINATOR TRAINING
 ORACLE RDC ONSITE RESEARCH COORDINATOR TRAINING TRAINING REQUIREMENTS RDC system training is designed and conducted for access to OnSite. Additional RDC training will be provided on a per study basis by
Working with Groups, Roles, and Users. Selectica, Inc. Selectica Contract Performance Management System
 Selectica, Inc. Selectica Contract Performance Management System Copyright 2008 Selectica, Inc. 1740 Technology Drive, Suite 450 San Jose, CA 95110 http://www.selectica.com World rights reserved. You cannot
Order Management Bookings - Getting Started Guide for Manufacturers
 Order Management Bookings - Getting Started Guide for Manufacturers Table Of Contents Order Management Bookings Getting Started Guide... 3 Purpose of this Document... 3 What is Order Management Bookings?...
Table of Contents UFA Credit Account Application... 9 Card Link Online Account Management User Management... 71
 Table of Contents Launch into the Card Link Online Web Application... 4 Roles for User Management... 5 UFA Credit Account Application... 9 Credit Application Options... 10 Accessing Card Link Online Launch
Overview & General Navigation
 User Guide Contents Overview & General Navigation... 3 Application Terminology... 3 Groups... 3 Text Formatting Menu Bar... 3 Logging into the Application... 3 Dashboard... 4 My Profile... 5 Administrator
Steps: 1. Log in to the Dmitri application through the following website URL, as appropriate:
 Dmitri Suite Getting Started Logging In and Logging Out Logging In Use the following steps to log in to the Dmitri application. Steps: 1. Log in to the Dmitri application through the following website
NJUNS Users Guide.
 NJUNS Users Guide www.njuns.com The National Joint Utilities Notification system, NJUNS, is a national organization of member utilities formed for the purpose of improving the coordination of joint ventures.
VERSION ASSET TRACKING SYSTEM USER MANUAL STARTER EDITION
 VERSION 4.20.3 ASSET TRACKING SYSTEM USER MANUAL STARTER EDITION ATS USER MANUAL- STARTER EDITION TABLE OF CONTENTS ATS User Manual- Starter Edition... 2 Table of Contents... 2 Quick Start Overview...
SCOUT SUSPENSE TRACKER Version 10.0
 SCOUT SUSPENSE TRACKER Version 10.0 USER S MANUAL For Civilian Personnel Management Service (CPMS) HPC-COM LLC Help Desk 800-795-1902 Updated: February 2011 Table of Contents SCOUT Suspense Tracker V10.0
Table of Contents UFA Credit Account Application... 9 Card Link Online Account Management User Management... 77
 Table of Contents Launch into the Card Link Online Web Application... 4 Roles for User Management... 5 UFA Credit Account Application... 9 Credit Application Options... 10 Accessing Card Link Online Launch
SMS Reminder Settings Setting Up Reminders in Demographics Custom Text Reminders... 38
 Table of Contents Activating Patient Portal... 1 Patient Portal... 3 Premium Patient Portal Admin Function... 3 Set Up... 3 How to Make Changes to the Portal Landing Page... 5 Premium Patient Portal Features...
Attorney Training Manual
 Attorney Training Manual Contact Information Phone Number: -855-264-2237 Email: efilingsupport@judicial.state.co.us Revised May 207 Table of Contents LOGIN / REGISTER ORGANIZATION... 2 NAVIGATION BAR...
Preface...6. Introduction to InspectTech Software...6. What to Look For in Version Glossary...9. InspectTech Basic Features...
 0 1 Table of Contents Preface...6 Introduction to InspectTech Software...6 What to Look For in Version 7.0...6 Glossary...9 InspectTech Basic Features...10 How to Log Into the InspectTech Website...10
INSERVICE. Version 5.5. InService Easily schedule and monitor attendance for your training programs, even at remote locations.
 INSERVICE Version 5.5 InService Easily schedule and monitor attendance for your training programs, even at remote locations. 5/15/2014 Page 0 of 11 Table of Contents 1.1 Logging In... 2 1.2 Navigation...
ScholarOne Abstracts. Review Administrator Guide
 ScholarOne Abstracts Review Administrator Guide 17-October-2018 Clarivate Analytics ScholarOne Abstracts Review Administrator Guide Page i TABLE OF CONTENTS Select an item in the table of contents to go
User Manual For SmartRoom Managers
 User Manual For SmartRoom Managers Table of Contents 1.0 Login 2.0 Confidentiality Agreement 3.0 Software Installation 4.0 Dashboard 5.0 Document Review and Index Maintenance 5.1 View by Index 5.1.1 Index
Printable Help. The complete text of the MLS Online Help
 Printable Help The complete text of the MLS Online Help Updated June 12, 2017 Table of Contents Table of Contents 2 Accessing the MLS 11 Access Edge MLS from a Mobile Device 11 Log On or Off the MLS 11
Preferences Table of Contents
 Preferences Table of Contents My Profile... 2 Quick Profile Maintenance... 2 My Names... 3 My Addresses... 3 My E-Mail Addresses... 4 Personal Photo and Logo Maintenance... 4 My Documents... 6 My Phone
User Manual: Instructor
 Learning Management System ( LMS ) User Manual: Instructor V NLFIG-03102017-1 Disclaimer and Warranty Information Limits of Liability / Disclaimer of Warranty The information contained within this manual
EMS MASTER CALENDAR User Guide
 EMS MASTER CALENDAR User Guide V44.1 Last Updated: May 2018 EMS Software emssoftware.com/help 800.440.3994 2018 EMS Software, LLC. All Rights Reserved. Table of Contents CHAPTER 1: Introduction to the
User Guide Product Design Version 1.7
 User Guide Product Design Version 1.7 1 INTRODUCTION 3 Guide 3 USING THE SYSTEM 4 Accessing the System 5 Logging In Using an Access Email 5 Normal Login 6 Resetting a Password 6 Logging Off 6 Home Page
Electronic Appraisal Delivery (EAD) Portal. FHA EAD General User Guide
 Portal. FHA EAD General User Guide") Electronic Appraisal Delivery (EAD) Portal FHA EAD General User Guide Last Updated: October 2015 FHA EAD General User Guide Page 2 of 87 Version 1.3.1 TABLE OF CONTENTS INTRODUCTION... 6 WHAT IS THE ELECTRONIC
Electronic Appraisal Delivery (EAD) Portal FHA EAD General User Guide Last Updated: October 2015 FHA EAD General User Guide Page 2 of 87 Version 1.3.1 TABLE OF CONTENTS INTRODUCTION... 6 WHAT IS THE ELECTRONIC
SharePoint User Manual
 SharePoint User Manual Developed By The CCAP SharePoint Team Revision: 10/2009 TABLE OF CONTENTS SECTION 1... 5 ABOUT SHAREPOINT... 5 1. WHAT IS MICROSOFT OFFICE SHAREPOINT SERVER (MOSS OR SHAREPOINT)?...
My Team And Manager Reports Rev 2
 My Team And Manager Reports 20141210 Rev 2 1 Contents My Team Overview... 3 My Team Search... 7 Action Items... 8 Tasks Overview... 8 Assign Training... 11 Profile Overview... 13 Transcript... 15 Calendar
On this page, go to the upper right side, to the Install Office 365 link; beneath that, click on Other Installs.
 Skype Basics: Instant Messaging can be used as a supplemental communication method to traditional emails and phone calls. Instant Messaging (or IM) is most useful for quick communications, either for a
Monash University Policy Management. User Guide
 Monash University Policy Management User Guide 1 Table of Contents 1. GENERAL NAVIGATION... 4 1.1. Logging In to Compliance 360 - Single Sign On... 4 1.2. Help... 4 1.2.1. The University Policy Bank...
ipcr Web Training Manual
 ipcr Web Training Manual Technical support: (800) 464-1740 Technical support email address: support@ipcrems.com [1] Table of Contents Accessing ipcr Web... 4 ipcr Web Sign In... 5 Persistent ipcr Web Features...
SharePoint 2010 Tutorial
 SharePoint 2010 Tutorial TABLE OF CONTENTS Introduction... 1 Basic Navigation... 2 Navigation Buttons & Bars... 3 Ribbon... 4 Library Ribbon... 6 Recycle Bin... 7 Permission Levels & Groups... 8 Create
TRAINING GUIDE. Lucity Web End User Training
 TRAINING GUIDE Lucity Web End User Training Web Application End-User Training In this booklet, we will introduce you to the Lucity Web application. The Web system allows you to utilize customized views,
Instruction Guide COMMERCIAL EEPM 2.0 ENERGY EFFICIENCY PROGRAM
 Instruction Guide COMMERCIAL EEPM 2.0 ENERGY EFFICIENCY PROGRAM 3 2 TABLE OF CONTENTS About EEPM 2.0...3 Program Participation...4 Service Provider Dashboard...5. Program Option Activity...5 Eligible Programs...5
J.S. Paluch Co. s Secure Sales Site Open Cancellation Notifications Feature
 This feature allows you to find the advertiser details associated with open cancellation notifications, along with the date notified, canceled, and/or saved. Click the Search button without selected any
BASIC NAVIGATION & VIEWS...
 Content Overview VISUAL TOUR... 5 NEW FEATURES IN OUTLOOK 2010... 6 BASIC NAVIGATION & VIEWS... 7 SETTING PREFERENCES... 7 Creating an Outlook Shortcut... 7 Choosing a Startup View... 7 CUSTOMIZING INBOX
SharePoint: Fundamentals
 SharePoint: Fundamentals This class will introduce you to SharePoint and cover components available to end users in a typical SharePoint site. To access SharePoint, you will need to log into Office 365.
Microsoft Outlook Basics
 Microsoft Outlook 2010 Basics 2 Microsoft Outlook 2010 Microsoft Outlook 2010 3 Table of Contents Getting Started with Microsoft Outlook 2010... 7 Starting Microsoft Outlook... 7 Outlook 2010 Interface...
USER GUIDE. Document ID: D. Abbott Point of Care Inc. Abbott Park, IL 60064
 USER GUIDE Document ID: 732029-00D Abbott Point of Care Inc. Abbott Park, IL 60064 This page intentionally left blank. Table of Contents Preface 1 1 - Getting started 1-1 1.1 Point-of-Care testing (POCT)
Legal Kiosk TM v3.0. Internal User Guide
 Legal Kiosk TM v3.0 Internal User Guide Table of Contents Overview... 2 Legal Kiosk Admin Management... 3 User Access Section... 3 Adding A New User... 3 Adding a New Contact... 6 Granting Access to Files
Decatur City Schools
 Decatur City Schools Table of Contents Introduction...5 Objectives...5 Why GW web?...5 Log in options...5 The menu...7 Blue title bar...7 Navigation...7 Folder list...8 Buttons in the message pane...8
Citizen Self Service Portal Guide to Online Permits
 Citizen Self Service Portal Guide to Online Permits The City has transitioned to a new online permit system. Citizen Self Service (CSS) is a web portal offering contractors a convenient way of conducting
Copyright Basware Corporation. All rights reserved.. Vendor Portal Admin Guide Basware P2P 17.3
 Copyright 1999-2017 Basware Corporation. All rights reserved.. Vendor Portal Admin Guide Basware P2P 17.3 1 Overview of Vendor Portal Setup Basware P2P s vendor portal allows vendors to retrieve easily
Company. Business Online Banking Admin - Company. Company - Profile. Company - BAI Settings
 Company The Company page displays information specific to your Business. Additional function tabs or sub-menus are available to view information and settings specific to the company. From here you can
Paragon Essentials: Getting Started with Paragon 4 This manual sets the foundation for all future work in Paragon 4. It covers the basic activities
 Paragon Essentials: Getting Started with Paragon 4 This manual sets the foundation for all future work in Paragon 4. It covers the basic activities necessary to navigate the MLS. Table of Contents 1. Accessing
My Site. Introduction
 My Site Introduction My Site is a component of the portal that is available to all NB educators. It is a personalized site that provides all users with the following features: A place to save and share
BeetleEye Application User Documentation
 BeetleEye Application User Documentation BeetleEye User Documentation 1 Table of Contents Welcome to the BeetleEye Application... 6 Overview... 6 Navigation... 6 Access BeetleEye... 6 Update account information...
User Guide. Customer Self Service (CSS) Web Application Progress Software Corporation. All rights reserved.
 Web Application Progress Software Corporation. All rights reserved.") User Guide Customer Self Service (CSS) Web Application 1993-2017 Progress Software Corporation. Version 2.1 March 2017 Table of Contents Welcome... 3 Accessing the Customer Self Service (CSS) Web Application...
User Guide Customer Self Service (CSS) Web Application 1993-2017 Progress Software Corporation. Version 2.1 March 2017 Table of Contents Welcome... 3 Accessing the Customer Self Service (CSS) Web Application...
emerge Help Document Table of Contents
 Table of Contents Logging Into emerge... 2 Navigation Bar... 3 Main Menu... 4 Creating a New Order... 6 Order Checklist... 6 Information... 7 Overview... 8 Geography... 9 List Select... 12 Demographics...
emerge Help Document Table of Contents
 Table of Contents Logging Into emerge... 2 Navigation Bar... 3 Main Menu... 4 My Account... 6 My Information... 6 Manage Lists... 7 Manage Seeds... 8 Search/Add Suppress... 9 Update My Suppress... 10 Creating
TrainingFinder Real-time Affiliate Integrated Network (TRAIN) Administrator Handbook. Version 3.2 (3/26/08) Public Health Foundation
 Administrator Handbook. Version 3.2 (3/26/08) Public Health Foundation") TrainingFinder Real-time Affiliate Integrated Network (TRAIN) Administrator Handbook Version 3.2 (3/26/08) Public Health Foundation Table of Contents About This Handbook 5 TRAIN Administrative Basics 6
TrainingFinder Real-time Affiliate Integrated Network (TRAIN) Administrator Handbook Version 3.2 (3/26/08) Public Health Foundation Table of Contents About This Handbook 5 TRAIN Administrative Basics 6
SureClose Product Line
 SureClose Product Line Release Notes 3.7 June 21, 2013 SureClose 3.7 Release Notes June 2013 1 Table of Contents Overview... 4 Post-Installation Considerations... 4 Features and Functionality... 6 New
Sourcing - How to Create a Negotiation
 Martin Baker Secure Source-To-Pay Sourcing - How to Create a Negotiation December 07 Contents To Create a Project... To Create a Negotiation... 5 Attachments... 7 Private File Archive... 7 Creating Lines,
SPECIFICATIONS Insert Client Name
 ESSENTIAL LMS BRANDING SPECIFICATIONS Insert Client Name Creation Date: June 23, 2011 Last Updated: July 11, 2017 Version: 16.5 Page 1 Contents Branding Elements... 3 Theme Management... 3 Header Images...
ASTRA USER GUIDE. 1. Introducing Astra Schedule. 2. Understanding the Data in Astra Schedule. Notes:
 ASTRA USER GUIDE 1. Introducing Astra Schedule Astra Schedule is the application used by Academic Space Scheduling & Utilization to schedule rooms for classes and by academic colleges, schools, and departments
DocAve Governance Automation Online
 DocAve Governance Automation Online Business User Guide Service Pack 9 Cumulative Update 6 Issued December 2017 Table of Contents What s New in this Guide... 5 About DocAve Governance Automation Online...
SmartPay Express User Guide
 SmartPay Express User Guide Table of Contents INTRODUCTION... 4 SmartPay Express Overview... 4 System Requirements... 5 Trusted Sites... 5 Available Resources... 7 Additional Resources... 7 LOGGING IN...
Center for Faculty Development and Support. Google Docs Tutorial
 Center for Faculty Development and Support Google Docs Tutorial Table of Contents Overview... 3 Learning Objectives... 3 Access Google Drive... 3 Introduction... 4 Create a Google Document... 4 Upload
SharePoint: Fundamentals
 SharePoint: Fundamentals This class will introduce you to SharePoint and cover components available to end users in a typical SharePoint site. To access SharePoint, you will need to log into Office 365.
Acuity 504. User Guide. Administrators 504 Coordinators Teachers. MSB Customer Care msb-services.
 TM Acuity 504 User Guide Administrators 504 Coordinators Teachers MSB Customer Care 800.810.4220 support@ Copyright 2014 MSB All rights reserved 1 Copyright MSB 2014 Table of Contents MSB Mission Statement...
Nintex Reporting 2008 Help
 Nintex Reporting 2008 Help Last updated: Thursday, 24 December 2009 1 Using Nintex Reporting 2008 1.1 Chart Viewer Web Part 1.2 Importing and Exporting Reports 1.3 Import Nintex report page 1.4 Item Level
Supplier Portal (External) JIRA User Guide. July 2016
 JIRA User Guide. July 2016") Supplier Portal (External) JIRA User Guide July 2016 External JIRA Tool Allows users outside of Honeywell (i.e. suppliers and customers) to interact with AeroJIRA projects Can be used by external users
Supplier Portal (External) JIRA User Guide July 2016 External JIRA Tool Allows users outside of Honeywell (i.e. suppliers and customers) to interact with AeroJIRA projects Can be used by external users
Legistar Administration Guide
 Legistar Administration Guide Legistar Administration Use Legistar Administration to configure the settings in your Legistar database. We've organized the Administration topics as follows: Legistar Administration
Outlook Web App (Exchange 2010) User Guide Computer Training Solutions Version Revision Date
 User Guide Computer Training Solutions Version Revision Date") Outlook Web App (Exchange 2010) Computer Training Solutions Version 1.7 Revision Date 2014-December-1 Table of Contents QUICK REFERENCE... 2 OUTLOOK WEB APP URL... 2 MANITOBA EHEALTH SERVICE DESK... 2
Outlook Web App (Exchange 2010) Computer Training Solutions Version 1.7 Revision Date 2014-December-1 Table of Contents QUICK REFERENCE... 2 OUTLOOK WEB APP URL... 2 MANITOBA EHEALTH SERVICE DESK... 2
Leon County Permits Online (Citizens Access - ACA)
") Leon County Permits Online (Citizens Access - ACA) Accela Citizens Access - Public User Guide L e o n C o u n t y B o a r d o f C o u n t y C o m m i s s i o n e r s Instructions for using Leon Counties
Leon County Permits Online (Citizens Access - ACA) Accela Citizens Access - Public User Guide L e o n C o u n t y B o a r d o f C o u n t y C o m m i s s i o n e r s Instructions for using Leon Counties
Investigator Site OC RDC PDF User Guide
 Investigator Site OC RDC PDF User Guide Version 1.0 Page 1 of 40 TABLE OF CONTENTS Accessing OC RDC Steps for Access 3 Logging On 4 Change Password 4 Laptop and System Security 5 Change Study 5 Navigating
UTILITY RELOCATION ELECTRONIC DOCUMENT MANAGEMENT SYSTEM (UREDMS)
") UTILITY RELOCATION ELECTRONIC DOCUMENT MANAGEMENT SYSTEM (UREDMS) TRAINING MANUAL EXTERNAL USERS prepared for Commonwealth of Pennsylvania Department of Transportation Bureau of Project Delivery VERSION
UTILITY RELOCATION ELECTRONIC DOCUMENT MANAGEMENT SYSTEM (UREDMS) TRAINING MANUAL EXTERNAL USERS prepared for Commonwealth of Pennsylvania Department of Transportation Bureau of Project Delivery VERSION
PRISM - FHF The Fred Hollows Foundation
 PRISM - FHF The Fred Hollows Foundation MY WORKSPACE USER MANUAL Version 1.2 TABLE OF CONTENTS INTRODUCTION... 4 OVERVIEW... 4 THE FHF-PRISM LOGIN SCREEN... 6 LOGGING INTO THE FHF-PRISM... 6 RECOVERING
etrac Report Builder
 etrac Guide to etrac Report Builder Version: 2.0 Published: 09/06/2013 Global DMS, 1555 Bustard Road, Suite 300, Lansdale, PA 19446 2014, All Rights Reserved. Table of Contents Introduction to Reporting...
Provider Secure Portal User Manual
 Provider Secure Portal User Manual Copyright 2011 Centene Corporation. All rights reserved. Operational Training 2 August 2011 Table of Contents Provider Secure Portal... 5 Registration... 6 Provider -
SharePoint General Instructions
 SharePoint General Instructions Table of Content What is GC Drive?... 2 Access GC Drive... 2 Navigate GC Drive... 2 View and Edit My Profile... 3 OneDrive for Business... 3 What is OneDrive for Business...
Managing Your Website with Convert Community. My MU Health and My MU Health Nursing
 Managing Your Website with Convert Community My MU Health and My MU Health Nursing Managing Your Website with Convert Community LOGGING IN... 4 LOG IN TO CONVERT COMMUNITY... 4 LOG OFF CORRECTLY... 4 GETTING
BE Share. Microsoft Office SharePoint Server 2010 Basic Training Guide
 BE Share Microsoft Office SharePoint Server 2010 Basic Training Guide Site Contributor Table of Contents Table of Contents Connecting From Home... 2 Introduction to BE Share Sites... 3 Navigating SharePoint
SALTO E&T website User manual
 SALTO E&T website User manual salto-et.net Second edition Last updated (01/02/2019) 1 / 34 Table of contents 1. Aims and objectives of the TCA Resource Centre... 4 2. Before use... 5 3. Structure of SALTO
Loan Closing Advisor SM. User Guide. December 2017
 Loan Closing Advisor SM User Guide December 2017 Notice This User Guide is Freddie Mac s CONFIDENTIAL INFORMATION as defined in and subject to the provisions of the Freddie Mac Single Family Seller/Servicer
smartdata.gen2 Corporate Cardholder Guide February 2014
 smartdata.gen2 Corporate Cardholder Guide February 2014 Table of Contents Chapter 1 Getting Started... 1-i Introduction... 1-1 Browser Requirements... 1-1 Security... 1-2 Selecting a Language Preference...
vbound User Guide vbound User Guide Version Revised: 10/10/2017
 vbound User Guide Version 4.1.1 Revised: 10/10/2017 Copyright 2014-2017 FFL Solutions Inc. Page 1 of 87 Table of Contents Using vbound...5 Starting vbound... 5 Bound Book List... 6 vbound Ribbon Menu...
HealthStream Connect Administrator User Guide
 HealthStream Connect Administrator User Guide ii Contents About HealthStream Connect... 1 Administrator Overview of HealthStream Connect... 2 Administrator Access and Privileges... 2 Navigating HealthStream
Printable Documentation
 Printable Documentation The complete text of the Online Help Updated April 10, 2007 Table Of Contents Administrative... 1 Add a picture to your Agent Profile... 1 Add a bio to your agent profile... 1 Add
General Features Guide
 General Features Guide 11/01/2017 Blackbaud Altru 4.98 General Features US 2017 Blackbaud, Inc. This publication, or any part thereof, may not be reproduced or transmitted in any form or by any means,
Electronic Grants Administration & Management System - EGrAMS
 Electronic Grants Administration & Management System - EGrAMS Introduction EGrAMS is an enterprise-wide web-based scalable, configurable, business rule driven and workflow based end-to-end electronic grants
Provider Portal 3.0 Manual. Health Axis 3.0 Provider Portal User Guide
 Provider Portal 3.0 Manual Health Axis 3.0 Provider Portal User Guide Table of Contents Provider Portal 3.0... 4 How to Access the Provider Portal... 4 Login credentials:... 4 How to Request Access to
Sourcing Buyer User Guide
 Sourcing Buyer User Guide Version 6.4 August 2011 Copyright 2002-2011 Ion Wave Technologies, Inc. Springfield, Missouri Welcome to Enterprise Sourcing! This manual is intended to provide buyers an instructional
Administrator Guide. Position Manager 11 Effective 4/9/2018
 Administrator Guide Position Manager 11 Effective 4/9/2018 Contents System Administration 4 Career Site 6 Acknowledgement Text 6 Career Site Settings: Acknowledgement Text Detail 6 Adding an Acknowledgement
DataMaster for Windows
 DataMaster for Windows Version 3.0 April 2004 Mid America Computer Corp. 111 Admiral Drive Blair, NE 68008-0700 (402) 426-6222 Copyright 2003-2004 Mid America Computer Corp. All rights reserved. Table
Luxor CRM 2.0. Getting Started Guide
 Luxor CRM 2.0 Getting Started Guide This Guide is Copyright 2009 Luxor Corporation. All Rights Reserved. Luxor CRM 2.0 is a registered trademark of the Luxor Corporation. Microsoft Outlook and Microsoft
Rabo Supplier Finance User Manual - Suppliers -
 Rabo Supplier Finance User Manual - Suppliers - Page 2 of 33 Table of Contents 1 About This Document... 3 1.1 Objectives of This Document... 3 1.2 Inside This Document... 3 2 Rabo Supplier Finance platform...
CORPORATE ACCOUNT RECONCILIATION. SAM2CAR: Key Functions Manual for Program Administrators
 CORPORATE ACCOUNT RECONCILIATION SAM CAR SAM2CAR: Key Functions Manual for Program Administrators May 2012 2 How to Use This Manual This manual is designed to serve as a reference guide to help you perform
User Guide. Web Intelligence Rich Client. Business Objects 4.1
 User Guide Web Intelligence Rich Client Business Objects 4.1 2 P a g e Web Intelligence 4.1 User Guide Web Intelligence 4.1 User Guide Contents Getting Started in Web Intelligence 4.1... 5 Log into EDDIE...
GlobeNewswire. GlobeNewswire, User s Guide USER S GUIDE. Version: 1.16 Issued: By: Global Corporate Services 12/06/
 GlobeNewswire USER S GUIDE Version: 1.16 Issued: 2011-06-12 By: Global Corporate Services 12/06/2011 1.16 1 (31) Table of Contents 1. INTRODUCTION... 4 1.1 Document Objectives... 4 1.2 Document conventions...