ipad: Accessibility Robert Miller, CTVI & AT Instructor Miranda Anderson, AT Lab Asst Oklahoma School for the Blind April 24, 2012 VoiceOver ZOOM
|
|
|
- Dinah Shaw
- 5 years ago
- Views:
Transcription


1 2012 ipad: Accessibility VoiceOver ZOOM Robert Miller, CTVI & AT Instructor Miranda Anderson, AT Lab Asst Oklahoma School for the Blind April 24, 2012
2 ipad and Accessibility TABLE OF CONTENTS Overview... page 4 Part 1: ipad and the Mainstream approach:... pages 5-9 Section 1.1: Physical Controls & Navigating the Home Screen... page 5 Section 1.2: Navigating the Home Screen Rearranging Apps Folders... page 5 Section 1.3: Surfing the Internet with Safari... pages 6-7 Section 1.4: Maps App... page 7 Section 1.5: Multitasking Gestures... page 7 Section 1.6: ibook (read a book)... page 8 Section 1.7: Typing with the Notes app... page 9 Part 2: ipad with VoiceOver:... pages Section 2.1: Physical Controls... page10 Section 2.2: Home Screen Navigation Rearranging Apps Folders Speech... pages Section 2.3: Surfing the Internet with Safari... page Section 2.4: Rearrange App Icons Multitasking: Switching Between Apps... page Section 2.5: ibook (read a book)... pages Section 2.6: Typing with the Notes app... pages Part 3: ipad with ZOOM:... pages Section 3.1: Physical Controls... page 18 Section 3.2: Surfing the Internet with Safari... pages Section 3.3: Accessing Maps (Accessibility ZOOM vs. Mainstream Zoom)... page 21 Section 3.4: Multitasking Gestures... pages 21 Section 3.5: Accessibility Feature (White on Black)... page 22 Section 3.6: ibook (read a book)... page 22 Section 3.7: Accessibility Feature (Large Text)... page 23 Section 3.8: Typing with the Notes app... page 23 Part 4: ipad with VoiceOver and the Refreshabraille 18:... pages Section 4.1: Physical Controls... pages Section 4.2: Making the connection (VoiceOver and the Braille Display)... page 25 Section 4.3: Navigating the Home Screen... pages 26 Section 4.4: Surfing the Internet with Safari... pages Section 4.5: ibook (read a book)... pages Developed by Robert Miller Oklahoma School for the Blind Last updated 24 April 2012 Page 2 of 58
3 TABLE OF CONTENTS (Continued) Part 4 (cont): ipad with VoiceOver and the Refreshabraille 18:... pages Section 4.6: Typing with the Notes app... page 33 Part 5: ipad with VoiceOver and the Focus 40 Blue:... pages Section 5.1: Physical Controls... page 34 Section 5.2: Making the connection (VoiceOver and the Braille Display)... page 35 Section 5.3: Navigate the Home Screen... pages 36 Section 5.4: Surfing the Internet with Safari... pages Section 5.5: ibook (read a book)... pages Section 5.6: Typing with the Notes app... page 43 Part 6: ipad with VoiceOver and the Apex as a Display:... pages Section 6.1: Physical Controls... pages Section 6.2: Making the connection (VoiceOver and the Braille Display)... pages Section 6.3: Navigating the Home Screen... pages Section 6.4: Surfing the Internet with Safari... pages Section 6.5: ibook (read a book)... pages Section 6.6: Typing with the Notes app... pages 53 Appendix A (Quick Commands List):... pages VoiceOver Commands... pages Braille Displays Common Commands (all our Bluetooth displays)... pages Refreshabraille 18 Display... page 57 Focus 40 Blue Display... page 58 Apex as a Display... page 58 Developed by Robert Miller Oklahoma School for the Blind Last updated 24 April 2012 Page 3 of 58
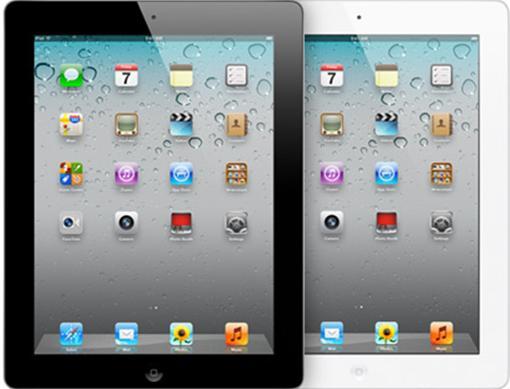
4 Overview What is the ipad? 1. It s a tablet computer designed, developed and marketed by Apple. 2. It serves primarily as a platform for audio-visual media including books, periodicals, movies, music, games, presentations and web content. 3. It s available in black or white. 4. The ipad 2 has a lithium-ion polymer battery that lasts up to 10 hours. How do you navigate the ipad? 1. Whether you are blind, have low vision, or are fully sighted, you will use what Apple calls, gestures to navigate the ipad (iphone & ipod Touch). 2. Gestures are ways to touch the ipad to get it to do something, similar to using a mouse on a PC. How do the blind and visually impaired access the ipad? 1. There are 3 main accessibility features that give access to those with visual impairments. a. VoiceOver, Zoom, and VoiceOver with a braille display. Presentation/workshop: i. VoiceOver: If you are blind or have very limited vision you will want to use VoiceOver, which is the screen reader all the idevices have. ii. Zoom: If you have low vision you may want to use Zoom, which is the screen magnifier that is on all idevices. iii. VoiceOver with a Bluetooth Braille Display: If you are a braille user you can connect a refreshable braille display via a Bluetooth connection. Now you have speech and braille access. 1. This document is divided into 6 parts: 2. Each part will demonstrate how to navigate Safari (web browser), read a book in ibooks, and type using Notes with the on-screen keyboard. Part 1: ipad & Mainstream Access Part 2: ipad & VoiceOver Access Part 3: ipad & Zoom Access Part 4: ipad & Access with Bluetooth Refreshable Braille Displays Part 5: ipad & Access with Bluetooth Focus 40 Blue Braille Display Part 6: ipad & Access with Braille Note Apex as a Braille Display Developed by Robert Miller Oklahoma School for the Blind Last updated 24 April 2012 Page 4 of 58
5 Part 1: ipad and the Mainstream Approach Section 1.1: Physical Controls Notes: All instructions will assume that the ipad is positioned in the horizontal position with the HOME button on the right. 1. Turning on and shutting down the ipad: a. Press & hold the Power button. 2. Lock/Sleep Mode: a. Press & release the Power button. b. Or, set in place on the keyboard case. 3. Unlock/Wake up from sleep: a. Press the (Home) button, the slide to unlock. b. Press & release the Power button. 4. Go to the Home screen: a. Press (Home) button. Section 1.2: Navigating the Home Screen Rearranging Apps Folders Task 1: Moving between Search & Home Screen Pages (1-Finger Gestures) 1. Move to the Search Screen; (1-Finger_SWIPE RIGHT). 2. Move to page 2 of the Home Screen; (1-Finger_SWIPE LEFT). 3. Move back to page 1 of the Home Screen; (1-Finger_SWIPE RIGHT). Task 2: Rearranging the App icons on the Home Screen (1-Finger Gestures) 1. Rearranging the App Icons on the Home screen (1-Finger_TOUCH & DRAG): a. Go to the Home Screen; press (HOME) button. b. Place the Home Screen Apps into Jiggle mode: i. Pick an App icon and (1-Finger_TOUCH & HOLD) the App. c. Drag the itunes app up to be the first icon; (1-Finger_TOUCH & DRAG). d. Disable Jiggle mode; press the (HOME) button. Task 3: Creating Folders (1-Finger Gestures) Power Sleep/Wake Button Head Phone Jack 1. Creating folders on the Home screen (1-Finger_TOUCH & DRAG): Silent/Rotation Lock Volume Front Camera a. Go to the Home Screen; press (HOME) button. b. Place the Home Screen Apps into Jiggle mode: i. Decide on an App icon and (1-Finger_TOUCH & HOLD) the App. c. Drag one app onto another app and lift finger; (1-Finger_TOUCH & DRAG). d. Keep the folder name or rename it. e. Disable Jiggle mode; press the (HOME) button. Developed by Robert Miller Oklahoma School for the Blind Last updated 24 April 2012 Page 5 of 58 Home Button Edge: Dock Connector
6 Section 1.3: Surfing the Internet with Safari (1-Finger Gestures) Note: During this section you will learn how to use several (1-Finger) gestures to open the web browser, Safari, go to a website, navigate web pages, zoom in & out. Task 1: Launch Safari 1. Selecting an Item (1-Finger_TOUCH): a. On the Home Screen, find the Safari app and launch it; (1-Finger_TOUCH). Task 2: Launch the website, & web page, Animal Facts 1. Launch : (Note: typing www or.com not necessary) a. Move to Address Bar (1-Finger_TOUCH). b. Select the Clear Text button (1-Finger_TOUCH). c. Touch letter keys for animalfactguide ; (1-Finger_TOUCH). d. Select the Go button; (1-Finger_TOUCH). 2. Select the Animal Facts link; (1-Finger_TOUCH). Task 3: Scrolling the web page 1. Scrolling (1-Finger_SWIPE): a. Scroll down the page to find the different animals; (1 Finger_SWIPE UP). b. Scroll up the page to find Atlantic Puffin ; (1-Finger_SWIPE DOWN). c. Select the Back button; (1-Finger_TOUCH). d. Now find and select the Bald Eagle link; (1-Finger_ TOUCH). Task 4: Accessing web page menus 1. Accessing Menus (1-Finger_ TAP & HOLD): a. Open the African Elephant web page in a New Tab: i. (1-Finger_TOUCH & HOLD) the African Elephant link & open Menu. ii. Open the web page in a New Tab; (1-Finger_TOUCH). iii. Switch between the 2 Tabs; (1-Finger_TOUCH). b. Define a word: i. On the Animal Facts web page, (1-Finger_TOUCH & HOLD) the word, Facts, then lift finger. ii. Select Define ; (1-Finger_TOUCH). iii. Scroll down the pop up window; (1-Finger_SWIPE UP). iv. Close the Pop Up ; (1-Finger_TOUCH) outside the Pop Up. Developed by Robert Miller Oklahoma School for the Blind Last updated 24 April 2012 Page 6 of 58
7 Task 5: Mainstream Zooming in & out (2-Finger_Pinch) Note: During this task you will use the Pinch gesture to zoom in & out. This gesture works with pictures, web pages, mail & maps. This doesn t replace the Zoom accessibility feature. 1. Zoom IN on the web page; (2-Finger_PINCH): a. Place your thumb and index finger together on the screen and then slide them apart. 2. Zoom OUT on the web page; (2-Finger_PINCH): a. Place your thumb and index finger apart on the screen and then slide them together. Section 1.4: MAPS App (1-Finger, 2-Fingers, 2-Finger_PINCH Gestures) Note: During this task you will learn how to use 1-Finger & 2-Finger gestures to Zoom IN and OUT on a map. 1. Launch Maps ; (1-Finger_TOUCH). 2. Zoom IN on the web page; (1-Finger_DOUBLE TOUCH), repeatedly. 3. Zoom OUT on the web page; (2-Finger_TOUCH), repeatedly. 4. Zoom IN on the web page; (2-Finger_PINCH): a. Place your thumb and index finger together on the screen and then slide them apart. 5. Zoom OUT on the web page; (2-Finger_PINCH): a. Place your thumb and index finger apart on the screen and then slide them together. Section 1.5: Multitasking Gestures Note 1: During this section you will learn how to use Multitasking Gestures to go to the Home screen, reveal the Multitasking Bar and switch between apps. Task 1: Going to the Home screen 1. Launch Safari ; (1-Finger_TOUCH). 2. Use the Multitasking Gesture to go to the Home screen; (4/5-Finger_PINCH). Task 2: Reveal the Multitasking Bar 1. Launch Settings ; (1-Finger_TOUCH). 2. Use the Multitasking Gesture to reveal Multitasking Bar; (4/5-Finger_SWIPE UP). 3. From the list, launch Safari ; (1-Finger_TOUCH). Task 3: Switch to Between Apps: 1. Safari should still be open. a. (Must have an app open first). 2. Switch to the Next App; (4/5-Finger_SWIPE LEFT). 3. Switch to the Previous App: (4/5-Finger_SWIPE RIGHT). Developed by Robert Miller Oklahoma School for the Blind Last updated 24 April 2012 Page 7 of 58
8 Section 1.6: ibooks (read a book) Notes: During this section you will learn how to navigate a book in ibooks. ibooks is a free app that you must download from the Apple Apps Store. Using itunes you can download epub and PDF books. 1. Launch ibooks : a. Go to the Home screen; press (Home) button. b. Move to Page 2 of the Home screen; (1-Finger_FLICK LEFT). c. Select & Activate the ibooks app; (1-Finger_TAP). 2. Open the Library, if not open already, by using (1-Finger_TAP) on the Library button. Library button 3. Select & open the book, ipad User Guide ; (1-Finger_TOUCH). 4. Open Table of Contents to move to Accessibility : a. Select Table of Contents button; (1-Finger_ TOUCH). b. Scroll down the table; (1-Finger_SWIPE UP). c. Select Accessibility ; (1-Finger_ TOUCH). 5. Turn Pages Slowly: a. Turn to the next page; on page s right edge (1-Finger_ TOUCH & DRAG LEFT). b. Turn to the previous page; on page s left edge: (1-Finger_ TOUCH & DRAG RIGHT). 6. Turn Pages Quickly: a. Turn to the next page; on center to right edge (1-Finger_ TOUCH & FLICK LEFT). b. Turn to the previous page; on center to left edge (1-Finger_ TOUCH & FLICK RIGHT). 7. Bookmarks: Table of Contents button Notes: You don t have to set a bookmark when you close the book; ibooks will remember your page and return you to it when you open the book again. a. Add a Bookmark; (1-Finger_ TOUCH) on the Ribbon, top-right corner. b. Remove a Bookmark; (1-Finger_ TOUCH) on the Ribbon, top-right corner. Developed by Robert Miller Oklahoma School for the Blind Last updated 24 April 2012 Page 8 of 58
9 Section 1.7: Typing with the Notes App 1. The Notes app allows you to take notes using the on-screen keyboard. It is easy to refer back to your notes or delete unwanted notes. 2. With an icloud account you can sync your notes with your other idevices and computer. 3. Notes can be as well. Add a Note Delete Note Task 1: Launch Notes 1. Launch the Notes app: a. Go to the Home screen; press (Home) button. b. Select & Activate the Notes app; (1-Finger_ TOUCH). Task 2: Create two Notes and type a sentences 1. Create Note 1: a. Create note 1, select the Add a Note button (1-Finger_ TOUCH). b. Type a sentence: i. Type, The sky is blue. ; (1-Finger_ TOUCH). ii. Select the Keyboard key to close the keyboard (1-Finger_ TOUCH). 2. Create Note 2: a. Create note 2, select the Add a Note button (1-Finger_ TOUCH). b. Type a sentence: i. Type, The grass is green. ; (1-Finger_ TOUCH). ii. Select the Keyboard key to close the keyboard (1-Finger_ TOUCH). Task 3: Switch between your notes 1. Select the created notes in the left pane; (1-Finger_ TOUCH). Task 4: Delete your two notes 1. Select the Delete icon; (1-Finger_ TOUCH). 2. Select the Delete Note button; (1-Finger_ TOUCH). Developed by Robert Miller Oklahoma School for the Blind Last updated 24 April 2012 Page 9 of 58
10 PART 2: ipad with VoiceOver Section 2.1: Physical Controls Notes: All instructions will assume that the ipad is positioned in the horizontal position with the HOME button on the right. 1. Turning on and shutting down the ipad: a. Press & hold the Power button. 2. Lock/Sleep Mode: a. Press & release the Power button. b. Or, set in place on the keyboard case. 3. Unlock/Wake up from sleep: a. Press the (Home) button, the slide to unlock. b. Press & release the Power button. 4. Go to the Home screen: a. Press (Home) button. Overview (VoiceOver) 1. VoiceOver is the speech/screen-reader that announces what appears on the screen. This allows the blind and visually impaired the ability to access the ipad. 2. When you select an element/item on the ipad, a Black Rectangle which is called the VoiceOver Cursor encloses it and VoiceOver speaks the name or describes the item. Section 2.2: Home Screen Navigation Rearranging Apps Folders Speech Task 1: Turning ON & OFF the unit 1. Power ON; press & Hold the (Power) button. 2. Unlock the ipad: a. Method 1: (TAP) i. Slide your finger to select the Slide to Unlock button; (1-Finger_TAP). ii. Activate button to unlock; (1-Finger_DOUBLE TAP). b. Method 2: (FLICK) i. Select the Slide to Unlock button; (1-Finger_FLICK) right or left. ii. Activate Slide to Unlock button to unlock; (1-Finger_DOUBLE TAP). Task 2: Speech Options Power Sleep/Wake Button Head Phone Jack 1. Change the Speech Rate: a. Change Rotor to Speech Rate ; (2-Finger_ROTATE) [Rotor will be discussed later]. b. Increase or Decrease Speech Rate ; (1-Finger_SWIPE UP/DOWN). 2. Change the Volume: a. Change Rotor to Volume ; (2-Finger_ROTATE) [Rotor will be discussed later]. b. Increase or Decrease Volume ; (1-Finger_SWIPE UP/DOWN). 3. Turn Speech ON & OFF; (3-Finger_DOUBLE TAP). 4. Turn VoiceOver OFF & ON; press HOME button 3 times, quickly (toggle). Silent/Rotation Lock Volume Front Camera Developed by Robert Miller Oklahoma School for the Blind Last updated 24 April 2012 Page 10 of 58 Home Button Edge: Dock Connector
11 Task 3: Two Methods of Navigating the App icons 1. Go to the Home Screen ; press the (HOME) button. 2. Method 1: (1-Finger_FLICK): a. Move forward one app at a time to YouTube ; (1-Finger_FLICK RIGHT). b. Move backwards one app at a time to Settings ; (1-Finger_FLICK LEFT). 3. Method 2: (1-Finger_SLIDE): a. Slide 1 finger back and forth on the screen in a grid pattern; (1-Finger_SLIDE). Task 4: Moving between Search & Home Screen Pages (3-Finger_SWIPE): 1. Move to the Search Screen; (3-Finger_SWIPE RIGHT). 2. Move back to Page 1 of the Home Screen; (3-Finger_SWIPE LEFT). 3. Move to Page 2 of the Home Screen; (3-Finger_SWIPE LEFT). 4. Move back to Page 1 of the Home Screen; (3-Finger_SWIPE RIGHT). Task 5: Rearrange App Icons & Create Folders on Home Screen 1. Select an app icon; (1-Finger_TAP). 2. Place apps in Jiggle mode; (1-Finger_DOUBLE TAP & HOLD). 3. Select the desired app icon; (1-Finger_TAP), then (1-Finger_DOUBLE TAP & HOLD). Then drag the app to the desired location. 4. Create a Folder: Repeat step 3 and drag the app on top of another app to create a folder. Section 2.3: Surfing the Internet with Safari Task 1: Launch Safari Note: During this task you will learn how to use several gestures to open the web browser, Safari, go to a websites, select links, etc. 1. Method 1: (1-Finger_SLIDE) a. Slide your finger across the screen to select the Safari app icon; (1-Finger_TAP). b. Activate and launch Safari ; (1-Finger_DOUBLE TAP). 2. Method 2: (1-Finger_FLICK) c. Flick one finger to the right or left to select Safari ; (1-Finger_FLICK) right or left. d. Activate and launch Safari ; (1-Finger_DOUBLE TAP). Task 2: Launch the website, & web page, Animal Facts 1. Move to Address Bar : a. Move left to the Address Bar; (1-Finger_FLICK LEFT), repeatedly. b. Note: the Address Bar is at the top, 5 th item to the right. 2. Enter the Address Bar ; (1-Finger_DOUBLE TAP). 3. Move right to the Clear Text button; (1-Finger_ FLICK RIGHT). 4. Activate the Clear Text button; (1-Finger_DOUBLE TAP). Note: There are 2 typing modes: Standard & Touch Typing. We will use Standard Typing. 5. Type the Web Address, animalfactguide : Developed by Robert Miller Oklahoma School for the Blind Last updated 24 April 2012 Page 11 of 58
12 a. Select the first character of the address; (1-Finger_FLICK R/L) or (1-Finger_TAP). b. Type the character; (1-Finger_DOUBLE TAP). c. Select the next character of the address; (1-Finger_FLICK R/L) or (1-Finger_TAP). d. Type the character; (1-Finger_DOUBLE TAP). e. Repeat the steps until the address is typed. 6. Select the Animal Facts link: a. Move to Animal Facts link; (1-Finger_FLICK RIGHT). b. Activate link & launch web page; (1-Finger_DOUBLE TAP). Task 3: Scrolling the web page 1. Scrolling (3-Finger_SWIPE): a. Scroll down to page 4 of 4; (3-Finger_SWIPE UP). b. Scroll up to page 1 of 4; (3-Finger_SWIPE DOWN). Task 4: Accessing Popup Menu Creating New Tabs Canceling a Popup/list 1. Access Menu Popup to create a New Tab; (1-Finger_ TAP & HOLD): a. Open the American Bison web page in a New Tab: i. Move to the American Bison link; (1-Finger_FLICK RIGHT or LEFT). ii. Open the links Menu ; (1-Finger_DOUBLE TAP & HOLD). iii. Move down menu & select the item, Open in New Tab ; (1-Finger_FLICK RIGHT). iv. Activate the Open in New Tab item; (1-Finger_DOUBLE TAP). Note: You are still on the same web page, but now you have a new Tab set for the African Penguin web page. 2. Switch to the African Penguin Tab: a. Move to your new American Bison Tab; (1-Finger_FLICK LEFT). b. Activate the Tab to go to the American Bison web page; (1-Finger_DOUBLE TAP). 3. Switch back to the Animals Facts Tab web page: a. Move to your new Animals Facts Tab; (1-Finger_FLICK LEFT). b. Activate the Tab to go to the American Bison web page; (1-Finger_DOUBLE TAP). 4. Cancel a Popup or list: a. Move to the Fun Stuff link; (1-Finger_FLICK RIGHT or LEFT). b. Open the link s Menu ; (1-Finger_DOUBLE TAP & HOLD). c. Cancel the menu Popup ; (2-Finger_SCRUB, LEFT & RIGHT). 5. Delete the American Bison Tab: a. Move to your new American Bison Tab; (1-Finger_FLICK LEFT). b. Activate the Tab to go to the American Bison web page; (1-Finger_DOUBLE TAP). c. Move to the Close Button for the American Bison Tab; (1-Finger_FLICK LEFT). d. Activate the Close Button to the American Bison Tab; (1-Finger_DOUBLE TAP). Developed by Robert Miller Oklahoma School for the Blind Last updated 24 April 2012 Page 12 of 58
13 Task 5: Use the Rotor to move by Headings Read (Pause & Resume Speech) Notes: On web pages there are different types of elements, such as text, links, headings, form controls, etc. Choosing the most efficient element to navigate by will help you find what you are looking for quicker. The Rotor is a virtual dial that makes it possible to choose which element to navigate. 1. Change the Rotor to Headings : a. Use your Thumb and Index finger to change the Rotor to Headings and listen to the number of Headings given; (2-Finger_ROTATE RIGHT) repeatedly. 2. Now move down the page by Headings to Cougar ; (1-Finger_FLICK DOWN). 3. Now move back the page by Headings to Atlantic Puffin (1-Finger_FLICK UP). 4. Activate Heading/Link and load web page, Atlantic Puffin ; (1-Finger_DOUBLE TAP). 5. Move down by Headings until you get to Atlantic Puffin ; (1-Finger_FLICK DOWN). 6. Move to read 1 st paragraph; (1-Finger_FLICK RIGHT), repeatedly. 7. Pause speech; (2-Finger_TAP). 8. Resume speech; (2-Finger_TAP) and pause speech again; (2-Finger_TAP). Task 6: Use the Rotor to move by Form Controls : Note: During this Task you will navigate by Form Controls. Form Controls are elements such as Edit boxes, Combo/Popup Boxes, Checkboxes, Buttons, etc. 1. Change Rotor to Form Controls ; (2-Finger_ROTATE RIGHT) repeatedly. 2. Move down the web page by Form Controls ; (1-Finger_FLICK DOWN). 3. Move back up the web page by Form Controls ; (1-Finger_FLICK UP). Task 7: Start Reading from the top Start Reading from your location 1. Start reading from the top; (2-Finger_SWIPE UP). 2. Start reading from your location; (2-Finger_SWIPE DOWN). Section 2.4: Multitasking Gestures: Switch Between Apps Task 1: Rearranging the App Icons on the Home screen: 1. Go to the Home Screen; (4/5-Finger_PINCH). 2. Place the Home Screen into Jiggle mode: a. Select the Notes app icon; (1-Finger_FLICK RIGHT/LEFT). b. Place in Jiggle mode; (1-Finger_DOUBLE TAP & HOLD). 3. Drag the Notes app up to be the first icon; (1-Finger_DOUBLE TAP & DRAG). Developed by Robert Miller Oklahoma School for the Blind Last updated 24 April 2012 Page 13 of 58
14 Task 2: Multitasking Gestures (Multitasking Bar) Note 1: During this task you will learn how to use Multitasking Gestures to go to the Home screen, reveal the Multitasking Bar, and Switch to another app. 1. Go to the Home screen; (4/5-Finger_PINCH). 2. Launch Safari ; (1-Finger_FLICK RIGHT / LEFT). 3. Again, go to the Home screen; (4/5-Finger_PINCH). 4. Launch Settings ; (1-Finger_FLICK RIGHT / LEFT). 5. Reveal the Multitasking Bar : a. Use the Multitasking Gesture to reveal Multitasking Bar; (4/5-Finger_SWIPE UP). b. From the list, move to Safari ; (1-Finger_FLICK RIGHT / LEFT). c. Activate Safari ; (1-Finger_DOUBLE TAP). Task 3: Switch to Between Apps 1. Safari should still be open. a. (Must have an app open first). 2. Switch to the Next App; (4/5-Finger_SWIPE) left. 3. Switch to the Previous App; (4/5-Finger_SWIPE) right. Task 4: Turn ON/OFF the Curtain Practice what you learned 1. Turn ON the Curtain; (3-Finger_TRIPLE TAP), toggle. a. Launch Safari: i. Go to the Home Screen ; press (HOME) button. ii. Navigate to Safari; (1-Finger_FLICK RIGHT / LEFT). iii. Activate and launch Safari; (1-Finger_DOUBLE TAP). b. Practice what you have learned in Part 2: ipad with VoiceOver. i. Go to 1. Move to the Address Bar. 2. Type zoo.org and go to the website. ii. Activate the following links: 1. Move to and activate the link ANIMALS & PLANTS. 2. Then move to and activate the link MAMMALS. iii. Change the Rotor to Form Controls 1. Move to the Animal Fact Sheets Combo/Popup box and select an animal. 2. Move back to the same Combo/Popup box and move to and select the GO button next to the box. iv. Change the Rotor to Headings 1. Move to each Heading and read its paragraphs. 2. Turn OFF the Curtain; (3-Finger_TRIPLE TAP), toggle. Developed by Robert Miller Oklahoma School for the Blind Last updated 24 April 2012 Page 14 of 58
15 Section 2.5: ibooks: (reading a book) Notes: During these tasks you will learn how to navigate and read a book in ibooks. ibooks is an app that comes with the ipad that allows you to read books. ibooks is accessible to the Blind and visually impaired through the VoiceOver, ZOOM, or VoiceOver with a braille display. Task 1: Launch ibooks 1. Go to the Home screen; press (Home) button. 2. Move to Page 2 of the Home screen; (3-Finger_FLICK LEFT). 3. Select the ibooks app; (1-Finger_FLICK RIGHT / LEFT). 4. Activate the ibooks app; (1-Finger_DOUBLE TAP). Library button Table of Contents button Task 2: Open the Library & Book 1. Select the Library button; (1-Finger_FLICK RIGHT / LEFT). 2. Activate the Library button; (1-Finger_DOUBLE TAP). 3. Open the book, ipad User Guide : a. Select the book, ipad User Guide ; (1-Finger_FLICK RIGHT / LEFT). b. Activate the book, ipad User Guide ; (1-Finger_DOUBLE TAP). Task 3: Navigate the book's Table of Contents 1. Select the book, Table of Contents button; (1-Finger_FLICK RIGHT / LEFT). 2. Activate the book, Table of Contents button; (1-Finger_DOUBLE TAP). a. Move down the table to Accessibility ; (1-Finger_FLICK RIGHT). b. Activate Accessibility ; (1-Finger_DOUBLE TAP). Task 4: Turning the Pages 3-Finger Swiping Page Chooser 1. 3-Finger_Flicking Method: a. Move into the text on the page; (1-Finger_FLICK RIGHT) or (1-Finger_TAP). b. Turn to the next page; on page s right edge; (3-Finger_SWIPE LEFT). c. Turn to the previous page; on page s left edge; (3-Finger_SWIPE RIGHT). 2. Page Chooser Method: a. Move to Page Chooser ; (1-Finger_FLICK RIGHT) or (1-Finger_TAP). b. Method 1: Turning pages; (1-Finger_SWIPE DOWN or UP). c. Method 2: Turning pages; (1-Finger_DOUBLE TAP & HOLD, DRAG LEFT OR RIGHT). Developed by Robert Miller Oklahoma School for the Blind Last updated 24 April 2012 Page 15 of 58
16 Task 5: Reading the pages 1. Method 1: Reading from the top: a. Jump to the top & start reading; (2-Finger_SWIPE UP). i. Note: Will start reading from the top of page and will keep reading. b. Pause the reading; (2-Finger_TAP) toggle. c. Resume & Pause again the reading; (2-Finger_TAP) toggle. 2. Method 2: Reading from your location: a. Start reading from your focused location; (2-Finger_SWIPE DOWN). 3. Method 3: Read one screen at a time. a. Jump to the top & start reading; (2-Finger_SWIPE UP). b. Move to the Text Box just after the Add Bookmark button; (2-Finger_FLICK RIGHT). 4. Method 4: Line by Line a. Read line by line; (1-Finger_TAP) on each line of text. Task 6: Bookmarks Notes: You don t have to set a bookmark when you close the book; ibooks will remember your page and return you to it when you open the book again. 1. Add A Bookmark: a. Jump to the top & start reading; (2-Finger_SWIPE UP). b. Move to the Add a Bookmark button; (2-Finger_FLICK RIGHT). c. Activate the Add a Bookmark button; (1-Finger_DOUBLE TAP). 2. Remove A Bookmark: a. Jump to the top & start reading; (2-Finger_SWIPE UP). b. Move to the Remove Bookmark button; (2-Finger_FLICK RIGHT). c. Activate the Remove Bookmark button; (1-Finger_DOUBLE TAP). Section 2.6: Typing with the Notes App 1. The Notes app allows you to take notes using the on-screen keyboard. It is easy to refer back to your notes or delete unwanted notes. 2. Using the on-screen keyboard with VoiceOver is slow at first, but with time, gets easier. 3. With an icloud account you can sync your notes with your other idevices and computer. 4. Notes can also be sent as s. Task 1: Launch Notes & Start a New Note 1. Go to the Home screen; press (Home) button. 2. Select & Activate the Notes app. 3. Start a new note: a. Jump to top of Notes ; (2-Finger_SWIPE UP). b. Move to Add button; (1-Finger_FLICK RIGHT). c. Activate Add Button; (1-Finger_DOUBLE TAP). 4. Note: This automatically opens the on-screen keyboard and places you in the text field and on the first line of the page. Add A Note Delete Note Developed by Robert Miller Oklahoma School for the Blind Last updated 24 April 2012 Page 16 of 58
17 Task 2: Launch Notes & Move to an Existing Note 1. Select & Activate the Notes app. a. Move to the first line of your Notes page using (1-Finger_FLICK RIGHT) until you hear Today s date and time. b. Enter the Text Field ; (1-Finger_DOUBLE TAP). 2. Note: Now your focus is on the first line and the on-screen keyboard is open. 3. Move your cursor at the end of your existing notes; (1-Finger_DOUBLE TAP). Task 3: Standard Typing: Type your sentences with the on-screen keyboard Note: With VoiceOver there are 2 typing modes: Standard Typing and Touch Typing. In Standard typing mode there are 2 methods of typing characters. 1. Use the Rotor to change the typing mode to Standard Typing : a. Activate the Rotor and change it to Typing Mode ; (2-Finger_ROTATE). b. Change the Typing Mode to Standard Typing ; (1-Finger_FLICK UP or DOWN). 2. Use the following steps to type the sentence, The sky is blue. a. Note: VoiceOver & Standard typing requires you to first select the letter, then activate it. b. Method 1: (1-Finger_TAP): i. Using (1-Finger_TAP) slide you finger over the keys until you find the letter, T announced, then use (1-Finger_DOUBLE TAP) to type the letter. Repeat the process to type he sky. c. Method 2: (1-Finger_FLICK) i. Using (1-Finger_FLICK RIGHT/LEFT) select the letters to the words, is blue. After selecting each key use (1-Finger_DOUBLE TAP) to type. Task 4: Touch Typing: Type your sentences with the on-screen keyboard Note: With VoiceOver there are 2 typing modes: Standard Typing and Touch Typing. 1. Use the Rotor to change the typing mode to Touch Typing : a. Change the Typing Mode to Touch Typing ; (1-Finger_FLICK UP or DOWN). 2. Use the following steps to type the sentence, The grass is green : a. Slide (1-Finger) back and forth across the keyboard until you hear the letter T and then lift your finger off the screen, the letter will be typed. b. Repeat the process until the sentence is typed. Task 5: Delete a note 1. Move to the Delete icon; (1-Finger_FLICK). 2. Activate the Delete Note button; (1-Finger_DOUBLE TAP). Developed by Robert Miller Oklahoma School for the Blind Last updated 24 April 2012 Page 17 of 58

18 Part 3: ipad with ZOOM Section 3.1: Physical Controls Notes: All instructions will assume that the ipad is positioned in the horizontal position with the HOME button on the right. 1. Turning on and shutting down the ipad: a. Press & hold the Power button. 2. Put to sleep: a. Press & release the Power button. b. Or, set in place on the keyboard case. 3. Wake up from sleep: a. Press the (Home) button, the slide to unlock. b. Press & release the Power button. 4. To Close a App/program: a. Press (Home) button. Power Sleep/Wake Button Head Phone Jack Silent/Rotation Lock Volume Front Camera Home Button Edge: Dock Connector Overview (ZOOM) 1. ZOOM is the screen magnifier that magnifies the entire screen, not just within the app. This allows visually impaired the ability to access the ipad. 2. As mentioned before the mainstream Zoom allows you to magnify such apps as web pages, pictures, and . Zoom does not magnify the title bar or toolbar across the top. Nor does it allow you to zoom the Home screen or within most other apps, such as Notes, Calendar, Settings, etc. Overview (Simple ZOOM Commands) Note: I have adjusted the Settings or when you press the HOME button 3 times repeatedly it toggles between ZOOM and VOICEOVER. 1. Switch ON the ZOOM feature; press HOME button 3 times. VoiceOver will announce, VoiceOver OFF. 2. To enable or disable the ZOOM magnification; (3-Finger_DOUBLE TAP). a. Toggles zoom in & out to from your last zoom setting. 3. To move around the screen; (3-Finger_DRAG). a. Keep your 3 fingers on the screen as you drag them around. 4. To change the zoom magnification; (3-Finger_DOUBLE TAP & SWIPE UP / DOWN). 5. MOST of the Mainstream gestures can be used to navigate. Developed by Robert Miller Oklahoma School for the Blind Last updated 24 April 2012 Page 18 of 58
19 Section 3.2: Surfing the Internet with Safari Task 1: Turning ON & OFF the unit & Switching between ZOOM & VoiceOver Note: During this task you will learn how to Power OFF & ON, Lock & Unlock, and switch between VoiceOver and ZOOM. 1. Power ON: a. Press & Hold the (Power) button (Make sure ZOOM is turned ON first). b. I couldn t get ZOOM to stay on when the ipad was Powered OFF. 2. Unlock the ipad: a. Slide your finger to select the Slide to Unlock button; (1-Finger_TAP & SLIDE RIGHT). 3. Enable & Disable ZOOM: a. Enable ZOOM; (3-Finger_DOUBLE TAP) Toggle. b. Disable ZOOM; (3-Finger_DOUBLE TAP)Toggle. c. Enable ZOOM again; (3-Finger_DOUBLE TAP) Toggle. 4. Switch between ZOOM & VoiceOver: a. Press HOME button 3 times, quickly (toggle). Task 2: Turning ON & OFF the unit & ZOOM Feature Note: During this task you will learn how to use both the Mainstream & ZOOM gestures to open the web browser, Safari & go to a website where you will select links & rearrange icons on Home Screen. 1. Turn on ipad, Unlock, Adjust ZOOM magnification: a. Power ON: i. Press & Hold the (Power) button. b. Unlock the ipad: i. Touch, Hold & Slide right Slide to Unlock button; (1-Finger_TAP, HOLD & SLIDE). c. Enable ZOOM; (3-Finger_DOUBLE TAP). d. Adjust ZOOM magnification; (3-Finger_TAP & DRAG UP or DOWN). 2. Launch Safari : a. Move Home screen around to locate Safari app icon; (3-Finger_DRAG or SWIPE). b. Launch Safari ; (1-Finger_TAP). 3. Launch Oaklandzoo.org website: a. Move to Address Bar ; (1-Finger_TAP). b. Select the Clear Text button; (1-Finger_TAP). c. Press the letter keys for oaklandzoo.org ; (1-Finger_TAP). Developed by Robert Miller Oklahoma School for the Blind Last updated 24 April 2012 Page 19 of 58
20 4. Activate Links needed to launch Yellow Anaconda web page: a. Select the Animals link; (1-Finger_TAP). b. Select the Mammals link; (1-Finger_TAP). c. Select the Back button; (1-Finger_TAP). d. Select the Reptiles link; (1-Finger_TAP). e. Now find & select the African Spurred Tortoise ; i. Move magnified web page in view; (3-Finger_TAP & DRAG). ii. Scroll down the web page; (1-Finger_SWIPE UP). iii. Select the link, Yellow Anaconda ; (1-Finger_TAP). 5. Navigate the Yellow Anaconda web page: a. Scroll down the web page to DESCRIPTION Heading; (1-Finger_SWIPE UP). b. Pan Right and Left to read paragraph; (3-Finger_TAP & DRAG). c. Scroll down the web page to Status In The Wild Heading; (1-Finger_SWIPE UP). d. Demonstrate how Panning & Scrolling works as I move back up the web page to Main Links ; i. Scrolling; (1-Finger_SWIPE). ii. Panning; (3-Finger_TAP & DRAG). 6. Open a Menu on the web page: a. Open the Animal Menu ; (1-Finger_TAP & HOLD). b. Open link as a New Tab, select Open in New Tab ; (1-Finger_TAP). c. Switch between the 2 Tabs; (1-Finger_TAP). 7. Define a word: a. On the Animals web page, define a word such as, birds (1-Finger_TAP & HOLD). b. Select Define ; (1-Finger_TAP). c. Pan up to the Popup window; (3-Finger_DRAG) up. d. Read the definition. Task 3: Rearranging the App Icons on the Home screen 1. Go to the Home Screen; press (HOME) button. 2. Place the Home Screen into Jiggle mode; (1-Finger_TAP & HOLD). 3. Drag the itunes app up to be the first icon; (1-Finger_TAP & DRAG). Developed by Robert Miller Oklahoma School for the Blind Last updated 24 April 2012 Page 20 of 58
21 Section 3.3: Accessing Maps (Accessibility ZOOM vs. Mainstream Zoom) Note: During these tasks you will learn the difference between mainstream Zoom and accessibility ZOOM on a map. You will use the TAP and PINCH methods. Task 1: Enable & Adjust ZOOM Magnification & Launch "Maps" App 1. Enable and adjust ZOOM magnification; (3-Finger_TAB & DRAG). 2. Launch Maps ; (1-Finger_TAP). Task 2: Mainstream Zoom 1. Method 1: Zoom In & Out using TAPS a. Zoom IN on the web page; (1-Finger_DOUBLE TAP), repeatedly. b. Zoom OUT on the web page; (2-Finger_TAP), repeatedly. 2. Method 2: Zoom in & Out using Pinch a. Zoom IN on the web page; (2-Finger_PINCH). i. Place your thumb and index finger together on the screen and then slide them apart. b. Zoom OUT on the web page; (2-Finger_PINCH). i. Place your thumb and index finger apart on the screen and then slide them together. Task 3: Accessibility ZOOM 1. Zoom IN; (3-Finger_TAP & DRAG UP). 2. Zoom OUT; (3-Finger_TAP & DRAG DOWN). Section 3.4: Multitasking Gestures Note 1: During these tasks you will learn how to use Multitasking Gestures to go to the Home screen, reveal the Multitasking Bar, and Switch to another app. Task 1: Going to the Home screen 1. Launch Safari ; (1-Finger_TAP). 2. Use the Multitasking Gesture to go to the Home screen; (4/5-Finger_PINCH). Task 2: Reveal the Multitasking Bar 1. Launch Settings ; (1-Finger_TAP). 2. Use the Multitasking Gesture to reveal Multitasking Bar; (4/5-Finger_SWIPE UP). 3. From the list, launch Safari ; (1-Finger_TAP). Task 3: Switch to Between Apps: 1. Safari should still be open. a. (Must have an app open first). 2. Switch to the Next App; (4/5-Finger_SWIPE LEFT). 3. Switch to the Previous App; (4/5-Finger_SWIPE RIGHT). Developed by Robert Miller Oklahoma School for the Blind Last updated 24 April 2012 Page 21 of 58
22 Section 3.5: Accessibility Feature: White On Black Note: The White on Black feature is the ipad s high contrast/negative image. Task 1: Turning on the White on Black feature 1. Go to Settings. 2. Go to Accessibility 3. Select the White on Black feature. 4. Move to Section 3.6 to demonstrate White on Black. Section 3.6: ibooks: (read a book) Notes: During these tasks you will learn how to navigate and read a book in ibooks. ibooks is a free app that you must download from the Apple Apps Store. Using itunes you can download epub and PDF books. 1. Launch ibooks : a. Go to the Home screen; press (Home) button. b. Move to Page 2 of the Home screen; (1-Finger_FLICK LEFT). c. Pan screen in view of ibooks app; (3-Finger_DRAG). d. Activate the ibooks app; (1-Finger_TAP). 2. Open the Library, if not open already, by using (3-Finger_DRAG) to pan Library button in view; then (1-Finger_TAP) activate the Library button. Library button Table of Contents button 3. Select & open the book, The Ugly Duckling ; (3-Finger_DRAG) & (1-Finger_TAP). 4. Open Table of Contents to move to The Ugly Duckling page 3 by using the (3-Finger_DRAG) & (1-Finger_TAP) method. 5. Turn Pages Slowly: (Use 3-Finger_DRAG when needed): a. Turn to the next page; on page s right edge; (1-Finger_TAP & DRAG LEFT). b. Turn to the previous page; on page s left edge; (1-Finger_TAP & DRAG RIGHT). 6. Turn Pages Quickly: a. Turn to the next page; on center to right edge; (1-Finger_TAP & FLICK LEFT). b. Turn to the previous page; on center to left edge; (1-Finger_TAP & FLICK RIGHT). 7. Bookmarks: Notes: You don t have to set a bookmark when you close the book; ibooks will remember your page and return you to it when you open the book again. a. Add a Bookmark; (1-Finger_TAP) on the Ribbon, top-right corner. b. Remove a Bookmark; (1-Finger_TAP) on the Ribbon, top-right corner. Developed by Robert Miller Oklahoma School for the Blind Last updated 24 April 2012 Page 22 of 58
23 Section 3.7: Accessibility Feature: Large Text Note: the Large Text feature will allow you to increase the font size up to 56-point text in alerts, Calendar, Contacts, Mail, Messages, and Notes. Task 1: Turning on the Large Text feature 1. Go to Settings. 2. Go to Accessibility. 3. Select 56 pt text in the Large Text feature. 4. Move on to Section 3.8 to demonstrate the Large Text feature in Notes. Section 3.8: Typing with the Notes App Note: The Notes app allows you to take notes using the on-screen keyboard. It is easy to refer back to your notes or delete unwanted notes. Using the on-screen keyboard with ZOOM may be a little frustrating if you have poor typing skills. Using an external Bluetooth ipad keyboard is going to be more efficient. With an icloud account you can sync your notes with your other idevices and computer. Notes can also be sent as s. 1. Launch the Notes app: c. Go to the Home screen; press (Home) button. a. Select & Activate the Notes app; (3-Finger_DRAG) & (1-Finger_TAP). 2. Start a new note by clicking the Add A Note button; (3-Finger_DRAG) & (1-Finger_TAP). 3. Type A Sentence (using on-screen keyboard): a. Place your focus on the first line; (3-Finger_DRAG) & (1-Finger_TAP). b. Type the sentence The sky is blue. 4. Delete a note; (1-Finger_TAP) Add A Note a. Select the Delete icon. b. Select the Delete Note button. Delete Note Developed by Robert Miller Oklahoma School for the Blind Last updated 24 April 2012 Page 23 of 58
 Notes: The ipad can be used in the vertical or horizontal position, but for these instructions will assume that the ipad is positioned in the horizontal")
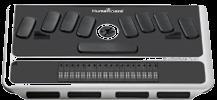
24 PART 4: ipad with VoiceOver and the Refreshabraille 18 ` Section 4.1: Refreshabraille 18 (Physical Controls) Notes: The ipad can be used in the vertical or horizontal position, but for these instructions will assume that the ipad is positioned in the horizontal position with the HOME button on the right. ipad: 1. Turning on and shutting down the ipad: a. Press & hold the Power button. 2. Lock/Sleep mode: a. Press & release the Power button. b. Or, set in place on the keyboard case. 3. Unlock/Wake from Sleep: a. Press the (Home) button, the slide to unlock. b. Press & release the Power button. 4. Go to the Home screen: a. Press (Home) button. Refreshabraille 18 Power Sleep/Wake Button Head Phone Jack Silent/Rotation Lock Volume Front Camera Home Button Edge: Dock Connector 1. Locate the features: a. Braille Display (18 cells) b. Pan Left & Right buttons c. Braille Keys 1-6 d. Joystick e. Space Bar (SP) f. Braille Keys 7 & 8 g. Power Button h. Aux Space Cursor Routing Pan Left 18 Cells Aux Space Pan Right Joystick Power Developed by Robert Miller Oklahoma School for the Blind Last updated 24 April 2012 Page 24 of 58
25 Overview: (Refreshable Braille Displays) Note: The ipad will connect to most Bluetooth refreshable braille displays. You must have VoiceOver on before the display will work. There are about 27 basic key commands that will work on braille displays with a braille keyboard (See Quick Commands List starting on page 54). There are additional key commands that are unique to each braille display, as there are with the Refreshabraille 18 (See Quick Commands List starting on page 57). Section 4.2: Making the Connection (VoiceOver and the Braille Display) Task 1: Making the Initial Bluetooth Connection (Pairing) 1. Turn on the Refreshabraille 18: a. Located on the front edge of display. b. Press & Hold the power button until it vibrates & the SN pops up in braille. 2. Turn on the ipad: (Place the Home button to right) a. Press & Release the Home button. b. Or Press & Release the Power Button. 3. Turn on VoiceOver: Cursor Routing a. Unlock the screen. b. Tap Settings. Pan Left c. Tap General. d. Tap Accessibility. e. VoiceOver. f. VoiceOver ON/OFF button, to turn ON. 4. Make Bluetooth Connection: a. (1-Finger_Touch) on right pane. b. (3-Finger_Flick Up) to view Braille option. Power c. (1-Finger_Double Tap) on Braille. d. Wait and then enter the pairing code , then (1-Finger_Double Tap) Done. Task 2: Once paired, making the Bluetooth Connections thereafter 1. Make sure VoiceOver enabled and the ipad screen is lock/sleep mode. 2. Turn on the Refreshabraille Turn on ipad. You should hear the connection sound and see the display refresh itself. Task 3: "VoiceOver Help" Note: During this task you will learn how to Start and Stop the Keyboard Help. This feature allows you to press a key command to hear its function without affecting the ipad. 1. Turn ON VoiceOver Help ; press (Dots 1-3-space). 18 Cells a. Enter the following commands and listen to the key command description: i. Press (H-space). ii. Press (Dot 4-space) then press (Dot 1-space). iii. Press (Dot space) then press (Dot 7-space). iv. Press (Dots space). v. Press Down on (Joy Stick). 2. Turn OFF VoiceOver Help ; press (Dots 1-2-space). Aux Space Pan Right Joystick Developed by Robert Miller Oklahoma School for the Blind Last updated 24 April 2012 Page 25 of 58
26 Section 4.3: Navigating the Home Screen Task 1: Navigate the "HOME" screen Adjust Volume & Speech Note: During this task you will learn how to use the braille display commands to move from one app to another on the HOME screen, adjust the VOLUME, and to turn the SPEECH OFF and ON. 1. Volume: a. Increase Volume; (Dots space) [ AR ] b. Decrease Volume; (Dots space) [ GH ]. c. Speech ON/OFF; (Dots space) [ M ] toggle. 2. Speech Rate: a. Set the Rotor to Speech Rate ; (Dots 5-6-space) or (Dots 2-3-space). b. Increase Speech Rate; (Dot 3-space). c. Decrease Speech Rate; (Dot 6-space). 3. Navigate Home Screen Pages: a. Go to Home Screen; (H-Space). b. Move to the Search Page; (Dots space). c. Move to Pages 1 & 2 of the Home Screen; (Dots space). d. Move to back to Page 1 of the Home Screen; (Dots space). 4. Navigate App Icons Forward: a. Method 1: (Dot 4-space). b. Method 2: (Joystick) rock to the right. c. Method 3: (Pan Right Button). 5. Navigate App Icons Backwards: a. Method 1: (Dot 1-space). b. Method 2: (Joystick) rock to the left. c. Method 3: (Pan Left Button). 6. Navigate to the Notes app (use above methods). 7. Activate the Notes app: a. Method 1: Press (Cursor Routing Button) to open app. b. Method 2: Press (Joystick) to open app. Cursor Routing Pan Left 18 Cells Power Aux Space Pan Right Joystick Developed by Robert Miller Oklahoma School for the Blind Last updated 24 April 2012 Page 26 of 58
27 Section 4.4: Surfing the Internet with Safari Task 1: Launch "Safari" from the HOME screen 1. Go to Home screen; press (H-space). 2. Navigate to and open the Safari app: a. Select Safari app; (Dot 4-space) or (Dot 1-space). b. Activate and open Safari app; press (Joystick) or (Cursor Routing Button). Task 2: Enter web address and launch Commands To Remember: Contracted Braille ON & OFF (Dots space) [G]. Jump to the top of the web page (Dots space). Jump to bottom of web page (Dots space). Navigate to the next or previous item; press (Dot 4-space) or (Dot 1-space). Activate the links, form controls, etc; press (Joystick) or (E-space). Delete; press (D-space). Back; press (B-space) or (Power Button). Cursor Routing Pan Left 18 Cells Aux Space Pan Right Joystick Power 1. Move to the Address Bar: a. Go to top of web page; press (Dots space) [L]. b. Move to Address Bar ; press (Dot 4-space) three times. c. Enter the Address Bar ; press (Joystick) or (Cursor Routing Button). d. Now, move to Clear Text button; press (Dot 4-space) once. e. Then activate the button; press (Joystick) or (Cursor Routing Button). 2. Type Web Address: a. Turn OFF Contracted Braille; press (Dots space) [G] b. Braille the letter a, then b, then c. c. Delete the b & c ; press (Dots space) [D]. d. Now, finish brailling the web address n I m a l f a c t g u I d e. 3. Launch website; press the (Dots 1-5-space) [E]. 4. Turn ON Contracted Braille; press (Dots space) [G]. SIDE BAR NOTE: Contracted braille can be turned on, but with it off you don t get the auto inserting of contractions. Developed by Robert Miller Oklahoma School for the Blind Last updated 24 April 2012 Page 27 of 58
28 Task 3: Load web page, "Animal Facts" 1. Move to Animal Facts link; press (Dot 4-space) or rock right on (Joystick) repeatedly. 2. Activate the Animal Facts link; press (Joystick) or (Cursor Routing Button). Task 4: Use the Rotor to move by Headings Read (Pause & Resume Speech) Notes: On web pages there are different types of elements, such as text, links, headings, form controls, etc. Choosing the most efficient elements to navigate by will help you find what you are looking for quicker. The Rotor Control makes it possible to choose which element to navigate. Commands To Remember: Change Rotor selection; press (Dots 5-6-space) or (Dots 2-3-space). Navigate to different Rotor items on web page; press (Dot 6-space) or (Dot 3-space). Activate the links, form controls, etc; press (Joystick). Navigate to the next or previous item; press (Dot 4-space) or (Dot 1-space). Pause & Resume Speech Reading ; press (P-space) toggle. Start Reading from top op web page; press (W-space). Start Reading from current location; press (R-space). Jump to bottom of web page; press (Dots space). Jump to the top of the web page; press (Dots space). Pan braille forward; press (Right Panning Button). Pan braille back; press (Left Panning Button). Activate the Home button; press (H-space). Cursor Routing Pan Left 18 Cells Aux Space Pan Right Joystick 1. Change the Rotor to Headings : Power a. Listen to the number of Headings as you change the Rotor to Headings ; press (Dots 5-6-space) or (Dots 2-3-space) repeatedly. 2. Navigating by Headings to find your desired animal information: a. Now move down the page by Headings to Cougar press (Dot 6-space). b. Now move back up the page by Headings to Atlantic Puffin press (Dot 3-space). c. Activate Heading/Link and load web page, Atlantic Puffin press (Joystick). d. Move down by Headings until you get to Atlantic Puffin press (Dot 6-space). 3. Reading the information : a. Now move to Heading s paragraph and read it; press (Dot 4-space), three times. b. Pause speech; press (Dots ) [P]. c. Resume speech; press (Dots ) [P]. Developed by Robert Miller Oklahoma School for the Blind Last updated 24 April 2012 Page 28 of 58
29 Cursor Routing 18 Cells Aux Space Pan Left Pan Right Joystick Power Task 5: Use the web page's Reader option to reformat the web page Note: During this Task you will select the Reader option to reformat the web page. This will rid the page of all content not related to the link you selected. 1. Move by Headings to the Giraffe heading/link; (Dot 6-space) or (Dot 3-space). 2. Activate the Giraffe heading/link; press down on (Joystick). 3. Jump to the web page; (Dots space). 4. Move across to the Reader button; (Dot 6-space). 5. Activate the Reader button; press down on (Joystick). 6. Move by Headings to the Conservation Status Heading; (Dot 6-space) or (Dot 3-space). 7. Now, move to the paragraph below the Heading; (Dot 4-space). 8. Close the Reader format; (Dots 1-2-space) [B]. Task 6: Use the Rotor to move by Form Controls" Note: During this Task you will navigate just by Form Controls. Form controls are elements such as edit boxes, combo/popup boxes, checkboxes, buttons, etc. 1. Change Rotor to Form Controls ; (Dots 5-6-space) or (Dots 2-3-space). 2. Move down the web page by Form Controls ; (Dot 6-space). 3. Move back up the web page by Form Controls ; (Dot 3-space). Task 7: Use the braille display instead of speech to read text on web page 1. Set Rotor to Headings and move to Giraffe Heading. 2. Turn Speech OFF; press (M-space) toggle. 3. Pan forward & read braille; press (Right Panning Button) or (Dot 5-space). 4. Pan Back; press (Left Panning Button) or (2-space). 5. Turn Speech ON; press (M-space) toggle. Task 8: Start Reading from your location Start Reading from the top 1. Start reading from your location; press (Dots space) [R]. 2. Start reading from the top; press (Dots space) [W]. Developed by Robert Miller Oklahoma School for the Blind Last updated 24 April 2012 Page 29 of 58
30 Task 9: Close the Curtain 1. Move to the Home Screen ; press (Dots space) [H]. 2. Close the Curtain; press (Dots space). a. You can now work without anyone seeing what s on the screen. b. Try it out! Use the commands just learned. Go to the Safari app on the Home Screen and launch it. Navigate by Headings, then move to the text of the Heading. 3. Open the Curtain; press (Dots space). Developed by Robert Miller Oklahoma School for the Blind Last updated 24 April 2012 Page 30 of 58
31 Section 4.5: ibooks: Reading a Book Notes: During these tasks you will learn how to navigate and read a book in ibooks. ibooks is a free app that you can download from the Apple Apps Store. Using itunes you can download epub and PDF books. ibooks is accessible to blind and visually impaired readers using VoiceOver, ZOOM, or VoiceOver with a braille display. Task 1: Launch ibooks 1. Go to the Home screen; press (H-space) button. 2. Move to Page 2 of the Home screen; (Dots space). 3. Select the ibooks app: a. Jump to top of screen; press (Dots space). b. Move to ibooks app; (Dot 4-space) repeatedly. c. Activate the ibooks app; press (Joystick). Task 2: Open the Library & Book Library button Table of Contents button 1. Move to Library button; (Dot 4-space) repeatedly. 2. Activate the Library button; press (Cursor Routing Button). 3. Open the book, The Ugly Duckling : a. Move to The Ugly Duckling button; rock right on (Joystick) repeatedly. b. Activate the The Ugly Duckling; press (Joystick). Task 3: Navigate the book's Table of Contents 1. Select the book s Table of Contents button; (Dot 4-space). 2. Activate the Table of Contents button; press (Joystick). 3. Move down table to The Ugly Duckling, page 3 ; (Dot 4-space)/ rock right on (Joystick). 4. Activate TOC item, The Ugly Duckling, page 3 ; (Joystick) or (Cursor Routing Button). Task 4: Turning & Reading the pages with SPEECH 1. Turn & Read the Next Page: a. Move into text then turn to the next pages; (Dots space) [O] several times. b. Pause the reading; press ( space) [P]. 2. Turn to the previous page; press (Dots space). a. Pause the reading; press ( space) [P]. 3. Page Chooser: a. Move to the Page Chooser; press (Dots 4-space). b. Move forward or backwards; press (Dots 6-space) or (Dots 3-space). Developed by Robert Miller Oklahoma School for the Blind Last updated 24 April 2012 Page 31 of 58
32 Cursor Routing 18 Cells Aux Space Pan Left Pan Right Joystick Power Task 5: Turning Pages using "Page Chooser" 1. Jump to the end of the page; (Dots space). 2. Move to the Page Chooser ; (Dot 1-space), repeatedly. 3. Turn the pages forwards; (Dots 6-space), repeatedly. 4. Turn the pages backwards; (Dots 3-space), repeatedly. Task 6: Turning & Reading the pages with Brialle Display (NO SPEECH) 1. Turn OFF Speech; (Dots space) [M] toggle. 2. Read the page with the braille display; a. Method 1: Panning Buttons i. Read forwards: (Right Panning Button) repeatedly. ii. Read backwards: (Left Panning Button) repeatedly. b. Method 2: Braille Dot keys i. Read forwards: (Dot 5-space) repeatedly. ii. Read backwards: (Dot 2-space) repeatedly. 3. Turn ON Speech: (Dots space) [M] toggle. Task 7: Bookmarks Notes: You don t have to set a bookmark when you close the book; ibooks will remember your page and return you to it when you open the book again. 1. Add A Bookmark: a. Jump to the top; (Dots space). b. Move to the Add a Bookmark button; (Dots 4-space). c. Activate the Add a Bookmark button; press (Joystick) or (Cursor Routing Button). 2. Remove A Bookmark: a. Jump to the top; (Dots space). b. Move to the Add a Bookmark button; (Dots 4-space). c. Activate Remove Bookmark button; press (Joystick) or (Cursor Routing Button). Developed by Robert Miller Oklahoma School for the Blind Last updated 24 April 2012 Page 32 of 58
33 Section 4.6: Typing with the Notes App 1. The Notes app allows you to take notes using the on-screen keyboard. It is easy to refer back to your notes or delete unwanted notes. 2. Using VoiceOver with a braille display is a lot easier to enter text then just using VoiceOver. 3. With an icloud account you can sync your notes with your other idevices and computer. Notes can also be sent as . Cursor Routing 18 Cells Aux Space Add A Note Pan Left Pan Right Joystick Delete Power Task 1: Launch Notes & Start a New Note 1. Go to the Home screen; press (Home) button. 2. Select & Activate the Notes app. a. Move to the Notes app; (Dots 4-space). b. Activate the Notes app; press (Joystick). 3. Start a new note: a. Move to the Add button; (Dots 4-space). b. Activate the Add button; press (Joystick). SIDE BAR NOTE: We also have Pages, the word processor for the idevices VoiceOver and Refreshabraille 18 works with Pages as well. Task 2: Writing contracted & uncontracted sentences with the Braille Display Note: Contracted braille is inserted after you press the space or ending punctuation. 1. Set display to uncontracted braille; (Dots space). Type the sentence with contracted braille The ipad is very cool. 2. Move to a New Line; (Dots 1-5-space) [E]. 3. Now set the display to contracted braille; (Dots space). Type the sentence with contracted braille VoiceOver makes the ipad easy to use. 4. Delete use. ; (Dots space) [D]repeatedly. 5. Now type have fun. 6. Delete a note: a. Move to the Delete icon; (Dot 4-space). b. Activate the first Delete button; (Joystick). c. Now activate second Delete Button; (Joystick). Developed by Robert Miller Oklahoma School for the Blind Last updated 24 April 2012 Page 33 of 58
 Notes: All instructions will assume that the ipad is positioned in the horizontal position with the HOME button on the right. 1.")
34 Part 5: ipad with VoiceOver and the Focus 40 Blue Section 5.1: Physical Controls (Focus 40 Blue) Notes: All instructions will assume that the ipad is positioned in the horizontal position with the HOME button on the right. 1. Locate the ipad s physical controls: a. Power button: i. Press & Hold to power up & down. ii. Press & Release to lock/put to sleep. b. Silent/Rotation Lock slider. c. Volume button. d. Home button: i. Press & Release: 1. To wake up. 2. Go to the Home Screen. e. Front Camera. Power (Sleep/Wake) Button Front Camera Silent/Rotation Lock Volume Home Button Edge: Dock Connector Head Phone Jack 2. Locate the Focus 40 Blue s physical controls: a. Power button b. Braille keys c. 40 braille cells d. Cursor Routing buttons e. Left/Right Whiz Wheels f. Row of 40 Hotkeys g. Left/Right Panning buttons h. Left/Right Rocker Bars i. Left/Right Selector buttons j. Space & 2 Shift buttons Power Button Hotkeys Cursor Routing Left Whiz Wheel L-Panning Button Rocker Bar Selector Button Shift keys Selector Button Rocker Bar Right Whiz Wheel R-Panning Button Overview: (Refreshable Braille Displays) 1. The ipad will connect to most Bluetooth refreshable braille displays. 2. You must have VoiceOver on before the display will work. 3. There are about 27 basic key commands that will work on braille displays with a braille keyboard (See Quick Commands List starting on page 54). 4. There are additional key commands that are unique to each braille display, as there are with the Focus 40 Blue (See Quick Commands List starting on page 56). Developed by Robert Miller Oklahoma School for the Blind Last updated 24 April 2012 Page 34 of 58
35 Section 5.2: Making the Connection (VoiceOver and the Braille Display) Task 1: Making the Initial Bluetooth Connection (Pairing) 1. Turn on the Focus 40 Blue: a. Press & Hold the power button. b. Located on the left side. 2. Turn on the ipad: (Place the Home button to right) a. Press & release the Home button. b. Or press & release the Power Button. 3. Turn on VoiceOver: a. Unlock the screen. b. Tap Settings. c. Tap General. d. Tap Accessibility. e. Tap VoiceOver. f. Tap VoiceOver ON/OFF button, to turn ON. 4. ipad (Make initial Bluetooth Pairing): a. (1-Finger_Touch) on right pane. b. (3-Finger_Flick Up) to view Braille option. c. (1-Finger_Double Tap) on Braille. d. Wait and then enter the pairing code 0000, then (1-Finger_Double Tap) Done. Task 2: Once paired, making the Bluetooth Connections thereafter 1. Make sure VoiceOver enabled and the ipad is off or in sleep mode. 2. Turn on the Focus 40 Blue. 3. Turn on ipad. You should hear the connection sound and see the display refresh itself. Task 3: "VoiceOver Help" Note: During this task you will Start and Stop the Keyboard Help. This feature allows you to press a key command to hear its function without affecting the ipad. 1. Turn ON VoiceOver Help ; press (Dots 1-3-space). a. Enter the following commands and listen to the key command description: i. Press (H-space). ii. Press (Dot 4-space). iii. Press (Dot 1-space). iv. Press (Dots space). v. Press (Dot space). vi. Press (Dot 7-space). vii. Press (Right Selector). viii. Press (Left Selector). ix. Press down (Right Rocker). 2. Exit VoiceOver Help ; (Dots 1-2-space). Developed by Robert Miller Oklahoma School for the Blind Last updated 24 April 2012 Page 35 of 58
36 Section 5.3: Navigating the Home Screen Task 1: Navigate the "HOME" screen Adjust Volume & Speech Note: During this task you will learn how to use the braille display commands to move from one app to another on the HOME screen, adjust the VOLUME, and to turn the SPEECH OFF and ON. 1. Volume: a. Increase Volume; (Dots space) [ AR ]. b. Decrease Volume; (Dots space) [ GH ]. c. Speech ON/OFF; (Dots space) [ M ] toggle. 2. Speech Rate: a. Set the Rotor to Speech Rate ; (Dots 5-6-space) or (Dots 2-3-space). b. Increase Speech Rate; (Dot 3-space). c. Decrease Speech Rate; (Dot 6-space). 3. Navigate Home Screen Pages: a. Go to Home Screen; (H-Space). b. Move to the Search page; (Dots space). c. Move to Pages 1 & 2 of Home screen; (Dots space). d. Move back to Page 1 of Home screen; (Dots space). 4. Navigate App Icons Forward: a. Method 1: (Dot 4-space). b. Method 2: (Whiz Wheels) roll toward your body. c. Method 3: (Rocker Bars) rock down. d. Method 4: (Right Panning Button). 5. Navigate App Icons backwards: a. Method 1: (Dot 1-space). b. Method 2: (Whiz Wheels) roll away from your body. c. Method 3: (Rocker Bars) rock up. d. Method 4: (Left Panning Button). 6. Now, navigate to the Calendar app icon (use above methods). 7. Activate the Calendar app: a. Method 1: (Cursor Routing Buttons) to open app. b. Method 2: (Whiz Wheels) down like a button. c. Method 3: (Selector Buttons). Developed by Robert Miller Oklahoma School for the Blind Last updated 24 April 2012 Page 36 of 58
37 Section 5.4: Surfing the Internet with Safari Task 1: Launch "Safari" from the "HOME" screen 1. Go to Home screen; press (H-space). 2. Navigate to and open the Safari app: a. Select Safari app; (Dot 4-space) or (Dot 1-space). b. Activate and open Safari app; press down (Whiz Wheel) or (Cursor Routing Button). Task 2: Enter web address and launch Commands To Remember: Contracted Braille ON & OFF (Dots space) [G]. Jump to the top of the web page (Dots space). Jump to bottom of web page (Dots space). Navigate to the next or previous item; press (Dot 4-space) or (Dot 1-space). Activate the links, form controls, etc; press (Cursor Routing) or (E-space) or (WhizWheel). Delete; press (D-space). Back; press (B-space). 1. Move to the Address Bar: a. Go to top of web page; press (Dots space) [L]. b. Move to Address Bar ; press (Dot 4-space) three times. c. Enter Address Bar ; press (Selector Button) or (Cursor Routing) or (WhizWheels). d. In the Address Bar move to Clear Text button; press (Dot 4-space) once. e. Then activate the button; (Selector Button) or (Cursor Routing Button) or (WhizWheels). 2. Type Web Address: a. Turn OFF Contracted Braille; press (Dots space) [G] b. Braille the letter a, then b, then c. c. Delete the b & c ; press (Dots space) [D]. d. Now, finish brailling the web address n i m a l f a c t g u i d e. 3. Launch website: a. Press the (Selector Button) or (Dots 1-5-space) [E] to launch web page. SIDE BAR NOTE: Contracted braille can be turned on, but with it off you don t get the auto inserting of contractions. Developed by Robert Miller Oklahoma School for the Blind Last updated 24 April 2012 Page 37 of 58
38 Task 3: Navigate the Elements: Load the web page, "Animal Facts" 1. Move to Animal Facts link; press (Dot 4-space) or press down (Whiz Wheel). 2. Activate the Animal Facts link; press (Selector Button) or (Cursor Routing Button). Task 4: Use the Rotor to move by Headings Read (Pause & Resume Speech) Notes: On web pages there are different types of elements, such as text, links, headings, Form Controls, etc. Choosing more efficient elements to navigate by will help you find what you are looking for quicker. The Rotor Control makes it possible to choose which element to navigate. Commands To Remember: Change Rotor selection; press (Dots 5-6-space) or (Dots 2-3-space). Navigate to different Rotor items on web page; press (Dot 6-space) or (Dot 3-space). Activate links, form controls, etc; press (Selector) or (WhizWheel) or (Cursor Routing) Navigate to the next or previous item; press (Dot 4-space) or (Dot 1-space). Pause & Resume Speech Reading ; press (P-space) toggle. Start Reading from top op web page; press (W-space). Start Reading from current location; press (R-space). Jump to bottom of web page; press (Dots space). Jump to the top of the web page; press (Dots space). Pan braille forward; press (Right Panning Button) or rotate (Whiz Wheel) toward you. Pan braille back; press (Left Panning Button) or rotate (Whiz Wheel) away from you. Activate the Home button; press (H-space). 1. Change the Rotor to Headings : a. Listen to the number of Headings as you change the Rotor to Headings ; press (Dots 5-6-space) or (Dots 2-3-space) repeatedly. 2. Navigating by Headings to find a desired animal: a. Jump to the top of the web page; press (Dots space). b. Move down the page by Headings to Cougar ; press (Dot 6-space). c. Now move back up the page by Headings to Bonobo ; press (Dot 3-space). d. Activate the Heading/Link and load the web page Bonobo ; (Whiz Wheel). e. Move down the page by Headings until you get to Bonobo ; (Dot 6-space). Developed by Robert Miller Oklahoma School for the Blind Last updated 24 April 2012 Page 38 of 58
39 3. Reading the information: a. Now move to Heading s paragraph and read it; press (Dot 4-space) twice. b. Pause the reading; press (P-space). c. Resume reading; press (P-space). d. Start reading from your current position; press (R-space). e. Jump to the top of web page and start speech reading; press (W-space). Task 5: Use the web page's Reader option to reformat the web page Note: During this Task you will select the Reader option to reformat the web page. This will rid the page of all content not related to the link you selected. 1. Move by Headings to the Bald Eagle heading/link; (Dots 6-space) or (Dots 3-space). 2. Activate the Bald Eagle heading/link; press down on (Whiz Wheel). 3. Jump to the web page; (Dots space). 4. Move across to the Reader button; rotate the (Whiz Wheel) toward your body. 5. Activate the Reader button; press down on (Whiz Wheel). 6. Move forward by Headings until you get to What You Can Do to Help ; (Dots 6-space). 7. Move to the paragraph below the Heading ; (Dot 4-space). 8. Close the Reader format; (Dots 1-2-space) [B]. Task 6: Use the Rotor to move by Form Controls : Note: During this Task you will navigate just by Form Controls. Form controls are elements such as edit boxes, combo/popup boxes, checkboxes, buttons, etc. 1. Change Rotor to Form Controls ; (Dots 5-6-space) or (Dots 2-3-space). 2. Move down the web page by Form Controls ; (Dot 6-space). a. Move back up the web page by Form Controls ; (Dot 3-space). Task 7: Use the braille display instead of speech to read text on web page 1. Set Rotor to Headings and move to Bald Eagle Heading. 2. Turn Speech OFF; press (M-space) toggle. 3. Pan forward & read braille; press (Right Panning Button) or (Dot 5-space). 4. Pan Back; press (Left Panning Button) or (2-space). 5. Turn Speech ON; press (M-space) toggle. Task 8: Start Reading from your location Start Reading from the top 1. Start reading from your location; press (Dots space) [R]. 2. Start reading from the top; press (Dots space) [W]. Developed by Robert Miller Oklahoma School for the Blind Last updated 24 April 2012 Page 39 of 58
40 Task 9: Close the Curtain: 1. Move to the Home Screen ; press (Dots space) [H]. 2. Close the Curtain; press (Dots space). a. You can now work without anyone seeing what s on the screen. b. Try it out! Use the commands just learned. Go to the Safari app on the Home Screen and launch it. Navigate by Headings and then move to the text of the Heading. 3. Open the Curtain; press (Dots space). NOTES: Developed by Robert Miller Oklahoma School for the Blind Last updated 24 April 2012 Page 40 of 58
41 Section 5.5: ibooks: (reading a book) Notes: During these tasks you will learn how to navigate and read a book in ibooks. ibooks is a free app that you can download from the Apple Apps Store. ibooks is accessible to the Blind and visually impaired through the VoiceOver, ZOOM, or VoiceOver with a braille display. Task 1: Launch ibooks 1. Go to the Home screen; press (H-space) button. 2. Move to Page 2 of the Home screen; (Dots space). 3. Select the ibooks app: a. Jump to top of screen; press (Dots space). b. Move to ibooks app; (Dot 4-space) repeatedly. c. Activate the ibooks app; press (Selector Button) or (Cursor Routing Button) or press (WhizWheel). Task 2: Open the Library & Book Library button Table of Contents button 1. Move to Library button; (Dot 4-space) repeatedly. 2. Activate the Library button; press (Cursor Routing Button). 3. Open the book, The Ugly Duckling : a. Move to The Ugly Duckling button; rotate (WhizWheel) repeatedly. b. Activate the The Ugly Duckling; press (WhizWheel). Task 3: Navigate the book's Table of Contents 1. Select the book s Table of Contents button; (Dot 4-space). 2. Activate the Table of Contents button; press (Selector Button). 3. Move down table to The Ugly Duckling, page 3 ; (Dot 4-space)/Rotate (WhizWheel). 4. Activate TOC item, The Ugly Duckling, page 3 ; press (WhizWheel) / (Cursor Routing). Task 4: Turning & Reading the pages with SPEECH 1. Turn & Read the Next Page: a. Turn to the next page; (Dots space). b. Listen to VoiceOver read the text on the screen. i. Note: if book displays 2 pages, it reads both pages on screen. c. Turn to the next page again; (Dots space). d. Pause the reading; press (P-space). 2. Turn to the previous page; (Dots space). a. Pause the reading; press (P-space). Developed by Robert Miller Oklahoma School for the Blind Last updated 24 April 2012 Page 41 of 58
42 Task 5: Turning Pages using "Page Chooser" 1. Jump to the end of the page; (Dots space). 2. Move to the Page Chooser ; (Dot 1-space), repeatedly. 3. Turn the pages forwards; (Dots 6-space), repeatedly. 4. Turn the pages backwards; (Dots 3-space), repeatedly. Task 6: Turning & Reading the pages with Brialle Display (NO SPEECH) 1. Turn OFF Speech; (M-space). toggle 2. Read the page with the braille display; a. Method 1: Panning Buttons i. Read forwards; (Right Panning Button) repeatedly. ii. Read backwards; (Left Panning Button) repeatedly. b. Method 2: Braille Dot keys i. Read forwards; (Dot 5-space) repeatedly. ii. Read backwards; (Dot 2-space) repeatedly. 3. Turn ON Speech; (M-space) toggle. Task 7: Bookmarks Notes: You don t have to set a bookmark when you close the book; ibooks will remember your page and return you to it when you open the book again. 1. Add A Bookmark: a. Jump to the top; (Dots space). b. Move to the Add a Bookmark button; (Dots 4-space) or Rotate (WhizWheel). c. Activate Add a Bookmark button; press (WhizWheel) or (Cursor Routing Button). 2. Remove A Bookmark: a. Jump to the top; (Dots space). b. Move to the Add a Bookmark button; (Dots 4-space) or Rotate (WhizWheel). c. Activate Remove Bookmark button; press (WhizWheel) or (Cursor Routing). Developed by Robert Miller Oklahoma School for the Blind Last updated 24 April 2012 Page 42 of 58
43 Section 5.6: Typing with the Notes App 1. The Notes app allows you to take notes using the on-screen keyboard. It is easy to refer back to your notes or delete unwanted notes. 2. Using VoiceOver with a braille display is a lot easier to enter text then just using VoiceOver. 3. With an icloud account you can sync your notes with your other idevices and computer. Notes can also be sent as s. Add A Note Delete Task 1: Launch Notes & Start a New Note 1. Go to the Home screen; press (Home) button. 2. Select & Activate the Notes app. a. Move to the Notes app; rotate (WhizWheel). b. Activate the Notes app; press (WhizWheel). 3. Start a new note: a. Jump to the top of the screen; (Dots space). b. Move to the Add button; (Dot 4-space). c. Activate the Add button; press (Selector). SIDE BAR NOTE: We also have Pages, the word processor for the idevices VoiceOver and Focus 40 Blue works with Pages as well. Task 2: Type your Sentences with the Braille Display Note: Contracted braille is inserted after you press the space or ending punctuation. 1. Set display to uncontracted braille; (Dots space). Type the sentence with contracted braille, The Focus 40 Blue is great. 2. Move to a New Line; (E-space). 3. Now set the display to contracted braille; (Dots space). Type the sentence with contracted braille The Focus 40 Blue makes the ipad easy to use. 4. Delete use. (D-space) repeatedly. 5. Now type have fun. 6. Delete a note: a. Move to the Delete icon (Dot 4-space). b. Activate the first Delete button (Cursor Routing Button). c. Now activate second Delete Button (Selector Button). Developed by Robert Miller Oklahoma School for the Blind Last updated 24 April 2012 Page 43 of 58
44 Part 6: ipad with VoiceOver and Apex as a Braille Display Section 6.1: Physical Controls (Apex as a Braille Display) Notes: All instructions will assume that the ipad is positioned in the horizontal position with the HOME button on the right. ipad: 1. Turning on and shutting down the ipad: a. Press & hold the Power button. 2. Lock/Sleep Mode: a. Press & release the Power button. b. Or, set in place on the keyboard case. 3. Unlock/Wake from Sleep: a. Press the (Home) button, the slide to unlock. b. Press & release the Power button. 4. Go to the Home screen: a. Press (Home) button. Apex: Power Sleep/Wake Button Head Phone Jack Silent/Rotation Lock Volume Front Camera Home Button Find the following features: 1. Braille Dot Keys Space 3. Cursor Routing Buttons 4. Braille Cells 5. Thumb keys ON / OFF button 7. Scroll Wheel 8. Dot 7 (backspace) 9. Dot 8 (Enter) ON/OFF (left side) Cursor Routing Buttons Scroll Wheel 18 / 32 Braille Cells Developed by Robert Miller Oklahoma School for the Blind Last updated 24 April 2012 Page 44 of 58
45 Overview: (Refreshable Braille Displays) 1. The ipad will connect to most Bluetooth refreshable braille displays. 2. You must have VoiceOver on before the display will work. 3. There are about 27 basic key commands that will work on braille displays with a braille keyboard (See Quick Commands starting on page 54). 4. There are additional key commands that are unique to each braille display, as there are with the Braille Note Apex (See Quick Commands starting on page 57). Section 6.2: Making the Connection (VoiceOver and the Braille Display) Task 1: Making the Initial Bluetooth Connection (Pairing) 1. Turn on the Braille Note Apex s Bluetooth, and place in Braille Terminal mode: a. Options; press (O-space). b. Connections; press (C), then turn on Bluetooth; press (B). c. Turn on Braille Terminal port; press (T), then (Enter). 2. Turn on the ipad: a. Press & Release the Home button. b. Or Press & Release the Power Button. 3. Turn on VoiceOver: a. Unlock the screen. b. Tap Settings. c. Tap General. d. Tap Accessibility. e. VoiceOver. f. VoiceOver ON/OFF button, to turn ON. 4. ipad (Make the initial Bluetooth Pairing): a. (1-Finger_Tap) on right pane. b. (3-Finger_Flick Up) to view Braille option. c. (1-Finger_Double Tap) on Braille. d. Wait and then enter the pairing code 0000, then (1-Finger_Double Tap) Done. Task 2: Once paired, making the Bluetooth Connections thereafter 1. Make sure VoiceOver enabled and the ipad is off or in sleep mode. 2. Turn on the Apex and make sure its Bluetooth is turned on. 3. Place in Braille Terminal mode: a. Main Menu; (Dots space). b. Turn on Braille Terminal Mode; (T), then (Enter). 4. Turn on ipad. You should hear the connection sound and see the display refresh itself. Developed by Robert Miller Oklahoma School for the Blind Last updated 24 April 2012 Page 45 of 58
46 Task 3: VoiceOver Help Note: During this task you will Start and Stop the Keyboard Help. This feature allows you to press a key command to hear its function without affecting the ipad. 1. Turn ON VoiceOver Help ; press (Dots 1-3-space). a. Important: Use Bypass Command (Dots space) prior to the following: i. Activate Home key function: Bypass (Dots space) then (H-space). ii. Enter function; Bypass (Dots space) then (Dots 1-5-space) [E]. b. Enter the following commands and listen to the key command description: i. Press (Dots space) then (Dots space) [H]. ii. Press (Dot 4-space) then press (Dot 1-space). iii. Press (Dot space) [D]. iv. Press (Dots space) [M]. v. Press Down (Cursor Router button). Scroll Wheel vi. Your Choice 2. Turn OFF VoiceOver Help ; press (Dots 1-2-space). ON/OFF (left side) Cursor Routing Buttons 18 / 32 Braille Cells Section 6.3: Navigating the Home Screen Task 1: Navigate the "HOME" screen Adjust Volume & Speech Note: During this task you will learn how to use the braille display commands to move from one app to another on the HOME screen, adjust the VOLUME, and to turn the SPEECH OFF and ON. 1. Volume: a. Increase Volume; (Dots space) [ AR ]. b. Decrease Volume; (Dots space) [ GH ]. c. Speech ON/OFF; press (Dots space) [ M ] toggle. 2. Speech Rate: a. Set the Rotor to Speech Rate ; (Dots 5-6-space) or (Dots 2-3-space). b. Increase Speech Rate; (Dot 3-space). c. Decrease Speech Rate; (Dot 6-space). 3. Navigate Home Screen Pages: a. Go to Home Screen; (Dots space) then (Dots Space) [H]. b. Move to the Search page; (Dots space). c. Move to Pages 1 & 2 on Home screen; (Dots space) then (Dots space) [O]. d. Move back to Page 1 of Home screen; (Dots space) [OW]. 4. Navigate App Icons Forwards: Developed by Robert Miller Oklahoma School for the Blind Last updated 24 April 2012 Page 46 of 58
47 a. Method 1: (Dot 4-space). b. Method 2: (Thumb 3). 5. Navigate App Icons Backwards: a. Method 1: (Dot 1-space). b. Method 2: (Thumb 2). 6. Move to the Notes app icon. 7. Activate the Notes app: a. Method 1: Press (Cursor Routing Button) to open app. NOTES: Developed by Robert Miller Oklahoma School for the Blind Last updated 24 April 2012 Page 47 of 58
48 Section 6.4: Surfing the Internet with Safari Task 1: Launch "Safari" from the HOME screen 1. Go to Home screen; press bypass (Dots space) then (H-Space). 2. Navigate to and open the Safari app: a. Select Safari app; (Dot 4-space) or (Dot 1-space). b. Activate and open Safari app; press (Cursor Routing Button). Task 2: Enter web address and launch Commands To Remember: Bypass (Dots space). Jump to the top of the web page (Dots space). Jump to bottom of web page (Dots space). Navigate to the next or previous item; press (Dot 4-space) or (Dot 1-space). Activate the links, form controls, etc; press (Cursor Routing Button). Enter; press (Dots space) then (E-space). Delete; press (D-space). Back; press (B-space). Scroll Wheel SIDE BAR NOTE: Contracted braille can be turned on, but with it off you don t get the auto inserting of contractions. ON/OFF (left side) Cursor Routing Buttons 18 / 32 Braille Cells 1. Move to the Address Bar: a. Go to top of web page; press (Dots space) [L]. b. Move to Address Bar ; press (Dot 4-space) three times. c. Enter the Address Bar ; press (Cursor Routing Button). d. In the Address Bar move to Clear Text button; press (Dot 4-space) once; then press (Cursor Routing Button) to activate. 2. Type Web Address: a. Turn OFF Contracted Braille; press (Dots space) [G] b. Braille the letter a, then b, then c. c. Delete the b & c ; press (Dots space) [D] twice. d. Now, finish brailling the web address n i m a l f a c t g u i d e. 3. Launch website: a. Press (Dots space) then (Dots 1-5-space) [E] to launch web page. Developed by Robert Miller Oklahoma School for the Blind Last updated 24 April 2012 Page 48 of 58
49 Task 3: Navigate the Elements: Load the web page, "Animal Facts" 1. Move to Animal Facts link; (Dot 4-space) or press (Thumb 4). 2. Activate the Animal Facts link; (Cursor Routing Button). Task 4: Use the Rotor to move by Headings Read (Pause & Resume Speech) Notes: On the web page there are different types of elements, such as text, links, headings, Form Controls, etc. Choosing efficient elements to navigate by will help you find what you are looking for quicker. The Rotor Control makes it possible to choose which element to navigate. Commands To Remember: Change Rotor selection; press (Dots 5-6-space) or (Dots 2-3-space). Navigate to different Rotor items on web page; press (Dot 6-space) or (Dot 3-space). Activate the links, form controls, etc; press (Joystick). Navigate to the next or previous item; press (Dot 4-space) or (Dot 1-space). Pause Speech Reading ; press (P-space). Resume Speech Reading ; press (P-space). Start Reading from top op web page; press (W-space). Start Reading from current location; press (R-space). Jump to bottom of web page; press (Dots space). Jump to the top of the web page; press (Dots space). Pan braille forward; press (Thumb 3). Pan braille back; press (Thumb 2). Activate the Home button; press (Dots space) then (H-space). 1. Change the Rotor to Headings : a. Listen to the number of Headings as you change the Rotor to Headings ; press (Dots 5-6-space) or (Dots 2-3-space) repeatedly. 2. Navigating by Headings to find a desired animal: a. Jump to the top of the web page; press (Dots space). b. Move down the page by Headings to Cougar ; press (Dot 6-space). c. Now move back up the page by Headings to American Bison ; press (Dot 3-space). d. Activate the Heading/Link and load the web page American Bison ; (Cursor Routing). e. Move down the page by Headings until you get to American Bison ; (Dot 6-space). 3. Reading the information: a. Now move to Heading s paragraph and read it; press (Dot 4-space) twice. b. Pause the reading; press (P-space). c. Resume reading; press (P-space). d. Start reading from your current position; press (R-space). e. Jump to the top of web page and start speech reading; press (W-space). Developed by Robert Miller Oklahoma School for the Blind Last updated 24 April 2012 Page 49 of 58
50 Task 5: Use the web page's Reader option to reformat the web page Note: During this Task you will select the Reader option to reformat the web page. This will rid the page of all content not related to the link you selected. 1. Move by Headings to the Bald Eagle heading/link; (Dots 6-space) or (Dots 3-space). 2. Activate the Bald Eagle heading/link; press down on (Cursor Routing). 3. Jump to the web page; (Dots space). 4. Move across to the Reader button; rotate the (Dot 4-space) or (Thumb 4). 5. Activate the Reader button; press down on (Cursor Routing). 6. Move forward by Headings until you get to What You Can Do to Help ; (Dots 6-space). 7. Move to the paragraph below the Heading ; (Dot 4-space). 8. Close the Reader format; (Dots 1-2-space) [B]. Task 6: Use the Rotor to move by Form Controls : Note: During this Task you will navigate just by Form Controls. Form controls are elements such as edit boxes, combo/popup boxes, checkboxes, buttons, etc. 1. Change Rotor to Form Controls ; (Dots 5-6-space) or (Dots 2-3-space). 2. Move down the web page by Form Controls ; (Dot 6-space). a. Move back up the web page by Form Controls ; (Dot 3-space). Task 7: Use the braille display instead of speech to read text on web page 1. Set Rotor to Headings and move to Bald Eagle Heading. 2. Turn Speech OFF; press (M-space) toggle. 3. Pan forward & read braille; press (Thumb 3) or (Dot 5-space). 4. Pan Back; press (Thumb 2) or (2-space). 5. Turn Speech ON; press (M-space) toggle. Task 8: Start Reading from your location Start Reading from the top 1. Start reading from your location; press (Dots space) [R]. 2. Start reading from the top; press (Dots space) [W]. Task 9: Close the Curtain 1. Close the Curtain; press (Dots space) then (Dots space) toggle. a. You can now work without anyone seeing what s on the screen. 2. Open the Curtain; press (Dots space) then (Dots space) toggle. Developed by Robert Miller Oklahoma School for the Blind Last updated 24 April 2012 Page 50 of 58
51 Section 6.5: ibooks: (reading a book) Notes: During these tasks you will learn how to navigate and read a book in ibooks. ibooks is a free app that you can download from the Apple Apps Store. ibooks is accessible to the Blind and visually impaired through the VoiceOver, ZOOM, or VoiceOver with a braille display. Task 1: Launch ibooks 1. Go to the Home screen; press (Dots space) then (H-space) button. 2. Move to Page 2 of the Home screen; press (Dots space) then (Dots space). 3. Select the ibooks app: a. Jump to top of screen; press (Dots space). b. Move to ibooks app; (Dot 4-space) repeatedly. c. Activate the ibooks app; press (Cursor Routing Button). Task 2: Open the Library & Book Library button 1. Move to Library button; (Dot 4-space) repeatedly. 2. Activate the Library button; press (Cursor Routing Button). 3. Open the book, The Ugly Duckling : a. Move to The Ugly Duckling button; (Dot 4-space) repeatedly. b. Activate the The Ugly Duckling; press (Cursor Routing Button). Task 3: Navigate the book's Table of Contents 1. Select the book s Table of Contents button; (Dot 4-space). 2. Activate the Table of Contents button; press (Cursor Routing Button). 3. Move down table to The Ugly Duckling, page 3 ; (Dot 4-space). 4. Activate TOC item, The Ugly Duckling, page 3 ; (Cursor Routing Button). Task 4: Turning & Reading the pages with SPEECH Table of Contents button 1. Turn & Read the Next Page: a. Turn to the next page; (Dots space) then (Dots space). b. Move to text (Dots 4-space) repeatedly. Listen to VoiceOver read text on the screen. i. Note: if book displays 2 pages, it reads both pages on screen. c. Turn to the next page again; (Dots space) then (Dots space). d. Move to text (Dots 4-space) repeatedly. Listen to VoiceOver read text on the screen. e. Pause the reading; press (P-space). 2. Turn to the previous page; press (Dots space) then (Dots space). a. Move to text (Dots 4-space) repeatedly. Listen to VoiceOver read text on the screen. b. Pause the reading; press (P-space). Developed by Robert Miller Oklahoma School for the Blind Last updated 24 April 2012 Page 51 of 58
52 Task 5: Turning Pages using "Page Chooser" 1. Jump to the end of the page; (Dots space). 2. Move to the Page Chooser ; (Dot 1-space), repeatedly. 3. Turn the pages forwards; (Dots 6-space), repeatedly. 4. Turn the pages backwards; (Dots 3-space), repeatedly. Task 6: Turning & Reading the pages with Brialle Display (NO SPEECH) 1. Turn OFF Speech; (M-space). toggle 2. Read the page with the braille display; a. Method 1: Panning Buttons i. Read forwards: (Thumb 3) repeatedly. ii. Read backwards: (Thumb 2) repeatedly. b. Method 2: Braille Dot keys i. Read forwards: (Dot 5-space) repeatedly. ii. Read backwards: (Dot 2-space) repeatedly. 3. Turn ON Speech: (M-space). toggle Task 7: Bookmarks Notes: You don t have to set a bookmark when you close the book; ibooks will remember your page and return you to it when you open the book again. 1. Add A Bookmark: a. Jump to the top; (Dots space). b. Move to the Add a Bookmark button; (Dots 4-space). c. Activate the Add a Bookmark button; (Cursor Routing Button). 2. Remove A Bookmark: a. Jump to the top; (Dots space). b. Move to the Add a Bookmark button; (Dots 4-space). c. Activate Remove Bookmark button; press (Cursor Routing Button). Developed by Robert Miller Oklahoma School for the Blind Last updated 24 April 2012 Page 52 of 58
53 Section 6.6: Typing with the Notes App 1. The Notes app allows you to take notes using the on-screen keyboard. It is easy to refer back to your notes or delete unwanted notes. 2. Using VoiceOver with a braille display is a lot easier to enter text then just using VoiceOver. Task 1: Launch Notes & Start a New Note 1. Go to the Home screen; press (Home) button. a. Press (Dots space) then (H-space). 2. Move back to Page 1 of Home Screen. a. Press (Dots space) 3. Select & Activate the Notes app. a. Move to the Notes app; (Dots 4-space). b. Activate the Notes app; press (Cursor Routing). 4. Start a new note: a. Move to the top of screen; (Dots space). b. Move to the Add button; (Dots 4-space). c. Activate the Add button; press (Cursor Routing). Add A Note Delete Task 2: Type your Sentences with the Braille Display 1. Type the sentence with contracted braille The ipad is very cool. a. Note: Contracted braille is inserted after you press the space or ending punctuation. 2. Move to a New Line; (Dots space) then (E-space). 3. Type the sentence with contracted braille VoiceOver makes the ipad easy to use. 4. Delete use. ; press (Dots space) [D] repeatedly. 5. Now, type have fun. 6. Delete your note: a. Move to the top of screen; (Dots space). b. Move to & select your note in list; (Dot 4-space) repeatedly, then (Cursor Routing). c. Move to the Delete icon (Dot 4-space) repeatedly. d. Activate the first Delete button (Cursor Routing Button) and wait a second. e. Now activate Delete Button again (Cursor Routing Button). SIDE BAR NOTE: We also have Pages, the word processor for the idevices VoiceOver and Apex as a display works with Pages as well. Add A Note Delete Developed by Robert Miller Oklahoma School for the Blind Last updated 24 April 2012 Page 53 of 58
54 Quick Commands List VoiceOver Speech 1. Speech ON/OFF a. (3-Finger_Double Tap). 2. Speak an item: a. (1-Finger_Touch). 3. Adjust Speech Rate: a. Access Rotor ; (Thumb & Index Finger_Rotate) to select Speech Rate. b. Increase Speech Rate: (1-Finger_Flick Up). c. Decrease Speech Rate: (1-Finger_Flick Down). 4. Stop Speaking: a. (2-Finger_Tap). 5. Read All from the Top of Screen: a. (2-Finger_Flick Up). 6. Read All from Current Position: a. (2-Finger_Flick Down). Navigation 1. To Select an Item: a. (1- Finger_Touch). 2. To Activate the selected Item: a. 1-Finger_Double Tap). i. Note: Once the desired item is selected, double tap anywhere. 3. To Scroll a item list: a. Scroll Up: (3-Finger_Flick Up). b. Scroll Down: (3-Finger_Flick Down). 4. Go to Next or Previous page: a. Next Page: (3-Finger_Flick Right). b. Previous Page: (3-Finger_Flick Left). Advance Gestures 1-FINGER 1. Activating Drag Mode & Dragging: a. Select desired icon; (1-Finger_Touch). b. (1-Finger_Double Tab & Hold) and then drag finger and icon around Home screen. VoiceOver will announce your location. c. Lift finger when you have your desired location. Developed by Robert Miller Oklahoma School for the Blind Last updated 24 April 2012 Page 54 of 58
55 2-FINGERS 1. Split-Tapping; (1-Finger_Touch & Hold) with one & (1-Finger_Tap) with another finger. 2. Add a label to a selected item; (2-Finger_Double Tab & Hold). Example adding a description tag to a webpage picture. 3. Cancel any pop-ups, lists, or activate Back button; (2-Finger_Scrub, Back & forth). 4. To Select or Unselect text: Step 1. First set Rotor settings to characters, words, or lines. Step 2. (Touch thumb & Index fingers) & Pinch Out to select; Pinch In to unselect. 5. Access the Rotor settings: (2-Finger_Dial Rotate) Right or Left to cycle through items. 6. Open the Item Chooser ; (2-Finger_Triple Tap). Step 1. Type a name to search or (1-Finger_Flick Right or Left) to move through list, Step 2. Then (1-Finger_Double Tap) to activate and move to that item on page. 3-FINGERS 1. Screen Curtain ON/OFF; press (3-Finger_Triple Tab). 4-5-FINGERS 1. Multitasking Gestures: Use 4 or 5 fingers to: (4/5-Finger_Pinch) to the Home Screen. (4/5-Finger_Flick Up) to reveal Multitasking Bar (4/5-Finger_Flick Left or Right) between open Apps. Developed by Robert Miller Oklahoma School for the Blind Last updated 24 April 2012 Page 55 of 58
56 Braille Displays Common Commands (ALL braille displays with braille dot keys) Activate VoiceOver Help 1. Enter VoiceOver Help ; press (Dots 1-3-space). 2. Exit VoiceOver Help ; press (Dots 1-2-space). Speech & Screen Curtain Commands 1. Speech ON/OFF a. Press (M-space). 2. Speech Volume: a. Increase Volume; press (Dots space) [ AR ]. b. Decrease Volume; press (Dots space) [ GH ]. 3. Adjust Speech Rate: a. Access Rotor ; press (Dots 5-6-space) to select Speech Rate. b. Increase Speech Rate; press (Dot 3-space). c. Decrease Speech Rate; press (Dot 6-space). 4. Pause & Resume Speaking; press (Dots space). [P] 5. Read All from the Top of Screen; press (Dots space) [W] 6. Read All from Current Position; press (Dots space) [R]. 7. Screen Curtain ON/OFF; press (Dots space). Navigation Commands 1. Top of page/first element: press (Dots space) [L]. 2. Bottom of page/last element: press (Dots space). 3. Move to next item; press (Dot 4-space). 4. Move to previous item; press (Dot 1-space). 5. Pan Braille Right; press (Dot 5-space). 6. Pan Braille Left; press (Dot 2-space). 7. Scroll Right 1 Page; press (Dots space) [O]. 8. Scroll Left 1 Page; press (Dots space). [OW]. 9. Move to Status Bar; press (Dots 2-3-4). 10. Rotor Settings: next item; press (Dots 5-6-space). 11. Rotor Settings: previous item; press (Dots 2-3-space). 12. Rotor: next item; press (Dot 6-space). 13. Rotor: previous item; press (Dot 3-space). 14. Launch App Switcher; press (Dots space) twice quickly. 15. Delete; press (Dots space) [D]. 16. Enter; press (Dots 1-5-space) [E]. 17. Go to the Home screen; press (Dots space) [H]. Developed by Robert Miller Oklahoma School for the Blind Last updated 24 April 2012 Page 56 of 58
57 General Commands 1. Activates Home button; press (Dots space) [H]. 2. Access App Switcher [ Home button twice quickly]; press (Dots space) [H]. 3. Screen Curtain; press (Dots space). 4. Delete ; press (Dots space) [D]. 5. Delete ; press (Dot 7-space). 6. Enter ; press (Dots 1-5-space) [E]. 7. Tab [text field]; press (Dots space). 8. Select text; press (Dots space). 9. Unselect text; press (Dots space). 10. Contracted braille ON/OFF; press (Dots space) [G]. Refreshabraille 18 Commands Cursor Routing Buttons 18 Cells Aux Space Pan Left Pan Right Joystick Power 1. Double-tap the selected item; press (Cursor Routing Button). 2. Move to previous item; press (Joystick Left). 3. Move to next item; press (Joystick Right). 4. Move to previous Rotor item; press (Joystick Up). 5. Move to next Rotor item; press (Joystick Down). 6. Select item; press (Joystick Press). 7. Pan Braille to the left; press (Left Panning Button). 8. Pan Braille to the right; press (Right Panning Button). 9. Back button if present; press (Power Button). Developed by Robert Miller Oklahoma School for the Blind Last updated 24 April 2012 Page 57 of 58
![Focus 40 Blue Commands (ONLY) 1. Double-tap the selected item; press (Router Row 1) or (Router Row 2). 2. Double-tap the selected item [method 2]; press (Router Row 2). 3.](/docs-images/85/91515383/images/58-2.jpg "Pan Braille to the right [method 1] ; press (Left or Right Whiz Wheel, Down). 4. Pan Braille to the right [method 2] ; press (Right Panning Button). 5.")
58 Focus 40 Blue Commands (ONLY) 1. Double-tap the selected item; press (Router Row 1) or (Router Row 2). 2. Double-tap the selected item [method 2]; press (Router Row 2). 3. Pan Braille to the right [method 1] ; press (Left or Right Whiz Wheel, Down). 4. Pan Braille to the right [method 2] ; press (Right Panning Button). 5. Pan Braille to the left [method 2] ; press (Left or Right Whiz Wheel, Up). 6. Pan Braille to the left; press (Left Panning Button). 7. Select item [method 1]; press (Left or Right Whiz Wheel, Press). 8. Select item [method 2]; press (Left or Right Selector Button). 9. Move to next item [method 1]; press (Left or Right Rocker Bar, Down). 10. Move to next item [method 2]; press (Left or Right Whiz Wheel, Rotate Down). 11. Move to previous item [method 1]; press (Left or Right Rocker Bar, Up). 12. Move to previous item [method 2]; press (Left or Right Whiz Wheel, Rotate Up). Apex as a Braille Display Commands Scroll Wheel ON/OFF (left side) Cursor Routing Buttons 18 / 32 Braille Cells 1. Bypass Function; press (Dots space). a. Use Bypass (Dots space) command prior to: o Activate Home button (H-space). o Next pages, Home screen or pages of a book (O-space). o Enter function; press (E-space). o Screen Curtain ON/OFF; press (Dots space). 2. Double-tap the selected item; press (Cursor Routing Button). 3. Pan Braille to the left; press (Thumb Key 2). 4. Pan Braille to the right; press (Thumb Key 3). Developed by Robert Miller Oklahoma School for the Blind Last updated 24 April 2012 Page 58 of 58
Oklahoma School for the Blind
 Oklahoma School for the Blind ipad: Accessibility 2012 ipad with: VoiceOver Zoom Refreshabraille 18 Braille Display Focus 40 Blue Braille Display Braille Note Apex as a Braille Display Robert Miller, CTVI
ipad: Accessibility Robert Miller, CTVI & AT Instructor Miranda Anderson, AT Lab Asst Oklahoma School for the Blind March 1, 2013
 2013 ipad: Accessibility Robert Miller, CTVI & AT Instructor Miranda Anderson, AT Lab Asst Oklahoma School for the Blind March 1, 2013 ipad and Accessibility TABLE OF CONTENTS Overview... page 4 Part 1:
2013 ipad and Accessibility Booklet ios 6
 2013 ipad and Accessibility Booklet ios 6 Navigating the ipad with VoiceOver and three refreshable braille displays: Refreshabraille 18, Focus 40 Blue Classic and the Apex as a display Developed by: Robert
Universal Access features ipad incorporates numerous accessibility features, including: VoiceOver screen reader
 Accessibility 24 Universal Access features ipad incorporates numerous accessibility features, including: VoiceOver screen reader Zoom magnification Large Text White on Black Speak Selection Speak Auto-text
Accessibility Solutions for the ipad
 Accessibility Solutions for the ipad Prepared for Kristina McGowan, B.A.,TRS By: Brittney Hook, U of C Student, 2012 Vision ipad includes an amazing screen reader along with other innovative accessibility
Bluetooth Keyboard Commands with VoiceOver on the ipad
 Bluetooth Keyboard Commands with VoiceOver on the ipad ios 9.2 Chapter 3: General Navigation using Bluetooth Keyboard Commands (Quick Nav is ON) Module Objectives 3.1 Mainstream Bluetooth Keyboard Shortcut
The ipad Center for Innovation in Teaching and Research Presenter: Chad Dennis Instructional Technology Systems Manager
 The ipad Center for Innovation in Teaching and Research Presenter: Chad Dennis Instructional Technology Systems Manager ce-dennis@wiu.edu Copyright 2012 Center for Innovation in Teaching and Research 1
Common ios braille commands
 Common ios braille commands (Updated 8/27/17) When using a braille display with VoiceOver on your iphone, ipad, or ipod touch, your braille display may support the following commands to help with navigation.
Image from Google Images tabtimes.com. CS87 Barbee Kiker
 Image from Google Images tabtimes.com CS87 Barbee Kiker bjkik@comcast.net Table of Contents ipad Parts... 3 Home Button... 3 Touch Gestures... 4 Additional Gestures... 4 Control Center... 5 Notification
ios7 Accessibility Quickstart
 ios7 Accessibility Quickstart This guide explains the ios 7 accessibility features and how to use these features on an iphone, ipad and ipod. Accessibility Tab To access the accessibility features within
ipads for Beginners For All HCPS Individual ipad Users
 ipads for Beginners For All HCPS Individual ipad Users May 2012 GETTING TO KNOW YOUR IPAD Buttons and Icons Sleep/Wake/Power- Press and release to put your ipad into sleep or wake mode. Press and hold
ipad Teacher Intro Sign teacher contract--get ipad collect sheets Set up Go through first screen Set apple ID in settings.
 ipad Teacher Intro Sign teacher contract--get ipad collect sheets Set up email Go through first screen Set apple ID in settings. Go to Itunes U Explain command center, search, scrolling. Search for k-12,
Must-Know Settings and New ios 8 Features
 Must-Know Settings and New ios 8 Features PERKINS October 17, 2014 Nicole Feeney, Assistive Technology Specialist 860-286-3101 Nicole.Feeney@oakhillct.org 1 Dictation is much faster!!! You can send text
BLUETOOTH KEYBOARD COMMANDS
 BLUETOOTH KEYBOARD COMMANDS WITH VOICEOVER ON THE IPAD IOS 9.2 The Bluetooth Keyboard Commands with VoiceOver on the ipad manual is being shared on the Paths to Technology website with permission from
ipad for Beginners How to Work the ipad Buttons
 ipad for Beginners How to Work the ipad Buttons The On/Off, Sleep/Wake button: This button is on the top of your ipad, and you use it to put your ipad's screen to sleep or wake it up. Home button: No matter
2017 NMUG CLASSES MANAGING THE IPHONE AND IPAD IN IOS 10
 2017 NMUG CLASSES MANAGING THE IPHONE AND IPAD IN IOS 10 1 iphone Overview Your Apple ID is the account you use for just about everything you do with Apple. If you already have an Apple ID use it when
AT That s Free. By Andrew Leibs. Accessibility Built Into Microsoft Windows & Office
 AT That s Free By Andrew Leibs Before the digital age, assistive technology was hard to miss, and hard to buy. Classmates would see a sight-impaired student s boxy video magnifier or hear her computer
How to Work the ipad Buttons
 How to Work the ipad Buttons Using the Apple ipad is pretty intuitive but to save time, have a look at these ipad buttons that you'll use frequently. They'll make your new ipad even simpler. The On/Off,
Using apps You interact with ipad using your fingers to tap, double-tap, swipe, and pinch objects on the touchscreen.
 Basics 3 Using apps You interact with ipad using your fingers to tap, double-tap, swipe, and pinch objects on the touchscreen. Opening and switching between apps To go to the Home screen, press the Home
GentivaLink ipad 4 Training Guide
 GentivaLink ipad 4 Training Guide Version 1.0 Box Contents Your ipad 4 device comes with the following: ipad 4 ipad 4 Wall Charger ipad 4 Lightning Data Cable Car Charger Targus Stylus Please ensure all
ipad and iphone Basics
 ipad and iphone Basics 1 Physical Attributes On/Off Sleep/Wake Silent/ Screen rotation Lock Sight/Camera Or On/Off Sleep/Wake iphone 10 has no home button! Volume: Up/Down Not all 2 Multitasking The multitasking
Chapter 1 Preparing Your ipads for Q-interactive
 Chapter 1 Preparing Your ipads for Q-interactive Q-interactive User Guide December 2016! Configuring Your ipad Settings for Q-interactive Before you can administer tests with Q-interactive, you need complete
ipad course St Heliers Community Centre Or find us on Facebook
 ipad course St Heliers Community Centre www.sthelierschurch.org.nz centre@sthelierschurch.org.nz Or find us on Facebook 28/02/2013 St Heliers Community Centre; www.sthelierschurch.org.nz; centre@sthelierschurch.org.nz
Accessibility on an ipad
 on an ipad Settings app General (on left hand side) VoiceOver 1 Enables the user to have the ipad announce anything they are touching. Also changes the way the ipad operates with gestures. 2 Controls:
i OS iphone and ipad Part 1
 i OS iphone and ipad 2019 - Part 1 iphone Overview Diagram - iphone 6 or later. iphone X or later has no Home button Lock Screen - when phone is on but asleep ipad Overview Lock Screen After first Home
INTRODUCTION TO READING, WRITING AND RESEARCH
 INTRODUCTION TO READING, WRITING AND RESEARCH ON THE IPAD VERSION 1.0 Intro 3R s Copyright 2013 Diane Brauner COMS, Inc. Pittsboro NC, USA. All Rights Reserved. Page 2 INTRODUCTION TO READING, WRITING
ipad Basics Table of Contents
 ipad Basics Atomic Learning was used to make this handout. Wherever you see the icon throughout the handout, it will list the section and item where it can be found on the Atomic Learning web site: http://www.atomiclearning.com/k12/ipad
iphones for beginners
 iphones for beginners This handout uses text and images from gcflearnfree.org. Check out www.gcflearnfree.org/iphonebasics for more information! The parts of the iphone: Note: The headphone jack was removed
Quick Guide for ipad ios 6 February 2012 Training:
 Getting Started with the ipad Touching the ipad Definitions: App small application designed for mobile devices. Double Tap responds differently depending on each app. Drag tap and drag across the screen.
ClaroPDF is an App for reading and commenting on PDF files and documents. ClaroPDF speaks back accessible text PDF files and documents with highqualit
 ClaroPDF User Guide ClaroPDF is an App for reading and commenting on PDF files and documents. ClaroPDF speaks back accessible text PDF files and documents with highquality speech and highlighting so you
ipad Beyond the Basics
 ipad Beyond the Basics Backup and Restore 2 Backup Using itunes 2 Backup Using icloud 3 Updating Device Software 5 Internet Browser 6 Bookmarks 6 Cut/Copy and Paste 7 Email 8 imessage 9 Maps 10 Editing
RICOH TAMAGO Presenter V1.2.0 Quick Guide. Ricoh Co., Ltd.
 RICOH TAMAGO Presenter V1.2.0 Quick Guide Ricoh Co., Ltd. 1 1. Introduction RICOH TAMAGO Presenter (TAMAGO Presenter) is a paper-less presentation software that allows sharing / synchronization of the
Bluetooth Keyboard Commands with VoiceOver on the ipad
 Bluetooth Keyboard Commands with VoiceOver on the ipad ios 9.2 Chapter 4: App Navigation using Bluetooth Keyboard Commands (Quick Nav is ON) Module Objectives 4.1 Navigating Dropbox using Bluetooth Keyboard
ipad For Dummies Cheat Sheet - For Dummies
 Page 1 of 5 Cheat Sheet ipad For Dummies From ipad For Dummies, 2nd Edition by Edward C. Baig, Bob LeVitus Can't wait to use your new ipad? The Apple ipad neatly combines an audio and video ipod, an e-book
Taking Your ipad 2. to the Max. Michael Grothai. Erica Sadun. Steve Sande
 Taking Your ipad 2 to the Max Erica Sadun Michael Grothai Steve Sande Contents Contents at a Glance About the Authors About the Technical Reviewer.. Acknowledgments Introduction iv xiii xiv xv xvi Chapter
Chapter 1: Preparing Your ipad for Optimal Assessment Experience
 Chapter 1: Preparing Your ipad for Optimal Assessment Experience Q-interactive User Guide April 014 Copyright 013. NCS Pearson, Inc. or its affiliate(s). All rights reserved. Q-interactive is a trademark
ipad Basics Hannah Digital Literacy Specialist December 6 th, 2017
 ipad Basics Hannah Digital Literacy Specialist December 6 th, 2017 What We ll Cover What is an ipad? Basic features Swiping and hand gestures Settings Built-In Apps The App Store Tips and Tricks Questions
Screen Shot. Mute Sound. Hold down the volume button for 2 seconds
 Screen Shot Mute Sound Hold down the volume button for 2 seconds Status Bar Control Center Pull up from the bottom Lock Screen, Air Play, Play Media, Adjust Brightness and Sound, Arrange/Organize Apps
3. Surfing with Your ipad
 101 3. Surfing with Your ipad In this chapter you are going to get acquainted with Safari, the web browser used by all Apple devices. With this web browser you can surf the Internet using your ipad. If
Basic ipad Use. Your ipad:
 Basic ipad Use Your ipad: Taking a screen shot: Hold down the home key and then press and release the sleep/wake switch. The screen will white out for a moment and you have just taken a screen shot! The
Taking Your iphone to
 Taking Your iphone to the Max, ios 5 Edition -"-I f.6>. ii "VS Michael Grothaus Steve Sande Erica Sadun Apress* Contents Contents at a Glance About the Authors About the Technical Reviewer iv xiv xv Part
Using a Refreshable Braille Display with the ipad
 Using a Refreshable Braille Display with the ipad Chapter 4: Modifying, Navigating & Answering Homework Questions Objectives 4.1 Modifying Documents o Underscore Lines o Answer after a Colon o Paragraph
Browse the internet, send and receive s and text messages, play music and movies, take and display photos and videos, and more.
 What is an ipad? The ipad is a tablet computer designed and sold by Apple Inc. What can it do? Browse the internet, send and receive emails and text messages, play music and movies, take and display photos
Lifespan Guide for installing and using Citrix Receiver on your Mobile Device
 Lifespan Guide for installing and using Citrix Receiver on your Mobile Device About Remote Access with Citrix Receiver... 2 Installation Instructions for iphones:... 3 ios - Learning Gestures... 7 Installation
Intro to ipad Learning Outcomes
 Intro to ipads by Barbara Episale, Media Specialist, Hedgepeth-Williams Middle School & Steven Stallone, Computer Lab Teacher, PJ Hill Elementary School Intro to ipad Learning Outcomes Identify the device
Getting to know your ipad exploring the settings, App store, Mail
 Getting to know your ipad exploring the settings, App store, Mail Exploring the settings Open the settings app from your homepage Wi-Fi Turn Wi-Fi on/off Add new Wi-Fi Connection Enter Network Name, any
ipads in NEISD Basics with ios 7
 ipads in NEISD Basics with ios 7 Physical Attributes On/Off Sleep/Wake Sight/Camera Silent/ Screen rotation Lock Volume: Up/Down Home Button Spotlight Search Feature Do a downward swipe from the any screen
Bluetooth Keyboard Commands with VoiceOver on the ipad
 Bluetooth Keyboard Commands with VoiceOver on the ipad ios 9.2 Chapter 6: Manipulating Text in Read-Only Text (ibooks & Safari) using Bluetooth Keyboard Commands (Quick Nav is ON) Module Objectives 6.1
ipad Basics January, 2013 Scoville Memorial Library
 ipad Basics January, 2013 Scoville Memorial Library ccayne@biblio.org Basic Navigation Tap to select something on home screen To return to home screen, either press home button or pinch 4-5 fingers together
The HOME PAGE opens with a screen split into two parts, Left panel and Right panel.
 How to Use the Goodreader Application Goodreader version 4.0.1 OPEN Goodreader from the ipad HOME SCREEN. The HOME PAGE opens with a screen split into two parts, Left panel and Right panel. The Left Panel
by AssistiveWare Quick Start
 Pictello - Visual Stories for Everyone by AssistiveWare Quick Start Pictello is a simple way to create talking photo albums and talking books. Each page in a Pictello Story can include a picture or short
Accessibility on the Mac Website:
 Website: http://etc.usf.edu/te/ The Mac operating system includes several assistive technologies designed to make it easier for a person with a disability to use the computer. Whether you have difficulty
Intro to ipad Accessibility Features for Blind and Low Vision Students
 Intro to ipad Accessibility Features for Blind and Low Vision Students ios 9.3 Chapter 3: ipad with VoiceOver Objectives 3.1 Practice Making VoiceOver Gestures 3.2 Navigate the Home Screen Apps with VoiceOver
Chapter 2: Android Device Basics
 Chapter 2: Android Device Basics 1 Chapter 2: Android Device Basics Android devices have a ton of cool features and are really fun to play with, but they have a very practical side as well. We ll touch
Bluetooth Keyboard Commands with VoiceOver on the ipad
 Bluetooth Keyboard Commands with VoiceOver on the ipad ios 9.2 Chapter 5: Editing and Manipulating Text in Editable Text Fields using Bluetooth Keyboard Commands (Quick Nav is OFF) Module Objectives 5.1
IPad Basics at Necessary Knowledge 2017
 Table of Contents IPad Basics at Necessary Knowledge 2017 Objectives:... 2 How to close all open apps on an ipad... 2 Gestures... 2 What is an Apple ID?... 3 Control Center on the ipad... 4 How to Open
ipads in the Classroom
 ipads in the Classroom Session Agenda: 1. Guidelines for ipad Labs 2. ipad Basics 3. ipad Tips and Tricks 4. Apps for Education 5. Workflow Management 6. Lesson Activities 7. Resources 1 ipad B a s i c
Contents at a Glance
 Contents at a Glance Introduction... 1 Part I: Making the ipad Yours... 5 Chapter 1: Buying Your ipad...7 Chapter 2: Looking Over the Home Screen...27 Chapter 3: Getting Going...55 Chapter 4: Making Your
ios Accessibility Features
 1. Introduction Apple, since the birth of ios in 2007, has quietly been adding more and more sophisticated accessibility features to its mobile operating system. All of the following features are built
ibooks and Print/Learning Disabilities
 Tech Ease 4 All ibooks and Print/Learning Disabilities ibooks is the free ebook reader app from Apple that works on any IOS device. ibooks includes support for resizing text and changing the font and background
Introducing OS X El Capitan 7
 Contents Contents 3 Introducing OS X El Capitan 7 About OS X El Capitan 8 Installing OS X El Capitan 9 The OS X Environment 0 About Your Mac About System Preferences 6 Changing the Appearance 7 Changing
Secure+ Password Manager ver 1.1.1
 Secure+ Password Manager ver 1.1.1 Table of Contents 1. First setup & Auto lock functionality 1. Setup 2. Auto Lock 2. Add new item & edit 1. Icons 2. Edit Fields (Title, Category, ID, Password, URL) 3.
ipad Training Field Management
 ipad Training Field Management ipad User Guide ipad Training Topics Overview Navigation Connectivity Field Apps Tips and Tricks Contacts FaceTime icloud imessage Email Safari Calendar Camera 2 Overview
iphone User Guide For iphone OS 3.1 Software SoftView Exhibit Kyocera Corp. v. SoftView LLC IPR
 iphone User Guide For iphone OS 3.1 Software SoftView Exhibit 2019-1 Contents 9 Chapter 1: Getting Started 9 Viewing the User Guide on iphone 9 What You Need 10 Activating iphone 10 Installing the SIM
Clicker Sentences User Guide
 Table of Contents Get Started... 1 Use, Create, and Edit Sentence Sets... 2 Open a Sentence Set... 2 Write with a Sentence Set... 2 Tools... 2 Speak Text in the Sentence Set... 3 Get Sentence Sets from
imovie for ipad CREATING A PROJECT
 imovie for ipad CREATING A PROJECT After opening the imovie app select the plus sign located in the dark grey box under the projects tab. A window will pop up asking for whether you want to create a movie
NETWORK THE HOME 10 FOLDERS APPS
 NID-7006 NAXA NID Tablet User s Guide Table of Contents GETTING STARTED 4 CONNECTING TO A WIRELESS NETWORK 4 USING THE TOUCHSCREEN 4 USING THE HOME SCREENS 5 USING THE NAVIGATION ICONS 6 USING THE ALL
To return to map view, tap the inset. Chapter 15 Maps
 Map Views You can choose classic, satellite, hybrid, or terrain view. You can also see a location in street view, when available. Change the view: Tap or drag the bottom-right corner of the screen, then
This document explains several types of Mac OS X assistance available for people with visual, dexterity, or hearing impairments.
 This document explains several types of Mac OS X assistance available for people with visual, dexterity, or hearing impairments. For people with low vision............ 2 Increase the visiblity of the items
Apps Every College Student Should Have
 Apps Every College Student Should Have Evernote Evernote makes it easy to remember things big and small from your everyday life using your computer, phone, tablet and the web. (All Platforms) myhomework
Learn more about Pages, Keynote & Numbers
 Learn more about Pages, Keynote & Numbers HCPS Instructional Technology May 2012 Adapted from Apple Help Guides CHAPTER ONE: PAGES Part 1: Get to Know Pages Opening and Creating Documents Opening a Pages
ipad Basics Class Handouts Presented by: Ashlee Tominey Adult Services Librarian
 ipad Basics Class Handouts Presented by: Ashlee Tominey Adult Services Librarian atominey@clpl.org 815-526-5152 Parts of the ipad Front camera takes pictures or video of whatever is facing or looking at
User s Guide. Attainment s. GTN v4.11
 Attainment s User s Guide A printable PDF of this user guide is available from the Attainment Company website: https://www.attainmentcompany.com/gotalk-now Contents 1 Getting Started with GoTalk NOW 1
Common iphone problems, tips and tricks
 Common iphone problems, tips and tricks F. M. Spowart Upd April 2018 Page 2 of 9 Randomly losing contacts; iphone does this for some strange reason. The reason why numbers disappear unlike other phones,
Save and Restore Backups using itunes File Sharing
 Save and Restore Backups using itunes File Sharing Proloquo2Go (ipad, iphone and ipod touch). In this tutorial you will learn how to create, export and import backups with itunes File Sharing using the
Controlling Windows with gestures
 Windows 10 and Office 2016: Controlling Windows with gestures Controlling Windows with gestures If you use a touchscreen or tablet, you no longer need a mouse or keyboard when working with Windows. Instead
ipad User Manual Version 2.3
 ipad User Manual Version 2.3 Introduction Teleprompt+ is a simple, yet powerful professional teleprompter application for the ipad, iphone and ipod touch. Whether you are a video producer looking for an
Chapter 1: Turning Your ipad On and Off...3. Chapter 2: Charging and Conserving Battery Power...9
 Contents in Detail Acknowledgments... xiv Introduction... xv How This Book Is Organized... xvi Part 1: Basic Training Chapter 1: Turning Your ipad On and Off...3 What You ll Be Using...4 Turning On Your
Mercury 10 PORTABLE CCTV USER GUIDE WITH SPEECH.
 Mercury 10 PORTABLE CCTV WITH SPEECH USER GUIDE www.trysight.com Congratulations on the purchase of your Mercury 10 Portable CCTV with Speech. Please read the manual fully before using. Mercury 10 is
Quick Start Guide MAC Operating System Built-In Accessibility
 Quick Start Guide MAC Operating System Built-In Accessibility Overview The MAC Operating System X has many helpful universal access built-in options for users of varying abilities. In this quickstart,
Tips and Tricks BASICS. Slide to the three different panels of your Home screen. Check out notifications to stay informed
 Tips and Tricks BASICS Slide to the three different panels of your Home screen Yes, basically you have three Home screens. Slide your finger left across the screen and then right to see the different panels.
ipad Settings Turn on icloud Backup Go to Settings, icloud. From here you can choose what items you want to have backed up.
 ipad Settings Make Passcode Complex for More Security A four digit passcode isn t as secure as a longer string of characters and numbers. To change this go to Settings and tap on Touch ID & Passcode. To
TouchChat User Guide. For wego A-D Speech-Generating Devices. Find more resources online:
 wegotm A TouchChat User Guide For wego A-D Speech-Generating Devices Find more resources online: www.talktometechnologies.com/support/ Table of contents Hardware, power buttons and features... 2 Guided
Introducing Mountain Lion 7
 Contents Contents Introducing Mountain Lion 7 About OS X Mountain Lion 8 Installing Mountain Lion 9 The OS X Environment 0 Aqua Interface About Your Mac About System Preferences 7 Changing the Background
Tips & Tricks on Ipad
 Tips & Tricks on Ipad PAGE 1 Page 1 Copying & Pasting Page 2 Splitting the Keyboard Page 3 Capitalizing & Zooming Page 4 App Searching Page 5 Organizing Apps Page 6 Screen Shot & Finger Functions 1.) How
Save and Restore Backups using itunes File Sharing
 Save and Restore Backups using itunes File Sharing Pictello (ipad, iphone and ipod touch). In this tutorial you will learn how to create, save and restore Pictello library backups with itunes File Sharing
Starting Point Community Learning Partnership
 Starting Point Community Learning Partnership Week 5 ipads Touchscreen including Keyboard The ipad has a built-in keyboard that appears whenever you're in a text-entry location, such as a Search field
Salesforce Classic Guide for iphone
 Salesforce Classic Guide for iphone Version 35.0, Winter 16 @salesforcedocs Last updated: October 27, 2015 Copyright 2000 2015 salesforce.com, inc. All rights reserved. Salesforce is a registered trademark
Contents in Detail. Part 1: Basic Training. Introduction...xix How This Book Is Organized...xx
 Contents in Detail Introduction...xix How This Book Is Organized...xx Part 1: Basic Training Chapter 1: Turning Your ipad On and Off...3 What You ll Be Using...4 Turning On Your ipad...4 Turning Off Your
How to Set Up and Customize Accounts in Windows 10 Mail Application
 How to Set Up and Customize Email Accounts in Windows 10 Mail Application Windows 10 comes with a built-in Mail app, from which you can access all your different email accounts (including Outlook.com,
New to Mac. Viewing Options in Finder:
 New to Mac Finder Preferences Finder helps you find and organize your files. To set Finder preferences, click on your desktop > Click Finder on the top left menu > Preferences. General Check External Hard
ipod touch User Guide For ios 6 Software
 ipod touch User Guide For ios 6 Software Contents 7 Chapter 1: ipod touch at a Glance 7 ipod touch overview 8 Accessories 9 Buttons 11 Status icons 12 Chapter 2: Getting Started 12 What you need 12 Setting
GETTING TO KNOW YOUR MACBOOK PRO. Equipment. 1. Ports LEFT SIDE RIGHT SIDE
 GETTING TO KNOW YOUR MACBOOK PRO Equipment 1. Ports LEFT SIDE RIGHT SIDE USB 3, Headphone/speaker Jack 2. Thunderbolt Dongle (laptop to VGA for projector) 3. Power Cord & Power Button - connect AC Power
Getting to Know Windows 10. Handout
 Handout Handout Session Overview We re excited to share the exciting new features of Windows 10 and look forward to answering any questions in real time as we learn more about this updated platform together.
Apple is rightfully proud of the user interface design incorporated into
 Customizing OS X Apple is rightfully proud of the user interface design incorporated into the Macintosh OS X family of operating systems. The interface is easy to use, and it s also easy to customize so
FOCUS: Fusion Experience for ipad. 1 of 10 FOCUS: Fusion Experience for ipad. Class Handout
 1 of 10 FOCUS: Fusion Experience for ipad Class Handout 2 of 10 What is Fusion Experience? Fusion Experience is the ipad app that allows MLS users to access Fusion functionality on their ipad. Important:
Salesforce Classic Mobile Guide for iphone
 Salesforce Classic Mobile Guide for iphone Version 41.0, Winter 18 @salesforcedocs Last updated: November 30, 2017 Copyright 2000 2017 salesforce.com, inc. All rights reserved. Salesforce is a registered
iphone & ipad Essentials
 iphone & ipad Essentials iphone & ipad Essentials January 24, 31: The Basics. February 7: WiFi, Carrier Networks & Syncing & Backups Bob Newcomb February 14: February 21: February 28: Phone Calls Email
PureAudio Live Recorder User Guide
 PureAudio Live Recorder User Guide Index Record and Playback Recording List Recording Details Category List Email Recording Wi-Fi Sync Settings itunes File Sharing Record and Playback Make a recording
iphone & ipad Essentials
 iphone & ipad Essentials iphone & ipad Essentials January 17, 24: The Basics January 31: WiFi, Carrier Networks & Syncing & Backups Bob Newcomb February 7: February 14: Phone Calls, Email & Texting Surfing