WELCOME TO 10ZIG INSTRUCTIONAL BOOKLET. Power. Speed. Performance.
|
|
|
- Erica Isabel Brown
- 5 years ago
- Views:
Transcription

1 WELCOME TO 10ZIG INSTRUCTIONAL BOOKLET
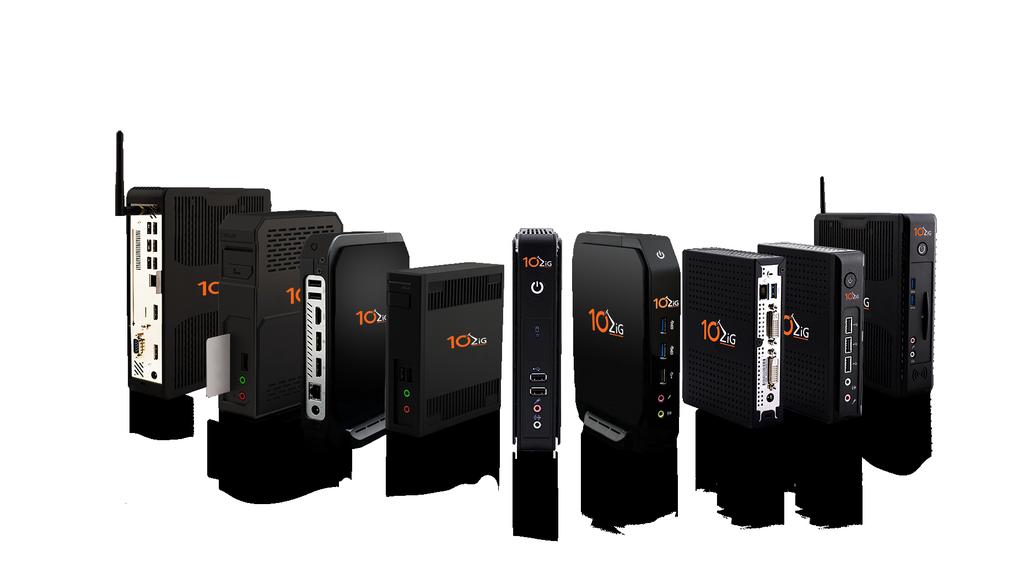

2 Cutting-Edge Thin Clients & Zero Clients pg.2
3 TABLE OF CONTENTS Windows 10 IoT Setup Instructions WE8S Setup Instructions WES7 Setup Instructions PeakOS Linux Setup Instructions VMware NOS Setup Instructions Citrix NOS Setup Instructions Parallels NOS Setup Instructions RDP NOS Setup Instructions PCoIP V1200 Series Setup Instructions 10ZiG Manager 10ZiG Manager Overview and Feature Set Installation/ Setup Instructions (Link to Cloud Setup) ZiG FAQ Site Overview Product Warranty & Terms pg.3

4 Just Getting To Know Us? Let s Get You Up and Running With Power, Speed, and Performance In case you did not know, we ve been around for a while The devices you want and the service you ve wished for Our difference makes all the difference When you think Thin & Zero Clients for virtual desktop infrastructure (VDI), think 10ZiG. Founded in 2003 and originally under the name of BOSaNOVA through 2009, 10ZiG quickly became premier Thin & Zero Client Technology specialists, from hardware to software to service. Headquartered in Arizona, US and Leicester, UK, with offices in Germany and Australia, we offer full international coverage and serve customers from all over the world. As world market leaders in cutting-edge Thin & Zero Clients for VDI Solutions, our VMware, Citrix, and Microsoft ready Clients are designed to suit all user types in any environment. 10ZiG Technology offers a wide selection of powerful, reliable, easy-to-manage, affordable Thin & Zero Client solutions. Our carefully custom-imaged devices are built to provide the best performance possible in VDI and server-based applications/ desktops for hosted and cloud environments. Thin & Zero Clients by 10ZiG available operating systems cover PeakOS (Linux) to Windows Embedded 7/8 and Windows 10 lot to NOS (Zero). We are certified for and/or support VMware (PCoIP & Blast Extreme), Citrix (HDX, HDX Premium, and HDX 3D Pro), Microsoft RDP and Parallels RAS (Remote Application Server). From low-level end users requiring Microsoft Office to power-users requiring HD Video/Audio, Flash/HTML5, video conferencing, 3D, CAD and 4K resolution, we have the perfect endpoints for your needs with the service you ve always wanted! Unlike our competition, 10ZiG solely focuses on Thin & Zero Client Technology, and that s why we re the best. Fully-Customizable Solutions: our unwavering commitment to providing you custom-tailored solutions for any customer request is a level of service you will be hard-pressed to find anywhere else. Local Support: our service is backed by our certified support technicians across the U.S., Europe, and the Asia Pacific; we have a team near you. Unrivaled Product Warranty: our 3-Year Advance Exchange Warranty can t be beat; as needed, we ship you a new device immediately without waiting on your current return. The 10ZiG Manager: our custom software centralizes configuration, maintenance, control, and even reporting from all Linux and Windows based Thin & NOS Zero Client devices for traditional managed networks. pg.4
 & NOS (Zero) Clients pg.")
5 Setup instructions for 10ZiG Windows, PeakOS (Linux) & NOS (Zero) Clients pg.5
6 Thin Clients for Windows 10 IoT (Models 4410, 5810q, 5910q & 7810q) Initial Setup and Configuration By default, when you first boot up your new Windows 10 IoT 10ZiG Thin Client, you are automatically logged in as Administrator. While logged in as Administrator, you will be able to set up, install and configure the Thin Client for use with any locked down users you may wish to create. Administrator s password: admin Components included 4410 Thin Client for Windows 10 IoT Thin Client Device Thin Client Stand Power Supply USB Wheel Mouse VESA Mounting Bracket (Optional) Wireless Adaptor (Optional) DVI to VGA Adaptor (Optional) pg.6
7 5810q Thin Client for Windows 10 IoT 7810q Thin Client for Windows 10 IoT ThinClientUser Login ThinClientUser has been developed to provide the administrator with a locked down user environment which has no rights to install, create, modify or delete. ThinClientUser is also unable to create shortcuts and is not allowed to run the right click context menu. ThinClientUser s password: ThinClientUser pg.7
8 Windows 10 IoT Setup Instructions 10ZiG Quick Start Wizard 5810q Thin Client for Windows 10 IoT When the Thin Client first logs in under administrator, you will be prompted with the 10ZiG Quick Start Wizard. The 10ZiG Wizard is here to make your customized setup and configuration a breeze. Simply follow the step-by-step instructions, and be sure to note the Connections, User Accounts/Domain and Personalization tabs on the following screens. 1. User Accounts (under User Accounts/Domain tab) - It is easy to setup a new account with user or administrative privileges using the 10ZiG Quick Start Wizard. Simply select from the radio button whether the user should have user or administrative rights and type username and password as shown below: 2. Domain Join (under User Accounts/Domain tab) Domain join and/or change hostname is a snap. Select the appropriate radio button on whether it is a domain join with name change or just a name change. If applicable enter the domain name, hostname, username and password (must have rights to join the domain). As shown below: Click the Create Account button when finished entering the data. Click the Join/Change button when finished entering the data. pg.8
 Please see document UWF Suggested Exclusions for extensive detail on UWF and setup.")
9 5910q Thin Client for Windows 10 IoT 4. Enable/Disable the Unified Write Filter (UWF) (under Personalization tab) By default, the Unified Write Filter is off. To turn it on/off is quite easy. (Please do not turn it on until you are finished configuring your Thin Client.) Please see document UWF Suggested Exclusions for extensive detail on UWF and setup. It can be downloaded here: Select the appropriate radio button for the desired action. 3. Set up the Date & Time (under Personalization tab) To change the date and time, simply tab through the field and enter the date as shown below: Click Change Write Filter. It will require a reboot to enable and the image will be protected from any changes. pg.9

10 10ZiG Unified Write Filter (UWF) Wizard Windows IoT comes with the 10ZiG UWF Wizard. You can use the UWF Wizard directly on a Windows IoT device to setup Shell Launcher, enable/disable and configure the Unified Write Filter. There is a status indicator telling you the status of UWF. The indicator is located in the system tray. A green indicator means it is disabled. A red indicator means it is enabled. To launch the configuration, you must have administrator rights. You can right click or double click on the status indicator to enter into the configuration. You can use Shell Launcher to replace the default Windows IoT shell with a custom shell. You can use any application or executable as your custom shell, such as a command window or a custom dedicated application. You can configure Shell Launcher to launch different shell applications for different users or user groups. You can set file/registry exclusions of changes you need to persist when UWF is enabled. There are settings to change UWF overlay if needed Thin Client for Windows 10 IoT To the right is the look and feel of the 10ZiG UWF Wizard: pg.10


11 Removing Automated Logon Feature By default, the 10ZiG Thin Client is configured to auto logon as Administrator. That can be easily changed or removed by using the 10ZiG Quick Start Wizard. If you have exited the wizard you can start it up again by clicking on the 10ZiG icon on the administrator desktop. Once the wizard is on the desktop, click on the User Accounts/ Domain tab. Choose the appropriate radio button to remove/change auto logon. Below is an example of removing the auto logon feature; please note your data might be different. Wireless Setup If your 10ZiG Thin Client came with a wireless network card, then click on the following icon. It will detect all the wireless networks that are in range to the Thin Client. Sample located below: Locate the network you want to connect to and click on its name. If it is a network you know and you will connect to on a regular basis, you should select the option that says: Connect automatically. This way, whenever your device is in the networks range, it will automatically connect to it. How to Set a Static IP Address 1. Click on Control Panel, Network and Sharing Center, Change Adapter Settings. 2. Right-click Local Area Connection and Select Properties. 3. Select Internet Protocol Version 4 and Click Properties 4. Enter the static IP address, the Subnet mask, the Default gateway and close the dialog box. 5. Click OK and OK again to close the Local Area Connection Properties box. Tight VNC The default password to connect to the Thin Client using the 10ZiG Manager is admin Once you click or tap Connect, Windows scans for the security settings of the network. Then, it will ask you for its security key. Windows IoT offers an option called Share the network with my contacts. This is a feature called Wi-Fi Sense that allows you to share the networks you connect to with your contacts. Wi-Fi Sense shares the networks, but it does it in a secure way, as it does not disclose the credentials you or others use. Once you have entered the password required by the network click next. If you want to check the accuracy of your password, you can see it before pressing Next by clicking the eye-like icon on its right side. When connected to the network the network name will display Connected to the right-side. pg.11

12 Third Party Software Install You can install additional third-party software that you may need to use on the Thin Client. Such items can include hardware or device drivers as well as any additional software that is required to run on the Thin Client device. Write Filter Windows IoT comes with the Unified Write filter installed on the 10ZiG Thin Client. Unified Write Filter (UWF) is a sector-based write filter that you can use to protect your storage media. UWF intercepts all write attempts to a protected volume and redirects those write attempts to a virtual overlay. This improves the reliability and stability of your device. You can use Hibernate Once/Resume Many (HORM). UWF also contains a file and registry filtering system. You can add specific files or folders on a protected volume to an exclusion list to exclude those files and folders from being filtered by UWF. When a file or folder is in the exclusion list for a volume, all writes to that file or folder bypass UWF filtering, and are written directly to the protected volume and persist after the device restarts. You must use an administrator account to add or remove file or folder exclusions during runtime, and you must restart the device for new exclusions to take effect. To determine if UWF and the filter status is enabled/disabled just look at the status indicator located in the system tray. Green is disabled and red is enabled. For additional information on the UWF configuration double click or right click on the indicator icon and the screen below will tell you type, maximum size, critical and warning thresholds of the overlay... For additional information on how to add/remove file/registry exclusions please use the UWF Wizard. For UWF Servicing on Windows Updates, see the below link. pg.12

13 pg.13
14 Thin Clients for Windows 8 (WE8S) (Models 4418, 5818q & 7818q) Initial Setup and Configuration By default, when you first boot up your new Windows Embedded 8 Standard 10ZiG Thin Client, you are automatically logged in as Administrator. While logged in as Administrator, you will be able to set up, install and configure the Thin Client for use with any locked down users you may wish to create. Administrator s password: admin Components included 4417 Thin Client for Windows 7 (WES7) Thin Client Device Thin Client Stand Power Supply USB Wheel Mouse VESA Mounting Bracket (Optional) Wireless Adaptor (Optional) DVI to VGA Adaptor (Optional) pg.14
15 5818q Thin Client for Windows 8 (WE8S) 7818q Thin Client for Windows 8 (WE8S) ThinClientUser Login ThinClientUser has been developed to provide the administrator with a locked down user environment which has no rights to install, create, modify or delete. ThinClientUser is also unable to create shortcuts and is not allowed to run the right click context menu. ThinClientUser s password: ThinClientUser pg.15

16 Windows 8 (WE8S) Setup Instructions 10ZiG Quick Start Wizard 4418 Thin Client for Windows 8 (WE8S) When the Thin Client first logs in under administrator you will be prompted with the 10ZiG Quick Start Wizard. The 10ZiG Wizard is here to make your customized setup and configuration a breeze. Simply follow the step-by-step instructions, and be sure to note the Connections, User Accounts/Domain and Personalization tabs on the following screens. 1. User Accounts (under User Accounts/Domain tab) - It is easy to setup a new account with user or administrative privileges using the 10ZiG Quick Start Wizard. Simply select from the radio button whether the user should have user or administrative rights and type username and password as shown below: 2. Domain Join (under User Accounts/Domain tab) Domain join and/or change hostname is a snap. Select the appropriate radio button on whether it is a domain join with name change or just a name change. If applicable enter the domain name, hostname, username and password (must have rights to join the domain) as shown below: Click the Create Account button when finished entering the data. Click the Join/Change button when finished entering the data. pg.16
17 5818q Thin Client for Windows 8 (WE8S) 4. Enable/Disable the Unified Write Filter (UWF) (under Personalization tab) By default the Unified Write Filter is off. To turn it on/ off is quite easy. (Please do not turn it on until you are finished configuring your Thin Client). Please see document UWF Suggested Exclusions for extensive detail on UWF and setup. It can be downloaded here: Select the appropriate radio button for the desired action. See below: 3. Set up the Date & Time (under Personalization tab) To change the date and time simply tab through the field and enter the date as shown below: Click Change Write Filter. It will require a reboot to enable and the image will be protected from any changes. Click the Set Date/Time button. pg.17
18 Embedded Lockdown Manager Windows Embedded 8 Standard comes with the Embedded Lockdown Manager. ELM is a snap-in to the Microsoft Management Console (MMC). You can use ELM directly on a Windows Embedded 8 Standard device or you can use ELM on a development computer and then remotely connect to the Thin Client device. ELM automatically detects which lockdown features are installed on the device, and displays configuration options for only those features. ELM uses Windows Management Instrumentation (WMI) to detect and change configuration settings. You can use Shell Launcher to replace the default Windows Embedded 8 Standard shell with a custom shell. You can use any application or executable as your custom shell, such as a command window or a custom dedicated application. You can also configure Shell Launcher to launch different shell applications for different users or user groups. Here is the look and feel of the ELM as well as the features installed. For additional information on how to add/remove file/registry exclusions please use the UWF Wizard. For UWF Servicing on Windows Updates, see the below link. pg.18

19 Removing Automated Logon Feature By default, the 10ZiG Thin Client is configured to auto logon as Administrator. That can be easily changed or removed by using the 10ZiG Quick Start Wizard. If you have exited the wizard, you can start it up again by clicking on the 10ZiG icon located on the Administrator s desktop. Once the application is active, click on User Accounts/Domain tab. Choose the appropriate radio button to remove/change auto logon. Snapshot below is removing the auto logon feature, please note your data might be different. Wireless Setup If your 10ZiG Thin Client came with a wireless network card, click on the following icon. It will detect all the wireless networks that are in range to the Thin Client. Sample located below: Locate the network you want to connect to and click on its name. If it is a network you know and you will connect to on a regular basis, you should select the option that says: Connect automatically. This way, whenever your device is in the networks range, it will automatically connect to it. How to Set a Static IP Address 1. Click on Control Panel, Network and Sharing Center, Change Adapter Settings. 2. Right-click Local Area Connection and Select Properties. 3. Select Internet Protocol Version 4 and Click Properties 4. Enter the static IP address, the Subnet mask, the Default gateway and close the dialog box. 5. Click OK and OK again to close the Local Area Connection Properties box. Once you click or tap Connect, Windows scans for the security settings of the network. Then, it will ask you for its security key. Tight VNC The default password to connect to the Thin Client using the 10ZiG Manager is admin Once you have entered the password required by the network click next. If you want to check the accuracy of your password, you can see it before pressing Next by clicking the eye-like icon on its right side. When connected to the network the network name will display Connected to the right-side. pg.19
20 Third Party Software Install You can install additional third-party software that you may need to use on the Thin Client. Such items can include hardware or device drivers as well as any additional software that is required to run on the Thin Client device. Write Filter Windows Embedded 8 Standard comes with the Unified Write filter installed on the 10ZiG Thin Client. Unified Write Filter (UWF) is a sector-based write filter that you can use to protect your storage media. UWF intercepts all write attempts to a protected volume and redirects those write attempts to a virtual overlay. This improves the reliability and stability of your device. You can use Hibernate Once/Resume Many (HORM). UWF also contains a file and registry filtering system. You can add specific files or folders on a protected volume to an exclusion list to exclude those files and folders from being filtered by UWF. When a file or folder is in the exclusion list for a volume, all writes to that file or folder bypass UWF filtering, and are written directly to the protected volume and persist after the device restarts. You must use an administrator account to add or remove file or folder exclusions during runtime, and you must restart the device for new exclusions to take effect. To determine if UWF and the filter status is enabled/disabled, bring up an admin command prompt and type uwfmgr get-config or use the Embedded Lockdown Manager to determine status. For additional information on suggested file/registry exclusions and UWF servicing on Windows Updates, see URL below: pg.20
21 A Wide Range of Devices to Fit Your Needs pg.21
22 Thin Clients for Windows 7 (WES7) (Models 4417, 5817q & 7817q) Initial Setup and Configuration By default, when you first boot up your new Windows Embedded 7 Standard 10ZiG Thin Client, you are automatically logged in as Administrator. While logged in as Administrator, you will be able to set up, install and configure the Thin Client for use with any locked down users you may wish to create. Administrator s password: admin Components included 4417 Thin Client for Windows 7 (WES7) Thin Client Device Thin Client Stand Power Supply USB Wheel Mouse VESA Mounting Bracket (Optional) Wireless Adaptor (Optional) DVI to VGA Adaptor (Optional) pg.22
23 5817q Thin Client for Windows 7 (WES7) 7817q Thin Client for Windows 7 (WES7) ThinClientUser Login ThinClientUser has been developed to provide the administrator with a locked down user environment which has no rights to install, create, modify or delete. ThinClientUser is also unable to create shortcuts and is not allowed to run the right click context menu. ThinClientUser s password: ThinClientUser pg.23
24 Windows 7 (WES7) Setup Instructions 10ZiG Quick Start Wizard When the Thin Client first logs in under administrator, you will be prompted with the 10ZiG Quick Start Wizard. The 10ZiG Wizard is here to make your customized setup fast and easy. Simply follow the step-by-step instructions, and be sure to note the Connections, User Accounts/Domain and Personalization tabs on the following screens Thin Client for Windows 7 (WES7) 1. User Accounts (under User Accounts/Domain tab) - It is easy to setup a new account with user or administrative privileges using the 10ZiG Quick Start Wizard. Simply select from the radio button whether the user should have user or administrative rights and type username and password as shown below: 2. Domain Join (under User Accounts/Domain tab) Domain join and/or change hostname is a snap. Select the appropriate radio button on whether it is a domain join with name change or just a name change. If applicable enter the domain name, hostname, username and password (must have rights to join the domain) as shown below: Click the Create Account button when finished entering the data. Click the Join/Change button when finished entering the data. pg.24
. Select the appropriate radio button for the desired action. See below: 3.")
25 5817q Thin Client for Windows 7 (WES7) 4. Enable/Disable the Enhanced Write Filter (EWF) (under Personalization tab) By default, the Enhanced Write Filter is off. To turn it on/off is easy. (Please do not turn it on until you are finished configuring your Thin Client). Select the appropriate radio button for the desired action. See below: 3. Set up the Date & Time (under Personalization tab) To change the date and time simply tab through the field and enter the date as shown below: Click Change Write Filter. It will require a reboot to enable and the image will be protected from any changes. Click the Set Date/Time button. pg.25


26 Removing Automated Logon Feature By default, the 10ZiG Thin Client is configured to auto logon as Administrator. That can be easily changed or removed by using the 10ZiG Quick Start Wizard. If you have exited the wizard you can start it up again by clicking on the 10ZiG icon on the administrator desktop. Once the application is active click on User Accounts/Domain tab. Choose the appropriate radio button to remove/change auto logon. Snapshot below is removing auto logon feature, please note your data might be different. Tight VNC The default password to connect to the Thin Client using the 10ZiG Manager is admin Wireless Setup If your 10ZiG Thin Client came with a wireless network card, right-click onnetwork located on the All Programs Menu. It will bring up the following screen: How to Set a Static IP Address 1. Click on Control Panel, Network and Sharing Center, Change Adapter Settings. 2. Right-click Local Area Connection and Select Properties. 3. Select Internet Protocol Version 4 and Click Properties 4. Enter the static IP address, the Subnet mask, the Default gateway and close the dialog box. 5. Click OK and OK again to close the Local Area Connection Properties box. Click on Change Adapter setting located on the left-hand side. The following screen will be displayed. Right-click on the wireless adapter and choose Connect /Disconnect. It will detect all the wireless networks that are in range to the Thin Client. Sample located below: pg.26

27 Locate the network you want to connect to and click on its name. If it is a network you know and you will connect to on a regular basis, you should select the option that says: Connect automatically. This way, whenever your device is in the networks range, it will automatically connect to it. Once you click or tap Connect, Windows scans for the security settings of the network. Then, it will ask you for its security key. Third Party Software Install You can install additional third-party software that you may need to use on the Thin Client. Such items can include hardware or device drivers as well as any additional software that is required to run on the Thin Client device. Write Filter Windows Embedded Standard 7 comes with the Enhanced Write filter installed on the 10ZiG Thin Client. Enhanced Write Filter (EWF) provides the ability to write-protect a run-time image. By redirecting all write requests to either a separate disk partition RAM-REG. EWF allows the run-time image to maintain the appearance of a writeable run-time image. Once you have entered the password required by the network click ok. If you want to encrypt the security key check the HideCharacters box. When connected to the network the network name will display Connected to the right-side. RAM-REG overlays store overlay information in RAM. However, the configuration information about EWF is not stored in a separate EWF volume, but within the registry. To determine if EWF status is enabled/disabled bring up an admin command prompt and type: ewfmgr c: Or the disk icon located in the system tray. Green light means disabled and orange is enabled. PLEASE NOTE: 10ZiG highly recommends keeping the EWF enabled at all times except when required to disable due to a need to apply update or make adjustment to the image. pg.27
28 Thin Client for PeakOS (Linux) (Models 4402/72, 5802q/72q, 5902q/72q & 7802q/72q) Initial Boot-Up Upon initial boot-up, the unit will attempt to configure the network settings using DHCP. Once the unit has obtained an IP address, the default behavior of the unit will be based up which type of specific software model that it is. Components included 4402 Linux Thin Client Thin Client Device Thin Client Stand Power Supply USB Wheel Mouse VESA Mounting Bracket (Optional) Wireless Adaptor (Optional) DVI to VGA Adaptor (Optional) pg.28

29 5802q Linux Thin Client 7802q Quad Core Linux Thin Client XX02 This model is in Desktop Mode by default which is similar to a Windows style desktop. From the desktop, Right-Click the Desktop and choose Terminal Properties to continue the initial configuration. XX72 This model is in WBT Mode by default which is similar to a Windows style desktop. From the desktop, Right-Click the Desktop and choose Terminal Properties to continue the initial configuration. pg.29
30 PeakOS (Linux) Setup Instructions Setting a Static IP Address and Wireless 7802q Quad Core Linux Thin Client 1. Go to the Terminal Properties (using one of the methods above) 2. Double click the Network icon, select Local Area and click the Edit button 3. Go to the TCP/IP Properties tab and check the box Use Static IP 4. Input your IP address, subnet mask and default gateway settings 5. Check the box use static DNS addresses to enter any DNS settings 6. If you have a wireless card installed, click the Add button and then click the Refresh button to see which wireless networks are available for you to connect to 7. Enter your wireless settings including WEP/WPA/WPA2 key Configuring Applications Your 10ZiG PeakOS Thin Client arrives with no connections pre-defined. You will need to manually configure the connections you wish to use. From the Connection Manager, select the Configuration tab and then click the Add button, or from a desktop select Start Button > Programs and then next to the program you wish to add. For example, to add an Internet browser-based connection, you would select the menu option Add Internet Browser. Locking Down the Thin Client Once you have added all the applications you need you can lock the unit down to prevent changes from being made. This can be done either remotely by the 10ZiG Management Software or on the unit itself. Enter the Terminal Properties, go to the Security tab and click the hide connections configuration tab check box. Then add a password to the unit to prevent the user from entering the control panel to edit settings. pg.30

31 Auto Start Applications Any connection can be set to automatically launch when the unit is powered on. In the configuration tab of the Connections Manager, highlight the connection you want to auto start and click the Startup button. Click the check boxes for auto-start, and/or for default connection. If this connection type is RDP, VMware or Citrix, you will also have a check box for auto reconnect. Optional Power Plus Features TN5250e Connections (Display & Printer) for direct line-up to AS/400 systems via Ethernet cable and TCP/IP protocol. TN3270e Connections (Display & Printer) for direct line-up to IBM 390 systems via Ethernet cable and TCP/IP protocol. Adobe PDF Viewer Hot Keys CTRL + ALT + END = Displays Terminal Connection Manager CTRL + ALT - = Jumps back to previous session CTRL + ALT + = Jumps back to the subsequent session F2 = Enters Terminal Setup from the Terminal Connection Manager screen. On power up if you hold down the space bar key it will get you to the quick set up screen. Non-Destructive Backspace Your 10ZiG PeakOS Thin Client can be configured but requires keyboard mapping. The keyboard mapping is done using the GUI configurator in desktop mode Hot Keys (Terminal Style) Enter Right CTRL Field Exit ENTER Error Reset Left CTRL Attention ESC Rule Cursor Home Dup Numpad Roll Up Page Down Roll Down Page Up Split Screen CTRL-ALT-INSERT Hot Key to Next Session ALT + TAB 5802q Linux Thin Client pg.31
32 Zero Client for VMware NOS (Models 4448v, 5848qv/qdv & 5948qv) Initial Boot-Up Upon initial boot-up, the unit will attempt to configure the network settings using DHCP. Once the unit has obtained an IP address, you may continue through the remainder of the setup process by filling in the required information based on your preferences and geographical settings. On the following setup screens, you will be asked to complete your country location, the time zone you are in and the current Time & Date. You will now be presented with your VMware View Settings to connect to your server. Once you have completed these steps, you will be given a login dialog box to fill in your Username, Password and Domain settings to continue connecting to your VMware server. Components included 4448v Zero Client for VMware Thin Client Device Thin Client Stand Power Supply USB Wheel Mouse VESA Mounting Bracket (Optional) Wireless Adaptor (Optional) DVI to VGA Adaptor (Optional) pg.32

33 5848qv Zero Client for VMware 5948qv Zero Client for VMware VMware Horizon Client Enter your VMware Horizon Connection Server address in the Server Address Field. You may designate a specific desktop to connect to here as well. You have the ability to preset your Username, Password and Domain settings to connect to your VMware Connection Server under the Login Option By Clicking OK on the VMware settings, you will see the dialog box shown below called the Launch Pad. pg.33

34 VMware NOS Setup Instructions Launch Pad 5848qv Zero Client for VMware From the launch pad you can access the following for quick adjustments Display Configuration Sound Configuration Keyboard Configuration System Settings - Control Panel At the bottom of the VMware login dialog box you will find a Gear icon in order to access the Control Panel applet. Mouse Configuration These options can be locked down under System Settings > Control Panel > System Area > Security Settings. Here you can manually configure the hardware, make changes or view your system parameters. pg.34


35 Test drive our powerful line of Thin Clients & Zero Clients for 30 days free. Setting a Static IP Address and Wireless 1. Click Gear icon... to enter the Control Panel. 2. Click the Network icon, select Local Area and click the Edit button. 3. Go to the TCP/IP Properties tab and check the box Use Static IP. 4. Input your IP address, subnet mask and default gateway settings. 5. Check the box use static DNS addresses to enter any DNS settings. 6. If you have a wireless card installed, click the Add button and then click the Refresh button to see which wireless networks are available for you to connect to. 7. Enter your wireless settings including WEP/WPA/WPA2 key. Locking Down the Zero Client Once you have setup the VMware connection and made the desired changes to the system, you can lock the unit down to prevent future changes from being made. This can be done either remotely by the 10ZiG Management Software or on the unit itself. Enter the System Settings Control Panel. Under the System area click Security Settings and check the Lock down control panel check box. Then add a password to this to prevent the user from accessing the control panel. pg.35

36 Zero Client for Citrix NOS (Models 4448c, 5848qc/qdc & 5948qc) Initial Boot-Up Upon initial boot-up, the unit will attempt to configure the network settings using DHCP. Once the unit has obtained an IP address, you may continue through the remainder of the setup process by filling in the required information based on your preferences and geographical settings. On the following setup screens, you will be asked to complete your country location, the time zone you are in and the current Time & Date. You will now be able to enter your Citrix Settings to connect to your server. You may select the connection type (options include Storefront for Web, StoreFront for PNAgent, XML Broker) and carefully type in the Server Address. You have the ability to preset your Username, Password and Domain settings to connect to your Citrix server under the Login Option 4448c Zero Client for Citrix NOS By Clicking OK on the Citrix settings, you will see the Dialog box shown below called the Launch Pad. pg.36
37 5848qc Zero Client for Citrix 5948qc Zero Client for Citrix Components included Thin Client Device Thin Client Stand Power Supply VESA Mounting Bracket (Optional) Wireless Adaptor (Optional) DVI to VGA Adaptor (Optional) USB Wheel Mouse pg.37
38 Citrix NOS Setup Instructions Launch Pad 5848qc Zero Client for Citrix From the launch pad you can access the following for quick adjustments Display Configuration Sound Configuration Keyboard Configuration System Settings - Control Panel At the bottom of the Citrix login dialog box you will find a Gear icon in order to access the Control Panel applet. Mouse Configuration These options can be locked down under System Settings > Control Panel > System Area > Security Settings. Here you can manually configure the hardware, make changes or view your system parameters. pg.38


39 Personalized Level of Service and Support Setting a Static IP Address and Wireless 1. Click Gear icon... to enter the Control Panel. 2. Click the Network icon, select Local Area and click the Edit button. 3. Go to the TCP/IP Properties tab and check the box Use Static IP. 4. Input your IP address, subnet mask and default gateway settings. 5. Check the box use static DNS addresses to enter any DNS settings. 6. If you have a wireless card installed, click the Add button and then click the Refresh button to see which wireless networks are avail able for you to connect to. 7. Enter your wireless settings including WEP/WPA/WPA2 key. Locking Down the Zero Client Once you have setup the Citrix connection and made the desired changes to the system, you can lock the unit down to prevent future changes from being made. This can be done either remotely by the 10ZiG Management Software or on the unit itself. Enter the System Settings Control Panel. Under the System area click Security Settings and check the Lock down control panel check box. Then add a password to this to prevent the user from accessing the control panel. pg.39
40 Thin Client for Parallels RAS NOS (Models 4448p, 5848qp/qpd & 5948qp) Initial Boot-Up Upon initial boot-up, the unit will attempt to configure the network settings using DHCP. Once the unit has obtained an IP address, you may continue through the remainder of the setup process by filling in the required information based on your preferences and geographical settings. On the following setup screens, you will be asked to complete your country location, the time zone you are in and the current Time & Date. You will now be presented with the Parallels Settings to connect to your server. Once you have completed these steps, you will be given a login dialog box to fill in your Username, Password and Domain settings to continue connecting to your Parallels server. Components included 4448p Zero Client for Parallels RAS Thin Client Device Thin Client Stand Power Supply USB Wheel Mouse VESA Mounting Bracket (Optional) Wireless Adaptor (Optional) DVI to VGA Adaptor (Optional) pg.40

41 5848qp Zero Client for Parallels RAS Parallels Client Setup Select your connection type, input your Connection Server network or IP address. If needed configure your Port and Connection Mode. Then Click OK You have the ability to preset your Username, Password and Domain settings to connect to your Parallels Server under the Authentication Option By Clicking OK on the Parallels settings, you will see the Dialog box shown right called the Launch Pad. pg.41
42 Parallels RAS NOS Setup Instructions Launch Pad From the launch pad you can access the following for quick adjustments 5948qp Zero Client for Parallels RAS Display Configuration Sound Configuration Keyboard Configuration System Settings - Control Panel At the bottom of the Parallels login dialog box you will find a Gear icon in order to access the Control Panel applet Mouse Configuration These options can be locked down under System Settings > Control Panel > System Area > Security Settings. Here you can manually configure the hardware, make changes or view your system parameters. pg.42
43 Setting a Static IP Address and Wireless 1. Click Gear icon... to enter the Control Panel. 2. Click the Network icon, select Local Area and click the Edit button. 3. Go to the TCP/IP Properties tab and check the box Use Static IP. 4. Input your IP address, subnet mask and default gateway settings. 5. Check the box use static DNS addresses to enter any DNS settings. 6. If you have a wireless card installed, click the Add button and then click the Refresh button to see which wireless networks are avail able for you to connect to. 7. Enter your wireless settings including WEP/WPA/WPA2 key. Locking Down the Zero Client Once you have setup the Parallels connection and made the desired changes to the system, you can lock the unit down to prevent future changes from being made. This can be done either remotely by the 10ZiG Management Software or on the unit itself. Enter the System Settings Control Panel. Under the System area click Security Settings and check the Lock down control panel check box. Then add a password to this to prevent the user from accessing the control panel. pg.43
44 Thin Client for RDP NOS (Models 4448r, 5848qr/qdr & 5948qr) Initial Boot-Up Upon initial boot-up, the unit will attempt to configure the network settings using DHCP. Once the unit has obtained an IP address, you may continue through the remainder of the setup process by filling in the required information based on your preferences and geographical settings. On the following setup screens, you will be asked to complete your country location, the time zone you are in and the current Time & Date. You will now be presented with your RDP Settings to connect to your server. Once you have completed these steps, you will be given a login dialog box to fill in your Username, Password and Domain settings to continue connecting to your RDS server. Components included 4448r Zero Client for RDP Thin Client Device Thin Client Stand Power Supply USB Wheel Mouse VESA Mounting Bracket (Optional) Wireless Adaptor (Optional) DVI to VGA Adaptor (Optional) pg.44

45 5848qr Zero Client for RDP RDP Client Setup Enter you RDS server name or IP address in the Server field. You may include and save credentials here as well. Make sure to set Security settings; most 2008R2 and newer servers use NLA. If you use a load balancer or RD Gateway, you enter them under the RD Gateway option. By Clicking OK on the RDP settings, you will see the Dialog box shown right called the Launch Pad. pg.45

46 RDP NOS Setup Instructions Launch Pad 5948qr Zero Client for RDP From the launch pad you can access the following for quick adjustments Display Configuration Sound Configuration Keyboard Configuration System Settings - Control Panel At the bottom of the RDP login dialog box you will find a Gear icon in order to access the Control Panel applet. Mouse Configuration These options can be locked down under System Settings > Control Panel > System Area > Security Settings. Here you can manually configure the hardware, make changes or view your system parameters. pg.46

47 Setting a Static IP Address and Wireless Locking Down the Zero Client 1. Click Gear icon... to enter the Control Panel. 2. Click the Network icon, select Local Area and click the Edit button. 3. Go to the TCP/IP Properties tab and check the box Use Static IP. 4. Input your IP address, subnet mask and default gateway settings. 5. Check the box use static DNS addresses to enter any DNS settings. 6. If you have a wireless card installed, click the Add button and then click the Refresh button to see which wireless networks are available for you to connect to. 7. Enter your wireless settings including WEP/WPA/WPA2 key. Once you have setup the RDP connection and made the desired changes to the system, you can lock the unit down to prevent future changes from being made. This can be done either remotely by the 10ZiG Management Software or on the unit itself. Enter the System Settings Control Panel. Under the System area click Security Settings and check the Lock down control panel check box. Then add a password to this to prevent the user from accessing the control panel. pg.47
 Ethernet Cable Quick Start Guide VESA Mounting Bracket (Optional) V1206-PD Zero Client pg.")
48 10ZiG PCoIP V1200 Series Zero Clients (Models V1200-P, V1200-QP, V1206-P, V1206-PD, & V1206-PDS ) Components included Applicable V1200 Series Zero Client Model Power Supply Cable Adapter for Dual-Link DVI (Optional) Ethernet Cable Quick Start Guide VESA Mounting Bracket (Optional) V1206-PD Zero Client pg.48
. 5.")
49 V1200-P Zero Client Tera2 PCoIP Portal Processor V1200-QP Zero Client Installation Steps 1. Connect USB keyboard and mouse. 2. Connect one end of Ethernet cable of the Zero Client and the other end to a switch/router. 3. Connect monitor cables to the Zero Client. 4. Connect speakers and/or headphones (optional). 5. Connect power supply to the Zero Client and a power source. 6. Press front panel button to power on the Zero Client. Default IP Address The Portal is set to DHCP client mode by default. Normally, the IP address of the portal is assigned by the DHCP server on your IP network. If your IP network does not have a DHCP server, the portal will fall back to a static IP address mode after a timeout period of approximately 2 minutes. In the fall back static IP address mode, you can access the Portal web interface to disable DHCP client mode and assign a static IP address. The portal s fall back IP address is pg.49
50 V1200 Series Setup Instructions Quick Configuration Click on OPTIONS on the top menu bar and select, CONFIGURATION. 1. Set manual IP if desired on the NETWORK TAB, or IPV6 tab for manual IPv6 addresses 2. On the SESSIONS tab choose the correct Connection Type which matches your PCoIP environment and/or the desired user experience. Direct To Host: options for connecting directly to a 10ZiG PCoIP host card. View Connection Server: option for connecting via a VMware View Server Connection Management Interface: used to communicate with an external connection management server. 3. In the DNS Name Or IP Address box enter your VMware View Connection Server/10ZiG PCoIP Host Card/Connection Manager s IP or DNS name. 4. Optional configuration settings such as Username, Password, Desktop etc. are presented depending on the Connection Type chosen. 5. Under the ADVANCED button on the SESSIONS tab you will have the chance to change various custom options such as Desktop Name, Port#, Auto Connect, Remember Username etc. 6. To create a password to lock out settings changes, you can click OPTIONS and then PASSWORD to create a password for the device. This will disallow settings changes via the On Screen Display without using the password. By default, the password field is left blank just click the login button. As you make changes remember to click APPLY to commit the changes and continue in the settings applet, or OK to commit the changes and close the settings applet. Some of the options and configuration settings can be dependent on your VMware View Network or Authentication configuration. pg.50
 The default setting on any certified VMware View Client is to warn")


 to the Do Not Verify Server Identity Certificates.")

51 V1206-PDS Zero Client VMware View Certificate Checking Mode (Unsecure & Secure Connections) The default setting on any certified VMware View Client is to warn the user if you are connecting to an unsecured VMware View Connection Server. If you are not using https/ssl certificates to secure your VMware View environment you may set your V1200 Series unit to not verify the server s identity. 1. Click on OPTIONS on the top menu bar and select USER SETTINGS 2. On the VMware View tab change the option from Warn Before Connection to Untrusted Servers (Default) to the Do Not Verify Server Identity Certificates. As you make changes remember to click APPLY to commit the changes and continue in the settings applet, or OK to commit the changes and close the settings applet. V1206-P Zero Client for VMware pg.51
52 Have You Met Our 10ZiG Manager? Let s get you introduced to The 10ZiG Manager our simple-to-understand, user-friendly, highly-functional Centralized Management Software Utility. Server-console or web-console, 10ZiG Manager is always FREE with Thin & Zero Client purchases and makes endpoint management, configuration, and deployment efficient and effortless. Manager Server or Web? Installation is Going To Be Easy Implement and start managing in under an hour. A single-manager server-based installation, along with optional remote consoles, provides automated discovery and centralized device configuration. Web Management allows management of your Clients from all major browsers (Firefox, Chrome, Internet Explorer, etc.), providing real-time status of all Clients from a single comprehensive page. Cloud Management Technology? Yeah, We ve Got That Our Cloud Agent supports internet connectivity and manages locations like smaller offices and home networks. End users deploying VDI, Session Virtualization, or Published Applications, not to mention Managed Service Providers, offering DaaS, SaaS, UCaaS, etc., are able to manage endpoints via the Cloud. Safe and Efficient Connectivity? Wouldn t Have It Any Other Way The 10ZiG Manger utilizes SSL encryption with secure logins verified against your Active Directory domain with timeouts for user inactivity and failed login attempts. Detailed installation guide and pictures ensure the 10ZiG Web Console is installed right the first time. Group Management and Configuration? We Have This Covered Whether manually or automatically populated, organized groups provide a simple, more logical way to configure, monitor, and manage devices. The 10ZiG Web Console includes a thorough configuration tool to quickly change all settings with nearly the same features as the 10ZiG Remote Console, as well as being able to use VNC with all clients. pg.52


53 How do I install the 10ZiG Manager? The 10ZiG Manager is the easiest and most straightforward client management software on the market today. Please see the below link for our 10ZiG Manager Setup Guide: Manager_Cloud_Setup_Guide.pdf 10ZiG FAQ Site: Do You Have Questions? Of course, you do! We re here to help. Many frequently asked questions can be answered at our Support FAQ site page on There, easily search by keyword or product type for tons of prepared and helpful information. While you re there, sign up to receive 10ZiG Technology & Firmware Updates! Not to worry, if you re really stumped, we ve got your back at support@10zig.com for the US, Canada and South America or support@10zig.com for EMEA. (Note: Suggestions for FAQs are always welcome for review.) 10ZiG Product Warranty & Terms The 10ZiG Thin & Zero Client Warranty is one of the best standard warranties in the marketplace today. Our units are covered by a 3 year advance hardware exchange (return freight is also covered), 3 years of tech support and 3 years of software upgrades. For full U.S. Product Warranty, see here: Product_Warranties_US_2018.pdf For full EMEA Product Warranty, see here: Product_Warranties_EMEA_2018.pdf pg.53
Windows 10 IoT QSG Edited Draft
 Initial Setup and Configuration Windows 10 IoT QSG Edited Draft By default, when you first boot up your new Windows 10 IoT 10ZiG Thin Client, you are automatically logged in as Administrator. While logged
10ZiG NOS User Guide
 About About This Guide Thank you for choosing from the 10ZiG Technology series of Zero Clients which are specifically designed for power users in an office environment. They feature a powerful, yet simple
10ZiG Linux V10 User Guide
 11/19/2012 Table of Contents About This Guide Thank you for choosing from the 10ZiG Technology series of thin clients which are specifically designed for power users in an office environment. They feature
User s manual. Mobile Thin Client Solution Atrust mt168w. for Windows 10 IoT Enterprise
 Mobile Thin Client Solution Atrust mt168w for Windows 10 IoT Enterprise Topics Covered: Setup and Maintenance Basics as an Endpoint Device in VDI Atrust Client Setup Console User s manual Internal Draft
10ZiG PeakOS User Guide
 About About This Guide Thank you for choosing from the 10ZiG Technology series of Thin Clients that are specifically designed for power users in an office environment. 10ZiG Thin Clients provide a powerful,
User s manual. Mobile Thin Client Solution Atrust mt180w
 Mobile Thin Client Solution Atrust mt180w Topics Covered: Setup and Maintenance Basics as an Endpoint Device in VDI Atrust Client Setup Console User s manual Internal Draft 0.01 Copyright 2015 Atrust Computer
Agility 2018 Hands-on Lab Guide. VDI the F5 Way. F5 Networks, Inc.
 Agility 2018 Hands-on Lab Guide VDI the F5 Way F5 Networks, Inc. 2 Contents 1 Lab1 - Getting Started 5 1.1 Jump Host.............................................. 5 1.2 Lab Network Setup.........................................
Dell Wyse Latitude 3480 Mobile Thin Client
 Dell Wyse Latitude 3480 Mobile Thin Client User Guide Regulatory Model: P79G Regulatory Type: P79G001 Notes, cautions, and warnings NOTE: A NOTE indicates important information that helps you make better
Network Connection Manager Edition
 Secure Lockdown Network Connection Manager Edition for Windows User Guide Contents Welcome... 3 System Requirements... 3 Installation... 3 Product Activation... 4 Product Deactivation... 4 Managing Licenses...
Dell Wyse Management Suite. Version 1.2 Administrator s Guide
 Dell Wyse Management Suite Version 1.2 Administrator s Guide Notes, cautions, and warnings NOTE: A NOTE indicates important information that helps you make better use of your product. CAUTION: A CAUTION
Wyse Converter for PCs. Version 2.0 Administrator s Guide
 Wyse Converter for PCs Version 2.0 Administrator s Guide Notes, cautions, and warnings NOTE: A NOTE indicates important information that helps you make better use of your product. CAUTION: A CAUTION indicates
Wyse Converter for PCs. Version 1.0 Administrator s Guide
 Wyse Converter for PCs Version 1.0 Administrator s Guide Notes, cautions, and warnings NOTE: A NOTE indicates important information that helps you make better use of your product. CAUTION: A CAUTION indicates
Parallels Remote Application Server
 Parallels Remote Application Server Parallels Client for Mac User's Guide v16 Parallels International GmbH Vordergasse 59 8200 Schaffhausen Switzerland Tel: + 41 52 672 20 30 www.parallels.com Copyright
Agent and Agent Browser. Updated Friday, January 26, Autotask Corporation
 Agent and Agent Browser Updated Friday, January 26, 2018 2018 Autotask Corporation Table of Contents Table of Contents 2 The AEM Agent and Agent Browser 3 AEM Agent 5 Privacy Mode 9 Agent Browser 11 Agent
Devon IT TC5 Terminal Quick Start Guide version1
 Devon IT TC5 Terminal version1 TC5D, TC5DW, TC5X, TC5XW For proper ventilation, the thin client must be placed in an open area in its vertical position. Improper mounting can use the unit to overheat and
NetExtender for SSL-VPN
 NetExtender for SSL-VPN Document Scope This document describes how to plan, design, implement, and manage the NetExtender feature in a SonicWALL SSL-VPN Environment. This document contains the following
About the XenClient Enterprise Solution
 About the XenClient Enterprise Solution About the XenClient Enterprise Solution About the XenClient Enterprise Solution XenClient Enterprise is a distributed desktop virtualization solution that makes
Dell Wyse Management Suite 1.2 Release Notes
 Rev. A00 2018-06 Dell recommends applying this update during your next scheduled release cycle. The update contains feature enhancements or changes that will help keep your system software current and
BROWSER-BASED SUPPORT CONSOLE USER S GUIDE. 31 January 2017
 BROWSER-BASED SUPPORT CONSOLE USER S GUIDE 31 January 2017 Contents 1 Introduction... 2 2 Netop Host Configuration... 2 2.1 Connecting through HTTPS using Certificates... 3 2.1.1 Self-signed certificate...
pinremote Manual Version 4.0
 pinremote Manual Version 4.0 Page 1 Table of content 1 Introduction... 4 2 Setup... 5 2.1 Requirements server... 5 2.2 Requirements client... 5 2.3 Setup process... 6 2.3.1 Single Server... 8 2.3.2 Cluster...
Alternative Desktop Computing. Inspect all parts visually for damage. If anything is damaged, please contact
 TC5Xc, TC5Dc Mount the thin client in its vertical orientation for best performance. If it is necessary to mount the unit horizontally, make sure the unit is properly ventilated. Improper mounting can
COS6.20 Cloud Client User Manual
 COS 6.20 Cloud Client User Manual Date: 2015-05 Centerm Information Co., Ltd Copyright Centerm Information Co., Ltd. 2002-2015. All rights reserved. The information contained in this document is subject
Connectivity options configuration
 Global Connection Settings dialog box, page 1 Connectivity options access, page 5 Advanced details about ICA and RDP connections, page 18 Global Connection Settings dialog box While it is not recommended
Enter your Appserv username and password to sign in to the Website
 Appserv Desktop Access Logging on from a Windows 10 Device Step 1. To sign in to the Appserv Desktop Access website, either enter the following address into the Microsoft Edge browser address bar, or click
Installing and Configuring Citrix XenApp 6.5 (Part 1)
") Installing and Configuring Citrix XenApp 6.5 (Part 1) Introduction The first part of this series describes the installation steps of the first server (which will create the XenApp environment) and the
Installing and Configuring Citrix XenApp 6.5 (Part 1) Introduction The first part of this series describes the installation steps of the first server (which will create the XenApp environment) and the
Parallels Remote Application Server
 Parallels Remote Application Server Parallels Client for Windows User's Guide v16.1 Parallels International GmbH Vordergasse 59 8200 Schaffhausen Switzerland Tel: + 41 52 672 20 30 www.parallels.com Copyright
Wyse Converter for PCs 1.1 Release Notes
 2018-09 Software releases are created to correct defects, make enhancements, or add new features. These releases are tested on all current, actively shipping platforms and operating systems, as applicable.
Configuring the SMA 500v Virtual Appliance
 Using the SMA 500v Virtual Appliance Configuring the SMA 500v Virtual Appliance Registering Your Appliance Using the 30-day Trial Version Upgrading Your Appliance Configuring the SMA 500v Virtual Appliance
Wyse Converter for PCs Release Notes
 2018-04 Software releases are created to correct defects, make enhancements, or add new features. These releases are tested on all current, actively shipping platforms and operating systems as applicable.
Deployment User Guide
 Deployment User Guide Version: 010319-2 Contents STEP 1: (Windows Users Only): Determine if your PC is running the 32-bit or 64-bit version of Windows. If you are not a PC user, please proceed to step
New in Release: Secomea Release 8.0. This document shows the changes from release 7.4 to release 8.0. Version: 1.5, 2018
 New in Release: Secomea Release 8.0 This document shows the changes from release 7.4 to release 8.0. Version: 1.5, 2018 Table of Contents Change log 4 1. Release 8.0 4 Highlights 4 2. General 6 2.1. New
IBM NetBAY Virtual Console Software. Installer and User Guide
 IBM NetBAY Virtual Console Software Installer and User Guide INSTRUCTIONS This symbol is intended to alert the user to the presence of important operating and maintenance (servicing) instructions in the
10ZiG Technology. Thin Desktop Quick Start Guide
 10ZiG Technology Thin Desktop Quick Start Guide 2010 05 20 Introduction This document is intended as a quick start guide for installing Thin Desktop. After reading this document, you will know how to:
Installing the Operating System or Hypervisor
 If you purchased E-Series Server or NCE Option 1 (E-Series Server or NCE without a preinstalled operating system or hypervisor), you must install an operating system or hypervisor. This chapter includes
Atrust t66 Thin Client. User s Manual. Internal Draft 0.05 Copyright Atrust Computer Corp.
 Atrust t66 Thin Client User s Manual Internal Draft 0.05 Copyright 2014-17 Atrust Computer Corp. UM-t66-EN-17022019 i Copyright and Trademark Statements Copyright 2014-17 Atrust Computer Corp. All rights
Fusion UDM Pro. Technical specifications. Device management for everyone. Fusion UDM Pro
 Device management for everyone Fusion UDM Pro System Requirements Hardware Intel Xeon Server of equivalent 8GB RAM Minimum (more if SQL Server on same server) 80GB HDD Minimum (more if SQL Server on same
Dell Wyse Management Suite. Version 1.3 Administrator s Guide
 Dell Wyse Management Suite Version 1.3 Administrator s Guide Notes, cautions, and warnings NOTE: A NOTE indicates important information that helps you make better use of your product. CAUTION: A CAUTION
Users Guide. Wyse PocketCloud TM. Issue: PN: Rev. F
 Users Guide Wyse PocketCloud TM Issue: 083010 PN: 883930-01 Rev. F Copyright Notices 2010, Wyse Technology Inc. All rights reserved. This manual and the software and firmware described in it are copyrighted.
Quick Installation Guide D-Link ShareCenter Pro 1100
 Quick Installation Guide D-Link ShareCenter Pro 1100 This document will guide you through the basic installation process for your new D-Link ShareCenter Pro 1100. DNS-1100-04 Documentation also available
ApplicationServer XG Version 11. Last updated:
 ApplicationServer XG Version 11 Last updated: 2013-10-09 Table of Contents Introduction to 2X ApplicationServer... 1 What is 2X ApplicationServer?... 1 How does it work?... 1 About This Document... 1 Introduction...
VMware Horizon Client for Windows User Guide. Modified on 03 OCT 2017 VMware Horizon Client for Windows 4.6 VMware Horizon Client for Windows 4.6.
 VMware Horizon Client for Windows User Guide Modified on 03 OCT 2017 VMware Horizon Client for Windows 4.6 VMware Horizon Client for Windows 4.6.1 VMware Horizon Client for Windows User Guide You can find
Dell Wyse Management Suite. Version 1.0 Administrator s Guide
 Dell Wyse Management Suite Version 1.0 Administrator s Guide Notes, cautions, and warnings NOTE: A NOTE indicates important information that helps you make better use of your product. CAUTION: A CAUTION
Tera2 PCoIP Zero Client Firmware
 Tera2 PCoIP Zero Client Firmware Version 6.0 Administrators' Guide TER1504003-6.0 Teradici Corporation #101-4621 Canada Way, Burnaby, BC V5G 4X8 Canada phone +1.604.451.5800 fax +1.604.451.5818 www.teradici.com
Dell Wyse Management Suite. Version 1.1 Administrator s Guide
 Dell Wyse Management Suite Version 1.1 Administrator s Guide Notes, cautions, and warnings NOTE: A NOTE indicates important information that helps you make better use of your product. CAUTION: A CAUTION
Amazon AppStream 2.0: SOLIDWORKS Deployment Guide
 2018 Amazon AppStream 2.0: SOLIDWORKS Deployment Guide Build an Amazon AppStream 2.0 environment to stream SOLIDWORKS to your users June 2018 https://aws.amazon.com/appstream2/ 1 Welcome This guide describes
Dell EMC OpenManage Mobile. Version User s Guide (Android)
") Dell EMC OpenManage Mobile Version 2.0.20 User s Guide (Android) Notes, cautions, and warnings NOTE: A NOTE indicates important information that helps you make better use of your product. CAUTION: A CAUTION
Dell EMC OpenManage Mobile Version 2.0.20 User s Guide (Android) Notes, cautions, and warnings NOTE: A NOTE indicates important information that helps you make better use of your product. CAUTION: A CAUTION
For details on using the LX, access online help from the application, or download help in PDF format from the Support page on Raritan's website.
 Dominion LX Quick Setup Guide Thank you for your purchase of the Dominion LX. The LX is the industry's highest quality, most affordable digital KVM (Keyboard, Video, Mouse) switch for your growing SMB
Edge Device Manager Quick Start Guide. Version R15
 Edge Device Manager Quick Start Guide Version R15 Notes, cautions, and warnings NOTE: A NOTE indicates important information that helps you make better use of your product. CAUTION: A CAUTION indicates
How to setup a basic proveos system
 How to setup a basic proveos system What you need: A proveos unit & included power supply, DVI-VGA adaptor, etc. A projector or LCD/Plasma display VGA or DVI cable of sufficient length Stereo (powered)
Device Manager. Managing Devices CHAPTER
 2 CHAPTER This chapter describes how to perform routine device management tasks using the Administrator Console. It provides information on managing the devices within your Cisco VXC Manager environment.
Migrating from Citrix XenApp (IMA / FMA) to Parallels Remote Application Server
 to Parallels Remote Application Server") Parallels Remote Application Server Migrating from Citrix XenApp (IMA / FMA) to Parallels Remote Application Server Contents 1. Introduction a. Why Should You Migrate from Citrix to Parallels RAS b. Overview
Parallels Remote Application Server Migrating from Citrix XenApp (IMA / FMA) to Parallels Remote Application Server Contents 1. Introduction a. Why Should You Migrate from Citrix to Parallels RAS b. Overview
Ultra-elegant Gigabit IP Phone
 Ultra-elegant Gigabit IP Phone SIP VP-T49G Quick Start Guide (V8011) wwwyealinkcom Applies to firmware version 5180010 or later Packaging Contents The following items are included in your package If you
Ultra-elegant Gigabit IP Phone
 Ultra-elegant Gigabit IP Phone SIP VP-T49G Quick Start Guide (V80100) wwwyealinkcom Applies to firmware version 5180075 or later Packaging Contents The following items are included in your package If you
VMware Horizon Client for Chrome OS User Guide. 04 JAN 2018 VMware Horizon Client for Chrome OS 4.7
 VMware Horizon Client for Chrome OS User Guide 04 JAN 2018 VMware Horizon Client for Chrome OS 4.7 You can find the most up-to-date technical documentation on the VMware website at: https://docs.vmware.com/
Dell Wyse Management Suite 1.2 HF1 Release Notes
 Rev. A00 2018-08 Dell recommends applying this update during your next scheduled release cycle. The update contains feature enhancements or changes that will help keep your system software current and
SC-T35/SC-T45/SC-T46/SC-T47 ViewSonic Device Manager User Guide
 SC-T35/SC-T45/SC-T46/SC-T47 ViewSonic Device Manager User Guide Copyright and Trademark Statements 2014 ViewSonic Computer Corp. All rights reserved. This document contains proprietary information that
Installation. Power on and initial setup. Before You Begin. Procedure
 Power on and initial setup, page 1 Customize ESXi host for remote access, page 4 Access and configure ESXi host, page 6 Deploy virtual machines, page 13 Install applications on virtual machines, page 14
Evaluation Kit Manual
 Xcalibur Global 1.2 Evaluation Kit Manual Management Software Written By: Chip PC Training Dep. December 2007 www.chippc.com 1 2 Contents 1 General 4 2 DVD Content 5 3 Installation Prerequisites 5 4 Xcalibur
J60 Thin Client. User Guide
 J60 Thin Client User Guide Version 1.7 ShenZhen JIEYUN Technology Co., Ltd. (www.jieyung.com) Updated at 2014-06-28 Copyright @ 2013 JIEYUN Technology Co., Ltd. All rights reserved. Please do not copy,
Ultra-elegant Gigabit IP Phone
 Ultra-elegant Gigabit IP Phone SIP VP-T49G Quick Start Guide (V225) wwwyealinkcom Applies to firmware version 512205 or later Packaging Contents The following items are included in your package If you
SRA Virtual Appliance Getting Started Guide
 SRA Virtual Appliance Getting Started Guide 1 Notes, Cautions, and Warnings NOTE: A NOTE indicates important information that helps you make better use of your system. CAUTION: A CAUTION indicates potential
Configuring Imprivata OneSign with 10ZiG NOS Zero clients
 Configuring Imprivata OneSign with 10ZiG NOS Zero clients OneSign Rev. 1.2 1 Document History 1.1 First Draft Release 1.2 Support of Omnikey 5022 CL Listing of 10ZiG under ProveID (OneSign 5.4) 2 This
271 Waverley Oaks Rd. Telephone: Suite 206 Waltham, MA USA
 Contacting Leostream Leostream Corporation http://www.leostream.com 271 Waverley Oaks Rd. Telephone: +1 781 890 2019 Suite 206 Waltham, MA 02452 USA To submit an enhancement request, email features@leostream.com.
AirServer Connect User Guide
 1 Contents Welcome... 3 Unique features... 3 Set up your AirServer Connect... 4 The Home Screen... 5 Navigating Menus... 5 Configuring Basic Settings... 6 Screen Mirroring Methods... 7 Airplay... 7 Mac...
Remote Support 19.1 Web Rep Console
 Remote Support 19.1 Web Rep Console 2003-2019 BeyondTrust Corporation. All Rights Reserved. BEYONDTRUST, its logo, and JUMP are trademarks of BeyondTrust Corporation. Other trademarks are the property
10ZiG Manager Cloud Setup Guide
 10ZiG Manager Cloud Setup Guide Welcome to the 10ZiG Manager Cloud Setup guide. This guide will help you install all of the components within the 10ZiG Management suite. Please take note of the following
VMware AirWatch: Directory and Certificate Authority
 Table of Contents Lab Overview - HOL-1857-06-UEM - VMware AirWatch: Directory and Certificate Authority Integration... 2 Lab Guidance... 3 Module 1 - Advanced AirWatch Configuration, AD Integration/Certificates
Parallels Remote Application Server
 Parallels Remote Application Server Parallels Client for Windows User's Guide v15.5 Parallels International GmbH Vordergasse 59 8200 Schaffhausen Switzerland Tel: + 41 52 672 20 30 www.parallels.com Copyright
VMware Horizon FLEX Client User Guide
 Horizon FLEX 1.10 This document supports the version of each product listed and supports all subsequent versions until the document is replaced by a new edition. To check for more recent editions of this
Crestron Mercury Tabletop UC Audio Conference Console for Microsoft Teams
 CCS-UC-1-T Crestron Mercury Tabletop UC Audio Conference Console for Microsoft Teams Supplemental Guide Crestron Electronics, Inc. Crestron product development software is licensed to Crestron dealers
Getting Started with ESX Server 3i Installable Update 2 and later for ESX Server 3i version 3.5 Installable and VirtualCenter 2.5
 Getting Started with ESX Server 3i Installable Update 2 and later for ESX Server 3i version 3.5 Installable and VirtualCenter 2.5 Getting Started with ESX Server 3i Installable Revision: 20090313 Item:
SonicWall Secure Mobile Access SMA 500v Virtual Appliance 8.6. Getting Started Guide
 SonicWall Secure Mobile Access SMA 500v Virtual Appliance 8.6 Getting Started Guide Copyright 2017 SonicWall Inc. All rights reserved. SonicWall is a trademark or registered trademark of SonicWall Inc.
Web Console Setup & User Guide. Version 7.1
 Web Console Setup & User Guide Version 7.1 1 Contents Page Number Chapter 1 - Installation and Access 3 Server Setup Client Setup Windows Client Setup Mac Client Setup Linux Client Setup Interoperation
Getting Started with ESX Server 3i Embedded ESX Server 3i version 3.5 Embedded and VirtualCenter 2.5
 Getting Started with ESX Server 3i Embedded ESX Server 3i version 3.5 Embedded and VirtualCenter 2.5 Title: Getting Started with ESX Server 3i Embedded Revision: 20071022 Item: VMW-ENG-Q407-430 You can
VMware Horizon Client for Windows User Guide. 04 JAN 2018 VMware Horizon Client for Windows 4.7
 VMware Horizon Client for Windows User Guide 04 JAN 2018 VMware Horizon Client for Windows 4.7 You can find the most up-to-date technical documentation on the VMware website at: https://docs.vmware.com/
Configuring Imprivata OneSign with 10ZiG NOS Zero clients
 Configuring Imprivata OneSign with 10ZiG NOS Zero clients OneSign Rev. 1.6 1 Document History 1.1 First Draft Release 1.2 Support of Omnikey 5022 CL Listing of 10ZiG under ProveID (OneSign 5.4) 1.3 Added
LeTOS Administrator Guide Documentation
 LeTOS Administrator Guide Documentation Release 1.3.0 Lenovo November 15, 2016 Contents 1 Introduction 2 1.1 What is LeTOS?........................................ 2 1.2 LeTOS Features........................................
Cisco Unified Serviceability
 Cisco Unified Serviceability Introduction, page 1 Installation, page 5 Introduction This document uses the following abbreviations to identify administration differences for these Cisco products: Unified
IBM NetBAY Virtual Console Software. Installer and User Guide
 IBM NetBAY Virtual Console Software Installer and User Guide INSTRUCTIONS This symbol is intended to alert the user to the presence of important operating and maintenance (servicing) instructions in the
Online Help StruxureWare Data Center Expert
 Online Help StruxureWare Data Center Expert Version 7.2.7 What's New in StruxureWare Data Center Expert 7.2.x Learn more about the new features available in the StruxureWare Data Center Expert 7.2.x release.
To ensure the optimal performance of Login VSI, you will need at least three separate (virtual)machines:
machines:") Login VSI Installation Guide This guide covers the initial installation and configuration of Login VSI, so you can get your first test up and running asap. For details on the more advanced functionality,
Login VSI Installation Guide This guide covers the initial installation and configuration of Login VSI, so you can get your first test up and running asap. For details on the more advanced functionality,
Microsoft Windows 10 IoT Enterprise for Dell Wyse Thin Clients. Administrator s Guide
 Microsoft Windows 10 IoT Enterprise for Dell Wyse Thin Clients Administrator s Guide Notes, cautions, and warnings NOTE: A NOTE indicates important information that helps you make better use of your product.
Load Balancing Microsoft Remote Desktop Services. Deployment Guide v Copyright Loadbalancer.org
 Load Balancing Microsoft Remote Desktop Services Deployment Guide v2.0.2 Copyright Loadbalancer.org Table of Contents About this Guide...4 2. Loadbalancer.org Appliances Supported...4 3. Loadbalancer.org
Remote Support Web Rep Console
 Remote Support Web Rep Console 2017 Bomgar Corporation. All rights reserved worldwide. BOMGAR and the BOMGAR logo are trademarks of Bomgar Corporation; other trademarks shown are the property of their
10ZiG Technology. 10ZiG Manager Getting Started Guide. Page 1
 10ZiG Technology 10ZiG Manager Getting Started Guide Page 1 10ZiG Manager Getting Started 10ZiG Technology Limited Headquarters US 2012 W Lone Cactus Dr Phoenix, AZ 85027 Phone 866-864-5250 Fax 623-516-8697
RocIT Defender User s Guide ViSoS TM Virtual System on a Stick
 RocIT Defender User s Guide ViSoS TM Virtual System on a Stick Table of Contents 1. Introduction 3 1.1. Minimum System Requirements 3 1.2. Drive Specifications 4 2. Startup Procedure 4 2.1. Configure computer
Privileged Identity App Launcher and Session Recording
 Privileged Identity App Launcher and Session Recording 2018 Bomgar Corporation. All rights reserved worldwide. BOMGAR and the BOMGAR logo are trademarks of Bomgar Corporation; other trademarks shown are
IP Mini PTZ CAMERA USER GUIDE
 IP Mini PTZ CAMERA USER GUIDE TYPE A: To switch the mount style, remove the two screws on the pan bottom and rotate 180 degree to remount. This Mini PTZ cylinder camera can support both wall mount and
Dell Wyse Management Suite. Version 1.0 Quick Start Guide
 Dell Wyse Management Suite Version 1.0 Quick Start Guide Notes, cautions, and warnings NOTE: A NOTE indicates important information that helps you make better use of your product. CAUTION: A CAUTION indicates
Silk Performance Manager Installation and Setup Help
 Silk Performance Manager 18.5 Installation and Setup Help Micro Focus The Lawn 22-30 Old Bath Road Newbury, Berkshire RG14 1QN UK http://www.microfocus.com Copyright 2004-2017 Micro Focus. All rights reserved.
A Guide to New Features in Propalms TSE 6.5
 A Guide to New Features in Propalms TSE 6.5 1 st February 2010 Contents New Load Balancer ranking scheme - % Utilization based... 3 TSE Web, TSE SPR and TSE DMZ-SPR redundancy using auto failover feature
VMware Horizon FLEX Client User Guide. 26 SEP 2017 Horizon FLEX 1.12
 26 SEP 2017 Horizon FLEX 1.12 You can find the most up-to-date technical documentation on the VMware Web site at: https://docs.vmware.com/ The VMware Web site also provides the latest product updates.
VMware Horizon View Client 4.10 Add-on for Dell Wyse ThinLinux Version 2.1. Release Notes
 VMware Horizon View Client 4.10 Add-on for Dell Wyse ThinLinux Version 2.1 Release Notes Notes, cautions, and warnings NOTE: A NOTE indicates important information that helps you make better use of your
Privileged Identity App Launcher and Session Recording
 Privileged Identity App Launcher and Session Recording 2003-2018 BeyondTrust, Inc. All Rights Reserved. BEYONDTRUST, its logo, and JUMP are trademarks of BeyondTrust, Inc. Other trademarks are the property
AM-101 AM-101AirMedia Presentation Gateway. Supplemental Guide Crestron Electronics, Inc.
 AM-101 AM-101AirMedia Presentation Gateway Supplemental Guide Crestron Electronics, Inc. Crestron software, including without limitation, product development software and product operating system software
Administrator Guide. Windows Embedded Standard 7
 Administrator Guide Windows Embedded Standard 7 Copyright 2010, 2012 2015, 2017 HP Development Company, L.P. Citrix and XenDesktop are registered trademarks of Citrix Systems, Inc. and/or one more of its
Dell EMC Ready Architectures for VDI
 Dell EMC Ready Architectures for VDI Designs for VMware Horizon 7 on Dell EMC XC Family September 2018 H17387 Deployment Guide Abstract This deployment guide provides instructions for deploying VMware
Accops HyWorks v3.0. Installation Guide
 Accops HyWorks v3.0 Installation Guide Last Update: 4/25/2017 2017 Accops Technologies Pvt. Ltd. All rights reserved. The information contained in this document represents the current view of Propalms
RX300 Settings Manual General
 RX300 Settings Manual General The RX300 is provisioned by the administrator. The settings can be modified remotely from vspace Console or the RX300 device itself. In the General tab, the administrator
WinClient Remote Manager USER S MANUAL. Revision: WRM /10/22
 WinClient Remote Manager USER S MANUAL Revision: WRM 2.1 2002/10/22 Copyright This manual and any accompanying software and firmware are copyrighted. No parts of this publication may be reproduced, stored