CHD FiVE. Quick reference
|
|
|
- Mervyn Adams
- 5 years ago
- Views:
Transcription


1 Quick reference
2 All rights reserved. SIA Dzelzavas 120i, Riga, LV-1021 Latvia Phone: Fax:
3 Table of contents 1. Batteries and Power Overview Suspend Mode...5 Suspending...5 Resuming Battery Battery Warnings and Cautions Battery Disposal Using Desktop Inbox Internet Explorer Quick ScanSet Application Word Pad Installing Programs...13 Using an Installation Wizard...13 Installing Programs Manually...13 Using File Explorer to Add to the Start Menu...14 Using ActiveSync to Add to the Start Menu Removing Programs Configuring a PDA Control panel Stylus Backlight...18 Battery power...18 External power...18 Keyboard backlight Bluetooth Date and Time Dialing Display Configuration...23 Background...23 Appearance Input Panel Internet Settings Keyboard Network and dialup connections Owner Password PC Connection Power Configuration Programm buttons Regional settings Scanner configure Storage manager System Properties...40 General...40 Memory...41 Device name Terminal server client licences Volume & sounds
4 4
5 1. Batteries and Power 1.1. OVERVIEW Battery charging, installation, and information about the single-slot dock, battery charger and power cable are located in the Quick Reference Guide SUSPEND MODE The PDA will go into suspend or sleep mode when it is idle for a configurable period of time, by default it is configured to 3 minutes. The idle duration can be customized using the Power control panel. Suspend mode works and looks just like you have turned the unit off. Press the [ On/Off ] key to suspend (put to sleep) the CHD Five. Press the [ On/Off ] key again for the PDA to resume its previous state. Use the Battery Power control panel to set the idle duration and suspend mode initiation. This will save battery power when PDA is not in use. Suspending The following conditions will suspend (put the PDA to sleep): Press the [ Power ] key while the unit is on. The sleep timer expires, which indicates that there has been no use for a specified period of time. The battery pack is completely discharged. 5
6 Resuming Use one of the following methods to resume (wake up the PDA): Press [ Power ] key to suspend or resume (wake up). Put the PDA into a dock or connect to data cabel. When a battery pack completely discharges while the unit is in suspend mode, the PDA remains suspended until the discharged battery is changed or PDA is connected to charger BATTERY The battery pack in the PDA is a Lithium Ion battery pack 3.7V, 2000 mah BATTERY WARNINGS AND CAUTIONS Prior to using the PDA for the first time, you MUST charge the battery pack. The initial charging cycle for both the battery pack and back-up battery takes approximately thirteen (13) hours. Subsequent charging cycles take four (4) hours. If you remove the battery pack or it completely discharges, there is a 2 hour window in which to insert a charged battery pack before the backup battery completely discharges. If your backup battery completely discharges, the contents of the RAM memory will be lost. If your backup battery is less than fully charged, there is proportionally smaller window of time available. Use only the correct battery packs, charger, and dock supplied by a CHD or CHD dealer. The use of other battery supplies can damage the PDA and void your warranty. For the correct supplies for the CHD FIVE, please contact your CHD reseller. Lithium-ion Polymer battery packs can get hot, explode, ignite and/or cause serious injury if exposed to abusive situations. Follow the safety warnings listed below: Do not place the battery pack in fire or heat the battery. Do not install the battery pack backwards so the polarity is reversed. Do not connect the positive terminal and negative terminal of the battery pack to each other with any metal object (such as wire). Do not carry or store battery pack together with metal objects. Do not pierce the battery pack with nails, strike the battery with a hammer, step on the battery or otherwise subject it to strong impacts or shocks. Do not solder directly onto the battery pack. Do not expose battery pack to liquids, or allow the battery contacts to get wet. Do not disassemble or modify the battery pack. The battery pack contains safety and protection devices, which, if damaged, may cause the battery pack to generate heat, explode or ignite. 6
7 Do not discharge the battery pack using any device except for the specified device. When it is used in devices other than the specified device, the battery pack can be damaged or its life expectancy reduced. If the device causes an abnormal current to flow, it may cause the battery pack to become hot, explode or ignite and cause serious injury. In the event the battery pack leaks and the fluid gets into one's eye, do not rub the eye. Rinse well with water and immediately seek medical care. If left untreated, the battery fluid could cause damage to the eye. If you remove the battery pack or perform a cold reset on the PDA, you will loose any data currently in RAM memory. When you remove the battery pack, the unit automatically performs a cold reset. It is a good idea to store any important data in the resident Flash memory for this reason. Always charge the battery pack within the temperature range of F (0-45 C). Do not place the battery pack in microwave ovens, high-pressure containers or on induction cookware. Immediately discontinue use of the battery pack if, while using, charging or storing the battery, it emits an unusual smell, feels hot, changes color or shape, or appears abnormal in any other way. Do not place the battery pack in or near fire, on stoves or other high temperature locations. Do not place the battery pack in direct sunlight or use or store the battery pack inside cars in hot weather. Doing so may cause the battery pack to generate heat, explode or ignite. Using the battery pack in this manner may also result in a loss of performance and a shortened life expectancy. CHD recommends annual replacement of rechargeable battery packs to ensure maximum performance BATTERY DISPOSAL Replace the battery pack only with one supplied by a CHD reseller. When the battery is worn out, insulate the battery contacts with adhesive tape or a similar material prior to disposal. Please recycle Lithium-Ion Batteries. Do not throw Lithium-Ion Batteries in the trash. 7

8 2. Using 2.1. DESKTOP Workflow is like all other Microsoft operational systems. To run program double tap on a shortcut icon on desktop or run program from Start menu. Below is standard desktop layout. 8

9 2.2. INBOX The PDA comes with Inbox for Windows CE.NET installed from the factory. Inbox is a familiar Microsoft interface. To set up Inbox: Open Inbox by selecting Start > Programs > Inbox. Select Services > Options from the command bar. Drag the dialog to show the right edge to configure . Select Add... Select Service Type and enter in name of service in the Service Name field. Select the type of service. Enter the server and user information in the Mail Service Definition. Configure your inbox using the Mail General Preferences dialog. Configure your mail retrieval settings using the Mail Inbox Preferences. Press OK to complete the Inbox configuration. Select Services > Connect from the command bar. Select Services > Send/Receive Mail from the command bar to manually retrieve mail. Any pending appears in the inbox after connecting. 9

10 2.3. INTERNET EXPLORER The PDA comes with Internet Explorer for Windows CE.NET installed Open Internet Explorer by selecting Start > Programs > Internet Explorer. To set a default home page, navigate to the desired default web page. Select View > Internet Options from the command bar. Enter the desired URL in the Start Page field. Press the OK button Internet Explorer uses sliding menus for application and navigation control. Tap and drag the sliding menus to the left or right to see the hidden menu items and toolbars. To achieve more screen real estate in Internet Explorer, you can hide the Status bar and View menu. From the top menu bar, go to View > Hide Toolbars. Once it is hidden, you must cold reset to access these features again. Refer to the Quick Reference Guide for information on the cold reset. 10

11 2.4. QUICK SCANSET APPLICATION Go to Start > Programs > Scanner > Quick ScanSet to open the bar code scanning application. This application works in the background and has a System Tray Icon you can use to access it's features and functions. Go to Start > Programs > Scanner > Scandiag to open scan dialog and test barcode scanning. 11
 Word Document (*. doc) Rich Text File (*.rtf) WordPad (*.pwd) When you transfer file types other than *.")
12 2.5. WORD PAD The PDA comes with WordPad for Windows CE.NET installed from the factory. To start Wordpad, select Start > Programs > Microsoft WordPad. The following text and document file types are compatible with WordPad: Text (*. txt) Word Document (*. doc) Rich Text File (*.rtf) WordPad (*.pwd) When you transfer file types other than *. pwd to the Windows CE.NET device, it translates the files into a compressed Windows CE.NET file type. 12
13 2.6. INSTALLING PROGRAMS Programs pre-installed on the device are stored in ROM (read only memory). You cannot remove, or modify this software. You may add programs and data files to RAM (random access memory) or into memory card. Please follow the directions provided with the software to install it. Using an Installation Wizard If the file has an installer, the installation wizard begins. Follow the directions on the screen. Once the software is installed on your desktop computer, the installer transfers the software to your terminal automatically. Installing Programs Manually If the file does not contain an installer, an error message indicates the program is valid but is designed for a different type of computer. 1. Install *. cab, *. exe, *. zip, setup. exe files, or other files designed for the device. 2. Windows CE.NET applications will also work on the device. Start by downloading the program to your desktop computer (or insert the CD or disk that contains the program into your desktop computer). 1. Select Start > Settings > Control Panel > System > General on device. Make a note of the information in the processor field. 2. Read the installation instructions, ReadMe files, or manual that comes with the program. Many programs provide installation instructions. If you cannot find installation instructions for the program in the ReadMe file or manual, use ActiveSync Explorer to copy the program file to the Program Files folder on your device. For more information on copying files using ActiveSync, refer to the ActiveSync online Help. 3. Connect your terminal and desktop computer. 4. Double-click the *. exe file. 5. Once the installation is complete, you double-tap the program icon from your desktop, or select Programs > program icon to select it. 13
14 Using File Explorer to Add to the Start Menu 1. Select Start > Programs > File Explorer, and select the folder where the pro gram is stored. 2. Select Cut from the Edit > Cut from the command bar. 3. Open the Programs folder located in the Windows folder, select Paste from the pop-up menu. The program appears on the menu. Using ActiveSync to Add to the Start Menu 1. Use the Explorer in ActiveSync on your desktop computer to explore the files on your PDA and locate the program. For more information on using ActiveSync, refer to the ActiveSync online Help. 2. Right-click on the program, then select Create Shortcut. 3. Move the shortcut to the Programs folder in the Windows folder. The shortcut appears on the menu. 14
15 2.7. REMOVING PROGRAMS Only user installed programs can be removed. To remove a program select Start > Settings > Control Panel > Remove Programs. Select the program you wish to remove from the list and press remove. 15

16 3. Configuring a PDA 3.1. CONTROL PANEL To change the settings on your new PDA, select Start > Settings > Control Panel to view the Control Panels and settings you can modify. Other than the Quick ScanSet applet, the list of settings is standard Windows CE.NET settings. For more information on the Windows CE.NET operating system, please refer to Microsoft's website at 16


17 3.2. STYLUS You might need to align the touch screen (i.e. when you notice that when you attempt to select one item with the stylus, another item is erroneously selected). To align the touch screen, press <FUNC> + <Space> to open the align Screen dialog as shown to the right. Carefully press and briefly hold stylus on the centre of the target as the target moves around the screen. 17


18 3.3. BACKLIGHT 1. Select Start > Settings > Control Panel > Backlight Battery power Modify display brightness when on battery. Set backlight timeout time Enable to turn on backlight when a button is pressed or the screen is tapped External power 18

19 Modify display brightness when on battery. Set backlight timeout time Enable to turn on backlight when a button is pressed or the screen is tapped Keyboard backlight Set keyboards backlight timeout. 19

20 3.4. BLUETOOTH Select Start > Settings > Control Panel > Bluetooth devices Click Scan Device button to scan Bluetooth devices in range. 20

21 3.5. DATE AND TIME In the Date/Time options, you can change the year, month, date, time, time zone, or select automatic adjust for Daylight Savings Time. To set or change the date and time: 2. Select Start > Settings > Control Panel > Date/Time 3. Select the month to open a pull down list of months or press the arrow buttons on either side of the month to increase or decrease the month. 4. To change the year, select the year to open a numeric dial. Select the up arrow to increase the value; select the down arrow to decrease the value. Or you can type a new year value in the field. 5. To change the time, select the hour, minute, seconds, or AM/PM and select the up arrow to increase the value; select/tap the down arrow to decrease the value. You can also type a new time value in the field. 6. Select your correct time zone from the pull-down list. 7. To automatically adjust the clock for Daylight Savings Time, enable the checkbox at the bottom of the screen. 8. Select Apply to make save your changes [and make additional modifications] or select OK to exit the Date/Time settings. 21

22 3.6. DIALING Edit dialling properties to connect device to network Select Start > Settings > Control Panel > Display 22

23 3.7. DISPLAY CONFIGURATION To modify the display and/or backlight of the PDA refer to the following: Background To change the Background image: The current file is located in the Windows directory with the CHD logo file named logo.bmp. Place a new image in the Windows directory. This file must be exactly 240 by 320 pixels. 1. Select Start > Settings > Control Panel > Display. 2. Select the new file name by using the Browse button. To exit the Background settings, 3. press OK from the control bar, or press the <Enter> key on the keypad. 23

24 Appearance To change Windows appearance default settings: 1. Select Start > Settings > Control Panel > Display > Appearance tab. 2. Select form Items dropdown menu desired item 3. Press on color box to change items color 4. To save your created appearance scheme tap on < Save.. > button. 5. To exit the Backlight settings, press OK from the control bar, 24


25 3.8. INPUT PANEL To change the Soft Input Panel settings: 1. Select Start > Settings > Control Panel > Input Panel. 2. Change the desired settings. 3. To change the Soft Keyboard Options, tap the Options button. 4. Change the soft keyboard options as desired, selecting from: Large or small keys. Using gestures for space, backspace, shift, and enter. 5. To exit the Soft Keyboard Options, press OK on the control bar, or press the <Enter> key on the keypad. 6. To exit Input Panel settings, press OK from the control bar, or press the <Enter> key on the keypad. 25


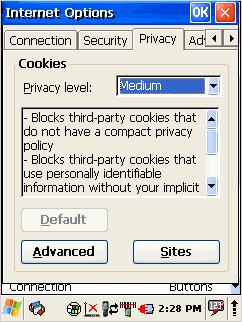
26 3.9. INTERNET SETTINGS 26


27 To change the Internet default settings: 1. Select Start > Settings > Control Panel > Internet Settings. 2. On the General tab - type in the URL of the desired start page and the desired search engine. You can also change the Cache Size, clear the Cache, and Clear the History. 3. On the Connection tab, modify the network access settings as desired. 4. On the Security tab change browsing security options. 5. On the Privacy tab set cookies options 6. On the Advanced tab change advanced browser options 7. On the Popups tab specify to allow to show or block popups 8. To exit Internet Settings, press OK from the control bar, or press the <Enter> key on the keypad. 27

28 3.10. KEYBOARD Select Start > Settings > Control Panel > Keyboard Enable or disable character repeat Adjust repeat delay and rate settings. If needed test your settings. 28

29 3.11. NETWORK AND DIALUP CONNECTIONS Select Start > Settings > Control Panel > Network and dialup connections Create new or edit current network connection settings. 29


30 3.12. OWNER To change the Owner default settings: 1. Select Start > Settings > Control Panel > Owner Properties. 2. Enter data using the input panel or the keypad on the PDA. 3. In the Notes tab set additional notes. 4. In the Network ID tab enter information to gain access to network resources. 5. To exit the Owner Properties control panel, press OK from the control bar, or press the <Enter> key on the keypad. 30

31 3.13. PASSWORD To change the Password default settings: 1. Select Start > Settings > Control Panel > Password Properties. 2. Enter the desired password twice as indicated in the two fields. 3. Select to enable password protection at power-on. 4. To exit the Password control panel, press OK from the control bar, or press the <Enter> key on the keypad. 31

32 3.14. PC CONNECTION The PC Connection control panel determines how ActiveSync works with the PDA. To modify the default settings: 1. Select Start > Settings > Control Panel > PC Connection. 2. Select the first checkbox to enable direct connections to the desktop computer. 3. Tap the Change Connection button to modify the connection method from USB or Serial. 4. To exit the Change Connection dialog, press OK from the control bar, or press the <Enter> key on the keypad. 32


33 3.15. POWER CONFIGURATION To adjust power management settings, 1. Select Start > Settings > Control Panel > Power. Use this control panel to check the charge on the battery or to change the Power settings. 2. The Battery tab provides change level indicators for Main battery, and Backup battery. 3. In the Power Off tab set idle time to turn off. 4. In the Wireless power tab turn on/off wireless devices (Bluetooth and wifi) 5. To exit, press OK from the command bar, or press the <Enter> key on the keypad. 33

34 3.16. PROGRAMM BUTTONS Select Start > Settings > Control Panel > Power Select programmable button Chose its type: Default button will be assigned No function button does not have any functions Scan key button is used as Scan key Application click on Open button to select application to bind with this key 34


35 3.17. REGIONAL SETTINGS To change the Regional Settings defaults: 1. Select Start > Settings > Control Panel > Regional Settings. 2. Select the desired language/location. 3. Review the Appearance Samples in the bottom half of the screen. Select the tab at the top for any settings you wish to change. Options to modify include Number, Currency, Time, and Date. 4. The Input Panel may open to facilitate data input. 5. Select input language 6. To exit Regional Settings, press OK from the control bar, or press the <Enter> key on the keypad. 35


36 3.18. SCANNER CONFIGURE To change the Scanner Settings and bar code types, complete as follows: Go to Start > Programs > Scanner > Quick ScanSet to open the bar code scanning application. The only indicator that the program is open is the bar code System Tray icon. Quick ScanSet starts automatically as device boots. Select/tap the bar code icon in the System Tray to open the menu shown on the left 36
37 Tab Section Option Description Basic Scanning Trigger timeout Set scanner (sec) timeout time Good read off Scanner will stop scanning after good read. Enable continuous scan Scanner will scan continuous until if checked good read. Rescan after (sec) Set rescan time if enabled continuous scan Notifier Wedge Symbologies Keyboard wedge If enable Keyboard wedge - a hardware device or software program that interfaces with a computer to translate data read by a device other than a keyboard, such as a magnetic strip or bar code reader or other such scanning device, into keyboard data. Enable Termination code Check to enable keyboard wedge Options: Type writing ; Copy & paste Select data input method according software you use Select the desired barcode end code from the pull down list Beep Volume Set sounds If enabled plays volume audio sound Succeed Set sound to indicate good read Fail Set sound to indicate bad read LED Enable Enable visual scan indicators Vibrator If enabled Succeed: Set devices vibration time after good read Barcode ID Label Filter Fail: Transmit Barcode ID Prefix Suffix Accept Deny Select barcode types you want to read Set devices vibration time after bad read. Enable to transmit barcode ID Enter labels prefix Enter labels suffix Set filter conditions to accept Set filter conditions to deny 37
38 Details General Enable this code Features Length Try with Current Setting Commit Current Setting Load Factory Default Revert to last Tap/enable this checkbox to enable the selected bar code type. Select the desired features you wish to enable for that specific bar code type. Set the minimum and maximum lengths from the pull-down lists. If the numbers are the same, acceptable bar codes will only be that length. Not all types will have this option enabled. This button is enabled only if you make changes to the current settings. 1. Tap the Try with Current Setting button. 2. Press the <Scan> key. 3. Check the result. 4. If you wish to keep the new current settings, select the Commit Current Setting button. After modifying the current settings, if you wish to keep them, select the Commit Current Setting button. After modifying the current settings, if you wish to return to the factory defaults, tap the Load Factory Default button. After modifying the 38
 storage card into the PDA Select Start > Settings >")

39 setting current settings, if you wish to return to the previous settings, tap the Revert to Last Setting button STORAGE MANAGER To change the Storage Properties control panel default settings: Insert secure digital (SD) storage card into the PDA Select Start > Settings > Control Panel > Storage Properties. From the Storage manager pull-down list, select the desired storage device. You can also format, perform scandisk and defrag. To save and exit the Storage Properties control panel, press OK from the control bar, or press the <Enter> key on the keypad. Formatting the DiskOnChip will erase all files and programs stored in Flash Memory. 39

40 3.20. SYSTEM PROPERTIES Refer to the System control panel for information related to the system. General Select Start > Settings > Control Panel > System Properties > General tab to determine the following information about your PDA: Operating system Model Boot time OS load time WiFi MAC address Bluetooth MAC address Devices Serial Number 40


41 Memory Move the slider to adjust memory allocation. Move slider to the left for more memory to run programs. Move it to the right for more storage space. Device name Your device uses this information to identify itself to other computers. The Input Panel will open to facilitate data entry. 41
42 3.21. TERMINAL SERVER CLIENT LICENCES Select Start > Settings > Control Panel > Terminal server client licenses 42


43 3.22. VOLUME & SOUNDS Select Start > Settings > Control Panel > Volume & sound Adjust sound volume and enable sounds. Change sounds for different items. Copy custom wav file into /windows directory and select it from list. 43
44 Regulatory Statements to be included in the Users Guide for Sputnik USA-Federal Communications Commission (FCC) This device complies with part 15 of the FCC Rules. Operation is subject to the following two conditions: (1) This device may not cause harmful interference, and (2) this device must accept any interference received, including interference that may cause undesired operation. This equipment has been tested and found to comply with the limits for a Class B digital device, pursuant to Part 15 of FCC Rules. These limits are designed to provide reasonable protection against harmful interference in a residential installation. This equipment generates, uses, and can radiate radio frequency energy. If not installed and used in accordance with the instructions, it may cause harmful interference to radio communications. However, there is no guarantee that interference will not occur in a particular installation. If this equipment does cause harmful interference to radio or television reception, which can be determined by tuning the equipment off and on, the user is encouraged to try and correct the interference by one or more of the following measures: -Reorient or relocate the receiving antenna -Increase the distance between the equipment and the receiver. -Connect the equipment to outlet on a circuit different from that to which the receiver is connected. -Consult the dealer or an experienced radio/tv technician for help. Any changes or modifications not expressly approved by the party responsible for compliance could void the user s authority to operate the equipment. Caution: Exposure to Radio Frequency Radiation. To comply with FCC RF exposure compliance requirements, for mobile configurations, a separation distance of at least 20 cm must be maintained between the antenna of this device and all persons. This device must not be co-located or operating in conjunction with any other antenna or transmitter.
Falcon Windows CE.NET Ruggedized PDA. Product Reference Guide
 Falcon 4220 Windows CE.NET Ruggedized PDA Product Reference Guide PSC Inc 959 Terry Street Eugene, Oregon 97402 Telephone: (541) 683-5700 Fax: (541) 345-7140 An Unpublished Work - All rights reserved.
Digital Photo Album Operation Manual
 Digital Photo Album Operation Manual English Instruction Manual... E-1 French Instruction Manual.. F-1 Spanish Instruction Manual. S-1 German Instruction Manual..G-1 Introduction... E-2 Product Overview...
Tablet PC. Android 5.1 User Manual
 Tablet PC Android 5.1 User Manual Tablet of Contents Specifications. What s inside the box Tablet Parts Getting started... How to use TF card How to connect to PC Connection to Internet.. Camera. Trouble
Bluetooth Micro Dongle User s Guide. Rating: 5V DC 80mA Made in China
 Bluetooth Micro Dongle User s Guide Rating: 5V DC 80mA Made in China Introduction Package Contents USB Bluetooth adapter x 1 Installation CD x 1 (includes Bluetooth software and User s Guide) User s Guide
Bluetooth Mini Keyboard. User s Manual. Version /05 ID NO: PAKL-231B
 Bluetooth Mini Keyboard User s Manual Version 1.0 20010/05 ID NO: PAKL-231B1501-00 0 About This Manual This manual is designed to assist you in installing and using the Bluetooth Keyboard Information in
Contents. Get Started Install SIM Card
 Contents Get Started... 2 Install SIM Card... 2 Insert Micro SD card... 2 Charge Mobile Phone... 3 PC-Phone File Transfer... 4 Keys and Parts... 5 Fingerprint... 7 Lock and Unlock the Screen... 9 Notification
mart atch B502 User Manual
 mart watch B502 User Manual Congratulations on your new ownership of a Polaroid smart watch. Please read the manual carefully for full understanding of all operations and functions of your new smart watch.
Wireless Smart Pad And Mini Keyboard User s Manual
 Wireless Smart Pad And Mini Keyboard User s Manual Version 1.0 2010/08 ID NO: About This Manual This manual is designed to assist you in installing and using the Wireless Touchpad Keyboard. Information
BTK-A21 Bluetooth Headset User Manual
 BTK-A21 Bluetooth Headset User Manual Thank you for purchasing the Mini Bluetooth Headset BTK-A21, we hope you will be delighted with its operation. Please read this user's guide to get started, and to
USER MANUAL CW14Q1P. CW14Q1P MANUAL-EN 70g 书纸,135x102mm
 CW14Q1P MANUAL-EN 70g 书纸,135x102mm USER MANUAL CW14Q1P Thank you for your choosing the new device This guide serves to enable users to get to know and familiar with our product as soon as possible. Here
Jentafon Wireless Loopset LPS-6 User Guide
 Jentafon Wireless Loopset LPS-6 User Guide User Guide for Jentafon Wireless Loopset LPS-6 Jentafon Wireless Loopset LPS-6 is a Bluetooth headset for T-coil equipped hearing aid or cochlear implant users.
i9 MID User Manual ShenZhen Ramos Digital Technology Co.,Ltd
 i9 MID User Manual ShenZhen Ramos Digital Technology Co.,Ltd 1 Thank you for your choosing and buying the i9 tablet. Please carefully read this operation manual before using the product. Precautions 1.
User manual Model: VIU-800 Brand:
 User manual Model: VIU-800 Brand: - 1 - This manual s main purpose is to introduce the correct way of using the Voter Identification Unit / Electronic Voting Machine (hereinafter referred to as "the device").
Welcome Guide. Ultra Compact Bluetooth Keyboard
 Welcome Guide Ultra Compact Bluetooth Keyboard Ultra Compact Bluetooth Keyboard 1 Package Contents Anker Ultra Compact Bluetooth Keyboard 2.3ft Micro USB charging cable Welcome Guide Product Overview 1.
CONTENTS. Safety Information Cleaning and Maintenance Function Information Messaging
 CONTENTS Safety Information... - 3 - Cleaning and Maintenance... - 3 - Function Information... - 5 - Messaging... - 7 - Email... - 8 - Camera... - 9 - Music... - 10 - FM Radio... - 12 - Sound Recorder...
Safety and Maintenance You can use your Tablet PC under a wide range of environmental conditions. However, to ensure long use and continued high
 EVG7 DL46 Getting Started Congratulations on your purchase of a Tablet PC. The Tablet PC is a fully functional PC with built-in LAN, and wireless connectivity. With your Tablet PC you will be able to organize
Content. 1 Welcome Your phone Phone overview Functions of Keys Getting started... 6
 User Manual -1- Content 1 Welcome... 3 2 Your phone... 4 2.1 Phone overview... 4 2.2 Functions of Keys... 5 3 Getting started... 6 3.1 Installing the SIM Cards and the Battery... 6 3.2 Linking to the Network...
User Manual of Entertainment Tablet series MID
 User Manual of Entertainment Tablet series MID Thank you for purchasing MID products. This user manual introduces every function of the MID briefly, which let you have an easy control in it and enjoy its
User Manual. Daffodil. 2.4GHz Wireless Mouse Souris Sans Fil 2.4GHz 2.4GHz Wireless Maus Mouse senza fili da 2.4 GHz Ratón Inalámbrica 2.
 Daffodil User Manual 2.4GHz Wireless Mouse Souris Sans Fil 2.4GHz 2.4GHz Wireless Maus Mouse senza fili da 2.4 GHz Ratón Inalámbrica 2.4GHz Model No. : UT-M3 User Manual Please follow the instructions
K8 smart watch phone quick start guide
 K8 smart watch phone quick start guide K8 smart watches are built-in android 4.4, call, text messages, audio and video, pictures, Internet radio, weather, tape recorder, step, health management, WIFI,
CncGcoder Models HD & HDx Manual
 CncGcoder Models HD & HDx Manual Table of Contents WELCOME... 3 IN THE BOX... 4 Optional Accessories...4 HANDHELD OVERVIEW... 5 Overview...5 Charging the Battery...6 Turning On and Off...6 Plugging in
Tank II User s Manual
 Tank II User s Manual -1- Table of Contents Key Functions... 4 Getting Started... 5 Installing the SIM Card, SD Card and Battery... 5 Menu Guide... 7 Messaging... 7 Contact... 7 Audio player... 8 Call
Charging Pad / Charging Stand
 Charging Pad / Charging Stand Congratulations on your choice to purchase one of the FUEL ion charge bases! You ve chosen to take your mobile world fully wireless with an effortless secure and charge solution
MXHP-R500. Remote Control
 MXHP-R500 Remote Control MX-HomePro MXHP-R500 Owner s Manual 2016 Universal Remote Control Inc. all rights reserved. The information in this manual is copyright protected. No part of this manual may be
Quick Start Guide. Layout. A Camera Two Megapixels. B Stylus. Earphone Jack. Micro SD Slot E F. E Microphone F RESET. Keyboard H LED.
 Quick Start Guide 1 Layout A Camera Two Megapixels B Stylus M L A B C D C Micro SD Slot E Microphone D Earphone Jack F RESET J I K E F G G Keyboard H LED H I HDMI Jack J USB/Charger Jack K ON/OFF Key L
Dash Jr. User Manual Table of Contents
 (/usermanuals) Dash Jr. User Manual Table of Contents Safety Information Safety Information Call Functions Contacts Messaging Opera Mini Browser Bluetooth & Wi Fi Camera Gallery Music Sound Recorder Alarm
Streaming Smart Stick. Quick Start Guide
 Streaming Smart Stick Quick Start Guide GETTING STARTED 1.1 Inside the Box 1 1.2 Equiso Streaming Smart Stick 2 1.3 Equiso Remote 3 1.4 Using Your Equiso Remote 4 1.5 What You Need 5 1.6 Charging the Remote
ThinkPad Bluetooth Laser Mouse User Manual
 ThinkPad Bluetooth Laser Mouse User Manual About this manual Thank you for your purchase of this Bluetooth mouse set. This topics covered in this manual are listed as following. (This mouse will be sold
Chromebook Owner s Manual
 CMT Chromebook Owner s Manual Before using, please read these operating instructions carefully. They contain important advice concerning the use and safety of your Chromebook. Use for its intended purpose
Wireless Entertainment Smart Pad Keyboard User s Manual
 Wireless Entertainment Smart Pad Keyboard User s Manual Version 1.0 2008/12 ID NO: PAKL-231B2001-00 0 About This Manual This manual is designed to assist you in installing and using the Wireless Touchpad
Chicony Standard Bluetooth Keyboard Users Manual. Model No.: KT-1063
 Chicony Standard Bluetooth Keyboard Users Manual Model No.: KT-1063 Issue: Jan. 03, 2011 Scope Getting Start Thank you for choosing this ultrathin keyboard with Bluetooth technology to ensure no hinder
PRO REMOTE. Universal Dual Sided Remote with Keyboard and Air Mouse All power in your hands. User Manual
 Universal Dual Sided Remote with Keyboard and Air Mouse All power in your hands User Manual 180413 TABLE OF CONTENTS 1. Overview 2. Cautions 3. Layout and Key Funtions 4. Pairing 5. Sleep 6. Air mouse
wirelessinteractive multimedia slate AS3A quick start guide
 wirelessinteractive multimedia slate AS3A quick start guide FEDERAL COMMUNICATIONS COMMISSION INTERFERENCE STATEMENT This equipment has been tested and found to comply with the limits for a Class B digital
Thanks for shopping with Improvements! Orbit Bluetooth Tracker Card Item #569169
 Thanks for shopping with Improvements! Orbit Bluetooth Tracker Card Item #569169 To order, call 1-800-642-2112 West Chester, OH 45069 Made in China 1217 If you have questions regarding this product, call
BLUETOOTH KEYBOARD & SPEAKER CASE
 BRYDGE BLUETOOTH KEYBOARD & SPEAKER CASE For ipad BR-101/102 BR-200 Please read the instructions carefully before using: The Brydge Bluetooth Keyboard &Speaker Case for ipad has been designed to provide
Laser Projection keypad
 Laser Projection keypad User Manual Model:ELK010 FCC ID:2AEPXELK010 All other products are trademarks or registered trademarks of their respective companies. Please refer to host device instruction manual
TABLET PC. Quick Start Guide. Model: TVE100 I
 TABLET PC Quick Start Guide Model: TVE100 I Safety Precautions 1. This production is suitable for use in non-tropic areas below 2,000 meters, and the mark in the nameplate indicates the product is suitable
7 Inch Quad Core Tablet
 7 Inch Quad Core Tablet Cautions This user manual has been specially designed to guide you through the functions and features of your device. ) Please read this manual carefully before using your device
Hardware Installation 1. Install two AA batteries in the mouse. Pairing Process in Vista and Windows XP SP2
 Hardware Installation 1. Install two AA batteries in the mouse. Pairing Process in Vista and Windows XP SP2 1. Open the Windows control panel, then select Bluetooth devices. 2. Click Add.. 3. Select My
This user manual has been specially designed to guide you through the functions and features of your device.
 DL102 Cautions This user manual has been specially designed to guide you through the functions and features of your device. 1) Please read this manual carefully before using your device to ensure safe
Bluetooth Hands-Free Speaker Phone Custom Accessories 23685
 Bluetooth Hands-Free Speaker Phone Custom Accessories 23685 1. Product Description This versatile Bluetooth speakerphone is specially designed for the user to enjoy convenient and free wireless communication.
MO-01J. Quick Start Guide
 MO-01J Quick Start Guide 1 LEGAL INFORMATION Copyright 2016 ZTE CORPORATION. All rights reserved. No part of this publication may be quoted, reproduced, translated or used in any form or by any means,
MID MODEL: M1703 USER MANUAL
 MID MODEL: M1703 USER MANUAL Preface Thank you for buying the MID. We wish you enjoy using it. Please read and retain all the operating instructions before operating the unit, we do not assume any liability
SLIMLINE DASH CAM Audio & Video Recorder
 SLIMLINE DASH CAM Audio & Video Recorder 1 EK142CAM INSTRUCTION MANUAL PLEASE READ ALL INSTRUCTIONS CAREFULLY AND RETAIN FOR FUTURE USE Getting Started Remove the Car Digital Video Recorder from the box.
W10 PRO QUICK START GUIDE
 W10 PRO QUICK START GUIDE GETTING STARTED Thank you for purchasing a Hipstreet product and we hope you enjoy using it. Please visit our website at www.hipstreet.com IMPORTANT SAFETY PRECAUTIONS Always
CBTH3. Bluetooth Speakerphone User Guide
 Bluetooth Speakerphone User Guide CBTH3 1. Notice Before Using Thank you for purchasing the Cobra Bluetooth Visor Speakerphone CBTH3. Your Cobra CBTH3 is a Bluetooth wireless technology device that enables
PTSGOB8W. Quick Start Guide
 PTSGOB8W Quick Start Guide Introduction Thank you for your choosing the new Tablet PC. This guide serves to enable users to get to know and familiar with our product as soon as possible. Here we have made
USB to Serial Converter User s Guide
 USB to Serial Converter User s Guide Important Note! In order to minimize possible installation problems and/or resource conflicts: Read Me First! About This User s Guide This User s Guide is designed
Quick Installation Guide
 Quick Installation Guide For Network Attached Storage Ver.1.1.0.0320 Table of Contents Notices... 3 Safety Precautions... 4 1. Package Contents... 5 2. Hardware Installation Guide... 6 2.1. Hard Disk Installation...
Quick Installation Guide
 Quick Installation Guide For Network Attached Storage Ver.1.1.0.0517 Table of Contents Notices... 3 Safety Precautions... 4 1. Package Contents... 5 2. Hardware Installation Guide... 6 2.1. Hard Disk Installation...
Chromebook Owner s Manual
 Chromebook Owner s Manual Before using, please read these operating instructions carefully. They contain important advice concerning the use and safety of your Chromebook. Use for its intended purpose
Wireless Bluetooth Music Receiver
 Wireless Bluetooth Music Receiver Quick Start Guide Model: BTM300 Package Contents: Diamond Bluetooth Music Receiver (BTM300) x 1 Quick Installation Guide x 1 3.5mm to 3.5mm stereo cable x 1 3.5mm to RCA
User Guide. Version 2.
 User Guide Version 2 www.rmepad.com RM epad TM User Guide Please read all instructions carefully before using Please retain these instructions for future reference RM epad TM contains replaceable, rechargeable
W IRELESS8000 T. Powerful Universal Portable Charger PLEASE READ BEFORE OPERATING THIS EQUIPMENT
 W IRELESS8000 T M Powerful Universal Portable Charger PLEASE READ BEFORE OPERATING THIS EQUIPMENT HALO WIRELESS 8000 Thank you for choosing HALO. The HALO WIRELESS 8000 is a portable charger with 8000mAh
User Guide of AU-4612
 1 User Guide of AU-4612 Installing the software of AU-4612...3 Configuring your wireless network (with Microsoft Zero Configuration Tool)...12 Wi-Fi Protect Setup (WPS)...14 Pin Input Config (PIN)...15
Digital Voice Recorder & Pen
 Digital Voice Recorder & Pen Model : MQ-71/MQ-72 Made in Korea Owner s Manual Thank you for purchasing this product. Before use, read this manual and understand its functions for appropriate use. After
motorola H17 Quick Start Guide
 motorola.com MOTOROLA and the Stylized M Logo are registered in the US Patent & Trademark Office. All other product or service names are the property of their respective owners. The Bluetooth trademark
Contents Welcome Know your Device Greeting started Features Accessing the Internet Taking Care of Your Device
 Thank you for purchasing the tablet PC and it is packaged with the following state of the art features and much more: 1 GHz Processor 7 Inch Full touch screen with Pinch Zoom 3G Dongle support via USB
Labtec Wireless Optical Desktop. Getting Started Guide
 Labtec Wireless Optical Desktop Getting Started Guide Important Ergonomic Information Long periods of repetitive motions using an improperly set-up workspace, incorrect body position, and poor work habits
7 inch HD IPS LCD, Resolution: 800*480 OS Android 4.2. Front:0.3MP Rear: 2.0MP(AF)
") Q PAD USER MANUAL Specification Display 7 inch HD IPS LCD, Resolution: 800*480 OS Android 4.2 CPU ARM Cortex A9,Dual core,mtk8312, 1GHz Camera G-sensor Network Audio Format Video Format Image Format Extended
Q PAD USER MANUAL Specification Display 7 inch HD IPS LCD, Resolution: 800*480 OS Android 4.2 CPU ARM Cortex A9,Dual core,mtk8312, 1GHz Camera G-sensor Network Audio Format Video Format Image Format Extended
User Manual Infinity:One
 User Manual Infinity:One For the latest updates and information, please visit: support.one-education.org Notice The information in this user s manual is protected by copyright laws, all parts of this manual,
1101 Universal Transmitter
 INSTALLATION SHEET 1101 Universal Description The 1101 is a two input transmitter that is typically used for door/window applications. The 1101 provides two internal magnetic reed switches and an on-board
POCKETALK[W] User Manual
![POCKETALK[W] User Manual](/thumbs/94/120114724.jpg "POCKETALK[W] User Manual") POCKETALK[W] User Manual Contents Appearance 02 Specifications 04 Safety Instructions 05 Safety and Handling Instructions 05 Recycling 06 Certifications 06 Charging 07 Configuring System Language 07 Setting
POCKETALK[W] User Manual Contents Appearance 02 Specifications 04 Safety Instructions 05 Safety and Handling Instructions 05 Recycling 06 Certifications 06 Charging 07 Configuring System Language 07 Setting
Please review this guide fully before use. For any questions not answered in this guide, please contact WARNING Battery warning
 Please review this guide fully before use. For any questions not answered in this guide, please contact Support@Komando.com WARNING THIS DEVICE SHOULD NOT BE ADJUSTED BY THE DRIVER WHILE DRIVING. Battery
OPERATING INSTRUCTIONS POWERSMART 10 10,000 MAH PORTABLE POWER PLEASE READ BEFORE OPERATING THIS EQUIPMENT
 POWERSMART 10 10,000 MAH PORTABLE POWER OPERATING INSTRUCTIONS PLEASE READ BEFORE OPERATING THIS EQUIPMENT HALO POWERSMART 10 Thank you for choosing HALO. Innovative and easy to use, the HALO POWERSMART
Anker Portable Bluetooth Speaker. Instruction Manual. Specifications. Model No: A7908
 Anker Portable Bluetooth Speaker Model No: A7908 Instruction Manual Package Contents Anker Portable Bluetooth Speaker Micro USB cable 3.5mm audio cable Travel pouch Instruction manual Product Features
LevelOne BLH-1000 Bluetooth Headset User s Manual
 LevelOne BLH-1000 Bluetooth Headset User s Manual - 1 - Introduction Introduction to Bluetooth Wireless Technology Bluetooth is a short- range wireless communication technology. It allows wireless connections
CONTENT FUNCTION MENU... 6
 CONTENT BASIC INFORMATION... 3 Phone Instruction... 3 Interface Icons... 4 Insert SIM card... 5 Charging the battery... 5 Power on/off your phone... 5 FUNCTION MENU... 6 PHONEBOOK... 6 MESSAGING... 6 Write
For more information. Go to Settings > About phone > Legal information to read the legal information.
 Quick Start Guide For more information Go to http://consumer.huawei.com/en/ to download the user guide for your device and read the FAQ, privacy policy, and other information. Go to Settings > About phone
Bluetooth Google TV Keyboard. - Multi-language supporting - Multi-Touch & Scrolling bar. User Manual
 Bluetooth Google TV Keyboard - Multi-language supporting - Multi-Touch & Scrolling bar User Manual Introduction: EFO Bluetooth Google TV keyboard consists of keyboard, mouse, touchpad, and laser pointer
USB Hub-Audio Series. January 1999 A
 Series January 1999 A15-0157-110 FCC COMPLIANCE STATEMENT: This device complies with part 15 of the FCC Rules. Operation is subject to the following two conditions: (1) This device may not cause harmful
Wireless Palm Style Keyboard with Touchpad PKA-1720A. User s Manual. Version /08 ID NO:
 Wireless Palm Style Keyboard with Touchpad PKA-1720A User s Manual Version 1.0 2013/08 ID NO: About This Manual This manual is designed to assist you in installing and using the Wireless palm style Keyboard.
Always there to help you. Register your product and get support at AEA1000. Question? Contact Philips.
 Always there to help you Register your product and get support at www.philips.com/welcome Question? Contact Philips AEA1000 User manual Contents 1 Important 2 Important safety information 2 Notice 3 English
WMC Remote Control and Receiver RRC-127 User Manual
 Welcome Congratulations on your purchase of the Remote Control and Receiver for Windows Media Center. The infrared (IR) remote control and receiver let you access and manage your Media Center PC and other
Smartphone Docking Station with Speaker and Bed Shaker
 TM WARRANTY The Silent Call AlarmDock is warranted for (see individual items for length of warranty) from the day of purchase to be free of defects in material and workmanship. This warranty is limited
P OWERBUDS. The perfect accessory for anyone who wants to be truly wireless PLEASE READ BEFORE OPERATING THIS EQUIPMENT
 P OWERBUDS The perfect accessory for anyone who wants to be truly wireless PLEASE READ BEFORE OPERATING THIS EQUIPMENT HALO POWERBUDS Thank you for choosing HALO. The HALO POWERBUDS are the perfect accessory
Table of Contents Confirming the camera location
 Table of Contents 1. What is the SenseView PORTABLE...1 2. Safety precaution...2 3. Package...3 4. Configuration...4 5. After purchasing...6 (1)... Charging...6 (2)Remove LCD protective film...6 6. How
WiFi Inspection Camera Instruction Manual
 WiFi Inspection Camera Instruction Manual FERRET WiFi CFWF50A Version 1.1 2018 Patent Pending The Cable Ferret Company Limited The Cable Ferret Company Pty Ltd Cable Ferret, Inc. www.cableferret.com Designed
Wireless Noise Cancelling Earbuds HEAR YOUR MUSIC AND NOTHING ELSE
 Wireless Noise Cancelling Earbuds HEAR YOUR MUSIC AND NOTHING ELSE TABLE OF CONTENTS Warnings and Cautions...1 Lithium-Ion Battery Warning... 4 Location of Parts and Controls... 5 Charging the Battery...6
Directions for use. Using the application icon. keyboard
 Beat 3.0 Directions for use Notification will show a new message, calendar and ongoing activities, such as call transfer or in the state. You can also open the notifications panel to view your network
PnP IP/Network Camera
 PnP IP/Network Camera Quick Installation Guide Pangolin T series VStarcam, IP Camera Expert 一. Hardware installation Please connect the IP camera and router via network cable. And make sure that the Power
TV WIRELESS HEADPHONES
 TV WIRELESS HEADPHONES Item No. 206077 Owner s Manual Thank you for purchasing the Sharper Image TV Wireless Headphones. This updated version has a new design with new features, including a digital audio
Model: MiTraveler 1081W
 10.1 Windows Tablet User Manual Model: MiTraveler 1081W Table of Contents 1. What s in the Box.1 2. Tablet Parts.. 1 3. Getting Started 2 4. The Start Screen 3 5. Getting Around.4 6. Apps..5 7. Charm Menu.6
8 Inch Full Ruggedized Tablet. Quick Start Guide
 8 Inch Full Ruggedized Tablet Quick Start Guide 1 Thank you for your choosing the new Tablet PC. This guide serves to enable users to get to know and familiar with our product as soon as possible. Here
Dear users, the configuration for this camera is professional, so please read the user manual carefully before using the camera V5.
 Dear users, the configuration for this camera is professional, so please read the user manual carefully before using the camera. IP Camera (629W) User manual 2014-03 V5.1 Statement If the user manual can
1. Product Description. 2. Product Overview
 1. Product Description Avantree Pluto Air is a multi-function Bluetooth speaker with high quality music performance and mini compact design. This mini speaker can allow you to stream music from Bluetooth-enabled
User Manual. BandLuxe. P530 Series. LTE/HSPA+/GPRS WLAN Mobile Router
 User Manual BandLuxe P530 Series LTE/HSPA+/GPRS WLAN Mobile Router Introduction Thank you for your purchase of the P530 Series LTE/HSPA+/GPRS WiFi Mobile Router. This device is designed to access the
PLEASE READ BEFORE OPERATING THIS EQUIPMENT.
 PLEASE READ BEFORE OPERATING THIS EQUIPMENT. HALO BOLT ACDC WIRELESS Thank you for choosing HALO! Powerful, compact and easy to use, the HALO BOLT ACDC WIRELESS can safely jump start your car or charge
User Manual. Product Name: 360 Panoramic Camera Brand: VIVITAR Model:DVR978HD, PDV3632. Manufacture:SHUOYING DIGITAL SCIENCE&TECHNOLOGY(CHINA)Co.
Co.") User Manual Product Name: 360 Panoramic Camera Brand: VIVITAR Model:DVR978HD, PDV3632 Manufacture:SHUOYING DIGITAL SCIENCE&TECHNOLOGY(CHINA)Co.,Ltd 0 Overview Thank you for purchasing this product! PANOVIEW
User Manual Product Name: 360 Panoramic Camera Brand: VIVITAR Model:DVR978HD, PDV3632 Manufacture:SHUOYING DIGITAL SCIENCE&TECHNOLOGY(CHINA)Co.,Ltd 0 Overview Thank you for purchasing this product! PANOVIEW
Manual Bluetooth Handsfree Speakerphone
 Manual Bluetooth Handsfree Speakerphone 2 To get the most out of your Sudio Vogue, make sure you read this owner s guide. The Sudio Vogue is designed for use with a Bluetooth enabled mobile phone, PDA
H560N. Quick Start Guide
 H560N Quick Start Guide Wireless Router Package Contents: ZXHN H560N Wireless Router, Power Adapter, Quick Start Guide, Warranty Card This product is a low Low-power product mainly used to extend the Wi-Fi
NA502S Multiple RF Home Gateway
 NA502S Multiple RF Home Gateway User Guide i Table of Contents CHAPTER 1 INTRODUCTION... 1 Package Contents... 1 Features... 1 LEDs... 2 CHAPTER 2 INITIAL INSTALLATION... 5 Requirements... 5 Procedure...
HOMTOM smart phone User Guide
 HOMTOM smart phone User Guide Table of Contents 1. ICONS...3 2. FUNCTIONAL MENU...5 3. FAQS AND SOLUTIONS...9 Icon 1 ICONS Description Indicate the intensity of network signals. Show missed calls. Location
Operating Instructions
 9000 Operating Instructions Contents Introduction 1 Operating Instructions 2-5 Demonstrations 6-8 Storing/Handling/Cleaning 9 Safety Precautions 9-10 Specifications 10 FCC Compliance Statement 11-12 Limited
Figure 20. Screw the cover into position.
 User Manual. Figure 20. Screw the cover into position. 89 16. Energy Efficiency Recommendations on how to save energy: Do not charge a battery when the ambient room temperature is above +40 C or below
Honor Whistle Smart Control Rechargeable Headset User Guide
 Honor Whistle Smart Control Rechargeable Headset User Guide Box contents 1 x Headset 3 x Ear tips (small, medium and large) 1 x Ear hook Your headset at a glance 1 x USB adapter 1 x User guide 1 Charging
Pad. ( )
") Pad www.gkpglobalsolutions.com (1-855-653-7724) Copyright Mimio LLC all rights reserved. No part of this document or the software may be reproduced or transmitted in any form or by any means or translated
Pad www.gkpglobalsolutions.com (1-855-653-7724) Copyright Mimio LLC all rights reserved. No part of this document or the software may be reproduced or transmitted in any form or by any means or translated
79 Backup and Reset DRAFT FOR INTERNAL USE ONLY. Factory Data Reset
 Backup and Reset Back up your data to Google servers. You can also reset your device to its factory defaults. Backup and Restore Samsung Account Enable backup of your information to Samsung servers. 2.
Quick Installation Guide
 Quick Installation Guide Applicable Models: AS3102T/AS3104T/AS3202T/AS3204T Ver.2.5.0128 (2016-1-28) Table of Contents Notices... 3 Safety Precautions... 4 1. Package Contents... 5 2. Optional Accessories...
14 Notebook PC WINBOOK CW140
 14 Notebook PC WINBOOK CW140 Quick Start Guide 1 I.System Layout Front Camera Charge/Power light Keyboard Touch Pad 2 Charge Indicator Charge Port USB Type-C Port USB Port SD Card Reader Power Button Headphone