User Manual Of Einscan-S Catalog
|
|
|
- Vanessa Oliver
- 5 years ago
- Views:
Transcription
1 User Manual Of Einscan-S Catalog 1 Software installation Software installation Software Uninstall Software Introduction First Scan Advanced options Calibration Free Scan Auto Scan Common Functions New Project Select Texture(White balance test) Select Mesh mode and details Open Projcet Adjust Brightness End Scan( Fast Mesh) HDR Brightness Mouse operation prompts Points and Triangles Edit buttons Single-piece edit Whole-piece edit Right Toolbar Buttons Introductio Start Scan button Manual Align Delete Current Data Pause button Mesh button Main Menu
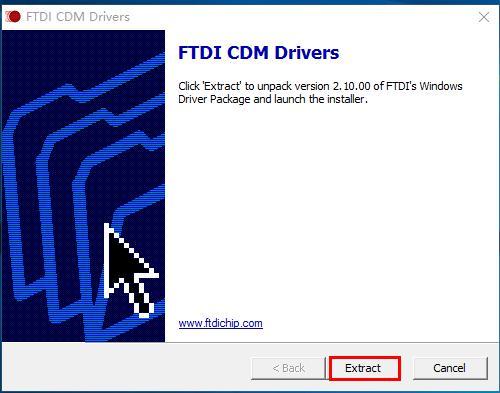
2 1 Software installation 1.1 Software installation Double click installation package, Follow the instructions as the window pops up like the below pictures shown: The acquire activated file window pop-ups, please confirm there is only one device connected. Choose device type and get activated file mode: Online activation and local activation. After activating a device, you can unplug the device and plug in other device to continue activating. When finishing click Next. Note: 1 Only one type of device is activated, then the installer only support the use of that type. If you want use both S and Pro, you should activate the two device type separately. Or you can activate device after installation, refer to 2.2 Advanced options. 2 When activate the Pro, please unplug the texture module. 2


3 Users can either choose the default installation path or click the Browse button to select the installation path. Default installation is suggested. Click Next to install. 3
4 Select your software language, default is English. 4
5 5

6 6
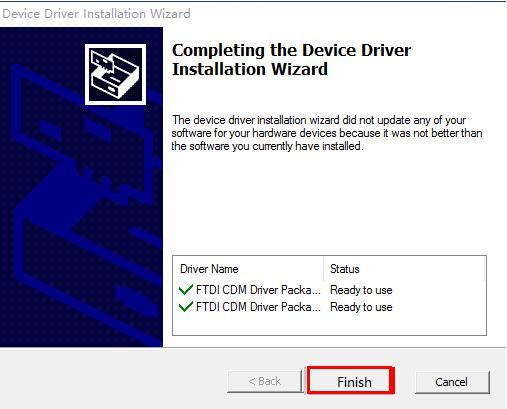
7 When installation is finished, there will be a shortcut of the software on the desktop. In the next step, we need to check whether the camera driver installation is successful, right click Computer, choose Computer Management - Device Management - Imaging devices to check if the two cameras display normally. 7

8 1.2 Software Uninstall Open the start menu, choose Shining3d----Click Uninstall or Modify Einscan, as shown below. Choose modify or remove, click Next : 2 Software Introduction 2.1 First Scan First time open the software to enter the home page, there will be User Experience Program pop-up, click "Learn more" to view the details of the plan as shown, and determine whether to participate in the program, or not. 8

9 Enter the Select Device Type interface, select EinScan-S and click Next, as shown below. Enter the page of choose scan mode, you can choose free scan or auto scan, as shown in Figure. 9

10 2.2 Advanced options Open the start menu, choose Shining3d----Click Advanced, as shown below. Advanced option window, you can do acquire activated file, set user experience program and open or close debug window. 10

11 Acquire activated file Please confirm there is only one device connected. Choose device type and get activated file mode: Online activation and local activation. After activating a device, you can unplug the device and plug in other device to continue activating. When finishing click Close. Note: 1 Only one type of device is activated, then the installer only support the use of that type. If you want use both S and Pro, you should activate the two device type separately. Or you can activate device after installation, refer to 4.3 Advanced options. 2 When activate the Pro, please unplug the texture module. User Experience Program The description of User Experience Program can refer to 2.1 First Scan. Check the box of User Experience Program mean enabled. Debug Window Check the box of Debug window. Start the software again, and the debug window will appear. Advanced option window, you can do acquire activated file, set user experience program and open or close debug window. 11
12 Acquire activated file Please confirm there is only one device connected. Choose device type and get activated file mode: Online activation and local activation. After activating a device, you can unplug the device and plug in other device to continue activating. When finishing click Close. Note: 1 Only one type of device is activated, then the installer only support the use of that type. If you want use both S and Pro, you should activate the two device type separately. Or you can activate device after installation, refer to 2.2 Advanced options. 2 When activate the Pro, please unplug the texture module. User Experience Program The description of User Experience Program can refer to 2.1 First Scan. Check the box of User Experience Program mean enabled. 3 Calibration Scanning cannot be entered if calibration is not done. There is a WARNING: No calibration data, please calibrate first. 12

13 Note: Scanning cannot be entered if calibration is not done. Please do the calibration first when there is a WARNING: No calibration data, please calibrate first. Click Calibrate to enter the interface of calibrate. Calibrating your scanner is important in order to get accurate scan results. The following describes the three steps required to successfully calibrate your EinScan-S. 13


14 Follow the software operation guide, adjust the distance between the projector and calibration board, and the cross from scanner should target at the calibration board n clearly. Place the calibration support and board in the center of the turntable as shown in Figure A. Check that the calibration board is located at the center of the turntable with the Figure A pattern facing the scanner and click Snap. Do not interfere or touch the calibration board during the calibration sequence. Don t move the support. Only rotate the calibration board. After the 1st calibration sequence, the turntable will stop and the display will show what is in FigureB. Being careful not to move the support, remove the calibration board, rotate it 90 counterclockwise and place the board back onto the support as shown in Fig. B. Note:Don t move the support. Only rotate the calibration board. Being careful not to move the support, remove the calibration board, rotate it 90 counterclockwise and place the board back onto the support as shown in Figure C. 14


15 Upon completion of the 3rd calibration sequence, the software will automatically calculate and archive the current conditions. This calculation may take several seconds but once complete, you are ready to start automatic turntable scanning. When calibration is finished, the software will close the calibration window automatically and enter the scan mode selection page. If the calibration fails, please try to re-calibrate following the instructions above. If calibration fails again, please contact your local support representative. 4 Free Scan Choose Free Scan, as shown below, then click next. 15

16 Enter the interface of New Project and Open Project, as shown below: Click New Project, it will pop-up a dialog as shown below. The default project save location is the desktop, then it will remember where the user last created a new project. Refer to 6.1 New Project and 6.2 Open Project. 16

17 Enter the project name, then click Save to enter the interface of Texture Scan and mesh selection. Refer to Select Texture and Select mesh mode. Click Apply, choose your desired brightness. Refer to 6.3 Adjust brightness. 17
18 Enter the interface of scan. Adjust the distance between the object and device, until the cross is clearly to be seen on the object. Click to start scanning. Refer to 6.3 Adjust brightness,6.4 Ens Scan(Fast Mesh),6.8 Edit and 6.9 Right Toolbar. 5 Auto Scan Choose Auto Scan, as shown below, click Next. 18

19 Enter the page of New Project. After building new project, enter the interface of texture and mesh selection, the operation is the same as auto free. Refer to Select Texture and Select Mesh mode. Enter the interface of scan. 19

20 Refer to 6.3 Adjust brightness,6.4 Ens Scan(Fast Mesh),6.8 Edit and 6.9 Right Toolbar. 6 Common Functions 6.1 New Project Enter the interface of scan. Click New Project, it will pop-up the window below. The default project save location is the desktop, then it will remember where the user last created a new project. 20


21 6.1.1 Select Texture(White balance test) The texture selection interface is shown below. Choose Texture scan to enter the white balance test. When scanning a colored object, you ll need to perform a white balance test to achieve better scanning results. Place a sheet of white paper as shown below on the calibration plate and click white balance test. The software interface for the white balance test appears as shown below: 21
 use this setting.")

22 After the white balance test has completed, you are free to continue with the texture scan Select Mesh mode and details When new project, you can select mesh mode and the scanning of detail. The default is unwatertight and low detail. If choose watertight there is no need to select the detail.end Scan( Fast Mesh) use this setting. Note: You should select a high level to capture fine model details. Please remember, high detail presets require longer processing times and will increase your file size. 6.2 Open Projcet Enter the scan mode, or click on the right side of the toolbar, you can operate the open project. Open project default location is the computer desktop, then it will remember where the user last opened a new project. If you want to import project, the opened project should be scanned under the same calibrated condition and scan mode. Refer to Start Scan, Edit, Mesh,End Scan. The projects created by auto scan and free scan can be reciprocally imported. 22

23 6.3 Adjust Brightness When new project after select mesh mode, it will show the adjust brightness window, or you can click the on the right toolbar to open the window. Click the button again, and the camera viewport will be hidden. Most users will find that the automatic settings work just fine but for more complex objects or lighting conditions, you can manually adjust scanner settings. Choose your desired brightness setting if the object is over or under exposed. Click Apply to confirm, or click Cancle to not save. The option Bright&Dark function is the same as 6.5 HDR brightness. 6.4 End Scan( Fast Mesh) After finish scanning, click End Scan (Fast Mesh) under the camera view for fast mesh. Mesh mode is selected when you create a new project.(6.1.2 Select Mesh mode and details).if you click (6.9.7 Mesh), then click End Scan (Fast Mesh),the mesh option is the same as when you click. After import project, click End Scan (Fast Mesh), the mesh option is the same as the last setting. 23

24 6.5 HDR Brightness The HDR brightness is below the camera viewport, enable HDR brightness can scan bright and dark objects. 6.6 Mouse operation prompts Lower left corner of the interface is the mouse operation prompts: After t scanned or imported project, the prompt text is as follows: Hold down the left mouse button: Rotate the object; Hold down the middle mouse button: pan the object; Hold down the mouse wheel: Scroll up and down to the object; scroll down to enlarge the object; Hold down the Shift + left mouse button: select the area on the object; Delete: Delete the selected area. Fixed scan s manual align, the prompt text is as follows: Press and hold shift + left mouse click: Select point to start manual align 6.7 Points and Triangles When scanning it will show the current points and current triangles in the lower right corner 24


25 6.8 Edit buttons Edit buttons introduction: 1 Deselect 2 Revert 3Delete 4Undo 5Show/Hide Stripes Non-texture scan, there is no such button Single-piece edit You can edit the current part data after each scan. As shown below, you can do the below edition if the data has excess parts. SHIFT+ left mouse button to select excess parts, as shown below: 25

26 Click Or DELETE to delete selected data, as shown below: Click right corner of the interface to end Single-piece edit, delete the current scan data Whole-piece edit After end the single-piece edit, the right toolbar will display, and now can edit the whole scan data. The specific operation is the same as the single-piece edit. You can also do the whole-piece edit after importing a project, the specific operation can refer to Single-piece edit. 6.9 Right Toolbar Buttons Introductio The following figure shows the right toolbar, free scan mode has no pause scan button. 26


27 1 Project 2 Start Scan 3 Align 4 Delete 5 Pause 6 Adjust brightness 7 Mesh 8 Save 9 Share 10 Main Menu Project button Click the Project button, as shown below, refer to 6.1 New Project and 6.2 Open Project Start Scan button Before scanning adjust the distance between the object and device, until the cross is clearly to be seen on the object. Free Scan Click to start scanning. When the scan is completed, change the position of object or scanner for next scan.make sure the overlap area of currently scan area and the last scanned data is more than 1/3. Then click scan button, the data will automatically align, until the whole 27
28 scanning completed. Auto Scan Before scanning, you can set the scan times per round under turntable scan by. The default setting is 8 times. Click you can change turntable steps. to start scanning. After the turntable has rotated one circle, 28


29 6.9.2 Manual Align If automatic alignment failed during scanning as shown below. Click button to open Manual Align view port on the left side of the software. Keep SHIFT down, and click left mouse button to select at least 3 non-collinear corresponding points in the 3D preview windows for Manual align. The data will be corrected after manual alignment as shown below. If manual alignment failed due to incorrect selection of corresponding points, click to re-select points Delete Current Data If you are not satisfied with current scanning data, or there is not enough overlapping region 29


30 for registration, click or the object to scan again. to delete current data and then change the position of the scanner When auto scan mode is scanning, you can click current data will be deleted directly. to stop the current scan. The Note: When import project, click Auto scan is to delete all the data. button the free scan is remove the single data; Pause button Auto scan, Click, scanning will pause; Click to resume scanning Mesh button When the scan is completed, click, proceed to post-processing. You will see two modes after clicking the button, as shown in the pictures: :Unwatertight for design meshing, unclosed model, results are shown in the picture: 30


31 :Watertight for print, closed model can be printed directly. You will see the pictures pop up as following after selecting this encapsulation. Select the object details. Note: 1 Select High for objects with fine texture, select Med or Low for objects in smooth surface or with less detail. The time for data processing is in relation to the detail setting. The higher the level of details is, the longer time the processing takes. 2 Watertight usually slower than unwatertigh, high resolution takes more time, please be patient. Watertight results are shown as in the picture: 31


32 Texture watertight results are shown in the picture: Data simplification After simplification, the polygon numbers, size and surface detail of data will be reduced accordingly. The comparison of detail between before simplification and after simplification (at 30% simplify 32


33 proportion). Before simplification After simplification Share button Click after merging to share data, it will show the dialog as below. You can share your model to Sketchfab, while model title, username and user password are required. Register an account and look at the shared model at 33


34 Note: Sketchfab Normal account can only upload data maximum 50M, while Professional account can share maximum 200M, and set model as private Save button Save data:click before merging can save data as asc. After merging, it can be saved as asc, stl, ply and obj. To save color texture, please select Ply and obj. Scale: Scaling the volume of scanning data, while the quantity of triangular facets and size of data will not be changed. Scaling result as reference: From left to right shows double size, original size and half size respectively Main Menu If you want to change the scan modes, click scan mode. to go back to the homepage to select the 34
LIGHTCONVERSE TOOLS Interface Overview
 MANUAL 1 Contents Contents... 1 LIGHTCONVERSE TOOLS Interface Overview... 2 Tool Manager... 3 Mouse... 4 Mouse Control Operation:... 4 3D Space Area... 4 Modes... 5 Balance Calculator in Warehouse Mode...
STUDIO 12 MANUAL PROCESSING GUIDE
 STUDIO 12 MANUAL PROCESSING GUIDE www.artec3d.com Artec Studio offers Autopilot for automatic processing of scan data. While this works very well, sometimes manual processing may be desired or needed.
Photogrammetry Guide to Creating Digital 3D Models
 Photogrammetry Guide to Creating Digital 3D Models By Emily Hauf (SUNY Geneseo) and the Paleontological Research Institution Guide Version 1.0 Part I - Photography Create studio setup with black cloth
Multi-Functional Handheld 3D Scanner
 Multi-Functional Handheld 3D Scanner Four mode scanning versatility The handheld 3D scanner for all your needs The EinScan-Pro multi-functional 3D scanner offers both portability and accuracy because of
NVMS User Manual. Version 2.1.0
 NVMS-1000 User Manual Version 2.1.0 Contents 1 Software Introduction... 1 1.1 Summary... 1 1.2 Operation Environment... 1 1.3 Install and Uninstall... 2 1.3.1 Install the Software... 2 1.3.2 Uninstall
A Guide to Processing Photos into 3D Models Using Agisoft PhotoScan
 A Guide to Processing Photos into 3D Models Using Agisoft PhotoScan Samantha T. Porter University of Minnesota, Twin Cities Fall 2015 Index 1) Automatically masking a black background / Importing Images.
A Guide to Autodesk Maya 2015
 A Guide to Autodesk Maya 2015 Written by Mitchell Youngerman Table of Contents Layout of Toolbars...pg 1 Creating Objects...pg 2 Selecting & Deselecting Objects...pg 3 Changing Perspective... pg 4 Transforming
GUIDE TO POST-PROCESSING OF THE POINT CLOUD
 GUIDE TO POST-PROCESSING OF THE POINT CLOUD Contents Contents 3 Reconstructing the point cloud with MeshLab 16 Reconstructing the point cloud with CloudCompare 2 Reconstructing the point cloud with MeshLab
Bumblebee2 Stereo Vision Camera
 Bumblebee2 Stereo Vision Camera Description We use the Point Grey Bumblebee2 Stereo Vision Camera in this lab section. This stereo camera can capture 648 x 488 video at 48 FPS. 1) Microlenses 2) Status
Library ebooks and Your B&N Nook
 Library ebooks and Your B&N Nook When using your B&N Nook for the first time, you will need to register for an account at www.bn.com. This will authenticate your Nook for use. During registration at B&N,
Siera CMS Panther v3.0
 1 This manual maybe exist inexact in technology, product feature, operation discrepancy or misprint. The content of the manual will renew according to the product function enhance, and regular change or
Legal Library. In this guide we will review how to download and use our Legal Library tool. Commercial Brokers Association May 2018
 Legal Library In this guide we will review how to download and use our Legal Library tool Commercial Brokers Association May 2018 Downloading Legal Library The Legal Library provides both fast and easy
NVMS User Manual
 NVMS-1000 User Manual Contents 1 Software Introduction...1 1.1 Summary... 1 1.2 Operation Environment... 1 1.3 Install and Uninstall... 2 1.3.1 Install the Software... 2 1.3.2 Uninstall the Software...
Autodesk Fusion 360 Training: The Future of Making Things Attendee Guide
 Autodesk Fusion 360 Training: The Future of Making Things Attendee Guide Abstract After completing this workshop, you will have a basic understanding of editing 3D models using Autodesk Fusion 360 TM to
THE ULTIMATE LIGHTROOM COURSE
 COURSE OUTLINE THE ULTIMATE LIGHTROOM COURSE BY MATT KLOSKOWSKI THE ULTIMATE LIGHTROOM COURSE This is the full course outline. To find something, simply press Cmd - F (PC: Ctrl - F) for Find in your PDF
NVMS User Manual
 NVMS-1000 User Manual Contents 1 Software Introduction...1 1.1 Summary... 1 1.2 Operation Environment... 1 1.3 Install and Uninstall... 2 1.3.1 Install the Software... 2 1.3.2 Uninstall the Software...
User Guide. for. JewelCAD Professional Version 2.0
 User Guide Page 1 of 121 User Guide for JewelCAD Professional Version 2.0-1 - User Guide Page 2 of 121 Table of Content 1. Introduction... 7 1.1. Purpose of this document... 7 2. Launch JewelCAD Professional
GraphWorX64 Productivity Tips
 Description: Overview of the most important productivity tools in GraphWorX64 General Requirement: Basic knowledge of GraphWorX64. Introduction GraphWorX64 has a very powerful development environment in
Premiere Pro Desktop Layout (NeaseTV 2015 Layout)
") Premiere Pro 2015 1. Contextually Sensitive Windows - Must be on the correct window in order to do some tasks 2. Contextually Sensitive Menus 3. 1 zillion ways to do something. No 2 people will do everything
Premiere Pro 2015 1. Contextually Sensitive Windows - Must be on the correct window in order to do some tasks 2. Contextually Sensitive Menus 3. 1 zillion ways to do something. No 2 people will do everything
GNOSYS PRO 0.7. user guide
 GNOSYS PRO 0.7 user guide Author Guido M. Re Date September 2016 Reviewer Chad Barksdale Date September 2016 3 Contents 1 Get Started 7 1.1 System Requirements...................................................
SignGO Pro // SignGO Lite Features Listing
 SignGO Pro // SignGO Lite Features Listing Features Design Text Entry SignGO Lite SignGO Pro Artistic Text Text On Arc Text On Path Frame Text AutoMerge Script Drawing Shape drawing Freehand drawing Logos
13. Albums & Multi-Image Printing
 13. Albums & Multi-Image Printing The Album function is a flexible layout and printing tool that can be used in a number of ways: Two kinds of albums: At left we used automatic mode to print a collection
ISRAEL OFFICE. Cadent Ltd. 17 Ha Taasiya St. Or Yehuda Israel Tel: Fax:
 ioc Scanner User Guide English COPYRIGHT Copyright by Cadent. 1995-2011. All rights reserved. The information contained in this manual is subject to change without notice. The hardware and software described
USER MANUAL. Mac Version
 USER MANUAL Mac Version Contents 1 Software Introduction... 1 1.1 Summary... 1 1.2 Install and Uninstall... 1 1.2.1 Install the Software... 1 2 Login Software... 3 2.1 Login... 3 2.2 Control Panel Instruction...
Maestro 3D Easy Dental Scan User's Manual
 Maestro 3D Easy Dental Scan User's Manual Introduction to the use of scanning software combined with Maestro 3D scanner. AGE SOLUTIONS S.r.l. 1 Introduction to the use of scanning software combined with
Working with PDF s. To open a recent file on the Start screen, double click on the file name.
 Working with PDF s Acrobat DC Start Screen (Home Tab) When Acrobat opens, the Acrobat Start screen (Home Tab) populates displaying a list of recently opened files. The search feature on the top of the
GETTING STARTED TABLE OF CONTENTS
 Sketchup Tutorial GETTING STARTED Sketchup is a 3D modeling program that can be used to create 3D objects in a 2D environment. Whether you plan to model for 3D printing or for other purposes, Sketchup
Česky. Introduction... E-1 Minimum system requirements for PC... E-1 Using the AVerVision Application for PC.. E-3
 Table of Contents Introduction... E-1 Minimum system requirements for PC... E-1 Using the AVerVision Application for PC.. E-3 Video Screen... E-3 Control Panel... E-3 Document Camera Control Panel... E-4
Code Finix Label Designer V 1.0 User Guide
 Code Finix Label Designer V 1.0 User Guide Introduction Welcome, Code Finix Label Designer is a family of professional labeling software products that brings a complete barcode printing solution for desktop
AL-1633/1644 Online Manual Start
 AL-6/6 Online Manual Start Click this "Start" button. Introduction This manual describes the printer and scanner functions of the AL-6/6 digital multifunctional system. For information on the following
Function Manual Intraoral Scanner i500
 Function Manual Intraoral Scanner i500 Revised Date: Feb 2019 Revision No.: 0 Contents 1 Introduction and overview... 3 1.1 Intended Use... 3 1.2 Indication for use... 3 1.3 Contraindications... 3 1.4
Inserting Information into PowerPoint
 LESSON 6 6.1 Inserting Information into PowerPoint After completing this lesson, you will be able to: Change the layout of a slide. Insert a clip art image. Scale an image. Insert and format a table. Insert
Make Your Pictures Come to Life with Photo Story 3
 Page 1 of 6 Click Here to Install Silverlight United States Change All Microsoft Sites Search Microsoft.com Submit Windows Media Home For Home Windows Media Player Music & Video Cool Devices For Professionals
Table of Contents. Introduction 1. Software installation 2. Remote control and video transmission 3. Navigation 4. FAQ 5.
 Table of Contents Introduction 1. Software installation 2. Remote control and video transmission 3. Navigation 4. FAQ 5. Maintenance 1.1 1.2 1.3 1.4 1.5 1.6 2 Introduction Introduction Introduction The
Quick Reference. WindoWall Console. Menu Icons (Toolbar) Menu Bar
 Menu Bar") WindoWall Console Quick Reference Menu Icons (Toolbar) Menu Bar New Open Save Help New (Ctrl+N) Starts a new WindoWall project file. Open (Ctrl+O) Opens an existing WindoWall project. Save (Ctrl+S) Saves
WindoWall Console Quick Reference Menu Icons (Toolbar) Menu Bar New Open Save Help New (Ctrl+N) Starts a new WindoWall project file. Open (Ctrl+O) Opens an existing WindoWall project. Save (Ctrl+S) Saves
American Board of Orthodontics (ABO) Model Conversion Utility User Guide Updated 7/2/2014. Authorized Users
 Model Conversion Utility User Guide Updated 7/2/2014. Authorized Users") Authorized Users American Board of Orthodontics (ABO) Model Conversion Utility User Guide Updated 7/2/2014 All orthodontists who have made application for ABO examination will be authorized to register
Authorized Users American Board of Orthodontics (ABO) Model Conversion Utility User Guide Updated 7/2/2014 All orthodontists who have made application for ABO examination will be authorized to register
Blender Lesson Ceramic Bowl
 Blender Lesson Ceramic Bowl This lesson is going to show you how to create a ceramic looking bowl using the free program Blender. You will learn how to change the view, add, delete, scale and edit objects
Basic Concepts 1. Starting Powerpoint 2000 (Windows) For the Basics workshop, select Template. For this workshop, select Artsy
 For the Basics workshop, select Template. For this workshop, select Artsy") 1 Starting Powerpoint 2000 (Windows) When you create a new presentation, you re prompted to choose between: Autocontent wizard Prompts you through a series of questions about the context and content of
1 Starting Powerpoint 2000 (Windows) When you create a new presentation, you re prompted to choose between: Autocontent wizard Prompts you through a series of questions about the context and content of
XnView 1.9. a ZOOMERS guide. Introduction...2 Browser Mode... 5 Image View Mode...15 Printing Image Editing...28 Configuration...
 XnView 1.9 a ZOOMERS guide Introduction...2 Browser Mode... 5 Image View Mode...15 Printing... 22 Image Editing...28 Configuration... 36 Written by Chorlton Workshop for hsbp Introduction This is a guide
Table of contents. LIPScan 3D Manual
 Table of contents SPECIFICATION & SYSTEM REQUIREMENTS... 1 FEATURES... 2 LIPSCAN 3D PACKAGE... 3 HARDWARE DESCRIPTION AND SETUP... 4 INSTALLATION... 6 UNINSTALLATION... 9 LIPSCAN 3D OPERATION... 11 AFTER
v Overview SMS Tutorials Prerequisites Requirements Time Objectives
 v. 12.2 SMS 12.2 Tutorial Overview Objectives This tutorial describes the major components of the SMS interface and gives a brief introduction to the different SMS modules. Ideally, this tutorial should
DDX-R Quick Start Guide
 DDX-R Quick Start Guide Imaging Support 1-855-726-9995 www.scilvet.com Contents USING DDX-R... 2 Opening a Patient File... 2 Opening a New Patient File... 3 Screen Layout... 3 ACQUIRING IMAGES ON A PATIENT...
Worn And Torn Text In Photoshop
 Worn And Torn Text In Photoshop Written by Steve Patterson. In this Photoshop text effects tutorial, we re going to learn how to create a worn and torn effect with our text. Here s the effect we re going
Section 1 Microsoft Excel Overview
 Course Topics: I. MS Excel Overview II. Review of Pasting and Editing Formulas III. Formatting Worksheets and Cells IV. Creating Templates V. Moving and Navigating Worksheets VI. Protecting Sheets VII.
Textures and UV Mapping in Blender
 Textures and UV Mapping in Blender Categories : Uncategorised Date : 21st November 2017 1 / 25 (See below for an introduction to UV maps and unwrapping) Jim s Notes regarding Blender objects, the UV Editor
Configuring Microsoft Outlook to Connect to Hosted Exchange Service
 Configuring Microsoft Outlook to Connect to Hosted Exchange Service Configuring Microsoft Outlook for Hosted Exchange Service Version: 1.0 Updated on: April 27, 2011 Page 1 of 7 TABLE OF CONTENTS Configuring
Room Classroom Technology Updated March 4, 2019
 Room 31-101 Classroom Technology Updated March 4, 2019 Table of Contents TURN CLASSROOM LIGHTS ON/OFF...2 EQUIPMENT LOCATION...2 LOGIN TO THE COMPUTER...2 Unsuccessful Login...3 TURN ON AND CONTROL THE
REVCONNECT. 1. Software Introduction Installation Description Usage Introduction User Guide... 6
 REVCONNECT 1. Software Introduction... 1 2. Installation Description... 1 3. Usage Introduction... 6 3.1 User Guide... 6 3.2 Mobile App Operation... 8 3.2.1 Starting and Logging In to the Mobile App...
Press the Plus + key to zoom in. Press the Minus - key to zoom out. Scroll the mouse wheel away from you to zoom in; towards you to zoom out.
 Navigate Around the Map Interactive maps provide many choices for displaying information, searching for more details, and moving around the map. Most navigation uses the mouse, but at times you may also
Edupen Pro User Manual
 Edupen Pro User Manual (software for interactive LCD/LED displays and monitors) Ver. 3 www.ahatouch.com Some services in Edupen Pro require dual touch capability. In order to use dual touch, your computer
This is the opening view of blender.
 This is the opening view of blender. Note that interacting with Blender is a little different from other programs that you may be used to. For example, left clicking won t select objects on the scene,
Speed, Accuracy and Performance at an Affordable Price
 Speed, Accuracy and Performance at an Affordable Price 012 2.A ions olut S 3D3 ed. serv s re ht ll rig VERSATILE for Industry Applications The HDI Advance 3D Scanner uses white light technology for capturing
NVMS1000. User Manual
 NVMS1000 User Manual Contents 1 Software Introduction... 1 1.1 Summary... 1 1.2 Operation Environment... 1 1.3 Install and Uninstall... 2 1.3.1 Install the Software... 2 1.3.2 Uninstall the Software...
USING THE PC.3 USING A LAPTOP COMPUTER [WINDOWS].5 USING A LAPTOP COMPUTER [MACINTOSH].7 PLAYING AN AUDIO CD.9 USING THE DVD PLAYER.
![USING THE PC.3 USING A LAPTOP COMPUTER [WINDOWS].5 USING A LAPTOP COMPUTER [MACINTOSH].7 PLAYING AN AUDIO CD.9 USING THE DVD PLAYER.](/thumbs/76/73433680.jpg "USING THE PC.3 USING A LAPTOP COMPUTER [WINDOWS].5 USING A LAPTOP COMPUTER [MACINTOSH].7 PLAYING AN AUDIO CD.9 USING THE DVD PLAYER.") Table of Contents USING THE PC...3 USING A LAPTOP COMPUTER [WINDOWS]...5 USING A LAPTOP COMPUTER [MACINTOSH]...7 PLAYING AN AUDIO CD...9 USING THE DVD PLAYER...11 USING THE VCR...13 USING THE DOCUMENT
Table of Contents USING THE PC...3 USING A LAPTOP COMPUTER [WINDOWS]...5 USING A LAPTOP COMPUTER [MACINTOSH]...7 PLAYING AN AUDIO CD...9 USING THE DVD PLAYER...11 USING THE VCR...13 USING THE DOCUMENT
Matrox MuraControl for Windows
 Matrox MuraControl for Windows User Guide (for software version 6.00) 20179-301-0600 2017.09.25 Contents About this user guide... 6 Using this guide... 6 More information... 6 Overview... 7 Supported Matrox
Ink2Go Help. Toolbar functions
 Toolbar functions S/N Icons Description 1 New Page Create a new page for annotations. Existing annotations will be saved as previous page. You can then use Previous Page/Next Page buttons to navigate between
Attention. Your CEIVA is currently displaying the demonstration slideshow. second until the Congratulations screen appears.
 Attention Your CEIVA is currently displaying the demonstration slideshow. Exiting the Demonstration Slideshow To enjoy your own personal slideshow, please follow these three easy steps: 1. Power on your
Lesson 1 Parametric Modeling Fundamentals
 1-1 Lesson 1 Parametric Modeling Fundamentals Create Simple Parametric Models. Understand the Basic Parametric Modeling Process. Create and Profile Rough Sketches. Understand the "Shape before size" approach.
Graphic Design & Digital Photography. Photoshop Basics: Working With Selection.
 1 Graphic Design & Digital Photography Photoshop Basics: Working With Selection. What You ll Learn: Make specific areas of an image active using selection tools, reposition a selection marquee, move and
EFI Fiery Utilities Technical Reference. Part Number: , Rev. 1.0
 EFI Fiery Utilities Technical Reference Part Number: 59308805, Rev. 1.0 15 March 2008 CONTENTS 3 CONTENTS INTRODUCTION 5 Terminology and conventions 6 About this document 7 About Help 7 Preparing for installation
Agisoft PhotoScan Tutorial
 Agisoft PhotoScan Tutorial Agisoft PhotoScan is a photogrammetry software that allows you to build 3D models from digital photographs. Photogrammetry requires a series of photographs of an object from
FACULTY AND STAFF COMPUTER FOOTHILL-DE ANZA. Office Graphics
 FACULTY AND STAFF COMPUTER TRAINING @ FOOTHILL-DE ANZA Office 2001 Graphics Microsoft Clip Art Introduction Office 2001 wants to be the application that does everything, including Windows! When it comes
ezimagex2 User s Guide Version 1.0
 ezimagex2 User s Guide Version 1.0 Copyright and Trademark Information The products described in this document are copyrighted works of AVEN, Inc. 2015 AVEN, Inc. 4595 Platt Rd Ann Arbor, MI 48108 All
A Document Created By Lisa Diner Table of Contents Western Quebec School Board October, 2007
 Table of Contents A Document Created By Lisa Diner Western Quebec School Board October, 2007 Table of Contents Some Basics... 3 Login Instructions... 4 To change your password... 6 Options As You Login...
Contents Toolbox Tools Standard Tools View 4 Add Design Select 4 Edit 4 Lettering 6 Monogram 7 Design Colors Sew Sequence Bounding Box
 Help Contents Toolbox Tools 3 Standard Tools 4 View 4 Add Design 4 Select 4 Edit 4 Lettering 6 Monogram 7 Design Colors 7 Sew Sequence 7 Bounding Box 8 Shortcuts 9 Install Toolbox on your Windows Computer
R2CAD User Guide V1.7. Copyright All rights reserved.
 R2CAD User Guide V1.7 Copyright All rights reserved. Table of Contents 1. About R2CAD... 1 1.1 System Requirements... 1 2. User Interface... 2 2.1 Main menu... 2 2.2 Mouse Operation... 2 2.3 Setting...
Copyright 2017 Xi'an NovaStar Tech Co., Ltd. All Rights Reserved. No part of this document may be copied, reproduced, extracted or transmitted in any
 Product Version: Document Number: SmartLCT Screen Configuration Software V3.2.0 NS110100363 Copyright 2017 Xi'an NovaStar Tech Co., Ltd. All Rights Reserved. No part of this document may be copied, reproduced,
Comcon Software Solutions. Samvad Teleprompter. User Manual
 Comcon Software Solutions Samvad Teleprompter User Manual Introduction to Samvad Opening Samvad Samvad Shortcut should be automatically created on your desktop at the time of installation. If it does not,
IOS. E Intraoral Scanner Quick Guide
 IOS E Intraoral Scanner Quick Guide GC Aadva IOS E - Contents Preface... 3 Components... 4 Unpacking... 5 Starting/Booting the system... 5 Log-in... 5 Scanning... 6 Inspecting... 9 Additional scans...
BE INSPIRED.
 BE INSPIRED www.scaninabox.com Last update October 2017 PROFESSIONALISM, OUR CORE Accurately manufactured in every detail, Scan in a Box FX offers high quality 3D Scans. The Made in Italy design has been
Scanning Protocol: Cyberware Model 15
 Scanning Protocol: Cyberware Model 15 By Caley M. Orr, School of Human Evolution and Social Change Scanning 1. Turn on scanner THEN computer (important). Red light on the scanner and black Cyberware box
Software Version 4.0 May 2011
 Software Version 4.0 May 2011 itero Scanner User Guide English COPYRIGHT Copyright by Cadent. 1995-2011. All rights reserved. The information contained in this manual is subject to change without notice.
epos Touchkit Manual (for Windows XP)
") epos Touchkit Manual (for Windows XP) 1. Touchkit Devices in Windows Device Manager After driver installation completed, all of Touchkit touchscreen controller devices will be list in the Mice and other
epos Touchkit Manual (for Windows XP) 1. Touchkit Devices in Windows Device Manager After driver installation completed, all of Touchkit touchscreen controller devices will be list in the Mice and other
VA-SW2000 VA-SW2000 INSTRUCTION MANUAL INSTRUCTION MANUAL. Network Archiving Software. Network Archiving Software. Netzwerk-Archivierungssoftware
 INSTRUCTION MANUAL INSTRUCTION MANUAL VA-SW2000 VA-SW2000 Network Archiving Software Network Archiving Software Netzwerk-Archivierungssoftware Logiciel d'archivage sur réseau Programa de Archivo de Red
PRINTER DRIVER GUIDE (For Macintosh CP-K60DW series)
") PRINTER DRIVER GUIDE (For Macintosh CP-K60DW series) Macintosh, Apple, and Mac OS are trademarks of Apple Inc. The various software packages mentioned in this manual are the registered trademarks of their
PRINTER DRIVER GUIDE (For Macintosh CP-K60DW series) Macintosh, Apple, and Mac OS are trademarks of Apple Inc. The various software packages mentioned in this manual are the registered trademarks of their
User manual. SmartPSS. Manual includes
 User manual software is used for viewing, playing back and exporting video footage from IP video surveillance systems. Manual includes Logging In Starting Live View Adding a Custom View Using Digital Zoom
A Study of Angles & Curves
 A Study of Angles & Curves Method 1: Cutting Quilt Shapes/Using the Shapes Tools Open BERNINA CutWork Software. Make sure that Create New is selected. Click Next. Place a dot in front of New Graphic. Select
LinkMotion and CorelDraw 9, 10, 11, 12, X3, X4, X5, X6, X7 and X8:
 LinkMotion and CorelDraw 9, 10, 11, 12, X3, X4, X5, X6, X7 and X8: After you install LinkMotion software and set up all settings launch CorelDraw software. Important notes: Solustan s LinkMotion driver
When attending an adobe room, you will view the room utilizing your computer and use a phone for the audio.
 Adobe Connect Rooms Best Practices: All times given for meetings are in EST. Call early (5-10 minutes prior to the start of the session). Use a phone headset (not computer). Do not use a speaker phone.
Magic-E-Board. User Manual
 Magic-E-Board Magic-E-Board Magic-E-Board...2 1) Included Parts and Optional Accessories...4 1.1) Package Checklist...4 1.2) Optional Accessories...4 2) Magic-E-Board Software Installation...5 3) Magic-E-Board
Voyant Connect User Guide
 Voyant Connect User Guide WELCOME TO VOYANT CONNECT 3 INSTALLING VOYANT CONNECT 3 MAC INSTALLATION 3 WINDOWS INSTALLATION 4 LOGGING IN 4 WINDOWS FIRST LOGIN 6 MAKING YOUR CLIENT USEFUL 6 ADDING CONTACTS
Publishing Electronic Portfolios using Adobe Acrobat 5.0
 Step-by-Step Publishing Electronic Portfolios using Adobe Acrobat 5.0 2002, Helen C. Barrett Here is the process we will use to publish a digital portfolio using Adobe Acrobat. The portfolio will include
Release Date Description V Release for the second time. New features: V First release Change History 1. Test Tool is a
 Rev: V3.1.0 Doc number: NS110000297 SmartLCT LED Display Configuration Software User Manual Release Date Description V3.1.0 2017-05-25 Release for the second time. New features: V3.0.0 2017-01-20 First
Dr.Engrave USER'S MANUAL
 Dr.Engrave USER'S MANUAL This document is the operation manual for Dr. Engrave for Windows, a program for plate engraving. Contents Introduction... 4 Operating environment... 5 Overview of Dr.Engrave...
SMARTdoc v2 User Manual
 Pages: 1/49 SMARTdoc v2 Pages: 2/49 1 Introduction SMARTdoc is an easy to use but full functional document management system. The mean focus is easy and fast. SMARTdoc is all about document and information
Basic Concepts 1. For this workshop, select Template
 Basic Concepts 1 When you create a new presentation, you re prompted to choose between: Autocontent wizard Prompts you through a series of questions about the context and content of your presentation not
Table of Contents. Contents
 Table of Contents Contents Table of Contents... 1 QOMO ARS Overview... 4 Part 1: Software... 5 Software Overview... 5 System Requirements... 5 Installation... 5 Using the QClick Software... 6 1.1 User...
Software for Observation and Measurement SGMMS V2.6. Users Manual
 AFM45-S03-12402 Software for Observation and Measurement SGMMS V2.6 Users Manual SIGMAKOKI Co., LTD. CONTENTS 1 OVERVIEW... - 3-2 BEFORE USE... - 3-2-1 OPERATIONAL ENVIRONMENT...- 3-2-2 INSTALLATION PREPARATION...-
CPM-200 User Guide For Lighthouse for MAX
 CPM-200 User Guide For Lighthouse for MAX Contents Page Number Opening the software 2 Altering the page size & Orientation 3-4 Inserting Text 5 Editing Text 6 Inserting Graphics 7-8 Changing the Colour
What s new in Solutionix s scanners?
 SOLUTIONIX 1 What s new in Solutionix s scanners? Solutionix provides fully automated 3D scanning solutions for both small and medium sized objects. With a powerful scan engine and affordable pricing,
Introduction to Microsoft Office 2016: Word
 Introduction to Microsoft Office 2016: Word Last Updated: September 2018 Cost: $2.00 Microsoft Word is a word processing software. You can use it to type letters, reports, and other documents. This class
OPEN SCAN Copings & Bridges
 OPEN SCAN Copings & Bridges User Manuel OpenCAD Rev. 3.0 Laserdenta GmbH Friedrich-Bessel-Strasse 12 50126 Bergheim Germany support@laserdenta.com www.laserdenta.com - 1 - Contens Pages Operation describtion.
Beginning Paint 3D A Step by Step Tutorial. By Len Nasman
 A Step by Step Tutorial By Len Nasman Table of Contents Introduction... 3 The Paint 3D User Interface...4 Creating 2D Shapes...5 Drawing Lines with Paint 3D...6 Straight Lines...6 Multi-Point Curves...6
Beginners Guide to Snippet Master PRO
 Beginners Guide to Snippet Master PRO This document assumes that Snippet Master has been installed on your site. If not please contact the Bakas IT web team at webreg@bakasit.com.au. Initial Login Screen...
EPSON. ES-1200C Pro Mac. Getting Started
 t EPSON ES-1200C Pro Mac Getting Started A Note Concerning Responsible Use of Copyrighted Materials Like photocopiers, scanners can be misused by improper copying of copyrighted material. Although Section
Click Install View Touch. Installation starts. Click Next. Click Finish.
 1. Please read the instructions carefully. Improper installation may cause permanent damages, which may not be covered by the warranty. 2. Check all the parts in the package against the following parts
Video Capture Card Manual
 Video Capture Card Manual 1. System Login System installation is completed, will generate desktop < DVR Surveillance System> icon, please double-click operation. Or choose Start -> All Programs -> DVR
Zoom-Twix/ Zoom-Office. Training Guide and User Manual OS Windows XP, Windows 7
 Zoom-Twix/ Zoom-Office Training Guide and User Manual OS Windows XP, Windows 7 Release 4.1.2 Revision date:_february 11, 2011 20 Main St Suite G2 Acton, MA 01720 800-681-5909 Patent Pending Table of Contents
IN THIS CLASS WE ARE GOING TO LEARN THE BASIC FEATURES OF WINDOWS 8.1 WITH HANDS ON TRAINING THE CLASS WILL RUN ON THE SPEED OF THE AVERAGE STUDENT
 1 IN THIS CLASS WE ARE GOING TO LEARN THE BASIC FEATURES OF WINDOWS 8.1 WITH HANDS ON TRAINING EACH CLASS WILL RUN APPROXIMATELY 40 MINUTES WE WILL PICK UP WHERE WE LEFT OFF AT THE NEXT CLASS THE CLASS
RHINO; AN INTRODUCTION + FAKING TRABECULAE; EndOfLine.info;
 RHINO; AN INTRODUCTION + FAKING TRABECULAE; EndOfLine.info; Rhinoceros is a relatively simple program with an AUTOCAD based interface. The disadvantage of this type of interface is a series of terms need