CONTENTS. Xiamen RGBlink Science & Technology Co., Ltd. Ph: / 45
|
|
|
- Kenneth Boone
- 5 years ago
- Views:
Transcription

1 D6 Quick Start Internal 4:4:4 processing HDR compliance HDMI 2.0 / DP 1.2/ HDMI 1.4/ Dual Link DVI inputs compatible 12G/6G/3G/HD/SD SDI inputs compatible HDMI 2.0 output 12G/6G/3G/HD/SD SDI outputs EDID management up to 4K Multiple working mode Presentation Switching with 4K background + 8 layers AUX outputs PVW with all the inputs multi viewer and PST Demountable front panel for remote control Genlock for both inputs and outputs
2 CONTENTS Product Introduction...2 Packing Configuration... 3 Hardware Orientation...4 Front Panel...4 Menu Structure... 4 Back Panel... 8 XPOSE Operation... 9 XPOSE Installation... 9 XPOSE Operation Login in XPOSE...11 Web Links...13 Connect with the D Output Settings...15 Operation Mode...17 Preview Mode (4K2K) Split Mode Presentation Mode (4K2K)...26 Presentation Mode(4K1K)...28 Presentation Mode (8K1K)...30 System Settings Contact Information Ph: support@rgblink.com 1 / 45

3 Product Introduction D6 is a 4K2K@60Hz scaler & presentation switcher, supports any format 4K2K signal input and output switching, D6 is based on fully optional input/output modules structure, with different optional modules to build the different range application. D6 can be set up with the local front panel or by remote controller with its remote control interfaces, including Ethernet, USB and RS 232. D6 local front panel is not only a dedicated normal local panel, but a removable remote control panel. Operator can control the D6 by setting up this remote control panel with a Cat5 cable only. The remote control panel is used to preview the input sources and PST by its LCD display directly. For the, remote controller, it is including the XPOSE runs on the desktop windows and MAC OS, and the T1 or the 3 rd party CMS, such as crestron and AMS. With the set up and operation, D6 can be set to meet different application, by its different working mode, including 4k Preview Switcher mode, Split mode and different presentation mode. System Connection Diagram This is the typical diagram for switcher and presentation application with multiple 4K/2K connection. D6 System Connection Diagram Ph: support@rgblink.com 2 / 45


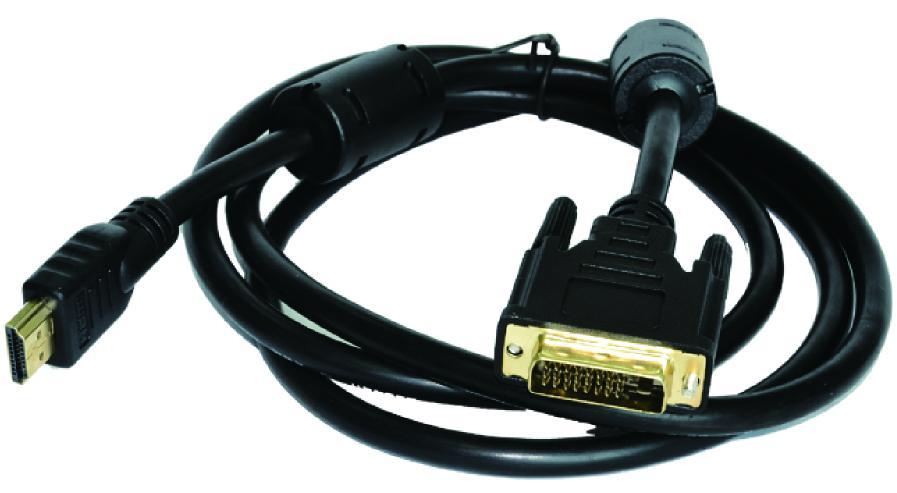
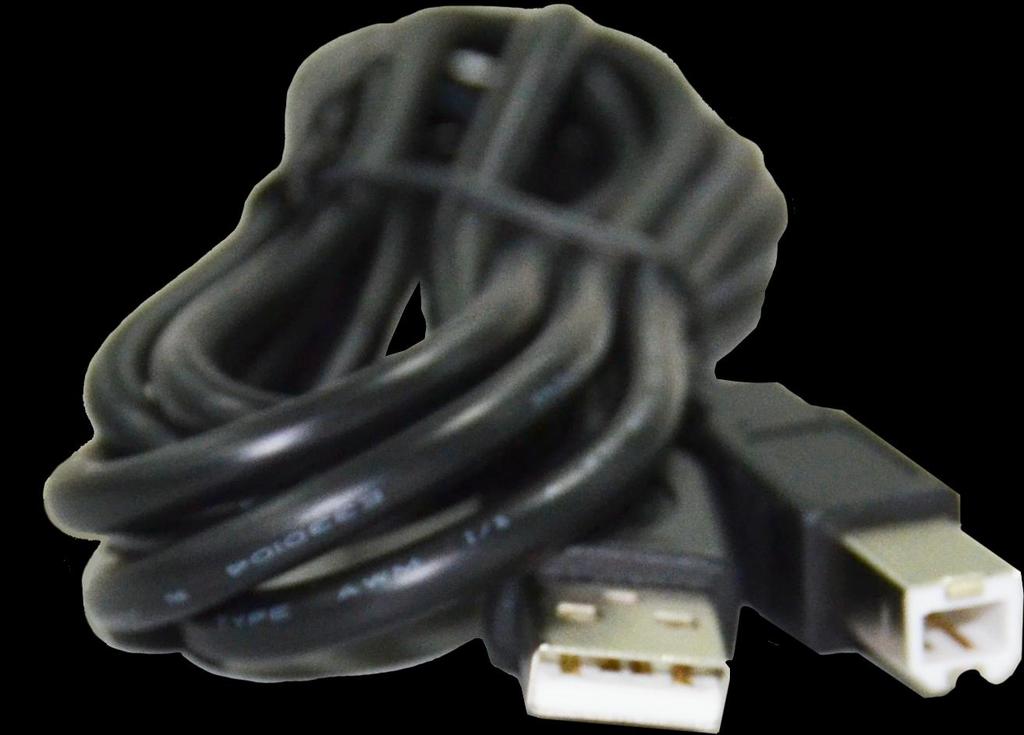


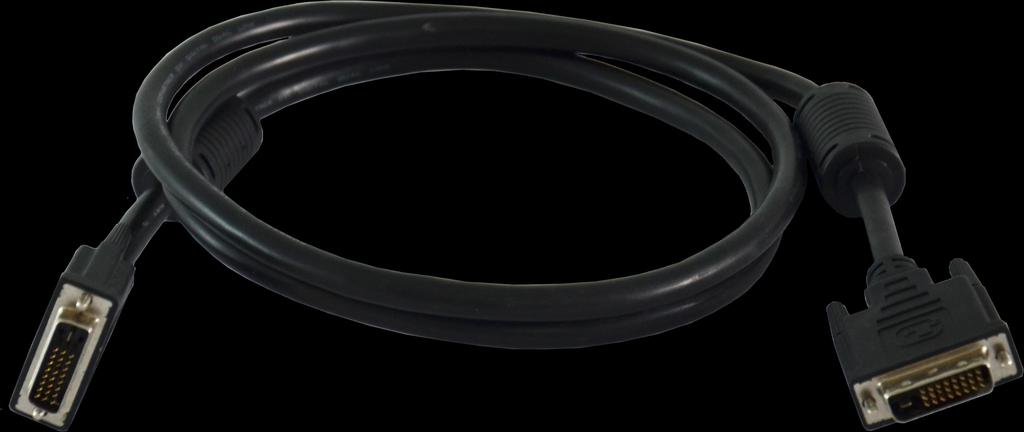

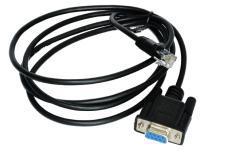


4 Packing Configuration AC Power Cord HDMI Cable HDMI to DVI Cable SDI Cable DVI Cable USB Cable DB9 to RJ11 Cable Screw Driver QC Declaration Note: AC Power Cable supplied as standard according to destination market. Ph: / 45

5 Hardware Orientation Front Panel Button Instruction 1~16 Input signal source button and Number button use for scale, crop, zoom and custom setting TP Test pattern button OUT1~OUT4 Main Output button SCALE Scale button Multiview presets area POS Adjust L1~L4 Layer Area FS Layer Mask BG1&BG2 Background button DIMMER Dimmer button LOGO1 & LOGO2 Logo button FORMAT Choose Resolution or custom Setting LCD Panel Show operation menu items PRO Program button Knob Confirm and adjust OLED menu PST PST button MENU Menu and back button PVW Source Monitoring ENTER Confirmation button BLACK Black button USB Connector USB Connector FREEZE Freeze Current LOAD Save the set up as the preset CUT Quickly Transition Effects from PST to PRO SAVE Loading the user preset TAKE Transition Effects from PST to PRO DSK Down streaming key T-Bar Transition Effects in any position Menu Structure Ph: / 45


6 Menu Instruction 1 Input menu 10 Background 2 Output Menu 11 Blending 3 PVW Menu 12 Test Pattern 4 Program Menu 13 Language 5 PST Menu 14 View, including Save & Load Menu 6 Layer Mask 15 System 7 DSK Menu 16 Tech Support 8 OSD 17 Factory Reset 9 LOGO Ph: support@rgblink.com 5 / 45


7 Ph: / 45

8 Ph: / 45

9 Back Panel Chassis Module Structure 4 input module slots, support SDI & 4K 1 Input module 4 output module slots, support HDMI 2 and SDI optional module 1 preview output card slot, including 2 4 HDMI output 5 Power module 3 Communication Board Ph: support@rgblink.com 8 / 45
 Monitor: Resolution must be 1280 x720 pixel or above (it can not display normally if the resolution is lower than 1280 x720) Operating")
10 XPOSE Operation XPOSE Installation Environment Requirements: Processor: 1 GHz or above 32 bit or 64 bit processor Memory: 2 GB or more Graphics: Support DirectX 9 128M or above (open AERO effect) Hard disk space: Above 16G (primary partitions, NTFS format) Monitor: Resolution must be 1280 x720 pixel or above (it can not display normally if the resolution is lower than 1280 x720) Operating system: Windows 7 or above (full version, not Ghost version or compact version) Double click select English, and click OK to confirm. icon, it will pop-up the Installer Language box, select the language, for example, Click Next to install: Ph: support@rgblink.com 9 / 45


11 Select Browse... to select the XPOSE software install location: Note User should get the rights in Roles Management when install the XPOSE to disk C if the system is Windows 7 or above. Click Install : Click Finish and is ready to run the XPOSE management software: Ph: support@rgblink.com 10 / 45


12 XPOSE Operation Login in XPOSE Double click the icon on the desktop. Log in interface will be enter after opening, the user name is Admin, and there is no password, select D6, and enter into the software by clicking Login. If user want to change the language to Chinese, click the drop down arrow after Language and select Chinese, as shown in the figure below, then click Login to enter into the XPOSE. Ph: / 45

13 XPOSE management software interface is shown as follows. XPOSE management software contains the functions including: Web Links, Search, Output Settings, Operation Mode, Admin and System Settings. In the following parts, we will introduce these in detail. Ph: / 45


14 Web Links XPOSE management software sets up the web links. Click the web links icon on the top left corner, and enter the RGBLink s website, as shown in the picture below: Connect with the D6 Firstly, set up the D6 IP, and make sure the IP of the computer and the D6 are on the same network range. Connect the PC which XPOSE runs on the PC with the CAT5 cable to the D6. Power on D6 and ready to make the remote set up and configuration. Then, click the shortcut Search on the operation interface. Ph: support@rgblink.com 13 / 45

15 Then it will search the D6, and show the D6 info, including the serial number and IP address, shown as the picture here: Finally, click the D6 and goes to its working mode page: Ph: / 45


16 The D6 will automatically synchronize after connection, as shown in the figure below: Output Settings Click the Output Settings, and enter to the interface as follows: Output Setting, DE Setting, Test pattern are included in output settings, specific as follows: Output Setting Ph: / 45

17 Click the Output Setting, and pop-up window as follows: Output: Click the drop down arrows after the formats, and select the output resolution in the pull-down menus according to actual needs. Format: The width, height and frequency can be set if select Custom in PGM Format. Click Setting to confirm. Genlock: Enable or disable the genlock function by sliding the genlock switch. If select ON, the output resolution will be same with the resolution that selected. HDMI or BNC can be selected in Input Source by sliding the switch. Aux/Backups: Enable or disable the Aux/Backups function by sliding the Aux/Backups switch. If users select ON, with four AUX outputs enable to show four individual layers; enable the splitting in horizontal with four AUX outputs, also show a whole image; and enable the splitting in horizontal with 2 AUX outputs, and show PIP. Note Content on AUX is set only need once,all operation modes are the same AUX signal. DE Setting Click the DE Setting, and pop-up window as follows: Ph: support@rgblink.com 16 / 45


18 Brightness: The brightness adjustment range is between 0~128. Click Set to confirm. De: User can select one port or all ports, and enable the De function by sliding the De Switch. The settings for De include X, Y, width, height, line polarity and scene polarity. Vertical spliting can be selected in Output Port. Test Pattern Click the Test Pattern, and pop-up window as follows: Output: User can select any board among the four boards. Color Choice: TP, color bar and pure color can be selected. Color: If select Pure Color, red, green and blue can be adjusted, the adjustment range is between 0~255. Operation Mode Click the Operation Mode, and enter to the interface as follows: Ph: / 45
 Click the Preview Mode (4K2K), and enter to the interface as follows: Ph: +86 592 5771197 support@rgblink.com www.rgblink.com 18 / 45")
19 Preview Mode (4K2K), Split Mode, Presentation Mode(4K2K), Presentation Mode(4K1K), and Presentation Mode (8K1K) are included in operation mode, specific as follows: Preview Mode (4K2K) Click the Preview Mode (4K2K), and enter to the interface as follows: Ph: / 45


20 Signal List The signal list is shown as follows: It displays the input module type, the quantity of inputs and input format. Right click the input for the following settings: Change Name: Select New Name, and input the new name, click OK after setting. Ph: / 45

21 Refresh Signals: Right click the input and select Refresh Signals. If there is signal, it will show the input format, or it will show No Input. Set Input Property: Right click the input and select Input Property, it will enter to the interface as follows: Scale: Set the X, Y, width and height. Crop: Crop the left, top, width and height. Display Mode: Select Live or Freeze. Mirror: Enable or disable the mirror function, default OFF. Bypass Mode: Enable or disable the bypass mode. When select ON, the output format will be the same with the input format. Brightness: Set the brightness, the adjustment range is 0~100. Contrast: Set the contrast, the adjustment range is 0~100. Color Term: Set the color temp (red, green and blue), the adjustment range is 0~100. Reset: Select Reset, the input property will be recover to factory setting. Layer split/merge: Right click the input, select layer split/ layer merge. Set 4K signal source: Right click the input, select 4K, and pop-up window as follows: Ph: / 45

22 Click the OK, and pop-up window as follows: Choose Input Module and Work Mode and Input 1 Type, then click Set Switch on Backups In the Output Setting: sliding the switch to the left is Backups, and pop-up window as follows: Ph: support@rgblink.com 21 / 45

23 Click the Operation Mode, and enter to the interface as follows: Switch on Aux In the Output Setting: sliding the switch to the right is Aux, and pop-up window as follows: Ph: / 45

24 Click the Operation Mode, and enter to the interface as follows: Note Content on AUX is set only need once,all operation modes are the same AUX signal. Ph: / 45


25 Split Mode Click Operation Mode and Choose Split Mode Click on signal shortcut, It displays the input module type, the quantity of inputs and input format. Right click the input for the following settings: Change Name: Select New Name, and input the new name, click OK after setting. Set Input Property: Right click the input and select Input Property. Layer split/merge: Right click the input, select layer split/ layer merge. Set 4K signal source: Right click the input, select 4K, Choose Input Module and Work Mode and Input 1 Type, then click Set. Ph: support@rgblink.com 24 / 45

26 Refresh Signals: Right click the input and select Refresh Signals. If there is signal, it will show the input format, or it will show No Input. Setting EDID Capture Signal to Bank 1 as Modular 1,2,3 Ph: support@rgblink.com 25 / 45
 Click Operation Mode and Choose Presentation Mode (4K2K) Ph: +86 592 5771197")
27 Reset: Select Reset, the input property will be recover to factory setting. Presentation Mode (4K2K) Click Operation Mode and Choose Presentation Mode (4K2K) Ph: / 45

28 Signal List The signal list is shown as follows: It displays the input module type, the quantity of inputs and input format. Right click the input for the following settings: Change Name: Select New Name, and input the new name, click OK after setting. Ph: / 45

29 Refresh Signals: Right click the input and select Refresh Signals. If there is signal, it will show the input format, or it will show No Input. Set Input Property: Right click the input and select Input Property. Set 4K signal source: Right click the input, select 4K, Choose Input Module and Work Mode and Input 1 Type, then click Set. Layer split/merge: Right click the input, select layer split/ layer merge. Output Setting Click Monitor shortcut, it will enter the interface as follows: Quick split: Enable or disable the quick split mode by sliding the quick split switch and set H total, V total, Top Border, Bottom Border, Left Border, Righ Border, Row and Column. Presentation Mode(4K1K) Click Operation Mode and Choose Presentation Mode (4K1K) Ph: support@rgblink.com 28 / 45

30 Signal List The signal list is shown as follows: Ph: / 45
31 It displays the input module type, the quantity of inputs and input format. Right click the input for the following settings: Change Name: Select New Name, and input the new name, click OK after setting. Refresh Signals: Right click the input and select Refresh Signals. If there is signal, it will show the input format, or it will show No Input. Set Input Property: Right click the input and select Input Property. Set 4K signal source: Right click the input, select 4K, Choose Input Module and Work Mode and Input 1 Type, then click Set. Layer split/merge: Right click the input, select layer split/ layer merge. Output Setting Click Monitor shortcut. Enable or disable the quick split mode by sliding the quick split switch and set H total, V total, Top Border, Bottom Border, Left Border, Righ Border, Row and Column. Presentation Mode (8K1K) Click Operation Mode and Choose Presentation Mode (8K1K) Ph: support@rgblink.com 30 / 45


32 Ph: / 45

33 Signal List The signal list is shown as follows: It displays the input module type, the quantity of inputs and input format. Right click the input for the following settings: Change Name: Select New Name, and input the new name, click OK after setting. Refresh Signals: Right click the input and select Refresh Signals. If there is signal, it will show the input format, or it will show No Input. Set Input Property: Right click the input and select Input Property. Set 4K signal source: Right click the input, select 4K, Choose Input Module and Work Mode and Input 1 Type, then click Set. Layer split/merge: Right click the input, select layer split/ layer merge. Output Setting Click Monitor shortcut. Enable or disable the quick split mode by sliding the quick split switch and set H total, V total, Top Border, Bottom Border, Left Border, Righ Border, Row and Column. Ph: support@rgblink.com 32 / 45

34 Signal List The signal list is shown as follows: It displays the input module type, the quantity of inputs and input format. Right click the input for the following settings: Change Name: Select New Name, and input the new name, click OK after setting. Refresh Signals: Right click the input and select Refresh Signals. If there is signal, it will show the input format, or it will show No Input. Set Input Property: Right click the input and select Input Property. Set 4K signal source: Right click the input, select 4K, Choose Input Module and Work Mode and Input 1 Type, then click Set. Layer split/merge: Right click the input, select layer split/ layer merge. Output Setting Click Monitor shortcut. Enable or disable the quick split mode by sliding the quick split switch and set H total, V total, Top Border, Bottom Border, Left Border, Righ Border, Row and Column. EDID Click the EDID shortcut, and pop-up window as follows: Ph: support@rgblink.com 33 / 45


35 The special display project or LED display application would like to require special resolution settings to meet the requirement. Select the input or output board to read and write the EDID. As shown in the figure below: Sync Click the sync shortcut to synchronize the current data. Load Script Click the load script shortcut, user can load the data from the computer. Save Script Ph: / 45


36 Click the save script shortcut Factory Reset, user can save the data to the computer. Click the factory reset shortcut to reset to factory settings. Output Card Click the output card shortcut, and pop-up window as follows: Click any output, and pop-up window as follows: Ph: / 45

37 X, Y, width, height, rotate can be set. If click Advanced Setting, pop-up window as follow: In advanced setting, scale and crop can be set. Not recommended to use Advanced Setting. Page set Click the page set shortcut to load and save 16 banks in one page. Transition Click the page set shortcut to switch banks immediately. Shortcut Keys Click the shortcut, and pop-up window as follows: Ph: / 45


38 Use shortcut keys to operate fast and easily. Take The take interface is shown as the figure below: Set transition time, and the adjustment range is 0~10S. Slide the black out switch to enable or disable the black function. Auto take on is the default state. If select black out and auto take on, the preview image will black or seamless switch to LED display instantaneously. Click Cut or Take, the preview will be cut or seamless switch to LED display. Admin Click the Admin, and enter the interface as follows: Ph: / 45

39 Role management and rights management are included in access control, specific as follows: Role Management Click the Role Management, and pop-up window as follows: Add: Input the user name and password, and select the user type as Admin or Users, click Add after setting. Edit: Select the admin or users in user s list, then edit the password or user type, click Edit after setting. Ph: support@rgblink.com 38 / 45
40 Del: Select the admin or users in user s list, then click Del, the selected user will be deleted. Rights Management Click the Rights Management, and pop-up window as follows: Select the admin or users in user s list, then click the rights in Managements Detail. Click OK after setting. User can operate the rights that selected. User Info: Display all the Admin or Users list, double click it will unfold or fold the list. Management Details: The admin can manage all the admin users and users user. Admin users can manage all the users user, except the admin users. Users can not mange all the users, including admin user and users user. System Settings Click the System Settings, and enter the interface as follows: Ph: support@rgblink.com 39 / 45

41 Connect Setting, IP Settings, System information, Power On Setting/ Fan control, Factory Reset, and help are included in System Settings, specific as follows: Connect Settings Click the Connect Setting, and pop-up window as follows: Ph: / 45


42 Setting the D6 with XPOSE connecting ways: Serial Connect, Net Connect and Search by this configuration. IP Settings Click the IP Settings, and pop-up window as follows: Default Auto get ip address. Users can also set IP address, mask and gateway manually. This is usually used if one computer control some devices or remote control. It takes effect after reboot the XPOSE if change IP through network. System Information Click the System Information, and pop-up window as follows: Ph: / 45


43 Display the D6 version information. Including Model Number, Serial Number, IP Address, firmware version, etc. Power on setting Fan Control Click the Power On Setting Fan Control, and pop-up window as follows: Set the time-lapse recall time, Enable or disable the Auto Fan Control, set Fan Speed and click Set, that will load. Factory Reset Click the Factory Reset, and pop-up window as follows: Click OK, return to factory resetting. Ph: / 45

44 Click OK, and Restart. Ph: / 45
45 Contact Information Warranty: All video products are designed and tested to the highest quality standard and backed by a full 3 years parts and labor warranty. Warranties are effective upon delivery date to customer and are non-transferable. RGBlink warranties are only valid to the original purchase/owner. Warranty related repairs include parts and labor, but do not include faults resulting from user negligence, special modification, lighting strikes, abuse(drop/crush), and/or other unusual damages. The customer shall pay shipping charges when unit is returned for repair. Headquarter: S601~608 Weiye Building Torch Hi-Tech Industrial Development Zone Xiamen, Fujian Province, P.R.C Tel: Fax: Customer Hotline: Web: ~ ~ support@rgblink.com Ph: support@rgblink.com 44 / 45
VENUS X3 Quick Start
 VIEWSIZE THE WORLD VENUS X3 Quick Start Scalable videowall processing for large videowall with up to 8 displays or more Card frame videowall processing system available with 6 slots Integrates easily into
DXP D0808 Quick Start
 VIEWSIZE THE WORLD DXP D0808 Quick Start Support any in any out Support independent output switching Support hot backup Support infrared remote control Can read and store up to 24/36 user scenarios Automatically
TSH8 Quick Start VIEWSIZE THE WORLD
 VIEWSIZE THE WORLD TSH8 Quick Start Compatible with all kinds of sending cards, 8 install full-color LED sending card slot System integration, ingeniously designed, which adopts board pluggable structure
MSP 215 Quick Start VIEWSIZE THE WORLD. Extends HDMI at 1080p Full HD up to 360 feet (110. meters) over one CAT-6A and up to 200 feet (60 meters)
 over one CAT-6A and up to 200 feet (60 meters)") VIEWSIZE THE WORLD MSP 215 Quick Start Extends HDMI at 1080p Full HD up to 360 feet (110 meters) over one CAT-6A and up to 200 feet (60 meters) over one CAT-5e cable Extends HDMI at 4K x 2K (3840 x 2160
VIEWSIZE THE WORLD MSP 215 Quick Start Extends HDMI at 1080p Full HD up to 360 feet (110 meters) over one CAT-6A and up to 200 feet (60 meters) over one CAT-5e cable Extends HDMI at 4K x 2K (3840 x 2160
VX6s XI'AN NOVASTAR TECH CO., LTD. User Manual. All-in-One Video Controller. Document Version:
 VX6s All-in-One Video Controller Document Version: Document Number: V1.0.0 NS160100270 Copyright 2018 Xi an NovaStar Tech Co., Ltd. All Rights Reserved. No part of this document may be copied, reproduced,
XTOOL USER MANUAL. Article No: RGB-RD-UM-XTOOL E001 Revision No: V1.1
 XTOOL USER MANUAL Article No: RGB-RD-UM-XTOOL E001 Revision No: V1.1 CONTENTS CONTENTS...1 Chapter 1 Software Overview...1 Chapter 2 Installing Software... 2 Chapter 3 Using Software...7 3.1 Connection...
KRAMER ELECTRONICS LTD. USER GUIDE. Control Software for VP-728, VP-729, VP-730, VP-731. P/N: Rev 1
 KRAMER ELECTRONICS LTD. USER GUIDE Control Software for VP-728, VP-729, VP-730, VP-731 P/N: 2900-300091 Rev 1 Contents 1 Introduction 1 2 Installing the Control Software 2 2.1 Connecting the PC 5 3 Defining
Release Date Description V Release for the second time. New features: V First release Change History 1. Test Tool is a
 Rev: V3.1.0 Doc number: NS110000297 SmartLCT LED Display Configuration Software User Manual Release Date Description V3.1.0 2017-05-25 Release for the second time. New features: V3.0.0 2017-01-20 First
VWC2-H4 Series Video Wall Controller
 VWC2-H4 Series Video Wall Controller SPECIFICATIONS Version 2 DESIGN TOR (Tender of Reference) Structure Video wall controller shall be hardware based processing. Video wall controller front panel shall
VX6s XI'AN NOVASTAR TECH CO., LTD. All-in-One Video Controller. Specifications. Document Version: V Document Number: NS
 VX6s All-in-One Video Controller Document Version: V1.0.0 Document Number: NS160100264 Copyright 2018 Xi an NovaStar Tech Co., Ltd. All Rights Reserved. No part of this document may be copied, reproduced,
SPLITMUX-4X4-HDVWC 4x4 HDMI Multiviewer / Video Matrix Switch / Video Wall Processor Installation and Operation Manual
 SPLITMUX-4X4-HDVWC 4x4 HDMI Multiviewer / Video Matrix Switch / Video Wall Processor Installation and Operation Manual MAN307 3/27/18 4x4 HDMI Multiviewer/Video Matrix Switch/Video Wall Processor This
Quick Start Guide. Installation Summary
 Quick Start Guide Installation Summary These instructions can help you connect and operate the FS2 quickly. For additional details, please see the FS2 Installation and Operation Guide on the supplied DVD..
AV800HD (V1) Multi-Format Live Video Switcher
 Multi-Format Live Video Switcher") AV800HD 8 Multi-Format Channels with Independent Scalers Built-in Multiview with a Variety of Output Formats 1 ME, 10 Channels 8 AV Inputs 5 AV Outputs Features 48 AV inputs (4 Multi-Format HDMI and 4
AV800HD 8 Multi-Format Channels with Independent Scalers Built-in Multiview with a Variety of Output Formats 1 ME, 10 Channels 8 AV Inputs 5 AV Outputs Features 48 AV inputs (4 Multi-Format HDMI and 4
Quick Start Guide. Installation Summary
 Quick Start Guide Installation Summary These instructions can help you connect and operate the FS2 quickly. For additional details, please see the FS2 Installation and Operation Guide on the supplied DVD..
User Manual. Video Wall Processor HW DVI-I inputs and 12 DVI outputs Video Wall controller with Preview function. Version number: V1.11.
 User Manual Video Wall Processor HW81200 8 DVI-I inputs and 12 DVI outputs Video Wall controller with Preview function Version number: V1.11.2 Contents 1. Product Introduction... 1 2. Hardware Introduction...
Copyright 2017 Xi'an NovaStar Tech Co., Ltd. All Rights Reserved. No part of this document may be copied, reproduced, extracted or transmitted in any
 Product Version: Document Number: SmartLCT Screen Configuration Software V3.2.0 NS110100363 Copyright 2017 Xi'an NovaStar Tech Co., Ltd. All Rights Reserved. No part of this document may be copied, reproduced,
State of the art hyper-optimized video management platform designed for ease, speed and efficiency. Blackjack BOLT-LX
 Quick Start Guide State of the art hyper-optimized video management platform designed for ease, speed and efficiency. Blackjack BOLT Up to 16 2.1MP Cameras (1080p True HD Resolution) Blackjack BOLT-LX
RemoteManager Software
 RMS RemoteManager Software User Manual Contents of this user manual are protected under copyrights and computer program laws. Functions or configurations are subject to be changed or modified without prior
Video Decoder Setup Guide
 Package Content Video Decoder Setup Guide Inspect the packaging carton. Make sure the Video Decoder is properly delivered. Remove all items from the box and make sure the box contains the following items.
NVMS User Manual
 NVMS-1000 User Manual Contents 1 Software Introduction...1 1.1 Summary... 1 1.2 Operation Environment... 1 1.3 Install and Uninstall... 2 1.3.1 Install the Software... 2 1.3.2 Uninstall the Software...
USER MANUAL. Mac Version
 USER MANUAL Mac Version Contents 1 Software Introduction... 1 1.1 Summary... 1 1.2 Install and Uninstall... 1 1.2.1 Install the Software... 1 2 Login Software... 3 2.1 Login... 3 2.2 Control Panel Instruction...
AV KVM Over Fiber Matrix Switcher
 AV KVM Over Fiber Matrix Switcher User Manual Version 2017 V1 Contents Contents WELCOME 1 ABOUT THIS MANUAL 1 CAUTIONS AND NOTES 1 COPYRIGHT 1 TRADEMARKS 2 DISCLAIMER 2 INTRODUCTION 3 MATRIX DEVICE 3 FRONT
100XUSB-PRO. All in One HD USB3.0 Capture Box User s Guide. Rev /3/20. Copyright All Rights Reserved.
 http://www..com Electronic Modular Solutions Limited Kendal House, 20 Blaby Road, S. Wigston, Leics., LE18 4SB, England Tel: +44 (0) 116 2775730 Fax: +44 (0) 116 2774973 Email: sales@ems-imaging.com Web:
B-Works 2 User s Guide
 B-Works 2 User s Guide UMBWORKS 011413V1 Table of Contents 1. Introduction... 2 2. System Requirements... 2 3. Install B-Works 2... 3 4. Connection to the Hardware... 7 5. Start to Use B-Works 2... 7 6.
NVMS1000. User Manual
 NVMS1000 User Manual Contents 1 Software Introduction... 1 1.1 Summary... 1 1.2 Operation Environment... 1 1.3 Install and Uninstall... 2 1.3.1 Install the Software... 2 1.3.2 Uninstall the Software...
Copyright 2018 Xi an NovaStar Tech Co., Ltd. All Rights Reserved. No part of this document may be copied, reproduced, extracted or transmitted in any
 MCTRL R5 Independent Controller Product Version: Document Number: V1.0.1 NS110100550 Copyright 2018 Xi an NovaStar Tech Co., Ltd. All Rights Reserved. No part of this document may be copied, reproduced,
XI104XUSB. HD+ Quad A/V USB3.0 Capture Box User s Guide. Rev /9/10
 XI104XUSB HD+ Quad A/V USB3.0 Capture Box User s Guide Rev 1.0 2012/9/10 Content 1. Preface... 4 2 Minimum Hardware Configuration... 4 3. Recommended Hardware Configuration... 4 4. Software Requirement...
4CH Real Time DVR. User Guide INFORMATION MAY CHANGE WITHOUT NOTICE. Digital Video Recorder
 User Guide INFORMATION MAY CHANGE WITHOUT NOTICE. Table of Contents Caution... 4 Package Contents... 4 Introduction... 5 1. Product Overview...5 2. Front Panel...5 3. Rear Panel...6 4. IR Remote Controller
Live events staging. Media centers
 Christie Spyder X80 80 megapixel, true 4K@60Hz performance across multiple displays Auditoriums Control rooms Live events staging Post-production Broadcast studios Corporate lobbies Media centers Sports
Aurora Multi-image System Control Software. User Manual
 Aurora Multi-image System Control Software User Manual Product Information Model: Aurora Controller Software Version: V010200 Release Date: January 18th, 2017 Company OSEE TECHNOLOGY CO., LTD. Contact
NVMS User Manual. Version 2.1.0
 NVMS-1000 User Manual Version 2.1.0 Contents 1 Software Introduction... 1 1.1 Summary... 1 1.2 Operation Environment... 1 1.3 Install and Uninstall... 2 1.3.1 Install the Software... 2 1.3.2 Uninstall
700TSU INSTALLATION MANUAL
 M 700TSU INSTALLATION MANUAL 2 Table of Contents Features...03 Specifications...04 Quick-Start...05 Remote Control...07 Hardware Installation...10 Software Installation...14 Touch Screen Driver Installation
NVMS User Manual
 NVMS-1000 User Manual Contents 1 Software Introduction...1 1.1 Summary... 1 1.2 Operation Environment... 1 1.3 Install and Uninstall... 2 1.3.1 Install the Software... 2 1.3.2 Uninstall the Software...
RS-1260 Digital Signage Player
 RS-1260 Digital Signage Player User Manual V1.3 Legal Notice and Disclaimer Thank you for choosing RapidSignage products. This user manual provides a description of the Player relevant guidelines for key
Pro71600N3 NVR User Manual
 Pro71600N3 NVR User Manual User Information Admin User Name: Admin Password: IP Address: System Name: Table Of Contents 1. Menu Operation...4 1.1 Main Menu...4 2. Start & Shutdown System...5 2.1 Start
NVMS1000. User Manual
 NVMS1000 User Manual Contents 1 Software Introduction... 1 1.1 Summary... 1 1.2 Operation Environment... 1 1.3 Install and Uninstall... 2 1.3.1 Install the Software... 2 1.3.2 Uninstall the Software...
MX-5004MZ. User Manual. 4x1 HDMI 2.0a Quad-View Video Processor with 4K2K60 4:4:4. rev: Made in Taiwan
 MX-5004MZ 4x1 HDMI 2.0a Quad-View Video Processor with 4K2K60 4:4:4 User Manual rev: 160318 Made in Taiwan Safety and Notice The MX-5004MZ 4x1 HDMI 2.0a Quad-View Video Processor with 4K2K60 4:4:4 has
GV-IP Decoder Box Plus User s Manual
 GV-IP Decoder Box Plus User s Manual Before attempting to connect or operate this product, please read these instructions carefully and save this manual for future use. DBPV10-UM-A 2015 GeoVision, Inc.
Quick Reference. WindoWall Console. Menu Icons (Toolbar) Menu Bar
 Menu Bar") WindoWall Console Quick Reference Menu Icons (Toolbar) Menu Bar New Open Save Help New (Ctrl+N) Starts a new WindoWall project file. Open (Ctrl+O) Opens an existing WindoWall project. Save (Ctrl+S) Saves
WindoWall Console Quick Reference Menu Icons (Toolbar) Menu Bar New Open Save Help New (Ctrl+N) Starts a new WindoWall project file. Open (Ctrl+O) Opens an existing WindoWall project. Save (Ctrl+S) Saves
USB 3.0 Universal Dual Video Docking Station Installation Guide
 Introduction USB 3.0 Universal Dual Video Docking Station Installation Guide The USB 3.0 Universal Dual Video Docking Station is designed for a computer that has multiple connectivity demands. Features
OPERATION MANUAL. MV-410HS Layout Editor. Version higher. Command
 OPERATION MANUAL MV-410HS Layout Editor Version 3.0 - higher Command Command Table of Contents 1. Setup... 1 1-1. Overview... 1 1-2. System Requirements... 1 1-3. Operation Flow... 1 1-4. Installing MV-410HS
Screen management for Virtual Reality systems. Modular 4K and 3D stereo screen management
 Screen management for Virtual Reality systems Modular 4K and 3D stereo screen management 3D Image processing made easy Combining multiple 3D stereo and mono images onto one or multiple high resolution
Pro7804N1 NVR User Manual
 Pro7804N1 NVR User Manual Pro7804N1 User Manual BW R6.indd 1 User Information Admin User Name: Admin Password: IP Address: System Name: Table Of Contents 1. Menu Operation...4 1.1 Main Menu...4 2. Start
Statement Welcome to use the product from Xi an NovaStar Tech Co., Ltd. (hereinafter referred to as Novastar ). It is our great pleasure to offer this
. It is our great pleasure to offer this") Statement Welcome to use the product from Xi an NovaStar Tech Co., Ltd. (hereinafter referred to as Novastar ). It is our great pleasure to offer this manual to help you understand and use the product.
Statement Welcome to use the product from Xi an NovaStar Tech Co., Ltd. (hereinafter referred to as Novastar ). It is our great pleasure to offer this manual to help you understand and use the product.
GRAND IP VIDEO SERVER PRO. User s Manual INDEX
 INDEX GRAND IP VIDEO SERVER PRO Video & Audio Transmission/ iphone Web Browser Support User s Manual ISSUE:Mar 16, 2010 1. Package Contents.... 1 2. Introduction.... 1 3. System Requirements...... 1 4.
REACH HD Encoder ENC1200
 REACH HD Encoder ENC1200 V1.5 2012-01 Copyright Shenzhen Reach IT Co., Ltd. Shenzhen Reach IT Co., Ltd. provides full technical supports for the customers. If you have any inquiries, please contact the
MagicInfo VideoWall Author
 MagicInfo VideoWall Author MagicInfo VideoWall Author User Guide MagicInfo VideoWall Author is a program designed to construct a VideoWall layout and create VideoWall content by adding various elements
POWER. allows users to interface a third party control system with the devices on a VN Matrix network.
 The Extron VNM Enterprise Controller 00 is a dedicated control device for managing large VN-Matrix systems. The controller allows users to view, manage, and dynamically control multiple VN-Matrix systems
HLong Asia Industrial
 SDI DVR Stand alone digital video recorder HLong Asia Industrial Thank you for using the company's products! This manual describes only the host functions basic operation. Product design and specification
Atlona Manuals Software AMS
 AMS Atlona Manuals Software Version Information Version Release Date Notes 1 03/18 Initial release AMS 2 Welcome to Atlona! Thank you for purchasing this Atlona product. We hope you enjoy it and will take
Mviewtech Multi-Monitor Expansion Module User Manual
 Shanghai Mviewtech Co., Ltd www.mviewtech.com Mviewtech Multi-Monitor Expansion Module User Manual Multiple views, multiple lives Support email: support@mviewtech.com Shanghai Mviewtech Co., Ltd www.mviewtech.com
QPC80H2 Portable Visualizer. Quick Guide. This document is subject to change without notice.
 QPC80H2 Portable Visualizer Quick Guide This document is subject to change without notice. Contents Warnings... 1 Parts Identification... 2 Control Panel... 3 Remote Control... 4 Portable Visualizer...
User s Guide. XI200DE-HDMI Dual HD HDMI capture Card. Rev /04/08
 XI200DE-HDMI Dual HD HDMI capture Card User s Guide 2013/04/08 Rev 1.0 Copyright 2009-2010 All Rights Reserved. Nanjing Universal Networks Co. i Content 1 Preface... 3 2 Minimum Hardware Configuration...
XI100XE-PRO HD Capture Adapter
 XI100XE-PRO HD Capture Adapter User s Guide Rev 1.0 2012/11/28 Content 1. Preface... 4 2. Minimum Hardware Configuration... 4 3. Recommended Hardware Configuration... 4 4. System Requirements... 4 5. Hardware
SNMP Web Management. User s Manual
 SNMP Web Management User s Manual Suitable Product: SNMP Web Card SNMP Web Box Management Software for Uninterruptible Power Supply Systems Table of Contents 1. Overview... 1 1.1 Introduction... 1 1.2
VGA Recorder Install Guide
 Install Guide Lite Standard Lecture Recorder Pro www.epiphan.com 8 April 2010 Firmware Version 3.7.7 Thank you for choosing Epiphan! At Epiphan, product function and quality are our top priority. We make
Mobile DVR Record File Manager Software User s Manual
 Mobile DVR Record File Manager Software User s Manual Version 1.0.0 Table of Contents 1 General Introduction...4 1.1 Overview...4 1.2 General Performance...4 2 Installation...5 2.1 Installation Steps...5
MX User Manual. Dual-View Video Processor. rev: Made in Taiwan
 MX-5022 Dual-View Video Processor User Manual rev: 151210 Made in Taiwan Safety and Notice The MX-5022 Dual-View Video Processor has been tested for conformance to safety regulations and requirements,
FIRMWARE RELEASE NOTE
 Products VRC300 Date May 28 th, 2018 Version 5.01.02 The version (s) indicated here above has (have) been tested and validated by the Technical Support Department. Technical Notes: Important: Iterations
F Series Indoor Fixed IP Camera. Quick Start Guide
 F Series Indoor Fixed IP Camera Quick Start Guide Welcome Thank you for purchasing our IP camera! Before install and use the IP camera, please read the following section carefully. Please keep this start
Roland Pro A/V - V-60HD HD Video Switcher
 Page 1 of 11 Products Video Switchers Streaming Switchers Matrix Switchers Converters Field Recorders Accessories Digital Consoles Digital Snakes Personal Mixers Multi-Channel Playback/Record AV Playback/Record
User Manual rev: Made in Taiwan
 ivu9s-pro 12-Display / 9-Display 4K2K Video Wall Processor User Manual rev: 150409 Made in Taiwan The ivu9s-pro 12-Display / 9-Display 4K2K Video Wall Processor has been tested for conformance to safety
Pro7400H1 Hybrid DVR User Manual
 Pro7400H1 Hybrid DVR User Manual User Information Admin User Name: Admin Password: IP Address: System Name: Table Of Contents 1. Menu Operation... 4 1.1 Main Menu... 4 2. Start Up/Shutdown System... 5
Dolphin ebase. Communication Cradle for the Dolphin 9700 Mobile Computer. User s Guide
 Dolphin ebase Communication Cradle for the Dolphin 9700 Mobile Computer User s Guide Introduction The Ethernet Base (ebase) enables a single Dolphin 9700 computer to communicate with a host device over
DDR-08 DDR-16 Full D1 Realtime H.264 DVR 8 / 16 CH. Quick Setup Guide
 DDR-08 DDR-16 Full D1 Realtime H.264 DVR 8 / 16 CH. Quick Setup Guide PACKAGE CONTENTS A. One (1) DDR-08 / DDR-16 DVR B. One (1) Remote Controller C. Two (2) AAA Battery for Remote Controller D. One (1)
XI100XE-PRO HD Capture Adapter User s Guide
 XI100XE-PRO HD Capture Adapter User s Guide Rev 1.0 2012/11/28 http://www.magewell.com Content 1 Preface... 1 2 Minimum Hardware Configuration... 1 3 Recommended Hardware Configuration... 1 4 System Requirements...
SmartWatch Eco/Eco Compact
 SmartWatch Eco/Eco Compact Digital Video Recorders SmartWatch Eco SmartWatch Eco Compact Quick User Guide Index Box Contents...3 Front Panel Controls...4-5 SmartWatch Eco Compact...4 SmartWatch Eco...5
HP RP7 Installation Guide
 HP RP7 Installation Guide One Blue Hill Plaza, 16th Floor, PO Box 1546 Pearl River, NY 10965 1-800-PC-AMERICA, 1-800-722-6374 (Voice) 845-920-0800 (Fax) 845-920-0880 1 P a g e This document provides step-by-step
ARCHITECTURAL SPECIFICATIONS
 ARCHITECTURAL SPECIFICATIONS CORIOmaster Video wall processor CORIOmaster, CORIOmaster mini, and/or CORIOmaster micro (HDCP compliant - HDMI, DVI, VGA, Component, Composite, S-Video, SD-SDI, HD-SDI, 3G-
HVR LINE INSTALL GUIDE
 HVR LINE INSTALL GUIDE 4.9.07 HVR v2.4.1 455 E. Industrial Drive P.O. Box 94 Hartland, WI 53029 Technical Support: 262.369.8798 Sales & Service: 262.369.8797 efax: 312.602.1356 www.visioncontrols.net Basic
CLOVER 10 Handheld Video Magnifier User Guide. Rev G
 CLOVER 10 Handheld Video Magnifier User Guide Rev G Contents Precaution 1 Quick Start 3 Overview 3 Compositions 5 Accessories 8 Battery Charging 9 Stand 11 Operation 13 Power Button 13 Beep Type 14 Beep
Quick Start Guide GV-VMS
 Quick Start Guide GV-VMS Thank you for purchasing GV-VMS. This guide is designed to assist the new user in getting immediate results from the GV-VMS. For advanced information on how to use the GV-VMS,
From programming layouts to controlling live, T-ONE is intuitive and opens up a wide range of possibilities in new ways.
 Control Consoles Take control of large events with T-ONE, putting full power of control with the programmer and operator. T-ONE features an integrated 14in LCD touch screen front and centre, with an impressive
VMS-A1 Client Software. User Manual
 VMS-A1 Client Software User Manual Contents Contents... 2 Chapter1. Overview... 4 1.1 Description... 4 1.2 Features & Functions... 4 Chapter2. Update Info... 6 Chapter3. Starting VMS-A1... 7 3.1 Installing
LadibugTM Visual Presenter Image Software User Manual
 LadibugTM Visual Presenter Image Software User Manual 1 Contents 1. Introduction... 3 2. System requirement... 3 3. Install Ladibug TM... 4 3.1 In Windows XP/ Vista... 4 3.2 In Windows MAC... 6 4. Connection...
PIVOT CMS CLIENT SOFTWARE USER MANUAL
 PIVOT CMS CLIENT SOFTWARE USER MANUAL 1 CMS USER GUIDE 1.1 PC REQUIREMENT Recommended PC Requirement OS CPU VGA RAM HDD Graphics Card OS CPU VGA RAM HDD Windows Vista, 7 or higher Intel Core2Quad Q9400
Contents. 1.2 Software Installation... 1
 Software Manual Contents 1 Software Installation... 1 1.1 Overview...1 1.2 Software Installation... 1 2 Introduction To Basic Function...6 2.1 Login System... 6 2.2 CMS Operating Interface...6 2.2.1 Operating
XI104AE VGA+ 4 SD Signals+ Audio Capture Adapter. User s Guide. Rev /6/1
 XI104AE VGA+ 4 SD Signals+ Audio Capture Adapter User s Guide Rev 1.0 2012/6/1 http://www.magewell.com Content 1 Preface... 1 2 Minimum Hardware Configuration... 1 3 Recommended Hardware Configuration...
DSS Pro FAQ. Ver:
 DSS Pro FAQ Ver: 7.01.000 Contents 1 Installation and Deployment... 1 1.1 What kind of OS can install DSS Pro?... 1 1.2 What kind of performance of server can install DSS Pro?... 1 1.3 Browser Compatibility
YDEA C5 User Manual. Welcome to use products of YDEA! We are appreciated if our user. manual offers help and convenience to you when you are using or
 YDEA C5 User Manual Version: 2-0-5 Statement Respectable Users: Welcome to use products of YDEA! We are appreciated if our user manual offers help and convenience to you when you are using or learning
*Note that LL Studio can also work in Stand-alone mode with an SD card.
 PC System requirements: Operating System : Microsoft Windows XP / Windows Vista / Windows 7 / Windows 8 C.P.U : Intel Pentium IV at 2.0 GHz (or higher) Video Card : 128 MB VRAM Memory : 1 GB RAM Hard Disk
XI100XE HD Capture Adapter User s Guide
 XI100XE HD Capture Adapter User s Guide Rev 1.0 2011/11/03 http://www.magewell.com Content 1 Preface... 1 2 Minimum Hardware Configuration... 1 3 Recommended Hardware Configuration... 1 4 System Requirements...
EGE-VWC-UHD-104 HDMI 4K 1X4 Videowall Controller
 SAFETY AND NOTİCE The EGE-VWC-UHD-104 Processor has been tested for conformance to safety regulations and requirements, and has been certified for international use. However, like all electronic equipment,
NVR-0316 User s Manual 1 NVR User s Manual. Version 1.0.0
 NVR-0316 User s Manual 1 NVR-0316 User s Manual Version 1.0.0 2 NVR-0316 User s Manual Table of Contents Hardware... 4 Overview... 4 LED & Buttons Definitions... 4 Connect to the NVR... 5 Use NVR Search
IP Matrix Client Software WV-ASM970 (Ver2.0)
") IP Matrix Client Software WV-ASM970 (Ver2.0) Security & AV Systems Business Unit Panasonic System Networks Company What is WV-ASM970 Client software for WV-ASC970 system. Control and operate almost all
IP Matrix Client Software WV-ASM970 (Ver2.0) Security & AV Systems Business Unit Panasonic System Networks Company What is WV-ASM970 Client software for WV-ASC970 system. Control and operate almost all
DESCRIPTION Enter user name provided by ISP Enter password provided by ISP
 User name Password ICON Enter user name provided by ISP Enter password provided by ISP 4-5-2. HTTP 4-5-3. DDNS ICON Startup HTTP Check to enable HTTP server. Users can remotely access into the DVR over
32 x 32 Modular Matrix Switch
 32 x 32 Modular Matrix Switch The Modular Matrix Switch offers advanced access and real-time control of multiple local and remote A/V input devices and displays from a single chassis. The allows users
AV500HD. AV500HD All-in One AV Mixer. Features. 1ME 4 Channel 6 Inputs 4 Outputs Video 4-Mic/Line 4-Stereo Input Compact Mixer with DFX
 AV500HD 1ME 4 Channel 6 Inputs 4 Outputs Video 4-Mic/Line 4-Stereo Input Compact Mixer with DFX Features Video Switcher: 46 Multi-Format Inputs (4 DP/HDMI and SDI) 43 PGM Outputs (1 DP/HDMI, 1 SDI and
ST-HVR8704 ST-HVR8708 ST-HVR8716. Professional Digital Video Recorders QUICK START GUIDE
 ST-HVR8704 ST-HVR8708 ST-HVR8716 Professional Digital Video Recorders QUICK START GUIDE 1 Thank you for purchasing this SecurityTronix Hybrid Video Recorder! The documentation for this HVR comes in 2 formats;
Single DW-BJ1NAS4T DW-BJ1NAS6T DW-BJ1NAS8T DW-BJ1NAS10T
 Single DW-BJ1NAS4T DW-BJ1NAS6T DW-BJ1NAS8T DW-BJ1NAS10T Default login Information for Blackjack NAS Username : admin Password : admin1234 Tel: +1 (866) 446-3595 / (813) 888-9555 www.digital-watchdog.com
RMS RemoteManager Software
 RMS RemoteManager Software This is a brief manual for quick and convenient reference. Please refer to the User Manual contained in CD for details. Quick Manual 1 st Edition : 31 Mar 2009 The picture might
Software User Guide. DB-VRC Series 4K Video Wall Controller 11-AUG
 Software User Guide DB-VRC Series 4K Video Wall Controller 11-AUG-2016 www.digibirdtech.com 1 Introduction... 6 1.1 About this Guide... 6 1.2 About the DB-VRC SERIES Video Wall Controller... 6 1.3 Key
Installation. 5.) Click Next > when the following is displayed.
 Click Next > when the following is displayed.") 1 Installation 1.) Plug the Sign into an AC Outlet to turn on. 2.) Plug-in the USB Flash Drive (provided) to your Computer s USB Slot. (Wait a few second until it load) 3.) Open the USB Flash Drive & double
1 Installation 1.) Plug the Sign into an AC Outlet to turn on. 2.) Plug-in the USB Flash Drive (provided) to your Computer s USB Slot. (Wait a few second until it load) 3.) Open the USB Flash Drive & double
Encore Presentation System
 Encore Presentation System Complete Show Control The Encore Presentation System is the most advanced video processing and presentation control system on the market today. The system provides source selection,
VW-1404ZH. User Manual. 4-Display HDMI2.0a 4K 4:4:4 Video Wall Processor. rev: Made in Taiwan
 VW-1404ZH 4-Display HDMI2.0a 4K 4:4:4 Video Wall Processor User Manual rev: 170621 Made in Taiwan Safety and Notice The VW-1404ZH 4-Display HDMI2.0a 4K 4:4:4 Video Wall Processor has been tested for conformance
PureMedia PM Tools Installation & User Guide
 PureMedia PM Tools Installation & User Guide PureLink TM 535 East Crescent Avenue Ramsey, NJ 07446 USA Tel: +1.201.488.3232 Fax: +1.201.621.6118 E-mail: sales@purelinkav.com www.purelinkav.com For order
HP Notebook PCs - Keyboard and TouchPad or ClickPad Guided Troubleshooter
 HP Notebook PCs - Keyboard and TouchPad or ClickPad Guided Troubleshooter This document applies to HP notebook computers. The keyboard, TouchPad, or ClickPad on your laptop is not working as expected:
Quantum Videowall Processor Setup Guide
 ATTENTION OBSERVE PRECAUTIONS FOR HANDLG ELECTROSTATIC SENSITIVE DEVICES Product Category Quantum Videowall Processor Setup Guide The Extron Quantum Elite 615 and 408 and the Quantum Connect are multi-window
User manual. 1080p HDMI Extender over IP with PoE P2K-HRSL3E1/ P2K- P2K-HRSL3E1 / P2K-LHRS1E3 P2K-HRSL3E1-P / P2K-LHRS1E3-P
 User manual P2K-HL3E1 P2K-HL3E1-P 1080p HDMI Extender over IP 1080p HDMI Extender over IP with PoE P2K-HRSL3E1/ P2K- P2K-HRSL3E1 / P2K-LHRS1E3 P2K-HRSL3E1-P / P2K-LHRS1E3-P Partilink Technology Co., Ltd
Web management. How to access to the web management. Log into the web management via a laptop
 Web management Your InstaShow is equipped with the web management that enables you to configure its features through a browser such as Google Chrome, Internet Explorer, or Firefox. The features may vary