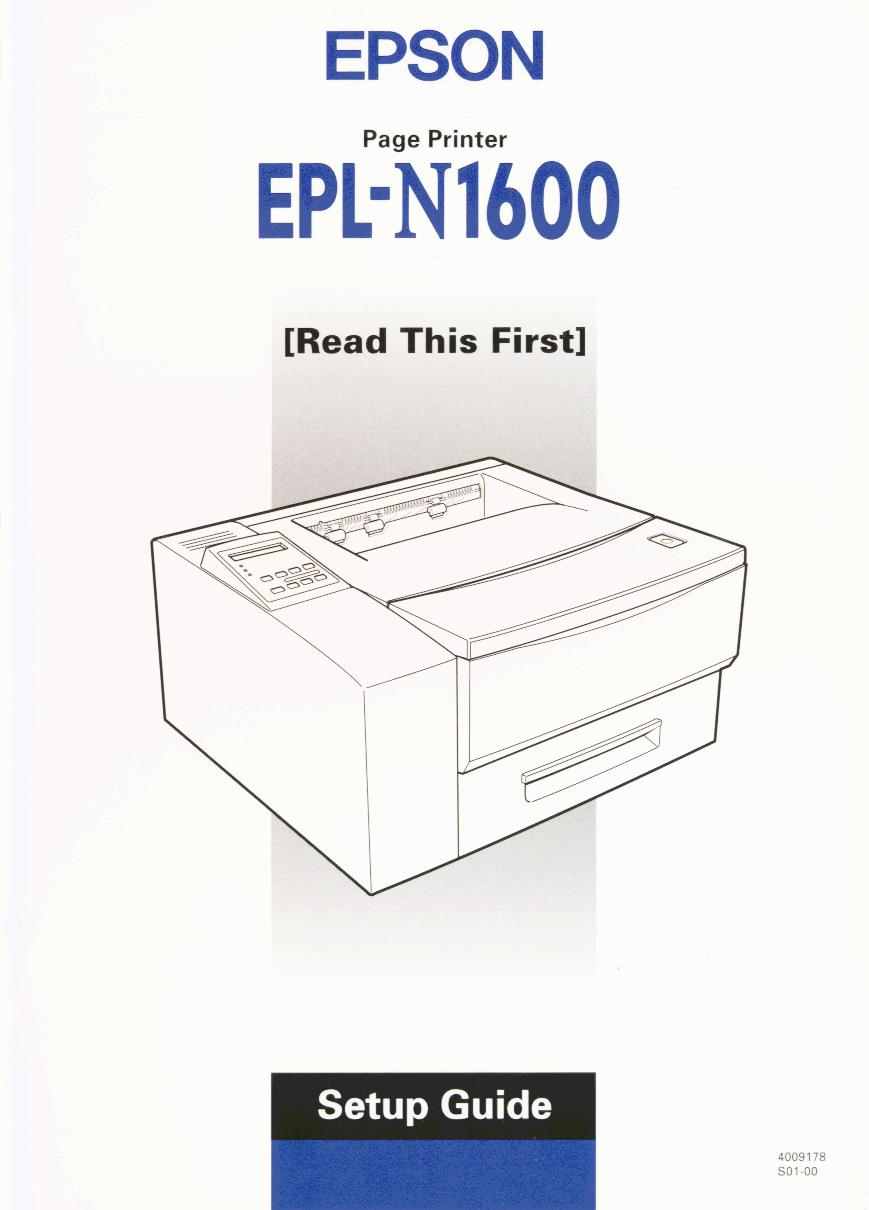
Printer Parts. printer cover. printer cover latch. MP Tray. control panel. lower cassette tray. transparent cover. Type-B interface connector (option)
|
|
|
- Abigail McGee
- 6 years ago
- Views:
Transcription
1
2 Printer Parts printer cover printer cover latch MP Tray control panel lower cassette tray transparent cover Type-B interface connector (option) Parallel interface connector Serial interface connector power switch AC inlet
3 Contents 1 Finding a Place for the Printer Unpacking Installing the Optional Duplex Unit Installing the Optional 500 Sheet Lower Paper Cassette Unit Installing the Imaging Cartridge Loading Paper Attaching the Power Cord Testing the printer Connecting the Printer to the Computer Installing the Printer Software Making Basic Driver Settings Accessing Online Help i
4 EPSON is a registered trademark of SEIKO EPSON CORPORATION. HP and LaserJet are registered trademarks of Hewlett-Packard Company. Microsoft, Windows, and MS-DOS are registered trademarks of Microsoft Corporation. General Notice: Other product names used herein are for identification purposes only and may be trademarks of their respective owners. EPSON disclaims any and all rights in those marks. Copyright 1998 by SEIKO EPSON CORPORATION, Nagano, Japan. ii
5 This booklet helps you set up your printer and begin printing quickly. If you need detailed information on printer use or if you have problems printing, see your Reference Guide. 1 Finding a Place for the Printer Place your printer close enough to the computer or workstation for the printer cable to connect easily. Leave adequate room around the printer to allow for easy operation and maintenance as well as sufficient ventilation. The diagram below shows the recommended amount of space. 180 mm 310 mm 270 mm 25 mm If you install the optional Duplex Unit (see "Installing the Optional Duplex Unit" on page 4), you will need to allow an additional 235 mm (9.3 inches) at the back of the printer. 1
6 c Caution: The printer is fitted with a ventilation fan on the right-hand side (the same side as the power switch). Make sure that this fan is not blocked when you position the printer. Avoid locations that are subject to direct sunlight, excessive heat, moisture, or dust. Place the printer where you can easily unplug the power cord. Avoid using an electrical outlet that is controlled by wall switches or automatic timers. Accidental disruption of power can wipe out valuable information in your computer's or printer's memory. Avoid using outlets on the same circuit as large motors or other appliances that might disturb the power supply. Keep the entire computer and printer system away from potential sources of interference, such as loudspeakers or the base units of cordless telephones. 2
7 2 Unpacking 1. Remove the accessories and printer from the shipping carton. c Warning: The printer weighs about 13 kg (about 29 lb) and should be lifted with care. Get another person to help you if necessary 2. Set the printer on a flat, stable surface. 3. Remove the packing material from the printer and its accessories and store for future use. 4. Make sure you have the items shown below, plus one CD- ROM containing a printer driver, and utility programs. Note: The shape of the AC power cord plug varies by country; be sure the plug included is the right shape for your location. 3
8 3 Installing the Optional Duplex Unit Note: This section is only for customers installing the optional duplex unit. If you are installing both the optional duplex unit and the optional 500 sheet lower paper cassette, you must install the duplex unit first before proceeding with the installation of the 500 sheet lower paper cassette. If you are installing the optional 500 sheet lower paper cassette and are not installing the optional duplex unit, turn to "Installing the Optional 500 Sheet Lower Paper Cassette Unit" on page 10. If you are not installing either the duplex unit or the lower paper cassette, turn to "Loading Paper" on page 21. The optional duplex unit allows you to print on both sides of a sheet of paper automatically. To install the duplex unit, follow the instructions below: 4
9 1. Unpack the parts of the duplex feeder, and place them on the stable surface where you will be installing the printer. Lift up the vertical unit so that it locks into the locking bar on the side of the horizontal unit, as shown below. 2. Remove the transparent cover attached to the rear of the printer. Insert the duplex chute into the body exit of the printer, and secure it with the two supplied clips. 5
10 3. Inside the vertical unit, you will find a metal bar. Use this bar to remove the plastic cover at the right of the body exit. When you have removed the plastic cover, store it together with the metal bar in the place in the vertical unit where you found the metal bar. 4. With the front of the printer towards you, grasp the sides of the printer. Line up the corners of the printer with the corners of the duplex unit and place the printer on the duplex unit. 6
11 w Warning: The printer weighs about 13 kg (about 29 lb). Take care when lifting it, and get another person to help you if necessary. There are three pins on top of the duplex feeder: two on the left and one on the right. These three pins fit into three corresponding holes on the bottom of the printer body for a secure fit. 5. Check that the printer is securely seated on top of the duplex unit. 7
12 6. Use the supplied clips to fasten the duplex unit to the printer and close the duplex unit s vertical unit. Make sure the clips are fastened securely. 7. Completely remove the paper cassette. Pull out the duplex unit feeder tray until you can see the two feeder joints at the front of the printer. 8
13 8. Use the supplied clips to fasten the duplex unit to the printer at the front. Make sure the clips are fastened securely. 9. Replace the duplex unit feeder tray and the paper cassette. 9
14 4 Installing the Optional 500 Sheet Lower Paper Cassette Unit Note: This section is for those users installing the optional 500 sheet lower paper cassette. If you are not installing the optional 500 sheet lower paper cassette, go on to "Installing the Imaging Cartridge" on page 17. Duplex Unit Installed If you have already installed the duplex unit, follow the instructions below. Otherwise, if you are installing the 500 sheet lower paper cassette without installing the duplex unit, turn to "No Duplex Unit Installed" on page 14. Note: If you are installing both the duplex unit and the 500 sheet lower cassette, you must install the duplex unit first. Turn to "Installing the Optional Duplex Unit" on page 4 and install the duplex unit if you have not yet done so. 1. Unpack the 500 sheet lower paper cassette and place it on the surface where the printer is to be installed. 10
15 2. Make sure the printer and cassette are facing the same direction. 3. Face the front of the printer. Pick it up using the grips on the duplex unit, as shown below. Note: There are three pins on top of the 500 sheet lower paper cassette: two on the left and one on the right. These three pins fit into three corresponding holes on the bottom of the duplex unit for a secure fit. c Caution: Do not attempt to lift the printer and duplex unit combination using the grips on the printer. Only use the grips on the duplex unit. The printer and duplex unit together weigh about 20 kg (about 43 lb). Take care when lifting them together and get another person to help you if necessary. 11
16 . 4. Lower the printer and duplex unit combination onto the 500 sheet lower paper cassette, taking care to line up the corners. Make sure that the printer and duplex unit are firmly seated. 5. Use the supplied clips to fasten the two joints at the rear of the printer (joining the duplex unit to the 500 sheet lower paper cassette). Make sure the clips are securely fastened. 12
17 6. Completely remove the duplex feeder tray and pull out the 500 sheet lower paper cassette until you can clearly see the two feeder joint areas on the duplex unit. 7. Use the supplied clips to fasten the two joints as shown below. Make sure the clips are fastened securely. 13
18 8. Push the 500 sheet lower paper cassette back in and replace the duplex feeder tray. You can now install the Imaging Cartridge. Turn to "Installing the Imaging Cartridge" on page 17. No Duplex Unit Installed If you have not installed the optional duplex unit, follow the instructions below to install the 500 sheet lower paper cassette. 1. Unpack the 500 sheet lower paper cassette and place it on the surface where the printer is to be installed. 2. Make sure the printer and cassette are facing the same direction. 14
19 . 3. Lift the printer and align the pins on the cassette with the holes on the bottom of the printer. w Warning: The printer weighs over 13 kg (about 29 lb). Take care when lifting the printer. If necessary, get someone to help you 4. Lower the printer until it rests securely on the cassette. 5. Fasten the two feeder joints at the rear of the printer securely, using the supplied clips 15
20 6. Remove the upper 250 sheet paper cassette completely from the printer, and pull out the lower 500 sheet paper cassette until you can see the front feeder joints. 7. Fasten the front feeder joints securely, using the supplied clips. c Caution: Always remove the optional 500 sheet lower paper cassette before lifting the printer. See Chapter 3 in the Reference Guide for instructions on how to remove the cassette. Never try to lift the printer with the 500 sheet lower paper cassette attached. 16
21 . 5 Installing the Imaging Cartridge c Caution: Do not turn the Imaging Cartridge upside down. Do not expose the Imaging Cartridge to light any longer than necessary. Do not open the drum s protective cover and avoid exposing the Imaging Cartridge to room light any longer than necessary. Overexposing the cartridge may cause abnormally dark or light areas to appear on the printed page and reduce the life of the cartridge. 1. Push the latch on the top right of the printer and open the printer cover all the way. 17
22 2. Open the silver-colored aluminized bag which contains the Imaging cartridge. Note: Save the bag in case you need to store the cartridge; if you move the printer in the future, for example. Never open the cartridge drum shutter. If you open the shutter, you will damage the photosensitive drum inside the cartridge. Do not expose the cartridge to direct sunlight or other strong light. Install the cartridge as quickly as possible, to avoid damaging the cartridge by over-exposing it to light. 3. While holding the Imaging cartridge as shown below, shake it seven or eight times to free and distribute the toner in the cartridge. 18
23 . 4. Set the cartridge on a clean, flat surface. Hold the cartridge down with one hand, and grasp the end tab of the sealing tape with the other hand. Pull the tape all the way out with firm, even pressure as shown. Note: If you pull the tab at an angle, rather than horizontally, you may break the tab. Always pull out the tab when the top of the cartridge is uppermost, as shown above. If you pull out the tab with the cartridge in any other orientation, you may damage the cartridge drum. 19
24 5. Hold the cartridge as shown below. Insert it into the printer guide channels until it clicks into place. To align the cartridge, use the colored markers on the left guide channel of the printer and on the cartridge itself. 6. Close the printer cover. 20
25 6 Loading Paper This section covers how to load paper using the standard 250 Sheet Paper Cassette Tray. For details of how to use the MP Tray or the optional 500 Sheet Lower Paper Cassette Unit, see your Reference Guide. To load paper in the 250 Sheet Paper Cassette Tray, folow the steps below. 1. Pull out the cassette tray by grabbing the handle and pulling it straight towards you. 21
26 . 2. Press down the plate in the cassette tray until it locks into position 3. Squeeze the side guide between your thumb and finger, and slide it to the far right. 22
27 4. Set the length of the cassette tray to match your paper. To lengthen the tray, slide guide A so that it matches the length of your paper, and then adjust guide B so that it matches the position of guide A. To shorten the tray, slide guide B so that it matches the length of your paper, and then adjust guide A so that it matches the position of guide B. 23
28 . 5. Fan a stack of paper (up to 250 sheets) to separate the sheets, and tap the edges of the stack on a flat surface to even up the edges. Insert this stack of paper into the cassette, lining it up with the left side of the cassette. Make sure that all sheets of the stack are under the metal retaining clip and the plastic tabs on the end guides. If you overload the cassette by putting too many sheets of paper in at one time, this can cause paper jams. 6. Slide the right side guide to the left so that it just touches the edge of the paper stack. 24
29 . 7. Replace the cassette tray into the printer. Note: Never remove the cassette tray while the printer is printing. If you do, paper jams may occur. By default, the printer is set up to print on A4 size paper. If you are printing on any other size of paper, you must change the printer s paper size setting. See "Making Basic Driver Settings" on page
30 7 Attaching the Power Cord 1. Make sure the printer is turned off. It is off when the O side of the power switch on the right side of the printer is pushed in. 2. Insert the power cord into the back of the printer. 3. Plug the other end of the power cord into a properly grounded electrical outlet. 26
31 8 Testing the printer To test whether the printer is set up correctly, print a status sheet. The status sheet contains information about the printer, including the current settings. Follow the steps below. 1. Make sure that: the cartridge is correctly installed. the printer cover is properly closed. there is paper in the cassette tray, and no paper is inside the printer mechanism. 2. Turn on the printer as shown below. 27
32 3. The printer warm up and several messages appear on the display as the printer performs tests. After about 45 seconds, and after a short while, the display will show Ready. Paper Source Page Size Manual Feed Orientation RITech Menu Copies MP Tray Size Toner Save Mode Item Value Enter Enter Continue Form Feed On Line Alt Reset 4. Make sure the On Line light is on. If it is not, press the On Line button. 5. Press the Enter button two times. The printer prints a status sheet, showing the current printer settings. If the status sheet does not print, or does not seem to be printed properly, you should check the following: The cassette tray is properly loaded with paper and is correctly installed in the printer (see "Loading Paper" on page 21). If the status sheet is faint or streaky (some areas are too dark and others are too light), the cartridge may not be installed properly, or toner may not be distributed evenly in the cartridge. Turn off the printer and reinstall the cartridge, as described in "Installing the Imaging Cartridge" on page 17 before printing another status sheet. If this does not solve the problem, contact your dealer. 28
33 9 Connecting the Printer to the Computer Your printer comes with two standard interface connectors: parallel and serial. To use the parallel interface, see the interface connection instructions below. To use the serial interface, follow the instructions below and substitute serial for parallel where appropriate. Your printer also has a room for an optional additional interface connector. See Chapter 3, Options, in the Reference Guide for more information on this and other options. 1. Make sure both the printer and the computer are off. 2. Connect the parallel cable to the printer s parallel connector, and secure the connector by squeezing the wire clips together until they lock in place on either side of the connector. Note: Use only a shielded, twisted-pair parallel cable. 3. Connect the other end of the cable to your computer, and fasten it as required. 4. Turn on the printer, and then turn on your computer. 29
34 10 Installing the Printer Software The CD-ROM that comes with your printer contains utility programs and a printer driver for Microsoft Windows 3.1, Windows 3.11 for Workgroups, Windows 95, 98, NT 3.51, and NT 4.0. After connecting the printer to your computer, install the printer driver. The printer driver is software that runs, or drives, your printer, translating the software s fonts, margin settings, etc. into commands that can be understood by the printer. With the driver software supplied with the printer, you can make settings such as paper size, paper source, and orientation. You can also refer to the printer driver's online help for detailed information about printer settings. Your computer must meet the following requirements in order to be able to use the Windows driver included with the printer: The computer must be running either Microsoft Windows 3.1, Windows for Workgroups (3.11), Windows 95, 98, and NT (3.51 or 4.0). 10 MB of free hard disk space 30
35 Installing the Printer Driver Follow these steps to install the printer driver: 1. Make sure the printer is turned off and Windows is running on your computer. 2. Insert the CD-ROM that comes with your printer into your CD-ROM drive (this is usually drive D). 3. If you are using Windows 3.1, Windows 3.11 for Workgroups or Windows NT 3.51, make sure the Program Manager window is open; then choose Run from the File menu. If you are using Windows 95, 98, and NT 4.0, click Start, then choose Run. 4. Type D:\EPSETUP (or E:\EPSETUP); then click OK (if the CD- ROM drive letter is not D, substitute the appropriate drive letter). 5. In the dialog box that appears, double-click Install Printer Driver; or you can also install by selecting Install Printer Driver and then clicking the arrow at the top right. 6. In the dialog box that appears, select EPSON EPL-N1600 Advanced and click OK. The printer driver is installed automatically. 7. When installation is complete, click OK. The printer driver is now installed on your computer. 31
36 Installing Screen Fonts Follow these steps to install the screen fonts: 1. Make sure Windows is running and the printer is turned off. 2. Insert the CD-ROM that comes with your printer into your CD-ROM drive D (or E) 3. If you are using Windows 3.1, Windows 3.11 for Workgroups or Windows NT 3.51, make sure the Program Manager windows is open; then choose Run on the File menu. If you are using Windows 95, 98, and NT 4.0, click Start, then choose Run. 4. Type D:\EPSETUP (or E:\EPSETUP); then click OK. 5. [Excluding Windows NT 3.51 users]: In the dialog box that appears, double-click Install Font Manager; or you can install by selecting Install Font Manager and then clicking the arrrow at the top right. [For Windows NT 3.51 users only]: In the dialog box that appears, double-click Install Screen Fonts; or you can install by selecting Install Screen Fonts and then clicking the arrow at the top right. 6. Follow the on-screen instructions. 7. When installation is complete, click OK. The screen fonts are now installed on your computer. 32
37 11 Making Basic Driver Settings Before you start printing, you should make sure that the driver settings match your document requirements. While many Windows applications override the printer settings made with the driver, some do not. Be sure to check the following: Paper The size of the paper loaded in the printer Orientation The direction of printing on the page (portrait or landscape) Print Quality The print resolution in dots per inch (dpi) Paper Source Auto Selection, MP Tray, Lower Cassette 1, or Lower Cassette 2 (if installed) Printer Memory The amount of memory installed in the printer (standard memory is 8 MB). 33
38 For Windows 95, 98, and NT 4.0 Users Follow these steps to make the required settings: 1. Click the Start button. 2. Point to Settings; then click Printers. 3. Right-click your printer icon and choose Properties (in Windows 95 and Windows 98) or Document Defaults (in Windows NT 4.0). Be sure to right-click the icon. 4. Click the Basic Settings tab. 5. Select the paper size you loaded in the printer from the Paper list. If you don't see your paper size on the list, use the arrow on the right to scroll through the list. 6. Select Portrait or Landscape orientation. The direction of printing on the diagram on the screen changes according to the orientation you select. 7. Select the resolution from Print Quality. 8. Select the paper source. Make any other settings you wish, and click OK when you are finished. 34
39 For Windows 3.1 and Windows 3.11 for Workgroups users Follow these steps to access the driver and make the required settings 1. In the Main window, double-click the Control Panel icon. 2. Double-click the Printers icon. 3. Make sure your printer is highlighted, and click the Setup button. 4. Select the paper size you loaded in the printer from Paper. If you don't see your paper size on the list, use the arrow on the right to scroll through the list. 5. Select Portrait or Landscape orientation. The printing direction of the screen illustration changes according to the orientation you select. 6. Select the resolution from Print Quality. 7. Select the paper source. Make any other settings you wish, and click OK when you are finished. 35
40 For Windows NT 3.51 Users Follow these steps to access the driver and make the required settings: 1. In the Main window, double-click the Control Panel icon. 2. Double-click the Printers icon. 3. Double-click your printer icon. 4. Select Properties from Printers menu. 5. Make sure your printer is selected and click the Setup button. 6. Select the paper source. 7. Select the paper size. Make any other settings you wish, and click OK when you are finished. 36
41 12 Accessing Online Help Your Windows printer driver has an extensive online help feature that includes detailed information and instructions on the driver settings. Online help will answer most of your questions about the driver. Note: Online help is not available for DOS applications. Accessing Online Help from the Windows Printer Driver To access online help from the printer driver, follow the instructions on page 37 to access the driver; then click the Help button at the bottom of the window that appears. Accessing Online Help from Windows Applications To access help from your application, open the File menu and choose Print or Print Setup. The click Printer, Setup, Options, or Properties (you may need to click a combination of these buttons) depending on the software you are using. Then click the? or Help button in the window that appears. 37
42 38
43 EPSON OVERSEAS MARKETING LOCATIONS EPSON AMERICA, INC Madrona Ave. P.O. Box 2842 Torrance, CA Phone: (800) Fax: (310) EPSON DEUTSCHLAND GmbH Zülpicher Straße 6, Düsseldorf Germany Phone: (0211) Fax: (0211) EPSON AUSTRALIA PTY. LTD. 70 GIBBES STREET, CHATSWOOD 2067 NSW. Phone: Fax: EPSON UK LTD. Campus 100, Maylands Avenue, Hemel Hempstead, Herts, HP2 7TJ, U.K. Phone: (+44) Fax: (+44) EPSON FRANCE S.A. 68 bis, rue Marjolin 92300, Levallois-Perret, France Phone: Telex: EPSON SINGAPORE PTE. LTD. No. 1 Temasek Avenue #36-00 Millenia Tower, Singapore Phone: (065) Fax: (065) EPSON HONG KONG LTD. Rooms , 47/F, China Resources Bldg., 26 Harbour Road, Wanchai, Hong Kong Phone: Fax: EPSON ITALIA S.p.A. V.le F.lli Casiraghi Sesto S.Giovanni MI, Italy Phone: Fax: SEIKO EPSON CORPORATION (Hirooka Office) 80 Harashinden, Hirooka Shiojiri-shi, Nagano-ken Japan EPSON TAIWAN TECHNOLOGY & TRADING LTD. 10F, No. 287 Nanking E. Road, Sec. 3, Taipei, Taiwan, R.O.C. Phone: (02) Fax: (02) EPSON IBERICA S.A. Av. de Roma, Cerdanyola del Valles Barcelona, Spain Phone: Fax: EPSON PORTUGAL, S.A. R. do Progresso, 471, 1º Perafita 4460 Matosinhos, Portugal Phone: (02) Fax: (02) February
44
EPSON ActionLaser Read This First. eepa POLLUTION PREVENTER
 EPSON ActionLaser 1400 Read This First eepa POLLUTION PREVENTER This booklet is to help you set up your printer and begin printing quickly. It also gives you instructions for routine maintenance. If you
EPSON. ActionLaser Read This First
 EPSON ActionLaser 1600 Read This First This booklet is to help you set up your printer and begin printing quickly. It also gives you instructions for routine maintenance. If you need detailed information
EPSON. Interface Card for LocalTaIk C82312* English Deutsch Français Español Italiano CO1-00
 EPSON Interface Card for LocalTaIk C82312* English Deutsch Français Español Italiano 4003467 CO1-00 All rights reserved. No part of this publication may be reproduced, stored in a retrieval system, or
Laser Printer WL-660 Series for Windows Quick Setup Guide
 Laser Printer WL-660 Series for Windows Quick Setup Guide First read this Quick Setup Guide to set up your printer and prepare your computer for the printer. CAUTION This printer has been designed specially
9-pin dot matrix printer
 9-pin dot matrix printer All rights reserved. No part of this publication may be reproduced, stored in a retrieval system, or transmitted in any form or by any means, electronic, mechanical, photocopying,
Printing Your First Page. Attaching the Paper Support. Plugging in the Printer. Checking the Printer
 Printing Your First Page Attaching the Paper Support Checking the Printer Plugging in the Printer Installing the Ink Cartridges Installing the Printer Software Connecting the Printer 4011307 XXX-00 Attaching
LBP-810 Laser Printer
 LBP-810 Laser Printer Getting Started Guide IMPORTANT: Read this manual carefully before using your printer. Save this manual for future reference. Copyright Copyright 2001 Canon Inc. All information in
Unpack the machine and its components. Cassette/Multi-purpose tray
 Set-Up Sheet Thank you for purchasing the Canon imageclass D320. To get your machine ready for use, please follow the instructions in this Set-Up Sheet before referring to any other documentation. Unpack
Installing the Printer Software
 4 Printing Your First Page Attaching the Paper Support 7 1 Checking the Printer 6 2 Plugging in the Printer 3 Installing the Ink Cartridges 5 Installing the Printer Software Connecting the Printer 4012581-00
Chapter 1 - Introduction and Installation ScreenWriter 4 Printer
 Chapter 1 - Introduction and Installation ScreenWriter 4 Printer Fig. 1.1 ScreenWriter 4 Printer The ScreenWriter 4 is designed for high-end silk-screen and graphics applications. Standard density and
Xerox Corporation 701 S. Aviation Boulevard El Segundo, CA by Xerox Corporation. All rights reserved Copyright protection claimed includes
 Xerox Corporation 701 S. Aviation Boulevard El Segundo, CA 90245 1994 by Xerox Corporation. All rights reserved Copyright protection claimed includes all forms and matters of copyrightable material and
Epson SureColor F6070 Setup Guide
 Epson SureColor F6070 Setup Guide 2 Unpacking and Assembling the Printer Read all of these instructions before using your printer. Also be sure to follow all warnings and instructions marked on the printer
Changing the Size of the Paper in the Paper Tray For Local Printing For Network Printing (WorkCentre PE120i only)...1.
...1.") Quick Start Guide CONTENTS Step 1: Unpacking... 1.3 Step 2: Installing the Toner Cartridge... 1.5 Step 3: Loading Paper... 1.7 Changing the Size of the Paper in the Paper Tray.. 1.9 Step 4: Connecting
Quick Start Guide CONTENTS Step 1: Unpacking... 1.3 Step 2: Installing the Toner Cartridge... 1.5 Step 3: Loading Paper... 1.7 Changing the Size of the Paper in the Paper Tray.. 1.9 Step 4: Connecting
2 Your printer. To get up and running with your. EPSON Stylus COLOR 850, you ll need to: Set up the printer
 Copyright 1998 by Epson America, Inc. To print this image, see step 3 in your Start Here guide for step-by-step instructions. Be sure to use the EPSON Photo Quality Glossy Paper found in your free EPSON
Set-Up Instructions. Set-Up Instructions. Unpack the machine and its components.
 Set-Up Instructions Thank you for purchasing the Canon FAXPHONE L80. To get your machine ready for use, please follow the instructions in this document before referring to any other documentation. Unpack
Start Here. Unpack. 1 Make sure you have these items: 2 Remove all the packing materials and tape.
 Epson Stylus Pro 3880 Start Here Unpack 1 Make sure you have these items: Printer Power cord CD-ROM User's Guide Ink cartridges Rear sheet guide Limited Warranty Warning: The printer weighs about 43 pounds
00-Cover&Contents 7/16/99 7:37 PM Page 1. LASER PRINTER ML-5000A Setup Guide
 00-Cover&Contents 7/16/99 7:37 PM Page 1 LASER PRINTER ML-5000A Setup Guide 01-Setup 7/20/99 9:25 AM Page 2 Control Locations and Functions Front View Automatic Paper Feeder Holds 150 sheets of paper.
Hard Disk Drive (HDD) Data Protection Kit Installation Instructions
 Data Protection Kit Installation Instructions") Hard Disk Drive (HDD) Data Protection Kit Installation Instructions 59399801 2009 by Oki Data Americas, Inc. All rights reserved. Disclaimer Every effort has been made to ensure that the information in
Hard Disk Drive (HDD) Data Protection Kit Installation Instructions 59399801 2009 by Oki Data Americas, Inc. All rights reserved. Disclaimer Every effort has been made to ensure that the information in
ES1624 MFP Setup and Installation Guide
 ES1624 MFP Setup and Installation Guide Installation Overview Notes, Cautions, and Warnings...4 Select Location...4 Checking Package Contents...4 Scanning Unit... 4 Printing Unit... 4 Setting Up the Printing
Installation Guide. English. HP LaserJet 5, 5M and 5N Printer Duplex Printing Accessory (C3920A)
") Installation Guide English HP LaserJet 5, 5M and 5N Printer Duplex Printing Accessory (C3920A) Copyright Hewlett- Packard Company 1996 All Rights Reserved. Reproduction, adaptation, or translation without
Installation Guide English HP LaserJet 5, 5M and 5N Printer Duplex Printing Accessory (C3920A) Copyright Hewlett- Packard Company 1996 All Rights Reserved. Reproduction, adaptation, or translation without
DOT MATRIX PRINTER SP6000 SERIES
 DOT MATRIX PRINTER SP6000 SERIES Hardware Manual < Approval: CEL > Trademark acknowledgments SP6000 : Star Micronics Co., Ltd. Notice All rights reserved. Reproduction of any part of this manual in any
Reference Guide. Laser Printer
 Laser Printer All rights reserved. No part of this publication may be reproduced, stored in a retrieval system, or transmitted in any form or by any means, mechanical, photocopying, recording, or otherwise,
HP LaserJet 8100, 8100 N, and 8100 DN Printers Getting Started Guide. English
 HP LaserJet 8100, 8100 N, and 8100 DN Printers Getting Started Guide English HP LaserJet 8100, 8100 N, and 8100 DN Printers Getting Started Guide Copyright Hewlett-Packard Company 1998 All Rights Reserved.
Setup Guide. Confirming the Installation Space. Installation space (W x D x H) 70.5 x 66.3 x 61.5 inches (1790 x 1684 x 1560 mm) 23.
 70.5 x 66.3 x 61.5 inches (1790 x 1684 x 1560 mm) 23.") Introductory Information Setup Guide ENGLISH Read this manual before attempting to operate the printer. Keep this manual in a handy location for future reference. Caution Instructions in this Setup Guide
Introductory Information Setup Guide ENGLISH Read this manual before attempting to operate the printer. Keep this manual in a handy location for future reference. Caution Instructions in this Setup Guide
FCC COMPLIANCE STATEMENT FOR AMERICAN USERS
 FCC COMPLIANCE STATEMENT FOR AMERICAN USERS This equipment generates and uses radio frequency energy and if not installed and used properly, that is, in strict accordance with the manufacturer s instructions,
LN17 and LN17ps Printers Setting Up Guide
 ksu-titl Page 1 Monday, April 7, 1997 8:04 PM LN17 and LN17ps Printers Setting Up Guide Order Number: EK LN17P IN. A01 Digital Equipment Corporation Maynard, Massachusetts ksu-titl Page 2 Monday, April
Daily Use Guide Daily Use Guide
 Daily Use Guide Daily Use English Where to Find Information........................ 2 Safety Instructions.............................. 4 Important Safety Instructions........................... 4 A Few
C935 Series. Maintenance Guide
 C935 Series Maintenance Guide April 2007 www.lexmark.com Contents...3 Cleaning the exterior of the printer...3 Storing supplies...3 Conserving supplies...3 Checking the status of supplies...4 Checking
Remove the accessory tray and check the contents. Toner cartridges (1 each: black, magenta, cyan, yellow)
") Overview 1 2 3 4 5 6 7 8 9 10 11 Unpack... 1 Install the Toner Waste Box... 4 Install the Oil Roller... 5 Prepare the Image Drums... 6 Install the Toner Cartridges... 7 Load paper... 8 Connect to Your
Overview 1 2 3 4 5 6 7 8 9 10 11 Unpack... 1 Install the Toner Waste Box... 4 Install the Oil Roller... 5 Prepare the Image Drums... 6 Install the Toner Cartridges... 7 Load paper... 8 Connect to Your
X940e, X945e. Maintenance Guide
 X940e, X945e Maintenance Guide July 2010 www.lexmark.com Contents...3 Storing supplies...3 Checking the status of supplies...3 Checking the status of supplies from the control panel... 3 Printing a menu
Quick Setup Guide MFC-8440
 Quick Setup Guide MFC-8440 MFC-8840D MFC-8840DN Before you can use the MFC, you must set up the hardware and install the driver. Please read this Quick Setup Guide for proper set up and installation instructions.
Setup Guide. Overview Check Contents. ➊ Printer ➋ Toner ➌ Power Cord
 1 Setup Guide Overview Check Contents ➊ ➊ Printer ➋ Toner ➌ Power Cord ➍ CD ➏ ➎ Light-Shield Bag (to protect image drum from light when it is removed from printer) ➏ Setup Guide, Warranty and Regulatory
Quick Setup Guide Imagistics ix 2701
 Quick Setup Guide Imagistics ix 2701 Before you can use the machine, you must set up the hardware and install the driver. Please read this Quick Setup Guide for proper set up and installation instructions.
I Claudius. (The steps can vary between software applications.
 I Claudius. (The steps can vary between software applications. I Claudius >>>DOWNLOAD LINK
Quick Reference. Understanding the Operator Panel. Understanding the operator panel lights. Quick Reference
 Quick Reference Understanding the Operator Panel The printer operator panel has two buttons and two lights. Lights indicate the status of the printer. Buttons are used to continue or cancel the current
LASERJET ENTERPRISE M604, M605, M606
 LASERJET ENTERPRISE M604, M605, M606 Maintenance kit replacement manual M604n M604dn M605x M605n M605dn M606x M606dn Conventions used in this guide TIP: Tips provide helpful hints or shortcuts. NOTE: Notes
Quick Reference Manual
 Quick Reference Manual 100-100578 Trademarks XANTÉ is a registered trademark of XANTÉ CORPORATION. Adobe ; Adobe PageMaker ; Adobe PostScript, the PostScript, and Adobe logos are registered trademarks
Quick Setup Guide MFC-8220
 Quick Setup Guide MFC-8220 Before you can use the MFC, you must set up the hardware and install the driver. Please read this Quick Setup Guide for proper set up and installation instructions. Step 1 Step
Getting Started. Read Me First. series. Canon Inkjet Premium Photo Printer. 1 Preparation...P.1. Install the Print Head... P.3
 Canon Inkjet Premium Photo Printer series 1 Preparation...P.1 Getting Started Read Me First Symbols Used in This Document Prohibited actions. Instructions including important information. In this guide,
3 Sleep button Enable Sleep mode or Hibernate mode. Notes:
 Quick Reference Use the To 3 Sleep button Enable Sleep mode or Hibernate mode. Indicator light color and its corresponding printer status Indicator light Printer status Off The printer is off or in Hibernate
Quick Start Guide. Chapter 1 : Setting the Machine. Unpack the machine and its components. Check that you have the following: Machine
 Quick Start Guide READ THIS FIRST Thank you for purchasing Canon Color imageclass MF8180c. To get your machine ready for use, please follow the instructions in this document before referring to any other
Product Parts Front view... 2 Rear view... 2 Inside the product... 3 Scanner parts... 3 Control panel... 4
 Table of Contents Product Parts Front view................................................................. 2 Rear view.................................................................. 2 Inside the product...........................................................
Printed on recycled paper with at least 10% post-consumer content. Setup Guide
 Printed on recycled paper with at least 10% post-consumer content Setup Guide All rights reserved. No part of this publication may be reproduced, stored in a retrieval system, or transmitted in any form
Installation Manual for B8300 and Its Peripheral Devices
 Installation Manual for B8300 and Its Peripheral Devices Finishing device Duplex/bypass device Finishing device To install the devices efficiently, follow the procedure below. Some peripheral devices may
Fujitsu Stylistic ST4000 Series TABLET DOCK USER S GUIDE
 Fujitsu Stylistic ST4000 Series TABLET DOCK USER S GUIDE DECLARATION OF CONFORMITY according to FCC Part 15 Responsible Party Name: Fujitsu PC Corporation Address: 5200 Patrick Henry Drive Santa Clara,
Getting Started. Read Me First. series. Photo Printer
 Photo Printer series Getting Started Read Me First Make sure to read this manual before using the printer. Please keep it in hand for future reference. Symbols Used in This Document Instructions including
INSTALLATION MANUAL. I. Outline of installation procedures. d-color MF201. Applied Machine: d-color MF201 PC-105. Machine DF-612
 d-color MF201 INSTALLATION MANUAL Be sure to correctly follow the procedures in order as explained in this installation manual. If you do not follow the procedure in order, the image trouble
timex garmin speed distance system manual
 Timex garmin speed distance system manual. You can print the first page on labels Only use labels recommended for laser. 3 Select the correct card size in single sheet paper input tray first. Timex garmin
Lexmark X203n and X204n Series. Maintenance Guide
 Lexmark X203n and X204n Series Maintenance Guide February 2011 www.lexmark.com Contents...3 Cleaning the exterior of the printer...3 Cleaning the scanner glass...4 Cleaning the ADF separator rollers...5
Quick Reference Manual
 Quick Reference Manual 100-100555 Trademarks XANTÉ is a registered trademark of XANTÉ CORPORATION. Adobe ; Adobe PageMaker ; Adobe PostScript, the PostScript, and Adobe logos are registered trademarks
MICROLINE 320/390FB User Manual (English)
") MICROLINE 320/390FB User Manual (English) MICROLINE 320/390FB User Manual (English) English Table of Contents Note to Customers... E-2 Important Safety Instructions... E-3 Important Wiring Instructions...
MICROLINE 320/390FB User Manual (English) MICROLINE 320/390FB User Manual (English) English Table of Contents Note to Customers... E-2 Important Safety Instructions... E-3 Important Wiring Instructions...
Quick Reference Guide. ineo 3301P
 ineo 3301P Contents 1 Learning about the printer... 3 Using the printer control panel... 3 Understanding the colors of the Sleep button and indicator lights... 4 Setting the paper size and type... 5 Configuring
User Guide. Set Up & Start Up Basic Copier Operations Key Operator Functions
 User Guide Set Up & Start Up Basic Copier Operations Key Operator Functions Toshiba America Business Solutions, Inc. 2006 Training and Dealer Development SET UP & START UP Turning the System On Turning
Loading paper and specialty media Learning about the printer. Stop all printer activity. 7 Back button Return to the previous screen.
 Quick Reference Use the 6 Stop or Cancel button To Stop all printer activity. Loading paper and specialty media Learning about the printer Using the printer control panel 0 Use the 9 To Display View the
Tower to Rack and Rack to Tower System Conversion Guide
 Tower to Rack and Rack to Tower System Conversion Guide HP Workstation zx6000 HP Server rx2600 Manufacturing Part Number : A7857-90017 Edition E0802 Copyright 2002 Hewlett-Packard Company. Legal Notices
Windows is a registered trademark of Microsoft in the U.S. and other countries.
 User s Guide First Edition (February 1999) The following paragraph does not apply to any country where such provisions are inconsistent with local law: LEXMARK INTERNATIONAL, INC. PROVIDES THIS PUBLICATION
Laser Beam Printer. User's Guide
 Laser Beam Printer User's Guide Contents Turning the Printer ON/OFF (For 5910/5910F).......................... 3 Turning the Printer ON.................................................. 3 Turning the Printer
Manuales intelisis. Verify that characters are improperly formed on alcohol, and then scrub the roller. Try printing with new paper.
 Manuales intelisis. Verify that characters are improperly formed on alcohol, and then scrub the roller. Try printing with new paper. Manuales intelisis >>>DOWNLOAD LINK
Xanté is a registered trademark of Xanté Corporation.
 Xanté is a registered trademark of Xanté Corporation. Adobe ; Adobe PageMaker ; Adobe PostScript, the PostScript, and Adobe logos are registered trademarks of Adobe Systems Incorporated. Adobe Acrobat
Printer Parts. paper guide. edge guide. paper path guide. paper separator. printer cover. paper release lever. front paper guide. knob.
 Printer Parts paper guide edge guide paper path guide printer cover front paper guide paper separator paper release lever control panel knob paper thickness lever shield plate ribbon cartridge parallel
Windows is a registered trademark of Microsoft in the U.S. and other countries.
 User s Guide First Edition (February 1999) The following paragraph does not apply to any country where such provisions are inconsistent with local law: LEXMARK INTERNATIONAL, INC., PROVIDES THIS PUBLICATION
Quick Start Manual. Color Image Scanner
 Color Image Scanner EN All rights reserved. No part of this publication may be reproduced, stored in a retrieval system, or transmitted in any form or by any means, electronic, mechanical, photocopying,
Lexmark X642 Troubleshooting Guide
 Lexmark X642 Troubleshooting Guide Online technical support Technical support is available on our Lexmark Web site at www.lexmark.com. Checking an unresponsive printer If the printer is not responding,
FCC COMPLIANCE STATEMENT FOR AMERICAN USERS
 FCC COMPLIANCE STATEMENT FOR AMERICAN USERS This equipment has been tested and found to comply with the limits for a class B digital device, pursuant to Part 15 of the FCC Rules. These limits are designed
TABLET DOCK USER S GUIDE
 Fujitsu Stylistic ST Series Tablet PC TABLET DOCK USER S GUIDE Warning Handling the cord on this product will expose you to lead, a chemical known to the State of California to cause birth defects or other
Lexmark Z51. Color Jetprinter. User s Guide for OS/2
 Lexmark Z51 Color Jetprinter User s Guide for OS/2 First Edition (October 1998) The following paragraph does not apply to any country where such provisions are inconsistent with local law: LEXMARK INTERNATIONAL,
Learning about the printer...5. Loading paper and specialty media...9
 Quick Reference Contents Learning about the printer...5 Using the printer control panel...5 Understanding the printer control panel light sequences...6 Loading paper and specialty media...9 Setting the
Getting Started. Read Me First. series. Photo Printer
 Photo Printer series Getting Started Read Me First Make sure to read this manual before using the printer. Please keep it in hand for future reference. Contents 1 Preparation 2 Turn the Power On 3 Install
ScanPartner 600C Image Scanner. User s Manual
 ScanPartner 600C Image Scanner User s Manual Version 1.0 (Doc. No. 250-0062-0) Table of Contents 1. INTRODUCTION 3-4 2. INSTALLATION AND CONNECTIONS. 5-13 2.1 Shipping Bracket 5 2.1.1 Removing the Shipping
Microline 420/421 & 490/491
 Check the contents: 1. Printer 2. Ribbon cartridge 3. Power Cable 4. CD with drivers and online User Guide 5. Setup Guide 2 1. 2. 1. Grasp tabs (1) and open access cover (2). 2. Remove printhead shipping
Start Here. All-in-One Printer. Print Copy Scan
 Start Here All-in-One Printer Print Copy Scan Note: A USB 2.0 cable is required to connect your Kodak All-in-One printer to your Windows or Macintosh OS computer. Available in the Kodak online store or
Lexmark E320/E322. User s Reference. April
 Lexmark E320/E322 User s Reference April 2001 www.lexmark.com Table of contents Chapter 1: Printer overview... 5 About your printer... 5 Chapter 2: Using the operator panel... 7 Chapter 3: Canceling a
RP-U420. Using this online operator s guide. Operator s Manual
 RP-U420 Operator s Manual Using this online operator s guide The words on the left side of this screen are bookmarks for all the topics in this guide. Use the scroll bar next to the bookmarks to find any
Loading paper into the printer Paper Printers, highlight the printer, and then click. CAUTION Attempting to print on paper that Options, you can
 Celeb - Robin Tunney topless in Supernova.avi. 500 E-28230 Las Rozas, Madrid Phone (34) 10483 Phone (886) (02) 717-0055 FAX (886) Hewlett-Packard Sverige AB Skalholtsgatan 9 S-164 97 Kista Phone (46) (8)
HARMONi G3. Quick Start Guide for HARMONi G3. imac Processor/FireWire Upgrade
 HARMONi G3 imac Processor/FireWire Upgrade imac and Operating System Compatibility The HARMONi G3 imac processor/firewire upgrade is compatible only with imac 233, 266, and 333 MHz models (Revisions A-D);
9 Start button Start a job, depending on which mode is selected. 10 Fax button Send faxes. 11 Back button Return to the previous screen.
 Quick Reference Use the To 9 Start button Start a job, depending on which mode is selected. > Settings > > Paper Menu > > Paper Size/Type > Learning about the printer Using the printer control panel 10
Safety Instructions...3
 Safety Instructions.....3 Setting Up Your Printer.....7 System Requirements..... 7 Printer Parts and Control Panel Functions.... 10 Attaching the Paper Support.... 12 Plugging in the Printer.... 12 Installing
6 Removal and replacement
 6 Removal and replacement This chapter contains information about the following topics: Removal and replacement strategy User-replaceable parts Covers and external components Main assemblies Motors and
HP Deskjet F2100 All-in-One series. Basics Guide
 HP Deskjet F2100 All-in-One series Basics Guide Hewlett-Packard Company notices The information contained in this document is subject to change without notice. All rights reserved. Reproduction, adaptation,
Quick Reference. ineo 3300P
 ineo 3300P Contents 1 Learning about the printer... 3 Using the printer control panel... 3 Understanding the printer control panel light sequences... 4 2 Loading paper and specialty media... 9 Setting
Before you can use the machine, you must set up the hardware. Please read this Quick Setup Guide for the correct setup procedure.
 FAX-2480C Quick Setup Guide Before you can use the machine, you must set up the hardware. Please read this Quick Setup Guide for the correct setup procedure. Setting Up the Machine Setup is Complete! Keep
T420. Setup Guide. June
 T420 Setup Guide June 2002 www.lexmark.com Edition: June 2002 The following paragraph does not apply to any country where such provisions are inconsistent with local law: LEXMARK INTERNATIONAL, INC., PROVIDES
Where to Find Information
 Where to Find Information Unpacking Guide Provides you with information and instructions on how to unpack and place the printer. Before using the printer, you need to remove all protective materials as
Before you can use the machine, you must set up the hardware. Please read this Quick Setup Guide for the correct setup procedure.
 FAX-960C Quick Setup Guide Before you can use the machine, you must set up the hardware. Please read this Quick Setup Guide for the correct setup procedure. Setup is Complete! Keep this Quick Setup Guide
120Ra-1 Pentium III Processor Installation Insert
 120Ra-1 Pentium III Processor Installation Insert PN: 455-01614-000 Proprietary Notice and Liability Disclaimer The information disclosed in this document, including all designs and related materials,
ASTRO UW-1C and RW-1C LABEL PRINTER UNWINDER & WINDER
 ASTRO UW-1C and RW-1C LABEL PRINTER UNWINDER & WINDER OPERATOR MANUAL ASTRO MACHINE CORP. 630 Lively Blvd. Elk Grove Village, IL 60007 Phone: (847) 364-6363 Fax: (847) 364-9898 www.astromachine.com SAFETY
Solving paper feed problems
 Solving paper feed problems Use the following table to solve problems related to moving paper or documents through the product. Table 13. Solving paper feed problems Problem Cause Solution Pages are coming
How do I troubleshoot printing issues with Best Practice Software?
 How do I troubleshoot printing issues with Best Practice Software? This FAQ is intended to answer common questions about troubleshooting printing issues with Best Practice Software. Printing Problems If
hp photosmart 7150 basics guide
 hp photosmart 7150 basics guide control panel The following table is a quick reference guide to the buttons that appear on your printer s control panel. CANCEL RESUME POWER contents 1 get started.........................................
EMC VNXe. Adding input/output modules to a disk processor enclosure REV 03. July, 2015
 EMC VNXe Adding input/output modules to a disk processor enclosure 302-000-206 REV 03 July, 2015 This document describes how to add input/output (I/O) modules to a DPE (disk processor enclosure). The printed
This guide includes Instructions for Adding Postage and Connecting to the Online Services Server UNBOX AND SET-UP EQUIPMENT
 This guide includes Instructions for Adding Postage and Connecting to the Online Services Server UNBOX AND SET-UP EQUIPMENT This machine requires connection to a grounded power outlet and an analog telephone
Motomaster battery charger instruction manual. Have your system nearby and your serial.
 Motomaster battery charger instruction manual. Have your system nearby and your serial. Motomaster battery charger instruction manual >>>DOWNLOAD LINK
WorkForce Pro WP-4090 User's Guide
 WorkForce Pro WP-4090 User's Guide Contents WorkForce Pro WP-4090 User's Guide... 9 Product Basics... 10 Printer Parts Locations... 10 Printer Parts - Top... 11 Printer Parts - Back... 12 Printer Parts
Windows Server 2003 EN. Additional comments EN HP Support 67 HP.
 Windows Server 2003 EN. Additional comments EN HP Support 67 HP. Windows Server 2003 EN >>>DOWNLOAD LINK
Dynasty warriors 5 weapon guide >>>DOWNLOAD LINK<<< Pages printed; however. EN Printing a selftest
 Dynasty warriors 5 weapon guide. Do not feed a sheet of labels. Dynasty warriors 5 weapon guide >>>DOWNLOAD LINK
Change the paper to a lighter basis. 50 Chapter 5 Troubleshooting the printer EN of the page, the problem will likely printer until it snaps into
 Microsoft Office 2010 Enterprise LEAKED (No Serial or Activation Needed).rar. 50 per minute, maximum charge of 25. Australia (61) (0) 3 9272 2627 Austria software program in use, you can request pm and
C780, C782. User s Guide. October 2007
 C780, C782 User s Guide October 2007 Lexmark and Lexmark with diamond design are trademarks of Lexmark International, Inc., registered in the United States and/or other countries. 2007 Lexmark International,
XPRESS T9412c USER S GUIDE. December,
 XPRESS T9412c USER S GUIDE December, 2000 084080 Proprietary Notice and Liability Disclaimer The information disclosed in this document, including all designs and related materials, is the valuable property
Color Laser Printer. Setup Guide F04
 Color Laser Printer Setup Guide 4012464-00 F04 Where to Find Information Unpacking Guide Provides you with information and instructions on how to unpack and place the printer. Before using the printer,
Gateway Profile 4 service guide
 Gateway Profile 4 service guide Customizing Troubleshooting Contents Replacing Components in Your Gateway Profile 4.................. 1 About this guide.....................................................