Installation Guide. Installation Instructions for Models: DI-148 Series DI-158 Series DI-710 Series DI-715B Series DI-718B(x) Series.
|
|
|
- Gwenda Lewis
- 6 years ago
- Views:
Transcription
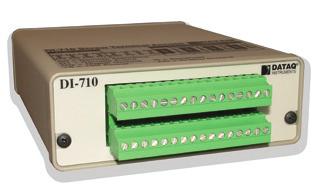

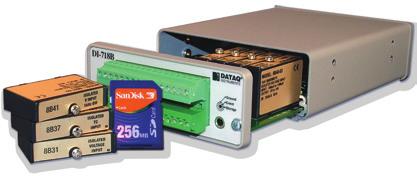

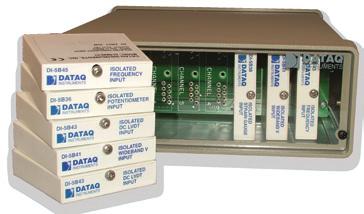

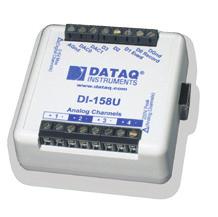

1 Installation Guide Installation Instructions for Models: DI-148 Series DI-158 Series DI-710 Series DI-715B Series DI-718B(x) Series Revision G M
2 Hardware and Software Installation Guide DI-148, DI-158, DI-71x USB and Ethernet Installation with WinDaq Acquisition and Playback Software SYSTEM REQUIREMENTS Hardware Intel or compatible PC Operating System Windows XP, Vista, and 7 Disk Space 40MB plus space for recorded data This installation guide explains how to install all DATAQ Instruments DI-148, DI-158, DI-710, DI-715B, DI-718B, and DI- 718Bx products to your PC. Table of Contents Section A: USB Device Installation...3 Section B: Ethernet Device Installation...6 Section C: Installing an Ethernet device directly connected to your PC or connected via a hub or switch where ONLY DI-71x products are installed..8 Section D: Installing an Ethernet device via a distributed network without a DHCP server Section E: Installing an Ethernet device via a distributed network with a DHCP server...13 Section F: Activation of WinDaq/High Speed Option...14 Section G: DATAQ Instruments Hardware Manager...14 Section H: Documentation and Support

3 Section A: USB Device Installation USB Hardware and Software Installation Guide IMPORTANT: Disconnect all DATAQ Instruments USB devices from your PC before continuing with installation. Once all devices are disconnected, install WinDaq Software and the DATAQ Instruments Hardware Manager. 1. Insert the WinDaq Resource CD in your drive. The installation software should start automatically within 20 seconds. If it does not, start it manually by double-clicking the Setup application (setup.exe) located on the root of the WinDaq Resource CD. 2. In the What do you want to do? window, select Install Software and click OK. 3. In the Installing Software window, select the Install Software for DI-148, DI-158, DI-710, DI-715B, and DI-718B(x) instruments option and click OK. 4. In the WinDaq Installation dialog box, select the Install WinDaq 3
4 USB Hardware and Software Installation Guide Software option and click OK to continue. If you wish to view the hardware documentation you may do so now by clicking on the appropriate radio button. Documentation will be saved to your hard drive during this installation. 5. In the Welcome! box, click OK to continue. 6. Read the License Agreement. If you accept the terms, click Accept and Continue. If you choose not to accept, click on the Do not accept and stop button to end the installation. 7. When prompted, enter your registration information (name and company) in the appropriate text boxes and click OK. Confirm your registration information before continuing. 8. When prompted, specify the directory where you want to install your WinDaq software. It is recommended that you accept the default. If you have already successfully installed a DI-148, DI-158, DI-710, DI- 715B, or DI-718B instrument be sure to install to the same folder. 9. In the Select an Interface box select USB and click OK. 10. DO NOT connect your USB device or cable to your PC until installation is complete. If your device is currently connected, please disconnect it before continuing with this installation. Once your device is disconnected, click the OK button. 11. When prompted to Select a Program Manager Group specify a destination (or group window) in the Start Menu for WinDaq software icons. It is recommended that you accept the default. 12. In the Installation Option dialog box specify whether you want all users to have access to WinDaq software or just the current User. Click Yes to allow all users to have access, click No to allow just the current user to have access. 13. After WinDaq Software installs, you will be prompted to install WinDaq/XL Trial Version and Advanced CODAS Analysis software. If you wish to install either software click on Yes in the appropriate dialog box. Follow the on screen prompts to complete installation. 14. Software installation is complete - you will now see a Successful Installation box - click OK to exit WinDaq Installation. 4
5 USB Hardware and Software Installation Guide You can now plug the device(s) into your PC and apply power (if required). You do not need to re-install this software when installing more DI- 148, DI-158, or DI-71x USB devices to your PC. If you are installing Ethernet devices you MUST run the Ethernet installation (see Section B: Ethernet Device Installation). 1. Plug the appropriate end of the supplied USB communications cable into the USB port on the instrument. 2. Connect the other end of the USB cable to one of your computer s USB ports. NOTE: Use a powered USB hub or a USB port on your PC Nonpowered USB hubs may not have sufficient power to run the instrument. 3. Apply power via the AC adapter (if required). Click on the appropriate program group (specified above default is Start > Programs > WINDAQ) and click on DATAQ Instruments Hardware Manager to run WinDaq software. All DATAQ Instruments software is located in the same program group. 5
6 Ethernet Hardware and Software Installation Guide Section B: Ethernet Device Installation Install WinDaq Software and the DATAQ Instruments Hardware Manager. 1. Insert the WinDaq Resource CD in your drive. The installation software should start automatically within 20 seconds. If it does not, start it manually by double-clicking the Setup application (setup.exe) located on the root of the WinDaq Resource CD. 2. In the What do you want to do? window, select Install Software and click OK. 3. In the Installing Software window, select the Install Software for DI-148, DI-158, DI-710, DI-715B, and DI-718B(x) instruments option and click OK. 4. In the WinDaq Installation dialog box, select the Install Software option and click OK to continue. If you wish to view the full hardware documentation you may do so now by clicking on the appropriate radio button. Documentation will be saved to your hard drive during installation. 5. In the Welcome! box, click OK to continue. 6. Read the License Agreement. If you accept the terms, click Accept and Continue. If you choose not to accept, click on the Do not accept and stop button to end the installation. 7. When prompted, enter your registration information (name and company) in the appropriate text boxes and click OK. Confirm your registration information before continuing. 8. When prompted, specify the directory where you want to install your WinDaq software. It is recommended that you accept the default. If you have already successfully installed a DI-148, DI-158, DI-710, DI- 715B, or DI-718B instrument be sure to install to the same folder. 9. In the Select an Interface box select the Ethernet option and click OK to continue. 10. When prompted to Select a Program Manager Group specify a destination (or group window) in the Start Menu for WinDaq software icons. It is recommended that you accept the default. 6
7 Ethernet Hardware and Software Installation Guide 11. In the Installation Option dialog box specify whether you want all users to have access to WinDaq software or just the current User. Click Yes to allow all users to have access, click No to allow just the current user to have access. 12. After WinDaq Software installs, you will be prompted to install WinDaq/XL Trial Version and Advanced CODAS Analysis software. If you wish to install either software click on Yes in the appropriate dialog box. Follow the on screen prompts to complete installation. 13. Installation is complete - you will now see a Successful Installation box - click OK to exit WinDaq Installation. Ethernet devices can now be connected to your network or PC. Follow the appropriate instructions in Section C: Installing an Ethernet device directly connected to your PC or connected via a hub or switch where ONLY DI-71x products are installed, Section D: Installing an Ethernet device via a distributed network without a DHCP server, or Section E: Installing an Ethernet device via a distributed network with a DHCP server of this manual for your specific network connections configuration. Click on the appropriate program group (specified above default is Start > Programs > WINDAQ) and click on DATAQ Instruments Hardware Manager to run WinDaq software. All DATAQ Instruments software is located in the same program group. 7

 that do not have an auto-switching sensor you must NOT use a crossover cable. NOTE: You MUST disable all wireless connections during installation.")
8 Ethernet Hardware and Software Installation Guide Section C: Installing an Ethernet device directly connected to your PC or connected via a hub or switch where ONLY DI-71x products are installed Installation of an Ethernet device directly connected to the network card on your computer requires you to change the IP address of your network card. NOTE: When installing your Ethernet device directly connected to your PC you MUST use a crossover cable (provided). For hubs (below) that do not have an auto-switching sensor you must NOT use a crossover cable. NOTE: You MUST disable all wireless connections during installation. Wireless connections can be re-enabled once installation is complete. Installation of an Ethernet device via an Ethernet hub/switch containing ONLY DI-71x products also requires you to change the IP address of your network card. 1. Find the Network Connections on your computer (usually in the Control Panel). 2. Double-click on the Local Area Connection icon. 8
 in the This connection uses the following items window")

9 Ethernet Hardware and Software Installation Guide 3. Click on the Properties button. 4. Select Internet Protocol (TCP/IP) in the This connection uses the following items window and click on the Properties button. 5. Click on the General tab. 6. Select the radio button Use the following IP address. 7. Enter in the space provided for the IP address. 9
 Properties dialog box then click on the OK button in the Local Area Connection Properties dialog box for the changes to take effect. 10.")
10 Ethernet Hardware and Software Installation Guide 8. Enter in the space provided for the Subnet mask. 9. Click on the OK button to close the Internet Protocol (TCP/IP) Properties dialog box then click on the OK button in the Local Area Connection Properties dialog box for the changes to take effect. 10. You will now be able to see the device in the DATAQ Instruments Hardware Manager (you may have to click the Update List button). NOTE: If you unplug your device and connect your PC to a network or router you should change these settings back to their original state. 10

11 Ethernet Hardware and Software Installation Guide Section D: Installing an Ethernet device via a distributed network without a DHCP server Installation of an Ethernet device connected to a distributed network that does not have a DHCP server or where the DHCP server is turned off requires you to obtain an IP address from your system administrator. NOTE: In the illustration above, the Hubs could instead be routers with DHCP turned off (i.e., a static IP assigned network). Contact your system administrator for details about your network. 1. Have the system administrator designate an IP address for your device. 2. Install software (see Section B: Ethernet Device Installation). 3. Plug the device into your network and apply power. 4. Open the DATAQ Instruments Hardware Manager software. 5. In the dropdown command list (lower left-hand corner), select Static IP. The Manage IP Addresses dialog box will open. 11
. 7.")
12 Ethernet Hardware and Software Installation Guide 6. Click on the MAC address of your device in the list of displayed MAC addresses (the MAC address of your device can be found on the silver sticker located on the bottom of your device). 7. Enter the IP address your system administrator assigned to you in the New IP Address text boxes. 8. Click on the Set Static button. Your device will appear in the list of available devices in the main DATAQ Instruments Hardware Manager window. It may take more than 15 seconds for your device to appear in the list. If you get a No Devices Found error after following the above instructions, click the Update List button until the device appears in the list. NOTE: These instructions change the settings inside the device. If you move the device to a DHCP-enabled network (i.e., where IP addresses are assigned automatically by a DHCP server or router) you will need to change the device settings using the DATAQ Instruments Hardware Manager. See the DATAQ Instruments Hardware Manager help file for complete details. 12
 requires no extra setup.")
13 Ethernet Hardware and Software Installation Guide Section E: Installing an Ethernet device via a distributed network with a DHCP server Installation of an Ethernet device connected to a distributed network that has a DHCP server (i.e., a DHCP router automatically assigns IP addresses to each device connected to the network) requires no extra setup. NOTE: If you are unsure whether your network is DHCP-enabled or not, check with your system administrator before installing WinDaq. 1. Connect your Ethernet device to your Local Area Network. 2. Apply power to the device. 3. You will now be able to see the device in the DATAQ Instruments Hardware Manager (you may have to click the Update List button). 13
14 Hardware and Software Installation Guide Section F: Activation of WinDaq/High Speed Option Activation is required for continued use of WinDaq/HS (High Speed option) to ensure compliance with the Software License Agreement. The Software License Agreement can be found in the WinDaq Software manual or in the WinDaq program group (License.txt). WinDaq/HS may be activated through the Help menu by clicking on Unlock WinDaq/ HS in the Acquisition software, or by waiting for the trial version to expire. Trial versions are good for a number of High Speed (over 1108 Hz throughput) recording sessions. The High Speed version may be purchased after the trial period expires through our online store or by phone. For help or for questions regarding Activation and/or the Software License Agreement, contact DATAQ Instruments Customer Support (see Section H: Documentation and Support below). Section G: DATAQ Instruments Hardware Manager The DATAQ Instruments Hardware Manager is installed when installing WinDaq Software. The Hardware Manager allows you to effectively manage and run multiple instruments installed and connected to your PC or your Network or even over the internet. WinDaq Data Acquisition Software and the Stand-alone Set Up program are both accessed through the DATAQ Instruments Hardware Manager. The DATAQ Instruments Hardware Manager may be accessed through the Windows Program Manager Group as specified during installation (default is Start > Programs > WINDAQ > DATAQ Instruments Hardware Manager). All available devices will automatically appear in the list box when you run the software. For help with the DATAQ Instruments Hardware Manager access the Help Files using either the Help menu item or by highlighting a menu item and pressing F1 to access context-sensitive help. 14
15 Section H: Documentation and Support Hardware and Software Installation Guide Full Hardware documentation is available from the Windows Program Group designated during installation (default is Start > Programs > WINDAQ > Documentation > DI-xxx Hardware Manual). A Fast Start guide with multimedia demonstrations is available after installation from the Windows Program Group designated during installation (default is Start > Programs > WINDAQ > Documentation > Multimedia Fast Start Guide to WinDaq Software) or from your hard drive at C:\Windows\Help\Multimedia Fast Start Guide to WinDaq Software.pdf. Context-sensitive Help is available in all software programs. Highlight a menu item and press F1 for help regarding that menu item or click on the Help menu item to access the help files. Installation: Support Forum: Submit a Support Ticket: Phone: Monday through Friday 8AM to 5PM EST 15
16 DATAQ Instruments, Inc. 241 Springside Drive Akron, Ohio U.S.A. Telephone: Fax: Designed and manufactured in the United States of America Copyright 2011 by DATAQ Instruments, Inc. DATAQ Instruments hardware and software products are not designed to be used in the diagnosis and treatment of humans, nor are they to be used as critical components in any life-support systems whose failure to perform can reasonably be expected to cause significant injury to humans. DATAQ, the DATAQ logo, and WinDaq are registered trademarks of DATAQ Instruments, Inc. All rights reserved.
DI-148U. User's Manual. The way PC-based instrumentation should be. 8-Channel USB Data Acquisition Starter Kit. Manual Revision B
 The way PC-based instrumentation should be DI-148U 8-Channel USB Data Acquisition Starter Kit User's Manual Manual Revision B Copyright 2004 by DATAQ Instruments, Inc. The Information contained herein
DI-718B Series. DI-718Bx Series. User's Manual. The way PC-based instrumentation should be. 8 Channel Data Logger with Signal-Conditioned Inputs
 The way PC-based instrumentation should be DI-718B Series 8 Channel Data Logger with Signal-Conditioned Inputs DI-718Bx Series 16 Channel Data Logger with Signal-Conditioned Inputs User's Manual Manual
The way PC-based instrumentation should be
 The way PC-based instrumentation should be DI-720 Series 32 Channel USB, Ethernet, or Printer Port Data Acquisition System DI-722 Series Extended Measurement Range Data Acquisition System DI-730 Series
DI-148U DI-148U-SP. DI-158 Series. User's Manual. The way PC-based instrumentation should be. 8-Channel USB Data Acquisition Starter Kit
 The way PC-based instrumentation should be DI-148U 8-Channel USB Data Acquisition Starter Kit DI-148U-SP USB Data Acquisition Starter Kit with Two String Pot Inputs DI-158 Series USB Data Acquisition Starter
DI-704P Ethernet Broadband Router. Ethernet (Straight Through) Cable. 5V DC Power Adapter
 Cable. 5V DC Power Adapter") 1 This product can be set up using any current Web browser, i.e., Internet Explorer or Netscape Navigator. DI-704P Ethernet Broadband Router and Print Server Before You Begin 1. If you purchased this router
1 This product can be set up using any current Web browser, i.e., Internet Explorer or Netscape Navigator. DI-704P Ethernet Broadband Router and Print Server Before You Begin 1. If you purchased this router
Ethernet (CAT5 UTP/Straight-Through) Cable. 5V DC Power Adapter
 Cable. 5V DC Power Adapter") 1 This product can be set up using any current web browser, i.e., Internet Explorer 6 or Netscape Navigator 6.2.3. Before You Begin Check Your Package Contents DI-824VUP+ 2.4GHz Wireless VPN Router and
1 This product can be set up using any current web browser, i.e., Internet Explorer 6 or Netscape Navigator 6.2.3. Before You Begin Check Your Package Contents DI-824VUP+ 2.4GHz Wireless VPN Router and
DP-301P+ D-Link Fast Ethernet Print Server
 This product can be setup using any current web browser, i.e., Internet Explorer 6 or Netscape Navigator 7.0 DP-301P+ D-Link Fast Ethernet Print Server Before You Begin You will need an Ethernet-enabled
DI-148U DI-148U-SP. DI-158 Series. User's Manual. The way PC-based instrumentation should be. 8-Channel USB Data Acquisition Starter Kit
 The way PC-based instrumentation should be DI-148U 8-Channel USB Data Acquisition Starter Kit DI-148U-SP USB Data Acquisition Starter Kit with Two String Pot Inputs DI-158 Series USB Data Acquisition Starter
DI GHz Wireless Router
 This product can be set up using any current web browser, i.e., Internet Explorer 6 or Netscape Navigator 6.2.3. DI-514 2.4GHz Wireless Router Before You Begin 1. If you purchased this router to share
Lab IP Addresses and Network Communication
 Lab 3.5.2 IP Addresses and Network Communication Objectives Build a simple peer-to-peer network and verify physical connectivity. Assign various IP addresses to hosts and observe the effects on network
Network USB over IP Server With 1-USB2.0 Port. User Manual V1.0
 Network USB over IP Server With 1-USB2.0 Port User Manual V1.0 1 2 TABLE OF CONTENTS COPYRIGHT...4 1. INTRODUCTION...5 PRODUCT OVERVIEW...5 COMPONENTS AND FEATURES...5 HARDWARE INSTALLATION...5 2. THE
User Manual 1-port USB 2.0 Print Server
 User Manual 1-port USB 2.0 Print Server GPSU21W6 PART NO. M1210-b 1 www.iogear.com 2 Welcome Thank you for purchasing this 1-port USB 2.0 Print Server that allows any networked computer to share a USB
DSL-G624T. Wireless ADSL Router. If any of the above items is missing, please contact your reseller. This product can be set up using any
 This product can be set up using any current web browser, i.e., Internet Explorer 6x or Netscape Navigator 7x. DSL-G624T Wireless ADSL Router Before You Begin 1. If you purchased this Router to share your
8.9.2 Lab: Configure an Ethernet NIC to use DHCP in Windows Vista
 8.9.2 Lab: Configure an Ethernet NIC to use DHCP in Windows Vista Introduction If Vista is not available in your classroom, you may complete this lab by viewing the figures in this document. Print and
BLUETOOTH 2.0 MINI USB ADAPTER. Quick Start Guide TABEL OF CONTENTS
 BLUETOOTH 2.0 MINI USB ADAPTER Quick Start Guide All rights reserved. All trade names are registered trademarks of respective manufacturers listed. The Bluetooth name and the Bluetooth trademarks are owned
C5100 Computer Connections & Software Install Guide
 C5100 Computer Connections & Software Install Guide Installation Checklist Network Install: Hardware...4 Connect to the Network Port...4 Network Install: Software...5 TCP/IP...5 Local Install: USB, Hardware...7
DI-154RS DI-195B. User's Manual. The way PC-based instrumentation should be. 4-Channel Data Acquisition Module
 The way PC-based instrumentation should be DI-154RS 4-Channel Data Acquisition Module DI-195B 2-Channel Serial Port I/O Module with Signal Conditioned Inputs User's Manual Manual Revision L Software Release
Windows XP Software Installation Instructions GCC Elite Series Printers
 TM Windows XP Software Installation Instructions GCC Elite Series Printers This document is intended to provide instructions for obtaining and installing the Windows XP driver software for GCC s Elite
DI a/11g Dualband 108Mbps Wireless Router
 1 This product can be set up using any curren ent t web browser owser,, i.e.,., Internet Explorer 6 or Netscape Navigator 6.2.3. Befor ore You Begin DI-784 11a/11g Dualband 108Mbps Wireless Router 1. If
DI-808HV 8-Port Broadband VPN Router
 This product can be set up using any current web browser, i.e., Internet Explorer 6 or Netscape Navigator 6.2.3. DI-808HV 8-Port Broadband VPN Router 1. Thank you for purchasing this Router to share your
Please take the time now to check the contents of your package: HPS12U Print Server One CD-ROM Quick Installation Guide One power adapter
 Congratulations on purchasing Hawking s HPS12U 1-Port Parallel + 2 USB Ports 10/100M Internet Print Server. The Hawking HPS12U is a powerful and convenient network printing solution that will connect your
Contents. RM Education Plc 2012 Page 2 of 18
 Installation Guide Contents Installation Options... 3 Installing RM TM Easiteach TM Next Generation... 4 Installing the Corbis Multimedia Asset Pack... 10 Installing the Text to speech voices... 12 Uninstalling
DVG-2001S VoIP Terminal Adapter
 This product can be set up using any current web browser, i.e., Internet Explorer 6 or Netscape Navigator 6.2.3. DVG-2001S VoIP Terminal Adapter Before You Begin 1. If you purchased this VoIP Terminal
DWL-G650+ AirPlus G+ 2.4GHz Wireless Cardbus Adapter
 This product works with the following operating system software: Windows XP, Windows 2000, Windows Me, Windows 98se DWL-G650+ AirPlus G+ 2.4GHz Wireless Cardbus Adapter Before You Begin You must have at
System Requirements. Package Contents
 System Requirements System Requirements Computer with Windows Vista or XP SP2 PC with 1.3GHz or above; at least 128MB RAM Internet Explorer 6.0 or Netscape Navigator 7.0 and above Existing 10/100 Ethernet-based
Congratulations on purchasing Hawking s HWPS12UG 1-Port Parallel + 2 USB Ports Wireless G Print Server. The Hawking HWPS12UG is a powerful and
 Congratulations on purchasing Hawking s HWPS12UG 1-Port Parallel + 2 USB Ports Wireless G Print Server. The Hawking HWPS12UG is a powerful and convenient network printing solution that will connect your
Vision Express Vision VE810 Installation Guide Vision Engraving & Routing Systems
 Vision Express Vision VE810 Installation Guide Vision Express - Vision VE810 Installation Guide All rights reserved. No parts of this work may be reproduced in any form or by any means - graphic, electronic,
DP-300+ Fast Ethernet Multi-Port Print Server
 This product can be setup using any current Web browser, i.e., Internet Explorer 6 or Netscape Navigator 7.0 DP-300+ Fast Ethernet Multi-Port Print Server Before You Begin You will need an Ethernet-enabled
WLAN PCMCIA Card. Quick Setup Guide WLC3010
 WLAN PCMCIA Card Quick Setup Guide WLC3010 This Quick Set-Up Guide only provides you with the basic instructions for setting up these wireless adaptors on your computer. A complete User Manual that includes
Installation Guide. Version 2600
 Installation Guide Version 2600 Before You Start Check here to see that your PC has what it needs to run FedEx Ship Manager Software: Minimum System and Hardware Requirements Intel Pentium 4, 2.4 GHz recommended
Section 4: Installing the ECC (Epilog Control Center)
") Section 4: Installing the ECC (Epilog Control Center) In This Section Installing the ECC The ECC (Epilog Control Center) provides Job Management features as well as laser control and laser machine configuration
Section 4: Installing the ECC (Epilog Control Center) In This Section Installing the ECC The ECC (Epilog Control Center) provides Job Management features as well as laser control and laser machine configuration
Part # Quick-Start Guide. SpeedStream 4200 Modem PPPoE Modem Router
 Part # 007-0-00 Quick-Start Guide SpeedStream 00 Modem PPPoE Modem Router Before you begin, Verify that the following items came with your DSL kit: Step > Install Line Filters 7 SpeedStream Device Documentation
BCSE 1000 SOFTWARE MANUAL
 BCSE 1000 SOFTWARE MANUAL THIS MANUAL CONTAINS: INSTALLATION AND SETUP INSTRUCTIONS FOR BCSGRAIN BCSGRAIN SOFTWARE MANUAL SPECIAL NOTE BOONE CABLE WORKS & ELECTRONICS, INC. 1773-219TH LANE - P.O. BOX 369
DSL-504T ADSL Router. CD-ROM (containing User Manual) Ethernet Cable (CAT5 UTP) ADSL Cable (For AUS 200CM) Power Adapter
 Ethernet Cable (CAT5 UTP) ADSL Cable (For AUS 200CM) Power Adapter") This product can be set up using any current web browser, i.e., Internet Explorer 6 or Netscape Navigator 6.2.3. DSL-504T ADSL Router Before You Begin 1. If you purchased this Router to share your high-speed
This product can be set up using any current web browser, i.e., Internet Explorer 6 or Netscape Navigator 6.2.3. DSL-504T ADSL Router Before You Begin 1. If you purchased this Router to share your high-speed
User Manual. Unpacking and Setup
 User Manual USB Print Server LPV2-USB-TX1 Unpacking and Setup This section provides unpacking and setup information for the USB Print Server. Unpacking Open the shipping carton of the Switch and carefully
WYNN. Quick Start Guide. Freedom Scientific, Inc Rev C
 WYNN Quick Start Guide Freedom Scientific, Inc. 440527-001 Rev C Freedom Scientific, Inc., 11800 31 st Court North, St. Petersburg, Florida 33716-1805, USA www.freedomscientific.com Copyright 2011 Freedom
Insert the D-Link CD-ROM Into Your Computer
 This product works with the following operating system software: Windows XP, Windows 2000, Windows Me, Windows 98SE DWL-G520+ AirPlus G+ 2.4GHz Wireless PCI Adapter Before You Begin You must have at least
Installing the DWL-650+ Drivers & Utility
 Package Contents: D-Link AirPlus DWL-650+ Wireless Cardbus Adapter Printed Quick Installation Guide CD with Manual, Quick Installation Guide and Drivers If any of the contents are missing, please contact
CD-ROM (Software, Manual and Warranty) 5V DC, 2.5A Power Adapter
 5V DC, 2.5A Power Adapter") This product can be setup using any current Web browser, i.e., Internet Explorer 6 or Netscape Navigator 7.0 DP-G321 AirPlus G 802.11g/2.4GHz Wireless Multi-Port Print Server Before You Begin: You will
This product can be setup using any current Web browser, i.e., Internet Explorer 6 or Netscape Navigator 7.0 DP-G321 AirPlus G 802.11g/2.4GHz Wireless Multi-Port Print Server Before You Begin: You will
User s Manual. Please Read before Installation (Combustion Pressure Analysis Software)
") User s Manual Please Read before Installation (Combustion Pressure Analysis Software) Thank you for purchasing the Combustion Pressure Analysis Software. This user s manual explains how to install the
User s Manual Please Read before Installation (Combustion Pressure Analysis Software) Thank you for purchasing the Combustion Pressure Analysis Software. This user s manual explains how to install the
START HERE. Wireless USB Wired. Do you want to connect the printer to a wireless network? Use the Wireless Setup and Connection.
 START HERE If you answer yes to any of these questions, turn to the section indicated for Setup and Connection instructions. Do you want to connect the printer to a wireless network? Use the Wireless Setup
DWL-122. Before You Begin. Check Your Package Contents. 2.4GHz USB Wireless Adapter. DWL-122 Wireless USB Adapter
 This product works with the following operating system software: Windows XP, Windows 2000, Windows Me, Windows 98SE, Macintosh OS X (10.2.x or later) DWL-122 2.4GHz USB Wireless Adapter Before You Begin
EA/Studio Installation Guide
 EA/Studio 1.5.2 Installation Guide Copyright 1994-2008 Embarcadero Technologies, Inc. Embarcadero Technologies, Inc. 100 California Street, 12th Floor San Francisco, CA 94111 U.S.A. All rights reserved.
OPERATION MANUAL. MV-410HS Layout Editor. Version higher. Command
 OPERATION MANUAL MV-410HS Layout Editor Version 3.0 - higher Command Command Table of Contents 1. Setup... 1 1-1. Overview... 1 1-2. System Requirements... 1 1-3. Operation Flow... 1 1-4. Installing MV-410HS
Mac OS 8 Installation Instructions for Sonnet Presto and Presto Plus Processor Upgrade Cards
 Mac OS 8 Installation Instructions for Sonnet Presto and Presto Plus Processor Upgrade Cards What You Need: Sonnet Presto or Presto Plus processor upgrade card. Sonnet Presto 8 Enabler Boot diskette. Macintosh
GRAMS Suite Version 9.0
 Thermo Scientific GRAMS Suite Version 9.0 Welcome Guide Revision A 2010 Thermo Fisher Scientific Inc. All rights reserved. Thermo Fisher Scientific Inc. provides this document to its customers with a product
A guide to assist dental or medical care facilities with the install of the DataGrabber, Apteryx s patented practice management bridging software.
 DATAGRABBER Apteryx Inc. 313 S. High St. Suite 200 Akron, OH 44308 330-376-0889 voice 330-376-0788 fax sales@apteryx.com www.apteryx.com DATAGRABBER Installation Guide Abstract Abstract A guide to assist
This guide provides instructions in the installation and configuration of XrayVision DCV.
 Apteryx Inc. 313 S. High St. Suite 200 Akron, OH 44308 330-376-0889 voice 330-376-0788 fax sales@apteryx.com www.apteryx.com XrayVision DICOM Capture View (DCV) Installation Guide Abstract Abstract Abstract
Business Internet Video Camera with Audio
 Business Internet Video Camera with Audio Quick Install Guide Package Contents WVC210 Camera Stand Power Supply (5V 2A) 6 Ethernet Cable Setup CD Antenna Quick Install Guide BUSINESS SERIES Model: WVC210
Sage Fixed Assets Single User
 Single User 2018.0 Installation guide October 2017 Last updated October 17, 2017 2017 The Sage Group plc or its licensors. All rights reserved. Sage, Sage logos, and Sage product and service names mentioned
Network License Manager and Client Toolchain. Installation Guide
 Network License Manager and Client Toolchain Contents This guide is intended to help you to install HEW and the Network License Manager and obtain a license key (if entitled). It will cover: 1. Installing
NETePay XML. Installation & Configuration Guide. For Moneris (Public) Version 3.00
 Version 3.00") NETePay XML Installation & Configuration Guide Version 3.00 For Moneris (Public) NETePay XML Installation & Configuration Guide Copyright 2005 Datacap Systems Inc. All rights reserved. This manual and
NETePay XML Installation & Configuration Guide Version 3.00 For Moneris (Public) NETePay XML Installation & Configuration Guide Copyright 2005 Datacap Systems Inc. All rights reserved. This manual and
Lab: Install a NIC in Windows XP
 11.4.1 Lab: Install a NIC in Windows XP Introduction Print and complete this lab. In this lab, you will install a NIC, verify NIC operation, and manually configure an IP address. Recommended Equipment
DBT-120 Bluetooth USB Adapter
 DBT-120 Bluetooth USB Adapter Rev.2.1 (09/25/2002) 2 Contents Introduction... 5 Package Contents... 6 Installing Bluetooth Software... 6 Hardware Installation... 8 Introduction to Bluetooth Software...
Table of Contents. D-Link SharePort Plus... 4 Introduction...4 System Requirements...4 Features...5. Installation... 6
 Table of Contents D-Link SharePort Plus... 4 Introduction...4 System Requirements...4 Features...5 Installation... 6 SharePort Plus Utility... 11 Utility Overview... 11 Device Server View... 12 Utility
ADSL Router Quick Setup Guide
 ADSL Router Quick Setup Guide RTA300 Important This Guide is intended to get you started quickly. The factory default profile of this Router is customised for New Zealand users. Please follow through the
Setting File Creation Software for North America. Installation Instructions
 Contents 1 Overview............................................................. 2 2 System Requirements.................................................. 2 3 Installing and Uninstalling..............................................
These are the items included with your DWL-AG650 purchase:
 This product works with the following operating system software: Windows XP, Windows 2000, Windows Me, Windows 98se DWL-AG650 TM AirXpert Tri-Mode Dualband Wireless Cardbus Adapter Before You Begin You
DUB-E100. Before You Begin: Check Your Package Contents. USB 2.0 Fast Ethernet Adapter
 This product can be used with: Windows XP,, Windows 2000, Windows Me,, and Windows 98SE DUB-E100 USB 2.0 Fast Ethernet Adapter Before You Begin: You will need the following: Windows XP, 2000, Me, or 98SE,
Print Server. User s Manual. Rev. 01 (April, 2004) Made In Taiwan
 Made In Taiwan") Print Server User s Manual Rev. 01 (April, 2004) Made In Taiwan TABLE OF CONTENTS ABOUT THIS GUIDE... 4 INTRODUCTION... 5 PACKAGE CONTENTS... 6 SYSTEM REQUIREMENTS... 6 GENERAL FEATURES... 7 PRODUCT VIEW...
Print Server User s Manual Rev. 01 (April, 2004) Made In Taiwan TABLE OF CONTENTS ABOUT THIS GUIDE... 4 INTRODUCTION... 5 PACKAGE CONTENTS... 6 SYSTEM REQUIREMENTS... 6 GENERAL FEATURES... 7 PRODUCT VIEW...
ChromQuest 4.2 Chromatography Data System
 ChromQuest 4.2 Chromatography Data System Installation Guide CHROM-97200 Revision A April 2005 2006 Thermo Electron Corporation. All rights reserved. Surveyor is a registered trademark and ChromQuest is
Sage Fixed Assets Single User. Installation guide
 Single User Installation guide Last updated January 15, 2019 2019 The Sage Group plc or its licensors. All rights reserved. Sage, Sage logos, and Sage product and service names mentioned herein are the
Quick Setup Guide Imagistics ix 2701
 Quick Setup Guide Imagistics ix 2701 Before you can use the machine, you must set up the hardware and install the driver. Please read this Quick Setup Guide for proper set up and installation instructions.
Wireless and Beyond Bridging Instructions O2Breeze and/or O2Wind
 Wireless and Beyond www.radiolabs.com Bridging Instructions O2Breeze and/or O2Wind 1 PLEASE READ THESE INSTRUCTIONS BEFORE CONFIGURING OR DEPLOYING YOUR O2BREEZE OR O2WIND ROUTERS Thank you for purchasing
CulinarE-Companion. Version 4.3 TABLE OF CONTENTS
 CulinarE-Companion Version 4.3 Copyright 2012 by John Wiley & Sons Ltd. All rights reserved. TABLE OF CONTENTS 1. ABOUT THE SOFTWARE 2. SYSTEM REQUIREMENTS 3. INSTALLING AND RUNNING THE PROGRAM 3.1. Installing
QUICK START GUIDE MODEL 195Ep
 QUICK START GUIDE MODEL 195Ep Before You Begin The ESTeem Model 195Ep wireless Ethernet radio modem is compatible with many different applications. The most common application is to bridge two or more
Minimum System Requirements. Package Contents
 Ver. 1.00 DCS-6111 System Requirements Minimum System Requirements Internet Explorer 6.x or above Windows XP or Windows Vista 1.7GHz processor or higher 256MB of RAM 1 Ethernet connection Package Contents
Lab: Install a Wireless NIC in Windows XP
 15.5.1 Lab: Install a Wireless NIC in Windows XP Introduction Print and complete this lab. In this lab, you will install and configure a wireless NIC. Recommended Equipment A computer with Windows XP installed
Installation Guide CONTROL MICROSYSTEMS
 Installation Guide CONTROL MICROSYSTEMS 48 Steacie Drive n Kanata, Ontario Canada K2K 2A9 Telephone: 613-591-1943 n Facsimile: 613-591-1022 Technical Support: 888-226-6876 (888-2CONTROL) ClearSCADA Getting
Updating the Firmware for Digital SLR Cameras (Mass Storage) Windows
 Windows") Updating the Firmware for Digital SLR Cameras (Mass Storage) Windows Thank you for choosing a Nikon product. This guide describes how to perform this firmware update. If you are not confident that you
Updating the Firmware for Digital SLR Cameras (Mass Storage) Windows Thank you for choosing a Nikon product. This guide describes how to perform this firmware update. If you are not confident that you
Sage Fixed Assets Lite Depreciation. Quick start guide
 Sage Fixed Assets Lite Depreciation Quick start guide Last updated January 13, 2019 2019 The Sage Group plc or its licensors. All rights reserved. Sage, Sage logos, and Sage product and service names mentioned
802.11g Wireless LAN MFP Server
 802.11g Wireless LAN MFP Server Quick Installation Guide Version: 1.0 (Jun. 2009) 1. Product Introduction Thank you for purchasing and using our 802.11g Wireless LAN MFP server. This MFP server allows
PhotoPDF User Guide. PhotoPDF. Photo to PDF Converter
 PhotoPDF Photo to PDF Converter PhotoPDF is a batch-processing tool to convert photos into PDF file. PhotoPDF provides three modes of conversion: Batch Convert, Photos Merge and Thumbnail Page. PhotoPDF
This installation guide is intended for customers who are installing NMIS for the first time. Included are the recommended hardware specifications
 This installation guide is intended for customers who are installing NMIS for the first time. Included are the recommended hardware specifications and sample screens to guide you through the installation
Bridge Cable User s Guide
 Bridge Cable User s Guide Table of Contents Overview -------------------------------------------------------------------- 2 Driver Installation --------------------------------------------------------
USER S MANUAL. QS2 USB2.0 QS2 USB2.0/eSATA Combo and QS2 USB2.0/eSATA/Firewire Combo Models
 USER S MANUAL QS2 USB2.0 QS2 USB2.0/eSATA Combo and QS2 USB2.0/eSATA/Firewire Combo Models FCC COMPLIANCE STATEMENTS This equipment has been tested and found to comply with the limits for a Class B digital
DeviceNet Network Analysis Using the NetDecoder Software Quick Start Guide
 DeviceNet Network Analysis Using the NetDecoder Software Quick Start Guide Copyright 2000 2010 Frontline Test Equipment, Inc. All rights reserved. You may not reproduce, transmit, or store on magnetic
Longshine Technologie Europe GmbH LCS-MFP101-2 Multifunction Printserver
 Longshine Technologie Europe GmbH LCS-MFP101-2 Multifunction Printserver www.longshine.de TABLE OF CONTENTS COPYRIGHT...2 1. INTRODUCTION...3 PRODUCT OVERVIEW...3 COMPONENTS AND FEATURES...3 HARDWARE INSTALLATION...3
Optional Lab: Install a Wireless NIC in Windows Vista
 15.5.1 Optional Lab: Install a Wireless NIC in Windows Vista Introduction Print and complete this lab. In this lab, you will install and configure a wireless NIC. Recommended Equipment A computer with
Executive Series 1220n Computer Connections & Software Install Guide
 Executive Series 1220n Computer Connections & Software Install Guide Installation Checklist Network Install: Hardware...2 Network Install: Software...3 TCP/IP...3 Novell...6 Local Install: Windows USB
Dongle-sized Wireless Print Server. Quick Installation Guide V1.0
 Dongle-sized Wireless Print Server Quick Installation Guide V1.0 1 Before you start, you should prepare the following items: Windows-based computer with print server setup CD Printer Printer cable One
Network Guide NPD EN
 NPD5659-00 EN Copyright and Trademarks No part of this publication may be reproduced, stored in a retrieval system, or transmitted in any form or by any means, mechanical, photocopying, recording, or otherwise,
License Manager Client
 License Manager Client Operations Guide NEC NEC Corporation of America November 2010 NDA-30899, Revision 6 Liability Disclaimer NEC Corporation of America reserves the right to change the specifications,
BankLink Books Clients
 BankLink Books Clients This document is for those practices installing BankLink Books. The BankLink Service Agreement permits licensed BankLink practices to install the software in as many locations as
Index Introduction 3 Chapter 1. - Beginning the installation User License Application User Information 4
 Index Introduction 3 Chapter 1. - Beginning the installation 1.1. - User License Application 4 1.2. - User Information 4 1.3. - Installation Folder 4 Chapter 2. - Standalone or Server Installation 2.1.
1) Installing Bluetooth software for Windows (A) Place installation CD into PC and setup should launch automatically.
 Installing Bluetooth software for Windows (A) Place installation CD into PC and setup should launch automatically.") 1) Installing Bluetooth software for Windows (A) Place installation CD into PC and setup should launch automatically. If setup does not launch, use Windows Explorer to navigate to the appropriate CD- ROM
1) Installing Bluetooth software for Windows (A) Place installation CD into PC and setup should launch automatically. If setup does not launch, use Windows Explorer to navigate to the appropriate CD- ROM
TABLE OF CONTENTS COPYRIGHT INTRODUCTION...3 PRODUCT OVERVIEW...3 COMPONENTS AND FEATURES...3 HARDWARE INSTALLATION
 TABLE OF CONTENTS COPYRIGHT...2 1. INTRODUCTION...3 PRODUCT OVERVIEW...3 COMPONENTS AND FEATURES...3 HARDWARE INSTALLATION...3 2. MFP SERVER INSTALLATION...5 PREPARATION...5 CONFIGURATION SOLUTION TABLE...5
QUICK START GUIDE MODEL 195Eg
 QUICK START GUIDE MODEL 195Eg Before You Begin The ESTeem Model 195Eg wireless Ethernet radio modem is compatible with many different applications. The most common application is to bridge two or more
Programming Manual KX-TVA50 KX-TVA200. Voice Processing System. Model
 Voice Processing System Programming Manual Model KX-TVA50 KX-TVA200 Thank you for purchasing a Panasonic Voice Processing System. Please read this manual carefully before using this product and save this
Configuration Guide for Microsoft Internet Connection Sharing
 Configuration Guide for Microsoft Internet Connection Sharing HUB INTERNET HOST CLIENTS Copyright 2002 Hughes Network Systems, Inc., a wholly owned subsidiary of Hughes Electronics Corporation. All rights
Notebook Adapter. Quick Installation Guide WPC300N (EU/LA) Package Contents
 Package Contents") Package Contents Wireless-N Notebook Adapter Setup Wizard CD-ROM User Guide (English only) on CD-ROM Quick Installation 24, GHz Wireless-N Notebook Adapter Wireless Model No. WPC300N (EU/LA) Quick Installation
Package Contents Wireless-N Notebook Adapter Setup Wizard CD-ROM User Guide (English only) on CD-ROM Quick Installation 24, GHz Wireless-N Notebook Adapter Wireless Model No. WPC300N (EU/LA) Quick Installation
GIFTePay XML SVS/GCS. Installation & Configuration Guide. Version Part Number: (ML) (SL) GIFTePay XML for SVS/GCS 4.
 (SL) GIFTePay XML for SVS/GCS 4.") GIFTePay XML Installation & Configuration Guide SVS/GCS Version 4.01 Part Number: 8662.97 (ML) 8662.98 (SL) GIFTePay XML for SVS/GCS 4.01 1 GIFTePay XML Installation & Configuration Guide Copyright 2008
GIFTePay XML Installation & Configuration Guide SVS/GCS Version 4.01 Part Number: 8662.97 (ML) 8662.98 (SL) GIFTePay XML for SVS/GCS 4.01 1 GIFTePay XML Installation & Configuration Guide Copyright 2008
SETUP AND SOFTWARE INSTALLATION INSTRUCTIONS FOR THE KTX WIRELESS SYSTEM
 SETUP AND SOFTWARE INSTALLATION INSTRUCTIONS SPECIAL NOTE BOONE CABLE WORKS & ELECTRONICS, INC. 1773-219TH LANE - P.O. BOX 429 READ THIS ENTIRE BOOKLET BOONE, IOWA 50036 USA BEFORE PROCEEDING WITH PHONE
Quick Installation Guide
 LevelOne FPS-1031 Parallel Print Server FPS-1032 USB Print Server FPS-1033 2 USB + 1 Parallel Print Server WPS-1133 2 USB + 1 Parallel Wireless Print Server Quick Installation Guide This guide covers only
3M Occupational Health and Environmental Safety 3M E-A-Rfit Validation System. Version 4.4 Software Installation Guide (Full) 1 P age
 1 P age") 3M Occupational Health and Environmental Safety 3M E-A-Rfit Validation System Version 4.4 Software Installation Guide (Full) 1 P age Contents Important Information Read First... 3 Software Installation
3M Occupational Health and Environmental Safety 3M E-A-Rfit Validation System Version 4.4 Software Installation Guide (Full) 1 P age Contents Important Information Read First... 3 Software Installation
DesignPro Tools for Xerox Elixir Technologies Corporation. All rights reserved.
 Follow the Crop Marks DesignPro Tools for Xerox Getting Started Guide C 1998-2008 Elixir Technologies Corporation. All rights reserved. Elixir Technologies Corporation 721 East Main Street Ventura, CA
GP-N100 Utility Software Manual
 System Requirements En Thank you for your purchase of a GP-N100. This manual describes how to use the GP-N100 Utility to download the latest assisted GPS data from Nikon servers to your GP-N100. To ensure
Rapid SQL 7.6 Installation Guide
 Rapid SQL 7.6 Installation Guide Copyright 1994-2009 Embarcadero Technologies, Inc. Embarcadero Technologies, Inc. 100 California Street, 12th Floor San Francisco, CA 94111 U.S.A. All rights reserved.
3.0. Manual and. Application note. USB Adapter
 3.0 USB Adapter Manual and Application note Index INTRODUCTION 1 CHAPTER 1 Package 2 Features 2 Bluetooth profile support 2 Drivers support 3 CHAPTER 2 Setup for Windows 98SE/ME/2000/XP 4 CHAPTER 3 Application
EASE Vehicle Interface Setup Instructions
 USB Interface Setup Note: These directions should be followed only after the EASE Scan Tool has been installed. Note: Visit www.fixcarsfaster.com for video setup instructions to supplement these instructions.