Course Code: ServiceMaxx Overview and Snapshot Analysis Study Guide
|
|
|
- Calvin Harrell
- 6 years ago
- Views:
Transcription


1 Course Code: 8798 ServiceMaxx Overview and Snapshot Analysis Study Guide
2 2015 Navistar, Inc Navistar Drive, Lisle, IL All rights reserved. No part of this publication may be duplicated or stored in an information retrieval system without the express written permission of Navistar, Inc.
3 1 ServiceMaxx Overview and Snapshot Analysis Study Guide Table of Contents Course Introduction... 3 System Requirements... 3 Contact Us... 3 Welcome... 3 Objectives... 3 ServiceMaxx Overview... 4 Launching ServiceMaxx... 4 Window Navigation... 4 Toolbar Buttons... 5 Menu Bar Navigation... 6 Connection Status Icon... 7 ServiceMaxx Update Indicator... 7 Connecting to a Vehicle... 8 Selecting Com Link... 8 Connection Indicator... 8 Reading Fault Codes... 8 DTC... 8 SPN... 8 FMI... 8 Type... 8 Freeze Frame... 8 Message... 8 Count... 9 Module... 9 Clear DTCs... 9 Refresh DTC/Vehicle Events... 9 Sessions... 9 Creating a Custom Session... 9 Watching Specific Sensors Searching for Signals Saving a Graph Saving and Opening Custom Sessions ServiceMaxx Overview and Snapshot Analysis 2015 Navistar, Inc. All rights reserved. All marks are trademarks of their respective owners.
4 ServiceMaxx Overview and Snapshot Analysis Study Guide 2 Loading a Custom Session Closing a Session Snapshots Recording a Snapshot Manual Recording Triggered Recording Adding a Trigger Configuring a Trigger Pre- and Post-Trigger Settings Snapshot Recording Intervals Arming the Trigger Reviewing Saved Snapshots Parameters and Signals Adjusting Parameters Numeric Changes Dropdown Changes Programming the Engine Conclusion NOTES ServiceMaxx Overview and Snapshot Analysis 2015 Navistar, Inc. All rights reserved. All marks are trademarks of their respective owners.
5 3 ServiceMaxx Overview and Snapshot Analysis Study Guide Course Introduction System Requirements If playback or course completion issues are experienced while viewing this course, Flash Player may need to be updated to the latest version. The following instructions assume the user is using Internet Explorer 9 or later. Go to get.adobe.com/flashplayer. Be sure to uncheck any checkboxes that appear under the OPTIONAL OFFERS heading to prevent unwanted software from being installed. Click the INSTALL NOW button on the right of the screen. A message should appear at the bottom of the screen to RUN or SAVE the file. Click RUN. Depending on the security settings, a message could appear asking: Do you want to allow the following program to make changes to this computer? Click YES. Choose the preferred Update Flash Player Preferences and click NEXT. Installation should begin. The user may be asked to close the browser in order to complete the installation process. Once the installation is complete, click FINISH. Internet Explorer will open an Adobe page with a message at the top confirming the installation. The user may now log back in to OnCommand (the LMS). Contact Us If you have questions or concerns regarding this course, please contact Navistar Service Education by submitting a case file (Dealer Personnel), or by calling THE INFORMATION PROVIDED WITHIN THIS COURSE IS FOR TRAINING PURPOSES ONLY. ALWAYS CONSULT THE LATEST SERVICE, DIAGNOSTIC, AND TOOL INFORMATION, LOCATED ON NAVISTAR S SERVICE PORTAL, PRIOR TO PERFORMING SERVICE ON NAVISTAR ENGINES, VEHICLES, AND EQUIPMENT. Welcome Welcome to the Navistar training course: ServiceMaxx Overview and Snapshot Analysis. This course is intended to preview the features of ServiceMaxx and demonstrate the procedure to capture and review a snapshot. Objectives Upon completion of this course, the student will be able to: Identify a Session in ServiceMaxx Select a pre-installed Session Record a Snapshot Open and Review a snapshot Use the filter feature View and Modify vehicle parameters. ServiceMaxx Overview and Snapshot Analysis 2015 Navistar, Inc. All rights reserved. All marks are trademarks of their respective owners.

6 ServiceMaxx Overview and Snapshot Analysis Study Guide 4 ServiceMaxx Overview Launching ServiceMaxx ServiceMaxx is a computer based diagnostic and programming service tool for Navistar Engines. It can be launched from either the ServiceMaxx desktop icon, or from the Navistar EZ-Tech Launcher. Once the software has been launched, the user will be prompted for their log-in information. This enables any elevated features the user may have access to, based on their access level. If the user does not have valid log-in information, the DIAGNOSTIC option can be selected which will provide limited access. Window Navigation After logging into ServiceMaxx the DEFAULT session will load. This session is comprised of four main sections or Windows. The VEHICLE INFORMATION window contains information such as Vehicle Identification Number and Engine Serial Number. The SIGNALS window contains multiple tabs that separate sensor values into different groups based on their unit of measure. This allows the user to view categories of sensors such as all temperature sensors, all pressure sensors, or all position sensors. The CONNECTION (SNIFFER) window displays real time information for the various modules on the vehicle's numerous networks that are communicating. The DIAGNOSTIC TROUBLE CODE Window allows the user to manage any Diagnostic Trouble Codes (DTCs) in the vehicles memory as well as read data link traffic. The DEFAULT session can be loaded at any time by selecting the DEFAULT session button in the Tool Bar. ServiceMaxx Overview and Snapshot Analysis 2015 Navistar, Inc. All rights reserved. All marks are trademarks of their respective owners.
7 5 ServiceMaxx Overview and Snapshot Analysis Study Guide Toolbar Buttons The Tool Bar also contains other important buttons which are commonly used. Activate Com Link The ACTIVATE COM LINK button is used to begin and end communications between the vehicle and ServiceMaxx. Trigger Setup IT IS POSSIBLE TO VARY THE RECORDING RATE OF SNAPSHOTS. THIS FEATURE WILL BE COVERED LATER IN THIS COURSE. The TRIGGER SETUP button allows ServiceMaxx to automatically start recording a snapshot when a pre-determined event occurs. The user can set multiple criteria to trigger a snapshot recording, such as when vehicle speed is above 15 miles per hour and engine load is above 80%. There are also settings for how long to record information before and after the trigger event occurs. Trigger Arm / Disarm The TRIGGER ARM/DISARM button arms and disarms the trigger to avoid accidental recording if the trigger criteria is too vague. Data Record The DATA RECORD button allows the user to manually record sensor information. Default Session The DEFAULT SESSION button loads the default session which can be used to view multiple performance related signals. Parameters Session The PARAMETERS SESSION button loads a pre-saved session that is ideal for viewing and adjusting parameters. Signals Session The SIGNALS SESSION button loads a pre-saved session that is ideal for viewing and graphing various sensor values. ServiceMaxx Overview and Snapshot Analysis 2015 Navistar, Inc. All rights reserved. All marks are trademarks of their respective owners.
8 ServiceMaxx Overview and Snapshot Analysis Study Guide 6 Stop Tests TO STOP SCR TESTS, THE USER MUST CLICK THE END TEST BUTTON WHEN AVAILABLE. The STOP TESTS button ends any non SCR related tests that are currently running. Print Vehicle Information The PRINT VEHICLE INFORMATION button prints a report with vehicle information and current DTCs, signal values, and parameters. Print Trip Report The PRINT TRIP REPORT button prints information about the vehicle's last trip. Menu Bar Navigation The MENU BAR has several useful features that can be accessed once connected to a vehicle. File The FILE menu offers the ability to open snapshot recordings and print vehicle information. View The VIEW menu allows the user to decide which windows are visible to offer a customized experience. This can also be used to create a custom session. Session The SESSIONS menu contains a list of pre-saved window arrangements called Sessions. The pre-saved sessions are optimized to show information for common tests or procedures. There are also options to load a saved session, save the current session, or rename the current session. Tests TO DETECT WEAK OR FAILING COMPONENTS, SOME TESTS IN SERVICEMAXX CAUSE SYSTEMS TO OPERATE UNDER SPECIALIZED CONDITIONS, WHICH MAY CAUSE CODES TO SET. IF A CODE SETS AS A RESULT OF A TEST IN SERVICEMAXX, FOLLOW THE DIAGNOSTIC PROCEDURE FOR THE CODE. The TESTS menu displays the engine specific tests that can be performed to ensure different components are operating correctly. Procedures The PROCEDURES menu displays the engine specific procedures that are performed to ensure different systems are operating correctly. ServiceMaxx Overview and Snapshot Analysis 2015 Navistar, Inc. All rights reserved. All marks are trademarks of their respective owners.
9 7 ServiceMaxx Overview and Snapshot Analysis Study Guide Tools The TOOLS menu contains some of the tools from the Tool Bar as well as a Communication Link selector and engine specific tools. There is also an option to set the Snapshot Recording Interval used for recording snapshots. Help The HELP menu contains information that makes ServiceMaxx easier. Connection Status Icon THE CONNECTION STATUS ICON DISPLAYS THE COMMUNICATION STATUS OF THE ENGINE CONTROL MODULE, NOT THE ENTIRE VEHICLE. In the lower right corner of the ServiceMaxx screen, there is a connection status icon. This icon resembles a Data Link Connector (DLC) and a Communication Link. These icons are normally black, but will turn green when either ServiceMaxx or the engine is trying to communicate. A successful connection between ServiceMaxx and the engine is indicated by the two icons connecting and turning green. ServiceMaxx Update Indicator This indicator displays the current update status of ServiceMaxx. When ServiceMaxx is opened, it will automatically check if an update is available. While this is happening, the indicator will display the message, Checking for updates. If an update is available, the download progress will be shown here as well. Once the update has been downloaded, the indicator turn green and display the message, Please restart ServiceMaxx. If an update is not available, the indicator will remain grey and display the message, ServiceMaxx is up to date. ServiceMaxx Overview and Snapshot Analysis 2015 Navistar, Inc. All rights reserved. All marks are trademarks of their respective owners.
10 ServiceMaxx Overview and Snapshot Analysis Study Guide 8 Connecting to a Vehicle Selecting Com Link To connect ServiceMaxx to a vehicle, you must first connect the proper communication link to the USB port of the computer running ServiceMaxx. The communication link should then be connected to the vehicle's DLC. Before the devices can communicate with each other, the user will need to select the communication link from the TOOLS menu. Select the TOOLS menu, and then highlight SELECT COM LINK. Navigate through the additional menus to select the connection device in use. ServiceMaxx will remember this selection the next time it is launched. A connection can now be initiated by turning the key to the on position. The ACTIVATE COM LINK button may need to be clicked if the connection is not made automatically. Connection Indicator A successful connection can be verified in multiple ways. The first is a solid green Connection Indicator Icon in the lower right corner of the screen. The left connection status icon will flash when ServiceMaxx is sending information to the engine, and the right connection status icon will flash when the engine is sending information to ServiceMaxx. Similarly, if either connector is solid black or the connectors of the icon are disconnected, the modules cannot communicate. The second way to verify a connection is by a fully populated VEHICLE INFORMATION window. Reading Fault Codes Once connected to the vehicle, any Diagnostic Trouble Codes (DTCs) that are stored in the vehicle's memory will be displayed. The default columns show the DTC if applicable, Suspect Parameter Number (SPN), Failure Mode Indicator (FMI), Fault Code Type, Freeze Frame Button, Message, Count, and Module. DTC This field displays a coded number that corresponds to a specific failure on EPA 07 and older engines. SPN This field displays a coded number that corresponds to specific vehicle systems. FMI This field displays a coded number that corresponds to a specific type of fault, such as an open circuit. Type This field displays a description of the current status of the DTC. Freeze Frame This button allows the user to view the vehicle data at the time the DTC was set. Message This field displays a description of the DTC. ServiceMaxx Overview and Snapshot Analysis 2015 Navistar, Inc. All rights reserved. All marks are trademarks of their respective owners.
11 9 ServiceMaxx Overview and Snapshot Analysis Study Guide Count This field lists the number of times the DTC has been detected since the first time the code was set. Module This field displays the module that set the DTC. Clear DTCs WHEN DIAGNOSING A FAULT, IT IS VERY IMPORTANT THAT THE TECHNICIAN DOES NOT CLEAR FAULT CODES UNLESS INSTRUCTED TO DO SO BY THE FAULT CODE ACTION PLAN (F-CAP) OR DIAGNOSTIC MANUAL. USEFUL DIAGNOSTIC DATA AND CODE HISTORY WILL BE LOST IF CODES ARE CLEARED AT THE WRONG TIME. This button allows the user to clear the fault codes that are currently saved in the vehicle's memory, along with its freeze frame data. Refresh DTC/Vehicle Events This button allows the user to update the DTC list to find out if any new codes have been set or if the status of a fault code has changed. Sessions Creating a Custom Session Pre-saved sessions can be opened from the SESSIONS menu at the top of the ServiceMaxx screen. Each session is optimized for a different function, which is typically described in the name of the session. Sessions are a collection and arrangement of windows within the ServiceMaxx screen. The user has the ability to add, resize, and remove windows to suit their needs. Resizing windows is useful for viewing more data, revealing graphs, or uncovering options that may be hidden. Tabs within windows can be moved to become their own window as well. For instance, the user could view temperature and pressure data at the same time. The columns of data can also be resized to show more or less information. There may be more data, or signals, available than what is displayed. ServiceMaxx has the ability to watch additional information that the user may want to have. To watch a signal, make sure the corresponding box in the WATCHED column is selected. If this column is not available, right click on one of the other column titles to open an options menu, and then select WATCHED to add the WATCHED column. Select the WATCHED option to continue. ServiceMaxx Overview and Snapshot Analysis 2015 Navistar, Inc. All rights reserved. All marks are trademarks of their respective owners.

12 ServiceMaxx Overview and Snapshot Analysis Study Guide 10 Watching Specific Sensors To view the other available signals, deselect the ONLY SHOW WATCHED box, which can be found by expanding the collapsed menu at that top of the window. This will populate the signals list with all of the available signals. After selecting the sensors to be watched, ensure the box at the top of the window labeled ONLY SHOW WATCHED is selected. All signals that are unchecked will be removed from the WATCHED list. Searching for Signals There are multiple ways to find a signal and add it to the WATCHED list. The first way is to scroll through the list and select it. Another option is to use the FILTER function built into ServiceMaxx. THE FILTER WILL SHOW ONLY ITEMS VIEWED IN THE TAB. IF THE ONLY SHOW WATCHED BOX IS CHECKED, THE FILTER FEATURE WILL SHOW ONLY THE SIGNALS AND PARAMETERS THAT ARE BEING WATCHED. IF THE BOX IS NOT CHECKED, ALL AVAILABLE VALUES CAN BE SELECTED USING THE FILTER FEATURE. To use this function, click the filter icon at the left of all of the columns in a window, enter a keyword into the search field, such as MANIFOLD, to search for the Intake Manifold Pressure Sensor, and select OK. ServiceMaxx will then search through the names and abbreviations of all signals for the specified keyword. The signals with the word MANIFOLD in the title will then be grouped at the top of the list. This makes it easier to search for the signal of interest. Once the new signal has been selected, the ONLY SHOW WATCHED option can be selected again to hide the extra data. ServiceMaxx Overview and Snapshot Analysis 2015 Navistar, Inc. All rights reserved. All marks are trademarks of their respective owners.
13 11 ServiceMaxx Overview and Snapshot Analysis Study Guide Saving a Graph When a graph has all of the desired values displayed, it can be saved as an image, printed, or fine-tuned by right-clicking on the graph to open an options menu. Saving and Opening Custom Sessions CUSTOM SESSIONS MUST BE SAVED BEFORE A NEW SESSION OR TEST IS STARTED. IF THE CUSTOM SESSION IS EXITED WITHOUT SAVING, THE CHANGES WILL BE LOST. If the new window arrangement is or will be used often, it can be saved as a custom session. To do this, open the SESSIONS menu at the top of the ServiceMaxx screen, and then select the SAVE SESSION option. Name the session and click the SAVE button. Loading a Custom Session To load a previously saved session, open the SESSIONS menu at the top of the ServiceMaxx screen, and then select the LOAD SESSION option. Navigate to, and select the desired session file to be opened. Click the OPEN button to load the session. Closing a Session The previous session is closed when the user starts a new session or test, or when the ServiceMaxx software is closed. Snapshots Recording a Snapshot Many times it is necessary to look at sensor values while the vehicle is moving. ServiceMaxx makes it possible to safely collect data while driving the vehicle. This feature is called a SNAPSHOT. Snapshots are recordings of all vehicle data over a portion of time. These recordings can be saved and viewed at a later time. Manual Recording There are two ways to take a snapshot. The first is to manually start and stop the recording using the DATA RECORD button. Clicking this button once starts the recording. Data will be recorded until the button is clicked again or the session is closed. Once recording stops, the snapshot is automatically saved. Triggered Recording The second option is to take a snapshot by setting up a trigger. Triggers allow the user to record information based on sensor readings. For instance, if a customer complains of an issue that occurs at 35 MPH (56 Km/H) or faster, you can set a trigger to focus on data once that speed is reached. To set up a trigger, click the TRIGGER SETUP button. ServiceMaxx Overview and Snapshot Analysis 2015 Navistar, Inc. All rights reserved. All marks are trademarks of their respective owners.
14 ServiceMaxx Overview and Snapshot Analysis Study Guide 12 Adding a Trigger Add a new requirement by clicking the ADD CRITERIA button. A blank line will be added to the list of triggers. The user can select a sensor to monitor by clicking the blank cell in the SIGNAL column. THE FILTER WILL SHOW ONLY ITEMS VIEWED IN THE TAB. IF THE ONLY SHOW WATCHED BOX IS CHECKED, THE FILTER FEATURE WILL SHOW ONLY THE SIGNALS AND PARAMETERS THAT ARE BEING WATCHED. IF THE BOX IS NOT CHECKED, ALL AVAILABLE VALUES CAN BE SELECTED USING THE FILTER FEATURE. This opens a drop down menu with all of the available signals listed in alphabetical order. Scroll to the desired signal, which is VEHICLE SPEED in this case. Configuring a Trigger Selecting a signal adds it to the list and populates the UNIT column with the assigned unit and displays a REMOVE button to remove the trigger. To configure a trigger, the user must determine the logic, as well as a value for the trigger. Logic determines what condition of the value is desired. The logic options include greater than, equal to, not equal to, and less than. Since the issue in this example only happens at or above 35 MPH (56 Km/H), the logic column should be set to GREATER THAN. The value should then be set to the desired reading, which is 35 MPH (56 Km/H) in this case. At this point, it is possible to add more criteria. For example, if an issue only happens once the engine coolant reaches a certain temperature or the engine is under a specific load range. Pre- and Post-Trigger Settings Once all of the triggers have been added, the Pre- and Post- trigger timers should be set to further narrow down the amount of information collected. The pre-trigger setting is used to determine how much information before the trigger event should be included in the snapshot. From the moment the trigger is armed, ServiceMaxx begins monitoring all signal data. The amount of pre-trigger data is then included in the snapshot based on the settings you choose when configuring the trigger. This is useful when trying to identify what causes a trigger, such as a sudden loss of fuel pressure. The post-trigger setting is used to determine how much data should be recorded after the trigger event. This setting also stops the snapshot feature once the set time has been reached. After all settings have been configured as desired, click the SAVE button to confirm the settings. ServiceMaxx Overview and Snapshot Analysis 2015 Navistar, Inc. All rights reserved. All marks are trademarks of their respective owners.
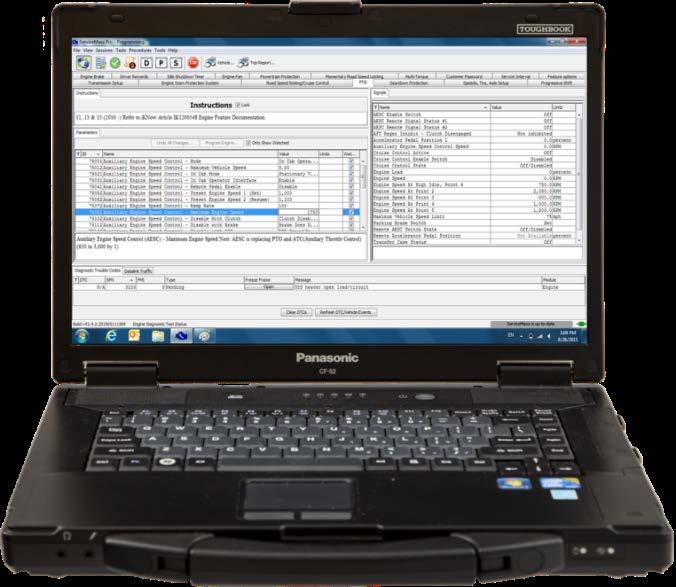
15 13 ServiceMaxx Overview and Snapshot Analysis Study Guide Snapshot Recording Intervals Before enabling the trigger, it is a good idea to adjust the SNAPSHOT RECORDING INTERVAL. This feature controls how often data is captured while recording a snapshot. This setting can be adjusted by opening the TOOLS menu, hovering the mouse over SNAPSHOT RECORDING INTERVAL, and then selecting the desired interval. A shorter recording interval means more data will be collected, more storage space is needed, and small changes can be easily identified. Longer recording intervals will collect data less often, require less memory for storage, and are ideal for identifying trends over a longer period of time. Arming the Trigger After setting up a trigger, and adjusting the recording interval, the trigger is ready to be armed by clicking the TRIGGER ARM button. Doing so disables the manual SNAPSHOT RECORD button and starts monitoring the vehicle data. Once a snapshot has ended, the file will automatically be saved into a SNAPSHOTS folder on the desktop. Reviewing Saved Snapshots ServiceMaxx also has the ability to review saved snapshots. To do this, start by opening the FILE menu. Select OPEN SNAPSHOT RECORDING FILE to browse available snapshots. Then double click the desired snapshot to open it with ServiceMaxx. Snapshots are opened in a separate window which contains a graph and a list of all available signals. Selecting signals from the list plots them on the graph, if possible, so that the information can be viewed and compared. The recorded information can be played back at the speed it was recorded or scrolled through manually. In the case of a triggered recording, the information before the beginning of the timeline can be viewed manually. Parameters and Signals Adjusting Parameters It is also possible to modify parameters within ServiceMaxx. The types of parameters that can be modified are dependent on the user's access level. To adjust parameters, select the PROGRAMMING session. Numeric Changes There are two basic ways to change a parameter. The first is by changing a numeric value. For example, on the PTO tab, it is possible to adjust the maximum speed for the auxiliary engine speed control. To change the parameter, click the current speed in the VALUE column. Once the current value is selected, enter the desired value and press ENTER on the keyboard. The updated parameter setting has been noted, but has not been programmed yet. The user can cancel the change by clicking the UNDO button. ServiceMaxx Overview and Snapshot Analysis 2015 Navistar, Inc. All rights reserved. All marks are trademarks of their respective owners.
16 ServiceMaxx Overview and Snapshot Analysis Study Guide 14 Dropdown Changes The second way to change a parameter is by selecting an option from a dropdown menu. Parameters such as Remote Pedal Mode can have two or more pre-determined options for setting the parameter. In this case, clicking on the value of a parameter enables the user to open a drop down menu. The drop down menu will list the available programming options for the parameter. Programming the Engine If another parameter needs to be changed, it can be done at this time. Once all of the parameters have been changed, select the PROGRAM ENGINE button towards the top of the screen. ServiceMaxx will ask the user to confirm that the new parameters should be programmed. Selecting YES starts the process of programming the changes. ServiceMaxx Overview and Snapshot Analysis 2015 Navistar, Inc. All rights reserved. All marks are trademarks of their respective owners.
17 15 ServiceMaxx Overview and Snapshot Analysis Study Guide Conclusion This concludes the Navistar training course: ServiceMaxx Overview and Snapshot Analysis. Thank you for your participation. NOTES ServiceMaxx Overview and Snapshot Analysis 2015 Navistar, Inc. All rights reserved. All marks are trademarks of their respective owners.
Generation 4 Body Controller Overview. Study Guide. Course Code: 8812
 Generation 4 Body Controller Overview Study Guide Course Code: 8812 1 Generation 4 Body Controller Overview Study Guide 2016 Navistar, Inc. 2701 Navistar Drive, Lisle, IL 60532. All rights reserved. No
User's Guide. For CarChip and CarChip E/X 8210 & 8220
 User's Guide TM For CarChip and CarChip E/X 8210 & 8220 Product Number: 8210, 8220 Davis Instruments Part Number: 7395.064 DriveRight CarChip User s Manual Rev A (January 2, 2003) Davis Instruments Corp.,
PocketMaxx ECM Update. Study Guide. Course Code: 8428
 PocketMaxx ECM Update Study Guide Course Code: 8428 1 PocketMaxx ECM Update Study Guide 2013 Navistar, Inc. 2701 Navistar Drive, Lisle, IL 60532. All rights reserved. No part of this publication may be
Pitstop Fuel Timer. Operating Manual
 Pitstop Fuel Timer Operating Manual Doug Shelby Engineering Revised: 8/25/2013 Table Of Contents 1. System Description:... 2 2. Software Installation:... 2 3. Hardware Installation:... 2 4. Driver Installation:...
Discovering Computers & Microsoft Office Office 2010 and Windows 7: Essential Concepts and Skills
 Discovering Computers & Microsoft Office 2010 Office 2010 and Windows 7: Essential Concepts and Skills Objectives Perform basic mouse operations Start Windows and log on to the computer Identify the objects
Working with Mailbox Manager
 Working with Mailbox Manager A user guide for Mailbox Manager supporting the Message Storage Server component of the Avaya S3400 Message Server Mailbox Manager Version 5.0 February 2003 Copyright 2003
Maximo Self Service Center
 Maximo Self Service Center Once you have received an email regarding your registration approval, go to the following web address: https://maximo.mysodexo.com Log in to the Self Service Center: Your User
USER GUIDE. NavKal User Guide (Public Version) Navistar, Inc Navistar Drive, Lisle, IL USA
 Navistar, Inc Navistar Drive, Lisle, IL USA") USER GUIDE NavKal User Guide (Public Version) Navistar, Inc. 2701 Navistar Drive, Lisle, IL 60532 USA 2018 Navistar, Inc. All rights reserved. All marks are trademarks of their respective owners. USER
USER GUIDE NavKal User Guide (Public Version) Navistar, Inc. 2701 Navistar Drive, Lisle, IL 60532 USA 2018 Navistar, Inc. All rights reserved. All marks are trademarks of their respective owners. USER
MagicInfo VideoWall Author
 MagicInfo VideoWall Author MagicInfo VideoWall Author User Guide MagicInfo VideoWall Author is a program designed to construct a VideoWall layout and create VideoWall content by adding various elements
The following instructions cover how to edit an existing report in IBM Cognos Analytics.
 IBM Cognos Analytics Edit a Report The following instructions cover how to edit an existing report in IBM Cognos Analytics. Navigate to Cognos Cognos Analytics supports all browsers with the exception
Total Connect 2.0 Online Help
 Security Events Users Locations Video Hints for use. After logging in hit F11 to toggle full screen mode. Hover over icons for tool tip help. Upon the initial login, control panel data should be imported
User Guide. Web Intelligence Rich Client. Business Objects 4.1
 User Guide Web Intelligence Rich Client Business Objects 4.1 2 P a g e Web Intelligence 4.1 User Guide Web Intelligence 4.1 User Guide Contents Getting Started in Web Intelligence 4.1... 5 Log into EDDIE...
User Guide. Avery Dennison Web Ordering Solution for Steinmart
 User Guide Avery Dennison Web Ordering Solution for Steinmart March 2012 Copyright 2012 A very Dennison The information in this document is subject to change without notice and should not be construed
AutoCAD 2009 User InterfaceChapter1:
 AutoCAD 2009 User InterfaceChapter1: Chapter 1 The AutoCAD 2009 interface has been enhanced to make AutoCAD even easier to use, while making as much screen space available as possible. In this chapter,
Introduction to Kaltura
 Introduction to Kaltura The Kaltura media content management system allows users to record, stream, and manage multimedia files. This industry-leading enterprise system offers many robust tools. This guide
Oracle User Productivity Kit Content Player. E March 2014
 Oracle User Productivity Kit Content Player E53039-01 March 2014 Oracle User Productivity Kit Content Player E53039-01 March 2014 Copyright 1998, 2014, Oracle and/or its affiliates. All rights reserved.
Builder Introduction and Usage Series. Diamond Logic
 A N AV I S TA R C O M PA N Y Diamond Logic Builder Introduction and Usage Series Study Guide TMT-080703 Study Guide Diamond Logic Builder Introduction and Usage Series TMT-080703 2007 International Truck
Creating Interactive PDF Forms
 Creating Interactive PDF Forms Using Adobe Acrobat X Pro for the Mac University Information Technology Services Training, Outreach, Learning Technologies and Video Production Copyright 2012 KSU Department
Oracle General Navigation Overview
 Oracle 11.5.9 General Navigation Overview 1 Logging On to Oracle Applications You may access Oracle, by logging onto the ATC Applications Login System Status page located at www.atc.caltech.edu/support/index.php
Title of Resource Introduction to SPSS 22.0: Assignment and Grading Rubric Kimberly A. Barchard. Author(s)
") Title of Resource Introduction to SPSS 22.0: Assignment and Grading Rubric Kimberly A. Barchard Author(s) Leiszle Lapping-Carr Institution University of Nevada, Las Vegas Students learn the basics of SPSS,
Title of Resource Introduction to SPSS 22.0: Assignment and Grading Rubric Kimberly A. Barchard Author(s) Leiszle Lapping-Carr Institution University of Nevada, Las Vegas Students learn the basics of SPSS,
CONTENT PLAYER 9.6_CA_BBP_EN_1.0
 CONTENT PLAYER 9.6_CA_BBP_EN_1.0 COPYRIGHT Copyright 1998, 2009, Oracle and/or its affiliates. All rights reserved. Oracle is a registered trademark of Oracle Corporation and/or its affiliates. Other names
Interskill Learning Management System(LMS)
") Interskill Learning Management System(LMS) Student Guide Your Guide to Interskill Learning s Online Training Systems www.interskill.com Table of Contents Interskill Interskill LMS Overview... 3 The Login
Interskill Learning Management System(LMS) Student Guide Your Guide to Interskill Learning s Online Training Systems www.interskill.com Table of Contents Interskill Interskill LMS Overview... 3 The Login
Introduction to SPSS
 Introduction to SPSS Purpose The purpose of this assignment is to introduce you to SPSS, the most commonly used statistical package in the social sciences. You will create a new data file and calculate
Barchard Introduction to SPSS Marks
 Barchard Introduction to SPSS 22.0 3 Marks Purpose The purpose of this assignment is to introduce you to SPSS, the most commonly used statistical package in the social sciences. You will create a new data
Intro to Excel. To start a new workbook, click on the Blank workbook icon in the middle of the screen.
 Excel is a spreadsheet application that allows for the storing, organizing and manipulation of data that is entered into it. Excel has variety of built in tools that allow users to perform both simple
Solar Eclipse Widgets and Menu Shortcuts. Release 9.0.5
 Solar Eclipse Widgets and Menu Shortcuts Release 9.0.5 i Table Of Contents Disclaimer This document is for informational purposes only and is subject to change without notice. This document and its contents,
Navigate to Cognos Cognos Analytics supports all browsers with the exception of Microsoft Edge.
 IBM Cognos Analytics Create a List The following instructions cover how to create a list report in IBM Cognos Analytics. A list is a report type in Cognos that displays a series of data columns listing
Creating a Website with Publisher 2016
 Creating a Website with Publisher 2016 Getting Started University Information Technology Services Learning Technologies, Training & Audiovisual Outreach Copyright 2017 KSU Division of University Information
Introduction to Moodle
 Introduction to Moodle Preparing for a Moodle Staff Development Session... 2 Logging in to Moodle... 2 Adding an image to your profile... 4 Navigate to and within a course... 6 Content of the basic template
VERUS Navigation Guide
 VERUS Navigation Guide diagnostics.snapon.com Contents Chapter 1: Getting Started... 3 Powering Up... 3 Module Buttons... 4 VERUS Toolbar... 5 Powering Down... 5 Emergency Shutdown... 5 Chapter 2: Scanner...
Release Date: September 4, 2014
 MV1DU User s Guide Release Date: September 4, 2014 Use of the MV1DU Diagnostic System requires an active license agreement or MV-1 Dealer Agreement. For information on obtaining a license, please email
Remote Support 19.1 Web Rep Console
 Remote Support 19.1 Web Rep Console 2003-2019 BeyondTrust Corporation. All Rights Reserved. BEYONDTRUST, its logo, and JUMP are trademarks of BeyondTrust Corporation. Other trademarks are the property
1. Understanding efinanceplus Basics
 1. Understanding efinanceplus Basics To understand the procedures described later in this guide, you will first need some background on the efinanceplus environment. Whether adding, searching for, viewing,
Panopto. End-User Guide
 Panopto End-User Guide Table of Contents INTRODUCTION... 3 PROVISIONING A COURSE... 3 LOGGING IN... 7 NAVIGATION... 8 PREPARING TO RECORD... 9 CREATING A SIMPLE RECORDING (AUDIO AND VIDEO ONLY)... 10 CREATING
Tasks. User Guide 4.12
 Tasks User Guide 4.12 ABOUT NORTHWOODS CONSULTING PARTNERS Northwoods Consulting Partners, Inc., founded in 1999, is a privately-held software development and services company headquartered in Dublin,
INSITE Professional INSITE Lite INSITE RSGR. QSC8.3 and QSL9 User's Manual
 INSITE Professional INSITE Lite INSITE RSGR QSC8.3 and QSL9 User's Manual Table of Contents Getting Started...1 What is INSITE...1 Registering INSITE...1 About...1 The Help System...2 Help Window...2 Help
Barchard Introduction to SPSS Marks
 Barchard Introduction to SPSS 21.0 3 Marks Purpose The purpose of this assignment is to introduce you to SPSS, the most commonly used statistical package in the social sciences. You will create a new data
Useful Google Apps for Teaching and Learning
 Useful Google Apps for Teaching and Learning Centre for Development of Teaching and Learning (CDTL) National University of Singapore email: edtech@groups.nus.edu.sg Table of Contents About the Workshop...
Welcome & Introduction
 Welcome & Introduction Welcome to ebeam Interactive Suite 3. Overview ebeam Interactive Suite 3 allows you to create lessons with provided resources and enhances curriculum delivery with dynamic annotation
Using Excel to Troubleshoot EMIS Data
 Using Excel to Troubleshoot EMIS Data Overview Basic Excel techniques can be used to analyze EMIS data from Student Information Systems (SISs), from the Data Collector, and on ODE EMIS reports This session
RITIS Training Module 4 Script
 RITIS Training Module 4 Script Welcome to the Regional Integrated Information System or RITIS Module 04 CBT. To begin, select the start button or press Shift+N on your keyboard. This training module will
HealthStream Connect Administrator User Guide
 HealthStream Connect Administrator User Guide ii Contents About HealthStream Connect... 1 Administrator Overview of HealthStream Connect... 2 Administrator Access and Privileges... 2 Navigating HealthStream
WhatsUp Gold 2016 Distributed Edition
 WhatsUp Gold 2016 Distributed Edition Contents Using WhatsUp Gold Distributed Edition 1 About WhatsUp Gold Distributed Edition... 1 About Distributed Edition's reporting capabilities... 2 Installing the
QUESTION ITEM BANK MAINTENANCE PROGRAM QUICK GUIDE & ILLUSTRATED HELP
 PROJECT PHOENIX EduTrax Instructional Management Solution Phoenix/EIM ItemPlus QUESTION ITEM BANK MAINTENANCE PROGRAM QUICK GUIDE & ILLUSTRATED HELP Version 1.3.3.2 The ItemPlus Windows PC program is used
NMS Spectrum Analyzer Application
 NMS Spectrum Analyzer Application Spectrum View Window... 3 Context Sensitive Menus for Spectrum View Window... 3 Add Horizontal Line... 4 Add Vertical Line... 4 Show Lines... 4 Hide Lines... 4 Delete
Remote Support Web Rep Console
 Remote Support Web Rep Console 2017 Bomgar Corporation. All rights reserved worldwide. BOMGAR and the BOMGAR logo are trademarks of Bomgar Corporation; other trademarks shown are the property of their
Monash University Policy Management. User Guide
 Monash University Policy Management User Guide 1 Table of Contents 1. GENERAL NAVIGATION... 4 1.1. Logging In to Compliance 360 - Single Sign On... 4 1.2. Help... 4 1.2.1. The University Policy Bank...
Using Sitecore 5.3.1
 Using Sitecore 5.3.1 An End-User s Guide to Using and Administrating Sitecore Author: Sitecore Corporation Date: December 12, 2007 Release: Rev. 1.0 Language: English Sitecore is a registered trademark.
SteelCentral Insights for SteelConnect Users Guide
 SteelCentral Insights for SteelConnect Users Guide Version 1.1.x November 2017 2017 Riverbed Technology, Inc. All rights reserved. Riverbed and any Riverbed product or service name or logo used herein
Working with PDF s. To open a recent file on the Start screen, double click on the file name.
 Working with PDF s Acrobat DC Start Screen (Home Tab) When Acrobat opens, the Acrobat Start screen (Home Tab) populates displaying a list of recently opened files. The search feature on the top of the
Steps: 1. Log in to the Dmitri application through the following website URL, as appropriate:
 Dmitri Suite Getting Started Logging In and Logging Out Logging In Use the following steps to log in to the Dmitri application. Steps: 1. Log in to the Dmitri application through the following website
ECR Vault User Guide. An ImageDirector product from Milner Technologies, Inc. ECR Vault Version 8.0
 ECR Vault User Guide An ImageDirector product from Milner Technologies, Inc. ECR Vault Version 8.0 COPYRIGHT Copyright 1995-2015 Milner Technologies, Inc. This manual and the software described in it are
All software, resources, drivers and documentation supplied with the product are copyright Promethean Ltd 2014.
 Activity Builder Copyright Information TP1908 Issue 01 2014 Promethean Limited. All rights reserved. All software, resources, drivers and documentation supplied with the product are copyright Promethean
NYLearns Curriculum Administration:
 NYLearns Curriculum Administration: Creating a Curriculum Map May 2014 2 This page left intentionally blank 3 Contents Signing in to NYLearns... 4 Curriculum Mapping... 6 Creating Curriculum Maps... 7
Work Smart: Windows 7 New Features
 About Windows 7 New Features The Windows 7 operating system offers several new features to help you work faster and more efficiently, and enable you to access the files, folders, programs, and applications
User Guide for TASKE Contact Web Interface
 User Guide for TASKE Contact Web Interface For Avaya Communication Manager with Application Enablement Services Version: 8.9 Date: 2011-06 This document is provided to you for informational purposes only.
AiM User Guide. Race Studio 3 Track Manager. Release 1.00
 AiM User Guide Race Studio 3 Track Manager Release 1.00 1 Introduction Track Manager is the Race Studio 3 section dedicated to tracks management. Here is possible to create and delete new tracks, modify
CyberLink. U Webinar. User's Guide
 CyberLink U Webinar User's Guide Copyright and Disclaimer All rights reserved. To the extent allowed by law, U Webinar IS PROVIDED AS IS, WITHOUT WARRANTY OF ANY KIND, EITHER EXPRESS OR IMPLIED, INCLUDING
RIVA / Athena Pro-Series ECU
 RIVA / Athena Pro-Series ECU USING SOFTWARE (MAYA) Running Maya for First Time Once installed, Maya is available in the Start menu under Programs -> Maya, or from a desktop short cut, if created. The first
User Guide. FTR Reporter For more information, visit
 FTR Reporter 5.7.1 For more information, visit www.fortherecord.com TABLE OF CONTENTS INTRODUCTION... 5 Overview... 5 About This Document... 5 GETTING STARTED... 6 Installation... 6 Starting Reporter...
It is recommended that you configure Internet Explorer to see the MLS as a trusted site.
 Tips for New Users Welcome to Rapattoni MLS! You now have access to the most advanced Internet-based multiple listing system on the market, with many exciting tools and features that will help you provide
Oracle User Productivity Kit Content Player
 Oracle User Productivity Kit Content Player Oracle User Productivity Kit Content Player Copyright 1998, 2012, Oracle and/or its affiliates. All rights reserved. Oracle and Java are registered trademarks
THE EXCEL ENVIRONMENT... 1 EDITING...
 Excel Essentials TABLE OF CONTENTS THE EXCEL ENVIRONMENT... 1 EDITING... 1 INSERTING A COLUMN... 1 DELETING A COLUMN... 1 INSERTING A ROW... DELETING A ROW... MOUSE POINTER SHAPES... USING AUTO-FILL...
Creators Basic Guide to Using UICapture (Windows)
") Creators Basic Guide to Using UICapture (Windows) All of the University of Iowa General Assignment Classrooms (GAC) are equipped with the recording software known as Panopto Recorder on Windows and Mac.
Creators Basic Guide to Using UICapture (Windows) All of the University of Iowa General Assignment Classrooms (GAC) are equipped with the recording software known as Panopto Recorder on Windows and Mac.
Astra Schedule User Guide Scheduler
 Astra Schedule User Guide 7.5.12 Scheduler 1 P a g e ASTRA SCHEDULE USER GUIDE 7.5.12... 1 LOGGING INTO ASTRA SCHEDULE... 3 LOGIN CREDENTIALS... 3 WORKING WITH CALENDARS... 4 CHOOSING A CALENDAR AND FILTER...
Creators Basic Guide to Using UICapture (Mac)
") Creators Basic Guide to Using UICapture (Mac) Download the software from http://helpdesk.its.uiowa.edu/software/signin.htm After downloading the software and setting up an account with your local IT support,
Creators Basic Guide to Using UICapture (Mac) Download the software from http://helpdesk.its.uiowa.edu/software/signin.htm After downloading the software and setting up an account with your local IT support,
ecuexplorer User Guide
 Installation...2 Getting Started...3 User Interface...3 Menu Structure...3 Initial Configuration...5 Hotkeys...6 Navigation Tree...7 User-Defined Data Items...7 Known Trouble Codes...8 Saved Log Files...9
Administration. Training Guide. Infinite Visions Enterprise Edition phone toll free fax
 Administration Training Guide Infinite Visions Enterprise Edition 406.252.4357 phone 1.800.247.1161 toll free 406.252.7705 fax www.csavisions.com Copyright 2005 2011 Windsor Management Group, LLC Revised:
Visitor Management System Module Settings and Operation Guide
 Visitor Management System Module Settings and Operation Guide Visitor Management System Module Settings and Operation Guide. Introduction.. 4 Starting and stopping the Visitor Management System software
Getting Started. Microsoft QUICK Source 7
 Microsoft QUICK Windows Source 7 Getting Started The Windows 7 Desktop u v w x u Icon links to a program, file, or folder that is stored on the desktop. v Shortcut Icon links to a program, file, or folder
Colleague UI4.3 Documentation
 Colleague UI4.3 Documentation Table of Contents Getting Started... 2 Add the Shortcuts to your Desktop... 2 Searching for and Using Forms... 3 Begin Your Form Search... 3 Form Search Results... 3 The Navigation
Clackamas Education Service District Special Education User Guide
 Clackamas Education Service District Special Education User Guide Canby CESD Colton Estacada Gladstone Lake Oswego Molalla River North Clackamas Oregon City Oregon Trail West Linn-Wilsonville Support Options
Web-based Configuration. First, setup motion detection windows in the web-based configuration of the camera.
 How do I record motion using IP surveillance? To schedule video recording with motion detection, you must first enable this feature on the Internet camera. This can serve as a security device by recording
SofTest Help Document
 SofTest Overview ExamSoft Support Contact Information: 1.866.429.8889 (Mon - Fri, 7:30 AM - 8:30 PM ET, Sat 8:30 AM - 6:30 PM ET) Visit our support portal at support.examsoft.com. Chats and emails are
Investigator Site OC RDC PDF User Guide
 Investigator Site OC RDC PDF User Guide Version 1.0 Page 1 of 40 TABLE OF CONTENTS Accessing OC RDC Steps for Access 3 Logging On 4 Change Password 4 Laptop and System Security 5 Change Study 5 Navigating
Welcome to the CP Portal
 Welcome to the CP Portal Access your school documents from home Launch Internet Explorer and navigate to: https://files.cpcsc.k12.in.us/htcomnet/ Click on Continue to this website (not recommended) Key
Microsoft How to Series
 Microsoft How to Series Getting Started with EXCEL 2007 A B C D E F Tabs Introduction to the Excel 2007 Interface The Excel 2007 Interface is comprised of several elements, with four main parts: Office
Computer Essentials Session 1 Lesson Plan
 Note: Completing the Mouse Tutorial and Mousercise exercise which are available on the Class Resources webpage constitutes the first part of this lesson. ABOUT PROGRAMS AND OPERATING SYSTEMS Any time a
Quick Start Guide - Contents. Opening Word Locating Big Lottery Fund Templates The Word 2013 Screen... 3
 Quick Start Guide - Contents Opening Word... 1 Locating Big Lottery Fund Templates... 2 The Word 2013 Screen... 3 Things You Might Be Looking For... 4 What s New On The Ribbon... 5 The Quick Access Toolbar...
Learning TradeStation. Essentials of the TradeStation Desktop
 Learning TradeStation Essentials of the TradeStation Desktop Important Information No offer or solicitation to buy or sell securities, securities derivative or futures products of any kind, or any type
Using Jive and SharePoint Together
 Using Jive and SharePoint Together Contents 2 Contents Using Jive and SharePoint Together... 3 Viewing SharePoint Content in Jive...3 Using Recent Activity Widgets... 3 Using SharePoint Sites Widgets...
Basic Millennium INTRODUCTION
 Basic Millennium INTRODUCTION Welcome to the Basic Millennium tutorial. Navigation tools, such as the Continue button, will display as you progress through the presentation, while playback functions are
Microsoft Word Basic Editing. Lesson , John Wiley & Sons, Inc. Microsoft Official Academic Course, Microsoft Word
 Microsoft Word 2013 Lesson 2 Basic Editing 2014, John Wiley & Sons, Inc. Microsoft Official Academic Course, Microsoft Word 2013 1 Objectives 2014, John Wiley & Sons, Inc. Microsoft Official Academic Course,
Guide for K-6 Teachers
 Guide for K-6 Teachers 2009 Houghton Mifflin Harcourt Publishing Company. All rights reserved. Houghton Mifflin Harcourt and its logo are trademarks of Houghton Mifflin Harcourt Publishing Company. Microsoft
SAS Universal Viewer 1.3
 SAS Universal Viewer 1.3 User's Guide SAS Documentation The correct bibliographic citation for this manual is as follows: SAS Institute Inc. 2012. SAS Universal Viewer 1.3: User's Guide. Cary, NC: SAS
Advisor Workstation Training Manual: Working in the Research Module
 Advisor Workstation Training Manual: Working in the Research Module Overview of the Research module - - - - - - - - - - - - - - - - 1 What you will learn in this section - - - - - - - - - - - - - - - -
FIREFOX MENU REFERENCE This menu reference is available in a prettier format at
 FIREFOX MENU REFERENCE This menu reference is available in a prettier format at http://support.mozilla.com/en-us/kb/menu+reference FILE New Window New Tab Open Location Open File Close (Window) Close Tab
Introduction to Personal Computers Using Windows 10 and Microsoft Office 2016
 Watsonia Publishing 47 Greenaway Street Bulleen VIC 3105 Australia www.watsoniapublishing.com info@watsoniapublishing.com Introduction to Personal Computers Using Windows 10 and Microsoft Office 2016 Quick
Bridgeware Systems War Board Documentation
 Introduction Temps Plus War Board Help Bridgeware Systems War Board Documentation Version date 2/3/2006 WarBoard.chm Version 4 Please visit www.bridgeware.net/webhelp for ideas, examples, and further education
USING SCAN TOOL MEMORY
 Table of Contents SAFETY PRECAUTIONS SAFETY FIRST!... 1 SCAN TOOL CONTROLS CONTROLS AND INDICATORS... 3 DISPLAY FUNCTIONS... 4 BATTERY REPLACEMENT... 6 USING THE SCAN TOOL CODE RETRIEVAL PROCEDURE... 7
Lab 3-1 Lab Installing Kofax Capture 10
 In the following lab instructions, you re going to install and license Kofax Capture, turn on User Tracking, review the product documentation, and prepare your system for the lab exercises in this course.
Quick Start Guide. Kaseya 2
 LiveConnect Quick Start Guide Kaseya 2 February 13, 2010 About Kaseya Kaseya is a global provider of IT automation software for IT Solution Providers and Public and Private Sector IT organizations. Kaseya's
ecuexplorer User Guide
 Installation...2 Getting Started...3 User Interface...3 Menu Structure...3 Initial Configuration...4 Hotkeys...4 Navigation Tree...5 User-Defined Data Items...5 Known Trouble Codes...6 Saved Log Files...7
isupport for Microsoft Windows Server TM Bomgar TM Integration
 Integration with Bomgar Software for Remote Desktop Access and Chat isupport integrates with Bomgar Software for remote desktop connection and chatting. The minimum Bomgar API version required is 1.4.2.
User Interface 4 Fundamentals
 User Interface 4 Fundamentals Contents About this Course... 4 Your Workbook... 4 The Colleague UI Window... 5 Menu Bar... 6 File Menu... 6 Options Menus... 6 Clear History Menu... 6 Reload Colleague Session...
Guide for Researchers: Online Human Ethics Application Form
 Guide for Researchers: Online Human Ethics Application Form What is Quest Quest is our comprehensive research management system used to administer and support research activity at Victoria University.
Troubleshooting in Microsoft Excel 2002
 Page 1 of 8 Troubleshooting in Microsoft Excel 2002 Result: To understand how to work with the Excel software to enter data, navigate the page, and print materials. Tabs Look at the tabs at the bottom
ipcam-wo Wireless Outdoor
 POWER NETWORK Total Connect Online Help Guide for: ip Cameras ipcam-wi Wireless Indoor ipcam-pt Pan and Tilt ipcam-wo Wireless Outdoor 800-08456 3/11 Rev. A TRADEMARKS Honeywell is a registered trademark
ICDL & OOo BASE. Module Five. Databases
 ICDL & OOo BASE Module Five Databases BASE Module Goals taken from the Module 5 ICDL Syllabus Module 5 Database requires the candidate to understand some of the main concepts of databases and demonstrates
User s Manual Dealer (Level 2) No Advanced Logic Programming
 No Advanced Logic Programming") DIAMOND LOGIC BUILDER SOFTWARE User s Manual Dealer (Level 2) No Advanced Logic Programming 2006 International Truck and Engine Corporation Printed in the United States of America S08304 2/06 Diamond Logic
DIAMOND LOGIC BUILDER SOFTWARE User s Manual Dealer (Level 2) No Advanced Logic Programming 2006 International Truck and Engine Corporation Printed in the United States of America S08304 2/06 Diamond Logic